1
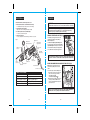
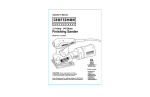
Operator’s Manual
®
P R O F E S S I O N A L
8.0 Amp / Variable Speed / Reversible
1/2-in. Hammer Drill
Model No.
172.28129
3025736
Certified to
CAN/CSA-C22.2
No.745-1,745-2-1
Conforms to
UL STD 745-1, 745-2-1
Double Insulated
CAUTION: Read, understand and follow
all Safety Rules and Operating Instructions
in this manual before using this product.
Sears, Roebuck and Co., Hoffman Estates, IL 60179 U.S.A.
Visit our Craftsman® website: www.sears.com/craftsman
• WARRANTY
• SAFETY
• UNPACKING
• DESCRIPTION
• OPERATION
• MAINTENANCE
SAFETY SYMBOLS
TABLE OF CONTENTS
Warranty……………………………...................................……………...Page
2
Safety Symbols……………………………...................................……...Page
3
Safety Instructions…………………………...................................……..Pages 4- 9
Unpacking ………………………………..................................……........Page 10
Description............................................................................................Pages 11-12
Operation..............................................................................................Pages 13 -19
Maintenance......................................................................................... Pages 20 -22
Accessories...........................................................................................Page 22
Parts List...............................................................................................Pages 23-25
Sears Repair Parts Phone Numbers.....................................................Back Cover
The purpose of safety symbols is to attract your attention to possible dangers.
The safety symbols, and the explanations with them, deserve your careful attention and
understanding. The symbol warnings DO NOT by themselves eliminate any danger.
The instructions and warnings they give are no substitutes for proper accident prevention
measures.
! WARNING: BE SURE to read and understand all safety instructions in
this manual, including all safety alert symbols such as “DANGER”, “WARNING”
and “CAUTION”, BEFORE using this tool. Failure to follow all instructions listed
below may result in electric shock, fire and/or serious personal injury.
SYMBOL MEANING
!
ONE YEAR FULL WARRANTY ON CRAFTSMAN PROFESSIONAL TOOL
If this Craftsman Professional Tool fails due to a defect in material or workmanship
within one year from the date of purchase, RETURN IT TO ANY SEARS STORE OR
PARTS AND REPAIR CENTER OR OTHER CRAFTSMAN OUTLET IN THE UNITED
STATES FOR FREE REPAIR (OR REPLACEMENT IF REPAIR PROVES
IMPOSSIBLE).
This warranty does not include expendable parts such as lamps, batteries, bits or
blades.
This warranty gives you specific legal rights, and you may have other rights, which
vary from state to state.
Sears, Roebuck and Co., Hoffman Estates, IL 60179
SAVE THESE INSTRUCTIONS!
READ ALL INSTRUCTIONS!
SAFETY ALERT SYMBOL: Indicates DANGER, WARNING, OR
CAUTION. May be used in conjunction with other symbols or pictographs.
Failure to obey this safety warning WILL result in death or
serious injury to yourself or to others. Always follow the
safety precautions to reduce the risk of fire, electric shock
and personal injury.
!
DANGER
!
WARNING
Failure to obey this safety warning CAN result in death or
serious injury to yourself or to others. Always follow the
safety precautions to reduce the risk of fire, electric shock
and personal injury.
!
CAUTION
Failure to obey this safety warning MAY result in personal
injury to yourself or others or property damage. Always
follow the safety precautions to reduce the risk of fire,
electric shock and personal injury.
DAMAGE PREVENTION AND INFORMATION MESSAGES
These inform user of important information and /or instructions that could lead to
equipment or other property damage if not followed. Each message is preceded
by the word “NOTE:” as in the example below:
! WARNING: Some dust created by using power tools contains chemicals
known to the State of California to cause cancer and birth defects or other
reproductive harm.
NOTE: Equipment and/or property damage may result if these instructions are
not followed.
! WARNING: The operation of any power tool can result
in foreign objects being thrown into your eyes, which can
result in severe eye damage. Before beginning power tool
operation, ALWAYS wear safety goggles or safety glasses
with side shield and a full-face shield when needed.
We recommend a Wide Vision Safety Mask for use over
eyeglasses or standard safety glasses with side shield,
available at Sears Stores or other Craftsman Outlets.
2
3
SAFETY INSTRUCTIONS
!
SAFETY INSTRUCTIONS cont.
WARNING: BE SURE to read and understand all instructions in this manual
before using this power tool. Failure to follow all instructions may result in electric
shock, fire and / or serious personal injury.
WORK AREA SAFETY
1. Keep your work area clean and well lit. Cluttered workbenches and dark areas
invite accidents.
2. DO NOT operate power tools in explosive atmospheres, such as in the presence
of flammable liquids, gases, or dust. Power tools create sparks which may ignite the
dust or fumes.
3. Keep bystanders, children and visitors away while operating a power tool.
Distractions can cause you to lose control.
4. Make your workshop childproof with padlocks and master switches. Lock
tools away when not in use.
5. MAKE SURE the work area has ample lighting so you can see the work and that
there are no obstructions that will interfere with safe operation BEFORE using your
power tool.
PERSONAL SAFETY
1. KNOW your power tool. Read the operator’s manual carefully. Learn the tool’s
applications and limitations, as well as the specific potential hazards related to this tool.
2. STAY ALERT, watch what you are doing and use common sense when operating a
power tool.
3. DO NOT use tool while tired or under the influence of drugs, alcohol or medication.
A moment of inattention while operating power tools may result in serious personal
injury.
4. DRESS properly. DO NOT wear loose clothing or jewelry. Pull back long hair. Keep your
hair, clothing, and gloves away from moving parts. Loose clothing, or long hair can be
caught in moving parts. Air vents often cover moving parts and should also be avoided.
5. AVOID accidental starting. Be sure switch is in “OFF” position before plugging in.
DO NOT carry tools with your finger on the switch. Carrying tools with your finger on the
switch or plugging in tools that have the switch in the “ON” position invites accidents.
6. REMOVE adjusting keys or blade wrenches before turning the tool “ON”. A wrench that
is left attached to a rotating part of the tool may result in personal injury.
7. Do not overreach. Keep proper footing and balance at all times. Proper footing and
balance enables better control of the tool in unexpected situations.
8. ALWAYS SECURE YOUR WORK. Use clamps or a vise to hold work when practical.
It is safer than using your hand and frees both hands to operate tool.
9. USE SAFETY EQUIPMENT. Always wear eye protection. Dust mask, non-skid safety
shoes, hard hat, or hearing protection must be used for appropriate conditions.
4
TOOL USE AND CARE SAFETY
! WARNING: BE SURE to read and understand all instructions before
operating this tool. Failure to follow all instructions listed below may result in
electric shock, fire and /or serious personal injury.
1. ALWAYS use clamps or other practical ways to secure and support the
workpiece to a stable platform. Holding the work by hand or against your body
is unstable and may lead to loss of control.
2. DO NOT force the tool. Use the correct tool and blade for your application. The
correct tool and accessory will do the job better and safer at the rate for which it is
designed.
3. DO NOT use the tool if switch does not turn it “On” or “Off”. Any tool that
cannot be controlled with the switch is dangerous and must be repaired.
4. DISCONNECT the plug from the power source before making any
adjustments, changing accessories or storing the tool. Such preventive
safety measures reduce the risk of starting the tool accidentally.
5. STORE idle tools out of the reach of children and other untrained persons.
Tools are dangerous in the hands of untrained users.
6. MAINTAIN tools with care. Keep cutting tools sharp and clean. Properly maintained
tools with sharp cutting edges are less likely to bind and are easier to control.
7. CHECK for misalignment or binding of moving parts, breakage of parts, and
any other condition that may affect the tool’s operation. If damaged, have the
tool serviced before using. Many accidents are caused by poorly maintained tools.
8. USE ONLY accessories that are recommended for this tool. Accessories that
may be suitable for one tool may become hazardous when used on another tool.
ELECTRICAL SAFETY
! WARNING: Do not permit fingers to touch the terminals of plug when
installing or removing the plug from the outlet.
1. Double insulated tools are equipped with a
polarized plug (one blade is wider than the other).
This plug will fit in a polarized outlet only one way.
If the plug does not fit fully in the outlet, reverse the
plug. If it still does not fit, contact a qualified
electrician to install a polarized outlet. Do not change
the plug in any way.
2. Double insulation
eliminates the need for the
three-wire grounded power cord and grounded power
supply system. Applicable only to Class II
(double-insulated) tools.
This tool is a double insulated tool.
Cover of
Grounded
Outlet Box
! WARNING: Double insulation DOES NOT take the place of normal safety
precautions when operating this tool.
3. BEFORE plugging in the tool, BE SURE that the outlet voltage supplied is within the
voltage marked on the tool’s data plate. DO NOT use “AC only” rated tools with
a DC power supply.
5
SAFETY INSTRUCTIONS cont.
SAFETY INSTRUCTIONS cont.
SAFETY SYMBOLS FOR YOUR TOOL
ELECTRICAL SAFETY cont.
4. AVOID body contact with grounded surfaces, such as pipes, radiators, ranges and
refrigerators. There is an increased risk of electric shock if your body is grounded.
5. DO NOT expose power tools to rain or wet conditions or use power tools in wet
or damp locations. Water entering a power tool will increase the risk of electric shock.
6. INSPECT tool cords for damage. Have damaged tool cords repaired at a Sears
Service Center. BE SURE to stay constantly aware of the cord location and keep it well
away from the moving blade.
7. DO NOT abuse the cord. NEVER use the cord to carry the tool by or to pull the
plug from the outlet. Keep cord away from heat, oil, sharp edges or moving parts.
Replace damaged cords immediately. Damaged cords increase the risk of electric shock.
The label on your tool may include the following symbols.
V.......................................................................Volts
A......................................................................Amps
Hz....................................................................Hertz
W..................................................................... Watts
....................................................................Alternating current
.................................................................Direct current
no ....................................................................No-load speed
....................................................................Class II construction, Double Insulated
RPM……........................………………… . . .Revolutions per minute
SPM……..........................…………………....Strokes per minute
OPM………........................………………......Orbits per minute
! .....................................................................Indicates danger, warning or caution.
It means attention! Your safety is involved.
SERVICE SAFETY
EXTENSION CORDS
Use a proper extension cord. ONLY use cords listed by Underwriters Laboratories (UL).
Other extension cords can cause a drop in line voltage, resulting in a loss of power and
overheating of tool. For this tool an AWG (American Wire Gauge) size of a least 14-gauge
is recommended for an extension cord of 25 - ft. or less in length. Use 12 -gauge for an
extension cord of 50 -ft. Extension cords 100-ft. or longer are not recommended.
Remember, a smaller wire gauge size has greater capacity than a larger number
(14 - gauge wire has more capacity than 16-gauge wire; 12-gauge wire has more capacity
than 14 - gauge). When in doubt use the smaller number. When operating a power tool
outdoors, use an outdoor extension cord marked “W-A” or “W”. These cords are rated for
outdoor use and reduce the risk of electric shock.
! CAUTION: Keep the extension cord clear of the working area. Position
the cord so that it will not get caught on lumber, tools or other obstructions while
you are working with a power tool.
! WARNING: Check extension cords before each use. If damaged replace
immediately. Never use tool with a damaged cord since touching the damaged
area could cause electrical shock, resulting in serious injury.
6
1. If any part of this tool is missing or should break, bend, or fail in any way;
or should any electrical component fail to perform properly: SHUT OFF the power
switch and remove the saw’s plug from the power source and have the missing,
damaged or failed parts replaced BEFORE resuming operation.
2. Tool service must be performed only at a Sears Service Center. Service or
maintenance performed by unqualified personnel could result in a risk of injury.
3. When servicing a tool, use only identical replacement parts. Follow instructions
in the maintenance section of this manual. Use of unauthorized parts or failure to
follow maintenance instructions may create a risk of electric shock or injury.
SAFETY RULES FOR HAMMER DRILLS
1. Know your Professional Hammer Drill. Read operator’s manual carefully. Learn
its applications and limitations, as well as the specific potential hazards related
to this tool. Following this rule will reduce the risk of electric shock, fire, or
serious injury.
2. BE SURE that twist drill bits, drive bits, hammer drill bits and other accessory
attachments are properly and securely mounted in the chuck jaws BEFORE
operating the hammer drill.
3. ALWAYS carefully inspect the material you are going to drill into. Drilling into nails,
pipes and electrical wires can cause serious personal injury.
4. HOLD HAMMER DRILL by insulated gripping surfaces (handles) when performing
an operation where the tool may drill into hidden wiring. Contact with a “live” wire
will make the exposed metal parts of the tool “live” and shock the operator.
5. NEVER hold the piece being drilled in your hands or across your legs. It is
important to support and clamp the workpiece properly in order to minimize body
exposure, bit binding, or loss of control.
7
SAFETY INSTRUCTIONS cont.
SAFETY INSTRUCTIONS cont.
SAFETY RULES FOR HAMMER DRILLS cont.
6. Maintain a firm grip on the hammer drill to resist starting torque.
7. Wear safety goggles or other eye protection. Hammering and drilling operations
cause chips to fly. Flying particles can cause permanent eye damage.
8. Wear ear protectors when hammering for extended periods of time. Temporary
hearing loss or serious ear drum damage may result from high sound levels generated
by hammer drilling.
9. ALWAYS use the side handle supplied with the tool. Keep a firm grip on the tool at
all times. Do not attempt to operate this tool without holding it with both hands.
10. Do not overreach while operating the tool. Maintain a balanced working stance at all
times. When necessary, use only properly positioned, safe, platforms and scaffolding.
WORK SAFELY.
11. Hammer drill bits and tools get hot during operation. Wear gloves when touching
them.
! CAUTION: DO NOT TOUCH ANY METAL PARTS OF THE TOOL when drilling
or driving into walls, floors or wherever tool could drill into hidden wiring. Hold the tool
only by insulated grasping surfaces to prevent electric shock if you drill or drive into a
live wire.
! CAUTION: Wear appropriate hearing protection during use. Under some
conditions and duration of use, noise from this product may contribute to hearing loss.
! WARNING: Some dust created by using power tools contains chemicals
known to the State of California to cause cancer and birth defects or other
reproductive harm. Some examples of these chemicals are:
• Lead from lead-based paints.
• Crystalline silica from bricks and cement and other masonry products.
• Arsenic and chromium, from chemically treated lumber.
Your risk from these exposures varies, depending upon how often you do
this type of work. To reduce your exposure to these chemicals:
• Work in a well-ventilated area.
• Work with approved safety equipment, such as those dust masks that
are specially designed to filter out microscopic particles.
! WARNING: Use of this tool can generate and /or disburse dust, which may
cause serious and permanent respiratory or other injury. Always use
NIOSH / OSHA approved respiratory protection appropriate for the dust exposure.
Direct particles away from face and body.
ADDITIONAL RULES FOR SAFE OPERATION
! WARNING: BE SURE to read and understand all instructions.
Failure to follow all instructions listed below may result in electric shock, fire
and / or serious personal injury.
1. Know your power tool. Read operator’s manual carefully. Learn the applications and
limitations, as well as the specific potential hazards related to this tool. Following this rule
will reduce the risk of electric shock, fire or serious injury.
2. ALWAYS wear safety glasses or eye shields when using this tool. Everyday
eyeglasses have only impact-resistant lenses; they are NOT safety glasses.
3. PROTECT your lungs. Wear a face mask or dust mask if the operation is dusty.
4. PROTECT your hearing. Wear appropriate personal hearing protection during use.
Under some conditions noise from this product may contribute to hearing loss
5. ALL VISTORS AND BYSTANDERS MUST wear the same safety equipment that the
operator of the tool wears.
6. INSPECT the tool cords periodically and if damaged have them repaired at your
nearest Sears Service Center. ALWAYS BE AWARE of the cord location.
7. ALWAYS check the tool for damaged parts. Before further use of the tool, a guard or
other part that is damaged should be carefully checked to determine if it will operate
properly and perform its intended function. Check for misalignment or binding of moving
parts, breakage of parts, and any other condition that may affect the tool’s operation.
A guard or other part that is damaged should be properly repaired or replaced at a
Sears Service center.
8. SAVE THESE INSTRUCTIONS. Refer to them frequently and use them to instruct
others who may use this tool. If someone borrows this tool, make sure they have
these instructions also.
Avoid prolonged contact with dust from power sanding, sawing, grinding,
drilling and other construction activities. Wear protective clothing and wash
exposed areas with soap and water. Allowing dust to get into your mouth, eyes,
or lay on the skin may promote absorption of harmful chemicals.
8
9
UNPACKING
!
DESCRIPTION
WARNING: Your tool should NEVER be connected to the power source
when you are assembling parts, making adjustments, installing or removing
bits, cleaning or when it is not in use. Disconnecting the drill will prevent
accidental starting, which could cause serious personal injury.
1. Remove the hammer drill from the storage / carry case and inspect it carefully to
make sure that no breakage or damage has occurred during shipping.
2. Do not discard any of the packing materials until all parts are accounted for.
3. Included with this hammer drill is an auxiliary handle, a depth stop rod, and a
chuck key.
4. If any of the parts are damaged or missing (refer to PARTS LIST below), return the saw
to your nearest Sears store or Craftsman outlet to have the tool replaced.
!
WARNING: If any parts are missing, DO NOT operate this tool until the
missing parts are replaced. Failure to do so could result in possible serious
personal injury.
PARTS LIST (Fig. 1)
1. Hammer Drill
2. Auxiliary Handle
3. Depth Stop Rod
4. Chuck Key
5. Carrying / Storage Case
6. Operator’s Manual
! WARNING: Do not attempt to modify this tool or create accessories not
recommended for use with this tool. Any such alteration or modification is
misuse and could result in a hazardous condition leading to possible serious
personal injury.
10
KNOW YOUR HAMMER DRILL (Fig. 2)
NOTE: Before attempting to use this product, familiarize yourself with all
operating features and safety rules.
Your Hammer Drill has a precision-built electric motor and it should be connected to a
120-volt, 60-Hz AC ONLY power supply (normal household current). DO NOT operate on
direct current (DC). The large voltage drop will cause a loss of power and the motor will
overheat. If the drill does not operate when plugged into correct 120-volt, 60-Hz AC ONLY
outlet, check the power supply. This hammer drill has a 10-ft., 2-wire power cord
(no adapter needed).
This Hammer Drill has the following features:
1. 8.0 Amp Motor
Provides torque, power and durability to handle continuous heavy-duty rotary or
hammer drilling jobs
2. Mode Selector Switch
For easy changes to rotary or hammer drilling applications
3. Rotary Drilling
Variable speed 0-2800 / min (no-load speed) allows matching drilling / driving speed to
bits and materials in a variety of job applications such as hard or soft woods, metal and
various building materials.
4. Forward / Reverse Lever
Conveniently located, reverse to back out screws and jammed bits when rotary
drilling / driving
5. Hammer Drilling
Variable speed 0-44,800 BPM (blows per minute) impact rate, for fast drilling in
concrete, brick, stone and tile
6. Variable Speed Trigger Switch
Controls speed, increase pressure for higher speed and torque
7. Power Lock-on Button
For use in continuous stationary hammer drilling applications
8. 1/2-in. Keyed Steel Chuck
Tighten bits quickly and securely with chuck key and spindle lock
9. Spindle Lock
Manually lock chuck’s spindle shaft for safe, secure tightening of bits in chuck
10. 360° Auxiliary Handle and Rear Handle with Soft-Grip
Provides maximum balance, control and gripping comfort. Auxiliary handle mounts in
any position for left or right hand use
11. Depth Stop Rod
Mounts in auxiliary handle and adjusts for precise pre-set drilling depths
12. Bubble Level
Helps provide more accurate right angle drilling / driving and hammer drilling straight
into workpiece
13. Live Tool Indicator
Green LED light lets you know when drill is plugged into power source
11
OPERATION
DESCRIPTION cont.
This Hammer Drill has the following features: cont.
! WARNING: Do not allow familiarity with tools to make you careless.
Remember that a careless fraction of a second is sufficient to inflict serious injury.
14. Metal Gear Box and Die-Cast Aluminum Gear Housing
For durability and long life. Helps protect tool from damage
15. High Impact-Resistant Housing
Helps protect tool from damage and reduces weight
16. Permanently Lubricated 100% Ball Bearings
For smooth operation and long life
17. Impact Resistant Case
For easy carrying and convenient storage of drill and accessories
Fig. 2
! WARNING: Always wear safety goggles or safety glasses with side shields
when operating power tools. Failure to do so could result in objects being
thrown into your eyes, resulting in possible serious injury.
VARIABLE SPEED TRIGGER SWITCH (Fig. 3)
Bubble Level
Drill / Hammer
Mode Selector Switch
Variable Speed
Trigger Switch
Auxiliary
Handle
Power Lock-on
Button
Fig. 3
The variable speed trigger switch controls the
variable speed in either the rotary drilling or
hammer drilling modes.
The drill delivers higher speed and torque with
increased pressure on the trigger switch and lower
speed and torque when the pressure is decreased.
To start the hammer drill, press the trigger switch.
To stop hammer drill, release the trigger switch.
Rear Handle
with Soft Grip
Depth
Stop Rod
Spindle Lock
NOTE: You might hear a whistling or ringing noise from the trigger switch during
low speed use. Do not be concerned; this is a normal part of the switch function.
Forward
Reverse Lever
ROTARY AND HAMMER DRILLING MODE SELECTOR SWITCH (Fig. 4)
Keyed Chuck
Chuck Jaws
Live Tool Indicator
120 Volts, 60 Hz AC
Input
8.0 Amps
Rotary Drilling (No-load Speed)
0-2800 / min. Variable Speed
Hammer Drilling (No-load Speed)
0-44,800 / BPM (blows per minute) Impact rate
Chuck
1/2-in. Keyed
7
PRODUCT SPECIFICATIONS
Rating
Fig. 4
6
10-Ft. Power Cord
Always have the trigger switch in the OFF
position when operating the mode selector
switch.
To select the rotary or hammer drilling mode:
1. Press in the end of the selector lever and
rotate so the lever points to either the
rotary drilling symbol
or the hammer drilling symbol .
2. When the lever is pointing to the mode you
selected, you will feel it click in on the
selection, and the drill will now operate in
your selected mode.
NOTE: The selector switch must be in either the rotary or hammer drilling modes
at all times; there are no operable positions between the two modes.
12
13
OPERATION cont.
OPERATION cont.
FORWARD / REVERSE LEVER (Fig. 5)
360° AUXILIARY HANDLE (Figs. 7 and 7a)
The direction of bit rotation, forward or reverse,
Fig. 5
is controlled by the lever above the trigger switch.
Always have the trigger switch in the OFF position
Forward
Reverse
when operating the forward / reverse lever.
1. For the Forward Bit Rotation the lever should be
to the left of the trigger switch (as you hold drill,
pointing forward, looking down), pointing to the
embossed arrow pointing forward towards
the chuck.
This forward position is used for Rotary drilling / driving and Hammer drilling.
2. To reverse Bit Rotation when in the Rotary drilling / driving mode only, move the lever to
the right of the trigger, pointing to the embossed arrow pointing towards the rear of the drill.
This reverse position is ONLY USED when rotary drilling / driving to back out screws and
jammed bits.
The auxiliary handle clamps to the front of the gear case as shown (see Fig. 7).
It can be rotated 360° to allow either right or left hand use, providing maximum balance
and control in any operating position.
To assemble the
Fig. 7
Fig. 7a
auxiliary handle onto
the drill, slide the clamp’s
assembly collar
completely over and past
the chuck onto the front
of the drill’s gear case
(see Fig. 7a) and tighten
by twisting the handle.
NOTE: The hammer drilling function will not operate for reverse hammering.
! CAUTION: To prevent gear damage, always allow the chuck to come to a
complete stop before changing the direction of rotation.
POWER LOCK-ON FEATURE (Fig. 6)
The Power Lock-On button is for use only when the hammer drill is mounted in a drill press
stand or otherwise held stationary. Do Not use the power lock-on feature when drilling or
driving by hand, so you can instantly release the trigger switch and stop the drill if the bit
binds in the hole or fastener. Be sure to release the power lock-on feature before
disconnecting the plug from the power supply. Failure to do so will cause the hammer drill
to start immediately the next time it is plugged in. Damage or injury could result.
The power lock-on feature, is convenient for
Fig. 6
continuous drilling for extended periods of time.
To lock-on:
1. Depress the variable speed trigger switch.
Lock-On
2. Push in and hold the lock-on button, located on
the side of the drill’s rear handle.
3. Release the variable speed trigger switch.
4. Release the power lock-on button and the drill will continue running at maximun speed.
5. To release the power lock-on, depress and release the variable speed trigger switch.
! WARNING: Before connecting the drill to a power supply source, always
check to be sure it is not in the power lock-on position by depressing and
releasing the variable speed trigger switch. Failure to ensure that it is not
locked-on could result in accidental starting of the drill, resulting in possible
serious injury. DO NOT lock the variable speed trigger switch in applications
where the drill may need to be suddenly stopped.
14
DEPTH STOP ROD (Fig. 8)
The Depth Stop Rod is used to control the
Fig. 8
depth of a hole when you are not
through-drilling.
The depth stop rod mounts into the clamp’s
assembly collar of the 360°auxiliary handle.
To adjust the depth stop rod, forward or
backwards, loosen the collar of the clamp
assembly by twisting the auxiliary handle
to loosen or tighten.
To adjust the depth stop rod for drilling to a
selected hole depth, move the rod so that
the distance between the end of the rod
and the end of the drill bit equals the
desired hole depth (see Fig. 8).
When drilling, stop when the end of the depth stop rod touches the surface you’re drilling in.
The depth stop rod is marked in inches, 1 through 7.
1/2-IN. KEYED STEEL CHUCK (Fig. 9)
The steel chuck is designed,
constructed and machined for
heavy-duty use, durability and long
service life.
Easily and securely install or remove
accessory bits using the chuck key
provided and the spindle lock on the
drill.
Apply a light coat of premium machine
oil to the surface of the chuck face and
jaws from time to time for rust
resistance.
Fig. 9
15
Spindle Lock
OPERATION cont.
OPERATION cont.
SPINDLE LOCK (Fig. 10)
BUBBLE LEVEL (Fig. 12)
The spindle lock is a convenience feature that allows you to tighten or loosen the chuck
jaws around a bit without having to use the chuck key.
1. Unplug the hammer drill.
In order to insure a perfect right angle when
drilling / driving and hammer drilling into a
workpiece, you can use the built-in bubble
level on the back of the drill / driver. The
bubble level is designed to work when
the hammer drill is in a horizontal position.
Line the air bubble up in the appropriate
circle, and to the workpiece. This will help
insure that you will drill / drive or hammer
drill straight into the workpiece.
Fig. 12
LIVE TOOL INDICATOR LIGHT
(Fig. 13)
Fig. 13
! WARNING: To prevent personal injury, ALWAYS disconnect the plug from power
source BEFORE assembling parts, making adjustments or changing bits.
2. Depress and hold the spindle lock button.
3. While keeping the button depressed,
manually rotate the chuck until the spindle
shaft “clicks” into a stationary position.
Rotate clockwise for tightening, and
counterclockwise for loosening.
4. Continue to rotate the chuck until the jaws
are tight around the bit. If loosening, rotate
until the jaws are free of the bit.
5. Release the spindle lock button.
Fig. 10
Spindle
Lock
Chuck Jaws
NOTE: To ensure that jaws are tight, you may want to insert the chuck key into
the chuck and add an extra tightening twist.
Your hammer drill has a LIVE TOOL
INDICATOR green LED light that comes
on when the drill is plugged into a power
source. This lets you know you have a
live tool.
Green
LED
Light
INSTALLING AND REMOVING
ACCESSORY BITS (Fig. 11)
You may install or remove bits using the spindle lock button as described above, or you
may simply use the chuck key inserted into the chuck. If you use the chuck key, you don’t
have to depress the spindle lock button. To loosen or tighten chuck with chuck key:
1. Unplug the hammer drill
! WARNING: To prevent personal injury, ALWAYS disconnect the plug from power
source BEFORE assembling parts, making adjustments or changing bits.
2. Insert chuck key into one of the holes in
the side of the chuck. Turn key to tighten
or loosen jaws for installing or removing bit
Fig. 11
Chuck
Key
3. If tightening, hold bit firmly in place.
Always make sure bit is tightly secured
in the chuck jaws before beginning
operation.
Bubble
Level
OPERATING THE HAMMER DRILL AS A DRILL / DRIVER
When using your 1/2-in. Hammer Drill for standard drill / driving applications, make sure
you have the Rotary and Hammer Drilling Selector Switch in the Rotary Drilling position
(see Page 13, Fig. 4).
NOTE: When unplugging the drill, first make sure that the Power Lock-On
Feature is not engaged, by pressing on the trigger switch to release it. Failure to
do so will cause the hammer drill to start immediately the next time it is plugged
in. Property damage or serious personal injury could result.
ROTARY DRILLING (Fig. 14)
Chuck Jaws
16
1. Always unplug the drill when installing or removing bits and accessories.
2. Use sharp bits only. Always use Craftsman bits and accessories to help ensure desired
performance.
3. For drilling in wood use twist drill bits, spade bits, power auger bits and hold saws.
4. Start drilling in wood with slow speed and increase to full power while applying firm
pressure on the hammer drill.
5. Pull the bit out of the hole frequently to clear the wood chips away from the flutes to
help keep the bit from overheating.
17
OPERATION cont.
OPERATION cont.
ROTARY DRILLING (Fig. 14) cont.
OPERATING THE DRILL AS A HAMMER DRILL
6. Always clamp the workpiece firmly. If
Fig. 14
drilling thin material, use a wood “back-up”
block to prevent splintering or damage to
the workpiece.
7. Always apply pressure in a straight line
with the bit. Use enough pressure to keep
the drill bit biting, but do not push hard
enough to stall the motor or deflect the bit.
8. Hold the hammer drill firmly to control the
twisting action of the hammer drill and bit.
9. IF HAMMER DRILL STALLS, it is usually
because it is being overloaded or
improperly used. RELEASE TRIGGER
SWITCH IMMEDIATELY, remove drill bit
from workpiece, and determine cause of
stalling. DO NOT START AND STOP A
STALLED DRILL BY QUICKLY APPLYING
AND RELEASING PRESSURE ON THE
TRIGGER SWITCH. THIS CAN
DAMAGE THE DRILL.
10. To minimize stalling or breaking through
the workpiece, reduce pressure on the
hammer drill and ease the bit through the last part of the hole.
11. Keep the motor running when pulling the bit out of a drilled hole. This will help prevent
the bit from jamming.
12. With variable speed there is no need to use a center punch at the point to be drilled.
Just use a slow speed to start the hole and accelerate by applying pressure to the
trigger switch when the hole is deep enough to drill without the drill bit skipping out
of the hole.
13. When drilling in metal start drilling with slow speed and increase to full power while
applying pressure on the hammer drill. A smooth even flow of metal chips indicates
proper drilling rate. Use a cutting lubricant when drilling metals. The exceptions are
cast iron and brass, which should be drilled dry. The cutting lubricants that work best
are sulfurized cutting oil or lard oil; bacon grease will also serve the purpose.
When using your drill for percussion hammer drilling applications, make sure you have the
Rotary and Hammer Drilling Selector Switch in the Hammer Drilling position
(see Page 13, Fig. 4).
NOTE: Large holes in steel (5/16 to 1/2 inches) can be made more easily if a
pilot hole 5/32 to 3/16-inch is drilled first.
14. When driving screws and various types of fasteners, always use the proper driving bit
matched to the screw or fastener. Start the driving action using a constant force on the
fastener at a lower speed and torque, slowly increasing the speed and torque to
effectively drive and set the fastener in its finished position.
18
NOTE: When unplugging the drill, first make sure that the Power Lock-On
Feature is not engaged, by pressing on the trigger switch to release it. Failure
to do so will cause the hammer drill to start immediately the next time it is
plugged in. Property damage or serious personal injury could result.
HAMMER DRILLING (Fig. 15)
1. Always unplug the drill when
Fig. 15
installing or removing bits and
accessories.
2. When hammer drilling in masonry
such as brick, concrete, cinder
block, stone and tile, use only
carbide tipped bits rated for
percussion drilling and be certain
that the bit is sharp.
3. Make sure that the hammer drill
mode is selected and that the bit
is securely installed in the chuck.
4. Use a constant and firm force on
the hammer drill to drill effectively.
A smooth, even flow of dust from
the hole indicates the proper
hammer drilling rate.
5. Start hammer drilling at slower speeds and increase to full speed while applying firm
pressure on the hammer drill.
6. When hammer drilling, use just enough force on the drill to keep it from bouncing
excessively or “rising” off the bit. Too much force will cause slower drilling speeds,
overheating, and a slower drilling rate.
7. Drill straight and keep the bit at a right angle to the work (the bubble level will help).
Do not exert side pressure on the bit when hammer drilling, as this will cause clogging
of the bit flutes, overheating, and a slower drilling speed.
8. When hammer drilling deeper holes, pull the bit partially out of the hole frequently
(with the drill still running), to help clear debris from the hole. This will help keep the bit
form overheating and produce a cleaner drilled hole.
19
MAINTENANCE
!
MAINTENANCE cont.
WARNING: To ensure safety and reliability, repairs, maintenance and
adjustments MUST be performed by a qualified service technician at a
Sears Service Center.
! WARNING: For your safety, ALWAYS turn off switch and unplug drill from
the power source before performing any maintenance or cleaning.
It has been found that electric tools are subject to accelerated wear and possible
premature failure when they are used to work on fiber glass boats and sports cars,
wallboard, spackling compounds or plaster. The chips and grindings from these materials
are highly abrasive to electrical tool parts, such as bearings, brushes, commutators, etc.
Consequently, it is not recommended that this tool be used for extended work on any
fiberglass material, wallboard, spackling compound or plaster. During any use on these
materials, it is extremely important that the tool is cleaned frequently by blowing with
an air jet.
! WARNING: Always wear safety goggles or safety glasses with side shields
during power tool operations, or when blowing dust. If operation is dusty, also
wear a dust mask.
ROUTINE MAINTENANCE
! WARNING: DO NOT at any time let brake fluids, gasoline, petroleum-based
products, penetrating oils, etc. come in contact with plastic parts. Chemicals can
damage, weaken or destroy plastic, which may result in serious personal injury.
Periodic maintenance allows for long life and trouble-free operation. A cleaning, lubrication
and maintenance schedule should be maintained. As a common preventive maintenance
practice, follow these recommended steps:
! WARNING: For your safety, ALWAYS turn off switch and unplug saw from
the power source before performing any maintenance or cleaning.
CHUCK REMOVAL
(Fig. 16, 16a and 16b)
Fig. 16
The chuck may be removed and replaced
with a new one.
1. Unplug the hammer drill.
1
!
WARNING: To prevent personal
0
injury, ALWAYS disconnect the plug
from power source BEFORE
assembling parts, making adjustments
or changing bits.
2. Insert a 5 /16-in. or larger hex key into the
chuck of the drill and tighten the chuck
jaws securely with the chuck key and
spindle lock.
3. Tap the hex key sharply with a mallet in a
clockwise direction. This will loosen the
screw in the chuck for easy removal.
4. Open the chuck jaws and remove the
hex key. Using a screwdriver, remove the
chuck screw by turning it in a clockwise
direction (see Fig. 16a). Note that the
chuck screw has left hand threads and
clockwise direction loosens instead of
tightens.
5. Insert the hex key into the chuck and
tighten the chuck jaws securely. Tap
sharply with a mallet in a counterclockwise
direction (see Fig.16b). This will loosen
the chuck on the spindle. It can now be
unscrewed by hand.
1. When work has been completed, clean the tool to allow smooth functioning of the tool
over time.
2. Use clean damp cloths to wipe the tool.
3. Check the state of all power cords.
4. Keep the motor air vent openings free from oil, grease and sawdust or woodchips,
and store tool in a dry place.
4
Fig. 16b
7
5. Be certain that the chuck and jaws are well lubricated with a light machine oil, particularly
after lengthy exposure to damp and/or dirty conditions.
6. Apply a light coat of machine oil to the surface of the chuck face and jaws from time
to time for rust resistance.
20
Fig. 16a
21
5
6
7
MAINTENANCE cont.
PARTS LISTS
TO RETIGHTEN A LOOSE CHUCK
(Figs. 17 and 17a)
Fig. 17
The chuck may become loose on the spindle
and develop a wobble. Also, the chuck screw
may become loose, causing the chuck jaws
to bind and prevent them from closing.
To tighten:
1. Unplug the hammer drill.
1
0
! WARNING: To prevent personal
injury, ALWAYS disconnect the plug
from power source BEFORE
assembling parts, making adjustments
or changing bits.
2. Open the chuck jaws
Fig. 17a
3. Insert a 5/16 in. or larger hex key into the
chuck and tighten the chuck jaws securely.
Tap the hex key sharply with a mallet in a
clockwise direction. This will tighten the
chuck on the spindle.
4. Open the chuck jaws, and remove the hex
key.
5. Tighten the chuck screw. Note that the chuck
screw has left hand threads and
counterclockwise direction tightens instead of loosens.
4
5
6
7
ACCESSORIES
! WARNING: The use of attachments or accessories that are not
recommended for this tool might be dangerous and could result in serious injury.
Sears and other Craftsman ® outlets offer a large selection of Craftsman drill/driver
accessories designed for all your drill /driving applications.
You may purchase kits and sets specifically for drilling and driving, twist drill bit sets,
a variety of power drill / driving bit sets, spade bit sets, hole saws, carbide-tipped masonry
drill bit sets that are percussion rated, extra long bits, magnetic bit holders and more.
Visit your local Sears store or other Craftsman outlets or shop sears.com/craftsman for all
of the accessories for your hammer drill.
22
23
PARTS LIST cont.
PARTS LIST cont.
HAMMER DRILL – MODEL NUMBER 172.28129
Item No.
101
1
2
3
4
5
6
7
8
9
10
102
11
12
13
14
103
15
16
17
18
19
20
21
22
23
24
25
26
27
28
29
30
104
31
32
33
34
35
36
105
37
38
39
40
41
Parts No.
200T0230009000A-00
200W2000022000A-00
200T0230007000A-00
200T0230006000A-00
200T0230008000A-00
200W4000034000A-00
200W4000040000A-00
2PDI11Q0007000A-00
2PDI11Q0003000A-00
2CDT04A0007000A-00
2PDI11Q0005000A-00
2PDI11Q0400000A-00
2PDI11Q0402000A-00
2PDI11Q0410000A-00
2PDI11Q0401000A-00
2PDI11Q0004000A-00
2PDI11Q0300000A-00
200W8000006000A-00
200T0240054000A-00
20TC9520028000A-00
200W7000012000A-00
200W8000018000A-00
200T0240074000A-00
2PDI05P0303000A-00
2PDI11Q0301000A-00
200T0080002000A-00
2PDI04A0203000A-00
2PDI11Q0302000A-00
200W5200074000A-00
200W8100004000A-00
200W8100002000A-00
2PDI04A0202000A-00
200T0240001000A-00
2PDI04P0500000A-00
2PDI04P0502000A-00
200W8300006000A-00
2PDI04P0501000A-00
2PDI11Q0001000A-00
200W3100004000A-00
200W1060026000A-00
2PDI11Q0100000A-00
2PDI11Q0101000A-00
200W7000008000A-00
200T0080046000A-00
200T0250024000A-00
200W8000063000A-00
Part Description
Side handle set
Bolt
Depth ruler
handle-sheath
handle
Self tapping screw(ST4.2x16)
Self tapping screw(ST4.2x28)
Rated label
Right housing
Gradienter
Light cover right
Light set
Light cover down
Power supply board
Light cover up
Light cover left
Center cover set
Ball bearing (607-2Z/P63)
Washer
Tc armature
Circlip(9)
Ball bearing(609-2Z/P63)
Washer
Felt seal
Center cover
Rubber O-ring
Converting-pin
Seal ring
Cylindrical pin (A4x18)
Roller bearing(HK101410)
Roller bearing(HK0610 09)
Serrated disc
Washer
Middle shaft set
Gear
Pin3x15.8
Middle shaft
Fixing block
screw(M6x25)
Chuck
Gear box set
Fore housing
Circlip(6)
Rubber O-ring
Felt seal
Ball bearing(6003-RSZ)
24
Qty.
1
1
1
1
1
8
3
1
1
1
1
1
1
1
1
1
1
1
1
1
1
1
1
1
1
1
1
1
1
1
2
1
2
1
1
1
1
1
1
1
1
1
1
1
1
1
HAMMER DRILL – MODEL NUMBER 172.28129
Item No.
42
43
44
45
46
47
48
49
50
51
106
52
53
54
55
56
57
58
59
60
61
62
63
64
65
66
67
68
69
70
71
72
73
74
75
76
Parts No.
200T0240076000A-00
200T0050075000A-00
200T0240075000A-00
2PDI11Q0104000A_00
2PDI11Q0103000A-00
200W7000027000A-00
200W7000020000A-00
200T0240078000A-00
200T0050165000A-00
2PDI05P0902000A-00
2PDI11Q0200000A-00
2PDI11Q0201000A-00
2PDI11Q0202000A-00
2PDI04P0302000A-00
200T0280385000A-00
200T0280093000A-00
200T0280387000A-00
200T0280122000A-00
200T0280384000A-00
200T0280383000A-00
200T0090004000A-00
200W0020117000A-00
200W0330001000A-00
200T0200005000A-00
200W0212708000A-00
200T0060012000A-00
2PDI11Q0002000A-00
2PDI11Q0006000A-00
2PDI04A0605000A-00
200T0050050000A-00
2PDI04A0604000A-00
200T0240077000A-00
200W7000011000A-00
20TC9500026000A-00
200T0040163000A-00
200T0030128000A-00
Part Description
Washer
Compression spring
Washer
Sleeve
Spindle lock button
Circlip(35)
Circlip(16)
Washer
Compression spring
Baffle board
Output shaft set
Spindle
Gear
Active serrated disc
Inner wire
Inner wire
Inner wire
Inner wire
Inner wire
Inner wire
Rubber pin
Switch
Terminal port
Cord clamp
Power cord
Cable protector
Left housing
Label
Push button
Compression spring
Knob
Washer
Circlip(8)
Stator
Brush holder
Carbon brush
25
Qty.
1
1
1
1
1
1
1
1
1
1
1
1
1
1
1
1
1
1
1
1
2
1
1
1
1
1
1
1
1
1
1
1
1
1
2
2
Get it fixed, at your home or ours!
Your Home
For expert troubleshooting and home solutions advice:
www.managemyhome.com
For repair – in your home – of all major brand appliances,
lawn and garden equipment, or heating and cooling systems,
no matter who made it, no matter who sold it!
For the replacement parts, accessories and
owner’s manuals that you need to do-it-yourself.
For Sears professional installation of home appliances
and items like garage door openers and water heaters.
1-800-4-MY-HOME®
(1-800-469-4663)
Call anytime, day or night (U.S.A. and Canada)
www.sears.com
www.sears.ca
Our Home
For repair of carry-in items like vacuums, lawn equipment,
and electronics, call anytime for the location of your nearest
Sears Parts & Repair Service Center
1-800-488-1222 (U.S.A.)
www.sears.com
1-800-469-4663 (Canada)
www.sears.ca
To purchase a protection agreement on a product serviced by Sears:
1-800-827-6655 (U.S.A.)
1-800-361-6665 (Canada)
Para pedir servicio de reparación
a domicilio, y para ordenar piezas:
Au Canada pour service en français:
1-888-SU-HOGAR®
1-800-LE-FOYER MC
(1-888-784-6427)
® Registered Trademark / TM Trademark / SM Service Mark of Sears Brands, LLC
® Marca Registrada / TM Marca de Fábrica / SM Marca de Servicio de Sears Brands, LLC
MC
Marque de commerce / MD Marque déposée de Sears Brands, LLC
(1-800-533-6937)
www.sears.ca
© Sears Brands, LLC