1
Epson PowerLite Cinema 200 Projector
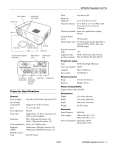
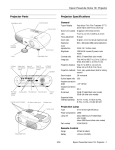
Projector Parts
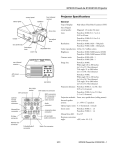
Projector Specifications
General
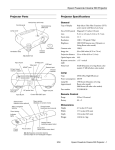
Vertical lens shift knob
Control panel
Horizontal lens
shift knob
Lamp cover
Lens cover
Infrared
receiver
Ventilation slots
Adjustable foot
Input B (computer VGA)
S-Video port
Input A
(component video)
Poly-silicon Thin Film Transistor (TFT)
active matrix with Micro Lens Array
Size of LCD panels
0.7 inches (18 mm) wide
Lens
F=2.1 to 2.8 mm, f=21.4 to 31.7 mm
Zoom ratio
1:1.5
Resolution
1280 × 720 pixels (720p)
Color
reproduction
24 bit, 16.8 million colors
Brightness
1300 ANSI lumens max. (Dynamic or
Living Room color mode)
Contrast ratio
1000:1
Image size
30 to 300 inches (0.76 to 7.6 m)
Projection distance
2.9 to 37 feet (0.9 to 11.3 m)
Optical aspect ratio 16:9
Keystone correction
angle
± 15° vertical
Control (RS-232C) port
USB port
D4 port (used
mainly in Japan)
Type of display
Infrared
receiver
Lens shift range
Vertical: 100% upward, 50% downward
Horizontal: 50% left and right
Noise level
37 dB (Dynamic or Living Room color
mode)
28 dB (all other color modes)
Lamp
Type
AC power inlet
Trigger out
port
Kensington® lock port
Power consumption 200 W
Video port (composite video)
Menu button
(displays on-screen menu)
Menu navigation
buttons
UHE (Ultra High Efficiency)
Source button
(switches input source)
Lamp life
(approximate)
1700 hours (Dynamic or Living
Room color mode)
3000 hours (all other color modes)
Part number
V13H010L28
Remote Control
Focus button
Indicator
lights
Range
30 feet (10 meters)
Battery
AA × 2
Dimensions
Aspect button
(switches aspect ratio)
Power
button
Zoom button
Esc button
(exits current menu item)
Height
4.5 inches (114 mm)
Width
17.3 inches (440 mm)
Depth
12.6 inches (320 mm)
Weight
11.8 lb (5.3 kg)
Keystone correction buttons
(correct shape of non-rectangular image)
1/04
Epson PowerLite Cinema 200 Projector - 1
Epson PowerLite Cinema 200 Projector
Electrical
Rated frequency
50/60 Hz
Power supply
100 to 120 V: 3.0 A
200 to 240 V: 1.4 A
Compatible Video Formats
The projector supports NTSC, PAL, and SECAM, as well as
the digital video and computer monitor formats listed below.
Power consumption Operating: 270 W max.
Standby: 0.3 W
Digital video formats
Environmental
Temperature
(non-condensing)
Operating: 41 to 95° F (5 to 35° C)
Storage: 14 to 140° F (–10 to 60° C)
Humidity
Operating: 20 to 80% RH,
non-condensing
Storage: 10 to 90% RH, non-condensing
FCC Part 15B Class B
UL1950 Rev. 3
Canada
ICES-003 Class B
CSA C22.2 No. 950-95 (cUL)
CE Marking
Directive 89/336/EEC
EN 55022, 1998 Class B
EN 55024, 1998
You can connect up to four pieces of video equipment to the
projector at the same time, to the ports listed below (cables are
not included):
Required Cable
Supported video formats
Video
RCA video cable
Analog TV (NTSC, PAL, SECAM)
S-Video
S-video cable
Analog TV (NTSC, PAL, SECAM)
Input A*
Component video
cable (with RCA
connectors)
Digital TV (SDTV and HDTV)
Analog TV (NTSC, PAL, SECAM)
Input B
VGA computer cable
Various computer monitor formats
(see table at right)
Aspect ratio
SDTV
480i
480p
575i
575p
640 × 480
640 × 480
768 × 576
768 × 576
4:3
4:3
4:3
4:3
HDTV
720p
1080i
1280 × 720
1920 × 1080
16:9
16:9
Format
Resolution
Refresh rate (Hz)
VGA
640 × 480
60
VESA
640 × 480
72, 75, 85
SVGA
800 × 600
60, 72, 75, 85, iMac
XGA
1024 × 768
43, 60, 70, 75, 85, iMac
SXGA
1280 × 1024
60
MAC13”
MAC16”
MAC19”
MAC21”
640 × 480
832 × 624
1024 × 768
1152 × 870
67
75
75
75
Resizing the Image
Composite and S-video signals are sized automatically to fit
on the screen when Auto is selected as the Aspect setting. For
other video signals, you may need to resize the image by
pressing the Aspect button. Choose from these settings:
❏ Normal for standard TV broadcasts, computer images, or
images having a 4:3 aspect ratio.
❏ Zoom for images recorded in 16:9 (wide-screen) format.
* Select YCbCr, YPbPr, or RGB-Video as the Input Signal setting in the
projector’s menu system (see page 5).
❏ Squeeze for recordings made in a compressed (anamorphic)
16:9 format, sometimes called “Squeeze Mode.”
Note: You can also connect a 3.5-mm mini jack cable to the
Trigger Out port. This outputs a 12-volt DC signal to raise or
lower the projection screen automatically.
❏ Through if your image is smaller than 1280 × 720 pixels
and you want to display it at its original pixel size without
resizing it to fit on the screen.
To use Cinema Color Editor, you have to connect your computer to
the projector’s USB port (a USB cable is included). But be sure to
install your software first (see your User’s Guide for instructions).
2 - Epson PowerLite Cinema 200 Projector
Resolution
Computer monitor formats (4:3)
Cable Connections
Port
Signal name
If you’re projecting from a computer, set the computer’s video
card at a refresh rate (vertical frequency) that’s compatible with
one of the following monitor formats. The frequencies of some
computers may not allow images to display correctly.
Safety
United States
Format
❏ Squeeze Through if your image is recorded in Squeeze
Mode, is smaller than 1280 × 720 pixels, and you want to
display it at its original pixel size.
1/04
Epson PowerLite Cinema 200 Projector
When you select an Aspect setting, the resolution at which the
image displays depends on the currently active picture source, as
listed below.
Analog TV
Aspect setting
Format
Normal
Zoom
Squeeze
Through
Squeeze
Through
NTSC
960 × 720
1280 × 720
1280 × 720
596 × 446
794 × 446
PAL or SECAM
960 × 720
960 × 720
960 × 720
708 × 528
944 × 528
Digital video formats received as component video
Aspect setting
Signal
name
Normal
Zoom
Squeeze
Through
Squeeze
Through
SDTV
480i
480p
575i
575p
960 × 720
960 × 720
960 × 720
960 × 720
1280 × 720
1280 × 720
1280 × 720
1280 × 720
1280 × 720
1280 × 720
1280 × 720
1280 × 720
596 × 446
596 × 446
708 × 528
708 × 528
794 × 446
794× 446
944 × 528
944 × 528
HDTV
720p
1080i
1280 × 720
1280 × 720
—
—
—
—
1176 × 664
—
—
—
Format
Digital video formats received as RGB video
Aspect setting
Signal
name
Normal
Zoom
Squeeze
Through
Squeeze
Through
SDTV
480i
480p
575i
575p
960 × 720
960 × 720
960 × 720
960 × 720
1280 × 720
1280 × 720
1280 × 720
1280 × 720
1280 × 720
1280 × 720
1280 × 720
1280 × 720
640 × 480
640 × 480
768 × 576
768 × 576
853 × 480
853 × 480
1024 × 576
1024 × 576
HDTV
720p
1080i
1280 × 720
1280 × 720
—
—
—
—
1280 × 720
—
—
—
Format
Computer monitor formats (analog RGB)
Aspect setting
Format
Normal
Zoom
Squeeze
Through
Squeeze
Through
VGA
960 × 720
1280 × 720
1280 × 720
640 × 480
853 × 480
VESA
960 × 720
1280 × 720
1280 × 720
640 × 480
853 × 480
SVGA
960 × 720
1280 × 720
1280 × 720
800 × 600
1066 × 600
XGA
960 × 720
1280 × 720
1280 × 720
—
—
SXGA
960 × 720
1280 × 720
1280 × 720
—
—
MAC13”
MAC16”
MAC19”
MAC21”
960 × 720
960 × 720
960 × 720
954 × 720
1280 × 720
1280 × 720
1280 × 720
1280 × 720
1280 × 720
1280 × 720
1280 × 720
1280 × 720
640 × 480
832 × 624
—
—
853 × 480
1109 × 624
—
—
1/04
Epson PowerLite Cinema 200 Projector - 3
Epson PowerLite Cinema 200 Projector
distorts (or “keystones”) the shape of the image, but you can
correct it using the projector’s Keystone function (see page 6).
Positioning the Projector
If you place the projector off to the side, aim it straight ahead
(rather than at the center of the screen), then use the horizontal
lens shift knob to center the image. Do not place the projector
farther to the left or right than the edge of the screen, or you
will not be able to project a square (or rectangular) image.
You can install the projector for these viewing setups:
Vertical lens shift knob
Horizontal lens shift knob
Front/Ceiling
Rear/Ceiling
Front
Rear
Adjustable feet
When projecting from a rear or overhead position, orient the
image by selecting the correct Projection option (see page 5).
Tip: To display a test pattern to help you center the image on the
screen, press the Pattern button on the remote control, then select
Cross-hatching. You can use the feet to correct a tilted image.
Image Size and Projection Distance
The maximum size of the image is determined by the distance
from the projector’s lens to the screen. Depending on how you
use the Zoom and other settings, the actual size may be smaller.
Projection
distance
Maximum diagonal image size
(16:9)
2.9 feet
30 inches (26 × 14 inches)
3.9 feet
40 inches (34 × 19 inches)
5.9 feet
60 inches (52 × 29 inches)
7.9 feet
80 inches (69 × 39 inches)
9.9 feet
100 inches (87 × 49 inches)
19.9 feet
200 inches (174 × 98 inches)
29.9 feet
300 inches (261 × 147 inches)
Turning the Projector On and Off
1. Connect the power cord to the projector and a grounded
electrical outlet.
2. Press the On button on the remote control, or press the
P Power button on the projector. The projector takes about
30 seconds to warm up. If you don’t see an image, you may
need to select its source (see page 5).[]
Projecting a Square Image
For best image quality, place the projector level and at a height
so its lens is between the top and bottom of the screen. Then
use the vertical lens shift knob to position the image.
Turning Off the Projector
To turn off the projector, press the Off button on the remote
control (or press the projector’s P Power button twice). Let it
cool about 30 seconds while the Ppower light flashes. Once the
light stops flashing and stays on, you can unplug the projector.
Caution: Turn the projector off when not in use. Continuous 24hour-a-day use may reduce its overall life. Never unplug the
projector without pressing the Off button and letting it cool, or you
could damage it and reduce lamp life.
If you place the projector above or below screen level, you’ll
have to tilt it up or down to aim the image at the screen; this
4 - Epson PowerLite Cinema 200 Projector
1/04
Epson PowerLite Cinema 200 Projector
Focusing and Zooming the Image
Locking the Projector
To adjust the sharpness or size of the image:
1. Press the Focus or Zoom button on the projector or remote
control.
You can lock the projector to prevent the image from being
accidentally changed once it’s adjusted, and to keep children
from using the projector without adult supervision.
You see this screen:
1. Press the Menu button on the remote control.
2. Use the menu navigation buttons to open the Setting menu,
then open the Operation menu and select Lock Setting.
3. Choose from these options:
❏ Focus Lock to prevent the focus from being changed.
❏ Zoom Lock to prevent the picture size from being
changed.
2. Use the
❏ Child Lock to make it more difficult to turn on the
projector from the control panel (but does not affect
operation of the remote control).
arrow buttons to adjust the image.
Note: If you use the remote control, you can stand close to the screen
while focusing the image. This lets you adjust the picture more
precisely.
To turn on the projector, either use the remote control,
or press and hold the projector’s P Power button for at
least 3 seconds.
3. Press ESC when done.
❏ Key Lock to disable all the buttons on the projector’s
control panel.
Inverting and Mirroring the Image
If the image is upside-down or backwards, use the Projection
function to adjust it:
1. Press the Menu button on the remote control.
Basic Image Adjustments
2. Use the menu navigation buttons to open the Setting menu,
then open the Screen menu and select Projection.
Once the projector is turned on, use these functions to adjust
the image.
3. Choose from these options:
❏ Front if the projector is located in front of the screen (for
example, on a table).
Selecting the Image Source
If you don’t see the image you want, press the Source button
on the remote control that corresponds to the port to which
your video equipment is connected. For example:
❏ Front/Ceiling if the projector is located in front of the
screen and mounted overhead.
To select the image source
connected to the Video port . . .
❏ Rear/Ceiling if the projector is located behind the screen
and mounted overhead.
❏ Rear if the projector is located behind the screen.
. . . press the Video button
Selecting the Input Signal
If you’re using the projector’s Input A port, select the correct
setting for the type of video equipment you’ve connected to it:
1. Press the Menu button on the remote control.
2. Use the menu navigation buttons to open the Setting menu,
then open the Input Signal menu and select Input A.
3. Choose from these options:
❏ YCbCr for a video player that outputs an NTSC signal.
Note: If you still don’t see an image after selecting the source, check
the troubleshooting tips on page 7. You can also use the Source
button on the projector’s control panel.
❏ YPbPr for a video player that outputs an HDTV signal.
❏ RGB-Video if your video player outputs an RGB video
signal.
1/04
Epson PowerLite Cinema 200 Projector - 5
Epson PowerLite Cinema 200 Projector
Performing Keystone Correction
If the projected image looks like
function to correct its shape.
or
Projector Status Lights
, use the Keystone
If your projector isn’t working correctly, first turn it off, wait for
the Power light to turn a steady orange, and unplug it. Then
plug the power cord back in and turn on the projector. If this
doesn’t solve the problem, check the lights on top of the
projector. They alert you to possible problems.
Note: If the image is shaped like
or
, the projector has been
placed off to the side of the screen and angled toward it. Face the
projector straight ahead (instead of at the center of the screen), then
use the horizontal lens shift knob to center the image.
To perform keystone correction:
Power light
1. Press the Menu button on the remote control.
2. Use the menu navigation buttons to open the Setting menu,
then open the Screen menu and select Keystone.
3. Use the
arrow buttons to adjust the shape of the image.
4. Press the Menu button when done.
Warning light
Choosing the Aspect Ratio
If the image doesn’t fit on the screen the way you like, you can
change the aspect ratio by pressing the Aspect button on the
remote control. See “Resizing the Image” on page 2 for details.
4:3 image using Normal setting
Light
Status
Action
P
off
Make sure the power cable is connected
securely at both ends, then press the
P Power button to turn on the projector. If
you’ve just replaced the lamp, make sure the
cover is securely fastened.
P
orange
The projector is in standby mode. You can
unplug it to turn it off or press the P Power
button to turn it on.
P
flashing
green
The projector is warming up. Wait about 30
seconds for a picture to appear.
P
green
The projector is operating normally.
P
flashing
orange
You’ve turned off the projector and it’s cooling
down. Wait until the light stops flashing, then
unplug the projector (or press the P Power
button to turn it back on). Never unplug the
projector when the light is flashing orange.
flashing
orange
High-speed cooling is in progress. If the
projector gets too hot again, it turns off
automatically. Make sure nothing is blocking
the air filter. If it continues to overheat, clean
the air filter; see page 10 for instructions.
red
The projector is too hot and the lamp has
turned off. Wait 5 minutes, then unplug the
projector. Make sure nothing is blocking the air
filter. If it continues to overheat, clean the air
filter; see page 10 for instructions.
flashing red
at halfsecond
intervals
The lamp needs to be replaced. See page 11
for instructions.
flashing red
at 1-second
intervals
If you just replaced the lamp, the lamp cover
may be loose; fasten it securely. Or there may
be an internal problem with the projector. Turn
it off, wait for the P power light to stop
flashing, then unplug the projector from the
electrical outlet and contact Epson for help.
16:9 image using Zoom setting
Choosing the Color Mode
You can change the Color Mode to adjust the brightness,
contrast, and color, letting you quickly optimize the image for
various lighting environments.
1. Select the image source you want to adjust (a different Color
Mode can be saved with each image source).
2. Press the Color Mode button on the remote control. Then
choose from these settings:
❏ Dynamic for projecting in bright rooms; images retain
their natural color.
❏ Living Room for projecting in rooms with subdued
lighting; images retain their natural color.
❏ Natural for projecting in darkened rooms; increases
contrast and makes flesh tones appear more natural.
❏ Theatre for projecting movies with dark scenes.
❏ sRGB for projecting computer images that conform to
the sRGB color standard.
Note: You can fine-tune the color and other image quality settings
using the projector’s menu system or the Cinema Color Editor
software. See the User’s Guide for details.
6 - Epson PowerLite Cinema 200 Projector
1/04
Epson PowerLite Cinema 200 Projector
❏ If the function key doesn’t let you display simultaneously on
both screens, you might need to use the Display utility in the
Windows® Control Panel to make sure that both the LCD
screen and external monitor port are enabled. From the
Control Panel, open the Display utility. In the Display
Properties dialog box, click the Settings tab, then click
Advanced. The method for adjusting the setting varies from
computer to computer; you may need to click a Monitor
tab, then make sure the external Monitor port is set as your
primary display or enabled. See your computer manual or
online help for details.
Troubleshooting
You cannot turn on the projector.
❏ Make sure the power cord is connected, then wait a moment
for the P power light to turn orange before pressing the
P Power button.
❏ If you’ve set the Key Lock (see page 5), the control panel
buttons are disabled; you must use the remote control to
turn on the projector.
❏ If you’ve set the Child Lock, use the remote control or press
and hold the P Power button on the projector for at least
3 seconds to turn it on (see page 5).
If you’re using a Macintosh with OS X:
No picture appears on the screen or you
see the message No Signal displayed.
2. Click Detect Displays.
1. Select System Preferences from the Apple menu and click
Displays.
3. To display the entire desktop on both your projector screen
and LCD screen, click the Arrange tab. (If you don’t see
this tab, make sure it isn’t hidden by another window.)
❏ Press the Source button on the projector or one of the
Source buttons on the remote control to select the correct
input source. Allow a few seconds for the projector to sync
up after pressing the button.
4. Click Mirror Displays in the lower corner of the screen.
One of the monitor icons automatically moves on top of the
other.
❏ Press the Blank button on the remote control to make sure
the picture hasn’t been turned off temporarily.
❏ Check that the P power light is green, not flashing, and the
lens cover is off.
❏ The projector may be in standby mode. If the P power light
is orange, press the P Power button to turn the projector
back on.
❏ Make sure your video equipment is turned on.
❏ Make sure your cable(s) are connected correctly.
❏ Make sure the output signal from your video equipment is in
a compatible format (see page 2).
Click here
If you’re using a Macintosh with OS 9.x or earlier:
You’re using a computer and no picture
appears on the screen.
1. From the Apple menu, select Control Panels, then click
Monitors or Monitors and Sound.
First, make sure the output signal from your computer is in a
compatible format (see page 2). If you still see no picture, check
additional computer settings as described below.
If you’re using Windows:
Click here
❏ Press the function key that lets you display on an external
monitor. It’s often labeled with an icon such as
, but it
may also be labeled CRT/LCD. You may have to hold down
the Fn key while pressing it. Check your laptop’s manual or
online help.
Drag one
monitor icon on
top of the other
On most systems, the
key lets you toggle between the
LCD screen and the projector, or display on both at the
same time. Allow a few seconds for the projector to sync up
after pressing the key.
2. Click the Arrange icon, and then drag one monitor icon on
top of the other.
1/04
Epson PowerLite Cinema 200 Projector - 7
Epson PowerLite Cinema 200 Projector
❏ If you’re using an extension cable, you may pick up
interference unless you use a signal amplifier. Or try turning
on Noise Reduction in the menu system.
If the Arrange option isn’t available, you may need to select
one of the Simulscan resolutions. Click the Monitor icon
and then select a Simulscan resolution from the Resolution
box. (Allow a few seconds for the projector to sync up.)
❏ If you’re displaying the same image on your computer and
projector screen, try turning off your laptop’s LCD display.
The picture is upside-down or reversed.
The picture is blurry.
Change the Projection setting in the menu system (see page 5).
❏ Make sure the Input Signal is set correctly for your video
equipment (see page 5).
Only part of the picture is displayed, or
the picture is distorted.
❏ There may be dirt on the lens. Gently clean the lens using
lens-cleaning tissue.
❏ Press the Aspect button to select a different aspect ratio (see
page 2).
❏ Adjust the focus (see page 5).
❏ If the Aspect is set to Zoom, you may need to use the Zoom
Caption option in the projector’s menu system to see the top
or bottom section of the screen (so that subtitles are visible).
❏ Make sure the lens is not fogged by condensation. If you’ve
just moved the projector from a cold environment, wait a
couple of minutes before using it.
❏ Check the Output Scaling setting in the menu system to
make sure it’s adjusted correctly.
❏ Adjust the Sharpness setting (see page 5).
❏ If you’re projecting from a computer, you may need to
adjust the Tracking and Sync settings (see the User’s Guide
for details).
❏ Use the Position setting in the menu system to reposition
the image on the screen.
❏ If you’ve connected a computer and you see only half the
image, make sure the computer’s Dual Display setting is
turned off.
The colors on the screen don’t look right.
❏ Make sure the Input Signal is set correctly for your
connected video equipment (see page 5).
The picture isn’t rectangular.
❏ Press the Color Mode button on the remote control to select
a different color mode (see page 6).
❏ If the image looks like
or
, the projector has been
placed off to one side of the screen and angled toward it.
Face the projector straight ahead (instead of at the center of
the screen), then use the horizontal lens shift knob to center
the image (see page 4).
❏ Check the brightness and contrast settings in the menu
system, as described in the User’s Guide.
❏ Fine-tune the colors with the menu’s color settings, as
described in the User’s Guide. You can also use Cinema
Color Editor to adjust each color individually (see your
User’s Guide).
❏ If the image looks like
or
, use the remote control
to access the Keystone function to correct its shape (see
page 6). Or press the
and
buttons on the projector’s
control panel.
❏ If the picture looks dark, you may need to replace the lamp
(see page 11).
Note: You won’t have to use the Keystone function to correct the
image if you place the projector level (not angled up or down) and
at a height between the top and bottom of the screen. Then use the
vertical lens shift knob to position the image. This produces the bestlooking picture.
The picture contains static or noise.
❏ Make sure the Input Signal is set correctly for your
connected video equipment (see page 5).
❏ If you’re viewing still images and you notice flickering or
horizontal lines, turn on the Progressive setting in the
projector’s menu system.
❏ Make sure your cables are securely connected at both ends.
8 - Epson PowerLite Cinema 200 Projector
1/04
Epson PowerLite Cinema 200 Projector
Adjusting the Picture Quality
Using Cinema Color Editor
You can use Cinema Color Editor in place of the projector’s
menu system to adjust the image.
Cinema Color Editor is a program that lets you use your
computer to operate the projector in place of the remote
control, and to make fine custom color adjustments.
1. Click the Picture Quality tab.
First, select
Picture Quality
Note: See the User’s Guide for instructions on installing Cinema
Color Editor and connecting the projector to your computer.
Remote Control Operations
You can use Cinema Color Editor to change the image source,
adjust the aspect ratio, or turn the power off—just as you would
from the remote control.
Then click one of
these buttons to
access additional
settings
1. Open Cinema Color Editor, then click the Remote Control
tab.
Select Remote Control
Turn off the power
2. Click one of the buttons shown above to access these
settings:
Change the image source
(see page 5)
Button
Available adjustments
Input Adjustment
Brightness
Color Intensity
Tint
Sharpness
Color Temp. and Flesh Tone
Adjust the aspect ratio
(see page 6)
Color Mode
Color Adjustment (see next section)
Progressive
Output Scaling
Setup Level
2. Click one of the buttons for the options shown above.
Note: See the User’s Guide for details on using these settings.
1/04
Epson PowerLite Cinema 200 Projector - 9
Epson PowerLite Cinema 200 Projector
Adjusting the Color
Cleaning and Replacing the Air Filter
You can use the Color Adjustment settings to fine-tune the
color of the image.
Clean the air filter on the bottom of the projector after every
100 hours of use. If it’s not cleaned periodically, it can become
clogged with dust, preventing proper ventilation. This can cause
overheating and damage the projector.
1. Select Picture Quality, then click Adjustment of image.
2. Select one of the following modes, then click Adjust.
❏ RGB: Adjusts the offset, gamma, and gain for each signal
color. Use Offset to adjust darker shades, Gamma for
intermediate shades, and Gain for the lightest shades.
1. Turn off the projector and wait for the P power light to stop
flashing.
2. Unplug the power cord and disconnect any cables.
❏ RGBCMY: Adjusts the hue and saturation for each of six
colors, as shown on the color palette below. After moving
a slider bar, click Apply.
3. Turn the projector over. Then use a small vacuum cleaner
designed for computers and other office equipment to clean
the filter. If you don’t have one, gently clean the filter using a
very soft brush, such as an artist’s paintbrush.
Adjust
the hue
(red,
green,
blue,
cyan,
magenta,
yellow)
Adjust the saturation
If the dirt is difficult to remove or the filter is broken, replace
it. Contact your dealer or call Epson at (800) 873-7766 and
ask for part number V13H134A04. In Canada, call (800)
463-7766 for dealer referral.
Saving and Recalling Picture Settings
Once you’ve adjusted the picture to your liking, you can save
your settings in the projector’s memory. Then you can use the
remote control (or Cinema Color Editor) to recall them for
future use. You can also rename or delete memory settings
stored on the projector.
4. If you need to replace the filter, release the tab and lift open
the cover.
1. Select Picture Quality, then click Memory management.
Use these
settings to
select,
register, or
edit a
memory
setting
5. Remove the old filter and replace it with a new one.
6. To replace the cover, insert the tabs and press down until the
cover clicks into place.
2. Click one of the following:
❏ Select to use a memory setting stored on the projector
❏ Register to create a new memory setting
❏ Edit to change the name of an existing setting
See the User’s Guide for details.
10 - Epson PowerLite Cinema 200 Projector
1/04
Epson PowerLite Cinema 200 Projector
4. Loosen the two screws securing the lamp.
Replacing the Lamp
The projection lamp lasts for up to 3000 hours (in low
brightness mode) or 1700 hours (in high brightness mode).
You can use the Info menu to check how long it’s been in use.
It’s time to replace the lamp when:
❏ The projected image gets darker or starts to deteriorate.
❏ The projector’s warning light flashes red at half-second
intervals.
5. Grasp the lamp as shown and pull it straight out.
❏ The message Replace the lamp appears on the screen when
you start projecting.
Note: Lamp life results will vary depending on the selected mode,
environmental conditions, and usage.
Contact your dealer or call Epson at (800) 873-7766 in the
United States for a replacement lamp. Request part number
V13H010L28. In Canada, call (800) 463-7766 for dealer
referral.
Warning: Let the lamp cool fully before replacing it. In the unlikely
event that the lamp has broken, small glass fragments may be
present and should be removed carefully to avoid injury.
6. Fully insert the new lamp and tighten its screws.
Caution: Don’t touch the glass portion of the lamp assembly.
Touching the glass could result in premature lamp failure.
The lamp component contains mercury. Please consult your state
and local regulations regarding proper disposal or recycling, and do
not place in the trash.
7. Replace the cover and tighten its screws. (The projector
won’t work if the lamp cover is open or loose.)
8. Reset the lamp usage timer, as described in the next section.
Caution: Never touch the lamp with your bare hands; the invisible
residue left by the oil on your hands may shorten the lamp life. Use
a cloth or glove to handle the new lamp.
Resetting the Lamp Timer
Follow these steps to replace the lamp:
After installing a new lamp, you need to reset the timer so the
projector can keep track of how many hours it has been used.
1. Turn off the projector and wait for the P power light to stop
flashing, then unplug the power cord.
1. Press the Menu button on the projector or remote control.
2. Use the menu navigation buttons to open the Reset menu,
then select Lamp-Hours Reset.
2. If the projector has been on, let it cool for about an hour.
3. Loosen the two screws securing the lamp cover (they don’t
come all the way out), and then remove the cover.
3. When you see a confirmation prompt, highlight Yes and
press the button.
4. When you’re finished, press the Menu button to exit.
The lamp usage timer doesn’t register until you’ve used the
lamp for at least 10 hours.
1/04
Epson PowerLite Cinema 200 Projector - 11
Epson PowerLite Cinema 200 Projector
Optional Accessories
Epson provides the following optional accessories:
Product
Part number
Replacement lamp (ELPLP28)
V13H010L28
Air filter replacement (ELPAF04)
V13H134A04
Ceiling mount
ELPHB01
Kensington security lock
ELPSL01
Projection screens:
50-inch portable screen
60-inch portable pop-up screen
80-inch portable pop-up screen
ELPSC06
ELPSC07
ELPSC08
Macintosh adapter set (includes monitor
adapter and desktop adapter)
ELPAP01
S-video cable
ELPSV01
You can purchase these accessories from your dealer, by calling
Epson at (800) 873-7766, or by visiting the Epson Store at
www.epsonstore.com (U.S. sales only). In Canada, please call
(800) 463-7766 for dealer referral.
SM
Related Documentation
CPD-17301
EPSON PowerLite Cinema 200
User’s Guide
CPD- 17303
EPSON Extra Care Home Service
warranty
CPD-17666
Update slipsheet (explains how to
perform vertical stripe adjustment)
SM
Note: Setup instructions are provided in the User’s Guide. There is
no setup sheet.
12 - Epson PowerLite Cinema 200 Projector
1/04