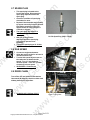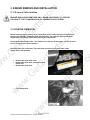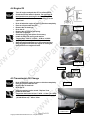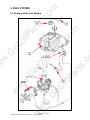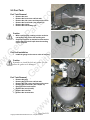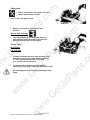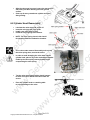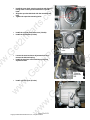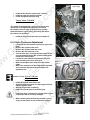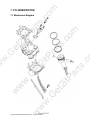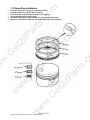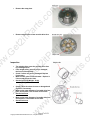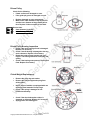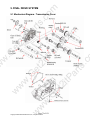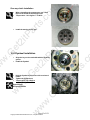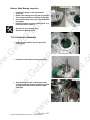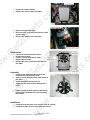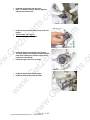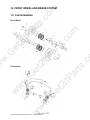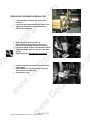
1
om rts .c om tP ar ts .c 2i tP a .G et ar ts .c .G et w 2i w ETON America 2i tP .G et Covers: VXL-250 w w w w w w VECTOR Service Manual Copyright ©2008-2009 ETON America, llc., all rights reserved. om CONTENTS tP a .G et 2i tP 2i .G et w w w w w w Copyright ©2008-2009 ETON America, llc., all rights reserved. ar ts .c 2i .G et w w rts .c om tP ar ts .c 1. Information ........................................................................................................................ 5 1.1 Safety ........................................................................................................................... 5 1.2 Notes ............................................................................................................................ 5 1.3 Important Symbols And Specifications ....................................................................... 6 1.4 Serial Number .............................................................................................................. 9 1.5 Torque Values.............................................................................................................. 9 1.5 Torque Values............................................................................................................ 10 2. Maintenance..................................................................................................................... 11 2.1 Maintenance Data ...................................................................................................... 11 2.2 Maintenance Schedule ............................................................................................... 12 2.3 Fuel Tube ................................................................................................................... 12 2.4 Throttle Operation...................................................................................................... 13 2.5 Throttle Cable Adjustment......................................................................................... 13 2.6 Air Filter..................................................................................................................... 13 2.7 Spark Plug.................................................................................................................. 14 2.8 Idle Speed................................................................................................................... 14 2.9 Drive Chain................................................................................................................ 14 2.10 Brake System ........................................................................................................... 15 2 . 1 1 W h e e l s A n d T i r e s .......................................................................................... 17 2 . 1 2 S t e e r i n g S y s t e m .............................................................................................. 17 2 . 1 3 T o e - I n .................................................................................................................. 18 3. Engine Remove And Installation ..................................................................................... 19 3 . 1 G e n e r a l I n f o r m a t i o n.......................................................................................... 19 3 . 2 E n g i n e R e mo v a l .................................................................................................. 19 3 . 3 E n g i n e I n s t a l l a t i o n ............................................................................................ 20 4. Lubrication System .......................................................................................................... 21 4 . 1 M e c h a n i s m D i a g r a m ......................................................................................... 21 4.2 Maintenance Guidelines............................................................................................. 22 4.3 Troubleshooting ......................................................................................................... 22 4.4 Engine Oil .................................................................................................................. 23 4.5 Transmission Oil Change........................................................................................... 23 4.6 Oil Pump .................................................................................................................... 24 5. Fuel System...................................................................................................................... 27 5.1 Drawing Of The Fuel System .................................................................................... 27 5.2 Maintenance Information........................................................................................... 28 5.3 Troubleshooting ......................................................................................................... 29 5.4 Carburetor Removal / Installation.............................................................................. 30 5.5 Air Cut-Off Valve ...................................................................................................... 31 5.6 Throttle Valve ............................................................................................................ 32 5.7 Float Chamber............................................................................................................ 33 5.8 Adjustment Of Idle Speed.......................................................................................... 35 5.9 Fuel Tank ................................................................................................................... 36 5.10 Air Cleaner............................................................................................................... 37 6. Cylinder Head/Valve ....................................................................................................... 38 6.1 Mechanism Diagram.................................................................................................. 38 6.2 Operation Precautions................................................................................................ 39 om tP a .G et 2i tP 2i .G et w w w w w w Copyright ©2008-2009 ETON America, llc., all rights reserved. ar ts .c 2i .G et w w rts .c om tP ar ts .c 6.3 Troubleshooting ......................................................................................................... 40 6.4 Cylinder Head Removal............................................................................................. 41 6.5 Cylinder Head Inspection .......................................................................................... 44 6.6 Valve Stem Replacement........................................................................................... 47 6.7 Valve Seat Inspection And Service............................................................................ 48 6.8 Cylinder Head Reassembly........................................................................................ 50 6.9 Cylinder Head Installation ......................................................................................... 51 6.10 Valve Clearance Adjustment ................................................................................... 53 7. Cylinder/Piston ................................................................................................................ 54 7.1 Mechanism Diagram.................................................................................................. 54 7.2 Operating Details ....................................................................................................... 55 7.3 Troubleshooting ......................................................................................................... 55 7.4 Cylinder And Piston Removal ................................................................................... 56 7.5 Piston Ring Installation.............................................................................................. 59 7.6 Piston Installation....................................................................................................... 60 7.7 Cylinder Installation................................................................................................... 60 8. V-Belt Transmission System ........................................................................................... 62 8.1 Mechanism Diagram.................................................................................................. 62 8.2 Maintenance Description ........................................................................................... 63 8.3 Troubleshooting ......................................................................................................... 63 8.4 Left Crankcase Cover ................................................................................................ 64 8.5 Drive Belt................................................................................................................... 64 8.6 Drive Face.................................................................................................................. 66 8.7 Clutch Outer/Driven Pulley ....................................................................................... 69 9. Final Drive System .......................................................................................................... 75 9.1 Mechanism Diagram - Transmission Cover .............................................................. 75 9.2 Maintenance Notes..................................................................................................... 76 9.3 Troubleshooting ......................................................................................................... 76 9.4 Disassembly Of Transmission ................................................................................... 77 9.5 Transmission Mechanism Inspection......................................................................... 80 9.6 Bearing Replacement ................................................................................................. 82 9.7 Final Drive Reassembly............................................................................................. 85 10. A/C Generator & Starting Clutch .................................................................................. 87 10.1 Mechanism Diagram................................................................................................ 87 10.2 Maintenance Notes................................................................................................... 88 10.3 Right Crankcase Cover Removal............................................................................. 89 10.4 A/C Generator Removal .......................................................................................... 89 10.5 Right Cover Bearing ................................................................................................ 89 10.6 Flywheel Removal ................................................................................................... 90 10.7 Starting Clutch ......................................................................................................... 91 10.8 Flywheel Installation................................................................................................ 93 10.9 Acg Set Installation.................................................................................................. 94 10.10 Right Crankcase Cover Installation ....................................................................... 94 11. Crankcase / Crank .......................................................................................................... 96 11.1 Mechanism Diagram................................................................................................ 96 11.2 General Information................................................................................................. 97 11.3 Troubleshooting ....................................................................................................... 97 11.4 Crankcase Disassembly ........................................................................................... 98 om tP a .G et 2i tP 2i .G et w w w w w w Copyright ©2008-2009 ETON America, llc., all rights reserved. ar ts .c 2i .G et w w rts .c om tP ar ts .c 11.5 Crankshaft Inspection ............................................................................................ 100 11.6 Crankcase Assembly.............................................................................................. 101 12. Cooling System............................................................................................................ 104 12.1 Mechanism Diagram.............................................................................................. 104 12.2 General Information............................................................................................... 105 12.3 Troubleshooting ..................................................................................................... 106 12.4 Troubleshooting Flowchart.................................................................................... 106 12.5 System Test............................................................................................................ 107 12.6 Radiator.................................................................................................................. 108 12.7 Water Pump ........................................................................................................... 110 12.8 Thermostat ............................................................................................................. 114 13. Steering And Suspension ............................................................................................. 115 13.1 Parts Drawing......................................................................................................... 115 13.2 Troubleshooting ..................................................................................................... 117 13.3 Handlebar............................................................................................................... 117 13.4 Throttle Housing .................................................................................................... 120 13.5 Steering System ..................................................................................................... 120 14. Front Wheel And Brake System .................................................................................. 122 14.1 Parts Drawing......................................................................................................... 122 14.2 Troubleshooting ..................................................................................................... 123 14.3 Front Wheels.......................................................................................................... 124 14.4 Hydraulic Brake ..................................................................................................... 124 14.5 Suspension System................................................................................................. 126 15. Rear Wheel And Brake System ................................................................................... 127 15.1 Parts Drawing......................................................................................................... 127 15.2 Troubleshooting ..................................................................................................... 129 15.3 Rear Wheel And Rear Brake Removal .................................................................. 129 15.4 Swingarm & Rear Axle Holder.............................................................................. 133 16. Fenders And Exhaust Pipe ........................................................................................... 136 16.1 Fenders Drawing.................................................................................................... 136 16.2 Rear Fenders Removal........................................................................................... 137 16.3 Front Fender Removal ........................................................................................... 138 16.4 Exhaust Pipe Removal ........................................................................................... 139 17. Electrical System ......................................................................................................... 141 17.1 Troubleshooting ..................................................................................................... 141 17.2 Ignition Coil ........................................................................................................... 142 17.3 Ignition Timing ...................................................................................................... 142 17.4 Battery Information................................................................................................ 142 17.5 Electric Starter ....................................................................................................... 143 17.6 Light Bulb Replacement ........................................................................................ 143 17.7 Instrument Panel .................................................................................................... 145 18. Troubleshooting ........................................................................................................... 147 18.1 Engine Does Not Run ............................................................................................ 147 18.2 Poor Performance At Low And Idle Speeds.......................................................... 148 18.3 Poor Performance At High Speed.......................................................................... 148 18.4 Loss Of Power........................................................................................................ 149 18.5 Poor Handling ........................................................................................................ 150 tP ar ts .c 1.1 SAFETY GASOLINE Gasoline is extremely flammable and is explosive under certain conditions. Do not smoke or allow sparks or flames in your work area. • CARBON MONOXIDE Never run the engine in a closed area. The exhaust contains poisonous carbon monoxide gas that may cause loss of consciousness and lead to death. rts .c om • BATTERY ELECTROLYTE The battery electrolyte contains sulfuric acid. Protect your eyes, skin and clothing. If it comes into contact with any part of your body, flush the area thoroughly with water. Call a doctor if electrolyte gets in your eyes. HOT PARTS Engine and exhaust pipe become very hot and remain hot for up to one hour after the engine is run. Wear insulated gloves before handling these parts. 2i • • USED ENGINE/GEAR OIL tP a .G et Used engine oil and gear oil may cause skin damage if it repeatedly comes into contact with the skin for long periods of time. Keep out of reach of children. Dispose of used gear and engine oil properly. 1.2 NOTES ar ts .c All information, illustrations, directions and specifications included in this publication are base on the latest product information available at the time of approval for printing. ETON America, LLC. reserves the right to make changes at any time without notice and without incurring any obligation whatever. 2i w 2i tP .G et w w .G et No part of this publication may be reproduced without written permission. w w w w w om 1. INFORMATION Copyright ©2008-2009 ETON America, llc., all rights reserved. om 1.3 Important Symbols and Specifications tP ar ts .c Symbols will appear throughout the manual to indicate important information or tasks. CAUTION – Safety notification. Proceed carefully. rts .c om ADJUSTMENTS – Requires inspection, adjustment, or torque. 2i FLUIDS – Lubrication or check and replace fluids. .G et MULTIMETER – Diagnostics and electrical testing. tP a MEASUREMENT – Gap and size measurements. ar ts .c w SPECIAL TOOL – Uncommon tools may be required. w w w w 2i tP .G et w w .G et w 2i GENERAL MAINTENCE PART – These parts may need to be replaced often. Part numbers will be provided when applicable. Copyright ©2008-2009 ETON America, llc., all rights reserved. Engine (Model No. VXL-250) Four cycle , Single Cylinder, Liquid cooled 249cc φ71mm * 63mm 10.6 : 1 22.3Nm @ 5500rpm / 16.4bhp Meets or exceeds EPA clean air requirements/CA Green Sticker Electrical with Kick starter back up Transmission Type Automatic (C.V.T. V-Belt) Manual Shift (Fwr/Rev) Chassis Suspension Dual A-arm Adjustable Shocks @ 2.95" travel Swing Arm Adjustable Shock @ 4.72" travel 2i Brakes Front Min Max Rear Min Max w Tire Pressure 21/7-10 22/11-9 3.2psi / 0.23kg/cm2 4.0psi / 0.28kg/cm2 3.2psi / 0.23kg/cm2 4.0psi / 0.28kg/cm2 w Wheels Bolt Pattern 4 x 110mm (P.C.D.) 520x15t 520x38t w Front Rear w Sprockets Kei-Hin with Manual choke 1.1mm 0.35mm Back out 1 - 2½turns Idle 1600 - 1800rpm w Make/Size Main Jet Pilot Jet Air Mixture Adjustment Idle Speed .G et w Carburetor 2i tP Hydraulic Disc (2) Hydraulic Disc .G et Front Rear Copyright ©2008-2009 ETON America, llc., all rights reserved. ar ts .c Front Rear Front Rear 1780mm / 70.1" 1030mm / 40.6" 1140mm / 44.9" 1190mm / 46.9" 890mm / 35.0" 150mm / 5.9" 200kg / 441lbs tP a .G et 2i Overall Length Overall Width Overall High Wheel Base Seat Height Ground Clearance Dry Weight Tires rts .c om tP ar ts .c Type Displacement Bore / Stroke Compression Ratio / Pressure Torque / BHP EPA Approved Starting w w om Vector 250 ATV Specifications #520*90 O-Ring Battery Jell Acid (Maintenance Free) 12V-9AH - GTX12-BS Spark Plug NGK 2i NGK-CR8E Electrode Gap 0.6-0.7mm / 0.023" Available Colors 136kg / 301lb (Optional) 330kg / 727lb (Optional) 50kg / 110lbs 150kg / 330lbs 16 years Red Blue w w w w .G et w w .G et * Subject to availability N/A 2i Front Rear Trailer Wgh Towing Capacity Tongue Wgh Maximum Rider Weight Minimum Rider Age Rack Capacity tP a .G et Carrying Capacity Copyright ©2008-2009 ETON America, llc., all rights reserved. ar ts .c Transmission Unleaded Gasoline 89 octane 12liters / 3.17gal SAE 10-30W 1.4 liters / 1.5 qt (1.2 liters / 1.3 qt for change) SAE 85/140 weight gear Oil 750cc / 25.4oz (650cc / 22oz for change) 2i tP Engine Oil Type Volume Type Volume Type Volume rts .c om Fuel tP ar ts .c Fluids w w om Chain om .G et 2i rts .c om tP ar ts .c 1.4 Serial Number w ar ts .c 2i tP .G et w w .G et w 2i w tP a The frame number is stamped on the front of the frame behind the front bumper. w w w The engine number is stamped on the left hand side of the crankcase. Copyright ©2008-2009 ETON America, llc., all rights reserved. 5 N-m (3.5 lbf-ft) 10 N-m (7.2 lbf-ft) 22 N-m (16 lbf-ft) 35 N-m (25 lbf-ft) 55 N-m (40 lbf-ft) tP ar ts .c STANDARD 5 mm bolt and nut 6 mm bolt and nut 8 mm bolt and nut 10 mm bolt and nut 12 mm bolt and nut ENGINE Cylinder head nut Spark plug Cylinder head bolt Alternator bolt FRAME Handlebar upper holder bolt Throttle housing cover screw Steering shaft nut Steering shaft holder bolt Wheel rim bolt Tie rod lock nut King pin nut Handlebar lower holder nut Front wheel bolt Front axle castle nut Front brake arm nut Rear brake arm nut Rear axle castle nut Rear wheel bolt Exhaust muffler mounting bolt Engine hanger bolt Rear axle holder bolt Swing arm pivot nut Rear shock absorber mounting nut w w w w 2i tP .G et w w .G et 2i tP a 24 N-m (17.7 lbf-ft) 4 N-m (2.9 lbf-ft) 50 N-m (36.9 lbf-ft) 33 N-m (24 lbf-ft) 18 N-m (13.3 lbf-ft) 35 N-m (25.8 lbf-ft) 40 N-m (29 lbf-ft) 40 N-m (29.5 lbf-ft) 24 N-m (17.7 lbf-ft) 40-60 N-m (30-45 lbf-ft) 4 N-m (3.0 lbf-ft) 7 N-m (5.2 lbf-ft) 40-60 N-m (30-45 lbf-ft) 24 N-m (17.7 lbf-ft) 30 N-m (22.1 lbf-ft) 30 N-m ( 22 lbf-ft) 90 N-m (65 lbf-ft) 90 N-m (65 lbf-ft) 45 N-m (33 lbf-ft) Copyright ©2008-2009 ETON America, llc., all rights reserved. ar ts .c rts .c om 28 N-m (20.7 lbf-ft) 12 N-m (8.9 lbf-ft) 20 N-m (14.8 lbf-ft) 8 N-m (5.9 lbf-ft) 2i .G et w w om 1.5 Torque Values tP ar ts .c 2.1 MAINTENANCE DATA om 2. MAINTENANCE SPECIFICATION SPARK PLUG w w w w .G et 2i tP 2i w w .G et w Copyright ©2008-2009 ETON America, llc., all rights reserved. ar ts .c 12-19 N-m / 8.9-14 lbf-ft 35-43 N-m / 25.8-31.7 lbf-ft 1.4 Liter (1.2Liter for change) 750cc / 25.4oz (650cc for change) tP a 2i w .G et GAP 0.6-0.7 mm / 0.023” NGK CR8E 5-10 mm / 0.20 - 0.39” 1700±100 rpm 15-25 mm / 0.59 – 0.98” 10-25 mm / 0.39 – 0.98” 5±10 mm / 0.20 ± 0.39” rts .c om SPARK PLUG RECOMMENDED SPARK PLUGS THROTTLE LEVER FREE PLAY IDLE SPEED BRAKE LEVER FREE PLAY DRIVE CHAIN SLACK TOE-IN TORQUE VALUES SPARK PLUG TIE-ROD LOCK NUT ENGINE OIL GEAR LUBRICATION OIL om Maintenance Schedule Four Stroke Vehicles tP ar ts .c WP-0027 300KM 2000 Miles 3700 Miles 7500 Miles NEW 1 Month 3 Months 6 Months 1 Year C * I I I Change I I R(paper) C I R(sponge) R I Change I R I I I I I I I I I I I I I I I I I I/L I 11 12 Check crankcase for leakage Transmission oil 13 Drive belt/roller 14 Fuel tank switch and lines Throttle valve operation and cable 19 Cam Chain/ignition time 20 Valve clearance 21 Shock absorbers 22 Front/Rear suspension 23 Main/Side stands 25 Crankcase (PCV) Valve Brake mechanism/brake lin‐ ing (pad) 26 Tighten all Bolts/Nuts & Fas‐ teners w 24 w 17 I Change I I I I .G et 18 Engine bolts and nuts Cylinder head, cylinder, and piston Exhaust system/cleaning carbon w 16 I .G et 15 I tP a .G et 8 2i 7 2i 6 I I ar ts .c Check transmission for leak‐ age 5 Air cleaner element 2i tP 10 3 4 w I I * = Clean or replace the air cleaner element more often when the vehicle is operated on dusty R = Replace C = Clean (replaced if necessary) L = Lubricate # = Maintenance should be performed more often if the vehicle is frequently operated at high w Code: I = Inspection, clean, and adjust w roads or in a heavily polluted environment. speed for prolonged time and after the vehicle has accumulated 50,000 miles. w w 600 Miles 9 2 Every 12000KM 200 Miles I * I Air cleaner C Oil filter (Screen) Engine oil Change I Tire, pressure I Battery I Spark plug I Carburetor (idle speed) I Steering bearing and handles 1 Every 1000KM Every 3000KM Every 6000KM rts .c om Scheduled Maintenance Copyright ©2008-2009 ETON America, llc., all rights reserved. om 2.2 MAINTENANCE SCHEDULE tP ar ts .c The internal maintenance in the following table is based on average riding in normal temperate conditions. Riding in dusty areas requires more frequent servicing. E-TON recommends that all maintenance and inspections be performed ONLY by a qualified and fully trained technician. I C I I I, L I I I I I I I .G et 2i tP a I I, L I I I I (Every 30 operating days) I 2.3 FUEL TUBE w .G et Inspect the fuel lines for deterioration, damage, or leaking. Replace if necessary. w w w I I R Page 12 of 151 R I I I I I I I I R I R 2i tP w Note – I: Inspect and Clean, Adjust, Lubricate, or Replace (if necessary) C: Clean L: Lubricate R: Replace Copyright ©2008-2009 ETON America, llc., all rights reserved. EVERY YEAR ar ts .c I I w w w .G et 2i Fuel Line Throttle Operation Air Filter system & Element Spark Plug Carburetor Idle Speed Drive Chain Brake Shoe Wear Brake System Nut, Bolt, Fastener Wheels & Wheel Nuts Steering System Suspension System Waste Gas Recovery Valve Intake & Exhaust Valve Adj. Gear & Engine Oil REGULAR SERVICE rts .c om INITIAL SERVICE (First week) • 2.5 THROTTLE CABLE ADJUSTMENT • Slide the rubber cap of the adjuster off the throttle housing. Loosen the lock nut and adjust the free play of the throttle lever by turning the adjuster on the throttle housing. Inspect the free play of the throttle lever. 2i • • • tP a w • .G et • Remove the four clips. Remove the two screws inside the air cleaner case. Remove the air filter element from the air cleaner case. Soak the element in nonflammable solvent. Squeeze out the solvent thoroughly. Let it dry. Soak the filter element in gear oil and then squeeze out the excess oil. Reinstall the components into air the cleaner. w • 2i 2.6 AIR FILTER Element .G et Note: for more detail, see chapter 5-10 w w w w w w .G et • Throttle Page 13 of 151 Copyright ©2008-2009 ETON America, llc., all rights reserved. ar ts .c • 2i tP • rts .c om • Inspect for smooth throttle lever full opening and automatic full closing in all steering positions. Ensure that there is no deterioration, damage, or kinking in the throttle cable. Replace it if necessary. Check the throttle lever. Free play is 5-10 mm at the tip of the throttle lever. Disconnect the throttle cable at the upper end. Lubricate the cable with commercially available lubricant to prevent premature wear. tP ar ts .c • om 2.4 THROTTLE OPERATION • With the sealing washer attached, thread the spark plug in by hand to prevent cross threading. Tighten the spark plug to 12-19 N-m. 2i • .G et • 2.8 IDLE SPEED tP a 2i • .G et • Connect an engine tachometer. Allow the engine to idle for at least 10 minutes to warm it up. Turn the idle-speed adjust screw on the carburetor to obtain the idle speed. “Turn in” (clockwise) to increase speed. “Turn out” (counter clockwise) to lower speed. IDLE SPEED: 1700±100 rpm 2.9 DRIVE CHAIN CHAIN SLACK:15-25mm (5/8-1”) Upper Locking Nuts w w w • .G et w w 2i tP Turn off the ATV and shift the transmission into neutral (N). Measure the drive chain slack midway between the sprockets. w w w • • 811799 Spark Plug (NGK – CR8E) Page 14 of 151 Copyright ©2008-2009 ETON America, llc., all rights reserved. ar ts .c • rts .c om • This spark plug is located at the front of the engine. Disconnect the spark plug cap and unscrew the spark plug. Check the condition of spark plug electrodes for wear. Replace if the electrodes and insulator tip appear unusually fouled or burned. Discard the spark plug if there is apparent wear or if the insulator is cracked or chipped. The spark plug gap distance is 0.6-0.7mm. tP ar ts .c • om 2.7 SPARK PLUG om TORQUE: 90N-m (65 lb-ft) When the drive chain becomes very dirty, it should be removed, cleaned, and lubricated. Use specialized chain oil to lubricate the drive chain. Clean the drive chain with kerosene and wipe it dry. Inspect the drive chain for any possible wear or damage. Replace the chain if it is worn excessively or damaged. • 2i .G et Inspect the sprocket teeth. If there is excessive wear or damage, replace it. w • • Inspect the front brake lever and lines for excessive play or other damage. Replace or repair if necessary. Measure the free play of the brake lever at the end of the brake lever. w • The standard free play is 15-25 mm. .G et • 2i tP 2.10 BRAKE SYSTEM w w w w w w • tP a .G et 2i • Lower Locking Nuts Page 15 of 151 Copyright ©2008-2009 ETON America, llc., all rights reserved. ar ts .c • tP ar ts .c • Adjust the chain slack. Loosen the upper and lower locking nuts and turn the drive chain adjusting nuts until proper slack is achieved. Tighten the axle holder bolts. rts .c om • • om Parking brake OFF The standard is 15-25 mm. w w NOTE: The rear brake master cylinder and reservoir is located under the left hand rear fender. This master cylinder is preset from the factory and no adjustment is necessary. Ensure the fluid is at the maximum level in the reservoir at all times. w w w w .G et Brake Fluid Dot-3 SAE-J1703 grade 2i tP .G et w 2i w tP a .G et • Parking brake ON Page 16 of 151 Copyright ©2008-2009 ETON America, llc., all rights reserved. ar ts .c 2i • • Inspect the rear brake lever and line for excessive play or other damage. Replace or repair if necessary. Measure the free play of the rear brake lever at the end of the lever. rts .c om • tP ar ts .c The parking brake is shown in the picture. When turned to the left side, the parking brake is OFF. Turn it to the right side to set it ON. om 2.11 WHEELS AND TIRES Inspect the tire surfaces for cuts, nails, or other sharp objects. • Check each tire surface at cold tire condition. • The standard tire pressure is 3.2-4.0 psi (maximum). 2i 2.12 STEERING SYSTEM Check the free play of the steering shaft with the front wheels turned straight ahead. • If there is excessive play, inspect the tie-rod, kingpin bushing, and ball joint. .G et w 2i w tP a .G et • w • .G et w • Remove the front fender. Remove the steering shaft holder and check the steering shaft bushing for wear or damage. If the bushing is worn or damaged, replace it. Grease the steering shaft bushing and install the parts in the reverse order of removal. w • • Torque: steering shaft holder bolt: 33 N-m (24 lbf-ft) w w w • 2i tP STEERING SHAFT HOLDER BUSHING Page 17 of 151 Copyright ©2008-2009 ETON America, llc., all rights reserved. ar ts .c rts .c om tP ar ts .c • 2i • Carefully move the vehicle backward, letting the wheels turn 180 degrees, so the marks on the tires are aligned with the axle center height. Measure the distance between the marks. Calculate the difference between the front and rear measurements. Toe-in: 5±10mm • • If the toe-in is out of the specification, adjust it by changing the length of the tie-rods equally by turning the tie-rod while holding the ball joint. Tighten the lock nuts. • Torque: 35-43 N-m w .G et 2i tP a • .G et w Locking Nut w w w w w w .G et • Page 18 of 151 Copyright ©2008-2009 ETON America, llc., all rights reserved. ar ts .c • 2i tP • rts .c om • Place the vehicle on level ground and align the front wheels so they are facing straight ahead. Mark the centers of the tires to indicate the axle center height. Measure the distance between the marks. tP ar ts .c • om 2.13 TOE-IN 3.1 General Information tP ar ts .c ENGINE SHOULD BE REMOVED ONLY WHEN NECESSARY TO REPAIR OR ADJUST THE TRANSMISSION OR COMBUSTION SYSTEMS. rts .c om 3.2 ENGINE REMOVAL 2i Before removing engine, remove all of components such as seat, front and rear body cover, fuel tube, exhaust pipe, carburetor cable and drive chain. The engine is attached with three hanger bolts which will be visible after removing the components. .G et Loosen these three hanger bolts. Two of these are in the rear of the engine, and one is in the front. The engine can now be removed. .G et Front hanger bolt. w w w w • Page 19 of 151 Copyright ©2008-2009 ETON America, llc., all rights reserved. ar ts .c 2i tP w w .G et • Remove the drive chain cover. Remove the drive chain retaining clip and master link. Remove the drive chain. 2i • • tP a Disconnect the wire connectors. There are three connectors: carburetor auto-choke, starter motor, and generator. w w om 3. ENGINE REMOVE AND INSTALLATION om Top rear hanger bolt. • Lower rear hanger bolt. tP a .G et 2i rts .c om tP ar ts .c • 3.3 ENGINE INSTALLATION .G et w w w w • 2i tP w Torque the engine hanger bolts to 30 N-m (22.1 lbf-ft). Reroute the throttle cable. Connect the carburetor cable and all fuel lines. Reinstall the drive chain. Install the exhaust pipe. Ensure all electrical connections are properly connected (A/C generator, starter motor, etc.) Reinstall the front and rear body covers. w • • • • • • Page 20 of 151 Copyright ©2008-2009 ETON America, llc., all rights reserved. ar ts .c .G et w 2i w Hanger bolt om 4. LUBRICATION SYSTEM w w w w Page 21 of 151 Copyright ©2008-2009 ETON America, llc., all rights reserved. ar ts .c 2i tP .G et w w .G et w 2i w tP a .G et 2i rts .c om tP ar ts .c 4-1 Mechanism Diagram om 4-2 Maintenance Guidelines General Information: tP ar ts .c This chapter contains maintenance information for the engine oil pump and gear oil replacement information. Inner rotor clearance Clearance between outer rotor and body tP a Oil pump Items Torque value Limit (mm) 0.15 0.20 0.15~0.20 0.25 0.04~0.09 0.12 14.7 N-m / 10.8 lbf-ft – 29 N-m / 22 lbf-ft 19 N-m / 14 lbf-ft – 25 N-m / 18 lbf-ft 10 N-m / 7 lbf-ft – 15 N-m / 10.7 lbf-ft 8 N-m / 5.8 lbf-ft – 12 N-m / 8.7 lbf-ft .G et 2i Torque value oil strainer cap Engine oil drain bolt Gear oil drain bolt Oil pump connection bolt w w Clearance between rotor side and body Standard (mm) 4-3 Troubleshooting • • • Oil leaking Valve guide or seat worn out Piston ring worn Low engine oil level Clog in oil strainer, circuits, or pipes Oil pump damaged w • • • w Low oil pressure Dirty oil .G et Change oil periodically Cylinder head gasket damaged Piston ring worn w w w w • • • 2i tP Low engine oil level Page 22 of 151 Copyright ©2008-2009 ETON America, llc., all rights reserved. ar ts .c .G et 2i Engine oil quantity (initial): 1.4L / 1.5 qt Engine oil quantity (replace): 1.2L / 1.2 qt Oil viscosity: SAE 10W-30 (Recommended King serial oils) Gear oil quantity (initial): 750cc / 25oz Gear oil quantity (replace): 650cc / 22 oz Gear oil viscosity: 85/140 Gear Oil (Recommended SYM Hypoid gear oils) rts .c om Specifications Drain oil when the engine is warm so it drains completely. Place an oil pan under the ATV. Remove the oil drain bolt. Drain the oil. Remove the oil strainer and spring. Clean the oil strainer. Check the O-ring, and replace if necessary. Install oil drain bolt, spring, and strainer. Torque value: 19 N-m / 14 lbf-ft – 25 N-m / 18 lbf-ft Add recommended oil (SAE 10W30) – 1.2L / 1.2 qt. Start the engine and allow to run for several minutes. Stop the engine and check the engine oil level again, Verify there are no engine oil leaks. Strainer .G et O-Ring w w w • Drain Bolt 2i tP .G et w w • • Drain Bolt Drain oil when the engine is warm so it drains completely. Place an oil pan under the ATV. Remove the oil drain bolt. Drain the oil. Verify the washer can be reused. Replace if not. Install the drain bolt. Torque the drain bolt: 10 N-m / 7 lbf-ft – 15 N-m / 10.7 lbf-ft Add recommended gear oil (85/140 W Gear oil) – 650cc / 22oz w • • ar ts .c 2i w w 4-5 Transmission Oil Change • • • Dipstick tP a .G et 2i • • • • • • • • • • • • rts .c om • Turn off engine, and park the ATV on a flat surface. Check the oil level with oil dipstick. Do not screw in the dipstick when checking the level. If the level is low, fill with the recommended oil to the upper level. tP ar ts .c • • om 4-4 Engine Oil Page 23 of 151 Copyright ©2008-2009 ETON America, llc., all rights reserved. Transmission Gear Oil Drain Bolt om 4-6 Oil Pump Oil Pump Removal • Remove generator and starting gear. rts .c om Remove cir clip and take out the oil pump driving chain and sprocket. Make sure that pump shaft can be rotated freely. Remove the 2 screws on the oil pump. Remove the oil pump. Remove the screws on oil pump cover and remove the cover. Remove oil pump shaft roller and shaft. w • • w Oil Pump Disassembly 2i tP .G et Retaining Bolts ar ts .c tP a Circle Clip 2i • • • w w .G et 2i • tP ar ts .c (Refer to chapter 10) w .G et Retaining Screw Roller Oil Pump Inspection Check the clearance between oil pump body and outer rotor. Limit: 0.25 mm • Check the clearance between the inner and outer rotors. Limit: 0.20 mm w w w • Page 24 of 151 Copyright ©2008-2009 ETON America, llc., all rights reserved. Roller om Check the clearance between the rotor side face and pump body. Limit: 0.12 mm rts .c om tP ar ts .c • • tP a Tighten the oil pump screw. 2i • w w .G et w w .G et 2i • • Pins Install the inner and outer rotors into the pump body. Align the indention on the driving shaft with the mark on the inner rotor. Install the oil pump shaft and roller. Install the oil pump cover and fixing pins properly. w .G et Oil Pump Installation Screw Install the oil pump and tighten screws. Torque value: • Ensure the oil pump shaft can be rotated freely. w w w • Page 25 of 151 Copyright ©2008-2009 ETON America, llc., all rights reserved. ar ts .c Oil Pump Assembly 2i tP • om Install the oil pump drive chain and sprocket. Install the cir clip onto the oil pump shaft. Install the starting gear and generator. (Refer to chapter 10) w w w w Page 26 of 151 Copyright ©2008-2009 ETON America, llc., all rights reserved. ar ts .c 2i tP .G et w w .G et w 2i w tP a .G et 2i rts .c om tP ar ts .c • • • om 5. FUEL SYSTEM tP a .G et 2i rts .c om tP ar ts .c 5-1 Drawing of the Fuel System w w w w .G et w Manifold Page 27 of 151 Copyright ©2008-2009 ETON America, llc., all rights reserved. ar ts .c 2i tP w .G et w 2i w Fuel General Information Warning tP ar ts .c Gasoline is flammable and explosive, so always work in a well-ventilated place and strictly prohibit smoking or flames when working with gasoline. Caution rts .c om • Do not bend the throttle cable. • When removing fuel system components, remember where O-rings were positioned, and replace them when reassembling the components. • Drain gasoline using the drain screw on the float chamber before removing it. • Do not remove the choke valve unless absolutely necessary. 2i Tools Special service tools .G et • Vacuum/air pressure pump • Fuel level gauge tP a Carburetor Specifications Component Specification Carburetor diameter I.D. number PTG 050 Fuel level Idle speed # 110 # 35 1700 ± 100rpm w Throttle lever clearance Air screw 1-3 mm 2i tP Idle injector .G et Main injector 14.8mm w w w w .G et w 1 1/2 turns out Page 28 of 151 Copyright ©2008-2009 ETON America, llc., all rights reserved. ar ts .c 25mm 2i w w om 5-2 Maintenance Information Engine Will Not Start Mixture too rich Rough idle Intermittent Misfires When Accelerating • Malfunctioning ignition system 2i • Malfunctioning ignition system • Incorrect idle speed • Malfunctioning carburetor • Fuel dirty • Clogged air jet • Malfunction of float valve • Fuel level too high in float chamber • Malfunction of carburetor choke • Dirty air cleaner tP a .G et 2i Malfunctioning carburetor choke Incorrect ignition timing Malfunctioning carburetor Dirty engine oil Air remaining in intake system • Idle speed too low Late Ignition Timing Clogged fuel jet Vacuum piston stuck and closed Malfunctioning float valve Fuel level too low in float chamber Clogged fuel tank cap vent Clogged fuel filter Obstructed fuel pipe Clogged air vent hose Air remaining in intake system Loss of Power • Fuel system clogged • Malfunctioning ignition system w w w w .G et w w .G et • Malfunctioning ignition system • Malfunctioning carburetor Page 29 of 151 Copyright ©2008-2009 ETON America, llc., all rights reserved. ar ts .c • • • • • • • • • • • • • • rts .c om Engine Dies After Starting w w Mixture Too Lean tP ar ts .c No fuel in fuel tank Clogged fuel tube Too much fuel in cylinder No spark from spark plug (malfunctioning ignition system ) • Clogged air cleaner • Malfunctioning carburetor choke • Malfunctioning throttle 2i tP • • • • om 5-3 Troubleshooting om 5-4 Carburetor Removal / Installation Removal 2i tP Clamp Ensure the drain screw is tightened. Install carburetor into intake and tighten the two nuts. Reconnect all vacuum and fuel lines. Reconnect the air boot from the air box. Turn the fuel petcock on and check for leaks. w w • Fuel Line .G et Installation w w • • Vacuum Line Choke Cable ar ts .c 2i w Remove the top of the carburetor from the carburetor. Remove the 2 intake nuts. Remove the carburetor. w • Screw Disconnect the fuel hose. Release the clamp strip on the air cleaner. .G et • • Drain Bolt tP a .G et • w w rts .c om Loosen the choke cable fixed screw from the plate. Remove the choke cable. 2i • Drain the fuel from the float chamber by loosening the drain bolt. tP ar ts .c • Page 30 of 151 Copyright ©2008-2009 ETON America, llc., all rights reserved. Disassembly Remove the two screws to gain access to the air cut-off valve. • Remove the air cut-off valve cover, spring, and valve. • w w • Check the valve for damage or wear. If the valve is undamaged, it will restrict air flow. If air flow is not being restricted, install a new carburetor kit. Ensure the vacuum pipe O-ring is undamaged and can be reused. Install in reverse order of removal. w w w w • .G et Assembly 2i tP 2i • • .G et Inspection Page 31 of 151 Copyright ©2008-2009 ETON America, llc., all rights reserved. ar ts .c tP a .G et 2i rts .c om tP ar ts .c • w w om 5-5 Air Cut-Off Valve tP ar ts .c 5-6 Throttle Valve Disassembly Disconnect the throttle cable from the throttle slide and remove the valve spring. Remove the fuel needle clip and fuel needle. Assembly • • Carburetor Cap 2i • Place the fuel needle onto the throttle slide and clip it with the needle clip. Install the sealed cap, carburetor cap, and throttle valve spring. Connect the throttle valve cable to the throttle slide. Install the throttle slide into the carburetor body. .G et • Clip w .G et w w Caution Align the groove inside the throttle valve with the throttle stopper screw of the carburetor body. Reattach the carburetor cap. Adjust the free play of throttle valve cable. w w w • • Throttle 2i tP • tP a .G et • Page 32 of 151 Copyright ©2008-2009 ETON America, llc., all rights reserved. ar ts .c 2i • Unscrew the carburetor cap to gain access to the throttle cable, slide, and needle. Remove the throttle slide and throttle cable. rts .c om • w w om Carburetor Cap tP a Float Float Pin 2i tP w • Check the float valve and valve seat for damage or blockages. Check the float valve for wearing, and check the valve seat face for wear or dirt. .G et • 2i Inspection ar ts .c Remove the float pin, float, and float valve. .G et • rts .c om 2i tP ar ts .c Disassembly • Remove the three mounting screws. • Remove the carburetor bowl. w w Float Valve .G et Caution In case of wear or dirt, the float valve and valve seat will not tightly seal, causing the fuel level to increase and as a result, fuel flooding. A worn out or dirty float valve must be replaced with a new one. w w w w w om 5-7 Float Chamber Page 33 of 151 Copyright ©2008-2009 ETON America, llc., all rights reserved. om Remove main jet, needle jet holder, needle jet, slow jet, and air adjustment screw. tP ar ts .c • .G et Assembly tP a Install main jet, needle jet holder, needle jet, slow jet, and air adjustment screw. Install the float valve, float, and float pin. .G et • 2i Caution Set the air adjustment screw according to number of turns noted before it was removed Caution • .G et w • Check to ensure the float valve and float are properly installed. To ensure correct measurement, position the float meter in such a way that float chamber face is vertical to the main jet. Fuel level: 14.8mm w • Carburetor Installation • Install the carburetor in the reverse order of removal. These adjustments must be made after installation: throttle cable adjustment, and idle adjustment. w w w • 2i tP Checking fuel level w w w • Page 34 of 151 Copyright ©2008-2009 ETON America, llc., all rights reserved. ar ts .c Clean the jets with cleaning fluid. Use compressed air to blow the dirt off. Clean carburetor body passages with the compressed air. 2i • • • rts .c om Caution Do not damage the jets and adjust screw. • Before removing adjustment screw, turn it all the way down and note the number of turns. • Do not turn adjust screw forcefully to avoid damaging the valve seat face. • Use a tachometer when adjusting engine RPM. Screw in the air adjustment screw gently, then back out to reach the standard. Standard turns: 1 ½ turns out • Warm up the engine. .G et 2i • • • Accelerate in small increments. Ensure the RPM and CO values remain standard after the engine returns to idle. If the RPM or CO values fluctuated, repeat the procedures described above for adjusting to standard value. Idle Adjustment Screw w .G et w • tP a • Connect an exhaust analyzer hose to the exhaust front end. Press the test key on the analyzer. Adjust the pilot screw and read CO reading on the analyzer. CO standard value: 1.0-1.5% 2i • .G et • Adjust the throttle stopper screw on the throttle valve to reach standard RPM. Idle speed rpm: 1700 ± 100 rpm w • 2i tP • w w w Air Mixture Screw Page 35 of 151 Copyright ©2008-2009 ETON America, llc., all rights reserved. ar ts .c rts .c om • tP ar ts .c Caution The air screw is factory set, so no adjustment is needed. Note the number of turns it takes to screw it all the way in. Use the parking brake to park the ATV before making adjustments. w w om 5-8 Adjustment of Idle Speed om 5-9 Fuel Tank Fuel Tank Removal Remove the seat Remove the front cover and fuel tank. Remove the side covers and lower side covers. Remove the front fender (see chapter 13). Remove the 4 bolts Remove the fuel sending unit rts .c om tP ar ts .c Caution • Fuel Unit Installation w • tP a .G et 2i • When removing the sending unit, be careful to not bend the arm on the fuel sending unit. Some fuel needs to be drained from the tank to ensure that no fuel will spill when the sending unit is removed. Install the gauge in the reverse order of removal. . Fuel Tank Removal w Remove the seat Remove the front cover and fuel tank. Remove the side covers and lower side covers. Remove the front fender. (See chapter 13) Disconnect fuel unit coupler. Remove fuel unit (4 bolts). Remove the fuel tube. Remove the vacuum tube. w w w w .G et w • • • • • • • • 2i tP .G et w 2i Caution Remember to install the fuel unit gasket. Do not allow the gasket to be damaged. Page 36 of 151 Copyright ©2008-2009 ETON America, llc., all rights reserved. ar ts .c • • • • • • om tP ar ts .c 5-10 Air Cleaner 2i Installation Cleaning air cleaner element • • 2i Remove the air cleaner cover (4 latches). Remove the element mounting screw. Loosen the air cleaner element clamp strip, and then remove the air cleaner element. Clean the element with non-flammable or high-flash point solvent and then squeeze out the excess fluid. Let it dry. .G et • • • tP a Install the tank in the reverse order of removal. .G et • w • Soak the element in clean engine oil and squeeze out the excess fluid. Install the element onto the element seat. Install the air cleaner cover. w w w • • Element clamp .G et w w Caution Never use gasoline or acidic solvent to clean the element. ar ts .c • Loosen the air cleaner and carburetor clamp. Remove the vapor hose. Loosen the air cleaner clamp, and then remove the air cleaner vapor hose. Remove the air cleaner (4 clips) 2i tP • • • rts .c om Removal w w Fuel tank bolts Page 37 of 151 Copyright ©2008-2009 ETON America, llc., all rights reserved. Element mounting screw om 6. CYLINDER HEAD/VALVE w w w w Page 38 of 151 Copyright ©2008-2009 ETON America, llc., all rights reserved. ar ts .c 2i tP .G et w w .G et w 2i w tP a .G et 2i rts .c om tP ar ts .c 6-1 Mechanism Diagram om 6-2 Operation Precautions General Information tP ar ts .c This section contains maintenance and service information for the cylinder head, valve, and camshaft, as well as the rocker arm. Cylinder head service can be carried out when the engine is in the frame. CYLINDER HEAD Specifications Compression pressure Intake Exhaust ID of valve rocker arm Rocker arm ID of valve guide Clearance between valve stem and guide Exhaust 140psi 5.90mm 5.85mm 5.70mm 5.65mm 11.982~12.000mm 12.080mm 11.966~11.984mm 11.936mm 4.975~4.990mm 4.900mm 4.950~4.975mm 4.900mm 5.000~5.012mm 5.030mm Intake 0.010~0.037mm 0.080mm Exhaust 0.025~0.062mm 0.100mm 2i Valve Free length of valve spring Intake 38.700mm Exhaust 40.400mm .G et w w Intake OD of valve stem 170±30psi tP a .G et OD of valve rocker arm shaft Limit Valve seat width Exhaust 0.15±0.02mm or .006” - --- w .G et 7 -10 lbf-ft 17-22 lbf-ft 7 -10 lbf-ft 26-29 lbf-ft 6-9 lbf-ft 9-12 lbf-ft 7 -10 lbf-ft 7 -10 lbf-ft 5-8 lbf-ft 7-9 lbf-ft w w 4.000mm - w w w 36.900mm 0.10±0.02mm or .004” Tilt angle of cylinder head Torque Values Bolt Exhaust pipe stud bolt Cylinder head bolt Cylinder head Nut Sealing bolt of cam chain auto-tensioner Bolt of cam chain auto-tensioner Cylinder side cover bolt Cam sprocket bolt Tappet adjustment screw nut Spark plug 35.200mm Intake 2i tP Valve clearance 3.400mm ar ts .c Height of cam lobe 2i Camshaft Standard rts .c om Item Page 39 of 151 Copyright ©2008-2009 ETON America, llc., all rights reserved. 0.050 Valve reamer: 5.0mm Valve guide driver: 5.0mm Valve spring compressor tP ar ts .c • • • 6-3 Troubleshooting rts .c om Engine performance can be affected by problems in the top end. The trouble usually can be determined or by performing cylinder compression test and judging the abnormal noise generated. Low compression pressure 1. Valve Improper valve adjustment Burnt or bent valve Improper valve timing Valve spring damage Valve carbon deposit .G et 2i • • tP a 2. Cylinder head Cylinder head gasket leaking or damage Tilted or cracked cylinder • Piston ring worn out 2i 3. Piston High compression pressure Too much carbon deposit on combustion chamber or piston head .G et w Improper valve clearance adjustment Burnt valve or damaged valve spring Camshaft worn out or damaged Chain worn out or loose Auto-tensioner worn out or damaged Camshaft sprocket Rocker arm or rocker arm shaft worn out w w w w .G et w • • • • • • • 2i tP • Noise Page 40 of 151 Copyright ©2008-2009 ETON America, llc., all rights reserved. ar ts .c • • • • • w w om Special Service Tools om 6-4 Cylinder Head Removal .G et w w w w Page 41 of 151 Copyright ©2008-2009 ETON America, llc., all rights reserved. Spark plug 2i tP .G et w Remove the side cover mounting bolts of cylinder head, and then take out the side cover. w • Tensioner bolts ar ts .c tP a • Remove Air Injection system (AI) pipe mounting bolts. Remove the spark plug. 2i • w w .G et • Thermostat Bolts Remove the 2 thermostat bolts and then remove the thermostat. Remove the cam chain tensioner bolt and relax the cam chain Loosen the bolts, and then remove the tensioner 2i • rts .c om • Remove the engine. (Refer to chapter 5) Remove the inlet pipe (2 nuts). tP ar ts .c • • om • Remove the cam shaft setting plate (1 bolt). rts .c om w Remove the cam shafts. Special Service Tool Needed: Rocker arm and cam shaft puller ar ts .c Rocker Arm Shafts .G et w • • Setting Plate tP a 2i Remove rocker arm shafts and rocker arms. Special Service Tool Needed: Rocker arm and cam shaft puller .G et • • w w w w w w .G et 2i tP ar ts .c • • Remove the LH clutch cover and turn the drive face counterclockwise, aligning the timing mark on the sprocket with that of cylinder head so the piston is at the TDC position. Remove cam sprocket bolts. Remove the sprocket by prying the chain out. 2i tP • Timing Marks Page 42 of 151 Copyright ©2008-2009 ETON America, llc., all rights reserved. Cam Shafts om Remove the cylinder head gasket and dowel pins. Remove the chain guide. Clean any gasket material from the surfaces of the cylinder and cylinder head. Do not scratch the surfaces or allow any material to fall into the crankcase. tP a 2i .G et w w • Use a valve cotter removal & assembly tool to depress the valve spring. Do not compress the spring too much to preserve its elasticity. Remove the valves. .G et • w w w w w w .G et 2i • • • Mounting Bolts Page 43 of 151 Copyright ©2008-2009 ETON America, llc., all rights reserved. ar ts .c • 2i tP • Remove the 2 cylinder head mounting bolts from the cylinder head right side. Remove 4 nuts and washers from cylinder head upper side. Remove the cylinder head. rts .c om • tP ar ts .c Cylinder Head • Clean any carbon deposits in the combustion chamber. Clean residue and foreign materials from the cylinder head matching surface. Do not damage the surface of the cylinder head. • Check if the spark plug or valve holes are cracked. Replace if necessary. Measure cylinder head warping with a straightedge and thickness gauge. .G et • 2i 6-5 Cylinder Head Inspection w Camshaft w Inspect the cam lobe height for damage. Service Limit: w .G et IN: Replace if less than 34.45mm. EX: Replace if less than 34.30mm. Inspect the camshaft bearing for looseness or wear. If any damage, replace the camshaft and bearing. w w w • 2i tP Service limit: 0.5 mm Page 44 of 151 Copyright ©2008-2009 ETON America, llc., all rights reserved. ar ts .c rts .c om tP a .G et 2i • w w om Remove the valve stem seals. tP ar ts .c • • • om Rocker Arm Check the rocker arm for wear or damage. Measure the rocker arm cam inner diameter. Rocker Arm Shaft • Measure the active O.D. of the rocker arm cam shaft and cam rocker arm. Service Limit: Replace when less than 11.91 mm. Find the clearance between the rocker arm shaft and the rocker arm. 2i Valve spring free length Valve stem w • Check if valve stems are bent, cracked, or burned. Check the operation condition of valve stem in the valve guide. Measure & record the valve stem outer diameter. w • • .G et Service limit: Inner spring 35.00 mm Outer spring 39.00 mm .G et Service Limit: w w w w IN: 4.90 mm EX: 4.90 mm Page 45 of 151 Copyright ©2008-2009 ETON America, llc., all rights reserved. ar ts .c Measure the relaxed length of the intake and exhaust valve springs. 2i • tP a .G et Service Limit: Replace when less than 0.10mm. 2i tP • w w rts .c om tP ar ts .c Service Limit: Replace when less than 12.10 mm. • om Valve guide tP ar ts .c Before measuring the valve guide, clean any carbon deposits with a reamer. Service limit: 5.03 mm The inner diameter of the valve guide minus the outer diameter of the valve stem is the clearance between the valve stem and valve guide. 2i • .G et Service Limit: IN→0.08 mm If clearance between the valve stem and valve guide exceeds the service limit, check whether replacing the valve guide will bring it into service limit. If so, replace just the valve guide. • If clearance still exceeds the service limit after replacing the valve guide, replace the valve stem as well. • Do not damage the valve seat when replacing the valve guide. w w w w .G et w w .G et 2i • w w tP a EX→0.10 mm Page 46 of 151 Copyright ©2008-2009 ETON America, llc., all rights reserved. ar ts .c Measure and record each valve guide inner diameter. 2i tP • rts .c om Tool: 5.0 mm valve guide reamer Heat up cylinder head to 100-150C (212- 300F) with a hot plate or other device. Caution tP ar ts .c Do not heat the cylinder head directly. Otherwise, the cylinder head may be deformed. Wear a pair of gloves to protect your hands when operating. • Hold the cylinder head and press out the old valve guide from the combustion chamber side. rts .c om • Tool: Valve guide driver: 5.0 mm • w w w w .G et w w • Use cutting oil when correcting the valve guide with a reamer. Turn the reamer in same direction when it is inserted or rotated. Adjust the valve seat. Clean all metal residue from the cylinder head. 2i tP • 2i • • .G et • tP a .G et • Page 47 of 151 Copyright ©2008-2009 ETON America, llc., all rights reserved. ar ts .c Check if the new valve guide has deformation after being pressed it in. When pressing in the new valve guide, ensure the cylinder head is kept at the same temperature (100-150C). Adjust the valve guide driver until the valve guide height is 13 mm. Press in a new valve guide from rocker arm side. Wait for the cylinder head to cool down to room temperature, and then correct the new valve guide with the reamer. 2i • w w om 6-6 Valve Stem Replacement Remove the valve and check its contact face. Replace the valve if the valve seal is rough, worn out, or does not come into contact with the valve seat. If the valve seat is too wide, narrow, or rough, adjust or replace it. 2i • • Valve seat width Service limit: 1.6mm • Check the condition of the valve seat surface. 2i Valve seat grinding The worn valve seat has to be ground with a valve seat chamfer cutter. Refer to operation manual for the valve seat chamfer cutter. • Use a 45° valve seat chamfer cutter to cut any rough or uneven surfaces from the valve seat. • After valve guide had been replaced, it has to be ground with a 45° valve seal chamfer cutter to correct its seat face. Use 32° cutter to cut the quarter upper parts out. w w w w .G et w • .G et • w w w tP a .G et • Page 48 of 151 Copyright ©2008-2009 ETON America, llc., all rights reserved. ar ts .c • Do not let emery enter between the valve stem and valve guide. Clean up the emery when finished, and apply engine oil onto the contact faces of valve and valve seat. 2i tP • rts .c om • • Clean up any carbon deposits on the intake and exhaust valves. Apply emery carefully onto valve contact face. Grind the valve seat with a rubber hose or other manual grinding tool. tP ar ts .c • om 6-7 Valve Seat Inspection and Service Use a 60° cutter to cut the quarter lower parts out. Remove the cutter and check the new valve seat. • Use a 45° cutter to grind the valve seat to the specified standard width. Make sure that all roughness and uneven faces have been ground. Grind the valve seat again if necessary. • If the contact surface is too high, grind the valve seat with a 32° cutter. Then, grind the valve seat to the specified width. If the contact surface is too low, grind the valve seat with a 60° cutter. Then, grind the valve seat to the specified width. .G et w • 2i tP The contact surfaces of the valve and valve seat are very important to the valve sealing capacity. w • w w w Page 49 of 151 Copyright ©2008-2009 ETON America, llc., all rights reserved. ar ts .c rts .c om tP a 2i • Coat the valve seat surface with red paint. Install the valve through valve guide until the valve touches the valve seat. Slightly press down the valve but do not rotate it so that a seal track will be created on the contact surface. .G et • • w w w .G et 2i • tP ar ts .c • om • • om • After the valve seat is ground, coat valve seat surface with emery and then carefully press the ground surface. Clean up all emery coated onto cylinder and valve after grinding. tP ar ts .c • • NOTE: The valve spring closed coils should face down toward the combustion chamber. .G et • In order to avoid damaging the valve stem and the cylinder head, place a rag in the combustion chamber inside by the valve spring remover/installer while compressing the valve spring. • Tap the valve stems gently with a plastic hammer to make sure valve retainer and valve cotter are secure. w w w w .G et 2i tP w Place the cylinder head on a working table to prevent damage to the valve. w • .G et w 2i tP a Use a valve cotter removal & assembly tool to press the valve spring; then, remove the valves. w • Page 50 of 151 Copyright ©2008-2009 ETON America, llc., all rights reserved. ar ts .c Lubricate the valve stem with engine oil Insert the valve into the valve guide. Install a new valve stem oil seal. Install the valve springs and retainers. 2i • • • • rts .c om 6-8 Cylinder Head Reassembly Install the 4 washers and tighten the 4 nuts on the top of the cylinder head, and then tighten the 2 cylinder head mounting bolts on the right side of the cylinder. 2i • tP a Install the camshaft into the cylinder head. Install the rocker arm and rocker arm shaft. 2i • • w • w .G et w w .G et Torque values: Nut: 26-29 lbf-ft Bolt: 7-10 lbf-ft w w w w .G et Install the rocker arm pin mounting plate. Page 51 of 151 Copyright ©2008-2009 ETON America, llc., all rights reserved. ar ts .c • Do not damage the surfaces of the cylinder and cylinder head. Do not allow any gasket material to fall into the crankcase. 2i tP • rts .c om • Clean off any residue and foreign materials on the surfaces of the cylinder and cylinder head. Install the chain guide, dowel pins and a new cylinder head gasket onto the cylinder. tP ar ts .c • om 6-9 Cylinder Head Installation • • Install the cylinder head side cover (3 bolts). Install the thermostat (2 bolts). tP a .G et w Install cylinder cover (4 bolts). w w w w .G et w • 2i tP 2i • Thermostat bolts Loosen the auto tensioner adjustment bolt and remove the bolt and spring. Install the tensioner and install the spring and adjustment bolt. w w • rts .c om tP ar ts .c .G et 2i • om • Install the cam chain onto the sprocket and align the timing mark on the sprocket with that of cylinder head. Align the sprocket bolt hole with the camshaft bolt hole. Tighten the sprocket mounting bolts. Page 52 of 151 Copyright ©2008-2009 ETON America, llc., all rights reserved. ar ts .c • Tensioner adjustment bolt Install the Air Injection system pipe. (4 bolts) Install the inlet pipe onto the cylinder Install and tighten the spark plug tP ar ts .c • • • om Spark plug Torque value: 7-14 lbf-ft 6-10 Valve Clearance Adjustment Loosen the two Air Injection system pipe upper side bolts. Remove the cylinder head cover. Remove the cylinder head side cover. Remove the left crankcase cover. Turn the drive face, and align the timing mark on the cam sprocket with that of the cylinder head with the piston at the TDC position. Loosen the valve clearance adjustment nuts and bolts located on the valve rocker arm. Measure and adjust valve clearance with a feeler gauge. After valve clearance had been adjusted to standard value, hold the adjustment bolt and tighten the adjustment nut. .G et • Install the cylinder head side cover. Start the engine and make sure that engine oil flows onto the cylinder head. Stop the engine after confirming. Install the cylinder head cover and AI pipe. • • .G et w • • w Standard Value: IN 0.10 ± 0.02 mm EX 0.15 ± 0.02 mm 2i tP • 2i • w If lubricant does not flow to the cylinder head, engine components will be seriously damaged. • When checking lubricant flowing condition, run the engine in idle speed. Do not accelerate the engine. w w • w w w • • • • tP a .G et • Page 53 of 151 Copyright ©2008-2009 ETON America, llc., all rights reserved. ar ts .c Install the engine onto the frame (see chapter 5). 2i • rts .c om This model is equipped with a special precision 4-valve mechanism so its tightened torque can not exceed the standard value in order to avoid causing cylinder head deformation, engine noise, and leaking that affect the vehicle’s performance. om 7. CYLINDER/PISTON w w w w Page 54 of 151 Copyright ©2008-2009 ETON America, llc., all rights reserved. ar ts .c 2i tP .G et w w .G et w 2i w tP a .G et 2i rts .c om tP ar ts .c 7-1 Mechanism Diagram om 7-2 Operating Details General Information tP ar ts .c Remove the engine from the frame before servicing the piston or cylinder. Cylinder Specifications 70.995-71.015 71.100 - 0.050 Top ring 2nd ring 0.015-0.050 0.090 0.015-0.050 0.090 Top ring 2nd ring 0.150-0.300 0.500 0.300-0.450 0.650 Oil ring side rail 0.200-0.700 - 70.430-70.480 70.380 0.010-0.040 0.100 17.002-17.008 16.970 16.994-17.000 16.960 0.002-0.014 0.020 17.016-17.034 17.064 ID Bend Clearance between piston rings Ring-end gap 2i Piston/ Piston ring .G et OD of piston (2nd) ID of piston pin boss OD of piston pin Clearance between piston and piston pin .G et 7-3 Troubleshooting 2i ID of connecting rod small-end tP a Clearance between piston and cylinder w Low or Unstable Compression Pressure Cylinder or piston ring worn out Knocking or Noise w Cylinder or piston ring worn out Carbon deposits on cylinder head top Piston pin hole and piston pin worn out w • • • Smoke in Exhaust Pipe Piston or piston ring worn out Piston ring installed improperly Cylinder or piston damaged .G et • • • Engine Overheats Carbon deposits on cylinder head top Cooling pipe clogged or not enough coolant in flow w w w • • 2i tP • w w Limit Page 55 of 151 Copyright ©2008-2009 ETON America, llc., all rights reserved. ar ts .c Cylinder Standard rts .c om Item tP ar ts .c Check if the inner diameter of cylinder is worn out or damaged. In the top, center, and bottom, of the cylinder, measure the X and Y values in respect to the cylinder. w w .G et Inspection w w Service limit: 71.016 mm w • 2i tP • Page 56 of 151 Copyright ©2008-2009 ETON America, llc., all rights reserved. ar ts .c tP a 2i Remove the cylinder gasket and dowel pin. Clean up all gasket residue or foreign materials from the surfaces of the cylinder and crankcase. Use a solvent to remove the residue if necessary. .G et • • w w w .G et • Cover the openings in the crankcase and cam chain with a rag or piece of cloth. Remove the piston pin clip, and then remove piston pin and piston. Coolant hose rts .c om • Remove the cylinder head (refer to chapter 6). Remove the coolant hose from cylinder. Remove the cylinder. 2i • • • om 7-4 Cylinder and Piston Removal om Inspect the cylinder for warping. Be careful when handling piston rings, as they are very fragile. Check if the piston rings are damaged or if the grooves are worn. • Place the piston rings into the cylinder 20 mm under the cylinder top. In order to keep the piston rings in even horizontal levels, push the rings in with the piston. .G et w w • w .G et 2i • w w Removing Piston Rings tP a .G et 2i Service Limit: Top ring: 0.09 mm 2nd ring: 0.09 mm w w w Service Limit: Top ring: 0.50 mm 2nd ring: 0.65 mm Page 57 of 151 Copyright ©2008-2009 ETON America, llc., all rights reserved. ar ts .c Measure clearance between piston rings and grooves. 2i tP • tP ar ts .c Service limit: 0.05 mm rts .c om • om Measure the outer diameter of the piston pin. .G et w w w w • • Measure the piston outer diameter. The measurement position is 10 mm from the piston bottom side, at a 90° angle to the piston pin. Service limit: 71.00 mm Compare measured value with service limit to calculate the clearance between piston and cylinder. w • • w .G et w • Measure the inner diameter of the piston pin hole. Service Limit: 17.02 mm Calculate the clearance between the piston pin and its hole. Service Limit: 0.02 mm 2i w • • • tP a .G et 2i Service Limit: 17.02 mm Page 58 of 151 Copyright ©2008-2009 ETON America, llc., all rights reserved. ar ts .c Measure the inner diameter of the smaller end of the connecting rod. 2i tP • tP ar ts .c Service Limit: 17.00 mm rts .c om • om 7-5 Piston Ring Installation tP a .G et .G et w .G et w 2i tP 2i w w w w w w Page 59 of 151 Copyright ©2008-2009 ETON America, llc., all rights reserved. ar ts .c rts .c om tP ar ts .c Clean the piston top, ring groove, and piston surface. Install the piston ring onto the piston carefully. Place the piston ring openings as shown in the diagram. Do not damage piston or piston rings. All marks on the piston rings must be on the top side facing forward. Make sure that all piston rings can be rotated freely after being installed. 2i • • • • • • Clean up all residue and foreign materials on the surface of the crankcase. Do not let residue or foreign materials fall into the crankcase. • Remove the residue with solvent to aid in cleaning. • • .G et w 2i w tP a .G et • Install the piston and piston pin, placing the IN marks on the piston top side facing the inlet valve. Install a new piston pin clip. Do not let the opening of the piston pin clip align with the piston cutout. Place a rag or piece of cloth between the piston and crankcase in order to prevent the ring or pieces of foreign material from falling into crankcase. 2i • Install the dowel pins and a new gasket. w w w w .G et w w • 2i tP 7-7 Cylinder Installation Page 60 of 151 Copyright ©2008-2009 ETON America, llc., all rights reserved. ar ts .c 7-6 Piston Installation rts .c om tP ar ts .c om • Do not push the piston into the cylinder forcefully or the piston and piston rings will be damaged. • • Install the coolant hose onto cylinder. Install the cylinder head (refer to Chapter 6). .G et 2i tP ar ts .c • rts .c om w w w w .G et w w Page 61 of 151 Copyright ©2008-2009 ETON America, llc., all rights reserved. ar ts .c .G et w 2i w tP a Coolant hose 2i tP • • Apply engine oil to the inside of the cylinder, piston, and piston rings. Be careful when installing piston into cylinder. Press the piston rings in one by one during installation. om • om 8. V-BELT TRANSMISSION SYSTEM w w w w Page 62 of 151 Copyright ©2008-2009 ETON America, llc., all rights reserved. ar ts .c 2i tP .G et w w .G et w 2i w tP a .G et 2i rts .c om tP ar ts .c 8-1 Mechanism Diagram • • tP ar ts .c Operating Procedures General Information Drive face, clutch outer, and driven pulley can be serviced while still installed. Drive belt and drive pulley must be free of grease. Standard value (mm) Limit (mm) 24.000 22.500 OD of movable drive face boss 29.946~29.980 29.926 2i ID of movable drive face 30.000~30.040 30.060 OD of weight roller 19.500~20.000 19.000 144.850~145.150 145.450 6.000 3.000 ID of clutch outer tP a Thickness of clutch weight Free length of driven pulley spring OD of driven pulley boss ID of driven face 97.400 40.950~40.990 40.930 41.000~41.050 41.070 17.700~18.300 2i Weight of weight roller 102.400 .G et Torque values Drive face nut: 8.5-10.5kgf-m / 61-76 lbf-ft Clutch outer nut: 5.0-6.0kgf-m / 36-43 lbf-ft Drive plate nut: 5.0-6.0kgf-m / 36-43 lbf-ft w 8-3 Troubleshooting w Engine starts but ATV does not move 1. Worn drive belt 2. Worn drive face 3. Worn or damaged clutch weight 4. Broken driven pulley Special Service Tools 17.200 Clutch spring compressor: SYM-2301000 Inner bearing puller: SYM-6204002 Clutch nut wrench 39 x 41 mm: SYM-9020200 Universal holder: SYM-2210100 Bearing driver: SYM-9100100 Insufficient horsepower or poor high speed performance w .G et 1. Worn drive belt 2. Insufficient spring force of driven pulley 3. Worn roller 4. Driven pulley malfunctioning w w w Sputter or misfire when driving 1. Broken clutch weight 2. Worn clutch weight g ar ts .c .G et Driving belt width 2i tP Item rts .c om V-BELT SYSTEM SPECIFICATIONS w w om 8-2 Maintenance Description Page 63 of 151 Copyright ©2008-2009 ETON America, llc., all rights reserved. g Left crankcase cover removal Release the 2 clamps on the left hand crankcase cover ducts, and then remove the ducts. • Remove the left crankcase cover. (9 bolts) • Remove the 2 dowel pins and the gasket. tP a Reinstall left crankcase cover in the reverse order of removal. 2i .G et Removal w Remove the left hand crankcase cover. Hold the drive face with a universal holder Remove nut and drive face. Special Tool: Universal holder w .G et w • • • • • Hold the clutch outer with the universal holder, and remove the nut, bearing stay collar, and clutch outer. Using special service tools for tightening or loosening the nut. w w w • 2i tP 8-5 Drive Belt Page 64 of 151 Copyright ©2008-2009 ETON America, llc., all rights reserved. ar ts .c Left crankcase cover installation .G et • rts .c om 2i tP ar ts .c • w w om 8-4 Left Crankcase Cover om • • 2i Inspection tP a w .G et w • Pull out the driven face to keep it from closing. Be careful not to press the friction plate too hard to avoid warping or damage. Install the drive belt onto driven pulley. w • • • Install the driven pulley with the belt already installed onto drive shaft. On the other end of the drive belt, install the movable drive face. w w w • 2i tP 2i Installation .G et w w .G et • Check the drive belt for crack or wear. Replace it if necessary. • Measure the width of drive belt as diagram shown. Service Limit: 22.5 mm • Replace the belt if exceeds the service limit. The surfaces of drive belt or pulley must be free of grease. Clean up all grease or dirt before installation. Page 65 of 151 Copyright ©2008-2009 ETON America, llc., all rights reserved. ar ts .c • rts .c om tP ar ts .c Push the drive belt into the belt groove as shown in the diagram so that the belt can be loosened. Remove driven pulley. Do not remove drive belt. Remove the drive belt from the groove of driven pulley. om Install the clutch outer and bearing stay collar. Hold the clutch outer with a universal holder. Tighten the nut to specified torque value. Torque value: 5.0-6.0kgf-m / 36-43 lbf-ft • • • • Install the drive face, washer, and drive face nut. Hold the drive face with a universal holder. Tighten the nut to specified torque value. Torque value: 8.5-10.5kgf-m / 61-76 lbf-ft .G et 8-6 Drive Face tP a Remove the left crankcase cover. Hold the drive face with a universal holder. Remove the drive face nut. Remove the drive face and drive belt. • Remove the movable drive face and drive face boss from the crankshaft. .G et w w w w w .G et w 2i tP 2i • • • • w w Removal Page 66 of 151 Copyright ©2008-2009 ETON America, llc., all rights reserved. ar ts .c 2i rts .c om tP ar ts .c • • • • Remove the ramp plate. • Remove weight rollers from movable drive face. • tP a w • w • Check if drive face boss is worn or damaged and replace it if necessary. Measure the outer diameter of movable drive face boss, and replace it if it exceeds service limit. Service limit: mm .G et • • w w • Measure the inner diameter of movable drive face, and replace it if it exceeds service limit. Service limit: mm w • 2i tP • .G et • The weight rollers press the movable drive face by centrifugal force. If the weight rollers are worn out or damaged, the force will be affected. Check if rollers are worn or damaged. Replace if necessary. Measure each roller’s outer diameter. Replace it if it exceeds the service limit. Service limit: mm (Weight: 18.2g) w • 2i Inspection Page 67 of 151 Copyright ©2008-2009 ETON America, llc., all rights reserved. ar ts .c rts .c om tP ar ts .c 2i .G et w w om • Install the weight rollers. • The weight roller end surfaces are not necessarily the same. In order to lengthen the rollers’ lifetime and prevent premature wear, install the weights in a counterclockwise order onto the movable drive face. • Install the ramp plate. tP a • w w w w .G et w Install the movable drive face assembly onto the crankshaft. 2i tP The movable drive face surface must be free of grease. Clean it with cleaning solvent. .G et • w • Apply grease to the movable drive face axle hole. Install drive face boss. 2i • Page 68 of 151 Copyright ©2008-2009 ETON America, llc., all rights reserved. ar ts .c 2i rts .c om tP ar ts .c • .G et w w om Reassembly/Installation Press the drive belt into the pulley groove, and then pull the belt onto the drive shaft. • • Install drive face, washer, and nut. Ensure the two sides of the pulley surfaces are free of grease. Clean with cleaning solvent if necessary. Hold the drive face with a universal holder. Tighten nut to specified torque. Torque value: 8.5-10.5kgf-m / 61-76 lbf-ft • Install the left crankcase cover. 2i tP a • .G et 8-7 Clutch Outer/Driven Pulley • Do not overexert the compressor. w .G et w • Remove drive belt, Outer clutch, and driven pulley. Install clutch spring compressor onto the pulley assembly, and press the compressor to let the wrench be installed more easily. w • • w w • Hold the clutch spring compressor onto bench vise, then remove mounting nut with a special service tool. Release the clutch spring compressor and remove the friction plate, clutch weight, and spring from the driven pulley. Remove the seal collar from the driven pulley. w • 2i tP Disassembly Page 69 of 151 Copyright ©2008-2009 ETON America, llc., all rights reserved. ar ts .c .G et • • rts .c om 2i tP ar ts .c • w w om Driven Pulley Installation om 2i Clutch Outer • 2i .G et Clutch Lining w Driven Pulley Spring Measure the length of the driven pulley spring. Replace it if it exceeds service limit. Service limit: 83.2 mm .G et • • • 2i tP Measure each clutch weight thickness. Replace it if it exceeds service limit. Service limit: 2.0 mm w • • • w w w w w w • tP a .G et • Measure the inner diameter of the clutch outer. Replace the clutch outer if it exceeds the service limit. Service limit: 145.450mm Page 70 of 151 Copyright ©2008-2009 ETON America, llc., all rights reserved. ar ts .c Inspection rts .c om • Remove the guide pin, guide pin roller, and movable driven face. Remove the O-ring & oil seal seat from the movable driven face. tP ar ts .c • om Driven Pulley Replace damaged or worn components. Measure the outer diameter of the driven face and the inner diameter of the movable driven face. Replace if either exceeds service limit. 2i rts .c om Service limit: • Outer diameter 33.94 mm • Inner diameter 34.06 mm .G et Driven Pulley Bearing Inspection • 2i • .G et w w • Check if the inner bearing oil seal is damaged. Replace it if necessary. Check if needle bearing is damaged or has too much clearance. Replace it if necessary. Rotate the inside of inner bearing with your fingers. The bearing should turn smoothly and quietly. Check if the bearing outer parts are closed and fixed. Replace if necessary. tP a • w Remove the snap ring and washer. Remove the clutch weight and spring from driving plate. w • • w • NOTE: Some of models are equipped with one mounting plate instead of 3 snap rings. Check if the spring is damaged or has insufficient elasticity. .G et • w w • Check if the shock absorption rubber is damaged or deformed. Replace it if necessary. Apply grease onto setting pins. w • 2i tP Clutch Weight Replacement Page 71 of 151 Copyright ©2008-2009 ETON America, llc., all rights reserved. ar ts .c • • tP ar ts .c Check for the following: • If both surfaces are damaged or worn. • If the guide pin groove is damaged or worn. om • Install the spring into the groove with pliers. tP a .G et Install the snap ring and mounting plate onto setting pin. • Remove the inner bearing. • If the inner bearing equipped with an oil seal on its side in the driven pulley, then remove the oil seal first. If the pulley equipped with a ball bearing, remove the snap ring and then the bearing. .G et w w • .G et Remove the snap ring and then push the bearing forward to the other side of the inner bearing. Place a new bearing onto the proper position with its sealing end should facing outside. Apply engine oil. w • • w w w • 2i tP 2i • w w rts .c om The clutch block should not be greased. If it is, replace it. Grease or lubricant will damage the clutch weight and affect the block’s connection capacity. 2i • Page 72 of 151 Copyright ©2008-2009 ETON America, llc., all rights reserved. ar ts .c • Install a new clutch weight onto the setting pin and then push into the specified location. Apply grease onto all the setting pins. tP ar ts .c • • The sealing end should be facing outside after installation. Install the needle bearing with a hydraulic presser. Install the ball bearing with a hydraulic presser. Install the snap ring into the groove on the drive face. Align oil seal lip with bearing, and then install a new oil seal (if necessary). 2i • tP a .G et • 2i w .G et w w • Install a new oil seal and O-ring onto the movable driven face. Apply grease to lubricate the inside of the movable driven face. • Install the movable driven face onto the driven face. Install the guide pin and guide pin roller. w w w • 2i tP • .G et Clutch Outer/Driven Pulley Installation Page 73 of 151 Copyright ©2008-2009 ETON America, llc., all rights reserved. ar ts .c • rts .c om • w w om Install a new inner bearing. tP ar ts .c • om Install the collar. • Install the friction plate, spring, and clutch weight onto a clutch spring compressor, and press down the assembly by turning the manual lever until the mounting nut can be installed. Hold the compressor with a bench vise and tighten the mounting nut to specified torque with clutch nut wrench. Remove the clutch spring compressor. Torque value: 5.0-6.0kgf-m / 36-43 lbf-ft Install clutch outer/driven pulley and drive belt onto drive shaft. w w w w Page 74 of 151 Copyright ©2008-2009 ETON America, llc., all rights reserved. ar ts .c 2i tP .G et w w .G et w 2i w tP a .G et • • • rts .c om 2i • tP ar ts .c • om 9. FINAL DRIVE SYSTEM w w w w Page 75 of 151 Copyright ©2008-2009 ETON America, llc., all rights reserved. ar ts .c 2i tP .G et w w .G et w 2i w tP a .G et 2i rts .c om tP ar ts .c 9-1 Mechanism Diagram - Transmission Cover Specification • Application oil: scooter gear oil Recommended oil: KING MATE serial gear oil Oil quantity: 750cc (650cc when replacing) tP ar ts .c • • Gear box cover 2.6-3.0kgf-m / 19-22 lbf-ft Gear oil drain bolt 0.8-1.2kgf-m / 6-9 lbf-ft Gear oil fill bolt 3.5-4.5kgf-m / 25-33 lbf-ft Special tools Bearing driver (6204): SYM-9110400 Bearing driver (6205LLU): SYM-9100400-HMA Bearing driver (6305): SYM-9100400-RB1 Needle bearing driver (HK2016): SYM-9100300-RB1 Drive shaft and oil seal driver: SYM-9120200-HMA Drive shaft puller: SYM-2341100 Inner bearing puller: SYM-6204002 9-3 Troubleshooting tP a .G et 2i • • • • • • • Engine can be started but vehicle can not be moved Damaged drive gear Burnt out drive gear Damaged gear shift system 2i • • • • • .G et Excessive Noise Worn or burnt gear Worn gear Excessive gear oil. Worn or damage oil seal w w w w .G et w w • • 2i tP Gear Oil Leaking Page 76 of 151 Copyright ©2008-2009 ETON America, llc., all rights reserved. ar ts .c • • • rts .c om Torque value w w om 9-2 Maintenance Notes om 9-4 Disassembly of Transmission Remove gear change lever (1 bolt). • • Remove the 3 bolts. Remove the drive chain protector. .G et w w w w • • 2i tP .G et w Remove gear oil fill bolt. Place an oil pan under the ATV. Remove the gear oil drain bolt. After draining, check whether washer can be re-used. Replace if not. Install the oil drain bolt. Torque values: Gear oil fill bolt 3.5-4.5 kgf-m Gear oil drain bolt 0.8-1.2 kgf-m w • • • • Page 77 of 151 Copyright ©2008-2009 ETON America, llc., all rights reserved. ar ts .c tP a Remove the 2 bolts shown in the picture. Remove the drive sprocket fixing plate, drive chain, and drive sprocket. 2i • • w w .G et 2i rts .c om tP ar ts .c • om Remove the gear box cover bolts (9 bolts). Remove the cover. • Remove the shift drum catch ball, spring, and bolt. .G et 2i tP .G et w w Remove the final shaft, counter shaft, and reverse shaft. w w w w • Page 78 of 151 Copyright ©2008-2009 ETON America, llc., all rights reserved. ar ts .c rts .c om tP a Remove the shift spindle, shift fork shaft, shift fork, and shift drum. 2i • w w .G et 2i tP ar ts .c • • Remove the drive shaft bearing setting plate (one bolt). • • • Remove the drive shaft. Special tool: Shaft protector Remove the gasket and dowel pin. w w w w .G et 2i tP 2i w w .G et w w • Unless it is necessary, do not remove the drive shaft from the case upper side. If the drive shaft is removed from the gear box, the bearing and oil seal must be replaced. Page 79 of 151 Copyright ©2008-2009 ETON America, llc., all rights reserved. ar ts .c • tP a .G et 2i rts .c om tP ar ts .c om • om 9-5 Transmission Mechanism Inspection Check the shift spindle for wear or damage. • Check the shift drum for wear or damage. Check the shift fork and shaft for wear or damage. • Check the counter shaft for wear or damage. .G et 2i tP 2i w w .G et w w w w w Page 80 of 151 Copyright ©2008-2009 ETON America, llc., all rights reserved. ar ts .c • w rts .c om tP a .G et 2i tP ar ts .c • Check the reverse shaft for wear or damage. • Check the final shaft and gear for burning, wear, or damage. tP a If the drive shaft is removed from the crankcase upper side, the bearing has to be replaced. w w w w .G et w w • 2i tP • 2i • .G et • • • Check the bearings on the gear box and gear box cover. Rotate each bearing’s inner ring with fingers. The bearing should turn smoothly and quietly. Check if the bearing outer ring is mounted on the gear securely. If the bearing rotation is uneven, makes noise, or mounted loosely, then replace it. Check oil seal for wear or damage, and replace it if necessary. Page 81 of 151 Copyright ©2008-2009 ETON America, llc., all rights reserved. ar ts .c 2i .G et • w w rts .c om tP ar ts .c om • Never install used bearings. Once a bearing is removed, it must be replaced with new one. tP ar ts .c • om 9-6 Bearing Replacement Crankcase side • Special tool: Inner bearing puller Install new final shaft, counter shaft, and reverse shaft bearings into the left crankcase. 2i • Install new drive shaft bearings with a bearing driver into the left crankcase. • .G et w • Install the universal bearing puller with the bearing driver. Turn the universal bearing puller to install the drive shaft bearing. 2i tP .G et w 2i w • w tP a .G et Special tool: Bearing driver (6204) Needle bearing driver (HK2016) w w w w Special tool: Bearing driver (6305) Universal bearing puller Page 82 of 151 Copyright ©2008-2009 ETON America, llc., all rights reserved. ar ts .c • Remove the drive shaft bearing setting plate. Remove the drive shaft bearing from left crankcase. Remove the reverse shaft bearing and counter shaft bearing from the left crankcase. Remove the drive shaft oil seal. rts .c om • • Install the drive shaft. 2i Special tool: Drive shaft and oil seal install bush Install the drive shaft bearing setting plate (1 bolt). tP a .G et • Gear box side Use inner bearing puller to remove the final shaft needle bearing, gear shift shaft bearing, and counter shaft bearing from the cover inner side. Special tool: .G et 2i • .G et Remove the final shaft cir clip from the outer bearing. w w w w • 2i tP w w Inner bearing puller Page 83 of 151 Copyright ©2008-2009 ETON America, llc., all rights reserved. ar ts .c • Apply grease onto the new drive shaft oil seal lip. Install the oil seal. rts .c om • tP ar ts .c Special tool: Drive shaft puller Drive shaft and oil seal install bush Clutch nut wrench w w om • Remove the final shaft outer bearing. om Special tool: Inner bearing puller Remove the oil seal from the gear box cover and discard the seal. • Install a new bearing with the bearing driver into the outer gear box cover. Install the universal bearing puller with the bearing driver. • .G et w • Install new oil seal and bearing driver into gear box cover inner side. Install the universal bearing puller and bearing driver. Turn the universal bearing puller to install drive shaft oil seal. 2i tP • w .G et Special tool: Bearing driver (6205) Universal bearing puller w w w Special tool: Bearing driver (6205) Universal bearing puller Page 84 of 151 Copyright ©2008-2009 ETON America, llc., all rights reserved. ar ts .c tP a Turn the universal bearing puller to install the drive shaft bearing. 2i • w w w .G et 2i • tP ar ts .c • rts .c om • om 9-7 Final Drive Reassembly Apply grease onto the oil seal lip of the final driving shaft. • Install the counter shaft, reverse shaft and final shaft onto the gear box. Install shift drum, shift fork, and fork shaft onto gear box. • Install shift drum fixed catch ball, spring, and bolt onto gear box. w w w w 2i tP .G et w w .G et w 2i w • Page 85 of 151 Copyright ©2008-2009 ETON America, llc., all rights reserved. ar ts .c rts .c om tP a .G et 2i tP ar ts .c • • Install dowel pins and a new gasket. Install the gear box cover and bolts. Torque value: 1.0-1.4kgf-m / 7-10 lbf-ft • Install the shift spindle bracket, drive chain protector, and gear change lever. Add gear oil. Gear oil quantity: 750cc of 85/140 weight gear oil w w w w .G et 2i tP w w • • .G et w 2i w tP a • • Page 86 of 151 Copyright ©2008-2009 ETON America, llc., all rights reserved. ar ts .c .G et 2i tP ar ts .c om • Align the position mark on the shift spindle sprocket with the one on the shift drum. Install the shift spindle. rts .c om • om 10. A/C GENERATOR & STARTING CLUTCH w w w w Page 87 of 151 Copyright ©2008-2009 ETON America, llc., all rights reserved. ar ts .c 2i tP .G et w w .G et w 2i w tP a .G et 2i rts .c om tP ar ts .c 10-1 Mechanism Diagram om 10-2 Maintenance Notes General information Refer to chapter 17: The troubleshooting and inspection of alternator Refer to chapter 17: The service procedures and precaution items of starter motor tP ar ts .c • • Specifications Standard value (mm) Limit (mm) rts .c om Item ID of starting clutch gear 25.026~25.045 25.100 OD of starting clutch gear 42.175~42.200 42.100 2i Torque value Flywheel puller: SYM-3110A00 Universal holder: SYM-2210100 w w w w 2i tP .G et w w .G et w 2i w • • Page 88 of 151 Copyright ©2008-2009 ETON America, llc., all rights reserved. ar ts .c Special tools tP a Flywheel nut: 5.0~6.0kgf-m / 36-43 lbf-ft Starting clutch hexagon bolt: 1.0~1.4kgf-m / 7-10 lbf-ft with adhesive 8 mm bolts: 0.8~1.2kgf-m / 6-9 lbf-ft 12 mm bolts: 1.0~1.4kgf-m / 7-10 lbf-ft .G et • • • • Remove the left footrest. Drain out the engine oil and coolant. Remove the coolant hoses. Remove the water pump cover (4 bolts). Remove 11 bolts from the right crankcase cover. Remove the right crankcase cover. Remove dowel pin and gasket. 10-5 Right Cover Bearing 2i Remove the cir clip. Remove the bearing. w • • .G et • Rotate the bearing with your finger. Make sure the bearing turns smoothly and quietly. Check if the bearing outer parts are closed and fixed. Replace if necessary. w • .G et Special tool: Inner bearing puller w w w w w w Inspection tP a .G et 2i • • • Remove the 2 mounted screws from the A/C Generator. Remove the A/C Generator. Remove 3 screws from right crankcase cover. Remove the generator coil set. 2i tP • Page 89 of 151 Copyright ©2008-2009 ETON America, llc., all rights reserved. ar ts .c 10-4 A/C Generator Removal rts .c om tP ar ts .c • • • • • • • om 10-3 Right Crankcase Cover Removal Check the oil seal for wear or damage. Replace if necessary. • Install a new bearing (6201LU) with a bearing driver. Remove the right crankcase cover. • • Remove the left crankcase cover. Hold the flywheel by the drive face with a universal holder. Remove the flywheel nut. w w w w .G et Special tool: Universal Holder 2i tP w w • .G et w 2i w • Page 90 of 151 Copyright ©2008-2009 ETON America, llc., all rights reserved. ar ts .c 10-6 Flywheel Removal tP a .G et 2i Special tool: Bearing driver rts .c om tP ar ts .c om • • Remove the starter reduction gear and shaft. Pull out the flywheel with a flywheel puller tool. Remove the flywheel and starting driven gear. 10-7 Starting Clutch Starting Clutch Inspection Remove the starting clutch driven gear. Inspect the gear for wear or damage. Measure the ID and OD of the starting clutch driven gear. 2i • • • tP a .G et Service Limit: ID: 25.1 mm OD: 42.10 mm Inspect the starting reduction gear and shaft for wear or damage. • Check each roller for wear or damage. w w w w 2i tP .G et w w .G et w 2i w • Page 91 of 151 Copyright ©2008-2009 ETON America, llc., all rights reserved. ar ts .c • tP ar ts .c Special tool: Flywheel puller tool rts .c om • om • • om • Install the starting clutch driven gear onto the one way clutch. Hold the flywheel and rotate the starting clutch gear. The starting clutch gear should be rotated counterclockwise freely, but not clockwise. tP ar ts .c • w w w w 2i tP .G et w w .G et w 2i tP a .G et Remove the 3 socket bolts. Remove the one way clutch. w • • Page 92 of 151 Copyright ©2008-2009 ETON America, llc., all rights reserved. ar ts .c Remove the starting driven gear. 2i • rts .c om One Way Clutch Removal • Install the starting driven gear. 2i • Align the key on the crankshaft with the flywheel groove. Install the flywheel. • • Hold the flywheel by drive face with a universal holder. Tighten the flywheel nut. Torque value: 5.0~6.0kgf-m w • .G et w w • w w w w .G et w Special tool: Universal Holder Page 93 of 151 Copyright ©2008-2009 ETON America, llc., all rights reserved. ar ts .c 10-8 Flywheel Installation tP a .G et 2i rts .c om tP ar ts .c • When reinstalling the components, use Teflon tape on the thread of the hexagon bolt. Torque value: 1.0-1.4kgf-m / 7-10 lbf-ft 2i tP • om One way clutch Installation om Install the reduction gear shaft and the reduction gear. tP ar ts .c • • Install the A/C generator coil set onto the right crankcase cover (3 screws). Install the A/C generator (2 screws). Attach the wire harness securely onto the indention of the crankcase. Ensure that the wire harness is placed under the A/C generator. 2i • • rts .c om 10-9 ACG Set Installation tP a .G et • • • Remove the water pump cover. Install the right crankcase cover onto the crankcase. Note: Align the water pump shaft indention with the oil pump shaft. w w w w .G et 2i tP .G et w w • Page 94 of 151 Copyright ©2008-2009 ETON America, llc., all rights reserved. ar ts .c Install the dowel pin and new gasket. 2i • w w 10-10 Right Crankcase Cover Installation om Install the right crankcase cover (11 screws). Install the dowel pin, a new gasket, and the water pump cover onto the crankcase cover • Connect the water hoses to the right crankcase cover and water pump cover. w w w w Page 95 of 151 Copyright ©2008-2009 ETON America, llc., all rights reserved. ar ts .c 2i tP .G et w w .G et w 2i w tP a .G et 2i rts .c om tP ar ts .c • • om 11. CRANKCASE / CRANK w w w w Page 96 of 151 Copyright ©2008-2009 ETON America, llc., all rights reserved. ar ts .c 2i tP .G et w w .G et w 2i w tP a .G et 2i rts .c om tP ar ts .c 11-1 Mechanism Diagram Maintenance Notes rts .c om 2i Specifications - Crankshaft Item tP a .G et Connecting rod side clearance of the larger end Vertical clearance of the larger end of the connecting rod Run-out Torque value 2i Bolts for crankcase: 0.8~1.2kgf-m / 6-9 lbf-ft Engine oil drain bolt: 3.5~4.5kgf-m / 25-33 lbf-ft Cylinder stud bolt: 1.0~1.4kgf-m / 7-10 lbf-ft .G et • • • Standard (mm) 0.100~0.400 0~0.008 0.030 Special tools L. crank shaft oil seal driver (27*42*7): SYM-1332100-HMA 11-3 Troubleshooting w w w w .G et Loose crankshaft bearing Loose crankshaft pin bearing Worn out piston pin and pin hole w • • • w Engine noise 2i tP • Page 97 of 151 Copyright ©2008-2009 ETON America, llc., all rights reserved. Limit (mm) 0.600 0.050 0.100 ar ts .c • This Section concerns disassembly of the crankcase for repairs. Remove following components before disassembling crankcase: o Engine: Chapter 5 o Cylinder head: Chapter 6 o Cylinder and piston: Chapter 7 o Drive face and driven pulley: Chapter 8 o A/C generator & one way clutch: Chapter 10 If it becomes necessary to replace the crankshaft bearing, oil pump drive chain, or the timing chain, it is recommended to replace the whole crankshaft assembly. tP ar ts .c • • w w om 11-2 General Information om 11-4 Crankcase Disassembly Remove the cam chain setting plate. Remove cam chain. Loosen the pivot bolt and remove the tensioner. • Loosen the 2 bolts on the right crankcase. Loosen the 11 bolts on the left crankcase. • Place the right crankcase facing downward and the left crankcase facing upward. Gently tap the left crankcase with a plastic hammer to remove it. Care should be taken not to damage the contact surfaces. w w w w 2i tP .G et w • w • .G et w 2i w • Page 98 of 151 Copyright ©2008-2009 ETON America, llc., all rights reserved. ar ts .c rts .c om tP a .G et 2i tP ar ts .c • • • Remove the balance shaft from the right crankcase. • Remove the crankshaft from the right crankcase. tP a Remove the gasket and dowel pins. Gently scrape gasket residue off the crankcase contact surface. • • Do not damage contact surface of the gasket. It is recommended to moisten the gasket residue for easier removal. • Remove the left crankcase oil seal. w w w w 2i tP .G et w w .G et 2i • • Page 99 of 151 Copyright ©2008-2009 ETON America, llc., all rights reserved. ar ts .c 2i .G et w w rts .c om tP ar ts .c om • .G et 2i • Measure the clearance of the larger end in the vertical direction. Service limit: 0.05 mm Place the crankshaft on a V-block. Measure the run-out of the crankshaft. Service limit: 0.10 mm tP a • • • 2i .G et w • Special tool: Outer bearing puller w w w w • .G et • Use your hand to turn the bearing. It should turn smoothly and quietly. Check the inner ring to ensure it links firmly on the bearing. If any roughness, noise, or loose linkage is detected, replace the bearing. Note: If bearing replacement is necessary, replace both bearings. w • • • 2i tP Crankshaft Bearing Inspection Page 100 of 151 Copyright ©2008-2009 ETON America, llc., all rights reserved. ar ts .c • rts .c om • Use a thickness gauge to measure the left and right clearance of the larger end of the connecting rod. Service limit: 0.6 mm tP ar ts .c • w w om 11-5 Crankshaft Inspection • • Special tool: Inner bearing puller Special tool: Bearing driver 2i 11-6 Crankcase Assembly Install the wave washer into the right crank bearing seat. • w tP a Install the crank shaft on the right crankcase. .G et w w w w .G et w Align the position mark on the balance shaft drive gear with that of balance shaft driven gear, and then install the balance shaft onto right crankcase. 2i tP 2i • w w .G et • Page 101 of 151 Copyright ©2008-2009 ETON America, llc., all rights reserved. ar ts .c • rts .c om • • • Check the bearings on the right and left crankcase. Rotate each bearing inner ring with your fingers. The bearings should turn smoothly and quietly. Ensure the bearing outer ring is mounted on the gear tightly. If bearing rotation is uneven, makes noise, or is loosely mounted, replace it. tP ar ts .c • om Balance Shaft Bearing Inspection Install the 2 dowel pins and a new gasket. • Install the left crankcase onto the right crankcase. Tighten the 11 bolts on the left crankcase. Torque value: 0.8~1.2kgf-m / 6-9 lbf-ft • • Tighten the 2 bolts on the right crankcase. Torque value: 0.8~1.2kgf-m / 6-9 lbf-ft w w w w 2i tP .G et w w .G et w 2i w • • Page 102 of 151 Copyright ©2008-2009 ETON America, llc., all rights reserved. ar ts .c rts .c om tP a .G et 2i tP ar ts .c om • Clean the crankshaft. Apply a layer of grease on the lip of oil seal. Install the left crankshaft. Install the oil seal in the left crankcase. Be careful not to damage the lip of the oil seal. • Use an oil seal driver (27×42×7) to install and secure the oil seal. .G et 2i tP .G et w w w w w w Page 103 of 151 Copyright ©2008-2009 ETON America, llc., all rights reserved. ar ts .c rts .c om tP a Install the tensioner and tighten the pivot bolt. Torque value: 0.8 ~1.2kgf-m / 6-9 lbf-ft Install the cam chain. Install the cam chain setting plate. 2i • • • • w w .G et 2i tP ar ts .c om • • • • om 12. COOLING SYSTEM w w w w Page 104 of 151 Copyright ©2008-2009 ETON America, llc., all rights reserved. ar ts .c 2i tP .G et w w .G et w 2i w tP a .G et 2i rts .c om tP ar ts .c 12-1 Mechanism Diagram Refill the radiator only with distilled water and anti-freeze solution. Add coolant to the reservoir only. The cooling system can be serviced while installed on the ATV. Never spill the coolant onto painted surfaces. Test the cooling system for any leaking after the repair. Refer to Section 17 for inspection of the temperature sensor switch for the fan motor and the water thermometer. rts .c om 2i Technical Specifications Specification 0.9±0.15 kgf/cm2 850c.c. 420c.c. tP a .G et Item Pressure to open filler cap Capacity of coolant: Engine + radiator Reservoir upper Begins to activate at 82~95℃ Stroke: 0.05~3mm Thermostat Thermos switch (fan) 2i Begins to activate at 98±3℃ .G et Boiling point Standard: 107.7℃ Pressurized: 125.6℃ Torque Value • Water pump rotor: 1.0~1.4kgf-m / 7-10 lbf-ft Special tools Anti-Freeze specification rating of H68 w w • Anti-freeze solution percentage 20% 30% 40% 50% w w Operating temperature 32° to -8° F -9° to -15°F -16° to -24°F -36° to -45°F 2i tP .G et w Water pump bearing driver (6901): SYM-9100100 Water pump oil seal driver (Inner): SYM-9120500-H9A Water pump mechanical seal driver: SYM-1721700-H9A Inner bearing puller: SYM-6204020 w • • • • Page 105 of 151 Copyright ©2008-2009 ETON America, llc., all rights reserved. ar ts .c • • • • • • tP ar ts .c Warning: Never attempt to open the radiator filler cap while the engine is running. The pressurized hot coolant may escape and cause serious scalding injuries. Do not perform maintenance unless the engine is completely cooled down. w w om 12-2 General Information Engine temperature too high Water thermometer or temperature sensor malfunctioning. Thermostat stays closed. Insufficient coolant. Water hose or jacket clogged. Fan motor malfunctioning. Radiator filler cap malfunctioning. tP ar ts .c • • • • • • • • Water thermometer or temperature sensor malfunctioning. Thermostat stays open. Coolant leaking Water pump mechanical seal loose or malfunctioning. O-ring worn or damaged. Water hose broken or worn. 2i • • • rts .c om Engine temperature too low .G et 12-4 Troubleshooting Flowchart w w w w w .G et w Page 106 of 151 Copyright ©2008-2009 ETON America, llc., all rights reserved. ar ts .c 2i tP 2i tP a Temperature indicated is too high: • Stop the engine and let it cool completely. Open the radiator cap and check the radiator coolant. o Coolant level low: Refill radiator with coolant and check for leaks • Turn the main switch on and make sure the water temperature indicator is at zero o If not: Check for current going to the thermostat. It must be at least 6V. If not: Replace the thermostat If so: Check for shorts or grounding in the circuitry • Open the radiator cap and very gently apply the throttle. Check if the coolant is circulating. o If it isn’t: Stop the engine and remove the water pump cover. Restart the engine and inspect the pump rotation. If it rotates, there is a clog in the water hose. If it does not, repair or replace the water pump. • Close the radiator cap. Test the thermostat current for variance as the temperature rises. o If it does not detect the temperature change, replace the thermostat. • Allow the engine to run at 3-4000 RPM. Inspect the cooling fan. o If the fan was not operating, check the thermal switch current for changes in voltage (12 Æ 0V). If the voltage does not change, replace the thermal switch. If it does, test the fan directly by attaching a 12V battery to the terminals on the fan. If the fan does not operate, replace it. • Keep the engine running at 3-4000 RPM. Inspect the coolant flow in the reserve tank. • Remove the thermostat from its holder and check its operation directly with water. If it does not operate correctly, replace the thermostat. • Refill the coolant reservoir and ensure there are no twists, bends, or air bubbles in the coolant tube. • To bleed air bubbles out, open the radiator cap while the engine is cool and start the engine. Gently press on the hose to bleed. Apply throttle and check if the surface of the coolant appears stable. Repeat bleeding if necessary. .G et w w om 12-3 Troubleshooting Pressure which is too high may damage the radiator. Never use pressure which exceeds 1.05 kg/cm2. 2i • If the system fails to maintain the specified pressure for at least 6 seconds, repair or replace. .G et • • • • 2i w • • Coolant recommended: SYM Bramax radiator agent. Concentration: 50% w w w • Coolant reservoir Water pump .G et w • • Remove the front center cover. Remove filler cap. Place a water pan under the water pump. Loosen the drain bolt to drain out the coolant. Reinstall the drain bolt. Refill system with coolant and bleed the air bubbles: Run the engine, and remove the by-pass pipe. Check by-pass hole for air bubbles to emit. If no air (only coolant) flows out, reinstall the bypass pipe and shut off the engine. Remove the radiator filler cap. Start the engine, ensure there are no air bubbles in the radiator coolant, and ensure the coolant liquid level is stable. Stop the engine. Add coolant to proper level if necessary. Screw in and tighten the radiator filler cap. .G et • • • • • • Never attempt to carry out service work on the cooling system unless the engine is completely cooled down. Serious injury could result. w • tP a Coolant Changing Radiator filler cap 2i tP • • rts .c om • Hermetically seal the filler cap. Apply water and pressure to the filler cap. Replace it with new one if it fails to maintain the specified pressure within a given time limit, or the opening pressure is too high or too low. The specified pressure should be maintained at least for 6 seconds in the test. Standard pressure for the filler cap: 0.9-0.15 kgf/cm2 Apply pressure to the radiator, engine and water hose to check for any leakage tP ar ts .c • • • Page 107 of 151 Copyright ©2008-2009 ETON America, llc., all rights reserved. ar ts .c Filler Cap Test w w om 12-5 System Test Drain bolt om Reserve Tank Inspection Inspection • Remove the front center cover, side covers, and front fender. Check for any leaking from the welded seam. Blow the radiator clean using compressed air. If the radiator is blocked by dirt or foreign material, use a low pressure water jet to clean it. Be careful when straightening the sink fan. • tP a .G et 2i • • Removal Place a water pan under the water pump. Loosen the drain bolt to drain out the coolant. • Remove the coolant filler pipe. .G et w w w w w .G et w 2i tP 2i • • w w Lower rts .c om 12-6 Radiator Upper Page 108 of 151 Copyright ©2008-2009 ETON America, llc., all rights reserved. ar ts .c • Remove the front center cover. Remove the reserve tank filler cap. Check the liquid level in the reservoir under the front right fender. Add coolant to the proper level if too low. Reinstall the reserve tank filler cap. tP ar ts .c • • • Filler coolant hose om Loosen the radiator 4 bolts. Remove the coolant upper side pipes. • • Remove coolant outlet pipe. Disconnect the couplers for the thermo switch and fan motor. Remove the radiator and cooling fan. Liquid packing must be applied to the thermo switch before installation to avoid damaging the radiator. Installation w Install the removed parts in the reverse order of removal. Install the radiator in the reverse order of removal. w • • w w • .G et w • • w • Install the fan motor onto the fan duct and insert the fan into the motor shaft. Apply a coat of adhesive to the shaft thread of the motor. Install the washer and the lock nut. Tighten the fan duct onto the radiator with 3 bolts. 2i tP Assembly • tP a 2i Loosen the 3 bolts from the fan duct. Remove the fan duct. Loosen 3 screws from the fan motor. Remove the fan motor. Remove the nut to remove the fan from the fan motor. .G et • • • • • w w Disassembly Page 109 of 151 Copyright ©2008-2009 ETON America, llc., all rights reserved. ar ts .c rts .c om .G et 2i • tP ar ts .c • • Water pump Upon installation, inspect for any leaks. om 12-7 Water Pump 2i • Place a water pan underneath the unit. Remove the coolant drain bolt. Ensure all the coolant is drained from the cooling system. Inspect the drained coolant for any unusual material or dirt. If there is, the inner water pump seals or cooling system may be damaged. The cylinder or cylinder head gasket may also be damaged; take apart the crankcase and inspect these before dismantling the cooling system. Water Pump Removal • • • • • • • Loosen the drain bolt to drain out the coolant. Remove the water hose. Loosen the 4 bolts and remove the pump cover. Loosen the 9 bolts and remove the right cover. Remove the gasket and dowel pins. Turn the pump rotor clockwise and remove. Note that the rotor uses a left hand threads. • Remove the cir clip from the right crankcase cover. Remove the water pump shaft and the inner bearing. Remove the outside bearing with an inner bearing puller. Rotate the inner ring of the bearing; the bearing should turn smoothly and quietly. If the bearing does not rotate smoothly or produces a noise, replace it. Special tool: Inner bearing puller w • w w w • 2i tP • .G et w • w • .G et w 2i w tP a .G et Drain bolt rts .c om • • • tP ar ts .c Inspection Page 110 of 151 Copyright ©2008-2009 ETON America, llc., all rights reserved. ar ts .c • om rts .c om Mechanical Seal Replacement • • 2i • Remove the inside bearing by inner bearing puller. Drive the mechanical seal and inner seal out of the right crankcase. Special tools: o Inner bearing puller o Water pump bearing driver Replace the mechanical seal and inside seal after removing it. tP a Apply a coat of sealant to the adjoining surfaces of the right crankcase before installing the new mechanical seal. • Install the mechanical seal onto the right crankcase. Special tool: Water pump mechanical seal driver. .G et w w w w w .G et w • 2i tP 2i • w w .G et • Page 111 of 151 Copyright ©2008-2009 ETON America, llc., all rights reserved. ar ts .c • Check for any wear and damage on the mechanical seal and inside seal. The mechanical seal and inside seal must be replaced together if necessary. tP ar ts .c • .G et w Install the cir clip onto the inner bearing to secure it. w w w w .G et w • Page 112 of 151 Copyright ©2008-2009 ETON America, llc., all rights reserved. ar ts .c tP a Mount the water pump shaft and the inner bearing to the right crankcase cover. 2i • w w .G et 2i • 2i tP • Install a new outside bearing to the right crankcase cover. Special tool: Water pump bearing driver (6901) Note: Do not reuse old bearing. It must be replaced with a new one once it has been removed. rts .c om • om • Install the new inner seal onto the right crankcase. Special tool: Water pump oil seal driver (inner) tP ar ts .c • Install the seal washer into the rotor. Note: The washer must be replaced together with the mechanical seal. • Install the rotor onto the water pump shaft and tighten. Torque Value: 1.0-1.4kgf-m The rotor is left hand threaded. • • Install the dowel pin and new gasket. Install the water pump cover (4 bolts). .G et w w w w w .G et w 2i tP 2i tP a • Install the dowel pin and right cover gasket. The water pump rotor rotating causes the water pump drive shaft scoop channel, aligns the oil pump drive shaft flange. Install the right crank case. (9 bolts) w w • • Page 113 of 151 Copyright ©2008-2009 ETON America, llc., all rights reserved. ar ts .c rts .c om tP ar ts .c .G et 2i • • om • • Please refer to chapter 17 for inspection of the temperature sensor. tP ar ts .c • om 12-8 Thermostat Removal Drain the coolant. Remove the thermostat set. (2 bolts) Visually inspect the thermostat for any damage. .G et 2i • • Place the thermostat into heated water to check its operation. Do not let the thermostat or thermometer touch the side of the water container to ensure an accurate reading. If the valve of the thermostat remains open at room temperature or the valve operation is not corresponding to the temperature change, then it must be replaced. .G et 2i tP a • w Valve begins to open Valve stroke Install the thermostat. Install the thermostat cover. (2 bolts) Refill the coolant and bleed out any air bubbles. .G et w • • • w Installation 82~95℃ 0.05 ~ 3mm 2i tP Technical Data w w w w w rts .c om Inspection Page 114 of 151 Copyright ©2008-2009 ETON America, llc., all rights reserved. ar ts .c • • om 13. STEERING AND SUSPENSION w w w w .G et w w STEERING Page 115 of 151 Copyright ©2008-2009 ETON America, llc., all rights reserved. ar ts .c 2i tP .G et w 2i w tP a .G et 2i rts .c om tP ar ts .c 13.1 PARTS DRAWING om rts .c om tP ar ts .c 2i tP a .G et w w w w Page 116 of 151 Copyright ©2008-2009 ETON America, llc., all rights reserved. ar ts .c 2i tP .G et w w .G et w 2i w HANDLEBAR Steering Too Hard o Faulty tire o Steering shaft holder too tight o Insufficient tire pressure o Faulty or damaged steering shaft bushing • Front Wheel Wobbles o Faulty tire o Worn front brake drum bearing o Bent rim o Axle nut not tightened properly • Steering Pulls To One Side o Bent tie rods o Wheel installed incorrectly o Unequal tire pressure o Bent frame o Worn swing arm pivot bushings o Incorrect wheel alignment Nose in the Front Suspension o Loose front suspension fasteners o Suspension link bound • Hard Suspension o Faulty front swing arm bushings o Improperly installed front swing arms o Bent front shock absorber swing rod • Soft Suspension o Weak front shock absorber springs o Worn or damaged front swing arm bushings .G et 2i tP a • • Remove the throttle housing by the two fixed screws. Remove the throttle lever housing on the right side of the handle bar. Remove the brake lever bracket assembly. w w w w • .G et w • w REMOVAL 2i tP 13.3 HANDLEBAR Page 117 of 151 Copyright ©2008-2009 ETON America, llc., all rights reserved. ar ts .c rts .c om 2i tP ar ts .c • .G et w w om 13.2 TROUBLESHOOTING w w w w Page 118 of 151 Copyright ©2008-2009 ETON America, llc., all rights reserved. ar ts .c 2i tP .G et w w .G et • Remove the bolts attaching the handlebar upper holder. Remove the handlebar. 2i • tP a .G et w w rts .c om Remove the handle cover and instrument panel by the four screws at the right and left sides shown in the picture. 2i • om • Remove the handle bar switch on the left handle bar. Remove rear brake lever bracket assembly. tP ar ts .c • om INSTALLATION • tP a .G et w w .G et • Install the rear brake lever bracket, aligning the small dot of the handlebar. Tighten the screw securely. 2i • w w w w w w .G et 2i • Install the switch housing, aligning the small dot of the handlebar. Tighten the upper screw first, and then tighten the lower one. Page 119 of 151 Copyright ©2008-2009 ETON America, llc., all rights reserved. ar ts .c • 2i tP • rts .c om • Put the handlebar on the lower holders. Make sure the handlebar punch marks match with the top end of the handlebar of lower holders. Install the handlebar upper holders with the L or R marks facing forward. Tighten the forward bolts first, and then tighten the rear bolts. Install the handlebar upper holder’s cover. tP ar ts .c • • om 13.4 THROTTLE HOUSING Loosen the screws on the throttle housing cover. Remove throttle housing cover and gasket. Disconnect throttle cable from the throttle arm and remove from the throttle housing. rts .c om 13.5 STEERING SYSTEM 2i Removal of Kingpin and Tie-rod Remove the front wheels and hub assembly. Remove the four self-lock nuts from the tie-rod ball joints and take off the two tie-rods. Nut Inspect the tie-rod for damage or bending. Inspect the ball joint rubbers for damage, wear, or deterioration. Turn the ball joints with fingers. The ball joints should turn smoothly and quietly. w w w w • .G et w • • w Tie-rod Inspection Tie rod 2i tP Nut .G et w 2i w tP a .G et • • Page 120 of 151 Copyright ©2008-2009 ETON America, llc., all rights reserved. ar ts .c • • • tP ar ts .c DISASSEMBLY om Steering Shaft Removal Steering Shaft Holder Inspection Remove the steering shaft. Remove the bushing from the shaft. Inspect the bushing for damage or wear; replace if necessary. Measure the bushing inner diameter. Maximum limit: 39.5 mm 2i • • • Steering Shaft Inspection • Inspect the steering shaft for damage or cracks. 2i w w w • • Apply grease to the holder. Install the holder and oil seal tighten with the nuts. Torque: 33 N.m (24 lbf-ft) Install the steering shaft nut and tighten it. This nut is under this steering shaft. Torque: 50 N.m (37 lbf.ft) Install a new carter key .G et • • • 2i tP • • .G et Installation of Steering Shaft w w w w w tP a .G et • • Page 121 of 151 Copyright ©2008-2009 ETON America, llc., all rights reserved. ar ts .c • • • rts .c om • • • Remove the handle bar cover and handle bar. (See section 8-3) Remove the front fender. (See section 11-1) Remove handlebar lower holder. Loosen the steering shaft holder bolt and remove steering shaft holder. Take off the cotter pin below steering shaft. Loosen the steering shaft fixed out below shaft. Pull the steering shaft carefully. tP ar ts .c • tP ar ts .c 14.1 PARTS DRAWING w w w w .G et 2i tP 2i w w .G et Front Brake Page 122 of 151 Copyright ©2008-2009 ETON America, llc., all rights reserved. ar ts .c tP a .G et 2i rts .c om Front Wheel w w om 14. FRONT WHEEL AND BRAKE SYSTEM om 14.2 TROUBLESHOOTING Hard Steering o Faulty tire o Insufficient tire pressure • Front Wheel Wobbling o Faulty tire o Worn front brake drum bearing o Bent rim o Axle nut not tightened properly • Brake Drag o Incorrect brake adjustment o Sticking brake cable • Steering Pulls to One Side o Bent tie rods o Wheel installed incorrectly o Unequal tire pressure o Incorrect wheel alignment .G et 2i tP 2i w w .G et w w w w w Page 123 of 151 Copyright ©2008-2009 ETON America, llc., all rights reserved. ar ts .c tP a Poor Brake Performance o Brake shoes worn o Worn brake drum o Brake linings oily, greasy, or dirty o Improper brake adjustment w • rts .c om .G et 2i tP ar ts .c • REMOVAL Install and tighten the four-wheel nuts Torque: 24 N.m (17.7 lbf.ft) Remember to put a cotter pin in the castle nut. 2i 14.4 HYDRAULIC BRAKE This applies to the two front brakes of the unit. 2i tP a .G et • REMOVAL w w w w .G et w w • Raise the front wheels off the ground by placing a jack or other support under the frame. Remove the front wheel nuts, washer, and front wheels. .G et • Page 124 of 151 Copyright ©2008-2009 ETON America, llc., all rights reserved. ar ts .c • • • rts .c om INSTALLATION 2i tP • Raise the front wheels off the ground by placing a jack or other support under the frame. Remove the front wheel nuts, washer, and wheels. tP ar ts .c • w w om 14.3 FRONT WHEELS om Remove the two bolts on the caliper to remove it. • After disassembling the wheel, inspect the disk plate. If the disk plate needs to be changed, loosen the castle nut to take the wheel hub apart. Before loosening the castle nut, remove the cotter pin. w Note: Pull the master cylinder back when changing the brake shoe. w • .G et w • w w w Reinstall the front brake assembly in reverse order of removal. Page 125 of 151 Copyright ©2008-2009 ETON America, llc., all rights reserved. ar ts .c 2i tP 2i Remove the bolt from the brake stopping plate. Remove the brake disc. .G et • • tP a .G et • w w rts .c om 2i • tP ar ts .c • om BRAKE OIL REPLACEMENT 14.5 SUSPENSION SYSTEM Suspension in this type of ATV can be adjusted. There are two ways to adjust suspension: o 1. You can raise the all ATV body up by using a repair platform. The four wheels are in the free position, and the suspension can be adjusted easily. o 2. If a repair platform is not available, use a specialized tool to adjust it. This will require more effort. .G et w 2i w tP a .G et 2i • • w w w w 2i tP .G et w w Special adjustment tool (See picture) Page 126 of 151 Copyright ©2008-2009 ETON America, llc., all rights reserved. ar ts .c • rts .c om • The brake fluid reservoir is located at the right hand side of handle bar. Check the brake fluid level position with the outside window of the tank. To open the brake oil tank cap, loosen the two screws on top. tP ar ts .c • om 15. REAR WHEEL AND BRAKE SYSTEM tP a .G et 2i rts .c om tP ar ts .c 15.1 PARTS DRAWING w w Page 127 of 151 Copyright ©2008-2009 ETON America, llc., all rights reserved. ar ts .c 2i tP .G et Rear Wheel Axle w w w w .G et w 2i w Rear Wheel om rts .c om tP ar ts .c 2i tP a .G et w w w w Page 128 of 151 Copyright ©2008-2009 ETON America, llc., all rights reserved. ar ts .c 2i tP .G et w w .G et w 2i w Rear Brake om 15.2 TROUBLESHOOTING Poor Brake Performance o Brake shoes are worn o Improper brake adjustment o Brake linings are oily, greasy, or dirty o Brake drums are worn o Brake arm setting is improperly engaged • Vibration or wobbling o Axle is not tightened well o Bent rim o Axle bearings are worn o Faulty tires o Rear axle bearing holder is faulty • Brake Drag o Incorrect brake adjustment o Sticking brake cam o Sticking brake cable Soft Suspension o Weak shock absorber damper o Weak shock absorber spring 2i .G et w Remove the four nuts and remove the rear wheel. w w w w .G et w w • 2i tP 15.3 REAR WHEEL AND REAR BRAKE REMOVAL Page 129 of 151 Copyright ©2008-2009 ETON America, llc., all rights reserved. ar ts .c • tP a Hard Suspension o Bent damper rod o Faulty swing arm pivot bushings w • rts .c om .G et 2i tP ar ts .c • om Loosen the two bolts to remove the rear brake caliper. .G et Loosen the bolt shown in the picture. w w w • 2i tP w w Brake Shoe Replacement Page 130 of 151 Copyright ©2008-2009 ETON America, llc., all rights reserved. ar ts .c tP a 2i Loosen the bolts and remove the brake disc Check the thickness of the disc. Replace if the thickness less than 3mm. .G et • • w w w .G et 2i rts .c om tP ar ts .c • om Push the plate back to take the shoe out as shown in the picture. tP a .G et w w w w .G et w w The two types of brake linings are shown in this picture. 2i tP 2i w w • Page 131 of 151 Copyright ©2008-2009 ETON America, llc., all rights reserved. ar ts .c Remove the brake shoe from the hub. .G et • rts .c om 2i tP ar ts .c • om 2i • 2i .G et w w • Pull the left brake lever gently to extract air from brake system. Fill the brake oil to the level shown on the cup when no more air comes out. Assemble the cover .G et • w w w w w w • tP a • • Page 132 of 151 Copyright ©2008-2009 ETON America, llc., all rights reserved. ar ts .c Add the brake oil (DOT 3 or DOT 4). Keep oil level at least halfway up the cup to prevent air from getting into the brake system. Loosen the bolt to vent the air from brake system. Tighten the bolt if there isn’t any air in the brake system. Tightening torque: 40-70kgf-cm / 35-61 lbf-in .G et • • 2i tP • • Loosen the bolts and open the cover of the reservoir. Loosen the drain bolt and drain the used oil out. Tighten the bolt after the used oil has been drained out completely. rts .c om • tP ar ts .c REPLACING THE BRAKE HYDRAULIC OIL om 2i tP a .G et 2i Swing arm .G et Tighten the hanger bolt on the right side as shown in picture. w w w w • 2i tP w w • Put the swing arm at the proper position as shown in picture. Two hanger bolts are used to hold the swing arm at its right and left side. .G et • ar ts .c This section introduces how to repair and install the swing arm. w w rts .c om tP ar ts .c 15.4 SWINGARM & REAR AXLE HOLDER Page 133 of 151 Copyright ©2008-2009 ETON America, llc., all rights reserved. Hanger bolt om .G et 2i tP 2i w w .G et w w w w w Page 134 of 151 Copyright ©2008-2009 ETON America, llc., all rights reserved. ar ts .c rts .c om Tighten the nut shown. w • tP a .G et 2i • Screw another hanger bolt on the left side as shown in the picture, but do not tighten it. Make sure the cross-section of bolt and crosssection of the hole are in the same plane. tP ar ts .c • om Suspension Adjustment Suspension in this type of ATV can be adjusted. There are two ways to adjust suspension: o 1. You can raise the all ATV body up by using a repair platform. The four wheels are in the free position, and the suspension can be adjusted easily. o 2. If a repair platform is not available, use a specialized tool to adjust it. This will require more effort. w w w w Page 135 of 151 Copyright ©2008-2009 ETON America, llc., all rights reserved. ar ts .c 2i tP .G et w w .G et w 2i w Special adjustment tool (See picture) tP a .G et 2i rts .c om tP ar ts .c • • 2i .G et w w w w 2i tP .G et w w EXHAUST PIPE Page 136 of 151 Copyright ©2008-2009 ETON America, llc., all rights reserved. ar ts .c tP a .G et 2i rts .c om tP ar ts .c 16.1 FENDERS DRAWING w w om 16. FENDERS AND EXHAUST PIPE Remove the rear rack. Loosen the four bolts which connect the front fender and rear fender. Loosen the two screws which connect the rear fender and frame. These two bolts are just below the seat. Remove the two screws on the top of the seat compartment. .G et • w w w Page 137 of 151 Copyright ©2008-2009 ETON America, llc., all rights reserved. ar ts .c tP a w w .G et • Loosen the three screws which connect the footrest plate. Pull the rear fender backward. 2i • Screws w w w .G et 2i • Bolts 2i tP • • rts .c om • There are two seat release bars located at the right and left hand side of the seat. Use these to remove the seat first. tP ar ts .c • om 16.2 REAR FENDERS REMOVAL Remove the screws on the sides of the rear of the ATV as shown. • Remove the bolts that hold on the footrests. w w w w .G et 2i tP .G et w Remove the mounting bolts from the front fender. Page 138 of 151 Copyright ©2008-2009 ETON America, llc., all rights reserved. ar ts .c • w tP a Remove the two screws shown in the picture. 2i • w w 16.3 FRONT FENDER REMOVAL rts .c om .G et 2i tP ar ts .c om • • 2i tP a .G et Remove the exhaust pipe bolts mounting on the frame below the seat. Remove the exhaust pipe carefully. w w w w • .G et w • 2i tP • 2i • .G et • Wait at least 15 minutes after stopping the engine before servicing the exhaust system. Remove the seat, rear fender and footrest plate before you take off the exhaust pipe. Loosen the two exhaust pipe bolts fixed on the engine. Warning: DO NOT service the exhaust pipe while hot. w • Page 139 of 151 Copyright ©2008-2009 ETON America, llc., all rights reserved. ar ts .c 16.4 EXHAUST PIPE REMOVAL w w rts .c om tP ar ts .c • Remove the two screws on the top of the headlight. Remove the now visible single screw on the front of the vehicle. Remove the screw near the suspension as shown in the picture. om • Installation is the reverse order of removal. Torque: Exhaust muffler bolts 30 N-m (22 lbf-ft) After installing, make sure that there are no exhaust leaks. w w w w Page 140 of 151 Copyright ©2008-2009 ETON America, llc., all rights reserved. ar ts .c 2i tP .G et w w .G et w 2i w tP a .G et 2i rts .c om tP ar ts .c • • • om EXHAUST PIPE INSTALLATION 17.1 TROUBLESHOOTING .G et w • w w w • 2i tP 2i w • .G et • w • tP a .G et • Page 141 of 151 Copyright ©2008-2009 ETON America, llc., all rights reserved. ar ts .c rts .c om 2i • Engine Starts But Dies o Improper Ignition Timing o Faulty Spark Plug No Spark At Plug o Engine Stop Switch At “Off” Position o Gearshift Is Not At Neutral Position o Faulty Ignition Coil o Faulty Generator o Faulty CDI Unit o Poorly Connected: Between CDI And Ignition Coil Between CDI And Engine Stop Switch Between Ignition Coil And Spark Plug Between Generator And CDI Unit Engine Starts But Runs Poorly o Ignition Primary Circuit Faulty Generator Faulty CDI Unit Faulty Alternator Exciter Coil Loose Contact Terminals Faulty Ignition Coil o Ignition Secondary Circuit Faulty Plug Loose Contact Spark Plug Wire Improper Ignition Timing Faulty Generator Faulty CDI Unit Charging System Failure o Faulty Generator o Faulty CDI Unit o Loose, Broken, Or Shorted Wire o Faulty regulator o Faulty Ignition Switch Engine Intermittent Power o Loose Battery Connection o Loose Charging System Connection Starter Motor Inoperable o Battery Short o Faulty Ignition Switch o Loose Or Disconnected Wire Engine Does Not Run o Faulty Ignition System o Engine Problems o Faulty Engine Stop Switch Headlight Inoperable o Switch Not Set To “ON” Position o Headlight Bulb Broken Or Needs Replacing tP ar ts .c • w w om 17. ELECTRICAL SYSTEM 17.3 IGNITION TIMING The ignition advance is 15°± 3°/4000rpm. The Capacitive Discharge Ignition (CDI) system is factory pre-set and does not require adjustment. 2i .G et 17.4 BATTERY INFORMATION The battery can emit explosive gases; keep sparks, flames, and cigarettes away. Provide adequate ventilation when charging or service the battery in an open area. The battery contains sulfuric acid (an electrolyte). Contact with skin or eyes may cause severe burns. Wear protective clothing and a face shield. Electrolyte is poisonous. If swallowed, drink large quantities of water or milk and call a physician. 2i tP a • w • • Battery is under the seat. Measure the battery voltage by using a multimeter. VOLTAGE: Fully charged: 13.1 V Undercharged: Below 12.0 V w BATTERY REMOVAL .G et Open the seat. The battery is underneath. Disconnect the negative cable (Black - ) first and then the positive cable (Red + ). Remove the restraining bolt. Remove the battery. w • • • BATTERY INSTALLATION w Install the battery in the reverse order of removal. After installing the battery, coat the terminals with clean grease. w w • • 2i tP • .G et BATTERY VOLTAGE INSPECTION Page 142 of 151 Copyright ©2008-2009 ETON America, llc., all rights reserved. ar ts .c • • w w rts .c om • Remove the spark plug cap from the spark plug. Disconnect the ignition coil primary wire. Measure the primary coil resistance. STANDARD: 0.1 - 0.3Ω(20) Measure the secondary coil resistance with the spark plug cap in place. STANDARD : 7.4 – 12 kΩ(20) tP ar ts .c • • • • • om 17.2 IGNITION COIL om CHARGING • • 2i 17.5 ELECTRIC STARTER .G et Information TROUBLESHOOTING 2i w • Starter Motor Turns Slowly o Weak battery. o Poorly connected starter motor cable. o Malfunctioning starter motor. o Poorly connected battery ground cable. Starter Motor Inoperable o Engine stop switch at “off” position. o Gearshift bar is not at neutral position. o Blown fuse near the battery. o Battery is undercharged or in poor condition. .G et • w w 17.6 LIGHT BULB REPLACEMENT HEADLIGHT To remove the headlight, loosen the three screws at the back of the headlight. .G et • w w w w w If a battery has not been used for a long period of time, the voltage may fade and may not provide enough power to starter motor. tP a • Page 143 of 151 Copyright ©2008-2009 ETON America, llc., all rights reserved. ar ts .c • 2i tP • rts .c om • Connect the charged positive cable to the battery positive terminal. Connect the charged negative cable to the battery negative terminal. Normal charging: Using 0.9A-charging current, charge about 11 hours. Quick charging: Using 4A-charging current, charge about 3 hours. Keep flames and sparks away from a battery that is being charged. Quick charging should be limited to an emergency. Normal charging is preferred. tP ar ts .c • • om • After loosening these three screws, find the wire connector. Detach the connector to replace the electrical bulb conveniently and safely. Installation is in the reverse order of removal. tP ar ts .c • • The cap is visible on the back of the brake light. Loosen the two screws on the cap to remove it. Turn the light bulb inside to remove it. .G et w w w w w .G et w 2i tP 2i • • • w w Rear Brake Light Removal tP a .G et 2i • The taillight combines a positional and a rear brake light. Normally, when users switch the key to “ON” position, the front & rear positional lights are always slightly illuminated. When the brake lever on the handlebar is depressed, the rear positional light becomes brighter. Page 144 of 151 Copyright ©2008-2009 ETON America, llc., all rights reserved. ar ts .c • rts .c om TAILLIGHT rts .c om Instrument Panel Removal • .G et w w w w w .G et w 2i tP 2i The sensor is installed at the brake disk and a cable is tightened on the left side of knuckle component as shown in the pictures. w w • tP a .G et 2i • There is a cable and connector on the back of the instrument panel. After removing the instrument panel, locate the electrical connector which is connected to the driving sensor at the back of the instrument panel. Page 145 of 151 Copyright ©2008-2009 ETON America, llc., all rights reserved. ar ts .c • The instrument panel includes a fuel gauge, speedometer, water temperature gauge, trip meter, and indicator lamp. A LCD is used on the Vector instrument panel to display all driving information for the rider. tP ar ts .c • om 17.7 Instrument Panel o .c ar ts tP 2i et om ar t tP .c 2i et ar ts tP w .G 2i et .G w w w w w tP ar ts .c 18.1 ENGINE DOES NOT RUN om 18. TROUBLESHOOTING • Spark test – weak or no spark o Faulty spark plug o Fouled spark plug o Faulty CDI unit o Faulty alternator o Faulty engine stop switch o Poorly connected, broken, or shorted wires o Broken or shorted ignition coil o Broken or shorted spark plug wire o Faulty pulse generator o Faulty ignition switch • Attempt to start engine – engine starts but dies o Auto choke off or damaged o Auto choke power wire disconnected o Improperly adjusted air screw o Improperly ignition timing o Fuel / air mixture ratio is too lean • Attempt to start engine – engine does not fire – inspect spark plug o Carburetor flooded o Improperly adjusted air screw o Fuel / air mixture ratio too rich o Auto choke stuck or damaged o Air cleaner dirty w w w w 2i tP .G et w w .G et 2i tP a Low cylinder compression o Worn cylinder or piston rings o Damaged cylinder head gasket Page 147 of 151 Copyright ©2008-2009 ETON America, llc., all rights reserved. ar ts .c .G et • w w rts .c om Check fuel flow to carburetor o No fuel in fuel tank o Clogged float valve o Clogged fuel tank cap breather hole o Clogged at fuel tube 2i • om 18.2 POOR PERFORMANCE AT LOW AND IDLE SPEEDS Check ignition timing o Faulty CDI or A/C generator • Check carburetor air screw adjustment o Improperly adjusted air screw • Check for leaking intake pipe o Deteriorated insulator o-ring o Loose carburetor • Spark test – weak or intermittent spark o Loose or disconnected ignition system wires o Faulty, carbon fouled, or water fouled spark plug o Faulty A/C generator o Faulty CDI unit o Faulty ignition switch o Faulty ignition coil o Faulty pulse generator o Broken or shorted spark plug wire o Faulty engine stop switch tP a 2i .G et • Carburetor fuel flow restricted in tube o Lack of fuel in tank o Clogged fuel line o Clogged fuel valve o Logged fuel tank breather hole • Remove carburetor and check for clogged jets o Clean with high pressure air gun • w w w w .G et 2i tP .G et w Check air cleaner filter element o Clean filter element if dirty Page 148 of 151 Copyright ©2008-2009 ETON America, llc., all rights reserved. ar ts .c Check ignition timing o Faulty CDI unit o Faulty A/C generator 2i • w 18.3 POOR PERFORMANCE AT HIGH SPEED w w rts .c om tP ar ts .c • Raise the wheels off the ground and spin by hand – wheels spin poorly o Brake dragging o Drive chain too tight o Damaged wheel bearing o Wheel bearing needs lubrication • Low tire pressure o Tire punctured o Faulty valve stem • Engine speed does not increase when accelerating o Fuel / air mixture ratio too rich or lean o Clogged air cleaner o Clogged muffler o Restricted fuel flow o Clogged fuel tank cap breather hole Low cylinder compression o Leaking head gasket o Worn cylinder and piston rings • Clogged carburetor o Clean carburetor jets with compressed air • Fouled or discolored spark plug o Clean the spark plug o Improper spark plug heat range • Check for engine overheating o Excessive carbon deposited in combustion chamber o Wrong type of fuel o Fuel / air mixture ratio is lean o Use of poor quality fuel • Knocking when run at high speed o Worn piston or cylinder o Fuel / air mixture ratio is lean o Wrong type of fuel o Ignition timing too advanced o Excessive carbon deposited in combustion chamber w w w w 2i tP .G et w w .G et 2i tP a • Page 149 of 151 Copyright ©2008-2009 ETON America, llc., all rights reserved. ar ts .c .G et Check ignition timing – timing bad o Faulty CDI unit o Faulty A/C generator rts .c om 2i tP ar ts .c • • w w om 18.4 LOSS OF POWER om 18.5 POOR HANDLING Steering is heavy o Damaged steering bearing o Damaged steering shaft bushing • Wheel wobbling o Bent rim o Improperly installed wheel hub o Excessive wheel bearing play o Bent swing arm o Bent frame o Swing arm pivot bushing excessively worn • Vehicle pulls to one side o Bent tie-rod o Incorrect tie-rod adjustment o Rear tie air pressure incorrect o Improper wheel alignment o Bent frame w Page 150 of 151 Copyright ©2008-2009 ETON America, llc., all rights reserved. 2i tP ar ts .c rts .c om w w w .G et w w .G et w 2i w tP a .G et 2i tP ar ts .c • om ETON America, LLC tP ar ts .c Service Bulletin C.D.I. Module Specifications Vector 250 Bulletin No.: SB-0037 ar ts .c .G et w 2i w tP a .G et 2i rts .c om Date: 05/01/2006 VXL-250 -- C0410-LRA0-0000 Electric resistance(Ω) specification w ∞ ∞ ∞ ∞ ∞ 30-40K BACK GND 20-30K 4.8-5.2K 80-100K 30-50K 7-8K 0 13-15K 1-3K ∞ 2i tP w w ACC PC+ PCIGN BACK GND PC+ PCIGN 50-70K 1-2K ∞ 30-50K ∞ 30-50K ∞ 50-60K 1-3K ∞ ∞ ∞ .G et ACC 0 ∞ 7-8K w Specifications highlighted in yellow are the suggested critical testing points. Test points should be tested first. w w We suggest using analogy type multi-meter to test the electric resistance. We have found using digital type meter produces to many inaccurate readings. Copyright ©2008-2009 ETON America, llc., all rights reserved. om ETON America, LLC tP ar ts .c Service Bulletin 0051 03/01/2007 E-TON ATV, Scooter and Utility Kart Headlight Wattages rts .c om Bulletin No: Date: Head Light Wattages .G et Viper 70‐4 10w 12w 10w Viper 150 20w 50w 35w 90w .G et 18w 24w 24w Beamer Matrix 18w 24w Beamer R2 18w 24w Beamer R4 18w Rover N/A Rover GT N/A 2i tP 18w w Beamer III 50w 12w 24w .G et w w 50w 20w 2i Vector 250 Beamer II 12w tP a w Maximum Viper 90‐4 Yukon 150 w Factory 5/24/2007 w w w Per: JI‐EE Engineers Page 1 Copyright ©2008-2009 ETON America, llc., all rights reserved. ar ts .c 2i Model om tP a .G et 2i tP 2i .G et w w w w w ar ts .c rts .c om tP ar ts .c 2i .G et w w w Page 151 of 151 Copyright ©2008-2009 ETON America, llc., all rights reserved.