1
FOR CAR USE ONLY/POUR APPLICATION AUTOMOBILE UNIQUEMENT/PARA USO EN AUTOMOVILES
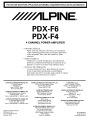
PDX-F6
PDX-F4
4 CHANNEL POWER AMPLIFIER
• OWNER'S MANUAL
Please read this manual to maximize your enjoyment
of the outstanding performance and feature capabilities
of the equipment, then retain the manual for future
reference.
• MODE D'EMPLOI
Veuillez lire ce mode d'emploi pour tirer pleinement
profit des excellentes performances et fonctions de cet
appareil, et conservez-Ie pour toute reference future .
• MANUAL DE OPERACION
Lea este manual, por favor, para disfrutar al maximo
de las excepcionales prestaciones y posibilidades
funcionales que ofrece el equipo, luego guarde el manual
para usarlo como referencia en el futuro.
ALPINE ELECTRONICS MARKETING, INC.
1-1-8 Nishi Gotanda,
Shinagawa-ku,
Tokyo 141-0031, Japan
Phone 03-5496-8231
ALPINE ELECTRONICS OF AMERICA, INC.
19145 Gramercy Place, Torrance,
California 90501, U.S.A.
Phone 1-800-ALPINE-1 (1-800-257-4631)
ALPINE ELECTRONICS OF CANADA, INC.
777 Supertest Road, Toronto,
Ontario M3J 2M9, Canada
Phone 1-800-ALPINE-1 (1-800-257-4631)
Qingdao Dongli Xinhaiyuan
Printing Co., Ltd.
No.17, jiushuidong road,
Qingdao, China
ALPINE ELECTRONICS OF AUSTRALIA PTY. LTD.
161-165 Princes Highway, Hallam
Victoria 3803, Australia
Phone 03-8787-1200
ALPINE ITALIA S.p.A.
ViaIe C. Colombo 8, 20090
Trezzano Sui Naviglio (MI), Italy
Phone 02-484781
ALPINE ELECTRONICS GmbH
Wilhelm-Wagenfeld-Str. 1-3,
80807 Munchen, Germany
Phone 089-32 42 640
ALPINE ELECTRONICS DE ESPANA, S.A.
Portal de Gamarra 36,
Pabell6n, 32
01013 Vitoria (Alava) - APDO
133, Spain
Phone 945-283588
ALPINE ELECTRONICS OF U.K. LTD.
Alpine House
Fletchamstead Highway,
Coventry CV4 9TW, U.K.
Phone 0870-33 33 763
ALPINE ELECTRONICS FRANCE S.A.R.L.
(RCS PONTOISE B 338 101 280)
98, Rue de la Belle Etoile,
Z.1. Paris Nord II, B.P. 50016,
95945 Roissy Charles de Gaulle
Cedex, France
Phone 01-48638989
ALPINE ELECTRONICS (BENELUX) GmbH
Leuvensesteenweg 510-B6,
1930 Zaventem, Belgium
Phone 02-725-1315
68-13530Z50-B
M351441401A
Printed in China (Y)
ENGLISH
Introduction:
Please read this OWNER'S MANUAL thoroughly to familiarize yourself with each control and function. We at
ALPINE hope that your new PDX-F6/F4 will give you many years of listening enjoyment.
In case of problems when installing your PDX-F6/F4, please contact your authorized ALPINE dealer.
CAUTION: These controls are for tuning your system. Please consult your authorized Dealer for
adjustment.
Lf:. WARNING
This symbol means important instructions.
Failure to heed them can result in serious injury or death.
Lf:. CAUTION
This symbol means important instructions.
Failure to heed them can result in injury or property damages.
&WARNING
• DO NOT OPERATE ANY FUNCTION THAT TAKES YOUR ATIENTION AWAY FROM SAFELY DRIVING
YOUR VEHICLE. Any function that requires your prolonged attention should only be performed after coming to a
complete stop. Always stop the vehicle in a safe location before performing these functions. Failure to do so may result in
an accident.
• KEEP THE VOLUME AT A LEVEL WHERE YOU CAN STILL HEAR OUTSIDE NOISES WHILE DRIVING.
Excessive volume levels that obscure sounds such as emergency vehicle sirens or road warning signals (train crossings,
etc.) can be dangerous and may result in an accident. LISTENING AT LOUD VOLUME LEVELS IN A CAR MAY ALSO
CAUSE HEARING DAMAGE.
• DO NOT DISASSEMBLE OR ALTER. Doing so may result in an accident, fire or electric shock.
• USE THIS PRODUCT FOR MOBILE 12V APPLICATIONS. Use for other than its designed application may
result in fire, electric shock or other injury.
• USE THE CORRECT AMPERE RATING WHEN REPLACING FUSES. Failure to do so may result in fire or
electric shock.
• DO NOT BLOCK VENTS OR RADIATOR PANELS. Doing so may cause heat to build up inside and may result
in fire.
• MAKE THE CORRECT CONNECTIONS. Failure to make the proper connections may result in fire or product
damage.
• USE ONLY IN CARS WITH A 12 VOLT NEGATIVE GROUND. (Check with your dealer if you are not sure.)
Failure to do so may result in fire, etc.
• BEFORE WIRING, DISCONNECT THE CABLE FROM THE NEGATIVE BATIERY TERMINAL. Failure to do
so may result in electric shock or injury due to electrical shorts.
• DO NOT ALLOW CABLES TO BECOME ENTANGLED IN SURROUNDING OBJECTS. Arrange wiring and
cables in compliance with the manual to prevent obstructions when driving. Cables or wiring that obstruct or
hang up on places such as the steering wheel, gear lever, brake pedals, etc. can be extremely hazardous.
• DO NOT SPLICE INTO ELECTRICAL CABLES. Never cut away cable insulation to supply power to other
equipment. Doing so will exceed the current carrying capacity of the wire and result in fire or electric shock.
• DO NOT DAMAGE PIPE OR WIRING WHEN DRILLING HOLES. When drilling holes in the chassis for
installation, take precautions so as not to contact, damage or obstruct pipes, fuel lines, tanks or electrical
wiring. Failure to take such precautions may result in fire.
• DO NOT USE BOLTS OR NUTS IN THE BRAKE OR STEERING SYSTEMS TO MAKE GROUND
CONNECTIONS. Bolts or nuts used for the brake or steering systems (or any other safety-related system), or
tanks should NEVER be used for installations or ground connections. Using such parts could disable control of
the vehicle and cause fire etc.
• KEEP SMALL OBJECTS SUCH AS BOLTS OR SCREWS OUT OFTHE REACH OF CHILDREN. Swallowing
them may result in serious injury. If swallowed, consult a physician immediately.
&
CAUTION
• HALT USE IMMEDIATELY IF A PROBLEM APPEARS. Failure to do so may cause personal injury or damage
to the product. Return it to your authorized Alpine dealer or the nearest Alpine Service Center for repairing.
• HAVE THE WIRING AND INSTALLATION DONE BY EXPERTS. The wiring and installation of this unit requires
special technical skill and experience. To ensure safety, always contact the dealer where you purchased this
product to have the work done.
• USE SPECIFIED ACCESSORY PARTS AND INSTALL THEM SECURELY. Be sure to use only the specified
accessory parts. Use of other than designated parts may damage this unit internally or may not securely install
the unit in place. This may cause parts to become loose resulting in hazards or product failure.
• ARRANGE THE WIRING SO IT IS NOT CRIMPED OR PINCHED BY A SHARP METAL EDGE. Route the
cables and wiring away from moving parts (like the seat rails) or sharp or pointed edges. This will prevent
crimping and damage to the wiring. If wiring passes through a hole in metal, use a rubber grommet to prevent
the wire's insulation from being cut by the metal edge of the hole.
• DO NOT INSTALL IN LOCATIONS WITH HIGH MOISTURE OR DUST. Avoid installing the unit in locations
with high incidence of moisture or dust. Moisture or dust that penetrates into this unit may result in product
failure.
SERVICE CARE
CD
Top Cover/
Couvercle
superieur/
Tapa superior
• IMPORTANT NOTICE
SERIAL NUMBER:
This Amplifier has been type tested and found to
comply with the limits for a Class B computing device in
accordance with the specifications in Subpart J of Part
15 of FCC Rules. This equipment generates and uses
radio frequency energy, and it must be installed and
used properly in accordance with the manufacturer's
instructions.
:~~i~~~i:g~ ~~~~N...,IC."....,IA...,N...,:-------
• For European Customers
Should you have any questions about warranty, please
consult your store of purchase.
_
PLACE OF PURCHASE:
• IMPORTANT
Please record the serial number of your unit in the
space provided here and keep it as a permanent
record. The serial number plate is located on the rear
of the unit.
• For Customers in other Countries
IMPORTANT NOTICE
Customers who purchase the product with which this
notice is packaged, and who make this purchase in
countries other than the United States of America and
Canada, please contact your dealer for information
regarding warranty coverage.
Fig. 1
SPECIFICATIONS
POX·F6
POX·F4
RMS Continuous Power (at 14.4 V)
CD
Self-Tapping
Screw
(M4 x 36)/
Vis autotaraudees/
Tornillos
autorroscantes
Ground Lead/
Conducteur de
mise ilia terre/
Cable de tierra
Hole/
Trous/
Agujeros/
• Per channel into 4 ohms
150Wx4
• Per channel into 2 ohms
150Wx4
100Wx 4
• Bridged into 4 ohms
300Wx2
200Wx2
THO+N (Reference: 10 W / rated power into 4 ohms)
100Wx4
0.003 % / 0.05 %
SIN Ratio (IHF A Weighted, Reference: rated power into 4 ohms)
SIN Ratio (IHF A Weighted, Reference: 1 W into 4 ohms)
116 dBA
115 dBA
94 dBA
95dBA
Input Impedance
10k ohms
Frequency Response (Reference: 1 W into 4 ohms)
5 Hz - 100 kHz / 0 dB - -3 dB
Crossover Frequency (Variable, L.P.F / H.P.F / OFF Selectable)
30 Hz- 400 Hz (-12 dB / oct)
• 1/2 ch
30 Hz - 400 Hz (-12 dB / oct)
• 3/4 ch
Input Sensitivity (V / at 10k ohms)
Dimensions
0.2 V - 4.0 V with Input Level
257.0 mm (10-1/8")
• Width
• Height
50.8 mm (2")
• Depth
192.0 mm (7·9/16")
Weight
2.88 kg
2.87 kg
NOTE:
• For product improvement. specifications and design are :mbjecr to change without IlOtice.
Fig. 2
.
CD
CD
CD
®
2
Machine Screw
(M3 x 7)/
Vis mecanique/
Tornillo
mecanico
Stacking Plate/
Plateau
d'empilement!
Placa de
apilamiento
ACCESSORIES
•
•
•
•
•
•
•
Stacking Plate (PDX-F6 Only)..
.
Machine Screw (M3 x 7) (PDX-F6 Only) ..
Machine Screw (M4 x 24) (POX-F6 Only)..
Self-Tapping Screw (M4 x 36)
Battery Connector
Speaker Connector:..
Hexagon Wrench (Large/Small)
.
..
.
2
.4
4
4
1
4
1 SET
INSTALLATION (Fig. 1 - Fig. 4)
With this series of amplifiers, up to three units can be stacked together in a typical installation. Depending on the
number of units you wish to install, refer to instructions A to C below.
&'CAUTION
• Caution on connection terminals/parts
• Keep electrically conductive objects away from the unit's terminals/parts (power terminals, fuses, speaker
output terminals, RCA connectors, etc.). Doing so prevents a possible short circuit and damage to the unit.
Note:
• Stack installation should always be parallel to the vehicle floor - do not install at an iI/cline. sitch as leaning agaiflSt a
vertical slliface. as this will invalidate your warranty.
Preparation for installation
1. Using the amplifier as a template, mark the four screw locations.
2. Make sure there are no objects behind the surface that may become damaged during drilling.
3. Drill the screw holes.
4. Position the PDX-F6/F4 over the screw holes, and secure with four self-tapping screws.
CD
-
Fig. 3
Machine Screw
(M4 x 24)/
Vis mecanique/
Tornillo
mecanico
NOTE:
• To securely connect the ground lead, t/se all already iI/stalled screw 011 the metal part oIthe vehicle (marked *). Be sure
this is a good grot/nd by checking continuity to the battery (-) terminal. As much as possible connect all equipmell1 to the
same ground poillt. These pmcedure.\· will help eliminate noise.
A. Single unit installation
1. Position the unit over the screw holes you prepared earlier.
2. Remove the Top Cover by inserting a flat-tipped instrument (such as a panel removal tool or slotted
screwdriver) into the 2 notches of the unit (marked A). II removal is still not possible, bend the Top Cover and
remove the tabs on both sides. Refer to Fig. 1.
3. Fasten the unit down with the four self-tapping screws (M4 x 36, supplied).Refer to Fig. 2.
4. Attach the Top Cover.
B. Stack installation 01 two units
Second unit!
Deuxieme unite/
Segunda unidad
1.
2.
3.
4.
5.
Firstly, securely install one unit, as described in steps 1-3 of A above.
Attach the Stacking Plates (*) on the first unit with Machine Screws M3 x 7(*). Refer to Fig. 3.
Stack the second unit on top of the installed unit.
Attach the second unit with four Machine Screws M4 x 24 (*). Refer to Fig. 4.
Attach the Top Cover to the second unit.
C. Stack installation 01 three units
1.
2.
Firstly, securely install the first two units firmly as described in steps 1 to 4 of B above.
Next, install the third unit as described for the second unit in B above. With this, stack installation of the 3
units is completed.
* PDX-F6: Supplied.
PDX-F4: Supplied with the stack illstallation unit.
First unit!
premiere unite/
Primera unidad
Fig. 4
CONNECTIONS (Fig. 5 - Fig. 8)
Before making connections, be sure to turn the power off to all
audio components. Connect the yellow battery lead from the
amp directly to the positive (+) terminal of the vehicle's battery.
Do not connect this lead to the fuse block.
&
CAUTION
• Caution on connection terminals/parts
Keep electrically conductive objects away from the unit's
terminals/parts (power terminals, fuses, speaker output
terminals, RCA connectors, etc.). Doing so prevents a
possible short circuit and damage to the unit.
To prevent external noise from entering the audio system.
• Locate the unit and route the leads at least 10 cm (315/16") away from the car harness.
Keep the battery power leads as far away from other leads
as possible.
Connect the ground lead securely to a bare metal spot
(remove any paint or grease if necessary) of the car
chassis.
If you add an optional noise suppressor, connect it as
far away from the unit as possible. Your Alpine dealer
carries various noise suppressors, contact them for further
information.
Your Alpine dealer knows best about noise prevention
measures so consult your dealer for further information.
G
~~~~~~=l@
(1)
Fig.S
o
e
Wire/Conducteur/Conductor 7-10 mm (9/32" -3/8")
II\
Power Supply Terminal
Fuse (30A x 2)
USE ONLY THE CORRECT AMPERE RATING WHEN
REPLACING FUSES.
Failure to do so may result in fire or electric shock.
e
Wire Terminal/Borne de conducteur/
Terminal del conductor
Fig. 6
CD
Battery Connector/Connecleur de la
batterie/Conector de bataria
@ Hexagon screw (Large)Nis a six pans
(grande)fTornilio hexagonal (grande)
@ Hexagon screw (Small)Nis a six pans
(petite)fTornilio hexagonal (pequeiia)
@ Ground lead/Conducteur de mise a la
terre/Cable de tierra
®
Remote turn-on leadiConducleur de
mise sous tension teh~commandeel
Cable para encendido remola
®
Battery lead/Conducteur de la balteriet
Cable de la bataria
Fig. 7
CD
Speaker connector/Connecteur du haulparleur/Conector de allavoz
@ Hex screw hole/Orifice de la vis a six
panslAgujero de tornillo hexagonal
@ Negative lead terminal hole/Orifice de la
borne du conducteur negatif/Agujero del
terminal del conductor negativo
@ Speaker wire (negative)/Cable du
haut-parleur (negatif)/Cable del altavoz
(negativo)
®
®
Positive lead terminal hole/Orifice de la
borne du conducteur positif/Agujero del
terminal del conductor positivo
Speaker wire (positive)/Cable du
haut-parleur (positif)/Cable del altavoz
(positivo)
Speaker Output Terminals
Referring to "Cautions on speaker wire connections~. insert
the speaker wire into the speaker connector, which is then
inserted in the speaker output terminal.
Notes:
Fully ill~'ert the speaker COl/llector 10 al'oid poor connection. or
the wire comil/g loose due 10 vehide vibmtion. etc.
" The S!Jeaker connector can be connected eilher way. reganJfess
ofpoilirity indiclition.
• Do n01 connect speaker leads together or to chassis gl"Olll/d.
o
RCA Input Jacks
Connect these jacks to the line out leads on your head unit
using RCA extension cables (sold separately).
" Battery Connector
Make the Battery, Remote Turn-on and Ground lead
connections (as shown) to the Battery Connector. Insert Plug
to Terminal 1.
Cit
Battery Lead (Yellow, sold separately)
Be sure to add a a fuse as close as possible to the battery's
positive (+) terminal. This fuse will protect your vehicle's
electrical system in case of a short circuit. If you need to
extend this lead, only use 4AWG-6AWG/13 mm 2 - 21 mm 2 (the
wire gauge) for this connection.
8
Remote Turn-On Lead (BluelWhite. sold separately)
Connect this lead to the remote turn-on or power antenna
(positive trigger. (+) 12V only) lead of your head unit.
e
Ground Lead (Black, sold separately)
Connect this lead securely to a clean, bare metal spot on
the vehicle's chassis. Verify this point to be a true ground by
checking for continuity between that point and the negative
(-) terminal of the vehicle's battery. Ground all your audio
components to the same point on the chassis to prevent
ground loops.
• Cautions on Power Wire connections
The power wire cannot be connected until its end has been
stripped. Below explains how to connect the stripped end of
the power wire.
Notes:
Use the .mpplied he.wgol/ screws/or this cO/lnection. It i~' highly
recommended /hat lhi.~ be carried ow by the dealer.
Ifyuu make this cOf/Iln-tion yourself ensure the cOl/nection is
correct by following the i/lSlrucrion.~ below careflllly
Be silre to lise the .\'lIpplied hexllgmr screw~"for thi.l· cO/lflection.
For safety ret/SOIlS. COlll/ect the bauery wire last.
To !Jrevetlt disCOllllectioll of tile leads or droppil/g of the UIl;t, do
not ('(jrry Ihe u1Iit by the wire.
Be SlIre to mid afuse as dose as pos.\'ihle to the baltery. Make
sure to use aflue oj/he correN ra/ingfor the power wire.
1. Check the wire gauge.
Notes:
Only lue 4AWG·6AWGI13 mm"_21 mm" (the wire gallge)for
tllis cOlll/ection
• If in doubt. CO/lsult your (Iealer or Customer Supporr
reglln/ing correct wire gallge to use.
2. Strip back between 7-10 mm (9/32--3/8") of the power
wire's insulation to expose the conductor.
Notes:
If Ihe length of Ihe exposed com/uctor i.\· 100 shorr. a IJoor
COIlIlectioll lIIay occur cllusing operatiollfllill/!"C or SOI/IU/
illterruptiof!.
COl/versely. if the exposed conductor is too /0I1R. all
electrical ~'}lOrt-circ/(it /lWV OCCIII:
3. Loosen the unit's wire terminal hexagon screws, and insert
the exposed conductor into the terminal and finally tighten
to secure the connection.
4. Verify that the power wire is connected securely.
• Cautions on speaker wire connections
When you connect the speaker wire to the unit. you need to
insert the speaker wire into the speaker connector. Below
explains how to insert the speaker wire into the speaker
connector.
1. Check the wire gauge.
Notes:
Tlte ami/able S!Jellker wire glU/ge/or thi.~ IIl1it is ,sAIVG16AWGI8 mmI - 13 mm".
•
If in doubt. consult your l/eliler regardillK correct wire gallge
to /lse.
2. Strip back between 7-10 mm (9/32--3/8") of the wire's
insulation to expose the conductor.
Notes:
If the lel/glh of the exposed COfl{/uctor is too .~hor/. a poor
COl/nection may occur callsing operatiol/fllilure or sound
interruptioll.
Conwrse/y. iflhe eXlwsed l'onductor is too 101/g. WI
electrical ~'hort-circ/(it /lUlV OCCIlr.
3 Loosen fully the speaker plug's 2 hexagon screws using
the hexagon wrench (small. supplied).
4. Insert fully the exposed conductor of the speaker wire into
the wire terminal hole. Refer to Fig. 8.
Note:
l/lsert the spetlker wire observi/lg tile +1- illl/iullio/ls OIl the
speaker COllllec/or. Illsert the positive .~IJellker It-'ire into the
positive speaker termi/wl, and rhe negative .I'pulker wire into
the lIeglltive .\peaker termillal.
5. Tighten the 2 hexagon screws using the hexagon wrench
(small, supplied).
SWITCH SETTINGS (Fig. 9)
When making adjustments 10·15 below, remove the hexagon
screw (indicated by
in the illustration) using the hexagon
wrench (small. supplied), and then open the control cover.
*
o
CD, mCrossover Mode Selector Switch
OFF
C·)
a
HP
LP
b) Set to the "HP" position when the amplifier
is used to drive a tweeter/midrange system.
The frequencies below the crossover point
will be attenuated at12 dB/octave.
FILTER
0. G)lnput Gain Adjustment Control
Fig.
LP
a) Set to the "LP" position when the amplifier is
used to drive a subwoofer. The frequencies
above the crossover point will be attenuated
at 12 dB/octave.
FILTER
rn
---',,-
Power Indicator
Lights up when power is on.
Is off when power is off.
Set the PDX4F6/F4 input gain to the minimum (4V) position.
Using a dynamic CD as a source, increase the head unit
volume until the output distorts. Then, reduce the volume 1
step (or until the output is no longer distorted). Now, increase
the amplifier gain until the sound from the speakers becomes
distorted. Reduce the gain slightly so the sound is no longer
distorted to achieve the optimum gain setting.
*
OFF
HP
FILTER
lro
---', <OFF
HP
LP
c)
Set to the "OFF" position when the amplifier
will be used for driving full-range speakers.
The full frequency bandwidth will be
output to the speakers with no high or low
frequency attenuation.
m.
CD Crossover Frequency Adjustment Knob
Permits adjustment of the crossover frequency, by rotating the
knob to select any frequency between 30 to 400 Hz as the
crossover point.
m Status Indicator
Indication color
Blue
Red
Status
Solution
Amplifier circuit is normal.
Amplifier circuit is abnormal. An
electrical short has occurred, or
supply current is too high.
Turn off the power supply and eliminate the cause. Then turn on the
unit and verify that the indicator color has changed to blue. If it remains
red, turn off the unit and consult your dealer.
Ambient temperature is too high.
Decrease the vehicle's interior temperature to a normal level. The
indicator color changes to blue.
Power supply voltage is too high.
Use the correct power supply voltage. The indicator color changes to
blue.
CONNECTION CHECKLIST (Fig.1 0)
Please check your head unit for the conditions listed
below: (Fig. 10)
a. The head unit does not have a remote turn-on or power
antenna lead.
b. The head unit's power antenna lead is activated only when
the radio is on (turns off in the tape or CD Mode).
c. The head unit's power antenna lead is logic level output
(+) 5V, negative trigger (grounding type), or cannot sustain
(+) 12V when connected to other equipment in addition to
the vehicle's power antenna. If any of the above conditions
exist, the remote turn·on lead of your PDX-F6/F4 must
be connected to a switched power source (ignition) in the
vehicle. Be sure to use a 3A fuse as close as possible to
this ignition tap. Using this connection method, the PDXF6IF4 will turn on and stay on as long as the ignition switch
is on.
If this is objectionable, a SPST (Single Pole, Single Throw)
switCh, in addition to the 3A fuse mentioned above. may be
installed in-line on the PDX-F6/F4 turn-on lead. This switch will
then be used to turn on (and off) the PDX-F6/F4. Therefore,
the switch should be mounted so that is accessible by the
driver. Make sure the switch is turned off when the vehicle is
not running. Otherwise. the amplifier will remain on and drain
the battery.
CD BluelWhite
@ Power Antenna
W Remote Turn-On Lead
@ To other Alpine components' Remote Turn-On Leads
® SPST Switch (optional)
® Fuse (3A)
As close as possible to the vehicle's ignition tap
@ Ignition Source
o
®_-J~ ®
O--'-- _ _
®
®
®
W
@
Fig. 10
TYPICAL SYSTEM CONNECTIONS/CONNEXIONS TYPIQUES DU SYSTEME/CONEXIONES TIPICAS DEL SISTEMA
[English]
5 Speaker SystemlSysteme de 5 haut-parleurs/Sistema de 5 altavoces
f) Center Speaker (sold separately)
fD
$
@l
fJl
@l
~
f)
~
il
Qil
Front Left Speaker (sold separately)
Front Right Speaker (sold separately)
Rear Left Speaker (sold separately)
Rear Right Speaker (sold separately)
Subwoofer (sold separately)
RCA Extension Cable (sold separately)
Speaker Connector
Head Unit, etc.
V-Adaptor (sold separately)
Fiber Optic Cable (sold separately)
NOTES:
Please observe the following when using Fiber Optic Cable.
Do not coil the Fiber Optic Cable smaller than a 30 mm
(1-3/16') radius.
Do not place anything on top of the Fiber Optic Cable.
[Franlfais]
f) Haut-parleur central (vendu separement)
fD
$
Haut-parleur avant gauche (vendu separement)
Haut-parleur avant droit (vendu separement)
@l Haut-parleur arriere gauche (vendu separement)
fJl
@l
~
f)
il
~
Qil
Haut-parleur arriere droit (vendu separement)
Haut-parleur de sous-graves (vendu separement)
Cable d'extension RCA (vendu separement)
Connecteur du haut-parleur
Unite principale, etc.
Adaptateur en forme de «Y » (vendu separement)
Cable II libre optique (vendu separement)
REMARQUES:
Respecter les points suivants lors de I'utilisation d'un cable
II fibre optique.
Ne pas embobiner Ie cable II fibre optique avec un rayon
inferieur II 30 mm.
Ne rien placer sur Ie cable II fibre optique.
Rear Left I Arriere gauche I Trasero izquierdo
.
__
__
__ _ _-_..__ __e.
l: :----------------------------_._-----Rear Right / Arriere droit I Trasero derecho
------- _ --------------------- ----------------_ _ :t--:
l:,
!:,
:::, __
._~~o.n:_~e.ft.~~~~~~~:~:~~!.~~I~~!:r~_i!~~~e!~~
.._.
"--,_.,,~ "
~ !,~~~~,.~,----------------------'
Terminal de sortie arriere /
Terminal de salida trasero
[Espanol]
fD
$
Altavoz delantero izquierdo (vendido separadamente)
Altavoz delantero derecho (vendido separadamente)
(L)
I::::
+ +(R)
,.....,,-,'
i·-~~~~~~~~~~~~~~~~~~~~~~~~~[~~l~~~~~i
_
i! .
1__ ~
..__.:__
:: :: :: r------------------T-Y----T-------f
:;
;
;;
(L)'r"""1n'·
+ +(R)
rl~~~;O;:::::*~~~~~~IJ --: i i i
CD Head unit / Unite principale CD I Unidad principal de CD
~~r~~~:';;eO~~~~~~~~~~oofer
I (L)
~
r,T,(R)
•__
X
@l
~
f)
@l
il
Qil
Altavoz trasero derecho (vendido separadamente)
Altavoz de subgraves (vendido separadamente)
Prolongador electrico RCA (vendido separadamente)
Conector de altavoz
Unidad principal, etc.
Adaptador en forma de "Y" (vendido separadamente)
Cables de fibra 6ptica (vendido separadamente)
NOTAS:
Observe 10 siguiente cuando utilice cables de fibra 6ptica.
• No bobine cables de fibra 6ptica mas pequenos que un
radio de 30 mm.
No coloque nada encima del cable de libra 6ptica.
..
---------------f..-::::j-------------!
:
,
I
I
I
I
e
v
~--~_ ••~::::.-
~i2
, ' ,
I .. __ ,}
l.
@t
:~
!:
: ®Qe
I
,
I
I
';rJ
(R)
i.. __:
I
: l:~: l:~: ~:~: ~:~: ~:~: ~:~: ~:~: ~:~: ~:~:(p:~:D~:X:~"-'~·F~6~0~r~p~DJx· b-.-Fj-4)·--·~+~'e :,; 'i'2 :,;
@l Altavoz trasero izquierdo (vendido separadamente)
fJl
i:,
Terminal de sortie avant I
Terminal de salida delantero
Terminal de salida del subwoofer
f) Altavoz central (vendido separadamente)
.
Front Right I Avant droit I Delantero derecho
:
I
4
~.~~
'._--_ . -----------------------------------------------._---------------_.
(PDX-M12 or PDX-M6)
Fig. 11
_
3 Speaker SystemiSysteme de 3 haut·parleursiSistema de 3 altavoces
: ,----------------------------------------------
~
5.1 channel Speaker SystemiSysteme de haut·parleurs 5,1 cannauxlSistema de altavoces 5,1 canales
---------j
U
ni:~~:~::~: ~~~~~ ~~~~{ero
Front output terminal I
l
(l) i i (AI
~~~6ad unit I Unite prinCi~::e CD{~~nidad pri.n.C..i.p.a..I
~~r:~~r~eO~t~~ ~~~~;~Ofer
Ii!
Terminal de salida del subwoofer ~ ~ (A)
t..
;..
..
I
.'
I
liS Head unit (sold separately) I
Unite principale lIS (vendu separement) I
Unidad principal de lIS (vendido par separado)
,
if----il ::__ :·························1
Fiber
outpulterminaV
~~::::r=========~
Bornedigital
de sortie
de fibre numeriquel r:
Terminal de salida de libra digital
~
, :::.U••.. . . . . . .§:·~l:~~:B
'--------.
!
<Tuner Box!
BoWer du lunerl
Caja del sintonizador>
<Monitorl
Moniteurl
Monitor>
Rear left I Arriere gauche I Trasero izquierdo
•••••••••••••••••••• ,
! f-;:::::::::::::::~:::::::::::~------------!
r·-:_-_-_-_-_-_-_-_-_·_·_·_~·_T·_~¥~~~R2~~li);~r!~r§_~~02~i_~riii~~·§§!!::.~~~·_·_·_·_~·1
::
(PDX-F6 or PDX-F4)
! Frontlefl/Avantgauche/Delaoteroizquierdo
: :
: : :
.-------------~-----------
I
·B:
Rearoutputtermin~11 x!! Xr·~~~~~~~~!~~~~~~~~~I:i~!~~!P.~~~~;!i.~~;ii~i.~~~i····imnmoo " iii i K~
ImportantTips on Bridging an Amplifier/Conseils importants lors de la mise en pont d'un amplificateurl
Consejos importantes cuando conecte en puente un amplificador
Borne de sortie arnere I
Terminal de salida
trasero
a:.
a:.
~
~
.,
NOTE:
The following troubles may occur when it is
not properly connected.
1) One side input results in low output.
2) One side input will cause failure.
3) One side input may cause more healing
and thus result in the earlier operation of
overheating protection.
O
Proper connection!
Connexion
correcteiConexion
correcta
(A)
REMARQUE:
Les difficultes suivantes peuvent se produire
quand il n'est pas correctement relie.
1) Entree d'un saul cote causant una sortie
basse.
2) Entree d'un seul cote causant une
panne.
3) L:entree d'un seul cote peut causer
plus de chauffage et avoir ainsi comme
consequence I'operation plus tot de la
protection de surchautfe.
~
~
ee
x
NOTA:
Las dificultades siguientes pueden ocurrir
cuando no esta conectado correctamente.
1) Entrada de un solo lado ocasionando
una salida baja.
2) Entrada de un solo lado ocasionando
fallos.
3) La entrada de un solo lado puede
producir mas calor y dar lugar as! a
una operaci6n mas temprana de la
protecci6n de recalentamiento.
(l)
"
: : : ::
"
:
II> ·J...!_·~ffi,~
:
~
. .
of>
:
-, •
(PDX·F6 or PDX·F4)
Ai-NET/Fiber digital compatible audio processor (sold
separately) I Audio processeur numerique compatible Ai-NET
(vendu separement) I Processador audio digital compatible
Ai-NET (vendido por separado)
~~~;.o~~e;~r~~~~ut~~~~~~;erl{ll~x!'
! (AI
!
TermlOal de salida del subwoofer
~~~~~r~eu~~:i~e;~;~~;
Terminal de salida central
:
~"".--.--:::J
:,
i
•
,--.!:--.
~
~_
W
U i .~ll~
:
~
,
~
fJ) •
o
~
~:.~
- ! , ~~~
~w'1:1
'•• -'
.... 0,...
I •••
f~':::::::::::::::::;·1
l..EP8·ijijij~:.·E:::::!.::i:·:~+:~.::e:::::::·····;
0 or
~::
.$L1c
:~. ~
~e
\BYE
uuu.uu.. . uuu.uu~~~~~~~~~~~~~~~~~~~~~~~~~umo U.mmm.m.mfi·m.m. '
(PDX-F6
@l
@)
"
~"O
e
:
0,.:
i
i
l l(Ail) AA(A)
@l
Improper connection!
Connexion
incorrecte/Conexi6n
incorrecta
B
Borne de sortie avant I
Terminal de sahda
Flberdl~ltallnputtermlOall
delantero
Borne d entree de fibre
numenquelTermlOalde
• entrada de hbra digital
PDX-F4)
:
@)
,
:•••• :
:
~
@.e
l·t~·_~~~~~~~~·.~~~~~~~~~~~~~~~~~~~~~~~~~~~~~~~~~·.~~·.~~B.~~~~j~·Bnmmum.mm.
C!JC~.aYlll
(PDX-M12
or PDX-M6)
(l)
(A)
~EiB
ee
C!JC~.,,)"1ll
(l)
(Doe signal I Un signal I Una sanal)
~
(AI
~
e
C!JC~1ll
(ll
{One signal I Un signal I Una senal)
Fig. 12
Fig. 13
Verification Certificate
Date:
•
Model : PDX- F6
Load Impedance: 40hms
Test Voltage: 14.4V D.C.
Serial:
-
ACTUAL TEST MEASUREMENT
• TEST
• SPECIFICATION
Output Power{RMS)
(Per Channel)
• ACTUAL
150 W min. (Full-Range)
ALPINE ELECTRONICS, I C.
W
NO POSTAGE
NECESSARY
IF MAILED
INTHE
UNITED STATES
BUSINESS REPLY MAIL
FIRST-CLASS MAIL
PERMIT NO. 320
TORRANCE CA
POSTAGE WILL BE PAID BY ADDRESSEE
ATIENTION MARKETING SERVICES
ALPINE ELECTRONICS OF AMERICA INC
PO BOX 2859 .
TORRANCE CA 90509-9939
11,1"11,,,11111111111111,1,11,1,11,1,1111,1,,11,111
i
FOR USE IN USA, PLEASE FOLD HERE AND ENSURE THAT
AMERICAN ADDRESS FACES UP.
·dn S3:::>\f.::l SS31::100\f N\fIO\fN\f:::>
1\fH131::1nSN3 ON\f 31::13H mo.::l 3S\f31d "v'O\fN\f:::> NI 3sn l::lO.::l
1
1'111'1'11111'1111111111'111"""11111111'111'11'11
v::m:13l1\1V
~o
S3.lV.lS 03.llNn
V':J 3':JNVtltlO.l
ld A':Jtl3l1\1Vt18 gv~6~
S':JINOtl.l':J313 3NldlV
9L86-~0906
. . . . AI III. _1IM_!SIlI
mid JSNOcIJIII1I1W Alt08 SSJNISDB liNOllIN8UNI
-.
OZE OlIN 1II:J31Sl181
mllS_
11101
IImII
lllSUlll
1II1Sl10101
_
I III
muIll!J!rn
DI!II!I
~/iLPINE.
Customer Care Registration
~ For easy on-line registration, go to
Thank you for choosing Alpine! Please register your product with us so we can serve you better.
0
First name:
Last name:
_
Home address: "'St=ree"'t:::ad""d,:::es:::-s- - - - - - - - - - -
City
State/Provo
Zip Code
May we contact you at this address? 1.0Ves 2.0 No
------------==----=~
1.0Ves 2.0 No
May we contact you at this number?
J:
..oJ
<t
w
en
E-mail Address:
----------;=~----=;--
May we contact you bye-mail?
o Gender
1.0 Male
o Date of Birth Month:
o Marital Status
1.0Ves 2.0No
2.0 Female
Vear:
1.0 Single
=----
2.0 Married
OWhich ethnicity best describes yourself:
1.0 Caucasian
2.0 Hispanic
3. 0 African-American
4.0 Asian
5.0 Other
_
9. 0 Monitor Controller
10.0 Video Monitor
11 . 0 Navigation
12.0 Mobile Mayday
13. 0 Video Tape Player
14.0 Processor/Equalizer
15.0 Security
16.00ther
c)
1.0 I usually have more electronic equipment than my friends
2. 0 I am usually one of the first of my friends to buy the newest
electronic equipment
3.0 I usually wait until a product has been out for a while before
I purchase it
4.0 I am usually on of the first of my friends to know about the
newest car
5.0 I usually know more about cars than my friends
_
_
_
o Date of Purchase:
Month:
Vear:
o If navigation system, which monitor?
1.0 Alpine --> (Model No.)
-----------------------
2.0 Other --> (Brand Name)
o Purpose of buying this unit?
1.0 Addition
2.0 Replacement --> Previous brand replaced?
*
1.0 Factory installed
2.0 Alpine
3.00ther
Thank you for your cooperation! We value your privacy. This information will remain confidential with Alpine and its affiliates.
2.0 Two or more times
c)
0
Occupation
6. ~ EngineeringlTechnical
7.
Farming/Fishing
8.
Retired
9.
Student
10.0 Other
_
1.0 Executive/Managerial
2. ~ Secretarial/Clerical
3.
Sales
4.
General Labor
5.
Professional
en
m
»
rJ:
m
:J:I
m
o Household Income
1.0 Less than $30,000
2.0 $30,000 - $50,000
3.0 $50,000 - $70,000
4.0 $70,000 - $90,000
5.0 $90,000 - $110,000
6.0 Over $110,000
OType of vehicle in which this unit is installed.
_
o Have you purchased Alpine products before?
1.0 First time
_
OWhich of the following statements best describes you?
OSerial Number:
OYour highest level of education completed:
1. 0 High School Student
2.0 High School Graduate
3.02 Vr. Degree/Some College
4. 0 Completed 4 Vr. College
5.0 Completed Graduate School
(Brand Name)
o Model Number:
Phone number: (
w
a:
w
o When you purchased this Alpine unit, did you
compare it with other brands?
1. o vest
2.0No.
Product purchased
1.0 Cassette Player
2.0 CD Player
3.0 MD Player
4. 0 DVD Player
5. 0 CD Changer
6.0 Amplifier
7.0 Speaker
8. 0 Subwoofer
Make:
Purchased Vear:
Model:
_
_
Model Vear:
_
o How was this vehicle purchased?
1. 0 Bought
Customer Care Registration is for Product registration.
Failure to complete and return this card does not diminish your warranty rights.
2. 0 Leased
PART NO. 68P04190K17-A
M3544084010
~/iLPINE®
GARANTIE LlMITEE
a
Fideles leur engagement de ne fournir que des produits de qualite, ALPINE ELECTRONIOUE DE L'AMERIOUE, INC. et
ALPINE ELECTRONIOUE DU CANADA, INC. (Alpine) sont heureuses de vous offrir cette garantie. Nous vous suggerons de Ie
lire attentivement et en entier. Si vous avez la moindre question, veuillez contacter I'un de nos concessionnaires ou appeler
directement Alpine aux numeros listes ci-dessous.
.PRODUITS COUVERTS PAR LA GARANTIE
Cette garantie couvre les produits audio de voiture et les
accessoires connexes ("Ie produit"). Elle ne couvre les
produits que dans Ie pays ou ils ont ete achetes.
eDUREE DE LA GARANTIE
Cette garantie est en vigueur pendant un an
du premier achat du client.
a partir de la date
®
Vous devez donner une description detaillee des
problemes qui sont a I'origine de votre demande de
reparation.
® Vous devez joindre la preuve de votre achat du produit.
@ Vous devez emballer soigneusement Ie produit pour eviter
tout dommage durant son transport. Pour eviter la perte
de I'envoi, il est conseille de choisir un transporteur qui
propose un service de suivi des envois.
ePERSONNES PROTEGEES PAR LA GARANTIE
eLiMITATION DES GARANTIES TACITES
Seul I'acheteur original du produit, s'il resisde aux Etats-Unis,
Porto Rico ou au Canada, peut se prevaloir de la garantie.
LA DUREE DE TOUTES LES GARANTIES TACITES, Y
COMPRIS LA GARANTIE D'ADAPTATION A L'UTILISATION
ET LA GARANTIE DE OUALITE LOYALE ET MARCHANDE,
EST L1MITEE ACELLE DE LA GARANTIE EXPRESSE
DETERMINEE CI-DESSUS. PERSONNE N'EST AUTORISE
AENGAGER AUTREMENT LA RESPONSABILITE D'ALPINE
EN VERTU DE LA VENTE D'UN PRODUIT.
a
.CE QUI EST COUVERT
Cette garantie couvre tous les defauts de materiaux et de
fabrication (pieces et main d'oouvre) du produit.
• CE QUI N'EST PAS COUVERT
Cette garantie ne couvre pas ce qui suit:
Les dommages survenus durant Ie transport des produits
renvoyes a Alpine pour etre repares (Ies reclamations
doivent etre adressees au transporteur);
@ Les degats provoques par un accident ou une mauvaise
utilisation, y compris des bobines acoustiques grillees
suite a une surexcitation des enceintes (augmentation
du niveau de I'amplificateur jusqu'a atteindre un effet de
distorsion ou d'ecretage), une defaillance mecanique
des enceintes (perforations, dechirures ou fentes),
panneaux LCD fissures ou endommages, disques durs
endommages ou ayant subi une chute.
® Tout degat provoque par negligence, usage inapproprie,
mauvaise utilisation ou par Ie non-respect des
instructions indiquees dans Ie manuel de I'utilisateur.
@ Les dommages dus a la force majeure, notamment aux
tremblements de terre, au feu, aux inondations, aux
tempetes ou aux autres cataclysmes natureIs;
Les frais ou les depenses relatifs a I'enlevement ou a la
reinstallation du produit;
rID Les services rendus par une personne, physique ou
morale non autorisee;
® Les produits dont Ie numero de serie a ete efface, modifie
ou retire;
(j) Les produits qui ont ete adaptes ou modifies sans Ie
consentement d'Alpine;
® Les produits qui ne sont pas distribues par Alpine aux
Etats-Unis, a Porto Rico ou au Canada;
® Les produits qui n'ont pas ete achetes par I'entremise d'un
concessionnaire Alpine autorise;
CD
.COMMENT SE PREVALOIR DE LA GARANTIE
CD
II vous faut remettre Ie produit necessitant des reparations
a un centre de service autorise Alpine ou a Alpine meme et
en assumer les frais de transport. Alpine a Ie choix entre
reparer Ie produit ou Ie remplacer par un produit neuf ou
revise, Ie tout sans frais pour vous. Si les reparations sont
couvertes par la garantie et si Ie produit a ete envoye a un
centre de service Alpine ou a Alpine, Ie paiement des frais
de reexpedition du produit incombe Alpine.
.EXCLUSIONS DE LA GARANTIE
ALPINE STIPULE EXPRESSEMENT OU'ELLE N'EST PAS
RESPONSABLE DES DOMMAGES-INTERETS ET
DOMMAGES INDIRECTS PROVOOUES PAR LE PRODUIT.
LES DOMMAGES-INTERETS SONT LES FRAIS DE
TRANSPORT DU PRODUIT VERS UN CENTRE DE
SERVICE ALPINE, LA PERTE DE TEMPS DE L'ACHETEUR
ORIGINAL, LA PERTE D'UTILISATION DU PRODUIT, LES
BILLETS D'AUTOBUS, LA LOCATION DE VOITURES ET
TOUS LES AUTRES FRAIS LIES A LA GARDE DU
PRODUIT.
LES DOMMAGES INDIRECTS SONT LES FRAIS DE
REPARATION OU DE REMPLACEMENT D'AUTRES BIENS
ENDOMMAGES SUITE AU MAUVAIS FONCTIONNEMENT
DU PRODUIT.
LES RECOURS PREVUS PAR LES PRESENTES
EXCLUENT ET REMPLACENT TOUTE AUTRE FORME DE
RECOURS.
ellEN ENTRE LA GARANTIE ET LA LOI
La garantie vous donne des droits specifiques, mais vous
pouvez aussi jouir d'autres droits, qui varient d'un etat ou
d'une province a I'autre. En outre, certains etats et certaines
provinces interdisent de limiter la duree des garanties tacites
ou d'exclure les dommages accessoires ou indirects. Dans ce
cas, les limites et les exclusions de la garantie peuvent ne pas
s'appliquer vous.
a
eCLAUSE APPLICABLE AU CANADA SEULEMENT
Pour que la garantie soit valable, il faut qu'un centre
d'installation autorise ait installe Ie systeme audio pour I'auto
dans votre vehicule et qu'il ait ensuite appose son cachet sur
la garantie.
eNUMEROS D'APPEL DU SERVICE
A. LA CLIENTELE
Si vous avez besoin de nos services, veuillez appeler Alpine
aux numeros ci-dessous pour Ie centre de service autorise
Alpine Ie plus proche.
AUDIO DE VOITURE
NAVIGATION
1-800-ALPINE-1 (1-800-257-4631)
1-888-NAV-HELP (1-888-628-4357)
Ou visitez notre site Web
a I'adresse http://www.alpine-usa.com
ALPINE ELECTRONIOUE DE L'AMERIOUE, INC., 19145 Gramercy Place, Torrance, California 90501, U.S.A.
ALPINE ELECTRONIOUE DU CANADA, INC., 777 Supertest Road, Toronto, Ontario M3J 2M9, Canada
N'envoyez aucun produit aces adresses.
Appelez notre numero gratuit ou visitez notre site Web si vous recherchez un centre de service.
/ffff/ILPINE®
LIMITED WARRANTY
ALPINE ELECTRONICS OF AMERICA, INC. AND ALPINE OF CANADA INC. ("Alpine"), are dedicated to quality
craftsmanship and are pleased to offer this Warranty. We suggest that you read it thoroughly. Should you have any
questions, please contact your Dealer or contact Alpine at one of the telephone numbers listed below.
.PRODUCTS COVERED:
This Warranty covers Car Audio Products and Related
Accessories ("the product"). Products purchased in the
Canada are covered only in the Canada. Products
purchased in the U.S.A. are covered only in the U.S.A.
@ You must supply proof of your purchase of the product.
@ You must package the product securely to avoid
damage during shipment. To prevent lost packages it is
recommended to use a carrier that provides a tracking
service.
.LENGTH OF WARRANTY:
.HOW WE LIMIT IMPLIED WARRANTIES:
This Warranty is in effect for one year from the date of the
first consumer purchase.
This Warranty only covers the original purchaser of the
product, who must reside in the United States, Puerto Rico
or Canada.
ANY IMPLIED WARRANTIES INCLUDING FITNESS FOR
USE AND MERCHANTABILITY ARE LIMITED IN
DURATION TO THE PERIOD OF THE EXPRESS
WARRANTY SET FORTH ABOVE AND NO PERSON IS
AUTHORIZED TO ASSUME FOR ALPINE ANY OTHER
LIABILITY IN CONNECTION WITH THE SALE OF THE
PRODUCT.
• WHAT IS COVERED:
.HOW WE EXCLUDE CERTAIN DAMAGES:
This Warranty covers defects in materials or workmanship
(parts and labor) in the product.
ALPINE EXPRESSLY DISCLAIMS LIABILITY FOR
INCIDENTAL AND CONSEQUENTIAL DAMAGES
CAUSED BY THE PRODUCT. THE TERM "INCIDENTAL
DAMAGES" REFERS TO EXPENSES OF
TRANSPORTING THE PRODUCT TO THE ALPINE
SERVICE CENTER, LOSS OF THE ORIGINAL
PURCHASER'S TIME, LOSS OF THE USE OF THE
PRODUCT, BUS FARES, CAR RENTALS OR OTHERS
COSTS RELATING TO THE CARE AND CUSTODY OF
THE PRODUCT. THE TERM "CONSEQUENTIAL
DAMAGES" REFERS TO THE COST OF REPAIRING OR
REPLACING OTHER PROPERTY WHICH IS DAMAGED
WHEN THIS PRODUCT DOES NOT WORK PROPERLY.
THE REMEDIES PROVIDED UNDER THIS WARRANTY
ARE EXCLUSIVE AND IN LIEU OF ALL OTHERS.
.WHO IS COVERED:
.WHAT IS NOT COVERED:
This Warranty does not cover the following:
CD Damage occurring during shipment of the product to
Alpine for repair (claims must be presented to the
carrier).
® Damage caused by accident or abuse, including burned
voice coils caused by over-driving the speaker (amplifier
level is turned up and driven into distortion or clipping).
Speaker mechanical failure (e.g. punctures, tears or
rips). Cracked or damaged LCD panels. Dropped or
damaged hard drives.
@ Damage caused by negligence, misuse, improper
operation or failure to follow instructions contained in the
Owner's manual.
@ Damage caused by act of God, including without
limitation, earthquake, fire, flood, storms or other acts of
nature.
Any cost or expense related to the removal or
reinstallation of the product.
® Service performed by an unauthorized person, company
or association.
® Any product which has the serial number defaced,
altered or removed.
(J) Any product which has been adjusted, altered or
modified without Alpine's consent.
® Any product not distributed by Alpine within the United
States, Puerto Rico or Canada.
® Any product not purchased from an Authorized Alpine
Dealer.
.HOW STATE/PROVINCIAL LAW RELATES TO THE
WARRANTY:
This Warranty gives you specific legal rights, and you may
also have other rights which vary from state to state and
province to province. In addition, some states/provinces do
not allow limitations on how long an implied warranty lasts,
and some do not allow the exclusion or limitation of
incidental or consequential damages. Accordingly,
limitations as to these matters contained herein may not
apply to you.
.IN CANADA ONLY:
This Warranty is not valid unless your Alpine car audio
product has been installed in your vehicle by an Authorized
Installation Center, and this warranty stamped upon
installation by the installation center.
.HOW TO OBTAIN WARRANTY SERVICE:
.HOW TO CONTACT CUSTOMER SERVICE:
CD You are responsible for delivery of the product to an
Should the product require service, please call the following
number for your nearest Authorized Alpine Service Center.
®
Authorized Alpine Service Center or Alpine for repair
and for payment of any initial shipping charges. Alpine
will, at its option, repair or replace the product with a
new or reconditioned product without charge. If the
repairs are covered by the warranty, and if the product
was shipped to an Authorized Alpine Service Center or
Alpine, Alpine will pay the return shipping charges.
You should provide a detailed description of the
problem(s) for which service is required.
CAR AUDIO 1-800-ALPINE-1 (1-800-257-4631)
NAVIGATION 1-888-NAV-HELP (1-888-628-4357)
Or visit our website at; http://www.alpine-usa.com
ALPINE ELECTRONICS OF AMERICA, INC., 19145 Gramercy Place, Torrance, California 90501, U.S.A.
ALPINE ELECTRONICS OF CANADA, INC., 777 Supertest Road, Toronto, Ontario M3J 2M9, Canada
Do not send products to these addresses.
Call the toll free telephone number or visit the website to locate a service center.
68-00493Z72-A (Y)
M3544091010