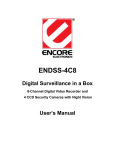
1
ENDSS-R4D8 Digital Surveillance in a Box 8-Channel Digital Video Recorder and 4 CCD Security Cameras with Night Vision User’s Manual Warnings and Safety Precautions FCC STATEMENT This equipment has been tested and found to comply with the limits for a Class A digital device, pursuant to Part 15 of the FCC Rules. These limits are designed to provide reasonable protection against harmful interference when the equipment is operated in a commercial environment. This equipment generates, uses, and can radiate radio frequency energy and, if not installed and used in accordance with the instruction manual, may cause harmful interference to radio communications. Operation of this equipment in a residential area is likely to cause harmful interference in which case the user will be required to correct the interference at his own expense. CE This product is marked with the CE symbol and indicates compliance with all applicable directives. WEEE DIRECTIVE & PRODUCT DISPOSAL At the end of its serviceable life, this product should not be treated as household or general waste. It should be handed over to the applicable collection point for the recycling of electrical and electronic equipment, or returned to the supplier for disposal. ii IMPORTANT GUIDELINES User Manual – After unpacking this product, read the owner‟s manual carefully, and follow all the operating procedures and other instructions. Power Source – This product should be operated only from the type of power source indicated on the label. If unsure of the type of power supply available in your home, office, or the area where you intend to use the product, consult product dealer or local power company. Ventilation – Slots and openings in the cabinet are provided for ventilation. They ensure reliable operation of the product and protect it from overheating. These openings must not be blocked or covered. The product should not be placed in a built-in installation such as a bookcase or rack unless proper ventilation is provided or the instructions have been adhered to. Heat – The product should be situated away from heat sources such as radiators, heat registers, stoves, or other products that produce heat. The general operating temperature should be 5ºC ~45ºC. Water and Moisture – Do not use this product near water. Do not exceed the humidity specifications for the product as detailed in this manual. Cleaning – Unplug this product from the wall outlet before cleaning. Do not use liquid cleaners or aerosol cleaners. Use a damp cloth. Power Cord Protection – Power-supply cords should not be routed so that they are likely to be walked on or pinched by items placed against them, paying particular attention to cords at plugs, receptacles, and the point where they exit the product. Overloading – Do not overload wall outlets, extension cords, or integral convenience receptacles as this can result in a risk of fire or electrical shock. Lightning – For added protection for this product during storm, or when it is left unattended and unused for long periods of time, unplug it from the wall outlet. This will prevent damage to the product due to lightning and power line surges. Accessories – Do not place this product on an unstable cart, stand, tripod, bracket, or table. The product may be irreparably damaged if it falls off and may cause serious personal injury. Disc Tray – Keep fingers well clear of the disc tray as it is closing. Neglecting to do so may cause serious personal injury. Burden – Do not place a heavy object on top of or step on the product. The object may be irreparably damaged if it falls off and may cause serious personal injury. Disc – Do not use a cracked, deformed, or repaired disc. These may cause serious personal injury (such as cuts and punctures) and product malfunction. iii Damage Requiring Service – Unplug the unit from the outlet and refer servicing to qualified service personnel under the following conditions: » When the power-supply cord or plug is damaged. » If liquid has been spilled, or objects have fallen into the unit. » If the unit has been exposed to rain or water. » If the unit does not operate normally by following the operating instructions. Adjust only those controls that are covered by the operating instructions as an improper adjustment of other controls may result in damage and will often require extensive work by a qualified technician to restore the unit to its normal operation. » If the unit has been dropped or the enclosure has been damaged. » When the unit exhibits a distinct change in performance - this indicates a need for service. Servicing – Do not attempt to service this product. Opening or removing covers may expose the user to dangerous voltage or other hazards. Refer all servicing to qualified personnel. Safety Check – Upon completion of any service or repairs to this unit, ask the service technician to perform safety checks to determine that the unit is in proper operating condition. iv CAUTION CAUTION RISK OF ELECTRIC SHOCK DO NOT OPEN CAUTION: TO REDUCE THE RISK OF ELECTRIC SHOCK. DO NOT REMOVE COVER (OR BACK). NO USER-SERVICEABLE PARTS INSIDE. REFER SERVICING TO QUALIFIED SERVICE PERSONNEL. Explanation of Graphical Symbols The lightning flash with arrowhead symbol, within an equilateral triangle, is intended to alert the user to the presence of insinuated "dangerous voltage" within the products enclosure that may be of sufficient magnitude to constitute a risk of electric shock to persons. The exclamation point within an equilateral rhombus is intended to alert the user to the presence of important operating and maintenance (servicing) instruction in the literature accompanying the product. USERS OF THE SYSTEM ARE RESPONSIBLE FOR CHECKING AND COMPLYING WITH ALL FEDERAL, STATE, AND LOCAL LAWS AND STATUTES COIPCERNING THE MONITORING AND RECORDING OF VIDEO AND AUDIO SIGNALS. PANACOM SHALL NOT BE HELD RESPONSIBLE FOR THE USE OF THIS SYSTEM IN VIOLATION OF CURRENT LAWS AND STATUTES. v Table of Contents Warnings and Safety Precautions .......................................................................ii Table of Contents ..................................................................................................vi 1 Overview .............................................................................................................1 1.1 Front Panel Control .................................................................................................. 2 1.2 Rear Panel Connector .............................................................................................. 3 1.3 Remote Control ........................................................................................................ 4 2 Installation ..........................................................................................................5 2.1 Hard Disk Installation ............................................................................................... 6 2.2 Sensor and RS485 Connector Installation ............................................................... 9 2.3 TV System PAL/NTSC Video Format Detection ...................................................... 10 2.4 Connection Guide .................................................................................................... 10 2.4.1 Brief Description for Connecting Devices ......................................................... 11 3 Getting Started ...................................................................................................13 3.1 Turning on the DVR Box .......................................................................................... 14 3.2 Home Screen ........................................................................................................... 15 3.2.1 State Bar Information ........................................................................................ 15 3.2.2 Control Bar Information .................................................................................... 16 3.2.3 Drag and Drop Channel Swap .......................................................................... 17 3.3 Main Menu ............................................................................................................... 18 3.4 Channel Setup ......................................................................................................... 19 3.4.1 Channel Number .............................................................................................. 19 3.4.2 Basic Settings ................................................................................................... 20 3.4.3 Standard Color Adjustment .............................................................................. 23 3.4.4 Special Color Adjustment ................................................................................. 24 3.5 Record Setup ........................................................................................................... 25 3.5.1 Auto Record ...................................................................................................... 25 3.5.2 Activate Performance Gains ............................................................................. 25 3.5.3 Record Schedule .............................................................................................. 25 3.5.4 Total Power ...................................................................................................... 29 3.5.5 Auto Settings Adjustment ................................................................................. 30 3.5.6 Channel Recording Setup ................................................................................ 30 3.6 Detector Setup ......................................................................................................... 32 3.6.1 Channel Number .............................................................................................. 32 3.6.2 Alarm Setup ...................................................................................................... 32 3.6.3 Motion Setup .................................................................................................... 34 3.6.4 Sensor Setup .................................................................................................... 37 vi 3.7 Authentication Setup ................................................................................................ 39 3.8 System Setup ........................................................................................................... 41 3.8.1 Language Selection .......................................................................................... 42 3.8.2 View Setup ....................................................................................................... 42 3.8.3 Date/Time Setup ............................................................................................... 46 3.8.4 Sequence Setup ............................................................................................... 49 3.8.5 Button Beep Setup ........................................................................................... 50 3.8.6 Input Device Setup ........................................................................................... 50 3.8.7 Auto Exit Menu ................................................................................................. 51 3.9 Hardware Setup ....................................................................................................... 51 3.9.1 Query Error Message ....................................................................................... 52 3.9.2 Hard Drive Setup .............................................................................................. 52 3.9.3 Network Setup .................................................................................................. 54 3.9.4 Keyboard / PTZ Setup ...................................................................................... 57 3.9.5 Screen Setup .................................................................................................... 61 3.9.6 Audio Setup ...................................................................................................... 63 3.10 Utility/Tools ............................................................................................................. 64 3.10.1 Format USB Disk ............................................................................................ 64 3.10.2 Firmware Update ............................................................................................ 65 3.10.3 Environmental Setting .................................................................................... 67 3.11 Exit Main Menu....................................................................................................... 69 3.11.1 Exit & Save Changes ...................................................................................... 70 3.11.2 Exit & Discard Changes.................................................................................. 70 4 Playback and Data Backup ................................................................................71 4.1 Calendar Menu ......................................................................................................... 72 4.2 Play Menu ................................................................................................................ 74 4.3 Event Search ............................................................................................................ 77 4.4 Data Backup ............................................................................................................. 79 5 PTZ Control .........................................................................................................81 5.1 Pan/Tilt/Zoom Control .............................................................................................. 82 6 System Information ............................................................................................86 6.1 Record Information ................................................................................................... 87 6.2 Hard Drive Information ............................................................................................. 88 6.3 Network Information ................................................................................................. 89 7 LAN & Online Viewing Setup .............................................................................90 7.1 PC Connection through Local Area Network............................................................ 91 7.2 DynDNS Service Overview ...................................................................................... 93 7.2.1 Register to the DynDNS Services .................................................................... 93 7.2.2 Create DynDNS Account .................................................................................. 94 vii 7.2.3 Login and Host Service .................................................................................... 96 7.2.4 Setup Router .................................................................................................... 99 7.2.5 Setup DynDNS Setting on DVR ....................................................................... 99 8 PC Viewer & Web Browser Viewer ....................................................................100 8.1 PCViewer Installation ............................................................................................... 101 8.1.1 Overview ........................................................................................................... 102 8.1.2 Connect PC Client to DVR ............................................................................... 102 8.1.3 Switching the Channel Displays ....................................................................... 104 8.1.4 Pause the Viewing ............................................................................................ 106 8.1.5 Capture Still Image ........................................................................................... 107 8.1.6 PTZ Control ...................................................................................................... 107 8.1.7 Remote Playback ............................................................................................. 109 8.1.8 Remote DVR Configuration .............................................................................. 114 8.2 Web Browser Viewer ................................................................................................ 115 8.2.1 Switching the Channel Displays ....................................................................... 118 8.2.2 Web Browser Viewer Operation ....................................................................... 118 9 SecuViewer For iPhones ...................................................................................119 9.1 Install SecuViewer for iPhones................................................................................. 120 9.2 SecuViewer Interface Overview ............................................................................... 121 9.3 Connecting to the Surveillance System.................................................................... 122 viii ENDSS-R4D8 Chapter 1 1 Overview 1 ENDSS-4C8 1.1 Front Panel Control ENDSS-R4D8 1 2 3 4 5 6 7 14 8 No 2 9 Button / Name 10 11 12 13 Function 1 USB Connects the USB 2.0 device (Support the pen drive and card reader) for firmware upgrading or video backup 2 REW Rewind through video 3 II PLAY Resume video playback 4 FF Fast forward through video 5 STOP Stop playback or enter the PTZ control menu 6 ● REC Start or stop recording/backup 7 Power LED (green) Indicates DVR is powered on 8 MODE Select screen display mode 9 MENU Enter the menu or go back to the previous menu 10 UP Moves up through list or changes selected values 11 DOWN Moves up through list or changes selected values 12 SELECT/ENTER Changes values in the menu or enters into a function 13 Hard disk active (red) Indicates hard drive is in use 14 IR Receiver (red) Remote control signal receiver ENDSS-R4D8 1.2 Rear Panel Connector The rear panel of the DVR contains all of the connectors you will be using. 1 2 3 7 4 8 9 5 10 6 11 No Name / Label Function 1 VIDEO-OUT Video output port for the security monitor 2 VIDEO-IN RJ45 connectors for video input: CH1~CH4 (for 4Ch), CH1~CH8 (for 8Ch) 3 IR_ext IR extender connector (optional) 4 VGA-OUT VGA output (DB-9) port for the LCD monitor 5 SENSOR Sensor ports (marked “1~4”) and a common ground (marked “G”) 6 ALARM Alarm port (Alarm 1+ and Alarm 1-) 7 AUDIO-IN and -OUT Connectors of audio input and output 8 LAN RJ45 port for the network cable 9 MOUSE Mouse port (for USB compatible mouse only) 10 DC IN 12V DC power port for the power adaptor 11 RS-485 RS-485 connector (typically for PTZ-capable cameras and keyboards) 3 ENDSS-4C8 1.3 Remote Control No 4 Button / Name Function in DVR Mode 1 REC Start or stop recording / backup. 2 DVR Switch to DVR mode 3 PTZ Switch to PTZ mode 4 REW Rewind through video 5 STOP Stop playback or backup 6 II PAUSE Pause recording of playback 7 FF Fast forward through video 8 ► PLAY Start video playback 9 MENU Enter a menu or exit 10 ▲(UP) (LEFT) 11 (Enter/Select) Change and confirm values 12 AUTO Start automatic screen view rotation 13 MODE ▼(DOWN) ►(RIGHT) Move through lists or change the settings of choices Changes to split-screen mode 14 - ZOOM OUT (Not available in DVR mode) 15 + ZOOM IN (Not available in DVR mode) 16 1,2,----8 (Channels) Selects the channel to view in full screen ENDSS-R4D8 Chapter 2 2 Installation 5 ENDSS-4C8 WARNING Make sure there is no power connection before starting installation! 2.1 Hard Disk Installation The type of DVR contains one internal hard drive bracket for installing one SATA hard drive. Follow these steps to install a SATA hard disk drive Step 1 Unscrew the two top screws on both sides of the DVR box housing. There are four screws to remove in this step. Step 2 Slide the top cover slightly backwards and then lift the cover up. Top Cover 6 ENDSS-R4D8 Step 3 Remove 3 screws to take out the hard drive bracket. Step 4 Install the hard drive to the bracket. Four screw holes on both sides should lined up together then screw-in four screws on both sides Hard Drive No Slot Side 7 ENDSS-4C8 Step 5 Attach the hard drive‟s SATA data cable from hard drive to the main board‟s J16 or J17 jumper connector. PJ2 connector Step 6 8 J16 / J17 connector Screw the bracket back to its original position uwing three screws. ENDSS-R4D8 Step 7 Slide top cover back into place. Secure with four screws on the both sides. Top Cover 2.2 Sensor and RS485 Connector Installation The images below show how to connect connectors guided by the red arrows: 9 ENDSS-4C8 Fix the screws on either side Fix the screws on either side 2.3 TV System PAL/NTSC Video Format Detection The DVR can automatically detect the TV system video format either NTSC or PAL after the cameras have been properly installed and the DVR has been powered on. Please refer the section “Hardware Setup” to setup the NTSC/PAL auto detection. 2.4 Connection Guide Make sure to connect all the peripheral devices properly before switching the DVR power on. If you forgot to connect the mouse and the DVR is turned on already, make sure to turn the power off, connect the mouse before turning the DVR power back on. 8-Channel CAT5 Cabling DVR Security Camera up to 8 Security Monitor Audio Devices (Microphone/Speaker) 10 CameraPowe r Ada Network Cable LCD Monitor Mouse Sensors Power Adaptor Alarm PTZ Camera ENDSS-R4D8 2.4.1 Brief Description for Connecting Devices Connecting the Security Cameras Connect each security cameras to the DVR video inputs RJ-45 connector labeled CH1 to CH8 using CAT5 Ethernet cable. This connection provides the DVR with the surveillance video input. Connect the security monitoring device Connect the security monitor to the video output labeled as “VIDEO-OUT” on the DVR. The connection provides a video transmission path from the DVR to the security monitor. Connect the LAN Network Cable to connect to your home or office LAN Connect the Ethernet network cable to the LAN port labeled as “ ” on the DVR. This connects the DVR to your office or home network computers. Connect the USB mouse Connect the USB mouse to the mouse port labeled as “ ” on the DVR. This port supports a USB mouse ONLY, no other USB devices will work in this port. Connect the LCD Monitor Connect the LCD monitor to the VGA output labeled as “VGA-OUT” on the DVR. The DVR will transmit the video signal to the LCD monitor through this connection. Connect the Sensors Connect the sensor wires to the sensor slots labeled as “SENSOR” and numbered 1~4 with a common ground “G” on the DVR. This device often used with a security camera at the monitoring space. Connect the Alarm Connect the alarm indicator to the alarm slots labeled as “ALARM 1+” and “ALARM 1-” on the DVR. This supports alarm that can be triggered when an event has occurred. Connect the PTZ Cameras Connect the communication wiring for the PTZ camera to the RS-485 pins labeled as “485+” and “485-” on the DVR. Note that PTZ-capable cameras still need to be connected to a channel. Connect the Audio Devices 11 ENDSS-4C8 Connect audio peripherals to the ports labeled as “AUDIO-IN” and “AUDIO-OUT” on the DVR. These support devices for capturing or broadcasting sound. Note: Only on CH1 supports audio recording through the audio jack on the video Balun. Connect the IR Extender (Optional) Connect the IR extender cable to the port labeled as “IR_ext” on the DVR. The cable is an optional device which serves as an IR controller extension. Connect the Power Adaptor Connect the Power Adaptor to the DC jack labeled as “DC-IN 12V” on the DVR. Connect the power adaptor after all devices have been properly installed. 12 Chapter 3 3 Getting Started 13 ENDSS-4C8 3.1 Turning on the DVR Box The DVR is ready for operations after all peripherals such as cameras, mouse, etc have been properly connected. Connect the power adaptors to turn the DVR on. The DVR may take a few second to startup. When a new hard drive is detected, it will ask whether or not you would like to format it. Refer to the conditions stated below to determine which course of action to take. Format the hard drive when: » It is the initial installation of the hard drive (1st time to install the HDD in the DVR). Do not format the hard drive when: » The hard drive has already been formatted by the DVR and not formatted by other devices. Release Date: May 25 2010 17:33:16 Video: PAL Hard Drive: WDC WD7500AYPS-01ZKB Rec:02.0 715403MB…Empty Disk DVR needs to format HDD, All data will be lost… Format / Cancel? The Home Screen is shown after the system is ready. 14 ENDSS-R4D8 3.2 Home Screen The Home Screen is the starting point for many functions and applications. It allows you to setup, access, and control the surveillance video data. You may think of this screen as a vantage point to give you instant access to video information and DVR functions. 1% 2010/06/06 15:37:47 3.2.1 State Bar Information The State Bar displays the status and notification icons of the surveillance system. 1% 2010/06/06 15:37:47 15 ENDSS-4C8 Icon XX% 2010/06/03 15:37:47 Function Camera is working Icon Function No signal from camera Recording Recording Stop Force Record Start Network connected USB disk connected Network disconnected Hard drive overwrite enabled Hard drive status Channel display rotation enabled Percentage of hard drive already used Current date Current time 3.2.2 Control Bar Information The Control Bar may be used to switch displays, open and setup channels and their related applications. Icon Function Icon Function Channel Views Load default channel display location 4-channel split view 1+7 Split View 9-channel split view Auto channel rotation Main Menu Enter main menu Recording Start recording Stop recording Start force recording Stop force recording Video Search and Playback Playback menu Calendar Menu Event search Pan/Tilt/Zoom control screen System Information Recording information Network information 16 Hard drive information ENDSS-R4D8 3.2.3 Drag and Drop Channel Swap The Drag and Drop Channel Swap enables swap the channel displays using your mouse. No need to interchange the BNC connectors. This function is also applicable for all kinds of Split View. Drag and Drop Channel Reposition 1% 2010/06/06 15:37:47 1% 2010/06/06 15:37:47 1% 2010/06/06 15:37:47 » Move the cursor onto the channelsquare you would like to shift. » Press left-button of the mouse (a hand icon will appear) and drag the channelsquare to the new position. » Release the mouse button to drop the channel-square into new position. » System will keep the new channel display arrangement even if you reboot the DVR system. Load Default Location Press the icon “ ” to reset channel displays to their default locations. 17 ENDSS-4C8 3.3 Main Menu Logging In for the First Time Press or the icon and enter the password to get into the Main Menu. Default password is “123456”. Enter Main Menu Password [ _ _ _ _ _ _] ▲ □0 □1 □2 □3 □4 □5 □6 □7 □8 □9 Press to exit the password dialog. Main Menu Guideline MAIN MENU Icon 18 Name Function DVR Power Supply To reboot or shutdown the DVR system Channel Setup Set the channel display, record, channel name and video color adjustment. Record Setup Set the record schedule, video performance and quality Detector Setup Set the motion, sensor and alarm mode. Authentication Setup Set the login account, password and the authentication. System Setup Set the status icons display, languages, date/time, rotation time, button beep tone, input device speed, and other relevant system features. ENDSS-R4D8 Icon Name Function Hardware Setup Configures error message checks, hard drive information, overwrite settings, network settings, PTZ/Keyboard, Audio and screen settings. Utility/Tools These are used to format USB devices, to update firmware, to export event logs, and to restore system settings. Exit Main Menu Exit the main menu. Operation Icons Click on the icon to expand the menu and view its contents. Click on the icon to minimize the menu contents. Click on the right button of your mouse to go back to the upper menu. 3.4 Channel Setup Click the “Channel Setup” on the Main Menu. The screen will display the menu shown in the following illustration. CHANNEL SETUP Channel Number Basic Setting Standard Color Adjustment Special Color Adjustment 3.4.1 Channel Number The Channel Number is used to designate to which channel or channels the settings will apply. Press the icon (for 4Ch), the icon (for 8Ch). This icon will turn orange and the settings will be applied to all channels. Press the icons “ , , , ” (for 4Ch), icons “ , , , , , , , ” (for 8Ch) to individually set each channel. The channel icon will turn green when selected and will turn to white when not selected. 19 ENDSS-4C8 3.4.2 Basic Settings CHANNEL SETUP Channel Number Basic Setting Active Channel [ ON] Record Channel [ ON] Hidden Channel [ NO] Channel Name [No Definition] Rotation Time ▐▬▬▬▬▬ [2Sec] Image Position Adjustment Standard Color Adjustment Special Color Adjustment 3.4.2.1 Active Channel To set each channel or all channels are to record and to be displayed on the screen. “ON” – Enables recording and on-screen display. The channel number icon turns to orange. “OFF”- Disables recording and on-screen display. The channel number icon turns to gray. 3.4.2.2 Record Channel To set one or all channels are record or not. The channel will be displayed on screen even when it is not recording. “ON” – Record. “OFF” – Not Record. 3.4.2.3 Hidden Channel To set whether or not to display one or all channels on the screen. The channel will continue to record regardless of it being hidden or not. “ON” – Hide the channel on screen. The channel square turns to black and channel number icon turns to white. “OFF”- Unhide the channel or channel is visible. 3.4.2.4 Channel Name Designate a name for each channel. The channel name is limited to 24 characters. Press the icon [ Default Name] to select a channel name from the list defined by the system: Room, Hall, Door, Lift, Area, Floor, Entry, and Point. Press the icon “ 20 ” to switch to big letters. ENDSS-R4D8 Press the icon “ ” to enter the channel name. The channel name will appear on the channel square. Or you can define the name by using buttons on IR remote: / ( / ) – move up / down /(/): move left / right to the character would like to select and press ” ” to select it. Channel Name [ _________________________ ] ▲ 1 2 3 4 5 6 7 8 9 0 - = q w e r A s d f Z x c v [Space] t y u I o p [ ] \ g h j k l ; „ b n m , . / ‟ [ Default Name] 3.4.2.5 Rotation Time Sets the period (with a range of 2 to 30sec) of full screen display for each channel. 3.4.2.6 Image Position Adjustment Adjusts the position of display on the monitor. Select the icon “ ” (for 4ch), “ ” (for 8ch), or “ ” (for 16Ch) to adjust the display position of all channels in 4/8-split view at one time. Select the icons “ ”, “ ”, “ ”, “ ” (for 4ch), “ ”, “ ”, “ ”, “ (for 8ch) to individually set the image position of each channel. ”, “ ”, “ ”, “ ”, “ ” The following figure will show when enter the “Image Position Adjustment”: 21 ENDSS-4C8 1% 2010/06/06 15:37:47 IMAGE POSITION ADJUSTMENT [ Default ] Adjust the image position by mouse left-click follow the direction change of cursor icon up/ down/ right/ left. Press [ 22 Default] to load or to restore to the default location. ENDSS-R4D8 3.4.3 Standard Color Adjustment Adjusts the video color parameters for each channel or simultaneously for all channels. CHANNEL SETUP Channel Number Basic Setting Standard Color Adjustment Brightness ◄▬▬▐▬▬► [10] Contrast ◄▬▬▐▬▬► [10] Hue ◄▬▬▐▬▬► [16] Saturation ◄▬▬▐▬▬► [16] Sharpness ◄▬▬▐▬▬► [8 Special Color Adjustment Brightness: Default is 10. Press the button “◄ / ►” to adjust the brightness from 1 to 20. Contrast: Default is 10. Press the button “◄ / ►” to adjust the contract from 1 to 20. Hue: Default is 16 Press the button “◄ / ►” to adjust the hue from 1 to 32. Saturation: Default is 16. Press the button “◄ / ►” to adjust the saturation from 1 to 32. Sharpness: Default is 8. Press the button “◄ / ►” to adjust the sharpness from 1 to 16. 23 ENDSS-4C8 3.4.4 Special Color Adjustment Special Color Adjustment applies to video color parameters and designates the setting for a specified period for an individual channel or for all channels. CHANNEL SETUP Channel Number Basic Setting Standard Color Adjustment Special Color Adjustment Activate Special Color [ Disable] Start Time ◄▬▬▐▬▬► [06:00] End Time ◄▬▬▐▬▬► [21:00] Brightness ◄▬▬▐▬▬► [10] Contrast ◄▬▬▐▬▬► [10] Hue ◄▬▬▐▬▬► [16] Saturation ◄▬▬▐▬▬► [16] Sharpness ◄▬▬▐▬▬► [8] 24 Active Special Color: “ Disable” (Default): Inactive this function. “ Enable”: Active this function Start Time: The start time for the special color setting. End Time: The end time for the special color setting. Brightness: Default is 10. Press the button “◄ / ►” to adjust the brightness from 1 to 20. Contrast: Default is 10. Press the button “◄ / ►” to adjust the contract from 1 to 20. Hue: Default is 16 Press the button “◄ / ►” to adjust the hue from 1 to 32. Saturation: Default is 16. Press the button “◄ / ►” to adjust the saturation from 1 to 32. Sharpness: Default is 8. Press the button “◄ / ►” to adjust the sharpness from 1 to 16. ENDSS-R4D8 3.5 Record Setup Click “Record Setup” on the Main Menu. RECORD SETUP Auto Record Activate Performance Gains Record Schedule ◄30Sec► [ Enable ] Total Power : 240 / 240 (Power/Sec) Auto Settings Adjustment Channel Recording Setup Channel Number Record Resolution [Middle Res (Half D1)] Video Quality [Standard] Record Frame Rate [30] Record Performance Gains [ YES] 3.5.1 Auto Record Auto Record is utilized to set the period (OFF, 10Sec, 20Sec, 30Sec, 40Sec, 50Sec or 60Sec) within which the DVR will automatically start recording. Default value is “30Sec”. This feature is particularly useful in automatically re-starting your DVR recording in case of an abnormal shut down. The DVR will not re-start recording when set this function “OFF”. 3.5.2 Activate Performance Gains The function enables system auto increase the recording power to the heavy loading channel from the not triggered or not recording channels. Enable this function makes “Record Performance Gains” at “Channel Recording Setup” is validated. 3.5.3 Record Schedule Record Schedule is a menu charting the recording schedule of a particular channel or all channels for the whole day (24 hours) and the entire week (7 days). Default setting is “Time Record”. 25 ENDSS-4C8 RECORD SCHEDULE Channel Number None Time Motion Sensor Motion+Sensor Day\Hour Sunday Monday Tuesday Wednesday Thursday Friday Saturday | | | | | | | 3.5.3.1 Channel Number Select the icon “ one time. ” (for 4Ch), “ ” (for 8Ch) or “ Select the icons “ ”, “ ”, “ ”, “ ” (for 4Ch), “ 8Ch) individually setup of each channel. ” (for 16Ch) to setup for all channels at ”, “ ”, “ ”, “ ”, “ ”, “ ”, “ ”, “ ” (for 3.5.3.2 Recording Mode Select “/(/): to move left and right “ ” To select the mode There are five recording modes: None: Indicates that the channel is set to not record during this duration Time: Indicates that the channel is set to continuously record during this duration Motion: Indicates that the channel is set to motion-triggered recording during this duration Sensor: Indicates that the channel is set to record when the sensor is triggered during this duration Motion+Sensor: Indicates that the channel is set to motion-triggered and sensortriggered recording during this duration NOTE 26 When “Motion Mode” is set for the recording schedule. Remember to complete the “Motion Setup” at the main menu of “Detector Setup” otherwise it will not be able to record during the period set on “Motion Mode”. ENDSS-R4D8 NOTE When “Sensor Mode” is set for the recording schedule. Remember to complete the “Sensor Setup” at the main menu of “Detector Setup” otherwise it will not be able to record during the period set on “Sensor Mode”. Press the icon “ ” to set the recording mode globally: the whole week (7 days) and the whole day (24 hours) are in the same mode throughout. The following example shows that the entire week (all 7 days) and the whole day (all 24 hours) are set to the “Motion” recording mode. Select “Motion” recording mode, press the icon “ ” and press “” ”. RECORD SCHEDULE Channel Number None Time Motion Sensor Motion+Sensor Day\Hour Sunday Monday Tuesday Wednesday Thursday Friday Saturday | | | | | | | Press the icon “ ” (located after the name of each day) to set every hour of an entire day to operate in the same mode. The following example shows that on Sunday, the whole day is set to the “Time” recording mode. Select “Time” recording mode, press the icon “ ” and press “” ”. 27 ENDSS-4C8 RECORD SCHEDULE Channel Number None Time Motion Sensor Motion+Sensor Day\Hour Sunday Monday Tuesday Wednesday Thursday Friday Saturday | | | | | | | Press the icon “ ” to set the same mode for a specified time every day. The following example shows that from 23:00 to 24:00 (11:00pm to 12:00mn) everyday there is no recording (set to “None” recording mode). Select “None” recording mode, press the icon “ ” and press “” ”. RECORD SCHEDULE Channel Number None Time Motion Sensor Motion+Sensor Day\Hour Sunday Monday Tuesday Wednesday Thursday Friday Saturday | | | | | | | You can also specifically set the recording mode for a particular time and day. The following example shows that on Sunday, from 19:00 to 24:00 (7:00pm to 12:00mn), and on Friday, from 2:00 to 4:00 (2:00am to 4:00am), are set to the “Time” recording mode. Select the recording mode first. Move the cursor and click the icon “ ”, “ ”, “ ”, “ ” or “ ” to change mode on the timetable. Select “Time” recording mode, move the cursor and click the period of icons “ ” change to “ ” and press “” ”. 28 ENDSS-R4D8 RECORD SCHEDULE Channel Number None Time Motion Sensor Motion+Sensor Day\Hour Sunday Monday Tuesday Wednesday Thursday Friday Saturday | | | | | | | 3.5.4 Total Power Total Power: 240/240 (Power / Sec) It shows the number of recording power that has been allocated and the total number of recording power. RECORD SETUP Auto Record Active Performance Gains Record Schedule ◄30Sec► [ Enable] Total Power: 240 / 240 (Power / Sec) Auto Settings Adjustment Channel Recording Setup Channel Number Record Resolution ◄ Middle Res (Half D1) ► Video Quality [Standard] Record Frame Rate [15] Record Performance Gains [ YES] To distribute the recording power into four channels by click the total power (as upper red border). 29 ENDSS-4C8 RECORD SETUP Total Power: 240/240 (Power/Sec) Resolution ◄Half D1► [ Half D1 ] [ Half D1 ] [ Half D1 ] [ Half D1 ] [ Half D1 ] [ Half D1 ] [ Half D1 ] Quality [Standard] [Standard] [Standard] [Standard] [Standard] [Standard] [Standard] [Standard] Frame rate [15] [15] [15] [15] [15] [15] [15] [15] Video Resolution, Quality and Frame Rate Setting for each Channel Resolution: Press the button “◄ / ►” to adjust the resolution from CIF, Half D1 and D1 for individual channel. Quality: Press the button “◄ / ►” to adjust the resolution from Lowest, Low, Standard, High and Highest for individual channel. Frame rate: Press the button “◄ / ►” to adjust the frame rate from 0 to 30 for individual channel. There is equal to not recording when setup the frame rate to 0. 3.5.5 Auto Settings Adjustment This function can automatically allocate the recording power under the selected record resolution. When all the channels are set at the same resolution, the “Auto Settings Adjustment” can automatically allocate the frame rate to every channel. When the setting applies to a specific channel or to specific channels with a particular resolution, video quality or frame rate the “Auto Settings Adjustment” feature automatically allocates the remaining frame rate among the other channels. 3.5.6 Channel Recording Setup The Channel Recording Setup is used to adjust the resolution, quality, frame rate and performance gains of recording. 30 ENDSS-R4D8 3.5.6.1 Channel Number Select the icon “ ” (for 4Ch), “ ” (for 8Ch) to setup for all channels at one time. Select the icons “ ”, “ ”, “ ”, “ ” (for 4Ch), “ (for 8Ch) individually setup of each channel. ”, “ ”, “ ”, “ ”, “ ”, “ ”, “ ”, “ ” 3.5.6.2 Recording Resolution Select the recording resolution for each or all channels as: » D1: 704 x 480 / 60fps (NTSC); 704 x 576 / 50fps (PAL) » Half D1: 704 x 240 / 120fps (NTSC); 704 x 288 (PAL) (Default) » CIF: 352 x 240 / 120fps (NTSC); 352 x 288 (PAL) 3.5.6.3 Video Quality Video image quality settings can be Highest, High, Standard, Low, and Lowest. Default is Standard. Higher video quality provides a much clearer image for playback but can utilize a much larger hard drive space with a larger file size. 3.5.6.4 Record Frame Rate T he recording frame rate for each or all channels may be set from 0~30 fps. If the frame rate is set to 0 it means that it will not be recording. RECORD SETUP Auto Record Active Performance Gain Record Schedule [ [30Sec] Enable ] Total Frame Rate: 240 / 240 (Power / Sec) Auto Settings Adjustment Channel Recording Setup Channel Number Record Resolution [Middle Res (Half D1)] Video Quality [Standard] Record Frame Rate [15] Record Performance Gains [ YES] 3.5.6.5 Recording Performance Gains The “Record Performance Gains” enables the system to automatically increase the system power on the heavy loading channel, taking power from the un-triggered, unutilized or non- recording channels. This function can apply for one or all channels. 31 ENDSS-4C8 3.6 Detector Setup Click “Detector Setup” on the Main Menu. DETECTOR SETUP Channel Number Alarm Setup Light Detect Mode Light Detect Alarm Mode Blind Detect Mode Blind Detect Alarm Mode Video Loss Mode Video Loss Alarm Mode Motion Setup Sensor Setup [Sensitivity OFF] [Mute] [Sensitivity OFF] [ Buzzer-Short] [ Disable] [ Buzzer-Short] 3.6.1 Channel Number Select the icon “ one time. ” (for 4Ch), “ ” (for 8Ch) or “ Select the icons “ ”, “ ”, “ ”, “ ” (for 4Ch), “ (for 8Ch) to individually setup of each channel. ” (for 16Ch) to setup for all channels at ”, “ ”, “ ”, “ ”, “ ”, “ ”, “ ”, “ ” 3.6.2 Alarm Setup Alarm Setup is accessed to configure the alarm mode of each channel, individually, or for all channels, simultaneously. DETECTOR SETUP Channel Number Alarm Setup Light Detect Mode Light Detect Alarm Mode Blind Detect Mode Blind Detect Alarm Mode Video Loss Mode Video Loss Alarm Mode Motion Setup Sensor Setup 32 [Sensitivity OFF] [Mute] [Sensitivity OFF] [ Buzzer-Short] [ Disable] [ Buzzer-Short] ENDSS-R4D8 3.6.2.1 Light Detect Mode This mode will be triggered when the video input and when the environment light becomes dark unexpectedly (close to complete darkness) or there is direct exposure by intense light. This mode is related to the ambient lighting of the DVR. The light intensity settings will have no effect when using the IR cameras. Choose any of the following settings to adjust the sensitivity of light detection: Sensitivity OFF: No sensitivity Sensitivity Low: Low sensitive level Sensitivity Normal: Normal sensitive level Sensitivity High: High sensitivity level Sensitivity Highest: Highest sensitive level 3.6.2.2 Light Detect Alarm Mode Select the alarm mode when the Light Detect Mode is triggered. Mute: No beep whatever loss of light or not. Buzzer-Short: Beep shortly by buzzer on main board. Buzzer-Long: Beep long by buzzer on main board. Alarm-Short: Short sound coming from the alarm. Alarm-Long: Prolonged sound coming from the alarm. 3.6.2.3 Blind Detect Mode This mode will be triggered when there is no video input (in total darkness) whether the security camera is purposefully covered or it is directly exposed to intense light. This detects if there is a deliberate attempt to hide the view of the camera. The light intensity settings will have no effect when using the IR cameras. Choose any of the following settings to adjust the sensitivity of blind detection: Sensitivity OFF: No sensitivity Sensitivity Low: Low sensitivity level Sensitivity Normal: Normal sensitivity level Sensitivity High: High sensitivity level Sensitivity Highest: Highest sensitivity level 3.6.2.4 Blind Detect Alarm Mode Select the alarm mode when the Blind Detect Mode is triggered. Mute: No beep whatever loss of light or not. Buzzer-Short: Beep shortly by buzzer on main board. Buzzer-Long: Beep long by buzzer on main board. Alarm-Short: Short sound coming from the alarm. Alarm-Long: Prolonged sound coming from the alarm. 33 ENDSS-4C8 3.6.2.5 Video Loss Mode The Video Loss Mode is for detecting the loss of the camera video input. Enable: Activates video loss detection Disable: Deactivates video loss detection 3.6.2.6 Video Loss Alarm Select the alarm mode when the Video Loss Mode is triggered. Mute: No beep whatever video loss or not. Buzzer-Short: Beep shortly by buzzer on main board. Buzzer-Long: Beep long by buzzer on main board. Alarm-Short: Short sound coming from the alarm. Alarm-Long: Prolonged sound coming from the alarm. 3.6.3 Motion Setup Motion Setup is accessed to configure the motion mode for each channel or all channels. DETECTOR SETUP Channel Number Alarm Setup Motion Setup Record Detection Activate [ Enable] Motion Mode [Sensitivity Normal] Record Time [10Sec] Alarm Mode [Mute] Alarm Time [10Sec] Trigger Full Screen [ OFF] Trigger Type [Initial Trigger] Motion Area Setup Sensor Setup NOTE 34 Remember to setup the motion mode period on “Record Schedule” at the main menu of “Record Setup” after completing “Motion Setup”. Otherwise, the system will be recording in the default schedule recording mode. ENDSS-R4D8 3.6.3.1 Record Detection Activate This feature makes the whole setting of motion setup is efficacious and system will log the motion triggered event even the DVR under the “Time Recording” mode. Enable: Activates the whole setting of motion setup Disable: Deactivates the whole setting of motion setup NOTE Remember to specify the area you would like monitor using the “Motion Area Setup” screen. Click on a particular channel you would like to set and then click on Motion Area Setup to define the particular area you would like to monitor. 3.6.3.2 Motion Mode Choose any of the following settings to adjust the motion sensitivity parameter: Sensitive OFF: No sensitivity Sensitive Low: Low sensitivity level Sensitive Normal: Normal sensitivity level Sensitive High: High sensitivity level Sensitive Highest: The highest sensitivity level 3.6.3.3 Record Time Set the recording time when the Motion Mode is triggered. The recording time as 5sec, 10sec, 15sec, 20sec, 25sec, 30sec, 45sec, 60sec, 90sec, 120sec, 150sec or 180sec. 3.6.3.4 Alarm Mode Select the alarm mode when Motion Mode is triggered. Mute: No beep whatever motion is detected or not. Buzzer-Short: Beep shortly by buzzer on main board. Buzzer-Long: Beep long by buzzer on main board. Alarm-Short: Short sound coming from the alarm. Alarm-Long: Prolonged sound coming from the alarm. 3.6.3.5 Alarm Time The Alarm Time is the duration of the beep and may be set to: “Nonstop”(no stop), 5sec, 10sec, 15sec, 20sec, 25sec, 30sec, 35sec, 40sec, 45sec, 50sec, 55sec or 60sec. 35 ENDSS-4C8 3.6.3.6 Trigger Full Screen Trigger Full Screen is the duration of the of full-screen display when a channel is triggered. This may be set to a period between 1 to 30 seconds. OFF: It will not display on full screen when the channel has been triggered. Also, the trigger area will turn to a red color. 3.6.3.7 Trigger Type There are two trigger types: Initial Trigger and Continuous Trigger. Initial Trigger When channel has been triggered, the triggering event will be displayed on full screen for the duration of the setting period. During that period, this channel will ignore any other triggering events. Continuous Trigger: When channel has been triggered, the triggering event will be displayed on full screen for the duration of the setting period. The channel is, however, still actively monitoring during that period. Should there be a new triggering event, this channel will display the more recent event and restart the display period. 3.6.3.8 Motion Area Setup The Motion Setup allows the user to block multi areas on screen for every single channel as motion detection area. Select a channel to set. Use the mouse or the (), (), (), () buttons to move the area. After positioning, press “” or click right button of the mouse to save it. MOTION SETUP □ □ □ □ □ □ □ □ □ □ □ □ □ □ □ □ □ □ □ □ □ □ □ □ □ □ □ □ □ □ □ □ □ □ □ □ □ □ □ □ □ □ □ □ □ □ □ □ □ □ □ □ □ □ □ □ □ □ □ □ + □ □ □ □ □ □ □ □ □ □ □ □ □ □ □ □ □ □ □ □ □ □ □ □ □ □ □ □ □ □ □ █ █ █ █ █ █ □ □ □ □ □ □ □ □ □ □ □ □ □ □ █ █ █ █ █ █ □ □ □ □ □ □ □ □ □ □ □ □ □ □ █ █ █ █ █ █ □ □ □ □ □ □ □ □ □ □ □ □ □ □ █ █ █ █ █ █ □ □ □ □ □ □ □ □ □ □ □ □ □ □ □ □ □ □ □ □ □ □ □ CAUTION 36 There will be no response in Motion Mode when the Motion Area Setup has not been completed. ENDSS-R4D8 3.6.4 Sensor Setup Sensor Setup is accessed to configure the sensor mode for each channel or all channels. DETECTOR SETUP Channel Number Alarm Setup Motion Setup Sensor Setup Record Detection Activate Sensor Mode Sensor Mapping Record Time Alarm Mode Alarm Time Trigger Full Screen Trigger Type NOTE [ Enable] [ Disable] [15Sec] [Mute] [10Sec] [ OFF] [Initial Trigger] Remember to set up the sensor mode recording for your desired period on the “Record Schedule” menu in “Record Setup” after completing “Sensor Setup”. Otherwise, the system will still be recording in the default recording mode. 3.6.4.1 Record Detection Activate This feature makes the whole setting of sensor setup is efficacious and system will log the sensor triggered event even the DVR under the “Time Recording” mode. Enable: Activates the whole setting of sensor setup Disable: Deactivates the whole setting of sensor setup 3.6.4.2 Sensor Mode This parameter enables or disables sensor mode detection. Enable: Activates sensor mode Disable: Deactivates sensor mode 3.6.4.3 Sensor Mapping This feature is to easily mapping a sensor port to a particular channel without having to remove any wires. 37 ENDSS-4C8 The default display when all channels are selected is: . (Note: There are more sensors for the 16Ch DVRs but the operating principle is still the same.) Click on a channel you would like to mapping with a sensor. Then select the sensor type is normally open or closed. It depends on the characteristics of the sensor you intend to use. DETECTOR SETUP Channel Number Alarm Setup Motion Setup Sensor Setup Record Detection Activate Sensor Mode Sensor Mapping Record Time Alarm Mode Alarm Time Trigger Full Screen Trigger Type [ Enable] [ Disable] [15Sec] [Mute] [10Sec] [ OFF] [Initial Trigger] Not Installed: The sensor is not connected to the channel. Normal – Open: The sensor type is in a normally open state. Normal – Close: The sensor type is in a normally closed state. 3.6.4.4 Record Time Set the recording time when the Sensor Mode is triggered. The recording time as 5sec, 10sec, 15sec, 20sec, 25sec, 30sec, 45sec, 60sec, 90sec, 120sec, 150sec or 180sec. 3.6.4.5 Alarm Mode Select the alarm mode when Sensor Mode is triggered. Mute: No beep whatever motion is detected or not. Buzzer-Short: Beep shortly by buzzer on main board. Buzzer-Long: Beep long by buzzer on main board. Alarm-Short: Short sound coming from the alarm. Alarm-Long: Prolonged sound coming from the alarm. 3.6.4.6 Alarm Time The Alarm Time is the duration of the beep and may be set to: “Nonstop”(no stop), 5sec, 10sec, 15sec, 20sec, 25sec, 30sec, 35sec, 40sec, 45sec, 50sec, 55sec or 60sec. 38 ENDSS-R4D8 3.6.4.7 Trigger Full Screen Trigger Full Screen is the duration of the of full-screen display when a channel is triggered. This may be set to a period between 1 to 30 seconds. OFF: It will not display on full screen when the channel has been triggered. Also, the trigger area will turn to a red color. 3.6.4.8 Trigger Type There are two trigger types: Initial Trigger and Continuous Trigger. Initial Trigger When the sensor has been triggered, the triggering event will be displayed on full screen for the duration of the setting period. During that period, the sensor will ignore any other triggering events. Continuous Trigger: When the sensor has been triggered, the triggering event will be displayed on full screen for the duration of the setting period. The sensor is, however, still actively monitoring during that period. Should there be a new triggering event, the display will revert to the more recent event and restart the display period. 3.7 Authentication Setup Authentication Setup manages the authorization for accounts, passwords, and permissions. Click the following icons for authority management AUTHENTICATION SETUP Account ID Passd admin power police guest [ ****** ****** ****** ****** Option] [ Create] [ Delete] Click the icons for setting: : Indicates a disabled account : Permits access to function : Indicates an active account : Disables access to function 39 ENDSS-4C8 : Creates a new account : Deletes an account Account ID: Enter characters as the account ID Passd (Password): By entering six characters or numbers as password Click “[ Option] for expire date setup AUTHENTICATION SETUP Account ID Passd admin power police guest [ ****** ****** ****** Option] Click the icons for setting: : No expiration date Click “[ ****** [ Expire Date Never Expires Never Expires Never Expires 2010/6/12 17:04:08 Create] [ Delete] : Sets the expiration date Option] for channel monitoring setup AUTHENTICATION SETUP Account ID Passd admin power police guest [ Video Monitoring ****** ****** ****** ****** Option] [ Create] [ Delete] Click the icons for setting: (for 4Ch), (for 8Ch): Enables the account to monitor all channels. The icon turns orange when enabled. “ ”, “ ”: Enables the account to monitor the specific channels. The icon turns green when enabled. Disabled accounts are indicated by white icons. 40 ENDSS-R4D8 Click “[ Option]” for audio monitoring setup AUTHENTICATION SETUP Account ID Passd admin power police guest [ Audio Monitoring ****** ****** ****** ****** Option] [ Create] [ Delete] Click the icons for setting: : Allows the user to monitor audio recording from the channels : Does not allow the user to monitor audio recording from the channels NOTE Disabling all accounts means that access is available to all users without a password. NOTE Disabling all users to access the specific function means that all users can access only specific functions. 3.8 System Setup System Setup sets the Language, Viewing, Date/Time, Sequence, Button Beep, Input Device, and other relevant parameters. Click on the System Setup icon or “System Setup ” on the Main Menu. 41 ENDSS-4C8 SYSTEM SETUP Language Selection View Setup Date/Time Setup Sequence Setup Full Screen Sequence 4 Split Sequence 1+7 Split Sequence 9 Split Sequence 1+12 Split Sequence 1+14 Split Sequence 16 Split Sequence Button Beep Setup Input Device Setup Auto Exit Menu ◄English► [ OFF] ▐▬▬▬▬▬ [ OFF] ▐▬▬▬▬▬ [ OFF] ▐▬▬▬▬▬ [ OFF] ▐▬▬▬▬▬ [ OFF] ▐▬▬▬▬▬ [ OFF] ▐▬▬▬▬▬ [ OFF] [ OFF] 3.8.1 Language Selection Language Selection is used to select the language for the on-screen display (OSD) Menu. 3.8.2 View Setup View Setup is for choosing whether to display certain illustrations and DVR information or not. VIEW SETUP System Display Setup Main Menu Graphics Mode Channel Dynamic Effects Icons Help Error Message State Bar Information Channel Information 42 [ ON] [ ON] [ ON] [ ON] ENDSS-R4D8 3.8.2.1 Main Menu Graphics Mode Sets the main menu displayed by graphic icons or text mode. Graphics Mode Text Mode MAIN MENU MAIN MENU Channel Setup Record Setup Detector Setup Authentication Setup System Setup Hardware Setup Utility/Tools Exit Main Menu Exit & Save Changes Exit & Discard Changes 3.8.2.2 Channel Dynamic Effect Enables or disables the channel moving effects during channel dynamic drag and drop. 3.8.2.3 Icon Help Enables or disables the help icon text description to appear when the mouse hovers over the icons. Default Location Icon Help Icons 3.8.2.4 Error Message Enables or disables system to show the log when an error occurs. 43 ENDSS-4C8 3.8.2.5 State Bar Information Determines how system status information is set and shown. VIEW SETUP System Display Setup State Bar Information All State Bar Information Record Light Network Information Hard Drive Information Date/Time Information Rotation Information Channel Information [ [ [ [ [ [ ON] ON] ON] ON] ON] ON] 1% 2010/06/06 15:37:47 State Bar Information 44 ENDSS-R4D8 3.8.2.6 Channel Information Enable or disable the channel information icons is set and shown on the home screen. VIEW SETUP System Display Setup State Bar Information Channel Information All Channels Information Channel Number Channel Name Record Light Video Loss Record Mode Detector Mode Alarm Display [ [ [ [ [ [ [ [ ON] ON] ON] ON] ON] ON] ON] ON] 1% 2010/06/06 15:37:47 Channel Information (4Ch) (8Ch): The Channel Number Icon : Recording Light : Video Loss (Flashing) : Record Mode (Not Flashing) : Detection Mode (Flashing) 45 ENDSS-4C8 3.8.3 Date/Time Setup Date/Time Setup Menu sets relevant information on date and time. DAY/TIME SETUP Date Display Mode Time Set Time Zone Daylight Saving Time Activate Daylight Saving Time Starts Time Ends NTP Server Activate Service Server IP Interval (Days) Synchronize Now [YYYY/MM/DD] [2010/06/14 11:18:19] [GMT +08:00] [Taipei] [ Disable] [No definition] [No definition] [ Enable] [time.stdtime.gov.tw] [3Day] 3.8.3.1 Date Display Mode Date Display Mode is used to choose a date format for the state information. The allowable formats are YYYY/MM/DD, DD/MM/YYYY, and MM/DD/YYYY. 3.8.3.2 Time Set “Time Set” is for adjusting the date and time. Time Set [ 2010/06/14 11:28:22] / ( / ): Up / Down – Change the number /(/): Move left/right to the character that needs to be changed : Exit after confirmed setting 3.8.3.3 Time Zone “Time Zone” is for adjusting time zone and location. 46 ENDSS-R4D8 3.8.3.4 Daylight Saving Time “Daylight Saving Time” is for adjusting the DST settings (for countries where it is applicable). 3.8.3.4.1 Activate Daylight Saving “Activate Daylight Saving” enables or disables the daylight saving mode. 3.8.3.4.2 Time Starts “Time Starts” indicates the start date of daylight saving time. The user can set the month, week number, day, and hour. Time Starts ◄October► [First Week] [Sunday] [0] Month Week Day Hour 3.8.3.4.3 Time Ends “Time Ends” indicates the end date of daylight saving time. The user can set the month, week number, day, and hour. Time Ends Month Week Day Hour ◄October► [First Week] [Sunday] [0] 47 ENDSS-4C8 3.8.3.5 NTP Server NTP Server allows for the synchronization of the day/ time settings with the NTP server through internet. DAY/TIME SETUP Date Display Mode Time Set Time Zone Daylight Saving Time Active Daylight Saving Time Starts Time Ends NTP Server Activate Service Server IP Interval (Days) Synchronize Now 48 [YYYY/MM/DD] [2010/06/14 11:18:19] [GMT +08:00] [Taipei] [ Disable] [Not definition] [Not definition] [ Enable] [time.stdtime.gov.tw] [3Day] Activate Service: Enable: Enable Synchronization Disable: Disable Synchronization Server IP: The IP address of NTP server (Maximum in 24 characters) Interval (Days): The frequency (number of days) of when the server is synchronized. Synchronize Now: Start synchronizing with NTP server now ENDSS-R4D8 3.8.4 Sequence Setup The Sequence Setup Menu is for setting the channel rotation sequence period. SYSTEM SETUP Language Selection View Setup Date/Time Setup Sequence Setup Full Screen Sequence 4 Split Sequence 1+7 Split Sequence 9 Split Sequence 1+12 Split Sequence 1+14 Split Sequence 16 Split Sequence Button Beep Setup Input Device Setup Auto Exit Menu [English] [ ▐▬▬▬▬▬ ▐▬▬▬▬▬ ▐▬▬▬▬▬ ▐▬▬▬▬▬ ▐▬▬▬▬▬ ▐▬▬▬▬▬ [ [ [ [ [ [ [ ON] OFF] OFF] OFF] OFF] OFF] OFF] OFF] Full Screen Sequence Enables or disables the full screen rotation period. 4 Split Sequence Enables or disables the 4 split display rotation period. 1+7 Split Sequence Enables or disables the 1+7 split display rotation period. 9 Split Sequence Enables or disables the 9 split display rotation period. 49 ENDSS-4C8 3.8.5 Button Beep Setup The Button Beep Setup configures the type of beeping sound for the mouse, keypad, and IR remote operations. The sound type can be either: [Mute], [Type A], [Type B], or [Type C]. SYSTEM SETUP Language Selection View Setup Date/Time Setup Sequence Setup Button Beep Setup Beep of Mouse Buttons Beep of Keypad Beep of IR Remote Input Device Setup Auto Exit Menu NOTE [English] [Sound A] [Sound B] [Sound C] [ OFF] Keypad Beep is available for models equipped with keypad. 3.8.6 Input Device Setup Input Device Setup is used to set the speed of the following input devices: mouse, keypad and IR Remote. The speeds can be assigned the following settings: SYSTEM SETUP Language Selection View Setup Date/Time Setup Sequence Setup Button Beep Setup Input Device Setup Mouse Moving Speed Mouse Repeat Speed Keypad Repeat Speed IR Repeat Speed Auto Exit Menu 50 Mouse Moving Speed: Slow, Normal, Fast Mouse Repeat Speed: Keypad Repeat Speed: [English] [Normal] [Normal] [Normal] [Normal] [ OFF] OFF, Slow, Normal, Fast OFF, Slow, Normal, Fast ENDSS-R4D8 IR Repeat Speed: NOTE OFF, Slow, Normal, Fast Keypad repeat speed is available for models equipped with keypad. 3.8.7 Auto Exit Menu The Auto Exit Menu configures the menu to automatically revert back to the main display screen after a specified period. Set Auto Exit Menu to [ OFF] for manual exit. Otherwise, the menu will exit after 10, 20, 30, 40, 50 or 60 seconds, depending on the set time. 3.9 Hardware Setup Hardware Setup is the menu for configuring hardware parameters including error message, hard drive, network, keyboard/PTZ, screen display and audio function. Click the “Hardware Setup” on the Main Menu. HARDWARE SETUP Query Error Messages Hard Drive Setup Network Setup Keyboard/PTZ Setup Screen Setup NTSC/PAL Auto Detection Video Output Format Screen Border Main Display Screen VGA Resolution Video Adjustment Audio Setup [ ON] [NTSC] [ ON] [VGA] [1024x768] 51 ENDSS-4C8 3.9.1 Query Error Message The Query Error Message window shows the all error messages. QUERY ERROR MESSAGES [ View Time] [ Clear Message] [ View Time]: Sort error messages by time of occurrence. [ Clear Message]: Clear all error logs. 3.9.2 Hard Drive Setup The Hard Drive Setup menu displays hard disk information and allows the user to enable the HDD overwriting. HARD DRIVE SETUP Overwrite Enable [ YES] Max. Recording Days ▐▬▬▬▬▬ [ None] First Hard Disk Model [WDC WD7500AYPS-01ZKB] HDD Size [715403MB] Max. Recording Days [1 Day] Record Start Time [2006/06/11 15:26:18] Record End Time [2010/06/14 13:13:30] Standard Record Size [2438/715351 MB 35%] Standard number of event [396/357376 20%] Format Hard Drive 3.9.2.1 Overwrite enable [ YES]: The hard drive automatically writes over the oldest video on the hard drive when it runs out of space for recording. [ 52 NO]: Recording will stop when the hard drive is full. ENDSS-R4D8 3.9.2.2 Max. Recording Days This function enables to specify the days of recording data which is retained in the hard drive. It will be required to format the hard drive once you change the limited days. Those expired recording data will be not found during event search. Once you have selected the number of days, click on “Format Hard Drive”. You can set the maximum recording days as from 1 to 30 or “None” not to limit. CAUTION If you decide to move or re-assign your DVR to a different system with a different ruling on how long you can keep your videos, you have to reformat your hard drive to change the Max. Recording Days. 3.9.2.3 First Hard Disk Model: Automatically displays the hard drive model number. HDD Size: Automatically displays the hard drive size. Max. Recording Days: Displays the current setting for the maximum number of days recorded videos are retained. Record Start Time: Displays the day and time when the hard drive starts storing recorded data Record End Time: Displays the day and time of the last recording on the hard drive Standard Record Size: The total hard drive capacity in megabyte (MB) and the ratio of using space. Standard Number of event: Total number of record events / total capacity of events and the ratio of using space. 3.9.2.4 Format Hard Drive You cannot format the hard drive when the system is running in recording mode. When you attempt to do so, the following warning message will appear on the screen. System is Recording Hard Disk Format is Prohibited. 53 ENDSS-4C8 3.9.3 Network Setup Network Setup is for adjusting network configurations. NETWORK SETUP Network Enable [ Enable] IP Address Setup IP Type [DHCP] IP Address [ 0. 0. 0. 0] Gateway [ 0. 0. 0. 0] Subnet Mask [ 0. 0. 0. 0] MAC Address [00:B2:95:DF:96:B7] PPPoE Account ID [No Definition] PPPoE Password [No Definition] Management/Monitoring Setup Server Setup 3.9.3.1 Network Enable [ Enable]: Network may be used [ Disable]: Network may not be used 3.9.3.2 IP Address Setup The IP address acts as a locator or an identification number to enable a device on a TCP/IP network to locate other devices and interact with them. Certain parameters need to be set through IP Address Setup to ensure proper network communication. NETWORK SETUP Network Enable [ Enable] IP Address Setup IP Type [DHCP] IP Address [ 0. 0. 0. 0] Gateway [ 0. 0. 0. 0] Subnet Mask [ 0. 0. 0. 0] MAC Address [00:B2:95:DF:96:B7] PPPoE Account ID [Not Definition] PPPoE Password [Not Definition] Management/Motoring Setup Server Setup 54 ENDSS-R4D8 IP Type There are two options for IP type: Static IP address and Dynamic IP address (DHCP and PPPoE). Static IP Address: User must manually define a static IP address. Contact the network administrator for this information. DHCP: System gets the IP address from the router or DHCP server. Contact the network administrator for this information. PPPoE: The Point-to-Point Protocol over Ethernet (PPPoE) is used mainly with DSL services where individual users connect to the DSL modem over Ethernet and in plain Metro Ethernet networks. Please input the PPPoE Account ID and Password provided by the ISP. (Note: Account ID maximum in 24 characters; Password maximum in 16 characters) GATEWAY: Define gateway IP address. Contact the network administrator for this information. SUBNET MASK: A sub network, or subnet, is a logically visible, distinctly addressed part of a single Internet Protocol network. Contact the network administrator for this information. MAC Address: MAC address is a unique identifier assigned to most network adapters or network interface cards (NICs) by the manufacturer for identification. It has been set at dedicated address even reset the DVR. NOTE You must plan on the network structure if the MIS or Network Administrator manages the network. Consult with the MIS or Network Administrator for the IP address segment and port-forwarding rule for the DVR network setup. 3.9.3.3 Management / Monitoring Setup The Management/Monitoring Setup menu addresses the management and monitoring service for remote DVR control and viewing from the internet (i.e. Internet Explorer) browser and PC Viewer. MANAGEMENT/MONITORING SETUP Management Service Activate Service Monitoring Service Activate Service Port Video Transmission Quality Audio Transmission [ Enable] [ Enable] [8000] [Standard] [ ON] 55 ENDSS-4C8 Management Service Activate Service: Enables or disables the management service for allowing remote control from IE or PC Viewer. Monitoring Service Activate Service: Enables or disables the monitoring service for allowing remote viewing from IE or PC Viewer. Port: The default port number is “8000” for DVR video and audio transmission. Video Transmission Quality: Selects the remote video transmission quality from Lowest, Low, Standard, High, and Highest. Audio Transmission: Enables [ NOTE ON] or disables [ OFF] audio transmission. You must plan on the network structure if the MIS or Network Administrator manages the network. You should consult with the MIS or Network Administrator for the IP address segment and port-forwarding rule for the DVR network setup. 3.9.3.4 Server Setup Configure the DNS server. SERVER SETUP Default DNS Address Custom DNS Address Dynamic DNS Activate Service Provider Server Name Account Password [168. 95.192. [168. 95. 1. 1] 1] [ Disable] [www.dyndns.com] [No Definition] [No Definition] [No Definition] Default DNS Address The Domain Name System (DNS) translates hostnames to IP addresses (default setting). If there is no DNS address setting or fail, DVR will go for Default DNS Address. Custom DNS Address The Domain Name system (DNS) translate hostnames to IP addresses (customer setting). 56 ENDSS-R4D8 Dynamic DNS Dynamic DNS is a system that allows the domain name data held in a name server to be updated in real time. Please refer to the chapter “DynDNS Service Overview”. Service Active: Enable the Dynamic DNS service. Provider: The web site / IP Address of Dynamic DNS provider Server Name: Define a name of Dynamic DNS (Maximum in 24 characters) Account: The account name of Dynamic DNS (Maximum in 20 characters) Password: Password for Dynamic DNS Please refer to DYNDNS Service (Maximum in 12 characters) 3.9.4 Keyboard / PTZ Setup NOTE The ENDSS-4C8 comes with 4 non-PTZ cameras. You may add a PTZ type camera and use this control. Configures the communication protocols between the DVR and the PTZ-capable cameras and the keyboard connected to it. KEYBOARD/PTZ SETUP Pan/Tilt/Zoom Setup RS-485 Baudrate Databit Parity Stopbit Keyboard Keyboard Model Keyboard ID [9600] [8 Bit] [No Parity] [1 Stopbit] [ OFF] [1] 57 ENDSS-4C8 3.9.4.1 Pan/Tilt/Zoom Setup The Pan/Tilt/Zoom Setup allows you to modify the PTZ settings for each channel of the DVR. These settings need to be matched to the camera you intend to connect to your DVR. PAN/TILT/ZOOM SETUP Channel Number PTZ Protocol Camera ID Camera Reset Speed Adjustment Pan Speed Tilt Speed Cruise Speed Auto Pan Speed Zoom/Focus/Iris [None] [1] ▬▬▬▐▬▬ ▬▬▬▐▬▬ ▬▐▬▬ ▬▬▬▐▬▬ [4] [4] [1] [4] Channel Number The “PAN/TILT/ZOOM SETUP” supports individually setup of each channel. Select the icons “ ”, “ ”, “ ”, “ ” (for 4Ch), “ ”, “ ”, “ ”, “ ”, “ ”, “ ”, “ (for 8Ch) to individually setup of each channel. ”, “ ” PTZ Protocol Provides options for the PTZ camera protocol: Pelco P, Pelco D, Teleview Pelco P, Teleview Pelco D, Merit LILIN (3B), Merit LILIN (7B), HiSharp, Nicecam and Elitar. Camera ID Adjusts the identification number based on the local settings of your camera. This value may be any number from 1 to 255. Use the arrows ( and ) to select. Camera ID [ 1] Speed Adjustment These pertain to the panning, tilting, and cruising speeds of your camera. Pan Speed: can be set between 0 to 8. Tilt Speed: can be set between 0 to 8. Cruise Speed: can be set between 0 to 3. Auto Pan Speed: can be set between 0 to 5. 58 ENDSS-R4D8 PAN/TILT/ZOOM SETUP Channel Number PTZ Protocol Camera ID Camera Reset Speed Adjustment Pan Speed Tilt Speed Cruise Speed Auto Pan Speed Zoom/Focus/Iris [None] [1] ▬▬▬▐▬▬ ▬▬▬▐▬▬ ▬▐▬▬ ▬▬▬▐▬▬ [4] [4] [1] [4] Zoom/Focus/Iris These pertain to the zoom, focus, and iris adjustment settings of your camera. Zoom Speed : can be set between 0 to 3. Focus Speed : can be set between 0 to 3. Iris Speed : can be set between 0 to 3. Auto Focus : can be Enabled or Disabled. Auto Iris : can be Enabled or Disabled. PAN/TILT/ZOOM SETUP Channel Number PTZ Protocol Camera ID Camera Reset Speed Adjustment Zoom/Focus/Iris Cruise Speed Focus Speed Iris Speed Auto Focus Auto Iris [None] [1] ▬▐▬ [1] ▬▐▬ [1] ▬▐▬ [1] [ Enable] [ Enable] 59 ENDSS-4C8 3.9.4.2 RS-485 The DVR uses the RS-485 standard for PTZ communication. The following settings must be configured in parallel with the local settings of the camera for the system to function properly. Baudrate Select a baud rate: 1200, 1800, 2400, 4800, 9600, 14400, 19200, 38400, 57600 or 115200. Databit Select a data bit communication protocol: 8-bit or 7-bit Parity Select a parity configuration: Odd, Even, or No Parity Stopbit Select a stop bit configuration: 1 Stopbit or 2 Stopbit NOTE Pan/Tilt/Zoom and RS-485 Settings may vary for each camera. Be sure to match local camera settings to those you input on the DVR. 3.9.4.3 Keyboard Keyboard Model Select the keyboard model you are using: CK201, KB-KT301 OFF (if there is no keyboard), CK101, Keyboard ID Adjusts the identification number based on the local settings of your keyboard. This value may be any number from 1 to 16. Keyboard Protocol Provides options for the keyboard communication protocol: Pelco P, Pelco D, Teleview Pelco P, Teleview Pelco D, Merit LILIN (3B), Merit LILIN (7B), HiSharp, Nicecam and Elitar. This setting depends on the keyboard model being used. 60 ENDSS-R4D8 3.9.5 Screen Setup Adjusts the video format and resolution of the display device. HARDWARE SETUP Query Error Message Hard Drive Setup Network Setup Screen Setup NTSC/PAL Auto Detection Video Output Format Screen Border Main Display Screen VGA Resolution Video Adjustment Audio Setup [ OFF] [NTSC] [ ON] [VGA] [1024x768] NTSC/PAL Auto Detection The system will automatically detect the video format NTSC/PAL from the video source, i.e. security cameras. Video Output Format The selection of video output format NTSC or PAL is available while the “NTSC/PAL Auto Detection” function is disabled. Screen Border 1% 2010/06/06 15:37:47 Screen Border [ ON] : To show the border [ OFF] : Not to show the screen border. 61 ENDSS-4C8 Main Display Screen Provides options to connect the main display screen to either a BNC or VGA port (Labeled as “VIDEO-OUT”). VGA Resolution Sets the resolution as 640x480, 800x600, 1024x768 or 1280x1024. Video Adjustment Adjusts the position of main display on the monitor when connect the main display screen to BNC port (Labeled as “VIDEO-OUT”). The following figure will show when enter the “Video Adjustment”: 1% 2010/06/06 15:37:47 VIDEO ADJUSTMENT [ Default ] Adjust the image position by using the mouse right-click button to follow the direction change of cursor icon up / down / right/ left. Press [ Default] to load the default location. 62 ENDSS-R4D8 3.9.6 Audio Setup Audio Setup relates to the settings for the audio device that may be connected to your DVR. HARDWARE SETUP Query Error Message Hard Drive Setup Network Setup Screen Setup Audio Setup Audio Record Audio Mute Input Volume Output Volume [ ON] [ OFF] ▐▬▬▬▬▬ [1] ▬▬▬▬▬▐ [16] Audio Record [ ON] : Enables audio recording [ OFF] : Disables audio recording Audio Mute [ ON] : Mutes the sound [ OFF] : Allows for sound to be heard Input Volume Adjusts the input volume from 1 to 16. Output Volume Adjusts the output volume from 1 to 16. 63 ENDSS-4C8 3.10 Utility/Tools These tools help you to format the USB dongle, to update firmware, to export event logs and to load or restore the environment configuration. Click the “Utility/Tools” on the Main Menu. UTILITY/TOOLS Format USB Disk Firmware Update Environment Setting Save Settings to USB Load Settings from USB Restore Default Setting 3.10.1 Format USB Disk The system supports USB pen drives and USB card readers with the FAT32 device file format. Please format the drive (using the file format function) if it is not in FAT32 otherwise an error will occur during backup. The file format function helps you format USB device to improve its compatibility with the DVR for storing video data into your USB device. FORMAT USB DISK USB Disk File System Free Capacity Total Capacity [General Flash Disk] [FAT32] [1005MB] [1005MB] [ 64 Format] ENDSS-R4D8 3.10.2 Firmware Update The firmware is updated by using a USB pen drive that contains the latest firmware file. Attach the external USB disk into the USB port on DVR front panel. FIRMWARE UPDATE Current Revision: V15.0.0 Current Date/Time: Jun 14 2010 05:22:38 Current Language: English Current Checksum: 0x0332E245 File Name: File Revision: File Date/Time: File Language: File Checksum: Plug USB Stick After the USB disk is attached to the port, the message “Read file Information” will appear on the bottom line. FIRMWARE UPDATE Current Revision: V15.0.0 Current Date/Time: Jun 14 2010 05:22:38 Current Language: English Current Checksum: 0x0332E245 File Name: FWVX4TWNFWI File Revision: File Date/Time: File Language: File Checksum: Read File Information 65 ENDSS-4C8 If there is a mistake or missing file on the pen drive, it will show: File not found or Disk Error on the bottom line. Please check USB disk or file. Re-attach disk to the port. After reading the firmware is displayed. Click this button on begin the upgrade. FIRMWARE UPDATE Current Revision: V15.0.0 Current Date/Time: Jun 14 2010 05:22:38 Current Language: English Current Checksum: 0x0332E245 File Name: FWVX4TWNFWI File Revision: V15.0.1 File Date/Time: Jan 15 2010 16:45:52 File Language: English File Checksum: 0x02E165B5 Update Process FIRMWARE UPDATE Current Revision: V15.0.0 Current Date/Time: Jun 14 2010 05:22:38 Current Language: English Current Checksum: 0x0332E245 Firmware is updating Please wait File Name: FWVX4TWNFWI File Revision: V15.0.1 File Date/Time: Jan 15 2010 16:45:52 File Language: English File Checksum: 0x02E165B5 Update Process When DVR is updating the firmware, it shows “Firmware is updating, please wait”. 66 ENDSS-R4D8 After firmware update is completed, Firmware update is success, System will restart ----“ is displayed, and then the system restarts. FIRMWARE UPDATE Current Revision: V15.0.0 Current Date/Time: Jun 14 2010 05:22:38 Current Language: English Current Checksum: 0x0332E245 Firmware update is success System will restart File Name: FWVX4TWNFWI File Revision: V15.0.1 File Date/Time: Jan 15 2010 16:45:52 File Language: English File Checksum: 0x02E165B5 Update Process 3.10.3 Environmental Setting Save Settings to USB SAVE SETTINGS TO USB USB Disk File System Free Capacity Write File [General Flash Disk] [FAT32] [1005MB] [Env2010-07-14_0503.env] [ Save File] This tool can help you duplicate the system environment configuration and store it on the USB device. You can use this to swiftly deploy your other DVR systems which will be using the same configuration. It will show the following message after file is duplicated successfully. SAVE SETTINGS TO USB File „Env2010-07-14_0503.env‟ Written successfully !!! [ OK] 67 ENDSS-4C8 Load Settings from USB LOAD SETTINGS FROM USB USB Disk File System Free Capacity Read File [ Load File] [ [General Flash Disk] [FAT32] [1005MB] [Env2010-07-14_0503] File Select] This tool can help you load the system environment configuration from the USB device. Click [ File select] to select the file you would like to load. LOAD SETTINGS FROM USB-FILE SELECT Env2010-07-14_0531.env Env2010-07-11_0526.env Env2010-07-09_0525.env Env2010-07-08_0504.env (Generic) (Generic) (Generic) (Generic) Click [ Load File] to load the selected file from USB device. It will show the following message: LOAD SETTINGS FROM USB File „Env2010-07-14_0503.env‟ Loaded. System will restart… 68 ENDSS-R4D8 Restore Default Setting This command resets the system to its default settings. UTILITY/TOOLS Format USB Drive Firmware Update Export Event Log Environment Setting Save Setting to USB Load Setting from USB Restore Default Setting Load default setting Restore default settings? [ YES] [ NO] Select “YES” to load the default setting. After which, the system will reboot. Reset completed, System will restart… 3.11 Exit Main Menu The Exit Main Menu window provides options to save or discard changes before exiting. MAIN MENU Channel Setup Record Setup Detector Setup Authentication Setup System Setup Hardware Setup Utility/Tools Exit Main Menu Exit & Save Changes Exit & Discard Changes 69 ENDSS-4C8 Click on the icon if you access this from the Main Menu in Graphics Mode. If you have made changes, you will be asked whether or not you would like to save those changes. Exit Main Menu Some configuration has been changed. Please confirm? [ Save] [ Discard] [ Cancel] Otherwise, in the regular Main Menu mode, you are presented with the following window: 3.11.1 Exit & Save Changes All changes are saved before exiting from the menu. Data Saving Please Wait… 3.11.2 Exit & Discard Changes All changes are ignored (The changes will not be saved and will take no effect.) before exiting from the menu. Confirm with “Yes” or go back to the menu by choosing “No”. Exit Main Menu Discard changes and exit now? [ 70 YES] [ NO] Chapter 4 4 Playback and Data Backup 71 ENDSS-4C8 4.1 Calendar Menu The Calendar Menu is a play back feature that allows you to access recorded videos by selecting the date and time when the video was captured. Press the Calendar Menu the live viewing window. Icon on the Control Bar to enter the Calendar Menu in CALENDAR MENU Year Selector Sun 4 11 18 25 Time Selector [2010] Mon 5 12 19 26 Tue Wed 6 13 20 27 7 14 21 28 [July] Thu Fri 1 2 8 9 15 16 22 23 29 30 Month Selector Sat 3 10 17 24 31 Day Selector 0 1 2 3 4 5 6 7 8 9 10 11 12 13 14 15 16 17 18 19 20 21 22 23 [ Play] [ Backup] Choosing the year of the video to play back The Year Selector will start blinking when your mouse is hovering over it. Click on the year or the arrows beside the year ( or ) to choose. Choosing the month of the video to play back The Month Selector will start blinking when your mouse is hovering over it. Click on the month or the arrows beside the month ( or ) to choose. Choosing the day of the video to play back The dates with recorded videos will be in a vivid white color for weekdays, red for Sundays, and cyan for Saturdays on the Day Selector. A specific day will start blinking when your mouse is hovering over it. Click on the day you would like to review. A circle will appear around the selected number and the number will be enclosed with brackets. 72 ENDSS-R4D8 Choosing the time of the video to play back Once you‟ve chosen the date, the hours with recorded videos will be in a vivid green color on the Time Selector. A specific time will start blinking when your mouse is hovering over it. Click on the hour you would like to review. A circle will appear around the selected number. Example of time-search video selection with Calendar Menu CALENDAR MENU Sun 4 11 18 25 [2010] Mon 5 12 19 [ ] Tue Wed 6 13 20 27 7 14 21 28 0 1 2 3 4 12 13 14 15 16 [ 5 Play] Thu 1 8 15 22 29 [July] Fri 2 9 16 23 30 Sat 3 10 17 24 31 6 7 8 9 10 11 18 19 20 21 22 23 [ Backup] In the example above, the date selected is July 26, 2010 (Monday) and the time is 17:00. The illustration also shows that recorded videos of that day are available from 09:00 to 18:00. [ Play]: Starts to play the event that has been selected. [ Backup]: Creates a backup file for the event that has been selected NOTE Play back and backup for the Calendar Menu is similar to the operation available in the Play Menu. Please refer to the section on the Video Playback Control Bar. 73 ENDSS-4C8 4.2 Play Menu Press “” (or “II”) button or icon to enter Play Menu in the live view window. PLAY MENU Channel Number Play Begin Time Play End Time 2121 ▲ 2120 2119 2118 2117 ▼ [ [2010/7/04 10:40:02] [2010/7/14 05:59:13] ▲ 2010/07/14 06:18:31 2010/07/14 06:17:12 2010/07/14 05:57:38 2010/07/14 04:20:11 ▼ 2010/07/14 02:18:42 Option] [ Play] [ ▲ Backup] Channel Number: select the channel to playback Play Begin Time: specify the beginning of the playback Play End Time: specify the end time of the playback The information below it shows the available recorded events. To click [ Option] to switching the window as follows: PLAY MENU 2121 ▲ 2120 2119 2118 2117 ▼ [ ▲ 2010/07/14 06:18:31 2010/07/14 06:17:12 2010/07/14 05:57:38 2010/07/14 04:20:11 ▼ 2010/07/14 02:18:42 Option] [ Play] [ ▲ Backup] [ Play]: Start playing the recorded data. After the data has been played, it will show “” [ 74 Backup]: To back-up the recorded data. Please refer to the “Backup” section ENDSS-R4D8 Commands and Recorded Data status: PLAY MENU Channel Number Play Begin Time Play End Time 2121 ▲ 2120 2119 2118 2117 ▼ [ [2010/7/04 10:40:02] [2010/7/14 05:59:13] ▲ 2010/07/14 06:18:31 2010/07/14 06:17:12 2010/07/14 05:57:38 2010/07/14 04:20:11 ▼ 2010/07/14 02:18:42 Option] [ Play] [ ▲ Backup] Scroll Bar for Search Start of Recording Time The type of event log Serial Number of Recorded Data S/N of Recorded Data: Series Number of recorded data provide by system Recording Status: o o / : Shows the begin or end of recording data in the hard drive : Shows the recording mode o : The data can be played (This icon doesn‟t show if no video recording is available.) o : The recorded video data has been played o : Power ON/OFF event occur Recording Time: The date / time of recorded data Searching: The vertical scroll bar for search the recorded data by mouse 75 ENDSS-4C8 Video Playback Control Bar You will see the control bar during video playback. PIP View Displays real-time video and playback video simultaneously in PIP (picture in picture) view. 4 Split View Displays playback video in 4-split view. 1+ 7 Split View Displays playback video in 1+7 split view. 9 Split View Displays playback video in 9-split view. Previous Segment Plays back the recorded video by one hour Rewind Plays backward faster Stop Stops the video playback Pause Pauses the video playback Play Starts the video playback Fast Forward Plays forward faster Next Segment Plays forward the recorded video by one hour Calendar Menu Goes back to Calendar Menu Play Menu Goes back to Play Menu Event Search Goes to Search Menu Play Bar 76 Shifts the bar to select the playback time from the recorded video data you would like to review. ENDSS-R4D8 4.3 Event Search Press “” (or “”) button or icon to enter Event Search Menu. SEARCH MENU Channel Number Filter Type Filter Time Setup 2121 ▲ 2120 2119 2118 2117 ▼ [ [All Events] [ Disable] ▲ 2010/07/14 06:18:31 2010/07/14 06:17:12 2010/07/14 05:57:38 2010/07/14 04:20:11 ▼ 2010/07/14 02:18:42 Option] [ Play] [ ▲ Backup] Channel Number: Specifies the channels to search Filter Type: Filters events by type “General Event”, “Record Event”, “Hardware Event”, “Warning Event”, and “All Events” Filter Time Setup: FILTER TIME SETUP Active Filter Time [ Disable] Filter Begin Time [2010/07/04 10:40:05] Filter End Time [2010/07/14 07:06:22] Time Reset Range Active Filter Time: Enables/disables filter time of event Filter Begin Time: Specifies the beginning time of event filter Filter End Time: Specifies the end time of event filter Time Reset Range: Resets the event search time period according to all effective events as recorded 77 ENDSS-4C8 SEARCH MENU Channel Number Filter Type Filter Time Setup 2121 ▲ 2120 2119 2118 2117 ▼ [ [All Events] [ Disable] ▲ 2010/07/14 06:18:31 2010/07/14 06:17:12 2010/07/14 05:57:38 2010/07/14 04:20:11 ▼ 2010/07/14 02:18:42 Option] [ Play] [ ▲ Backup] [ Play]: Starts to play the event that has been selected [ Backup]: Creates a backup file for the event that has been selected [ Option]: Switches the top frame of the Search Menu into an event content display. The display depends on the type of event being referenced. SEARCH MENU Event Type: Time Record Trigger Channel: Record End Time: 2010/07/14 06:20:31 2121 ▲ 2120 2119 2118 2117 ▼ [ ▲ 2010/07/14 06:18:31 2010/07/14 06:17:12 2010/07/14 05:57:38 2010/07/14 04:20:11 ▼ 2010/07/14 02:18:42 Option] [ Play] [ Backup] Event Type: Shows the name of the selected event Triggered Channel: Shows the triggered channel Record End Time: Shows the recording end time. 78 ▲ ENDSS-R4D8 4.4 Data Backup The DVR supports data backup by USB 2.0 device (Support the pen drive and card reader) on the front panel. Press the “” (or “II”) button to enter the “Play Menu”. PLAY MENU Channel Number Play Begin Time Play End Time 2121 ▲ ▲ ▲ 2010/07/14 06:18:31 2010/07/14 06:17:12 2010/07/14 05:57:38 2010/07/14 04:20:11 ▼ 2010/07/14 02:18:42 2120 2119 2118 2117 ▼ [ [2010/7/04 10:40:02] [2010/7/14 05:59:13] Option] [ Play] [ Backup] Use the “(/)” buttons to select which data to backup. Press [ enter the “Backup Menu”. Backup Start] to BACKUP MENU Backup Device Free Capacity Backup Channel [Generic Flash Disk] [1029352/1029380 KB] Estimate Time Start Time End Time Backup Period Backup Size [30Sec] [2010/07/14 06:18:31] [2010/07/14 06:17:25] [00Min 06Sec] [1152KB] [ Backup Start] Disk information is shown on the top portion of the screen and recorded data information is shown in the bottom portion. 79 ENDSS-4C8 Backup Device: shows the backup device where data will be stored for backup. Free Capacity: shows the amount of free space on the backup device. Backup channel: selects single or multi channels you would like to backup. You can change the period of recorded data for backup by setting the “Start Time” and “End Time”. BACKUP MENU Backup Device Free Capacity Backup Channel [Generic Flash Disk] [1029352/1029380 KB] Estimate Time [30Sec] [2010/07/14 06:18:31] [00Min 06Sec] [1152KB] Start Time Backup Period Backup Size [ Backup Start] BACKUP MENU Backup Device Free Capacity Backup Channel [Generic Flash Disk] [1029352/1029380 KB] Estimate Time [30Sec] [2010/07/14 06:18:31] [00Min 06Sec] [1152KB] End Time Backup Period Backup Size [ Backup Start] The “Free Capacity”, “Estimate Time”, “Backup Period” and “Backup Size” will be changed automatically. The “Start Time” and “End Time” of the selected video record data will be shown. Press [ Backup Start], it starts to backup data into USB 2.0 device. There is a PVF video file “ ” stored into the USB device. You can playback this video file on the software “PC Viewer”. Please reference to the chapter of “PC Viewer and Web Browser Viewer”. 80 ENDSS-R4D8 Chapter 5 5 PTZ Control 81 ENDSS-4C8 5.1 Pan/Tilt/Zoom Control Pan/Tilt Zoom Control screen is for easy operation of your PTZ-capable camera. Click on the PTZ Control icon on the Control Bar and a full screen display will appear. 1% 2010/06/06 15:37:47 Channel Number and Status PTZ Exit Button Channel Menu PTZ Control Channel Number and Status: Shows the number and the recording status of the current channel on the PTZ display. PTZ Exit Button: Exits PTZ display mode and reverts back to DVR viewing. PTZ Channel Menu: This menu appears when you move your mouse to the righthand side of the screen. It shows the channels on your DVR. The channel number will be vivid yellow if the channel has a PTZ-capable camera connected to it, green if it has a non-PTZ camera, and faint white if it has no camera. PTZ Control Menu: This menu appears when you move your mouse to the lower portion of the screen. It allows you to operate the PTZ camera you have selected. 82 ENDSS-R4D8 NOTE Make sure to properly configure the Pan/Tilt/Zoom Setup. You can access this menu by going to the Main Menu then Hardware Menu and then clicking on Keyboard/PTZ Setup. Without activating the PTZ feature, the PTZ Control icon will not appear on the Control Bar. PTZ Control Menu The PTZ Control Menu is your command center for manipulating and setting your pan/tilt/zoom-enabled camera. Icon - Name Preset Buttons Operation These allow you to direct your camera towards a predefined location. Move your mouse on top of the number and when it starts to blink, the following operations can be performed: / Left-Button Mouse Click : Calls the preset and the camera directs to that stored location / Right-Button Mouse Click : Programs a preset position / Right-Button Hold for 2 seconds: Clears the stored preset position Buttons with stored presets are displayed in a vivid green color. Cruise Start Left-click this icon to begin linear and lateral panning. Cruise Stop This icon appears after Cruise has been activated. Leftclick this icon to stop linear and lateral panning. Auto Pan Start Left-click this icon to begin horizontal panning. Auto Pan Stop This icon appears after Auto Pan has been activated. Left-click this icon to stop horizontal panning. Setup Left Limit Direct your camera to your desired location and left-click on this icon to specify the leftmost limit for panning. Setup Right Limit Direct your camera to your desired location and left-click on this icon to specify the rightmost limit for panning. Auto Iris Left-click on this icon to automatically set the optimal amount of light that enters the lens 83 ENDSS-4C8 Icon Name Operation Iris Open Left-click on this icon to allow more light to enter the lens Iris Close Left-click on this icon to allow less light to enter the lens Auto Focus Left-click on this icon to automatically set the focus of the lens for optimal clarity Focus Near Left-click on this icon to adjust to near focus Focus Far Left-click on this icon to adjust to far focus Zoom In Left-click on this icon to zoom into a telescopic view Zoom Out Left-click on this icon to zoom out to a wider view Goto Origin Left-click on this icon to return the camera to its base orientation. PTZ Control Screen Operation You can also direct your camera to a certain location using your mouse. Arrows will appear when you move your mouse around the screen (refer to the figure below). CRUISE: Right-click on the directional ( , , , , , , , ) arrows to activate and direct your camera. The outer arrows allow you quickly cruise through the desired direction. The inner arrows allow you to cruise more slowly. PAN: Right-click on the inverted-U ( ) arrow to laterally pan your camera. ZOOM: Roll forward the scroll wheel located at the center of your mouse to zoom into a specific point and roll the scroll wheel backward to zoom out. Press the scroll wheel to pause zooming. NOTE 84 It is suggested that you try this feature as speed of response and general characteristics may vary from one camera to another. You will find that this operation can be very helpful in directing your camera, once you get accustomed to its behavior. ENDSS-R4D8 1% 2010/06/06 15:37:47 85 ENDSS-4C8 Chapter 6 6 System Information 86 ENDSS-R4D8 6.1 Record Information The “Record Information” menu displays the current states of the DVR system. On your Control Bar, locate and click on the icon. The Record Information will appear as follows: RECORD INFORMATION --10 30 ---10 30 -- Record Information Parameters Record Information Parameters (topmost bar) : Channel Number : Recording Resolution : Video Loss : Recording Mode : Recording Mode : Buzzer Alarm : Latest Recording Frame Rate : External Alarm Possible corresponding values for the parameters : Channel Number : CIF Recording Resolution : D1 Recording Resolution : Motion Record Mode : Motion Record Mode 10: Record Time Count Down : Video Loss : Half D1 Recording Resolution : Not Recording : Time Record Mode : Time Record Mode 30: Frame Rate in Use : Buzzer Alarm Mode 87 ENDSS-4C8 6.2 Hard Drive Information The Hard Drive Setup menu displays the hard drive status. On your Control Bar, locate and click on the icon. HARD DRIVE SETUP First Hard Disk Model [WDC WD7500AYPS-01ZKB] HDD Size [715403 MB] Max. Recording Days [ None] Record Start Time [2006/06/11 15:26:18] Record End Time [2010/06/14 13:13:30] Standard Record Size [2438/715351 MB 35%] Standard number of event [396/357376 20%] Model: Displays the hard drive model number. HDD Size: Displays the hard drive size. Record Start Time: Displays the day and time when the hard drive starts storing recorded data Record End Time: Displays the day and time of the last recording on the hard drive Standard Record Size: Displays the total hard drive capacity in megabyte (MB) and the ratio of using space. Standard Number of event: Displays the number of record events / total capacity of events and the ratio of using space. 88 ENDSS-R4D8 6.3 Network Information Network Information displays the current state of network connections. On your Control Bar, locate and click on the icon. NETWORK SETUP IP Type IP Address IP Status Login Status Login Count Network Service Management Service Monitoring Service Dynamic DNS [DHCP] [192.168. 11.198] [ Connected] [0] [ Enable] [ Enable] [X Disable] Network Information » “IP Type” shows the network connection type. » “IP Address” shows the current IP address. » “IP Status” shows the network is connected or not connected. » “Login Count” shows how many connections from remote site. » “Management Service” shows enable or disable the management service for allowing remote control from IE or PC Viewer » “Monitoring Service” shows enable or disable the management service for allowing remote viewing from IE or PC Viewer » “Dynamic DNS” shows enable or disable the Dynamic DNS service. 89 ENDSS-4C8 Chapter 7 7 LAN & Online Viewing Setup 90 ENDSS-R4D8 7.1 PC Connection through Local Area Network Here is an example that shows how to find the basic network information from the local area network (hub). Search Router IP Address Please click “Start” and then “Run” option under Windows. Please enter “CMD” and then “OK” Please enter “ipconfig” on DOS prompt, and then record the Address Number of Default Gateway as shown: It is the Router‟s IP Address. 91 ENDSS-4C8 Find out your DVR IP address Now we know the Router IP address is 192.168.11.1. Generally the usable IP Address is from 192.168.11.2~192.168.11.253. The suggested IP Address available for assigned to other network devices is from 192.168.11.160 to 192.168.11.199. Find out the available IP address Please enter “ping 192.168.11.189” on DOS prompt (as shown in the following figure). When “Reply from 192.168.11.189: bytes=32 time<10ms TTL=128” appears, as in the following illustration, that means this IP Address “192.168.11.189” is occupied by another network device. Please try to find another available IP address. Enter “ping 192.168.11.188” on DOS prompt. If “Request timed out” appears, it means this IP address is not being used now and can be used for the DVR. 92 ENDSS-R4D8 Setup DVR IP Address When you find a usable IP address, go back to DVR menu: “Network Setup” to enter IP address. IP ADDRESS: Enter the DVR‟s address [192.168.011.188] GATEWAY: Enter Router IP Address[192.168.011.001] Subnet MASK: 255.255.255.0 NOTE You must plan on the network structure if the MIS or Network Administrator manages the network. You should consult with the MIS or Network Administrator for the IP address segment and port-forwarding rule for the DVR network setup. 7.2 DynDNS Service Overview For DVR you can only set a static IP address. It does not support the dynamic IP. If you have to or prefer to use dynamic IP, then it is recommended to use a DYNDNS service. DYNDNS is a service the maps internet domain names to IP address and works with dynamic IP address (assigned by ISP server). Remark: A router is needed as the interface between PC and DVR when DVR is under internal network environment. 7.2.1 Register to the DynDNS Services NOTE The following screens are captured from the DYNDS web site at time of this writing. Changes might occur by the time you check their site. NOTE As of this writing, the DYNDS service is free. Contact the DYNDS company if the service is still free to make sure, before creating an account with them. There are three suggestions for DYNDNS service: www.no-ip.com, www.changeip.com and www.dyndns.com The following will use DYNDNS website: http://www.dyndns.com as example. If you have no account, create one when you access DynDNS (DYNDNS service) website. 93 ENDSS-4C8 7.2.2 Create DynDNS Account Click the Create Account, and then start to create your own DynDNS Account and fill out all the blanks for account‟s application as following: Please refer below for the maximum number of characters acceptable for the DVR: “Server Name”: Maximum of 24 characters “Account”: Maximum of 20 characters “Password”: Maximum of 12 characters 94 ENDSS-R4D8 After you click "Create Account", it shows the message for verifying the account. DynDNS will create a new account for you and send you an e-mail to the address you provided. It needs to confirm your account within 48 hours after receiving the e-mail or it will automatically delete your account. Just click the first link to confirm the account. 95 ENDSS-4C8 7.2.3 Login and Host Service Log-in by entering the Username and Password of your account. Then, go to “My Service” to get a host name 96 ENDSS-R4D8 Double click “Add New Hostname” as following: Specify the Hostname for DYNDNS IP which will be applied to the DVR‟s DYNDNS setting. We take dvr-host-tw.homelinux.net as an example, and click “Add to Cart” The Dynamic DNS Hosts service is sufficient and is provided for free. Press “Next” 97 ENDSS-4C8 Press “Activate Services” Now, the DYNDNS service is completed. 98 ENDSS-R4D8 Take note of the User name, Password and Hostname. 7.2.4 Setup Router Most of the settings for the router are identical, here is the suggestion: Specify DYNDNS service provider: DnyDNS.org (dynamic) Specify DYNDNS IP by DYNDNS account (user name / password ) Specify DVR IP as private IP setting Specify one pair of connection port (control port / streaming port) , like”80” 7.2.5 Setup DynDNS Setting on DVR After completing, the DYNDNS account application, go to the DVR server setup menu and input the DYNDNS information for network connection. SERVER SETUP Default DNS Address Custom DNS Address [168. 95.192. [168. 95. 1. □x 1] 1] Dynamic DNS - ○ Activate Service [X Disable] Provider [www.dyndns.com] Server Name [www.dvr-host-tw.homelinuix.net] Account [example] Password [123456] 99 Chapter 8 8 100 PC Viewer & Web Browser Viewer ENDSS-R4D8 8.1 PCViewer Installation PC Viewer will help you to play the video data on the Windows platform computer, Install the PCViewer utility software to your Windows PC to view, monitor and playback. To install PCViewer insert the setup disc to your CDROM drive, the Main Menu screen similar to the picture below will automatically pops up. Click the “PCViewer Utility Software” icon and follow the easy step-by-step installation instructions. Windows OS platform requires that the application be run as the administrator user. NOTE The product picture at the main menu above may be different from what you may see on your installation disc. Please ignore the product picture. NOTE Encore strongly suggests that you install the DirectX software. It provides a smoother display of the PC Viewer video on the computer. 101 ENDSS-4C8 8.1.1 Overview Click on the PC desktop icon “ PC Viewer” to execute the PC Viewer at the Windows platform computer. The PC Viewer support remote viewing and control for maximum 4 DVR connections. 1 6 7 2 3 4 5 8 9 No. Function 1 DVR connection window 2 Delete the DVR connection 3 Modify the DVR connection 4 Add new DVR connection 5 Close the connections window 6 Open the DVR connection window 7 DVR connection status and switch button 8 Exit the PC viewer 9 Capture the still images 8.1.2 Connect PC Client to DVR This section describes how to manage the DVR connection window. 102 Step 1 Click the button to open the DVR connection window. Step 2 Click the button to add, modify, delete the DVR connection or close the DVR connection window. ENDSS-R4D8 Step 3 Add a new DVR connection: Press the “Add' button to create a DVR connection. Step 4 Input or modify the DVR name, DVR IP address, Port No (Default port number is 80 or 8000), Password and number of DVR channels Step 5 The DVR list will show the new DVR connections after setup. New Connections 103 ENDSS-4C8 Step 6 Select the DVRs you would like to connect, viewing and control from the list of available DVRs. A check mark will indicate your choices. 8.1.3 Switching the Channel Displays This section briefly illustrates how to switch channel display. Display a single channel on one quadrant Double click on the channel you would like to display on one quadrant. The screen will appear as follows: 104 ENDSS-R4D8 Display 4 and 8channels viewing on one quadrant Double click the single channel viewing to switch the display. The screen will appear as follows: Display a single DVR connection display in full view Click the DVR connection switch button to display a single DVR connection in full view. The screen will appear as follows: 105 ENDSS-4C8 Display single channel in full view: Double click the specific channel you would like to display in full view, or click the “ ” icon to switch the display. The screen will appear as follows: 8.1.4 Pause the Viewing Click on the “ 106 ” icon to pause the current viewing. ENDSS-R4D8 8.1.5 Capture Still Image Click on the icon to capture still image of the view that is currently displayed on the screen. Save the BMP image to the specific location in your computer. For Web Browser Viewer, the still image will be stored at “C:\Viewer” in your computer. 8.1.6 PTZ Control This interface supports remote PTZ control on your personal computer. 107 ENDSS-4C8 Icon 108 Name Function Left Limit Set the left limit of auto pan Right Limit Set the right limit of auto pan Patrol Start / Stop the auto pan mode Cruise Start / Stop the cruise mode Set Set preset position Call Call preset position Clear Clear preset position Zoom In Tap the button to zoom in Zoom Out Tap the button to out Auto Iris Set as auto iris Iris Open Tap the button to make a selection Iris Close Tap the button to cancel a selection Auto Focus Set as auto focus Focus Near Tap the button to focus near Focus Far Tap the button to focus far Moving Icon Move to top-left / top / top-right Moving Icon Move to left / stop / right Moving Icon Move to bottom-left / bottom / bottom-right PTZ ID Select the ID of the PTZ camera ENDSS-R4D8 8.1.7 Remote Playback Click on the icon to display the remote playback interface on your PC Viewer. Playback control window Control bar 8.1.7.1 Preview of the Control Bar 1 2 3 4 5 6 7 8 9 No. Name Function 1 Fast Backward 2x Plays backward faster by twice the normal speed 2 Fast Backward 1x Plays backward faster by 1x the normal speed 3 Playback Starts the video playback 4 Fast Forward 1x Plays forward faster by 1x the normal speed 5 Fast Forward 2x Plays forward faster by twice the normal speed 6 Pause Pauses the video playback 7 Stop Stops the video playback 8 Time Bar Adjust the playback time 9 Volume Volume switch 109 ENDSS-4C8 8.1.7.2 Playback by Time Search “Time Search” playback mode supports playback by the specific time. Select the “Begin Date” and “Begin Time” then press the button “Play” to start video playback. You will see the search result table as following figure: Click on the 110 icon back to “Time Search” control window. ENDSS-R4D8 Press the button “Backup” start to backup the video data. Select the start date and time and end of date and time, the file size will show on the file size column. Then press “start” to start backup to a PVF file. 111 ENDSS-4C8 8.1.7.3 Playback by Event Search “Event Search” playback mode supports playback by the specific event. Select the “Event Begin Date”, “Event Begin Time”, Event End Date”, “Event End Time” and “Event (Event Type)” then press the button “Search”. You will see the search result table as following figure: Playbacks the event by mouse double clicks. You will see the video playback as following figure: 112 ENDSS-R4D8 Click on the icon back to “Event Search” control window. Select the start date and time and end of date and time, the file size will show on the file size column. Then press “start” to start backup to a PVF file. 113 ENDSS-4C8 8.1.8 Remote DVR Configuration Click the icon to display the remote configuration interface on your PC Viewer. Login the Remote Configure Interface The authentication procedure for remote site access follows the DVR authentication process. Please login by using the designated user name and password. If you did not change any of these settings on your DVR, please use the default settings below. Default User: admin Default Password: 123456 You can change the DVR configuration after successfully logging in. The operation method of the remote configuration interface is consistent with the DVR interface. Please refer to the DVR operation sections on this manual. 114 ENDSS-R4D8 8.2 Web Browser Viewer This section introduces the remote viewing and control through Web Browser Viewer. This function is supported only in the IE browser. You may encounter abnormal operations if you use other browsers. Install the Active-X directly from the webpage (For initial installation). Refer to the following example to enter the Web Browser Viewing: Step 1 Start up IE Explorer and enter the DVR IP address to IE address bar. (Please refer to DVR Network Information of DVR IP Address.) Step 2 An alert message occurring “Install ActiveX control” on the tool bar. (Please refer directly to step 9 if ActiveX has already been installed) Step 3 Click on this alert message and select “Install ActiveX Control”. Step 4 If the message “Your security Settings do not allow web sites to use ActiveX controls installed on your computer.” pops up when logging in, please follow following instruction. Step 5 Select the IE browser “Tools” on the tool bar and select “Internet Options” 115 ENDSS-4C8 116 Step 6 Select “Security” → “Trusted Sites” → “Sites” Step 7 Enter the DVR address into the blanks shown in picture, and click “add.” (This address is only for demonstration. Please use the IP address linked to your on-site DVR.) ENDSS-R4D8 The newly added website will appear at the trusted web sites list. Press Close to leave the menu. Step 8 Go back to the internet browser (IE) window, press refresh button or F5. You will enter the Web Browser Viewer login page. Enter the designated user name and password. (Enter the default user name “admin” and password “123456” if you did not change the DVR Authentication settings.) Then press the “ ” icon to connect to the DVR from the remote site. 117 ENDSS-4C8 8.2.1 Switching the Channel Displays Display single channel in full view: Double click the channel to display single channel in full view. Display four channels in full view: Double click the full view display to switch into four channels display. 8.2.2 Web Browser Viewer Operation The Web Browser interface is consistent with PC Viewer. Please refer to the PC Viewer operation guide. 118 Chapter 9 9 SecuViewer 10 For iPhones, iPad and iPod Touch 119 ENDSS-R4D8 10.1 Install SecuViewer for iPhones, iPad and iPod touch SecuViewer is the free software applications for iPhone, iPad and iPod touch users to remotely connect to the ENDSS-4C8 DVR. Please search the SecuViewer on iPhone “App Store”. Enter “SecuViewer” to search the SecuViewer software on the iPhone APP Store search page. Tap on the icon Free. It will change to the icon Install. Tap on the Install icon to install SecuViewer. 120 ENDSS-R4D8 You can see the SecuViewer icon on the iPhone main screen. 10.2 SecuViewer Interface Overview Connect to the DVR Stop the DVR connection Switch the channel button (CH1~CH4 CH5~CH8 CH9~CH12 CH13~CH16) Setup the DVR connection SecuViewer simple operation guide Display channel one Display channel two Display channel three Display channel four Display channel five Display channel six Display channel seven Display channel eight 121 ENDSS-R4D8 Display channel nine Display channel ten Display channel eleven Display channel twelve Display channel thirteen Display channel fourteen Display channel fifteen Display channel sixteen 10.3 Connecting to the Surveillance System Select the SecuViewer icon on iPhone main screen to start the remote monitoring. 122 ENDSS-R4D8 Select the “Setup” icon to setup the DVR connection. Please setup all information to connect to the DVR: 59.124.68.61 » Network IP Address: Enter the DVR IP Address. » Network Port: Enter the network port (default is 8000). » User Name: Enter the user name (default is admin). » Password: Enter the password (default is 123456). admin 123456 When you are done with the setup, tap on the “Ok” icon. 123 ENDSS-R4D8 Tap on the “Play” icon to connect to the DVR. SecuViewer can display only one channel on the iPhone screen at a time. The default viewing channel is channel one. Tap on the corresponding channel numbers to view the other channels. 124