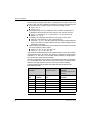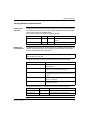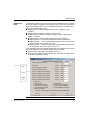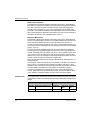
1
Modbus Plus to
Ethernet Bridge
174 CEV 200 40
User Guide
890 USE 191 00
2
890 USE 191 00 12/2004
Table of Contents
Safety Information . . . . . . . . . . . . . . . . . . . . . . . . . . . . . . . . . . . . 5
About the Book . . . . . . . . . . . . . . . . . . . . . . . . . . . . . . . . . . . . . . . 7
Chapter 1
Introduction to the Modbus Plus to Ethernet Bridge . . . . . . . . 9
Introduction to the Modbus Plus to Ethernet Bridge . . . . . . . . . . . . . . . . . . . . . . 10
Physical Description . . . . . . . . . . . . . . . . . . . . . . . . . . . . . . . . . . . . . . . . . . . . . . 12
Chapter 2
Theory of Operations . . . . . . . . . . . . . . . . . . . . . . . . . . . . . . . . . 15
Theory of Operations. . . . . . . . . . . . . . . . . . . . . . . . . . . . . . . . . . . . . . . . . . . . . . 16
Modbus Plus to Ethernet Routing . . . . . . . . . . . . . . . . . . . . . . . . . . . . . . . . . . . . 17
Ethernet to Modbus Plus Routing . . . . . . . . . . . . . . . . . . . . . . . . . . . . . . . . . . . . 23
Chapter 3
Hardware Installation . . . . . . . . . . . . . . . . . . . . . . . . . . . . . . . . . 29
Hardware Installation Overview. . . . . . . . . . . . . . . . . . . . . . . . . . . . . . . . . . . . . .
Mounting the Bridge Hardware . . . . . . . . . . . . . . . . . . . . . . . . . . . . . . . . . . . . . .
Connecting the Network and Power Cables . . . . . . . . . . . . . . . . . . . . . . . . . . . .
Installation Requirements . . . . . . . . . . . . . . . . . . . . . . . . . . . . . . . . . . . . . . . . . .
Verifying Network Communications . . . . . . . . . . . . . . . . . . . . . . . . . . . . . . . . . .
Periodic Maintenance . . . . . . . . . . . . . . . . . . . . . . . . . . . . . . . . . . . . . . . . . . . . .
Chapter 4
4.1
4.2
4.3
890 USE 191 00 12/2004
30
31
34
36
37
38
Getting Started . . . . . . . . . . . . . . . . . . . . . . . . . . . . . . . . . . . . . . 41
Bridge Setup . . . . . . . . . . . . . . . . . . . . . . . . . . . . . . . . . . . . . . . . . . . . . . . . . . . .
Console Methods . . . . . . . . . . . . . . . . . . . . . . . . . . . . . . . . . . . . . . . . . . . . . . . .
Monitor Console Method . . . . . . . . . . . . . . . . . . . . . . . . . . . . . . . . . . . . . . . . . . .
Web Console Method . . . . . . . . . . . . . . . . . . . . . . . . . . . . . . . . . . . . . . . . . . . . .
Configuration . . . . . . . . . . . . . . . . . . . . . . . . . . . . . . . . . . . . . . . . . . . . . . . . . . . .
Configuration Overview . . . . . . . . . . . . . . . . . . . . . . . . . . . . . . . . . . . . . . . . . . . .
Initial Configuration . . . . . . . . . . . . . . . . . . . . . . . . . . . . . . . . . . . . . . . . . . . . . . .
MB+ to Ethernet Tab . . . . . . . . . . . . . . . . . . . . . . . . . . . . . . . . . . . . . . . . . . . . . .
Ethernet to MB+ Tab . . . . . . . . . . . . . . . . . . . . . . . . . . . . . . . . . . . . . . . . . . . . . .
Networks Tab . . . . . . . . . . . . . . . . . . . . . . . . . . . . . . . . . . . . . . . . . . . . . . . . . . .
Admin Tools Tab . . . . . . . . . . . . . . . . . . . . . . . . . . . . . . . . . . . . . . . . . . . . . . . . .
42
43
44
46
49
50
54
58
66
70
74
3
Chapter 5
Chapter 6
Maintenance . . . . . . . . . . . . . . . . . . . . . . . . . . . . . . . . . . . . . . . . 75
Diagnostics. . . . . . . . . . . . . . . . . . . . . . . . . . . . . . . . . . . . . . . . . 77
Listening Points . . . . . . . . . . . . . . . . . . . . . . . . . . . . . . . . . . . . . . . . . . . . . . . . . . 78
Diagnostics Tab . . . . . . . . . . . . . . . . . . . . . . . . . . . . . . . . . . . . . . . . . . . . . . . . . . 79
Chapter 7
MSTR Examples . . . . . . . . . . . . . . . . . . . . . . . . . . . . . . . . . . . . . 87
Appendices
. . . . . . . . . . . . . . . . . . . . . . . . . . . . . . . . . . . . . . . . . . . . . . . 91
Appendix A
Log File Messages . . . . . . . . . . . . . . . . . . . . . . . . . . . . . . . . . . . 93
Appendix B
Modbus Error Codes . . . . . . . . . . . . . . . . . . . . . . . . . . . . . . . . . 97
Appendix C
Default Routing Records. . . . . . . . . . . . . . . . . . . . . . . . . . . . . . 99
Appendix D
Dynamic Routing . . . . . . . . . . . . . . . . . . . . . . . . . . . . . . . . . . . 105
Appendix E
Additional Routing Examples . . . . . . . . . . . . . . . . . . . . . . . . . 109
Networks with Multiple Local Modbus Plus and Ethernet Devices . . . . . . . . . . 110
Networks with Bridges to Additional Modbus Plus Networks. . . . . . . . . . . . . . . 116
Networks with Routers to Additional Ethernet Networks . . . . . . . . . . . . . . . . . . 121
4
Appendix F
Factory Settings. . . . . . . . . . . . . . . . . . . . . . . . . . . . . . . . . . . . 125
Appendix G
Technical Specifications . . . . . . . . . . . . . . . . . . . . . . . . . . . . . 127
Glossary
. . . . . . . . . . . . . . . . . . . . . . . . . . . . . . . . . . . . . . . . . . . . . . 131
Index
. . . . . . . . . . . . . . . . . . . . . . . . . . . . . . . . . . . . . . . . . . . . . . 141
890 USE 191 00 12/2004
Safety Information
§
Important Information
NOTICE
Read these instructions carefully, and look at the equipment to become familiar with
the device before trying to install, operate, or maintain it. The following special
messages may appear throughout this documentation or on the equipment to warn
of potential hazards or to call attention to information that clarifies or simplifies a
procedure.
The addition of this symbol to a Danger or Warning safety label indicates
that an electrical hazard exists, which will result in personal injury if the
instructions are not followed.
This is the safety alert symbol. It is used to alert you to potential personal
injury hazards. Obey all safety messages that follow this symbol to avoid
possible injury or death.
DANGER
DANGER indicates an imminently hazardous situation, which, if not avoided, will
result in death, serious injury, or equipment damage.
WARNING
WARNING indicates a potentially hazardous situation, which, if not avoided, can result
in death, serious injury, or equipment damage.
CAUTION
CAUTION indicates a potentially hazardous situation, which, if not avoided, can result
in injury or equipment damage.
890 USE 191 00 12/2004
5
Safety Information
PLEASE NOTE
6
Electrical equipment should be serviced only by qualified personnel. No responsibility is assumed by Schneider Electric for any consequences arising out of the use
of this material. This document is not intended as an instruction manual for untrained
persons.
© 2004 Schneider Electric. All Rights Reserved.
890 USE 191 00 12/2004
About the Book
At a Glance
Document Scope
Schneider Electric provides many network solutions, including
z Modbus (serial)
z Modbus Plus
z Modbus over TCP/IP (Ethernet)
A single industrial plant may use combinations of these networks. In many cases,
these networks must be linked together to allow cross-network communications.
Schneider Electric offers several products that allow bridging of industrial networks.
For example, the Bridge/MUX (BM85) allows you to bridge Modbus networks to
other Modbus Plus networks. Bridge Plus (BP85) provides routing between Modbus
Plus networks. These products address the demand for inter-network connectivity
and are well-suited for many applications.
The Modbus Plus to Ethernet bridge (174 CEV 200 40) provides a communication
link between devices operating on Ethernet and Modbus Plus (MB+) industrial
networks. It functions as an addressable node on each network, managing the
Ethernet and Modbus Plus protocols and translating messages between the
network applications in both directions.
A simple Web console allows access for configuration and diagnostics from any
computer on a plant LAN. Most of the configuration can be done on-line, without
stopping or restarting the bridge.
Validity Note
The data and illustrations found in this book are not binding. We reserve the right to
modify our products in line with our policy of continuous product development. The
information in this document is subject to change without notice and should not be
construed as a commitment by Schneider Electric.
890 USE 191 00 12/2004
7
About the Book
Related
Documents
Title of Documentation
Reference Number
Modbus Plus Planning and Installation Guide
890 USE 100 00
Modbus Plus Network IBM Host Based Devices User's Guide
890 USE 102 00
Modbus Plus Network I/O Servicing Guide
840 USE 104 00
Product Related
Warnings
Schneider Electric assumes no responsibility for any errors that may appear in this
document. If you have any suggestions for improvements or amendments or have
found errors in this publication, please notify us.
No part of this document may be reproduced in any form or by any means, electronic
or mechanical, including photocopying, without express written permission of
Schneider Electric.
All pertinent state, regional, and local safety regulations must be observed when
installing and using this product. For reasons of safety and to ensure compliance
with undocumented system data, only the manufacturer should perform repairs to
components.
When controllers are used for applications with technical safety requirements,
please follow the relevant instructions.
Failure to use Schneider Electric software or approved software with our hardware
products may result in improper operating results.
Failure to observe this product related warning can result in injury or equipment
damage.
User Comments
We welcome your comments about this document. You can reach us by e-mail at
[email protected]
8
890 USE 191 00 12/2004
Introduction to the Modbus Plus
to Ethernet Bridge
1
At a Glance
Overview
This chapter includes general information about the Modbus Plus to Ethernet bridge
(174 CEV 200 40).
What's in this
Chapter?
This chapter contains the following topics:
890 USE 191 00 12/2004
Topic
Page
Introduction to the Modbus Plus to Ethernet Bridge
10
Physical Description
12
9
Introduction to the Modbus Plus to Ethernet Bridge
Introduction to the Modbus Plus to Ethernet Bridge
Overview
10
As part of the Schneider Electric family of network solutions, the Modbus Plus to
Ethernet bridge (174 CEV 200 40) provides a communication link between devices
operating on Ethernet and those operating on Modbus Plus industrial networks.
The popular Schneider Electric industrial network solutions include:
z Modbus (serial)
z Modbus Plus
z Modbus over TCP/IP (Ethernet)
A single industrial plant may use combinations of these networks. In many cases,
these networks must be linked together to allow cross-network communications.
Schneider Electric offers several products that allow bridging of industrial networks.
For example, the Bridge/MUX (BM85) allows you to bridge Modbus networks to
other Modbus Plus networks. Bridge Plus (BP85) provides routing between Modbus
Plus networks. These products address the demand for inter-network connectivity
and are well-suited for many applications.
The Modbus Plus to Ethernet bridge (174 CEV 200 40) functions as an addressable
node on each of the networks it serves, managing the Ethernet and Modbus Plus
protocols and translating messages between the network applications in both
directions. The flexible syntax of the routing table records is simple enough for the
beginning user to understand and apply quickly, while providing advanced users
with tools to make even very complex routing requirements manageable.
The initial setup and some diagnostics can be done from the monitor console at the
bridge itself. Alternatively, a simple Web console allows convenient access for initial
setup, routing configuration, and diagnostics from any computer on the plant
network. The only software required on the configuration computer is a standard
Web browser. The configuration tools are password-protected for security. Most of
the configuration can be done online, without stopping or restarting the bridge.
890 USE 191 00 12/2004
Introduction to the Modbus Plus to Ethernet Bridge
Where to Begin
If you are a first time user of the Modbus Plus to Ethernet bridge (174 CEV 200 40)
or you would like to set up the bridge quickly, start with the routing configuration
tutorial (see p. 50), which walks you through a complete routing configuration
session.
You must configure the bridge before you can use it. Bridge setup (see p. 42)
covers the initial configuration that you must do after you receive the bridge.
Once you complete the initial setup, continue with the configuration example
(see p. 54) and the configuration tabs discussed on the following pages
(see p. 58, p. 66, p. 70, and p. 75).
Once you have configured the bridge, refer to the diagnostics tab (see p. 79) topic
for tips on maintaining and troubleshooting its operation.
If you want an in-depth understanding of how the bridge functions and which
configuration options are available, refer to the theory of operations (see p. 16),
which describes architectural and implementation details of the product. This
chapter describes the routing records that you must create to define how the bridge
routes messages and presents examples of some typical bridge applications.
Customer
Support
Go to http://www.schneider-electric.com to find the nearest Schneider Electric
sales office. Select your country in the drop-down menu to find customer support
closest to you.
Everything
Schneider Electric can do
for your business.
Catalogs, sales agencies,
distributors, services,
customer support and more...
>Select a country
>Select a country
Argentina
Australia
Austria
Belgium
Brazil
Bulgaria
Canada
Chile
China
890 USE 191 00 12/2004
11
Introduction to the Modbus Plus to Ethernet Bridge
Physical Description
Introduction
12
This topic describes the physical appearance and external features of the Modbus
Plus to Ethernet bridge (174 CEV 200 40).
890 USE 191 00 12/2004
Introduction to the Modbus Plus to Ethernet Bridge
The Bridge
The following figure shows the front and rear panels of the bridge.
1
3
2
4
5
6
7
1. front panel view
2. rear panel view
3. power indicator
4. connector panel *
5. reset switch
6. power switch
7. AC power connection
(* described on p. 34)
Note:
z Average boot time for the bridge is 70 seconds.
z If the bridge is power cycled (manually or unexpectedly, due to power failure), the system
may take up to three minutes to reboot.
z Avoid using the reset switch or power cycling the bridge while it is booting because this
may cause file system corruption.
890 USE 191 00 12/2004
13
Introduction to the Modbus Plus to Ethernet Bridge
14
890 USE 191 00 12/2004
Theory of Operations
2
At a Glance
Overview
This chapter presents the general operation of the Modbus Plus to Ethernet bridge
(174 CEV 200 40).
What's in this
Chapter?
This chapter contains the following topics:
890 USE 191 00 12/2004
Topic
Page
Theory of Operations
16
Modbus Plus to Ethernet Routing
17
Ethernet to Modbus Plus Routing
23
15
Theory of Operations
Theory of Operations
Overview
The Modbus Plus to Ethernet bridge (174 CEV 200 40) functions as a message
router between devices operating on Ethernet and Modbus Plus industrial networks.
It functions as an addressable node on each network, and can simultaneously route
messages from Ethernet to Modbus Plus and Modbus Plus to Ethernet networks.
The bridge uses two methods of routing messages, static and dynamic.
z static — To implement static routing, the bridge maintains two tables of routing
records that define how to route messages.
z One table defines the routing of Modbus Plus messages to Ethernet.
z The other table defines the routing of Ethernet messages to Modbus Plus.
Each routing record contains a source and destination section. A simple wizardbased Web console allows for easy creation and editing of these records. Most
of the configuration changes can be done on-line, without stopping or restarting
the bridge. Support for various routing expressions allows you to describe even
complicated routing configurations with just a few routing records.
z dynamic — For dynamic routing, the Ethernet nodes that initiate the messages
must tell the bridge at runtime how to route them. They do this by using specific
bridge internal commands to specify the destination addresses.
When the bridge receives a message, it tries to locate the first routing record that
describes how it should route the message. If the record exists, the bridge sends the
message to the appropriate destination and then sends the reply message back to
the original source node. If the bridge does not locate the routing record, it returns a
Modbus error code (exception code) to the source node.
Note: The bridge does not support Modbus Plus global data or peer cop
messages. These types of messages are passed only among nodes and devices
on the local Modbus Plus network. The bridge also does not support global data
(publish and subscribe) messages on the Ethernet side.
16
890 USE 191 00 12/2004
Theory of Operations
Modbus Plus to Ethernet Routing
Modbus Plus
Messages
Received by the
Bridge
The bridge uses the bytes of the Modbus Plus message to route the message to the
Ethernet side. The bridge requires at least one non-zero address byte immediately
following its node address to be able to route a message. The bridge uses this byte
to determine the Modbus Plus path through which the message is processed. The
bridge also uses this non-zero address byte to select the routing record, which then
determines the IP address to which the message should be sent. The last three
bytes of the Modbus Plus address are used to refine or confirm the selection of the
routing record by checking them against a routing filter. The outgoing IP address can
either be explicitly specified in the routing record or determined through expressions,
which could contain the Modbus Plus bytes.
Modbus Plus address used to send a message to the bridge
MB1: Bridge
Node
Address
MB2:
Bridge
Slave Path
MB3: 3rd Modbus MB4: 4th Modbus MB5: 5th Modbus
Plus Address
Plus Address
Plus Address
Byte
Byte
Byte
1 . . . 64
1...8
0 . . . 255
0 . . . 255
0 . . . 255
z bridge node address MB1 — The first byte specifies the node address of the
bridge as set in the Modbus Plus Address field of the Configuration/Networks tab.
z bridge slave path MB2 — The second byte specifies the slave path that the bridge
uses to receive the message.
z address bytes MB3 - MB5 — The third through fifth address bytes provide
additional routing information that the bridge uses. The specific meaning of each
byte varies from one installation to another, depending upon how you configure
the routing records.
Note: Due to the fact that the bridge requires a minimum of two non-zero bytes in
the Modbus Plus address of the incoming message to route the message, a
maximum of three BP85s could be used before a Modbus Plus to Ethernet bridge.
890 USE 191 00 12/2004
17
Theory of Operations
Modbus Plus to
Ethernet Routing
Here is a simple routing table, containing only one record. Depending upon the
complexity of your application, your routing table may contain many records.
Source: Modbus Plus
Destination: Ethernet
(Filter to the Received Modbus Plus Message) (Selected IP Address to Send Message Out)
Slave Path Modbus Plus Address Filter
IP Address
1
205.167.7.MB3 0
*.1.*.*.*
Destination Timeout
Index
(ms)
5000
For Modbus Plus to Ethernet routing examples, see p. 54.
Source Section
of Routing
Record (Modbus
Plus Side)
The source section consists of a slave path and a Modbus Plus address filter.
Together, they define a message filter for incoming Modbus Plus messages. The
source section information determines whether that record applies to the incoming
message. The meaning of each of these fields is explained below.
Slave Path
The slave path can contain a single number or a range of numbers. The bridge looks
at the second byte of the Modbus Plus address received (slave path), MB2, and
sees what record matches that number. The same slave path number can be used
in multiple routing records.
18
890 USE 191 00 12/2004
Theory of Operations
Modbus Plus
Address Filter
The Modbus Plus address filter consists of five fields. Each field corresponds to a
byte in the five-byte address that is part of the received message. The fields can
each contain a number, a number range, or an asterisk.
When the bridge receives a message, after selecting the one or multiple records for
which the second byte matches the slave path number, it then compares each byte
in the message’s address against the corresponding Modbus Plus address filter
field. If the Modbus Plus address filter contains a number, an exact match of a
corresponding byte is required. For a number range, the corresponding byte must
fall within the selected range. An asterisk in a Modbus Plus address filter indicates
that any value is acceptable.
When an incoming message’s Modbus Plus address matches the Modbus Plus
address filter, the bridge builds the IP address and destination index as specified in
the record. It then transmits the message to the destination node using this new
routing. If the incoming message’s routing path does not match a Modbus Plus
address filter for any of the records, the bridge sends an error message back to the
sender. Each message is routed only once, even if it matches more than one routing
table record. Only the first matching record is used.
The following table shows examples of routing filters and which Modbus Plus
addresses or ranges would pass through those filters.
Modbus Plus
Address Filter
Modbus Plus Addresses that Pass Successfully through the Filter
2.1.0.0.0
2.1.0.0.0
2.1.*.0.0
2.1.0.0.0 to 2.1.255.0.0
2.1.0-63.0.0
2.1.0.0.0 to 2.1.63.0.0
2.1.*.*.*
2.1.0.0.0 to 2.1.255.0.0,
2.1.1.0.0 to 2.1.1.255.0,
2.1.2.0.0 to 2.1.2.255.0,
.
.
2.1.255.255.0 to 2.1.255.255.255
*.1-8.*.*.*
Destination
Section of
Routing Record
(Ethernet Side)
890 USE 191 00 12/2004
any Modbus Plus address whose first byte is the bridge address
The destination section consists of an IP address, destination index, and timeout
and controls how a message is routed to its destination. A record’s destination
section processes only messages that match the slave path and Modbus Plus
address filter for that record. The meanings of these fields are explained in the
following paragraphs.
19
Theory of Operations
Ethernet
Messages Sent
by the Bridge
For all messages received on the Modbus Plus port for which a routing record can
be found, the bridge sends an Ethernet message. The destination IP address and
destination index, which the bridge uses in the message it sends out, depend on the
routing record and addressing mode used.
In the standard method (see p. 61), the address is built as follows, assigning
directly an IP address and a destination index to each Modbus Plus incoming
message.
Destination: Ethernet
IP Address
Destination Index
IP1: 1st Byte
IP2: 2nd Byte
IP3: 3rd Byte
IP4: 4th Byte
Destination Index
0 . . . 255
0 . . . 255
0 . . . 255
0 . . . 255
0 . . . 255
z address bytes IP1 - IP4 — These bytes contain the IP address of the destination
node.
z destination index — This byte contains the destination index. This value does not
affect where the message is sent, but rather is used by the receiving device to
take some prescribed action. Most Ethernet devices ignore this byte.
These bytes can be a constant value, a variable, or an arithmetic expression.
The standard addressing method is the most commonly used method for addressing
Ethernet devices since it requires no special configuration and assigns an IP
address directly.
In the advanced method (see p. 63), the address is assigned indirectly using a
lookup index. When the routing record is programmed, the user determines the
index that will be used for that record. Then, this index is used to look up the IP
address and destination index to send out the Ethernet message.
If the advanced method is used for routing a particular Modbus Plus incoming
message, after completing the configuration, the user will see in the routing table:
z IP Lookup Idx -> under IP Address
z a number under Destination Index
as shown in the table below. The number under Destination Index is used as a
lookup index to determine the destination IP address in the IP lookup table found
under the Networks (see p. 72) tab.
Destination: Ethernet
IP Address
Destination Index
IP Lookup Idx ->
lookup index number
ex: 48
z IP address — Not used in the advanced method.
z lookup index — This byte contains the lookup index that will be used to select a
routing record in the IP lookup table.
20
890 USE 191 00 12/2004
Theory of Operations
The advanced addressing method allows more flexibility in addressing Ethernet
devices. The destination IP address in multiple routing records can use the same
lookup index to address an Ethernet device. If the IP address of this device changes,
you must change only a single mapped entry to correct all routing records. In
addition, you can map a lookup index to a host name instead of an IP address. The
standard method does not allow the use of host names.
IP Address
890 USE 191 00 12/2004
The IP address field defines how to construct the four-byte IP address that the
bridge uses when it retransmits the message. This field consists of four arithmetic
expressions, each corresponding to a byte of the IP address. If you specify the
advanced method of addressing using the IP lookup table, these fields are not used.
For standard addressing, the arithmetic expressions take one of the following forms:
z {address byte} = operand
z {address} = operand + operand
z {address} = operand – operand
where operand may be one of the following:
z a constant value
z a variable = MB1, MB2, MB3, MB4, or MB5 — Use a specified byte from the
command message’s five-byte Modbus Plus address, where MB1 specifies the
first byte, MB2 specifies the second byte, etc.
z asterisk (*)
z Destination Record = IP: *.*.*.*., DI: *
z IP Address Assigned = IP: MB2.MB3.MB4.MB5., DI: MB1
Because these are unsigned byte values, each expression must take a value in the
range 0 to 255. The editor validates the expression according to the following rules.
z If the expression is a single constant, it must be in the range 0 to 255.
z valid: 1, 213, 37
z invalid: -5, 313
z If the expression is the sum or difference of two constants, the expression is
evaluated and the result must be in the range 0 to 255. The result is saved.
z valid: 5 + 3 (saved as 8), 74 - 13 (saved as 61), -12 + 22 (saved as 10)
z invalid: 3 - 5, -12 + 2
z Constants in the expression must each be in the range of -255 to +255.
z valid: 255 - 250 (saved as 5), -252 + 255 (saved as 3)
z invalid: 260 - 10, -275 + 300 (Notice that both expressions evaluate within the
range of 0 to 255, but are still invalid because they contain constants that are
individually out of range.)
z If the expression includes at least one operand that is not a constant, then at least
one of the operands must be positive.
z valid: MB1 + 3, MB4 - 22, 64 - MB2, -MB2 + MB3
z invalid: -MB1 - 2, -16 - MB2, -MB2 - MB3
It is possible for a valid expression to take a negative value at run time. For example,
if the expression is MB4 - 22 and the value of MB4 for a message is 8, the
expression evaluates to -14. The value -14 is an invalid number; therefore, the
bridge reports an error and does not process the message.
21
Theory of Operations
Similarly, an expression may overflow to a value greater than 255. The expression
MB1 + 64 evaluates to 266 if MB1 is 202. In this case, the value is an invalid number;
therefore, the bridge reports an error and does not process the message.
The following table shows examples of configurations and the addresses they
create.
Destination
Index
Incoming FiveByte Address
Routing Table Contents
(Destination Section)
Outgoing IP Destination
(Generated by Records Once
Evaluated)
Modbus Plus
Address
IP Address Field
Destination
Index
IP Address
Destination
Index
1.2.3.4.5
2.0.0.0
3
2.0.0.0
3
1.2.3.4.5
2.MB4.MB5.0
3
2.4.5.0
3
1.2.3.68.5
2.MB4-64.MB5.0
3
2.4.5.0
3
1.2.3.4.5
MB3.MB4.MB5.0
3
3.4.5.0
3
1.2.3.4.5
MB3.MB4.MB5.0
MB2
3.4.5.0
2
1.2.3.4.5
*.*.*.*
*
2.3.4.5
1
The destination index is a number included in the outgoing Ethernet message, as
explained in the Modbus TCP protocol. This index can be used in different ways by
the devices receiving the Ethernet messages. For example, an Ethernet to Modbus
(serial) bridge can use this index to route the Modbus message to a specific Modbus
serial device on the RS-485 serial network, after getting through the bridge.
Note: Most end devices do not use this field.
Timeout
22
The timeout field specifies the time that the bridge waits for a reply message before
reporting an error. The valid range is 50 - 99999 ms (5000 ms is the default). Be
aware that operations like downloading applications through the bridge may require
a timeout value that is higher than the default.
890 USE 191 00 12/2004
Theory of Operations
Ethernet to Modbus Plus Routing
Ethernet
Messages
Received by the
Bridge
In the case of Ethernet messages received by the bridge, the bridge routes the
messages according to the received destination index and IP address of the source
node (not the bridge's). The destination index is used as the index to enter into the
routing table, and the four IP bytes are run through the filter to further define the final
record that contains the outgoing Modbus Plus address.
IP1: Source IP
Address Byte
#1
IP2: Source IP
Address Byte
#2
IP3: Source IP
Address Byte
#3
IP4: Source IP
Address Byte
#4
DI:
Destination
Index
0 . . . 255
0 . . . 255
0 . . . 255
0 . . . 255
0 . . . 255
z address bytes IP1 - IP4 — These four bytes contain the IP address of the node
that sent the message.
z destination index — This byte contains the destination index. The destination
index may also be used in expressions inside the Modbus Plus address of the
routing records. The specific way this is done varies from one installation to
another, depending upon how you configure the routing records. Destination
indexes 0, 254, and 255 are reserved for use by the dynamic routing feature.
Destination indexes 250 to 253 are reserved for future use and should not be
used in your configuration. Therefore, destination indexes 1 to 249 are available
for general use.
Ethernet to
Modbus Plus
Routing
Here is an example of a record that routes messages from Ethernet to Modbus Plus.
Source: Ethernet
Destination: Modbus Plus
(Filter to the Source IP Address and Destination (Selected Modbus Plus Address to Send
Index of the Received Ethernet Message)
Message Out)
Destination Index
IP Address Filter
Modbus Plus Address
Timeout (ms)
1
*.*.*.*
DI.0.0.0.0
5000
For Ethernet to Modbus Plus routing examples, see p. 56.
Source Section
of Routing
Record (Ethernet
Side)
The source section consists of a destination index and an IP address filter. Together,
they define a message filter for incoming messages. The source section information
determines whether that record applies to the incoming message. The meaning of
each of these fields is explained below.
Destination
Index
The destination index is the value of the destination index in the incoming Modbus
TCP message.
890 USE 191 00 12/2004
23
Theory of Operations
IP Address Filter
The IP address filter consists of four fields that correspond to the four bytes of an IP
address. The fields can contain a number, a number range, or an asterisk.
When the bridge receives a message, it compares each byte of the source node’s
IP address (not the bridge’s) against the corresponding IP address filter field. If the
IP address filter contains a number, an exact match of a corresponding byte is
required. For a number range, the corresponding byte must fall within the selected
range. An asterisk in a IP address filter field indicates that any value is acceptable.
When an incoming message’s source IP address matches the source filter, the
bridge builds the Modbus Plus address for the destination node as specified in the
record. It then transmits the message to the destination node using this new routing.
If the incoming message’s destination index and IP address do not match any of the
records, the bridge sends an error message back to the sender. Each message is
routed only once, even if it matches more than one routing table record. Only the first
matching record is used.
The following table shows examples of IP address filters and which IP addresses or
ranges would pass through those filters.
IP Address Filter
IP Addresses that Pass Successfully through the Filter
1.0.0.0
1.0.0.0
1.*.0.0
1.0.0.0 to 1.255.0.0
1.0-63.0.0
1.0.0.0 to 1.63.0.0
1.*.*.*
1.0.0.0 to 1.255.0.0,
1.1.0.0 to 1.1.255.0,
1.2.0.0 to 1.2.255.0,
.
.
1.255.255.0 to 1.255.255.255
*.*.*.*
Destination
Section (Modbus
Plus Side)
24
any routing path
The destination section consists of a Modbus Plus address and a timeout and
controls how a message is routed to its destination. A record’s destination section
processes only messages that match the destination index and IP address filter for
that record. The meanings of these fields are explained in the following paragraphs.
890 USE 191 00 12/2004
Theory of Operations
Modbus Plus
Messages Sent
by the Bridge
Destination: Modbus Plus
Modbus Plus Address
MB1
MB2
MB3
MB4
MB5
1-64
0-64
0-255
0-255
0-255
For all messages received on the Ethernet port of the bridge for which a routing
record can be found, the bridge sends out a Modbus Plus message.
When the bridge sends messages to a Modbus Plus node, the five-byte address
identifies the destination node. These bytes can be a constant value, a variable, or
an arithmetic expression.
For example, if the destination node is located on the local Modbus Plus network,
the first byte contains the address of that node, and the remaining four bytes are
typically set to zero (for example, 5.0.0.0.0, for a PLC at node address 5). However,
the destination node can be up to four Modbus Plus networks away, in which case
you need to use additional bytes.
For example, if we had three Modbus Plus networks joined by standard Modbus
Plus bridges and wanted to route a message to a programmable controller that was
located two networks away, we might address it to 5.26.13.0.0. The message first
goes to node 5, a bridge on the local network. The bridge sends the message to
node 26, another bridge on the second network. That bridge then passes it along to
node 13 (PLC) on the third network.
For more information on addressing Modbus Plus nodes, refer to the documentation
for the specific Modbus Plus device.
Modbus Plus
Address
890 USE 191 00 12/2004
The Modbus Plus address field defines how to construct the five-byte Modbus Plus
address that the bridge uses when it retransmits the message. This field consists of
five arithmetic expressions, each corresponding to a byte of the Modbus Plus
address. The arithmetic expressions take one of the following forms.
z {destination routing byte} = operand
z {destination routing byte} = operand + operand
z {destination routing byte} = operand – operand
where operand may be one of the following:
z a constant value
z a variable = DI, IP1, IP2, IP3, or IP4 — Use a specified byte from the incoming
Ethernet message’s source IP address and destination index, where DI specifies
the destination index, IP1 specifies the first source IP address byte, IP2 specifies
the second source IP address, etc.
z asterisk (*) — Use the byte from the incoming Ethernet message’s source IP
address and destination index as follows.
z Destination Record = MB+: *.*.*.*.*
z MB+ Address Assigned = MB+: DI.IP1.IP2.IP3.IP4
25
Theory of Operations
Because these are unsigned byte values, each expression must take a value in the
range 0 to 255. The editor validates the expression according to the following rules.
z If the expression is a single constant, it must be in the range 0 to 255.
z valid: 1, 213, 37
z invalid: -5, 313
z If the expression is the sum or difference of two constants, the expression is
evaluated and the result must be in the range 0 to 255. The result is saved.
z valid: 5 + 3 (saved as 8), 74 - 13 (saved as 61), -12 + 22 (saved as 10)
z invalid: 3 - 5, -12 + 2
z Constants in the expression must each be in the range of -255 to +255.
z valid: 255 - 250 (saved as 5), -252 + 255 (saved as 3)
z invalid: 260 - 10, -275 + 300 (Notice that both expressions evaluate within the
range of 0 to 255, but are still invalid because they contain constants that are
individually out of range.)
z If the expression includes at least one operand that is not a constant, then at least
one of the operands must be positive.
z valid: DI + 3, IP4 - 22, 64 - IP2, -IP2 + IP3
z invalid: -IP1 - 2, -16 - IP2, -IP2 - IP3
It is possible for a valid expression to take a negative value at run time. For example,
if the expression is IP4 - 22 and the value of IP4 for a message is 8, the expression
evaluates to -14. The value -14 is an invalid number; therefore, the bridge reports
an error and does not process the message.
Similarly, an expression may overflow to a value greater than 255. The expression
IP1 + 64 evaluates to 266 if IP1 is 202. In this case, the value is an invalid number;
therefore, the bridge reports an error and does not process the message.
The following table shows examples of Modbus Plus address fields and the
addresses they create.
26
Incoming Ethernet
Information
Routing Table Contents
(Destination Section)
Outgoing Modbus Plus
Destination
(Generated by Records Once
Evaluated)
Destination Source Node’s
Index
IP Address
Modbus Plus Address
Field
Outgoing Modbus Plus
Destination
1
2.3.4.5
3.2.0.0.0
3.2.0.0.0
1
2.3.4.5
3.2.IP3.IP4.0
3.2.4.5.0
1
2.3.68.5
3.2.IP3-64.IP4.0
3.2.4.5.0
1
2.3.4.5
3.IP2.IP3.IP4.0
3.3.4.5.0
1
2.3.4.5
IP1.IP2.IP3.IP4.0
2.3.4.5.0
1
2.3.4.5
*.*.*.*.*
1.2.3.4.5
890 USE 191 00 12/2004
Theory of Operations
Timeout
890 USE 191 00 12/2004
The timeout field specifies the time that the bridge waits for a reply message before
reporting an error. The valid range is 50 - 99999 ms (5000 ms is the default). Be
aware that operations like downloading applications through the bridge may require
a timeout value that is higher than the default.
27
Theory of Operations
28
890 USE 191 00 12/2004
Hardware Installation
3
At a Glance
Overview
This chapter describes the Modbus Plus to Ethernet bridge (174 CEV 200 40)
hardware and installation procedures.
What's in this
Chapter?
This chapter contains the following topics:
890 USE 191 00 12/2004
Topic
Page
Hardware Installation Overview
30
Mounting the Bridge Hardware
31
Connecting the Network and Power Cables
34
Installation Requirements
36
Verifying Network Communications
37
Periodic Maintenance
38
29
Hardware Installation
Hardware Installation Overview
Mounting the
Bridge Hardware
The bridge can be physically installed on a vertical wall panel or horizontal shelf
using mounting brackets (see p. 32) supplied with the bridge. Be sure to provide
clearance for ventilation and access to the bridge’s rear panel connectors and
indicators (see p. 33).
Connecting the
Network and
Power Cables
Connect the Ethernet and Modbus Plus cables to the bridge’s rear panel (see p. 34).
Connect the power cable and apply power. The bridge has these connectors:
z Ethernet: RJ-45
z Modbus Plus: Two DB-9S for redundant Modbus Plus drop cables
z Power: 3-prong AC connector
Verifying the
Network
Communication
Check the Ethernet and Modbus Plus LEDs to verify operation of the bridge
(see p. 37).
Periodic
Maintenance
The air filters (see p. 38) should be cleaned periodically, as conditions in the work
environment dictate.
30
890 USE 191 00 12/2004
Hardware Installation
Mounting the Bridge Hardware
Mounting the
Bridge
WARNING
POWER SUPPLY
When mounting the bridge hardware, make sure that no power is being supplied to
the bridge.
Failure to follow this precaution can result in death, serious injury, or
equipment damage.
To mount the bridge, follow these instructions:
890 USE 191 00 12/2004
Step
Action
Comment
1
Install the two mounting brackets on the The mounting brackets and screws are
bridge’s side or bottom panel. Secure the provided with the bridge.
brackets with the screws.
If you use your own hardware, use 6-32
machine screws and do not allow any
screw to protrude more than 1/4 in
(6 mm) into the bridge.
2
Secure the bridge to a vertical panel or
horizontal shelf with screws through the
mounting bracket holes.
31
Hardware Installation
Mounting
Requirements
Provide adequate service access to the rear panel cable connectors.
165 mm
165 mm
32
138 mm
bottom panel
mount
238 mm
side panel
mount
890 USE 191 00 12/2004
Hardware Installation
Ventilation
890 USE 191 00 12/2004
For proper ventilation, maintain a minimum clearance of 5.0 in (125 mm) between
all vents and external equipment.
The ventilation ports on Modbus Plus to Ethernet bridge are shown in the following
figure.
1
front panel vents
2
rear panel vents
3
side panel vents
33
Hardware Installation
Connecting the Network and Power Cables
Before You
Begin
Before connecting the power cable, connect the Ethernet and Modbus Plus network
cables. Refer to the rear panel layout and the panel detail drawings (below) for
locations of the connectors.
For information about Modbus Plus network design, including the availability of drop
cables for connection to the bridge, refer to the Modbus Plus Network Planning and
Installation Guide (890USE10000).
See your Ethernet network administrator for information about the Ethernet cables
and connectors applicable to your system and application requirements.
The following figure shows the rear panel layout of the Modbus Plus to Ethernet
bridge.
1
2
3
4
1
2
3
4
34
connector panel (see detailed illustration, below)
reset switch
power switch
AC power connector
890 USE 191 00 12/2004
Hardware Installation
Note:
z Average boot time for the bridge is 70 seconds.
z If the bridge is power cycled (manually or unexpectedly, due to power failure), the system
may take up to three minutes to reboot.
z Avoid using the reset switch or power cycling the bridge while it is booting because this
may cause file system corruption.
The following figure is a detailed view of the connector panel.
MB+B
MS
1
2
KB
ACT
ERR
3
ERR
VGA
1
4
MB+A
PCI-85
Modicon
1
2
3
4
5
AN
5
Modbus Plus redundant port cabling
mouse port
keyboard port
VGA video port
Ethernet port 10/100 Mbit/s
When you have completed the connection of the Ethernet and Modbus Plus cables,
set the bridge’s power switch to the 0 (off) position. Connect the power cable to the
bridge power connector and to the external power source.
Set the bridge’s power switch to the 1 (on) position. The bridge’s power LED should
illuminate, showing that power is applied and within specification.
The LED indicators for the Ethernet and Modbus Plus cards may also illuminate if
those networks are active.
890 USE 191 00 12/2004
35
Hardware Installation
Installation Requirements
Modbus Plus
Grounding
The shield on the Modbus Plus cable should be attached to a suitable ground.
Ferrite Bead on
RJ-45 Cable
If the Ethernet network is being connected to the 10/100Base-T (RJ-45) connector,
an approved ferrite bead should be installed on the cable at the connector.
The approved bead is enclosed in a plastic box that can be clipped over the network
cable. It is not necessary to insert the cable through the bead before you install the
RJ-45 connector on the cable.
The ferrite bead on an RJ-45 cable is shown in the figure below:
22 mm
12 mm
32 mm
Information about the approved ferrite bead is in the following table:
36
Manufacturer (or Equivalent)
Location and Telephone
Part Number
Steward
Livingston, Scotland, UK
0044-1--506-414-200
28A2029-0A0
890 USE 191 00 12/2004
Hardware Installation
Verifying Network Communications
Ethernet Card
Indicators
Modbus Plus
Card Indicators
The Ethernet RJ-45 port has an indicator that shows a valid connection between the
RJ-45 port and the network. It has another indicator that flashes to show the bridge’s
communication activity on the Ethernet link.
Ethernet card indicators are shown in the following table:
Indicator
Color
Location
Status
TCP/IP Network Active
yellow
top
Bridge is actively communicating
TCP/IP.
RJ-45 Connection Valid
green
bottom
Valid connection exists at RJ-45 port.
The Modbus Plus card has an indicator that flashes a repetitive pattern to show its
network communication status, plus two indicators which identify communication
errors on the two Modbus Plus cable paths.
Note: One error indicator is lit normally in single-cable installations, showing that a
second cable does not exist.
The Modbus Plus active indicator patterns are shown in the following table:
Indicator (Green) (ACT LED)
Status
six flashes/second
normal operating state — All nodes on a healthy network
flash this pattern.
one flash/second
node is off-line — After being in this state for 5 s, the node
attempts to go to its normal operating state.
two flashes, then OFF for 2 s
token passing — The node detects the network token
being passed among other nodes, but it never receives
the token.
Three flashes, then OFF for 1.7 s no token passing — The node does not detect any token
passing on the network.
Four flashes, then OFF for 1.4 s
same address — The node has detected another node
using the same address.
The Modbus Plus channel error indicators are shown in the following table:
890 USE 191 00 12/2004
Indicator (Red)
Location
Status
error channel A
bottom
communications error at network port A
error channel B
top
communications error at network port B
37
Hardware Installation
Periodic Maintenance
Overview
Periodic maintenance consists of cleaning the bridge’s two internal air filters. Do this
at least annually.
Locating the Air
Filters
The figure below shows the location of the two air filters on the Modbus Plus to
Ethernet bridge.
1
2
38
1
upper air filter
2
lower air filter
890 USE 191 00 12/2004
Hardware Installation
Cleaning the
Upper Air Filter
CAUTION
Possible Loss of Network Communication
Remove the operating power to the bridge before cleaning the filters. Contact your
network administrator to ensure that your application is not adversely affected
before removing power to the bridge.
Failure to follow this precaution can result in injury or equipment damage.
z Remove the four screws that secure the bridge’s enclosure cover, and remove
the cover. The upper air filter is accessible behind the bridge’s front panel.
z Remove the filter, clean it with a detergent solution suitable for your site, and
reinstall it.
Cleaning the
Lower Air Filters
890 USE 191 00 12/2004
Do not remove the lower air filters from the bridge housing. Simply vacuum the filters
from the exterior to clean.
39
Hardware Installation
40
890 USE 191 00 12/2004
Getting Started
4
At a Glance
Overview
This chapter explains getting started with the Modbus Plus to Ethernet bridge
(174 CEV 200 40).
What's in this
Chapter?
This chapter contains the following sections:
890 USE 191 00 12/2004
Section
Topic
Page
4.1
Bridge Setup
42
4.2
Console Methods
43
4.3
Configuration
49
41
Getting Started
4.1
Bridge Setup
Bridge Setup
Overview
You must configure the Modbus Plus to Ethernet bridge before you can use it.
During this setup, you can select the desired Modbus Plus and IP addresses for the
bridge, along with other network settings and message routing information. In most
cases, you perform this setup only once. For information on configuring the routing
records, see p. 50.
There are two methods for setting up the bridge.
z bridge monitor console
z bridge Web console
Bridge Console
Tools
z The monitor console is available only locally, using a monitor, a keyboard, and a
42
mouse attached directly to the bridge. With the monitor console, you can set up
the network parameters needed to operate the bridge. You can also use the
monitor console to change the administrator password and reset the bridge to its
factory settings. Finally, there is a set of diagnostic tools available at the monitor
console to assist you with troubleshooting the bridge and its networks.
z The Web console is available to any computer on the Ethernet network equipped
with a web browser. Like the monitor console, you can set up the networks,
change the administrator password, and reset the device. The Web console also
contains the full suite of editing tools to set up the Ethernet and Modbus Plus
routing records. In addition, it provides debugging tools to monitor traffic passing
through the bridge, view and log error messages, and read from and write to
specific data registers of Modbus Plus and Ethernet devices.
890 USE 191 00 12/2004
Getting Started
4.2
Console Methods
At a Glance
Overview
This section explains the two console methods you can use for configuring the
bridge.
z monitor console
z Web console
What's in this
Section?
This section contains the following topics:
890 USE 191 00 12/2004
Topic
Page
Monitor Console Method
44
Web Console Method
46
43
Getting Started
Monitor Console Method
Monitor Console
Method
To access the monitor console, you must plug a standard PC keyboard, a mouse,
and a VGA monitor into the bridge connectors (see p. 34). The editing screen,
below, shows the factory default settings (see p. 125).
Initially, all the controls will be grayed-out, and the data fields will be display-only. To
operate the controls, click Login under Administrator Account, and enter the
password. The default password is password. The controls are now active, and
Login changes to Logout.
Modbus Plus to Ethernet Bridge
Version 1.0
Troubleshooting Tools
Network Settings
Use DHCP
Static IP
IP Address
192.168.0.1
Subnet Mask
255.255.255.0
Default Gateway
0.0.0.0
Host Name
MBPEB
Workgroup
WORKGROUP
Run
Event Viewer
Administrator Account
Logout
Change Password
Restore System
Name Server
Factory Settings: Reset all configuration
values, including passwords.
Factory Image: Reset all settings
and software.
Factory Settings
MAC Address
00:60:97:d4:81:66
MB+ Address
1
Factory Image
Reboot System
Apply
Schneider Electric
The system must be rebooted after changing
network settings or restoring factory settings.
Cancel
Reboot
Copyright © 2004, Cyberlogic Software, Inc.
From this screen, you may set up the network parameters as needed for your
network. Contact your network administrator for the proper settings.
Note: After you change any network setting, click Apply | Reboot. Changes to the
network settings do not take effect until you reboot the bridge.
44
890 USE 191 00 12/2004
Getting Started
The parameters available for editing are:
Parameter
Description
Use DHCP /
Static IP
Have a DHCP server assign an IP address to the bridge or assign a static IP address yourself. Selecting
DHCP also assigns the subnet mask and gateway.
Note: Be aware that changing the IP address of the bridge using DHCP will not update your routing
tables.
IP Address
The IP address assigned to the bridge must be unique on the network. The default value is 192.168.0.1.
If you change the IP address, a pop-up window appears asking if you want to reset the bridge routing
records to reflect the IP address change. This prompt appears when you click Apply.
Subnet Mask
The subnet mask to be used (dependent upon your network’s addressing setup).
Default Gateway
(optional)
The IP address of the gateway device used to communicate to devices outside of the local network. If
your network configuration includes a router to permit communication with another Ethernet network,
use the router’s IP address as the default gateway.
Host Name
The bridge name, which allows you to refer to the bridge by name rather than by its IP address. Host
names are 15 characters maximum and are not case-sensitive. The default is MBPEB.
Workgroup
The name of the workgroup to which the bridge belongs. Workgroup names are 15 characters
maximum and are not case-sensitive. The default is WORKGROUP.
Name Server
(optional)
The IP address of the server that translates system names into addresses. If you use host names,
rather than IP addresses, to refer to any Ethernet network devices, you must specify a name server.
MAC Address
This display-only field, which cannot be edited, shows the 12-character hexadecimal identifier for the
network adapter.
MB+ Address
Allows you to select the Modbus Plus address of the bridge.
Troubleshooting
Tools (not
available on the
Web console)
Use the drop-down list to select Event Log Viewer, Performance Monitor, IP Config, NetStat, Ping, ARP,
MBPStat, MBXDemo, or Time and Date. Select the tool, and click Run to open. (Note: You must log in
with the administrator password to use the troubleshooting tools.)
Administrator
Account:
Change
Password
The default administrator password is password. If you want to change the administrator password,
you must know the current password. If you forget the administrator password, contact customer
support (see p. 11) to reset the password.
Administrator
Account: Login/
Logout
You must log in with the administrator password to make any changes or use the troubleshooting tools.
When you are finished, click this button to prevent unauthorized operation. The default password is
password.
Restore System
You can restore the bridge to its factory default settings, including all configurations and the
administrator password.
z Click Factory Settings to restore the original configuration settings of the bridge (see p. 125). The
bridge remains at the current revision and software patch level as it was before you clicked Factory
Settings.
z Click Factory Image to restore the original configuration settings of the bridge (see p. 125) and
return the bridge to the original revision delivered from the factory. After you click Restore, you must
reapply any bridge software service packs to update to the current revision.
Note: Be aware that restoring to Factory Image does not restore the initial settings associated with
any of the troubleshooting tools.
Reboot System
Click this button to reboot the system after you change the network settings or restore factory settings
or factory image. These changes do not take effect until you reboot.
890 USE 191 00 12/2004
45
Getting Started
Web Console Method
Web Console
Method
You can set up a temporary network connection to the bridge with the bridge Web
Console. You must use an Ethernet crossover cable or a standard Ethernet hub to
connect the bridge to your computer. You must then set your computer’s network
settings to be compatible with the default bridge settings, as shown in factory
settings (see p. 125). After changing your network settings, you may have to reboot
your computer.
Open your web browser and navigate to http://192.168.0.1. The bridge console
opens. Click the Configuration tab; then click Network. The login screen, below,
opens.
Modbus Plus to Ethernet Bridge
Home
Info
MB+ to Ethernet
Ethernet to MB+
Configuration
Diagnostics
Networks
Admin Tools
Log In
User:
Administrator
Password:
Submit
Note:
Java Runtime Environment (JRE) version 1.4.2 or later is required. If the line below does
not correctly display your JRE version, you may need to download the latest version from
java.sun.com. Alternatively, if an internet connection is not available, JRE version 1.4.2 is
provided here.
Detected JRE version: 1.4.2
Login
Help
Select Administrator from the User drop-down menu, and enter the default
administrator password, which is password.
Note: After 30 minutes of inactivity, you will be automatically logged out.
46
890 USE 191 00 12/2004
Getting Started
Note:
z If you are logged on to the bridge’s Web console from one PC, you must log out
in order to log in to the Web console from another PC. If you simply close the
Web console on the initial PC without logging out, you must wait 30 minutes to
log on to the Web console from another PC. If you try to do so before the 30
minutes, you will get an error message stating that the administrator is already
logged in.
z Also, if you are logged on to the monitor console, you cannot log in to the Web
console and make changes. You must log out of the monitor console to make
changes through the Web interface.
The networks edit screen opens.
890 USE 191 00 12/2004
47
Getting Started
Here you may set up the network parameters required by your system. Once again,
contact your network administrator for the proper settings. After entering the desired
information, click Save Changes.
Note: The IP Lookup Table configuration is part of the advanced addressing
(see p. 63) technique and is not required to set up and run the bridge.
You must reboot the bridge for the changes to take effect. To restart, click Admin
Tools | Reboot. When the bridge restarts, it may no longer be able to communicate
with the computer you have been using because of the changes you just made.
Connect the bridge to the network and access the bridge via another computer on
that network, or change the Ethernet parameters on your computer as necessary.
48
890 USE 191 00 12/2004
Getting Started
4.3
Configuration
At a Glance
Overview
This section explains basic configuration, and it details the configuration tabs used
in the Web console.
What's in this
Section?
This section contains the following topics:
890 USE 191 00 12/2004
Topic
Page
Configuration Overview
50
Initial Configuration
54
MB+ to Ethernet Tab
58
Ethernet to MB+ Tab
66
Networks Tab
70
Admin Tools Tab
74
49
Getting Started
Configuration Overview
Overview
After the initial setup of the bridge, you may begin the message routing
configuration. To do this, use the tools available in the configuration tabs discussed
on the following pages. To introduce you to these tools, below is a simple
configuration tutorial and a detailed discussion of the Web console features.
Routing
Configuration
Tutorial
This routing configuration tutorial includes login instructions, an example of a typical
desired configuration, and instructions for device and bridge configuration. All
instructions can be used in a typical configuration session.
Log In
You must log in before you can configure the bridge. The following instructions tell
you how to log in to the Modbus Plus to Ethernet bridge.
Step
Action
1
Open your web browser and go to The home screen loads.
http://192.168.0.1. (See step 6 for
instructions on how to change the
bridge’s IP address.)
Comment
Modbus Plus to Ethernet Bridge
Home
Info
Configuration
Diagnostics
Welcome to Modbus Plus to Ethernet Bridge
The System Name, Host Name, IP Address, and MB+ Address for this bridge are shown below.
Please verify that this is the bridge you intend to work with.
System Name: Bridge
Host Name: MBPEB
IP Address: 192.168.0.1
MB+ Address: 1
If you plan to make any configuration changes, you should first save the current bridge
configuration to a disk file. To access the Save Configuration function, click the Configuration
Tab, then the Admin Tools Tab.
Schneider Electric
Copyright 2003, Cyberlogic Software, Inc.
Login
50
Help
890 USE 191 00 12/2004
Getting Started
Step
Action
Comment
2
Click Login.
The login screen loads. Check the bottom of the
screen for the Java Runtime Engine (JRE)
version running on your system. JRE version
1.4.2 or higher is required to use the Web console
configuration tools. If the version displayed is not
correct, you can either upload the version
included in the bridge by clicking on the
highlighted link or download and install the latest
version from http://java.sun.com/. You must
reboot your PC after installing the Java engine.
Modbus Plus to Ethernet Bridge
Home
Info
MB+ to Ethernet
Ethernet to MB+
Configuration
Diagnostics
Networks
Admin Tools
Log In
User:
Administrator
Password:
Submit
Note: Java Runtime Environment (JRE) version 1.4.2 or later is required. If the line below does
not correctly display your JRE version, you may need to download the latest version from
java.sun.com. Alternatively, if an internet connection is not available, JRE version 1.4.2 is
provided here.
Detected JRE version: 1.4.2
Login
890 USE 191 00 12/2004
Help
51
Getting Started
52
Step
Action
Comment
3
From the User drop-down field,
select Administrator.
Note: If an administrator is logged in at the
monitor console, you cannot log in at the Web
console.
There are two types of users, guest and
administrator.
z A guest can view all configuration settings but
cannot change them. The default setting is no
password. (An administrator can configure a
guest password, if desired.)
z An administrator can both view and change
configuration settings. You must enter a
password to log in as an administrator.
4
In the Password field, type the
administrator password.
The default is password.
5
Click Submit.
You are now logged in.
6
To change the IP address of the
bridge
z click Configuration
z click Networks
z type the new IP address of the We will use these IP and MB+ addresses in the
bridge (205.167.7.65) in the IP rest of this chapter.
Address field (see figure
below)
z type 5 in the MB+ Address
field (see figure below))
z click Save Changes
890 USE 191 00 12/2004
Getting Started
Step
Action
Comment
Modbus Plus to Ethernet Bridge
Home
Info
Configuration
Diagnostics
MB+ to Ethernet
Ethernet to MB+
Networks
Admin Tools
Ethernet
Use DHCP
Static IP
Host Name
MBPEB
IP Address
205.167.7.65
Workgroup
WORKGROUP
Subnet Mask
255.255.255.0
Name Server
Default Gateway
0.0.0.0
MAC Address
IP Lookup Table
Configure...
006097d48166
Socket Idle Timeout [s] 300
MB+
MB+ Address
< Back
5
Save Changes
There are unsaved changes.
Logout Administrator
7
Connected to BridgePC
Help
When you click Save Changes, a pop-up window appears asking if you want to reset
the bridge routing records to reflect the IP address change. Select Yes so that you
can follow the subsequent examples.
Note: For explanation of the screen options found under the Networks tab,
see p. 70.
890 USE 191 00 12/2004
53
Getting Started
Initial Configuration
Configuration
Example
The figure below represents Ethernet and Modbus Plus networks connected
through a bridge.
Modbus Plus to Ethernet bridge
IP: 205.167.7.65
5
Ethernet network
IP: 205.167.7.100
PC
Example:
Modbus Plus to
Ethernet Routing
54
Modbus Plus network
12
IP: 205.167.7.2
Quantum PLC
984 PLC
In this example, the 984 PLC sends a message to the Quantum PLC.
Step Action
Result
1
The originating node at address 12
sends a message with Modbus Plus
address 5.1.2.0.0.
The first Modbus Plus address byte sends
the message to the bridge at node address
5.
2
The bridge receives the message and
uses the Modbus Plus path number 1 to
process the message, as specified by the
second Modbus Plus address byte.
3
The bridge looks in the Modbus Plus to
Ethernet routing table for records for
slave path 1.
4
The bridge finds all records that contain
path number 1. In order to determine the
unique record, the bridge then looks in
the Modbus Plus address filter.
5
The IP address and destination index
fields set the destination routing to:
IP: 205.167.7.2
DI: MB4
6
The message goes to its destination at IP The Quantum PLC processes the message
address 205.167.7.2.
and sends a response back to the bridge,
which passes it over to the original node at
Modbus Plus address 12.
The bridge finds that the record with address
filter *.1-8.2.*.* is a unique match for the
incoming Modbus Plus address 5.1.2.0.0
(see the figure on the next page).
890 USE 191 00 12/2004
Getting Started
In the graphic below, in order to reach the Quantum PLC, the 984 PLC sends a
message to the bridge using the following Modbus Plus address: 5.1.2.0.0, where:
z 5 = the address of the bridge
z 1 = the Modbus Plus path that the bridge would use
(any number between 1 and 8)
z 2 = the byte that forces the bridge through the use of the Modbus Plus filter
(*.1-8.2.*.*) to use the second routing record in the table that points to the
IP address 205.167.7.2 of the Quantum PLC
MB+ address sent
by the 984 PLC
to the bridge
5.1.2.0.0
1
1-8
Modbus Plus network
2
*.1-8.2.*.*
3
205.167.7.2
4
MB4
5
5000
Ethernet address
sent out of the bridge
to the Quantum PLC
enlarged
view
Ethernet network
12
IP: 205.167.7.2
Quantum PLC
984 PLC
1
The 2nd byte of the Modbus Plus address (any number, 1-8, would work).
2
The filter that looks at the Modbus Plus 5-byte address to determine which record would
be used to route the incoming message. In our case, *.1-8.2.*.* is the filter of the record
that can process the message.
3
The IP address used for the outgoing Ethernet message as assigned by the routing record.
4
The destination index assigned to the outgoing Ethernet message (only needed if the
Ethernet message is going to a bridge (not a PLC) or other end device that uses it).
5
The default timeout is 5000 ms. Be aware, however, that operations like downloading
applications through the bridge may require a timeout value that is higher than the default.
See MSTR function examples (see p. 87) to implement this type of communication
from a 984 PLC to a Quantum PLC.
890 USE 191 00 12/2004
55
Getting Started
Example:
Ethernet to
Modbus Plus
Routing
56
In this example, the Quantum PLC sends a message to the 984 PLC.
Step
Action
1
The Quantum PLC sends a message
with the following routing:
Destination IP: 205.167.7.65
Source IP: 205.167.7.2
DI: 12
2
The bridge receives the message
through the Ethernet port and uses the
routing record number 12, as specified
by the destination index.
3
The bridge then compares the IP
address filter (*.*.*.*.*) with the source IP
address (205.167.7.2).
4
The Modbus Plus address field sets the
destination to 12.0.0.0.0.
5
The message goes to its destination at
Modbus Plus node address 12.
Result
Because the filter contains all asterisks,
any message received on destination
index number 12 passes, and the bridge
selects that record to process the
message (see the figure on the next
page).
The 984 PLC processes the message and
sends a reply back to the bridge, which
passes it over to the original Ethernet
node.
890 USE 191 00 12/2004
Getting Started
In the graphic below, in order to reach the 984 PLC, the Quantum PLC sends the
message to the bridge using the following Ethernet address: IP 205.167.7.65, with
a destination index of 12. The destination index (12) is then used in the routing table
to determine what Modbus Plus address is assigned to this message.
destination index inside
the Ethernet message
sent by the
Quantum PLC
to the bridge: 12
12
*.*.*.*
1
Ethernet network
12.0.0.0.0
2
3
5000
4
Modbus Plus address sent
out of the bridge
to the 984 PLC
12.0.0.0.0
Modbus Plus network
12
IP: 205.167.7.2
984 PLC
Quantum PLC
1
The destination index of the incoming Ethernet message used to select the routing record
to process the message.
2
The filter that looks at the IP address of the device that sent the message to determine if
the record(s) selected through the destination index can be used to route the incoming
message. By using asterisks (in above example), any incoming message with a
destination index of 12 would be routed to the Modbus Plus address 12.0.0.0.0.
3
The Modbus Plus address used for the outgoing message as assigned by the routing
record.
4
The default timeout is 5000 ms. Be aware, however, that operations like downloading
applications through the bridge may require a timeout value that is higher than the default.
See MSTR function examples (see p. 87) to implement this type of communication
from a Quantum PLC to a 984 PLC.
890 USE 191 00 12/2004
57
Getting Started
MB+ to Ethernet Tab
Overview
The MB+ to Ethernet tab allows you to configure the Modbus Plus to Ethernet
routing records for the bridge. These records determine how the bridge passes
messages from the Modbus Plus network to the Ethernet network.
Note: Changing a routing table entry associated with an existing communicating
device can cause a programming path to disconnect. Attempts to reconnect to a
device may result in a PLC is already logged in error message. If this occurs, you
must physically lift the device off the backplane and reseat it.
58
890 USE 191 00 12/2004
Getting Started
The main portion of the screen displays the routing table records. The editing
controls are below the records.
Editing Control
New/Edit
Controls
890 USE 191 00 12/2004
Description
New
Click New to create a new record.
Edit
Click the record you want to edit, and click Edit.
Remove
Click the record you want to delete, and click Remove. To highlight a
block of records, click the first record in the block, hold down the shift
key, click the last record in the block, and click Remove.
Move Up / Move
Down
The bridge checks messages against the records in the order that they
appear. To change the position of a record in the list, click the record
you want to move and click Move Up or Move Down.
Save Changes
Click Save Changes to save any changes you made.
If you select New or Edit, the following screen appears.
59
Getting Started
The screen options are:
Option
Description
Single Path / Range of
Paths
Select one of these options for the Slave Path Filter. If you
choose Single Path (the 2nd byte of the Modbus Plus incoming
address, MB2, see p. 18), the record applies to messages with
a slave path that you specify. If you choose Range of Paths
(valid ranges are 1 to 8), the record applies to messages with
a slave path within that range.
First Path / Last Path
If you choose Single Path, only one drop-down menu appears,
named Path. If you choose Range of Paths, select the first and
last paths in the range from the two drop-down menus, First
Path and Last Path.
MB+ Address (MB1 MB2
MB3 MB4 MB5) Filter
In these five fields, enter the criteria for the Modbus Plus
address filter. For more information on how this filter works and
how to determine your critieria, refer to the Modbus Plus
address filter (see p. 19).
Note: MB2, the 2nd Modbus Plus address byte, is a displayonly field and always contains the path or range you selected
for the slave path filter. The second Modbus address byte
always contains the slave path number. Since you already
defined the desired filter criteria for this byte, the criteria is
copied into this field for your convenience and to prevent
configuration errors.
Examples
Click Examples to display message routing examples.
Next >
Click Next > to proceed to the next screen.
Finish
Click Finish to complete editing and return to the main Modbus
Plus to Ethernet screen.
Cancel
Click Cancel to terminate editing and discard any changes you
made in the record.
If you click Next >, the destination information screen appears. There are two
methods you can use to address messages sent from the Modbus Plus side to the
Ethernet side.
z standard ⎯ The standard addressing method is most often used because it is
simpler and requires less configuration.
z advanced ⎯ The advanced addressing method provides additional capabilities
and may be useful in certain situations, where additional bridging networks may
be required.
60
890 USE 191 00 12/2004
Getting Started
Standard
Addressing
890 USE 191 00 12/2004
If you choose IP Address, you use the standard addressing method, and the
following screen appears.
61
Getting Started
The screen options are:
62
Option
Description
IP Address
Enter the desired IP address for the destination in these four fields.
Each field may contain a constant or an expression, as explained in
Destination Section of Routing Record (Ethernet Side) (see p. 19).
Destination Index
Select a byte of the Modbus Plus address from this drop-down menu
to use as the destination index for the Ethernet routing. You may
choose Custom, which causes a data entry field to open, in which you
may enter a constant or expression value as desired.
Timeout (ms)
Enter the desired timeout value in milliseconds (minimum: 50,
maximum: 99999). Be aware that operations like downloading
applications through the bridge may require a timeout value that is
higher than the default.
Examples
Click Examples to display message routing examples.
< Back
Click <Back to return to the previous screen.
Finish
Click Finish to complete editing and return to the main Modbus Plus
to Ethernet screen.
Cancel
Click Cancel to terminate editing and discard any changes you made
in the record.
890 USE 191 00 12/2004
Getting Started
Advanced
Addressing
If you choose IP Lookup Table (see p. 70), you use the advanced addressing
method, and the following screen appears. For further explanation of advanced
addressing, see p. 20.
The screen options are:
890 USE 191 00 12/2004
Option
Description
Lookup Table Index
From the drop-down menu, select the lookup table record that
contains the routing information for this record.
Timeout (ms)
Enter the desired timeout value in milliseconds
(minimum: 50, maximum: 99999). Be aware that operations like
downloading applications through the bridge may require a timeout
value that is higher than the default.
Examples
Click Examples to display message routing examples.
< Back
Click <Back to return to the previous screen.
Finish
Click Finish to complete editing and return to the main Modbus Plus
to Ethernet screen.
Cancel
Click Cancel to terminate editing and discard any changes you made
in the record.
63
Getting Started
Following the Initial Configuration (see p. 54) example:
z Select Lookup Table Index 48 from the drop down menu.
z Click Finish.
The routing table looks as follows. Click Save Changes to save any changes you
made.
64
890 USE 191 00 12/2004
Getting Started
After completing the routing table configuration, you must configure the IP lookup
table (see p. 72). The screen below shows the result of the IP lookup configuration
according to the configuration example (see p. 54) using advanced addressing.
890 USE 191 00 12/2004
65
Getting Started
Ethernet to MB+ Tab
Overview
The Ethernet to MB+ tab allows you to configure the Ethernet to Modbus Plus
routing records for the bridge. These records determine how the bridge passes
messages from the Ethernet network to the Modbus Plus network.
Note: Changing a routing table entry associated with a Modbus Plus port can
cause a programming path to disconnect. Attempts to reconnnect to a device may
result in a PLC is already logged in error message. If this occurs, you must
disconnect the Modbus Plus cable from the PLC and reconnect it.
66
890 USE 191 00 12/2004
Getting Started
The main portion of the screen displays the routing table records. The editing
controls are below the records.
Editing Control
New/Edit
Controls
890 USE 191 00 12/2004
Description
New
Click New to create a new record.
Edit
Click the record you want to edit, and click Edit.
Remove
Click the record you want to delete, and click Remove. To highlight a
block of records, click the first record in the block, hold down the shift
key, click the last record in the block, and click Remove.
Move Up / Move
Down
The bridge checks messages against the records in the order that they
appear. To change the position of a record in the list, click the record
you want to move and click Move Up or Move Down.
Save Changes
Click Save Changes to save any changes you made.
If you select New or Edit, the following screen appears.
67
Getting Started
The screen options are:
68
Option
Description
Single Index / Range of
Indexes
Select one of these options for the Destination Index Filter. If you
choose Single Index, the record applies to messages with a
destination index value that you specify. If you choose Range of
Indexes, the record applies to messages with a destination index
within that range.
First Index / Last Index
If you choose Single Index, only one drop-down menu appears,
named Index. If you choose Range of Indexes, select the first
and last destination indexes in the range from the two drop-down
menus, First Index and Last Index.
IP Address (IP1 IP2 IP3
IP4) Filter
In these four fields, enter the criteria for the IP address filter for
this record. For more information on how this filter works and how
to determine your criteria, refer to Bridge Routing Records -Ethernet to Modbus Plus (see p. 23).
Timeout (ms)
Enter the desired timeout value in milliseconds (minimum: 50,
maximum: 99999). Be aware that operations like downloading
applications through the bridge may require a higher than usual
timeout value.
Examples
Click Examples to display message routing examples.
Next >
Click Next > to proceed to the next screen.
Finish
Click Finish to complete editing and return to the main Modbus
Plus to Ethernet screen.
Cancel
Click Cancel to terminate editing and discard any changes you
made in the record.
890 USE 191 00 12/2004
Getting Started
If you click Next >, the following screen appears.
The screen options are:
890 USE 191 00 12/2004
Option
Description
MB+ Address
In these five fields, enter the desired Modbus Plus address for the
destination. Each field may contain a constant or an expression, as
explained in Destination Section (Modbus Plus Side) (see p. 24).
Timeout (ms)
Enter the desired timeout value in milliseconds (minimum: 50, maximum:
99999). Be aware that operations like downloading applications through
the bridge may require a higher than usual timeout value.
Examples
Click Examples to display message routing examples.
< Back
Click < Back to return to the previous screen.
Finish
Click Finish to complete editing and return to the main Modbus Plus to
Ethernet screen.
Cancel
Click Cancel to terminate editing and discard any changes you made in
the record.
69
Getting Started
Networks Tab
Network Settings
Click Networks to view and modify the network settings for the bridge.
Modbus Plus to Ethernet Bridge
Home
Info
Configuration
Diagnostics
MB+ to Ethernet
Ethernet to MB+
Networks
Admin Tools
Ethernet
Use DHCP
Static IP
Host Name
MBPEB
IP Address
205.167.7.65
Workgroup
WORKGROUP
Subnet Mask
255.255.255.0
Name Server
Default Gateway
0.0.0.0
MAC Address
IP Lookup Table
Configure...
006097d48166
Socket Idle Timeout [s] 300
MB+
MB+ Address
< Back
5
Save Changes
There are unsaved changes.
Logout Administrator
Connected to BridgePC
Help
Note: Before you make any changes to the network settings, check with your
network administrator to ensure that the changes you make will work properly and
not disrupt network operation.
70
890 USE 191 00 12/2004
Getting Started
The screen options are:
890 USE 191 00 12/2004
Option
Description
DHCP / Static IP
Assign a static IP address or have a DHCP server assign it to the
bridge.
Note: Be aware that changing the IP address of the bridge using
DHCP will not update your routing tables.
IP Address
The IP address assigned to the bridge must be unique on the network.
The default value is 192.168.0.1. If you change the IP address, a popup window appears asking if you want to reset the bridge routing
records to reflect the IP address change. This prompt appears when
you click Save Changes.
Subnet Mask
The Subnet Mask depends upon the addressing setup your network
uses. The default value is 255.255.255.0.
Default Gateway
If used, the default gateway is the IP address of the gateway device,
which communicates to devices outside the local network. If the
network configuration includes a router to permit communication with
another Ethernet network, use the router’s IP address as the default
gateway.
IP Lookup Table
If you use the advanced (see p. 63) method of Modbus Plus to
Ethernet routing, you must configure the IP lookup table.
Host Name
This is the bridge system name, which allows you to refer to the bridge
by name rather than by IP address. Host names are 15 characters
maximum, and are not case-sensitive. The default is MBPEB.
Workgroup
This is the name of the workgroup to which the bridge belongs.
Workgroup names are 15 characters maximum and are not casesensitive. The default is WORKGROUP.
Name Server
If used, this is the IP address of the server that will translate system
names into addresses. If you use names, rather than IP addresses, to
refer to any of the devices on the Ethernet network, you must specify
a Name Server.
MAC Address
This display-only field, which shows the 12-character hexadecimal
identifier for the network adapter, cannot be edited.
Socket Idle
Timeout [s]
This is the amount of time (in seconds) after which the socket will be
closed if there has been no activity. The default is 300 s. The range of
valid values is 0 - 1000 s with 1 s increments.
MB+ Address
Select the Modbus node address for the bridge.
Save Changes
Click Save Changes to save all changes made to the network settings.
You may have to restart the bridge before the changes take effect.
71
Getting Started
IP Lookup Table
Configuration
If you click Configure for the IP Lookup Table, the following screen appears.
The main portion of the screen displays the IP lookup table records. The editing
controls are below the records.
Editing Control
72
Description
New
Click New to create a new record.
Edit
Click the record you want to edit, and then click Edit.
Remove
Click the record you want to delete, and then click Remove. To
highlight a block of records, click the first record in the block, hold down
the shift key, and click the last record in the block.
Save Changes
Click Save Changes after you make any changes.
890 USE 191 00 12/2004
Getting Started
New/Edit
Controls
If you click New or Edit, the following screen appears.
The screen options are:
Option
Description
Lookup Index Configure this number in the Modbus Plus to Ethernet routing
table to identify that this is the lookup table entry you want to reference
(see p. 63).
890 USE 191 00 12/2004
IP Address /
Host Name
Provide either the IP address or the host name of the destination Ethernet
device. If you choose IP Address, four fields appear; enter a fixed IP address.
(Expressions are not permitted.) If you choose Host Name, only one field
appears. Host names are 15 characters maximum, and are not casesensitive. The default is MBPEB.
Destination
Index
Select the destination index value for this record.
OK
Click OK to accept the changes you made.
Cancel
Click Cancel to cancel the changes you made and return to the previous
screen.
73
Getting Started
Admin Tools Tab
Overview
74
The Admin Tools tab includes tools and services for managing administrative and
maintenance tasks on the bridge. For more information, see p. 75.
890 USE 191 00 12/2004
Maintenance
5
Maintenance
Overview
To maintain and update the bridge, use the Admin Tools tab, which includes tools
and services for managing administrative and maintenance tasks on the bridge.
update the software
restore configuration
settings
restore configuration
settings & software
890 USE 191 00 12/2004
75
Maintenance
The screen options are:
Option
Description
System Name
Enter a name for the bridge (15 characters maximum). The name is
displayed on the status line near the bottom of each configuration screen.
Diagnostic Update
Interval (ms)
The Diagnostic Update Interval is the minimum time, in milliseconds,
between update requests when viewing the diagnostic screens, which
updates automatically. The default value is 500 ms. The other values you
can select are 1000 and 5000 ms.
Logging Type
Choose to log all bridge activity, errors only, or nothing. See p. 79 for
more information.
Save Configuration Click Save to save your current configuration settings as a local file.
Load Configuration Click Load after you saved a configuration to restore the saved
configuration settings from the local file. These are your routing records
for Modbus Plus to Ethernet and Ethernet to Modbus Plus.
Restart Routers
Click Restart to restart the bridge routers, which stops all communication
until the routers restart. This does not reboot the bridge system.
Admin Password
Click Change to change the administrator password. You need the
current administrator password to make the change. The default
password is password.
If you forget the administrator password, contact customer support
(see p. 11) to reset the password.
Guest Password
Click Change to change the guest password. Only an administrator can
change the guest password. You need the current guest password to
make the change. The default is no password.
Service Pack
Click Install to install a service pack. In the window that opens, click
(update the bridge) Browse to select the service pack file you want to install. Note: The
service pack file should be a file that you have already stored on a local
disk.
76
Factory Settings
Click Restore to restore the original configuration settings of the bridge
(see p. 125). The bridge remains at the current revision and software
patch level as it was before you clicked Restore.
Factory Image
Click Restore to restore the original configuration settings of the bridge
(see p. 125) and return the bridge software to the original revision
delivered from the factory. After you click Restore, you must reapply any
bridge software service packs to update to the current revision.
Note: Be aware that restoring to Factory Image does not restore the
initial settings associated with any of the troubleshooting tools.
Reboot System
Click Reboot to reboot the bridge system.
< Back
Click < Back to return to the previous screen.
Save Changes
Click Save Changes to save all changes made.
890 USE 191 00 12/2004
Diagnostics
6
At a Glance
Overview
The Modbus Plus to Ethernet bridge (174 CEV 200 40) contains several diagnostic
tools that you can use to observe the operation of the bridge and verify the correct
configuration of the routing records. The tools work with listening points that provide
access to the messages as they pass through the bridge. This chapter describes
what listening points are, how to use the diagnostic tools, and how to interpret the
messages they produce.
What's in this
Chapter?
This chapter contains the following topics:
890 USE 191 00 12/2004
Topic
Page
Listening Points
78
Diagnostics Tab
79
77
Diagnostics
Listening Points
Overview
78
The bridge maintains a table of routing records that defines how it routes messages.
(Theory of Operations (see p. 16) contains more information.) Based upon these
records, the bridge creates a list of listening points. A listening point is the
combination of a receiving side device (Ethernet or Modbus Plus) and a slave path.
You can also think of a listening point as a logical channel through which messages
are received. When a message arrives at a listening point, the bridge either routes
it to an appropriate destination or sends back an error response.
The bridge diagnostic tools allow you to monitor the listening points to see how they
are handling the messages. When routing problems develop, you can see if the
listening points are receiving messages and if the bridge is properly routing those
messages to their destinations.
890 USE 191 00 12/2004
Diagnostics
Diagnostics Tab
Overview
The Web console diagnostics tab contains five sub-tabs.
z Bridge Logs
z Bridge Stats
z Device Info
z Device Stats
z Read/Write
Bridge Logs Tab
This tab allows you to view the logged events for a specific listening point
(see p. 78). Each record in the log file has a time and date stamp header followed
by the event message. For explanation of the messages you see, refer to log file
messages (see p. 93).
890 USE 191 00 12/2004
79
Diagnostics
The screen options are:
80
Option
Description
Listening Point
Select the listening point you want to examine from the drop-down
menu. Make sure you click Pause before selecting the listening point.
Otherwise, you can not select a listening point.
Pause / Resume
This toggle button pauses the update of the display and permits it to
resume updating.
When you click Resume, the log entries for the selected listening point
are displayed, updating at the Diagnostic Update Interval (see p. 75).
When you click Pause, the screen stops updating. New events are held
in a buffer and are displayed when you click Resume. If the buffer fills
up while the screen updates are stopped, the oldest events are lost.
Save
Click Save to save the displayed values to a log file. Save is available
only when the display update is paused.
Clear Log
Click Clear Log to discard all log entries.
Top / Bottom
Click Top to move to the top of the log, displaying the oldest records.
Click Bottom to move to the bottom of the log, displaying the most
recent records.
Page Up / Page
Down
Click Page Up to move up one screen, displaying older records. Click
Page Down to move down one screen, displaying more recent records.
890 USE 191 00 12/2004
Diagnostics
Bridge Stats Tab
890 USE 191 00 12/2004
The bridge maintains statistical and diagnostic information about each listening
point (see p. 78). The Bridge Stats screen shows this information for the selected
listening point. The following figure describes each diagnostic field. (Note: The
Diagnostic Update Interval (see p. 75) determines the rate at which the screen
updates.)
81
Diagnostics
The screen options are:
82
Option
Description
Listening Point
Select the listening point you want to examine from the drop-down
menu (Modbus Plus path data/program or Ethernet record).
Status
This field shows the current operation mode for the selected listening
point. A listening point can be in one of three operation modes.
z Normal (This is the only mode in which messages can be routed.)
z Pausing
z Stopped
Current State
This field shows the current operation state for the selected listening
point. While in the Normal operation mode, a listening point can be in
one of four operation states.
z Idle
z Waiting for query on the slave path.
z Waiting for a master path to become available.
z Waiting for the reply from the destination device.
Routing Records
Each listening point is associated with one or more routing records.
This field shows how many routing records are associated with the
selected listening point.
Total Transactions
This field shows the number of routing transactions for the selected
listening point since the bridge began operating.
Total Errors
This field shows the number of routing errors for the selected listening
point since the bridge began operating.
Reset Counts
Click Reset Counts to reset the error count and total transactions to
zero.
890 USE 191 00 12/2004
Diagnostics
Device Info Tab
The bridge maintains statistical and diagnostic information about each device. The
Device Info tab displays this information for the selected device. (Note: The
Diagnostic Update Interval (see p. 75) determines the rate at which the screen
updates.)
The screen options are:
890 USE 191 00 12/2004
Option
Description
Device
Select the network you want to view from the drop-down menu. The
options available are Modbus Plus and Ethernet; the screens shown
differ depending on the network you choose.
Next > / < Back
There are two display screens. Click Next > and < Back to switch
between the two screens.
83
Diagnostics
Device Stats Tab
The Device Stats tab shows the network statistics and the active node table for the
selected device. (Note: The Diagnostic Update Interval (see p. 75) determines the
rate at which the screen updates.)
The screen options are:
Option
Description
Device
Select the network you want to view from the drop-down menu.
Note: The bridge is referred to as a host computer.
84
890 USE 191 00 12/2004
Diagnostics
Read/Write Tab
890 USE 191 00 12/2004
The Read/Write tab can be used for simple troubleshooting. It allows reading from
and writing values to the selected device over Modbus Plus or Ethernet networks.
85
Diagnostics
The screen options are:
86
Option
Description
Device
Select the device you want to read from or write to, either
Modbus Plus or Ethernet.
MB+ Address / IP Address
This field changes depending upon your Device selection. If
you choose MB+, enter the device’s MB+ address. If you
choose Ethernet, enter the device’s IP address.
Destination Index
This field appears only if you choose the Ethernet device. Enter
the destination index value.
Reference Value
Enter the reference value for the location you want to read or
write.
Read Length / Read
Enter the number of registers to be read. The maximum is 20.
Click Read to begin reading values from the designated
registers. (Note: The Diagnostic Update Interval (see p. 75)
determines the rate at which the displayed values update.)
Data Format
Select Dec (decimal), Hex (hexadecimal), or Bin (binary)
format, which will be used for both the read and write values.
Write Value / Write
Enter the value you want to write to the register. Click Write to
execute the write operation.
890 USE 191 00 12/2004
MSTR Examples
7
MSTR Examples
TCP/IP Node
890 USE 191 00 12/2004
The following example shows a Concept screen for an MSTR function in a TCP/IP
node. To send a message from the Quantum PLC to the 984 PLC (as described in
the configuration example (see p. 54)), you set up an MSTR as follows.
z Register 400051 contains the function code to be performed (2 = a read
operation).
z Register 400053 contains the length in words of data to be read.
z Register 400054 contains the start address in the remote device to begin reading
data from.
z Register 400055 (HEX):
z The high byte contains the index value the bridge will use to determine which
routing record to use.
z The low byte contains either the slot number of the NOE module sending out
the request or a value of FE (hex) to represent the coprocessor module on the
high end Quantum modules.
z Registers 400056 - 400059 contain the IP address of the bridge.
87
MSTR Examples
The bridge receives this request and uses the index number to look up the
appropriate record in the routing table. In this case, Map Index 0C maps to Modbus
Plus address 12.0.0.0.0 (as described in the Ethernet to Modbus Plus routing
example (see p. 56)).
MSTR: TCP/IP, Node Transaction
400051
400070
MSTR
# 10
Page:
2
/4
TCP/IP Operation Function Code
400051
UINT
2
Error Status
400052
UINT
0
Number of Registers Transferred
400053
UINT
10
Function-dependent Information
400054
UINT
5
Map Index (or unused)
400055
09:16
0C
high byte
Slot ID or Sequence Number
400055
01:08
FE
low byte
IP Address (B4.B3.B2.B1)
400056
UINT
205 167
Number of Input Regs (Func 23 only)
400060
UINT
0
Server Input Base Address (Func 23 only)
400061
UINT
0
HEX
7
65
Function Codes
01 -> WRITE DATA
03 -> GET LOCAL STATISTICS
07 -> GET REMOTE STATISTICS
09 -> Not Supported
11 -> READ CTE
23 -> READ/WRITE DATA
02 -> READ DATA
04 -> CLEAR LOCAL STATISTICS
08 -> CLEAR REMOTE STATISTICS
10 -> RESET OPTION MODULE
12 -> WRITE CTE
Use page 1 for MB+; page 3 for SYPEP MSTR; page 4 for MMSE MSTR
Close
88
<<
>>
Help
890 USE 191 00 12/2004
MSTR Examples
The following example shows a Concept screen for an MSTR function in a Modbus
Plus node. It writes 10 registers to the destination node, in this case, the Quantum
PLC whose address is 205.167.7.2 on the Ethernet network (as described in the
configuration example (see p. 54)).
z Register 400271 contains the MSTR function code 1, specifying a write
operation.
z Register 400273 contains the number of words to write.
z Register 400274 contains the destination register to write to (addressed as
register 1 = 400001).
z Registers 400275 - 400279 contain the path to route the message to.
z Register 400275 = 5, which is the Modbus Plus address of the bridge.
z Register 400276 = 1, which is the Modbus Plus path number to use within the
bridge. This can be any number from 1 to 8.
z Register 400277 = 2, which is used to pass through the Modbus Plus filter, and
the routing table, in this case, maps to 205.167.7.2.
If the message is sent from a NOM through a bridge to an Ethernet device, the first
byte of the destination device address (register 400275) contains:
z the slot number of the NOM in the high byte of the word
z the Modbus Plus address of the bridge in the low byte of the word (represented
in hex, then converted to decimal)
Modbus Plus
Node
Modbus Plus Network Node Transaction
Page:
MSTR Operation Function Code
400271
UINT
1
Error Status
400272
UINT
0
Number of Registers Transferred
400273
UINT
10
Function-dependent Information
400274
UINT
1
Routing 1, Destination Device Address
400275
UINT
5
Routing 2, Destination Device Address
400276
UINT
1
Routing 3, Destination Device Address
400277
UINT
2
MSTR
Routing 4, Destination Device Address
400278
UINT
0
# 10
Routing 5, Destination Device Address
400279
UINT
0
400271
400020
Function Codes
1 -> WRITE DATA
3 -> GET LOCAL STATISTICS
5 -> WRITE GLOBAL DATABASE
7 -> GET REMOTE STATISTICS
9 -> PEER COP HEALTH
1
/4
HEX
2 -> READ DATA
4 -> CLEAR LOCAL STATISTICS
6 -> REAL GLOBAL DATABASE
8 -> CLEAR REMOTE STATISTICS
Use page 2 for TCP/IP; page 3 for SYPEP MSTR; page 4 for MMSE MSTR
Close
890 USE 191 00 12/2004
<<
>>
Help
89
MSTR Examples
90
890 USE 191 00 12/2004
Appendices
At a Glance
Overview
These appendices contain information that may be useful to users of the Modbus
Plus to Ethernet bridge (174 CEV 200 40).
What's in this
Appendix?
The appendix contains the following chapters:
Chapter
A
890 USE 191 00 12/2004
Chapter Name
Page
Log File Messages
93
B
Modbus Error Codes
97
C
Default Routing Records
99
D
Dynamic Routing
105
E
Additional Routing Examples
109
F
Factory Settings
125
G
Technical Specifications
127
91
Appendices
92
890 USE 191 00 12/2004
Log File Messages
A
Log File Messages
Error Messages
The messages in the following table report communication errors or other problems.
Message
Meaning
Listening point tried to open the already The bridge attempted to reuse resources that are
open source device.
already in use.
Listening point received the following
The bridge received an error when it tried to access
error <error number>, <error text>
the source device. Verify that the source device is
when it tried to open the source device. configured and accessible.
890 USE 191 00 12/2004
Listening point received the following
error (<error number>, <error text>)
when it tried to open the slave path.
The bridge was unable to open the slave path.
Verify that no other application has the slave path
open. Also, verify that the source device is
configured and that the slave path number is valid
for that device.
Listening point received the following
error (<error number>, <error text>)
when it tried to read the slave path.
The bridge received an error when it tried to wait for
messages on the slave path.
Listening point received the following
error (<error number>, <error text>)
when it tried to receive a query on the
slave path.
The bridge received a message on the slave path.
However, there was a problem retrieving the
message from the source device.
Listening point was unable to find a
destination for this source routing-<routing path>.
A message was received on the slave path.
However, the routing information in the message
could not be matched to a destination. If the
message is valid and must be sent to a destination,
go to the Configuration / Bridge tab to specify the
destination.
93
Log File Messages
Message
Meaning
Listening point was unable to get a
<Data/Program> master path on
destination device <device number>.
Check the master-path-limits
configuration of the bridge.
A message received on the slave path was targeted
for destination device <device number>. No master
path configuration for that device was specified. Go
to the Configuration / Bridge tab. On the DM/PM
paths screen, verify that the destination device is
listed and apply the changes.
Listening point was unable to open a
<Data/Program> master path on
destination device <device number>.
The bridge was unable to get a master path on the
destination device. Usually, this means that all
master paths that are available to the bridge are in
use. If possible, increase the number of master
paths available to the bridge by closing any
applications using master paths and/or by going to
the Configuration / Bridge tab and increasing the
number of master paths the bridge is allowed to use.
Listening point received the following
error (<error number>, <error text>)
when it tried to send the query to the
destination device.
The resending of the message to the destination
device failed.
Listening point received the following
The retransmission of the message to the
error (<error number>, <error text>)
destination device succeeded, but there was trouble
when it tried to get the results of the last retrieving the reply.
transmission.
Listening point received the following
error (<error number>, <error text>)
when it tried to open the log file.
94
The listening point was unable to open the log file.
890 USE 191 00 12/2004
Log File Messages
Traffic Messages
The messages in the following table report events that are part of the normal
handling of messages through the bridge.
Message
Meaning
Query received with the following source The listening point received a command query on
address: <routing byte 1>.<routing byte a slave path. This message displays the routing
2>.<routing byte 3>.<routing byte
information that came along with the command.
4>.<routing byte 5>.
<query or reply>--Bytes <starting byte> - This message displays the actual command
<ending byte>: <bytes>
queries and replies as hexadecimal bytes.
Miscellaneous
Messages
890 USE 191 00 12/2004
Sending query to destination (Device
<MBX device number>. Address:
<routing byte 1>.<routing byte
2>.<routing byte 3>.<routing byte
4>.<routing byte 5>)
The listening point is rerouting the command it
received to the destination device.
Reply received from the destination.
The destination device received the rerouted
command and sent back a reply.
The message in the following table reports that the log file was cleared.
Message
Meaning
The log file was cleared.
The Web console was used to clear the log file.
95
Log File Messages
96
890 USE 191 00 12/2004
Modbus Error Codes
B
Modbus Error Codes
Modbus Error
Codes
890 USE 191 00 12/2004
Messages sent to the bridge on either Ethernet or Modbus Plus contain an
embedded Modbus message, consisting of a function code and additional
information such as register addresses and data. The bridge uses the Modbus
function code to determine the type of internal path required for the transaction and
opens a path if one is available. If a path is not available, a Modbus error code
(exception code) is returned by the bridge to the requesting node.
97
Modbus Error Codes
The Modbus error codes are:
98
Code
Definition
01
The function received in the query is not an allowable action for the server
(or slave). This may be because the function code is only applicable to newer
devices and was not implemented in the unit selected. It could also indicate that
the server (or slave) is in the wrong state to process a request of this type, for
example, because it is unconfigured and is being asked to return register values.
02
The data address received in the query is not an allowable address for the
server (or slave). More specifically, the combination of reference number and
transfer length is invalid. For a controller with 100 registers, a request with offset
96 and length 4 will succeed; a request with offset 96 and length 5 will generate
exception 02.
03
A value contained in the query data field is not an allowable value for the server
(or slave). This indicates a fault in the structure of the remainder of a complex
request, such as the implied length is incorrect. It does NOT mean that a data
item submitted for storage in a register has a value outside the expectation of the
application program, since the Modbus protocol is unaware of the significance of
any particular value of any specific register.
04
An unrecoverable error occurred while the server (or slave) was attempting to
perform the requested action.
05
Specialized use in conjunction with programming commands. The server
(or slave) has accepted the request and is processing it, but a long duration of
time will be required to do so. This response is returned to prevent a timeout error
from occurring in the client (or master). The client (or master) can next issue a
Poll Program Complete message to determine if processing is completed.
06
Specialized use in conjunction with programming commands. The server
(or slave) is engaged in processing a long-duration program command. The client
(or master) should retransmit the message later when the server (or slave) is free.
08
Specialized use in conjunction with function codes 20 and 21 and reference type
6 to indicate that the extended file area failed to pass a consistency check.
The server (or slave) attempted to read record file, but detected a parity error in
the memory. The client (or master) can retry the request, but service may be
required on the server (or slave) device.
0A
Specialized use in conjunction with gateways, indicates that the gateway was
unable to allocate an internal communication path from the input port to the output
port for processing the request. Usually means that the gateway is misconfigured
or overloaded.
0B
Specialized use in conjunction with gateways, indicates that no response was
obtained from the target device. Usually means that the device is not present on
the network.
890 USE 191 00 12/2004
Default Routing Records
C
Default Routing Records
The Modbus Plus to Ethernet bridge has a default routing configuration that is
available when you install the bridge. This configuration is restored if you restore the
bridge factory settings (see p. 75). In addition, if you change the IP address
(see p. 70) for the bridge, you are asked if you want to reset the routing records
using the new IP address or if you prefer to leave the routing records unchanged.
The figure below explains the default routing tables.
Overview
Modbus Plus to Ethernet bridge
IP: 192.168.0.1
5
Ethernet network
IP: 192.168.0.23
Quantum
Modbus Plus network
IP: 192.168.0.87
Quantum
2
12
984
3
BP-85
BP-85
10
6
2
Compact 984
984
BP-85
8
984
890 USE 191 00 12/2004
99
Default Routing Records
Default Routing
Records
The default routing records depend upon the IP address you select for the bridge.
The tables show the records for the default IP address 192.168.0.1. These are also
the default records for any IP address using 192.168.0 as the first three bytes. If you
use any other IP address, the IP address fields in the Modbus Plus to Ethernet
routing table change so that the first three bytes match the first three bytes of the
bridge's IP address. For example, if you assign the IP address 205.167.7.65 to the
bridge, the IP address fields become 205.167.7.xxx. Everything else in the default
records is the same for all bridge IP addresses.
There are two versions of default routing available in the bridge. They are
functionally identical, but the
z explicit form uses the explicit routing approach to define addresses, while the
z compact form uses arithmetic routing expressions (see p. 21) to define the
routing.
Explicit Form
The explicit form is similar to the routing table in the 174 CEV 200 30 bridge. This
default contains several hundred records but is easier to understand for those who
are familiar with the 174 CEV 200 30. In addition, if your application requires just a
few non-standard routings, this default provides an easy base configuration to
modify.
Source: Modbus Plus
Destination: Ethernet
(Filter to the Modbus Plus Received Message) (Selected IP Address to Send Message Out)
100
Slave Path Modbus Plus Address Filter
IP Address
Destination Timeout
Index
(ms)
1-8
*.1-8.1.*.*
192.168.0.1
MB4
1-8
*.1-8.2.*.*
192.168.0.2
MB4
5000
1-8
z
z
z
z
z
z
MB4
5000
1-8
*.1-8.255.*.*
192.168.0.255 MB4
5000
5000
890 USE 191 00 12/2004
Default Routing Records
Source: Ethernet
Destination: Modbus Plus
(Filter to the Source IP Address and Destination (Selected Modbus Plus Address to Send
Index of the Received Ethernet Message)
Message Out)
890 USE 191 00 12/2004
Destination Index
IP Address Filter
Modbus Plus Address
Timeout (ms)
1
*.*.*.*
1.0.0.0.0
5000
2
*.*.*.*
2.0.0.0.0
5000
z
z
z
*.*.*.*
z
z
z
5000
64
*.*.*.*
64.0.0.0.0
5000
65
*.*.*.*
2.1.0.0.0
5000
66
*.*.*.*
2.2.0.0.0
5000
z
z
z
*.*.*.*
z
z
z
5000
128
*.*.*.*
2.64.0.0.0
5000
129
*.*.*.*
3.1.0.0.0
5000
130
*.*.*.*
3.2.0.0.0
5000
z
z
z
*.*.*.*
z
z
z
5000
192
*.*.*.*
3.64.0.0.0
5000
193
*.*.*.*
3.2.1.0.0
5000
194
*.*.*.*
3.2.2.0.0
5000
z
z
z
*.*.*.*
z
z
z
5000
249
*.*.*.*
3.2.57.0.0
5000
101
Default Routing Records
Modbus Plus to Ethernet
The Modbus Plus to Ethernet default routing table, shown above, allows Modbus
Plus devices to communicate with Ethernet devices that have IP addresses between
192.168.0.1 and 192.168.0.255. If the 984 controller on the local Modbus Plus
network sends a message to 5.1.23.1.0, the message gets into the bridge using
slave path 1, and it matches the Modbus Plus address filter for the 23rd record in the
table. The IP address and destination index fields for that row route the message to
IP address 192.168.0.23, with a destination index value of 1.
Ethernet to Modbus Plus
The Ethernet to Modbus Plus default routing table, shown above, allows Ethernet
devices to send messages to devices on four separate Modbus Plus networks. The
first 64 rows allow addressing nodes on the local Modbus Plus network. For
example, a message sent to IP address 192.168.0.1, with a destination index value
of 12, uses record 12, matching the 12th row of the table, and results in the message
going to 12.0.0.0.0.
The next 128 rows allow addressing devices on remote Modbus Plus networks,
accessing them through BP-85 bridges at nodes 2 and 3 of the local Modbus Plus
network. A message sent to IP address 192.168.0.1, with a destination index value
of 74, uses record 74 and matches the 74th row, which results in a Modbus Plus
address of 2.10.0.0.0. The message is sent through the BP-85 at node 2 of the local
network to node 10 of the remote network (Compact 984).
Rows 129-192 work similarly but go through a different BP-85, allowing access to a
separate network.
The last group of rows (193-249) allow you to address a node that is two networks
away. To do so, you might send the message to IP address 192.168.0.1, with a
destination index value of 200, which uses record 200 and corresponds to the 200th
row in the Ethernet to Modbus Plus routing table. The destination routing is
3.2.8.0.0. The message goes to the BP-85 at node 3 of the local Modbus Plus
network, which passes it to another BP-85 at node 2 of the remote network, which,
in turn, passes it to the 984 controller at node 8 of the next remote network.
Compact Form
The compact form is much shorter because it requires only five records. This version
is preferred if you plan to stay with the default routing or make many changes to the
default.
Source: Modbus Plus
Destination: Ethernet
(Filter to the Modbus Plus Received Message) (Selected IP Address to Send Message Out)
102
Slave Path Modbus Plus Address Filter
IP Address
1-8
192.168.0.MB3 MB4
*.1-8.*.*.*
Destination Timeout
Index
(ms)
5000
890 USE 191 00 12/2004
Default Routing Records
Source: Ethernet
Destination: Modbus Plus
(Filter to the Source IP Address and Destination (Selected Modbus Plus Address to Send
Index of the Received Ethernet Message)
Message Out)
Destination Index
IP Address Filter
Modbus Plus Address
Timeout (ms)
1-64
*.*.*.*
DI.0.0.0.0
5000
65-128
*.*.*.*
2.DI-64.0.0.0
5000
129-192
*.*.*.*
3.DI-128.0.0.0
5000
193-249
*.*.*.*
3.2.DI-192.0.0
5000
Modbus Plus to Ethernet
The Modbus Plus to Ethernet routing table allows Modbus Plus devices to
communicate with Ethernet devices that have IP addresses between 192.168.0.1
and 192.168.0.255. If the 984 controller on the local Modbus Plus network sends a
message to 5.1.23.1.0, the message goes to the bridge using slave path 1 and
matches the Modbus Plus address filter. The IP address and destination index fields
for that row route the message to IP address 192.168.0.23, with a destination index
value of 1.
Ethernet to Modbus Plus
The Ethernet to Modbus Plus routing table allows Ethernet devices to send
messages to devices on four separate Modbus Plus networks. The first row allows
addressing nodes on the local Modbus Plus network. For example, a message sent
to IP address 192.168.0.1, with a destination index value of 12, uses record 12,
matching the first row of the table, and results in the message going to 12.0.0.0.0.
The second and third rows allow addressing devices on the remote Modbus Plus
networks, accessing them through BP-85 bridges at nodes 2 and 3 of the local
Modbus Plus network. A message sent to IP address 192.168.0.1, with a destination
index value of 74, uses record 74 and matches the second row, which results in a
Modbus Plus address of 2.10.0.0.0. The message is sent through the BP-85 at node
2 of the local network to node 10 of the remote network (Compact 984). The third
row works similarly but goes through a different BP-85, allowing access to a
separate network.
The last row permits you to address a node that is three networks away. To do so,
you might send the message to IP address 192.168.0.1, with a destination index
value of 200, which uses record 200 and corresponds to the fourth row in the
Ethernet to Modbus Plus routing table. The destination routing is 3.2.8.0.0. The
message goes to the BP-85 at node 3 of the local Modbus Plus network, which
passes it to another BP-85 at node 2 of the remote network, which, in turn, passes
it to the 984 controller at node 8 of the next remote network.
890 USE 191 00 12/2004
103
Default Routing Records
104
890 USE 191 00 12/2004
Dynamic Routing
D
Dynamic Routing
Host-Based and
Socket-Based
Dynamic Routing
Note: Dynamic routing is available only for routing messages from the Ethernet
side to the Modbus Plus side.
In addition to the static mapped message routing from Ethernet to Modbus Plus, the
bridge permits dynamic routing of these messages. There are two types of dynamic
routing available, host-based and socket-based.
z host-based routing — Host-based dynamic routing sets up the routing from an
Ethernet node (IP address) to a Modbus Plus destination. The bridge routes any
message from that Ethernet node with destination index 0 to the specified
Modbus Plus destination. The bridge maintains a cache of 25 host-based routing
records, so up to 25 hosts may concurrently set up and use this mode of dynamic
routing. If all 25 are in use and another host attempts to establish an association,
the new one overwrites the record in the cache that has been idle for the longest
time.
z socket-based routing — Socket-based dynamic routing sets up the routing from
a particular Ethernet socket to a Modbus Plus destination. The bridge routes any
message from that Ethernet socket (IP address and port) with destination index
254 to the specified Modbus Plus destination. The bridge maintains a cache of
eight socket-based routing records. If all eight are in use, the bridge rejects new
requests until an opening exists.
890 USE 191 00 12/2004
105
Dynamic Routing
Dynamic Routing
Setup
As its name implies, dynamic routing is not part of the bridge’s fixed configuration.
Instead, you must use runtime commands to set up the routing before you can use
it. The commands specify whether you want to use host-based or socket-based
routing. They also specify the Modbus routing path to the destination node.
The commands are a part of a Write Multiple Registers query that must be sent to
the bridge with a destination index of 255. The following table shows the format.
Byte #
Byte Value
Description
1
0x10
function code: write multiple registers
2
0x00
3
0x00 or 0xFE
4
0x00
5
0x03
6
0x06
number of bytes that follow
7
8
0x05
number of bytes that follow
mb1
destination routing path field 1
9
10
mb2
destination routing path field 2
mb3
destination routing path field 3
11
12
mb4
destination routing path field 4
mb5
destination routing path field 5
host-based routing (0x00) or socket-based routing (0xFE)
In this case, the routing path of the destination device is mb1.mb2.mb3.mb4.mb5.
Example
The following example sets up a host-based routing to a Modbus Plus node
destination on the routing path 30.18.9.37.2.
Bytes
Contents (Hex)
Contents (Decimal)
7&8
05 1E
05 30
9 & 10
12 09
18 09
11 &1 2
25 02
37 02
Note: The five-byte routing path must be preceded with a byte
(always containing 05) to show the length in bytes of the routing path.
106
890 USE 191 00 12/2004
Dynamic Routing
Query
The query message specifies the register references to be written. Registers are
addressed starting at zero (Register 1 is addressed as 0.). The requested written
values are specified in the query data field. Data is packed as two bytes per register.
Here is an example of a request to write two registers starting at register 40002 to
values of 00 0A and 01 02 hex, in slave device 17.
Field Name
Hex
slave address
11
function
10
starting address hi
00
starting address lo
01
number of registers hi
00
number of registers lo
02
byte count
04
data hi
00
data lo
0A
data hi
01
data lo
02
Using Dynamic
Routing
After you have set up the bridge for dynamic routing, you can send the messages
you want to route.
If you set up for host-based routing, send the message to the bridge with destination
index 0. These messages are routed to the specified destination.
If you set up for socket-based routing, send the message to the bridge with
destination index 254. These messages are routed to the specified Modbus Plus
path.
890 USE 191 00 12/2004
107
Dynamic Routing
108
890 USE 191 00 12/2004
Additional Routing Examples
E
At a Glance
Overview
This appendix provides examples of how to configure the Modbus Plus to Ethernet
bridge (174 CEV 200 40) for common situations that are more complex than the
basic configuration (see p. 54).
What's in this
Chapter?
This chapter contains the following topics:
Topic
Networks with Multiple Local Modbus Plus and Ethernet Devices
890 USE 191 00 12/2004
Page
110
Networks with Bridges to Additional Modbus Plus Networks
116
Networks with Routers to Additional Ethernet Networks
121
109
Additional Routing Examples
Networks with Multiple Local Modbus Plus and Ethernet Devices
The following figure shows multiple devices on each side of the bridge that must
communicate with one another.
Overview
Modbus Plus to Ethernet bridge
IP: 205.167.7.65
5
Modbus Plus network
Ethernet network
IP: 205.167.7.127
IP: 205.167.7.2
12
42
Compact 984
Quantum
Quantum
984
As you might expect, there are different ways to meet this requirement. A few are
discussed here, but be aware that other approaches are possible. You may want to
use a combination of these techniques.
Approach 1:
Explicit Routing
If you want to be very clear about the routing path mappings, you can explicitly
define each path, as shown in the following routing table.
Source: Modbus Plus
Destination: Ethernet
(Filter to the Modbus Plus Received Message) (Selected IP Address to Send Message Out)
110
Slave Path Modbus Plus Address Filter
IP Address
Destination Timeout
Index
(ms)
1
*.1.*.*.*
205.167.7.2
1
5000
2
*.2.*.*.*
205.167.7.2
1
5000
3
*.3.*.*.*
205.167.7.127 1
5000
4
*.4.*.*.*
205.167.7.127 1
5000
890 USE 191 00 12/2004
Additional Routing Examples
Source: Ethernet
Destination: Modbus Plus
(Filter to the Source IP Address and Destination (Selected Modbus Plus Address to Send
Index of the Received Ethernet Message)
Message Out)
Destination Index
IP Address Filter
Modbus Plus Address
Timeout (ms)
1
*.*.*.*
12.0.0.0.0
5000
2
*.*.*.*
12.0.0.0.0
5000
3
*.*.*.*
42.0.0.0.0
5000
4
*.*.*.*
42.0.0.0.0
5000
In this case, any message sent to the Modbus Plus device slave path 1 or 2 goes to
the Quantum controller at IP address 205.167.7.2. The Modbus Plus devices
address their messages to 5.1.0.0.0 or 5.2.0.0.0 because the last three bytes are
irrelevant. Having two paths available permits both of the Modbus Plus devices to
send messages on different paths and thereby avoid interfering with each other.
Similarly, we have dedicated data slave paths 3 and 4 to communications with the
Quantum controller at IP address 205.167.7.127.
On the Ethernet side, messages sent through records 1 and 2, as specified by the
destination index, go to the 984 controller at node 12, and messages using records
3 and 4 go to the Compact 984 at node 42.
This approach is the easiest to understand and works well for very small
applications. For larger configurations, it requires a very long routing table. In
addition, this method dedicates each slave path to communicate with a specific
destination. Because the Modbus Plus side has only eight slave paths, you can not
configure the bridge to allow communication to more than eight devices on the
Ethernet side.
The next three approaches show you how to configure the bridge to connect more
than eight devices on the Ethernet side. Be aware, however, that you are still
restricted to eight Modbus Plus slave paths, so you cannot have more than those
eight paths open simultaneously. In addition, only one device at a time can use a
particular slave path. If two or more devices need to use the same slave path, they
must coordinate their usage to avoid conflicts. The bridge does not handle this
coordination for them.
890 USE 191 00 12/2004
111
Additional Routing Examples
Approach 2:
Range of Source
Paths and
Source Address
Codes
This is much more compact than the first approach, yet still not very complex. It uses
the following routing table:
Source: Modbus Plus
Destination: Ethernet
(Filter to the Modbus Plus Received Message) (Selected IP Address to Send Message Out)
Slave Path Modbus Plus Address Filter
IP Address
1-2
205.167.7.MB3 1
*.1-2.*.*.*
Destination Timeout
Index
(ms)
5000
Source: Ethernet
Destination: Modbus Plus
(Filter to the Source IP Address and Destination (Selected Modbus Plus Address to Send
Index of the Received Ethernet Message)
Message Out)
Destination Index
IP Address Filter
Modbus Plus Address
Timeout (ms)
1-64
*.*.*.*
DI.0.0.0.0
5000
We have reduced the number of rows to two by using two techniques. We use a
range of slave paths and refer to source address bytes in the destination
constructor.
When one of the Modbus Plus devices wants to send a message to the Quantum
controller at IP address 205.167.7.127, it addresses the message to 5.1.127.0.0 or
5.2.127.0.0. The bridge receives these messages on data slave paths 1 or 2,
respectively. Either path passes the criteria for the Modbus Plus to Ethernet routing
table. The IP address uses 205.167.7 for the first three bytes. The MB3 in the last
position causes it to insert the third byte of the source Modbus Plus address (127 in
this case) as the last byte of the IP address. Finally, it uses 1 as the destination
index.
To send a message to the Compact 984, the Quantum units address the message
to IP address 205.167.7.65, with a destination index value of 42.
The bridge accepts this on data record 42 and determines that it meets the criteria
for the Ethernet to Modbus Plus routing table. It then inserts the destination index
value into the first byte of the Modbus Plus address, resulting in 42.0.0.0.0, the
Modbus Plus routing path of the Compact 984 controller.
There is a potential problem with this approach. To address the Quantum unit at IP
address 205.167.7.127, the 984 must use Modbus Plus addres 5.1.127.0.0 or
5.2.127.0.0. Unfortunately, some older devices and applications do not allow
Modbus Plus address bytes that are larger than 64. If your device is one of these,
you cannot specify the needed path. The next two approaches handle this limitation.
112
890 USE 191 00 12/2004
Additional Routing Examples
Approach 3:
Arithmetic
Routing
Expressions
In this approach, we take advantage of two more advanced features of the bridge:
z Modbus Plus address filter
z ability to calculate destination address bytes
Source: Modbus Plus
Destination: Ethernet
(Filter to the Modbus Plus Received Message) (Selected IP Address to Send Message Out)
Slave Path Modbus Plus Address Filter
IP Address
Destination Timeout
Index
(ms)
1-8
*.1-8.1.*.*
205.167.7.MB4
1
5000
1-8
*.1-8.2.*.*
205.167.7.MB4+64 1
5000
Source: Ethernet
Destination: Modbus Plus
(Filter to the Source IP Address and Destination (Selected Modbus Plus Address to Send
Index of the Received Ethernet Message)
Message Out)
Destination Index
IP Address Filter
Modbus Plus Address
Timeout (ms)
1-64
*.*.*.*
DI.0.0.0.0
5000
The Ethernet to Modbus Plus routing is identical to that of the previous example.
Notice that both of the Modbus Plus to Ethernet records apply to messages sent
through any of the eight available slave paths. Instead of using the path to determine
which record to apply to the message, we use the Modbus Plus address filter. When
the 984 wants to send a message to the Quantum controller at IP address
205.167.7.2, it addresses the message to 5.1.1.2.0. The bridge receives this on its
Modbus Plus device slave path 1. The Modbus Plus address passes the Modbus
Plus address filter for the first row, which requires the third byte to be a 1, and the
bridge processes it according to the IP address for that row. The IP address entry
puts the fourth byte of the Modbus Plus address into the last position of the IP
address and routes the message to IP address 205.167.7.2, with a destination index
value of 1.
Notice that the 984 could have used any of the eight slave paths because the
Modbus Plus address filter, not the slave path, determines the routing table row to
use.
To send a message to the Quantum controller at IP address 205.167.7.127, the
proper Modbus Plus address to use is 5.1.2.63.0. (Again, the sending unit could
have specified any slave path.) This Modbus Plus address does not pass the
Modbus Plus address filter criteria for the first row because its third byte is not 1. It
instead passes the criteria for the second row. The IP address entry adds 64 to the
fourth byte of the source routing path and inserts that sum as the last byte of the IP
address. The result is IP address 205.167.7.127, with a destination index value of 1.
This technique allows Modbus Plus devices to address any device on the Ethernet
side with the last IP byte value of 0 to 128 while still maintaining the requirement that
no byte on the Modbus Plus side is greater than 64. By adding two more rows to the
routing table, we could cover the full IP addressing range of 0 to 255.
890 USE 191 00 12/2004
113
Additional Routing Examples
Approach 4:
Mapped Modbus
Plus Node
Addresses
Using the advanced addressing method (see p. 63), we can take yet another
approach. The routing tables would look like these.
Source: Modbus Plus
(Filter to the Modbus Plus
Received Message)
Destination: Ethernet
(Selected IP Address to Send Message Out)
Slave Path
Modbus Plus
Address Filter
IP Address
Destination Index
Time-out (ms)
1-8
*.1-8.1.*.*
205.167.7.MB4
1
5000
1-8
*.1-8.2.*.*
IP Lookup IDX -> MB4
5000
Source: Ethernet
Destination: Modbus Plus
(Filter to the Source IP Address and Destination (Selected Modbus Plus Address to Send
Index of the Received Ethernet Message)
Message Out)
Destination Index
IP Address Filter
Modbus Plus Address
Timeout (ms)
1-64
*.*.*.*
DI.0.0.0.0
5000
This method requires you to create a set of records in the IP lookup table.
IP Lookup Table
Lookup Index
IP Address / Host Name
Destination Index
25
main-conveyor
1
57
205.167.7.127
1
64
My MB+ Node
This technique allows you to assign a Modbus Plus node address to devices on the
Ethernet side and communicate with them using that address. In this example, when
the 984 wants to send a message to the Quantum controller at IP address
205.167.7.127, it addresses it to 5.1.2.57.0. This passes the Modbus Plus address
filter for the second row of the Modbus Plus to Ethernet routing table, and the record
shows that the advanced addressing method is being used and the IP lookup index
is MB4, which equals 57. As it searches the lookup table, the bridge finds for lookup
index 57 a destination IP address of 205.167.7.127 and a destination index of 1(the
proper path for the desired Quantum device).
The 984 can also address either Quantum unit by using the same technique as in
the previous approach. The Ethernet device mapping table does not affect the result
because there is no record in the table that matches any of the addresses generated
by the first record in the Modbus Plus to Ethernet routing table.
114
890 USE 191 00 12/2004
Additional Routing Examples
However, there is another way that Modbus Plus devices can send messages to the
Quantum unit at 205.167.7.2. In this case, we assign the host name main-conveyor
to this controller. The Modbus Plus devices can then address their messages to
5.1.2.25.0. The bridge accepts this and processes it according to the second row of
the Modbus Plus to Ethernet routing table. The lookup index MB4, which equals 25,
matches the first row of the IP lookup table, and the message is sent to the device
with the host name main-conveyor.
An advantage of this approach is that the routing path sent by the 984 is
independent of the IP address of the device on the Ethernet side. The mapping is
controlled entirely within the bridge. If an IP address changes, the only programming
change required is within a single table in the bridge, leaving the Modbus Plus
devices and routing records unaffected. Furthermore, this is the only method by
which the bridge can address Ethernet devices by host name rather than by IP
address.
890 USE 191 00 12/2004
115
Additional Routing Examples
Networks with Bridges to Additional Modbus Plus Networks
In this configuration, there are two Modbus Plus networks joined by a BP-85.
Devices on the second Modbus Plus network must communicate with devices on the
Ethernet network.
Overview
Modbus Plus to Ethernet bridge
IP: 205.167.7.65
5
Ethernet network
IP: 205.167.7.2
Quantum
Modbus Plus network
IP: 205.167.7.5
Quantum
12
3
984
2
BP-85
27
42
Compact 984
984
116
890 USE 191 00 12/2004
Additional Routing Examples
Approach 1:
Explicit Routing
The following routing tables describe the hard-coded addressing version.
Source: Modbus Plus
Destination: Ethernet
(Filter to the Received Modbus Plus Message) (Selected IP Address to Send Message Out)
Slave Path Modbus Plus Address Filter
IP Address
Destination
Index
Timeout
(ms)
1
*.1.*.*.*
205.167.7.2
1
5000
2
*.2.*.*.*
205.167.7.5
1
5000
Source: Ethernet
Destination: Modbus Plus
(Filter to the Source IP Address and Destination (Selected Modbus Plus Address to Send
Index of the Received Ethernet Message)
Message Out)
Destination Index
IP Address Filter
Modbus Plus Address
Timeout (ms)
1
*.*.*.*
12.0.0.0.0
5000
2
*.*.*.*
3.27.0.0.0
5000
3
*.*.*.*
3.42.0.0.0
5000
This configuration handles communication between the various devices using only
the slave paths to select the routing. As with the previous hard-coded examples, the
addressing is clear, but it requires many rows in the routing table. This approach has
a serious limitation in that it has only one path available for each destination device.
If two or more devices try to communicate to the same device at the same time, only
one gets through. You could solve this by adding more entries in the table, but to
cover all the possible cases for this relatively small network requires 12 rows. In
addition, a network structure that is slightly more complex would run out of available
slave paths for this type of configuration.
890 USE 191 00 12/2004
117
Additional Routing Examples
Approach 2:
Source Paths
Range and
Arithmetic
Routing
Expressions
In this approach, use slave paths to direct the messags.
Source: Modbus Plus
Destination: Ethernet
(Filter to the Received Modbus Plus Message) (Selected IP Address to Send Message Out)
Slave Path Modbus Plus Address Filter
IP Address
Destination Timeout
Index
(ms)
1-8
205.167.7.MB3
1
*.1-8.*.*.*
5000
Source: Ethernet
Destination: Modbus Plus
(Filter to the Source IP Address and Destination (Selected Modbus Plus Address to Send
Index of the Received Ethernet Message)
Message Out)
Destination Index
IP Address Filter
Modbus Plus Address
Timeout (ms)
1-64
*.*.*.*
DI.0.0.0.0
5000
65-128
*.*.*.*
3.DI-64.0.0.0
5000
This configuration handles communication between the 984 at node 12 on the first
Modbus Plus network and the Ethernet devices in exactly the same manner as the
earlier examples (see p. 112).
When a device on the second Modbus Plus network wants to send a message to
one of the Quantum units, it is only slightly more complex. Assume the Compact 984
is sending the message to the Quantum unit at IP address 205.167.7.5. The routing
path it uses is 2.5.1.5.0. The 2 in the first byte sends the message to the BP-85,
which then sends it to the bridge at 5.1.5.0.0. The Modbus Plus to Ethernet bridge
sends it to IP address 205.167.7.5, with a destination index value of 1, as in the
earlier cases.
If the Quantum unit wants to send a message to the Compact 984, it addresses it to
IP address 205.167.7.65, with a destination index value of 106. The bridge accepts
this message using slave path 106, which is associated with the second row of the
routing table. This row always inserts 3 as the first byte of the Modbus Plus address
and then subtracts 64 from the destination index of the source address to obtain the
second byte. Thus, the Modbus Plus address is 3.42.0.0.0, which sends the
message to the BP-85, which then passes it to the Compact 984 using Modbus Plus
address 42.0.0.0.0.
118
890 USE 191 00 12/2004
Additional Routing Examples
Approach 3:
Advanced
Source Filter
This is not a different approach to the addressing, but rather illustrates an additional
capability of the source filter feature.
Source: Modbus Plus
Destination: Ethernet
(Filter to the Received Modbus Plus Message) (Selected IP Address to Send Message Out)
Slave Path Modbus Plus Address Filter
IP Address
1-8
205.167.7.MB3 1
*.1-8.*.*.*
Destination Timeout
Index
(ms)
5000
Source: Ethernet
Destination: Modbus Plus
(Filter to the Source IP Address and Destination (Selected Modbus Plus Address to Send
Index of the Received Ethernet Message)
Message Out)
Destination Index
IP Address Filter
Modbus Plus Address
Timeout (ms)
1-64
*.*.*.*
DI.0.0.0.0
5000
65-128
*.*.*.5-10
3.DI-64.0.0.0
5000
95-128
*.*.*.*
3.DI-64.0.0.0
5000
The Modbus Plus to Ethernet routing table and the first row of the Ethernet to
Modbus Plus routing table are identical to those used in the previous approach. The
last two lines of the Ethernet to Modbus Plus routing table are duplicates of the last
line of the previous table, with two exceptions:
z The IP address filter for the second row is no longer all wildcards.
z The destination index range for the third row is more restricted.
Each allows only certain ranges of values in the first or last byte position of the
source IP address.
This configuration handles addressing in the same manner as the previous
approach, but the filters limit which Ethernet devices can address nodes on the
secondary Modbus Plus network. To understand how they do this, remember that
the source routing path for Ethernet devices contains the IP address of the sending
device, not the IP address to which the message is sent.
If the Quantum unit at IP address 205.167.7.5 addresses a message to the 984
controller on the secondary Modbus Plus network, it sends it to IP address
205.167.7.65, with a destination index value of 91, as it does in the previous
approach. The bridge checks the source IP address 205.167.7.5, with a destination
index value of 91, against the IP address filter criteria and finds that it matches the
filter for the second row. The bridge then passes the message along to 3.27.0.0.0.
However, if the Quantum unit at IP address 205.167.7.2 addresses a message to IP
address 205.167.7.65, with a destination index value of 91, the source IP address
used for comparison is IP address 205.167.7.2, with a destination index value of 91.
This does not match the criteria for any row in the table. Its destination index of 91
matches only the second row, but the last IP address byte, 2, does not fall in the
range of 5-10 specified by the IP address filter for that row. The bridge does not pass
the message along but, instead, returns an error message.
890 USE 191 00 12/2004
119
Additional Routing Examples
If the Quantum unit at IP address 205.167.7.5 sends a message to the Compact
984, it addresses it to IP address 205.167.7.65, with a destination index value of
106, and the source IP address compared is IP address 205.167.7.5, with a
destination index value of 106. This passes the filter for the second row, and the
bridge routes the message. If the Quantum unit at IP address 205.167.7.2 sends a
message to the Compact 984, it also uses the routing path 205.167.7.65, with a
destination index value of 106, but the source routing path is IP address
205.167.7.2, with a destination index value of 106. This does not pass the IP
address filter for the second row, but does pass the IP address filter for the third row.
The bridge routes this message.
Using this technique, you allow the Quantum controller at 205.167.7.5 to send
messages to any device on the secondary Modbus Plus network but limit the
Quantum controller at 205.167.7.2 to send messages only to devices with node
addresses in the range of 31 to 64.
120
890 USE 191 00 12/2004
Additional Routing Examples
Networks with Routers to Additional Ethernet Networks
This example has a generic TCP/IP router joining two Ethernet networks. The 984
controller must communicate with both Quantum controllers.
Overview
Modbus Plus to Ethernet bridge
IP: 205.167.7.65
5
Ethernet network
generic TCP/IP router
Ethernet network
Modbus Plus network
IP: 205.167.7.2
Quantum
12
984
IP: 10.0.0.15
Quantum
Note: When setting up the bridge for this network configuration, you must enter the
IP address of the router as the default gateway address. Click Configuration |
Network to do so.
890 USE 191 00 12/2004
121
Additional Routing Examples
Approach 1:
Explicit Routing
As before, begin with the direct approach.
Source: Modbus Plus
Destination: Ethernet
(Filter to the Received Modbus Plus Message) (Selected IP Address to Send Message Out)
Slave Path Modbus Plus Address Filter
IP Address
Destination
Index
Timeout (ms)
1
*.1.*.*.*
205.167.7.2
1
5000
2
*.2.*.*.*
10.0.0.15
1
5000
Source: Ethernet
Destination: Modbus Plus
(Filter to the Source IP Address and Destination (Selected Modbus Plus Address to Send
Index of the Received Ethernet Message)
Message Out)
Destination Index
IP Address Filter
Modbus Plus Address
Timeout (ms)
1
*.*.*.*
12.0.0.0.0
5000
2
*.*.*.*
12.0.0.0.0
5000
The direct approach has the same benefits and limitations of the hard-coded
approaches of the previous examples. It is easy to understand but suitable for very
small networks only.
122
890 USE 191 00 12/2004
Additional Routing Examples
Approach 2:
Range of Source
Paths and
Source Routing
Path Codes
In this approach, use the slave paths to direct messages.
Source: Modbus Plus
Destination: Ethernet
(Filter to the Received Modbus Plus Message) (Selected IP Address to Send Message Out)
Slave Path Modbus Plus Address Filter
IP Address
Destination Timeout
Index
(ms)
1
*.1.*.*.*
205.167.7.MB3 1
5000
2
*.2.*.*.*
10.0.0.MB3
5000
1
Source: Ethernet
Destination: Modbus Plus
(Filter to the Source IP Address and Destination (Selected Modbus Plus Address to Send
Index of the Received Ethernet Message)
Message Out)
Destination Index
IP Address Filter
Modbus Plus Address
Timeout (ms)
1-64
*.*.*.*
DI.0.0.0.0
5000
Either Quantum unit sends a message to the 984 by addressing it to IP address
205.167.7.65, with a destination index value of 12. The bridge accepts this
message, using routing record 12. The Ethernet to Modbus Plus routing table record
directs this to Modbus Plus address 12.0.0.0.0, the address of the 984 controller.
When the 984 wants to send a message to the Quantum unit on the first level of
Ethernet, it addresses it to 5.1.2.0.0. The bridge accepts this on slave path 1. That
path is associated with the first record in the Modbus Plus to Ethernet routing table,
so the IP address is 205.167.7.2, with a destination index value of 1.
To send a message to the Quantum controller on the second level of Ethernet, the
984 uses the routing path 5.2.15.0.0. The bridge accepts this on data slave path 2,
associated with the second record in the Modbus Plus to Ethernet routing table. It
constructs an IP address of 10.0.0.15, with a destination index value of 1. The router
passes this to the desired Quantum unit.
890 USE 191 00 12/2004
123
Additional Routing Examples
Approach 3:
Source Filter,
Source Paths
Range, Source
Routing Path
Codes
In this approach, use the source filter to direct messages. This approach allows the
maximum flexibility with the slave paths.
Source: Modbus Plus
Destination: Ethernet
(Filter to the Received Modbus Plus Message) (Selected IP Address to Send Message Out)
Slave Path Modbus Plus Address Filter
IP Address
Destination Timeout
Index
(ms)
1-4
*.1-4.1.*.*
205.167.7.MB4 1
5000
5-8
*.5-8.2.*.*
10.0.0.MB4
5000
1
Source: Ethernet
Destination: Modbus Plus
(Filter to the Source IP Address and Destination (Selected Modbus Plus Address to Send
Index of the Received Ethernet Message)
Message Out)
Destination Index
IP Address Filter
Modbus Plus Address
Timeout (ms)
1-64
*.*.*.*
DI.0.0.0.0
5000
Like the previous approach, either Quantum unit sends a message to the 984 by
addressing it to IP address 205.167.7.65, with a destination index value of 12. The
bridge accepts this using routing record 12. The record directs this to Modbus Plus
address 12.0.0.0.0, the path of the 984 controller.
When the 984 wants to send a message to the Quantum unit on the first level of
Ethernet, it addresses it to 5.1.1.2.0. The bridge accepts this on slave path 1. (The
message could have used any of the slave paths 1 to 4.) It passes the Modbus Plus
address filter for the first record in the Modbus Plus to Ethernet routing table,
resulting in the IP address 205.167.7.2, with a destination index value of 1.
To send a message to the Quantum controller on the second level of Ethernet, the
984 uses the Modbus Plus address 5.6.2.15.0. The bridge accepts this on slave path
6. (Again, any slave path in the range 5 to 8 is acceptable.) This address passes the
source filter for the second record in the Modbus Plus to Ethernet routing table and
constructs a destination IP address of 10.0.0.15, with a destination index value of 1.
The router passes this to the desired Quantum unit.
Note: For this example, we reserved slave paths 1 through 4 for communication to
the top level Ethernet and slave paths 5 through 8 for communication to the second
level Ethernet.
124
890 USE 191 00 12/2004
Factory Settings
F
Factory Settings
Overview
The factory settings for the Modbus Plus to Ethernet bridge (174 CEV 200 40) are:
Control
Factory Setting
IP Address
192.168.0.1
Subnet Mask
255.255.255.0
Default Gateway
0.0.0.0
Host Name
MBPEB
Workgroup
WORKGROUP
System Name
Bridge
Diagnostic Update Interval
500 ms
Modbus Plus Device Node
1
Administrator Password
password
Guest Password
(no password)
For more information on the two versions of default routing available in the bridge,
see explicit form (see p. 100) and compact form (see p. 102).
890 USE 191 00 12/2004
125
Factory Settings
126
890 USE 191 00 12/2004
Technical Specifications
G
Technical Specifications
Power
890 USE 191 00 12/2004
Input
Tolerance
Line Frequency
Consumption
110 − 240 VAC
90 − 264 VAC
47-63 Hz
60 W
127
Technical Specifications
Immunity
Parameter
Reference
Component
Limit
Radiated Interference
EN 55011
Enclosure
Class A
Conducted Interference
EN 55011
Enclosure
Class A
Radiated RF Immunity
IEC 1000-4-3
Enclosure
80-2000 Mhz 10 V/
m
Electrostatic Discharge
IEC 1000-4-2
Enclosure
8kV Air
4kV Contact
Conducted RF Immunity
IEC 1000-4-6
Comm Lines
Power Lines
.15-80 Mhz 10
Vrms
Fast Transient Burst
IEC 1000-4-4
Comm Lines
Power Lines
1kV Cap. Clamp
2kV Direct
Surge Transient
IEC 1000-4-5
Shield to Grd
Power Lines
2kV
2kV CM / 1kV DM
Voltage Dips / Sag
EN 61131-2: 2003
Power Lines
Protective Earth Continuity
EN 61131-2: 2003
Enclosure to Earth
30 A < 0.1 Ω
Hipot (0-2 km Altitude)
Hipot
AC Power Lines
Modbus Plus
Ethernet
1780 VDC
500 VDC
500 VDC
Note:
z Tests applied to communication ports longer than 3 m and permanently
connected the device.
z Rated for light industrial duty.
Agency Approval
z UL 508
z CSA 22.2 No. 142 or 1010-1
Conformity
Conforms to these Council Directives (for the European Economic Area market)
z LV 23/73/EEC
z EMC 89/336/EEC
128
890 USE 191 00 12/2004
Technical Specifications
Environmental
Parameter
Reference
Limit
Temperature, Storage
IEC 68-2-1
IEC 68-2-2
-25° C for 96 hours
+70° C for 96 hours
Temperature, Operating
IEC 68-2-2
0 to 55° C Ambient
Humidity, Operating
IEC 68-2-3
95% RH at 50° C for 24 hours
non-condensing
Mechanical Tests
EN 61131-2: 2003, Sec. 6.2
Note: Rated for light industrial duty.
890 USE 191 00 12/2004
129
Technical Specifications
130
890 USE 191 00 12/2004
Glossary
A
address
On a network, the identification of a station. In a frame, a grouping of bits that
identifies the frame’s source or destination.
API
Application Program Interface. The specification of functions and data used by one
program module to access another; the programming interface that corresponds to
the boundary between protocol layers.
ARP
Address Resolution Protocol. A network layer protocol used to determine the
physical address which corresponds to the IP address for a host on the network.
ARP is a sub–protocol which operates under TCP/IP.
auto-negotiate
Protocol that allows devices at either end of a link segment to advertise and
negotiate modes of operation such as speed of link, flow control, or half or full duplex
operation.
auto-sense
Ability of a 10/100 Ethernet device to interpret the speed or duplex mode of the
attached device and to adjust to that rate.
autobaud
Automatic determination and matching of transmission speed.
autoIP
AutoIP is an alternative to DHCP that allows a computer to automatically obtain an
IP DHCP server available to perform that function.
890 USE 191 00 12/2004
131
Glossary
B
backbone
The main cable in a network.
bandwidth on
demand
Feature that allows a remote access device to initiate a second connection to a
particular site to increase the amount of data transferred to that site to increase the
desired threshold. The network manager configuring the remote access server will
specify a number of bits or a percentage of connection bandwidth threshold which
will trigger the secondary connection. Multilink PPP is an emerging standard to allow
this feature to be interoperable, but right now the only way to ensure correct
operation is to use devices on both end from the same vendor.
baseband LAN
A LAN that uses a single carrier frequency over a single channel. Ethernet, Token
Ring and Arcnet LANs use baseband transmission.
baud
Unit of signal frequency in signals per second. Not synonymous with bits per second
since signals can represent more than one bit. Baud equals bits per second only
when the signal represents a single bit.
binaries
Binary, machine readable forms of programs that have been compiled or
assembled. As opposed to Source language forms of programs.
binary
Characteristic of having only two states, such as current on and current off. The
binary number system uses only ones and zeros.
bit
The smallest unit of data processing information. A bit (or binary digit) assumes the
value of either 1 or 0.
block
A block is a variable-size piece of memory that a task can acquire. Blocks are
allocated from heaps.]
BNC
A standardized connector used with Thinnet and coaxial cable.
BOOTP
Bootstrap Protocol. A TCP/IP–based protocol that allows a host to configure itselfdynamically. Provides a means to assign a host its IP address, typically without user
intervention.
bps
Bits per second.
bridge
A device that connects two or more physical networks which use the same protocol.
Bridges read frames and decide whether to transmit or block them based on their
destination address.
132
890 USE 191 00 12/2004
Glossary
broadband
A data transmission technique allowing multiple high-speed signals to share the
bandwidth of a single cable via frequency division multiplexing.
broadband
network
A network that uses multiple carrier frequencies to transmit multiplexed signals on a
single cable. Several networks may coexist on a single cable without interfering with
one another.
brouter
A device that routes specific protocols, such as TCP/IP and IPX, and bridges other
protocols, thereby combining the functions of both routers and bridges.
bus
A LAN topology in which all the nodes are connected to a single cable. All nodes are
considered equal and receive all transmissions on the medium.
byte
A data unit of eight bits.
C
channel
The data path between two nodes.
client
A computer process requesting service from other computer processes.
coaxial cable
An electrical cable with a solid wire conductor at its center surrounded by insulating
materials and an outer metal screen conductor with an axis of curvature coinciding
with the inner conductor - hence "coaxial." Examples are standard Ethernet cable
and Thinwire Ethernet cable.
collision
The result of two network nodes transmitting on the same channel at the same time.
The transmitted data is not usable.
collision detect
A signal indicating that one or more stations are contending with the local station's
transmission. The signal is sent by the Physical layer to the Data Link layer on an
Ethernet/IEEE 802.3 node.
communication
server
A dedicated, standalone system that manages communications activities for other
computers.
CSMA/CD
Carrier Sense Multiple Access with Collision Detection is the Ethernet media access
method. All network devices contend equally for access to transmit. If a device
detects another device's signal while it is transmitting, it aborts transmission and
retries after a brief pause.
890 USE 191 00 12/2004
133
Glossary
cut-through
Technique for examining incoming packets whereby an Ethernet switch looks only
at the first few bytes of a packet before forwarding or filtering it. This process is faster
than looking at the whole packet, but it also allows some bad packets to be
forwarded.
D
data link
A logical connection between two nodes on the same circuit.
data link layer
Layer 2 of the seven-layer OSI reference model for communication between
computers on networks. This layer defines protocols for data packets and how they
are transmitted to and from each network device. It is a medium-independent, linklevel communications facility on top of the Physical layer, and is divided into two
sublayers: medium-access control (MAC) and logical-link control (LLC).
default gateway
The IP address of the network or host to which all packets addressed to an unknown
network or host are sent. The default gateway is typically a router or other device.
dest_idx
The destination field in a Modbus message. Corresponds to the Modbus device
addressed in the message.
DHCP
Dynamic Host Configuration Protocol. A network protocol used to configure IP
addresses dynamically. DHCP is an extension of BOOTP.
dialback
A security feature that ensures people do not log into modems that they shouldn't
have access to. When a connection is requested, the system checks the user name
for validity, then "dials back" the number associated with that user name.
DNS
Domain Name System. A protocol within TCP/IP used to find IP addresses based
on host names.
download
The transfer of a file or information from one network node to another.
E
end node
134
A node such as a PC that can only send and receive information for its own use. It
cannot route and forward information to another node.
890 USE 191 00 12/2004
Glossary
Ethernet
The most popular LAN technology in use today. The IEEE standard 802.3 defines
the rules for configuring an Ethernet network. It is a 10 Mbps, CSMA/CD baseband
network that runs over thin coax, thick coax, twisted pair or fiber optic cable.
F
FDDI
Fiberoptic Data Distribution Interface. A cable interface capable of transmitting data
at 100 Mbps. Originally specified for fiber lines, FDDI can also operate over twistedpair cable for short distances.
fiber optic cable
A transmission medium composed of a central glass optical fiber cable surrounded
by cladding and an outer protective sheath. It transmits digital signals in the form of
modulated light from a laser or LED (light-emitting diode).
field
A logical grouping of contiguous bits that convey one kind of information, such as
the start or end of a message, an address, data or an error check.
file server
A computer that stores data for network users and provides network access to that
data.
filtering
Process whereby an Ethernet switch or bridge reads the contents of a packet and
then finds that the packet does not need to be forwarded, drops it. a filtering rate is
the rate at which a device can receive packets and drop them without any loss of
incoming packets or delay in processing.
firmware
Alterable programs in semipermanent storage, e.g., some type of read-only or flash
reprogrammable memory.
forwarding
Process whereby an Ethernet switch or bridge reads the contents of a packet and
then passes that packet on to the appropriate attached segment. A forwarding rate
is the time that it takes the device to execute all of the steps.
frame
A group of bits which form a discrete block of information. Frames contain
networkcontrol information or data. The size and composition of a frame is
determined by the network technology being used.
framing types
Two common framing types are Ethernet II and IEEE 802.3.
FTP
File Transfer Protocol. A networking protocol used to exchange files between
stations on a network or over the Internet.
890 USE 191 00 12/2004
135
Glossary
full-duplex
Independent, simultaneous two-way transmission in both directions, as opposed to
half-duplextransmission.
G
gateway
A device which connects networks with dissimilar network architectures and which
operates at the Application Layer. This term may refer to a router.
H
header
The initial part of a data packet or frame containing identifying information such as
the source of the data, its destination, and length.
heartbeat
Ethernet defined SQE signal quality test function.
host
A node on a network.
host name
A domain name given to a specific computer on a network and used to address that
computer.
host table
A list of TCP/IP hosts on the network along with their IP addresses.
HTTP
HyperText Transport Protocol. A protocol used to deliver hypertext documents.
hub
A device which connects a series of flexible and centralized modules to create a
network.
I
ICMP
Internet Control Message Protocol. A protocol within TCP/IP used to report errors in
datagram transmission.
IEEE 802.3
The IEEE (Institute of Electrical and Electronic Engineers) standard that defines the
CSMA/CD media-access method and the physical and data link layer specifications
of a local area network. Among others, it includes 10BASE2, 10BASE5, 10BASEFL and 10BASE-T Ethernet implementations.
136
890 USE 191 00 12/2004
Glossary
inter-networking
A term for all the concepts, technologies, and devices that allow people and their
computers to communicate across different kinds of networks.
Internet
The global interconnection of TCP/IP based computer communication networks.
IP
Internet Protocol. A common network layer protocol. IP is most often used with TCP.
IP address
Internet Protocol Address. A 32–bit address assigned to hosts using TCP/IP.
L
layer
In the OSI model, a portion of the structure of a device which provides defined
services for the transfer of information.
M
MAC address
Media Access Control address. The hardware address of a device. A MAC address
is assigned to an Ethernet TCP/IP module in the factory.
N
network
Interconnected devices sharing a common data path and protocol for
communication.
node
An addressable device on a communications network.
O
OSI model
890 USE 191 00 12/2004
Open System Interconnection model. A reference standard describing the required
performance of devices for data communication. Produced by the International
Standards Organization.
137
Glossary
P
packet
The unit of data sent across a network.
PING
Packet Internet Groper. A program used to test whether a destination on a network
can be reached.
port
An access point for data entry or exit within a host using TCP services.
protocol
Describes message formats and a set of rules used by two or more devices to
communicate using those formats.
R
repeater
A device that connects two sections of a network and conveys signals between them
without making routing decisions or filtering packets.
router
A device that connects two or more sections of a network and allows information to
flow between them. A router examines every packet it receives and decides whether
to block the packet from the rest of the network or transmit it. The router will attempt
to send the packet through the network by the most efficient path.
S
server
Provides services to clients. This term may also refer to the computer on which the
service is based.
socket
The association of a port with an IP address, serving as an identification of sender
or recipient.
stack
The software code which implements the protocol being used. In the case of the
NOE modules it is TCP/IP.
STP
Shielded Twisted Pair. A type of cabling consisting of several strands of wire
surrounded by foil shielding, twisted together.
138
890 USE 191 00 12/2004
Glossary
subnet
A physical or logical network within an IP network, which shares a network address
with other portions of the network.
subnet mask
Used to indicate which bits in an IP address identify a subnet.
switch
A network device which connects two or more separate network segments and
allows traffic to be passed between them. A switch determines whether a frame
should be blocked or transmitted based on its destination address.
T
TCP
Transmission Control Protocol.
TCP/IP
A protocol suite consisting of the Transmission Control Protocol and the Internet
Protocol; the suite of communications protocols on which the Internet is based.
U
UDP
User Datagram Protocol. A protocol which transmits data over IP.
URL
Uniform Resource Locator. The network address of a file.
UTP
Unshielded Twisted Pair. A type of cabling consisting of insulated cable strands
which are twisted together in pairs.
W
Winsock
The Microsoft implementation of the Windows Sockets networking API based on the
Berkeley UNIX Sockets interface for supporting TCP/IP.
WWW
World Wide Web. A hypertext–based, distributed information system in which clients
and servers are freely available.
890 USE 191 00 12/2004
139
Glossary
140
890 USE 191 00 12/2004
Index
Numerics
5-byte address, 17, 23
bridge node address, 17
bridge slave path, 17
destination index, 20, 23
destination node, 25
IP address, 20, 23
outgoing message, 20
routing byte, 17
A
AC power connection, 13
AC power connector
rear panel, 34
additional Ethernet network, 121
additional Modbus Plus networks, 116
address, 17
mapped Modbus Plus node, 114
address byte, 17, 21
non-zero, 17
address filter, 19, 24
Modbus Plus, 18
source section, 18
address, same
Modbus Plus indicator pattern, 37
addressing method
advanced, 20, 60, 63
standard, 20, 60, 61
890 USE 191 00 12/2004
B
AC
admin tools
admin password, 76
diagnostic update interval, 76
factory image, 76
factory settings, 76
guest password, 76
load configuration, 76
logging type, 76
reboot system, 76
restart routers, 76
save configuration, 76
service pack, 76
system name, 76
admin tools tab, 74, 75
administrator password
change, using monitor console, 42
advanced addressing method, 20, 60
lookup table, 63
advanced source filter, 119
air filter
cleaning, 39
location, 38
maintenance, 38
arithmetic expression, 21
asterisk, 21, 25
constant, 21, 26
destination routing byte, 25
Modbus Plus address, 25
negative value, 21, 26
operand, 21, 26
single constant, 21, 26
141
Index
specified byte from the 5-byte
Modbus Plus address, 21
specified byte from the 5-byte routing
path, 25
sum or difference of 2 constants, 21, 26
unsigned byte value, 21, 26
value greater than 255, 22, 26
asterisk
arithmetic, 21
arithmetic expression, 25
Modbus Plus address field, 25
B
brackets
for mounting bridge, 32
bridge logs diagnostic tab, 79
bridge node address, 17
Bridge Plus (BP85), 10
bridge slave path, 17
bridge stats diagnostic tab, 81
Bridge/MUX (BM85), 10
bridges to additional Modbus Plus
networks, 116
C
change administrator password
monitor console, 42
Web console, 42
channel A
Modbus Plus error indicator, 37
channel B
Modbus Plus error indicator, 37
communication error
log file message, 93
compact form
default routing, 100, 102
configuration, 11
Ethernet to Modbus Plus, 57
example, 22, 26, 54
log in, 50
routing, 50
tutorial, 50
Web console, 50
142
configuration tab
admin tools, 74, 75
Ethernet to Modbus Plus, 66
Modbus Plus to Ethernet, 58
networks, 70
connecting network and power
cables, 30, 34
connection
Ethernet 10/100Base-T (RJ-45), 36
ferrite bead, 36
ground, 36
connector panel, 13
Ethernet port, 35
keyboard port, 35
Modbus Plus port, 35
serial port option, 35
VGA video port, 35
connectors
Ethernet
RJ-45, 30
Modbus Plus
two DB-9S, 30
power
3-prong 110/220 VAC, 30
console tools, 42
constant
arithmetic expression, 21, 26
invalid, 21, 26
valid, 21, 26
cross-network communication, 10
customer support, 11
D
debugging tools
log error message, 42
monitor traffic, 42
read from device register, 42
view error message, 42
Web console, 42
write to device register, 42
default gateway
network parameter in monitor
console, 44
890 USE 191 00 12/2004
Index
default routing
compact form, 100, 102
configuration, 99
explicit form, 100
records, 100
destination byte, 113
destination index, 18, 19, 22, 23, 24
5-byte address, 20, 23
configuration example, 22, 26
destination IP address
routing record, 21
destination node, 24, 25
destination routing byte, 25
destination section
destination index, 19, 24
IP address, 19, 21
IP address filter, 24
Modbus Plus address filter, 19, 24
slave path, 19
timeout, 19, 24
device info diagnostic tab, 83
device register
Web console debugging tools, 42
device stats diagnostic tab, 84
DHCP
network parameter in monitor
console, 44
diagnostic tab, 79
bridge logs, 79
bridge stats, 81
device info, 83
device stats, 84
read/write, 85
diagnostic tools
in monitor console,
for troubleshooting, 42
diagnostic update interval
admin tools, 76
diagnostic tab, 81, 83, 84
diagnostics
listening points, 78
890 USE 191 00 12/2004
diagram
AC power connection, 13
connector panel, 13
front and rear panels, 13
LED indicator, 13
power switch, 13
dynamic routing, 16
Ethernet to Modbus Plus only, 105
host-based, 105, 107
setup, 106
socket-based, 105, 107
using, 107
E
editing control
destination index filter, 68
edit, 59, 67
Ethernet to Modbus Plus configuration
tab, 67
examples, 60, 68
IP address filter, 68
Modbus Plus address filter, 60
Modbus Plus to Ethernet configuration
tab, 59
move down, 59, 67
move up, 59, 67
new, 59, 67
range of paths, 60
remove, 59, 67
save changes, 59, 67
single path, 60
slave path filter, 60
error
log file message, 93
error code
Modbus, 97
error message
Web console debugging tools, 42
Ethernet
5-byte address, 23
Ethernet 10/100Base-T (RJ-45), 36
Ethernet card
LED indicator, 35
network communication indicator, 37
143
Index
Ethernet port
connector panel, 35
Ethernet to Modbus Plus
routing, 56
Ethernet to Modbus Plus configuration
tab, 66
editing control, 67
event log, view
network parameter in monitor
console, 44
example
IP address filter, 24
Modbus Plus address filter, 19
routing a message, 25
exception code
Modbus, 97
explicit form
default routing, 100
explicit routing, 110, 117, 122
F
factory image, 44
admin tools, 76
factory settings, 44, 125
admin tools, 76
default routing record, 125
ferrite bead, 36
fixed IP address, 20
front panel
diagram, 13
front panel vent, 33
G
global data message
bridge does not support, 16
ground connection, 36
guest password
admin tools, 76
H
host interface adapter, 17
host name
network parameter in monitor
console, 44
host-based dynamic routing, 105, 107
I
incoming message, 17, 23
destination index, 24
error, 24
IP address, 24
installation
ground connection, 36
internal slave path, 17
inter-network connectivity, 10
IP address, 18, 19, 21, 23
5-byte address, 20, 23
address byte, 21
advanced method, 21
arithemtic expression, 21
configuration example, 22, 26
network parameter in monitor
console, 44
operand, 21
standard addressing, 21
standard addressing method, 61
IP address filter, 23, 24
asterisk, 24
destination node, 24
example, 24
sending device, 24
source filter, 24
IP lookup table, 20
IP1, IP2, IP3, IP4
specified byte in arithmetic
expression, 25
K
keyboard port
connector panel, 35
hardware
mounting, 30
physical description, 12
144
890 USE 191 00 12/2004
Index
L
LED indicator, 13
Ethernet card, 35
Modbus Plus card, 35
listening point, 79, 81
listening points, 78
load configuration
admin tools, 76
log error message
Web console debugging tools, 42
log file message
error, 93
traffic, 95
log in, 50
logging type
admin tools, 76
lookup index, 21
lookup table
advanced addressing method, 63
M
MAC address
network parameter in monitor
console, 44
main-conveyor, 114
maintenance, 74, 75
air filter, 38
periodic, 38
mapped Modbus Plus node address, 114
main-conveyor, 114
MB1, MB2, MB3, MB4, MB5
specified byte in arithmetic
expression, 21
message
incoming, 17
outgoing, 25
routing example, 25
message filter
source section, 18, 23
messages not supported by bridge
global data, 16
peer cop, 16
Modbus error code, 97
890 USE 191 00 12/2004
Modbus Plus address, 23
arithmetic expression, 25
configuration example, 22, 26
destination routing byte, 25
network parameter in monitor
console, 44
operand, 25
Modbus Plus address field
arithmetic expression, 25
how to construct 5-byte address, 25
Modbus Plus address filter, 18, 19, 113
Modbus Plus card
LED indicator, 35
network communication indicator, 37
Modbus Plus indicator pattern
channel A, 37
channel B, 37
no token passing, 37
node off-line, 37
normal operating state, 37
same address, 37
token passing, 37
Modbus Plus port
connector panel, 35
Modbus Plus to Ethernet
routing, 54
Modbus Plus to Ethernet configuration
tab, 58
editing control, 59
monitor console
access, 44
change administrator password, 42
diagnostic tools, for troubleshooting, 42
reset bridge to factory settings, 42
set up network parameters, 42, 44
monitor traffic
Web console debugging tools, 42
mounting
brackets, 32
diagram, 32
instructions, 31
requirements, 32
ventilation, 33
multiple Modbus Plus and Ethernet
devices, 110
multiple routing records, 18
145
Index
N
O
name server
network parameter in monitor
console, 44
negative value
arithmetic expression, 21, 26
network
additional Ethernet network, 121
bridges to additional Modbus Plus
networks, 116
connection, 30, 34
multiple devices, 110
verify communication, 30
verifying communication, 37
network communication indicator
Ethernet card, 37
Modbus Plus card, 37
network parameters
change administrator password, 44
default gateway, 44
DHCP or static IP, 44
host name, 44
IP address, 44
MAC address, 44
Modbus Plus address, 44
name server, 44
reboot system, 44
restore system, 44
subnet mask, 44
troubleshooting tools, 44
view event log, 44
workgroup, 44
network solutions, 10
networks tab, 70
no token passing
Modbus Plus indicator pattern, 37
node address
mapped, 20
node addressing, 10
node off-line
Modbus Plus indicator pattern, 37
non-zero address byte, 17
normal operating state
Modbus Plus indicator pattern, 37
off-line node
Modbus Plus indicator pattern, 37
operand, 21, 25
arithmetic expression, 21, 26
invalid, 21, 26
valid, 21, 26
outgoing message, 25
5-byte address, 20
146
P
password
change administrator, using monitor
console, 42
peer cop message
bridge does not support, 16
physical description, 12
power
connection, 30, 34, 35
LED, 35
switch, 35
power switch, 13
rear panel, 34
Q
query
write multiple registers, 106
R
range of paths, 60
range of source paths, 112, 123
read from device register
Web console debugging tools, 42
read/write diagnostic tab, 85
rear panel
AC power connector, 34
diagram, 13
power switch, 34
rear panel vent, 33
890 USE 191 00 12/2004
Index
reboot system
admin tools, 76
network parameter in monitor
console, 44
requirements
for mounting bridge, 32
reset bridge to factory settings
monitor console, 42
Web console, 42
restart routers
admin tools, 76
restore factory image
network parameter in monitor
console, 44
restore factory settings
network parameter in monitor
console, 44
routing
arithmetic expression, 113
default record configuration, 99
default routing record, 125
dynamic, 105
Ethernet to Modbus Plus, 56
explicit, 110, 117, 122
Modbus Plus to Ethernet, 54, 55
routing a message
example, 25
routing byte, 17
routing configuration tutorial, 50
routing path, 17, 23
routing record, 23
destination IP address, 21
Ethernet to Modbus Plus, 23
IP address filter, 24
Modbus Plus address filter, 19
Modbus Plus to Ethernet, 18
slave path, 18
source device, 18
source filter, 18
source section, 18
run time
negative value, 21, 26
runtime command
set up dynamic routing, 106
write multiple registers query, 106
890 USE 191 00 12/2004
S
same address
Modbus Plus indicator pattern, 37
save configuration
admin tools, 76
sending device, 24
serial port option
connector panel, 35
service pack
admin tools, 76
setup
console tools, 42
dynamic routing, 106
IP address, 42
message routing, 42
Modbus Plus address, 42
monitor console, 42
Web console, 42
side panel vent, 33
single constant
arithmetic expression, 21, 26
invalid, 21, 26
valid, 21, 26
single path, 60
slave path, 18
internal, 17
socket-based dynamic routing, 105, 107
source path
range, 112, 118, 123, 124
source section
address filter, 18
IP address filter, 23
message filter, 18, 23
specified byte
arithmetic expression, 21, 25
standard addressing method, 20, 60
IP address, 61
static IP
network parameter in monitor
console, 44
static routing, 16
subnet mask
network parameter in monitor
console, 44
147
Index
sum or difference of 2 constants
arithmetic expression, 21, 26
invalid, 21, 26
valid, 21, 26
support, 11
system name
admin tools, 76
T
technical support, 11
theory of operations, 16
timeout, 18, 22, 23, 27
token passing
Modbus Plus indicator pattern, 37
traffic message, 95
troubleshooting, 11
diagnostic tools in monitor console, 42
tutorial
routing configuration, 50
W
Web console, 10, 16, 46
change administrator password, 42
debugging tools, 42
diagnostic tab, 79
reset bridge to factory settings, 42
set up network parameters, 42
workgroup
network parameter in monitor
console, 44
write to device register
Web console debugging tools, 42
U
unsigned byte value
arithmetic expression, 21, 26
V
validation, 11
value greater than 255
in arithmetic expression, 22, 26
ventilation
diagram, 33
for mounting bridge, 33
front panel, 33
rear panel, 33
side panel, 33
verifying network communication, 37
VGA video port
connector panel, 35
view error message
Web console debugging tools, 42
view event log
network parameter in monitor
console, 44
148
890 USE 191 00 12/2004