1
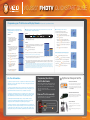
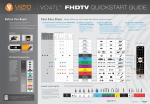
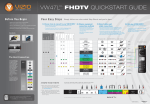
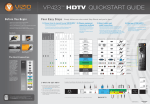
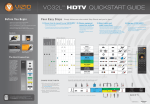
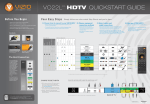
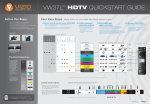
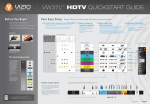
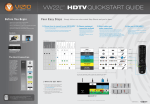
VOJ320 FHDTV QUICKSTART GUIDE 1A TM TM Programming your TV to Receive and Display Channels: All you need is your Remote Control. Receiving Channels through DTV/TV Input using Regular Antenna or Regular Cable Service (No Box) Signals. Displaying Channels from different Signal Sources (External TV Tuner, VCR, Cable Box or Satellite Receiver) through different Inputs. Fine Tuning your TV for Home Use. After completing either Procedure 1 or Procedure 2, please follow the steps below to optimize your TV set display: STEP 2.1 STEP 1.1 Connect your signal source (cable from antenna or cable from the wall for Cable Service without box) directly to the DTV/TV RF (commonly named COAXIAL) connector. STEP 1.2 Turn on the TV. The Initial Setup menu screen should appear. If this screen does not appear see User’s Manual, Chapter 3 for TV Tuner Setup. Please choose Home Mode for energy savings. Press key to initialize the process. Select the correct input connection; RF (DTV/TV)* connector, Composite (Yellow, Red and White)* connectors, Component (Red, Green, Blue plus Red and White)* connectors, HDMI* connectors or S-Video (AV)* plus Red and White connectors (if applicable). Make the physical connection or hook up. 1. Press the the or key to bring up the Menu display. Use button to scroll to the Color Temperature option. 2. Press the button to select it. 3. Press either or and then press the button to change setting to Normal, key again to go back to previous screen. STEP 2.2 4. Press either or button to select the Picture Mode option. Turn on the TV. The Initial Setup menu screen should appear. If this screen does appear, 5. Press either to Standard. or button to change the Picture Mode option Select Language: English, Español, Francais. 6. Press the press on remote control to initialize the process. If the screen does not appear, please skip to Step D. Press key to exit the on screen display Menu. key to exit the Initial Setup menu. NOTE: If you followed Procedure 1, take the following steps to ensure that the correct program times are shown when pressing the Guide key: If you have an HD service you must use the HDMI (best) or Component connection. NOTE: Composite and S-VIDEO Cables can only be used for SD (480i) pictures. Select Language: English, Español, Francais. Press button to go to next screen. Press the Turn on your Cable Box, VCR, External TV Tuner or Satellite Receiver and you will see a picture on your TV set. If there is not a picture, make sure you have selected the correct input on the TV set. Press or Pressing either the once to select Cable or Antenna. to continue to next screen. Press key on remote control to scan for channels. Scanning for available channels could take several minutes. or button, scroll across to the icon showing the little satellite dish or antenna. The next screen will appear showing If the selected input is RF connection, you should be aware that the TV set needs to be on either channel 3 or channel 4 matching the Press key, which will bring up the picture mode menu. channel which has been selected on the back of the VCR, Cable Box, External TV Tuner or Satellite Receiver; please refer to Owner or User’s Manual of such equipment for details. Time Zone; using either the pressing either the NOTE: The TV set will be displaying any television station or program selected by the Cable Box, VCR, External Tuner or Satellite Receiver. The TV set will not be able to change programs or channels; this is controlled by the equipment sending the signal. If the service being used includes a box with two different outputs for two different (distant) rooms, then scanning channels should help to find the signal. Be aware that the channel to be selected varies from provider to provider, meaning you may have to call your provider company so they can provide you with the specific channel to use with high-definition TV sets. Some examples of these channels are: 105, 106, 115 and 116. area. Press the or or button, select it, and finally by button, choose the proper Time Zone for your key to exit the on screen display Menu. Once scanning is finished, programming is complete. Press the * key to exit. For Your Information: Coaxial connection (RF connector) is recognized as the threaded connector, commonly Programming Your Cable or Satellite Box Remote called cable, screw on or coaxial connector which carries the image (picture) and sound (audio) through a single cable. Consult your Cable or Satellite Owner’s Manual to determine if you need a 3, 4 or 5-digit code. If your Cable or Satellite Box requires: Composite connection (RCA connectors) is recognized by the three (yellow, red and • 3-digits, please use “627” (This code usually works with DISHNetwork.) white) standardized color coded RCA connectors. Yellow carries the image (picture); red (right channel) and white (left channel) carry the sound (audio) of the signal. Component connection (RCA connectors) is recognized by the three (green, blue and red) standardized color coded RCA connectors for image (picture) plus the two (red and white) standardized color coded RCA connectors for the sound (audio) of the signal. HDMI (High-Definition Multimedia Interface) connection (HDMI connector) is • 4-digits, please use “1758”, “0178” or “0128” Optional Components ENHANCE YOUR VIZIO EXPERIENCE When it comes to components and accessories, don’t settle for less than VIZIO. We offer a full line of products specifically designed to accentuate your VIZIO HDTV. To learn more about how you can enhance your VIZIO experience, call 888-849-4623 or visit www.VIZIO.com. • 5-digits, please use “11758”, “10178” or “10128” (These codes usually work with DIRECTV.) VIZIO HIGH-DEFINITION CERTIFIED CABLES Your new TV set is now ready to automatically reproduce the best picture quality from the input signal being fed into it. Enjoy your VIZIO HDTV. recognized by the standardized elongated D-Shaped connector which carries both the image (picture) and the sound (audio) of the signal through a single cable. Our VIZIO Certified HD cables carry the same standards of excellence as all our VIZIO products. Available in: DVI, HDMI and Component in lengths of 2, 5, and 10 meters. VIZIO CERTIFIED MOUNTS S-Video (separate video) connection (4-pin Mini-DIN connector) is recognized by the small connectors at the end of a cable with multiple pins in it. This connection carries only the image (picture) of the signal; therefore, there is a need to supply a separate sound (audio) signal by using the two (red and white) standardized color coded RCA connectors. These small arrows correspond to FLUSH MOUNT- turn your HDTV into a work of art the arrows shown in the above Steps. TILT MOUNT- adjust your HDTV for the most comfortable viewing position They surround the Legend key. ARTICULATING ARM- position your HDTV exactly where you want it ©2008 VIZIO Inc.