1
INSTALLATION
OPERATION
AND
MAINTENANCE
MANUAL
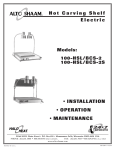
HOT CARVING
SHELF, ELECTRIC
MODELS:
100-HSL/BCB-2
100-HSL/BCS-2
100-HSL/BCS-2S
W 1 6 4 N 9 2 2 1 W a t e r S t r e e t • P. O . B o x 4 5 0 • M e n o m o n e e F a l l s , W i s c o n s i n 5 3 0 5 2 - 0 4 5 0
PHONE:
262.251.3800
800.558-8744
PRINTED IN U.S.A.
USA/CANADA
FAX: 262.251.7067 • 800.329.8744 U.S.A.
262.251.1907 INTERNATIONAL
ONLY
U.S.A.
WEBSITE:
www.alto-shaam.com
#802/1 • 3/2005
®
H O T C A R V I N G S H E LV E S
UNPACKING and SET-UP
E L E C T R I C A L I N S TA L L AT I O N
The Alto-Shaam Carving Shelf has been
thoroughly tested, checked for calibration, and
inspected to insure only the highest quality unit
is provided. When you receive your unit, check
for any possible shipping damage and report it at
once to the delivering carrier. See
Transportation Damage and Claims section
located in this manual.
The carving shelf, complete with unattached
items and accessories should be checked to
ensure all the following items have been received
as standard with each unit.
4: 1” (25mm) Legs
4: Nylon Screws
1: Cutting Board
2: Lamps
4: Sneeze Guard Mounting Screws (some models)
Save all the information and instructions
packed inside the carton. Complete and return
the warranty card to the factory as soon as
possible to assure prompt service in the event of
a warranty parts and labor claim.
Alto-Shaam hot carving shelves are designed
for the purpose of maintaining hot food at a
temperature for safe consumption. The unit
must be installed on a level surface in a location
that will permit the equipment to function for its
intended purpose and allow adequate access for
proper cleaning and maintenance.
The carving shelf must not be installed in any
area where it will b affected by steam, grease,
dripping water, high temperatures, or any other
severEly adverse conditions.
NOTE: All claims for warranty must include the full
model number and serial number of the unit.
1. An identification tag is permanently mounted
on the unit.
PH
PATENT NOS. 3521030
4595247
®
2. If necessary, a proper receptacle or
permanent wiring for this unit must be
installed by a licensed electrician in
accordance with applicable local
electrical codes.
3. Plug the unit into a properly grounded
receptacle ONLY, positioning the unit so the
power supply cord is easily accessible in case
of an emergency.
ENSURE POWER SOURCE
MATCHES VOLTAGE STAMPED ON
NAMEPLATE OF UNIT
For 230V units: To prevent an electrical shock
hazard between the appliance and other
appliances or metal parts in close vicinity, an
equalization-bonding stud is provided. An
equalization bonding lead must be connected to
this stud and the other appliances / metal parts
to provide sufficient protection against potential
difference. The terminal is marked with the
following symbol.
NOTE: The appliance must be connected
to an electrical circuit that is protected by an
external GFCI outlet.
HEATING CHARACTERISTICS
The shelf is equipped with a special, low-heat-density, heating cable. Through the Halo Heat
concept, the heating cable is mounted against the top surface of the shelf to provide an evenly
applied heat source, controlled by a thermostat.P
Through even heat application, the quality of a food product is maintained up to as much as several
hours.
#802/1 Operation & Care Manual • 1.
38"—(965mm)
maximum
24-1/4"—(616mm)
Exterior Dimensions
3"—(76mm)
1"
(25mm)
28-1/8" (714mm)
26-1/8"
(664mm)
28-7/8"—(733mm)
1"
(25mm)
I N S TA L L AT I O N
1" (25mm)
FOR LEGS
100-HSL/BCB-2
100-HSL/BCS-2
100-HSL/BCS-2S
Options and Accessories
Carving Holder
Prime Rib . . . . . . . . . . . . . . . . . . . . . . . . . . . . . . . . . . . . . . . . . . . . . . . . . . . . . . . . . . . . . . . . . . . . . . . . . . . . . .HL-2635
Steamship or Cafeteria Round . . . . . . . . . . . . . . . . . . . . . . . . . . . . . . . . . . . . . . . . . . . . . . . . . . . . . . . . . . . . . . . .4459
Carving Shelf Mounting Adapter . . . . . . . . . . . . . . . . . . . . . . . . . . . . . . . . . . . . . . . . . . . . . . . . . . . . . . . . . . . . .16237
Cutting Board, with gravy lane, 18" x 24" x 1/2" (457mm x 610mm x 13mm) . . . . . . . . . . . . . . . . . . .BA-2054
Cutting Board, with gravy lane, 18" x 12" x 1/2" (457mm x 305mm x 13mm) . . . . . . . . . . . . . . .BA-2358
Using Stacking Platform from
kits 16222 or 16237
to provide carving shelf:
1. Remove the three screws in the top plate at the
front of the cabinet.
.
No
2. Remove the three screws in the back plate near the
top of the cabinet.
2. Position the stacking platform on top of the unit
with the flange in front, aligning the holes in the
platform over the holes in the cabinet.
37
162
kit
for
lf
she
ng
i
v
ar
gc
kin
c
a
st
22
162
or
Step 2
Step 1
3. Reinstall the cabinet screws removed in steps 1 and 2
through the platform holes to attach it to the cabinet,
front and back.
4. Place the carving shelf on the stacking platform.
#802/1 Operation & Care Manual • 2.
or
0-S
0
5
0-S
75
I N S TA L L AT I O N
1.
O P E R AT I O N
WHEN THE UNIT IS EQUIPPED WITH A
SNEEZE GUARD:
Refer to the Service Views located in this
manual. Swing the sneeze guard up to the
proper position and secure each side with
the two (2) additional screws provided.
Tighten all four (4) screws to mount the
sneeze guard securely.
2.
The hot carving shelf is designed to be
mounted directly on top of a Halo Heat
cook/hold oven or holding cabinet. The
shelf can also be used as a free-standing unit
without the Halo Heat cabinet.
A.
CABINET MOUNTED SHELVES:
Install the four (4) nylon screws in the leg
mounting holes to protect the top surface
of the cabinet and to provide a more
stable placement between the shelf and
the cabinet. Do not install the 1" (25mm)
equipment legs.
B.
FREE-STANDING SHELVES:
Install the 1” (25mm) legs before
operating the shelf. Failure to install the
1" legs prior to heating the shelf could
result in damage to the surface on which
the shelf is placed, may pose a potential
fire hazard, and nullifies the validity of
the UL listing mark.
1.
Turn power switch ON.
2.
Turn lamp switch ON.
3.
The base of the shelf is equipped with a
thermostat indicating a range of 1 through
10. Set the dial at 8 to preheat the shelf.
When the indicator light goes out, the unit is
preheated.
4.
The product must be at the proper internal
temperature before transferring to the
carving shelf. Use a meat thermometer to
check the internal temperature of the product
being held. Adjust the thermostat on the
shelf to give the best overall setting based on
the internal product temperature.
5.
The proper temperature range for the
products being held will depend on the
type and quantity of product. When
holding food for prolonged periods,
it is advisable to periodically check the
internal temperature of each item with a
food thermometer to assure maintenance
of the proper temperature range of
140° to 160°F (60° to 71°C). Read this
manual for additional information on safe
internal product temperatures, general
holding guidelines, and sanitation
procedures.
✧ Use hand protection when handling
hot items.
3.
Before operating the shelf, clean the metal
surface exterior of the unit with a clean,
damp cloth and mild soap solution. Rinse
carefully. Clean the acrylic sneeze guard
with soap or mild detergent and water. Dry
with a clean, damp chamois. Grease and oil
may be removed with naphtha or hexane.
Do not use commercial or household cleaners
containing ammonia. To avoid scratching, do
not use dry cloths or scouring compounds.
✧ DO NOT use knives or utensils
on the hot shelf surface.
A cutting board is supplied.
#802/1 Operation & Care Manual • 3.
GENERAL HOLDING GUIDELINES
Chefs, cooks and
other
specialized food
service personnel
employ varied
methods of cooking.
Proper holding
temperatures for a
specific food product
must be based on the
moisture content of
the product, product
density, volume, and
proper serving
temperatures. Safe
holding temperatures
must also be
correlated with
palatability in
deter mining the
length of holding time
for a specific product.
H O L D I N G T E M P E R AT U R E R A N G E
MEAT
BEEF ROAST — Rare
BEEF ROAST — Med/Well Done
FA H R E N H E I T
CELSIUS
140°F
60°C
160°F
71°C
BEEF BRISKET
160° — 175°F
71° — 79°C
CORN BEEF
160° — 175°F
71° — 79°C
PASTRAMI
160° — 175°F
71° — 79°C
PRIME RIB — Rare
STEAKS — Broiled/Fried
RIBS — Beef or Pork
140°F
60°C
140° — 160°F
60° — 71°C
160°F
71°C
160° — 175°F
71° — 79°C
HAM
160° — 175°F
71° — 79°C
PORK
160° — 175°F
71° — 79°C
LAMB
160° — 175°F
71° — 79°C
CHICKEN — Fried/Baked
160° — 175°F
71° — 79°C
DUCK
160° — 175°F
71° — 79°C
TURKEY
160° — 175°F
71° — 79°C
GENERAL
160° — 175°F
71° — 79°C
FISH — Baked/Fried
160° — 175°F
71° — 79°C
LOBSTER
160° — 175°F
71° — 79°C
VEAL
POULTRY
FISH/SEAFOOD
When product is
removed from a high
temperature cooking
environment for
immediate transfer
into equipment with
the lower
temperature required
for hot food holding,
condensation can
for m on the outside
of the product and
on the inside of
plastic containers
used in self-service
applications.
Allowing the product
to release the initial
steam and heat
produced by high
temperature cooking
can alleviate this
condition. To
preserve the safety
and quality of freshly
cooked foods
however, a maximum
of 1 to 2 minutes
must be the only
time period allowed
for the initial heat to
be released from the
product.
71° — 79°C
Halo Heat maintains
BAKED GOODS
the maximum amount
BREADS/ROLLS
120° — 140°F
49° — 60°C
of product moisture
MISCELLANEOUS
content without the
CASSEROLES
160° — 175°F
71° — 79°C
addition of water,
DOUGH — Proofing
80° — 100°F
27° — 38°C
water vapor, or
EGGS —Fried
150° — 160°F
66° — 71°C
steam. Maintaining
FROZEN ENTREES
160° — 175°F
71° — 79°C
maximum natural
HORS
D'OEUVRES
160°
—
180°F
71° — 82°C
product moisture
PASTA
160° — 180°F
71° — 82°C
preserves the natural
PIZZA
160° — 180°F
71° — 82°C
flavor of the product
POTATOES
180°F
82°C
This unit is equipped
and provides a more
PLATED
MEALS
180°F
82°C
with a ther mostat
genuine taste. In
SAUCES
140° — 200°F
60° — 93°C
control between 60°
addition to product
SOUP
140° — 200°F
60° — 93°C
and 200°F (16° and
moisture retention,
VEGETABLES
160° — 175°F
71° — 79°C
93°C). If the unit is
the gentle properties
The
holding
temperatures
listed
are
suggested
guidelines
only.
equipped with vents,
of Halo Heat
close the vents for
maintain a consistent
temperature throughout the cabinet without the moist holding and open the vents for crisp
holding. Use a metal-stemmed ther mometer to
necessity of a heat distribution fan, thereby
measure the inter nal temperature of the
preventing further moisture
product being held. Adjust the ther mostat
loss due to evaporation or dehydration.
setting to achieve the best overall setting based
on inter nal product temperature.
SHRIMP — Fried
160° — 175°F
#802/1 Operation & Care Manual • 4.
CARE and CLEANING
The cleanliness and appearance of this
equipment will contribute
considerably to operating
efficiency and savory,
appetizing food. Good
equipment that is kept clean
works better and lasts longer.
Warranty does not
apply if the carving
shelf is flooded or
immersed in water.
CLEAN THE CARVING SHELF
AFTER EACH USE:
1.
Disconnect the shelf from the power source.
2.
Remove cutting board after each use. Clean
and sanitize separately following applicable
state or local health sanitation ordinances.
Air dry the board on a clean, flat surface to
prevent board from warping. If the board
becomes warped, heating will restore
flexibility to facilitate flattening. Warped
boards may be heated on the carving shelf
surface, in a preheated Combitherm
combination oven/steamer for 10 minutes on
the steam program, or in a preheated Halo
Heat cook and hold oven for 15 minutes at
250°F (121°C).
3.
4. DO NOT use knives or utensils on the hot
shelf surface. A cutting board is supplied.
5.
Clean the acrylic sneeze guard with soap or
mild detergent and water. Dry with a clean,
damp chamois. Grease and oil may be
removed with naphtha or hexane. Do not use
commercial or household cleaners containing
ammonia. To avoid scratching, do not use dry
cloths or scouring compounds.
DISCONNECT SHELF FROM
POWER SOURCE BEFORE
CLEANING OR SERVICING
Clean metal surface with mild soap
solutions only. DO NOT clean with
lye or alkaline based cleaners or any
abrasive cleaners. Rinse carefully
with a clean sponge and water to
remove all soap or detergent residue.
AT N O T I M E S H O U L D T H E C A R V I N G
S H E L F B E F L O O D E D W I T H WAT E R O R
LIQUID SOLUTION.
NEVER STEAM CLEAN.
SEVERE DAMAGE OR ELECTRICAL
H A Z A R D C O U L D R E S U LT.
#802/1 Operation & Care Manual • 5.
SANITATION
Food flavor and aroma are usually so closely
related that it is difficult, if not impossible, to
separate them. There is also an important,
inseparable relationship between cleanliness and
food flavor. Cleanliness, top operating efficiency,
and appearance of equipment contribute
considerably to savory, appetizing foods. Good
equipment that is kept clean, works better and
lasts longer.
The most accurate method of measuring safe
temperatures of both hot and cold foods is by
internal product temperature. A quality
thermometer is an effective tool for this purpose,
and should be routinely used on all products that
require holding at a specific temperature.
A comprehensive sanitation program should focus
on the training of staff in basic sanitation
procedures. This includes personal hygiene,
Most food imparts its own particular aroma and
proper handling of raw foods, cooking to a safe
many foods also absorb existing odors.
internal product temperature, and the routine
Unfortunately, during this absorption, there is no monitoring of internal temperatures from
distinction between GOOD and BAD odors. The receiving through service.
majority of objectionable flavors and odors
troubling food service operations are caused by
Most food-borne illnesses can be prevented
bacteria growth. Sourness, rancidity, mustiness,
through proper temperature control and a
stale or other OFF flavors are usually the result of comprehensive program of sanitation. Both these
germ activity.
factors are important to build quality service as
the foundation of customer satisfaction. Safe
The easiest way to insure full, natural food flavor food handling practices to prevent food-borne
is through comprehensive cleanliness. This
illness is of critical importance to the health and
means good control of both visible soil (dirt) and
safety of your customers. HACCP, an acronym
invisible soil (germs). A thorough approach to
for Hazard Analysis (at) Critical Control Points, is
sanitation will provide essential cleanliness. It
a quality control program of operating procedures
will assure an attractive appearance of equipment, to assure food integrity, quality, and safety.
along with maximum efficiency and utility. More Taking steps necessary to augment food safety
importantly, a good sanitation program provides
practices are both cost effective and relatively
one of the key elements in the prevention of
simple. While HACCP guidelines go far beyond
food-borne illnesses.
the scope of this manual, additional information
is available by contacting:
A controlled holding environment for prepared
foods is just one of the important factors involved
Center for Food Safety and Applied Nutrition
in the prevention of food-borne illnesses.
Food and Drug Administration
Temperature monitoring and control during
1-888-SAFEFOOD
receiving, storage, preparation, and the service of
foods are of equal importance.
I N T E R N A L F O O D P R O D U C T T E M P E R AT U R E S
HOT FOODS
DANGER ZONE
CRITICAL ZONE
SAFE ZONE
40° TO 140°F
70° TO 120°F
140° TO 165°F
(4° TO 60°C)
(21° TO 49°C)
(60° TO 74°C)
COLD FOODS
DANGER ZONE
SAFE ZONE
ABOVE 40°F
36°F TO 40°F
(ABOVE 4°C)
(2°C TO 4°C)
FROZEN FOODS
DANGER ZONE
CRITICAL ZONE
SAFE ZONE
ABOVE 32°F
0° TO 32°F
0°F OR BELOW
(ABOVE 0°C)
(-18° TO 0°C)
(-18°C OR BELOW)
#802/1 Operation & Care Manual • 6.
100-HSL/BCS-2
Service Parts List
PART DESCRIPTION
UNIT
QUANTITY
ALTO-SHAAM
PART NUMBER
1. LEGS, 1” (25mm)
NYLON SCREWS
4
4
LG-2043
SC-2464
2. BOTTOM ASSEMBLY
1
4496
3. BOTTOM ASSBLY MTG SCREWS 16
SC-2459
4. INSULATION
— 26” x 28” (660mm x 711mm)
1
IN-2381
5. HEATING ELEMENT CLAMP
1
1224
6. THERMOSTAT CAPILLARY BULB
1
______
1
IN-3043
8. HEATING ELEMENT
1
CB-3524
9. CABLE CONNECTOR (Large)
3
CR-3067
10. CABLE CONNECTOR (Small)
2
CR-3066
11. CONTROL PLATE
1
11570
12. CONTROL PLATE MTG. SCREWS
4
SC-2459
13. THERMOSTAT
1
TT-3498
14. THERMOSTAT KNOB
1
KN-3473
15. INDICATOR LIGHT (125V)
INDICATOR LIGHT (230V)
1
1
LI-3027
LI-3951
16. SWITCH (125V)
SWITCH (230V)
2
2
SW-3409
SW-3962
17. CORD & PLUG SET (125V)
CORD & PLUG SET (230V)
1
1
CD-3232
CD-3922
18. LAMP BLOCK BOTTOM COVER
2
1221
19. LAMP BLK BTM CVR MTG SCREWS
2
SC-2459
20. CONNECTORS
2
CR-3068
21. LAMP MOUNTING BLOCK (Silver) 2
BK-2668
7. CERAMIC FIBER PAPER
17-3/4” x 20-1/2” (451mm x 521mm)
22. LAMP MOUNTING BLOCK BRACKET
2
1223
23. LAMP MOUNTING BLOCK
MOUNTING SCREWS
4
SC-22378
24. LAMP ASSEMBLY
2
LP-3525
25. LAMP (125V)
LAMP (230V)
2
2
LP-3016
LP-3319
26. CUTTING BOARD
1
BA-2054
27. GROUND STUD
1
ST-24173
DISCONNECT SHELF FROM POWER
SOURCE BEFORE
CLEANING OR SERVICING
#802/1 Operation & Care Manual • 7.
SERVICE VIEW PARTS LIST
05/15/03
05/15/03
100-HSL/BCB-2
UNIT
QUANTITY
ALTO-SHAAM
PART NUMBER
1. LEGS, 1” (25mm)
NYLON SCREWS
4
4
LG-2043
SC-2464
2. BOTTOM ASSEMBLY
1
4596
PART DESCRIPTION
100-HSL/BCS-2S
PART DESCRIPTION
UNIT
QUANTITY
ALTO-SHAAM
PART NUMBER
1. LEGS, 1” (25mm)
NYLON SCREWS
4
4
LG-2043
SC-2464
2. BOTTOM ASSEMBLY
1
4496
3. BOTTOM ASSBLY MTG SCREWS 16
SC-2459
3. BOTTOM ASSBLY MTG SCREWS 16
SC-2459
4. INSULATION
— 26” x 28” (660mm x 711mm)
1
IN-2381
4. INSULATION
— 26” x 28” (660mm x 711mm)
1
IN-2381
5. HEATING ELEMENT CLAMP
1
1224
5. HEATING ELEMENT CLAMP
1
1224
6. THERMOSTAT CAPILLARY BULB
1
______
6. THERMOSTAT CAPILLARY BULB
1
______
1
IN-3043
1
IN-3043
8. HEATING ELEMENT
1
CB-3524
8. HEATING ELEMENT
1
CB-3524
9. CABLE CONNECTOR (Large)
1
CR-3067
9. CABLE CONNECTOR (Large)
1
CR-3067
10. CABLE CONNECTOR (Small)
1
CR-3066
10. CABLE CONNECTOR (Small)
1
CR-3066
11. CONTROL PLATE
1
1010
11. CONTROL PLATE
1
11570
12. CONTROL PLATE MTG SCREWS
4
SC-2735
12. CONTROL PLATE MTG. SCREWS
4
SC-2459
13. THERMOSTAT
1
TT-3498
13. THERMOSTAT
THERMOSTAT KNOB
1
1
TT-3498
KN-3473
14. THERMOSTAT KNOB
1
KN-3473
15. INDICATOR LIGHT (125V)
INDICATOR LIGHT (230V)
1
1
LI-3027
LI-3951
14. INDICATOR LIGHT (125V)
INDICATOR LIGHT (230V)
1
1
LI-3027
LI-3951
16. SWITCH (125V)
SWITCH (230V)
2
2
SW-3409
SW-3962
15. SWITCH (125V)
SWITCH (230V)
2
2
SW-3409
SW-3962
17. CORD & PLUG SET (125V)
CORD & PLUG SET (230V)
1
1
CD-3232
CD-3922
16. CORD & PLUG SET (125V)
CORD & PLUG SET (230V)
1
1
CD-3232
CD-3922
17. LAMP BLOCK BOTTOM COVER
2
1221
18. LAMP BLOCK BOTTOM COVER
2
1221
19. LAMP BLK BTM CVR MTG SCREWS
4
SC-2459
18. LAMP BLOCK BOTTOM COVER
MOUNTING SCREWS
4
SC-2459
20. CONNECTORS
4
CR-3068
19. CONNECTORS
4
CR-3068
21. LAMP MOUNTING BLOCK (Brass)
2
BK-2671
20. LAMP MOUNTING BLOCK (Silver) 2
BK-2668
22. LAMP MOUNTING BLOCK BRACKET
2
1223
23. LAMP MTG BLOCK SCREWS
8
SC-22378
24. LAMP ASSEMBLY (Brass)
2
LP-3526
25. LAMP (125V)
LAMP (230V)
2
2
LP-3016
LP-3319
26. SNEEZE GUARD BRACKET, RH (Brass) 1
BT-2669
27. SNEEZE GUARD BRACKET, LH (Brass) 1
BT-2670
28. SNEEZE GUARD BRACKET SCREWS
4
SC-2735
29. SNEEZE GUARD
1
30. SNEEZE GUARD MTG SCREWS
7. CERAMIC FIBER PAPER
7. CERAMIC FIBER PAPER
17-3/4” x 20-1/2” (451mm x 521mm)
17-3/4” x 20-1/2” (451mm x 521mm)
21. LAMP MOUNTING BLOCK BRACKET
2
1223
22. LAMP MOUNTING BLOCK
MOUNTING SCREWS
8
SC-22378
23. LAMP ASSEMBLY (Silver)
2
LP-3525
24. LAMP (125V)
LAMP (230V)
2
2
LP-3016
LP-3319
25. SNEEZE GUARD BRACKET, RH (Silver)1
BT-2665
26. SNEEZE GUARD BRACKET, LH (Silver)1
BT-2666
GD-2667
27. SNEEZE GUARD BRACKET
MOUNTING SCREWS
4
SC-2425
4
SC-2736
28. SNEEZE GUARD
1
GD-2667
31. SNEEZE GUARD MTG CAP NUTS
4
NU-2737
29. SNEEZE GUARD SHOULDER STUDS 4
ST-2546
32. CUTTING BOARD
1
BA-2054
30. CUTTING BOARD
1
BA-2054
33. GROUND STUD
1
ST-24173
31. GROUND STUD
1
ST-24173
#802/1 Operation & Care Manual • 8.
#802/1 Operation & Care Manual • 9.
#802/1 Operation & Care Manual • 10.
#802/1 Operation & Care Manual • 11.
#802/1 Operation & Care Manual • 12.
#802/1 Operation & Care Manual • 13.
#802/1 Operation & Care Manual • 14.
LIMITED
WARRANTY
T R A N S P O RTAT I O N
DAMAGE and CLAIMS
All Alto-Shaam
equipment is
sold F.O.B. shipping
point, and when
accepted by the
carrier, such shipments
become the property
of the consignee.
Should damage occur in shipment, it is a matter between the
carrier and the consignee. In such cases, the carrier is
assumed to be responsible for the safe delivery of the
merchandise, unless negligence can be established on the
part of the shipper.
1. Make an immediate inspection while the equipment is
still in the truck or immediately after it is moved to the
receiving area. Do not wait until after the material is
moved to a storage area.
2. Do not sign a delivery receipt or a freight bill until you
have made a proper count and inspection of all
merchandise received.
3. Note all damage to packages directly on the carrier’s
delivery receipt.
4. Make certain the driver signs this receipt. If he refuses
to sign, make a notation of this refusal on the receipt.
5. If the driver refuses to allow inspection, write the
following on the delivery receipt:
D r i v e r re f u s e s t o a l l o w i n s p e c t i o n o f
containers for visible damage.
6. Telephone the carrier’s office immediately upon finding
damage, and request an inspection. Mail a written
confirmation of the time, date, and the person called.
7. Save any packages and packing material for further
inspection by the carrier.
8. Promptly file a written claim with the carrier and attach
copies of all supporting paperwork.
We will continue our policy of assisting our customers in
collecting claims which have been properly filed and actively
pursued. We cannot, however, file any damage claims for
you, assume the responsibility of any claims, or accept
deductions in payment for such claims.
Alto-Shaam, Inc. warrants to the original purchaser that any
original part that is found to be defective in material or
workmanship will, at our option, subject to provisions
hereinafter stated, be replaced with a new or rebuilt part.
The labor warranty remains in effect one (1) year from installation
or fifteen (15) months from the shipping date, whichever occurs
first.
The parts warranty remains in effect one (1) year from installation
or fifteen (15) months from the shipping date, whichever occurs
first.
Exceptions to the one year part warranty period are as listed:
A. Halo Heat cook/hold ovens include a five (5) year parts
warranty on the heating element. Labor will be covered
under the terms of the standard warranty period of one (1)
year or fifteen (15) months.
B. Alto-Shaam Quickchillers include a five (5) year parts
warranty on the refrigeration compressor. Labor will be
covered under the terms of the standard warranty period of
one (1) year or fifteen (15) months.
This warranty does not apply to:
1. Calibration
2. Replacement of light bulbs and/or the replacement of
display case glass due to damage of any kind.
3. Equipment damage caused by accident, shipping, improper
installation or alteration.
4. Equipment used under conditions of abuse, misuse,
carelessness or abnormal conditions.
5. Any losses or damage resulting from malfunction, including
loss of product or consequential or incidental damages of
any kind.
6. Equipment modified in any manner from original model,
substitution of parts other than factory authorized parts,
removal of any parts including legs, or addition of any
parts.
This warranty is exclusive and is in lieu of all other warranties,
expressed or implied, including the implied warranties of
merchantability and fitness for purpose. In no event shall the
Company be liable for loss of use, loss of revenue, or loss of
product or profit, or for indirect or consequential damages.
This warranty is in lieu of all other warranties expressed or
implied and Alto-Shaam, Inc. neither assumes or authorizes any
persons to assume for it any other obligation or liability in
connection with Alto-Shaam equipment.
A LT O - S H A A M , I N C .
Warranty effective January 1, 2000
RECORD THE MODEL AND SERIAL NUMBERS OF THE UNIT FOR EASY REFERENCE. ALWAYS REFER TO BOTH
MODEL AND SERIAL NUMBERS IN ANY CONTACT WITH ALTO-SHAAM REGARDING THE UNIT.
Model: _____________________________________________________
Voltage: ____________________________________________________
Serial Number: _____________________________________________
Date Installed:_______________________________________________
Purchased From: _____________________________________
_____________________________________________________________
W 1 6 4 N 9 2 2 1 W a t e r S t r e e t ● P. O . B o x 4 5 0 ● M e n o m o n e e F a l l s , W i s c o n s i n 5 3 0 5 2 - 0 4 5 0 ● U . S . A .
PHONE: 262.251.3800
FA X : 2 6 2 . 2 5 1 . 7 0 6 7 • 8 0 0 . 3 2 9 . 8 7 4 4 U . S . A / C A N A D A
WEBSITE:
800.558.8744 USA/CANADA
2 6 2 . 2 5 1 . 1 9 0 7 I N T E R N AT I O N A L
W W W. a l t o - s h a a m . c o m
PRINTED IN U.S.A.