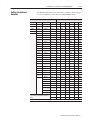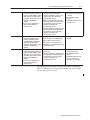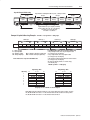
1
"!
"
Important User Information
Because of the variety of uses for the products described in this
publication, those responsible for the application and use of these
products must satisfy themselves that all necessary steps have been
taken to assure that each application and use meets all performance and
safety requirements, including any applicable laws, regulations, codes
and standards. In no event will Rockwell Automation be responsible or
liable for indirect or consequential damage resulting from the use or
application of these products.
Any illustrations, charts, sample programs, and layout examples shown
in this publication are intended solely for purposes of example. Since
there are many variables and requirements associated with any particular
installation, Rockwell Automation does not assume responsibility or
liability (to include intellectual property liability) for actual use based
upon the examples shown in this publication.
Allen–Bradley publication SGI–1.1, Safety Guidelines for Application,
Installation, and Maintenance of Solid–State Control (available from
your local Rockwell Automation office), describes some important
differences between solid–state equipment and electromechanical
devices that should be taken into consideration when applying products
such as those described in this publication.
Reproduction of the contents of this copyrighted publication, in whole or
part, without written permission of Rockwell Automation, is prohibited.
Throughout this publication, notes may be used to make you aware of
safety considerations. The following annotations and their accompanying
statements help you to identify a potential hazard. avoid a potential
hazard, and recognize the consequences of a potential hazard.
WARNING
!
Identifies information about practices or
circumstances that can cause an explosion in a
hazardous environment, which may lead to personal
injury or death, property damage, or economic loss.
Identifies information about practices or
ATTENTION circumstances that may lead to personal injury or
death, property damage, or economic loss.
!
Identifies information that is critical for
IMPORTANT successful application and understanding of the
product.
ATTENTION
!
Environment and Enclosure
This equipment is intended for use in a Pollution
Degree 2 industrial environment, in overvoltage
Category II applications (as defined in IEC publication
60664–1), at altitudes up to 2000 meters without
derating.
This equipment is considered Group 1, Class A
industrial equipment according to IEC/CISPR
Publication 11. Without appropriate precautions, there
may be potential difficulties ensuring electromagnetic
compatibility in other environments due to conducted
as well as radiated disturbance.
This equipment is supplied as “open type” equipment.
It must be mounted within an enclosure that is suitably
designed for those specific environmental conditions
that will be present, and appropriately designed to
prevent personal injury resulting from accessibility to
live parts. The interior of the enclosure must be
accessible only by the use of a tool. Subsequent
sections of this publication may contain additional
information regarding specific enclosure type ratings
that are required to comply with certain product safety
certifications.
See NEMA Standards publication 250 and IEC
publication 60529, as applicable, for explanations of
the degrees of protection provided by different types of
enclosures. Also, see the appropriate sections in this
publication, as well as the Allen–Bradley publication
1770–4.1, (“Industrial Automation Wiring and
Grounding Guidelines”), for additional installation
requirements pertaining to this equipment.
FLEX I/O is grounded through the DIN rail to chassis
ATTENTION ground. Use zinc plated, yellow chromated steel DIN
rail to assure proper grounding. Using other DIN rail
material (e.g. aluminum, plastic, etc.) which can
corrode, oxidize or are poor conductors can result in
improper or intermittent platform grounding.
!
Preventing Electrostatic Damage
ATTENTION This equipment is sensitive to electrostatic discharge,
which can cause internal damage and affect normal
operation. Follow these guidelines when you handle
this equipment.
!
• Touch a grounded object to discharge potential
•
•
•
•
•
static.
Wear an approved grounding wriststrap.
Do not touch connectors or pins on component
boards.
Do not touch components inside the equipment.
If available, use a static–safe workstation.
When not in use, keep modules in appropriate
static–safe packing.
The information below summarizes the changes to the Remote I/O
Adapter User Manual, publication 1794-UM009D–EN–P, since the
last release.
The series E adapter is capable of recognizing the safe state data for
the FLEX Integra analog modules, and allows use of 32 point FLEX
I/O modules. You must use a series D or later adapter when using
FLEX Integra analog modules in your system.
New Information
The following new information is included in this version of the
publication:
Corrected Switch Positions
Switch positions on S! and S2 were incorrectly identified in the
previous version of this publication. Corrections have been made on
page 2–11 of Chapter 2.
Additional FLEX I/O Modules
New modules available since the last version of this publication have
been added.
Change Bars
The areas in this manual which are different from previous editions
are marked with change bars (as shown to the right of this paragraph)
to indicate the addition of new or revised information.
Publication 1794ĆUM009D-EN-P - April 2004
soc–ii
Summary of Changes
Publication 1794ĆUM009D-EN-P - April 2004
Preface
Using This Manual
Preface Objectives
Read this preface to familiarize yourself with this manual and to
learn how to use it properly and efficiently.
Important:
You must use a series D or later adapter to
IMPORTANT communicate with FLEX Integra analog modules. You
must use a series E or later adapter to communicate
with 32 point FLEX modules.
Audience
We assume that you have previously used an Allen–Bradley
programmable controller, that you are familiar with its features, and
that you are familiar with the terminology we use. If not, read the
user manual for your processor before reading this manual.
Vocabulary
In this manual, we refer to:
• the individual adapter module as the “adapter.”
• the programmable controller as the “controller” or the
“processor.”
• input and output modules as the “module.”
What This Manual
Contains
The contents of this manual are as follows:
Table P. A
What This Manual Contains
Chapter
Title
What's Covered
1
Overview of FLEX I/O and the Remote
I/O Adapter Module
Describes features, capabilities, and hardware
components.
2
Installing Your Remote I/O Adapter
Procedures and guidelines for installing the module
3
Communicating with FLEX I/O Modules
Hardware addressing and configuration options
4
Troubleshooting
Troubleshooting aids
Appendix
Title
A
Specifications
B
Differences Between Series A, B, C, D
and E Remote I/O Adapters
C
Safety Approvals
What's Covered
Module specifications
Publication 1794ĆUM009D-EN-P - April 2004
P–2
Using This Manual
Conventions
We use these conventions in this manual:
In this manual, we show:
Like this:
that there is more information about a topic
in another chapter in this manual
that there is more information about the
topic in another manual
For Additional Information
More
For additional information on FLEX I/O systems and modules, refer
to the following documents:
Catalog
Number
Publications
Voltage
1794
Description
Installation
Instructions
1794 FLEX I/O Product Data
1794Ć2.1
1794ĆACN
24V dc
ControlNet Adapter
1794Ć5.8
1794ĆACNR
24V dc
Redundant Media ControlNet Adapter
1794Ć5.18
1794ĆACN15
24V dc
ControlNet Adapter
1794Ć5.47
1794ĆACNR15
24V dc
Redundant Media ControlNet Adapter
1794Ć5.48
User
Manual
1794ĆADN
24V dc
DeviceNet Adapter
1794Ć5.14
1794Ć6.5.5
1794ĆASB/E
24V dc
Remote I/O Adapter
1794ĆIN046
1794ĆUM009
1794ĆASB2/D
24V dc
2ĆSlot Remote I/O Adapter
1794ĆIN044
1794ĆUM059
1794ĆAPB
24V dc
Profibus Adapter
1794ĆIN040
1794ĆUM057
1794ĆIB8
24V dc
8 Sink Input Module
1794Ć5.30
1794ĆOB8
24V dc
8 Source Output Module
1794Ć5.31
1794ĆIB16
24V dc
16 Sink Input Module
1794ĆIN072
1794ĆIB32
24V dc
16 Source Output Module
1794ĆIN084
1794ĆOB16
24V dc
16 Source Output Module
1794Ć5.3
1794ĆOB16P
24V dc
16 Source Output Module
1794Ć5.45
1794ĆOB32P
24V dc
32 Electronically Fused Output Module
1794ĆIN090
1794ĆIV16
24V dc
16 Source Input Module
1794Ć5.28
1794ĆOV16
24V dc
16 Sink Output Module
1794Ć5.29
1794ĆOB8EP
24V dc
8 Electronically Fused Output Module
1794Ć5.20
1794ĆOV16P
24V dc
16 Electronically Fused Output Module
1794Ć5.52
1794ĆIB8S
24V dc
Sensor Input Module
1794Ć5.7
1794ĆIB10XOB6
24V dc
10 Input/6 Output Module
1794Ć5.24
1794ĆIB16XOB16P
24V dc
16 Input/16 Output Module
1794ĆIN083
Table continued on next page
Publication 1794ĆUM009D-EN-P - April 2004
Using This Manual
P–3
Publications
Catalog
Number
Voltage
1794ĆOW8
24V dc
8 Relay Output Module
1794Ć5.19
1794ĆIE8
24V dc
Selectable Analog 8 Input Module
1794Ć5.6
1794ĆOE4
24V dc
Selectable Analog 4 Output Module
1794Ć5.5
1794ĆIE4XOE2
24V dc
4 Input/2 Output Analog Module
1794Ć5.15
1794ĆOF4I
24V dc
4 Output Isolated Analog Module
1794Ć5.37
1794ĆIF4I
24V dc
4 Input Isolated Analog Module
1794Ć5.38
1794ĆIF2XOF2I
24V dc
2 Input/2 Output Isolated Analog Module
1794Ć5.39
1794ĆIR8
24V dc
8 RTD Input Analog Module
1794Ć5.22
1794Ć6.5.4
1794ĆIT8
24V dc
8 Thermocouple Input Module
1794Ć5.21
1794Ć6.5.7
1794ĆIRT8
24V dc
8 Thermocouple/RTD Input Module
1794Ć5.50
1794Ć6.5.12
1794ĆIJ2
24V dc
2 Frequency Input Module
1794Ć5.49
1794Ć6.5.11
1794ĆID2
24V dc
2 Channel Frequency Input Module
1794Ć5.63
1794Ć6.5.15
1794ĆIP4
24V dc
2 Channel Pulse Counter Module
1794Ć5.64
1794Ć6.5.16
1794ĆHSC
24V dc
High Speed Counter Module
1794Ć5.67
1794Ć6.5.10
1794ĆIC16
48V dc
48V dc 16 Input Module
1794Ć5.53
1794ĆOC16
48V dc
48V dc Output Module
1794Ć5.54
1794ĆIA8
120V ac
8 Input Module
1794Ć5.9
1794ĆOA8
120V ac
8 Output Module
1794Ć5.10
1794ĆIA8I
120V ac
Isolated 8 Input Module
1794Ć5.55
1794ĆOA8I
120V ac
Isolated Output Module
1794Ć5.56
1794ĆIA16
120V ac
16 Input Module
1794Ć5.60
1794ĆOA16
120V ac
16 Output Module
1794Ć5.61
1794ĆIM8
220V
ac/dc
8 Input Module
1794ĆOM8
220V
ac/dc
8 Output Module
Description
Installation
Instructions
User
Manual
1794Ć6.5.2
1794Ć6.5.8
1794Ć5.57
1794Ć5.58
1794ĆTB2
1794ĆTB3
2Ćwire Terminal Base
3Ćwire Terminal Base
1794ĆIN070
1794ĆTBN
Terminal Base Unit
1794ĆIN016
1794ĆTBNF
Fused Terminal Base Unit
1794Ć5.17
1794ĆTB3T
Temperature Terminal Base Unit
1794Ć5.41
1794ĆTB3S
Spring Clamp Terminal Base Unit
1794Ć5.42
1794ĆTB3TS
Spring Clamp Temperature Base Unit
1794Ć5.43
1794ĆTB3G
Terminal Base Unit
1794Ć5.51
1794ĆTB3GS
Spring Clamp Terminal Base Unit
1794Ć5.59
1794ĆTB32
Cage Clamp Terminal Base Unit
1794ĆIN085
1794ĆTB32S
Spring Clamp Terminal Base Unit
1794ĆIN085
Table continued on next page
Publication 1794ĆUM009D-EN-P - April 2004
P–4
Using This Manual
Catalog
Number
Publications
Voltage
1794ĆCE1, ĆCE3
1794ĆNM1
Description
Installation
Instructions
Extender Cables
1794Ć5.12
Mounting Kit
1794Ć5.13
1794ĆPS13
24V dc
Power Supply
1794Ć5.35
1794ĆPS3
24V dc
Power Supply
1794Ć5.71
User
Manual
FLEX Ex
1797ĆIBN16
See note
16 NAMUR Digital Input Module
1797ĆOB4D
See note
4 NI, Ex Source Digital Output Module
1794Ć5.6
1797ĆIE8
See note
8 Selectable Input Module
1794Ć5.5
1797ĆIE8NF
See note
8 Selectable Filter Analog Input Module
1794Ć5.31
1797ĆOE4
See note
Selectable Analog 4 Output Module
1794Ć5.3
1797ĆIRT8
See note
8 Thermocouple/RTD Input Module
1794Ć5.4
1797ĆIJ2
See note
2 Frequency Input Module
1794Ć5.9
3Ćwire Screw Clamp Terminal Base
3Ćwire Spring Clamp Terminal Base
1797Ć5.1
1797Ć5.2
1797ĆTB3
1797ĆTB3S
1794ĆIN072
1797ĆBIC
See note
I.S. Bus Isolator
1797Ć5.13
1797ĆCEC
See note
FLEX Ex Bus Connector
1797Ć5.13
Note: Intrinsically Safe Voltage
ATTENTION
!
Publication 1794ĆUM009D-EN-P - April 2004
FLEX I/O is grounded through the DIN rail to chassis
ground. Use zinc plated, yellow chromated steel DIN
rail to assure proper grounding. Using other DIN rail
materials (e.g. aluminum, plastic, etc.) which can
corrode, oxidize or are poor conductors can result in
improper or intermittent platform grounding.
Using This Manual
ATTENTION
!
P–5
Preventing Electrostatic Discharge
This equipment is sensitive to electrostatic
discharge, which can cause internal damage and
affect normal operation. Follow these guidelines
when you handle this equipment:
• Touch a grounded object to discharge potential
•
•
•
•
•
WARNING
!
static.
Wear an approved grounding wriststrap.
Do not touch connectors or pins on component
boards.
Do not touch circuit components inside the
equipment.
If available, use a static–safe workstation.
When not in use, keep modules in appropriate
static–safe packaging.
Remove field-side power before removing or
inserting this module. This module is designed so
you can remove and insert it under backplane
power. When you remove or insert a module with
field-side power applied, an electrical arc may
occur. An electrical arc can cause personal injury or
property damage by:
• sending an erroneous signal to your system’s
field devices causing unintended machine motion
• causing an explosion in a hazardous environment
Repeated electrical arcing causes excessive wear to
contacts on both the module and its mating
connector. Worn contacts may create electrical
resistance.
Publication 1794ĆUM009D-EN-P - April 2004
P–6
Using This Manual
Publication 1794ĆUM009D-EN-P - April 2004
This preface gave you information on how to use this manual
efficiently. The next chapter introduces you to the remote I/O
adapter module.
Table of Contents
Overview of FLEX I/O and
your Remote I/O Adapter
Module
Chapter 1
Installing Your Remote I/O
Adapter Module
Chapter 2
Communicating with
FLEX I/O Modules
Chapter 3
Chapter Objectives . . . . . . . . . . . . . . . . . . . . . . . . . . . . . . . . . . .
The FLEX I/O System . . . . . . . . . . . . . . . . . . . . . . . . . . . . . . . . .
How FLEX I/O Modules Communicate with Programmable Controllers
Hardware Components . . . . . . . . . . . . . . . . . . . . . . . . . . . . . . . .
Diagnostic Indicators . . . . . . . . . . . . . . . . . . . . . . . . . . . . . . . .
Reset Pushbutton . . . . . . . . . . . . . . . . . . . . . . . . . . . . . . . . . .
Remote I/O Wiring . . . . . . . . . . . . . . . . . . . . . . . . . . . . . . . . . .
Power Wiring . . . . . . . . . . . . . . . . . . . . . . . . . . . . . . . . . . . . . .
Address Switch Assemblies . . . . . . . . . . . . . . . . . . . . . . . . . . .
Chapter Summary . . . . . . . . . . . . . . . . . . . . . . . . . . . . . . . . . . . .
Chapter Objectives . . . . . . . . . . . . . . . . . . . . . . . . . . . . . . . . . . .
Power Requirements . . . . . . . . . . . . . . . . . . . . . . . . . . . . . . . . . .
Mounting the Remote I/O Adapter . . . . . . . . . . . . . . . . . . . . . . . . .
Mounting on a DIN Rail before installing the terminal base units . .
Mounting (or Replacing) the Adapter on an Existing System . . . .
Mounting on a Wall or Panel . . . . . . . . . . . . . . . . . . . . . . . . . . .
Wiring . . . . . . . . . . . . . . . . . . . . . . . . . . . . . . . . . . . . . . . . . . . . .
Setting the Switches . . . . . . . . . . . . . . . . . . . . . . . . . . . . . . . . . .
Starting I/O Group . . . . . . . . . . . . . . . . . . . . . . . . . . . . . . . . . .
I/O Rack Number . . . . . . . . . . . . . . . . . . . . . . . . . . . . . . . . . . .
Hold Inputs . . . . . . . . . . . . . . . . . . . . . . . . . . . . . . . . . . . . . . .
Rack Fault Select Switch (RFS) . . . . . . . . . . . . . . . . . . . . . . . .
Addressing Mode Selection Switches . . . . . . . . . . . . . . . . . . . .
Communication Rate . . . . . . . . . . . . . . . . . . . . . . . . . . . . . . . .
Processor Restart Lockout (PRL) . . . . . . . . . . . . . . . . . . . . . . .
Hold Last State (HLS) . . . . . . . . . . . . . . . . . . . . . . . . . . . . . . .
Setting the Mode Selection Switches . . . . . . . . . . . . . . . . . . . . . . .
Setting the Address Switches . . . . . . . . . . . . . . . . . . . . . . . . . . . .
Setting the Address Switches for Complementary I/O . . . . . . . . . . .
Primary Rack . . . . . . . . . . . . . . . . . . . . . . . . . . . . . . . . . . . . .
Complementary Rack . . . . . . . . . . . . . . . . . . . . . . . . . . . . . . . .
Chapter Summary . . . . . . . . . . . . . . . . . . . . . . . . . . . . . . . . . . . .
Chapter Objectives . . . . . . . . . . . . . . . . . . . . . . . . . . . . . . . . . . .
FLEX I/O Module Data . . . . . . . . . . . . . . . . . . . . . . . . . . . . . . . . .
Addressing I/O . . . . . . . . . . . . . . . . . . . . . . . . . . . . . . . . . . . . . .
Analog (Block Transfer) Modules . . . . . . . . . . . . . . . . . . . . . . . . .
1-1
1-1
1-2
1-3
1-3
1-4
1-4
1-4
1-4
1-4
2-1
2-3
2-3
2-3
2-4
2-5
2-7
2-8
2-8
2-8
2-8
2-9
2-9
2-10
2-10
2-10
2-12
2-13
2-15
2-15
2-15
2-15
3-1
3-1
3-2
3-5
Publication 1794ĆUM009D-EN-P - April 2004
ii
Table of Contents
Standard Addressing . . . . . . . . . . . . . . . . . . . . . . . . . . . . . . . . . .
Standard - 32 Addressing . . . . . . . . . . . . . . . . . . . . . . . . . . . . . .
Compact Addressing . . . . . . . . . . . . . . . . . . . . . . . . . . . . . . . . . .
Compact Mode . . . . . . . . . . . . . . . . . . . . . . . . . . . . . . . . . . . .
Complementary Addressing Mode . . . . . . . . . . . . . . . . . . . . . . . .
Complementary Mode - 16Ćpoint . . . . . . . . . . . . . . . . . . . . . . .
Complementary Mode - 8Ćpoint . . . . . . . . . . . . . . . . . . . . . . . .
Complementary - 32 Addressing . . . . . . . . . . . . . . . . . . . . . . . . .
Mapping Data into the Image Tables . . . . . . . . . . . . . . . . . . . . . . .
Determining Rack Size . . . . . . . . . . . . . . . . . . . . . . . . . . . . . . . . .
Operating Modes . . . . . . . . . . . . . . . . . . . . . . . . . . . . . . . . . . . . .
Chapter Summary . . . . . . . . . . . . . . . . . . . . . . . . . . . . . . . . . . . .
Troubleshooting
Chapter 4
Chapter Objectives . . . . . . . . . . . . . . . . . . . . . . . . . . . . . . . . . . .
Fault Conditions . . . . . . . . . . . . . . . . . . . . . . . . . . . . . . . . . . . . .
Troubleshooting with the Indicator Lights . . . . . . . . . . . . . . . . . . . .
Chapter Summary . . . . . . . . . . . . . . . . . . . . . . . . . . . . . . . . . . . .
Specifications
3-6
3-7
3-8
3-8
3-12
3-12
3-13
3-15
3-16
3-16
3-18
3-18
4-1
4-1
4-1
4-3
Appendix A
Specifications . . . . . . . . . . . . . . . . . . . . . . . . . . . . . . . . . . . . . . .
A-1
Differences Between
Appendix B
Remote I/O Adapter Series Differences Between Remote I/O Adapter Series A, B, C, D and E . .
A, B, C, D and E
B-1
Safety Approvals
Appendix C
Safety Approvals . . . . . . . . . . . . . . . . . . . . . . . . . . . . . . . . . . . . .
Publication 1794ĆUM009D-EN-P - April 2004
C-1
Overview of FLEX I/O and your
Remote I/O Adapter Module
Chapter Objectives
In this chapter, we tell you about:
• what the FLEX I/O system is and what it contains
• how FLEX I/O modules communicate with programmable
controllers
• the features of your adapter module
The FLEX I/O System
Adapter
FLEX I/O is a small, modular I/O system for distributed
applications that performs all of the functions of rack-based I/O. The
FLEX I/O system contains the following components shown below:
Terminal Base
I/O Module
20125
• adapter/power supply – powers the internal logic for as many as
eight I/O modules
• terminal base – contains a terminal strip to terminate wiring for
two- or three-wire devices
• I/O module – contains the bus interface and circuitry needed to
perform specific functions related to your application
Publication 1794ĆUM009D-EN-P - April 2004
1–2
Overview of FLEX I/O and your Remote I/O Adapter Module
How FLEX I/O Modules
Communicate with
Programmable Controllers
Data transfer to and from the remote I/O adapter/power supply and
discrete I/O modules occurs every flexbus scan. This provides the
controller with updated data.
The remote I/O adapter/power supply transfers data to the analog I/O
module (block transfer write) and from the analog I/O module (block
transfer read) using BTW and BTR instructions in your ladder
diagram program. These instructions let the adapter obtain input
values and status from the I/O module, and let you send output
values to establish the module’s mode of operation. The
communication process is described in the following illustration.
1
2
The adapter transfers your configuration data
to the module using a BTW.
External devices transmit
analog signals to the module.
Flexbus
PWR
ADAPTER
ACTIVE
FAULT
LOCAL
FAULT
1794-IE8
ANALOG INPUT
24VDC
POWER SUPPLY
RIO ADAPTER
1794ĆASB
2
4
Your ladder program instructs the
adapter to perform a BTR of the values
and stores them in a data table.
INPUT 0 INPUT 1 INPUT 2 INPUT 3 INPUT 4 INPUT 5 INPUT 6 INPUT 7
V I
V I
V I
V I
V I
V I
V I
V
I
5
The adapter and module determine
that the transfer was made without error
and input values are within specified
range.
6
Your ladder program can use and/or move the data (if valid)
before it is written over by the transfer of new data in a
subsequent transfer.
7
Your ladder program performs BTWs to the module when you power
it up, and any time you wish to reconfigure the module.
Publication 1794ĆUM009D-EN-P - April 2004
3
The module converts analog signals
into binary format and stores these
values until the adapter requests their
transfer.
Overview of FLEX I/O and your Remote I/O Adapter Module
Hardware Components
1–3
The adapter module consists of the following major components:
•
•
•
•
•
diagnostic indicators
reset pushbutton
remote I/O wiring connections
24V dc power wiring connections
address/group switch assemblies
AllenĆBradley
Diagnostic Indicators
PWR
ADAPTER
ACTIVE FAULT
LOCAL
FAULT
24 VDC
POWER SUPPLY
RIO ADAPTER
1794-ASB
Reset Pushbutton
24V dc Common Wiring Connections
Address/Group Switches
+24V dc Wiring Connections
Remote I/O Wiring Connections (connector part no. 942029-03)
Diagnostic Indicators
Diagnostic indicators are located on the front panel of the adapter
module. They show both normal operation and error conditions in
your remote I/O system. The indicators are:
•
•
•
•
Power ON (green)
Adapter ACTIVE (green)
Adapter FAULT (red)
LOCAL FAULT (red)
A complete description of the diagnostic indicators and how to use
them for troubleshooting is explained in chapter 4.
Publication 1794ĆUM009D-EN-P - April 2004
1–4
Overview of FLEX I/O and your Remote I/O Adapter Module
Reset Pushbutton
Use the reset pushbutton to reset the adapter module and resume
communication when a communication error occurs. (The adapter’s
processor restart lockout switch (PRL) must be in the “locked out”
position.) If the adapter is not locked out by the PRL switch, it
will be automatically reset via special commands sent over the
communication link.
Important:
Do not cycle power to the adapter to clear a fault. All
queued block transfer instructions will be lost.
Remote I/O Wiring
The remote I/O wiring termination is made to a plug-in connector on
the front of the adapter module. Refer to Chapter 2 for information
on wiring the connector.
Power Wiring
Connections are provided for connecting the required 24V dc power
to the front of the module. The power wiring can be daisy-chained to
the terminal base unit located next to the adapter to supply power to
the module installed in that base unit. Wiring information is shown in
Chapter 2.
Address Switch Assemblies
1
1
2
2
3
3
4
4
5
5
6
6
7
7
8
FlipĆopen
cover
8
Multi-position switches are provided for:
ON
S1
ON
•
•
•
•
•
•
•
•
starting I/O group
I/O rack number
hold inputs
mode switches for mode 0, mode 1, mode 2, mode 3 and mode 4
rack fault
communication rate
processor restart lockout (PRL)
hold last state (outputs)
These switches are accessed by lifting the hinged cover on the front
of the module. Refer to Chapter 2 for switch settings.
S2
Chapter Summary
Publication 1794ĆUM009D-EN-P - April 2004
In this chapter you learned about the FLEX I/O system and features
of the remote I/O adapter module.
Installing Your Remote I/O
Adapter Module
Chapter Objectives
This chapter describes the procedures for installing your remote I/O
adapter module. These include:
• power requirements
• mounting the remote I/O adapter
• setting the module switches
ATTENTION
!
Environment and Enclosure
This equipment is intended for use in a Pollution
Degree 2 industrial environment, in overvoltage
Category II applications (as defined in IEC
publication 60664–1), at altitudes up to 2000
meters without derating.
This equipment is considered Group 1, Class A
industrial equipment according to IEC/CISPR
Publication 11. Without appropriate precautions,
there may be potential difficulties ensuring
electromagnetic compatibility in other
environments due to conducted as well as radiated
disturbance.
This equipment is supplied as “open type”
equipment. It must be mounted within an
enclosure that is suitably designed for those
specific environmental conditions that will be
present, and appropriately designed to prevent
personal injury resulting from accessibility to live
parts. The interior of the enclosure must be
accessible only by the use of a tool. Subsequent
sections of this publication may contain additional
information regarding specific enclosure type
ratings that are required to comply with certain
product safety certifications.
See NEMA Standards publication 250 and IEC
publication 60529, as applicable, for explanations
of the degrees of protection provided by different
types of enclosures. Also, see the appropriate
sections in this publication, as well as the
Allen–Bradley publication 1770–4.1, (“Industrial
Automation Wiring and Grounding Guidelines”),
for additional installation requirements pertaining
to this equipment.
Publication 1794ĆUM009D-EN-P - April 2004
2–2
Installing Your Remote I/O Adapter Module
Preventing Electrostatic Discharge
ATTENTION This equipment is sensitive to electrostatic
discharge, which can cause internal damage and
affect normal operation. Follow these guidelines
when you handle this equipment:
• Touch a grounded object to discharge potential
static.
• Wear an approved grounding wriststrap.
• Do not touch connectors or pins on component
boards.
• Do not touch circuit components inside the
equipment.
• If available, use a static–safe workstation.
• When not in use, keep modules in appropriate
static–safe packaging.
!
ATTENTION
!
Remove field-side power before removing or
inserting this module. This module is designed so
you can remove and insert it under backplane
power. When you remove or insert a module with
field-side power applied, an electrical arc may
occur. An electrical arc can cause personal injury
or property damage by:
• sending an erroneous signal to your system’s
field devices causing unintended machine
motion
• causing an explosion in a hazardous environment
Repeated electrical arcing causes excessive wear
to contacts on both the module and its mating
connector. Worn contacts may create electrical
resistance.
ATTENTION
!
Publication 1794ĆUM009D-EN-P - April 2004
FLEX I/O is grounded through the DIN rail to
chassis ground. Use zinc plated, yellow chromated
steel DIN rail to assure proper grounding. Using
other DIN rail materials (e.g. aluminum, plastic,
etc.) which can corrode, oxidize or are poor
conductors can result in improper or intermittent
platform grounding.
Installing Your Remote I/O Adapter Module
Power Requirements
2–3
The Remote I/O adapter module requires a current of 450mA at
24V dc from an external power supply for flexbus operation. This is
sufficient to support the flexbus current requirements of 8 modules.
Remember to add this amount to current requirements for other
modules using the same 24V supply.
Mounting the Remote I/O
Adapter
The remote I/O adapter module can be DIN rail or wall/panel
mounted. Refer to the specific method of mounting below.
Mounting on a DIN Rail before installing the terminal base units
A
B
C
C
1. Position the remote I/O adapter module A on a 35 x 7.5mm DIN
rail B (A-B pt. no. 199-DR1; 46277-3; EN 50022) at a slight
angle.
2. Rotate the adapter module onto the DIN rail with the top of the
rail hooked under the lip on the rear of the adapter module.
3. Press the adapter module down onto the DIN rail until flush.
Locking tab (C) will snap into position and lock the adapter
module to the DIN rail.
If the adapter module does not lock in place, use a screwdriver or
similar device to move the locking tab down while pressing the
adapter module flush onto the DIN rail and release the locking tab
to lock the adapter module in place. If necessary, push up on the
locking tab to lock.
4. Connect the adapter wiring as shown under “Wiring” later in this
document.
Make certain that the DIN rail is properly
IMPORTANT grounded to the panel. Refer to “Industrial
Automation Wiring and Grounding Guidelines,”
publication 1770-4.1.
Publication 1794ĆUM009D-EN-P - April 2004
2–4
Installing Your Remote I/O Adapter Module
Mounting (or Replacing) the Adapter on an Existing System
If you connect or disconnect wiring while the field
ATTENTION side power is on, an electrical arc can occur. This
could cause an explosion in hazardous location
installations. Be sure that power is removed or the
area is nonhazardous before proceeding.
!
1. Remove the RIO plug-in connector from the front of the adapter.
2. Disconnect any wiring connected to the adjacent terminal base.
3. Using a screwdriver or similar tool, open the lock and remove the
module from the base unit to which the adapter will be attached.
4. Push the flexbus connector toward the right side of the terminal
base to unplug the backplane connection.
ATTENTION
!
Make certain that the flexbus connector is
completely clear of the adapter. The slide must be
completely to the right and the raised spot on the
slide visible.
5. Release the locking tab and remove the adapter.
6. Before installing the new adapter, notice the notch on the right
rear of the adapter. This notch accepts the hook on the terminal
base unit. The notch is open at the bottom. The hook and adjacent
connection point keep the terminal base and adapter tight
together, reducing the possibility of a break in communication
over the backplane.
ATTENTION
!
Make certain that the hook on the terminal base is
properly hooked into the adapter. Failure to lock
the hook into the adjacent base/adapter can result
in loss of communication on the backplane.
7. Place the adapter next to the terminal base unit and push down to
mate the hook into slot.
Publication 1794ĆUM009D-EN-P - April 2004
Installing Your Remote I/O Adapter Module
2–5
8. With the hook on the terminal base inside the notch on the
adapter, and the lip on the rear of the adapter hooked over the
DIN rail, press in and down to lock the adapter onto the DIN rail.
C
If the adapter module does not lock in place, use a screwdriver or
similar device to move the locking tab down while pressing the
adapter module flush onto the DIN rail and release the locking tab
(C) to lock the adapter module in place. If necessary, push up on
the locking tab to lock.
9. Gently push the flexbus connector into the side of the adapter to
complete the backplane connection.
10.Reinstall the module into the terminal base unit.
11. Reconnect the adapter wiring as shown under “Wiring.”
Mounting on a Wall or Panel
To mount the remote I/O adapter module on a wall or panel, you
must have the 1794-NM1 mounting kit. The kit contains a special
plate and screws necessary for wall/panel mounting. Proceed as
follows:
Install the mounting plate on a wall or panel as follows:
1. Lay out the required points on the wall/panel as shown in the
drilling dimension drawing.
2. Drill the necessary holes for #6 self-tapping mounting screws.
3. Mount the mounting plate (1) for the adapter module using two
#6 self-tapping screws (18 included).
Make certain that the mounting plate is properly
IMPORTANT grounded to the panel. Refer to “Industrial
Automation Wiring and Grounding Guidelines
for Noise Immunity,” publication 1770-4.1.
4. Hold the adapter (2) a slight angle and engage the top of the
mounting plate in the indention on the rear of the adapter module.
5. Press the module down flush with the panel until the locking
lever locks.
Publication 1794ĆUM009D-EN-P - April 2004
2–6
Installing Your Remote I/O Adapter Module
Inches
(Millimeters)
A
1.4
(35)
2.3
(59)
1.4
(35)
3.7
(94)
0.9
(23)
.83 (21)
2.0
(50)
3.2
(80)
3.7
(94)
3.2
(80)
3.4
(87)
1.2
(30)
2.7
(68)
1794 Adapters
3.4H x 2.7W x 2.7D
(87H x 68W x 69D)
3.7
(94)
1794 Terminal Base Units
3.7H x 3.7W x 2.7D
(94H x 94W x 69D)
A
= Mounting hole dimensions for optional
mounting kit
6. Position the termination base unit up against the adapter and push
the female bus connector into the adapter.
7. Secure to the wall with two #6 self-tapping screws.
8. Repeat for each remaining terminal base unit.
Note: The adapter is capable of addressing eight modules. Do not
exceed a maximum of eight terminal base units in your system.
1.4
(35.5)
1 - Adapter Mounting Plate
2 - Remote I/O Adapter Module
Mounting Screws(18) 2 for the mounting plate
and 2 each for the 8
possible modules
Publication 1794ĆUM009D-EN-P - April 2004
Installing Your Remote I/O Adapter Module
Wiring
2–7
Connect external wiring to the remote I/O adapter as shown below.
AllenĆBradley
ADAPTER
ACTIVE FAULT
PWR
LOCAL
FAULT
24 VDC
POWER SUPPLY
RIO ADAPTER
1794-ASB
B
C
COM
A
1
SH 2
Termination resistor (if required)
82Ω or 150Ω (refer to your processor
documentation for size and usage)
D
24V
20131
1. Connect the remote I/O cable to the removable plug-in remote
I/O connector.
Connect
To
Blue Wire - RIO
1
Shield Wire - RIO
SH
Clear Wire - RIO
2
ATTENTION
!
If this is the last adapter in your FLEX I/O
system, or the last adapter on the remote I/O link,
you must use a termination resistor across
terminals 1 and 2 on the remote I/O connector.
Refer to the information supplied with the
processor being used for information on the size
of the resistor.
2. Connect +24V dc input to the left side of the lower connector
terminal A.
3. Connect 24V common to the left side of the upper connector
terminal B.
4. Connections C and D are used to pass 24V dc power and
common to the next module in the series (if required).
For Example:
DaisyĆchaining
24V dc
Wiring when total current draw is less than 10A
Note: Modules must be either all analog or all discrete. Do not mix analog
and discrete modules when using the daisyĆchain wiring scheme.
Note: Refer to the individual instructions for each module for actual wiring information.
Publication 1794ĆUM009D-EN-P - April 2004
2–8
Installing Your Remote I/O Adapter Module
Setting the Switches
The remote I/O adapter module has two 8-position switch assemblies
which you set for:
•
•
•
•
•
•
•
•
starting I/O group
I/O logical rack number
hold inputs
addressing modes
last chassis
communication rate
processor restart lockout (PRL)
hold last state (outputs)
WARNING
!
The switch settings on the series E adapter are not
the same as on the series A, B, C or D adapter. If
you are replacing an earlier series adapter with
this series E adapter, make certain that the
switches are set correctly for your application.
Starting I/O Group
An I/O group is an addressing unit that can contain up to 16 input
terminals and 16 output terminals. The starting I/O group is the
first group of input and output circuits that correspond to one word in
both the input and output image tables. These starting I/O groups are
numbered 0, 2, 4 and 6. The number of modules that make up an I/O
group varies with the mode of addressing.
Chapter
I/O Rack Number
One logical I/O rack is 8 I/O groups. You cannot have more than 2
logical racks per adapter. Refer to “Determining Rack Size” on page
3–16 for examples.
Hold Inputs
When hold inputs is enabled (S2-7 on), the adapter will retain the
last memory image present when you remove a discrete input
module from its base. These inputs are held until the correct module
is placed back in the base. If the same type of module is reinserted
into the base, its inputs will be transferred. If a different type of
module is inserted in the base, its memory image will go to zero.
Any associated outputs will also go to zero.
Publication 1794ĆUM009D-EN-P - April 2004
Installing Your Remote I/O Adapter Module
2–9
Rack Fault Select Switch (RFS)
The rack fault select allows the user to determine what action the
adapter takes if communication is lost with one or more I/O modules
ATTENTION
!
If an I/O module stops responding to the adapter
due to a module being removed under power, a
problem with the flexbus, or a problem with an
I/O module, the adapter declares a Local fault.
When RFS is disabled (S2–6 on), module removal and insertion
under power (RIUP) is possible. If an I/O module stops responding,
the adapter declares a local fault and flashes the Local Fault
indicator. The adapter also resets the output data (if any) for the
module not responding. All other modules remain active.
When the RFS is enabled (S2-6 off), communication error
detection is extended to the I/O module level. If an I/O module stops
responding, the adapter declares a local fault, flashes the Local Fault
indicator and causes the scanner to declare a Rack Fault. The adapter
resets the output data (if any) for the module not responding and
commands all other outputs to go to the state determined by the Hold
Last State switch (S2–1).
ATTENTION
!
Module removal and insertion under power
(RIUP) will cause a rack fault when Rack Fault
Select is enabled.
Addressing Mode Selection Switches
The addressing mode switches are used to select the addressing
modes of the adapter: standard, 8-pt compact, 16-pt compact, 8-pt
complementary, 16-pt complementary, 32 standard, and 32
complimentary. Refer to the table on page2–12 for information on
the interaction of these switches.
Mode switch S1-1 provides different functions. In standard mode, it
acts as part of the rack address, providing backward compatibility
with the series A or B adapters. In compact mode, it determines 8 or
16-point density. In complementary mode, it specifies whether the
rack has a complementary rack at the same address.
Publication 1794ĆUM009D-EN-P - April 2004
2–10
Installing Your Remote I/O Adapter Module
Communication Rate
You set these switches (S2-3 and S2-4) for the desired
communication rate (in bits/s). Selections are:
57.6k bits/s
115.2k bits/s
230.4k bits/s
Autobaud (used in 32-pt modes)
Processor Restart Lockout (PRL)
When PRL is disabled (switch S2-2 on), the programmable
controller can restart communication with the adapter in the event of
a communication fault.
Reset
Pushbutton
When PRL is enabled (switch S2-2 off), the programmable controller
cannot restart communication with the adapter in the event of a
communication fault. In this case, you must press the restart
pushbutton on the front of the adapter module to restart
communication.
Hold Last State (HLS)
The hold last state option allows the user to determine what action
the outputs take in the event of a communication error.
When HLS is enabled (S2–1 off), all digital outputs, and 1794-OE4
and 1794-IE4XOE2 analog modules remain in their last state. All
other analog outputs take their configured safe state action
When HLS is disabled (S2–1 on), all digital outputs are reset. All
analog outputs take their configured safe state action
ATTENTION
!
Only 1794-OE4 and 1794-IE4XOE2 analog
modules hold their last state when Hold Last State
is enabled. Refer to the respective module
publications for information about configuring
analog output safe state actions.
The switch assemblies are located under a flip-open cover on the
front of the adapter module.
Publication 1794ĆUM009D-EN-P - April 2004
Installing Your Remote I/O Adapter Module
2–11
Starting I/O Group1
S1-8
S1-7
I/O group
ON
ON
0 (1st quarter)
OFF
ON
2 (2nd quarter)
ON
OFF
4 (3rd quarter)
OFF
OFF
6 (4th quarter)
1 In 32 point mode, starting quarter must be 0
(S1-8 and S1-7 on).
FlipĆopen
cover
I/O Rack Number
Mode Switch 0
Refer to Mode Selection Switches, 2-12
S2-7
Hold Inputs
ON
Hold Inputs
OFF
Reset Inputs
I/O Rack
Number
Mode
Switch 2
S2-6
Rack Fault
ON
Not Enabled (default)
OFF
Enabled
S1
Mode Switch 1
Refer to Mode Selection Switches, 2-12
Communication Rate/
32-pt Mode Select
S2-4
S2-3
Bits/s
ON
ON
57.6k
OFF
ON
115.2k
ON
OFF
230.4k
OFF
OFF
Autobaud (use only with 32Ćpt
mode1) Use these switches to put
the adapter in 32-pt mode and
perform autobaud.
ON
ON
S2
1 2 3 4 5 6 7 8
S2-5
Starting
I/O Group
1 2 3 4 5 6 7 8
S2-8
1 2 3 4 5 6 7 8
Refer to page 2-13
1 2 3 4 5 6 7 8
S1-6 thru S1-1
ON
S1
Mode Switch 0
Hold Inputs
Rack Fault
Mode Switch 1
Mode Switch 4
Communication Rate/Mode switches 3 and 4
Mode Switch 3
Processor Restart Lockout
Hold Last State
ON
S2
1 Cycle power to the 1794ĆASB/E or push the reset
button when baud rate is changed in the scanner.
Processor Restart Lockout (PRL)
S2-2
Processor:
ON
Restart
OFF
Locked out
Hold Last State (HLS)
S2-1
Processor will:
ON
Reset outputs
OFF
Hold last state
Publication 1794ĆUM009D-EN-P - April 2004
2–12
Installing Your Remote I/O Adapter Module
Setting the Mode Selection
Switches
Set the mode selection switches for the desired mode as follows.
1. Lift the hinged switch cover on the front of the adapter to expose
the switches.
2. Set the switches as shown below.
3. Cycle power to the adapter to activate the settings.
When Using this
Addressing Mode
And
Standard1
Compact2
Complementary
Mode Switch 2
S1Ć1
Mode Switch 1
S2Ć5
Mode Switch 0
S2Ć8
8 and/or 16Ć point
modules
See note 1
ON
ON
8Ćpoint modules
OFF
ON
OFF
16Ćpoint modules
ON
ON
OFF
See Complementary Rack Addressing Table, page2-15
Primary chassis
Complementary chassis
Complementary
8Ćpoint modules
OFF
OFF
ON
ON
OFF
ON
See Complementary Rack Addressing Table, page 2-15
Primary chassis
Complementary chassis
16Ćpoint modules2
OFF
OFF
OFF
ON
OFF
OFF
1
In standard mode, this switch retains its function as switch position 1 of rack addressing. In Standard mode, the module is functionally
interchangeable with a 1794ĆASB series A or B adapter.
2 In compact mode, 32-point modules appear as 8 or 16-point modules.
3 When programming block transfers, address analog modules as module 0 if switch S1Ć1 is on; module 1 if switch S1Ć1 is off.
When Using this
Addressing Mode
And
Standard - 321
8, 16 and/or 32Ć
point modules
Complementary - 32
Primary chassis2
Complementary - 32
Complementary chassis2
8, 16 and/or 32Ć
point modules
1
Mode Switch 0
S2-8
Mode Switch 1
S2Ć5
Mode Switch 2
S1-1
Mode Switch 3
S2-3
Mode Switch 4
S2Ć4
ON
ON
See note 1
OFF
OFF
OFF
OFF
OFF
OFF
OFF
OFF
OFF
ON
OFF
OFF
In Standard - 32 mode, any module in the chassis occupies 32 input points and 32 output points in the Input/Output data table.
In Complementary - 32 mode, any module in the chassis occupies 32 input points or 32 output points in the Input/Output data table. If using an 8 point or 16 point module, the unused
points in the data table are zeroed out.
2
Publication 1794ĆUM009D-EN-P - April 2004
Installing Your Remote I/O Adapter Module
Setting the Address
Switches
2–13
Use the following table to set your address switches. (Refer to page
2–15 to set address switches when in complementary mode.)
Rack Number
S1 Switch Position
1747ĆSN
PLCĆ5
PLCĆ5/250
PLCĆ3
6
5
4
3
2
1
Rack 0
Not Valid
Rack 0
Rack 1
Rack 1
Rack 1
Rack 0
ON
ON
ON
ON
ON
ON
Rack 1
OFF
ON
ON
ON
ON
ON
Rack 2
Rack 2
Rack 2
Rack 3
Rack 3
Rack 3
Rack 2
ON
OFF
ON
ON
ON
ON
Rack 3
OFF
OFF
ON
ON
ON
ON
Rack 4
Rack 4
Rack 4
ON
ON
OFF
ON
ON
ON
Rack 5
Rack 5
Rack 5
OFF
ON
OFF
ON
ON
ON
Rack 6
Rack 6
Rack 6
ON
OFF
OFF
ON
ON
ON
Rack 7
Rack 7
Rack 7
OFF
OFF
OFF
ON
ON
ON
Rack 10
Rack 10
Rack 10
ON
ON
ON
OFF
ON
ON
Rack 11
Rack 11
Rack 11
OFF
ON
ON
OFF
ON
ON
Rack 12
Rack 12
Rack 12
ON
OFF
ON
OFF
ON
ON
Rack 13
Rack 13
Rack 13
OFF
OFF
ON
OFF
ON
ON
Rack 14
Rack 14
Rack 14
ON
ON
OFF
OFF
ON
ON
Rack 15
Rack 15
Rack 15
OFF
ON
OFF
OFF
ON
ON
Rack 16
Rack 16
Rack 16
ON
OFF
OFF
OFF
ON
ON
Rack 17
Rack 17
Rack 17
OFF
OFF
OFF
OFF
ON
ON
Rack 20
Rack 20
Rack 20
ON
ON
ON
ON
OFF
ON
Rack 21
Rack 21
Rack 21
OFF
ON
ON
ON
OFF
ON
Rack 22
Rack 22
Rack 22
ON
OFF
ON
ON
OFF
ON
Rack 23
Rack 23
Rack 23
OFF
OFF
ON
ON
OFF
ON
Rack 24
Rack 24
Rack 24
ON
ON
OFF
ON
OFF
ON
Rack 25
Rack 25
Rack 25
OFF
ON
OFF
ON
OFF
ON
Rack 26
Rack 26
Rack 26
ON
OFF
OFF
ON
OFF
ON
Rack 27
Rack 27
Rack 27
OFF
OFF
OFF
ON
OFF
ON
Rack 30
Rack 30
ON
ON
ON
OFF
OFF
ON
Rack 31
Rack 31
OFF
ON
ON
OFF
OFF
ON
Rack 32
Rack 32
ON
OFF
ON
OFF
OFF
ON
Rack 33
Rack 33
OFF
OFF
ON
OFF
OFF
ON
Rack 34
Rack 34
ON
ON
OFF
OFF
OFF
ON
Rack 35
Rack 35
OFF
ON
OFF
OFF
OFF
ON
Rack 36
Rack 36
ON
OFF
OFF
OFF
OFF
ON
Rack 37
Rack 37
OFF
OFF
OFF
OFF
OFF
ON
Rack 40
ON
ON
ON
ON
ON
OFF
Rack 41
OFF
ON
ON
ON
ON
OFF
See note 1 - Rack addresses 40 thru 76 are
only available in standard and standard
standard-32
32
modes.
Continued on next page
Publication 1794ĆUM009D-EN-P - April 2004
2–14
Installing Your Remote I/O Adapter Module
Rack Number
1747ĆSN
PLCĆ5
PLCĆ5/250
S1 Switch Position
PLCĆ3
6
5
4
3
2
1
Rack 42
ON
OFF
ON
ON
ON
OFF
Rack 43
OFF
OFF
ON
ON
ON
OFF
Rack 44
ON
ON
OFF
ON
ON
OFF
Rack 45
OFF
ON
OFF
ON
ON
OFF
Rack 46
ON
OFF
OFF
ON
ON
OFF
Rack 47
OFF
OFF
OFF
ON
ON
OFF
Rack 50
ON
ON
ON
OFF
ON
OFF
Rack 51
OFF
ON
ON
OFF
ON
OFF
Rack 52
ON
OFF
ON
OFF
ON
OFF
Rack 53
OFF
OFF
ON
OFF
ON
OFF
Rack 54
ON
ON
OFF
OFF
ON
OFF
Rack 55
OFF
ON
OFF
OFF
ON
OFF
Rack 56
ON
OFF
OFF
OFF
ON
OFF
Rack 57
OFF
OFF
OFF
OFF
ON
OFF
Rack 60
ON
ON
ON
ON
OFF
OFF
Rack 61
OFF
ON
ON
ON
OFF
OFF
Rack 62
ON
OFF
ON
ON
OFF
OFF
Rack 63
OFF
OFF
ON
ON
OFF
OFF
Rack 64
ON
ON
OFF
ON
OFF
OFF
Rack 65
OFF
ON
OFF
ON
OFF
OFF
Rack 66
ON
OFF
OFF
ON
OFF
OFF
Rack 67
OFF
OFF
OFF
ON
OFF
OFF
Rack 70
ON
ON
ON
OFF
OFF
OFF
Rack 71
OFF
ON
ON
OFF
OFF
OFF
Rack 72
ON
OFF
ON
OFF
OFF
OFF
Rack 73
OFF
OFF
ON
OFF
OFF
OFF
Rack 74
ON
ON
OFF
OFF
OFF
OFF
Rack 75
OFF
ON
OFF
OFF
OFF
OFF
Rack 76
ON
OFF
OFF
OFF
OFF
OFF
Not Valid
OFF
OFF
OFF
OFF
OFF
OFF
Rack address 77 is an illegal configuration.
PLCĆ5/11 processors can scan rack 03.
PLCĆ5/15 and PLCĆ5/20 processors can scan racks 01-03.
PLCĆ5/25 and PLCĆ5/30 processors can scan racks 01-07.
PLCĆ5/40 and PLCĆ5/40L processors can scan racks 01-17.
PLCĆ5/60 and PLCĆ5/60L processors can scan racks 01-27.
PLCĆ5/250 processors can scan racks 00-37.
PLCĆ3 processors can scan racks 00-76.
Note 1 - When using a 1794ĆASB series C (or later) adapter module, rack addresses 40 to 76 are only available in Standard and
Standard-32 modes.
Publication 1794ĆUM009D-EN-P - April 2004
Installing Your Remote I/O Adapter Module
Setting the Address
Switches for
Complementary I/O
2–15
Use the following table to set your address switches for
complementary I/O when using a PLC-5 processor. For all other
processors, refer to the programming manual for that specific
processor.
Primary Rack
Rack Number
1747ĆSN
PLCĆ5
Rack 0
Rack 1
S1 Switch Position
6
5
4
3
2
1
Not Valid
ON
ON
ON
ON
ON
OFF
Rack 1
OFF
ON
ON
ON
ON
OFF
Rack 2
Rack 2
ON
OFF
ON
ON
ON
OFF
Rack 3
Rack 3
OFF
OFF
ON
ON
ON
OFF
Rack 4
ON
ON
OFF
ON
ON
OFF
Rack 5
OFF
ON
OFF
ON
ON
OFF
Rack 6
ON
OFF
OFF
ON
ON
OFF
Rack 7
OFF
OFF
OFF
ON
ON
OFF
Complementary Rack
Rack Number
Chapter Summary
S1 Switch Position
1747ĆSN
PLCĆ5
6
5
4
3
2
1
Rack 0
Not Valid
ON
ON
ON
OFF
ON
ON
Rack 1
Rack 1
OFF
ON
ON
OFF
ON
ON
Rack 2
Rack 2
ON
OFF
ON
OFF
ON
ON
Rack 3
Rack 3
OFF
OFF
ON
OFF
ON
ON
Rack 4
ON
ON
OFF
OFF
ON
ON
Rack 5
OFF
ON
OFF
OFF
ON
ON
Rack 6
ON
OFF
OFF
OFF
ON
ON
Rack 7
OFF
OFF
OFF
OFF
ON
ON
In this chapter you learned how to install your adapter module and
set your switches. Chapter 3 tells you how to communicate with your
system.
Publication 1794ĆUM009D-EN-P - April 2004
2–16
Installing Your Remote I/O Adapter Module
Publication 1794ĆUM009D-EN-P - April 2004
Communicating with
FLEX I/O Modules
Chapter Objectives
In this chapter, we tell you about:
•
•
•
•
•
•
FLEX I/O Module Data
FLEX I/O module data
selecting an addressing type
selecting an addressing mode
determining rack size
mapping data into the image tables
operating modes
There are 2 types of data associated with FLEX I/O modules: input
data and output data.
• input data – data read from the module by the processor
• output data – data written to the module by the processor
Some digital I/O modules have both input and output data associated
with them. Digital I/O modules map input data and output data to the
input and output image tables in the processor. Input and output data
can be defined as:
• real I/O data – data that represents the actual state of
hardwired inputs and outputs (input data on input modules,
output data on output modules)
• configuration/status data – data written to configure the
module (such as delay times); and status information (such as
a fuse blown indication)
For FLEX analog modules, input and output data is only accessible
by the processor using block transfer instructions. The data is
contained in block transfer write (BTW) and block transfer read
(BTR) data files, not in the input and output image tables. A byte of
input image and a byte of output image is required for the module
status byte (MSB) and the module control byte (MCB). The MSB
uses input image, and the MCB uses output image. These bytes are
required for block transfer command communications.
Publication 1794ĆUM009D-EN-P - April 2004
3–2
Communicating with FLEX I/O Modules
Addressing I/O
The 1794-ASB series E adapter supports 5 different modes of
addressing: standard, compact, complementary, standard–32 and
complementary–32.
For digital modules, the mode of addressing determines what type of
data is available to the processor from the module.
• standard addressing – input and output data is available for each
digital module connected to the adapter
• compact addressing – either input or output data (not both) is
available for each digital module connected to the adapter
• complementary addressing – either input or output data (not both)
is available for each digital module connected to the adapter
Analog modules can be used in any mode of addressing with no loss
of data because data is not stored in the input and output image table,
with the exception of the MCB and MSB. Analog data is stored in
BTW and BTR data files.
The following table helps you to select an addressing mode based on
the kind of modules you want to use, and the features you need from
those modules. The table also lists both advantages and
disadvantages of using each addressing type.
Addressing Mode
Use this addressing scheme when:
Advantages
Standard
• you need full FLEX I/O module
Compact
• you don't need full FLEX I/O module • Eight 8 point modules equal 1/4 logical
functionality, including combination
modules (1794ĆIB10XOB6), settable
input delay times on input modules
(1794ĆIB16, ĆIB8S), and fuse blown
indication (1794ĆOB8EP) for
example. Will work with 32-pt.
modules with 16 in and 16 out
(1794-IB16XOB16P).
functionality, including combination
modules (1794ĆIB10XOB6), settable
input delay times on input modules
(1794ĆIB16, ĆIB8S), and fuse blown
indication (1794ĆOB8EP), for
example.
• you can locate equal numbers of
input and output modules in a single
chassis
Publication 1794ĆUM009D-EN-P - April 2004
• User has access to 1 word of input, 1
word of output for each digital module.
• Eight modules equal 1 logical rack.
• No restrictions on module placement
• Maximum use of configuration/status and
combination modules
racks (when input and output modules are
installed in alternate slots).
• Eight 16 point modules equal 1/2 logical
racks (when input and output modules are
installed in alternate slots).
• Provides maximum use of I/O image table
by a single FLEX chassis (when input and
output modules are installed in alternate
slots).
Disadvantages
• Inefficient I/O image table
utilization
• You must configure all modules
in the chassis as either 8Ćpoint
orĆ16 point.
• No combination modules
allowed
• Configuration/status data is not
accessible to user
Communicating with FLEX I/O Modules
3–3
Complementary
• you need full FLEX I/O module • Eight 8 point modules in each chassis
• You must configure all modules
Standard - 32
• you need full FLEX I/O module
• User has access to 2 words of input, 2
• Inefficient I/O image table
Complementary - 32
• you need full FLEX I/O module • Eight modules in each chassis equal 2
• All digital I/O modules are
functionality, including combination
modules (1794ĆIB10XOB6), settable
input delay times on input modules
(1794ĆIB16, ĆIB8S), and fuse blown
indication (1794ĆOB8EP), for
example.
• you can locate equal numbers of
input and output modules in
separate chassis
functionality, including 32 point
modules, combination modules
(1794ĆIB10XOB6), settable input
delay times on input modules
(1794ĆIB16, ĆIB8S), and fuse blown
indication (1794ĆOB8EP) for
example.
functionality, including combination
modules (1794ĆIB10XOB6), settable
input delay times on input modules
(1794ĆIB16, ĆIB8S), and fuse blown
indication (1794ĆOB8EP), for
example.
• you can locate equal numbers of
input and output modules in
separate chassis
equal 1/2 logical rack (when input
modules are installed in 1 chassis, and
output modules are installed in the
complementary chassis).
• Eight 16 point modules in each chassis
equal 1 logical rack (when input modules
are installed in 1 chassis, and output
modules are installed in the
complementary chassis).
• Provides maximum use of I/O image table
in 2 FLEX chassis (when input modules
are installed in 1 chassis, and output
modules are installed in the
complementary chassis).
words of output for each digital module.
• Four modules equal 1 logical rack.
• No restrictions on module placement
• Maximum use of configuration/status and
combination modules
logical racks
• Provides maximum use of I/O image table
in 2 FLEX chassis (when input modules
are installed in 1 chassis, and output
modules are installed in the
complementary chassis).
in both chassis as either 8Ćpoint
or 16Ćpoint.
• No combination modules
allowed
• Configuration/status data is not
accessible to user
utilization
configured as 32Ćpoint.
• No combination modules
allowed
• Configuration/status data may
not be accessible to user
(depending on module type).
The amount of data accessible to the processor in the 5 addressing
modes is illustrated below. Note that the shaded areas represent data
not accessible by the processor.
Publication 1794ĆUM009D-EN-P - April 2004
3–4
Communicating with FLEX I/O Modules
Digital I/O Modules
Input Word
Output Word
Input Module Example
8 Bits
8 Bits
8 Bits
8 Bits
Output Module Example
Note: If 32 pt. modules are used in standard
mode, only the lower word (16 bits) will be sent
to the processor. All 32 bits of the 32-pt
combo module are available.
Input Module Example
Input Word 0
Input Word 1
Output Word 0
Output Word 1
Output Word
8 Bits
8 Bits
8 Bits
8 Bits
8 Bits
8 Bits
8 Bits
8 Bits
8 Bits
8 Bits
8 Bits
8 Bits
8 Bits
8 Bits
8 Bits
8 Bits
8 Bits
8 Bits
8 Bits
8 Bits
Output Module Example
8 Bits
8 Bits
8 Bits
8 Bits
Note: If 32 pt. modules are used in 16 pt.
compact mode, only the low word (16 bits)
will be sent to the processor.
Input Module Example
Input Word
Output Word
8 Bits
8 Bits
8 Bits
8 Bits
Standard Mode
16 bits of input AND
16 bits of output available
Output Module Example
8 Bits
8 Bits
Input Module Example
Input Word
8 Bits
8 Bits
Output Module Example
8 Bits
8 Bits
8 Bits
8 Bits
Standard - 32 Mode
32 bits of input AND
32 bits of output available
Compact Mode
16Ćpt Density
16 bits of input OR
16 bits of output available
Compact Mode
8Ćpt Density
8 bits of input OR
8 bits of output available
Note: If 16Ćpt or 32Ćpt modules are used in 8Ćpt
compact addressing, only the information in
the lowest byte (8 bits) will be sent to the
processor.
16Ćbit Input modules complemented by 16Ćbit output modules
Primary Chassis
Input Module Example
Input Word
Output Word
8 Bits
8 Bits
8 Bits
8 Bits
Complement Chassis
Input Module Example
Input Word
Output Word
8 Bits
8 Bits
Publication 1794ĆUM009D-EN-P - April 2004
8 Bits
8 Bits
Output Module Example
8 Bits
8 Bits
8 Bits
8 Bits
Output Module Example
8 Bits
8 Bits
8 Bits
8 Bits
Note: If 32Ćpt modules are used in 16Ćpt complimentary addressing,
only the information in the lower word will be sent to the processor.
Complementary Mode
16Ćpt Density
16 bits of input OR
16 bits of output available
Communicating with FLEX I/O Modules
3–5
8Ćbit Input modules complemented by 8Ćbit output modules
Primary Chassis
Input Module Example
Input Word
Output Word
8 Bits
8 Bits
8 Bits
8 Bits
Output Module Example
8 Bits
8 Bits
8 Bits
8 Bits
Complementary Mode
8Ćpt Density
8 bits of input OR
8 bits of output available
Complement Chassis
Input Module Example
Input Word
Output Word
8 Bits
8 Bits
Output Module Example
8 Bits
8 Bits
8 Bits
8 Bits
8 Bits
8 Bits
Note: If 16Ćpt or 32Ćpt modules are used in 8Ćpt complementary addressing,
only the information in the lowest byte will be sent to the processor.
32Ćbit Input modules complemented by 32Ćbit output modules
Primary Chassis
Input Module Example
Input Word 0
Input Word 1
Output Word 0
Output Word 1
Output Module Example
8 Bits
8 Bits
8 Bits
8 Bits
8 Bits
8 Bits
8 Bits
8 Bits
8 Bits
8 Bits
8 Bits
8 Bits
8 Bits
8 Bits
8 Bits
8 Bits
Complement Chassis
Input Module Example
Output Module Example
Input Word 0
Input Word 1
Output Word 0
Output Word 1
8 Bits
8 Bits
8 Bits
8 Bits
8 Bits
8 Bits
8 Bits
8 Bits
8 Bits
8 Bits
8 Bits
8 Bits
8 Bits
8 Bits
Complementary - 32 Mode
32-pt density
32 bits of input OR
32 bits of output available
Complementary - 32 Mode
32 bits of input OR
32 bits of output available
8 Bits
8 Bits
Note: Shaded areas represent data not accessible by the processor.
Analog (Block Transfer)
Modules
Analog modules use block transfers, which require 1 byte (8 bits) of
input image for the module status byte, and 1 byte (8 bits) of output
image for the module control byte. This is true for any addressing
mode selected.
Input or Output Example
Input Word
Output Word
8 Bits
8 Bits
MSB
MCB
Any Mode
Block transfers require
8 bits of input image and
8 bits of output image
Publication 1794ĆUM009D-EN-P - April 2004
3–6
Communicating with FLEX I/O Modules
Standard Addressing
Use standard addressing when:
• you need full FLEX I/O module functionality, such as delay time
selection on input modules, fuse-blown indication on the
1794-OB8EP, etc.
• using combination modules, such as the 1794-IB10XOB6 10 in/6
out module
In standard mode, each module position equals one I/O group – 1
word of input image and 1 word of output image. If 32-pt input or
output modules are used, only the lower 16 bits are available. All 32
bits of the 32–pt combination modules are available.
Standard Addressing
Any combination of digital or analog modules.
Input
Output
Input
Adapter
Output
Analog
Analog
Output
Input
Eight terminal bases per adapter (maximum)
Each terminal base represents 1 I/O group
20128
Standard Addressing Example - 8 modules = 1 logical rack = 8 I/O groups
I/O Group 0
I/O Group 1
I/O Group 2
I/O Group 3
I/O Group 4
I/O Group 5
I/O Group 6
M1
M2
M3
M4
M5
M6
M0
ASB/E
IH
OH
IL
OL
IH
OH
IB16
IL = Input Low Byte
IH = Input High Byte
OL = Output Low Byte
OH = Output High Byte
IL
OL
OB16
IH
OH
IL
OL
IB16
IH
IL
OH
OL
OB16
MCB = Module Control Byte (output data)
MSB = Module Status Byte (input data)
MSB
MCB
IE8
0
1
2
3
4
5
6
7
17
10 07
M0ĆIH
M1ĆIH
M2ĆIH
M3ĆIH
M6ĆIH
M7ĆIH
Publication 1794ĆUM009D-EN-P - April 2004
M0ĆIL
M1ĆIL
M2ĆIL
M3ĆIL
M4ĆMSB
M5ĆMSB
M6ĆIL
M7ĆIL
IE8
IH
IL
OH
OL
OB16
1 module position is an I/O group
Output Image Table
00
M7
IH
OH
Legal Module Placement in Standard Addressing
Any module in any slot
Input Image Table
I/O Group
MSB
MCB
I/O Group 7
17
10 07
00
M0ĆOH
M0ĆOL
M1ĆOH
M1ĆOL
M2ĆOH
M2ĆOL
M3ĆOH
M3ĆOL
M4ĆMCB
M5ĆMCB
M6ĆOH
M6ĆOL
M7ĆOH
M7ĆOL
IL
OL
IB16
Communicating with FLEX I/O Modules
Standard - 32 Addressing
3–7
Use standard 32 point addressing when:
• you use 32 point modules in your system
• you need full FLEX I/O module functionality, such as delay time
selection on input modules, fuse-blown indication on the
1794-OB8EP, etc.
• using combination modules, such as the 1794-IB16XOB16 16
in/16 out module
In standard – 32 mode, each module position equals two I/O groups
– 2 words of input image and 2 words of output image.
Standard 32 Addressing Example - 8 modules = 2 logical racks, N and N+1 = 16 I/O groups
Rack N
M0
Gr. 0
ASB/E
M1
Gr. 1
ILH ILL
Rack N + 1
M2
Gr. 2 Gr. 3
IHH IHL ILH ILL
IHH IHL
Gr. 4
Gr. 5
OB32
Gr. 0
M5
Gr. 1
Gr. 2 Gr. 3
M6
Gr. 4
M7
Gr. 5
Gr. 6 Gr. 7
IHH IHL
MSB
MSB
IL
ILH
OLH OLL OHH OHL
MCB
MCB
OL
OLH OLL OHH OHL
Analog
Analog
ILH ILL
OL
M4
Gr. 6 Gr. 7
IH IL
OLH OLL OHH OHL OLH OLL OHH OHL OH
IB32
M3
IB16
IB32
IB8
ILL
IHH IHL
OB32
Note: Shaded areas represent data which is not available.
Eight terminal bases per adapter (maximum)
Each terminal base represents 2 I/O groups.
Legal Module Placement in Standard Addressing
ILL, OLL = Bits 0 thru 7 for input and output words of 32 point modules
Any module in any slot
ILH, OLH = Bits 8 thru 15 for input and output words of 32 point modules
IHL, OHL = Bits 16 thru 23 for input and output words of 32 point modules
1 module position is 2 I/O groups
IHH, OHH = Bits 24 thru 32 for input and output words of 32 point modules
IL, OL = Bits 0 thru 7 for input and output words for 16 and 8 point modules
IH, OH = Bits 8 thru 15 for input and output words for 16 point modules
MCB = Module Control Byte (output data)
MSB = Module Status Byte (input data)
Input Image Table for Rack N
Output Image Table for Rack N
I/O Group
I/O
Group
17
10 07
00
17
10 07
00
0
1
2
3
4
5
6
7
I/O Group
0
1
2
3
4
5
6
7
0
1
2
3
4
5
6
7
M0ĆILL
M0ĆIHL
M1ĆILL
M1ĆIHL
M2ĆIL
M2ĆILL
M2ĆIHL
M3ĆILL
M3ĆIHL
M0ĆILH
M0ĆIHH
M1ĆILH
M1ĆIHH
M2ĆIH
M2ĆILH
M2ĆIHH
M3ĆILH
M3ĆIHH
Input Image Table for Rack N+1
17
10 07
M1ĆILH
M1ĆIHH
M2ĆILH
M2ĆIHH
M7ĆILH
M3ĆILH
M7ĆIHH
M3ĆIHH
M4ĆMSB
M5ĆMSB
M1ĆILL
M1ĆIHL
M6ĆIL
M2ĆILL
M2ĆIHL
M7ĆILL
M3ĆILL
M7ĆIHL
M3ĆIHL
00
I/O Group
0
1
2
3
4
5
6
7
M0ĆOLH
M0ĆOHH
M1ĆOLH
M1ĆOHH
M2ĆOLH
M2ĆOH
M2ĆOHH
M3ĆOLH
M3ĆOHH
M0ĆOLL
M0ĆOHL
M1ĆOLL
M1ĆOLL
M1ĆOHL
M1ĆOHL
M2ĆOLH
M2ĆOL
M2ĆOHL
M3ĆOLL
M3ĆOHL
Output Image Table for Rack N+1
17
10 07
00
M4ĆMCB
M0ĆOLH
M0ĆOLL
M0ĆOHH
M0ĆOHL
M5ĆMCB
M1ĆOLH
M1ĆOLL
M1ĆOHH
M1ĆOHL
M6ĆOL
M2ĆOLH
M2ĆOLH
M2ĆOHH
M2ĆOHL
M7ĆOLH
M7ĆOLL
M3ĆOLH
M3ĆOLL
M3ĆOHH
M3ĆOHL
M7ĆOHH
M7ĆOHL
Publication 1794ĆUM009D-EN-P - April 2004
3–8
Communicating with FLEX I/O Modules
Compact Addressing
Use compact addressing when:
• you are not using combination modules
• you are using only digital input, digital output and analog
modules
• you don’t need all the features of digital FLEX I/O modules (You
can only access the input word on an input module, or the output
word of an output module. Any status information/configuration
information in the corresponding input/output word is not
accessible.)
• you can locate equal numbers of input and output modules in a
single chassis
• you want more efficient use of the input/output data table
Compact Mode
Compact mode maximizes single chassis I/O image table usage when
using either 8- or 16-point modules and block transfer modules.
Compact mode allows more than 1 module to occupy a single I/O
group. How many modules depends on the density selected (16- or
8-point).
In compact mode, with 16-point density, 2 digital modules (1 input
and 1 output module) can occupy 1 I/O group. In addition, 2 block
transfer modules can occupy 1 I/O group. If higher density modules
are used, only the lowest 16 bits will be available.
In compact mode, with 8-point density, 4 digital modules (2 input
and 2 output modules) mounted in module pairs can occupy 1 I/O
group. In addition, 2 block transfer modules can occupy 1 I/O group.
If higher density modules are used, only the lowest 8 bits will be
available.
Publication 1794ĆUM009D-EN-P - April 2004
Communicating with FLEX I/O Modules
16Ćpoint Compact Addressing
Input modules and Output modules in pairs, or analog modules.
Group 1
Group 2
Group 0
Input
Output
Input
Adapter
Output
Analog
Analog
3–9
Group 3
Output
Input
Eight terminal bases per adapter (maximum)
Each module represents 1/2 of an I/O group
2 modules represent 1 I/O group
8 modules = 1/2 I/O rack
20128
Compact 16Ćpoint Addressing Example - 8 modules = 1/2 logical rack = 4 I/O groups
I/O Group 0
M0
ASB/E
I/O Group 1
M1
IH
IL
OH
OL
OB16
IB16
IL = Input Low Byte
IH = Input High Byte
OL = Output Low Byte
OH = Output High Byte
M2
IH
I/O Group 2
M3
IL
IB16
M4
OH
OL
OB16
MCB = Module Control Byte (output data)
MSB = Module Status Byte (input data)
Note: Shaded areas represent unavailable data
M5
MSB
MCB
IE8
0
1
2
3
4
5
6
7
17
10 07
00
M0ĆIH
M0ĆIL
M2ĆIH
M2ĆIL
M5ĆMSB
M4ĆMSB
M7ĆIH
M7ĆIL
IE8
M6
MSB
MCB
OH
OL
OB16
M7
IH
IL
IB16
Legal Module Placement in 16Ćpt Compact Addressing
A 16Ćpoint input module and a 16Ćpoint output module
(or an empty slot) in an I/O group.
A 16Ćpt output module and a 16Ćpt input module
(or an empty slot) in an I/O group.
A block transfer module with another block transfer module
(or an empty slot) in an I/O group.
An empty slot with any module, or another empty
slot in an I/O group.
2 module positions = an I/O group
Input Image Table
I/O Group
I/O Group 3
Output Image Table
17
10 07
00
M1ĆOH
M1ĆOL
M3ĆOH
M3ĆOL
M5ĆMCB
M4ĆMCB
M6ĆOH
M6ĆOL
I/O groups 4-7 are available for another adapter.
Note: When using block transfer modules in 16Ćpt compact addressing, address module positions
M0, M2, M4 and M6 as module 0" in a block transfer instruction block; address module positions
M1, M3, M5 and M7 as module 1" in a block transfer instruction block.
Publication 1794ĆUM009D-EN-P - April 2004
3–10
Communicating with FLEX I/O Modules
8Ćpoint Compact Addressing - Digital Modules
Input modules and Output modules in the same group.
Group 0
Group 1
Input
Output
Input
Adapter
Output
Output
Input
Output
Input
Eight terminal bases per adapter (maximum)
Each module represents 1/4 of an I/O group
4 modules represent 1 I/O group
20128
Compact 8Ćpoint Addressing Example - 8 digital modules = 1/4 logical rack
I/O Group 0
M0
M1
IL
ASB/E
IA8
I/O Group 1
M2
M3
OL
M5
IA8
OW8
IL = Input Low Byte
IH = Input High Byte
OL = Output Low Byte
OH = Output High Byte
OL
OW8
Input Image Table
10 07
IL
OL
IA8
OA8
Output Image Table
00
M0ĆIL
M5ĆIL
17
10 07
M3ĆOL
M6ĆOL
I/O groups 2-7 are available to additional adapters.
Publication 1794ĆUM009D-EN-P - April 2004
M7
IA8
Legal Module Placement in 8Ćpoint Compact Addressing
Two 8Ćpoint input modules and two 8Ćpoint output modules (or empty
slots) in an I/O group. Module type must alternate within an I/O group:
input, output, etc.
One block transfer module with 3 empty slots
One block transfer module, followed by an empty slot, another
block transfer module and another empty slot.
4 module positions to an I/O group
Note: Shaded areas represent unavailable data
M2ĆIL
M7ĆIL
M6
IL
OL
OA8
I/O Group 17
0
1
2
3
4
5
6
7
M4
IL
00
M1ĆOL
M4ĆOL
Communicating with FLEX I/O Modules
3–11
8Ćpoint Compact Addressing - Analog Modules
Analog modules in the same group.
Adapter
Group 0
Analog
Empty
Adapter
Group 1
Analog
Empty
Analog
Empty
Analog
Empty
Eight terminal bases per adapter (maximum)
Each module and adjacent empty base represents 1/2 of an I/O group
20128
Compact 8Ćpoint Addressing Example - 4 Analog modules = 1/4 logical rack = 2 I/O groups
I/O Group 0
M0
ASB/C
I/O Group 1
M1
M2
MSB
MCB
IE8
MSB
MCB
IE8
MCB = Module Control Byte (output data)
MSB = Module Status Byte (input data)
Note: Shaded areas represent unavailable data
M3
M4
M5
MSB
MCB
IE8
M6
M7
MSB
MCB
IE8
Legal Module Placement in 16Ćpt Compact Addressing
A 16Ćpoint input module and a 16Ćpoint output module
(or an empty slot) in an I/O group
A block transfer module and another block transfer module
(or an empty slot) in an I/O group.
An empty slot and any module (or another empty slot)
in an I/O grouop.
2 module positions = an I/O group
Input Image Table
I/O Group
0
1
2
3
4
5
6
7
17
10 07
00
M2ĆMSB
M0ĆMSB
M6ĆMSB
M4ĆMSB
Output Image Table
17
M2ĆMCB
M6ĆMCB
10 07
00
M0ĆMCB
M4ĆMCB
I/O groups 4-7 are available for another adapter.
Note: When using block transfer modules in 16Ćpt compact addressing, address module positions
M0, M2, M4 and M6 as module 0" in a block transfer instruction block; address module positions
M1, M3, M5 and M7 as module 1" in a block transfer instruction block.
Publication 1794ĆUM009D-EN-P - April 2004
3–12
Communicating with FLEX I/O Modules
Complementary
Addressing Mode
Use complementary addressing when:
• you are not using combination modules
• you don’t need all the features of FLEX I/O modules
• you can locate equal numbers of input and output modules in
separate chassis
• you want more efficient use of the input/output image table
Complementary Mode - 16Ćpoint
Complementary mode maximizes 2 chassis I/O image table usage
when input modules are installed in 1 chassis, and output modules
are installed in another chassis. This mode allows 2 modules to
occupy a single I/O group.
In complementary mode, with 16-point density, 1 digital input
module in the primary chassis, and 1 digital output module in the
complementary chassis, or vice versa, form an I/O group. In
addition, analog modules can be complemented by another analog
module or an empty base. If 32-pt modules are used, only the lowest
16 bits will be available.
16Ćpoint Complementary Addressing
Any combination of digital or analog modules.
Primary
Adapter
S1Ć1 OFF
Input
I/O Group 0
Empty
Input
I/O Group 1
I/O Group 2
Analog
I/O Group 3
Analog
I/O Group 4
Input
I/O Group 5
Output
I/O Group 6
Input
I/O Group 7
Complementary
Adapter
Output
Output
S1Ć1 ON
Output
Empty
Analog
Output
Input
Output
Complement of modules in primary chassis, or analog or empty for analog.
Eight terminal bases per adapter (maximum)
2 modules, 1 in primary and 1 in complement represent 1 I/O group
Note: When programming block transfers, address analog modules as module 0 if switch S1Ć1 is on; module 1 if switch S1Ć1 is off.
Publication 1794ĆUM009D-EN-P - April 2004
20128
Communicating with FLEX I/O Modules
3–13
Complementary 16Ćpoint Addressing Example - Up to 16 modules = 1 logical rack
1 I/O Group
M0
ASB/E
Primary
IH
M1
IL
IB16
CĆM0
ASB/E
Comp.
OH
OL
OB16
IL = Input Low Byte
IH = Input High Byte
OL = Output Low Byte
OH = Output High Byte
M2
IH
IL
IB16
Empty
CĆM1
CĆM2
OH OL
OB16
OH
OL
OB16
M3
MSB
MCB
OE4
M4
MSB
MCB
IE8
CĆM3
Empty
M5
IH
IB16
CĆM4
MSB
MCB
IE8
MCB = Module Control Byte
MSB = Module Status Byte
Input Image Table
17
10 07
CĆM5
OH OL
OB16
OH
OL
OB16
CĆM6
IH
IL
IB16
M7
IH
IL
IB16
CĆM7
OH
OL
OB16
Legal Module Placement in 16Ćpoint Complementary
Any module or empty slot in any I/O position of the
primary chassis; input modules complemented by
output modules, or empty slots; output modules
complemented by input modules or empty slots; block
transfer modules complemented by block transfer
modules or empty slots; or empty slots
complemented by input, output, or empty slots.
Note: Shaded areas represent unavailable data
I/O Group
0
1
2
3
4
5
6
7
M6
IL
Output Image Table
00
M0ĆIH
M1ĆIH
M0ĆIL
M1ĆIL
M3ĆMSB
M4ĆMSB
M5ĆIH
CĆM6ĆIH
M7ĆIH
CĆM4ĆMSB
M5ĆIL
CĆM6ĆIL
M7ĆIL
17
10 07
00
CĆM0ĆOH
CĆM0ĆOL
CĆM1ĆOH
CĆM1ĆOL
CĆM2ĆOH
CĆM2ĆOL
M3ĆMCB
M4ĆMCB
CĆM4ĆMCB
CĆM5ĆOH
CĆM5ĆOL
M6ĆOH
M6ĆOL
CĆM7ĆOH
CĆM7ĆOL
Note: When programming block transfer instructions, address analog modules in the primary rack as module
1," and analog modules in the complementary rack as module 0."
Complementary Mode - 8Ćpoint
Complementary mode maximizes chassis I/O image table usage
when input modules are installed in one chassis, and output modules
are installed in a complementary chassis. This allows four modules
to occupy a single I/O group.
In complementary mode, with 8-point density, 2 digital input
modules in the primary chassis, and 2 digital output modules in the
complementary chassis, or vice versa, form an I/O group. In
addition, analog modules must be complemented by an empty base.
If higher density modules are used, only the lowest 8 bits will be
available.
Publication 1794ĆUM009D-EN-P - April 2004
3–14
Communicating with FLEX I/O Modules
8Ćpoint Complementary Addressing
Any combination of digital or analog modules.
Primary
Input
Adapter
Input
Input
I/O Group 0
Input
Analog
I/O Group 1
Analog
Input
Input
I/O Group 2
I/O Group 3
Complementary
Output
Output
Adapter
Output
Output
Empty
Empty
Output
Output
Complement of modules in primary chassis, or empty for analog.
Eight terminal bases per adapter (maximum)
Four modules, 2 in the primary and 2 in the complement, represents 1 I/O group
20128
Complementary 8Ćpoint Addressing Example - up to 16 digital or 8 analog modules = 1/2 logical rack
I/O Group 0
M0
M1
M2
IL
ASB/E
Primary
IL
M3
IL
M4
MSB
MCB
IL
IA8
IA8
IA8
IA8
IE8
CĆM0
CĆM1
CĆM2
CĆM3
CĆM4
ASB/E
Comp.
OL
OA8
OL
OA8
I/O Group
0
1
2
3
4
5
6
7
CĆM5
OA8
OA8
OL
OA8
OL
OA8
CĆM6
CĆM7
Empty
Empty
IA8
Legal Module Placement in 8Ćpoint Complementary
2 inputs in a group complemented by 2 outputs or empty slots
2 outputs in a group complemented by 2 inputs or empty slots
2 block transfer modules complemented by 2 empty slots
1 block transfer module and 1 input in a group complemented
by 1 empty slot and 1 output module
Empty slots complemented by an empty slot, input or output slot
10 07
00
M1ĆIL
M0ĆIL
M3ĆIL
M2ĆIL
M5ĆMSB
M4ĆMSB
CĆM7ĆIL
CĆM6ĆIL
Output Image Table
17
10 07
00
CĆM1ĆOL
CĆM0ĆOL
CĆM3ĆOL
CĆM2ĆOL
M5ĆMCB
M4ĆMCB
M7ĆOL
M6ĆOL
I/O groups 4-7 are available to additional adapters.
Publication 1794ĆUM009D-EN-P - April 2004
M7
IL
Input Image Table
17
M6
OL
OL
IL = Input Low Byte
IH = Input High Byte
MCB = Module Control Byte
OL = Output Low Byte
MSB = Module Status Byte
OH = Output High Byte
Note: Shaded areas represent unavailable data
M5
MSB
MCB
IE8
IL
IA8
Communicating with FLEX I/O Modules
Complementary - 32
Addressing
3–15
Use complementary 32 point addressing when:
• you use 32 point modules in your system
• you need full FLEX I/O module functionality, such as delay time
selection on input modules, fuse-blown indication on the
1794-OB8EP, etc.
• using combination modules, such as the 1794-IB16XOB16 16
in/16 out module
In complementary mode, each module position equals two I/O
groups – 2 words of input image and 2 words of output image.
Complementary 32 Addressing Example - 16 modules = 2 logical racks, N, (N+1), NC and (N + 1)C
Rack N
Group 2 & 3 Group 4 & 5
Group 0 & 1
ASB/E
Primary
Group 6 & 7
M0
M1
M2
M3
Input 32
Output 32
Empty
Output 32
M4
Analog
MSB
MCB
OLH OLL OHH OHL MSB
MCB
ILH ILL IHH IHL OLH OLL OHH OHL
Rack (N + 1)
Group 2 & 3 Group 4 & 5
Group 0 & 1
M5
M6
M7
Analog
Output 8
Input 32
CĆM0
CĆM1
Input 32
Output 32
OLH OLL OHH OHL ILH ILL
CĆM2
OL
CĆM3
Input 32
ILH ILL
0
1
2
3
4
5
6
7
I/O Group
0
1
2
3
4
5
6
7
Input Image Table for Rack N and NC
17
10 07
00
M0ĆILH
M0ĆILL
M0ĆIHH
M0ĆIHL
M1ĆILH
CM1ĆILH
M1ĆILL
CM1ĆILL
CM1ĆIHH
CM1ĆIHL
M1ĆIHH
M1ĆIHL
CM3ĆILH
M3ĆILH
CM3ĆIHH
M3ĆIHH
CM3ĆILL
M3ĆILL
CM3ĆIHL
M3ĆIHL
CĆM4
Empty
M5ĆMSB
M1ĆILH
CM5ĆMSB
M1ĆILL
CM6ĆIL
M2ĆILL
M7ĆILH
M3ĆILH
M7ĆIHH
M3ĆIHH
M7ĆILL
M3ĆILL
M7ĆIHL
M3ĆIHL
CĆM6
CĆM7
Input 8
Output 32
IL
OLH OLL OHH OHL
Legal Module Placement in 32Ćpoint Complementary
Any module in any slot in primary chassis. Complement of primary
chassis module in complementary chassis slot.
Any input module complemented by an output module or empty slot.
Any output module complemented by an input module or empty slot.
Any block transfer module complemented with a block transfer
module or empty slot.
An empty slot complemented by an empty slot, input
or output module
Output Image Table for Rack N and NC
I/O Group 17
10 07
00
0
CM0ĆOLH
CM0ĆOLL
M0ĆOLH
M0ĆOLL
1
CM0ĆOHH
CM0ĆOHL
M0ĆOHH
M0ĆOHL
M1ĆOLH
M1ĆOLL
M1ĆOLL
2
3
M1ĆOHH
M1ĆOHL
M1ĆOHL
4
M2ĆOLH
CM2ĆOL
CM2ĆOH
M2ĆOLH
5
M2ĆOHH
M2ĆOHL
6
M3ĆOLH
M3ĆOLL
7
M3ĆOHH
M3ĆOHL
Input Image Table for Rack N+1 and (N+1)C
I/O Group
17
10 07
00
M4ĆMSB
CĆM5
Analog
MSB
MCB
IHH IHL
Eight terminal bases per adapter (maximum)
1 module in primary chassis, 1 module in complementary
chassis represents 2 I/O groups.
ILL, OLL = Bits 0 thru 7 for input and output words of 32 point modules
ILH, OLH = Bits 8 thru 15 for input and output words of 32 point modules
IHL, OHL = Bits 16 thru 23 for input and output words of 32 point modules
IHH, OHH = Bits 24 thru 32 for input and output words of 32 point modules
IL, OL = Bits 0 thru 7 for input and output words for 16 and 8 point modules
IH, OH = Bits 8 thru 15 for input and output words for 16 point modules
Note: Shaded areas represent unavailable data
I/O Group
IHH IHL
Rack (N + 1)C
Output 16
IHH IHL OH
ILH ILL
OL
Rack NC
ASB/E
Comp.
Group 6 & 7
0
1
2
3
4
5
6
7
Output Image Table for Rack N+1 and (N+1)C
17
10 07
M4ĆMCB
M5ĆMCB
CM7ĆOLH
M3ĆILH
CM7ĆOHH
M3ĆIHH
00
CM5ĆMCB
M1ĆIHL
M6ĆOL
M2ĆILL
CM7ĆOLL
M3ĆILL
CM7ĆOHL
M3ĆIHL
Publication 1794ĆUM009D-EN-P - April 2004
3–16
Communicating with FLEX I/O Modules
Mapping Data into the
Image Tables
After the rack size has been determined by the remote I/O adapter,
the data from the modules must be mapped into the data tables. Data
associated with digital modules is mapped into the input and output
image table.
Data transfer to and from the remote I/O adapter and digital modules
occurs every flexbus scan. This data is mapped into the input/output
image table.
The switch settings on the adapter module
IMPORTANT determine whether both the input and output bits
are transferred. Standard addressing is the only
mode that maps both input and output bits for
each module.
For analog modules, only the MSB and MCB block transfer bytes
are mapped into the input and output image table. The remote I/O
adapter transfers data to analog I/O modules (block transfer write)
and from analog I/O modules (block transfer read) using BTW and
BTR instructions in your ladder diagram program. This data is
mapped to the data files selected in the ladder logic block transfer
instructions.
The adapter identifies the type of module in each base unit when the
module is added, and stores this information for later use, if
necessary.
If you are changing your configuration, you
IMPORTANT must power down, then power back up after
changing a module type in a terminal base unit.
ATTENTION
!
Determining Rack Size
In Standard Addressing Mode, FLEX I/O modules
do not support complementary I/O. Do not
attempt to use the complementary image table
word of a module in Standard Addressing Mode.
The complementary word is reserved for use by
the module.
After the remote I/O adapter has identified the modules present in its
system, it creates a “rack image” so data transfer can take place using
the remote I/O protocol.
Building a rack image consists of:
• mapping each module to an I/O group (16 bits of input and 16
bits of output)
• determining rack size – all empty terminal bases are counted
unless they occur at the end of the rack
• automatically sizing the rack image, based upon the mode switch
setting
Publication 1794ĆUM009D-EN-P - April 2004
Communicating with FLEX I/O Modules
3–17
• smallest rack size is 1/4, regardless of the mode switch settings
Some examples of rack definition are shown below.
Example 1 - 8 Terminal Bases, 8 Modules
Adapter
Module
Module
Module
Module
Module
Module
Module
Module
= 2 Logical Racks in Standard 32 mode, any density or analog module mix
= 1 Logical Rack in Standard mode, any density or analog module mix
= 1/4 Rack in Compact mode with 8Ćpt modules; 1/2 Rack in Compact mode (with 16Ćpt modules)
Example 2 - 16 Terminal Bases, 16 Modules, Complementary Mode
PrimaryĆ
Adapter
Module
Module
Module
Module
Module
Module
Module
Module
Complement
Module
Adapter
Module
Module
Module
Module
Module
Module
Module
= 2 Logical Racks in Complementary 32 mode (16 modules total, any density),
= 1 Logical Rack in Complementary mode (16 16Ćpt modules), primary input modules - complement
output modules and vice versa; analog complemented with another analog module or an empty slot
= 1/2 Rack in Complementary mode (16 8Ćpt modules), primary input modules - complement output
modules and vice versa; analog complemented with an empty slot
Last
Module
M
d l
Position
Standard
32
Standard
Rack Size for each Addressing Mode
Compact Compact Complement Complement
16
8
32
16
Complement 8
0
1/4 rack
1/4 rack
1/4 rack
1/4 rack
1/4 rack
1/4 rack
1/4 rack
1
1/2 rack
1/4 rack
1/4 rack
1/4 rack
1/2 rack
1/4 rack
1/4 rack
2
3/4 rack
1/2 rack
1/4 rack
1/4 rack
3/4 rack
1/2 rack
1/4 rack
3
Full rack
1/2 rack
1/4 rack
1/4 rack
Full rack
1/2 rack
1/4 rack
4
1-1/4 rack
3/4 rack
1/2 rack
1/4 rack
1-1/4 rack
3/4 rack
1/2 rack
5
1-1/2 rack
3/4 rack
1/2 rack
1/4 rack
1-1/2 rack
3/4 rack
1/2 rack
6
1-3/4 rack
Full rack
1/2 rack
1/4 rack
1-3/4 rack
Full rack
1/2 rack
7
2 Full racks
Full rack
1/2 rack
1/4 rack
2 Full racks
Full rack
1/2 rack
Publication 1794ĆUM009D-EN-P - April 2004
3–18
Communicating with FLEX I/O Modules
If a rack size offset by the selected quarter results in more than a full
rack, the adapter will declare a rack fault and error as indicated.
In 32 point mode, the starting quarter should always be 0 (switches
S1–8 and S1–7 on).
ATTENTION
!
Operating Modes
Do not use the auto-config feature of 6200
software when using a PLC-3 processor with
1775-S4A or 1775-S4B scanner modules. If you
do an auto-config for a scanner channel
containing 1 or more 1794-ASB adapters with that
configuration, the adapters may not show up in
the scan list for that scanner channel. Manually
insert these adapters into the scan list for the
scanner.
Most reset commands are issued by the processor when it is placed
in the PROG mode. However, the processor automatically issues a
special command to any rack declared faulted regardless of the
processor mode.
When this special command is received by the faulted remote I/O
adapter, and processor restart lockout (PRL) has not been selected,
the adapter will:
• continue to read output image data from the link, and queue block
transfers if MCBs are detected
• reset all bits in the output words of digital modules
• reset all bits in the write words of analog modules up to but not
including the write words of the safe state values
• assigns safe state values to outputs of analog modules
• issue a reply command
If processor restart lockout (PRL) has been selected, the adapter does
not update data, does not issue a reply command, and does not clear
the fault.
Chapter Summary
Publication 1794ĆUM009D-EN-P - April 2004
In this chapter, you learned how to address your I/O, how to
determine rack size, and how the modules are mapped
Chapter Objectives
In this chapter, we tell you:
• about the indicators on the module front plate
• how to use the indicators for troubleshooting the module
Fault Conditions
Three conditions can cause the remote I/O adapter to declare a
communication fault.
• no remote I/O (link) communication for more than 100ms
• no commands issued to this address over the remote I/O link
within the last 255 link transactions
• communication is lost to a module when Rack Fault Select is
enabled
When any of these conditions exist, the adapter will:
• reset all digital outputs or leave them in their last state (depending
on the position of the last state switch, S2-1). Refer to page 2–9
for an explanation of analog module responses.
A communication fault will be automatically cleared by a command
from the processor if PRL (processor restart lockout) is not selected,
or by pressing the reset switch on the front of the module if PRL is
selected.
Local Fault
Adapter Fault
Adapter Active
ADAPTER
LOCAL
PWRACTIVE FAULT FAULT
Power ON/OFF
Reset Switch
Important:
Troubleshooting with the
Indicator Lights
Cycling power to the adapter will also reset faults.
However, any queued block transfers will be lost, and
all outputs will turn off, regardless of the position of the
last state switch.
The module has indicators on the front plate as shown below. Use
these indicators for troubleshooting the module. The following tables
describes problems that may occur, probable causes, and
recommended courses of action.
Publication 1794ĆUM009D-EN-P - April 2004
4–2
Troubleshooting
Table 4.A
Remote I/O System Troubleshooting Guide
Local Fault
Adapter Fault
Adapter Active
PWR
ACTIVE
ADAPTER
LOCAL
FAULT FAULT
Communication States and Module Display
Local
Fault
Adapter
Fault
Adapter
Active
Off
Off
On
Off
Off
Off
Off
Off
Operating State
Actions
Fault Reset
Normal Communications
Outputs enabled.
Communicating with scanner
Not applicable
Blinking
Program or Test mode
Outputs disabled
Communicating with scanner
Sending current input status
back to scanner.
Not applicable
Off
Communication (lack of
communications)
All modules; digital outputs in the
rack follow HLS setting.
Resume proper communications (if no
Refer to page 2-9 for analog
processor restart lockout)
output action.
Processor lockout in effect
during communications by
scanner
Outputs follow last state switch
setting.
No replies sent to scanner
Blinking alternately
Press Reset button on front of adapter
module (or cycle power) and resume
proper communication.
Module Faults
Local
Fault
Adapter
Fault
Adapter
Active
On
On
Off
Noise problems on I/O bus
All outputs off. Communications off.
Cycle power. (This fault is a fatal
fault.)
On
Off
Following
Link
Status
Different module installed
replacing removed module.
Old inputs maintained. Outputs set
to zero.
AutoĆreset when incorrect module
is removed; or cycle power to
establish new identification for
module.
Blinking
Off
On
Module not responding.
Possibly module removed
under power. Only module
removed is affected.
Module not responding: Old inputs
maintained. Outputs set to zero.
All other modules: Outputs active
(enabled).
Sending current input status back
to scanner.
Replace
same module; or cycle
p
y
power to establish new
identification for module.
Processor in RUN mode
Rack Fault Select NOT enabled
Fault Condition
Publication 1794ĆUM009D-EN-P - April 2004
Actions
Fault Reset
Troubleshooting
4–3
Module Faults
Local
Fault
Adapter
Fault
Adapter
Active
Blinking
OFF
Blinking
Processor in PROG/TEST mode
Rack Fault Select NOT enabled
Blinking
Off
Blinking
Processor in RUN/PROG/TEST
Rack Fault Select enabled
Fault Condition
Actions
Fault Reset
Module not responding.
Possibly module removed
under power. Only module
removed is affected.
Module not responding: Old inputs
maintained. Outputs set to to zero.
All other modules: Outputs
disabled.
Sending current input status back
to scanner.
Module not responding.
Possibly module removed
under power. Only module
removed is affected.
Module not responding. All outputs
set to 0.
All other modules; digital outputs in Replace
p
same module; or cycle
y
the rack follow HLS
S setting.
power to establish new
Refer to page 2-9 for analog output identification for module.
action.
No replies sent to scanner.
Replace
same module; or cycle
p
y
power to establish new
identification for module.
Configuration Faults
Local
Fault
Off
Adapter
Fault
Adapter
Active
Blinking in unison
On
On
On
On
Off
Actions
Fault Reset
Incorrect starting I/O group number.
Incorrect baud rate setting.
Another adapter on the link has the
same address.
Blinking in sequence
Blinking
Fault Condition
Illegal module placement - compact
addressing mode selected.
Not applicable.
Turn power off. Set SW1 and
SW2 correctly.
correctly Turn power on
on.
Not applicable.
Correct module placement
and cycle power.
Additional Faults and Module Displays
Local
Fault
Off
Adapter
Fault
On
Adapter
Active
Off
Chapter Summary
Fault Condition
Actions
Fault Reset
Random Access Memory fault.
Reset outputs. Stop
communicating on remote I/O
link.
Read Only Memory fault (on
powerup only).
Outputs remain reset.
Communication never starts.
Internal watchdog timer timed
out.
Try to reset outputs. Stops
communicating on the remote I/O
link.
Cycle power. (This may not
correct fault.)
If this does not correct the fault,
replace the module with a known
good module,
module and return the bad
module to the factory for repair.
In this chapter you learned how to use the indicators on the front of
the module to troubleshoot your module.
Publication 1794ĆUM009D-EN-P - April 2004
4–4
Troubleshooting
Publication 1794ĆUM009D-EN-P - April 2004
1794ĆASB Series E Specifications
Note: This adapter cannot be used with PLCĆ2 processors This adapter can communicate with FLEX Integra analog
modules and 32-point FLEX modules.
I/O Capacity
8 modules
Power Supply
Note: In order to comply with CE Low Voltage Directives, you must use a Safety
Extra Low Voltage (SELV) or a Protected Extra Low Voltage (PELV) power supply to
power this adapter.
Input Voltage Rating
24V dc nominal
Input Voltage Range
11.0V to 31.2V dc (includes 5% ac ripple)
Communication Rate
57.6k bps
115.2k bps
230.4k bps
Indicators
Power - green
Adapter Active - green
Adapter fault - red
Local fault - red
Flexbus Output Current
640mA maximum
Isolation Voltage
500V ac between user power and flexbus
Power Consumption
330mA at 24V; 730mA at 12V
Power Dissipation
4.6W maximum @ 31.2V dc
Thermal Dissipation
15.7 BTU/hr @ 31.2V dc
Environmental Conditions
Operating
Temperature
IEC 60068-2-1 (Test Ad, Operating Cold)
IEC 60068-2-2 (Test Bd, Operating Dry Heat)
IEC 60068-2-14 (Test Nb, Operating Thermal Shock)
32 to 131°F (0 to 55°C)
Storage Temperature
IEC 60068-2-1 (Test Ab, Unpackaged, Nonoperating Cold)
IEC 60068-2-2 (Test Bb, Unpackaged, Nonoperating Dry Heat)
IEC 60068-2-14 (Test Na, Unpackaged, Nonoperating Thermal Shock)
-40 to 185°F (-40 to 85°C)
Relative Humidity
IEC 60068-2-30 (Test Db, Unpackaged, Nonoperating Damp Heat)
5 to 95%, noncondensing
Shock
Operating
Nonoperating
IEC 60068-2-27 (Test Ea, Unpackaged Shock)
30g
50g
Vibration
IEC 60068-2-6 (Test Fc, Operating)
5g @ 10-500Hz
ESD Immunity
IEC 61000-4-2
4kV contact discharges
8kV air discharges
Radiated RF Immunity
IEC 61000-4-3
10V/m with 1kHz sine-wave 80% AM from 30MHz to 2000MHz
EFT/B Immunity
IEC 61000-4-4
+4kV @ 2.5kHz on power ports
+2kV @ 5kHz on communications ports
Specifications continued on next page
Publication 1794ĆĆUM009D-EN-P - April 2004
A–2
Specifications
1794ĆASB Series E Specifications
Surge Transient Immunity
IEC 61000-4-5
+1kV line-line (DM) and +2kV line-earth (CM) on signal ports
Conducted RF Immunity
IEC 61000-4-6
10V rms with 1kHz sine wave 80% AM from 150kHz to 80MHz
Emissions
CISPR 11
Group 1, Class A (with appropriate enclosure)
Enclosure Type Rating
None (open-style)
Remote I/O Cable
Belden 9463 or equivalent as specified in publication ICCGĆ2.2
Remote I/O Connector Plug
Part Number 942029-03
Power Conductors
Wire Size
Category
Agency Certification
(when product is marked)
12 gauge (4mm2) maximum sokid or stranded wire rated at 75oC or greater
3/64 inch (1.2mm) insulation max.
21
UL
UL Listed Industrial Control Equipment
UL
UL Listed for Class I, Division 2 Group A, B, C and D Hazardous Locations
CSA
CSA Certified Process Control Equipment for Class I, Division 2 Group A, B,
C, D Hazardous Locations
EEx2 European Union 94/9/EEC ATEX Directive, compliant with
EN 50021; Potentially Explosive Atmospheres, Protection n"
European Union 89/336/EEC EMC Directive, compliant with:
CE2
EN 50081-2, Industrial Emissions
EN 50082-2, Industrial Immunity
EN 61326, Meas./Control/Lab., Industrial Requirements
EN 61000-6-2, Industrial Immunity
C-Tick2 Australian Radiocommunications Act,compliant with:
AS/NZS 2064, Industrial Emissions
Publications
Installation Instructions 1794-IN046
1 Use this conductor category information for planning conductor routing. Refer to publication
1770Ć4.1, Industrial Automation Wiring and Grounding Guidelines."
2 See the Product Certification link at www.ab.com for Declarations of Conformity, Certificates and
other certification details
Publication 1794ĆĆUM009D-EN-P - April 2004
Specifications
A–3
European Zone 2 Certification
This equipment is intended for use in potentially explosive atmospheres as defined by
European Union Directive 94/9/CE.
The LCIE (Laboratoire Central des Industries Electriques) certifies that this equipment has
been found to comply with the Essential Health and Safety Requirements relating to the
design and construction of Category 3 equipment intended for use in potentially explosive
atmospheres, given in Annex II to this Directive. The examination and test results are
recorded in confidential report No. 28 682 010.
Compliance with the Essential Health and Safety Requirements has been assured by
compliance with EN 50021 (1999).
IMPORTANT
Observe the following additional Zone 2 certification requirements:
• This equipment is not resistant to sunlight or other sources of UV
radiation.
• The secondary of a current transformer shall not be open-circuited.
• The marking ALCR" is to be considered as applicable" to individual
products.
• Equipment of lesser Enclosure Type Rating must be installed in an
enclosure providing at least IP54 protection when applied in Class I,
Zone 2 environments.
• This equipment must be powered by energy limited associated
equipment as defined in EN 50021 when applied in Class I, Zone 2
environments.
• Provision shall be made to prevent the rated voltage from being
exceeded by transient disturbances of more than 40% when applied in
Class I, Zone 2 environments.
Publication 1794ĆĆUM009D-EN-P - April 2004
A–4
Specifications
Publication 1794ĆĆUM009D-EN-P - April 2004
Appendix
B
Differences Between Remote
I/O Adapter Series A, B, C, D
and E
Major differences between adapter series are indicated in the
following table.
Series A
Series B
Processor compatibility
Can be used with PLCĆ2 processors
Standard Mode - Analog
module removal under
power
Block transfers continue
when a block transfer
module is removed from
its base.
Local Fault Indication
Local Fault Indicator only
Series C
Series D
Series E
Cannot be used with PLCĆ2 processors
Ceases to do block transfers and a block transfer bit is set when a block transfer
module is removed from the chassis. This error bit provides feedback to the
processor that a block transfer module has been removed.
With Rack Fault Select enabled, local fault indication sent to
scanner, and local fault indicator lighted. With Rack Fault
Select disabled, local fault indicator lights.
No complementary addressing
Addressing
Standard mode of addressing only
Three modes of addressing:
Standard Compact,
Compact and
Standard,
Complementary
Five modes of
addressing:
Standard, Compact,
Complementary,
Standard 32, and
Complementary 32
Hold Inputs
When hold inputs is
enabled, the adapter
retains the last memory
image present when a
module is removed from
the terminal base.
The hold inputs feature applies only to digital modules. When hold inputs is enabled,
the adapter retains the last memory image present when a digital module is removed
from the terminal base. This feature does not apply to analog modules. If you
need this feature for analog modules, you must simulate it in your programming.
European Union
Directives Compliance
Does not comply with
European Union
Directives. NO CE mark.
Complies with European Union Directives. Has CE mark.
Module Removal and
Insertion Under Power
(RIUP)
Always enabled.
Recognize 1793 Integra
analog modules
Cannot recognize 1793 Integra analog modules
No module removal and insertion under power when Rack
Fault Select is enabled.
Can recognize 1793 Integra analog
modules
Publication 1794ĆĆUM009D-EN-P - April 2004
B–2
Differences Between Remote I/O Adapter Series A, B, C, D and E
Publication 1794ĆĆUM009D-EN-P - April 2004
Appendix
C
Safety Approvals
The following information applies when operating this equipment in hazardous locations:
Products marked CL I, DIV 2, GP A, B, C, D" are suitable for use in Class I Division 2 Groups A, B, C, and D
Hazardous Locations and nonhazardous locations only. Each product is supplied with markings on the rating
nameplate indicating the hazardous location temperature code. When combining products within a system, the
most adverse temperature code (lowest T" number) may be used to help determine the overall temperature code
of the system. Combinations of equipment in your system are subject to investigation by the local Authority Having
Jurisdiction at the time of installation.
WARNING
!
EXPLOSION HAZARD • Do not disconnect equipment unless power has been removed or the area is known to
be nonhazardous.
• Do not disconnect connections to this equipment unless power has been removed or
the area is known to be nonhazardous. Secure any external connections that mate to
this equipment by using screws, sliding latches, threaded connectors, or other means
provided with this product.
• Substitution of components may impair suitability for Class I, Division 2.
• If this product contains batteries, they must only be changed in an area known to be
nonhazardous.
Informations sur l'utilisation de cet équipement en environnements dangereux:
Les produits marqués CL I, DIV 2, GP A, B, C, D ne conviennent que une utilisation en environnements de Classe I
Division 2 Groupes A, B, C, D dangereux et non dangereux. Chaque produit est livré avec des marquages sur sa
plaque d'identification qui indiquent le code de température pour les environnements dangereux. Lorsque plusieurs
produits sont combinés dans un systéme, le code de température le plus défavorable (code de température le plus
faible) peut eatre utilisé pour déterminer le code de température global du systéme. Les combinaisons
d'equipements dans le systéme sont sujettes à inspection par les autorités locales qualifiées au moment de
l'installation.
AVERTISSEMENT
!!
RISQUE D'EXPLOSION • Couper le courant ou s'assurer que l'environnement est classé non dangereux avant
de débrancher l'équipement.
• Couper le courant ou s'assurer que l'environnement est classé non dangereux avant
de débrancher les connecteurs. Fixer tous les connecteurs externes reliés à cet
équipement à l'aide de vis, loquets coulissants, connecteurs filetés ou autres moyens
fournis avec ce produit.
• La substitution de composants peut rendre cet équipement inadapté à une utilisation
en environnement de Classe 1, Division 2.
• S'assurer que l'environnement est classé non dangereux avant de changer les piles.
Publication 1794ĆĆUM009D-EN-P - April 2004
C–2
Safety Approvals
Publication 1794ĆĆUM009D-EN-P - April 2004
Index
A
adapter switch settings, 2-8
L
last chassis switch, 2-9
addressing, 32 point standard, 3-7, 3-15
addressing mode selection switches, 2-9
addressing modes, 3-2
B
block transfer
read, 1-2
write, 1-2
C
communication rate switch, 2-10
compact mode, 3-8
complementary addressing mode, 3-12
complementary rack switch settings, 2-15
components, hardware, 1-3
connecting wiring, 2-7
D
data table mapping, 3-16
defining racks in Flex I/O, 3-17
determining rack size, 3-16
diagnostic indicators, 1-3
F
fault conditions, 4-1
M
mapping, data into image tables, 3-16
mode
addressing, 3-2
compact, 3-8
complementary addressing, 3-12
standard, 3-6
mode selection switches, 2-12
mode switches, 2-9
mounting on a DIN rail
before installing terminal bases, 2-3
on an existing system, 2-4
mounting on a wall or panel, 2-5
P
power requirements, 2-3
primary rack switch settings, with
complementary, 2-15
processor lockout switch, 2-10
R
rack definition, 3-17
rack image, 3-16
remote I/O cable, connecting the wiring,
2-7
removing the adapter, 2-4
replacing an adapter, 2-4
H
hold inputs, 2-8
S
hold inputs switch, 2-8
safe state values, 3-18
hold last state switch, 2-10
selecting the mode, 2-12
setting the address switches, 2-13, 2-15
I
I/O rack number, 2-8
I/O rack number switches, 2-8
indicators, 4-1
specifications, A-1
standard mode, 3-6
starting I/O group, 2-8
switch settings, 2-8
Publication 1794ĆUM009D-EN-P - April 2004
I–2
Index
troubleshooting, fault conditions, 4-1
troubleshooting guide, 4-2
troubleshooting indicators, 4-1
Publication 1794ĆUM009D-EN-P - April 2004
AllenĆBradley
Publication Problem Report
If you find a problem with our documentation, please complete and return this form.
Remote I/O Adapter User Manual
Pub. Name
Cat. No.
1794ĆASB/E
Check Problem(s) Type:
Pub. No.
1794ĆUM009D-EN-P
Pub. Date
Aprio 2004
Part No.
Describe Problem(s):
Internal Use Only
Technical Accuracy
text
Completeness
procedure/step
illustration
definition
info in manual
example
guideline
feature
(accessibility)
explanation
other
What information is missing?
illustration
info not in
manual
Clarity
What is unclear?
Sequence
What is not in the right order?
Other Comments
Use back for more comments.
Your Name
Location/Phone
Return to: Marketing Communications, AllenĆBradley Co., 1 AllenĆBradley Drive, Mayfield Hts., OH 44124Ć6118
Publication ICCGĆ5.21ĆMay 1990
Phone:
FAX:
(216)646Ć3176
(216)646Ć4320
PN 955107Ć82
Other Comments
PLEASE REMOVE
I–2
PLEASE FOLD HERE
NO POSTAGE
NECESSARY
IF MAILED
IN THE
UNITED STATES
BUSINESS
REPLY MAIL
FIRST-CLASS MAIL PERMIT NO. 18235 CLEVELAND OH
POSTAGE WILL BE PAID BY THE ADDRESSEE
TECHNICAL COMMUNICATION
1 ALLEN BRADLEY DR
MAYFIELD HEIGHTS OH 44124-9705
Publication 1794ĆUM009D-EN-P - April 2004
Publication 1794ĆUM009D-EN-P - April 2004
Publication 1794ĆUM009D-EN-P - April 2004
Support Services
At Allen-Bradley, customer service means experienced
representatives at Customer Support Centers in key cities throughout
the world for sales service and support. Our value-added services
include:
Technical Support
•
•
•
•
SupportPlus programs
telephone support and 24-hour emergency hotline
software and documentation updates
technical subscription services
Engineering and Field Services
•
•
•
•
application engineering assistance
integration and start-up assistance
field service
maintenance support
Technical Training
•
•
•
•
lecture and lab courses
self-paced computer and video-based training
job aids and workstations
training needs analysis
Repair and Exchange Services
•
•
•
•
your only “authorized” source
current revisions and enhancements
worldwide exchange inventory
local support
Publication 1794ĆUM009D-EN-P - April 2004
AllenĆBradley, a Rockwell Automation Business, has been helping its customers improve
productivity and quality for more than 90 years. We design, manufacture and support a broad
range of automation products worldwide. They include logic processors, power and motion
control devices, operator interfaces, sensors and a variety of software. Rockwell is one of the
world's leading technology companies.
Worldwide representation.
Argentina • Australia • Austria • Bahrain • Belgium • Brazil • Bulgaria • Canada • Chile • China, PRC • Colombia • Costa Rica • Croatia • Cyprus • Czech Republic •
Denmark • Ecuador • Egypt • El Salvador • Finland • France • Germany • Greece • Guatemala • Honduras • Hong Kong • Hungary • Iceland • India • Indonesia •
Ireland • Israel • Italy • Jamaica • Japan • Jordan • Korea • Kuwait • Lebanon • Malaysia • Mexico • Netherlands • New Zealand • Norway • Pakistan • Peru •
Philippines • Poland • Portugal • Puerto Rico • Qatar • Romania • Russia-CIS • Saudi Arabia • Singapore • Slovakia • Slovenia • South Africa, Republic • Spain •
Sweden • Switzerland • Taiwan • Thailand • Turkey • United Arab Emirates • United Kingdom • United States • Uruguay • Venezuela • Yugoslavia
AllenĆBradley Headquarters, 1201 South Second Street, Milwaukee, WI 53204 USA, Tel: (1) 414 382Ć2000 Fax: (1) 414 382Ć4444
Publication 1794ĆUM009D-EN-P - April 2004
Supersedes publication 1794ĆUM009C-EN-P - MARCH 2003
Copyright 2004 AllenĆBradley Company, Inc. Printed in USA
Publication 1794ĆUM009D-EN-P - April 2004