1
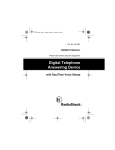
43-932.fm Page 1 Wednesday, January 12, 2000 9:56 AM
Cat. No. 43-932
OWNER’S MANUAL
Please read before using this equipment.
CID-932
Talking Caller ID
43-932.fm Page 2 Wednesday, January 12, 2000 9:56 AM
FEATURES
Your RadioShack CID-932 Voice Caller ID uses the latest caller
identification technology. The CID-932 announces the caller’s
telephone number only and displays all available information.
The CID-932 stores and displays up to 50 single (number only)
or multiple (name and number) Caller ID records and lets you
review them at any time.
It also has these features:
Audio Announcement of Incoming Calls — announces the
telephone number of the calling party twice after the first ring.
Voice VIP Messages — lets you record a message to go with
each of up to 15 VIP phone numbers, then announces the corresponding message whenever you receive a call from one of
those numbers.
Volume Control — lets you adjust the volume of the CID-932’s
announcements.
New Call Indicator — flashes when you receive a new call.
Extra Large 3-Line Liquid Crystal Display — makes it easy to
read the Caller ID information.
© 2000 Tandy Corporation.
All Rights Reserved.
RadioShack is a registered trademark used by Tandy Corporation.
2
43-932.fm Page 3 Wednesday, January 12, 2000 9:56 AM
This CID-932 has been tested and found to comply with all applicable UL and FCC standards.
WARNING: To reduce the risk of fire or shock hazard, do not expose this product to rain or moisture.
CAUTION
RISK OF ELECTRIC SHOCK.
DO NOT OPEN.
!
CAUTION: TO REDUCE THE RISK OF ELECTRIC SHOCK,
DO NOT REMOVE COVER OR BACK. NO USER-SERVICEABLE PARTS INSIDE. REFER SERVICING TO QUALIFIED
PERSONNEL.
This symbol is intended to alert you to the presence of uninsulated dangerous voltage within the
product’s enclosure that might be of sufficient
magnitude to constitute a risk of electric shock.
Do not open the product’s case.
!
This symbol is intended to inform you that important operating and maintenance instructions are
included in the literature accompanying this product.
3
43-932.fm Page 4 Wednesday, January 12, 2000 9:56 AM
Important Information:
• To use this Caller ID, you must be in an area where Caller
ID service is available, and you must subscribe to the service.
• Where Caller ID is offered, one or more of the following
options are generally available:
–
caller’s number only
–
caller’s name only
–
caller’s name and number
Your Caller ID displays the caller’s name only if that option
is available in your area.
The actual number of Caller ID records your Caller ID will store
depends on the amount of Caller ID information sent by the
phone company.
FCC INFORMATION
We have designed your CID-932 to conform to federal regulations, and you can connect it to most telephone lines. However,
each device, such as a telephone or answering machine that
you connect to the telephone line draws power from the telephone line. We refer to this power draw as the device’s ringer
equivalence number, or REN. The REN is on the bottom of your
device.
4
43-932.fm Page 5 Wednesday, January 12, 2000 9:56 AM
If you use more than one phone or other device on the line, add
up all of the RENs. If the total is more than five (or three in rural
areas), your telephones might not ring. If ringer operation is impaired, remove a device from the line.
Your CID-932 complies with Part 68 of FCC Rules. You must,
upon request, provide the FCC registration number and the
REN to your telephone company. Both numbers are located on
the bottom of your CID-932.
Note: You must not connect your CID-932 to:
• coin-operated systems
• party-line systems
• most electronic key telephone systems
Your telephone company may make changes in its facilities,
equipment, operations or procedures that could affect the proper functioning of your equipment. If they do, you will be notified
in advance to give you an opportunity to maintain uninterrupted
telephone service.
This equipment complies with the limits for a Class B digital device as specified in Part 15 of FCC Rules. These limits provide
reasonable protection against radio and TV interference in a
residential area.
5
43-932.fm Page 6 Wednesday, January 12, 2000 9:56 AM
However, your equipment might cause TV or radio interference
even when it is operating properly. To eliminate interference,
you can try one or more of the following corrective measures:
• reorient or relocate the receiving antenna
• increase the distance between the equipment and the radio
or TV
• use outlets on different electrical circuits for the equipment
and the radio or TV
Consult your local Radio Shack store if the problem still exists.
IMPORTANT SAFETY INSTRUCTIONS
When using your telephone equipment, basic safety precautions should always be followed to reduce the risk of fire, electric shock and injury to persons, including the following:
1. Read and understand all instructions.
2. Follow all warnings and instructions marked on the product.
3. Unplug this product from the wall outlet before cleaning. Do
not use liquid cleaners or aerosol cleaners. Use a damp
cloth for cleaning.
4. Do not use this product near water, for example, near a
bath tub, wash bowl, kitchen sink, or laundry tub, in a wet
basement, or near a swimming pool.
6
43-932.fm Page 7 Wednesday, January 12, 2000 9:56 AM
5. Do not place this product on an unstable cart, stand, or
table. The product may fall, causing serious damage to the
product.
6. Slots and openings in the cabinet and the back or bottom
are provided for ventilation, to protect it from overheating,
these openings must not be blocked or covered. The openings should never be blocked by placing the product on a
bed, sofa, rug, or other similar surface. This product should
never be placed near or over a radiator or heat register.
This product should not be placed in a built-in installation
unless proper ventilation is provided.
7. This product should be operated only from the type of
power source indicated on the marking label. If you are not
sure of the type of power supplied to your home, consult
your dealer or local power company.
8. Do not allow anything to rest on the power cord. Do not
locate this product where the cord will be abused by persons walking on it.
9. Do not overload wall outlets and extension cords as this
can result in the risk of fire or electric shock.
10. Never push objects of any kind into this product through
cabinet slots as they may touch dangerous voltage points
or short out parts that could result in a risk of fire or electric
shock. Never spill liquid of any kind on the product.
11. Do not use the telephone to report a gas leak in the vicinity
of the leak.
7
43-932.fm Page 8 Wednesday, January 12, 2000 9:56 AM
12. To reduce the risk of electric shock, do not disassemble
this product; take it to a qualified serviceman when service
or repair work is required. Opening or removing covers
may expose you to dangerous voltages or other risks.
Incorrect re-assembly can cause electric shock when the
appliance is subsequently used.
13. Unplug this product from the wall outlet and refer servicing
to qualified service personnel under the following conditions:
a. When the power supply cord or plug is damaged or
frayed.
b. If liquid has been spilled into the product.
c. If the product has been exposed to rain or water.
d. If the product does not operate normally by following
the operating instructions. Adjust only those controls
that are covered by the operating instructions because
improper adjustment of other controls may result in
damage and will often require extensive work by a qualified technician to restore the product to normal operation.
e. If the product has been dropped or the cabinet has
been damaged.
f. If the product exhibits a distinct change in performance.
14. Avoid using a telephone (other than a cordless type) during
an electrical storm. There may be a remote risk of electric
shock from lightning.
8
43-932.fm Page 9 Wednesday, January 12, 2000 9:56 AM
CONTENTS
Preparation ..........................................................................
Installing a Battery .........................................................
Mounting the CID-932 ...................................................
Attaching the Bracket .............................................
Mounting on a Wall ................................................
Connecting the CID-932 ................................................
Setting the Time and Date .............................................
10
10
11
11
12
13
15
Operation .............................................................................
Receiving a Call .............................................................
Adjusting the Volume .....................................................
Turning the Speaker On or Off ...............................
Caller ID Messages .......................................................
Reviewing Caller ID Records .........................................
With Voice Announcements ...................................
Without Voice Announcements ..............................
Deleting Caller ID Records ............................................
VIP Call List ...................................................................
Recording Voice VIP Messages .............................
Reviewing and Re-recording Voice VIP Messages
Deleting Voice VIP Messages ................................
Care ...............................................................................
The FCC Wants You to Know .......................................
Lightning ........................................................................
16
16
16
16
17
18
18
18
19
19
19
20
21
22
23
23
9
43-932.fm Page 10 Wednesday, January 12, 2000 9:56 AM
PREPARATION
INSTALLING A BATTERY
You need one 9V battery (not supplied) to provide backup power for the CID-932’s memory in the event of a power failure. For
the best performance, we recommend an alkaline battery, available at your local RadioShack store.
Cautions:
• Use only a fresh battery of the required size and recommended type.
• Always remove old or weak batteries. They can leak chemicals that can damage electronic circuits.
Follow these steps to install the battery.
9 VOLT BATTER Y
Note: The screw is packed separately. Insert the screw into the
battery compartment cover when you first install the battery.
1. Use a small Phillips screwdriver to remove the screw from
the battery compartment cover.
2. Lift the cover in the direction of the arrow.
3. Place a fresh battery in the compartment, as indicated by
the polarity symbols (+ and –) marked inside.
4. Replace the battery compartment cover and tighten the
screw.
10
43-932.fm Page 11 Wednesday, January 12, 2000 9:56 AM
Notes:
• If you are not installing the battery for the first time, press
any control button and LOW disappears.
• Replace the battery when
LOW
appears.
• Replace the battery within 15 seconds to avoid losing
Caller ID information and Voice VIP messages that are
stored in memory.
Warning: Dispose of old batteries promptly and properly. Do
not burn or bury them.
Caution: If you do not plan to use the CID-932 with batteries for
a month or longer, remove the batteries. Batteries can leak
chemicals that can destroy electronic parts.
MOUNTING THE CID-932
You can set the CID-932 flat on a desk, shelf, or table or attach
the supplied bracket if you want the CID-932 to sit up at an angle. You can mount the CID-932 on a wall.
Attaching the Bracket
1. Align the two slots on the
bottom of the CID-932 with
the hooks on the bracket.
ON
R
KE
F
OF PEA
S
11
43-932.fm Page 12 Wednesday, January 12, 2000 9:56 AM
2. Insert the hooks into the slots and gently push the CID-932
down on the bracket to snap the bracket onto the CID-932.
To remove the bracket, firmly hold the CID-932 and pull up on
the top of the bracket.
Mounting on a Wall
To mount the CID-932 on a wall, you need two screws (not supplied) with heads that fit into the keyhole slots on the back of the
CID-932.
ON
OFF
2. Insert a screw into each hole, letting the
head extend 1/8 inch from the wall.
SPEAKER
1. Use the supplied template to mark the
mounting screw locations on the wall.
Then drill a hole in the wall at each
marked location.
1
/8"
3. Connect the CID-932. See “Connecting
the CID-932” on Page 13.
4. Align the keyhole slots on the CID-932 with the screws and
slide it down.
12
43-932.fm Page 13 Wednesday, January 12, 2000 9:56 AM
CONNECTING THE CID-932
The CID-932 connects to a modular phone line jack and your
telephone.
1. Unplug the telephone line cord from your telephone and
plug it into the CID-932’s PHONE jack.
2. Plug the supplied line cord into the CID-932’s LINE jack
and the other end into the modular phone line jack.
Note: The CID-932 must be connected directly to the telephone line. To share the same wall jack with a fax, modem
or answering machine, use a duplex adapter (available at
your local RadioShack store) to split the wall jack so it can
feed the CID-932 directly.
13
43-932.fm Page 14 Wednesday, January 12, 2000 9:56 AM
Cautions:
You must use a Class 2 power source that supplies 9V DC and delivers at least 300 mA. Its center tip must be set to positive and its plug must fit
the CID-932's DC9V jack. The supplied adapter meets
these specifications. Using an adapter that does not meet
these specifications could damage the CID-932 or the
adapter.
!
• Always connect the AC adapter to the CID-932 before you
connect it to AC power. When you finish, disconnect the
adapter from AC power before you disconnect it from the
CID-932.
3. Insert the supplied AC adapter’s barrel plug into the DC9V
jack on the bottom of the CID-932. Plug the AC adapter
into a nearby outlet that does not operate with a light
switch.
Note: AC power is required in order for the CID-932’s voice
feature to function. Be sure to connect AC power.
14
43-932.fm Page 15 Wednesday, January 12, 2000 9:56 AM
SETTING THE TIME AND DATE
The time and date are automatically set when the CID-932 first
receives a call. Subsequently, each incoming call automatically
updates the time and date.
To change the time and date follow these steps.
1. Hold down REVIEW8and9 for about 6 seconds until
the hour segment flashes.
2. Press REVIEW8or9to change the hour digit.
3. Press DELETE to confirm. The minute digits flash.
4. Repeat Steps 2–3 to set the minutes, day, and month.
The display returns to standby and the CID-932 is ready to receive calls.
15
43-932.fm Page 16 Wednesday, January 12, 2000 9:56 AM
OPERATION
RECEIVING A CALL
After the first ring, the CID-932 displays the caller’s telephone
number (and name, if available) and the date and time of the
call for about one minute, and announces the caller’s phone
number (or a recorded Voice VIP message, if one has been assigned to that number). The NEW CALL indicator flashes, and
the number of new and total calls appear.
Note: The ringer of a connected phone does not sound while
the CID-932 is making voice announcements.
ADJUSTING THE VOLUME
You can adjust the CID932’s volume at any time.
Repeatedly press VOLUME
until the desired level (OFF,
LOW, or HIGH) appears.
DELETE
REVIEW
VOICE VIP
MODE
VOLUME
PLAY
RECORD
Turning the Speaker On or Off
You can also turn the CID-932’s
speaker on or off by sliding
SPEAKER, located on the right
side, to ON or OFF.
16
OF
F
SP
EA
ON
R
KE
43-932.fm Page 17 Wednesday, January 12, 2000 9:56 AM
CALLER ID MESSAGES
Display
Description
LONG DISTANCE
Appears if your phone company
sends information indicating that
the incoming call is long distance.
PRIVATE CALL
Appears when the caller has
blocked the number.
NO CALL
There are no Caller ID records.
ERROR
Appears when there is an error in
transmission or reception of a call.
RPT #
Appears when two or more calls
have been received from the same
number. Repeat calls do not cause
the number of new or total calls to
increase.
CALLER UNKNOWN
The call is not within a Caller ID
service area.
CALL FORWARD
The call was forwarded to you from
another number.
17
43-932.fm Page 18 Wednesday, January 12, 2000 9:56 AM
REVIEWING CALLER ID RECORDS
The CID-932 stores the number,
name, date and time of up to 50
calls, then begins replacing the
oldest call record with each new
one received. You can review
call records, with or without voice
announcements any time the
CID-932 is not receiving a call.
DELETE
REVIEW
VOICE VIP
MODE
VOLUME
PLAY
RECORD
With Voice Announcements
Press PLAY. The CID-932 announces only new calls, starting
with the newest.
If a telephone number is on the VIP Call list, the Voice VIP message for that number plays instead of the number.
After the CID-932 announces the last number (or Voice VIP
message), END OF RCV appears for about 20 seconds, then
the CID-932 is ready to receive new calls.
Without Voice Announcements
Repeatedly press REVIEW9to see the Caller ID information
starting from the newest call, or REVIEW8to start from the
oldest call. The CID-932 displays the number, name, and time
of each call, then END OF RCV appears for about 20 seconds,
then the CID-932 is ready to receive new calls.
18
43-932.fm Page 19 Wednesday, January 12, 2000 9:56 AM
DELETING CALLER ID RECORDS
To delete an individual call record, press DELETE twice while
the number you want to delete is displayed. The deleted number disappears and the next number in the CID-932’s memory
appears.
DELETE
REVIEW
VOICE VIP
MODE
VOLUME
PLAY
RECORD
To delete all call records, hold down DELETE for at least six
seconds until NO CALL appears.
VIP CALL LIST
You can record a Voice VIP message for any telephone number
in the CID-932’s memory (up to 15 messages). The CID-932
plays the message whenever you receive a call from that number. You can review, re-record, or delete Voice VIP messages
any time the CID-932 is not receiving a call.
Recording Voice VIP Messages
1. Repeatedly press REVIEW8or9 to scroll through the
Caller ID records until the desired telephone number
appears.
19
43-932.fm Page 20 Wednesday, January 12, 2000 9:56 AM
2. Press RECORD and begin speaking immediately after the
beep. RECORDING appears.
3. Record your message within 2 seconds. The CID-932
immediately plays back the message, and displays the
telephone number, then the message OK? PRESS
RECORD appears.
4. To accept the message, press RECORD again.
If you want to re-record the message, press DELETE, then
repeat the recording process.
If there is already a Voice VIP message for that number,
the CID-932 beeps twice and ALREADY EXISTS
appears. See “Reviewing and Re-recording Voice VIP
Messages”.
If the VIP Call List is full, the CID-932 beeps twice and
MEMORY FULL appears. You must delete a Voice VIP
message to free a memory location. See “Deleting Voice
VIP Messages” on Page 21.
Repeat the steps above to record another Voice VIP message.
Reviewing and Re-recording Voice VIP
Messages
1. Press VOICE VIP. VIP LIST appears.
2. Repeatedly press REVIEW8or9 to scroll through the
VIP Call list until the desired telephone number appears.
20
43-932.fm Page 21 Wednesday, January 12, 2000 9:56 AM
3. Press PLAY to hear the Voice VIP message for that number.
4. If you want to re-record a message, press RECORD,
record your message within two seconds, then press
RECORD again.
Repeat Steps 2–4 to hear or re-record any other Voice VIP
messages.
Note: If you do not press any button for 20 seconds, the CID932 exits the VIP Call list and is ready to receive new calls.
Press VOICE VIP to exit the call list sooner.
Deleting Voice VIP Messages
Follow these steps to delete a telephone number and its Voice
VIP message from the VIP Call list.
1. Press VOICE VIP. VIP LIST appears.
2. Repeatedly press REVIEW8or9 to scroll through the
VIP Call list until the telephone number you want to delete
appears.
3. Press DELETE. The CID-932 beeps once and DELETE
MSG? appears.
4. If you made a mistake, press REVIEW8or9. Otherwise, press DELETE again to confirm the deletion. First
MSG DELETED, then the next number in the VIP Call list
appears. If there are no more numbers, VIP LIST
appears.
21
43-932.fm Page 22 Wednesday, January 12, 2000 9:56 AM
Repeat Steps 2–4 for other numbers you want to delete from
the VIP Call list.
If you do not press any button for 20 seconds, the CID-932 exits
the VIP Call list and is ready to receive new calls. Press VOICE
VIP to exit the VIP Call list sooner.
CARE
To enjoy your CID-932 for a long time:
• Keep the CID-932 dry. If it gets wet, wipe it dry immediately.
• Use and store the CID-932 only in normal temperature
environments.
• Handle the CID-932 gently and carefully. Don’t drop it.
• Keep the CID-932 away from dust and dirt.
• Wipe the CID-932 with a damp cloth occasionally to keep it
looking new.
Modifying or tampering with the CID-932’s internal components
can cause a malfunction and invalidate its warranty. If your CID932 is not performing as it should, take it to your local RadioShack store for assistance. If the trouble is affecting the telephone lines, the phone company can ask you to disconnect
your CID-932 until you have resolved the problem.
22
43-932.fm Page 23 Wednesday, January 12, 2000 9:56 AM
THE FCC WANTS YOU TO KNOW
In the unlikely event that your phone causes problems on the
phone line, the phone company can temporarily discontinue
your service. If this happens, the phone company attempts to
notify you in advance. If advance notice is not practical, the
phone company notifies you as soon as possible and advises
you of your right to file a complaint with the FCC.
Also, the phone company can make changes to its lines, equipment, operations, or procedures that could affect the operation
of this telephone. The telephone company notifies you of these
changes in advance, so you can take the necessary steps to
prevent interruption of your telephone service.
LIGHTNING
Your telephone has built-in protection circuits to reduce the risk
of damage from surges in telephone line and power line current.
These protection circuits meet or exceed the FCC requirements. However, lightning striking the telephone or power lines
can damage your telephone.
Lightning damage is not common. Nevertheless, if you live in an
area that has severe electrical storms, we suggest that you unplug your phone during storms to reduce the possibility of damage.
23
43-932.fm Page 24 Wednesday, January 12, 2000 9:56 AM
Limited One-Year Warranty
This product is warranted by RadioShack against manufacturing defects in material and
workmanship under normal use for one (1) year from the date of purchase from RadioShack company-owned stores and authorized RadioShack franchisees and dealers.
EXCEPT AS PROVIDED HEREIN, RadioShack MAKES NO EXPRESS WARRANTIES
AND ANY IMPLIED WARRANTIES, INCLUDING THOSE OF MERCHANTABILITY
AND FITNESS FOR A PARTICULAR PURPOSE, ARE LIMITED IN DURATION TO THE
DURATION OF THE WRITTEN LIMITED WARRANTIES CONTAINED HEREIN. EXCEPT AS PROVIDED HEREIN, RadioShack SHALL HAVE NO LIABILITY OR RESPONSIBILITY TO CUSTOMER OR ANY OTHER PERSON OR ENTITY WITH
RESPECT TO ANY LIABILITY, LOSS OR DAMAGE CAUSED DIRECTLY OR INDIRECTLY BY USE OR PERFORMANCE OF THE PRODUCT OR ARISING OUT OF
ANY BREACH OF THIS WARRANTY, INCLUDING, BUT NOT LIMITED TO, ANY DAMAGES RESULTING FROM INCONVENIENCE, LOSS OF TIME, DATA, PROPERTY,
REVENUE, OR PROFIT OR ANY INDIRECT, SPECIAL, INCIDENTAL, OR CONSEQUENTIAL DAMAGES, EVEN IF RadioShack HAS BEEN ADVISED OF THE POSSIBILITY OF SUCH DAMAGES.
Some states do not allow limitations on how long an implied warranty lasts or the exclusion or limitation of incidental or consequential damages, so the above limitations or exclusions may not apply to you.
In the event of a product defect during the warranty period, take the product and the RadioShack sales receipt as proof of purchase date to any RadioShack store. RadioShack
will, at its option, unless otherwise provided by law: (a) correct the defect by product repair without charge for parts and labor; (b) replace the product with one of the same or
similar design; or (c) refund the purchase price. All replaced parts and products, and
products on which a refund is made, become the property of RadioShack. New or reconditioned parts and products may be used in the performance of warranty service. Repaired or replaced parts and products are warranted for the remainder of the original
warranty period. You will be charged for repair or replacement of the product made after
the expiration of the warranty period.
This warranty does not cover: (a) damage or failure caused by or attributable to acts of
God, abuse, accident, misuse, improper or abnormal usage, failure to follow instructions,
improper installation or maintenance, alteration, lightning or other incidence of excess
voltage or current; (b) any repairs other than those provided by a RadioShack Authorized Service Facility; (c) consumables such as fuses or batteries; (d) cosmetic damage;
(e) transportation, shipping or insurance costs; or (f) costs of product removal, installation, set-up service adjustment or reinstallation.
This warranty gives you specific legal rights, and you may also have other rights which
vary from state to state.
RadioShack Customer Relations,
200 Taylor Street, 6th Floor, Fort Worth, TX 76102
We Service What We Sell
01A00
12/99
RadioShack
A Division of Tandy Corporation
Fort Worth, Texas 76102
Printed in China