1
4W315C
Operating Instructions & Parts Manual
Please read and save these instructions. Read carefully before attempting to assemble, install, operate or maintain the product described.
Protect yourself and others by observing all safety information. Failure to comply with instructions could result in personal injury and/or
property damage! Retain instructions for future reference.
Dayton Diesel Electric
Generator
®
Description
Unpacking
Dayton professional-duty generators are rugged and compact. These models provide
dependable, trouble-free service. The alternators are brushless with revolving fields.
Yanmar diesel engines provide long life under heavy use. These engines are governed to
maintain engine speed of 3600 RPM under load. 3600 RPM engine speed provides 120/
240V, 60 Hz power. Additional features include circuit breaker protection, spark-arresting
muffler, large fuel tank, oil alert system, electric starter, and a pressurized lubrication
system.
1. Remove generator from carton.
2. Remove any protective packaging
applied to generator for shipment.
3. Check for loose or missing parts. Check
for shipping damage. If any parts are
missing or damaged, promptly inform
dealer where you bought generator.
4. Battery cables are supplied. These cables
are in a separate bag inside generator
carton. You must install these cables to
engine. See “Battery,” page 7 for
installation instructions.
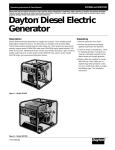
Figure 1 – Model 4W315C
Form 5S3125
®
Printed in U.S.A.
03430
0703/215/VCPVP
Version B - For Reduction
G016.J
4W315C
Dayton Operating Instructions and Parts Manual
Dayton Diesel Electric Generator
®
Specifications
ELECTRICAL SPECIFICATIONS
Rated
Wattage*
Maximum
VA
Rated Amperage
120V
Rated Amperage
240V
5000
6500
41.7
20.8
* Single-phase, 1.0 power factor
NOTE: Ratings apply to SAE standard conditions. Reduce ratings 3 1/2% for each 1000 feet above sea level and 1% for each 10°
Fahrenheit rise above 60°F.
GENERAL SPECIFICATIONS
Yanmar
Engine H.P.
Yanmar
Model
Fuel
Type
Fuel Tank
Capacity
Oil Alert
System
Electric
Start
Weight
(pounds)
10
L100
Diesel
4.2 gal.
Yes
Yes
241
RECEPTACLE SPECIFICATIONS
120V
Duplex
Yes
120V, 30-Amp
Twist-Lock
Yes
120/240V, 20-Amp
Twist-Lock
Yes
120V Full
Power Switch
Yes
ELECTRICAL COMPONENT SPECIFICATIONS
Stator
Main
Winding *
Resistance in Ohms
Stator
Rotor
Auxiliary
Primary
Winding ∆
Winding †
Rotor
Secondary
Winding †
Capacitor,
MFD
450 Volt
Diodes (2)
800 Volt
0.54
1.38
2.29
50
70 Amp
0.61
(*) Connect T2 (green) and T3 (black). Measure resistance between T1 (red) and T4 (yellow).
(∆) Resistance between brown and white leads.
(†) Remove diodes to check resistance.
107358
2
Dayton Operating Instructions and Parts Manual
Model 4W315C
Product Identification
E
F
Full Power
Selector Switch
Control Panel
Roll Cage
120
VO
LT
S
FU
120
ON
LL
PO
WE
LY
Engine Run Lever
R
SEL
ECT
120
OR
0
10
0
AC
OU
TP
UT
VO
/24
0V
120
20
0
VO
LT
S
LT
AG
RU
/24
0 VO
LT
S
ST
30
N
OP
E
120 Volt
Receptacles
Engine Stop Lever
Hour Meter
Fuel Valve (under fuel tank)
120/240 Volt
Receptacle
Alternator
Oil Alert Lamp
Circuit
Breaker
Fuel Gage
Battery Discharge Lamp
Fuel Cap
Electric Start Switch
Fuel Tank
E
Decompression
Lever
F
Starter Grip
Ground
Lug
Spark
Arrester
Engine
Muffler
Oil Dipstick
Figure 2 – Portable Generator
Battery (Not
included, must
be purchased
separately)
®
107358
3
Version B - For Reduction
G016.J
4W315C
Dayton Operating Instructions and Parts Manual
Dayton Diesel Electric Generator
®
General Safety Information
IMPORTANT: Read these instructions and
engine owner’s manual carefully. Become
familiar with generator before trying to
operate or service it. Know its uses,
limitations, and any hazards involved.
Improper use of generator can cause
severe injury or death from explosion, fire,
burns, electrical shock, or carbon monoxide poisoning.
Make certain you read and understand all
warnings. Keep these instructions for
reference. They are your guide to safe and
proper operation of this generator.
Safety information appears throughout
these instructions. Pay close attention to
them. Below are definitions for the safety
information listed throughout this manual.
Under this heading,
installation, operating, and maintenance procedures or
practices will be found that, if not carefully
followed, WILL result in IMMEDIATE
serious personal injury or death.
Under this heading,
installation, operating, and maintenance procedures or
practices will be found that, if not carefully
followed, COULD result in severe personal
injury or death.
Under this heading,
installation, operating, and maintenance procedures or
practices will be found that, if not carefully
followed, MAY result in minor personal
injury, product or property damage.
Engine exhaust
contains poisonous
carbon monoxide gas. Overexposure
will cause loss of consciousness and
will lead to death. Use only in wellvented areas. Make sure area has
plenty of free-moving, fresh, outside
air. Never run generator in an enclosed
or confined area. Never run generator
inside occupied building.
Guard against fire
hazard. Keep
operation area well-vented. Keep
generator at least three feet away
from any object. Do not place flammable objects near generator.
Early signs of carbon monoxide
poisoning resemble the flu, with
headaches, dizziness, or nausea. If you
have these signs, get fresh air at once!
Some people are more affected by
carbon monoxide than others. These
include pregnant women, persons with
heart or lung disease or anemia, those
under the influence of alcohol, and
those at high altitudes.
• Do not use generator in enclosed
spaces. This includes motor home or
RV generator compartments.
Diesel fuel presents a hazard of
fire. Diesel fuel is flammable.
• Properly ground generator before
starting.
• Keep fuel out of children’s reach.
• Refuel generator in a well-vented
area. Do not fill fuel tank in the dark.
Do not refuel while engine is
running. Unhook all electrical loads
and shut off engine before refueling.
• Do not use generator where flammable vapors are present. Some
vapors are heavier than air. These
vapors settle in low-lying places.
Guard against
electric shock.
Generator produces high voltage. This
high voltage can cause severe electric
shock. Only responsible adults should
use the generator.
• Never let anyone operate or service
generator without proper instructions.
• Avoid contact with live terminals or
bare wires.
• Do not use generator outdoors in
rain or snow.
• Do not use generator near standing
water or snow.
• Do not overfill fuel tank. Always
allow room for fuel to expand. If you
overfill tank, fuel can overflow onto
hot generator. This can cause fire.
After refueling, tightly close fuel
tank cap.
• Do not use if generator is wet or
damp.
• Do not spill fuel. If fuel spills, make
sure area is dry before starting
engine.
• Do not use any worn or damaged
electric cords. Electric shock or
damage to generator may result.
• Never smoke in refueling area. Never
allow open flames or sparks in area.
• Store fuel in approved container.
Store fuel in a well-vented area free
of open flames or sparks.
• Do not use generator in highly
conductive areas. These areas include
metal decking and steelwork.
• Only use grounded extension cords.
• On construction sites, you must use a
Ground Fault Circuit Interrupter
(GFCI). This helps guard against
electric shock. OSHA and the National Electrical Code requires this.
• Do not wear damp clothing or wet
shoes when using generator.
107358
4
Dayton Operating Instructions and Parts Manual
Model 4W315C
General Safety Information
(Continued)
Guard against
burns. Hot engine
parts can cause severe injury. Use
caution and remain alert when using
generator.
• Keep children and animals away
from generator while it is running or
hot.
• Keep all covers and shields in place.
Keep them tightly secured.
• The muffler becomes very hot during
operation. The muffler remains hot
for a while after shutdown. Do not
touch muffler while it is hot. Do not
let muffler touch anything flammable. Let engine cool before
transporting or storing.
Have standby
installation to
home or building performed by a
licensed electrician. Do not let anyone
else wire into a utility circuit. Personal
injury, equipment damage, or damage
to home could occur.
Never connect
generator to any
existing electrical circuits. The generator output will back-feed into the
utility power line. This may electrocute
a power company line repair person.
Also, if generator is powering electrical circuits, the chance of an electrical
fire exists.
Battery contains
sulfuric acid.
Battery acid is poisonous if swallowed.
Contact with skin or eyes may cause
severe burns. Do not tilt generator
with battery installed. Tilting could
cause battery acid to spill. Wear
protective clothing and face shield
when servicing. Keep out of children’s
reach.
Only a qualified
electrical service
person should service and repair
generator.
• Generator produces high voltage.
Use extreme caution when working
on electrical parts.
• When working on generator, avoid
hot muffler, exhaust manifold, and
engine parts. Severe burns may
occur.
• Do not work on generator when
tired.
• Use only factory approved replacement parts.
Store generator in
a well-vented area.
Make sure fuel tank is empty. Never
store with fuel in tank.
Never operate
generator
• if engine speed changes greatly
• if engine misfires often
• if powered items overheat
Battery gives off
explosive gases.
Keep sparks, flames, and cigarettes
away. Do not remove or install battery
cables when engine is cranking or
running. Only service or use battery in
a well-vented area.
• if electrical output drops
• if it is sparking
• if it produces smoke or flames
• if it vibrates at high levels
Keep generator
and nearby areas
clean.
• Keep generator free of oil, mud, and
other foreign matter.
• Remove anything that creates
slippery areas around generator.
• Remove oily rags and other items
that create fire hazards.
• Keep a fire extinguisher nearby.
Make sure it is rated ABC by the
NFPA. They are good for all uses.
Consult your local fire department.
• Keep fire extinguisher well maintained. Be familiar with its use.
Know how to stop
engine quickly.
Know how to use all controls.
Prolonged exposure to loud noise
can cause hearing loss.
• When working around generator,
wear approved hearing protection.
• Remember neighbors when using
generator.
Generator Features
OIL ALERT SYSTEM
The oil alert system protects the engine
from low oil damage. This system automatically shuts down the engine and
prevents engine restarting if the oil
pressure falls too low.
If this system shuts down the engine, the
engine will not start until you add oil. The
oil alert lamp is near engine starter switch
(See Figure 3, page 6). Add oil to engine
(See “Engine Oil,” page 8).
See engine owner’s manual for more
information.
• if it has a damaged receptacle
®
107358
5
Version B - For Reduction
G016.J
4W315C
Dayton Operating Instructions and Parts Manual
Dayton Diesel Electric Generator
®
Generator Features
(Continued)
OI
C
OF
R
HA
120/240 VOLT: This position sends full
power to the 120/240V receptacle. It also
powers the 120V receptacles at reduced
wattage capacity.
L
GE
F
Battery
Discharge
Lamp
When protected by the GFCI, you may still
feel a shock, but the GFCI should cut it off
quickly. A person in normal health should
not receive serious injury.
Oil Alert
Lamp
Figure 3 - Battery Discharge Lamp and Oil
Alert Lamp Location
BATTERY DISCHARGE LAMP
The battery discharge lamp (See Figure 3,
above) will light if battery charger is not
operating while engine is running. If this
happens, the battery will not charge and
will eventually run down. Have battery
charging circuit repaired by authorized
service person.
Figure 5 – Full Power Selector Switch in
120/240 Volt Position
IMPORTANT: Do not move the full power
selector switch while powering electrical
items. Unplug all items before moving
switch. Failure to do so can damage switch.
HOUR METER
The hour meter will measure the total run
time of the generator, including all idle
time. Hour meter is accurate up to 1/10 of
an hour.
120 VOLT ONLY: This position sends full
power to the 120V receptacles only. 240V
power is not available. Use this position
when powering 120V items only.
Figure 6 – Hour Meter
ELECTRIC START
A battery is not supplied with generator.
You must provide a 12-volt, 45-amp-hour
battery. For more battery information, see
“Battery,” page 7.
GROUND FAULT CIRCUIT INTERRUPTER
RECEPTACLE
Figure 4 – Full Power Selector Switch in 120
Volt Only Position
NOTE: Infants and very small children may
still be affected.
TEST PROCEDURE
Check the GFCI receptacle every month.
This insures it is working right.
1. Push black TEST button. Red RESET
button should pop out. This should
trip GFCI, resulting in no electrical
power at receptacle. Verify this by
plugging test lamp with good bulb
into receptacle. If lamp does not work,
GFCI receptacle is good.
If RESET button
does not pop out,
do not use the GFCI receptacle. Contact
a qualified electrician for repairs.
FULL POWER SELECTOR SWITCH
The full power selector switch is on the
control panel. The switch has two positions: 120 VOLT ONLY, and 120/240 VOLT.
electrical shock caused when your body
becomes a path through which electricity
travels to reach ground. This could happen
when you touch an appliance or cord that
is ‘live’ through faulty mechanism, damp
or worn insulation, etc.
This generator has a 120-volt ground fault
circuit interrupter (GFCI) receptacle. The
GFCI receptacle is on the control panel.
The GFCI protects you against hazardous
2. If the GFCI receptacle tests okay, restore
power by pushing the RESET button
back in. The test lamp should work at
this time.
IMPORTANT: You
must press the RESET
button firmly and fully.
It should lock into
place. If the GFCI does
not lock into place, do
not use receptacle.
Contact a qualified
electrician for repairs.
RE
SE
TE T
ST
Figure 7 – GFCI Receptacle
107358
6
Dayton Operating Instructions and Parts Manual
Model 4W315C
Muffler
Generator Features
(Continued)
Clamp
RECEPTACLE CIRCUIT BREAKER
The circuit breakers protect the receptacles
and alternator. Overloading generator will
trip circuit breaker. A short circuit in item
being powered will also trip breaker. If this
occurs, unplug electrical load from
receptacle. Let circuit breaker cool down.
Push circuit breaker button to reset.
Electric motors need higher starting
current. They require up to 3-times their
rated wattage to start. The starting current
needed may be too high. This can cause
nuisance circuit breaker tripping. To help
prevent this, start electric motors first.
Connect additional items to generator
after starting motors. If this continues to
happen, reduce the total generator load.
20
Normal
20
Tripped
Figure 8 – Receptacle Circuit Breaker Button
SPARK ARRESTER
We ship a spark arrester with this generator. You must install spark arrester to
muffler (See Figure 9).
A spark arrester is required if using
generator in a national forest and other
designated state and local areas. Check
local codes.
The spark arrester needs periodic cleaning.
A dirty spark arrester reduces engine
output and increases fuel consumption. It
also makes starting difficult. See engine
owner’s manual for cleaning instructions.
Spark
Arrester
IMPORTANT: Make sure battery connections are the correct polarity. Electric start
generators use negative ground, 12-volt
DC starting system.
A battery is not supplied with generator. You
must provide a 12-volt, 45-amp-hour
battery. The positive and negative battery
cables are supplied with generator. You must
install these cables before mounting battery.
Figure 9 - Installing Spark Arrester
Assembly
BATTERY
Battery gives off
explosive gases.
Keep sparks, flames, and cigarettes
away. Do not remove or install battery
cables when engine is cranking or
running. Only service or use battery in
a well-vented area.
Battery contains
sulfuric acid.
Contact with skin or eyes may cause
severe burns. Do not tilt generator with
battery installed. Tilting could cause
battery acid to spill. Wear protective
clothing and face shield when servicing.
Keep out of children’s reach.
Always wear safety glasses when working
with battery. Make sure battery terminals are
clean. Make sure cable connections are tight.
Always shut down engine before removing
or attaching battery cables. Always remove
the negative (–) cable first. Always attach
negative (–) cable last.
INSTALLING BATTERY CABLES TO
ENGINE
1. Attach the red, positive (+) battery cable
to the starter solenoid on engine (See
Figure 10).
Starter
Solenoid
• If battery acid gets on your skin,
wash with water.
• If battery acid gets in your eyes,
flush with water at least 15 minutes.
Call a doctor at once.
Battery acid is poisonous.
• If swallowed, drink large amounts of
water or milk. Follow with milk
of magnesia or vegetable oil. Call a
doctor at once.
If you remove
battery, insulate
the red, positive (+) battery cable
terminal. Insulate with electrical tape.
Exposed terminal may spark when
generator runs.
Red, Positive (+)
Battery Cable
Figure 10 – Connecting Red, Positive (+)
Battery Cable to Starter Solenoid on Engine
2. Attach the black, negative (–) battery
cable to the engine block. Use the bolt,
nut, and two washers provided with the
battery cables. Attach cable as shown in
Figure 11, page 8.
®
107358
7
Version B - For Reduction
G016.J
4W315C
Dayton Operating Instructions and Parts Manual
Dayton Diesel Electric Generator
®
Assembly (Continued)
Black, Negative (–)
Battery Cable
2. Locate the red, positive (+) battery cable
from starter solenoid. Connect it to the
positive (+) battery terminal (See Figure
13).
• Do not overfill fuel tank. Always
allow room for fuel to expand. If you
overfill tank, fuel can overflow onto
hot engine. This can cause fire. After
refueling, tightly close fuel tank cap.
3. Locate the black, negative (–) battery
cable attached to engine block. Connect
it to the negative (–) battery terminal
(See Figure 13).
• Do not spill fuel. If fuel spills, make
sure area is dry before starting
engine.
4. Check battery before starting engine.
Make sure fluid levels are full. Make
sure battery is charged.
• Store fuel in approved container.
Store fuel in a well-vented area free
of open flames or sparks.
See engine owner’s manual for more
information.
Use clean, fresh, diesel fuel. Use diesel fuel
with cetane rating of 45 or higher. Avoid
getting dirt, dust, or water in fuel tank.
See engine owner’s manual for more
information.
Red, Positive Cable
From Starter Solenoid
Figure 11 – Connecting Black, Negative (–)
Battery Cable to Engine Block
ENGINE OIL
We ship the generator without oil in the
engine crankcase. You must add oil before
starting engine. See “Engine Lube Oil,”
page 9 for specific oil type.
MOUNTING BATTERY TO GENERATOR
1. Secure battery to generator by battery
hold-down system. This system consists
of the battery mounting bracket, hook
bolt, and nut (See Figure 12).
Battery Mounting
Bracket
CHECKING OIL LEVEL AND ADDING OIL
Follow steps below to check oil level.
Make sure engine is level and stopped.
Nut
Black, Negative
Cable From
Engine Block
Figure 13 – Connecting Positive and
Negative Cables to Battery
Installation
FUEL
Diesel fuel presents a hazard of
fire. Diesel fuel is flammable.
• Keep fuel out of children’s reach.
Battery
Hook Bolt
Figure 12 – Battery Hold-Down System
• Never smoke in refueling area. Never
allow open flames or sparks in area.
1. Remove dipstick (See Figure 14). Wipe
dipstick clean.
2. Insert dipstick into oil filler neck. Do not
screw it in. Oil level should be at top of
filler neck. Oil should cover most of
dipstick.
3. If level is low, fill to top of oil filler neck
(See Figure 14). Use proper lube oil to
preserve your engine.
NOTE: If oil level is too low, oil alert
system will shutdown engine and prevent
engine from restarting.
• Refuel generator in a well-vented
area. Do not fill fuel tank in the dark.
Do not refuel while engine is
running. Unhook all electrical loads
and shut off engine before refueling.
107358
8
Dayton Operating Instructions and Parts Manual
Model 4W315C
Installation (Continued)
20W 40
10W 30
Oil Level
At Top Of
Filler Neck
VENTILATION
Dipstick
Oil
Figure 14 – Checking Oil Level
ENGINE LUBE OIL
Nothing affects the performance and
durability of your engine more than the
lube oil you use. Using inferior oil or not
changing oil regularly increases the risk of
piston seizure, piston ring sticking, and
accelerated wear of cylinder liner, bearing
and other moving parts. Your engine life
may be seriously shortened. Yanmar
recommends CC/CD oil of API engine
service classification, stock number 4ZF20.
Always use oil with the right viscosity for
the ambient temperature in which you are
using the engine. Use the chart below
when choosing your engine oil.
Lube Oil Capacity:
4W315C 1.74 qt.
Locate ground lug on end of generator
housing (See Figure 15). Attach a #10
stranded-copper ground wire to ground
lug. Drive grounding point into ground.
Grounding point can be a stake, grounding rod, or pipe. Grounding point should
be copper or brass. Attach ground wire to
grounding point. You must supply the
ground wire and grounding point. They do
not come with generator. Follow the
National Electrical Code and all state and
local codes. Consult your power company
or a licensed electrician.
Use only in wellvented areas. Make
sure area has plenty of free-moving,
fresh, outside air. Never run generator
in an enclosed or confined area. Never
run generator inside occupied building.
Engine exhaust contains poisonous
carbon monoxide gas. Overexposure
will cause loss of consciousness and
will lead to death.
This generator needs cooling air to run
properly. Never block free-flowing, cooling
air to generator. Overheating will occur
without cooling air. This will damage the
generator. Keep generator at least three
feet away from any object.
Ground Lug
Copper or
Brass
Grounding
Point
Alternator
Ground Wire
Figure 15 – Grounding Generator
For a grounding
point, do not use
metal pipe being used to carry combustible materials or gases.
DUST, DIRT, RAIN, AND SNOW
GENERATOR GROUNDING
You must properly
earth-ground
generator before starting. This will
help guard against deadly electric
shock. Only use grounded plugs with
generator. Only use grounded extension cords. Only use three-wire or
double-insulated power tools.
Grounding generator helps prevent electric
shock from a ground fault condition.
Do not use generator outdoors in
rain or snow. Do not use generator
near standing water or snow. Do not
use if generator is wet or damp.
Operating generator in these conditions increases the risk of electrocution. Severe injury or death can occur.
Do not use generator in extremely dusty or
dirty conditions. This will severely affect its
life. Keep generator clean. Do not allow
®
107358
9
Version B - For Reduction
G016.J
4W315C
Dayton Operating Instructions and Parts Manual
Dayton Diesel Electric Generator
®
Installation (Continued)
dust, dirt, rain, or snow to collect on it.
Protect generator from outdoor elements.
EXTENSION CORDS
Only use grounded extension cords. Be sure
to use extension cord with proper wire
gauge size. See chart below.
RECOMMENDED MINIMUM WIRE
GAUGES (AWG) FOR EXTENSION CORDS
Ampere
Load
AWG for
50' Cord
AWG for AWG for
100' Cord 150' Cord
2
18
18
18
3
18
18
18
4
16
16
16
5
16
16
16
6
16
16
14
8
16
14
12
10
16
14
12
12
14
14
12
14
14
12
10
16
12
12
10
20
10
10
8
GROUND FAULT PROTECTION
Ground Fault Circuit Interrupter (GFCI)
helps guard against electric shock. On
construction sites, you must use a GFCI.
OSHA and the National Electric Code
requires this.
STANDBY INSTALLATION TO HOME OR
BUILDING
Have standby
installation
performed by a skilled, licensed
electrician. Do not let anyone else wire
into a utility circuit. Personal injury,
equipment damage, or damage to
home could occur.
IMPORTANT: This generator will not
power your entire home. Most home
utility electric service is more than 60
amps. This will exceed generator output.
Only power needed items during a power
outage. Make sure total wattage of
electrical load does not exceed rated
wattage of generator.
You can use this generator as a standby
power source. During a power outage, the
generator will power selected items in a
building. Have generator and additional
wiring installed by a skilled, licensed
electrician. This is not a do-it-yourself job.
Follow all local codes.
The electrician must install a doublethrow transfer switch. This isolates
existing electrical circuits from the
utility power line. If not isolated,
generator output
will back-feed into
utility power line.
This may electrocute a power company
line repair person.
DETERMINING ELECTRICAL LOAD FOR
GENERATOR
You must decide what electrical load your
generator can power. Do this before using
generator. Use the following four-step
method. It will help you select a load that
is not too large. Make sure total wattage
of all electrical loads does not exceed
5000 watts. Electric motors present a
special problem when figuring load. Read
Step 3 carefully.
1. Make two lists of items you want
powered by generator. List all motors
and motor powered appliances in one.
List all lights, small appliances, etc. in
the other. For standby service to home
or building, only include items you must
power.
2. Enter running watts of each item except
motors. The light bulb or appliance
nameplate lists its wattage. Remember,
1KW = 1000 watts.
NOTE: The nameplate may not list
wattage. It may only list volts and amps.
The formula for finding wattage is: Volts x
Amps = Watts. For example: An appliance
nameplate states 3 amps at 120 volts. 3
amps x 120 volts = 360 watts.
3. Electric motors present a special
problem. They require 3 to 6 times their
rated full-load wattage to start. Chart 2,
page 11, shows starting watts (maximum volt-amperes [VA]) for different
size motors. For example: an electric
motor nameplate states 5 amps at 120
volts. 5 amps x 120 volts = 600 watts
running. Multiply this figure by 3. This
will show the starting watts (maximum
VA) needed. 600 watts x 3 = 1800
watts (VA) to start. When figuring the
generator load for motors, you must use
the starting watts (maximum VA) figure.
Do not use the running watts figure.
NOTE: Some motors require nearly the
same wattage to run as to start. These
items include saws, drills, hair dryers, and
food mixers. See Chart 1, page 11 for
typical appliance wattage examples.
4. Add watts and starting watts (maximum
VA) of all items. This total must not be
larger than 5000 watts. It is a good idea
to have up to 25% extra capacity for
future needs or extra equipment.
107358
10
Dayton Operating Instructions and Parts Manual
Model 4W315C
Installation (Continued)
TYPICAL ELECTRIC APPLIANCE WATTAGES
Chart to be used as a reference. Data may vary with size, make, and/or model.
CHART 1
Equipment
Running
Watts
Light bulb (100W)
Radio
Fan
Television
Furnace fan—1/3 HP with blower
Vacuum cleaner
Sump pump—1/3 HP
Refrigerator/freezer
6" Circular saw
Floodlight
1/2" Drill
Toaster/coffeemaker
Skillet
14" Chain saw
Water well pump—1/2 HP
Hot plate/range (per burner)
10" Table saw
Water heater (storage-type)
100
150
200
400
600
600
700
800
800
1000
1000
1200
1200
1200
1000
1500
2000
5000
Starting
Watts
(Max.VA)
100
150
600
400
1800-2400
750
2100-2800
2400-5000
1000
1000
1250
1200
1200
1500
3000-6000
1500
6000
5000
CHART 2
Motor
HP
Rating
Approximate
Running
Watts
Approximate
Starting Watts*
(Max. VA)
Universal Motors
(small appliance)
1/8
1/4
1/3
1/2
3/4
1
1 1/ 2
2
3
500
700
800
1100
1400
1700
2100
2450
3600
625
875
1000
1375
1750
2125
2625
3075
†
Approximate
Starting Watts*
(Max. VA)
Repulsion
Induction Motors
1100
1550
1750
2400
3100
3750
4620
5400
7800
Approximate
Starting Watts*
(Max. VA)
Capacitor
Motors
1500
2100
2400
3300
4200
5100
6300
7350
10800
Approximate
Starting Watts*
(Max. VA)
Split Phase
Motors
2250
3150
3600
4950
†
†
†
†
†
(*) Always use starting watts (maximum VA), not running watts, when figuring correct electrical load.
(†) Motors of higher horsepower are not generally used.
NOTE: Please check with appliance manufacturer for maximum wattage required.
®
107358
11
Version B - For Reduction
G016.J
4W315C
Dayton Operating Instructions and Parts Manual
Dayton Diesel Electric Generator
®
Operation
HIGH AND LOW TEMPERATURE
OPERATION
Air temperature affects generator output.
Output drops 1% for each 10° temperature rise above 60° F. Very low temperatures may make the engine hard to start.
See engine owner’s manual for more
information.
Use receptacles properly. Improper use
could damage generator. Use only
grounded extension cords. Power only
grounded or double-insulated items. Do
not overload receptacles. These generators have the following receptacles (See
Figure 16):
Ground
(Green)
• 120V, 15-amp duplex receptacle
• 120V, 15-amp GFCI duplex receptacle
GENERAL INFORMATION
• 120V, 30-amp twist-lock receptacle
This generator is not large enough to
power your entire home. Do not connect
generator to any existing electrical circuits.
Plug items directly into generator receptacles. Do not exceed amperage rating of
receptacles. Only use grounded cords.
• 120/240V, 20-amp twist-lock receptacle
Use only in wellvented areas. Make
sure area has plenty of free-moving,
fresh, outside air. Never run generator
in an enclosed or confined area. Never
run generator inside occupied building.
engine exhaust contains poisonous
carbon monoxide gas. Overexposure
will cause loss of consciousness and
will lead to death.
120 Volt
30 Amp
NOTE: We supply the engine owner’s
manual with generator. Refer to that
manual for questions concerning engine
operation.
Ground
(Green)
NOTE: Do not exceed amperage rating of
receptacles. Exceeding rating will trip
receptacle circuit breaker.
L5-30P
Plug
Neutral
120V 120V
X
(Hot)
w
Y
X
G
L14-20P
Plug
120V, 15-Amp GFCIDuplex
Ground
120V, 15-Amp Duplex
Y
(Hot)
12
0V
OL
TS
W
(Neutral)
Figure 17 – Cord and Plug Configurations
PRESTART
RE
SE
TE T
ST
12
ON 0
LY
12
24 0
0V
EN
M
00
00
0
00
HO
UR
S
5
1/10
RE
SE
T
RE
120V, 30-Amp
Twist-Lock
120/240V, 20-Amp
Twist-Lock
Figure 16 – Receptacle Locations
POWER CORD AND PLUG REQUIREMENTS
120V, 30-amp twist-lock receptacle
• NEMA L5-30P plug
USING RECEPTACLE
W X
G
W
(Neutral)
120/240 Volt
20 Amp
SE
T
Never connect
generator to any
existing electrical circuits. The generator output will back-feed into the
utility power line. This may electrocute
a power company line repair person.
Also, if generator is powering electrical circuits, the chance of an electrical
fire exists.
X
(Hot)
• Three-wire, 30-amp cord
120/240V, 20-amp twist-lock receptacle
• NEMA L14-20P (20-amp) plug
• Four-wire, 20-amp cord
Operate generator on a firm, dry, and
clean surface. The surface must be level.
Protect generator from heavy dust, sand,
dirt, rain, or snow. Do not locate generator near standing water or snow. Make
sure area is well-vented.
Only responsible
adults should use
generator. Never let anyone operate
generator without proper instructions.
NOTE: If oil level is too low, oil alert
system will keep engine from starting (See
“Oil Alert System,” page 5). Make sure oil
level is full before starting. See Engine Oil,
page 8.
Before starting the engine, disconnect all
electric loads from generator.
You may need to bleed fuel line to remove
trapped air
• if starting engine for first time
• if starting engine after allowing
generator to run out of fuel
107358
12
Dayton Operating Instructions and Parts Manual
Model 4W315C
Operation (Continued)
S
BLEEDING FUEL LINE
1. Loosen fuel line clamp and remove fuel
line from engine. Place open end of fuel
line over a clean container to catch any
fuel spilled in step 3, below.
2. Move fuel valve lever to the “O” (open)
position (See Figure 18).
3. Allow air to bleed from line. When fuel
exits fuel line in a steady stream,
reattach fuel line to engine.
Decompression
Lever
O
Fuel Valve
Lever
Figure 18 - Fuel Valve Lever In “O” (open)
Position
3. Move engine run lever to the RUN
position (See Figure 19).
Engine Run
Lever
Figure 20 - Decompression Lever
4. Add spilled fuel back into fuel tank.
STARTING
RUN
Never use gasoline, paint thinner,
or any other flammable liquid as a
starting aid. An explosion may occur.
IMPORTANT: The engine speed is preset.
The throttle is locked in preset position. Do
not adjust throttle. Preset position lets
engine run at 3600 RPM under load. The
engine must maintain 3600 RPM for
generator to create correct voltage.
Running engine at lower speeds will
damage generator and powered items.
IMPORTANT: Never start generator with
electrical loads connected. Start engine
before adding electrical loads.
1. Make sure fuel tank is full. See “Fuel,”
page 8 for fuel information.
2. Move fuel valve lever to the “O” (open)
position (See Figure 18).
STOP
(3) Turn the starting key clockwise to
the START position (See Figure 21).
Hold it there until engine starts.
Starting Key
L
OI
GE
Figure 19 - Engine Run Lever
R
HA
C
F
You must fully
move engine run/
stop knob to the RUN position to run
engine at 3600 RPM. Do not run engine
at lower speeds. Running engine at
lower speeds will damage generator
and powered items.
OF
Figure 21 - Starting Key
(4) When engine starts, release key.
4. Start the engine.
a. Electric Starter
(1) Slowly pull starter rope until you
feel strong resistance. Gently
return starter rope to engine.
IMPORTANT: Do not use electric starter
more than ten seconds. Starter motor
damage may occur. If engine fails to start,
release the key and wait 15 seconds. After
15 seconds, try starting again.
(2) Push decompression lever all the
way down (See Figure 20). Decompression lever will stay in this
position until you turn starting key.
®
107358
13
Version B - For Reduction
G016.J
4W315C
Dayton Operating Instructions and Parts Manual
Dayton Diesel Electric Generator
®
Operation (continued)
b. Recoil Starter
(1) Slowly pull starter rope until you
feel strong resistance. Gently
return starter rope to engine.
(2) Push decompression lever all the
way down (See Figure 22). Decompression lever will stay in this position until you pull starter rope.
Decompression
Lever
HIGH ALTITUDE OPERATION
DISCONNECTING ELECTRIC LOADS
This generator will not perform well at
high altitudes without proper adjustment. Contact a Yanmar dealer for
adjustment information.
Remove electrical loads one at a time.
Remove voltage sensitive items first.
Voltage sensitive items include TVs, VCRs,
and other home electronic items.
ADDING ELECTRICAL LOADS
STOPPING ENGINE
IMPORTANT: Do not overload generator.
Make sure total wattage of all electrical
loads does not exceed rated wattage of
generator. Overloading may shorten
generator life. It could also cause internal
damage to generator. Overloading
will trip circuit breaker.
Follow the steps below to stop engine.
IMPORTANT: Keep full power selector
switch in the 120 VOLT ONLY position if
only powering 120V items. Only move
switch to 120/240 VOLT position if
powering 240V items.
1. Check items to be powered. Their
nameplate lists their wattage ratings.
Figure 22- Decompression Lever
(3) Firmly grasp starter grip with both
hands. Remove slack from starter
rope by lightly pulling starter grip.
(4) To start engine, pull starter rope
briskly. You must pull the starter
rope all the way out. If not, the
engine will not start.
IMPORTANT: Do not let starter grip snap
back against engine. Return it gently. This
will prevent damage to starter.
Never use gasoline, paint thinner,
or any other flammable liquid as a
starting aid. An explosion may occur.
NOTE: The wattage ratings for some
electrical motors are misleading. They
may require 3 to 6 times their rated fullload wattage to start. You must figure
total electrical load wattage. Make sure
total wattage of all electrical loads does
not exceed rated wattage of generator.
See “Determining Electrical Load For
Generator,” page 10.
2. Start engine. Let engine reach full speed.
3. Connect electrical loads one at a time. If
the load consists of electric motors, start
them first. Always start the largest first.
Start each motor individually.
1. Remove all electrical loads from
generator (See “Disconnecting Electrical
Loads,” above). Remove electrical loads
one at a time.
2. Let engine run for two or three minutes
after removing electrical loads. This lets
engine cool slightly.
3. Push down engine stop lever (See Figure
23). This releases engine run lever and
stops engine. Do not stop engine with
the decompression lever.
4. Turn the starter key to the OFF position.
RUN
STOP
Engine Stop Lever
Figure 23 - Pushing Down Engine Stop
Lever
5. Turn fuel valve lever off. Do this by
moving valve lever to the “S” position
(See Figure 24, page 15).
6. Slowly pull starter rope until you feel
strong resistance. Gently return starter
rope to engine. This action closes the
intake and exhaust valves. This prevents
rust from forming while not using engine.
If engine does not start, repeat steps
under b. Recoil Starter on this page.
107358
14
Dayton Operating Instructions and Parts Manual
Model 4W315C
Operation (continued)
O
S
Fuel Valve Lever
Figure 24 - Fuel Valve Lever In “S” Position
Maintenance and Repairs
Only a qualified
electrical service
person should service and repair the
alternator on this generator. Use only
factory approved replacement parts.
You must always
run the engine at
full speed. Do not run engine at lower
speeds. At full speed, the engine runs
at 3600 RPM under load. The engine
must maintain 3600 RPM for generator
to create correct voltage. Running
engine at lower speeds will damage
generator and powered items.
Shut off generator
before performing
maintenance.
IMPORTANT: Keep generator level when
servicing. Never turn generator upside
down or stand it on end to service.
NOTE: We supply the engine owner’s
manual with generator. Refer to that
manual for questions concerning engine
maintenance and repairs.
Non-engine parts require little maintenance.
Keep generator clean. Use a damp cloth to
clean outside surfaces. Never use water to
clean generator. Water can cause damage to
internal parts. Use vacuum to clean air inlet
and outlet louvers of alternator.
SERVICING THE ENGINE
For Yanmar engine replacement parts,
contact Grainger Parts at 1-800-323-0620.
Yanmar engine servicing should be
handled by your nearest authorized
Yanmar engine service firm. Contact
Yanmar at 1-847-541-1900 for nearest
authorized Yanmar engine service firm.
Only use genuine
Yanmar parts. The
use of replacement parts which are
not of equivalent quality may damage
the engine.
HOW TO CHANGE YOUR ENGINE OIL
Remove the oil filler cap. Remove the drain
plug and drain the old oil while the engine
is still warm. The plug is located on the
bottom of the cylinder block. Tighten the
drain plug and refill with the recommended oil. (See the section under
“Preparations for Starting” in the engine
owner’s manual.)
CLEANING THE OIL FILTER
Loosen the fixing bolt and then pull out
the oil filter. Clean oil filter every six
months or 500 hours of operation.
ENGINE MAINTENANCE
CHANGING THE AIR CLEANER ELEMENT
Periodic checks and maintenance are very
important for keeping the engine in good
condition and durable. The chart on page
18 indicates which checks to make and
when to make them. The mark “•”
indicates that special tools and skills are
required. Items marked “•” should be
serviced by an authorized Yanmar dealer,
unless the owner has the proper tools and
is mechanically proficient.
Do not wash the air cleaner element with
detergent because this is a wet-type
element. Change air cleaner element every
six months or 500 hours of operation (or
earlier if dirty).
Consult your Yanmar dealer.
Shut off the
engine before
performing any maintenance. If the
engine must be run, make sure the area
is well ventilated. The exhaust contains
poisonous carbon monoxide gas.
After the engine
has been used,
clean the engine immediately with a
cloth to prevent corrosion and to
remove sediment.
See the section for changing the air
cleaner element under “Preparations for
Starting” in the engine owner’s manual.
Never run the
engine without
the air cleaner element or with a
defective element.
NOTE: A clogged element hinders the
flow of air to the combustion chamber.
This reduces engine output, increases lube
oil and fuel oil consumption and makes
starting difficult. Make sure you clean your
®
107358
15
Version B - For Reduction
G016.J
4W315C
Dayton Operating Instructions and Parts Manual
Dayton Diesel Electric Generator
®
Maintenance and Repairs
(Continued)
element regularly.
CLEANING AND REPLACING THE FUEL
FILTER
The fuel filter also has to be cleaned
regularly to insure maximum engine output.
Clean fuel filter every six months or 500
hours of operation. Replace fuel filter every
year or 1000 hours of operation.
1. Drain the fuel oil from the fuel tank.
2. Loosen the nuts of the fuel cock and
pull out the filter from the fuel tank
filler port. Wash the filter thoroughly
with diesel fuel.
CLEANING THE SPARK ARRESTER
If the engine has
been running, the
muffler and the spark arrester will be
very hot. Allow these to cool before
proceeding.
Remove the lock nut, end cap and diffuser
discs and clean off the carbon deposits.
Clean spark arrester every three months or
100 hours of operation (or earlier if dirty).
Clamp
Spark
Arrester Diffuser
Discs
A clogged spark
arrester hinders
the flow of exhaust gas. This reduces
engine output, increases fuel consumption and makes starting difficult.
Make sure you clean your spark
arrester regularly.
TIGHTEN CYLINDER HEAD BOLTS
Tightening the cylinder head bolts requires
a special tool. Don’t try it yourself. Consult
your Yanmar dealer.
CHECKING THE INJECTION NOZZLE,
INJECTION PUMP, ETC.
• Adjusting the valve head clearance for
the intake and exhaust valves.
• Lapping of intake and exhaust valves.
• Replacing piston ring.
All these require special tools and skills.
Consult your Yanmar dealer.
Do not perform the
injection nozzle
test near an open fire or any other kind
of fire. The fuel spray may ignite. Do
not expose bare skin to the fuel spray.
The fuel may penetrate the skin and
cause injury to the body. Always keep
your body away from the nozzle.
CHECKING AND REPLENISHING BATTERY
FLUID AND CHARGING THE BATTERY
Battery fluid will be lost through continuous charging and discharging.
The battery
electrolyte
contains sulfuric acid. Protect your
eyes, skin, and clothing. In case of
contact, flush thoroughly with water
and get prompt medical attention,
especially if your eyes are affected.
Muffler
End Cap
Figure 25 - Spark Arrester
Lock Nut
Batteries generate
hydrogen gas,
which can be highly explosive. Do not
smoke or allow flames or sparks near
the battery, especially during charging.
NOTE: Much more fluid is lost during
summer than in winter.
Before starting, check for physical damage
to the battery and also the electrolyte
levels, and replenish with distilled water up
to the upper mark if necessary. When
actual damage is discovered, replace the
battery. Check battery fluid monthly.
Before charging,
remove the cap
from each cell of the battery. Charge
the battery in a place where there is
plenty of ventilation. Discontinue
charging if the electrolyte temperature
exceeds 45° C (117° F).
Do not charge the
battery with the
battery cable still connected. The diodes
will be damaged by the high voltage.
Connect the (+)
lead of the charger
to the (+) terminal of the battery, and
the (–) lead to the (–) terminal. Reversed polarity will damage the
charger rectifier or the battery.
Storage
Remove all fuel
from fuel tank
before storing generator. Store fuel in
approved container. Store fuel in a
well-vented area free of open flames
or sparks.
The muffler
becomes very hot
during operation. The muffler remains
hot for a while after shutdown. Let
engine cool before storing.
IMPORTANT: Keep generator level while
in storage. Never store generator upside
down or standing on end.
Cover and store generator in a clean, dry
place. Do not expose generator to extreme
high or low temperatures during storage.
107358
16
Dayton Operating Instructions and Parts Manual
Model 4W315C
Storage (Continued)
ENGINE STORAGE
If storing your engine for long periods,
make the following preparations.
1. Operate the engine for about 3 minutes
and then stop.
2. Stop the engine. Drain the engine lube
oil while the engine is still warm and fill
with new oil.
4. Wipe the oil and dirt from the engine
and store in a dry place.
3. Pull the recoil starter slowly. Stop when
it feels tight. This closes the intake and
exhaust valves (in compression position)
and helps prevent rust from forming.
CHART 3
Item
Daily
Check
Service
First
Month
or 20 Hrs.
Service
Monthly
Service
Every
3 Months
or 100 Hrs.
Service
Every
6 Months
or 500 Hrs.
Service
Every
Year
or 1000 Hrs.
Check and replenish fuel oil
Drain fuel from fuel tank
Check and replenish lube oil
Check for oil leakage
Check and tighten engine parts
Check and tighten engine head bolts
Change lube oil (first time)
Change lube oil (each time after first)
Clean oil filter (replace if needed)
Replace air cleaner element (Service more
frequently when used in dusty areas)
Clean fuel filter
Replace fuel filter
Clean spark arrester
Check fuel injection pump
Check fuel injection nozzle
Check fuel piping (replace if needed)
Adjust valve head clearance for intake
and exhaust valves (first time at 20 hrs)
Adjust valve head clearance for intake
and exhaust valves (each time after first)
Lap intake and exhaust valves
Replace piston rings
Check battery fluid
Special tools and skills required.
No special tools or skills required.
®
107358
17
Version B - For Reduction
G016.J
4W315C
Dayton Operating Instructions and Parts Manual
Dayton Diesel Electric Generator
®
Wiring Diagrams
Red
Black
Red
120/240V 20A
Receptacle
White
Circuit
Breaker
25A
Black
White
ck
T4
Yellow
White
Black
Circuit
Breaker
20A
Hour
Meter
Green
Black
Green
Main
Windings
White
T1
T4
T3
Green
Red
Capacitor
White
White
LINE
Black
Black
Circuit
Breaker
20A
Red
Red
Red
120V, 30A
Receptacle
GFCI
Black
T3
Bla
Circuit
Breaker
25A
Duplex
T2
Full Pwr
Selector
Switch
HOT
T1
Green
White
120V, 15A
Receptacle
White
120V, 15A
Receptacle
WHITE
Green/Yellow
T2
T2
T1
Auxiliary
Phase
T4
T3
Stator
Stator
Rotor
Green
Red
Black
Diode
T1
T2
White
Diode
L1
Yellow
110/120V
Brown
T3
T4
220/240V
L2
110/120V
Figure 26 - Alternator Wiring Diagram
Key
Switch
Green
Charge
Coil
Green/White
Green
2
Green
Charge Yellow
Regulator
White
3
Yellow
Green/White
4
White
1
Red
Charge
Lamp
Black
White
Fuse
White
Red
Green/White
Starter
Motor/
Solenoid
+
-
Red
Shutdown
Solenoid
Black
Battery
Yellow
Red
Bridge
Red
30
87
Oil
P Pressure
Switch
Relay
86
Green/White
Red
85 White
Black
White
Low Oil
Pressure Lamp
Black
Figure 27 - Engine Wiring Diagram
107358
18
Dayton Operating Instructions and Parts Manual
Model 4W315C
Troubleshooting Chart
NOTE: See engine owner’s manual for
engine troubleshooting.
Only a qualified
electrical service
person should service and repair
generator. Use only factory approved
replacement parts.
Symptom
Possible Cause(s)
Corrective Action
No voltage when starting generator with
no electrical load
1. Defective capacitor
2. Winding short circuit or loose connections
3. Defective rotor diode
4. Loss of residual magnetism
1. Replace capacitor
2. Check resistance of coils (See “Electrical
Component Specifications,” page 2)
3. Replace both diodes on rotor
4. Apply 12-volt battery to capacitor
terminals for 2-3 seconds
Voltage is less than normal voltage with
no electrical load
1. Engine speed too low
1. Set engine speed to 3720 RPM (62 Hz)
with no load
2. Clean arrester. See engine owner’s
manual
3. Replace both diodes on rotor
4. Check resistance of coils (See “Electrical
Component Specifications,” page 2)
5. Replace capacitor
2. Clogged spark arrester
3. Defective rotor diode
4. Partial short circuit in winding
5. Defective capacitor
Voltmeter reading more than 10% high
with no electrical load
Engine speed too high
Set engine speed to 3720 RPM (62 Hz)
with no load
Voltmeter reading correct with no
electrical load, but more than 10% low
when electrical load is added
1. Defective rotor diode
2. Electrical load too high
3. Engine not running properly
1. Replace both diodes on rotor
2. Do not overload generator
3. Contact an authorized engine service
center
Engine will not start
1. Fuel level too low
2. Fuel cock not in “O” (open) position
3. Diesel fuel not reaching the fuel
injection pump or nozzle
4. Speed control lever not in START
position
5. Lube oil level not correct
6. Fuel injection nozzle not working right
7. Recoil starter not pulled quickly and
firmly enough
1. Add fuel to fuel tank
2. Move fuel cock to “O” (open) position
3. See qualified Yanmar service person
8. Spark arrester clogged by carbon
9. Battery not discharging
4. Move speed control lever to START
position
5. Add lube oil to engine
6. See qualified Yanmar service person
7. When starting engine with recoil starter,
pull starter rope quickly and firmly. You
must pull starter rope all the way out
8. Clean spark arrester. See “Cleaning the
Spark Arrester,” page 16
9. Loose battery connections, corrosion on
battery terminals, or battery dead
®
107358
19
Version B - For Reduction
G016.J
4W315C
Dayton Operating Instructions and Parts Manual
For Repair Parts, call 1-800-323-0620
Dayton Diesel Electric Generator
®
24 hours a day - 365 days a year
Please provide following information:
-Model number
-Serial number (if any)
-Part description and number as shown in parts list
Address parts correspondence to:
Grainger Parts
P.O. Box 3074
1657 Shermer Road
Northbrook, IL 60065-3074 U.S.A.
2
1
3
E
F
5
4
20
9
15
9
8
14
6
7
10
11
12
13
19
19
14
18
9
8
16
8
14
9
9
17
Figure 28 – Repair Parts Illustration for Fuel Tank and Roll Cage
107358
20
4W315C
Dayton Operating Instructions and Parts Manual
Repair Parts
List for Fuel Tank and Roll Cage
Model
4W315C
Reference
Number
Description
Part No. for
Model 4W31SC:
Quantity
1
Fuel tank assembly
099935-01
1
2
1/4-20 x 3/4" Screw
*
4
3
1/4" Washer
WP-4C
4
4
1/4-20 Nut
103880-01
4
5
Roll cage
099943-01
1
6
Spreader
099945-01
1
7
5/16-18 x 1 1/2" Bolt
*
2
8
5/16" Washer
WP-5C
5
5/16-18 Nut
NEC-5C
9
10
9
1/2-20 x 1" Screw
26302006
2
11
1/2" Lockwasher
WLI-8
2
12
Shock mounts
17529000
2
13
5/16-18 x 3/4" Bolt
26007004
4
14
5/16" Washer
WLE-5
3
15
Shock mount
099853-02
1
16
Battery bracket
099749-01
1
17
Hook bolt
099750-01
2
18
Ground strap
14138000
1
19
1/4-20 x 1/2" Screw
*
2
20
#8-18 x 1/2" Sems screw
100410-01
4
∆
Safety information decal
099947-01
1
∆
Operation decal
099948-01
1
∆
Battery cable (positive)
099873-01
1
∆
Battery cable (negative)
099873-02
1
(∆) Not shown.
(*) Standard hardware. Available from local hardware store.
®
107358
21
Version B - For Reduction
G016.J
4W315C
Dayton Operating Instructions and Parts Manual
For Repair Parts, call 1-800-323-0620
Dayton Diesel Electric Generator
®
24 hours a day - 365 days a year
Please provide following information:
-Model number
-Serial number (if any)
-Part description and number as shown in parts list
Address parts correspondence to:
Grainger Parts
P.O. Box 3074
1657 Shermer Road
Northbrook, IL 60065-3074 U.S.A.
21
22
14
20
23
19
17
9
23
18
10
8
13
16
7
6
12
5
15
4
1
24
2
11
3
Figure 29 – Repair Parts Illustration for Alternator Assembly
107358
22
4W315C
Dayton Operating Instructions and Parts Manual
Repair Parts
List for Alternator Assembly
Model
4W315C
Reference
Number
Description
Part No. for
Model 4W31SC:
Quantity
1
End cover
099844-01
1
2
M5 x 13 Screw
099701-01
6
3
Bushing
099760-01
1
4
Terminal block (4-block)
099863-01
1
5
Terminal block (2-block)
099863-02
1
6
Ground lug
†
1
7
#10-16 x 3/8" Screw
M11084-26
1
8
Stator bolt
099847-02
4
5/16" Lockwasher
WLE-5
4
10
9
Bearing housing
099843-01
1
11
Capacitor
27005003S
1
12
Stator
†
1
13
Fan bracket
27003002
1
14
M8 x 20 Screw
*
4
15
Rotor nut
099891-01
1
16
Draw bolt
099842-02
1
17
Bearing
27003003
1
18
Diode
27003012S
2
19
Rotor
†
1
20
Fan
27003008
1
21
Engine flange
101839-01
1
22
3/8-16 x 5/8" Bolt
*
4
23
3/8" Lockwasher
*
8
24
Foam pad
099892-01
1
Alternator assembly complete
099723-02
1
∆
(†) Parts not available. Included in Alternator Assembly.
(∆) Includes reference numbers 1 through 24.
(*) Standard hardware. Available from local hardware store.
®
107358
23
Version B - For Reduction
G016.J
4W315C
Dayton Operating Instructions and Parts Manual
For Repair Parts, call 1-800-323-0620
Dayton Diesel Electric Generator
®
24 hours a day - 365 days a year
Please provide following information:
-Model number
-Serial number (if any)
-Part description and number as shown in parts list
Address parts correspondence to:
Grainger Parts
P.O. Box 3074
1657 Shermer Road
Northbrook, IL 60065-3074 U.S.A.
11
2
2
1
3
12
0V
OL
RE
SE
TE T
ST
5
14
TS
7
4
6
FU
12
LL
0O
NL
12
PO
WE
Y
R
SE
CT
OR
0/2
40
V
12
0/2
40
VO
LT
6
S
RE
RE
SE
SE
T
T
13
E
00 NM
00
00
05
U
HO
12
12
LE
RS
1/1
0
8
9
10
Figure 30 – Repair Parts Illustration for Control Panel
107358
24
4W315C
Dayton Operating Instructions and Parts Manual
Repair Parts
List for Control Panel
Model
4W315C
Reference
Number
Description
1
Control panel, front
2
Part No. for
Model 4W315C:
Quantity
103349-02
1
20 Amp Circuit breaker
*22616009
2
3
120V, 30A Twist-lock receptacle
*099833-01
1
4
120V, 15A Duplex receptacle
*15342000
1
5
Full power selector switch
*099956-01
1
6
25 Amp Circuit breaker
*22616011
2
7
120/240V, 20A Twist-lock receptacle
*099834-01
1
8
Hour Meter
101350-01
1
9
Bushing
099760-01
1
10
#8-18 x 1/2" Sems screw
100410-01
4
11
Control box, rear
100149-01
1
12
U-nut
22261000
8
13
Switch plug
099997-01
1
14
120V, 15A GFCI Duplex receptacle
100445-01
1
∆
Panel schematic decal
100177-07
1
†
Control panel assembly
103348-02
1
(∆) Not shown.
(†) Includes reference numbers 1 through 14.
(*) Includes fastening hardware.
®
107358
25
Version B - For Reduction
G016.J
4W315C
Dayton Operating Instructions and Parts Manual
For Repair Parts, call 1-800-323-0620
Dayton Diesel Electric Generator
®
24 hours a day - 365 days a year
Please provide following information:
-Model number
-Serial number (if any)
-Part description and number as shown in parts list
Address parts correspondence to:
Grainger Parts
P.O. Box 3074
1657 Shermer Road
Northbrook, IL 60065-3074 U.S.A.
3
2
1
17
16 15
10
20
13
4
12
9
12
11
5
4 22
23
7
8
6
19
4
4
21
14
3
18
3
Figure 31 – Repair Parts Illustration for Switch Control Box
107358
26
4W315C
Dayton Operating Instructions and Parts Manual
Repair Parts
List for Switch Control Box
Model
4W315C
Reference
Number
Description
Part No. for
Model 4W315C:
Quantity
1
Switch control box
101037-01
1
2
Low oil light
22721000
1
3
Key switch, lamp, and harness assembly
099936-01
1
4
1/4-28 Keps nut
101039-01
4
5
Strain relief bushing
099760-01
1
6
1/4-20 x 5/8" Hex-head sems
101040-01
2
7
Relay
26498000
1
8
#10-32 Hex locknut
NTF-3C
1
Adhesive-backed PVC foam
RN12000100
1
10
9
Connector
*
1
11
#6-32 x 1/2" Hex tapping screw
*
1
12
#6 Internal-tooth lockwasher
*
5
13
Full bridge
26509000
1
14
#8-32 x 3/8" Screw
*
4
15
Grommet
*
1
16
#10 Flat washer
WP-3C
1
17
#10-32 x 3/4" Hex-head screw
26499000
1
18
Solenoid
26490000
1
19
M4 x 8 Hex-head screw
*
2
20
M3 x 8 Hex-head screw
*
4
21
Control box cover
101038-01
1
22
Cable
101036-01
1
23
Conduit
101035-01
1
Switch control box assembly
101103-01
1
†
(†) Includes reference numbers 1 through 23.
(*) Standard hardware. Available from local hardware store.
®
107358
27
Version B - For Reduction
G016.J
4W315C
Dayton Operating Instructions and Parts Manual
Dayton Diesel Electric Generator
®
NOTE: The five-year limited warranty below covers all non-engine parts of this generator including the alternator. Yanmar warrants the
engine. See engine owner’s manual for engine warranty information.
Limited Warranty
DAYTON FIVE-YEAR LIMITED WARRANTY. Professional-duty electric generator alternator, Model 4W315C, are warranted by
Dayton Electric Mfg. Co. (Dayton) to the original user against defects in workmanship or materials under normal use for five years
after date of purchase. Any part which is determined to be defective in material or workmanship and returned to an authorized
service location, as Dayton designates, shipping costs prepaid, will be, as the exclusive remedy, repaired or replaced at Dayton’s
option. For limited warranty claim procedures, see PROMPT DISPOSITION below. This limited warranty gives purchasers specific legal
rights which vary from jurisdiction to jurisdiction.
LIMITATION OF LIABILITY. To the extent allowable under applicable law, Dayton’s liability for consequential and incidental damages is
expressly disclaimed. Dayton’s liability in all events is limited to and shall not exceed the purchase price paid.
WARRANTY DISCLAIMER. Dayton has made a diligent effort to provide product information and illustrate the products in this
literature accurately; however, such information and illustrations are for the sole purpose of identification, and do not express or imply
a warranty that the products are MERCHANTABLE, or FIT FOR A PARTICULAR PURPOSE, or that the products will necessarily conform
to the illustrations or descriptions.
Except as provided below, no warranty or affirmation of fact, expressed or implied, other than as stated in the “LIMITED WARRANTY”
above is made or authorized by Dayton.
PRODUCT SUITABILITY. Many jurisdictions have codes and regulations governing sales, construction, installation, and/or use of products
for certain purposes, which may vary from those in neighboring areas. While Dayton attempts to assure that its products comply with
such codes, it cannot guarantee compliance, and cannot be responsible for how the product is installed or used. Before purchase and
use of a product, review the product applications, and all applicable national and local codes and regulations, and be sure that the
product, installation, and use will comply with them.
Certain aspects of disclaimers are not applicable to consumer products; e.g., (a) some jurisdictions do not allow the exclusion or limitation
of incidental or consequential damages, so the above limitation or exclusion may not apply to you; (b) also, some jurisdictions do not
allow a limitation on how long an implied warranty lasts, consequently the above limitation may not apply to you; and (c) by law, during
the period of this limited
warranty, any implied warranties of implied merchantability or fitness for a particular purpose applicable
to consumer products purchased by consumers, may not be excluded or otherwise disclaimed.
PROMPT DISPOSITION. Dayton will make a good faith effort for prompt correction or other adjustment with respect to any product
which proves to be defective within limited warranty. For any product believed to be defective within limited warranty, first write or
call dealer from whom the product was purchased. Dealer will give additional directions. If unable to resolve satisfactorily, write to
Dayton at address below, giving dealer’s name, address, date, and number of dealer’s invoice, and describing the nature of the defect.
Title and risk of loss pass to buyer on delivery to common carrier. If product was damaged in transit to you, file claim with carrier.
Manufactured for Dayton Electric Mfg. Co., 5959 W. Howard St., Niles, Illinois 60714 U.S.A.
Manufactured for Dayton Electric Mfg. Co.
Niles, Illinois 60714 U.S.A.
®
107358-01
Rev. B
07/03
Version B - For Reduction
G016.J