1
Setting up the Screen
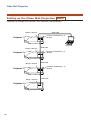
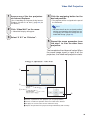
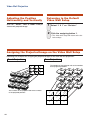
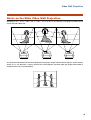
For optimal image quality, position the projector perpendicular to the screen with the projector’s feet flat
and level. Doing so will eliminate the need for Keystone correction and provide the best image quality.
Note
• The projector lens should be centered in the middle of the screen. If the horizontal line passing through the
lens center is not perpendicular to the screen, the image will be distorted, making viewing difficult.
• For an optimal image, position the screen so that it is not in direct sunlight or room light. Light falling directly
on the screen washes out the colors, making viewing difficult. Close the curtains and dim the lights when
setting up the screen in a sunny or bright room.
Standard Setup (Front Projection)
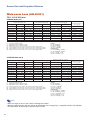
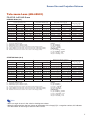
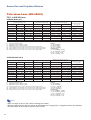
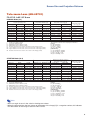
■ Place the projector at the required distance from
the screen according to the desired picture size.
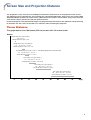
Example of standard setup
Screen size : 100 inch (254 cm) STRETCH Mode : 16:9 (When the standard zoom lens attached)
Side View
• The distance from the screen
Screen
H1 : –24 33/64"
(–62.3 cm)
Lens center
Lower lens shift
position
(High mount setup)
Lens center
H2
8 11/64" (20.8 cm)
Upper lens shift
position
(Desktop setup)
to the projector may vary
depending on the size of the
screen.
• The default setting can be used,
when placing the projector in front
of the screen. If the projected image is reversed, readjust the setting to “Front” in the “PRJ Mode”
menu. (See page 84 on the
owner’s manual of the projector.)
Top View
Lens center
W : 13 5/16 "
(33.2 cm)
Screen
Leftmost lens shift
position
Center of screen
Lens center
Rightmost lens shift
position
2
• Place the projector so that an
imaginary horizontal line that
passes through the center of the
lens is perpendicular to the
screen.