1
DW368
185 mm Circular Saw
Additional Safety Instructions for Circular Saws
INSTRUCTION MANUAL
Questions? See us in the World Wide Web at
www.dewalt.com
• Store idle tools out of reach of children and other untrained persons. Tools are dangerous in the hands of untrained users.
• Maintain tools with care. Keep cutting tools sharp and clean. Properly maintained
tools, with sharp cutting edges are less likely to bind and are easier to control.
• Check for misalignment or binding of moving parts, breakage of parts, and any
other condition that may affect the tools operation. If damaged, have the tool serviced before using. Many accidents are caused by poorly maintained tools.
• Use only accessories that are recommended by the manufacturer for your model.
Accessories that may be suitable for one tool, may become hazardous when used on
another tool.
SERVICE
• Tool service must be performed only by qualified repair personnel. Service or maintenance performed by unqualified personnel could result in a risk of injury.
• When servicing a tool, use only identical replacement parts. Follow instructions in
the maintenance section of this manual. Use of unauthorized parts or failure to follow
maintenance instructions may create a risk of electric shock or injury.
DEWALT Industrial Tool Co., 701 East Joppa Road, Baltimore, MD 21286
The following are trademarks for one or more DEWALT power tools: the yellow and black
color scheme; the “D” shaped air intake grill; the array of pyramids on the handgrip; the kit
box configuration; and the array of lozenge-shaped humps on the surface of the tool.
GENERAL SAFETY INSTRUCTIONS
WARNING! Read and understand all instructions. Failure to follow all
instructions listed below may result in electric shock, fire and/or serious
personal injury.
SAVE THESE INSTRUCTIONS
WORK AREA
• Keep your work area clean and well lit. Cluttered benches and dark areas invite accidents.
• Do not operate power tools in explosive atmospheres, such as in the presence of
flammable liquids, gases, or dust. Power tools create sparks which may ignite the dust
or fumes.
• Keep bystanders, children, and visitors away while operating a power tool.
Distractions can cause you to lose control.
ELECTRICAL SAFETY
• Grounded tools must be plugged into an outlet properly installed and grounded in
accordance with all codes and ordinances. Never remove the grounding prong or
modify the plug in any way. Do not use any adapter plugs. Check with a qualified
electrician if you are in doubt as to whether the outlet is properly grounded. If the
tools should electrically malfunction or break down, grounding provides a low resistance
path to carry electricity away from the user. Applicable only to Class I (grounded) tools.
• Double insulated tools are equipped with a polarized plug (one blade is wider than
the other.) This plug will fit in a polarized outlet only one way. If the plug does not
fit fully in the outlet, reverse the plug. If it still does not fit, contact a qualified electrician to install a polarized outlet. Do not change the plug in any way. Double insulation
eliminates the need for the three wire grounded power cord and grounded power
supply system. Applicable only to Class II (double insulated) tools. The DW368 and
DW369 are double insulated tools.
• Avoid body contact with grounded surfaces such as pipes, radiators, ranges and
refrigerators. There is an increased risk of electric shock if your body is grounded.
• Don’t expose power tools to rain or wet conditions. Water entering a power tool will
increase the risk of electric shock.
• Do not abuse the cord. Never use the cord to carry the tools or pull the plug from
an outlet. Keep cord away from heat, oil, sharp edges or moving parts. Replace
damaged cords immediately. Damaged cords increase the risk of electric shock.
• When operating a power tool outside, use an outdoor extension cord marked “WA” or “W.” These cords are rated for outdoor use and reduce the risk of electric shock.
Minimum Gage for Cord Sets
Volts
Total Length of Cord in Meter
220-240V
0-15
16-30
31-61
62-91
Ampere Rating
More
Not more
AWG
Than Than
12
16
14
12
Not Recommended
PERSONAL SAFETY
• Stay alert, watch what you are doing and use common sense when operating a
power tool. Do not use tool while tired or under the influence of drugs, alcohol, or
medication. A moment of inattention while operating power tools may result in serious
personal injury,
• Dress properly. Do not wear loose clothing or jewelry. Contain long hair. Keep your
hair, clothing, and gloves away from moving parts. Loose clothes, jewelry, or long hair
can be caught in moving parts. Air vents often cover moving parts and should also be
avoided.
• Avoid accidental starting. Be sure switch is off before plugging in. Carrying tools with
your finger on the switch or plugging in tools that have the switch on invites accidents.
• Remove adjusting keys or wrenches before turning the tool on. A wrench or a key
that is left attached to a rotating part of the tool may result in personal injury.
• Do not overreach. Keep proper footing and balance at all times. Proper footing and
balance enables better control of the tool in unexpected situations.
• Use safety equipment. Always wear eye protection. Dust mask, non-skid safety shoes,
hard hat, or hearing protection must be used for appropriate conditions.
TOOL USE AND CARE
• Use clamps or other practical way to secure and support the workpiece to a stable
platform. Holding the work by hand or against your body is unstable and may lead to loss
of control.
• Do not force tool. Use the correct tool for your application. The correct tool will do the
job better and safer at the rate for which it is designed.
• Do not use tool if switch does not turn it on or off. Any tool that cannot be controlled
with the switch is dangerous and must be repaired.
• Disconnect the plug from the power source before making any adjustments, changing accessories, or storing the tool. Such preventative safety measures reduce the risk
of starting the tool accidentally.
DANGER! Keep hands away from cutting area and blade. Keep your second hand on
auxiliary handle, or motor housing. If both hands are holding the saw, they cannot be cut
by the blade.
CAUTION: Blades coast after turn off.
• Keep your body positioned to either side of the blade, but not in line with the saw
blade. KICKBACK could cause the saw to jump backwards (see Causes and Operator
Prevention of Kickback and KICKBACK).
• Do not reach underneath the work. The guard can not protect you from the blade below
the work.
• Check lower guard for proper closing before each use. Do not operate saw if lower
guard does not move freely and close instantly. Never clamp or tie the lower guard
into the open position. If saw is accidentally dropped, the lower guard may be bent. Raise
the lower guard with the retracting handle and make sure it moves freely and does not
touch the blade or any other part, at all angles and depth of cut.
• Check the operation and condition of the lower guard spring. If the guard and the
spring are not operating properly, they must be serviced before use. Lower guard may
operate sluggishly due to damaged parts, gummy deposits, or a buildup of debris.
• Lower guard should be retracted manually only for special cuts such as “pocket
cuts” and “compound cuts.” Raise lower guard by retracting handle. As soon as
blade enters the material, lower guard must be released. For all other sawing, the lower
guard should be allowed to operate automatically.
• Always observe that the lower guard is covering the blade before placing saw down
on bench or floor. An unprotected, coasting blade will cause the saw to walk backwards,
cutting whatever is in its path. Be aware of the time it takes for the blade to stop after switch
is released.
• NEVER hold piece being cut in your hands or across your leg. It is important to support the work properly to minimize body exposure, blade binding, or loss of control.
• Hold tool by insulated gripping surfaces when performing an operation where the
cutting tool may contact hidden wiring or its own cord. Contact with a “live” wire will
also make exposed metal parts of the tool “live” and shock the operator.
• When ripping, always use a rip fence or straight edge guide. This improves the accuracy of cut and reduces the chance for blade binding.
• Always use blades with correct size and shape (diamond vs. round) arbor holes.
Blades that do not match the mounting hardware of the saw will run eccentrically, causing
loss of control.
• Never use damaged or incorrect blade washers or bolts. The blade washers and bolt
were specially designed for your saw, for optimum performance and safety of operation.
• Avoid cutting nails. Inspect for and remove all nails from lumber before cutting.
CAUSES AND OPERATOR PREVENTION OF KICKBACK
• Kickback is a sudden reaction to a pinched, bound or misaligned saw blade, causing an
uncontrolled saw to lift up and out of the workpiece toward the operator.
• When the blade is pinched or bound tightly by the kerf closing down, the blade stalls and
the motor reaction drives the unit rapidly back toward the operator.
• If the blade becomes twisted or misaligned in the cut, the teeth at the back edge of the
blade can dig into the top surface of the wood causing the blade to climb out of the kerf and
jump back toward operator.
• Kickback is the result of tool misuse and/or incorrect operating procedures or conditions
and can be avoided by taking proper precautions as given below:
• Maintain a firm grip with both hands on the saw and position your body and arm to
allow you to resist kickback forces. Kickback forces can be controlled by the operator, if
proper precautions are taken.
• When blade is binding, or when interrupting a cut for any reason, release the trigger
and hold the saw motionless in the material until the blade comes to a complete stop.
Never attempt to remove the saw from the work or pull the saw backward while the
blade is in motion or kickback may occur. Investigate and take corrective actions to eliminate the cause of blade binding.
• When restarting a saw in the workpiece, center the saw blade in the kerf and check
that the saw teeth are not engaged into the material. If saw blade is binding, it may walk
up or kickback from the workpiece as the saw is restarted.
• Support large panels to minimize the risk of blade pinching and kickback. Large panels tend to sag under their own weight. Support must be placed under the panel on both
sides, near the line of cut and near the edge of the panel.
• Do not use dull or damaged blade. Unsharpened or improperly set blades produce narrow kerf causing excessive friction, blade binding, and kickback.
• Blade depth and bevel adjusting locking levers must be tight and secure before making cut. If blade adjustment shifts while cutting, it may cause binding and KICKBACK.
• Use extra caution when making a “Pocket Cut” into existing walls or other blind
areas. The protruding blade may cut objects that can cause kickback.
WARNING: Some dust created by power sanding, sawing, grinding, drilling, and other construction activities contains chemicals known to cause cancer, birth defects or other reproductive harm. Some examples of these chemicals are:
• lead from lead-based paints,
• crystalline silica from bricks and cement and other masonry products, and
• arsenic and chromium from chemically-treated lumber (CCA).
Your risk from these exposures varies, depending on how often you do this type of work. To
reduce your exposure to these chemicals: work in a well ventilated area, and work with
approved safety equipment, such as those dust masks that are specially designed to filter out
microscopic particles.
• Avoid prolonged contact with dust from power sanding, sawing, grinding, drilling,
and other construction activities. Wear protective clothing and wash exposed areas
with soap and water. Allowing dust to get into your mouth, eyes, or lay on the skin may
promote absorption of harmful chemicals.
WARNING: Use of this tool can generate and/or disburse dust, which may cause serious
and permanent respiratory or other injury. Always use NIOSH/OSHA approved respiratory protection appropriate for the dust exposure. Direct particles away from face and body.
WARNING: Always use eye protection. All users and bystanders must wear eye protection that conforms to ANSI Z87.1.
CAUTION: Wear appropriate personal hearing protection during use. Under some conditions and duration of use, noise from this product may contribute to hearing loss.
CAUTION: When cutting into walls, floors or wherever live electrical wires may be encountered, DO NOT TOUCH ANY METAL PARTS OF THE TOOL! Hold the tool only by insulated
grasping surfaces to prevent electric shock if you cut into a live wire.
• The label on your tool may include the following symbols. The symbols and their definitions
are as follows:
V ................volts
A ......................amperes
Hz ..............hertz
W ......................watts
min ............minutes
....................alternating current
..............alternating or
..................direct current
..................direct current
no......................no load speed
..............Class II Construction
…/min ..............revolutions per minute
..............earthing terminal
....................safety alert symbol
FEATURES
A. End cap
B. Trigger switch
C. Bevel angle adjustment
B
D. Shoe
E. Blade clamping screw
F. Lower blade guard
A
Motor
Your DEWALT tool is powered by a DEWALT motor. Be sure
your power supply agrees with nameplate marking. As
little as 10% lower voltage can cause loss of power
and can result in overheating. All D EWALT tools are
factory-tested; if this tool does not operate, check the
power supply.
D
E
F
C
Changing Blades
CAUTION: ALWAYS TURN OFF AND DISCONNECT TOOL BEFORE CHANGING
ACCESSORIES OR MAKING ANY ADJUSTMENTS.
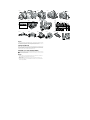
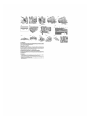
TO INSTALL THE BLADE (FIG. 1 - 4)
1. Place inner clamp washer (G) on saw spindle with the large flat surface facing out toward
the blade.
2. Retract the lower blade guard (F) and place blade on saw spindle against the inner clamp
washer, making sure that the blade will rotate in the proper direction (the direction of the
rotation arrow on the saw blade and the teeth must point in the same direction as the direction of rotation arrow on the saw). Do not assume that the printing on the blade will always
be facing you when properly installed. When retracting the lower blade guard to install the
blade, check the condition and operation of the lower blade guard to assure that it is working properly. Make sure it moves freely and does not touch the blade or any other part, in
all angles and depths of cut.
3. Place outer clamp washer (H) on saw spindle with the large flat surface against the blade
and the wording on the outer clamp washer facing you.
4. Thread blade clamping screw (E) into saw spindle by hand (screw has right-hand threads
and must be turned clockwise to tighten).
5. Depress the blade lock (I) while turning the saw spindle with the blade wrench until the
blade lock engages and the blade stops rotating.
6. Tighten the blade clamping screw firmly with the blade wrench.
NOTE: Never engage the blade lock while saw is running, or engage in an effort to stop the tool.
Never turn the saw on while the blade lock is engaged. Serious damage to your saw will result.
TO REPLACE THE BLADE
1. To loosen the blade clamping screw (E), depress the blade lock (I) and turn the saw spindle with the blade wrench until the blade lock engages and the blade stops rotating. With
the blade lock engaged, turn the blade clamping screw clockwise with the blade wrench
(screw has right-hand threads and must be turned counterclockwise to loosen).
2. Remove the blade clamping screw (E) and outer clamp washer (H) only. Remove old
blade.
3. Clean any sawdust that may have accumulated in the guard or clamp washer area and
check the condition and operation of the lower blade guard as previously outlined. Do not
lubricate this area.
4. Select the proper blade for the application (see Blades). Always use blades that are the
correct size (diameter) with the proper size and shape center hole for mounting on the saw
spindle. Always assure that the maximum recommended speed (rpm) on the saw blade
meets or exceeds the speed (rpm) of the saw.
5. Follow steps 2 through 6 under To Install the Blade, making sure that the blade will rotate
in the proper direction.
LOWER BLADE GUARD
WARNING: The lower blade guard is a safety feature which reduces the risk of serious
personal injury. Never use the saw if the lower guard is missing, damaged, misassembled or not working properly. Do not rely on the lower blade guard to protect you under
all circumstances. Your safety depends on following all warnings and precautions as
well as proper operation of the saw. Check lower guard for proper closing before each
use as outlined in Additional Safety Rules for Circular Saws. If the lower blade guard is
missing or not working properly, have the saw serviced before using. To assure product safety and reliability, repair, maintenance and adjustment should be performed by
an authorized service center or other qualified service organization, always using identical replacement parts.
Cutting Depth Adjustment (Figures 5 - 7)
CAUTION: ALWAYS TURN OFF AND DISCONNECT TOOL BEFORE CHANGING
ACCESSORIES OR MAKING ANY ADJUSTMENTS.
1. Hold the saw firmly. Raise the depth adjustment lever (J) to loosen and move shoe to
obtain the desired depth of cut, as shown. Make sure the depth adjustment lever has been
retightened (lowered) before operating the saw.
2. Your saw is equipped with a carbide tipped saw blade for long life and efficient cutting.
3. Setting the saw at the proper cutting depth keeps blade friction to a minimum, removes
sawdust from between the blade teeth, results in cooler, faster sawing and reduces the
chance of kickback. Align the appropriate mark on the depth adjustment strap with triangle
on the upper blade guard (K). Your depth is set.
4. For the most efficient cutting action using a carbide tipped saw blade, set the depth adjustment so that about one half of a tooth projects below the surface of the wood to be cut.
5. A method of checking for the correct cutting depth is shown in Figure 7. Lay a piece of the
material you plan to cut along the side of the blade, as shown in the figure, and observe
how much tooth projects beyond the material.
Bevel Angle Adjustment (Figure 8)
CAUTION: ALWAYS TURN OFF AND DISCONNECT TOOL BEFORE CHANGING
ACCESSORIES OR MAKING ANY ADJUSTMENTS.
The full range of bevel adjustment is from 0 to 56 degrees. The pivot bracket is graduated in
increments of 1 degree.
There is a bevel angle adjustment mechanism (M) consisting of a quadrant with a pointer (N)
and a lever (L) on the front of the saw.
1. To set the saw for a bevel cut, raise the lever to loosen the Bevel Adjustment.
2. Tilt the shoe to the desired angle by aligning the pointer with the desired angle mark on the
pivot bracket.
3. Retighten the bevel adjustment by lowering the lever.
Bevel Detent (Figure 8)
CAUTION: ALWAYS TURN OFF AND DISCONNECT TOOL BEFORE CHANGING
ACCESSORIES OR MAKING ANY ADJUSTMENTS.
The saw is equipped with a bevel detent feature. As you tilt the shoe you will hear a click and
feel the shoe stop at both 22.5 and 45 degrees. If either of these is the desired angle, retighten the lever (L) by lowering it. If you desire another angle, continue tilting the shoe until the
pointer aligns with the desired mark.
Kerf Indicator (Figure 9)
The front of the saw shoe has a kerf indicator for vertical and bevel cutting. This indicator
enables you to guide the saw along cutting lines penciled on the material being cut. The indicator lines up with the left (inner) side of the saw blade, which makes the slot or "kerf" cut by
the moving blade fall to the right of the indicator. The ribs on the front of the shoe are at 1/4"
(6.35 mm) spacing. The notches on the front of the shoe are at 1/2" (13 mm) intervals.
OPERATION
Switch (Fig. 1)
Pull the trigger switch (B) to turn the motor on. Releasing the trigger turns the motor off. This
tool has no provision to lock the switch in the on position, and the tool should never be locked
on in any way.
Workpiece Support
Figure 10 and 12 show proper sawing position. Figure 11 and 13 show an unsafe condition.
Hands should be kept away from cutting area, and power cord is positioned clear of the cutting area so that it will not get caught or hung up on the work.
To avoid kickback, DO support board or panel NEAR the cut, (Figure 10 and 12). DON’T support board or panel away from the cut (Figure 11 and 13). When operating the saw, keep the
cord away from the cutting area and prevent it from becoming hung up on the work piece.
WARNING: It is important to support the work properly and to hold the saw firmly to prevent
loss of control which could cause personal injury; Figure 12 illustrates typical hand support of
the saw.
ALWAYS DISCONNECT SAW BEFORE MAKING ANY ADJUSTMENTS! Place the work with its
“good” side - the one on which appearance is most important - down. The saw cuts upward, so
any splintering will be on the work face that is up when you saw it.
Cutting
Support the work so that the waste will be on your right. Place the wider portion of the saw
shoe on that part of the work piece which is solidly supported, not on the section that will fall
off when the cut is made. As examples, Figure 12 illustrates the RIGHT way to cut off the end
of a board, and Figure 13 the WRONG way. Always clamp work. Don’t try to hold short pieces
by hand! Remember to support cantilevered and overhanging material. Use caution when
sawing material from below.
Be sure that the saw is up to full speed before blade contacts material to be cut. Starting the
saw with blade against material to be cut or pushed forward into kerf can result in kickback.
Push the saw forward at a speed which allows the blade to cut without laboring. Hardness and
toughness can vary even in the same piece of material, and knotty or damp sections can put
a heavy load on the saw. When this happens, push the saw more slowly, but hard enough to
keep it working without much decrease in speed.
Kickback
When the saw blade becomes pinched or twisted in the cut, kickback can occur. The saw is
thrust rapidly back toward the operator. When the blade is pinched or bound tightly by the kerf
closing down, the blade stalls and the motor reaction drives the unit backward. When the blade
becomes twisted or misaligned in the cut, the teeth at the back edge of the blade can dig into
the top surface of the wood causing the blade to climb out of the kerf and jump back toward
the operator.
Kickback is more likely to occur when any of the following conditions exist.
1. IMPROPER WORKPIECE SUPPORT
A. Sagging or improper lifting of the cut off piece can cause pinching of the blade and lead
to kickback. (Figure 11)
B. Cutting through material supported at the outer ends only can cause kickback. As the
material weakens it sags, closing down the kerf and pinching the blade.
C. Cutting off a cantilevered or overhanging piece of material from the bottom up in a vertical direction can cause kickback. The falling cut off piece can pinch the blade.
D. Cutting off long narrow strips (as in ripping) can cause kickback. The cut off strip can
sag or twist closing the kerf and pinching the blade.
E. Snagging the lower guard on a surface below the material being cut momentarily
reduces operator control. The saw can lift partially out of the cut increasing the chance
of blade twist.
2. IMPROPER DEPTH OF CUT SETTING ON SAW
To make the most efficient cut, the blade should protrude only far enough to expose 1/2 of
a tooth as shown in figure 5. This allows the shoe to support the blade and minimizes twisting and pinching in the material. See the section titled “Cutting Depth Adjustment.”.
3. BLADE TWISTING (MISALIGNMENT IN CUT)
A. Pushing harder to cut through a knot, a nail, or a hard grain area can cause the blade
to twist.
B. Trying to turn the saw in the cut (trying to get back on the marked line) can cause blade
twist
C. Over-reaching or operating the saw with poor body control (out of balance), can result
in twisting the blade.
D. Changing hand grip or body position while cutting can result in blade twist.
E. Backing up the saw to clear blade can lead to twist if it is not done carefully.
4. MATERIALS THAT REQUIRE EXTRA ATTENTION
A. Wet lumber
B. Green lumber (material freshly cut or not kiln dried)
C. Pressure treated lumber (material treated with preservatives or anti-rot chemicals)
5. USE OF DULL OR DIRTY BLADES
Dull blades cause increased loading of the saw. To compensate, an operator will usually
push harder which further loads the unit and promotes twisting of the blade in the kerf.
Worn blades may also have insufficient body clearance which increases the chance of
binding and increased loading.
6. LIFTING THE SAW WHEN MAKING BEVEL CUTS
Bevel cuts require special operator attention to proper cutting techniques - especially guidance of the saw. Both blade angle to the shoe and greater blade surface in the material
increase the chance for binding and misalignment (twist) to occur.
7. RESTARTING A CUT WITH THE BLADE TEETH JAMMED AGAINST THE MATERIAL
The saw should be brought up to full operating speed before starting a cut or restarting a
cut after the unit has been stopped with the blade in the kerf. Failure to do so can cause
stalling and kickback.
Any other conditions which could result in pinching, binding, twisting, or misalignment of the
blade could cause kickback. Refer to the sections on “Adjustments And Set-Up” and
“Operation” for procedures and techniques that will minimize the occurrence of kickback.
MAINTENANCE
Cleaning
Use only mild soap and a damp cloth to clean the tool. Many household cleaners contain
chemicals which could seriously damage plastic. Do not use gasoline, turpentine, lacquer or
paint thinner, dry cleaning fluids or similar products. Never let any liquid get inside the tool;
never immerse any part of the tool in a liquid.
Lubrication
Self lubricating ball and roller bearings are used in the tool and relubrication is not required.
However, it is recommended that, once a year, you take or send the tool to a service center
for a thorough cleaning, inspection and lubrication of the gear case.
Electric Brake (DW369 Only)
Your saw has an automatic electric brake which is designed to stop the blade from coasting
in about two seconds, after you release the trigger switch. It is useful when making certain
cuts in wood where a coasting blade would result in a wide, imprecise cut.
Occasionally, the brake will not function properly and won’t stop the saw in the 2 seconds
discussed above. If this condition persists, turn the saw on and off four or five times. If the
brake still does not stop the blade in about 2 seconds, the problem may be worn brushes.
Replace the brushes as described below and try the saw again. If the problem still persists,
have the tool serviced at a DEWALT certified service center.
Repairs
To assure product SAFETY and RELIABILITY, repairs, maintenance and adjustment should be
performed by authorized service centers or other qualified service personnel, always using identical replacement parts. (See the section titled “Brushes” for brush replacement information.)
Brushes
CAUTION: ALWAYS TURN OFF AND DISCONNECT TOOL BEFORE CHANGING
ACCESSORIES OR MAKING ANY ADJUSTMENTS.
Inspect carbon brushes regularly by unplugging tool, removing the end cap and withdrawing
the brush assembly. Keep brushes clean and sliding freely in their guides. Always replace a
used brush in the same orientation in the holder as it was prior to removal. Carbon brushes
have varying symbols stamped into their sides, and if either brush is worn down to the line closest to the spring, the brushes must be replaced. Use only identical DEWALT brushes. New
brush assemblies are available at your local service center. Always replace the end cap after
inspecting or servicing brushes. The tool should be allowed to “run in” (run at no load without
a blade) for 5 minutes before use to seat new brushes.
While “running in” DO NOT TIE, TAPE, OR OTHERWISE LOCK THE TRIGGER SWITCH ON.
HOLD BY HAND ONLY.
Shoe Adjustment
CAUTION: ALWAYS TURN OFF AND DISCONNECT TOOL BEFORE CHANGING
ACCESSORIES OR MAKING ANY ADJUSTMENTS.
Your shoe has been factory set to assure that the blade is perpendicular to the shoe. If after
extended use, you need to re-align the blade follow the directions below:
ADJUSTING FOR 90 DEGREE CUTS
1. Return the saw to 0 degrees bevel.
2. Place the saw on its side, and retract the lower guard.
3. Loosen the bevel adjustment lever (L). Place a square against the blade and the shoe as
shown in figure 14.
4. Using a hex wrench, turn the set screw on the underside of the shoe until the blade and
the shoe are both in flush contact with the square. Retighten the bevel adjustment lever.
ADJUSTING DEPTH ADJUSTMENT AND BEVEL ADJUSTMENT LEVERS (FIGURE 15)
It may be desirable to adjust the depth adjustment lever or the bevel adjustment lever. They
may loosen in time and hit the shoe before tightening. To tighten the levers, follow the steps
below.
ADJUSTING THE BEVEL ADJUSTMENT LEVER
1. Using a small screwdriver, pry the lock ring off.
2. Remove the lever and rotate it in the desired direction about 1/8 of a revolution.
3. Reinstall the lock ring with the concave side against the lever.
ADJUSTING DEPTH ADJUSTMENT LEVER - (DW369 ONLY)
1. Loosen the screw securing the depth adjustment lever.
2. Remove the depth adjustment lever and rotate it to the desired location, about 1/8 of a
revolution.
3. Tighten the lever screw.
Blades
A dull blade will cause inefficient cutting, overload on the saw motor, excessive splintering and
increase the possibility of kickback. Change blades when it is no longer easy to push the saw
through the cut, when the motor is straining, or when excessive heat is built up in the blade.
It is a good practice to keep extra blades on hand so that sharp blades are available for immediate use. Dull blades can be sharpened in most areas; see SAWS-SHARPENING in the yellow pages.
Hardened gum on the blade can be removed with kerosene, turpentine, or oven cleaner. Antistick coated blades can be used in applications where excessive build-up is encountered, such
as pressure treated and green lumber.
ACCESSORIES
Recommended accessories for use with your tool are available at extra cost from your local
service center.
CAUTION: The use of any non-recommended accessory may be hazardous.
DO NOT USE WATER FEED ATTACHMENTS WITH THIS SAW.
VISUALLY EXAMINE CARBIDE BLADES BEFORE USE. REPLACE IF DAMAGED.
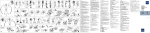
FIG. 1
FIG. 2
FIG. 4
FIG. 3
LOOSEN
I
K
G
H
E
J
DW368
DW369
TIGHTEN
FIG. 5
1/4”
6.35 mm
1/2”
13 mm
45˚
LOOSEN
N
L
TIGHTEN
M
FIG. 10
FIG. 11
FIG. 12
FIG. 13
FIG. 14
FIG. 15
P
Repairs
To assure product SAFETY and RELIABILITY, rapirs, maintenance and adjustment (including
brush inspection and replacement) should be performed by authorized service centers or
other qualified service organizations, always using identical replacement parts.
SERVICE INFORMATION
DEWALT offers a full network of company-owned and authorized service locations throughout
Asia. All DEWALT Service Centers are staffed with trained personel to provide customers with
efficient and reliable service. Whether you need technical advice, repair, or genuine factory
replacement parts, contact the DEWALT location nearest to you.
UNWANTED TOOLS AND THE ENVIRONMENT
Should you find one day that the tool needs replacement or is of no further use, think of
the protection of the environment. D EWALT recommends you to contact your local
council for disposal information.
NOTES
• DEWALT's policy is one of continuous improvement to our products and, we reserve the
right to change product specifications without prior notice.
• Standard equipment and accessories may vary by country.Product specifications may
differ by country.
• Complete product range may not be available in all countries. Contact your local DEWALT
dealers for range availability.
J
FIG. 9
FIG.7
FIG. 6
0˚
• ߝ̻ۯ࠵ੂݮײΖǹȗ̻ܓҡޭ˅٠іΞ࠵ײޛۯЬި̻ۯ࠵ͣޭؾǸܤեǽੂڊڑ
݃ ༙ഏხ ྨၔ ຫဧၴਜ਼ ႖લૐ ຫဧዻૺ௴ ၁ጔጁఁఋ.
• ࠕިҗɁߝܬݲΖǹȗҗߣ֞ੈ͈͒ ႗ఎ ૐ௴ ஃᆽടધ ୳ዻ ጁఁఋ. ஃᆽചဪ ႗
ఎ ක൘ ਜ਼ჰ ၹ ႜ๗ౘ લૐ౹ၔ ီჯၭၦ ඳಀხ ྨၒඑ ႞࿌ዻૺ ༱ཀఁఋ.
• ߵߣտсޭΖջսިǢੇջսިؾυǹȗΖܸܤ࠘ޜٟ̻ॹҗޯੂ
݃ڊڑື࿘ఋඓ, ຫဧዻૺ ႖ લૐ ༘൘ዻཊགྷ. ႜ๗ਜ਼ ุዻඓ ൣၔ ຫધਜ਼
෧ແጁఁఋ.
• ߥߵܜƢȦ߆ੂ̻ջؼਣҩ ݃ڊڑੂݮײዽ લૐ ൬௴ ิዜၕ ఋ൏ લૐ ຫဧዾ ಕ
၁ጔዾ ༘ ၰཀఁఋ.
ځ֞ؖ
࠹ ӽ ޭ ͈ ڑ ޙɍ ? w w w . d e w a l t . c o m݃ ڊ ڑ ݃ ܤ
• ߝΖǹȗ̻ځ֞ؖǞޭ̻ٟҟɁ٣ҩޭੋ ͈͒ੈ܄ၴગၦ ࿖௴ ჯဴၡ ๗༺
ႜ๗௴ ิື ၁ጔၦ ၰၕ ༘ ၰཀఁఋ.
• ځ֞ؖԭޜϜΖްȒࢷջਣҩ ݃ڊڑੂݮײޜม ໕ၡ ႜ๗ ิึ ၰ௴ ხགྷຫ
ጃ౹ၕ ಋ്ཊགྷ.
ݻ੯ঠިջƢߜޯۭߝٟࣻ
ވਜ਼ ߞ͕ջսǻˊޜؾؖܤӇҟੂ͒݃ڊڑҖޙؾѡեߵ˅ޭ߃ؾӡੂ߃ޜ࠾ݯ
݃ڊڑޙ ක ၕ ၼધ ၰఋඓ, ஃၦ ၕ ၴ ༘ ࿖ཀఁఋ.
ݮײӞؖ
DW368
185 mm ݻ੯ঠ
ࠕި" ஃၔ ႖ဴၕ ୬ ፎ ፂ႖ጁఁఋ.
DEWALT Industrial Tool Co., 701 East Joppa Road, Baltimore, MD 21286
ிೣ຺ અၔ຺ၡ ང, "D"ၴක࿅ၡ લૺၮ ૯൛, ၼၦၡ ዳೡු , ሠቼ
༺ၡ ဘጨ, લૐ ዑඓၡ ൠකጨ ౾ၔ DEWALT ႖લૐ ൢၡ ችჷၮఁఋ.
ްԬۭߝ࠵ऀ
ǧǮӡξ࠵ऀޱޜǮޭੋੂྤ݃ڊڑ೭ ხགྷຫጃၕ ა༘ዻხ ྨၕ ઠ
ဨ, ႖ၦ, ጷႁ, ิືၦ ၰၕ ༘ ၰཀఁఋ.
ޭ࠵ײڊπޜ٠࠵ੂ݃ڊڑ
ܜǹƤ
• ܜǹƤ ޜəʺੂǕ ੂǮ տ ޜԯૈ ݃ڊڑጯၼዽ ၵ࿕ఝဉ ࿌ဪ લ௴ ຫધ ၁ጔ ၦ ၰཀఁఋ.
• Ƣ˅ࢷۼأܯƢځӆ࠵υޙѡޯԮވਜ਼ޭ̻ǸߝؖܤΖǹȗҗ࠵ੂݮײҧڑ
݃ڊ႖લૐ௴ ൿხ ෧මჲ ุၕ ฿ၩ ༘ ၰ௴ ุିၕ ൢ౼ఁఋ.
• ߝΖǹȗҗ̻ੂݮײΖۭȗǧʘޭ˅ܓҡޭԵӽπޭߡȸੂ࠵өੂΌѢੂ ݃ڊڑၡ
ਜ਼ ຮൢጄხඓ, લૐ ၵ གྷ ቛ႞ዻხ ජዾ ༘ ၰཀఁఋ.
ߝɁۭߝ
• ߡ࠵Οǹȗ̻ӡξǽіȳߣǻȳࣻܤҳǕߥͤѡࣺΟवܯܤৃاǢੋܓ͈͒ੈ܄
ϧԵޙڋѡΌਸ਼тȶҗ՜੯ڊ१࠵ҧ͒݃ڊڑҖͩܓਸ਼тȶΌ࠵ੂݮײҧ݃ڊڑव
ৃاƢߜߞੂǕߡ࠵Ξځڐި࠵̻ܟтݲǧݯǞޭ̻ߝɁɁ٣җঢੋޯੂڊڑ
݃ લૐਜ਼ ႖ૺ႕ၒച ૺၕ ዻხ ජዻ ધၿ உఋඓ, ႚხືሲ௴ ຫဧၴ ႖ૺਜ਼
ቛዻხ ྨ௴ ၔ ႔ጃഎၕ ൢ౹ ఁఋ. ႞ 1Ⴖ(ႚხ) ႖લૐൢ ႕ဧ௴ ຫጃၮఁ
ఋ.
• ޭࠞߞܯǹȗ̻ܤսȷਸ਼тȶƢ߆ࣺΞ͒ޛࡧ͈͒ڇܓҖࡧޭ͈͒ڇ˫ੋ֞ܤ
ਸ਼тȶ̻սȷवܤৃاԵޙѡҩπܓҳǕ͈͒ਸ਼тȶƢवૈߝݒܤৃاҳ࠵ۯ
ޜǧݯਸ਼тȶҗΐє ݃ڊڑੂݮײؖ႖ᎁ ൬ხ ྨఋඓ, ႖ૺૺ༜ၴ ึ૰ ᇮቼ
໕ᆳ ဠᅯዻཊགྷ. ࿌௲ ෮ฅၒച౷ ዯ૯ ોጹዻხ ൠཊགྷ. ၦთ ႗ၔ ຳ໓ ႚ
ხ ႖എ ᇬဉ ႚხ ႖എ લ གྷ༺ቋၦ ዶဠዻხ ྨཀఁఋ. ႞ 2Ⴖ(ၦთ ႗) લૐൢ
႕ဧ௴ ຫጃၮఁఋ. DW368 DW369௴ ၦთ ႖ લૐ ၮఁఋ.
• ޭ˅Шχޭܤьޯ࠵˞߆ǮݐƱ࠵ߡޛਘӚ࠵ੂޜࣆߡࢷڌܤҧ ݃ڊڑၨᅰ
ਜ਼ ႚხ ඓ జၒඓ ႖ ၁ጔၦ ᇑჵఁఋ.
• ֞Ƣ˖ҟ̻Ǹޭ˅ߤޛǸߝܤΖǹȗҗΥ࠵ҧ ݃ڊڑ႖લૐ මၦ ౹࿌ਜ਼ඓ ႖
၁ጔၦ ᇑჵఁఋ.
• ळμҗ ੇջѡ ࠵ੂݮײҧ ݃ڊڑલૐ ခ૾ ಕ ᇮቼ ዯ૯ ຐၕ ಕ ᇬ
႗ఝ ၦဧዻხ ൠཊགྷ. ၦ ૺ, ஃᆽചဪ ක൘, ီჯၦ௴ මᅰ ᇬ ਜ਼ଆၦ
ხ ൠཊགྷ. ືౘ ᇬ௴ ყགྷ ોᅰዻཊགྷ. ືౘ ᇬ௴ ႖ ၁ጔၦ ჭਜ਼ጁఁ
ఋ.
• ߝΖǹȗҗ ݟջ ݮײ ؖܤϜ, "WA"˅"W"Ƣ ਘڊΟ ߆ ݟڎळμҗ ݃ڊڑੂݮײ. ၦ ᇬ
౹ၔ ཇဘဧၦඑ, ႖ ၁ጔၦ ጁఁఋ.
ळμި࣑ػȳǞ
ߝ۵
220-240V
ߝҌ
ၦື
ၦዻ
ळμ ߝࢷ Ʌޭ (m)
0-15
16-30
12
14
16
31-61
62-91
AW G
12
๗ ၿຫጃ
ƴޯިۭߝ
• ߝΖǹȗިࠕڊݮײҗɁޭݲǮܤڋҳǕ݃ڊڑੂݮײǰϜ˅܅ӿ٣ި܅ਣޜ
զؖܤॹݮǹȗҗ࠵ੂݮײҧ ݃ڊڑ႖લૐ ຫဧགྷ ิၡዽ ༚, ཉੜዽ ิືၕ
ၮၕ ༘ ၰཀఁఋ.
• ߜߞզ߆ڌ߆˅ޭݍ࠷ܓ̼݃ڊڑੂޜȗҗ࠵ੂݮҧ݃ڊڑɃӄҟҗੂ݃ڊڑ
ӄҟऄЩǻ߆ݍƪޜǹȗިȗΖջؖܤވӇҟΥ௵ ݃ڊڑ࿌ჰ ဆၦ ၿཅૐ, ૼ ൽ൘
ᆽೢၔ ૐิ၁ ༘ ၰཀఁఋ. ጹዟૐ௴ ႶႶ ૐิ၁ ਜ਼൘ધ ၰၒාച ዳጄ ጁ
ఁఋ.
• ȽځфڊΖ࠵ੂޜҧ݃ڊڑਸ਼тȶҗʅɁߝࣺވځܤƢɥ߭༺ ݃ڊڑੂޯޜޞ
၁ᆳ ਜ਼ೢၕ ౠ ᅘ લૐ ᇣ ዻ௴ લૐ લૐ ၦዻඓ ຫધਜ਼ ၩ࿌ஃ
༘ ၰཀఁఋ.
• ǹȗҗपɁߝߣߵܤ१˅юࣺҗࣺ ݃ڊڑݯલૐၡ ፂ႖ิึ ༘ ၰ௴ ഇᆳ Ⴎႜ
ሠ ၡጄ ືጄ ၮၕ ༘ ၰཀఁఋ.
• ࠵˅ࣺǕ࠵ੂݮײҧ ݃ڊڑ࿎႞ ྩ൬ၔ ෧ንၕ ધ ૭ጨၕ ၉ხዻཊགྷ. ႕႗ዽ ෧ን
૭ጨၔ ືዻხ ජዽ ືጼ લૐ ၹ ႞࿌ዾ ༘ ၰ ጁఁఋ.
• ۭߝ߆֞җ݃ڊڑੂݮײեੴۭǧ ݃ڊڑੂݮޜ෮ჰ ൠ༺ሙ ු୪ ෮ხဧ ྦ
႖ ཅ෧, ઙધዽ ጛඎ, ൠ੭ ౾ၕ ႕႗ዽ ືሲ ຫဧዻ ጁఁఋ.
ߝΖǹȗݮײԦǽҟ
• ࠍّ˅ ͒Җ ޯߜݮڎԵՌ ܬੂݮײ ޜǮߣ ਸ਼кਐͤ ܜ ܤӿ ޜΥǮ ࠵࠵ͤ ޜܭ
ੂǕੂࢷڌ˅ޭؾ݃ڊڑѡܜӿޜԭࣺ̻ǎޛտۭߣੂӘߥܓѕޜޜٟ͈͒ڇ
• ߝΖǹȗ ܤӺҟ ૌ ࠵ࠕ ޜҧ ݃ڊڑဧ ൬௴ લૐ ຫဧዻཊགྷ. ႕႗ዽ લૐച
ཅዻધ ྦ႖ዻ ၵ࿕ዾ ༘ ၰཀఁఋ.
• ߝࣺވځݻƢΖੂ࠵ޙۯӚǹȗҗ࠵ੂݮײҧ༺ ݃ڊڑ၁ᆳਜ਼ ุዽ લૐ௴ ၁ጔዻඑ
གྷ ༘൘ጄ ጁఁఋ.
• ߝΖǹȗިߵߞ߆ࣺޜߣ՜ǧੂdž˅ջؼਣޜȒੂdž˅եǽੂɁߝؖܤݻߝܤਸ਼т
ȶҗ ͈͒ੈ܄۫חၦዽ ෮ ྦ႖ฅၦ ືᆳ ජዽ લૐၡ གྷ ၁ጔၕ གྷሥఁఋ.
• ঠˊް˅ޭܺܤїѡ࠵ؖҧ ݃ڊڑၒച ၦ ౪ᄠၒച ቶ૾ ༘ ၰཀఁఋ ("
ၡဴၨຫဧၴ෮" ""ၕ พཊགྷ).
• ȶͤܜӿ۫д࠵ܤҧ ݃ڊڑ૯ ၵ࿕ ఝືම ྤ೭௴ ਜ਼ਜ਼ ຫဧၴ ஃ
พጭጄბ ༘ ࿖ཀఁఋ.
• Ҷި͕ੂߝݮײƢμƢ͖ૈߝݒ੧̻࠵ޯੂ ݃ڊڑዻఎၡ ਜ਼ਜ਼ ၴ၉ട ီჯၦ
ხ ྨ ყགྷ ఏᎁხ ྨ௴ఋඓ ၕ ၵዻხ ൠཊགྷ. ዻఎၡ ਜ਼ ࿌ Ⴣ࿌
ඵ࿌ხ ൠཊགྷ. ၦ ဨᎁ ಡ࿌ხඓ, ዻఎၡ ਜ਼௴ ႚᎆఁఋ. ၼၦ ႚ࿌ ዻ
ఎၡ ਜ਼ ౹࿌ ൘ધ, ၴ၉ട ီჯၦ௴ხ ጸၨዻધ, ஃၦ, ක౷ ੜဉ ႗ຬ ଅ
ၦ ࿌௲ ิึၦ౷ ൢხხ ൠཊགྷ.
• ੂ͕ިƢμځҦިΖǻॹҗޯੂ ݃ڊڑਜ਼ဉ ༺ይൟၦ ႕႗ዻ ၵዻხ ྨ
௴ఋඓ, ຫဧ ႖ ๗༺ ෦ၒ ጁఁఋ. ືౘ ิ၁ ႙ᅎໜ ᆹᅎම, ኒኻၡ ᆔ႕
౾ၒച ዻఎၡ ਜ਼ ૺၦ ิჰዾ ༘ ၰཀఁఋ.
• ੂ͕ިƢμ̻"नट"ޭ˅"झݱμट"ǻƱߣৄޛटܤҩҶ̳ܤܘϒШܰੈ܄ܓ
͈͒ ጆ౹ၕ ႚ࿌ ዻఎၡ ਜ਼ ൝ఁఋ. ஃၦ ႁഭ ౹࿌ਜ਼ၴൠၴ ዻఎၡ ਜ਼௴ ዚ
࿌Ⴆ ጁఁఋ. ක౷ ૺረ ၔ ዻఎၡ ਜ਼ਜ਼ ၴ႕ၒച ၵጄ ጁఁఋ.
• ঠ˅ܤͤܜޜԨ͓˖ܤє̐Ɂߝި͕ੂܤƢμƢߡ੧̻࠵ਁե ݃ڊڑพጭ
ხ ྨધ ු୪ხ௴ ஃၔ ၦ ౪ച ਜ਼ഛ ዻ ૯ ઠചၡ ࿌ಠ මઁၦ౷ხ ၴ്
ఁఋ. ༺၁ᆳ ୪ધ ஃၦ ංᆓ௴ వ ઃ൘௴ གྷၕ ྩྤཊགྷ.
• ͒˅ޭؾҟѡ߀ҡߵƣ࠵߃ͤߞޜҧ ݃ڊڑཅᅰ ிᆖ ஃ છጀ, ႞࿌എၕ ᆊጷዻ
ഛ ૯ ၵ࿕ၕ ༘ጌዻ௴వ ൯ဨ თဠጁఁఋ.
• Ƣє࠷ߝࢷ˅ޭؚळμࣆߡܤٟ̻ǸߝؖܤΖǹȗҗΖڊ४Ϝ̻ߞܯΟ߃ؾ
ޭਘӚ"݃ڊڑޙ߃ޜ႖ਜ਼ ፯്௴" ႖໓ၡ ႚᅿၔ લૐၡ ிᆖౘ ิึ "႖
ਜ਼ ፯്" ൢ౹࿌ එ, ຫဧၴਜ਼ ႖ౙ ༘ ၰཀఁఋ.
• ȗӌ ˙ ޜϜ, Ҥ৻(ځrip fence)˅ ࠶ ؚեߵ Ƣޭμҗ ޭ݃ڊڑੂݮ. ၦ௴ ႗ఎ ႜጸ
ጎືགྷᇣඑ ஃၡ છጁ ૺፂ ბვఁఋ.
• ߞߜॠɁݐӡ۫ޭ͒܌Ӥμ˅ݻ੯ࣛȗӌިঠˊ ݃ڊڑੂݮײޜၡ ᅰછิ
ዜ ൬ხ ྨ௴ ஃၔ ኻཉ႕ၒച ၵዻ ႞࿌എၕ ၬ ఁఋ.
• ؾΞdž˅ҳ࠵̻ۯঠˊݐخݐթৃҗߞͤ࠵ੂݮײҧ ݃ڊڑஃ ဉဉ ยቼ௴ ဴ
ጨၡ ᆊ႕ၡ ༘ጌ ၵ ྦ႖ၕ ધጄ ໕ઢ࿘ཀఁఋ.
• өޜҔ࠵ۯΌѢੂ ݃ڊڑၴ്ૺ ႖ ႁඛ ක౷ ජၕ ະኺพધ ႞ዻཊགྷ.
ԬΖިޯݻǻܼݮײԵ
• ԬΖܓߥޛΞ࠵ޛۯঠˊޭπ݆ܓє࠵ǮͤܜԪޙѡݮײҗੋষ˅ܓƢӚؖ؈Ɂ
dž˅ঠˊޭࢌૈǮԩૈdž˅ߵߣտсޯ˅ؖܤॹ९˅̻ȽځфԬ͈͒ޡ
• ঠˊޭ˅Ӻި߀ҡȘƢɍޭ۫дѡॱॱੂǕӿҟdž˅ԩ੮ޜϜঠˊިڊƤܯ࠵ޜ
ڊ१ǮӡԬܤݮײޜޡੂ࠵ۯǕ߈֬ҟȶ͕ވҗߵߣੈ͈͒
• ঠˊޭߞ͕ջؖܤވɼܷdž˅ߵߣΞ࠵ۯ۷͒ӚঠˊިεӚƢ߆ҟިޭƢ˅Ӻިގ
ਘӚޜٟࣾܓঠˊޭ˅Ӻި߀ҡȘԪޙѡɁ݃ܓҔdž˅ݮײҗੋٟ
͈͒ڇ
• ߝΖǹȗި߀өΟݮײǻ݆ԨҔ࠵ޛۯΖǻߣޭ˅ިॹǢǻѡԬΖޭ؈Ɉ͈͒ ૯
൘ધ, ྤ೭ ຫጃఝച ႕႗ዽ ෮Ⴎᆳ ᆟዻඓ ၦ ዳዾ ༘ ၰཀఁఋ.
• Υޙؾѡঠੂ͕͕ޜǕࠢǮԬΖѕੂߛܤΌѢঢ়ǻ͒ҟҗ ͈͒ੈࣺވ႕႗ዽ ෮Ⴎ
ᆳ ᆟዻඓ ຫဧၴਜ਼ എၕ Ⴎ႗ዾ ༘ ၰཀఁఋ.
• ঠˊޭԩ੧ޜϜ˅͒Җޭސѡߞ͕ޭΞ࠵ޜۯϜȗΖࣺވځҗ̐Ǯঠˊޭߝݒ
ૈӉࣝϜɍ࠵߈Ѵܤঠިܝޭ࠶ݵΌѢ߃Ǯ ͈͒ڇၵ࿕ዻ௴ ႗ఝ ၕ ႞
ዻધ ዻხ ൠཊགྷ. ጮၔ ஃၦ ီჯၦધ ၰ ၦ ແ૾ ༘ ၰၕ ಕ ၕ ౪ച
ఙૺხ ൠཊགྷ. ஃၦ ᎃ ဴၨၕ Ⴎຫዻધ ၦ ႞ዾ ༘ ၰ௴ ጌၕ ᆟዻཊགྷ.
• ͤܜӿؖܤঠڊ͒ޜΖڊ४Ϝঠˊ˅ޜӺছҨިࠞ۸ܤΥǮঠ͈Ƣ߈Ѵܤ
Ӿ੧࠵ ͈͒ੈޯ ࠵ޛۯஃၦ ጠၰၕ ಕ ၕ ఋགྷ ၵགྷሠඓ, ၵ࿕ ఝືම
ၦ ླၒച ਜ਼ ၦ ၰၕ ઇၮఁఋ.
• ঠˊԩૌǻԬΖިވਜ਼ੂػ࣑ޜɁॢੋވ˩ѡ࠵࠵ͤҗҩμ ݃ڊڑማ ኲၔ ૯
ၴᅰ ඳച ፠ધ ጁఁఋ. ხხ௴ ࿅ᄠ ක ၴ്௴ ิ၁ ਜ਼ଆၦ, ኲၡ ਜ਼ၿၴ
൘ ਜ਼ଆၦച གྷ ኞၡ ྤ೭ ࿌ ጁఁఋ.
• Ӻχdž˅ؾΟঠˊ࠵ੂݮײޜҧ ݃ڊڑඳಀધ ႕႗ᆳ ජዽ ஃၔ ዽ ൠᅑ ஃ
ᎅ, ၕ ૺዻ௴ Ⴔၔ ᇤ ၴၕ ൢ౼ఁఋ.
• ьՅҗ߂ȶΌѢߵߣੂ̻ߞ׳Ɍޭݐǧੂ͕ߞ̻ײɁߝܤʈࠊੂ܄ܬӘޭҗޯੋ
͈͒ੈ܄႗ఎዻ௴ ྦ ஃၕ Ⴎႜዽఋඓ, ᎅ ၕ ૺዾ ༘ ၰཀఁఋ.
• ՛ޭ˅͒Җեޭ࠵̻ۯջս"ޜनट"ޜϜͮ ݃ڊڑࠕੋިࠕݰተ࿌ ஃ
ၔ ၕ ૺዾ ༘ ၰ௴ මᅰ ၴ ༘ ၰཀఁఋ.
ǧǮ" ኒဲົಉ, ჲ, ૯ೡၨಉ, ൛ൟ, ૺረ ઁ໕ ጺ ແૺ௴ ၩิ ൿხ౹ၔ ྭၦ
ૺጨ, ૺረ ແང႕ၨ ၁ጔၕ ૺዽఋધ ྩჰ ጷዼමჲ౹ၦ ၰཀఁఋ. ၦ ጷዼමჲၡ ௴
ఋၗ ੪ཀఁఋ.
• இໜึ ኲၨቼၡ இ
• ด གྷඊቼ, ૺረ ໐ႁ ႞ዜၡ ၦຮጷ૬ છႜ
• ጷዼᅧ൘ዽ ඛႁ(CCA)ၡ ๗ဉ ሙഞ
ၦዽ ၩၕ ዻ௴ ๙ ಋೡ ືૺ ிᆖചิሽ ຫဧၴၡ ၁ጔၔ ఋ࿅ጁఁఋ. ၦ౹ ጷዼමჲ
ிᆖၦ బዻഛ ጹૺਜ਼ ၹ௴ ၩዻ, ුໞ ၮၴ ዻ௴ ෮ჰ ൠ༺ሙဉ
੪ၔ གၨౘ ྦ႖ ၿ๗ ᅎဧዻધ ၵ࿕ጁఁఋ.
• ݹϐঠ࠹ȶШޯϐμҢҦɁ९Ljؖܤܜ؈Ɂ̻ӆ࠵݃ܤдߡࣆੂ̻ǎޜ
ੂ݃ڊڑեੴզޜǮ̢֞ݐӿѡ̆ࣝΟջս݃ڊڑࠕܓ۩ޜȬੂިޭ˅̤ջܤ
̻ӆ࠵πੋޛѡݱӿ࠹ાٟҗࣆ࠷ڊ४ٟ͈͒ڇ
ǧǮ"ၦ ၿ๗ၡ ຫဧၔ ཉੜዻધ ૐ႕ၨ ጭ፷ઢ ጮၔ ఋ൏ ືၕ ૺዾ ༘ ၰ௴ ൿხ
෧ແགྷሠ ࿌ბ ༘ ၰཀఁఋ. ጃື NIOSH/OSHA གၨ ጭ፷ พጭ ൿხ ிᆖ
႕ጁዻ ຫဧዻཊགྷ. ࿑ ච ၮၴ ჯႚ႕ၒച ൘ዻཊགྷ.
ǧǮ"եੴۭǧ ݃ڊڑੂݮޜක౷ ຫဧၴဉ ૐઠዻ௴ ຫ౹ၔ གྷ ANSI Z87.1
ಋ്௴ พጭྦઠၕ ᅎဧጄ ጁఁఋ.
ࠕި" ̻ੂݮײΖۭ ߜੈ Ȭҧƴҗ ݃ڊڑੂݮၩิ ືጼၦ ຫဧ თ ၦ ແຮዜၡ
ၗၦ ᅯഎၕ ၬ ዾ ༘ ၰཀఁఋ.
ࠕި"ดၕ ႗ఎዾ ಕ, ఌၦ ࿌ಀ౷ ႖ૺਜ਼ ቛዻ௴ ႖໓ၦ ၰၕ ༘ ၰཀఁఋ. ႖લૐ
ၡ ิ၁ ൢხხ ൠཊགྷ. ႖ਜ਼ ፯്௴ ႖໓ၕ ႗ఎ ዽఋඓ ႖ხ ྨഛ ႗
ౘ ዑඓൢ ฿ၼၒཊགྷ.
• ႖લૐ ၰ௴ ዑགྷ௴ ྤ೭ ૺጭ౹ၦ ၰཀఁఋ. ૺጭဉ ႜၡ௴ ఋၗ ੪ཀఁఋ.
V ................ยቼ
Hz ..............ጘ്ᆫ(ჰ༘)
min ............ึ
..............ჯ ጮၔ
..................ો႖
..............႞ 2Ⴖ ႗
..............ႚხఎၴ
A ......................ྭኲ࿌
W ......................ဉቼ
....................ો ႖
..................ჯ႖
no......................ඳิዻ
…/min ..............ึఙ ፂ႖
....................ྦ႖ၡ ૺጭ
ȗأ
A. ྶ ᇊ
B. ૐ ༺၁ᆳ
C. ઠຫੜ Ⴎႜၿᆳ
B
A
D. ን
E. ஃ Ⴎၭ ຫ
F. ዻఎၡ ਜ਼
ӡ
ዻၡ DEWALT ၿ๗௴ DEWALT කሽച ૐఁఋ. ႖ဴ
લ ၿᆳਜ਼ ዑૺౘ ఝച ൬௴ხ ጸၨዻཊགྷ. 10% ႕ၔ
႖ྮၒച ႖എ ཇၕ ૺዾ ༘ ၰၒඑ, ၦ ౙ ༘ ၰ
ཀఁఋ. ක౷ DEWALT ၿ๗௴ લၿ અຫዻඑ, લૐਜ਼
ၵዻხ ྨၕ ઠဨ, ႖ဴલၿᆳ ጸၨጄཊགྷ.
D
E
F
C
ঠˊȒੂɁ
ࠕި"ջؼਣޜȒੂdž˅ੂޜߣߵߣɁߝޜݻߝܤʱǮਸ਼тȶҗ͈͒ڇח
ঠˊ ੂࣺɁ (Fig. 1-4)
1. ˖ջ ߵ (خݐG)җ ঠˊ ࣛ ܤঠˊ ޜੋ ҧࠕեΌѢ ॢ ਇਇ ਘӚޙѡ ̐۫Ϊ͈͒.
2. ۫д ঠˊ Ƣμ(F)җ ߡ˱ ܓǮ, ˖ջ ߵ ੋͤ ܤخݐঠ ࣛ ܤঠˊ ۫̐ ޜঠˊޭ ԨҖ Եޙ
ѡ ઉߝ ǎ(݃ڊڑੂޯ ޜஃ ఁ ፂ႖ ጷະዑ ෮ጎၔ ၡ ፂ႖ ጷະዑ ෮
ጎᅧ ੪ၔ ෮ጎၦ࿌ ጁఁఋ). ၹ ໕ᆳጋၕ ಕ, ஃ ዑགྷౘ ઇၦ ጃື ຫဧၴ ጎ
ዻધ ၰၕ ઇၦೡધ ఎႜዻხ ൠཊགྷ. ஃ ዻఎၡ ਜ਼ ႚ࿌ ஃၕ ໕ᆳዾ ಕ, ਜ਼
ၡ ືሲဉ ၵၦ ႞ఝച ၵዻ௴ხ ጸၨዻཊགྷ. ၴ၉ട ီჯၦધ, ක౷ ੜဉ
႗ຬ ଅၦ ஃၦ ఋ൏ ิึၕ ઁ൘ხ ྨ௴ხ ጸၨጁఁఋ.
3. ݟջ ߵ (خݐH)җ ঠˊ ॢ ੋͤ ܤਇਇ ਘӚ ؖܤঠ ࣛ ܤΥǮ ݟջ ߵ خݐƢ ݮײҗ
ੂǕ Ϊ͈͒.
4. ঠˊ ߵ ˅(ײE)җ ঠ ࣛޙؾ ؖܤѡ ˅ ޜײҩσ͈͒(ຫ௴ ൏ ෮ጎၦඑ, Ⴎၦધၴ ዾ
ಕ௴ གྷઢ෮ጎၒച ࿌ ጁఁఋ).
5. ঠˊ ߂ȼ ߆ࣺƢ ߜݮΞǮ ঠˊޭ ઉߝ ޜӉࣝ Ϝɍ࠵ ঠˊ юࣺ ݐঠ ࣛ ޜΐҟ̻ Ζۭ ঠˊ ߂
ȼ߆ࣺ(I)җ ̢ҙ͈͒.
6. ঠˊߵ˅ײҗঠˊюࣺѡ͈͒ࠜܬࠊૈڎ
"ިސၦ ၵዻધ ၰ௴ ྦ ஃ ၻၿᆳ ઁ൘ხ ൠཊགྷ. ጮၔ લૐ ංᆓૺ ၁
ጄ ඳ൘ዽ ᎅၕ ਜ਼ዻხ ൠཊགྷ. ၻၿᆳਜ਼ ࿌ ၰ௴ ྦ ၕ ᇥ ༘ ࿖ཀఁఋ. ၔ ཉ
ੜዽ ືၕ ၮ ౙ ઇၮఁఋ.
ঠˊȒੂɁ
1. ঠˊ ߵ ˅(ײE)җ ਡࠕܓɁ ੋވ, ঠˊ ߂ȼ߆ࣺ(I)җ ̦тࠕǮ, ঠ юࣺѡ ঠࣛޭ ઉߝ ޜӉࣝ
Ϝɍ࠵ ΐє͈ࠜ͒. ஃ ၻၿᆳਜ਼ ࿌ ၰ௴ ືሲ, ஃ Ⴎၭ ຫ ஃ ഇᆳച
གྷઢ෮ጎၒച ვఁఋ(ຫ௴ ൏ຫၦඑ, ዚ࿌ૺ ၁ጄ௴ གྷઢ ෮ጎၒച
࿌ ጁఁఋ).
2. ঠˊ ߵ ˅(ײE)ݟ ݐջ ߵ (خݐH)ҩ͈͒ࠜݹࣺ ޜ. ຫဧዽ ஃၕ ஔఁఋ.
3. Ƣμخݐߵݐջսޯڞܤӆ࠵җəʺޭ͔۫ࠕǮޭߝܤҬǎࢮцঠˊੂ͕ި
ƢμިݐॹΖ ͈͒ੈޯޜၦ ิึ ૺၕ ᆳხ ൠཊགྷ.
4. ߜߞ ঠˊ(͈͒ੈॺؚ ޜஃၕ พཊགྷ). ᆔ ໕ᆳዻૺ ႕႗ዽ ሙૺဉ ක࿅ თ
ྱ ૐඅၕ ਜ਼ჰ ྩ൬ၔ ሙૺ(ჯઠ)ၡ ஃၕ ຫဧዻཊགྷ. ஃၡ ᆊఝ ၿ (rpm)
ᆚႯዻ ၡ (rpm)ၕ ხ ྨ௴ხ ௵ ጸၨዻཊགྷ.
5. ঠˊ ੂࣺɁި 2Շ ؖܤ6Շ ǻߣ ޜϒШ ঠˊޭ ݆ԨҖ Ե ޜઉߝ ǎޯ࠵ ޯੋ ࠕڊڑ
݃.
ঠˊੂ͕ިƢμ
ǧǮ"ঠˊੂ͕ިƢμ̻ڐƣވؾਜ਼ޜƩڊػ१̻ۭߝ߆ࣺ͈͒ੂ͕ިƢμƢػ
ڎΞܟdž˅ؾΞܟdž˅߀өߵҤΞܟdž˅߀Ζੂ࠵̻͒ۯӚঠ࠵ੂݮײͤߞޜҧڑ
݃ڊක౷ ືጼ ஃ ዻఎၡ ਜ਼ਜ਼ ຫဧၴ พጭዾ ઇၦೡધ ແੜዻხ ൠཊགྷ. ຫဧ
ၴၡ ྦ႖ၔ ၡ ൏ ၵທ ྤఁೡ ක౷ ઠધဉ ෮ხᆹ౹ၕ ಋ്௴వ ఐၰཀఁఋ.
ᝓ⒓☉Ἂิਜ਼႕ၨ ྦ႖ ༘ᆴឱဉ ၰ௴ ఝച ൯ ຫဧ ႖ ዻఎၡ ਜ਼ਜ਼ ၹ ၻખၰ௴
ხ ጸၨጁఁఋ. ஃ ዻఎၡ ਜ਼ਜ਼ ཇ࿘ ၹ ၵዻხ ྨ௴ ઠဨ, ຫဧ ႖ ၕ
གྷ ๗༺ ෦ၒཊགྷ. ႞ዜၡ ྦ႖ໜ ཅദໜၕ ጸၨዻૺ ၁ጄ, ༘൘, ၉ხ, Ⴎႜ ౾ၔ
๗༺ ሽ ૺረ ၴગၦ ၰ௴ ๗༺ ૺશ ༘ጌጄ ዻඑ, ጃື ၩዽ ોᅰ ิዜၕ
ຫဧጄ ጁఁఋ.
ߞ ׳Ɍޭ ߵߣ(Fig. 5-7)
ࠕި"ջؼਣޜȒੂdž˅͒ҖੂޜߣߵߣɁߝߝܤΖǹȗިߝޜݻʱǮਸ਼т
ȶҗ݃ڊڑޙח
1. ঠ ݃ڊڑޙ߃ ૈ͕͕ ޜଅၦ Ⴎႜ അ(J) ዚૺ ၁ጄ ౹࿌൘ધ, พၦ௴ ఝച ဴዻ
௴ ႗ຬ ଅၦ Ⴎႜዻૺ ၁ጄ ንၕ ီჯ ვఁఋ. ၕ ၵዻૺ ႖ ଅၦ Ⴎႜ അ
ਜ਼ ఋགྷ ႮႫ௴ხ(ྤ೭ച ጎጄၰ௴ხ) ጸၨዻཊགྷ.
2. ݃жٟӞǻઐੋވޜ͕ߞޯߜޓऄԨޭμঠˊޭπ͈͒ڇܓ
3. ߜߞߞ׳Ɍޭؖܤঠޛঠˊިҧ࢘ੂػ࣑ޜΌѢੂߣǮঠ͈ܤޭײӆ࠵җߥ
džੂܬঠ࠹ޭੂؼڌǕޭѺ࠵ܓΌѢੂǮԬΖިɁઉҗƩڊػ६͈͒ ႕႗ዽ ዑགྷ ଅ
ၦ Ⴎႜ ၡ ஃ ືఎၡ ਜ਼(K) ຳੜጨၒച ዻཊགྷ. ଅၦਜ਼ ໕ႜ࿘ཀఁఋ.
4. ऄԨޭμިঠˊܬੂݮײޜƢ߆ઐǻߜޙѡߞ͕ੂɁੋވɌޭߵߣ݃ڊڑੂߣޜ
૯೭ ఁၡ ྾ 1 1/2ਜ਼ ႗ఎౙ ඛႁၡ ዑඓ ྤ೭ ၰ ఁఋ.
5. Fig. 7݆ ̻ؖܤԨҖ ߞ ׳Ɍޭҗ ޯੂ̻ ԵՌޭ ˅͈͒ڇݐ. ႗ఎዾ ႁഭၡ Ⴎੜၕ ૯൜
พხ௴ ఝച ஃၡ ၕ ಋೡ ધ, ࿑ൠ ൣၔ ఁਜ਼ ႁഭၡ ྤ೭ ౹࿌੦௴ხ
શᅑዻཊགྷ.
ǧײƣΌ ߵߣ(Fig. 8)
ࠕި"ջؼਣޜȒੂdž˅͒ҖੂޜߣߵߣɁߝߝܤΖǹȗިߝޜݻʱǮਸ਼т
ȶҗ݃ڊڑޙח
ઠຫ Ⴎႜၡ ක౷ ค၁௴ 0-56 ၮఁఋ. ዳล ๐ೡᇡၔ 1 ჭਜ਼ዾ ಕൠఋ ตዻ ఁఋ.
ዅၨሽ(N)ဉ അ(L)ച ၡ ླඓ 2ึဴၒച ૐໜౘ ઠຫੜႮႜ ૺၵ(M)ၦ ၰཀఁఋ.
1. ઠຫ ႗ఎၕ ၁ጄ ၡ ໕ႜၕ ตઠዻૺ ၁ጄ, ઠຫႮ႗ ၿᆳ ௲༼ዻ ዻഛ അ
൘ཊགྷ.
2. ዳล ๐ೡᇡ ဴዻ௴ ઠຫੜ ዑགྷዻ ዅၨሽ ጀၒച ဴዻ௴ ੜ ንၒ
ച ૺါვఁఋ.
3. അ ྤ೭ച ዻ ઠຫႮႜၿᆳ ఋགྷ Ⴎၮఁఋ.
1. ͤ ܜӿި ߀өΟ ࠵࠵
1) ႗ఎႮੜၦ ྤ೭ച ᅧხ ิ႕႗ዻ ౹࿌ჴၒച ஃၦ ༘ ၰၒඑ
ၦ ແ૾ ༘ ၰཀఁఋ(Fig 11)
2) ᄠ ୵ൢၕ ხხዽ ၵ࿕ ఝືමၕ ႗ఎዾ ઠဨ ၦ ແ૾ ༘ ၰཀఁఋ. ၵ࿕ ఝ
ືමၦ ྤ೭ച ᅸႦ ྾ጄჴ ಋೡ ᇤ ၴၦ ྤ೭ച ધ ஃၦ ୶ ఁఋ.
3) ༘ჯၒച ఌၕ ၁ചዻ ተ࿌ ᆖౘ ၵ࿕ ఝືමၡ Ⴎੜၕ ႗ఎጀၒച
ၦ ແ૾ ༘ ၰཀఁఋ. ႗ఎ Ⴎੜၦ ಡ࿌ხඓ ஃ ᎄ ༘ ၰཀఁఋ.
4) ૾ધ ਜ਼௲ఋೣ ൡఝ ႗ఎ(ະ ੪ၔ)ዻ௴ ઠဨ ၦ ແ૾ ༘ ၰཀఁఋ. ૯ Ⴎੜၕ
ၹೡஏඓ ᇤ ၴၦ ਜ਼ଆၦ ஃၦ ᎁ ଵၩ ༘ ၰཀఁఋ.
5) ༚႕ၒച ၴ ၵ࿕ ఝືම ྤ೭ ዑඓ ዻఎၡ ਜ਼ਜ਼ ઃ൘௴ ઠဨ ຫဧၴਜ਼ ႞࿌
ዻૺ ᎅ౹࿌ ჵఁఋ. ஃၡ ધၭ ૺፂਜ਼ ൣྤხഛ ิึ႕ၒച ႗ఎ ิึၡ ᄠ
ၒച ၕ ౹࿌൛ ༘ ၰཀఁఋ.
2. ߞ͕ ިߣջߜߞ ߞ ׳Ɍޭ
ਜ਼ၿ ፉ႕ၒച ႗ఎၕ ዻૺ ၁ጄ, ஃၔ Fig 5 พၦ௴ ఝച ఁၡ ႗ ႜਜ਼
ிᆖૺ ᆚึዽ ႜൢ ᆖ࿌ ጁఁఋ. ၦ௴ ንၦ ஃၕ ხხዻધ ஃၦ ၵ࿕ ఝ
ືම ᎁ ଵၦ௴ ઇၕ ᆊጷዻഛ ጄვఁఋ. "႗ຬଅၦႮႜ"ิึၕ พཊགྷ.
3. ঠˊ ɼ(ߞ͕ߣߵ ؖܤտс)
1) ൯౼ၦ ජ, ಌಌዽ ඳછၕ ቛዻ ၴ്௴ వ ధ ൣၔ ᎅၕ ౹ ු௴ ઠဨ ஃ
ၦ ଵၩ ༘ ၰཀఁఋ.
2) ႗ఎዻඓ ၡ ෮ጎၕ ધၴ ዾ ಕ(ዑགྷౘ ิึၒച ྤਜ਼ഛ ዾ ಕ) ஃၦ
ଵၩ ༘ ၰཀఁఋ.
3) චᅰ ધႜགྷሠხ ྨၔ ᅘ ၕ ຫဧዻ ஞඳ ຣႦ௴ ઠဨ, ஃၦ ଵၩ ༘
ၰཀఁఋ.
4) ႗ఎዻ௴ ྦ ၼ௴ ၁ᆳ චၡ ၁ᆳ ඓ ஃၦ ଵၩ ༘ ၰཀఁఋ.
5) ጸཇᎁ ႗ఎഛ ஃၕ ౪ച ዻ௴ ઠဨ ၡ ૺါၦხ ྨၒඓ, ஃၦ ଵၩ ༘
ၰཀఁఋ.
4. ࠕިҗ ߈ ̻ੂݧѴ
1) ႝၔ ඛႁ
2) ແඛႁ(ၴ൏ ხ ࿑ൠ ྦౘ ઇၦ ઁႮགྷሠხ ྦၔ ઇ)
3) ྮഎ ᅧ൘ዽ ඛႁ(พႰ႞ ิኞ ෮ხ ྾ዜ ᅧ൘)
5. Ӻχdž˅ ͮт ݱঠˊި ݮײ
ඳಂ ஃച ၡ ิዻਜ਼ ჭਜ਼ዾ ༘ ၰཀఁఋ. ၦ พႜዻૺ ၁ጄ, ຫဧၴ௴ ၦፎ ૯
ิึ ጃື ᎅၕ ࿌ ෘ ఁఋ. ఔၔ ஃၔ ವዽ ᎄ ૺፂਜ਼ ൣྤხધ, ิዻਜ਼
ჭਜ਼ዾ ༘ ၰၒඑ චᅰਜ਼ ୳ዻხ ྨၕ ༘ ၰཀఁఋ.
6. ƣΌ ߞ͕ ޜϜ ঠ ޜπ݆ܓң
ੜ ႗ఎၔ ႗ఎ ૺ༜ၕ ႕႗ዻ ຫဧዻഛ ຫဧၴਜ਼ ችᎁ ၡጄ ጁఁఋ. ችᎁ,
ን ఝዽ ஃၡ ੜဉ ၵ࿕ ఝືම ஃၡ ዑඓၦ ᇑხ௴ ઠဨ ක ஃၦ
ᎁ Ⴎႜ ุ ౙ ૺፂਜ਼ ൣྤჵఁఋ.
7. ͤ ܜӿ ܤԩ ঠ͈ѡ ߞ͕ ڊ͒ ޜϜ
႗ఎၕ གྷၵዻ ૯ ఎ၁ਜ਼ ᇤ ၴ ஃ ઃ൚ ፎ ႗ఎၕ ఋགྷ གྷၵዻૺ ႖
ၵ ဋ႖ᎁ ጁఁఋ. ၦഄ ხ ྨ௴ఋඓ ႗ఎ གྷၦ ხ
ၦ ແ૾ ༘ ၰཀఁఋ.
ঠˊިԩૌޭ˅ɼߵߣտс܄ޜɁٟ̻Ɂ९ॹπѡԬΖޭ؈Ʌٟ͈͒ڇ
ၡ ෧ແၕ ᆊጷ གྷሣ ༘ ၰ௴ ႜ ૺ༜ ఝጄ "Ⴎႜ ໕ᆳ" "ၵ"ิึၕ ᅒႮ
ዻཊགྷ.
ǽҟ
ࢶǢ
ǹȗҗ͔۫ࠕ̻ͼ̻١̢֞ݍޛߤݐƩҩ ݃ڊڑੂݮײޜఋ༘ၡ ਜ਼ႜໞ႞౹ၔ ዯೡ༺
ኋ ືၕ ბ ༘ ၰ௴ ጷዼමჲၦ ዅጀ࿌ ၰཀఁఋ. ਜ਼൚ၦ ቇഅ๙, ೭ᇑ ኲၨቼ
፻໐႞, ೡၦ ሙ൘ఉ ဧྵၦ ૺረ ၉ຫ ႞ዜ౹ၕ ຫဧዻხ ൠཊགྷ. ႖લૐၡ ஏิ௴
මૺਜ਼ ࿖࿌ ዻඑ, લૐၡ ࿌௲ ิึၦ౷ ྵᅰ క૯ხ ൠཊགྷ.
ȃॺ˖Ɂ
Ƣȃॺթޭ˅ѤтՐܓҦߝޛΖǹȗݮײܤΞӘ߈ȃॺޛ͈͒ڇۯ࠵ੂݧ
૯, ၩஶ ዽ લૐ ๗༺ ሽ พஏ ୳ၦ ዻધ, અຫዻඑ, ૺ࿌ ဧૺ ။ጺዻ
ᅪ႔ᎁ ዻഛ ዻૺ ၿጁఁఋ.
ߝɁ ߥΖ߆ࣺ(DW369ҩ)
௴ ෮ྤ༊ ༺၁ᆳ ၔ ፎ ྾ 2ᅾ ႜ௴ ྤਜ਼ఋਜ਼ ஃၦ ංᆓഛ ዻ௴ ၴ ႖ૺ
႞ၿᆳਜ਼ ၰཀఁఋ. ረໜၒച ྤਜ਼௴ ஃၔ தધ ุጸཇዽ ႗ఎඓၦ ၰ௴ ඳ ႗ఎ
ၕ ዾ ಕ ၉ဧጁఁఋ.
ਜ਼ୱ, ႞ၿᆳၡ ૺၦ ဴጺዻხ ྨધ, 2ᅾ ஏ ၦ ංᆓხ ྨཀఁఋ. ၦዽ ືሲ௴
ၕ ᇣધ ୪௴ ઇၕ 4~5 ฟጁఁఋ. ႖ᎁ 2ᅾ ྦ ஃၦ ංᆓხ ྨ௴ఋඓ, ๐གྷ
බ႞ਜ਼ ၰၕ ༘ ၰཀఁఋ. ྤ೭ ໕ዽ ఝച ๐གྷ ોᅰዻધ ၵၕ ఋགྷ ጄพཊགྷ.
႖ᎁ බ႞ਜ਼ ၰఋඓ, DEWART ๗༺ ሽ ๗༺ ෦ၒཊགྷ.
ٟҟ
ߥਣިۭߝǻڌѭੋވޜأΖްͤࢷջؼਣاځ֞ؖؖੋݮײޜ˅͒Җځ֞ؖ
࠶ܤݻǕߝΖǹȗިٟҟԦޜߣߵ࠵ސԭ(݃ڊڑޙ๐གྷ ોᅰ ႜพ શጄ "๐གྷ" ิึ
ၕ พཊགྷ).
ǧ ײӉّࣞ(Fig. 8)
֗тڊ
ࠕި"ջؼਣޜȒੂdž˅͒ҖੂޜߣߵߣɁߝߝܤΖǹȗިߝޜݻʱǮਸ਼т
ȶҗ݃ڊڑޙח
ঠ̻ܤǧײӉّࣞƢ߆Ξ ͈͒ڇܓንၒച Ⴎႜၕ ጀ ಋೡ, ಎଇ ൘ ౹ၒ ཇ ༘
ၰၒඑ, 22.5ဉ 45 ንၦ ංᆓ௴ ઇၕ ௲ ઇၮఁఋ. ౡ თ ዻਜ਼ ဴዻ௴ ੜၨ
ઠဨ, അ(L) ᆛ Ⴎვఁఋ. ఋ൏ ੜ ဴዽఋඓ, ဴዻ௴ ዑགྷਜ਼ ዅၨሽ ረ
ஃ ಕଆხ ንၒച ઢ Ⴎႜጁఁఋ.
ࠕި"ิዜၕ ોጹዻ ఋ൏ ໕ႜႮႜၕ ዻૺ ႖ ႖લૐၡ ႖ဴၕ ጃື ୪ધ ዯ
૯ ຐၒཊགྷ.
႖ဴၦ છ࿌ ၰხ ྨၔ લૐ ྶ ᇊၕ ฆૺધ ๐གྷ ጄᅰዻ ႜૺ႕ၒച ሪ
๐གྷ ະኺฤఁఋ. ๐གྷਜ਼ ୳ዻધ, ਜ਼ၦ ஏ ၴ၉ട ු୪ხ௴ხ ጸၨዻཊ
གྷ. ጃື ၦ႖ၡ ઇ ၩዽ ႞ዜၒച ๐གྷ ોᅰጁఁఋ. ሪ ๐གྷ௴ ඓ
ዑགྷਜ਼ ၰၒඑ, ๐གྷਜ਼ ༺ይൟ ਜ਼ၿ ਜ਼ଆဪ ໓ ఔྰఋඓ ๐གྷ གྷ ોᅰጄ ጁ
ఁఋ. ၩዽ DEWALT ๐གྷൢၕ ຫဧዻཊགྷ. ູചဪ ๐གྷ Ⴎ൝ၔ ხ ๗༺ ሽ
෦ၒཇ ༘ ၰཀఁఋ. ๐གྷ ະኺพ ๗༺ ෦ၔ ፎ௴ ྶ ᇊၕ ጃື ႞ ၁ᆳ
ཊགྷ. ູചဪ ๐གྷ ધႜགྷሠഛ ຫဧዻૺ ႖ 5ึ ྦ લૐ ၵགྷᇣ ጁఁ
ఋ(ஃ ࿖ၦ ิዻ ხ ྨધ ၵ).
"ၵ" གྷሠ௴ ྦ ෮ྤ༊ ඵ ၻ૯ხ ધ ၒചൢ ၼၒཊགྷ.
फ Ș ਘ࠵(Fig. 9)
ఁ ንၡ ླඓ௴ ༘ჯ ੜ ႗ఎၕ ၁ጄ ᇤ ၴ ዑხၴਜ਼ ၰཀఁఋ. ၦ ዑხၴ௴ ႗
ఎዻધၴ ዻ௴ ඛႁ ዶച ዑགྷౘ ႗ఎ໓ၕ ಋೡ ၕ ྦஏዻ௴ ઇၦ ਜ਼ዻ ጁఁఋ.
ዑགྷၴ௴ ൏ᄠၒച ီჯၦ௴ ஃၕ ಡ࿌್൜ ಋೡ ጲၦ "ᇤၴ"ၕ ൢ௴ ஃၡ
ယᄠ(ྦᄠ) ิึၒച ௵࿌ ၰཀఁఋ. ንၡ ླᄠ ະၔ 6.35mm લ ၰཀఁఋ. ንၡ
ླิึ ູၔ 13mmၡ ગ ၰཀఁఋ.
Ζ
(ࣺވځFig. 1)
කሽਜ਼ ᇣხഛ ႖ဴ༺၁ᆳ(B) ఙଁఁఋ. ෮ྤ༊ ၒඓ කሽ௴ ଞჵఁఋ. ၦ લૐ௴
૯ ၴ൘ ༺၁ᆳ ၻਜ਼ౡ ၿᆳਜ਼ ࿖ၒඑ, ၦ લૐ௴ છᇬ ࿌ಠ ෮ฅၒച౷ ၻૺხ ྨཀ
ఁఋ.
ͤܜӿ࠵࠵
Fig 10 12௴ ႕႗ዽ ჲ ၁ᆳ พვఁఋ. Fig 11 13ၔ ྦ႖ዻხ ྨၔ ືሲ พვ
ఁఋ. ၔ ႗ఎ ิ၁ ൘ ࿌ ዻඑ, ႖ဴ ᇬ௴ ႗ఎ ิ၁ ಡ࿌ჰ ิึ ၁ᆳ
ዻഛ ዻ ၵ࿕ གྷ ၼᎁ ઃ൘ხ ྨ ఁఋ.
ၕ ዳዻૺ ၁ጄ, ႗ఎඓ ਜ਼ଆၦ พ ኞച ხხጄვఁఋ(Fig 10 12). ႗ఎ ิ၁
൘ พ ኞၕ ხხዻხ ൠཊགྷ(Fig 11 13). ၕ ၵዾ ಕ, ᇬ ႗ఎ ิ၁
൘ ၁ᆳዻ ၵ࿕ લ ઃ൘ხ ྨഛ ጁఁఋ.
ǧǮ"૯ ၵ࿕ ఝືමၕ ၹ ხხዻધ, ືᅧਜ਼ ແ૾ ༘ ၰ௴ ႞࿌ືཇၕ ෮ხዻૺ ၁ጄ ၕ
ఎఎᎁ მ௴ ઇၔ თဠጁఁఋ. Fig 12௴ ၡ ႖ጨ႕ၨ ხხ ືሲ พვఁఋ.
Ⴎႜၕ ዻૺ ႖௴ གྷ ၡ ႖ဴၕ ຐཀఁఋ. ဘ࿅ၦ ਜ਼ၿ თဠዽ"Ⴙၔ"ඓၕ ྤ೭ച
ၵ࿕ ఝືමၕ ၒཊགྷ. ၦ ၁ച ႗ఎၕ ዻ, ᄟ੭ჰ Ⴎੜၦ ჲၕ ዾ ಕ ၵ࿕ ඓၔ
၁ച ጎዻ ౙ ઇၮఁఋ.
ߞ͕
ၵ࿕ ఝືමၕ ხხዻඓ ૯ ൽხ௴ ൏ᄠ ၰၕ ઇၮఁఋ. ንၡ ధ தၔ ิึၕ ႗
ఎ ዾ ಕ ಡ࿌ჲ ิึၦ ྤఁೡ, ಌಌዻ ხხ࿌ ၰ௴ ၵ࿕ ఝືම ิึ ౣఁఋ.
౹࿌, Fig 12௴ พၡ ୵ၕ ၹೡஒ ൏ ෮ฅၕ พધ ၰၒඑ, ૯൜ 13ၔ ၹජౘ ෮ฅၕ
พვఁఋ. ጃື ၵ࿕ ఝືමၕ ધႜགྷሥఁఋ. ᄀၔ Ⴎੜၕ ၒച ၼၒધ ዻხ ൠཊགྷ
. ဘኖพᅧ ተ࿌ ᆖౘ ႁഭ ხხጄ ጀၕ ૺዻཊགྷ. ྤ೭ิሽ ႁ
ഭ ჲዾ ಕ ၡຫጃၕ ხሠཊགྷ.
႗ఎዻૺ ၁ጄ ஃၕ ၵ࿕ ఝືම ૺ ႖ ਜ਼ ဋ႖ዻഛ ၕ ၁ച ጎዻ ጄ
ጀၕ ጸၨዻཊགྷ. ႗ఎ ᇤ ၴၕ ጎጄ ෘ࿌ഛ ၵ࿕ ఝືම ჲၕ གྷၵዻ௴
ዻඓ ၕ ૺዾ ༘ ၰཀఁఋ.
ᎅၕ ౹ၦხ ྨધ ၴ്ૺ ၁ጄ ጏဧ ၕ ླၒച ෘ࿌ვఁఋ. ઠဉ ੧௴ ႁഭ
ၡ ੪ၔ Ⴎੜ ఋ࿅ዾ ༘ ၰၒඑ, ဇၦਜ਼ ၰ ᆔᆔዽ ิึၔ ඳ൘ዽ ิዻ
ౡ ༘ ၰཀఁఋ. ၦ ၩၦ ෧ແዾ ઠဨ, ၕ ధဩ ᅩᅩᎁ ෘ࿌ხൢ, ፘྞ ბၦხ
ྨધ ၵ࿕ၕ ઢዾ ༘ ၰၕ ႜച௴ ੧ዻ ෘ࿌ვఁఋ.
ԧড়ߵߣ
ࠕި"ิዜၕ ોጹዻ ఋ൏ ໕ႜႮႜၕ ዻૺ ႖ ႖લૐၡ ႖ဴၕ ጃື ୪ધ ዯ
૯ ຐၒཊགྷ.
ንၔ ༘ჯၒച ஃၦ ௴ ઇၕ ጸၨዻ௴ ႞ዜၮఁఋ. ຫဧ ፎ, ྤ೭ ෮ጎၕ ಋೡ ஃၕ
ఋགྷ Ⴎႜጄ ጁఁఋ.
90Ό ߞ͕ߣߵ ވ ޜ
1. ၕ 0 ੜച ཀఁఋ.
2. ၕ ૯ ඓ ધ ዻఎၡ ਜ਼ ႚཀఁఋ.
3. ੜ Ⴎႜ അ(L) ዚ࿌ვఁఋ. Fig 14 พཅ ဉ ੪ၦ ஃ ን ఝጄ ຫੜጨ
ၕ ౣఁఋ.
4. 6ੜጨ ഇᆳ ຫဧጄ ஃ ንၦ ක ૯ ຫੜጨ ၦ࿌ჲ ಕଆხ ንၡ ྤ೭ ิึ
ၡ ຫ ვఁఋ. ੜ Ⴎႜ അ ఋགྷ Ⴎვఁఋ.
Ɍޭ ߵߣ߆ࣺ ݐƣΌ ߵߣ ьՅ ߵߣੂɁ(Fig 15)
ଅၦ Ⴎႜ അ ੜ Ⴎႜ അ Ⴎႜዻ௴ ઇၔ ርஒ ༘ ၰ௴ ၩၮఁఋ. ႞ ಕ ዚ࿌ჲ ༘
ၰၒඑ, Ⴎၦૺ ႖ ንၕ ᆷ ༘ ၰཀఁఋ. അ Ⴎၦૺ ၁ጄ, ఋၗ ႜၕ ಋ്ཊགྷ.
ƣΌߵߣьՅߵߣੂɁ
1. ၵၔ ຫ ೡၦ ຫဧጄ ၻ ൟၕ ౹࿌൝ఁఋ.
2. അ ႞ዻધ ፂ႖ၡ 1/8ႜ ဴዻ௴ ෮ጎၒച ཀఁఋ.
3. അ ఝጄ ඛዽ ิึၒച ၻൟၕ ఋགྷ ໕ᆳጁఁఋ.
ߞ׳Ɍޭ ߵߣ ьՅ ߵߣੂɁ(DW369ҩ)
1. ଅၦ Ⴎႜ അ ጸၨዻഛ ຫ ዚ࿌ვఁఋ.
2. ଅၦ Ⴎႜ അ ႞ዻધ, ፂ႖ၡ 1/8ႜ ဴዻ௴ ෮ጎၒച ፂ႖གྷᇣვఁఋ.
3. അ ຫ Ⴎვఁఋ.
ঠˊ
ඳಂ ஃၔ ๗ፉ႕ၨ ႗ఎ, කሽၡ ิዻ, ൣၔ ኒኻ, ၡ ਜ਼ໜ ჭਜ਼ ૺዾ ༘
ၰཀఁఋ. ႗ఎ གྷ ధ ၦື ၕ ෘૺਜ਼ ༘ဵዻხ ྨၕ ಕ, කሽਜ਼ ඳ൘ ጋ, ஃ
ၦ ၩ࿌உၕ ಕ ஃၕ ોጹጄვఁఋ. ึၡ ஃၕ ਜ਼ხધ ၰၒඓ ஃᆽചဪ ஃၕ ყ
གྷ ຫဧዾ ༘ ၰཀఁఋ. ඳಂ ஃၕ ஃᆽട ዾ ༘ ၰཀఁఋ. ிೣ຺ ኲၦხ -ஃᆽട
ዻૺ พཊགྷ.
ஃၡ ၔ ધඳჲၔ ౾၉ ቇഅ๙၉, ๒ ሙ൘ஞച ႞ዾ ༘ ၰཀఁఋ. ฿ၭ ෮ხ ᅧ൘
ౘ ஃၔ ఋ൏ ᅧ൘ਜ਼ ࿘ ແඛႁဉ ੪ၦ ዽ ᎅၦ ዶဠዽ ઠဨ ႕ဧၦ ਜ਼ጁఁ
ఋ.
ԬΖ
ջؼਣ
ߞ͕ ؖܤঠˊޭ ʽdž˅ ɼ͒ܬӚ ԬΖޭ ް ˊܓٟ ͈͒ڇঠݮײ ޛҗ ੋ ֩ҔǕ
ԟєˊٟ ͈͒ڇᇤ ၴ ਜ਼ଆၦ ਜ਼ඓ ஃၦ ୶࿘ ఎఎᎁ ࿌ ၰၕ ಕ,
ჲ གྷၦ ხඑ, කሽ௴ ૯ ஃ ఎ၁ ౪ച ඞྤვఁఋ. ၴ ಕ ஃၦ ଵ ၹජ
࿘ၕ ಕ, ஃၡ ౪ᄠ ਜ਼ၿၴ൘ၡ ఁਜ਼ ஃၦ ᇤ ၴၡ ၒച ૺ࿌് ຫဧ
ၴ ጎጄ ೇ௴ ઇၕ ૺዻ௴ ඳၡ ၁ᄠ ዑඓၒച ኒጘᆷ ༘ ၰཀఁఋ.
ၔ ఋၗ ືሲਜ਼ ၰၕ ಕ ၩ࿌ஃ ਜ਼ໜၦ ைཀఁఋ.
ၿዻ௴ ิዜၔ ხ ๗༺ ሽ ๗ဧၕ ხุዻ ጁఁఋ.
ࠕި"ၿዻხ ྨၔ ิዜၡ ຫဧၔ ၁ጔዾ ༘ ၰཀఁఋ.
ၦ ၕ ම ၦ ၿᆳ ຫဧዻხ ൠཊགྷ.
ຫဧ ႖ ᆽၦ ஃၕ ၒച ະኺพཊགྷ. ື࿘ఋඓ ોᅰዻཊགྷ.
FIG. 1
FIG. 2
FIG. 4
FIG. 3
LOOSEN
I
K
G
H
E
J
DW368
DW369
TIGHTEN
FIG. 5
1/4”
6.35 mm
1/2”
13 mm
45˚
LOOSEN
N
L
TIGHTEN
M
FIG. 10
FIG. 11
FIG. 12
FIG. 13
FIG. 14
FIG. 15
P
ٟҟ
႞ዜၡ ྦ႖ໜ ཅദໜၕ ጸၨዻഛ ጃື ၩዽ ોᅰ ዜඛၕ ຫဧጄ ༘൘ ෟ ၉ხ, Ⴎ
ႜၕ ๗༺ ሽ ఋ൏ ๗༺ ჯဴၦ ༘ጌጄ ጁఁఋ.
ߣځ֞ؖե
DEWART௴ ྤགྷྤ ၴຫ ၉ၡ ဋ႖ዽ ೢ൫ ๗༺ ხຫ ႞લጁఁఋ. ක౷
DEWART ๗༺ ሽ௴ ๗ၴ ൈ႕ၦધ ཅദၕ ௴ ๗༺ ႞લዻഛ ો၊
෦ၔ ჯဴ౹ၦ ၰཀఁఋ. ૺ༜႕ၨ Ⴎ࿎ၦ ༘൘, ჰዜ લၿ ોᅰ ิዜၦ ዶဠዻඓ, ਜ਼ଆ
ၦ ၰ௴ DEWART ხຫ ೢዻཊགྷ.
̻ۯ࠵ੂݮײǹȗݐǧ
લૐਜ਼ ોᅰዾ ዶဠਜ਼ ၰ ధ ၦື ຫဧዻხ ྨ௴ఋඓ, ጹઠ พጭ ແੜዻཊགྷ.
DEWART௴ ૺ ႜพ શጄ ხຫ ືక ೢዻགྷૺ ೦ఁఋ.
ࠕ"
• DEWARTၡ ႜᅙၔ ၴຫ ႞ዜၡ ઢ႕ၨ ጎືၡ ၩጹၒച, ຫ႖ ቛધ ࿖ၦ ႞ዜ ໕
༘ႜዾ ൘ਜ਼ ၰཀఁఋ.
• ዑა ၿ๗ဉ ิዜၔ ೡൠఋ ఋ ༘ ၰཀఁఋ. ႞ዜ ໕ ವዽ ೡൠఋ ఋ ༘ ၰ
ཀఁఋ.
• ක౷ ೡ ක౷ ႞ዜၦ ਜ਼ዻხ ྨၕ ༘ ၰཀఁఋ. DEWART ხຫ ਜ਼ዽ ႞ዜ ค
၁ શጄ බၡዻཊགྷ.
J
FIG. 9
FIG.7
FIG. 6
0˚