1
MIXING ATTACHMENTS
CAUTION: Fit and remove the mixing attachments with the Bench Mixer head raised.
Ensure the unit is switched off and unplugged from the power outlet.
FITTING THE ATTACHMENTS
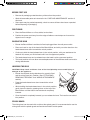
• Ensure the Bench Mixer is switched off and unplugged from the power outlet.
• Raise the head. (See “RAISING THE HEAD” section)
• Select the appropriate attachment.
• Align the notch on the mixing attachment drive shaft with the groove on the mixing
attachment fitting. Push the attachment up as far as it will go. Turn the attachment anticlockwise as far as it will go then pull down to lock into place.
REMOVING THE ATTACHMENTS
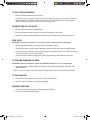
• Gently push the attachment up the mixing attachment drive and turn it clockwise as far as it will go.
• Gently pull it down of the mixing attachment drive.
POWER UP
CAUTION: If attachments or accessories are not fitted correctly you may damage the machine.
• Check that the speed control is set to ‘OFF’.
CAUTION: If the speed control is not set to ‘OFF’ prior to connecting power to the
Bench Mixer, it will not operate. It will only operate once the speed control has been
reset to the ‘OFF’ position.
• Insert the plug into the wall power outlet and switch it on.
SPEED CONTROL
• Turn the speed control clockwise to increase speed to the desired speed setting.
• Turn the speed control anti-clockwise to decrease speed or to turn the motor ‘OFF’.
CAUTION: Do not run the motor continuously for more than 10 minutes, it may overheat.
After 10 minutes, switch off for at least 10 minutes to let the motor cool.
ATTACHMENT SPEED USE
ATTACHMENT
SPEED
USE
Dough hook
Min - 1
Heavy mixes, dough, pastry
Beater
4-5
Creaming butter and sugar, medium mixes
Whisk
4 - Max
Whisking/aerating cream, egg whites, batter, light mixes
RHBM1000_FA_110712.indd 8
12/07/12 3:26 PM