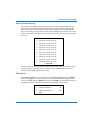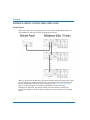
1
Triplex Digital Video
Multiplexer
User’s Guide
English
Models
TMV110Q, TMV110Q-1,
TMV16Q, TMV16Q-1, TMV910Q,
TMV910Q-1, TMV96Q, TMV96Q-1
Notice
The information in this manual was current when published. The manufacturer reserves the right to revise and
improve its products. All specifications are therefore subject to change without notice.
Copyright
Under copyright laws, the contents of this manual may not be copied, photocopied, reproduced, translated or reduced
to any electronic medium or machine-readable form, in whole or in part, without prior written consent of Sensormatic
Electronics Corporation.
© Copyright 1997–2002
Sensormatic Electronics Corporation
Video Systems Division
6795 Flanders Drive
San Diego, CA 92121-2903 U.S.A.
Trademarks
Robot® is a registered trademark of Sensormatic Electronics Corporation.
Trademarked names are used throughout this manual. Rather than place a symbol at each occurrence, trademarked
names are designated with initial capitalization. Inclusion or exclusion is not a judgment on the validity or legal status of the
term.
Triplex Digital Video Multiplexer
User’s Guide
User’s Guide
WARNINGS AND CAUTIONS
WARNING: TO REDUCE RISK OF ELECTRIC SHOCK, DO NOT REMOVE COVER. NO USER
SERVICEABLE PARTS INSIDE. REFER SERVICING TO QUALIFIED SERVICE PERSONNEL.
DO NOT EXPOSE THIS APPLIANCE TO RAIN OR MOISTURE.
DO NOT INSTALL THIS PRODUCT IN HAZARDOUS AREAS WHERE HIGHLY
COMBUSTIBLE OR EXPLOSIVE PRODUCTS ARE STORED OR USED.
The lightning flash/arrowhead symbol, within an equilateral triangle, alerts the user to the presence of a
shock hazard within the product’s enclosure.
CAUTION: Danger of explosion if battery is incorrectly replaced.
Replace only with the same or equivalent type recommended by the battery manufacturer. Dispose of used
batteries according to the battery manufacturer’s instructions.
WARNING: THIS EQUIPMENT HAS BEEN TESTED AND FOUND TO COMPLY WITH THE LIMITS FOR
A CLASS “A” DIGITAL DEVICE, PURSUANT TO PART 15 OF THE FCC RULES. THESE
LIMITS ARE DESIGNED TO PROVIDE REASONABLE PROTECTION AGAINST HARMFUL
INTERFERENCE WHEN THE EQUIPMENT IS OPERATED IN A COMMERCIAL
ENVIRONMENT. THIS EQUIPMENT GENERATES, USES AND CAN RADIATE RADIO
FREQUENCY ENERGY AND, IF NOT INSTALLED AND USED IN ACCORDANCE WITH THE
INSTRUCTION MANUAL, MAY CAUSE INTERFERENCE TO RADIO COMMUNICATIONS.
OPERATION OF THIS EQUIPMENT IN A RESIDENTIAL AREA IS LIKELY TO CAUSE
HARMFUL INTERFERENCE IN WHICH CASE THE USER WILL BE REQUIRED TO
CORRECT THE INTERFERENCE AT THEIR OWN EXPENSE.
Changes or modifications not expressly approved by the party responsible for compliance could void the
user’s authority to operate the equipment.
NOTE:
This product was FCC verified under test conditions that included the use of shielded I/O cables
and connectors between system components. To be in compliance with FCC regulations, the
user must use shielded cables and connectors for all except power and alarm cables.
This digital apparatus does not exceed the Class A limits for radio noise emissions as set out in the Radio
Interference Regulations (ICES-003) of the Canadian Department of Communications.
Le présent appareil numérique n’émet pas de bruits radioélectriques dépassant les limites applicables de la
Classe A prescrites dans le Réglement (ICES-003) sur le brouillage radioélectrique édicté par le Ministère
des Communications du Canada.
Important Information
Before proceeding, please read and observe all instructions and warnings contained in this manual. Retain
this manual with the original bill of sale for future reference and, if necessary, warranty service.
When unpacking your unit, check for missing or damaged items. If any item is missing, or if damage is
evident, DO NOT INSTALL OR OPERATE THIS PRODUCT. Contact your dealer for assistance.
For your Records
Complete the following product purchase information. The factory requests this information when contacted
for technical support. It is also valuable in case of loss or theft.
Purchase Date: _______________________________________
Serial Number: ________________________________________
ii
TABLE OF CONTENTS
Technical Overview ............................................................................................................... 1
Triplex Multiplexer Advantages ..................................................................................................1
Video System Compatibility .........................................................................................................1
Digital Video Processing ...............................................................................................................2
Video Encoding .......................................................................................................................2
Video Decoding .......................................................................................................................2
Selected Features .................................................................................................................. 5
System Installation ................................................................................................................ 7
Basic Connections ...........................................................................................................................7
Optional Connections ....................................................................................................................7
Basic Operations ................................................................................................................. 11
Front Panel Controls ....................................................................................................................11
Viewing Live and Playback Video Images ...............................................................................13
Main Monitor View Formats ...............................................................................................13
Assigning Cameras to Windows ........................................................................................14
Viewing Live Cameras/VCR Playback .............................................................................14
2x2 Digital Zoom ...................................................................................................................14
Pause .......................................................................................................................................15
Sequential Switching ............................................................................................................15
Call Monitor ...........................................................................................................................17
Basic Operation with VCRs ........................................................................................................18
VCR Recording ......................................................................................................................18
Synchronous Mode ........................................................................................................18
Asynchronous Mode .....................................................................................................18
VCR Playback ........................................................................................................................18
Basic Alarm Features ...................................................................................................................19
Video Loss Alarm Event ......................................................................................................19
Alarm In Alarm Event ..........................................................................................................19
Motion Detection Alarm Event ...........................................................................................20
Increased Recording Detail on Alarmed Channel ...........................................................20
Alarm History Log ................................................................................................................20
Active Window Feature ..............................................................................................................21
Advanced Setup Using On-Screen Menus ........................................................................ 23
OSD/Timer Set Up ......................................................................................................................24
Date/Time Set Up .................................................................................................................24
Date Display Mode ...............................................................................................................25
User’s Guide
iii
User’s Guide
Date/Time Display ...............................................................................................................25
Date/Time Position ..............................................................................................................25
RS-485 Time Calibration .......................................................................................................25
Spot Monitor Dwell ..............................................................................................................25
Text Color ...............................................................................................................................25
Display Type ..........................................................................................................................25
OSD .........................................................................................................................................26
Monitor Set Up ..............................................................................................................................26
Live Refresh Rate ...................................................................................................................26
Screen Center Point ...............................................................................................................27
Screen H-Size .........................................................................................................................27
Background Color .................................................................................................................27
Show Color Bar ......................................................................................................................27
Camera Set Up ..............................................................................................................................28
Configuration Table 1 ...........................................................................................................28
Camera Auto-Detect .............................................................................................................30
Camera Title ...........................................................................................................................30
Power ON Detect ..................................................................................................................31
Title Position ..........................................................................................................................31
VCR Set Up ....................................................................................................................................32
VCR Playback Set Up ...........................................................................................................32
VCR Rec Mode .......................................................................................................................33
VCR Source ............................................................................................................................33
Rec Priority Mode .................................................................................................................33
Alarm Real Rec ......................................................................................................................34
Rec Time .................................................................................................................................34
Rec Density .............................................................................................................................34
Sync-Trig Edge ......................................................................................................................34
Date/Time Position ..............................................................................................................34
Alarm Set Up .................................................................................................................................35
Schedule Set Up .....................................................................................................................35
Day Frame Set Up/Night Frame Set Up: ...................................................................36
Configuration Table 2 ....................................................................................................37
Day/Night Switch .................................................................................................................38
Day/Night SW Enable ..................................................................................................38
Switch <OFF> .................................................................................................................38
Switch <ON> ..................................................................................................................38
Delay For Active .............................................................................................................38
Alarm Response ....................................................................................................................39
Motion Detection ...................................................................................................................41
Detect Area ......................................................................................................................42
Sensitivity ........................................................................................................................42
iv
User’s Guide
Triplex Digital Video Multiplexer
Alarm In .................................................................................................................................42
Video Loss Detection ............................................................................................................42
Alarm Set/Reset Switch .......................................................................................................42
Release Time ..........................................................................................................................43
Alarm List (Alarm History Log) .........................................................................................45
Clear Alarm List ....................................................................................................................45
Others .............................................................................................................................................46
RS-485 ID Set Up ...................................................................................................................46
RS-485 Protocol ......................................................................................................................46
Software Information ...........................................................................................................47
Save & Load Default ....................................................................................................................48
Load Installer Setting ............................................................................................................48
Save Installer Setting ............................................................................................................48
Load Factory Setting .............................................................................................................48
Load Factory Password ........................................................................................................48
Installer Set Up .............................................................................................................................49
Input password .....................................................................................................................49
Special Functions ...................................................................................................................49
Enter Installer Set Up ............................................................................................................51
Factory Password .........................................................................................................................51
Maintenance ......................................................................................................................... 53
Preventive Tips ......................................................................................................................53
Troubleshooting ....................................................................................................................53
Repairs ....................................................................................................................................53
Appendices ........................................................................................................................... 55
Appendix A: Connector Pin Assignment .................................................................................55
RS-485 (RJ-11, 6P6C) .............................................................................................................55
RS-485 ID ................................................................................................................................55
System ID Setting ...........................................................................................................55
Multiplexer (MPX) Channels and Camera ID Mapping ..........................................56
External I/O Port (37 pin DSUB) ........................................................................................57
Appendix B: Technical Specifications .......................................................................................58
Appendix C: RS-485 Command Set ...........................................................................................60
Appendix D: Remote Control Panel User’s Guide ..................................................................62
System Diagram ....................................................................................................................62
ID Select ..................................................................................................................................63
Connector Pin Assignment ..................................................................................................63
Specification And Connectors .............................................................................................64
Appendix E: Troubleshooting Guide ........................................................................................65
Monitor and Display ............................................................................................................65
VCR .........................................................................................................................................67
User’s Guide
v
User’s Guide
Alarm ......................................................................................................................................69
Keypad and Password ..........................................................................................................69
Remote Control Panel ...........................................................................................................70
vi
User’s Guide
TECHNICAL OVERVIEW
TRIPLEX MULTIPLEXER ADVANTAGES
The multiplexer allows you to view multiple cameras using a single monitor, and to
record the video signals from all the camera inputs using a single VCR. Using the
triplex capability and two VCRs, live video cameras and playback channels from the
second VCR can be viewed side-by-side on a single monitor, while simultaneously
recording all of the live camera inputs. In other words, tape playback on the second
VCR does not affect the recording of all cameras by the first VCR. There are two
models available in this family: 16 channels (camera inputs) and 10 channels.
The multiplexer offers complete control over the system setup, including:
• Layout of windows on the monitor screen
• On-screen display including date and time & camera titles
• Programmable sequential switching on the main monitor
• Advanced alarm handling with history log
• Intelligent motion detection
• Special support for time-lapse VCRs
Please refer to Selected Features on page 5 for more information on multiplexer
features, and to Advanced Setup Using On-Screen Menus on page 23 and System
Installation on page 7 for detailed instructions for using all of the functions.
VIDEO SYSTEM COMPATIBILITY
Models without a -1 at the end of the product number are designed for NTSC/EIA
standard video cameras, VCRs, monitors, etc. with a scanning frequency of 60Hz.
Models with a -1 at the end of the product number are designed for PAL/CCIR
standard video cameras and other equipment with a scanning frequency of 50Hz.
Technical Overview
1
User’s Guide
DIGITAL VIDEO PROCESSING
Video Encoding
The video encoder continuously analyses the video inputs (signals from the cameras),
and then generates a video signal for recording which contains field by field samples
of each camera. The processor includes important information in the encoded output
signals, including the date, time, camera title, camera number and alarm status. The
encoded video signal recorded by the VCR looks like the following example. Each
block represents a field of camera input.
The processor also digitally generates the monitor display video signal, according to
the layout of windows selected by the user.
Figure 1 — Video Encoding
Video Decoding
During video playback, the process is reversed. The video decoder decodes the
sequence of fields from the VCR and then reallocates the video signal from each
recorded camera to the appropriate window on the monitor. The date/time stamp
and other recorded information including alarm status, video loss, camera title, etc.
are also decoded and displayed.
2
Technical Overview
Triplex Digital Video Multiplexer
Unlike a quad processor, which records pages of several cameras each in real time but
with greatly reduced resolution (75% of the information is lost per image in a quad
view), the multiplexer records each image in the sequence encoded and sent to the
VCR at full resolution. This results in high definition reproduction of each video
image, but not in real time. This triplex multiplexer records a full 60 fields per second,
for minimal reduction in smoothness of motion. A multiplexer is usually considered
more satisfactory for most installations than a video switcher, which records one
camera at a time for a preset interval, allowing a significant gaps between recording
intervals for each camera, during which important information can be missed.
Figure 2 — Video Decoding
Technical Overview
3
User’s Guide
NOTES
4
Technical Overview
SELECTED FEATURES
• Triplex operation allows video recording while viewing live video (from cameras
input) and video playback (from 2nd VCR) at the same time.
• Outstanding picture quality (720 x 512 pixel display with 256 gray levels and 16
million colors).
• Compatible with B&W (EIA or CCIR standard) and color (NTSC or PAL standard)
video sources.
• All camera inputs are looping, with internal termination that can be set using on
screen menus.
• Fastest possible field by field recording regardless of whether inputs are
synchronized or not. Up to 60 unique fields per second for both monitor display
and VCR recording.
• Intelligent motion detection allocates camera recording priority dynamically based
on picture motion conditions.
• Motion detection area and sensitivity are programmable for each camera
individually, and there are 2 motion detection algorithms for each camera.
• Alarm history log holds up to 255 records, including: video loss, motion detected
and alarm input.
• Two independent monitor outputs: Main to display multi-window digital images,
Call to provide full screen live analog output.
• “Active Window”: the user can select any one camera in the view to display in real
time.
• Main monitor screen center and horizontal size adjustable.
• Main monitor, VCR input and VCR output are all equipped with BNC and SuperVHS connectors.
• Supports Double/Triple density time-lapse VCRs.
• Versatile multi-windows display format (PIP/4/7/9/10/13/16 window) with 2x2
electronic zoom.
• Powerful alarm processor with user configurable alarm trigger & response.
• On-Screen Display (OSD): date, time, alarm & video loss indication, 12-character
camera titles.
• OSD for both live and playback windows in any view.
• Built-in color bar pattern generator for monitor calibration.
• RS-485 communication port for remote control.
Selected Features
5
User’s Guide
• Sequential switching: 3 independent sequences of up to 16-pages per sequence. All
sequences and pages can be programmed individually.
• The call monitor switching sequence can be programmed.
• Independent digital gain control for each camera (range: 70% to 150%).
6
Selected Features
SYSTEM INSTALLATION
WARNING: TURN POWER OFF BEFORE MAKING CONNECTIONS.
BASIC CONNECTIONS
A. Connect the video signal from each camera to one of the video input BNC
connectors marked Video IN.
B. Connect the Main Monitor to the Main Monitor output of the unit (either BNC or
S-VHS connector).
C. Connect the DC 12V/1.5Amp adapter to the DC jack at the lower right of the rear
panel.
OPTIONAL CONNECTIONS
G
H
II
Gray indicates connectors/controls not available on 10-Channel models
Figure 3 — Rear Panel
Single VCR:
Connect the input of the VCR to the VCR Output BNC or S-VHS connector (D), and
the output of the VCR to the VCR Input BNC or S-VHS connector (E). This will allow
previously recorded video to be replayed through the multiplexer, but not while
simultaneously recording live video.
Two VCRs:
Connect the input of the VCR to be used for recording to the VCR Output BNC or SVHS connector.
System Installation
7
User’s Guide
D. Connect the output of the second VCR, to be used for playback, to the VCR Input
BNC or S-VHS connector
E. This arrangement will allow triplex operation, in which the multiplexer can
display playback of previously recorded video and live cameras on the same
screen, while simultaneously recording all the live cameras.
F. Call Monitor output BNC connector
G. RJ-11 RS-485 port for connection to a remote keyboard or PC for external control
H. External I/O connector (37 pin DSUB): for connection to external expansion
board. The expansion board permits the inputs and outputs listed below (see
External I/O Port (37 pin DSUB) on page 57).
8
Alarm In:
TTL level input, for NC or NO types of alarm signals. Please
refer to Alarm Set Up on page 35 for set up procedure to match
input behavior to alarm type.
Alarm Out:
NO and NC outputs available. Connect these pins to the alarm
input of the VCR or other device, such as a siren or flashing
light.
VCR Trigger:
TTL level input, connect to VCR trigger out.
Set Alarm:
TTL level input, normal open (NO). Shorting this pin to ground
will activate the alarm output, if enabled in the setup menu.
Reset Alarm:
TTL level input, normal open (NO). Shorting this pin to ground
will deactivate the alarm output, if enabled in the setup menu.
System Installation
User’s Guide
I.
Day/Night
Switch:
TTL level input, use normal open (NO) type switch. If switch is
OFF multiplexer detects high, if switch is ON, multiplexer
detects low. Please refer to Day/Night Switch on page 38 for set
up procedure.
Day/Night
Output:
TTL level output, if the Day/Night switch is ON, this output is
0 Volts. If the switch input is OFF, this output will also be high.
Looping Video Outputs: Connect the BNC connector to external video equipment
for constant monitoring of that channel. Internal 75 Ohm termination is provided
by the multiplexer. To use the loop back connector, disable the termination in the
setup menu (see Configuration Table 1 on page 28).
System Installation
9
User’s Guide
NOTES
10
System Installation
BASIC OPERATIONS
FRONT PANEL CONTROLS
The following figure shows a ten channel triplex digital multiplexer.
Figure 4 — Front Panel, Ten Channel Triplex Multiplexer
The figure below shows a sixteen channel triplex digital multiplexer.
Figure 5 — Front Panel, Sixteen Channel Triplex Multiplexer
The remote panel has the same configuration as the sixteen channel front panel.
A. Camera Select Key
B. Enter/Zoom Key
C. Direction Keys: Moves the window cursor, or the cursor in onscreen menus.
Used to select the active window, and to pan/tilt a zoomed image.
Basic Operations
11
User’s Guide
D. Function Keys:
Esc
Press and hold while pressing another key to select the second
function of the other key. Press to cancel or exit from certain
modes and menus.
Menu
Press to call the on-screen display (OSD) setup menu.
Seq
Press to enter automatic sequential sequencing mode, or to
switch between different user-programmed sequences.
View
Select the format for the Main Monitor display. See Main Monitor
View Formats on page 13.
Set
Used to assign a camera to one of the windows on the monitor.
See Assigning Cameras to Windows on page 14.
Lock
Press for 3 seconds to lock/unlock the keypad, in order to
prevent accidental changes to the system setup. The Lock key
remains lit when the keypad is locked.
Pause:
Press to freeze the image on the monitor, or to stop sequential
switching mode. See Pause on page 15.
Live/VCR:
Press to switch between live cameras and VCR playback. See
Viewing Live Cameras/VCR Playback on page 14
E. Second Functions:
12
Call
Monitor
Select:
Press Esc and a Camera Select key to switch the Call Monitor
image to the selected camera.
Reset
Press Esc and 1 and 2 simultaneously to restart the system.
Basic Operations
Triplex Digital Video Multiplexer
VIEWING LIVE AND PLAYBACK VIDEO IMAGES
Main Monitor View Formats
The Main monitor displays designated cameras or video playback in a versatile multiwindow view format. The available view formats are illustrated below.
To switch between available view formats, press View.
1
PIP
Full Screen
Picture-IN-Picture
4
7
9
10
13
16
Gray indicates connectors/controls not available on
10-Channel models.
Figure 6 — Available View Formats
In all formats except Picture-in-Picture (PIP), each window contains a reduced size
image of the full frame, without cropping the image. In PIP format, the main window
on the left contains a full screen image from one camera, with the smaller windows on
the right covering a portion of the main window underneath them.
Basic Operations
13
User’s Guide
Assigning Cameras to Windows
Using the Set key, direction keys and camera select keys, a camera can be assigned to
each window. Once a camera has been assigned, playback images of that camera can
be viewed in the window by switching the window between live and VCR modes.
Step-by-step:
1. Press the Set key. The window cursor appears as a highlighted frame around one
of the windows, and the word SET appears on the OSD.
2. Move the window cursor to the desired window using the direction keys.
3. Press a camera select key to assign the camera to the selected window.
Viewing Live Cameras/VCR Playback
The Live/VCR key will switch the display between live cameras and VCR playback.
When the LED in the Live/VCR button is off, all the displayed windows contain live
video images. When the LED is lit, at least one window contains VCR playback.
Windows displaying VCR playback will have reversed OSD camera titles and
time/date stamps.
If you press the Live/VCR key when the window cursor is not displayed, all of the
windows will be switched between live and playback. If the window cursor is visible,
only the window selected by the cursor will be switched.
2x2 Digital Zoom
Any window can be zoomed, starting from one of the multiwindow view formats.
Step-by-step:
1. Press the Zoom key to show the window cursor. If the multiplexer is in sequence
mode, the first time Zoom is pressed, the sequence will stop and the display will
be in a multi-window view. Press Zoom again to obtain the window cursor.
2. Use the direction keys to move the cursor to the desired window.
3. Press the Zoom key once to switch to a full screen view of the selected window.
4. Press Zoom a second time to switch the display to a zoomed-in view of the same
window.
5. To move (pan/tilt) the zoomed area around the original image, use the direction
keys. Press Esc to exit zoom mode.
14
Basic Operations
Triplex Digital Video Multiplexer
The use of the Zoom and Esc keys can be illustrated as follows:
ZOOM
Seq.
Mode
MultiWindow
Select
Window
Full
Screen
Zoomed
In
ESC
Figure 7 — Use of Zoom and Esc Keys
Pause
When the multiplexer is not in sequential switching mode, pressing Pause will freeze
the image on the main monitor in frame mode. Frame mode is suitable for static
images, however if the image contains moving objects, it will be more stable in field
mode. Press Pause again to switch to field mode.
The frozen image can be zoomed (see above).
Press any key to exit freeze mode and return to Live/VCR video mode.
Sequential Switching
In automatic sequential switching mode, the cameras and windows shown on the
main monitor are rotated according to a user set program. The user can set which
pages will be displayed, and the time interval between pages. There are 16 pages per
program and three different programs available.
Step-by-step:
1. Press Seq until the desired sequence is running on the monitor (Seq 1, Seq 2 or
Seq 3 appears in the upper left of the screen), then press Set to enter the set up
mode.
Basic Operations
15
User’s Guide
2. The following menu will appear:
Sequence_1 Set Up
1 Pages
16
11 Page 8
2 Mode
1
12 Page 9
3 Timer
5
13 Page10
4 Page1
14 Page11
5 Page2
15 Page12
6 Page3
16 Page13
7 Page4
17 Page14
8 Page5
18 Page15
9 Page6
19 Page16
10 Page7
20 Exit
3. Use the direction keys and enter key to change the settings as desired.
Pages:
Select the total number of pages in this sequence
(1-16).
Mode:
Select the view layout to be used in this sequence.
0=Full screen
1=PIP
2=4 windows... 7=16 windows
Timer:
Set the dwell time between pages in the sequence.
4. To set up each page of the sequence, move the cursor to one of the page numbers,
and press Enter. Set up the page as you would a view format, by using the Set
key and the direction keys to place the window cursor, and the camera select keys
to assign a camera to each window. Press Esc to return to the sequence menu in
order to set up the rest of the pages.
5. When completed programming the sequence, press Esc to leave the sequence
menu. The multiplexer will begin to display the sequence.
16
Basic Operations
Triplex Digital Video Multiplexer
Call Monitor
The Call monitor displays full screen video of all installed cameras in sequence.
During normal operation, the Call monitor Select function described in Front Panel
Controls on page 11 allows the user to switch the Call Monitor display to a specific
camera. During an alarm, however, the Call monitor will switch automatically to the
camera on which the alarm channel is activated. If more than one alarm occurs
simultaneously, the Call monitor will display all affected cameras in sequence. The
use of the Call monitor avoids having to zoom the Main monitor window or change
the layout of windows in any way in order to see the full detail of cameras with
important activity in real time.
Basic Operations
17
User’s Guide
BASIC OPERATION WITH VCRS
VCR Recording
There are two modes for recording, synchronous or asynchronous. For optimum tape
recording and playback, the multiplexer must be configured correctly (see Rec Time on
page 34).
Synchronous Mode
Time Lapse VCRs must be used in this mode. The VCR generates a trigger signal (SW)
which must be connected to the multiplexer. The recording will be perfectly
synchronized with the VCR fields.
Asynchronous Mode
Either a Time Lapse VCR or normal VCR can be used in this mode. The recording time
must be set to the same speed as the VCR: Real Time, 6 hr., 8 hr., 12 hr., 18 hr., 24 hr., 27
hr., 30 hr., 40 hr., 48 hr., 72 hr., 168hr, 240 hr., 480 hr., 720 hr. or 960 hr.
VCR Playback
To review a previously recorded tape, the Video Output connector of the VCR must be
connected to the multiplexer’s VCR IN connector (either BNC or SVHS). Decoding of
recorded tapes consists of automatically separating the multiplexed camera fields and
then grouping each camera’s fields together for display. Using the coded data that
was inserted into each recorded field, the unit can automatically reconstruct each
camera’s ID, status, date, and time information. The images can be displayed in any
multi-windows format on the Main monitor, just like in live camera mode. Moreover,
the user can enable or disable the OSD (on-screen display) of the recorded date, time
and alarm information.
Cue the tape to the desired event, play the tape, and assign the cameras you desire to
view from the tape to windows in the view, switching those windows to VCR mode
using the Live/VCR button.
18
Basic Operations
Triplex Digital Video Multiplexer
BASIC ALARM FEATURES
The multiplexer is equipped with an alarm processor to handle all alarm inputs and
outputs. The processor can be programmed to react to alarm events, and can be
activated by a timer or an external day/night switch. One of the principal uses of the
alarm function is to increase the level of recording detail of cameras which may
capture images of an event that caused an alarm.
Video Loss Alarm Event
If the video decoder can not detect the video signal from a camera channel that
normally has a camera present, a Video Loss alarm is triggered. The following actions
will occur:
1.
2.
3.
4.
The Alarm NC output will be open.
The Alarm NO output will be shorted to ground.
The internal buzzer will start beeping (if enabled).
The corresponding window on the Main Monitor will display the background
color, and the word “Loss”.
5. The camera will be encoded as “Video Loss” to the VCR output.
6. The events will be added to the alarm history log (if enabled).
The above actions will continue until the following conditions are met:
1. The video signal from the camera is restored.
2. The alarm duration time has elapsed.
Alarm In Alarm Event
The following responses will be activated (if enabled), when any one of the Alarm In
pins is active:
1.
2.
3.
4.
The Alarm NC output will be open.
The Alarm NO output will be shorted to ground.
The buzzer will start beeping (if enabled).
The corresponding window on the Main Monitor will show “ALARM” in the
OSD (on-screen display).
5. The camera with be encoded as “Alarm” to the VCR output.
6. The Main monitor will switch to the alarmed camera channel, and return to
previous state when alarm ends (if enabled).
Basic Operations
19
User’s Guide
7. The Call Monitor will switch to the alarmed camera channel. If more than one
camera is alarmed, the affected cameras will be displayed in sequence.
8. The events will be added to the alarm history log (if enabled).
The above actions will continue until the following conditions are met:
1. All the Alarm In pins are inactive.
2. The alarm input release time has elapsed, and no further Alarm In has been
triggered.
3. The alarm output duration time has elapsed.
Motion Detection Alarm Event
The response triggered by motion detection is the same as for an Alarm In, with the
exception that the label for the alarm that is sent to the VCR and recorded in the alarm
history log is “Motion Detect”. See Motion Detection on page 41 for more information.
Increased Recording Detail on Alarmed Channel
More fields from the alarmed camera or cameras will be output to the VCR by the
encoder during an Alarm In or Motion Detect condition, than for “quiet” cameras
which are not the subject of an alarm. The net result is a higher refresh rate and a
smoother picture that is closer to real time for the alarmed camera. The following
diagram illustrates the concept for a four-camera installation:
Normal Operation
1
2
3
4
1
2
3
4
Sequence of fields sent to VCR
Motion Detection Alarm on Channel 2
ALARM
1
2
ALARM
3
2
ALARM
4
2
ALARM
3
2
Sequence of fields and alarm signal sent to VCR
Figure 8 — Recording Detail for Four-Camera Installation
Alarm History Log
The alarm events will be logged in non-volatile memory. See Alarm List (Alarm History
Log) on page 45 for more information.
20
Basic Operations
Triplex Digital Video Multiplexer
ACTIVE WINDOW FEATURE
The multiplexer allows the user to select one window in a multi-camera view to be the
“Active Window”. This Active Window will be displayed in a close approximation of
real time, allowing the user to see more detail of motion in that window. To use this
feature, simply press the direction keys to display and position the window cursor.
The window highlighted by the window automatically becomes the Active Window.
Press Esc or change views to cancel Active Window.
Basic Operations
21
User’s Guide
NOTES
22
Basic Operations
ADVANCED SETUP USING ON-SCREEN MENUS
The advanced functions of the multiplexer can be set up according to the nature of the
application using the hierarchical menus and the on-screen display (OSD). To enter
the Main Menu, press Menu:
Main Menu
1
OSD/Timer Set Up
2
Monitor Set Up
3
Camera Set Up
4
VCR Set Up
5
Alarm Set Up
6
Others
7
Save/Load Default
8
Installer Set Up
9
Exit
The cursor appears as a highlighted bar, which can be moved up and down the list of
submenus using the Direction keys. You can also highlight an item by pressing the
Camera Select key with the same number as the item. To enter a submenu, highlight
it, and press Enter.
To exit the Main Menu, or to exit any menu and return to the previous menu, press
Esc, or move to the 9 Exit function in the menu and press Enter.
When exiting the Main Menu, the user must choose whether to save or cancel the
changes made to the setup. If you choose Save, the new setup will be stored in nonvolatile memory.
Exit Menu
1
Set Up Data : Save
2
Set Up Data : Cancel
3
Exit
If you press Esc or choose option 3, the new settings will be used, but not stored in
non-volatile memory, meaning that they are temporary and will be lost when the
multiplexer is turned off.
Advanced Setup Using On-Screen Menus
23
User’s Guide
OSD/TIMER SET UP
This menu allows you to set the current date/time, and other on-screen display (OSD)
parameters.
OSD/Timer Set Up
1
Date/Time Set Up
2
Date Display Mode
Y/M/D
3
Date/Time Display
2 Rows
4
Date/Time Position
5
RS-485 Time Calibration
6
Spot Monitor Dwell
5
7
Text Color
1
8
Display Type
1
9
OSD
5
10
Exit
Date/Time Set Up
Date/Time Set Up
1
Year
2001
2
Month
3
Date
10
4
Hour
10
5
Minute
4
6
Second
23
7
Week
8
Exit/Update
9
Exit/Without Update
2
SAT
The time and date must be correctly set for the times recorded on the VCR, for the
alarm history log, and for the Day/Night switch behavior to function properly. Use
the UP/DOWN Direction keys to highlight the item you wish to set up, and use the
RIGHT/LEFT keys to adjust its value.
24
Advanced Setup Using On-Screen Menus
Triplex Digital Video Multiplexer
To cancel all the changes, move the cursor to 9 Exit/ Without Update and press Enter.
To save the changes, move the cursor to 8 Exit/Update and press Enter.
Date Display Mode
There are three types of date/time OSD (on-screen display): Y/M/D, M/D/Y and
D/M/Y. Move the cursor to 2 Date Display Mode, and use the RIGHT/LEFT keys to
change the option.
Date/Time Display
The date/time OSD (on-screen display) can be shown in one or two rows, move the
cursor to 3 Date/Time Display, and use the RIGHT/LEFT keys to change the option.
Date/Time Position
In the OSD/Timer Set Up Menu, move the cursor to 4 Date/Time Position and press
Enter. The menu will disappear, and only the date/time display will be left on the
Main Monitor.
Use the Direction keys to adjust the position of the date/time display. Press Esc to
exit when finished.
RS-485 Time Calibration
In the OSD/Timer Set Up Menu, move the cursor to 5 RS-485 Time Calibration, and
press Enter. Other multiplexers which are connected by RS-485 will be calibrated to
the same date/time as the triplex multiplexer.
Spot Monitor Dwell
Unless there is an alarm or the user selects a specific monitor, the spot monitor (Call
Monitor) shows full screen video of all installed cameras in sequence. This item
allows you to set the Dwell Time between switching. The timer value can range from 1
to 255 seconds.
Text Color
This item allows you to select one of 16 different colors for the on-screen display.
Display Type
To improve OSD (on-screen display) visibility, the user can select from six different
combinations of font color and background color.
Advanced Setup Using On-Screen Menus
25
User’s Guide
OSD
This item allows the user to specify what information to show on the default OSD (onscreen display). There are four options:
OPTION
DESCRIPTION
T&D/T
Title, date and time
Title
Camera titles only
D/T
Date and time only
OFF
No OSD
MONITOR SET UP
This menu allows you to tune the quality of the displayed image. Items 1-4 allow you
to adjust the display quality, using the RIGHT/LEFT keys to adjust the length of the
bars. Items 3 Saturation and 4 Hue are invalid for monochrome models, and 4 Hue is
valid only for NTSC color models.
Monitor Set Up
1
Brightness
100 IIIIIIII
2
Contrast
159 IIIIIIII
3
Saturation
127 IIIIIIII
4
Hue
126 IIIIIIII
5
Live Refresh Rate
6
Screen Center Point
7
Screen H-Size
8
Background Color
9
Show Color Bar
10
Exit
Auto
1
Live Refresh Rate
This item allows you to set up the refresh rate of each camera on the Main Monitor.
Use the RIGHT/LEFT keys to select Fix or Auto. Fix means each camera has the same
refresh rate, Auto allows the multiplexer to allocate a higher refresh rate to cameras
with a motion detection alarm.
26
Advanced Setup Using On-Screen Menus
Triplex Digital Video Multiplexer
Screen Center Point
This item allows you to move the center point of the Main Monitor. Move the cursor
to 6 Screen Center Point and press Enter. The menu will disappear, allowing you to
use the Direction keys to pan/tilt the monitor center. Press Esc to exit when finished.
Screen H-Size
This option allows you to change the horizontal size of the Main monitor image.
Move the cursor to 7 Screen H-Size, and adjust the size using the LEFT/RIGHT
Direction keys.
Background Color
Allows the user to set the background color displayed if a camera is uninstalled, set to
“covert”, or in case of video loss.
Show Color Bar
This function allows you to fine tune the monitor's performance using a color bar
pattern generated by the multiplexer. Move the cursor to 9 Show Color Bar and press
Enter to show the color bar. Press Esc to exit when monitor adjustment is finished.
Advanced Setup Using On-Screen Menus
27
User’s Guide
CAMERA SET UP
This menu provides access to the configuration parameters that can be set for each
camera (select 3 from the Main Menu).
Camera Set Up
1
Configuration Table 1
2
Power ON Detect
3
Exit
OFF
Configuration Table 1
There are seven parameters that can be configured for each camera. Of these, four can
only be accessed by the installer or using the password: Install, Covert, Terminal
Resistor, and Call Monitor sequence setup (see Enter Installer Set Up on page 51). The
default values for the parameters in Configuration Table 1 are as follows:
1
28
2
3
4
5
6
7
8
9 10 11 12 13 14 15 16
Install
9 9 9 9 9 9 9 9 9 9 9 9 9 9 9 9
Covert
• •
Terminal Res
9 9 9 9 9 9 9 9 9 9 9 9 9 9 9 9
Gain Control
8
8
8
8
8
8
8
8
8
8
8
8
8
8
8
8
Rec Priority
1
1
1
1
1
1
1
1
1
1
1
1
1
1
1
1
Alm Rec Prio
8
8
8
8
8
8
8
8
8
8
8
8
8
8
8
8
Call Seq
1
2
3
4
5
6
7
8
9 10 11 12 13 14 15 16
•
•
•
•
•
•
•
•
•
•
•
•
•
•
Advanced Setup Using On-Screen Menus
Triplex Digital Video Multiplexer
Use the Direction keys, the Enter key and the Camera Select keys to change the
values in the table.
PARAMETER
DESCRIPTION
Camera Install
Used to manually disable channels to which there is no
camera or other input connected (9 = camera installed,
• = no camera installed). When a channel is disabled, or
“un-installed”, all related functions for that channel are
disabled in other setup menus, for example: video loss
detection, motion detection, etc. Disabled channels will
be skipped by the video encoder when encoding the
VCR Output signal, so that the remaining cameras are
recorded more frequently.
Covert
Allows chosen inputs to be made covert (invisible) on
both the Main Monitor and Call Monitor, while
continuing to be recorded by the VCR (9 = camera
covert, • = camera noncovert).
Termination Resistor
Used to enable/disable the 75 Ω termination resistor
inside the multiplexer for each camera channel
(9 = termination resistor enabled, • = termination
resistor disabled). If the camera loop-back connector is
not in use, the termination resistor should be enabled for
correct signal termination; this is the default condition.
Gain Control
Used to set the video input gain for each camera. The
value ranges from 1 to 16 (70% to 150%).
Rec Priority
Used to set the recording priority for each camera under
normal conditions (no alarm encountered). Cameras
with higher priority will be recorded more frequently by
the VCR. The value ranges from 1 to 16 (lowest to
highest priority). The Rec Priority of uninstalled cameras
will be set to 0 automatically.
Advanced Setup Using On-Screen Menus
29
User’s Guide
PARAMETER
DESCRIPTION
Alarm Rec Priority
Used to set the recording priority when an alarm is
triggered for the current channel, either by an Alarm In
or by Motion Detection. This value should be set above
the Rec Priority value for the channel if increased
recording detail is desired during an alarm.
Call Monitor Sequence
There are 16 slots in the Call Monitor sequence. One
camera can be displayed in each slot, in sequence from
left (column 1) to right (column 16) in the row. Enter a
digit in each slot to customize the sequence: 0=jump to
next column, 1=channel 1, 2=channel 2, … 16=channel
16.
Camera Auto-Detect
The multiplexer can check the camera inputs for a video signal to determine whether
a functioning camera is connected or not. Auto detection avoids wasting VCR
recording bandwidth on undetected cameras. To use the auto detection function,
move the cursor to 2 Camera Auto-Detect, and press Enter. A table will appear, with
undetected cameras marked with a dot symbol in the corresponding position.
Camera Title
Camera titles can be turned on or off by configuring the OSD, or on-screen display
(see OSD on page 26). The default title for each camera is 1-16. This menu allows you
to enter a custom title (up to 12 characters) for each camera. In the Camera Set Up
Menu, move the cursor to 3 Camera Title and press Enter. The following list of
cameras will appear:
Camera Title
30
1
Camera_1
10
Camera_10
2
Camera_2
11
Camera_11
3
Camera_3
12
Camera_12
4
Camera_4
13
Camera_13
5
Camera_5
14
Camera_14
6
Camera_6
15
Camera_15
7
Camera_7
16
Camera_16
8
Camera_8
17
Exit
9
Camera_9
Advanced Setup Using On-Screen Menus
Triplex Digital Video Multiplexer
Step-by-step:
1. Use the UP/DOWN keys to select a camera, press Enter to edit the title.
2. Use the Mode Select keys to position the cursor in the title entry field.
3. To place characters in the camera title, use the Direction keys to move the cursor
through the lists of characters to the character you need, then press Enter to
select.
4. Press Esc after title entry is finished.
Power ON Detect
The item allows you to enable/disable camera auto detection during multiplexer
power-ON. If cameras are added or removed, then using this feature can be a
convenient way of ensuring that unused channels are automatically removed from
the signal recorded by the VCR. However, if a camera is connected but simply turned
off when the multiplexer is powered-up, it will show as undetected. To fix the
problem, turn on the camera and reset the multiplexer. If the Power ON Detect feature
is disabled, use Camera Auto-Detect to detect all connected cameras.
Title Position
The camera title can be placed in one of five positions in the display window: Default
(top-middle); Top-L (top-left); Top-R (top-right); Btm-L (bottom-left); Btm-R (bottomright). (Use the RIGHT/LEFT Direction keys to select.)
Advanced Setup Using On-Screen Menus
31
User’s Guide
VCR SET UP
Correct VCR setup is essential for the proper operation of the multiplexer and for
correct recording of encoded video. In the Main Menu, move the cursor to 4 VCR Set
Up and press Enter. The following menu will appear:
VCR Set Up
1
VCR Playback Set Up
2
VCR Source
3
Rec Time
4
VCR Rec Mode
5
Rec Density
6
Interval
7
Sync-Trig Edge
Fall
8
Playback Adjust
Auto
9
VCR Input Check
Off
10
BNC
24Hr
Field
Standard
0.1998 sec
Exit
VCR Playback Set Up
When VCR playback video is shown on the Main Monitor, the picture quality can be
adjusted using this menu. This function can only be executed when there is at least
one window displaying VCR playback video, otherwise the message “-NOT VCR
MODE-” will appear. Using the Direction keys, adjust the following parameters to
obtain the best possible display quality for playback:
VCR Playback Set Up
32
1
Bright
143
IIIIIIII
2
Contrast
159
IIIIIIII
3
Saturation
127
IIIIIIII
4
Hue
128
IIIIIIII
5
Exit
Advanced Setup Using On-Screen Menus
Triplex Digital Video Multiplexer
VCR Rec Mode
This item determines how the VCR Out signal is constructed during encoding. Field
or Frame mode can be used, but the selection must match the setting of the Time
Lapse VCR. The following are sample setups to illustrate the proper configuration of
VCR Rec Mode:
A. Time Lapse VCR operating in 24Hr field mode: The Sw
OUT from the VCR is connected to the VCR Trig input of the
multiplexer. Under VCR Rec Mode, select Field. Under Rec
Time (see Rec Time on page 34), select Sync.
VCR Trig. (Sw out)
Signal to VCR Out
1 1 1 11 1 1 1 1 1 1 1 2 2 2 2 2 2 2 2 2 2 2 2
B. Time Lapse VCR operating in 24Hr frame mode: The VCR
Out is connected to the VCR Trig input of multiplexer. Under
VCR Rec Mode select Frame. Under Rec Time (see Rec Time
on page 34), select Sync.
VCR Trig. (Sw out)
Signal to VCR Out
1 2 1 2 1 2 1 2 1 2 1 2 1 2 1 2 1 2 1 2 1 21 2
VCR Source
There are two types of connector for VCR IN: BNC and S-VHS (4 pin mini-DIN).
Either one must be connected to the Video OUT of the VCR in order to play back
previously recorded video tape. Select the connector type according to the connector
used in your application.
Rec Priority Mode
Use the RIGHT/LEFT keys to select Setup or Auto. Setup means that the camera
priorities during recording will follow the setup values in Configuration Table 1 (see
page 28). Auto means that cameras with motion detected will receive higher
recording priority automatically during a Motion Detection alarm.
Advanced Setup Using On-Screen Menus
33
User’s Guide
Alarm Real Rec
Used to enable/disable real-time recording during an alarm. If “Yes” is selected, the
Alarm NC/NO output (in the external IO connector of the multiplexer) must be
connected to the VCR Alarm-in to trigger real time recording. Please check the VCR
manual to decide whether a NC or NO signal should be used.
Rec Time
Select the recording period from one of the following options: SYNC, 1Hr ~ 999Hr.
In real-time mode, recording period depends on the length of the tape (2 hours for a T120 tape, 3 hours for a T-180 tape).
“SYNC” indicates that the multiplexer output video signal will be synchronized with
the VCR (recommended for the highest quality recording with all VCRs that feature a
SW Out or Trig Out connection). Connect the VCR Trigger input (in the external IO
connector) to the VCR's SW Out or Trig Out (SW Out).
Rec Density
Select standard/double/triple density according to the Time Lapse VCR setting. The
double/triple density feature is sometimes called “virtual real time”, and indicates a
higher recording bandwidth. Thus, a smoother image is accessible using this kind of
time lapse VCR.
Sync-Trig Edge
Used to select the rising or falling edge of the sync (trigger) signal from the VCR.
Date/Time Position
When VCR playback video is shown on the Main Monitor, both the camera titles and
date/time display of windows showing playback will be reversed, to distinguish
from Live mode. This menu allows you to choose the VCR date/time OSD (on-screen
display) position. In the VCR Set Up menu, move the cursor to 9 Date/Time Position
and press Enter. The menu will disappear, and only the playback date/time display
will remain on the screen. Use the Direction keys to move the OSD (on-screen display)
to the desired position.
34
Advanced Setup Using On-Screen Menus
Triplex Digital Video Multiplexer
ALARM SET UP
Refer to Basic Alarm Features on page 19 for a technical introduction to the alarm
capabilities of the multiplexer. The following menus allow the user to configure how
alarm conditions are handled. In the Main Menu, move the cursor to 5 Alarm Set Up
and press Enter. The following menu will be displayed:
Alarm Set Up
1
Schedule Set Up
2
Day/Night Switch
3
Alarm Response
4
Motion Detect
5
Alarm In
6
Video Loss Detect
Dis
7
Alarm Set/Reset SW
en
8
Release Time
9
Alarm List
10
Clear Alarm List
11
Exit
Schedule Set Up
The Alarm Processor allows you to define 2 time periods to create a schedule for
alarm operation: the Day Frame and the Night Frame. Each Frame has its own begin
and end times, and the motion detection setup of each camera can be defined
individually for each frame. The 16 Alarm In pins can also be individually enabled or
disabled for each frame.
Schedule Set Up
1
Day Frame Set Up
2
Night Frame Set Up
3
Configuration Table 2
4
Exit
Advanced Setup Using On-Screen Menus
35
User’s Guide
Day Frame Set Up/Night Frame Set Up:
In the Schedule Set Up Menu, move the cursor to 1 Day Frame Set Up and press
Enter. The following menu will appear.
Day Frame Set Up
1
Day Start Time
09:00
2
Day Stop Time
19:00
3
Sunday
En
4
Monday
En
5
Tuesday
En
6
Wednesday
En
7
Thursday
En
8
Friday
En
9
Saturday
En
10
Exit
Set the start and end times of the Day Frame, and enable the frame for the days it
should be active (e.g.: weekends).
In the Schedule Set Up Menu, move the cursor to 2 Night Frame Set Up and set the
start and end times of the Night Frame, and enable the frame for the days it should be
active (e.g.: every day).
NOTE: If the day and night time frames overlap, NIGHT will have priority over day.
Example:
P riority 00:00
08:00
17:00
LOW
36
21:00
D AY
HIGH
NIGHT
Result
NIGHT
NIGHT
D AY
NIGHT
Advanced Setup Using On-Screen Menus
Triplex Digital Video Multiplexer
Configuration Table 2
Used to configure Alarm In & Motion Detect operation for Day/Night time frames.
The default values for the parameters in Configuration Table 2 are as follows:
1
2
3
4
5
6
7
8
9 10 11 12 13 14 15 16
Alm In Type
O
O
O
O
O
O
O
O
O
Motion Algr
D1 D1 D1 D1 D1 D1 D1 D1 D1 D1 D1 D1 D1 D1 D1 D1
Day: Alm In
9 9 9 9 9 9 9 9 9 9 9 9 9 9 9 9
Day: Motion
9 9 9 9 9 9 9 9 9 9 9 9 9 9 9 9
Night: Alm In
9 9 9 9 9 9 9 9 9 9 9 9 9 9 9 9
Night: Motion
9 9 9 9 9 9 9 9 9 9 9 9 9 9 9 9
O
O
O
O
O
O
O
A description of each parameter in Configuration Table 2 is presented in the table
below.
PARAMETER
DESCRIPTION
Alarm in Type
Defines the signal type of the external alarm sensor as
Normally-Open (O) or Normally-Closed (C).
Motion Algr
Select the motion detect algorithm for each camera:
D1=Normal (suitable to detect a small change in a large area
or for INDOOR usage), D2=Special (suitable to detect rapid
changes in a small area or for OUTDOOR usage); see also
Motion Detection on page 41 for motion detection set up.
Day Alm In
Used to enable or disable each Alarm In pin during the Day
Frame, (3= enabled, y = disabled).
Day Motion
Used to enable or disable motion detection for each camera
during the Day Frame, (3= enabled, y =disabled).
Night Alm In
Used to enable or disable each Alarm In pin during the
Night Frame, (3= enabled, y = disabled).
Night Motion
Used to enable or disable motion detection for each camera
during the Night Frame, (3= enabled, y = disabled).
Advanced Setup Using On-Screen Menus
37
User’s Guide
Day/Night Switch
Use this function to determine the behavior of the multiplexer alarm processor in
response to an external NO (normally open) Day/Night remote. In the Alarm Set Up
Menu, move the cursor to 2 Day/Night Switch and press Enter. The following menu
will appear:
Day/Night Switch
1
Day/Night SW Enable
2
Switch <OFF>
3
Switch <ON>
4
Delay For Active
5
Exit
NO
Day
Night
60
Day/Night SW Enable
Use the Left/Right Direction keys to select YES (enabled) or NO (disabled). When
disabled, the Day/Night Switch signal will be ignored, and the alarm processor will
follow the time frames as defined in the previous section. When enabled, the position
of the Day/Night Switch will override the alarm schedule time frames.
Switch <OFF>
Configures which alarm setting (Day/Night) will be activated when the switch is OFF
(open).
Switch <ON>
Configures which alarm setting (Day/Night) will be activated when the switch is ON
(closed).
Delay For Active
Sets the time delay between the moment the switch setting is changed, and the
moment the change takes effect, allowing time for the switch operator to exit the
premises without triggering a false alarm. For example, the Night setting may enable
the Motion Detect for the channel corresponding to the camera monitoring the
hallway through which the person who activates the switch must exit, making a delay
necessary.
38
Advanced Setup Using On-Screen Menus
Triplex Digital Video Multiplexer
Alarm Response
This menu allows you to set up how the multiplexer will respond to the triggered
alarm. In the Alarm Set Up Menu, move the cursor to 3 Alarm Response and press
Enter. The following menu will appear:
Alarm Response
1
Internal Buzzer
ON
2
Alarm Relay Output
ON
3
Alarm Log
ON
4
Alarm Full Screen
OFF
5
Alarm Spot Display
ON
6
Response Duration
10
7
Any key To Stop
ON
8
Exit
A description of each selection in the Alarm Response Menu is presented in the table
below.
MENU ITEM
DESCRIPTION
Internal Buzzer
The multiplexer has an internal buzzer that is activated in
response to an alarm if this setting is set to ON.
Alarm Relay Output
There are two alarm output signals available in the external
IO connector: ALARM NO and ALARM NC. These signals
are driven by an on-board relay that can be used to drive a
light or siren to warn the operator of alarm events. The
alarm output pins are enabled/disabled by setting this
parameter ON/OFF.
Alarm Log
Used to enable/disable the Alarm History Log. When
enabled, up to 255 events will be logged using non-volatile
memory. The memory architecture is FIFO (First In First
Out), so that the latest 255 events are kept in the list.
Alarm Full Screen
When an alarm occurs on any camera input, the
corresponding camera will be displayed on the Main
Monitor in full screen until the alarm duration expires. This
item allows you to enable or disable this function.
Advanced Setup Using On-Screen Menus
39
User’s Guide
MENU ITEM
40
DESCRIPTION
Alarm Spot Display
Select “YES” for this item to cause the Call Monitor to
switch to the corresponding camera when an alarm event is
triggered. If “NO” is selected, the Call Monitor will
continue to follow the Call Monitor switching sequence in
Configuration Table 1. (See page 28)
Response Duration
This item allows you to decide how long the buzzer and
Alarm Out relay will function after an alarm is triggered.
The value can range from 1 to 9999 seconds.
Any Key To Stop
If this setting is enabled (“YES”), the operator will be able to
turn off the buzzer and alarm relay responses following an
alarm by pressing any key.
Advanced Setup Using On-Screen Menus
Triplex Digital Video Multiplexer
Motion Detection
This menu allows you to configure how Motion Detection works. The “Detect Area”
and “Sensitivity” can be defined individually for each camera. In the Alarm Set Up
Menu, move the cursor to 4 Motion Detect and press Enter. The following menu will
appear:
Motion_Detect
1
Motion Detect
OFF
2
Configuration Table 2
3
Condition Set Up
4
Exit
Motion Detect
Use to enable or disable the motion detection function of
the multiplexer.
Configuration Table 2
An alternate entry to Configuration Table 2. See Schedule
Set Up on page 35 for the settings relevant to motion
detection.
Condition Set Up
This menu allows you to set up the detection area and
sensitivity for each camera input.
Condition Set Up
1
Camera_1
10
Camera_10
2
Camera_2
11
Camera_11
3
Camera_3
12
Camera_12
4
Camera_4
13
Camera_13
5
Camera_5
14
Camera_14
6
Camera_6
15
Camera_15
7
Camera_7
16
Camera_16
8
Camera_8
17
Exit
9
Camera_9
Advanced Setup Using On-Screen Menus
41
User’s Guide
Detect Area
When this item is selected, the screen will be covered by 192 points forming a
“detection grid” (16 wide x 12 high). Use the Direction keys and the Enter key to
enable/disable points in the grid in order to define the area of the image to be
processed using the motion detection algorithm (small circle = disabled; large
circle = enabled). The default cursor size is one grid point, meaning that grid points
may be toggled one at a time. You can use the View key to change the cursor size from
1x1 to 2x2, 3x3 or 4x4 grid points, to make the set up process easier. You may also use
the SET key to turn the grid points all on or all off.
Sensitivity
Sensitivity determines how much variation in the image is required to indicate
motion. It is set using two bars that can be adjusted using the Direction keys. The
upper bar shows the current detected amount of motion of this camera. The lower bar
allows you to set the “trigger level”. When motion detected in the detect area exceeds
the trigger level, a Motion Detect alarm is triggered. The sensitivity and grid setup can
be tested by having someone walk through the frame, or by simulating the type of
motion you wish to detect and observing the change in the upper bar.
Alarm In
Used to enable or disable alarm input detection. When set to “ON”, the alarm
processor will function as defined in Schedule Set Up Menu and Configuration
Table 2.
Video Loss Detection
Used to enable or disable Video Loss as an alarm event.
Alarm Set/Reset Switch
Used to enable or disable the Alarm Set/Reset signal of the external connector. If you
select EN (enable), then you can activate the alarm output by an Alarm Set signal,
even if no alarm event has actually occurred, or deactivate the alarm output by an
Alarm Reset signal after an alarm is triggered.
42
Advanced Setup Using On-Screen Menus
Triplex Digital Video Multiplexer
Release Time
Release Time
1
Motion Res Time
2
2
Video Loss Res Time
3
Alarm In Res Time
4
Exit
2
10
This menu is used to set the “release time” of each alarm source: motion detection,
video loss and alarm in. The release time is a period of time after the alarm trigger
condition is removed, during which the same condition will be ignored to avoid a
false alarm being re-triggered.
Example 1: An alarm input occurs for a particular channel as
shown below. An alarm will be triggered at the rising edge of
signal A, and the response duration timer countdown will begin
(the multiplexer stays in alarm status until the signal ends and
the response time expires). When the alarm ends (falling edge
of signal A), the alarm-in release time countdown (2 sec. in this
example) begins. A new alarm signal at point B will trigger a
new alarm since the alarm-in release time from signal A is
over. If another alarm input is detected before the timer times
out (e.g. C, D), then the alarm inputs will be disregarded, and
the alarm in release timer will be reset. In this example, the
next possible time for the alarm-in channel to be reactivated is
2 sec. after the end of signal D. Signal E would produce a new
alarm.
t=2 sec
Alarm-In A
Advanced Setup Using On-Screen Menus
t=<2 sec
B
C
D
t=2 sec
etc.
E
43
User’s Guide
Example 2. Assume that 3 types of alarm occur for one
particular channel. Video-Loss has highest priority, followed by
Alarm-In and Motion-Detection. In other words, Alarm-In A1
can trigger another alarm during the Motion-Detect M1 alarm,
and Video-Loss V1 can trigger another alarm during the
Alarm-In A1 alarm. Motion-Detect M2 is however ignored
during the Video-Loss-V1 alarm, and Motion- Detect M3 is
ignored during the release time delay for the Alarm-In A2
alarm.
Motion-Detect
Trigger
Alarm-In
Trigger
Video-Loss
Trigger
M1
M2
A1
A2
V1 V2
2 Sec
Result
44
M4
M3
M1 A 1
V1
2 Sec
A2
M4
Advanced Setup Using On-Screen Menus
Triplex Digital Video Multiplexer
Alarm List (Alarm History Log)
Alarm events are logged in non-volatile memory. To view the Alarm History Log,
select 9 Alarm List from the Alarm Set Up Menu. The Alarm History Log lists the
latest alarm events on the OSD in the format shown below. Use the LEFT/RIGHT
keys to scroll one page up or down, while the UP/DOWN keys will move the cursor
one row up or down. You may also use the View Select Key to go to the top or bottom
of the list.
ALARM DATA LIST
1
98/10/01 10:00:30 A 01
2
98/10/03 11:21:45 A 12
3
98/10/13 14:04:35 L 15
4
98/11/08 18:26:55 A 03
5
98/11/23 05:38:42 L 06
6
98/11/24 02:01:31 A 07
7
98/12/05 21:34:24 A 11
8
98/12/14 02:52:48 L 02
9
98/12/15 21:29:19 A 09
10
98/12/24 02:15:47 L 09
--- CONTINUE ---
The first column is the item number, followed by the date and time of the alarm and
the alarm type: A = Alarm Input, L = Video Lost, M = Motion Detected. The last
column is the channel number of the alarm.
Clear Alarm List
In the Alarm Set Up menu, move the cursor to 10 Clear Alarm List and press Enter.
The menu will appear as shown below. To clear the Alarm History Log, move the
cursor to 2 (YES) and press Enter. Otherwise press Enter to choose NO. The menu is
designed in this way to reduce the chance of accidentally erasing the log.
Clear Alarm List
1
Clear Alarm List:
No
2
Clear Alarm List:
Yes
3
Exit
Advanced Setup Using On-Screen Menus
45
User’s Guide
OTHERS
This menu allows the user to check the RS-485 ID, communication protocol and
software version. In the Main Menu, move the cursor to 6 Others and press Enter. The
following sub menu will appear:
Others
1
RS-485 ID Set Up
2
RS-485 Protocol
224
3
Software Information
4
Exit
RS-485 ID Set Up
This item can only be accessed by the installer or using the password. Used to change
the RS-485 ID address of the multiplexer.
RS-485 Protocol
This menu shows the details of the RS-485 protocol. Baud rate allows you to select one
of the following options: 2400, 4800, 9600, 19200, 38400 bps. The installer can modify
the RS-485 ID address of the multiplexer (refer to RS-485 ID on page 55). Multiplexers
may be assigned a RS-485 ID address between 224 and 239. Each multiplexer must
have a unique address. The other settings are fixed, and can't be changed by the user
or installer.
RS-485 Protocol
46
1
Baud Rate :
9600bps
2
Bits :
8
3
Stop :
1
4
Parity :
5
Exit
None
Advanced Setup Using On-Screen Menus
Triplex Digital Video Multiplexer
Software Information
This menu presents the software information including the version and date code.
Others
1
CPU Filename
DN6T0170
2
FPGA Filename
FPGA0101
2
DATE
4
Multiplex Type
Triplex
3
Channel Number
16
5
VCR Encode Type
04
6
Exit
Advanced Setup Using On-Screen Menus
2001/01/30
47
User’s Guide
SAVE & LOAD DEFAULT
Used to restore the multiplexer to the default configuration set by the installer, or to
the factory settings.
Save/Load Default
1
Load Installer Setting
2
Save Installer Setting
3
Load Factory Setting
4
Load Factory Password
5
Exit
Load Installer Setting
This item recalls the “Installer's Configuration” from the on-board non-volatile
memory.
Save Installer Setting
This item saves the current settings as the “Installer's Configuration”. This operation
can only be executed with the installer password, otherwise an “Illegal Operation”
message will be displayed.
Load Factory Setting
This item recalls the “Factory Default” setup configuration from the read only
memory.
Load Factory Password
This item allows you to reload the factory password in case you forget your own
password.
48
Advanced Setup Using On-Screen Menus
Triplex Digital Video Multiplexer
INSTALLER SET UP
In the Main Menu, move the cursor to 8 Installer Set Up, press Enter, and the
following menu will appear:
Installer Set Up
1
Input Password
2
Special Functions
3
Enter Installer Set Up
4
Exit
9999
Input password
The items in this menu are password protected; to access them, input the password
in this area before moving the cursor to menu items 2 and 3.
Special Functions
Input the password and move the cursor to 2 Special Functions, press Enter, and the
following menu will appear:
Special Functions
1
Change Password
9999
2
VCR Input Check
OFF
3
Super MMX Mode
OFF
4
Recorder Type
VCR
5
System Color
Color
6
Exit
Change Password:
The password can be changed to any 4-digit number. Use the LEFT/RIGHT Direction
keys to input the new password and press Esc when finished. The password will be
saved in nonvolatile memory. (The factory password can be recalled as described in
the Input password section, above, in the case of a forgotten password.)
Advanced Setup Using On-Screen Menus
49
User’s Guide
VCR Input Check:
Used by the installer to diagnose problems with the VCR input. Change this item to
'ON', and select VCR playback mode. There will be two rows on the screen; the first
row displays the total number of fields coming from the VCR, the second row
displays the fields with errors detected in data encoding.
Super MMX Mode:
This function is used for Matrix-Multiplexer systems. The system skeleton should be
set up as shown in the following figure. If “ON” is selected, the Call Monitor display
will depend on RS-485 commands. The Call Monitor output of MUX1-16 must be
connected to the video input of MUX17, to allow monitoring any of up to 256
cameras. For information on commanding the multiplexer in super MMX mode,
please refer to the user manual of the remote keyboard. To control the multiplexer
using a computer or other devices, please refer to Appendix C of this multiplexer user
manual.
If “OFF” is selected, the Call Monitor will work as defined in Configuration Table 1 or
the Alarm Set Up Menu (if there is an alarm condition).
Figure 9 — Matrix-Multiplexer Super MMX Mode Setup
50
Advanced Setup Using On-Screen Menus
Triplex Digital Video Multiplexer
Recorder Type:
Most DVRs (Digital Video Recorders) are incompatible with multiplexers. This
function will make the multiplexer compatible with many DVRs. If you select 'DVR',
there is no date/time display during DVR playback. The titles in DVR mode are
limited to 1,2,3, …,16.
System Color:
This function is valid only for color multiplexers. Selecting “Mono” will cause the
color multiplexer to work like a monochrome multiplexer.
Enter Installer Set Up
If you have input the correct password and move cursor to 3 Enter Installer Set Up,
pressing Enter will return you to the Main Menu, but with access to functions that are
normally blocked (installer only functions), for example the Install function under
Configuration Table 1 (see page 28).
FACTORY PASSWORD
The factory password is 9999.
Advanced Setup Using On-Screen Menus
51
User’s Guide
NOTES
52
Advanced Setup Using On-Screen Menus
MAINTENANCE
Preventive Tips
• This unit is designed for indoor use. Do not use it near water, steam or in other
extremely humid conditions or near a source of oil vapor.
• Take care not to drop the unit or subject it to major shocks during transportation.
• Keep a suitable distance around system components to allow for proper air
convection.
• Always power down the system prior to connecting and disconnecting cameras or
accessories.
Troubleshooting
This unit has been carefully tested at the factory prior to shipping. In the event that
problems do occur, refer to Appendix E to perform the corresponding verifications.
NOTE: Do not open the unit. There are no user-serviceable parts inside.
Repairs
This multiplexer is a precise instrument. If treated with care, it will provide years of
satisfactory performance. However, in the event of difficulties, the user or installer is
advised not to attempt to make repairs or to open the enclosure. Servicing should be
referred to your distributor.
Maintenance
53
User’s Guide
NOTES
54
Maintenance
APPENDICES
APPENDIX A: CONNECTOR PIN ASSIGNMENT
RS-485 (RJ-11, 6P6C)
Pin No.
Definition
Direction
1
TA
O
2
+12V
Power
3
GND
Power
4
RA
|
5
RB
|
6
TB
O
RS-485 ID
System ID Setting
Item
ID Address
Device Name
Remarks
1
00H, 0
Host Controller
Keyboard or computer
2
01H-DFH, 1—223
Speed dome
Total 223 Dome sets
3
E0H-EFH, 224—239
Multiplexer
224—239 (Mpx1—Mpx16)
4
F0H-FEH, 240—254
Remote control panel
Keyboard or computer
5
FFH, 255
Matrix
Appendices
55
User’s Guide
Multiplexer (MPX) Channels and Camera ID Mapping
56
MPX
NO
MPX ID
Camera ID
Remarks
1
E0H,224
01H – 10H, 1—16
2
E1H,225
11H – 20H, 17—32
3
E2H,226
21H – 30H, 33—48
4
E3H,227
31H – 40H, 49—64
5
E4H,228
41H – 50H, 65—80
6
E5H,229
51H – 60H, 81—96
7
E6H,230
61H – 70H, 97—112
8
E7H,231
71H – 80H, 113—128
9
E8H,232
81H – 90H, 129—144
10
E9H,233
91H – A0H, 145—160
11
EAH,234
A1H – B0H, 161—176
12
EBH,235
B1H – C0H, 177—192
13
ECH,236
C1H – D0H, 193—208
14
EDH,237
D1H – DFH, 209—223
Only 15 domes can be connected
15
EEH,238
None
Can connect to normal camera
16
EFH,239
None
Can connect to normal camera
Channel 1—16
Appendices
Triplex Digital Video Multiplexer
External I/O Port (37 pin DSUB)
Pin No.
Definition
1
GND
2
Pin No.
Definition
Power
20
Reserved
Input
GND
Power
21
Reset Alarm
Input
3
GND
Power
22
Day/Night output
Output
4
GND
Power
23
Day/Night switch
Input
5
GND
Power
24
Set Alarm
Input
6
GND
Power
25
VCR trigger
Input
7
Alarm NO
Output
26
Alarm In 13
Input
8
Alarm COM
Output
27
Alarm In 12
Input
9
Alarm NC
Output
28
Alarm In 11
Input
10
GND
Power
29
Alarm In 10
Input
11
GND
Power
30
Alarm In 9
Input
12
GND
Power
31
Alarm In 8
Input
13
GND
Power
32
Alarm In 7
Input
14
GND
Power
33
Alarm In 6
Input
15
GND
Power
34
Alarm In 5
Input
16
Alarm In 16
Input
35
Alarm In 4
Input
17
Alarm In 15
Input
36
Alarm In 3
Input
18
Alarm In 14
Input
37
Alarm In 2
Input
19
Alarm In 1
Input
Appendices
Direction
Direction
57
User’s Guide
APPENDIX B: TECHNICAL SPECIFICATIONS
All specifications are subject to change without notice.
Item
Video Level
Display
Connectors
58
Description
Camera Inputs
1.0Vp-p, 75 Ω terminated
Camera Outputs
Loop through of camera inputs
Main Monitor Output
Composite: 1.0Vp-p, 75 Ω loaded
S-VHS -Y: 1.0Vp-p, 75 Ω loaded
-C: 0.286Vp-p, 75 Ω loaded
Call Monitor Output
1.0Vp-p, 75 Ω loaded
VCR Inputs
Composite: 1.0Vp-p, 75 Ω terminated
S-VHS -Y: 1.0Vp-p, 75 Ω terminated
-C: 0.286Vp-p, 75 Ω terminated
VCR Outputs
Composite: 1.0Vp-p, 75 Ω loaded
S-VHS -Y: 1.0Vp-p, 75 Ω loaded
-C: 0.286Vp-p, 75 Ω loaded
Gray Level
256 (8 bits)
Color Palette
16M colors (24 bits)
Resolution
720x480 (NTSC/EIA), 720x576 (PAL/CCIR)
Power
DC Jack
Camera In
BNC Female Connector
Camera Out
BNC Female Connector
Main Monitor
BNC Female Connector & S-VHS
Call Monitor
BNC Female Connector
VCR In
BNC Female Connector & S-VHS
VCR Out
BNC Female Connector & S-VHS
Alarm input
DSUB 37 pin male (TTL level)
Alarm output
2.0A/24V
RS-485
RJ-11 ( 6P6C )
Remote Control
RJ-45 ( 8P8C )
Appendices
Triplex Digital Video Multiplexer
Item
Power Supply
Dimensions
Input Voltage:
12V DC ±10%
Power Consumption
16W
Safety Approval
CE, FCC
Width
432 mm (17.00 in.)
Height
44 mm (1.73 in.)
Depth
270 mm (10.63 in.)
Net Weight
Environmental
Appendices
Description
3.7 kg
Operation Temperature
5° C – 40° C
Humidity
10%–90%, RH, non-condensing
Storage Temperature
-20° C – 70° C
59
User’s Guide
APPENDIX C: RS-485 COMMAND SET
Command
OP_Code
Data 0,1 (ASCII
Format)
Notes
“01”–”0G”
Channel 1 – 16
Right
“MR”
Left
“ML”
See User’s Manual for
setting details
Sequence
“S1”–”S3”
Sequence 1 – 3
Up key
“DU”
Down key
“DD”
Left key
“DL”
Right key
“DR”
Zoom/Enter
“DZ”
Live/VCR
“KV”
Freeze
“KA”
Set
“KS”
ESC”
“KE”
List
“KL”
Buzzer
“SB”
Date/Time
“SD”
Title
“ST”
PROG (Menu)
“SP”
Key Lock
“SK”
Universal End
“UE”
Channel select
Screen mode
select
Camera select for
Call monitor
60
A0
A8
“C1” –”CG”
Select cam 1–16 output
via Call monitor
Set MMX Mode
“CR”
Set Call monitor remote
control mode
Set Normal Mode
“CN”
Set Call monitor normal
mode
Appendices
Triplex Digital Video Multiplexer
Example:
If the Keyboard ID is 00H, the Multiplexer ID is E0H.
If you want to select camera 0 on the main monitor, you can use the ‘01’ command.
(The ASCII code of ‘01’ is 30 & 31H.)
Byte 1
Byte 2
Byte 3
Byte 4
Byte 5
Byte 6
Receiver ID
Transmitter ID
OP Code
Data0
Data1
Checksum
E0H
00H
A0H
30H
31H
41H
NOTE: 1. These six bytes must be sent out in 12 ms.
2. The time interval between each two bytes must be less than 2 ms.
3. Checksum = Byte 1x or Byte 2x or Byte 3x ... or Byte 5x.
Appendices
61
User’s Guide
APPENDIX D: REMOTE CONTROL PANEL USER’S GUIDE
System Diagram
Before using the remote control panel, you must confirm the RS-485 ID address of
each multiplexer and that all cables are properly connected.
After you connect the RS-485 cable, the remote control panel will automatically search
for any multiplexers connected to the remote control panel. The channel LEDs will
light up sequentially while the search is in progress. (See Front Panel Controls on
page 11 for panel diagram.) The LED corresponding to each responding
multiplexer(s) will flash. The remote control panel will continue searching for
connected multiplexers until no further responses are received from any connected
device.
62
Appendices
Triplex Digital Video Multiplexer
ID Select
To control a specific multiplexer, press the channel key for that multiplexer for 2
seconds. When communication is established between the remote control panel and
the multiplexer, the channel LED for that multiplexer flashes. The channel key
corresponds to the multiplexer's RS-485 ID address.
Channel Key
RS-485 ID
Channel Key
RS-485 ID
1
224
9
232
2
225
10
233
3
226
11
234
4
227
12
235
5
228
13
236
6
229
14
237
7
230
15
238
8
231
16
239
Connector Pin Assignment
Pin No.
Definition
Direction
1
TA
O
2
+12V
Power
3
GND
Power
4
RA
I
5
RB
I
6
TB
O
Appendices
63
User’s Guide
Specification And Connectors
Item
Specification
Description
Power Input
12V DC ±15%
Power Consumption
0.5W
Ambient Temperature
0° C to 50° C
Ambient Humidity
Less than 90%
Width
432 mm (17.00 in.)
Height
34 mm (1.34 in.)
Depth
44 mm (1.73 in.)
Power
2.5 mm DC jack (center positive)
Remote I/O
RJ-11 6P6C
Cable
RJ-11 6P6C one to one
1000 meter maximum
RS-485 ID
Default 254
F0H-FEH, 240-254 (See System
ID Setting on page 55)
Dimension
Connector
64
Appendices
Triplex Digital Video Multiplexer
APPENDIX E: TROUBLESHOOTING GUIDE
If the solutions to common problems presented here do not correct the problem
experienced with the multiplexer, refer to a qualified service person for assistance.
Monitor and Display
Symptom: Main monitor display is not clear or the OSD is jittering.
Reason:
Solution:
If the color burst separation circuit of the monitor is not good enough,
the high frequency component of video signal could interfere with
color signal, making jitter on the display.
1. Use monitor with S-VHS input
2. Use monitor of better quality
Symptom: Main monitor image too bright.
Reason:
Solution:
“Brightness” value is too high in “Monitor Setup” menu.
Adjust the brightness to a lower value.
Reason 2:
Solution:
Camera iris is not adjusted properly.
Adjust camera iris to a smaller value.
Reason 3:
Camera video output signal does not comply with the standard
(RS170/A).
Use a camera that outputs correct video.
Solution:
Reason 4:
Solution:
Termination resistor is not enabled (OFF) (and loop back connector is
not used).
Enter setup menu and enable the termination resistor.
Reason 5:
Solution:
The multiplexer is broken.
Ask a qualified service person.
Symptom: Main monitor image too dark.
Reason 1:
Solution:
“Brightness” value is too low in “Monitor Setup” menu.
Adjust the Brightness to a higher value.
Reason 2:
Solution:
Camera iris is not adjusted properly.
Adjust camera iris to a larger value.
Reason 3:
Solution:
Camera cable is too long making video signal too attenuated.
Minimize cable length, or use video amplifier.
Appendices
65
User’s Guide
Reason 4:
Solution:
Looping connector is in use, but termination resistor is enabled (ON).
Enter setup menu and disable the termination resistor.
Reason 5:
Solution:
Multiplexer is broken.
Ask a qualified service person.
Symptom: Some cameras cannot be displayed on the Main monitor.
Reason 1:
Solution:
When multiplexer is first powered on, it will auto-detect the presence
or absence of a camera on each channel. Channels without a video
signal will be disabled automatically.
Make sure every camera is connected properly. Enter setup menu and
use Camera Auto-Detect to detect cameras OR enable Power ON
Detect; then, power off and on again.
Reason 2:
Solution:
The camera is malfunctioning or cable is open or shorted.
Repair camera and/or cable.
Reason 3:
Multiplexer suffered an abnormal spike or shock which damaged
some channels.
Use a good camera to test each channel, if some channels do not
function, please return the unit to the dealer for repair.
Solution:
Symptom: In multi-window display format, some windows interfere with others.
Reason:
Solution:
The video signal from one of the cameras doesn't comply with the
standard (RS170/A), and/or the vertical sync amplitude is too small.
Disconnect all cameras one by one, until the failed camera is found.
Replace the failed camera.
Symptom: Some windows on the main monitor are frozen.
Reason:
Solution:
When VCR record time is set to 2 hours (refer to Rec Time on page 34),
if you assign more than one window to display the same camera,
only one window can be displayed normally. The others will freeze.
Assign only one window for each camera, or change the VCR record
time to the another setting (12Hr, 24Hr…) from the setup menu.
Symptom: While displaying speed dome cameras, the image breaks when the dome turns, and levels fluctuate
dramatically.
Reason:
Solution:
66
Light levels vary suddenly in the areas covered when the dome turns.
Avoid brilliant lighting or glare producing conditions in the path of
the speed dome, or use a lower speed.
Appendices
Triplex Digital Video Multiplexer
Symptom: When switching cameras, the call monitor synchronizes to the new camera very slowly.
Reason:
The monitor's response time (to new video input) is too slow. Usually
it ranges from 0.03 sec. to 1 sec.
Solution:
Use a monitor with a faster response time.
VCR
Symptom: During VCR playback, the update frequency of each camera is not even.
Reason 1:
Solution:
Multiplexer and VCR record setup are not matched.
Check multiplexer and VCR record setup (refer to VCR Set Up on
page 32).
Reason 2:
An alarm condition was triggered during recording, and cameras
have different recording priority.
This is a normal condition.
Solution:
Symptom: During VCR playback, the video is frozen.
Reason 1:
Solution:
Reason 2:
Solution:
Multiplexer REC TIME was set to “SYNC” mode, but the VCR trigger
cable was not connected.
Connect the VCR trigger (or SW OUT) signal from the VCR to
multiplexer (refer to Rec Time on page 34).
VCR tape is worn out or the head is dirty.
Change the tape or clean the head and try again.
Symptom: During VCR playback, some windows are not displayed.
Reason 1:
Solution:
If you assign more than one window to display the same camera
channel, only one window can be displayed normally.
Do not assign more than one window to the same camera channel.
Reason 2:
Solution:
That camera channel was not connected during recording.
Connect the camera and check that it is recorded properly.
Reason 3:
Solution:
VCR playback bypasses the multiplexer.
Verify that the VCR output is connected to the multiplexer's VCR
Input.
Appendices
67
User’s Guide
Symptom: Random characters are displayed on OSD during VCR playback.
Reason:
Solution:
VCR tape is worn out.
Change tape.
Symptom: VCR TIME was not set to “SYNC” mode, but some channels cannot be displayed during playback.
Reason:
Solution:
The REC MODE, REC TIME or REC DENSITY setup value was not
correctly matched between multiplexer and VCR.
Change the incorrect setting and try again.
Symptom: VCR TIME was set to “SYNC” mode, but some windows cannot be displayed during playback.
Reason 1:
Solution:
Reason 2:
Solution:
The REC MODE setup was not matched between multiplexer and
VCR.
Change the REC MODE setting and try again.
The SYNC TRIG EDGE setup was not matched between multiplexer
and VCR.
Change the SYNC TRIG EDGE setting and try again.
Symptom: The above solutions do not solve the problem.
Reason:
Solution:
68
VCR malfunction.
Perform the following diagnostic test:
Enter Installer Set Up menu, change the “VCR INPUT CHECK” to
ON, exit the menu and, playback VCR tape. There will be two lines of
characters on the screen:
?VCR INPUT FIELDS? ????? equals the total number of multiplexer
input fields received.
?VCR ERROR FIELDS? ????? equals the number of fields that contain
errors.
If the number of errors is high, the multiplexer cannot receive correct
encoded video signals from the VCR. This could be caused by:
Worn out tape, VCR head is dirty, video cable contact problems or a
broken VCR.
If VCR INPUT FIELDS=0, the “VCR IN” cable may not be connected
correctly. Ensure the VCR IN of the multiplexer is correctly connected
to the VCR's output connector.
Appendices
Triplex Digital Video Multiplexer
Alarm
Symptom: Motion detection is not working.
Reason 1:
Solution:
The motion detect function was not enabled, or the detect area was
not defined, or the trigger level setting is too high.
Modify the above setup values and try again.
Reason 2:
Solution:
“Time Frame” setup not correct.
Modify the above setup value and try again.
Reason 3:
Solution:
“Configuration Table” setup not correct.
Modify the above setup value and try again.
Symptom: Motion detection response too slow.
Reason:
Solution:
The sensitivity setup is not correct (trigger level too high) or the
detect area is too large.
Set the trigger level lower or modify the detect area to critical area
only.
Symptom: Alarm Output pin not working.
Reason 1:
Solution:
Reason 2:
Solution:
Alarm Processor setup not correct, for example:
Motion Detect was set off, Alarm In was set off, Alarm in NC/NO
type definition error, Schedule Setup not correct, etc.
Review the Alarm Processor settings (please refer to Alarm Set Up on
page 35).
Alarm Output was used to drive alarm device directly.
Apply external power driver. Because the alarm output is a dry
contact, there is no power output available to drive an external alarm
device.
Keypad and Password
Symptom: Password not accepted.
Reason 1:
Solution:
Appendices
Forgotten password.
Load factory password, password is restored to 9999, try again
(please refer to Load Factory Password on page 48).
69
User’s Guide
Reason 2:
Solution:
Penalty lockout following three incorrect password attempts.
Press Esc +1+2 to reset the multiplexer, then input the password
again.
Symptom: Front panel keys are not working.
Reason:
Solution:
Front panel keys are locked.
Press Esc and Lock key together to unlock the front panel.
Symptom: When more than one remote keypad is connected, the remote keypad does not work properly.
Reason:
Solution:
Remote control keypad IN/OUT connectors were not connected
properly.
Please refer to Appendix D: Remote Control Panel User’s Guide on
page 62 for the correct connection method.
Remote Control Panel
Symptom: The channel LEDs always light one by one
Reason 1:
Connecting cables may be loose or improperly installed.
Solution:
Make sure that the RS-485 cables are properly connected.
Reason 2:
Multiplexer may be assigned an incorrect RS-485 address.
Solution
Assign the multiplexer a RS-485 ID address between 224
and 239. (See RS-485 Protocol on page 46)
Reason 3:
Transmission baud rate incompatible with cable rating.
Solution
Set baud rate to factory default setting. (9600 baud). See
RS-485 Protocol on page 46 for more information.
Remote control panel LEDs light at random OR the LED status display does not correspond to multiplexer’s status
70
Reason:
More than one multiplexer has the same RS-485 ID
address.
Solution:
Verify that all multiplexers have a unique RS-485 ID
address. (Refer to RS-485 ID on page 55 and RS-485
Protocol on page 46)
Appendices
CUSTOMER SERVICE
For more information or technical assistance, contact Sensormatic Electronics Corporation:
Sensormatic Electronics Corporation
Video Systems Division
6795 Flanders Drive
San Diego, CA 92121-2903 U.S.A.
Customer Service:
TEL U.S.A.: 845-624-7640
Option 2 for Technical Support
TEL Europe :
Customer Service: (032) 65-765-280
Internet:
http://www.tycovideo.com
Sensormatic Video SystemsDivision
6795 Flanders Drive
San Diego, California 92121
TEL:
858-642-2400
800-854-2057
FAX:
858-642-2440
Part Number 8200-0168-00 REV AO