1
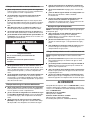
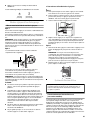
To Clean Your Refrigerator:
NOTE: Do not use abrasive or harsh cleaners such as window
sprays, scouring cleansers, flammable fluids, cleaning waxes,
concentrated detergents, bleaches or cleansers containing
petroleum products on plastic parts, interior and door liners or
gaskets. Do not use paper towels, scouring pads, or other harsh
cleaning tools.
1. Unplug refrigerator or disconnect power.
2. Hand wash, rinse, and dry removable parts and interior
surfaces thoroughly. Use a clean sponge or soft cloth and a
mild detergent in warm water.
3. Wash stainless steel and painted metal exteriors with a clean
sponge or soft cloth and a mild detergent in warm water.
4. There is no need for routine condenser cleaning in normal
home operating environments. If the environment is
particularly greasy or dusty, or there is significant pet traffic in
the home, the condenser should be cleaned every 2 to
3 months to ensure maximum efficiency.
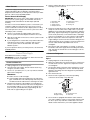
If you need to clean the condenser:
■
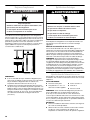
Remove the base grille.
■
Use a vacuum cleaner with a soft brush to clean the grille,
the open areas behind the grille and the front surface area
of the condenser.
■
Replace the base grille when finished.
5. Plug in refrigerator or reconnect power.
Changing the Light Bulbs
NOTE: Not all bulbs will fit your refrigerator. Be sure to replace
the bulb with one of the same size, shape and wattage. On some
models, the dispenser light requires a heavy duty 10-watt bulb.
All other lights require a 40-watt bulb. Replacement bulbs are
available from your dealer.
1. Unplug refrigerator or disconnect power.
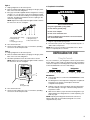
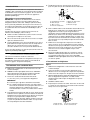
2. Remove light shield when applicable.
NOTE: To clean the light shield, wash it with warm water and
liquid detergent. Rinse and dry the shield well.
3. Remove light bulb and replace with one of the same size,
shape and wattage.
4. Replace light shield when applicable.
5. Plug in refrigerator or reconnect power.
TROUBLESHOOTING
First try the solutions suggested here or visit our website and reference FAQs (Frequently Asked Questions)
to possibly avoid the cost of a service call.
In the U.S.A., www.whirlpool.com In Canada, www.whirlpool.ca
Refrigerator Operation
■
The refrigerator will not operate
New installation? Allow 24 hours following installation for
the refrigerator to cool completely.
NOTE: Adjusting the temperature controls to coldest setting
will not cool either compartment more quickly.
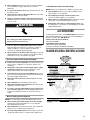
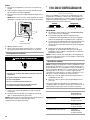
WARNING
The motor seems to run too much
Your new refrigerator may run longer than your old one due to its
high-efficiency compressor and fans. The unit may run even
longer if the room is warm, a large food load is added, doors are
opened often, or if the doors have been left open.
Electrical Shock Hazard
The refrigerator is noisy
Plug into a grounded 3 prong outlet.
Do not remove ground prong.
Do not use an adapter.
Do not use an extension cord.
Failure to follow these instructions can result in death,
fire, or electrical shock.
■
■
■
■
Refrigerator noise has been reduced over the years. Due to this
reduction, you may hear intermittent noises from your new
refrigerator that you did not notice from your old model. Below
are listed some normal sounds with an explanation.
■ Buzzing - heard when the water valve opens to fill the ice
maker
■
Power cord unplugged? Plug into a grounded 3 prong
outlet.
Pulsating - fans/compressor adjusting to optimize
performance
■
Is outlet working? Plug in a lamp to see if the outlet is
working.
Rattling - flow of refrigerant, water line, or from items placed
on top of the refrigerator
■
Household fuse blown or circuit breaker tripped? Replace
the fuse or reset the circuit breaker. If the problem continues,
call an electrician.
Sizzling/Gurgling - water dripping on the heater during
defrost cycle
■
Popping - contraction/expansion of inside walls, especially
during initial cool-down
■
Water running - may be heard when water melts during the
defrost cycle and runs into the drain pan
■
Creaking/Cracking - occurs as ice is being ejected from the
ice maker mold.
Are controls on? Make sure the refrigerator controls are on.
See “Using the Controls.”
9