1
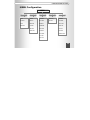
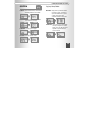
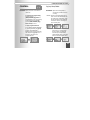
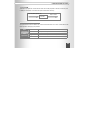
Creative MuVo VIDZ User Guide
COPYRIGHT NOTICE
Copyright© 2005 Creative Technology Ltd. All rights reserved. The Creative logo and MuVo VIDZ are
trademarks or registered trademarks of Creative Technology Ltd. in the United States and/or other countries.
Microsoft, Windows and the Windows logo are registered trademarks of Microsoft Corporation.
All other products are trademarks or registered trademarks of their respective owners and are hereby
recognized as such.
Creative MuVo VIDZ
1.
Creative MuVo VIDZ is a portable digital audio player that can save and play Microsoft® WMA files
as well as MP3 files.
2.
Creative MuVo VIDZ allows you to play video in MV4 format and display JPG images on its color
LCD. You can also select segments of video for transcoding.
Note: ensure that each movie file saved is limited to an hour of playback time per file before
transcoding.
3.
Creative MuVo VIDZ has a built-in MP3 encoder that allows you to take an audio input (via the linein port) from a voice recorder, CDP or other audio device, and save it as an MP3 file.
4.
Creative MuVo VIDZ also has a built-in FM radio allowing you to listen to FM broadcasts and save
them as MP3 files.
C
r
e
a
t
i
v
e
M
u
V
o
V
I
D
Z
Table of Contents
2
Product Features
5
SAFETY CONCERNS
7
Package Contents
8
Name of Parts
9
LCD Display
10
Charging battery
11
Connecting to PC
12
Power on/Playing music
18
Bookmark
20
Creative MuVo VIDZ User Guide
EQ Selection/Navigation/Deleting a File
21
Listening to FM Radio
22
Recording Voice
24
Recording external input
25
Using a program list
26
Playing video/Displaying images
27
Using Text Viewer
29
Using the M3U Playlist
30
To use User’s Logo
31
MENU Configuration
33
3
C
r
e
a
t
i
v
e
M
u
V
o
V
Using MENU
I
D
Z
34
MODE ................................................................................ 34
SYSTEM.............................................................................. 35
CONTROL ........................................................................... 36
SOUND............................................................................... 39
DISPLAY ............................................................................. 40
4
Accessing the latest features through
firmware upgrades
42
Using Transcoder
44
Specifications
53
Troubleshooting
55
Support
56
Warranty
56
Creative MuVo VIDZ User Guide
Product Features
MP3, WMA music files playback
Save and play Microsoft WMA files as well as MP3 files.
FM Reception and Recording
Make an MP3 digital recording of an FM broadcast, while listening to it.
Voice Recording in the quality MP3 format
Save and play voice signals as an MP3 file with the world’s best sound quality.
Recording external audio input signals as an MP3 file
Convert and save audio signals from any analog audio device directly to an MP3 file without the need for a PC.
Support M3U Playlist
Supporting M3U file, which can be played in Winamp and Microsoft Windows Media® Player at the same time.
Enhanced firmware upgrade
After downloading an upgrade file, turn the power off and back on to automatically upgrade your product, keeping
it up to date.
5
C
r
e
a
t
i
v
e
M
u
V
o
V
I
D
Z
Setting Variable Bit Rate (VBR)
Adjust the recording quality for more efficient use of memory by configuring the voice or line-in recording bit rate
according to your particular time requirements and location conditions.
Speed Control
Adjust the playback speed.
Provide Convenient Text Viewer Function
Can read text file by Text Viewer function.
Playing video/Displaying an image
Enjoy video and image files on the 128×80 65K OLED high-quality color LCD.
A built-in rechargeable lithium polymer battery
No need to purchase a separate battery as your battery can be easily recharged with your PC’s USB socket.
6
Creative MuVo VIDZ User Guide
SAFETY CONCERNS
The following cautions are provided to ensure user safety and to prevent damage to property. Please be sure to
read it through thoroughly before using the product.
Do not listen to the music for a
long time with a high volume.
- This might damage your hearing
ability.
Do not exert impact on LCD panel
or product.
- This might be a reason of
product trouble.
Do not leave the product in too
hot (over 35°C) or too cold (below
-5°C) environment.
- This might be a reason of
product trouble.
Clean the product with soft and
dry cloth and do not use benzene
or thinner.
- This might be a reason of
product trouble.
Take care not to introduce dirt or
fluids into the product.
- This might be a reason of
product trouble. In such as case,
stop using the product and
contact the Call Center.
Do not place the product near
cash cards, prepaid cards, etc.
- The magnetic part of cash card,
prepaid cards and others might
be damaged and become
useless.
7
C
r
e
a
t
i
v
e
M
u
V
o
V
I
D
Z
Package Contents
Creative MuVo
VIDZ Player
USB Cable
8
Necklace type
earphone
Software
Installation CD
LINE IN Cable
User Guide
Carrying Case
Creative MuVo VIDZ User Guide
Name of Parts
Earphone Port/LINE IN Port
Microphone
RESET Button
Power/Play/Stop Button
LCD
Navigation/Bookmark/EQ Button
Record/Segment Button
HOLD Switch
LED (Charge/
Operation Indication)
Jog Key
USB Port
9
C
r
e
a
t
i
v
e
M
u
V
o
V
I
D
Z
LCD Display
Current track number/
Total number of saved tracks
Operation Mode
Play Control
Folder Format indicator/
Folder name
File format indicator
EQ Mode
Play mode /
Segment Repeat indicator
Hold(Lock indicator)
Battery life
Playback progress
Playing time
File name and ID3 Tag Info
Level Meter
Bit Rate
10
Creative MuVo VIDZ User Guide
Charging battery
Charging via PC
After turning your PC on, connect the product to the USB port of your PC using the USB cable.
The charging time may vary depending on the USB usage of your PC.
※IMPORTANT: Be sure to power off the product before connecting it to your PC for battery charging.
Failing to do so may result in damaging your player's OLED Screen irreversibly.
- The charge LED (blue) of the player lights up during charging and goes off once charging is complete.
11
C
r
e
a
t
i
v
e
M
u
V
o
V
I
D
Z
Connecting to PC
Installing the USB device driver
USB device driver installation is only required for Window 98 SE/ME environments.
1. Insert the installation CD into the CD-ROM drive of your PC and select ‘USB Device Driver’. The installation
program runs automatically. Follow the instructions in the installation window.
2. Restart your PC.
12
Creative MuVo VIDZ User Guide
Connecting to PC
Recommended PC requirements
Part
Specifications
CPU
A PC with Pentium MMX or above
OS
Windows 98SE/ME/2000/XP/Mac or Linux
Hard Disk
50 Mbyte or more hard disk storage available
Other
CD-ROM drive, USB Port
1. Power on the player.
2. Connect it to the USB port of your PC. A new
3. After selecting a file to save, drag & drop or
copy & paste it to the Removable Disk.
Removable Disk is created in My Computer.
- Do NOT disconnet while transferring a file.
- The order in which music files appear in
Windows Explorer does not reflect the play
order.
ROOT directory
13
C
r
e
a
t
i
v
e
M
u
V
o
V
I
D
Z
Installing the Windows 98 driver manually
1. Power on the product and connect the USB port
3. Press the [Update Driver] button.
to your PC.
2. Select [Control PanelÆSystemÆDevice
Manager] and the following window appears.
After selecting ‘USB Device’, press the
[Properties] button.
4. The Device Driver Update Wizard is displayed.
Press the [Next] button.
14
Creative MuVo VIDZ User Guide
5. After creating a driver list, select a driver to
7. Press the [Have Disk] button.
update and press the [Next] button.
8. After inserting the provided CD into the CD ROM
6. Select
‘Hard disk controllers’ and press the
[Next] button.
drive, choose [Browse] button and select the
‘DriversÆWin98’ folder and press the [OK] button.
15
C
r
e
a
t
i
v
e
M
u
9. Press the [Next] button.
V
o
V
I
D
Z
11. Check whether it has been properly installed.
Go to ‘Control PanelÆSystem’ for checking.
10. Installation of the USB driver is now complete.
Press the [Finish] button.
- If after the above procedure has been
completed the product is still not recognized,
uninstall the USB driver completely and install it
again.
16
Creative MuVo VIDZ User Guide
Managing files
Disconnecting from PC
- The product is recognized as a removable disk
when it is connected to your PC and it contains
two folders named CONFIG and RECORD.
- MP3, WMA music files can be saved to either of
the folders.
- FM recording and encoding files should be saved
to the RECORD folder.
- The player can hold up to 999 files in 999 folders.
ROOT directory
- Data loss may occur if you disconnect the device
from your PC during data transfer.
- In Windows ME/XP/2000 environments, only
remove the device after first disabling it by
)
clicking the ‘Safely remove hardware’ icon (
displayed in the lower right corner of the task bar.
- File transfer in progress. Do NOT remove the
device.
- File transfer complete. You can now remove the
device.
17
C
r
e
a
t
i
v
e
M
u
V
o
V
I
D
Z
Power on/Playing music
Power on
- Press the PLAY/STOP [▶/■] button briefly.
- The product turns on and the CREATIVE screen or another user
specified screen appears on the LCD.
Power off
- Press and hold the PLAY/STOP [▶/■] button for more than
2 seconds.
- ‘Bye Bye’ is displayed on the LCD and the product turns off.
HOLD Switch
- Push the HOLD switch in the indicated direction to disable all buttons.
To play a track
- Press the PLAY/STOP [▶/■] button to play an MP3 or WMA file.
To select track
- Push the jog key in the << or >> direction to skip to the previous/next
track. Push the jog key in the << direction within 3 seconds of starting
playback to skip to the previous track, and after 3 seconds of playback to
move to the beginning of the current track.
- Push and hold the jog key to the << or >> to seek within the current track.
To stop playing
- To stop playing, press the PLAY/STOP [▶/■] button.
- To resume playing, press the PLAY/STOP [▶/■] button.
18
Creative MuVo VIDZ User Guide
Volume Control
- The volume level can be set between 0-39.
- To increase the volume: Push the jog key in the ∧ direction. Push
and hold it to increase the volume further.
- To decrease the volume: Push the jog key in the ∨ direction. Push
and hold it to decrease the volume further.
- The volume level setting is automatically saved when the product is
turned off, and used when the product is turned on again.
※Please exercise caution. Exposure to loud volumes for an extended
time may result in hearing impairment and earphone damage.
Segment Repeat
- Press the [REC/A-B] button where you want to start Segment
icon is displayed.
Repeat during playback. The
- Press the [REC/A-B] button again, this time at the point where
you want to end Segment Repeat.
icon is displayed and the selected segment is played
- The
repeatedly.
- To disable Segment Repeat, press the [REC/A-B] button once
icon disappears and Segment Repeat is disabled.
more. The
19
C
r
e
a
t
i
v
e
M
u
V
o
V
I
D
Z
Bookmark
Inserting a bookmark
- While playing a music file, press and hold the jog key to insert a
bookmark. (Up to 99 bookmarks can be inserted.)
Searching for a bookmark
- When stopped, press the [NAVI/B-MARK (EQ)] button briefly to
display the bookmark list.
- After moving to the desired bookmark by using the ∧ or ∨ key of
the jog key, press the FF [>>] button and playing begins from
the bookmark. The
symbol is displayed as the play mode
indicator. (The same button operations apply as when navigating.)
Deleting a bookmark
- When stopped, press the [NAVI/B-MARK (EQ)] button briefly to
display the bookmark list.
- After moving to the desired bookmark by using the ∧ or ∨ key of
the jog key in the front panel, press the [NAVI/B-MARK (EQ)]
button to delete it.
- Press and hold the [NAVI/B-MARK (EQ)] button to delete all
saved bookmarks at once.
- Any changes to a file on the ‘removable disk’ to which a bookmark
has been added (deletion/moving) will cause a ‘NO SONG’ message
to appear upon bookmark playback i.e. the bookmark feature can
only be used if the file location has not been changed since its
download.
20
Creative MuVo VIDZ User Guide
EQ Selection/Navigation/Deleting a File
EQ (Sound Effect) Mode
- You can enjoy music in various tones.
- The sound tone changes each time you press the
[NAVI/B-MARK (EQ)] button briefly:
- NORMAL, ROCK, JAZZ, CLASSIC, POP, USER EQ (user-defined)
Navigation
- Press and hold the [NAVI/B-MARK (EQ)] button to enter
Navigation mode.
- After locating the desired file with the jog key, push the key in the
>> direction to play the selected file right away.
Moving to the sub folder
- Select the desired folder and push the jog key in the >> direction.
Moving to the upper folder
- Whilst in a folder, push the jog key in the << direction.
Deleting a File
- Press the [REC/A-B] button briefly.
21
C
r
e
a
t
i
v
e
M
u
V
o
V
I
D
Z
Listening to FM Radio
Listening to FM radio (87.5~108.0MHz, 76.0~108.0MHz)
- After displaying the main menu screen by pressing the jog key
briefly, select MODE and use the jog key to select ‘FM’ mode.
※Please be sure to plug in the earphones before using FM mode. The
earphones work as an antenna.
- The Station Search mode has two modes: Manual and Preset.
- Press and hold the jog key to enable or disable the Preset mode.
AUTOSCAN
- Press and hold the [NAVI/B-MARK (EQ)] button. The device then
automatically scans frequencies and stores up to 20 present channels.
PRESET SCAN Mode
- Push the jog key further in the << or >> direction to increase/
decrease the preset number and locate a desired station.
(Ex. ① 93.1Æ② 95.9Æ③ 97.3)
- Push the jog key briefly in the << or >> direction to
increase/decrease the channel and locate a desired station.
AUTOSEARCH SCAN Mode
- Push the jog key in the << or >> direction to increase/decrease the
frequency and locate a desired station. (Ex. 89.1Æ91.9MHz)
22
Creative MuVo VIDZ User Guide
Storing a station channel
- Press the [NAVI/B-MARK (EQ)] button Briefly in the center of
the side of the player to create a new channel number and save the
current frequency.
Erasing a station channel
- Select a channel and press the [NAVI/B-MARK (EQ)] button
briefly to erase the channel number along with the stored frequency.
FM Recording
- While listening to FM, press the [REC/A-B] button to start recording.
To pause recording:
- Press the PLAY/STOP [▶/■] button to pause recording and press it
again to resume recording.
is displayed.
※When paused,
To finish recording:
- Press the [REC/A-B] button briefly to stop recording. The
recording file is automatically saved in the RECORD folder.
- The recording time is displayed. When the max recording time determined by memory capacity - is reached, recording is
automatically stopped and the recording saved.
※The Max Recording Time (based on 256 Mbyte)
128 kbps (4 hr), 64 kbps (9 hr), 32 kbps (18 hr), 16 kbps (36 hr)
23
C
r
e
a
t
i
v
e
M
u
V
o
V
I
D
Z
Recording Voice
Voice Recording
- After selecting MODE by pressing the jog key briefly,
select ‘Voice’ mode.
- In the Recording mode, press the [REC/A-B] button briefly to
start recording.
To pause voice recording:
- Press the PLAY/STOP [▶/■] button to pause recording and press it
again to resume recording.
is displayed.
※When paused,
To finish voice recording:
- Press the [REC/A-B] button briefly to stop recording. The
recording file is automatically saved in the ‘RECORD’ folder.
- It displays the recording time. When the recording time exceeds the
max recording time - determined by the memory capacity - the
device stops recording automatically and saves the recording.
- You cannot make a recording when the displayed remaining time is
[00:00:00].
- (Out of memory space. Delete a file and try voice recording again.)
24
Creative MuVo VIDZ User Guide
Recording external input
Entering the Line-in Recording mode
- Connect an external device to the line-in port of the player with the
line-in cable.
- Press the jog key to display the main menu.
- Select ‘ENCODING’ mode in the MODE menu and press the jog key.
External Audio Input
To make a line-in recording:
- Press the PLAY/STOP [▶/■] button briefly to pause recording and
press it again to resume recording.
is displayed.
※When paused,
To finish line-in recording:
- Press the [REC/A-B] button briefly to stop recording. The
recorded file is automatically saved in the ‘RECORD’ folder.
- The recording time is displayed. When the max recording time determined by memory capacity - is reached, recording is
automatically stopped and the recording saved.
※Set the output volume of the external device to a high level before
commencing line-in recording. If the output volume of an external
device is low, the volume level of the recording may end up being
too low to be audible. Use the Auto Sync feature to split recording
over separate tracks. (See page 37)
How to use Speed Key for Voice/External Input Recording
- In Playback mode, If press the [REC/A-B] button long, it return to
the latest function of Voice or External Input Recording.
25
C
r
e
a
t
i
v
e
M
u
V
o
V
I
D
Z
Using a program list
To create a program list:
- Select a track in navigation mode to add it to a program list by
pressing the [NAVI/B-MARK (EQ)] button briefly. (Up to 99 files
can be added.)
To view a program list:
- Go to ‘CONTROLÆPROGRAM’ to display the selected files.
To paly a program list:
- After moving to the desired track in the PROGRAM list by pushing the
jog key in the ∧ or ∨ direction, press the >> direction key. While
in program play mode,
is displayed.
To delete a program list:
- After moving to the desired file in the PROGRAM list by pushing the jog
key in the ∧ or ∨ direction, press the [NAVI/B-MARK (EQ)]
button briefly to delete the selected track from the list.
- Press and hold the [NAVI/B-MARK (EQ)] button to delete all the
saved lists at once.
To exit from the program play mode:
- To activate general play mode while in program play mode, enter
navigation mode and play another track.
26
Creative MuVo VIDZ User Guide
Playing video/Displaying images
Playing video
- Press and hold the [NAVI/B-MARK (EQ)] button and select an
MV4 file by pushing the jog key in the ∧ or ∨ direction. After
selecting an MV4 file, push the jog key in the >> direction.
To select a teack:
- Push the jog key in the << or >> direction to skip to the
previous/next track.
To stop:
- Press the PLAY/STOP [▶/■] button to stop.
- Press the PLAY/STOP [▶/■] button again to resume playing.
- During Playback if press the [REC/A-B] button long, it return to
the Playback Screen.
- Only MV4 files that have been converted using the Transcoder
program (on the provided CD) can be played. If the file capacity is over
the one hour, our set can not support to this kind of files.
27
C
r
e
a
t
i
v
e
M
u
V
o
V
I
D
Z
Displaying an image
- Press and hold the [NAVI/B-MARK (EQ)] button and push the
jog key in the ∧ or ∨ direction to select a JPG file.
- After selecting a JPG file, push the jog key in the >> direction to
view the image file as a slide.
To finish viewing an image file:
- Press the jog key briefly and select an MP3 file.
- Our set can not support to progressive and compressed JPG mode file.
28
Creative MuVo VIDZ User Guide
Using Text Viewer
Using Text Viewer
- Press and hold the [NAVI/B-MARK (EQ)] button, and select a TXT
file by moving the jog key in the ∧ or ∨ direction.
- After selecting a TXT file, push the jog key in the << or >>
direction to move to the previous/next page within the current file.
Turn the pages automatically [Set Up / Cancel]
- If you set a value for ‘DISPLAYÆJPG Slide’, the page advances
automatically when the specified time duration elapses (See page 42)
- When the page has advanced, pressing the PLAY/STOP [▶/■]
button pauses and/or cancels Automatic Page Advancement.
To Use the bookmark in Text Viewer
- Push the Jog key to the direction of ‘∧’ to memorize the present
page, push the Jog key to the direction of ‘∨’ to go to memorized
page (Only one page is available for book mark).
- It will move to same page, which is memorized when user tries to
read other text file. It will go to last page if the page number of
other files is below the page of bookmarked.
To Close the Text Viewer:
- Press the jog key briefly, and select an MP3 file.
- It goes FM Radio mode directly when user click the
[NAVI/B-MARK (EQ)] button during text viewer, it goes Music
mode when user click [NAVI/B-MARK (EQ)] button again.
29
C
r
e
a
t
i
v
e
M
u
V
o
V
I
D
Z
Using the M3U Playlist
Using the M3U Playlist:
- Press and hold the [NAVI/B-MARK (EQ)] button, and select an
M3U file by moving the jog key in the ∧ or ∨ direction.
- After selecting an M3U file, push the jog key in the ∧ or ∨ direction.
The playlist is played beginning with track #1, and the PLAY MODE
).
icon is changed to M3U (
To Select a Track:
- Enter NAVIGATION MODE in the M3U MODE to display the list of
music files contained in a chosen M3U file. Select the desired track
and press >> to start playing from the selected point.
To Disable M3U MODE:
- Enter NAVIGATION MODE in the M3U MODE to display the list of
music files contained in a chosen M3U file. Press << to move to the
directory where the M3U files are located, and cancel M3U MODE.
Push the jog key to change from PLAY MODE in the menu, or push
the [REC/A-B] button when paused to change to PLAY MODE.
To Create an M3U File:
- After running the Winamp program, select a track to save, and press
‘Save Playlist’ in Manage Playlist.
- To Play an M3U File: The tracks contained in the M3U file should exist
in MP3 player.
30
Creative MuVo VIDZ User Guide
To use User’s Logo
Connect the player with PC and Push to PLAY/STOP [▶/■] button for Power On. The [Removable Disk] will
be shown in [My Computer].
Save the Logo File
Rename the picture as ‘LOGO00.BMP ~ LOGO11.BMP’ (The other name and format can not be available, and it
should be use LOGO00.BMP format)
- BMP File: Maximum 12 files
Below 1Mbyte per each file capacity
Zip BMP file does not supported
The Size of BMP is indicated 128×80 Pixel
(Optimum 128×80 Pixel)
31
C
r
e
a
t
i
v
e
M
u
V
o
V
I
D
Z
‘INTERVAL’ time setting
1. Copy and Paste the picture file in ROOT
Directory after connecting PC.
2. Create the TXT file under name of
‘LOGINFO.TXT’ on the WINDOWS WORD PAD,
and write [INTERVAL:200] in the TXT file and
save it into the root directory.
- User can adjust the time of ‘INTERVAL’ value.
- Example) The INTERVAL (The Gap of Files)
time range: Can be adjusted between 100ms ~
5000ms.
[INTERVAL:100]: After 0.1 sec. Move to the
next image
[INTERVAL:300]: After 0.3 sec. Move to the
next image
※If have no ‘LOGINFO.TXT’ file, adjust 200ms
(0.2 sec) automatically.
32
3. Remove the USB cable out, and power off &
power on again. The ‘USERLOGO.LOG’ file is
coming in the root directory by automatically,
and saved ‘BMP’ file & ‘TXT’ file will be
eliminated automatically too. User can re-use
‘USERLOGO.LOGO’ file through moving it to PC
and re-download.
Creative MuVo VIDZ User Guide
MENU Configuration
MENU
MODE
SYSTEM
CONTROL
SOUND
DISPLAY
MUSIC
FORMAT
LANGUAGE
SELECT EQ
CONTRAST
FM RADIO
DEFAULT
PLAY MODE
SETTING
SCR SPEED
VOICE
LANGUAGE
PROGRAM
BACK LIGHT
ENCODING
SYS INFO
RECORDING
BLINK LED
MEM INFO
SLEEP TIME
ID3 DISP
POWER OFF
STUDY KEY
JPG SLIDE
PLAY SPEED
SCREEN SAVER
VOL LIMIT
Radio CTRL
33
C
r
e
a
t
i
v
e
M
u
V
o
V
I
D
Z
Using MENU
MODE
Jog key Move/Select
MUSUC: Play various file formats - including MP3,
WMA, JPG, TXT and MV4.
VOICE: Record voice.
FM: Listen to or record FM radio.
ENCODING: Record audio signals from an external
device to an MP3 file.
34
Creative MuVo VIDZ User Guide
SYSTEM
Jog key Move/Select
FORMAT: Used to format the memory. Use with caution
as formatting results in the loss of all files.
MEM INFO: Display memory-related information:
total memory space, used memory
space and available memory space.
• USED: Used memory space
• REMAIN: Available memory space
DEFAULT: Restore all the settings of the product
to the initial factory settings.
LANGUAGE: Convert system language.
POWER OFF: The product turns off automatically
when play is stopped for a certain
period of time. The idle time can be
specified as anywhere between
1 and 30 minutes.
SYS INFO: Check the firmware version.
35
C
r
e
a
t
i
v
e
M
u
V
o
V
I
D
Z
CONTROL
Jog key Move/Select
LANGUAGE: Select a language to be used for will
be used to displaying ID3 TAG
information.
- Play Mode
NORMAL: Play the entire tracks once in a
sequential order.
NORMAL DIR: Play the tracks within a directory
once.
REPEAT ALL: Play the entire tracks repeatedly.
REPEAT DIR: Play the entire tracks repeatedly.
REPEAT One: Play a single track repeatedly.
PLAY MODE: Select a desired play mode. After
selecting CONTROL in the main
menu, select PLAY MODE and then a
desired play mode.
SHUFFLE RPT: Play the entire tracks repeatedly in a
random order.
SHUFFLE DIR: Play the tracks within a directory
repeatedly in a random order.
INTRO Play the entire tracks for the first 10
seconds per each.
PROGRAM: Play the programmed tracks only.
BOOKMARK: Play the bookmarked portions only.
- Press the [REC/A-B] button briefly when
stopped and then the play mode changes
sequentially.
36
Creative MuVo VIDZ User Guide
CONTROL
Jog key Move/Select
PROGRAM: Allows you to listen to the selected
tracks only.
RECORDING: Adjust the recording quality of
external input, FM radio and voice
recording.
To perform track programming:
Press and hold the
[NAVI/B-MARK (EQ)] button to
enter Navigation mode. After selecting
a desired track with the jog key,
press the [NAVI/B-MARK (EQ)]
button briefly to save it.
To play programmed tracks:
Go to ‘MENUÆCONTROLÆPROGRAM’
by pressing and holding the jog key
and then the PROGRAM list is
displayed. Select a track to begin play
with and push the jog key in the >>
direction to play tracks in the
programmed order.
- BITRATE: Specify the recording quality that you
want. A low bit rate decreases file size
but yields poorer sound quality. A high
bit rate yields better sound quality but
increases the file size, shortening the
max. Recording time.
- AUTO SYNC: This function automatically detects
when there is no incoming signal
during encoding (recording) and
saves the input in separate files.
(Signals following about 3 seconds of
silence are saved as separate files.)
37
C
r
e
a
t
i
v
e
M
u
V
o
V
I
D
Z
CONTROL
Jog key Move/Select
- MIC VAD: During voice-recording, stops recording
when there is no signal.
STUDY KEY: Set the time interval that is skipped
when the jog key is pushed in the
<< or >> direction.
This function allows you to skip the
specified time interval by pushing the
jog key in the << or >> direction,
which can be useful when used with
a language study file that has a long
recording time.
※Set it to 00 to disable the function.
SLEEP TIME: Specify the time after which the
player automatically powers off
while playing.
- SET TIMER: Specify the desired time (0-60 minutes).
- TIMER: Display the remaining timer time.
38
PLAY SPEED: Specify the desired play speed.
Press ‘∨’ to decrease and ‘∧’ to
increase the play speed. 100% (00)
represents normal play speed.
Creative MuVo VIDZ User Guide
CONTROL
SOUND
VOL LIMIT: Limit the post power-on volume level.
(e.g. if you set the value to 10, then the
volume level will be set to 10 whenever
you power on the player - even if the
volume level was higher than 10 when
you turned the power off.)
SELECT EQ: Specify the music tone appropriate for
each genre:
NORMAL, ROCK, JAZZ, CLASSIC, POP,
USER EQ (user-defined)
SETTING: Configure 3D sound effects.
RADIO CTRL: Select the frequency range for your
country. (76.0 - 108.0 MHz)
(US, Europe, Japan)
- USER EQ: Adjust the tone from low to high frequency
according to user preference.
Select a band, by pushing the jog key in
the << or >> direction, and use ∧ or ∨
to set its value.
39
C
r
e
a
t
i
v
e
M
u
V
o
V
I
D
Z
DISPLAY
Jog key Move/Select
CONTRAST: Adjust the contrast of LCD. (00~06)
BACK LIGHT: Adjust the LCD backlight
time. (00~180 Sec)
SCR SPEED: Adjust the filename scroll
speed. (00~06)
- After Setting ‘Not Use’ in Screen Turned Off
function, if use long, the Afterimage could be
continuous on LCD.
BLINK LED: Let the LED blink while playing a file.
This allows you to see that the player
is operating, even when the backlight
is off.
40
Creative MuVo VIDZ User Guide
DISPLAY
Jog key Move/Select
ID3 DISP: Display the ID3 TAG information
instead of the filename.
SCREEN SAVER: The ‘USERLOG.LOG’ images in
the root directory as user
selected will be displayed after
user set the SCR SAVER time.
Logo Files saved by User are
shown on the screen during
listening to Music.
(Can be adjusted 0~30 Sec)
JPG SLIDE: Specify the time duration for which
each JPG file is displayed. (00~15 Sec)
(Automatically proceeds to the next
file after the specified time period.)
41
C
r
e
a
t
i
v
e
M
u
V
o
V
I
D
Z
Accessing the latest features through
firmware upgrades
1. Download the latest firmware version from www.creative.com and save it in your player.
2. The firmware upgrade file must be saved in the root directory.
3. Power off and then power on the player; the firmware is automatically upgraded.
- The firmware upgrade should be done only when there is sufficient battery icon with two bars.
- If the upgrade process is interrupted by a power-off due to insufficient battery power, serious product damage
can result. Please ensure that the power does not go off during upgrades.
- For more information on firmware upgrades, please refer to our web page.
※What is the root directory? This is the directory that contains all other directories and folders in the system.
42
Creative MuVo VIDZ User Guide
Introdution
Transcoder is a program that converts video file formats such as WMV, ASF, MPG or AVI that are commonly used
in desktop PC environments to the MV4 format (which Creative MuVo VIDZ uses).
Input: File (WMV, ASF, MPG, AVI)
Output: .MV4 File
Transcoder
Recommended PC requirements
The system should run Microsoft Windows XP or above and Microsoft DirectX 9.0 or above. It should also have the
filters required for video play properly installed.
H/W
requirement
S/W
requirement
CPU
Intel Pentium 4 1 GHz or above
Hard Disk
20MByte or more space
OS
Microsoft Windows 2000/XP
Program
Microsoft DirectX 9.0, Microsoft Media Player 9.0
Other
DivX and other codecs
43
C
r
e
a
t
i
v
e
M
u
V
o
V
I
D
Z
Using Transcoder
Install
1. Run [Transcoder]. The following window is
3. When the installation is complete, press the
displayed. Press the Next button to proceed.
2. After specifying a directory to install to using
the Browse button, press the [Next] button.
44
[Finish] button.
4.
Creative MuVo VIDZ User Guide
Transcoding
1. Double-click the
icon.
2. Press the [Open] button to select an input file.
The input file name is given a ‘*.MV4’ extension.
Information on both input and output files are
displayed in the window. The initial information
of the output file is the same as that of the
input file.
3. To specify another output file, press the
[Save as] button and enter the filename of
the file to be created.
4. Press the
button to transcode the
entire range to the input file. A dialog window
appears showing the transcoding progress
along with information on the input/output files.
45
C
r
e
a
t
i
v
e
M
u
5. Press the
button to stop transcoding.
When transcoding is complete, the
button is pressed automatically.
V
o
V
I
D
Z
Selection Transcoding
You can also select specific segments for
transcoding.
1. Select
2. Select
3. Press the
to choose a file to transcode.
to start playing the selected file.
button to set the start point.
is displayed over the selected point showing that it is the start point.
※After right-clicking in the file list pane, select View
File Information to view information on the
selected file.
46
Creative MuVo VIDZ User Guide
4. Press the
button to set the end point.
is displayed over the selected point showing that it is the end point.
5. Press
the button to confirm the
selected segment. The selected segment is
highlighted in sky blue, indicating that the
segment has been confirmed.
button to cancel the
(Press the
selected segment.)
6. Press the
button to start transcoding.
※Ensure that each movie file saved is limited to
an hour of playback time per file before
transcoding.
47
C
r
e
a
t
i
v
e
M
u
V
o
V
I
D
Z
Multi Transcoding
You can select multiple files and transcode them at the same time.
1. Press the
button repeatedly to select
multiple files. Alternatively, drag & drop all the
desired files onto the Transcoder window at the
same time to register all of them automatically.
2. To perform Selection Transcoding from a
registered list, click a desired file and repeat the
above Selection Transcoding procedures.
3. After selecting a list that you do not want to
transcode among the registered lists, right-click
on it and choose ‘Delete selected list’. Choose
‘Delete all list’ to cancel all files.
- You cannot apply different settings to each of the
files when performing Multiple Transcoding.
(The same settings are applied to each file).
48
4. Press the
button and the selected
files are transcoded sequentially. The file that is
currently being transcoded is highlighted.
5. Press the
button to stop transcoding of
the current file and start transcoding of the
next file.
Creative MuVo VIDZ User Guide
Setup
You can set the video and audio options and specify a directory to save output files to.
Press the
button to display the tab dialog, where you can specify file attributes.
1. Select the Video tab to set various video related
options.
1) Video Rotate: Rotate a video image by 90, 180
and 270 degrees and set the
symmetry.
49
C
r
e
a
t
i
v
e
M
Video Rotation
0
90
180
270
90
180
270
Video Symmetry
0
50
u
V
o
V
I
D
Z
2) Video Quality: Adjust video quality. You can
specify a desired setting
(number) in the Video Quality
combo box. The video quality
degrades as the number
increases.
Creative MuVo VIDZ User Guide
2. Audio Setup: Press the Audio tab to set the
sampling rate to 32.0 or 44.1 KHz and the
audio bit rate to 96, or 128 Kbps.
3. Specify the output file directory. You can
specify a directory to save output files to that
have been created during transcoding.
51
C
r
e
a
t
i
v
e
M
u
V
o
V
I
D
Z
Player
The transcoded file can be played with Player.
1. Double-clikc the
icon.
2. Press the
button to select a file to play.
3. Press the
button to start playing.
4. Press the
or
playing location.
5. Press the
the
52
button to change the
button to pause and
button to stop playing.
6. Press the
and the
button to minimize the window
button to exit.
Creative MuVo VIDZ User Guide
Specifications
Type
Audio
FM Radio
Option
Specification
No of channels
Stereo (L/R)
Frequency range
20 Hz ~ 20 kHz
Headset output
L 12 mW + R 12 mW (Max. Volume, 16 Ω)
Signal to noise Ratio
> 87 dB (30 kHz LPF)
Frequency range
87.5 MHz ~ 108.0 MHz
Signal to noise ratio
Decoding file
> 58 dB (with filter applied)
MPEG 1/2/2.5 Layer3, WMA
JPG, MV4 (PIXTREE FORMAT), TXT, M3U
Encoding file
MP3: 16~192 kbps
Bit Rate
MP3: 8 kbps ~ 320 kbps supported,
VBR (Variable Bit Rate) Supported
supported files
WMA: 32 kbps ~ 192 kbps supported
Tag
ID3 V1 Tag, ID V2 Tag
53
C
r
e
a
t
i
Type
v
e
54
u
V
o
Option
Dimension (W×H×D)
General
Specification
M
V
I
D
Z
Specification
Appr. 32×65×15.7 mm
Weight
Appr. 33 g (Including the battery)
Playing time (music file)
Up to 10 hours (based on 128 kbps, MP3, EQ Normal, Back
Light Off, Vol 20)
Playing time (FM Radio)
Up to 14 hours (based on Back Light Off, Vol 20)
Voice Recording Time
About 36 hours (16 kbps, 256 MB)
Language
Multiple language supported
USB Spec.
USB 2.0 (High speed)
Charging time
About 4 hours for complete charge using PC USB power
Battery
Li-Polymer Battery (3.7 V, 480 mAh)
LCD
128 × 80 65K OLED
Ambient Temperature
5 ~35 ℃
Humidity
10 ~75 %
Creative MuVo VIDZ User Guide
Troubleshooting
When a problem occurs while using the product, please use the following checklist:
The product fails to operate
with nothing displayed on the
LCD.
▶
No sound during playback.
Recharge the built-in battery.
- Ensure that a track has been saved to the removable disk.
▶
- Check whether the volume level is set to ‘0’.
- Ensure that the earphones are properly plugged in.
Button keys do not work.
▶
Cannot download a file.
- Make sure that the product is properly connected to your PC.
▶
Stops operating.
Check whether they have been locked (Hold mode).
▶
- When using the USB extension cable, make sure that it has
been properly connected.
Press the RESET button next to the HOLD button on the
player. (This forces the product to shut down.)
55
Support
Creative Knowledge Base
Resolve and troubleshoot technical queries at Creative’s 24-hour self-help Knowledge Base.
Go to www.creative.com, select your region and then select Support.
Product Registration
Registering your product ensures you receive the most appropriate service and product support available.
You can register your product during installation or at www.creative.com/register.
Please note that your warranty rights are not dependent on product registration.
Warranty
Customer Support Services and Warranty
You can find Customer Support Services and Warranty information in the CD.
Customer Support
d:\support\<language>\support.chm
Services
Warranty
d:\warranty\<region>\<language>\warranty.chm
Please keep your Proof of Purchase for the duration of the warranty period.
(replace d:\with the drive letter of your CD-ROM/DVD-ROM drive, <region> with the region that you are in, and
<language> with the language that your document is in)
56
Creative MuVo VIDZ User Guide
著作権表示
Copyright © 2005 by Creative Technology Ltd. All rights reserved. Creative ロゴと MuVo VIDZ は Creative Technology
Ltd.の米国、またはその他の国々における商標、または登録商標です。 Microsoft、Windows、および Windows のロゴは、
Microsoft Corporation の登録商標です。
その他の製品は、それぞれの所有者の商標または登録商標であり、これにより同様に認識されています。
Creative MuVo VIDZ
1.
Creative MuVo VIDZ は、WMA および MP3 のオーディオファイル、MPEG4 形式のビデオファイル、JPEG の画像が
再生できるポータブルメディアプレーヤーです。 音楽だけでなく動画や静止画を高品質な OLED カラーディスプレイ
でご覧になれます。
2.
Creative MuVo VIDZ で再生可能な MPEG4 形式の MV4 ビデオファイルを作成可能な変換ソフトウェアが付属
しています。
メモ:ビデオの変換を行う際は、各ビデオファイルが 1 時間以内に収まることを確認してください。
3.
Creative MuVo VIDZ には MP3 エンコーダーが内蔵されているため、MD プレーヤーや CD プレーヤーなどの外部
4.
Creative MuVo VIDZ には FM ラジオが内蔵されており、FM 放送を MP3 ファイルに録音することができます。 また、
オーディオ機器からからアナログのオーディオ入力を行って、MP3 ファイルに録音することができます。
マイクも内蔵していますのでボイス録音を行うことも可能です。
C
r
e
a
t
i
v
e
M
u
V
o
V
I
D
Z
目次
製品の機能
60
安全にご使用いただくために
62
パッケージ内容
63
各部名称
64
表示画面
65
バッテリーの充電
66
インストール
67
電源のオン・オフ/オーディオファイルの再生
71
ブックマーク
73
イコライザの選択/ナビゲーション/ファイルの削除
74
FMラジオ
75
ボイス録音
77
ライン録音
78
プログラムリストの使用
79
58
Creative MuVo VIDZ User Guide
ビデオの再生と画像の表示
80
M3Uプレイリストの使用
81
スクリーンセーバーの作成
82
メニュー設定
83
メニューの使用
84
MODE(モード) ...................................................................................................................................84
SYSTEM(システム)..........................................................................................................................85
CONTROL(コントロール)......................................................................................................................86
SOUND(サウンド).............................................................................................................................89
DISPLAY(ディスプレイ).....................................................................................................................90
ファームウェアのアップデート
92
トランスコーダーの使用
94
仕様
101
トラブルシューティング
103
サポート情報
104
製品保証
104
59
C
r
e
a
t
i
v
e
M
u
V
o
V
I
D
Z
製品の機能
オーディオファイルの再生
WMA および MP3 形式のオーディオファイルを再生します。
ビデオ/画像ファイルの再生
MPEG4 形式の MV4 ファイルと JPEG ファイルを再生します。
FM ラジオの受信と録音
FM ラジオの受信および録音を行います。
ボイス録音/ライン録音
内蔵マイクによるボイス録音と、ライン入力による録音を行います。
M3U プレイリストのサポート
プレーヤーに保存されているオーディオファイルを含めた M3U プレイリストファイルの再生を行います。
M3U 形式のプレイリストファイルは Microsoft® Windows Media® Player で作成することができます。詳細は Windows Media
Player のヘルプなどをご覧下さい。
ウェアアップグレード可能なファームウェア
アップグレードファイルのダウンロード後に、電源を切って入れ直すとプレーヤーのファームウェアが自動的にアップグレードされて最新の
状態に維持されます。
60
Creative MuVo VIDZ User Guide
可変ビットレート(VBR)のサポート
効率よくメモリーを使用するために、可変ビットレートのオーディオファイルを使用することが可能です。
速度コントロール
オーディオファイルの再生速度を調整します。
語学学習やボイス録音の聞き取りに便利です。
ビデオの再生と画像の表示
128×80 ピクセル、65,000 色の高品質 OLED カラーディスプレイでビデオファイルと画像ファイルをお楽しみ頂けます。
充電可能な内蔵リチウムポリマーバッテリー
内蔵のリチウムポリマーバッテリーは PC の USB ポートより充電できるのでバッテリーを別途に購入する必要はありません。
61
C
r
e
a
t
i
v
e
M
u
V
o
V
I
D
Z
安全にご使用いただくために
使用上の安全を維持して物的損害を防止するために、以下の点にご注意ください。 必ずこれらの注意事項を読んでから、製品を
使用してください。
大音量で長時間続けて音楽を聴かな
いでください。
- 聴力を損なう可能性があります。
LCDパネルまたは製品に衝撃を加えな
いでください。
- 製品の問題の要因になる可能性が
あります。
35℃以上になる高温な環境や-5℃以
下の低温な環境に製品を放置しないで
ください。
- 製品の問題の要因になる可能性が
あります。
柔らかい乾いた布で製品を清掃してくだ
さい。ベンジンまたはシンナーを使用しな
いでください。
- 製品の問題の要因になる可能性が
あります。
ほこりや液体が製品に入らないように注
意してください。
- 製品の問題の要因になる可能性が
あります。 製品の問題の要因になる
可能性があります。
製品をキャッシュカードやプリペイドカード
などの近くに置かないでください。
- キャッシュカードやプリペイドカードの磁
性部分が損傷して使用不能になる
可能性があります。
62
Creative MuVo VIDZ User Guide
パッケージ内容
ステレオヘッドフォン
インストレーションCD
ユーザーズガイド
Creative MuVo
VIDZプレーヤー
USBケーブル
ライン入力ケーブル
63
C
r
e
a
t
i
v
e
M
u
V
o
V
I
D
Z
各部名称
ヘッドフォン出力/ライン入力ジャック
マイクロフォン
リセットボタン
ロックスイッチ
電源オン・オフ/再生/停止ボタン
OLEDディスプレイ
録音/A-Bリピートボタン
LEDランプ
(充電/動作状態)
ジョグキー
64
ナビゲーション/ブックマーク/
イコライザボタン
Creative MuVo VIDZ User Guide
表示画面
再生モード
ファイル番号/ファイル総数
ロックステータス
動作モード
バッテリー残量
再生ステータス
フォルダアイコン/フォルダ名
ファイル形式
イコライザ
再生の進捗
再生時間
ファイル名/タグ情報
音量レベル
ビットレート
65
C
r
e
a
t
i
v
e
M
u
V
o
V
I
D
Z
バッテリーの充電
PC による充電
PC の電源をオンにしたら、USB ケーブルを使用してプレーヤーを PC の USB ポートに接続します。
バッテリーが空の常態から満充電にはおよそ 4 時間程度を要します。充電時間は PC で使用されている USB によって異なる場合が
あります。
※重要:バッテリー充電の際は必ずプレーヤーの電源をオフにしてから、PC に接続してください。 電源をオンにしたままで接続すると、
プレーヤーの OLED ディスプレイが損傷して使用不能になる可能性があります。
- 充電中はプレーヤーの充電 LED ランプ(青)が点灯し、充電が完了すると消灯します。
66
Creative MuVo VIDZ User Guide
インストール
USB デバイスドライバーが必要になるのは Windows 98 SE 環境の場合のみです。
USB デバイスドライバーのインストール
1.インストール CD を PC の CD-ROM ドライブに挿入して、
3.
ライセンスに同意して[I Accept...]オプションを選択して
[Next]ボタンをクリックします。
4.
使用者の名前や会社名を入力して[Next]ボタンを
クリックします。
[USB Device Driver]メニューをクリックします。
2. [Next]ボタンをクリックします。
67
C
5.
r
e
a
t
i
v
e
[Complete]オプションを選択して[Next]ボタンを
クリックします。
6. [Install]ボタンをクリックします。
68
M
u
V
o
V
I
D
Z
7.
インストールが始まります。
8.
インストールが完了したら[Finish]ボタンをクリックします。
Creative MuVo VIDZ User Guide
PC への接続
PC の推奨要件
PC
仕様
CPU
Pentium MMX 以上のプロセッサが搭載された PC
OS
Windows 98SE/ME/2000/XP
ハードディスク
50 メガバイト以上のハードディス空き容量
その他
CD-ROM ドライブ、USB ポート
1.
2.
プレーヤーの電源をオンにします。
プレーヤーを PC の USB ポートに接続します。 マイ
コンピュータにリムーバブルディスクが現れます。
3. Windows エクスプローラで転送するファイルを選択し、
リムーバブルディスクにドラッグアンドコピーするか貼り付け
ます。
- ファイルの転送中は取り外しを行わないでください。
- プレーヤーでの再生順序はファイル名の名前順になり
ます。
69
C
r
e
a
t
i
v
e
M
u
ファイルの管理
V
o
V
I
D
Z
PC からの取り外し
- プレーヤーは PC に接続されるとリムーバブルディスクとして
認識されます。
- データの転送中にプレーヤーを PC から取り外すと、データ
損失が生じる可能性があります。
- ボイス録音およびライン録音ファイル、FM ラジオの録音フ
ァイルは[RECORD]フォルダに保存されます。
- Windows ME/XP/2000 環境では、必ずタスクバーの
右下隅に表示される[ハードウェアの安全な取り外し]
アイコン をクリックしてリムーバブルディスクを無効にして
から取り外してください。
- オーディオファイル(MP3/WMA)やビデオファイル(MV4)、
画像ファイル(JPG)は任意のフォルダに保存できます。
- プレーヤーでは 999 のフォルダ内に 999 個までのファイルを
保持できます。
- ファイルの転送中は:
プレーヤーを取り外さないでください。
- 待機中は:
プレーヤーを取り外すことができます。
ルートフォルダ
70
Creative MuVo VIDZ User Guide
電源のオン・オフ/オーディオファイルの再生
電源をオンにする
▶
- 再生/停止[ /■]ボタンを 2 秒以上押し続けます。
- プレーヤーの電源が入り、CREATIVE ロゴ(またはスクリーンセーバー)が画面に
表れます。
電源をオフにする
▶
- 再生/停止[ /■]ボタンを 2 秒以上押し続けます。
- 終了メッセージが画面に表示されて、プレーヤーの電源が切れます。
ミュージックモードに移る
- ジョグキーを押して[MODE(モード)]メニューを選択したら、[MUSIC(ミュージッ
ク)]モードを選択します。
オーディオファイルを再生する
▶
- 再生/停止[ /■]ボタンを押して、オーディオファイルを再生します。
再生を停止する
▶
▶
- 再生を停止するには、再生/停止[ /■]ボタンを押します。
- 再生を再開するには、再生/停止[ /■]ボタンを押します。
再生ファイルを移動する
- ジョグキーを<<または>>の方向に押して、前または次のファイルにスキップします。
再生が開始されて 3 秒以内にジョグキーを<<の方向に押すと前のファイルにスキッ
プし、3 秒後以降に押すと現在のファイルの始めに移動します。
- ジョグキーを<<または>>の方向に押し続けて、現在のファイル内を移動します。
71
C
r
e
a
t
i
v
e
M
u
V
o
V
I
D
Z
ロックスイッチ
- 指示されている方向にロックスイッチをスライドさせて、すべてのボタン操作を無効
にします。
ボリュームコントロール
- 音量は 0~39 の範囲で設定できます。
- 音量を上げるにはジョグキーを∧の方向へ、音量を下げるにはジョグキーを∨の
方向に押します。 押し続けると、連続して変化させることができます。
- ボリュームレベル設定はプレーヤーの電源をオフにすると自動的に保存されます。
※音量には十分に注意してください。 長時間大音量のままで聴き続けると、聴
力障害およびヘッドフォン障害が発生する可能性があります。
A-B リピート
- 再生中に A-B リピートを開始するポイントで[REC/A-B]ボタンを押します。
アイコンが表示されます。
- 次は、A-B リピートを終了するポイントで[REC/A-B]ボタンをもう一度押します。
アイコンが表示されて、選択した区間が繰り返し再生されます。
- A-B リピートを無効にするには、[REC/A-B]ボタンをもう一度押します。
アイコンが消えて、A-B リピートが無効化されます。
72
Creative MuVo VIDZ User Guide
ブックマーク
ブックマークを挿入するには:
- オーディオファイルの再生中に、ジョグキーを押し続けてブックマークを挿入します
(最大 99 までのブックマークを挿入できます)。
ブックマークを検索するには:
- 停止しているときに、[NAVI/B-MARK (EQ)]ボタンを押してブックマークリストを
表示します。
- ジョグキーの∧または∨キーを使用して目的のブックマークに移動した後で、>>
アイコンが表示
の方向に押すと、ブックマークから再生が開始されます。
されます。
ブックマークを削除するには:
- 再生を停止させ、[NAVI/B-MARK (EQ)]ボタンを押してブックマークリストを
表示します。
- 正面パネルでジョグキーの∧または∨キーを使用して目的のブックマークに移動
したら、[NAVI/B-MARK (EQ)]ボタンを押してブックマークを削除します。
- [NAVI/B-MARK (EQ)]ボタンを押し続けると、保存されているすべてのブック
マークが同時に削除されます。
- ブックマークが追加されているファイルを削除したり移動すると、ブックマークの
再生時に曲がないというメッセージが表示されます。ブックマーク機能を使用
できるのは、オーディオファイルの場所が変更されていない場合に限られます。
73
C
r
e
a
t
i
v
e
M
u
V
o
V
I
D
Z
イコライザの選択/ナビゲーション/ファイルの削除
イコライザ
- さまざまなエフェクトで音楽を楽しむことができます。
- イコライザは、次のように[NAVI/B-MARK (EQ)]ボタンを押すたびに変化します。
- ノーマル、ロック、ジャズ、クラシック、ポップス、カスタム(ユーザー定義)
ナビゲーション
- [NAVI/B-MARK (EQ)]ボタンを押し続けてナビゲーションモードに入ります。
- ジョグキーを使用して目的のファイルを探したら、キーを>>の方向に押して選択
したファイルを再生します。
サブフォルダに移動するには:
- 目的のフォルダを選択して、ジョグキーを>>の方向に押します。
上のフォルダに移動するには:
- フォルダを表示しているときに、ジョグキーを<<の方向に押します。
ミュージックモードとボイス/ライン録音の切り替えるには:
- ミュージックモードで[REC/A-B]ボタンを長く押すと、以前に使用した録音モード
(ボイス録音またはライン録音)との間をすばやく移行することができます。
ファイルを削除する
- [REC/A-B]ボタンを押します。
74
Creative MuVo VIDZ User Guide
FM ラジオ
FM ラジオを聴く
- ジョグキーを押してメインメニュー画面を表示したら、[MODE(モード)]メニューを
選択し、ジョグキーを使用して[FM(FM ラジオ)]モードを選択します。
※必ずヘッドフォンを接続してから FM モードを使用してください。 ヘッドフォンは
アンテナとして機能します。
- チューニングには、次の 2 つのモードがあります:手動とプリセット
- ジョグキーを押し続けて、プリセットと手動でのチューニングを切り替えます。
オートスキャンするには:
- [NAVI/B-MARK (EQ)]ボタンを押し続けます。 プレーヤーによって周波数が
自動的にスキャンされ、最大 20 までのプリセットが保存されます。
プリセットを移動するには:
- さらにジョグキーを<<または>>の方向に押し、プリセット番号の数値を大きくした
り小さくしたりして、目的の局を探します。 (例:(1) 76.0→(2) 79.5→(3) 80.0)
- ジョグキーを<<または>>の方向に押し、チャネルの数値を大きくしたり小さくしたり
して、目的の局を探します。
受信可能な局をスキャンするには:
- ジョグキーを<<または>>の方向に押し、周波数の数値を大きくしたり小さくしたり
して、目的の局を探します。 (例:76.1→80.0MHz)
75
C
r
e
a
t
i
v
e
M
u
V
o
V
I
D
Z
プリセットを保存するには:
- プレーヤーの側面の中央にある[NAVI/B-MARK (EQ)]ボタンを押して、新しい
プリセット番号に現在の周波数を保存します。
プリセットを消去するには:
- プリセットを選択し、[NAVI/B-MARK (EQ)]ボタンを押して保存されているプリセッ
トを消去します。
FM 録音をする
- FM を聴いているときに、[REC/A-B]ボタンを押して録音を開始します。
- 録音時間が表示されます。 メモリー容量によって決定される最大録音時間が
経過すると、録音が自動的に停止して録音が保存されます。
※録音可能な時間(1GB モデルの場合):最大約 16 時間(128kbps)、最大約
36 時間(64kbps)、最大約 72 時間(32kbps)、最大約 108 時間(16kbps)
録音を一時停止するには:
- 再生/停止[ /■]ボタンを押して録音を一時停止します。録音を再開するに
は、もう一度このボタンを押します。
※一時停止すると、 が表示されます。
▶
録音を終了するには:
- [REC/A-B]ボタンを押して録音を停止します。 録音ファイルが自動的に
[RECORD]フォルダに保存されます。
76
Creative MuVo VIDZ User Guide
ボイス録音
ボイス録音をする
- ジョグキーを押して[MODE(モード)]メニューを選択したら、[VOICE(ボイス
録音)]モードを選択します。
- 録音時間が表示されます。 メモリー容量によって決定される最大録音時間が
経過すると、録音が自動的に停止して録音が保存されます。
※録音可能な時間(1GB モデルの場合):最大約 16 時間(128kbps)、最大約
36 時間(64kbps)、最大約 72 時間(32kbps)、最大約 108 時間(16kbps)
- [REC/A-B]ボタンを押して録音を開始します。
ボイス録音を一時停止するには:
- 再生/停止[ /■]ボタンを押して録音を一時停止します。録音を再開するに
は、もう一度このボタンを押します。
※一時停止すると、 が表示されます。
▶
ボイス録音を終了するには:
- [REC/A-B]ボタンを押して録音を停止します。 録音ファイルが自動的に
[RECORD]フォルダに保存されます。
- 録音時間が表示されます。 録音時間がメモリー容量によって決定される最大
録音時間を超えると、録音が自動的に停止されて、録音が保存されます。
- 表示されている残り時間が[00:00:00]の場合は、録音を実行できません。
- メモリーが不足していますので、不要なファイルを削除して、音声録音を再試行
してください。
77
C
r
e
a
t
i
v
e
M
u
V
o
V
I
D
Z
ライン録音
ライン録音モードに移る
外部オーディオ入力
- ライン入力ケーブルを使用して、外部オーディオ機器をプレーヤーのライン入力
ジャックに接続します。
- ジョグキーを押して[MODE(モード)]メニューを選択したら、[ENCODING(ライン
録音)]モードを選択します。
- 録音時間が表示されます。 メモリー容量によって決定される最大録音時間が
経過すると、録音が自動的に停止して録音が保存されます。
※録音可能な時間(1GB モデルの場合):最大約 16 時間(128kbps)、最大約
36 時間(64kbps)、最大約 72 時間(32kbps)、最大約 108 時間(16kbps)
ライン録音を実行するには:
- 再生/停止[ /■]ボタンを押して録音を一時停止します。録音を再開するに
は、もう一度このボタンを押します。
※一時停止すると、 が表示されます。
▶
ライン録音を終了するには:
- [REC/A-B]ボタンを押して録音を停止します。 録音したファイルが自動的に
[RECORD]フォルダに保存されます。
※外部オーディオ機器の出力音量を適度に調節してから、ライン録音を開始して
ください。 外部オーディオ機器の出力音量が高かったり低いと、音が割れたり
小さくて聴き取り不能になる可能性があります。
シンクロ録音機能を使用して、録音を個別ファイルに分割することもできます。
78
Creative MuVo VIDZ User Guide
プログラムリストの使用
プログラムリストを作成するには:
- [NAVI/B-MARK (EQ)]ボタンを押して、ナビゲーションモードでファイルを選択し、
プログラムリストに追加します(99 までのファイルを追加できます)。
プログラムリストを表示するには:
- ジョグキーを押して[CONTROL(コントロール)]メニューを選択したら、
[PROGRAM(ミュージック)]メニューを選択します。
プログラムリストを再生するには:
- ジョグキーを∧または∨の方向に押して、プログラムリスト内の目的のファイルに
移動したら、>>方向キーを押します。 プログラム再生モードで実行中に
が表示されます。
プログラムリストを削除するには:
- ジョグキーを∧または∨の方向に押してプログラムリスト内の目的のファイルに移
動したら、[NAVI/B-MARK (EQ)]ボタンを押して選択したファイルをリストから削
除します。
- [NAVI/B-MARK (EQ)]ボタンを押し続けると、保存されているすべてのリストが
同時に削除されます。
プログラム再生モードを終了するには:
- プログラム再生モードで実行中に一般的な再生モードをアクティブにするには、
ナビゲーションモードに入って別のファイルを再生します。
79
C
r
e
a
t
i
v
e
M
u
V
o
V
I
D
Z
ビデオの再生と画像の表示
ビデオを再生する
- [NAVI/B-MARK (EQ)]ボタンを押し続け、ジョグキーを∧または∨の方向に押し
て MV4 ファイルを選択します。
- MV4 ファイルを選択したら、ジョグキーを>>の方向に押します。
ファイルを選択するには:
- ジョグキーを<<または>>の方向に押して、前または次のファイルにスキップします。
停止するには:
- 再生/停止[ /■]ボタンを押して停止します。
- 再生/停止[ /■]ボタンをもう一度押して再生を再開します。
- 再生中に[REC/A-B]ボタンを長く押すと、ミュージックモードに戻ります。
- インストレーション CD に含まれるトランスコーダプログラムを使用して変換された
MV4 ファイルのみを再生できます。 ビデオの長さが 1 時間を超えている場合は
ファイルの再生がスキップされます。
▶
▶
画像を表示する
- [NAVI/B-MARK (EQ)]ボタンを押し続け、ジョグキーを∧または∨の方向に押し
て JPEG ファイルを選択します。
- JPEG ファイルを選択したら、ジョグキーを>>の方向に押して画像ファイルを表示
します。
画像ファイルの表示を終了するには:
- ジョグキーを押します。
- プログレッシブ JPEG ファイルはサポートしていません。
80
Creative MuVo VIDZ User Guide
M3U プレイリストの使用
M3U プレイリストを使用する
M3U プレイリストを再生するには:
- [NAVI/B-MARK (EQ)]ボタンを押し続け、ジョグキーを∧または∨の方向に押し
て M3U ファイルを選択します。
に変化します。
- 再生モードアイコンが
ファイルを選択するには:
- [NAVI/B-MARK (EQ)]ボタンを押し続けてナビゲーションモードに入り、選択した
M3U ファイルに含まれているオーディオファイルのリストを表示します。 目的のフ
ァイルを選択し、>>を押して選択されたポイントから再生を開始します。
M3U プレイリストの再生を無効にするには:
- [NAVI/B-MARK (EQ)]ボタンを押し続けナビゲーションモードに入り、選択した
M3U ファイルに含まれているオーディオファイルのリストを表示します。
- <<の方向に押して、M3U の音楽リストから抜けて、他のファイルを再生します。
81
C
r
e
a
t
i
v
e
M
u
V
o
V
I
D
Z
スクリーンセーバーの作成
画像ファイルを用意する
- スクリーンセーバーは、合計 12 枚までの静止画をループして表示することが可
能です。
- 静止画ファイルを用意して、表示される順に LOGO00.BMP~LOGO11.BMP に
ファイル名を変更します。
- Windows のメモ帳を使用して LOGINFO.TXT というファイルを作成し、
[INTERVAL:xxx] (xxx は 100~5000 までの数字)と記述して保存します。
各静止画の表示間隔は 100 ミリ秒~5000 ミリ秒の間で指定可能です
- 解像度 128x80 の BMP ファイルのみを使用できます。それ以外のフォーマット
やファイル名は使用できません。また、BMP ファイルの合計サイズは 1MB まで、
圧縮されている BMP はサポートしていません。
- プレーヤーを PC に接続して各 BMP ファイルと LOGINFO.TXT ファイルをルート
フォルダに保存します。
スクリーンセーバーのファイルを作成する
▶
- プレーヤーを取り外し、再生/停止[ /■]ボタンを 2 秒以上押して電源をオフ
にします。
- 再生/停止[ /■]ボタンを 2 秒以上押して電源をオンにします。
- ルートフォルダに USERLOGO.LOG ファイルが作成されます。 使用した BMP
ファイルは自動的に削除されます。
▶
スクリーンセーバーを有効にする
- ジョグキーを押し続けて[DISPLAY(ディスプレイ)]メニューから[SCREEN
SAVER(画面セーバー)]を選択します。
82
Creative MuVo VIDZ User Guide
メニュー設定
メインメニュー
モード
システム
コントロール
サウンド
ディスプレイ
ミュージック
フォーマット
タグ言語
イコライザ
コントラスト
FMラジオ
設定リセット
再生モード
設定
スクロール
ボイス録音
メニュー言語
プログラム
画面点灯
ライン録音
システム情報
録音
LED点滅
メモリー情報
スリープタイマ
タグ有効
パワーオフ
再生スキップ
スライド間隔
再生スピード
画面セーバー
初期ボリューム
FMラジオ
83
C
r
e
a
t
i
v
e
M
u
V
o
V
I
D
Z
メニューの使用
MODE(モード)
ジョグキー移動/選択
MUSIC(ミュージック):
MP3、WMA、JPEG、MV4 などのメディアのファイルを再生
します。
VOICE(ボイス録音):
ボイス録音を行います。
FM(FM ラジオ):
FM ラジオを聴いたり録音したりします。
84
ENCODING(ライン録音):
外部からのオーディオ信号を録音します。
Creative MuVo VIDZ User Guide
SYSTEM(システム)
FORMAT(フォーマット):
メモリーをフォーマットするときに使用します。 フォーマットを実行
するとすべてのファイルが失われます。
ジョグキー移動/選択
SYS INFO(システム情報):
ファームウェアバージョンを確認します。
MEM INFO(メモリー情報):
メモリー容量に関する情報を表示します。
DEFAULT(設定リセット):
プレーヤーのすべての設定を出荷時初期状態に戻します。
LANGUAGE(メニュー言語):
システムメニューの言語を変更します。
POWER OFF(パワーオフ):
再生がある特定の時間停止されていると、プレーヤーの
電源が自動的にオフになります。 1~30 分の範囲内で
指定できます。
85
C
r
e
a
t
i
v
e
M
CONTROL(コントロール)
LANGUAGE(タグ言語):
ID3 タグ情報の表示に使用する言語を選択します。
u
V
o
V
I
D
Z
ジョグキー移動/選択
REPEART DIR(単位リピート):
全体のファイルを繰り返し再生します。
REPEAT ONE(曲リピート):
単一のファイルを繰り返し再生します。
PLAY MODE(再生モード):
目的の再生モードを選択します。
SHUFF RPT(ランダム):
全体のファイルをランダムに繰り返して再生します。
SHUFF DIR(単位ランダム):
フォルダ内のファイルをランダムに繰り返して再生します。
INTRO(イントロ):
全体のファイルをそれぞれ最初の 10 秒間再生します。
PROGRAM(プログラム):
プログラムされたファイルのみを再生します。
- PLAY MODE(再生モード)
NORMAL(ノーマル):
全体のファイルを順番に 1 回再生します。
NORMAL DIR(フォルダ単位):
フォルダ内のファイルを 1 回再生します。
REPEART ALL(オールリピート):
全体のファイルを繰り返し再生します。
86
BOOKMARK(ブックマーク):
ブックマークされた部分のみを再生します。
- オーディオファイルの再生中にしたときに[REC/A-B]ボタン
を押すと、再生モードが順次に変更されます。
Creative MuVo VIDZ User Guide
CONTROL(コントロール)
ジョグキー移動/選択
PROGRAM(プログラム):
選択されたファイルのみを再生することができます。
プログラムリストを作成するには:
[NAVI/B-MARK (EQ)]ボタンを押し続けてナビゲーション
モードに入ります。 ジョグキーを使用して目的のファイルを
選択したら、[NAVI/B-MARK (EQ)]ボタンを押してプログ
ラムリストに保存します。
プログラムされたファイルを再生するには:
ジョグキーを押し続けて[CONTROL(コントロール)]メニュ
ーから[PROGRAM(プログラム)]を選択すると、プログラム
リストが表示されます。 再生を開始するファイルを選択し、
ジョグキーを>>の方向に押して、ファイルをプログラムされた
順序で再生します。
RECORDING(録音):
ボイス録音とライン録音、FM ラジオ録音の際の品質を調
整します。
- BITRATE(ビットレート):
必要な録音品質を指定します。 ビットレートを低く設定
するとファイルサイズが小さくなりますが、音質は低下しま
す。 ビットレートを高く設定すると、音質が向上しますが、
ファイルサイズが大きくなって最大録音時間が短くなります。
- AUTO SYNC(シンクロ録音):
この機能では、ライン録音時に無音を検出して自動的に
個別ファイルに保存します(約 3 秒間の無音後の信号は
個別ファイルとして保存されます)。
87
C
r
e
a
t
i
v
e
M
u
V
o
V
I
D
Z
CONTROL(コントロール)
ジョグキー移動/選択
- MIC VAD(ボイス連動):
この機能はボイス録音時に無音を検出して録音を一時
停止します。 再び音声を検出するとボイス録音を再開
します。
SLEEP TIME(スリープタイマ):
再生中にプレーヤーの電源が自動的にオフになるまでの
時間を指定します。
- SET TIMER(時間設定):
目的の時間(無効~60 分)を指定します。
- TIMER(残り時間):
電源がオフになるまでの時間を表示します。
88
STUDY KEY(再生スキップ):
ジョグキーを<<または>>の方向に押したときにスキップされ
る時間(無効~300 秒)を設定します。
この機能を有効にすると、ジョグキーを<<または>>の方向
に押して、指定された時間分、前後にスキップできます。
PLAY SPEED(再生スピード):
目的の再生速度を指定します。通常の速度を 100%とし
て 60%~140%の間で速度を変更できます。
Creative MuVo VIDZ User Guide
CONTROL(コントロール)
SOUND(サウンド)
VOL LIMIT(初期ボリューム):
電源をオンにした後の音量レベルを制限します(たとえば、
値を 10 に設定した場合は、プレーヤーの電源をオンにする
と必ず音量レベルが 10 に設定されます。これは、前に電源
をオフにしたときの音量レベルが 10 よりも高い場合でも同じ
です)。
SELECT EQ(イコライザ):
次のようにそれぞれのジャンルに適したエフェクトを指定し
ます。
NORMAL(ノーマル)、ROCK(ロック)、JAZZ(ジャズ)、
CLASSIC(クラシック)、POP(ポップス)、USER EQ(カスタム)
RADIO CTRL(FM ラジオ):
居住している国の周波数範囲を選択します。
SETTING(設定):
イコライザの設定を行います。
- USER EQ(カスタム):
ユーザーの好みに応じて、低域から高域までのトーンを調整
します。 ジョグキーを<<または>>の方向に押してバンドを選
択し、∧または∨を使用してその値を設定します。
89
C
r
e
a
t
i
v
e
DISPLAY(ディスプレイ)
CONTRAST(コントラスト):
画面のコントラスト(0~6)を調整します。
SCR SPEED(スクロール):
表示のスクロール速度(しない~6)を調整します。
M
u
V
o
V
I
D
Z
ジョグキー移動/選択
BACK LIGHT(画面点灯):
画面の点灯時間(常時~180 秒)を調整します。
- 画面を常時点灯させておくと、バッテリーの消耗が早い
だけでなく、焼け付きを起こして残像が発生する場合
があります。
BLINK LED(LED 点滅):
ファイルの再生中に LED ランプを点滅させます。 この機
能を使用すると、画面が消灯しているときでもプレーヤー
が動作していることを確認できます。
90
Creative MuVo VIDZ User Guide
DISPLAY(ディスプレイ)
ジョグキー移動/選択
ID3 DISP(タグ有効):
ファイル名ではなく ID3 タグ情報を表示します。
SCREEN SAVER(画面セーバー):
あらかじめ作成してあるスクリーンセーバーのファイル
USERLOG.LOG がプレーヤーのルートフォルダにある場合、
スクリーンセーバーが表示されるまでの時間(無効~30
秒)を指定します。
JPG SLIDE(スライド間隔):
それぞれの JPEG ファイルが表示される時間(手動送り~
15 秒)を指定します。指定された時間が経過すると自動
的に次のスライドに進みます。
91
C
r
e
a
t
i
v
e
M
u
V
o
V
I
D
Z
ファームウェアのアップデート
1.
最新のファームウェアバージョンを www.creative.com からダウンロードしてプレーヤーに保存します。
2.
ファームウェアのアップグレードファイルは、ルートフォルダに保存する必要があります。
3.
プレーヤーの電源をいったんオフにしてからオンにすると、ファームウェアが自動的にアップグレードされます。
- ファームウェアのアップグレードは、必ずバッテリー残量が充分(アイコンに 2 本以上のバー)であるときに行ってください。
- バッテリーの残量不足により電源がオフになりアップグレードプロセスが中断されると、製品に重大な損傷が生じる可能性が
あります。また、アップグレード中は電源がオフにならないようにしてください。
- ファームウェアアップグレードの詳細については、当社の Web ページ等を参照してください。
92
Creative MuVo VIDZ User Guide
トランスコーダーの概要
トランスコーダーは、拡張子が AVI や MPG/MPEG、WMV/ASF のビデオファイルをプレーヤーで再生可能な MPEG4フォーマットの
MV4 ファイルに変換するプログラムです。
入力:ビデオファイル
AVI、MPG/MPEG、WMV/ASF
出力:MV4ファイル
トランスコーダー
別途 Windows に対応するビデオ/オーディオコーデックがインストールされていないと正常に変換できない場合がありますのでご注意
ください。
PC の推奨要件
システムでは、Microsoft Windows XP 以上の OS とバージョン 9.0 以上の Microsoft DirectX が稼働している必要があります。
また、ビデオの再生に必要なフィルタが正しくインストールされている必要があります。
PC
ソフトウェア
CPU
Intel Pentium 4 1 GHz 以上のプロセッサ
ハードディスク
20 メガバイト以上のハードディスク容量
OS
Windows 98SE/ME/2000/XP
プログラム
Microsoft DirectX 9.0、Microsoft Media Player 9 以降
その他
各種ビデオ/オーディオコーデック
93
C
r
e
a
t
i
v
e
M
u
V
o
V
I
D
Z
トランスコーダーの使用
ソフトウェアのインストール
1.
インストレーション CD を PC の CD-ROM ドライブに挿
入して、[Transcoder]メニューを選択します。
2.
[Next]ボタンをクリックします。
94
3. [Browse]ボタンを使用して、インストールするフォルダを
指定してから[次へ]ボタンを押します。
4.
インストールするプログラムグループを指定します。
特に変更する必要がない場合は、そのまま[Next]ボタン
を押します。
Creative MuVo VIDZ User Guide
5.
インストールが始まります
ビデオファイルの変換
1.
デスクトップの
アイコンをダブルクリックします。
2. [Open]ボタンを押して、入力ファイルを選択します。
[ファイルを開く]ダイアログボックスが現れますので入力
ファイル種類や保存場所、ファイル名を指定してビデオ
ファイルを開きます。
6.
インストールが完了したら[Finish]ボタンを押します。
3.
別の出力ファイルを指定するには、[Save As]ボタンを
押して、作成するファイルのファイル名を入力します。
95
C
4.
r
e
a
t
i
v
e
M
長さが 1 時間未満のビデオであれば、
ボタ
ンを押して、範囲全体を変換します。変換の進捗が表
示されます。
u
V
o
V
変換を中断するには
ボタンを押します。変換が
ボタンが自動的に押されます。
完了すると、
ファイルリストパネルのファイルを右クリックして[View File
Information]メニューを選択すると入力および出力ファ
イルの情報が表示されます。
96
D
Z
範囲の指定
ビデオの特定の範囲を指定して変換することも可能です。
1.
5.
I
ボタンを押して変換するファイルを選択します。
2.
ボタンを押して、選択されたファイルの再生を開始
します。
3.
ボタンを押して、開始ポイントを設定します。
選択されたポイント上に が表示されます。
4.
ボタンを押して、終了ポイントを設定します。
選択されたポイント上に が表示されます。
Creative MuVo VIDZ User Guide
5.
ボタンを押して、選択された範囲を確定しま
す。 選択された範囲はスカイブルー色でハイライトされ
ています。
ボタンを押すと、範囲の指定を取り消します。
6.
4.
ボタンを押すと、選択されたファイルが順次
変換されます。 現在変換中のファイルがハイライトされ
ます。
5.
実行中の変換を中断して次のファイルに移るには
ボタンを押します。
ボタンを押して変換を開始します。
※変換を行う前に、指定した範囲が 1 時間以内である
ことを確認してください。
複数ビデオファイルの一括変換
複数のビデオファイルを一括して変換することができます。
1.
ボタンを押して、複数の入力ファイルを開き
ます。
2.
3.
ファイルリストパネルから、変換しないファイルを消去する
には、ファイルを右クリックして、[Delete Selected List]
メニューを、すべてのファイルを取り消すには[Delete All
List]メニューを選択します。
- 複数のビデオファイルを一括して変換する場合は、ファ
イルごとにことなるトランスコードの設定(次ページ)を
指定することはできません。
変換する範囲を指定する場合は、ファイルリストパネル
でファイルを選択し、前述の手順に従って範囲を指定し
ます。
97
C
r
e
a
t
i
v
e
M
u
V
o
V
I
D
Z
トランスコードの設定
ビデオやオーディオのオプションて、出力ファイルの保存先フォルダを指定できます。
ボタンを押して、[Setting]ダイアログボックスを表示します。
1. [Video]タブを選択して、表示の向きや画像のクオリティ
を設定します。
1) Video Rotate: ビデオ画像を 90 度、180 度、270
度回転させます。反転させることも可能です。 チェッ
クボックスをオンにしてリストよりオプションを選択します。
例:
0°
symmetry
0°
98
90°
180°
270°
90°
symmetry
180°
symmetry
270°
symmetry
Creative MuVo VIDZ User Guide
2) Video Quality: ビデオの画質を調整します。
2. [Audio]タブを押して、音声のサンプリングレート(32.0 ま
3.
出力ファイルの保存フォルダを指定します。
4.
[OK]ボタンを押して変更した設定を保存します。
たは 44.1 KHz)とビットレート(96 または 128 Kbps)を選
択します。
99
C
r
e
a
t
i
v
e
M
u
V
o
V
I
D
Z
PC での MV4 ファイルの再生
MV4 に変換されているファイルを再生するには、専用のプレーヤーソフトを使用します。
1.
デスクトップの
アイコンをダブルクリックします。
2.
ボタンを押して、再生するファイル開きます。
3.
ボタンを押して再生を開始します。
4.
または
します。
5.
ボタンを押して再生を一時停止します。
再生を停止するには、 ボタンを押します。
100
ボタンを押して、再生の場所を変更
6.
ボタンを押して、ウィンドウを最小化します。
終了するには、 ボタンを押します。
Creative MuVo VIDZ User Guide
仕様
種類
オーディオ
FM ラジオ
オプション
仕様:
チャネル
ステレオ(L/R)
周波数範囲
20 Hz ~ 20 kHz
ヘッドフォン出力
L 12mW + R 12mW(最大、16Ω)
SN 比
87 dB
周波数範囲
76.0 MHz~108.0 MHz
SN 比
58 dB
MP3/WMA
再生ファイル
MV4
JPG
サポートされているファイル
ビットレート
MP3:8 kbps~320 kbps(VBR サポート)
WMA:32 kbps ~ 192 kbps
タグ情報
ID3 V1/V2
録音形式
MP3:16~192 kbps(CBR)
101
C
r
e
a
t
種類
i
v
e
V
o
V
I
D
Z
仕様:
約 32×65×15.7 mm
重量
約 33 g(内蔵バッテリー含む)
再生時間(オーディオファイ
ル)
最大約 10 時間(128 kbps、MP3、イコライザ無使用、バックライトオフ、音量
レベル 20 の場合の目安)
再生時間(FM ラジオ)
最大約 14 時間(バックライトオフ、音量レベル 20 の場合の目安)
録音時間
最大約 130 時間(16 kbps、1GB モデルの場合)
言語
複数言語をサポート
USB
USB 2.0/1.1
充電時間
約 4 時間(USB 充電の場合の目安)
バッテリー
リチウムポリマーバッテリー(3.7 V、480 mAh)
液晶画面
1.18 型カラー有機 EL ディスプレイ
解像度 128×80 ピクセル、65,000 色
動作条件
102
u
オプション
寸法(W×H×D)
全般的な
仕様
M
温度:5~35 ℃
湿度:10~75%(結露なき事)
Creative MuVo VIDZ User Guide
トラブルシューティング
この製品を使用しているときに問題が発生した場合は、以下のチェックリストを使用してください。
製品が動作せず画面に何も表示
されない。
▶
内蔵バッテリーを充電してください。
- ファイルがリムーバブルディスクに保存されていることを確認してください。
再生中に音が聞こえない。
▶
- 音量レベルが 0 に設定されていないかどうかを確認してください。
- ヘッドフォンが正しく接続されていることを確認してください。
ボタンやキーが動作しない。
▶
キーがロックされていないかどうか(ロックスイッチ)を確認してください。
▶
- USB 延長ケーブルを使用しているときは、ケーブルが正しく接続されて
いることを確認してください。
▶
プレーヤーのロックスイッチの隣にあるリセットボタンを押してください。
- 製品が正しく PC に接続されていることを確認してください。
ファイルを保存できない。
動作が停止して反応しない。
103
サポート情報
製品 FAQ
製品の技術的な問題への対策やよくあるご質問とその回答等は、Creative ナレッジベース(www.creative.com)や製品
FAQ(jp.creative.com)でご覧になれます。また、弊社カスタマーサポートにお問い合わせ頂くことも可能です。
ユーザー登録
インストール時や www.creative.com/register にてユーザー登録をして頂くと、製品や技術サポートの情報やキャンペーン
などをお知らせするメール配信等のサービスをお受けになることが出来ます。ユーザー登録に関わらず保証規定の範囲で製
品保証を受けることが出来ますが、なるべくユーザー登録されることをお勧めします。
製品保証
テクニカルサポートとハードウェア保証
テクニカルサポート情報およびハードウェア保証書はインストレーション CD の下記のフォルダに収録されています。
テクニカルサポート情報
d:\support\<language>\support.chm
d:\warranty\<region>\<language>\warranty.chm
ハードウェア保証書
ハードウェア保証書の保証規定の適用を受けるには、購入日を証明出来るもの(販売店の発
行するステッカーやレシート、納品書、送付状等のいずれか)を必ず保存しておいて下さい。
(d:はインストレーション CD のドライブ名、<region>および<language>は製品をお求めになった国/地域(日本の場合は
asia)と言語(日本語の場合は japanese)が当てはまります。
104