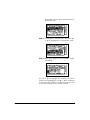
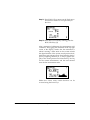
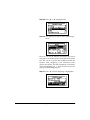
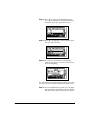
1
System 824
Training Manual
Larson•Davis Inc.
1681 West 820 North
Provo, UT 84601-1341
Phone: (801) 375-0177
FAX: (801) 375-0182
www.lardav.com
I824.02
March 3, 1998
System 824 USER MANUAL
Copyright
Ó
1997
by
Larson•Davis,
Copyright
Incorporated. This manual and the software
described in it are copyrighted, with all rights
reserved. The software may not be copied in
whole or in part for commercial use without
prior written consent of Larson•Davis Inc. The
manual may not be copied in whole or in part
for any use without prior written consent of
Larson•Davis Inc.
Disclaimer
The following paragraph does not apply in any
state or country where such statements are not
agreeable with local law:
Even though Larson•Davis, Inc. has tested the
software and reviewed its documentation,
Larson•Davis Incorporated makes no warranty
or representation, either expressed or implied,
with
respect
to
this
software
and
documentation, its quality, performance,
merchantability, or fitness for a particular
purpose. This documentation is subject to
change without notice, and should not be
construed as a commitment or representation by
Larson•Davis Inc.
This publication may contain inaccuracies or
typographical errors. Larson•Davis Inc. will
periodically update the material for inclusion in
new editions. Changes and improvements to the
program described in this manual may be made
at any time.
Please examine your instrument and record the
following information below. You may be asked
to give this information in any future
communications you have with Larson•Davis,
Inc.
System 824 Serial #______________________
Microphone Model #____________________
Microphone Serial # ____________________
ii
Table of Contents
Chapter 1
System 824 Overview
1-1
General Description ................................................................................ 1-1
User Interface ........................................................................................... 1-3
Chapter 2
Setup S
2-1
Simple Sound Analyzer (SSA)............................................................... 2-1
Chapter 3
View V
3-1
Any Data................................................................................................... 3-1
RTA Live, RTA Max, and RTA Leq ...................................................... 3-6
Chapter 4
Data D
4-1
Chapter 5
Tools T
5-1
About......................................................................................................... 5-1
Calibration ................................................................................................ 5-5
Modifying the Calibration Level .................................................... 5-10
Clock/Timer........................................................................................... 5-11
TIMER................................................................................................. 5-15
Memory................................................................................................... 5-22
Lock ......................................................................................................... 5-24
Power Monitor ....................................................................................... 5-25
Communication ..................................................................................... 5-34
Chapter 6
Log - Logging Sound Level Meter (Option 01)
6-1
Current SLM............................................................................................. 6-2
Modifying the SLM Settings.............................................................. 6-4
Stats ........................................................................................................... 6-9
Modifying the STAT Settings........................................................... 6-10
Ln Centiles.............................................................................................. 6-11
Modifying the Ln Settings ............................................................... 6-12
Exposure ................................................................................................. 6-15
Modifying the Exposure Settings ................................................... 6-16
i
System 824 Training Manual
Overall SLM ........................................................................................... 6-18
Modifying the Overall SLM Settings.............................................. 6-20
Run Log................................................................................................... 6-21
Time History .......................................................................................... 6-22
Modifying the Time History Settings............................................. 6-22
Viewing Time History Data ............................................................. 6-29
Intervals .................................................................................................. 6-31
Modifying the Interval Settings ...................................................... 6-32
Viewing Interval Data ...................................................................... 6-39
Exceedance History............................................................................... 6-41
Modifying the Exceedance History Settings ................................. 6-42
Viewing Exceedance History Data ................................................. 6-50
Spectra Intervals .................................................................................... 6-53
Viewing Spectra Intervals ................................................................ 6-57
ii
CHAPTER
1
System 824 Overview
Congratulations! You now have your hands on the
smallest, most powerful, smartest Real Time Analyzer
and Precision Sound Level Meter available. We at Larson Davis thank you for your purchase of the System
824, and hope you receive many years of good service
from it. This Training Manual has been developed to
jump-start your initiation into the use of your new
instrument. Consider it a “getting started” guide as
you get to know your 824.
General Description
This manual is best used accompanied with the instrument. You will be guided through a step by step tour of
the System 824. The appropriate keypad button will be
shown on the page. The resultant 824 display will then
be presented to verify that you have performed the
correct action.
For example: S
This is the SETUP button on the lower set of keys on
your 824. Pressing this button will present the SETUP
menu on the 824’s display:
2/19/98
System 824 Overview
1-1
You will likely find the user interface of the System 824
to be very intuitive. However, it is recommended that
you initially follow the steps shown in this manual
until you have full exposure to the nuances of the
instrument’s operating system. It should also be mentioned that for detailed explanations of the System
824’s functions, you should defer to the System 824
User Manual. The purpose of this manual is to help the
user navigate through the 824 interface and make measurements immediately. You will find that it will also
be useful to refer to this guide when you are trying
something new with the 824.
Step 1 If you have not already done so, turn the 824
on by pressing the On/Off key: v
The instrument will go through a brief start up cycle,
where it flashes the 824 ID screen.
It will then switch to the display that was established
before it was powered off in its previous session. The
On/Off key can also be used the check the battery
power, as well as verify the on/off status of the display’s backlight. Press the On/Off key again to view
the PWR screen: v
Battery life is expressed in a percentage (100% being
fully charged). If you are powering the 824 with an
1-2
System 824 Training Manual
2/19/98
external source (such as AC), the voltage value will be
shown on this screen.
You can also toggle the screen’s backlight by pressing
the right arrow keyr
The screen contrast can be adjusted by continuous
presses of u or d. Contrast is expressed as a number between 0 and 100. You will find a value between
64 and 70 to be optimal.
Step 2 Press l to exit the PWR screen
User Interface
There are quite a few places you can go from here. It’s
worthwhile to discuss the 824 User interface, starting
with the instrument keypad. The three keys on the top
2/19/98
System 824 Overview
1-3
of the keypad (nearest the LCD screen) are used when
a measurement setup has been established and you are
ready to begin making measurements. Following is a
brief description of each of these keys.
s - This is the RUN/STOP key. It initiates or ends a
measurement.
p - The PAUSE key suspends a measurement. Pressing the pause key again will allow the measurement to
continue.
R - RESET is used to clear the current measurement
from the display. The screen will clear and a new measurement can be acquired.
The five keys located at the lower most part of the keypad affect the way that data is gathered, viewed, and
reported. Following is a brief description of each.
Pressing the key once gets you into the associated
menu. Pressing the key again (within the menu),
brings you out of the menu.
V The VIEW key is used to choose which data type to
be displayed. The views available depend the measurement setup that you have selected.
D - The DATA key is used to access the data store and
recall functions of the 824.
S - The SETUP key brings the user into the instrument
setup menu. From here, the user can select a pre-configured measurement setup, create a new one, or edit
an existing setup.
T - The TOOLS key is used to access the different system settings of the 824 including setting the clock,
viewing the available memory, establishing 824 locking (security) system, and external communications.
824 calibration is also handled within this area.
P - The PRINT key is used to establish the setting
required to communicate with an external serial
printer. The user also selects the type of report that
they wish to print from within this menu.
1-4
System 824 Training Manual
2/19/98
The arrow keys: l,r,u,d, provide a variety of
different navigation operations within the 824’s operating system. This includes maneuvering through
menus and displays. Typically, the up u and down
d arrows move the user up and down through
menus and through parameters within the display
screens. The left l and right r arrows move the
user from one related screen to the next, control cursor
movement, and moves the user in and out of menus.
The check key c is used to select an option or choice
from an 824 menu. It is also used to access the various
Settings menus from within the measurement displays
(views).
2/19/98
System 824 Overview
1-5
1-6
System 824 Training Manual
2/19/98
CHAPTER
2
Setup S
As mentioned, the SETUP S key is used to establish
the 824 measurement setups and associated parameters. Press the SETUP S.
The setup names in the setup menu screen list will depend on the configuration of your 824. Specifically, it
will depend on the options that you purchased, and the
setups that you or another user may have already created and stored in the 824.
Simple Sound Analyzer (SSA)
Common to all 824’s is the SSA or Simple Sound Analyzer. This pre-configured setup places the 824 in a
mode that performs simultaneous Sound Level Meter
(SLM) and 1/3 octave band Real Time Analysis.
2/19/98
Setup S
2-1
Step 1 Press d until this SLM&RTA (SSA) is highlighted.
Step 2 Let’s select this setup now by pressing the
check key: c. At this point, you may be confronted with the Recall screen and a message
that suggests that you have not saved current
measurement data. If the following screen
appears, press the desired choice. In this
example, the choice “No” will be selected.
Step 3 Press r once to highlight “No” (or whatever choice you desire)
2-2
System 824 Training Manual
2/19/98
The SLM&RTA (SSA) setup is now
active denoted by the SLM+RTA
title at the top of the screen. Notice
that the SLM characters are bolded.
This denotes that the current view
within this operating mode is the
Sound Level Meter. If the reverse situation is true (RTA characters
bolded), we will need to change the
current View for the sake of this
exercise.
Step 4 Now press the check key: c to proceed with
the SLM&RTA (SSA) setup recall. If another
message appears noting that the Active ID
has change, press r to highlight “No”. Then
press the check key: c to proceed.
Step 5 Press the VIEW V to access the View menu.
Step 6 If SLM is not highlighted, press u until it is.
Step 7 Press c to select the SLM view choice.
2/19/98
Setup S
2-3
Step 8 Let’s make a measurement by pressing the
RUN/STOP key: s.
If this is the first time that the 824 has been used, the
following screen will appear to let you know that the
built in clock should be set so that your measurements
will be time and date correlated. If the clock is already
set, or you wish to skip this for now, go to Step 22
Step 9 To set the time, press TOOLS T to access the
clock/timer set feature.
Step 10 Press d to highlight “Clock/Timer”.
2-4
System 824 Training Manual
2/19/98
Step 11 Press r to enter the “Clock/Timer” menu.
Within this menu, you can change the Current Time,
Current Date, Day of Week, Timer Mode, Run Date,
Stop Date, Run Time 1, Stop Time 1, Run Time 2, and
Stop Time 2. For now, we will only worry about setting
the time, date, and day of the week.
Step 12 Press u or d to highlight “Current Time”.
Step 13 Press r to enter the “Current Time” modification field.
Step 14 Here, use l or r to highlight the number
you wish to change. Once highlighted, use
u or d to increment or decrement the
number. Continue this process until you have
2/19/98
Setup S
2-5
the desired “Current Time” entered. Press c
to enter the time.
Step 15 To change the “Current Date”, first press u
or d to highlight the “Current Date” field.
Step 16 Press r to enter the “Current Date” modification field.
Use l or r to highlight the number you want to
change. Once highlighted, use u or d to increment
or decrement the number. Continue this process until
you have the desired “Current Date” entered.
2-6
System 824 Training Manual
2/19/98
Step 17 Press c to enter the date.
Step 18 To change the current “Day Of Week”, press
u or d to highlight the “Day Of Week”
field.
Step 19 Press r to enter the “Day Of Week” modification field.
Step 20 Use d or u to highlight the weekday you
want active. Then press c.
2/19/98
Setup S
2-7
Step 21 Press TOOLS T to return exit the Tools menu
and return to where we were previously in
the View.
Step 22 If the 824 is not currently running, press the
RUN/STOP key: s
After a moment of stabilization, the measurement will
commence. The jogging man animation at the top right
corner of the display verifies that the instrument is
indeed “running”. Other items on this screen include
the digital readout of the current sound pressure level;
the detector rate selection (Fast, Slow, Impulse); the frequency weighting selection (A, C, Flat); a graphic display of the sound pressure level time history; the Leq
for the current measurement, and the total runtime
since the last measurement reset.
Within this screen, many useful functions can be
accessed using the arrow keys.
2-8
System 824 Training Manual
2/19/98
In the SLM View, (on-screen parameter modification) can be performed
using the u, d, l, r arrow
keys.
Step 23 Press r once and Slow will be highlighted.
Step 24 Now press r (or l) and you will cycle
through the three detector rate options: Fast,
Slow, and Impulse.
After you stop on a desired detector rate option, you
either press the check key c to exit the cycle mode, or
press dto jump to the next screen controlled parameter.
Step 25 Press d for this exercise to get to the frequency-weighting field.
Step 26 Press r (or l) to cycle through the
weighting options (A, C or Flat). Again, press
the check key c to exit the cycle mode, or
press d to jump to the next screen controlled parameter. You can also perform this
same kind of on-screen editing for the Leq
field. Here, you can toggle between Leq, SEL,
Min, Max, and Peak.
2/19/98
Setup S
2-9
The field at the bottom of the screen shows the total
duration of the current measurement. This field can
also be used for adjusting the signal gain of the 824.
Press the down arrow d to highlight the gain field.
The following gain values can be established by pressing r (or l): 0, 10, 20, 30, 40, and 50.
Step 27 All of these settings (plus a few more) can
also be accessed from within the Setup menu
of the 824. Press SETUP S to access this
menu.
Step 28 The Edit Settings function is currently highlighted. Press the check key c (or r) to
enter Settings menu.
Here we can access menus to change the “Title” that
appears in the printed reports; the SLM (Sound Level
Meter) parameters; the RTA (Real Time Analyzer)
parameters; the RTA Intervals; the Report settings; and
the I/O (input/Output) Controls. Let’s enter the SLM
Settings menu.
2-10
System 824 Training Manual
2/19/98
Step 29 Press u or d highlight SLM.
Step 30 Now press c (or r) to enter SLM Settings
menu.
Here you can see the different parameters that can be
changed for the SLM functions of the 824. The parameters that can be accessed and modified include the
Detector Rate, Weighting, Gain, Transducer (Condenser microphone, Electret microphone, and Direct),
and Peak Weighting (A, C, Flat). In this exercise, let’s
change the Peak Weighting to C.
Step 31 Press d until Pk Weighting is highlighted.
2/19/98
Setup S
2-11
Step 32 Press r to enter the Pk Weighting menu.
You will be required to reset the current measurement. Press c to perform the reset.
Step 33 Press u to highlight C. Then press the check
key c to select and exit.
Step 34 You will now be returned to the Settings
menu. Notice that C is now the current choice
for Peak Weighting.
We will explore the other Settings menus later. Now
we will look at the different SLM measurement views.
Step 35 To exit the SLM Settings menu you can either
press the left key three times, or press SETUP.
For this exercise, press SETUPS. You will be
2-12
System 824 Training Manual
2/19/98
returned to the SLM + RTA measurement display.
2/19/98
Setup S
2-13
2-14
System 824 Training Manual
2/19/98
CHAPTER
3
View V
As mentioned earlier, the VIEW key V is used to
choose the different types of data that can be viewed
using the current measurement setup that you have
selected. Press VIEW V.
Since we are currently in the SLM&RTA (SSA) setup,
the View options will reflect this selection.
Any Data
Up to this point, we have been using the SLM view to
explore the different ways to see sound pressure level
data. Let’s now explore some of the other ways that we
can view SSA data.
Step 1 Press d once to highlight “Any Data”.
2/19/98
View V
3-1
In this display mode, you can see the
real power of the 824’s sound level
meter capabilities. In fact, you can
see 33 simultaneous values from the
parallel slow, fast, impulse detectors
with concurrently applied A, C, and
Flat frequency weighting filters.
You can also view the associated
SPL, Leq, SEL, Lmin, Lmax, Peak,
and Taktmaximal (German versions)
with the different detector and
weighting values.
Step 2 Press c to activate the “Any Data” viewing
mode. If the 824 is not running at this point,
do so by pressing the RUN/STOP s
The title at the top of the current screen should be
“Any Level”. This indicates that we are viewing the
live sound pressure level data from the 824.
Here you will see the current SPL
(Sound Pressure Level) data from the
Fast and Slow detectors. You will
also notice that the A, C, and Flat
frequency weighting is applied concurrently to the data.
Step 3 Press r (or l) to cycle through the different view screens. Stop when you get to the
“Any Level a” screen.
Now you are viewing the current
Leq and SEL data with the various
weighting values applied.
Step 4 Press r to get to the “Any Level b”screen.
3-2
System 824 Training Manual
2/19/98
These are the current Lmax values
from the Fast and Slow detectors
with the weighting values applied.
Step 5 Press r again to get to the “Any Level c”.
These are the current Lmin values
from the Fast and Slow detectors
with the weighting values applied.
Step 6 Press r again to get to the “Any Level d”
screen.
You are now viewing the current
Peak data from the Peak detector
with the A, C, and Flat weighting
values applied. The display also
repeats the SPL data from the Fast
detector.
Step 7 Press r again to get to the “Any Level e”
screen.
Step 8 Press r again to return to the “Any Level
a”.
2/19/98
View V
3-3
Here we see the value, date, and time
associated with the Lmax from the
824’s slow detector.
Step 9 Press u to access the “Any/Time-a” screen.
Now we see the value, date, and time
associated with the Lmax from the
824’s fast detector.
Step 10 Press r to access the ”Any/Time-b” screen.
Here we see the value, date, and time
associated with the Lmax from the
824’s impulse detector.
Step 11 Press r to access the ”Any/Time-c” screen.
Here we see the value, date, and time
associated with the Lmin from the
824’s slow detector.
Step 12 Press r to access the ”Any/Time-d” screen.
3-4
System 824 Training Manual
2/19/98
Now we see the value, date, and time
associated with the Lmin from the
824’s fast detector.
Step 13 Press r to access the “Any/Time-e” screen.
This is the value, date, and time
associated with the Lmin from the
824’s impulse detector.
Step 14 Press r to access the “Any/Time-f” screen.
Here we see the value, date, and time
associated with the Peak data from
the 824’s Peak detector.
Step 15 Press r to access the “Any/Time-g” screen.
Step 16 Press r to return to the “Any/Time-a”
screen.
2/19/98
View V
3-5
Here you will see the current SPL
(Sound Pressure Level) from the
Impulse detector of the 824 with
simultaneous A, C, and Flat weighting applied. The SPL data from the
Fast detector is also repeated here.
Step 17 Press u to access the “Any Impl-a” screen.
Now you will see the current Lmax
(Maximum Sound Pressure Level)
from the Impulse detector of the 824
with simultaneous A, C, and Flat
weighting applied. The Lmax from
the Fast detector is repeated here.
Step 18 Press r to advance to the “Any Impl-b”
screen.
Now you will see the current Lmin
(Minimum Sound Pressure Level)
from the Impulse detector of the 824
with simultaneous A, C, and Flat
weighting applied. The Lmin from
the Fast detector is repeated here.
Step 19 Press r to advance to the “Any Impl-c”
screen.
These are all of the screen associated with the “Any
Data” viewing option. Press VIEW V to return to the
View menu.
RTA Live, RTA Max, and RTA Leq
Let’s now explore some of the different ways that we
can look at RTA data from the 824. First, make sure that
you are in the View menu.
3-6
System 824 Training Manual
2/19/98
Step 1 Now press d to highlight the “RTA Live”
viewing option.
Step 2 Press c to accept this View choice.
The “SLM+RTA Live” screen is
now active as is noted at the top of
the display. Notice that RTA is now
in bold letters informing us that we
are viewing the fractional octave
band data from the 824.
In the SLM+RTA Live screen, notice
the graphical display of the 1/3
octave band data. You will also be
able to see the frequency of where the
cursor is currently located and the
dB level at that frequency.
In this sample, we are looking at the 800 Hz band. You
can move the cursor to other 1/3 octave band frequencies by pressing the left or right arrow keys. Press
rto move the cursor to the 1000 Hz. 1/3 octave band.
You can view the overall summation of frequencies by
sequentially pressing r to the last visible frequency
2/19/98
View V
3-7
band.
Now press c to access additional RTA viewing
options.
Step 3 First verify that the “Tabular” option is highlighted. Then press c. The display will now
show the 1/3 octave band data in tabular format rather than graphic.
Step 4 Pressing the left and right arrow keys (l or
r) will scroll through all of the frequencies
and amplitudes. When you have finished,
3-8
System 824 Training Manual
2/19/98
press c again to re-enter the SLM/RTA viewing options.
Step 5 With “Spectrum” highlighted, press c to
switch the display back to the graphical format.
Step 6 Press c again to re-enter the SLM/RTA viewing options. Now press d to highlight the
“Graph” options.
Step 7 Press c to enter the “Adjust Graph” screen.
2/19/98
View V
3-9
Step 8 The Scale and Level of the displayed graphic
can be adjusted now. Pressing the right or left
arrows controls the Scale settings. You can
expand or magnify the display by pressing
the right arrow. The left arrow compresses the
display. Press r.
Notice the expanded vertical scale. Pressing the up or
down arrow controls the level. This moves the measurement up or down within the display. Press d and
u a few times to see the measurement move vertically within the display. Using both the Scale and Level
adjustments lets you focus in on areas of interest in the
measurement.
Step 9 Press c twice to return to the SLM/RTA
viewing options.
Step 10 Now press d to highlight the “Setting”
options. Then press c.
3-10
System 824 Training Manual
2/19/98
Step 11 Now press c to enter Setting.
Step 12 Press d to highlight the RTA settings
option.
Step 13 Next, press c (or r) to enter the RTA settings menu.
Filters is used to conserve power.
Setting the filter to12.5 KHz is less
energy consuming than using 20
KHz
2/19/98
Here we can change the settings for the RTA Detector
(Fast, Slow), the fractional octave Bandwidth (1/3, or
1/1), and upper Filters frequency (low pass 12.5 kHz
or 20 kHz) can be modified here. Now let’s change the
Bandwidth from 1/3 octave to 1/1 octave.
View V
3-11
Step 14 Press d until Bandwidth is highlighted.
Step 15 Now press c (or r) to enter the Bandwidth
menu
Step 16 Press u to highlight 1/1.
Step 17 Then press c to initiate the bandwidth
change.
3-12
System 824 Training Manual
2/19/98
Step 18 Press l three times to exit the Settings
menu and back to View. You will now see the
1/1 octave band data in the graphical display.
For purposes of this exercise, let’s change the display
back to 1/3 octave bands. We’ll repeat the process we
just completed.
Step 19 First press c. Next press d to highlight
“Settings”, then press c again. Verify that
RTA is highlighted, then press c once more.
Press d to highlight “Bandwidth”. Once
more, press c to enter the “Bandwidth”
menu. Press d to highlight “1/3”. Then
press c to actuate the change back to 1/3
octave analysis. To get back to the View display, press l three times. We should now
have 1/3 octave band data in the graphical
display.
2/19/98
View V
3-13
The screen contains a graphic of the
Max spectrum. This is the spectrum
that occurred that contains the largest amount of energy during the current run time. r and l are used
to move the cursor to the various frequency bands.
Step 20 Press u to access the “SLM+RTA Max”
screen.
Here the screen shows a graphic of
the Leq spectrum. r and l once
again are used to move the cursor to
the different frequency bands of the
spectrum.
Step 21 Press u to access the “SLM+RTA Leq”
screen.
Notice the next two choices in the
View menu are “RTA Leq” and
“RTA Max”. We have just viewed
these displays. They can also be
accessed here from the View menu.
Step 22 Press VIEW V to return to the View menu.
We are finished with the Simple Sound Analyzer
(SSA). We have seen the data that we can view in this
mode, and have learned how to change the different
setup and display options. Before exploring the other
types of setups that you may have in your particular
824, lets explore the other common features with all
824’s.
Step 23 Press V to exit back to the SLM+RTA screen.
3-14
System 824 Training Manual
2/19/98
CHAPTER
4
Data D
The DATA key D provides access to the data storage
and recall functions of the System 824. Data files are
stored in the 824’s internal memory. First, verify that
the 824 is still running (running figure in top right corner). If it is not, press RUN/STOP s.
Step 1 With the instrument stopped, press D to
enter the Data Files menu.
If you have never stored data with the 824, it will
appear as above. If there is data currently stored in the
824’s memory, the Data Files screen will appear as it
does below.
Notice that the “Store Data” function is currently highlighted. It signifies that the 824 is now ready to store
data.
To store the data, press the c. If the 824 is running (as
it should be now), you will see the following warning
2/19/98
Data D
4-1
message on the screen.
If the 824 is stopped, this message does not appear and
the data is immediately stored.
Step 2 Press c to stop the 824 and store the current
data. The 824 will beep to signify that the data
storage has occurred, and return the display
to the previously active View screen.
Step 3 To examine previously stored data, press
DATA D.
4-2
System 824 Training Manual
2/19/98
Step 4 Notice that the stored data record now
appears in the Data Files list. Press d to
highlight the stored record.
Step 5 To see information on the stored measurement, press r.
This screen shows the date and time of the measurement beginning and end. It also displays the measurement type (SLM&RTA SSA), the measurement label,
and the size of the data file in bytes. If you have multiple data files (indicated at top right corner of screen),
you can cycle through the Data Files info for each measurement by pressing u or d.
Step 6 You can recall stored data by pressing c.
Within this menu, you can recall the data you previously selected. If you have multiple stored data files,
you can recall them using “Beginning”, “Ending”, or
“Find”.
2/19/98
Data D
4-3
• “Beginning” is used to recall the 1st data record.
• “Ending” recalls the last data record.
• “Find” lets you enter the record number of the data
record to be recalled.
Step 7 To recall the previously selected record, use
u or d to highlight “Recall Data”.
Step 8 Press c to recall the currently selected record.
The 824 will beep and the data record will be displayed.
4-4
System 824 Training Manual
2/19/98
CHAPTER
5
Tools T
The TOOLS T key accesses system oriented operations for the 824. These include calibration; setting the
824 clock/timer; checking memory; establishing lock
parameters; power monitoring; and setting communications protocol. Press TOOLS T to access the Tools
menu.
About
“About” should be the current highlighted Tool choice.
This area contains 824 system information.
This screen provides information
about your 824 including the serial
number and firmware revisions (for
the SLM and everything else).
2/19/98
Step 1 To see this information, press c to view the
“About-a” screen.
Tools T
5-1
This screen lists some user definable
titles that can be used to personalize
your 824. We will describe how to
edit these fields shortly.
Step 2 Press r to advance to the “About-b” screen.
The About-c screen lists the options
contained in your 824. It also lists
the total RAM (memory) in your
unit.
Step 3 Press r again to advance to the “About-c”
screen.
Step 4 Press r to return to the “About-a” screen.
Step 5 Press TOOLS T to return to the Tools menu.
5-2
System 824 Training Manual
2/19/98
Step 6 To change the user titles within “About”,
press r to enter this editing area.
This screen contains fields for entering your company,
address, and a title. This allows you to “personalize”
your System 824. Let’s enter a name in this exercise.
The first name field should already be highlighted. If it
isn’t, press u or d to highlight the first “Name”
field.
Step 7 Then press r to enter this area. The following message will appear.
2/19/98
Tools T
5-3
Step 8 Select Yes to reset. The following Name field
will immediately appear.
Step 9 First clear the field by pressing RESET R.
To scroll rapidly through the character choices, hold the u or d keys
down.
5-4
Now type in a name. For this exercise, let’s enter the
word “TEST”. To do this, use u or d to scroll
through the alphabet. When you arrive at the desired
character, press r to move to the next letter location;
then press u or d for the next letter. Continue this
process until the name is complete. Note that the scroll
list contains upper and lower case letters, numbers,
punctuation, and a variety of useful symbols.
System 824 Training Manual
2/19/98
Step 10 Press c to enter this name.
Step 11 The other name field can be edited in the
same fashion. Press l to return to the Tools
menu.
Calibration
Step 1 From within TOOLS, press d to highlight
“Calibration”.
2/19/98
Tools T
5-5
This screen displays the date and
time of the last 824 system calibration and calibration check. We will
perform a calibration next.
Step 2 To view the calibration information, press c
to enter the “Calibration” screen.
Step 3 Press TOOLS T to return to the Tools menu.
Step 4 Next, let’s press r to enter the “Calibration”
menu to check and change the calibration values.
Step 5 To check the current calibration, confirm that
“Check” is highlighted in the Calibration
menu.
5-6
System 824 Training Manual
2/19/98
Next, connect a microphone calibrator to the 824’s
microphone. Then turn the calibrator on. (Note: the
calibrator dB output level should match the number
associated with “Cal Level” in the Calibration menu. If
it does not, skip to “Cal Level” now and change the
value to match your calibrator).
Step 6 Press r to perform a calibration check.
Step 7 The system will go through a calibration
check. Upon completion, press TOOLS T to
return to the Calibration menu.
Step 8 To change the calibration press d to highlight “Change in the Calibration menu.
Step 9 Next, connect a microphone calibrator to the
824’s microphone. Press r to perform a calibration change. The following screen may
2/19/98
Tools T
5-7
appear alerting you that a reset of the current
measurement is required.
Step 10 Press c to perform the reset. The following
screen will next appear to remind you to turn
on your microphone calibrator.
Step 11 After turning on the calibrator, press c to
answer “Yes”. The system will go through a
calibration change.
Step 12 If you are using a condenser microphone (and
you have the 824 Option 01 installed), you
will be asked if you’d like to “Calibrate the
5-8
System 824 Training Manual
2/19/98
High Range?” of the 824. Press c to answer
“Yes”.
In order to perform high range measurements, the 824 reduces the
microphone polarization voltage by
20 dB. It will take about one minute
for this change (and stabilization) to
occur, so that the high range can be
calibrated.
After stabilization, the high range will be calibrated.
The Cal Level field should contain a
dB output level value that matches
the true output of your microphone
calibrator.
2/19/98
Step 13 Press TOOLS T to return to the Calibration
menu.
Tools T
5-9
Modifying the Calibration Level
Step 1 To modify the calibration level, press d to
highlight “Cal Level”.
Step 2 Press r to enter the Cal Level modification
field.
Step 3 Here, use l or r to highlight the number
you wish to change. Once highlighted, use
u or d to increment or decrement the
number. Continue this process until you have
the desired “Cal Level” entered. Press c to
enter the level.
5-10
System 824 Training Manual
2/19/98
As you probably know, it is good
measurement practice to use the
same calibrator every time you perform a calibration check and/or
change to your 824. The “Calibrator
S/N” is used to enter the serial number of the calibrator that you have
designated as your “824 calibrator”.
Step 4 Press l to exit the “Calibration” menu.
Clock/Timer
The 824 contains a quartz clock that is used for applying date and time information to measurements, and
for establishing automatic timer parameters (run/stop
dates and times) for unattended measurements.
Step 1 From within TOOLS, press d to highlight
“Clock/Timer”.
This screen shows the current time,
day of the week, and date. The “next
action” field at the bottom of the
screen denotes that the 824 timer is
set to go off at the listed time. (00:00
typically indicates that no timer is
set).
2/19/98
Step 2 To view the clock information, press c to
enter the “Time-a” screen.
Tools T
5-11
Step 3 Press r to advance to the “Time-b” screen.
This screen list the parameter associated with the 824
timer including “Timer Mode” (on/off), and the timer
start and stop dates/times.
Step 4 Press TOOLS T to return to the Tools menu.
Step 5 To change the clock parameters, confirm that
“Clock/Timer” is highlighted in the Tools
menu.
Step 6 Press r to enter the “Clock/Timer” menu.
Within this menu, you can change
the Current Time, Current Date,
Day of Week, Timer Mode, Run
Date, Stop Date, Run Time 1, Stop
Time 1, Run Time 2, and Stop Time
2. These parameters are all changed
in a similar way.
5-12
The following is an example of performing a Clock/
Timer modification by editing the “Current Time”.
System 824 Training Manual
2/19/98
Step 7 Press u or d to highlight “Current Time”.
Step 8 Press r to enter the “Current Time” modification field.
Step 9 Here, use l or r to highlight the number
you wish to change. Once highlighted, use
u or d to increment or decrement the
number. Continue this process until you have
the desired “Current Time” entered. Press c
to enter the time.
2/19/98
Tools T
5-13
Step 10 To change the “Current Date”, press u or
d to highlight the “Current Date” field.
Step 11 Press r to enter the “Current Date” modification field.
Step 12 Use l or r to highlight the number you
want to change. Once highlighted, use u or
d to increment or decrement the number.
Continue this process until you have the
desired “Current Date” entered. Press c to
enter the date.
5-14
System 824 Training Manual
2/19/98
Step 13 To change the current “Day Of Week”, press
u or d to highlight the “Day Of Week”
field.
Step 14 Press r to enter the “Day Of Week” modification field.
Step 15 Use d or u to highlight the weekday you
want active. Then press c .
TIMER
From within the “Clock/Timer” menu, we can set and
activate a timer that causes the 824 to turn itself on and
gather data automatically.
2/19/98
Tools T
5-15
Step 1 To modify the “Timer Mode”, press u or
d to highlight the “Timer Mode” field.
“Block Mode” is used when you
want to gather data for one single
measurement period that could span
seconds, minutes, or even days. (uses
Run Date, Stop Date, Run Time 1,
and Stop Time 1)
“1/Day” is used when you want to
collect data during a single daily
time period, for several sequential
days. (uses Run Date, Stop Date,
Run Time 1, and Stop Time 1)
“2/Day” is used when you want to
collect data during a two separate
daily time periods, for several
sequential days. (uses Run Date,
Stop Date, Run Time 1, Stop Time 1,
Run Time 2, and Stop Time 2)
Step 2 Press r to enter the “Timer Mode” modification field.
Step 3 Use d or u to highlight the desired Timer
Mode selection.
5-16
System 824 Training Manual
2/19/98
Step 4 For exercise sake, choose “Block Mode” by
using u or d to highlight “Block”.
Step 5 Once you have selected the “Block” Timer
Mode choice, press c to activate it.
Step 6 To change the “Run Date”, first press u or
d to highlight the “Run Date” field.
Step 7 Press r to enter the “Run Date” modification field.
2/19/98
Tools T
5-17
Step 8 Use l or r to highlight the number you
want to change. Once highlighted, use u or
d to increment or decrement the number.
Continue this process until you have the
desired “Run Date” entered.
Step 9 Press c to enter the run date.
For sake of economy, use a short measurement duration in this exercise (one minute). To change the “Stop
Date”, first press u or d to highlight the “Stop
Date” field.
5-18
System 824 Training Manual
2/19/98
Step 10 Press r to enter the “Stop Date” modification field.
Step 11 Use l or r to highlight the number you
want to change. Once highlighted, use u or
d to increment or decrement the number.
Continue this process until you have the
desired “Stop Date” entered. For this exercise,
use the same date as the “Run Date”.
Step 12 Press c to enter the “Stop Date”.
2/19/98
Tools T
5-19
Step 13 To change the “Run Time 1”, press u or d
to highlight the “Run Time 1” field.
Step 14 Press r to enter the “Run Time 1” modification field.
Step 15 Use l or r to highlight the number you
want to change. Once highlighted, use u or
d to increment or decrement the number.
Continue this process until you have the
desired “Run Time 1” entered.
Step 16 Press c to enter the “Run Time 1”.
5-20
System 824 Training Manual
2/19/98
Step 17 To change the “Stop Time 1”, press u or d
to highlight the “Stop Time 1” field.
Step 18 Press r to enter the “Stop Time 1” modification field.
Use l or r to highlight the number you want to
change. Once highlighted, use u or d to increment
or decrement the number. Continue this process until
you have the desired “Stop Time 1” entered.
Step 19 For this example, choose a “Stop Time 1” one
minute later than the “Run Time 1”.
2/19/98
Tools T
5-21
Step 20 Press c to enter “Stop Time 1”.
Run Time 2 and Stop Time 2 are changed in the same
manner as Run Time 1 and Run Time 2. These are only
used when the 2/Day timer mode is desired.
The “Block” Timer is now set. The 824 will turn on and
gather data (using the active measurement setup) until
the stop date/time are reached.
Press l to return to the “Tools” menu.
Memory
Step 1 While in the TOOLS menu, press d to highlight “Memory”.
5-22
System 824 Training Manual
2/19/98
The “Memory-a” screen displays the
amount of available memory in your
824.
Step 2 Press c to enter the “Memory-a” screen.
“Memory-b” provides additional
memory information including the
number of data files stored and the
available setup allocations.
Step 3 Press r to advance to the “Memory-b”
screen.
Step 4 Press TOOLS T to return to the Tools menu.
Within this menu you can purge
data files, allocate the number of
EEPROM registers for storing setups (default 10), and store measurement setups to an EEPROM within
the 824.
Step 5 Press r to enter the Memory menu.
Unless you have valuable data stored in the 824, go
ahead and purge the files you stored to memory ear-
2/19/98
Tools T
5-23
lier. Press r to initiate this process.
Step 6 Press c to purge all of the 824 data files. Press
TOOLS T to return to the Tools menu.
Lock
Step 1 From the TOOLS menu, press d to highlight “Lock”.
The “Lock” screen shows the lock
status of the 824.
5-24
Step 2 Press c to enter the “Lock” screen.
System 824 Training Manual
2/19/98
Press TOOLS T to return to the Tools menu.
Power Monitor
Step 1 While in the TOOLS menu, press d to highlight “Power Monitor”.
The “Battery” screen provides information regarding the power source
of the 824. Battery life is expressed
in a percentage (100% being fully
charged). If you are powering the
824 with an external source (such as
AC), the voltage value will be shown
on this screen.
Step 2 Press c to enter the “Battery” screen.
Within the “Power” menu you can
control the Power Settings, and
Charge Mode for the rechargeable
NiMH batteries. You can also access
the “Battery” screen by selecting
“Status”.
Step 3 Press c to enter the “Power” menu.
2/19/98
Tools T
5-25
Step 4 With “Status” highlighted, press r to verify
that this is an alternative route to the “Battery” screen.
Step 5 Press c to return to the “Power” menu.
Step 6 Let’s take a look at the various “Settings”
options. Now press d to highlight “Settings”.
Within this menu, you can control
the Power Settings parameters.
These include “Power Off Mode”,
“Auto-Off Time”, “Standby Time”,
“Backlight Time”, “Backlight”,
“LCD contrast”, and “External
Power”.
5-26
Step 7 Press c (or r) to enter the “Settings” menu.
System 824 Training Manual
2/19/98
Step 8 To look at the “Power Off Mode” press u or
d to highlight this choice.
The “Blank LCD” selection will
cause the LCD screen to turn off,
while still allowing the 824 to continue gathering data. The idle time
required before this happens is set in
the “Auto-Off Time” feature that we
will look at shortly. “Auto Off”
enables a mode that causes the 824 to
automatically power off if it is idle
for a predetermined time (this time is
also set in the “Auto-Off Time” feature). This is a power saving feature
of the 824. “Manual Off” overrides
“Auto Off” so that the 824 will only
power off if the user presses the On/
Off v key.
Step 9 Now press c (or r) to enter the “Power Off
Mode” menu.
Select a choice, or press l to return to the Power Settings menu.
Step 10 Let’s press d to highlight “Auto-Off Time”.
2/19/98
Tools T
5-27
Step 11 Press c (or r) to enter the “Auto-Off Time”
menu.
Here you can establish the duration of idle time
required before the 824 automatically powers off
(when “Auto Off” is enabled). The u and d arrow
keys increment through the minute numbers, while
l and r toggles between to minute fields.
Step 12 Once you have established a desired “AutoOff Time, press c.
Step 13 Now press d to highlight “Standby Time”.
5-28
System 824 Training Manual
2/19/98
“Standby Time” places the 824 in an
energy conservation state by turning
off the LCD (screen), the serial port,
and the DC output, while still gathering data. Here you establish the
“Standby Time” before the 824 automatically powers these features
(LCD, serial port, and DC output)
off.
Step 14 Press c (or r) to enter the “Standby Time”
menu.
Step 15 In order to have the LCD turn off, you must
select “Blank LCD” in the “Power Off Mode”
menu that was shown above. The u and d
arrow keys increment through the minute
numbers, while l and r toggles between
to minute fields. Once you have established a
desired “Standby Time, press c.
Step 16 Use d to highlight “Backlight Time”.
2/19/98
Tools T
5-29
Within the “Backlight Time” screen
you can determine the amount of idle
time that the 824 backlight stays on
before it automatically turns off. It
should be noted that the backlight
draws a significant amount of current and will greatly reduce the
amount of time that you can operate
on batteries.
Step 17 Next, press c (or r) to enter the “Backlight
Time” menu.
The u and d arrow keys increment through the
minute numbers, while l and r toggles between to
minute fields.
Step 18 Once you have established a desired “Backlight Time, press c.
Step 19 Now press d to highlight “Backlight”.
5-30
System 824 Training Manual
2/19/98
The “Backlight” screen provides
another means of enabling or disabling the backlight function.
Step 20 Then press c (or r) to enter the “Backlight”
menu.
Step 21 Use u or d to establish your backlight
choice. Press c to activate this selection.
Step 22 Now press d to highlight “LCD Contrast”.
The “LCD contrast” window lets
you adjust the screen contrast of the
display. The u and d arrow keys
increment through the contrast
numbers, while l and r toggles
between the contrast fields. Contrast
is expressed as a number between 0
and 100. You will find that a value
between 64 and 70 to be optimal.
2/19/98
Step 23 Then press c (or r) to enter the “LCD Contrast” menu.
Tools T
5-31
Step 24 Once you have established a desired “LCD
Contrast”, press c.
Here you can choose your preferred
means to power the 824, should you
wish to use an external power
source. The choices here are “AC
Pwr”, or “Battery”. “AC Pwr” is
used if you plan to power the 824
from an AC source using the 12-Volt
adapter that was provided with the
instrument when it was purchased.
Note that this configuration will also
charge the NiMH batteries if they
are in the 824 battery compartment.
NOTE: You should never attempt to
use the 12-Volt adapter with alkaline
batteries installed in the 824. This
could cause the batteries to overheat
and leak, which may result in serious
damage to the 824.
Step 25 Press d to highlight “External Power”.
Step 26 Next, press c (or r) to enter the “External
Power” menu.
Choosing “Battery” is the proper choice if you plan to
power the 824 from an external 12-Volt battery (lead
acid for example). Please consult Larson Davis regarding the proper method of connecting the 824 to the
external battery.
5-32
System 824 Training Manual
2/19/98
Step 27 Use u or d to establish your external battery choice. Press c to enable this selection.
Step 28 Press l to exit the “Power Settings” menu
and return to the “Power” Menu.
Step 29 Now let’s press d to highlight “Charge
Mode”.
Here you can choose the method of
recharging the internal NiMH batteries of the 824. The choices are: Off,
Trickle, Pulse, or Full. Trickle provides a slow charge to the batteries,
which will ultimately prolong the life
of the NiMH cells. Pulse offers’ Full
is the quickest method of recharging
the batteries, but will reduce the
number of times that the NiMH can
be charged.
2/19/98
Step 30 Next, press c (or r) to enter the “Charge
Mode” menu.
Tools T
5-33
Step 31 Use u or d to establish your battery
charge choice. Press c to enable this selection.
Step 32 Press l to return to the Tools menu.
Communication
Step 1 From within the TOOLS menu, press d to
highlight “Communication”.
5-34
System 824 Training Manual
2/19/98
The screen becomes active during
serial communication with a computer. You can monitor the communication process within this window.
Step 2 Press c to enter the “Communication”
screen.
Here, you can establish and modify
the parameters associated with communication to an external device,
such as a computer or modem. The
options are Baud Rate, Serial
Address, and Flow Control.
Step 3 Now, press c again to enter the “Serial Communication” screen.
Step 4 Use u or d to highlight “Baud Rate”.
Press c (or r) to enable this selection.
Your baud rate choices are: 300, 1200, 2400, 9600, 19200,
28800, 57600, and 115K.
2/19/98
Tools T
5-35
Step 5 Select your baud rate choice using u or d.
Press c to enable this selection.
Step 6 Now press d to highlight “Serial Address”.
Here you can establish a serial
address for the 824 for situations
where you may have multiple devices
connected via the computer serial
port.
Step 7 Press c (or r) to enter the “Serial Address”
screen.
Step 8 Use the u and d arrow keys increment
through the address numbers, while l and
r toggles between the three address fields.
Press c when you have selected the desired
address.
5-36
System 824 Training Manual
2/19/98
Step 9 Now press d to highlight “Flow Control”.
Within this menu, you can select the
method of handshaking appropriate
for the device which you plan to communicate with. The choices are:
“None”,
“Hdwr”
(hardware),
“Xoff”, and “Both”.
Step 10 Press c (or r) to enter the “Flow Control”
menu.
Step 11 Choose your Flow Control selection using
u or d. Press c to enable this choice.
Step 12 Press l to return to the TOOLS menu. Press
l one more time to exit.
2/19/98
Tools T
5-37
5-38
System 824 Training Manual
2/19/98
CHAPTER
6
Log - Logging Sound Level
Meter (Option 01)
Your 824 does not necessarily contain the Log option.
This is a non-standard option that is purchased separately from the basic Model 824. If you indeed have
purchased this option, proceed.
Step 1 To enable the logging analysis option, first
press SETUP S.
Step 2 Now press d to highlight “Logging”.
Step 3 Press c (or r) to select this Setup option.
2/19/98
Log - Logging Sound Level Meter (Option 01)
6-1
Step 4 Next, press VIEW V to access the different
measurement viewing choices for the Log
option.
We have already seen and used the “SLM” and “Any
Data” View modes from the standard SSA setup. Let’s
now look at the “Current SLM” View.
Current SLM
Step 1 Press d to highlight the Current SLM selection.
In this display, you will see a graphic
time history of the measured sound
pressure, along with a “real-time”
digital numeric readout of the sound
pressure level. The associated setup
parameters (detector rate and
weighting), and run time are also
shown. It should be noted that “Current” means the data since the last
RESET R.
Step 2 Press c to accept this View choice. The “SLM
Current-a” screen is now active as is noted at
the top of the display.
If the 824 is not currently running, press RUN/STOP
s to start a measurement.
6-2
System 824 Training Manual
2/19/98
Step 3 The current data can be witnessed by performing a data reset. Press RESET R.
Notice that the run time clock is set to 00:00:00 and
restarts when the reset is performed.
The screen lists the date and time
when the current measurement
began, along with the current date
and time if the measurement is running (stop date and time if it is not
running), and the elapsed run time.
Step 4 Now press r to see the “SLM Current-b”
screen.
The “SLM Current-c” screen lists
the Lmax and Lmin values, and the
date and time when they occurred for
the current measurement.
Step 5 Press r to see the “SLM Current-c” screen.
The “SLM Current-d” screen lists
the A, C, and Flat weighted Peak
values along with the date and time
when they occurred for the current
measurement.
Step 6 Press r to see the “SLM Current-d” screen.
2/19/98
Log - Logging Sound Level Meter (Option 01)
6-3
Here we see the Leq and SEL values,
with the total run time for the current measurement.
Step 7 Press r to see the “SLM Current-e” screen.
Step 8 Press r to return to the “SLM Current-a”
screen.
Modifying the SLM Settings
This section applies to both the current and overall
SLM of the 824, since you cannot have independent
settings for each. To change the settings for the SLM,
you can either go to the SETUP menu by pressing S,
or you can take a shortcut from where you are now.
For this exercise, use the shortcut.
Step 1 From within the “SLM Current” window,
press c.
You are now viewing the SLM setting screen. From
here, you can modify the various parameters associ-
6-4
System 824 Training Manual
2/19/98
ated with the 824 Sound Level Meter functions. The
“Graph” settings operate the same as was shown earlier in the Simple Sound Analyzer (SSA) section.
Step 2 For review, first verify that “Graph” is highlighted.
Step 3 Now press c to activate the “Adjust Graph”
feature.
Step 4 The Scale and Level of the SLM time history
graphic can be adjusted now. Pressing l
and r controls the Scale settings. You can
expand or magnify the display by pressing
r. The left arrow l compresses the display. Press r
Step 5 Notice the expanded vertical scale. Pressing
the using u or d controls the level. This
moves the measurement up or down within
the display. Press u and d a few times to
2/19/98
Log - Logging Sound Level Meter (Option 01)
6-5
see the measurement move vertically within
the display. Using both the Scale and Level
adjustments lets you focus in on areas of
interest in the measurement. Press c to
return to the SLM Current-a screen.
Step 6 Press c to return to the “SLM Settings” window.
Step 7 Now press d to highlight “Settings”.
Step 8 Press the check key c to enter Settings menu.
6-6
System 824 Training Manual
2/19/98
The parameters that can be modified
here include: SLM Detector (Fast,
Slow), SLM Weighting (A,C, Flat),
Range (Normal, Low, High), Transducer (Condenser microphone, Electret microphone, and Direct), and
Peak Weighting (A, C, Flat),
Step 9 Press u or d to view the different parameters that can be changed for the current SLM
setup. For this exercise, press d until Pk
Weighting is highlighted.
Step 10 Press r to display the Pk Weighting menu.
You will be required to reset the overall measurement.
Step 11 With “Yes” highlighted, press c to perform
the reset.
2/19/98
Log - Logging Sound Level Meter (Option 01)
6-7
Step 12 Press u to highlight C. Then press the check
key c to select and exit.
Step 13 You will now be returned to the Settings
menu. Notice that C is now the current choice
for Peak Weighting.
Step 14 Press lto return to the SLM Settings menu.
We will look at the TWA settings when we cover the
Exposure features of the 824.
Step 15 Press l to exit the SLM Settings menu.
6-8
System 824 Training Manual
2/19/98
Stats
Displayed here are the current settings of the SPL exceedance thresholds, with the number of times that
these values have been surpassed
during the current measurement.
Step 1 Press u to move to the SLM Stats screens.
Immediately shown is the “SLM Stats-a”
screen.
These are the current settings of the
Peak I and I exceedance thresholds,
with the number of times that these
limits have been surpassed during
the current measurement.
Step 2 Press r to advance to the “SLM Stats-b”
screen.
Here we see the number of time that
the instrument has been overloaded
during the current measurement.
Note that overloads are caused when
the signal exceeds the capacity of the
824’s analog to digital converters.
They commonly occur when the
microphone is bumped against a
hard surface. Overloads render a
measurement invalid.
Step 3 Press r to advance to the “SLM Stats-c”
screen.
2/19/98
Log - Logging Sound Level Meter (Option 01)
6-9
Step 4 Press r to return to the “SLM Stats-a”
screen.
Modifying the STAT Settings
To change the settings for the Event (Exceedance)
Thresholds, you can either go to the SETUP menu by
pressing S , or you can take the shortcut from where
you are now. Let’s do the shortcut.
From this “Event Counting”
screen, you can modify the different
settings associated with the SLM
Stats screens for the SLM and Peak
detectors that you just viewed. These
are the values that if exceeded or surpassed, will be counted and shown.
You can set two exceedance levels for
the SPL detector, and two exceedance
levels for the Peak detector.
Step 1 From within the “SLM Stats” window, press
c.
Step 2 For this exercise, change the Peak 1 level.
Press d until “Pk-1 Excd Lvl” is highlighted.
6-10
System 824 Training Manual
2/19/98
Step 3 Press r to enter the “Pk-1 Excd Lvl” screen.
Step 4 The u and d arrow keys increment
through the exceedance level numbers, while
l and r toggles between the three
numeric fields. Once you have selected a
desired “Pk-1 Excd Lvl” value, press c.
The new “Pk-1 Excd Lvl” value now appears in the
associated field. Press l to exit the “Event Counting”
screen.
Ln Centiles
Ln Centiles (percentiles) represent the percent of time
that a sound pressure level exceeded a particular decibel value. An L50 with a value of 47.8 means that 50%
of the measurement time, the sound pressure level was
greater than 47.8 dB.
2/19/98
Log - Logging Sound Level Meter (Option 01)
6-11
Step 1 Press u to move to the SLM Ln-a screen.
Step 2 This screen contains the Ln statistical descriptors for the current measurement. Press r to
advance to the “Ln-b Centiles” display.
Here we see the graphic distribution of the entire Ln’s
(L1 thru L99). Use the u and d arrow keys move a
cursor across the graph. The value of the particular Ln
where the cursor resides is displayed.
Step 3 Press r to return to the “SLM Ln-a” display.
Modifying the Ln Settings
To change the values of the six Ln settings for the SLM,
you can again go to the SETUP menu by pressing S,
or you can take the shortcut from where you are currently. Once again, take the shortcut.
6-12
System 824 Training Manual
2/19/98
Step 1 From within the “SLM Ln” window, press c.
The “Graph” settings operate the same as was shown
earlier in the “SLM Current” section. We will skip that
feature now. Press d to highlight “Settings”.
Step 2 Then press r to enter to the “Ln” setting
screen.
Within this screen you can set the Start Level” (minimum dB level associated with the Percentiles graph),
and establish the values for the six Ln’s presented in
the “SLM Ln-a” table.
2/19/98
Log - Logging Sound Level Meter (Option 01)
6-13
Step 3 For this example, let’s modify the “Ln 3 Percent” field. Press d to highlight “Ln 3 Percent”.
Step 4 Press r to enter the “Ln 3 Percent” field.
Step 5 The u and d arrow keys increment
through the percentage numbers, while l
and r toggles between the different
numeric fields.
Step 6 Once you have selected a desired “Ln 3”
value, press c.
6-14
System 824 Training Manual
2/19/98
Step 7 The new “Ln 3” value now appears in the
associated field. Press l to exit the “Ln”
screen.
Step 8 Press l again to return to the “SLM Ln” display window.
Exposure
This screen shows the Dose and Projected Dose. The feature is used primarily when surveying workplace
noise exposure.
Step 1 Press u to move to the SLM Exposure-a
screen.
Here we see the dose expressed in SE
(Sound Exposure) in units of Pa2H.
Step 2 Press r to advance to the “SLM Exposureb” display.
2/19/98
Log - Logging Sound Level Meter (Option 01)
6-15
This screen displays a C minus A
measurement that is often used for
the evaluation of hearing protection.
This is a simultaneous measurement
and subtraction of the A-weighted
Leq from the C-weighted Leq.
Step 3 Press r to go to the “SLM Exposure-c” display.
Step 4 Press r to return to the “SLM Exposure-a”
display.
Modifying the Exposure Settings
To change the Exposure or dose parameters, you can
choose to go to the SETUP menu by pressing S, or
you can take the shortcut from where you are currently. Once again, take the shortcut.
Within the “Exposure” setting
menu, you can change the different
parameters associated with noise
exposure or noise dose measurements. These include the Overall
Exchange Rate, Overall Threshold
Level, Overall Criterion Level, and
the Criterion Time.
6-16
Step 1 From within the “SLM Exposure” window,
press c.
System 824 Training Manual
2/19/98
Step 2 For sake of exercise, let’s change the exchange
rate. Use u or d to highlight “Ovll
Exchange”.
Step 3 Press r to enter the “Ovll Exchange” window.
Step 4 The following warning will appear letting
you know that a measurement reset is
required if the exchange rate is going to be
altered.
Step 5 Press c to accept the reset. The “Ovll
Exchange” window will then be displayed.
2/19/98
Log - Logging Sound Level Meter (Option 01)
6-17
Step 6 Use u or d to highlight “5dB”.
Step 7 Then press c to activate this choice.
Step 8 This selection now appears in the “Exposure”
window. Press l to return to the “SLM
Exposure” screen.
Overall SLM
In this display, you will see a graphic
time history of the overall measured
sound pressure, along with a “realtime” digital numeric readout of the
sound pressure level. The associated
setup parameters (detector rate and
weighting), and run time are also
shown. It should be noted that
“Overall” is different from “Current”. Recall that “Current” shows
only the data since the last RESET
R. “Overall” is unaffected by a
RESET and is the accumulated data
from the original start of the measurement.
6-18
Step 1 Press u to move to the “SLM Overall.
System 824 Training Manual
2/19/98
This screen lists the date and time
when the overall measurement
began, along with the current date
and time if the measurement is running (stop date and time if it is not
running), and the elapsed run time.
Step 2 Press r to see the “SLM overall-b” screen.
The “SLM Overall-c” screen lists
the Lmax and Lmin values, and the
date and time when they occurred for
the overall measurement.
Step 3 Press r to see the “SLM Overall-c” screen.
The “SLM Overall-d” screen lists
the A, C, and Flat weighted Peak
values along with the date and time
when they occurred for the overall
measurement.
Step 4 Press r to see the “SLM Overall-d” screen.
Here we see the TWA and SEL values, with the total run time for the
overall measurement.
Step 5 Press r to see the “SLM Overall-e” screen.
2/19/98
Log - Logging Sound Level Meter (Option 01)
6-19
Step 6 Press r to return to the “SLM Overall-a”
screen.
Modifying the Overall SLM Settings
Changing the “Overall SLM” settings is identical to
changing the “Current SLM” settings. This is because
the Current and Overall SLM settings cannot be different. Since this was already covered in the Current SLM
write up, please refer back to that section.
Step 1 Press VIEW V to return to the View window.
You can see that we have already visited a number of
the Logging “Views” including “Current SLM”,
“Overall SLM”, “Exposure”, “Ln Centiles”, and
“Stats”. We accessed these by toggling the u and d
arrow keys while we were in the measurement display
(recall that we started with “SLM Current”). Let’s look
at the rest of them now.
6-20
System 824 Training Manual
2/19/98
Run Log
Step 1 Press d to highlight the “Run Log” View
selection.
The Run Log provides a record for
each 824 measurement run and stop.
In other words, it keeps a record of
every time the RUN/STOP key s
has been pressed since the last Overall RESET. It logs the date and time
of the RUN/STOP key press.
Step 2 Then press c (or r) to select “Run Log”.
This menu allows you to move to different places within the Run Log.
The choices are “Beginning”, “Ending”, and “Find”. “Beginning”
moves you to the first record in the
Run Log. “Ending” moves you to
the last record, and “Find” lets you
choose a Log record to recall and display.
Step 3 Press c to enter the “Log” search field.
Step 4 Select c to exit the “Log” menu.
2/19/98
Log - Logging Sound Level Meter (Option 01)
6-21
Step 5 Press VIEW V to return to the View window.
Time History
Time history function is used to store
only the value of the Leq and, if
desired, one additional user-selected
parameter such as Lpk or Lmax.
Data can be stored as fast as 32 samples per second.
Step 1 Press d to highlight the “Time History”
View option.
Before we view the Time History function, let’s first set
it up Press c to enter Time History
Modifying the Time History Settings
To change the Time History parameters, you can
choose to go to the SETUP menu by pressing S, or
you can take the shortcut from where you are currently.
6-22
System 824 Training Manual
2/19/98
The choices within the “Time History” menu include: “Beginning”,
“Ending”, “Find”, “Graph”, and
“Settings”. “Beginning” moves you
to the first Time History sample of
the active measurement. “Ending”
moves you to the last Time History
sample of the active measurement.
“Find” lets you choose a Time History sample to move to within the
Time History display. The “Graph”
settings operate the same as was
shown earlier in the “SLM Current”
section. You can control the graph
level and scale of the Time History
using this feature. “Settings” is the
area where you can modify the
parameters associated with acquiring the Time History measurement.
Step 1 From within the “SLM Time History” window, press c.
The choices here are: “Hist Enable”,
“Hist Period”, “Period Units”,
“Other Level”, and “Resolution”.
The “Hist Enable” activates or deactivates the Time History measurement function.
Step 3 Next, press c (or r) to enter the “Time History” settings menu.
2/19/98
As an exercise, we will set the 824 to gather a time history of the Leq in 10 second samples. We will also set
the instrument up so that the Lmax is acquired simultaneously.
Step 2 Press d to highlight “Settings”.
Log - Logging Sound Level Meter (Option 01)
6-23
Step 4 Press u or d to highlight “Hist Enable”.
Step 5 Now press c (or r) to enter the “Hist
Enable” screen.
Step 6 The choices are “Yes” or “No”. Use u or d
to highlight “Yes”. Then press c to enter
your choice.
“Hist Period” is used to establish the duration of each
Time History sample.
Step 7 Press u or d to highlight “Hist Period”.
6-24
System 824 Training Manual
2/19/98
Step 8 Press c (or r) to enter the “Hist Period”
screen.
The u and d arrow keys increment through the
Period Time values, while l and r toggles
between the different numeric fields.
Step 9 Let’s set the 824 to acquire 10 second time history samples. After you have entered 10 as
the desired “Hist Period”, press c to enter
this choice.
“Period Units” lets you select a multiplier that ultimately determines the duration between the Time History samples. This setting provides a lot of flexibility in
determining the Time History sample period.
Step 10 For our lesson, we will use 1.0 second units to
establish our 10 second time history sampling. Press u or d to highlight “Period
Units”.
2/19/98
Log - Logging Sound Level Meter (Option 01)
6-25
Step 11 Press c (or r) to enter the “Period Units”
menu.
The selections in the “Period Units” menu are “1/32s”,
“1s”, “10s”, and “60s”.
Step 12 Now press u or d to highlight the 1.0s
“Period Units” choice. Then press c to enter
the selection.
“Other Level” provides the capability of logging the
Time History of one additional measurement type,
along with the Leq. The choices include “none”, “Pk2”, “Pk-1”, “Lmax”, and “Advc”. Here.
Step 13 Let’s choose Lmax as our other measurement
to be logged. Press u or d to highlight
“Other Level”.
6-26
System 824 Training Manual
2/19/98
Step 14 Press c (or r) to enter the “Other Level”
screen.
Step 15 Use the u or d arrow keys to highlight
Lmax as the other level to be logged with the
Time History of the Leq. Then press c to
enter this selection.
“Resolution” lets you choose the dB resolution of the
Time History. The options are “0.1 dB” or “1.0 dB”.
Step 16 Let’s set the resolution to 1.0 for this example.
Press u or d to highlight “Resolution”.
2/19/98
Log - Logging Sound Level Meter (Option 01)
6-27
Step 17 Press c (or r) to enter the “Resolution”
menu.
Step 18 Press the u or d arrow keys to highlight
1.0 dB “Resolution” selection. Press c to
enter this choice.
Step 19 Now press l to exit the Time History “Settings” menu.
Step 20 Next, press l to return to the Time History
display. There is no data because the acquisition parameters have changed.
6-28
System 824 Training Manual
2/19/98
Viewing Time History Data
Step 1 Press s to initiate the measurement.
On the screen you will see a graph of
the Leq versus time. The display also
lists the value of the Leq (larger digital number), and the “other level”
(in this case Lmax) in smaller digits.
The time history period where the
cursor is currently at is shown at the
top left part of the screen. The current total number of time history
periods is shown on the right. The
graph updates when pressing any of
the arrow keys.
Step 2 After the measurement has run for a brief
duration (minute or so), press l or r (or
u or d ) to cycle through the time history
periods. The cursor will move to each time
history, and the associated information specific to the period is shown.
Step 3 Let’s disable the time history logging by
pressing c to access the Settings menu.
2/19/98
Log - Logging Sound Level Meter (Option 01)
6-29
Step 4 Press r to enter the Settings menu.
Step 5 Verify that “Hist Enable” is highlighted, then
press r to enter this selection menu. The
following warning screen will be shown.
Step 6 Press c to accept the reset.
Step 7 Now let’s disable the time history logging
feature. Press u to highlight “No”, then
press c to accept.
6-30
System 824 Training Manual
2/19/98
Step 8 Now press l to return to the Time History
“Settings” menu.
Step 9 Press l again to return to Time History
view.
Step 10 Push VIEW V to return to the View window.
Intervals
Intervals is very useful when monitoring noise levels for extended periods of time. An environmental noise
monitoring survey would be an
example of an application using the
Intervals feature. The following
parameters are automatically stored
to memory at user defined time that
may range from one second to 99
hours, fifty nine minutes and 59 seconds each: Leq, SEL, Lmax, Lmin,
LpkI, LpkI. Also, you may chose to
store six Ln levels, based on userdefined percentages, with each time
interval. This permits the user to
study the statistical distribution of
the noise as a function of time.
2/19/98
Step 1 Within VIEW, press u or d to highlight
“Intervals”.
For sake of exercise, we will configure the setting so
that we are gathering data in 1 minute intervals. Let’s
also arrange to have the Ln statistics logged with our
other interval data.
Log - Logging Sound Level Meter (Option 01)
6-31
Step 2 Now, press c to enter the Interval view
window.
Modifying the Interval Settings
To change the Interval parameters, you can choose to
go to the SETUP menu by pressing S, or you can take
the shortcut from where you are currently.
Step 1 From within the “SLM Interval” window,
press c.
Step 2 Press d to highlight “Settings”.
6-32
System 824 Training Manual
2/19/98
The choices here are: “Intv Enable”,
“Intv Period”, “Intv Time Sync”,
“Intv Save Ln’s”, “Intv Auto Stop”,
“Intv
Threshold,
and
“Intv
Exchange”. The “Intv Enable” activates or deactivates the Intv measurement function.
Step 3 Next, press c (or r) to enter the “Interval”
settings menu.
Step 4 Press u or d to highlight “Intv Enable”.
Step 5 Now press c (or r) to enter the “Intv
Enable” screen.
Step 6 The choices are “Yes” or “No”. Use u or d
to highlight “Yes”. Then press c to enter
your choice.
2/19/98
Log - Logging Sound Level Meter (Option 01)
6-33
Step 7 “Intv Period” is used to establish the duration
of each Interval sample. Press u or d to
highlight “Intv Period”.
Step 8 Press c (or r) to enter the “Intv Period”
screen.
The u and d arrow keys increment through the
Interval time values, while l and r toggles
between the different numeric fields (hh:mm:ss).
Step 9 Now enter our one minute interval choice by
selecting “00:01:00” After you have entered
this “Intv Period”, press c to enable this
selection.
6-34
System 824 Training Manual
2/19/98
“Intv Time Sync” enables or disables
the capability of synchronizing the
measurement interval with the 824’s
built-in clock. An example would be
if you wanted to have an interval
stored every hour, on the hour. The
synchronization time is dependent
on the Interval Period selected.
Step 10 Press u or d to highlight “Intv Time
Synch”.
Step 11 Now press c (or r) to enter the “Intv Time
Sync” screen.
Step 12 The choices are “Yes” or “No”. For this lesson,
we will choose “No”. Use u or d to highlight “No”, then push c to enter this choice.
The “Intv Save Ln’s” enables or disables the storage of Ln statistics with
each Interval. It uses the Ln values
that are established in the SLM settings of the 824.
2/19/98
Step 13 Press u or d to highlight “Intv Save Ln’s”.
Log - Logging Sound Level Meter (Option 01)
6-35
Step 14 Now press c (or r) to enter the “Intv Save
Ln’s” screen.
Step 15 The options are “Yes” or “No”. Use u or d
to highlight “Yes”. Then press c to enter this
choice.
“Intv Auto Stop” enables or disables
the feature of having the 824 stop
after each Interval is complete. The
next Interval will then begin only
when the RUN/STOP key s is
pushed.
Step 16 Press u or d to highlight “Intv Auto
Stop”.
Step 17 Now press c (or r) to enter the “Intv Auto
Stop” screen.
6-36
System 824 Training Manual
2/19/98
The choices are “Yes” or “No”. Use u or d to highlight your “No”.
Step 18 Then press c to enter this choice.
“Interval Threshold” lets you select
a threshold or level for calculating an
Interval TWA (Time Weighted Average). Only sound pressure levels
above the threshold will used in the
TWA computation.
Press u or d to highlight “Interval Threshold”.
Step 19 Press c (or r) to enter the “Interval
Threshold” menu.
The u and d arrow keys increment through the
Interval Threshold values, while l and r toggles
between the different numeric fields. For now, let’s
enter a threshold of “000”After you have chosen this
2/19/98
Log - Logging Sound Level Meter (Option 01)
6-37
“Interval Threshold”, press c to enter the selection.
“Interval Exchange” is used to select
the exchange rate used for calculating an Interval TWA (Time
Weighted Average). The choices are
“3dB”, “4dB”, “5dB”, and “6dB”.
Step 20 Press u or d to highlight “Interval
Exchange”.
Step 21 Press c (or r) to enter the “Interval
Exchange” menu.
Step 22 The u and d arrow keys increment
through the exchange rate choices. Let’s use a
3 dB exchange rate for now. Once you have
highlighted this preference, press c.
6-38
System 824 Training Manual
2/19/98
Step 23 Press l to return to the “Interval” settings
menu.
Step 24 Press l again to enter the “Interval” measurement screen.
Viewing Interval Data
This is the Interval-a screen. It
shows the Leq and SEL for the first
interval, along with the date and
time of the interval. The bottom of
the screen shows the duration of the
interval (in this case 1 minute). The
“1/” at the top of the display indicates the interval being displayed.
2/19/98
Step 1 Press RUN/STOP s to initiate the measurement. After the first interval is complete (60
seconds), a display similar to the following
will be shown.
Log - Logging Sound Level Meter (Option 01)
6-39
Here we see the Lmax and Lmin for
the first interval.
Step 2 In this case, it is the 1st interval. Press r to
advance to the “Interval-b” screen.
This display shows the Lpeak1 and
Lpeak2 for the first interval.
Step 3 Press r to advance to the “Interval-c”
screen.
This screen summarizes the number
of times that the SPL and Peak
thresholds were exceeded during the
interval, along with the number of
overloads that occurred.
Step 4 Press r to advance to the “Interval-d”
screen.
Here we see the six Ln statistical
descriptors for the first interval.
Step 5 Press r to advance to the “Interval-e”
screen.
6-40
System 824 Training Manual
2/19/98
In the upper right part of the display
(to the right of 1/) you can see the
number of one minute intervals that
have occurred since the measurement was initiated.
Step 6 Press r to return to the “Interval-a” screen.
Step 7 You can view the other interval data by pressing d.
Notice that a new interval number appears at the top
of the screen (2/). You can view all of the interval data
by pressing d to advance through each time interval,
and l or r to view the data associated with each
interval. When you are finished examining the data,
press VIEW V to get back to the View menu.
Exceedance History
Step 1 Press d to highlight “Excd History”.
The Exceedance History is useful feature that, when
enabled, will trigger the 824 when the sound level goes
above a predetermined threshold (set by the user). The
2/19/98
Log - Logging Sound Level Meter (Option 01)
6-41
Model 824 records the time, date, duration, and a time
history of the sound with each exceedance.
Step 2 Press c to enter the “Excd History” View
screen
Modifying the Exceedance History Settings
To change the Exceedance History parameters, you can
choose to go to the SETUP menu by pressing S, or
you can take the shortcut from where you are currently.
The choices within the “View Excd”
menu include: “Time History”,
“Beginning”, “Ending”, “Find”,
and “Settings”. “Time History” lets
you view Time History graphs
(event vs. time) of the exceedance
events. “Beginning” moves you to
the first Exceedance record of the
active measurement. “Ending”
moves you to the last Exceedance
record of the active measurement.
“Find” lets you choose an Exceedance record to move to within the
active measurement “Settings” is
the area where you can modify the
parameters associated with acquiring the Exceedance records.
6-42
Step 1 From within the “Excd ” window, press c.
Step 2 Press d to highlight “Settings”
System 824 Training Manual
2/19/98
Step 3 Press the rto enter the “Excd Settings”
menu.
This menu lets you to set an exceedance threshold level. When the 824
measures a level that surpasses the
established threshold level, it will log
the exceedance history. Included
with the exceedance history is Leq,
SEL, Lmax, Peak, a graph of the Leq
during the event, and the time, date,
and duration of the exceedance. The
824 can trigger off of an SPL (rms)
level or a Peak level. A common setting is to establish the “SPL Excd
Lvl 1” parameter to act as the trigger
level. We will do that in this exercise,
setting the value to 85 dB.
Step 4 Press the u or d to highlight the “Triggering”, then press the c.
Step 5 Press u or dto highlight “SPL Excd Lvl 1”
and the press c to enter the “SPL Excd Lvl 1”
field.
The u and d arrow keys increment through the
SPL exceedance level values, while l and r toggles between the different numeric fields.
2/19/98
Log - Logging Sound Level Meter (Option 01)
6-43
Step 6 Let’s enter a level of “085 dB”. After you have
chosen this “SPL Excd Lvl 1”, press c to
enter the selection.
You can set the other three exceedance level parameters (SPL Excd Lvl 2, Pk-1 Excd Lvl, and Pk-2 Excd Lvl)
in the same fashion. For this exercise, we will ignore
them.
“Hysteresis” is used to establish the
end of an exceedance event. It is the
value, in dB, that must drop below
the exceedance level to signify the
end of the event. For example, if we
consider our established “SPL Excd
Lvl 1”, a hysteresis value of 5 would
mean that during an exceedance
event, if the SPL level drops below
80 dB (SPL Excd Lvl 1 minus Hysteresis), the 824 will stop gathering
data, and re-arm its trigger for the
next exceedance event.
6-44
Step 7 Press d to highlight “Hysteresis”.
Step 8 Let’s set the “Hysteresis” to 5. Press r to
enter the “Hysteresis” window.
System 824 Training Manual
2/19/98
Step 9 Use u to increment the hysteresis value to 5
dB, then press c to enter this choice.
Step 10 Press the lto return to the “Excd Settings”
menu. Press u or d to highlight “Excd
Enable”.
Step 11 “Excd Enable” activates or deactivates the
exceedance gathering feature. Let’s go ahead
and enable it. Press c to enter this screen.
Step 12 Use u or d to highlight “Yes”. Then press
c to activate this selection.
2/19/98
Log - Logging Sound Level Meter (Option 01)
6-45
This menu item defines the minimum time period that the SPL level
must be above the established threshold level before it will register it as
an exceedance. With the “Excd
Threshold” set to 85dB and if we
establish a “Min Duration” of 5 seconds, the 824 will log an exceedance,
in the exceedance history, when the
SPL level is above 85dB for a time
period at least 5 seconds long. Let’s
set the “Min Duration” to 5 seconds.
Step 13 Now, press u or d to highlight “Min
Duration”.
Step 14 Press c to enter the “Min Duration” menu.
Step 15 Use u and d increment through “Min
Duration” values. l and r toggles
between the three numeric fields. Enter 5 seconds. Then press c.
Step 16 Next, push u and d to highlight “Excd
Time-Hist”. With this menu item set to “Yes”,
a time history of the event will be saved when
6-46
System 824 Training Manual
2/19/98
an exceedance event occurs. Let’s set this field
to “Yes”.
Step 17 Press c to enter the “Excd Time-Hist” menu.
Step 18 Now use u or d to select “Yes”. Then
press c to accept this choice.
Step 19 Press u and d to highlight “T.H. Period”.
This menu establishes the sampling rate for
time history data acquired during the exceedance event.
2/19/98
Log - Logging Sound Level Meter (Option 01)
6-47
The number entered in this field will
be divided by 32. For example, a
value of 1 will result in a time history sample period of 1/32 seconds
(32 times per second). A value of 32
will yield a 1 second sample period.
Step 20 Press c to enter the “T.H. Period” menu.
Step 21 For this exercise, let’s enter 32 to establish a 1
second period. Use u and d increment
through “T.H. Period” values. l and r
toggles between the three numeric fields.
Enter 32. Then press c.
Here you can choose between
“Level” or “Passby” as a means of
triggering the exceedance data capture. Passby incorporates the 10 dB
down-points in the exceedance
acquisition. (see user manual for
details on Passby).
Step 22 Press u and d to highlight “Excd Trigger”.
Step 23 Press c to enter the Excd Trigger menu.
6-48
System 824 Training Manual
2/19/98
Step 24 For this example, we will use “Level”. Press
u or d to highlight “Level”. Then, press
c to activate this selection.
Step 25 Now, press u or d to highlight “Excd
Time”.
Step 26 Then, press c to enter the “Excd Time”
menu.
Here you establish the criteria for
where the exceedance time occurred.
“Start” logs the exceedance time as
the moment when the sound level
crossed the predefined exceedance
level. “Max” logs the exceedance
time at the point where the maximum sound level occurs during the
exceedance event.
2/19/98
Step 27 Use u or d to highlight “Start”. Then,
press c to activate this selection.
Log - Logging Sound Level Meter (Option 01)
6-49
Step 28 Press lto exit the “Excd History” menu.
Step 29 Now press l again to return to Excd view.
Viewing Exceedance History Data
Here you will note a number of
things. First, the Leq and SEL of the
event are shown. In addition, the
date and time of when the exceedance
event started are logged. At the bottom of the screen, the total duration
of the exceedance event is listed.
6-50
Step 1 Press s to start the measurement. Make
enough noise (whistle or whatever) to exceed
the 85 dB exceedance trigger level and initiate
the gathering of exceedance history data. You
should see a “Excd-a” screen similar to the
one below.
System 824 Training Manual
2/19/98
This display shows the Peak 1, Peak
2, and Lmax values for the exceedance event.
Step 2 Press r to advance to the “Excd-b” screen.
Step 3 Press l or r to return to the “Excd-a”
screen.
Again, the Leq and SEL of the event,
and the time and date of the start are
logged. Notice the “2/” label at the
top of the screen. This indicates that
you are looking at the 2nd exceedance
event.
Step 4 Go ahead and create another noise event to
initiate one more exceedance event. Once that
is done, press d to view the data from this
event.
Step 5 Press c to enter the “View Excd” menu.
2/19/98
Log - Logging Sound Level Meter (Option 01)
6-51
Step 6 Now, verify that “Time History” is highlighted, then press c.
The larger number on the screen is
the sound pressure level at the location of the cursor. Just below is a
value that indicates the number of
samples (with respect to the cursor
location) before (or after) the maximum SPL of the event.
Step 7 Here we see a graph of the time history event.
Press r to advance the cursor across the
graph.
Step 8 Press c to return to the “View Excd” menu.
The other choices within the “View Excd” menu
include: “Beginning”, “Ending”, “Find”, and “Graph”.
“Beginning” moves you to the first exceedance time
history record. “Ending” moves you to the last exceedance time history record. “Find” lets you select the
number of the exceedance time history record that you
wish to advance to. The “Graph” settings operate the
same as was shown earlier in the “SLM Current” section. You can control the graph level and scale of the
Exceedance Time History using this feature. “Settings”
is the area where you can modify the parameters asso-
6-52
System 824 Training Manual
2/19/98
ciated with acquiring the Exceedance Time History
measurement.
Spectra Intervals
The Log option also adds the very useful feature of
automatically collecting 1/3 or 1/1 octave band spectra over time to the Simple Sound Analyzer (SSA). You
can capture and store data as fast as 1 spectrum per
second. Let’s activate this feature now.
Step 1 Press S to enter the setup menu.
Step 2 To select the SSA measurement setup, press
d to highlight “SLM&RTA SSA”
Step 3 Press c to select this setup
2/19/98
Log - Logging Sound Level Meter (Option 01)
6-53
Step 4 Next, press the c to enter the Interval setup
menu area.
Step 5 Next, press d to highlight “Settings”
Step 6 Press c to enter Interval “Settings”.
Step 7 Press d to highlight “Settings.
6-54
System 824 Training Manual
2/19/98
Step 8 Next, press c (or r) to enter the “Interval”
settings menu.
Step 9 Now press c (or r) to enter the “Intv
Enable” screen.
Step 10 The choices are “Yes” or “No”. Use u or d
to highlight “Yes”. Then press c to enter
your choice.
Step 11 “Intv Period” is used to establish the duration
of each Interval sample. Press u or d to
highlight “Intv Period”.
2/19/98
Log - Logging Sound Level Meter (Option 01)
6-55
Step 12 Press c (or r) to enter the “Intv Period”
screen.
The u and d arrow keys increment through the
Interval time values, while l and r toggles
between the different numeric fields (hh:mm:ss).
Step 13 Now enter a ten second interval choice by
selecting “00:00:10”.
Step 14 Press c (or r) to enter the “Intv Period”
screen.
Step 15 The l twice to exit Interval Settings.
6-56
System 824 Training Manual
2/19/98
Viewing Spectra Intervals
After you have enabled the Interval setup parameters,
press VEIW V to access the Simple Sound Analyzer
(SSA) View menu
Step 1 Press d to highlight “Leq Spectra”.
Step 2 Press c to activate this View selection.
2/19/98
Log - Logging Sound Level Meter (Option 01)
6-57
Here you see the Leq (average) spectrum for an interval. The 824 will
continue to log spectra (every 10 seconds).
Step 3 Now press RUN/STOP s to begin the measurement. The first Interval spectrum will
appear after 10 seconds.
As you increment through the
logged spectra, you can see the interval number above the large Leq value
at the top, left part of the screen. Use
l or r to move the cursor across
the frequencies.
Step 4 To look at other logged spectra, press d to
increment through the 10 second Leq’s.
Step 5 Now let’s look at the Max spectra for each
interval. Press View V to return to the View
screen
Step 6 Press d until you have highlighted the
“RTA MAX” selection.
6-58
System 824 Training Manual
2/19/98
The Max spectra is the frequency
spectrum that contains the largest
amount of acoustic energy that
occurred during the measurement
interval. As you increment through
the logged Max spectra, you can see
the interval number at the top, left
part of the screen. Use l or r to
move the cursor across the frequencies.
Step 7 Press c to view the Interval Max spectra
.
You can see the other logged Max spectra by pressing
the u and d arrow keys.
2/19/98
Log - Logging Sound Level Meter (Option 01)
6-59
6-60
System 824 Training Manual
2/19/98
Index
Numerics
1/1 octave 3-13
A
About
screens 5-2
Adjust Graph 6-5
Any Data 3-1
Any Level 3-2
Auto-Off Time 5-27 to 5-28
B
Backlight 1-3
Backlight Time 5-30
Bandwidth 3-11
Battery 5-32
power 1-2
Baud Rate 5-35
C
Calibration 5-5
Cal Level 5-10
change 5-7
check 5-6
Calibrator 5-8
Charge Mode 5-33
Clock
824 internal 5-11
Clock/Timer 5-11
Timer mode 5-12, 5-16
Current SLM 6-2
Cursor 3-7
D
Data
files 4-3
key 4-1
store 4-1
Detector rate 2-9
Dose 6-15
parameters 6-16
E
EEPROM registers 5-23
Event Counting 6-10
Exceedance History 6-41
2/26/98
viewing 6-50
Exceedance Levels 6-10
Exceedance Threshold 6-43
Exchange Rate 6-17
External Battery 5-33
External Power 5-32
F
Files
Data 4-3
Flow Control 5-37
Frequency
weighting field 2-9
H
High Range 5-9
Hysteresis 6-44
I
ID screen 1-2
Impulse 3-6
Impulse detector 3-6
Interval Exchange 6-38
Interval Threshold 6-37
Intervals
interval exchange 6-38
Intv Auto Stop 6-36
Intv Period 6-34
Intv Save Ln’s 6-35
Intv Time Synch 6-35
settings 6-31
spectra 6-53
threshold 6-37
view spectra 6-57
viewing interval data 6-39
Intv Auto Stop 6-36
Intv Period 6-34
Intv Save Ln’s 6-35
Intv Time Synch 6-35
K
Key
On/Off 1-2
Keys
arrow 1-5
Index-1
check 1-5
DATA 4-1
Data 1-4
PAUSE 1-4
PRINT 1-4
RESET 1-4
RUN/STOP 1-4
SETUP 1-4, 2-1
TOOLS 1-4, 5-1
VIEW 1-4, 3-1
L
LCD Contrast 5-31
Leq spectrum 3-14
Lmax 6-19
Lmin 6-19
Lock 5-24
Log
Logging SLM 6-1
M
Max spectra 6-58 to 6-59
Max spectrum 3-14
Memory 5-22
EEPROM registers 5-23
O
On/Off 1-2
Overall SLM
settings 6-20
P
Passby 6-48
Peak Weighting
Pk Weighting setting 6-8
Pk Weighting 6-7
Power 5-26
Auto-Off Time 5-27 to 5-28
Backlight Time 5-30
battery 5-32
charge mode 5-33
external battery 5-33
External Power 5-32
LCD Contrast 5-31
Power Off Mode 5-27
Standby Time 5-28
Power Monitor 5-25
Power Off Mode 5-27
Index-2
Projected Dose 6-15
R
RTA
data 3-6
settings 3-11
RTA Live 3-7
Run Log 6-21
S
screen
contrast 1-3
Screens
About 5-2
SEL 6-19
Serial Address 5-36
Serial Communication
baud rate 5-35
flow control 5-37
serial address 5-36
serial communication 5-35
Settings
RTA 3-11
Simple Sound Analyzer
see SSA 2-1
SLM
functions 2-11
settings 6-6
SLM Settings 6-6
SLM Stats 6-9
Sound Exposure 6-15
Spectra Intervals 6-53
Spectrum 3-9
SSA 2-1
Standby Time 5-28
statistical descriptors 6-12
Store
data 4-1
T
Tabular 3-8
Taktmaximal 3-2
Time History 6-22
periods 6-29
settings 6-28
Timer Mode 5-12, 5-16
Titles
System 824 Training Manual
2/26/98
user 5-3
Tools
key 5-1
Lock 5-24
memory 5-22
Power Monitor 5-25
TWA 6-19
U
User
titles 5-3
User interface 1-3
V
View
Any Data 3-1
Current SLM 6-2
Spectra Intervals 6-57
Viewing
Exceedance History 6-50
Viewing Interval Data 6-39
2/26/98
Index-3