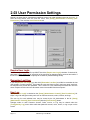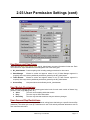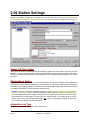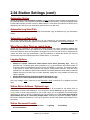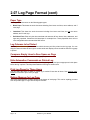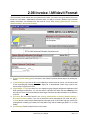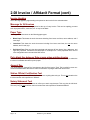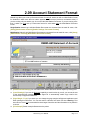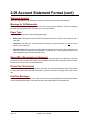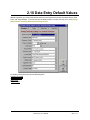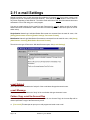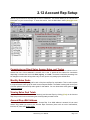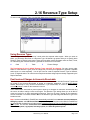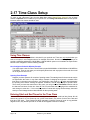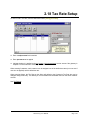
1
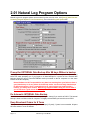
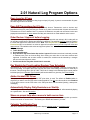
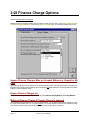
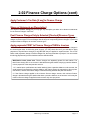
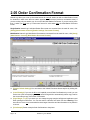
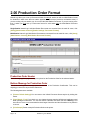
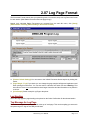
Chapter 2 - Natural Log SetUp Setup allows you to create and maintain various station and system information and formatting. To access the Setup section of Natural Log, from the Main Menu select [Setup]. Administrator Controls Under this menu you may: Set program options such as data backup prompts, how long to save data, and Finance Charge options. See sections 2.01 and 2.02 of this manual. Setup and control users and their passwords and permissions. See section 2.03 of this manual. Setup stations, including formatting of documents such as invoices and statements for each individual station as well as the "Multi-Station" documents. See sections 2.05 through 2.09 of this manual Set default values for new Customer and Order entry screens. See section 2.10 of this manual. Other Program Settings Setup Account Rep [salesmen] data and sales goals. See section 2.12 of this manual. Setup Agencies to make data entry easier when many new sponsor are entered for the same agency. See section 2.13 of this manual. Setup Avail-Types to restrict avail usage for sponsorships and other specialized avails. See section 2.14 of this manual. Define Product-Code protections. See section 2.15 of this manual. Define Revenue Types (such as Cash, Trade, etc.) and how they are handled by the Natural Log system. See section 2.16 of this manual. Define Time-Classes only for the few instances when they are needed. See detailed discussion before creating Time-Classes. See section 2.17 of this manual. Define Tax-Rates to be applied to your customers' purchases. See section 2.18 of this manual. The above subjects are addressed in detail on the following pages. Natural Log User Manual Page 2-1 2.01 Natural Log Program Options Natural Log's main program options are accessed from the main NL menu, click [Setup] [Administrator Controls] [Program Options / User Permissions]. Then click the Program Options tab. Prompt for EXTERNAL Data Backup After ## days Without a backup It is highly recommended you do DAILY external data backups, but this allows you to decide how long before NL starts prompting you if you forget to do data backups for a period of time. External data backups should be done to some EXTERNAL media (not saved on the NL computer or in the same location as the NL computer). Natural Software is NOT responsible for any data loss resulting from your failure to have a good data backup or for any failure of the backup media. You must do daily data backups to different locations / discs / removable drives in case you have any problem with a backup, you always have another. Natural Log support CANNOT help you recover data if you do not have a good recent data backup! Do Automatic INTERNAL Data Backup NL will do an automatic INTERNAL data backup (during NL startup) if you set this to DAILY. This internal backup is done to a folder on the NL computer. It is highly recommended you leave this set to DAILY Keep Broadcast Orders for # Years This option allows you to specify how long orders are kept [2-5 years]. 5 years is recommended. 99 years will cause orders to never be deleted. Page 2-2 Natural Log User Manual 2.01 Natural Log Program Options Keep Logs for # Years This option allows you to specify how long Logs are kept [2-5 years]. 2 years is recommended. 99 years will cause logs to never be deleted. Keep A/R Transactions for # Years This option allows you to specify how long individual Account Transactions such as invoices and payments are kept [2-5 years] after they are zeroed out. 5 years is recommended. 99 years will cause AR Transactions to never be deleted. Note: To preserve AR balances, non-paid and non-zeroed invoice and prepayment transactions are never deleted until they are zeroed out no matter what this value is set to. Order Review / Approval before Logging This option allows you to permit Account Reps [salesmen] to enter their own orders in NL, but they will not run until the required level of Review and Approval is obtained. The specified UserType must be logged in to review and approve the order before it runs. Note: If the Require User LogIn checkbox (on the User Permissions tab) is not checked, no review or approval is required even if you set a required review and approval here! The available order review and approval options are: Sales Manager Traffic Director Accounting Manager Only Reviewer may revise Order after review / approval If at least one review is selected, prevents a restricted user [such as Account Rep] from revising an order after it has been reviewed and approved. If checked, and an order revision is needed, the revision must be entered by a usertype that can review and approve orders. Prohibit new Order entry after Credit Limit is exceeded Day Weights for Front-Loading Random-Type Schedules Most stations do not use Front-Loading so these should be set to NORMAL. However for those that do use Front-Loading , this option allows you to specify how much front-loading can be done for each day of the week. This can range from -90% to +90%. This is the % change in the likelihood (from normal) that an individual spot (from a Random-Type Schedule) will be scheduled on a given day. See Front-Loading. Adobe Acrobat PDF Driver This option allows you to specify if NL8's PDF print driver is used. The default is Enabled which is required if you want to use the PDF writer included with NL8. The only time this would be set to Disabled is if you don't want to use the PDF writer or the PDF print driver can't be loaded [causing startup error messages]. Automatically Display Daily Reminders on StartUp NL allows you to set reminders for the NL system or individual customers that NL will automatically display on a specific date. Also see Reminders Show on-screen help when mouse is held over an item Windows has "Tool Tips" which can pop up on screen to give you context-sensitive help when you rest the mouse over certain on-screen items. This allows you to disable this feature if you want. Calendar Tool Display Type NL8 has a calendar tool that can be configured to display calendar month or broadcast month. Natural Log User Manual Page 2-3 2.02 Finance Charge Options Also see assessing finance charges Natural Log's main program options are accessed from the main NL menu, click [Setup] [Administrator Controls] [Program Options]. Then click the Finance Charges tab. The following options may be set: Impose Finance Charges After an Account Balance is Unpaid for ## Days The default is 30 days but you may set it for any time period you like. This will cause finance charges to be imposed if the customer has a balance due over ## days and that customer's account specifies a Finance Charge %. (See Customer entry) Impose Finance Charges on... The default is Average Daily Balance or you may select Minimum Daily Balance or Ending Balance. Minimum Finance Charge If Finance Charge is Imposed The default is 0.00 but may be set to any currency amount. This is useful if you want to charge a flat late fee such as $25 rather than a %. You still must put a % on the customer accounts (see Customer entry) so some late charge is due, then NL will set it to this currency amount as a minimum. Page 2-4 Natural Log User Manual 2.02 Finance Charge Options (cont) Apply Customer's Tax Rate [if any] to Finance Charge The default is unchecked. Show on Statements as [Description] The default is Finance Charge but you may type any description you desire to be shown on statements for the Finance Charges / Late Fees. Post Finance Charges Only to Selected [Checked] Revenue Types. This allows you to exclude late fees on Trades or other Revenue Types. Note that posting finance charges to revenue type F-Finance Charges has the effect of compounding finance charges. If you do not compound finance charges, do not check revenue type F. Apply payments FIRST to Finance Charges THEN to Invoices The default value is unchecked which causes NL8 to apply payments to invoices and finance charges in the chronological order in which they were incurred. You may check this box if you want NL8 to apply payments to unpaid finance charges [if any] BEFORE they are applied to unpaid invoices. This is how banks credit payments, always to finance charges first, then any remainder to principal. You can override this during payment entry but this checkbox sets the default method. Multi-Station users please note: Finance charges are separately posted for each station. The total finance charge due on an account is allocated among the stations carrying a past-due balance in their proportion of the total past-due amount. 1. If 1 station has a credit balance and other station(s) have a past-due balance on the account, the credit balance first offsets the past-due balance, the finance charge is assessed on this net pastdue balance, and this net finance charge is allocated among stations with past-due balance. 2. If the finance charge applied is the minimum finance charge amount, this minimum finance charge is allocated among the stations that have a past-due balance on the account. In this way the minimum finance charge is applied to each account only once per period. Natural Log User Manual Page 2-5 2.03 User Permission Settings Natural Log allows the NL_Administrator significant control over what individual users can do in NL. To enter the User section, from the main NL menu, click [Setup] [Administrator Controls] [User Permissions]. Then click the Users/Passwords tab. Require User LogIn To have user permissions in effect you MUST check the [Require user LogIn] checkbox. If checked, NL also keeps a User Activity Log of any activity of the user such as changes made to accounts and orders. If this box is unchecked, NL does not prompt for a UserID or password during startup. Remember Last User If you click[Require user LogIn], you also click [Remember Last User] to tell NL8 to remember the last user logged in on each computer. This means the user won't have to type in their user name each time, but they still must provide their password. This is useful for a user who always accesses NL8 from the same computer and who does not allow other users to access NL8 from that computer. User Log If [Require user LogIn] is checked on the [Setup] [Administrator Controls] [User Permissions], NL keeps a log of all changes made by each user to customer accounts, orders, invoices, and logs. The user log for each individual user may be viewed by the NL_Administrator in the NL [Setup] [Administrator Controls] [User Permissions] with the [View UserLog] button. Changes made on each Customer Account, Order, Invoice, or Log may be viewed under the [Tools][Activity Log] menu choice while that particular account, order, invoice, or log is open on the screen. Page 2-6 Natural Log User Manual 2.03 User Permission Settings (cont) UserNames and UserTypes When you click [New User] or [Edit User], the NL_Administrator can enter information for that user. Each use must have a unique UserName and be assigned to one of the UserTypes. NL_Administrator Can do anything in NL including setting permissions for other users. Sales Manager Allowed to review and approve orders for air (if Sales Manager approval is required). Also may have any additional permissions granted by the NL_Administrator. Traffic Director Allowed to review and approve orders for air (if Traffic Director approval is required). Also may have any additional permissions granted by the NL_Administrator. Account Rep User permissions are defined by the NL_Administrator. User Module Permissions Each user may assigned any of the following permission levels for each main module of Natural Log (such as Traffic, Logs, Billing, A/R, etc.) Allow The user can do anything within that module. Deny The user may not enter that module. Read-Only The user may view that module but may not make any changes. User Account Rep Restrictions The user may be restricted to viewing (and if allowed, editing) items that belong to a specific Account Rep (salesman). This allows you to set up a salesman as a user in NL and only allow that salesman to see his own customers and orders. Natural Log User Manual Page 2-7 2.04 Station Settings Natural Log's Station Settings are accessed from the main NL menu, click [Setup] [Administrator Controls] [Station Settings / Document Formats]. The screen that is then displayed will allow you to set up and edit Station information: Station Call Sign / Name This is how the station is identified within the Natural log system and each station must have a unique identifier. You may rename the station at any time without affecting anything already entered in NL but you will have to manually modify the station return address on the NL station document settings if you rename the station. Deactivating a Station You can't delete any station that has 1 or more transactions in the Natural Log system. These transactions may include Customer Account assignments, running Orders, or any billing or collection items assigned to this Station. This deletion prohibition maintains the referential database integrity and assures that all items are properly accounted for in the historical accounting records. Solution: Instead of deleting a discontinued station, in [SetUp] [Administrator Controls][Station Settings / Document Formats], select the discontinued station and click [File][De-Activate Station] from the dropdown menu after you have ended any running orders and zeroed out any open Accounts Receivable items for that station. This will cause the InActive station to no longer show up on any menus, however its Accounts Receivable history will show up on billing history reports on which you do not restrict the stations included in the report. Automation Log Type This is the type of automation log NL must create (if any). Page 2-8 Natural Log User Manual 2.04 Station Settings (cont) Automation Station This is not used for most automation systems, but may be used to uniquely identify the automation log for a particular station. For example the NL8 automation log for BSI Simian™ is named mmddyyT# where # is the station number you enter in this box. RDS Phantom™ uses AM or FM in this box. If this box is not displayed by NL8, the log for your automation system does not use this entry. Automation Log Send Path This is the location where NL needs to send the Automation Logs as determined by your automation vendor. Automation Log Read Path This is the location where NL can read the "air log" returned by your automation system for Log Reconciliation. Not all automation systems are supported for reconciliation. See Automation Systems. When Reconciling Play-Log, match items... Natural Log can reconcile its log against the actual play-log from some automation systems [see Reconciling Automation Play Log in section 6.06 of this manual]. The value you set here tells NL how much time difference there can be between the logged time for an item and the time it played and still "match" the items in the log reconcilication. If the time difference is outside this window, NL does not reconcile and record the runtime for that item. Default value is +/- 60 minutes. Logging Options You can tell NL if you want to: Attempt to equalize commercial loads between hours when generating logs. NL8's log generator has 2 conflicting goals when generating a log: [1] good horizontal and vertical rotation of customer's spots into all allowed hours and [2] even spot loading in each hour. This setting tells NL8 to give priority to equally filling log hours over trying to equally rotate customers' spots into every possible hour. All customer's spots will run within the time window ordered and will rotate into different dayparts and hours but they may not rotate absolutely equally into every possible hour when this option is selected. Prohibit Same Announcer Voice back-to-Back this stations' Logs Prohibit Live or Call-In Spots back-to-Back on this station's Logs See Copy manager voice in section 4.01 and Description / Note in section 3.07 to designate live/call-in spots. Station Return Address / Optional Logo This is the address to be printed as the return address on all documents for this station such as Confirmations, Invoices, and Statements. You can add an optional small logo by right clicking on the [Logo] button or in the Logo picturebox. If you do add a logo, you are responsible for assuring proper dimensions. NL does not shrink or expand the logo, NL just prints it as-is. The printed logo should be approximately the size of a first class postage stamp. Generally any Windows-compatible graphics file format is supported (bitmap etc.) The Logo is printed to the left of the station return address on the documents. Station Document Formats Order Confirmation Account Statement Production Order LogSetup Natural Log User Manual InvoiceSetup Page 2-9 2.05 Order Confirmation Format Natural Log allows you to set up document formats for each NL station as well as a Multi-Station format for situations in which more than one station appears on a Document (such as a multi-station order). If you are running only one station you do not need the Multi-Station Documents. If you are running more than 1 station you must set up a Document format for each station plus the Multi-Station Document format. Single Station Natural Log's individual Station Documents are accessed from the main NL menu, click [Setup] [Administrator Controls] [Station Settings / Document Formats]. Multi-Station Natural Log's Multi-Station Documents are accessed from the main NL menu, click [Setup] [Administrator Controls] [Multi-Station Document Formats]. [Restore Default Settings] You can return to the 'default' Document format anytime by clicking this button. [e-mail Settings] If you use the NL e-mail capability to send Order Confirmations by e-mail, you can set the text of the accompanying message as well as signal NL to automatically carbon copy e-mail to the Account Rep a copy of the Order Confirmation. [Page Margin / Font] If you desire you can change the page margins left/right and top/bottom used when printing this Document. You can also select a different font and/or font size. Warning: Font sizes above 12 are not recommended because larger fonts allow too little information to be printed in a column. [Print Sample] Sends a sample Order Confirmation to the printer. Page 2-10 Natural Log User Manual 2.05 Order Confirmation Format Order Confirmation Heading This is the large typeface page heading to be printed on the Order Confirmation for the selected station. Paper Type You may print this document on the following paper types. Blank Paper Draws the entire document including form boxes and lines, return address, and if used, logo Letterhead Same as Blank Paper, but does not draw the return address, and if used, logo. PrePrinted Form Prints only the document data and assumes all form boxes, lines, addresses, and logos are preprinted. Contact the NL8 developer for a sample form. These preprinted forms are not user-configurable and must match the NL8 format. Compute Projected Billing for Order Confirmation based on The Order Confirmation includes a table showing projected billing. You can have NL8 display this projected billing as Gross, Net, Gross+Tax, or Net+Tax. If you select one of the +Tax options to display the projected billing on the confirmation, tax will only be included in the projected billing total if the order calls for tax to be assessed. Bottom Message for Order Confirmation This is the small typeface message printed at the end of the Order Confirmation. This can be anything you want such as contract language or verification language. Natural Log User Manual Page 2-11 2.06 Production Order Format Natural Log allows you to set up Document formats for each NL station as well as a Multi-Station format for situations in which more than one station appears on a Document (such as a multi-station order). If you are running only one station you do not need the Multi-Station Documents. If you are running more than 1 station you must set up a Document format for each station plus the Multi-Station Document format. Single Station Natural Log's individual Station Documents are accessed from the main NL menu, click [Setup] [Administrator Controls] [Station Settings / Document Formats]. Multi-Station Natural Log's Multi-Station Documents are accessed from the main NL menu, click [Setup] [Administrator Controls] [Multi-Station Document Formats]. Production Order Header This is the large typeface page heading to be printed on the Production Order for the selected station. Bottom Message for Production Order This is the small typeface message printed at the end of the Production Confirmation. This can be anything you want such as production instructions. The following buttons are available: [Restore Default Settings] You can return to the 'default' Document format anytime by clicking this button. [Page Margin / Font] If you desire you can change the page margins left/right and top/bottom used when printing this Document. You can also select a different font and/or font size. Warning: Font sizes above 12 are not recommended because larger fonts allow too little information to be printed in a column. [Print Sample] Sends a sample Production Order to the printer. Page 2-12 Natural Log User Manual 2.07 Log Page Format This Document Format controls how your printed log looks. You need to set up one Log Document format for each station. (Multi-Station Document does not apply to logs.) Natural Log's individual Station Documents are accessed from the main NL menu, click [Setup] [Administrator Controls] [Station Settings / Document Formats]. [Restore Default Settings] You can return to the 'default' Document format anytime by clicking this button. [Page Margin / Font] If you desire you can change the page margins left/right and top/bottom used when printing this Document. You can also select a different font and/or font size. Warning: Font sizes above 12 are not recommended because larger fonts allow too little information to be printed in a column. [Print Sample] Sends a sample Log Page to the printer. Log Heading This is the large typeface page heading to be printed on the Order Confirmation for the selected station. Top Message for Log Page This is the small typeface message printed at the top of each page. This can be anything you want such as operator sign-on / sign-off text. May be left blank. Natural Log User Manual Page 2-13 2.07 Log Page Format (cont) Paper Type You may print this document on the following paper types. Blank Paper This draws the entire document including form boxes and lines, return address, and if used, logo Letterhead This draws the entire document including form boxes and lines, but not the return address, and if used, logo. PrePrinted Form Prints only the document data and assumes all form boxes, lines, addresses, and logos are preprinted. Contact the NL8 developer for a sample form. These preprinted forms are not user-configurable and must match the NL8 format. Log Columns to be Printed Use the [Select Columns] button to select which columns you'd like printed on the log page. You can drag the column dividers left and right to set how wide each display column should be when the log page is printed. Compress Empty Lines to Save Space on Page This removes 'most' empty lines before the log page is printed. Hide Automation Commands on Printed Log This removes all automation commands (text lines beginning with &) and puts empty spaces in their place before the log is printed. This helps the aesthetics of the log for human users. Print Log Pages for These Hours You can select the hours for which a printed log is needed if less than all hours. See inserting pagebreaks to force NL8 to print 1 hour per page. Bottom Message for Log Page This is the small typeface message printed at the bottom of each page. This can be anything you want such as operator sign-on / sign-off text. May be left blank. Page 2-14 Natural Log User Manual 2.08 Invoice / Affidavit Format This Document Format controls how your printed invoice looks. You need to set up one Invoice Document format for each station. (Multi-Station Document does not apply to Invoices.) Natural Log's individual Station Documents are accessed from the main NL menu, click [Setup] [Administrator Controls] [Station Settings / Document Formats]. [Restore Default Settings] You can return to the 'default' Document format anytime by clicking this button. [e-mail Settings] If you use the NL e-mail capability to send Invoices by e-mail, you can set the text of the accompanying message as well as signal NL to automatically carbon copy e-mail to the Account Rep a copy of the Invoice. [Page Margin / Font] If you desire you can change the page margins left/right and top/bottom used when printing this Document. You can also select a different font and/or font size. Warning: Font sizes above 12 are not recommended because larger fonts allow too little information to be printed in a column. [e-Invoice] On the invoice format in the [Setup] [Administrator Controls] [Station Settings / Document Formats] section, if you use an electronic invoice clearinghouse, you must click the [eInvoice] button to enter certain station-specific information such as the 4-letter call sign used for the clearinghouse to identify your station, the band [AM or FM], and the media type [Radio, TV, or Local Cable]. [Print Sample] Sends a sample Invoice to the printer. Natural Log User Manual Page 2-15 2.08 Invoice / Affidavit Format (cont) Invoice Heading This is the large typeface page heading to be printed on the Invoice for the selected station. Message for All Invoices This is the small typeface message printed at the top of every Invoice. This can be anything you want such as payment terms, reminders, etc. or may be left blank. Paper Type You may print this document on the following paper types. Blank Paper This draws the entire document including form boxes and lines, return address, and if used, logo Letterhead This draws the entire document including form boxes and lines, but not the return address, and if used, logo. PrePrinted Form Prints only the document data and assumes all form boxes, lines, addresses, and logos are preprinted. Contact the NL8 developer for a sample form. These preprinted forms are not user-configurable and must match the NL8 format. Put a blank line between Date groups when printing Invoice If checked, NL puts a blank space between each group of spots that run on the same day. It makes the Invoice more readable but takes up more paper. Amount Due You can change the "Amount Due" text shown to the left of the Invoice Total. This is useful for some noncommercial broadcasters that want to reference donations or pledges rather than amount due. Station Official Certification Text You can change the Station Official Certification text to anything that suits you. This is only printed on the Invoice when the order specifies an "Affidavit". Notary Statement Text You can change the Notary Statement to reflect your state's requirements. This may also be left blank. This text (if any) is only printed on the Invoice when the order specifies a "Notarized Affidavit". Page 2-16 Natural Log User Manual 2.09 Account Statement Format Natural Log allows you to set up Document formats for each NL station as well as a Multi-Station format for situations in which more than one station appears on a Document (such as a multi-station order). If you are running only one station you do not need the Multi-Station Documents. If you are running more than 1 station you must set up a Document format for each station plus the Multi-Station Document format. Single Station Natural Log's individual Station Documents are accessed from the main NL menu, click [Setup] [Administrator Controls] [Station Settings / Document Formats]. Multi-Station Natural Log's Multi-Station Documents are accessed from the main NL menu, click [Setup] [Administrator Controls] [Multi-Station Document Formats]. [Restore Default Settings] You can return to the 'default' Document format anytime by clicking here. [e-mail Settings] If you use the NL e-mail capability to send Invoices by e-mail, you can set the text of the accompanying message as well as signal NL to automatically carbon copy e-mail to the Account Rep a copy of the Statement. [Page Margin / Font] If you desire you can change the page margins left/right and top/bottom used when printing this Document. You can also select a different font and/or font size. Warning: Font sizes above 12 are not recommended because larger fonts allow too little information to be printed in a column. [Print Sample] Sends a sample Statement to the printer. Natural Log User Manual Page 2-17 2.09 Account Statement Format (cont) Statement Heading This is the large typeface page heading to be printed on the statement for the selected station. Message for All Statements This is the small typeface message printed at the top of every Account Statement. This can be anything you want such as payment terms, reminders, etc. or may be left blank. Paper Type You may print this document on the following paper types. Blank Paper This draws the entire document including form boxes and lines, return address, and if used, logo Letterhead This draws the entire document including form boxes and lines, but not the return address, and if used, logo. PrePrinted Form Prints only the document data and assumes all form boxes, lines, addresses, and logos are preprinted. Contact the NL8 developer for a sample form. These preprinted forms are not user-configurable and must match the NL8 format. Show ### of Broadcasts on Statement If checked, NL puts a line showing the number of broadcasts as a description on the Statement. This adds an extra line to each entry but also creates a more readable Statement and is particularly useful for station that do not send Invoice and only send Statements. Please Pay This Amount You can change the "Please Pay This Amount" text shown to the left of the Statement Total. This is useful for some non-commercial broadcasters that want to reference donations or pledges rather than amount due. Past Due Messages These text lines may be left blank if not used. If they are used, the appropriate text is printed at the bottom of each Statement depending on the maximum age of the unpaid balance on that Statement. Page 2-18 Natural Log User Manual 2.10 Data Entry Default Values Natural Log allows you set the initial default values for new Customer Accounts, Broadcast Orders, Order Lines, and Copy Manager. To access and set the default values, from the main NL menu, click [Setup] [Administrator Controls] [Default Screen Entry Values]. For details of each entry value see the following items: Customer Accounts Broadcast Orders Order Lines Copy Manager Natural Log User Manual Page 2-19 2.11 e-mail Settings Natural Log allows you to e-mail documents from within the NL program only if you have a normal e-mail program on your NL computer (such as MS Outlook). There will be an e-mail button or menu choice on any screen supporting e-mail within NL. The NL8 e-mailer will make a PDF file of the selected document and attach it to an e-mail using your e-mail program. You can set certain options for the e-mail for each Document for each NL station as well as for MultiStation Documents for situations in which more than one station appears on a Document (such as a multistation order). Single Station Natural Log's individual Station Documents are accessed from the main NL menu, click [Setup] [Administrator Controls] [Station Settings / Document Formats]. Multi-Station Natural Log's Multi-Station Documents are accessed from the main NL menu, click [Setup] [Administrator Controls] [Multi-Station Document Formats]. Then click on the type of Document. With that Document open, click [e-mail Settings] e-mail Subject This is the text to be included as the "subject" of the e-mail when this type document is sent. e-mail Message This is the text to be included as the "body" of the e-mail when this type document is sent. Carbon Copy e-mail to Account Rep If checked (and if you have entered an e-mail address for the Account Rep), the Account Rep will be carbon copied with a copy of the Document by e-mail. [Test e-mail] This attempts to open your e-mail program and send a test e-mail Page 2-20 Natural Log User Manual 2.12 Account Rep Setup Natural Log uses the term "Account Rep" to refer to 'Salesmen". This section allows you to enter and edit information on your Account Reps. To enter this section, from the Main Menu select [Setup][Account Reps]. Commission on Direct Sales, Agency Sales, and Trades These are default values for this Account Rep's sales commissions. Whenever a broadcast order is entered into one of this salesman's accounts, this is the % which will be entered for commission depending on whether the account is direct, agency, or a trade. The actual commission percentage can be changed on each order during order entry, so here you are only setting up the default value. Monthly Sales Goals You can enter a monthly sales goal for each of the Account Reps for each station. This is used in reports to compare actual versus goals for each Account Rep and Station. The Station's sales goals are the sum of all the individual Account Rep sales goals for that station. You can show these sales goals on Sales Projection Reports. Viewing Sales Goal Totals You can view Sales Goal Totals for the Station(s) and Account Reps by clicking [View] on the Account Rep Setup screen menu and selecting the summary totals you want to view. Account Rep eMail Address You may enter an eMail address for each Account Rep. If an eMail address is entered, NL can send carbon copy eMails you send to the Account Reps customers (items such as order confirmations, invoices, etc.) Also see Sending eMail Natural Log User Manual Page 2-21 2.12 Account Rep Setup (cont) Deleting Account Reps You can't delete any Account Rep that has 1 or more transactions in the Natural Log system. These transactions may include Customer Account assignments, Orders, and any billing or collection items assigned to this Account Rep. This deletion prohibition maintains the referential database integrity and assures that all items are properly accounted for in the historical accounting records. Solution: Instead of deleting a discontinued Account Rep, in [SetUp] [Account Reps], check the [Inactive] box for the discontinued AccountRep after you have reassigned any customers, running orders, and any open Accounts Receivable items for that AccountRep. This will cause the inactive AccountRep to no longer show up on any menus. Page 2-22 Natural Log User Manual 2.13 Agency Setup To create an agency item, from the Main Menu select [Setup][Agencies]. This section allows you to enter and edit information on advertising agencies you deal with. This is optional but is advantageous in the following instances. 1. If you enter many new customers [sponsors] that use the same agency, you can create an agency in the NL8 setup, then simply select that agency during entry of the new sponsor. NL8 will then autofill the data fields for the new customer including billing address, invoice type, billing cycle, etc. 2. If you use electronic invoicing through the Encoda / SpotData clearinghouse, each invoice must have specific agency information attached such as AgencyIDB. This agency setup is where that information is entered. Apply->Accounts If you make changes in these agency data records, the changes will become the default values for any future customers entered for this agency. The values do not automatically apply to customer accounts existing before the data changes. If you make a chnage and want to apply the new agency values to all existing accounts assigned to the agency, click the [Apply->Accounts] button. Use this with care as there is no "mass-undo" if you apply something incorrectly. Agency Data Fields Except for Agency name and AgencyIDB, the data required to set up an agency is mostly the same as the data used during customer entry. See 3.02 for a complete description of these data entry values. Agency IDB This is a unique number that identifies the agency in your electronic invoice clearinghouse and should be provided by the agency or the clearinghouse. Natural Log User Manual Page 2-23 2.13 Agency Setup (cont) New Sponsor Default Values Except for Agency name and AgencyIDB, the data required to set up an agency is mostly the same as the data used during customer entry. See 3.02 for a complete description of these data entry values. If you make changes in these agency data records, the changes will become the default values for any future customers entered for this agency. The values do not automatically apply to customer accounts existing before the data changes. If you make a chnage and want to apply the new agency values to all existing accounts assigned to the agency, click the [Apply->Accounts] button. Use this with care as there is no "mass-undo" if you apply something incorrectly. Page 2-24 Natural Log User Manual 2.14 Avail-Type Setup To enter or edit an Avail Type, from the Main Menu select [Setup][Avail Types]. Using Avail-Types Avail-Types allow you to reserve certain avail slots in your log formats for specific sponsor or spot types. Then during Order entry you can enter the Avail-Type on the schedule entry line. This will force that spot to be logged into an avail slot with the specified Avail-Type. When building the Log Formats or entering Orders, the Avail Type is always left blank for normal "non-restricted" avail slots. Avail-Type Example Suppose you want to reserve particular avail slots in your Log Templates [skeleton logs] for Weather Sponsors and you decide to assign WS as the Avail Type for weather sponsorship avails. In the Log Templates you would enter WS in the TYPE column. In the [Traffic][Orders] section you'd also enter WS in the AVAIL-TYPE column. This will force all schedule lines on which you have placed the WS Avail-Type to be logged only into avail slots on the Log Template with the matching WS Avail-Type. See Also Log Templates Order Line Entry Natural Log User Manual Page 2-25 2.15 Product Code Setup To enter or edit a Product Code, from the Main Menu select [Setup][Product Codes]. This section allows you to enter meaningful names for your Product Codes and set the required protection for spots that advertise each type of product. Using Product Codes These allow you to protect similar products from appearing together on the log. Then during order entry you put 1 or 2 Product Codes on the Order. Natural Log will then provide the required protection between all Orders that have been assigned the same Product Code. This prevents 2 car dealers from running too close together. Product Code Protections You can specify which type of protection these product codes need. When generating the LOGS, the computer will not schedule spots with the same Product Codes together. You can select the type of protection for each product code from the following: 1-per-Break 1 item with this Product Code may play within a commercial break. No Back-Back 2 items with this Product Code may NOT play Back-to-Back. ### Minutes Page 2-26 Protect this Product Code for a number of minutes. Natural Log User Manual 2.16 Revenue-Type Setup To enter or edit a Revenue Type, from the Main Menu select [Setup][Revenue Types]. Using Revenue Types Revenue Types allow you to "break out" certain sales into separate sales reports. When you enter an Order, you will assign that Order to a Revenue Type. All Natural Log reports allow you to specify which Revenue Types to include in the report. These are most often used to designate orders as Cash, Trade, etc. Natural Log has 3 default Revenue Types that are sufficient for most users. C Cash T Trade F Finance Charge The Descriptions for the 3 default Revenue Types may NOT be changed. You may use any other letters to create Revenue Types (such as Political, etc.) for which you might want to generate a separate sales report or to treat separately. You do NOT need to create a separate Revenue Type for National, Local, or Regional sales or for each Account Rep because these subgroups are already supported by the Report Generator. Post Invoiced Charges to Accounts Receivable This allows you to tell NL8 whether invoices created for broadcast orders with this Revenue Type should be posted to the Accounts Receivable to appear on customers' statements. You will almost always answer Yes except in very unusual circumstances. If you answer No, an invoice is issued but no accounting charge is made on the customer's account. Some stations don't want trade or promo spots to show up as charges on customers' accounts but they do want to be able to assign a value to the spots. This Revenue Type setting allows you to tell NL8 to create an invoice for an order assigned this Revenue Type, but not post a charge to the customer's account receivable. You would set this to No for the Revenue Type and assign that Revenue Type to the broadcast order. Note: Invoices marked No for Post2AR are automatically excluded from customer account statements, A/R Aging reports, and A/R Reconciliation reports. Orders and Invoices marked No for Post2AR are not automatically excluded from all other reports unless that Revenue Type is excluded from the specific report format. This includes Transactions-Invoiced Sales reports, Customer Billing History reports, Order Rates reports, Log reports, Inventory reports, and Sales Projection reports. Natural Log User Manual Page 2-27 2.17 Time-Class Setup To enter or edit a Revenue Type, from the Main Menu select [Setup][Time Classes]. Use of these classes is Optional but is included for your optional use. See Using Time Classes below for the specific instances when time classes should be used. Using Time Classes Use of these classes is Optional but is included for your optional use. These are only required when you want to run spots in non-contiguous times, for example drive times. Normal order entry requires you to provide a scheduling window like 6:00:00 AM to 10:00:00 AM for spots to run but what if the required time window is not contiguous? See the following example: Non-Contiguous Schedule Window Example You could create a time for Drive-Times which includes 06:00:00AM to 10:00:00AM and 3:00:00PM to 7:00:00PM. Then on your order you could specify Drive-times and any spots on that order line would run in any hour 6-10A or 3-7P. Sporting Event Example Suppose you have sponsors for a series of sporting events. The starting times for these events may be set right before the event or may often change. Instead of changing each sponsor's schedule each time there is a change in the event time, you could define a time class (e.g. S) which would designate the sporting event. When entering the sponsor schedules, enter S times instead of specific times. Then, when you know the exact times of the event, you can go into the Time Define function and set the start and end times for the time class S. This is much easier than changing all the schedules for each change in event time. If it is a recurring series of events with varying times and days, then each week you could change the time class definition for the upcoming week. Entering Start and End Times for the Time Class Start and End Times should be entered for each day of the week in your usual local time format. NL will assume any spots for a Time Class can run in ANY times listed in any column for that Time Class and that day of the week. Time Classes DO NOT guarantee a specific amount of spots in any particular daypart column, only that the spot will run in ONE of the dayparts columns for that day. Page 2-28 Natural Log User Manual 2.18 Tax Rate Setup To enter or edit a Tax Item, from the Main Menu select [Setup][Tax Rates]. Enter a unique name for this tax item Enter percent tax to be applied Indicate whether it is applied to the net, gross, or discounted-gross invoice amount. See glossary in Chapter 10 of this manual for a description of these terms. When entering Customers, each customer can be assigned one of the defined tax rates (or no tax rate if none is to be applied) as their default tax rate. When entering Orders, the Tax Rate on the Order will default to the Customer's Tax Rate but may be changed during Order entry. This allows you to have taxable and untaxable orders on the same customer account. See Tax Reports Natural Log User Manual Page 2-29 This page intentionally left blank. Page 2-30 Natural Log User Manual