1
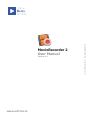
MovieRecorder 2.2. - User Manual vers 1
MovieRecorder 2
User Manual
Version 1.2.
www.softron.tv
1
MovieRecorder 2.2 - User Manual vers 1
Softron Media Services
© 2011 Softron Media Services. All rights reserved.
2
Contents
Part I
Welcome to MovieRecorder
Chapter 1
About MovieRecorder
Chapter 2
System Requirements
Chapter 3
Supported Video Formats
Part II
Configuring MovieRecorder
QuickStart Guide
Chapter 5
MovieRecorder Settings
Chapter 6
Preferences
Part III
Using MovieRecorder
Chapter 7
Main Window
Chapter 8
Scheduled Recordings
Chapter 9
Metadata
Chapter 10
MovieRecorder 2.2. - User Manual vers 1
Chapter 4
VTR Control
3
Remarks
MovieRecorder 2.2 - User Manual vers 1
In this manual, we will indicate the pop-up menus as following : File > Save As.
The first part before the sign “>” is the menu from the menu bar. The second is a
command that you can choose within this menu.
You can visit our web site www.softron.tv for informations about the updates and to
contact us for support.
4
Part I : Welcome to
MovieRecorder
I
MovieRecorder is a powerful professional application that is extremely easy to
use. Its User Interface is uncluttered yet provides the most important information
the user needs to see at a glance. MovieRecorder running on one networked
workstation can be monitored and controlled from another workstation on the same
network using the MovieRecorder Control application that comes bundled with
MovieRecorder.
5
MovieRecorder 2.2. - User Manual vers 1
MovieRecorder is a Softron Media Services application that gives everyone the
ability to capture video directly into their Macintosh workstation using either a AJA,
Blackmagic Design or Matrox video card. The user can not only capture video
interactively, but can schedule capture sessions over time. MovieRecorder supports
most of the available QuickTime codecs installed in the Macintosh system. It can
capture simultaneously to multiple destinations (hard drives) to ensure that if a
hard drive fail, you still have your recording. It can also record a Proxy file (lowresolution) at the same time. And last but not least, it can record metadata to the
QuickTime file for use with Media Asset Management software like Final cut Server.
6
MovieRecorder 2.2 - User Manual vers 1
About MovieRecorder
1
There are 3 types of MovieRecorder:
MovieRecorder is to be used with PCI video cards such as AJA, Blackmagic
or Matrox. It can record in multiple formats and do Edit-while-ingest, create
proxy, add metadata, do scheduled recordings, etc.. You can also use FireWire
devices (DV, HDV, DVCPROHD) with MovieRecorder but it is not as efficient as
MovieRecorder DV for DV material.
MovieRecorder DV is a ‘light” version of MovieRecorder and is to be used with
DV FireWire converter (not compatible with HDV). The main advantage is that it
uses some very light functions of MacOSX and is the ideal companion of Editors
who want to edit-while-ingest DV material on a MacBook Pro, Mac Mini, or any
light configuration.
In this manual we will only talk about MovieRecorder. Refer to MovieRecorder DV
and MovieRecorder Express manuals for instructions on how to use these software.
MovieRecorder is used to capture video live using almost any format that
QuickTime supports. Video clips captured using MovieRecorder can be used in
many Macintosh applications including Softron’s OnTheAir Video, a sophisticated
yet easy to use playlist manager used for broadcasting, information kiosks, and
concert events. When used in conjunction with a PCI video I/O card such as those
from AJA, Blackmagic Design or Matrox, MovieRecorder can capture standard
definition and high definition video. Designed specifically to work for live ingest,
MovieRecorder will work with cameras, tape decks and live feeds.
Simplicity MovieRecorder is easy to use. The User Interface is deliberately basic. You choose
your Ingest Settings, choose a name and press record. That’s it. Behind this simple
interface is a spophisticated application.
Flexibility MovieRecorder enables you to start editing as soon as ingest has started. Press
record, wait for a few seconds and start editing in Final Cut Pro. This saves time
and increases productivity.
MovieRecorder can be integrated in broadcast architecture. External devices can
control MovieRecorder
Security MovieRecorder is based on a Macintosh/Unix architecture known for their reliability
and flexibility. A fast and personalized support is also what we do best.
7
MovieRecorder 2.2. - User Manual vers 1
MovieRecorder Express is used for compliance recording to record 24/7 a
incoming signal and encode a proxy file in H.264 at the same time. It is a very
light application as well that can run on a simple Mac Mini. It can use both PCI and
DV hardware.
8
MovieRecorder 2.2 - User Manual vers 1
Systems Requirements
Computer
2
MovieRecorder requests (also depends on the format you are recording to) :
• PowerMac or MacPro computer with a 1.8GHz or faster PowerPC G5 or Intel
processor. Dual, dual-core or quad-core CPUs are recommended.
• Minimum 6 GB RAM for SD, 8GB RAM for HD
• Mac OS X version 10.4.11 or later
• Quicktime 7.5 or later
Video/Audio input
Check with each manufacturer how to install and setup the video card(s) you will
be using.
You can put 2 (or more) video cards in one MacPro or Xserve and therefore
ingest 2 video signals on one computer. You will need to purchase one license of
MovieRecorder per channel. Check the compatibility of 2 (or more) video cards in
one Mac with the manufacturer or ask us the question.
Also consider that ingesting for example Apple ProRes HQ in HD is very demanding
for the CPU, and you will probably not be able to do more than 2 streams on one
Mac, but you can test that with the DEMO version available from our website or
contact us at [email protected] to tell us what you want to do, we’ll be glad to
tell you what will or will not work.
Storage
MovieRecorder is “storage agnostic” because you can work with any Volume that
will mount on your Mac. The only limitation is the bandwidth. Don’t try to do
Uncompressed HD on your Boot drive, this won’t work. Remember also that you
must have sustained bandwidth, ro you have the risk to have dropped frames.
Video Hardware vendors often provide a small software utility to test your storage
write data rate. Check that you have enough Write Data Rate on the volume you
intend to use. Check also that you have that all the time, and not only in peak
moments.
9
MovieRecorder 2.2. - User Manual vers 1
Video Card Version
MovieRecorder needs a Video Card for the input of the Video and Audio signals.
• AJA
• Blackmagic-Design
• Matrox (with some limitations with A/V sync)
• MOTU (with some limitations with A/V sync)
10
MovieRecorder 2.2 - User Manual vers 1
Supported Formats
3
MovieRecorder creates regular Quicktime files that can be imported in Final Cut
Pro, Final Cut Server, Adobre Première, or any editing suite that support Quicktime
Files. MovieRecorder supports most Quicktime codecs, but due to the Edit-whileingest capability, MovieRecorder can not record files with Time-Compressed Codecs
such as HDV, XDCAM HD, etc...
To have a complete and up to date list of supported codecs, go on our website and
visit the compare ingest solutions page:
http://www.softron.tv/products/ingest/compare.html
In any case, we always recommend to download the DEMO version of
MovieRecorder and to run some tests to check for compatibility before ordering.
The DEMO version are there so you can be sure that everything works as intended
before you buy.
Do not hesitate to test different formats and to keep us informed on your tests and
comments by mail at: [email protected]
11
MovieRecorder 2.2. - User Manual vers 1
If you don’t have access to the internet, here is a non extensive list of supported
codecs at the time of writing:
• Apple ProRes 422 (Proxy)
• Apple ProRes 422 (LT)
• Apple ProRes 422
• Apple ProRes 422 (HQ)
• Apple ProRes 4444
• DV-PAL
• DV/DVCPRO - NTSC
• DVCPRO-PAL
• DVCPRO HD
• DVCPRO50
• MPEG IMX
• Uncompressed 8bit
• Uncompressed 10bit
• XDCAM EX
12
MovieRecorder 2.2 - User Manual vers 1
Part II : Configuring
MovieRecorder
II
In this second part, we will explain how to install, start, and how to set up the
preferences of MovieRecorder.
Please read this part carefully! Not only to set up your hardware and software
correctly, but also because some information given here in the preferences will be
helpful in your every day use of MovieRecorder.
MovieRecorder 2.2. - User Manual vers 1
13
14
MovieRecorder 2.2 - User Manual vers 1
QuickStart Guide
`
Installing MovieRecorder
4
First download the latest version of MovieRecorder from the website. Once
downloaded, unzip the file and simply copy the whoel MovieRecorder Folder to the
Applications Folder of your Mac.
Don’t forget also to install the Video card and the appropriate drivers for the video
card, or to connect a FireWire device to one of the FireWire port of your Mac.
Running MovieRecorder in DEMO mode
Buying a license for MovieRecorder
You can order a license for MovieRecorder from a list of trusted resellers around
the world. Softron integrators and resellers are knowledgeable and trustworthy.
They can help you define your precise application needs will be there to assist you
in your local area. If you do not have a reseller or integrator located near you, you
can order from our online store. We will be glad to fulfill your order. But we want
to emphasize that a local reseller will provide you support not just on our products,
but on your individual integration needs. And they will do so gladly, in your own
language, and at the same price!
Dongles and Activations
When you purchase a license, and if you don’t order the dongle option, you are
issued a unique serial number for you to use to register MovieRecorder on your
workstation. You receive this serial number by email. this serial number needs to
be activated on the computer that will use it. This activation process will require an
internet connection. Activations are made on our website:
http://www.softron.tv/support/activate.html
If you do not want to bother activating a software, you can order the dongle
option. With this dongle, you just need to install the drivers of this dongle and plug
it in one of the USB port of the computer. This is the best way to go if you want to
move around your license, or if you want to be able to move your license quickly if
your computer crashes.
For more informations on the Activations, the dongles, etc, check the Knowledge
Base about Activations and Dongles:
http://softron.zendesk.com/forums/178563-activations-deactivations-and-dongles
15
MovieRecorder 2.2. - User Manual vers 1
If you didn’t buy a license for MovieRecorder, you’ll be able to try it for 10
minutesbefore it automatically quits. When you will order a license, this is the
same version that you are going to unlock. It means that you are sure that all
the test you made with the DEMO version will have the same results in a licensed
version.
Updating MovieRecorder
If the update you want to do is free of charge (most are), the only thing you will
have to do is replacing the “old” version of MovieRecorder and replace it with the
new one. A good principle, is also to zip the “old” version before replacing it with
the new one, so in case you want to go back, you still have the previous version.
If the update is not free of charge, then you have to order first the update to this
version. If you are using Serial numbers, you will receive an upgrade serial number
(you will still need both serials). If you are using dongles, you will need to send us
the serial number of the dongle, and you will receive in return an upgrade file for
your dongle.
MovieRecorder 2.2 - User Manual vers 1
For instructions on how to do upgrades, again, check the “Application Licensing
Explained” document available from the website:
http://www.softron.tv/support/download_docs.html
The serial number activations are linked to one computer an one
installation of the OS. It means that:
- if you move the hard drive to another computer without deactivating
first, you will loose the activation, with no possibility to deactivate
(unless you switch the hard drive back in the old computer.
- if you reinstall the system on the same computer, same hard drive
without deactivating first, you will also loose the activation with no
possibility to deactivate it.
So, ALLWAYS DEACTIVATE before doing this kind of operation, or
you will loose your activations.
Options
With the DEMO version of MovieRecorder, all features are activated, but some
features are only available with the Pro option. Once you are using a licensed
application (using Serial numbers or Dongles) and if you didn’t order the Pro
option, you will not be able to use these feature anymore. the features only
available with the Pro option are:
• VTR Control and Batch Captures
• Metadata
• Proxy generation
• Loop Recording option (for Time Shifting)
16
You can see directly in the User Interface when the Pro option is activated with:
• The window says “MovieRecorder Pro” instead of “MovieRecorder”
• The Metadata and VTR Control buttons are not present.
• The option “Loop Recording” is not present from Settings > Destinations
•
MovieRecorder without the Pro option
MovieRecorder with Pro option activated
MovieRecorder 2.2. - User Manual vers 1
DUAL, QUAD, HEXA, OCTO versions of MovieRecorder
On the website, there are different versions of MovieRecorder: MovieRecorder,
MovieRecorder DUAL, MovieRecorder QUAD, MovieRecorder HEXA and
MovieRecorder OCTO.
Which version do you need ?
MovieRecorder PCI versions are very similar; the only thing that differentiates one
from another is the number of inputs (streams) you can do on a single Mac.
All these versions are similar, the only thing that changes is the number of ingest
you can do on one Mac:
- the SINGLE INGEST version is to be used for one ingest
- the DUAL INGEST version is for users who want to ingest 2 streams on the same
Mac
- the QUAD INGEST version is for users who want to ingest 4 streams on the same
Mac
- the HEXA INGEST version is for users who wants to ingest 6 streams on the
same Mac (not possible in HD)
17
When ingesting more than one stream on a Mac, be aware that there are hardware
limitations. Ingesting 4 or 6 streams of Apple ProRes (HQ) is very CPU intensive,
and will then work only on the latest MacPro 12 core with at least 12 Gb of Memory,
with no other CPU or disk demanding task running. With this spec, you can record
up to 4 streams of HD and 8 streams of SD.
You should test your configuration to make sure your computer CPU, hard drive and
memory will handle the amount of data to process with multiple ingests.
!!! You will need one full license per stream.
MovieRecorder 2.2 - User Manual vers 1
MovieRecorder Control
MovieRecorder Control is a free application that comes bundled with MovieRecorder.
It enables you to control an unlimited number of MovieRecorder across the Network.
You can install MovieRecorder Control on an unlimited number of station.
18
Settings for
MovieRecorder
5
The Settings window pane allows the user to select from three different tabs. It
opens when you click on the “Settings” button on the Main Window.
MovieRecorder 2.2. - User Manual vers 1
1. Destinations
Destination Folders
In the Destinations Tab, you can set the places where you want MovieRecorder
to record the file to. The default destination is the Root of your Boot Drive. Of
course we strongly recommend that you change that to a more efficient storage.
The storage can be a simple second hard drive, a FireWire drive or FibreChannel
storage, Xsan, etc...
You can record the same file to multiple destinations simultaneously (without taking
more CPU). It enables you to record to 2 different hard drives. So in case one of the
drive fail, you still have a backup.
19
You can add a Destination simply by clicking on the + button, and delete a
destination by selecting it and clicking on the - button. Each Destination must be
unique, so you won’t be able to record the Proxy and the Hi-Res files in the same
folder. If you try to set 2 identical destinations, you will get a warning :
When you add a destination, the default path is /. To modify the path, click on
“Select” and choose the Volume or Folder where you want to record.
MovieRecorder 2.2 - User Manual vers 1
For each destination, you can
• check the “HiRes” checkbox : MovieRecorder will record at that destination a
High Resolution file in the format and codec you have chosen in the Audio/Video
Tab.
• check the “Proxy” checkbox: MovieRecorder will record at that destination a Low
Resolution file in the codec chosen in the Proxy section of the Audio/Video Tab.
(This feature is only available with the Pro option).
• check the “H.Ref” checkbox: MovieRecorder will record at that destination a
Reference Movie file that will point to the HiRes self contained file.
• check the “P.Ref” checkbox: MovieRecorder will record at that destination a
Reference Movie file that will point to the Proxy slef-contained file.
• You can not record the Hi-Res and Proxy resolution to the same
destination
• You can record the Self-contained and Reference file (for High-Res
and Proxy) to the same destination IF you have selected in general
preferences that the extension of the Reference recording is .ref
and NOT .mov
• If you want to create a reference file (High Res or Proxy), you must
have a Self-contained (High Res or Proxy) file created otherwise,
the Reference file will link to nothing.
• You can not select multiple destinations for the Proxy file. Only one
destination can be set for the proxy file (due to CPU limitations).
20
About Reference and Self-contained movies
In MovieRecorder version 1, the edit-while-ingest was done on Reference movies
only. When we started MovieRecorder version 2, we achieved edit-while-ingest on
Self-contained movies and thus did not create any more reference movies.
In MovieRecorder version 2.1 we reintroduced reference movies because the selfcontained movies that are being modified all the time are not well supported by
Final Cut Server which thinks that there is a new file all the time and thus tries to
create a Proxy and thumbnail all the time AND it will fail to create the Proxy file
because it will meet “non existing frames” when it will try to encode it. This doesn’t
happen with reference files that have the .ref extension.
Loop Recording (with Pro option only)
The “Loop Recording” option is to be used when you want to do Time Shifting for
example. When you enable that option, it disables the “Update Movie Duration
when Stopping” option automatically.
What the Loop Recording option does is that when you start recording,
MovieRecorder will create a file to the duration that you have set in the
“MovieDuration” field. It will add the frames as they arrive to this file but when
MovieRecorder will reach the end of the file, it will start writing the frame back at
the beginning and thus erase the frames that were written.
When you enable this option, the user interface changes to show a knid of
“timeline” that will show you where MovieRecorder is currently writing its frame in
the Movie file.
21
MovieRecorder 2.2. - User Manual vers 1
There is another issue with self-contained movie file that are being modified all the
time (when new frames are added) is when used in Final Cut Pro. If you use the file
while it is being recorded in a timeline and need to do some renders. If you go out
of Final Cut Pro (select another application like the Finder) and come back in Final
Cut Pro, you will have lost all your renders. This is because Final Cut Pro saw that
the file has been modified since the last time you were in the program and thus
trashes the render files. this doesn’t happen with reference files.
For Time Shifting, you can use the file that is recorded with the Loop option and
play it continuously using OnTheAir Node or OnTheAir Video.
Movie Duration
The “Movie Duration” field enables you to set the expected length of recording. The
default value is 01:00:00:00. As MovieRecorder has “Edit-While-Ingest” capability,
the file is created as soon as you start recording with the duration that you have set
in the “Movie Duration” field. If you open the file being recorded with Quicktime,
Final Cut Pro, or any editing software, it will have a duration of one hour (if you
have kept the default duration). You will be able to read the file while it is being
recorded. If you record more than the duration set in “Movie Duration”, you will not
be able to see that until you stop recording, and provided you have checked the
“Update movie duration at the end of the recording” option.
MovieRecorder 2.2 - User Manual vers 1
Note that the maximum duration of a QuickTime file is 12 hours.
Update movie duration at the end of the recording
If the “Update movie duration at the end of the recording” option is enabled,
MovieRecorder will automatically change the Movie Duration to what you really
recorded when you stop recording.
When MovieRecorder updates the duration at the end of the recording:
it will rewrite the Quicktime header
the modification of the Quicktime header will change the last modification date
on Xsan volumes, it will dealocate the disk space
Example:
You set the “Movie Duration” to 01:00:00:00 and enable the “update duration at the
end of the recording” option:
- if you record only during 00:35:00:00, MovieRecorder will “cut” the extra 25
minutes so you don’t end up with 25 minutes of black at the end of your file.
- if you record during 01:20:00:00, MovieRecorder will “add” the extra 20 minutes at
the end of the recording (not during recording) so you’ll be able to access it.
If you disable the “update duration at the end of the recording”, MovieRecorder will
leave the duration of the Movie File as first set in the “Movie Duration” field when
you started recording.
So why is this an option? When MovieRecorder updates the duration at the end
of the recording, it changes the Quicktime header and the File Last Modification
Date/File. Some programs may not like that. There are no major known issue with
that, but one little annoying thing: in Final Cut Pro, if you are editing the file in the
“Viewer” window, the file will “jump out” of the Viewer window when MovieRecorder
will update the duration. This can be surprising.
22
OnTheAir Video and OnTheAir Video Express will handle the update movie duration
with no problem. But they will not update the movie duration automatically, you will
have to repoen the playlist OR do a “Check for missing clip”.about that
23
MovieRecorder 2.2. - User Manual vers 1
Some important information:
• On XSAN volumes (and only on XSAN volumes) MovieRecorder
will pre-allocate the disk space. It means it does only one request
to the metadata controller and doesn’t make any other request
afterwards. It also means that MovieRecorder will virtually
“reserve” the necessary disk space considering the “Movie
duration” you have set and the codec chosen. (For example if
you have set the Movie Duration to 1 hour, and the codec in DV,
MovieRecorder will pre-allocate 13GB if Disk as soon as you start
recording. At the end of the recording, and provided the “update
movie duration at the end of the recording” option is checked,
MovieRecorder will “deallocate” (free up) the unnecessary disk
space. MovieRecorder will NOT pre-allocate on other type of
Volumes.
• If your computer crashes during a recording, the file will still be
readable (on all types of volumes). But, even if the update duration
option was checked, as MovieRecorder couldn’t update the
duration at the end, the file will still be shown with the initial Movie
duration.
• With MovieRecorder 2.0, you will be able to record TO an AFP
volume mounted on your computer without any problem or
limitation (except the bandwidth of course). BUT, if you record
locally and then want to access the recording file in “Edit-whilleingest over the AFP, you will face some “refreshment” issue. The
only way to bypass that is to share and mount the volume in SMB.
2. Audio/video
MovieRecorder 2.2 - User Manual vers 1
The second tab in this window is used for configuring the audio and video capture
settings for the various audio and video inputs that are available in the system for
MovieRecorder to use.
When opened, you will see either an empty list or a list containing already
configured settings.
To enter a new video track, click on the “Add Video Track” button. An entry named
“V” (for Video) appears in the list with the name of the video card under summary
(“null” for Blackmagic, or “AJA” or “Matrox”). On the same line are also 2 new
buttons: one “Settings...” (source and format - see next page) button to change the
video settings and one “Remove” Button to remove this Video track.
To enter a new audio track, click on the “Add Audio Track” button. An entry named
“A” (for Audio) appears in the list with the name of the audio hardware name under
summary (Built-in, AJA, Blackmagic, Matrox, or any available audio input). On the
same line are also 2 new buttons: one “Settings...” button to change the audio
settings (source and format - see next page) and one “Remove” button to remove
this Audio track.
Important information:
• You can choose any of the available audio input, but be aware that
if you want to have A/V synchronisation, you need to select the
audio from the same source as the video source.
• It is mandatory to set at least one audio and one video track to
record
• It is not supported to create more then one Video Track.
24
Video Track Settings
When you click on “Settings” on a Video track, a new window pops up with 3 tabs:
• Adjustment : disabled most of the times
• Compression : choose the codec you want to use and its settings
• Sources : choose the source of the video.
Source Settings
In this window, select the source of the video :
• which video card (AJA, Blackmagic-Design, Matrox, FireWire, etc...)
• what is the format of the incoming signal (1080i25, 1080i29.7, 720p50, NTSC,
PAL, ...). You must select the same format as what is coming in.
If you have more then one card in your Mac, and if they are from a different brand
(for example one AJA and one Matrox), it will be easy to differentiate, you will
choose AJA or Matrox and then the resolution.
25
MovieRecorder 2.2. - User Manual vers 1
But if you installed more than one card in your Mac, the only way to differentiate
each of the card is with the number. The card that is situated in the upper PCI slot
of your Mac, will be card number 1 and the one below, card number 2, etc... In
the screenshot below, you can see that right above the selected line, it is stated
“Blackmagic 2 NTSC/PAL”. And below that, we have selected in the popup menu the
Format PAL. It means that we have selected the card number 2 with PAL format.
Compression Settings
In this window, choose among a large choice of Codecs, but beware of 2 things:
• Some codecs are not present by default in the list. You might need to install the
component in the Quicktime Library. For example the Apple ProRes, DVCPro HD
and MPEG IMX codecs are installed and available when you install Final Cut Pro
or a third party manufacturer like MXF4Mac or Calibrated.
• The codec list is not filtered and all codec might not be supported. Go to
the MovieRecorder specifications page of our website to check the latest list
of available codecs. And remember that no time-compressed codecs will be
supported (HDV, MPEG-2, etc..)
• MovieRecorder is not a encoding Engine. It can for example record HD signal in
SD, but is not optimized for that adn we do not recommend it, the format (SD or
HD) should always be the same as the input.
• You can only choose the same frame rate as the signal that comes in, and leaving
the frame rate on “Best” is recommended.
MovieRecorder 2.2 - User Manual vers 1
Allways remember also to use and reuse the ability to download the DEMO version
available from our website. You can then test and make sure that MovieRecorder
will be able to record the file corresponding to your expectations. Do not hesitate to
contact us to enquire for a supported codec.
Remember that you should always start with the selection of the
source before setting up the compression settings because every time
you change the source, the compression settings are reset to the
default Uncompressed Settings
26
Audio Track Settings
The Audio Settings window is divided in 3 parts:
• The Record Settings where you choose the audio source and the number of audio
Channels to record to your file.
• The Preview Settings where you can set if and how you are going to listen to a
“preview” sound.
• The Output Settings where you set the Settings (Format, Channels, Rate, Quality,
etc..)
This part of the Audio Settings window is divided in 2 parts: The “Device” and the
“Device Channels”.
The “Device” section is where you set the Audio Source and format that you
choose among any available audio source on your Mac (remember to choose the
same Audio source as the Video source if you want to ensure Audio and Video
Synchronisation)
The Device Channels section is where you set the number of audio channels that
you want to record to your file. Depending on the Device selected you will have
a number of available Audio Channels (be aware that if you have more than 8
channels, you will have to scroll down to see all channels). For each Cahannel, you’ll
be able to set :
• Mute : no sound will be recorded for this Audio Channel
• Solo : all other channels will be Muted
• Label : set the Label for each channel (Left, Right, Center, etc...)
• Gain : you can lower the gain for each track but not put it higher
27
MovieRecorder 2.2. - User Manual vers 1
Record Settings
Audio Preview Settings
This part of the Audio Settings window sets the output and format of the preview,
so you can listen to the incoming signal on another Audio output. For example you
can preview the audio coming in your video card using the internal audio output of
your Mac. Activate the “Preview while Recording” option if you want to listen to the
incoming signal while recording.
Output Settings
This is the most important part ! That is where you set the audio codec and format
for your recorded file.
MovieRecorder 2.2 - User Manual vers 1
When you click on the “Set output format” button, it will open a new window :
The best output format for MovieRecorder is when it is set as the screenshot above:
• Format : Linear PCM
• Channels : Stereo (L R)
• Rate : 48.000 kHz
• Quality : Normal
• Sample Size : 16 bit
Linear PCM is the only supported format for MovieRecorder. For
the other settings, if it doesn’t stick to the settings above, please
allways test and make sure it works for you. We do our best to test
as many configurations and formats as possible, but take advantage
of the demo versions to make sure the audio format you need is fully
supported.
28
3. Timecode
The the last tab is about Timecode selection. You can choose among 5 Timecode
source:
If you are recording in NTSC, don’t forget to indicate whether you want the
Timecode to be Drop Frame or non- Drop Frame.
Timecode source = Mac Clock
The Timecode source is the internal mac clock. Typically it will be the clock you have
set in system preferences > Date & Time.
You can synchronize the internal Mac clock to a NTP server in System Preferences
Date & Time preferences, you have to enable the “Set date and time automatically”
option, and type in the IP adress of your NTP server.
Timecode Source = Sony RS-422 Serial Protocol
If you have a VTR connected to the RS422 port of your video card, you will need
to select this option in order to be able to control it using the VTR control available
with the Pro option of MovieRecorder.
29
MovieRecorder 2.2. - User Manual vers 1
For All these Timecode sources you will be able to set an Offset, so in case the
Timecode is not in sync with the image, you can change the offset of the Timecode
in order to resynchronize it. Do some tests recording and see wether it synchronize
better. Also don’t forget that a Tiemcode Track in a quicktime file is just an
information at the beginning, and all later timecode is derived from the first frame
timecode. So if you loose synchronization of timecode with time, it probably means
that you are dropping video frames.
Timecode source = Adrienne Broadcast Serial Protocol
Before we natively supported Audio LTC Timecode, we were using the Adrienne
AEC-mBox LTC to RS422 converter Box. This Adrienne Box has several mode (Sony
protocol emulation or broadcast mode for example). The broadcast mode of the
Adrienne box enable to connect multiple RS 422 connectors with one box, so you
didn’t need to purchase one box per MovieRecorder.
Timecode source = Video Card Timecode
Some Video card support to get the Timecode in the SDI signal in RP188. If you
have such a video board and that there is a Timecode in the SDI signal, you can use
this option.
Timecode source = Audio LTC
MovieRecorder 2.2 - User Manual vers 1
MovieRecorder supports natively Audio LTC Timecode. Once this option selected you
will have to choose the source of the Audio LTC. The most common is to use the
Built-in input of your Mac to enter the Audio LTC Timecode.
30
Preferences
6
The Preferences pane is where you set some more generic information. Don’t forget
that Audio/Video, Timecode and Destinations are set in the “Settings” window
available from the ‘Settings” Button from the general User Interface.
1. General
If “Erase existing files before recording” is checked, the files created with the
name indicated in the “Recording name” field will be overwritten and the name will
be reused.
When the “Make recorded files read-only” option is enabled, after you stop
recording, the files will continue to be “read-only” and thus will not be modifiable.
You’ll have to change their privileges if you want to modify them later.
If the “Report Errors” button is checked MovieRecorder will not warn when there
are dropped frames for example. This is an option that you should use for example
when you are doing some remote recordings when you don’t want the application to
be blocked by a warning. If a warning is shown on the computer, then all the Telnet
communications are blocked.
The “Reference File Extension” preference defines what extension will be added
to the reference file created. Choose .ref if you want to be able to record in the
same destinations the self-contained and the reference file.
31
MovieRecorder 2.2. - User Manual vers 1
The “Erase existing files before recording” option, when un-checked,
MovieRecorder will append a number at the end of the file name if the name
entered is not changed between recording sessions. The first file will be the name
without any numerical suffix, all subsequent files saved will append a digit or digits
to the file(s) captured.
If the “Require Telnet Authentication” option is checked, it will mean that
you will need to enter a login and password when you will try to connect to
MovieRecorder remotely using Telnet commands or MovieRecorder Control. If it is
not checked, it will mean that anybody that is in the same network of the computer
will be able to control the MovieRecorder.
The “Bonjour Name” field is the name that you will see when you’ll try to connect
to a MovieRecorder using MovieRecorder Control. When installing it has a default
name which is the Computer’s name + channel 1 or 2 if using the DUAL version
of MovieRecorder. You can change that Bonjour Name to anything you want (for
example Camera 1, Camera 2, etc... But be aware of a few things:
- you will need to restart the application for the new Bonjour Name to be
implemented.
- do NOT use 2 times the same name or it will lead to confusion in the
MovieRecorder Control interface.
MovieRecorder 2.2 - User Manual vers 1
If you click on the “Reset” button, the Bonjour Name will be reset to the default
name : Computer name + Channel 1 or 2.
AppleScript
If the option “Launch the “Start Recording” action when recording” is
enabled, when you press the start recording button, it will start the AppleScript
named “Start Recording” stored in the “Actions” Folder which is stored at the same
level as the application MovieRecorder. This Applescript can be anything. It is mainly
used to control OnTheAir Video, or OnTheAir Switch.
If the option “Launch the “Stop Recording” action when recording” is
enabled, when you press the stop recording button, it will stop the AppleScript
named “Stop Recording” stored in the “Actions” Folder, stored at the same level
as the application. This Applescript can be anything. It is mainly used: to control
OnTheAir Video, or OnTheAir Switch.
For both these optins you can put a delay for the start of the AppleScript so ti will
start only after a given number of seconds.
32
TVPlayer
This preference is intended to users of TVPlayer software. Please refer to the
TVPlayer Manual for information on this preference.
MovieRecorder 2.2. - User Manual vers 1
33
34
MovieRecorder 2.2 - User Manual vers 1
Part III : Using
MovieRecorder
III
In this second part, we will explain how to use MovieRecorder, in the main user
interface, how to create schedules, how to add metadata, etc...
MovieRecorder 2.2. - User Manual vers 1
35
36
MovieRecorder 2.2 - User Manual vers 1
Main Window
Movie Recorder’s main window
7
When you are not recording, there are 3 control buttons, but only the record button
is enabled.
• REC : to start recording
• PAUSE : to pause the recording, you will keep on recording to the same file, but
pause the recording for as long as you click back on Pause to start again the
recording or on stop to stop the recording. !!! Be aware that you will of course
loose all TimeCode accuracy after the moment you hit the pause button. The
beginning of the file will be in sync with the TimeCode but not the rest !!!
• STOP : to stop the current record button.
When you start recording
• a red border is drawn around the preview window
• the “Already Recorded” time start running giving you an information about how
long you already recorded.
• the Stop and Pause buttons are enabled
• the REC button is replaced by a Timer Button (see next page)
• the Settings, Scheduling and VTR Control buttons are greyed out
37
MovieRecorder 2.2. - User Manual vers 1
Recording Control Buttons (STOP - PAUSE - REC)
Timer
The timer function is very useful if you want MovieRecorder to stop the recording
automatically after a given time. You can then start recording and go do something
else while MovieRecorder will stop the recording when the program is finished.
When MovieRecorder is recording, the REC Button is replaced by a TIMER Button
Not recording
Recording
MovieRecorder 2.2 - User Manual vers 1
If you click on the TIMER button, a new window opens up:
You can choose to set between:
• Recorded Duration : sets the total recording duration in hours:minutes:seconds
(from the moment you have clicked on the REC button, not from the moment you
click on OK on this window)
• End Time : sets the time at which MovieRecorder will stop recording (only refers
to the Internal Mac Clock, not to the incoming Timecode)
When you click on OK, the Sotron logo at the center of the Time informations bar
is be replaced by the “Remaining Recording Time”, indicating in how many hours/
minute/seconds/frames the recording will end (In the example below we have set a
one hour TIMER).
Time Informations Bar
Across the top of MovieRecorder’s main window is the Time Information Bar with
several informations:
The “Already Recorded” time displayed on the left is the currently recorded time in
hours, minutes, seconds and frames.
Below the Already Recorded time can be displayed (if there are any) the dropped
frames during recording. See the Troubleshooting chapter for solutions when you
are facing Dropped Frames issues and for explanations on possible causes for
dropped frames.
38
In the center of the Time Information Bar, lays Softron logo OR the Remaining
Recording Time if you hit set the MovieRecorder TIMER (see previous page).
Without Timer
With Timer set on 01:00:00
Below the Device Timecode, is the estimated remaining disk space considering
• the video format and codec chosen in the Audio/Video settings,
• if you have multiple destinations set in the preferences, it will indicate the
remaining space on the smallest High-Res destination.
The Disk Space indicator changes color with the remaining disk space available :
• Green = more than one hour of remaining disk space available
• Otange = between 30 and 60 minutes of remaining disk space available
• Red = less then 30 minutes of remaining disk space available
• Grey = 0 minutes of remaining disk space available
39
MovieRecorder 2.2. - User Manual vers 1
The “Device Timecode” on the right displays the Timecode from the selected
Timecode source (Internal System Clock, RS422, LTC, ...).
Recording Name
On top of the REC/PAUSE/STOP buttons is the field where you can set the Recording
Name. This is the name that MovieRecorder will use to name the recorded file.
If you check the “Auto” option right on top of the recording name, MovieRecorder
will automatically name the recorded files with the date/time/bonjour name.
(Bonjour Name is set in preferences
MovieRecorder 2.2 - User Manual vers 1
The Recording Name field will then indicate <<auto>> and you will not be able to
edit it.
Reveal in finder
On the right of the Recording Name Filed is a magnifying glass. This is the “Reveal
in finder” button. If you click on it, it will show you a list of all destination files. If
you click on any of these Files, MovieRecorder will reveal in the finder the files being
recorded or the last file that has been recorded at the selected path.
40
Preview and VU Meter
MovieRecorder’s Preview displays the video as it is ingested; audio level bars to the
left side of the Preview allow the user to check for audio input for the first 4 Audio
Channels. There is a red outline in the preview window when MovieRecorder is
recording.
Ch1 - Ch2
Ch3 - Ch4
On the lower part of the user interface are 4 buttons that will open new windows
when you click on them:
• Settings : set destinations, Audio/Video settings, TimeCode Source
• Scheduling : schedule recordings for automated recording
• Metadata : add/edit Metadata to the recording Quicktime File
• VTR Control : Control a VTR through the RS422 port, and do Batch Captures.
When MovieRecorder is recording, the Settings, Scheduling and VTR control buttons
are greyed out because you can’t edit these while MovieRecorder is recording.
If you didn’t purchase the Pro option, then the Metadata and VTR button will be
disabled.
41
MovieRecorder 2.2. - User Manual vers 1
Settings - Scheduling - Metadata - VTR Control
42
MovieRecorder 2.2 - User Manual vers 1
Scheduled Recording
8
The Scheduled Recordings list pane opens when the Scheduling button in
MovieRecorder’s main window is selected. Unless a prior schedule has been created,
the list displayed will be empty.
To delete a previously scheduled ingest session, the row that contains the session is
selected and the minus (-) sign on the lower left of the screen is clicked. The ingest
session will immediately disappear from the list.
When the plus sign (+) is selected, the programming page for Scheduled Recordings
opens allowing a programming schedule to be entered.
Recording times are entered by selecting a specific date for the ingest session or
weekly day and time for the ingest session. Two tables at the top of the window
allow the user to choose the preference for entry.
43
MovieRecorder 2.2. - User Manual vers 1
The plus (+) button located at the lower left of the window pane is used to add
a recording session to the list. Clicking on the plus sign will open a new window,
which is used to select time, date and location for the desired ingest session.
When entering a Specific Date recording schedule, the user will enter the specific
date by month, day and year as well as the “Start Time” and the “Duration” or
the “Start Time” and the “End Time.” If “Start Time” and “Duration” is selected,
the “End Time” is calculated; if “Start Time” and “End Time” are selected, the
“Duration” is calculated.
When entering a Weekly recording schedule, the user will enter the day or days of
the week desired as well as the “Start Time” and the “Duration” or the “Start Time”
and the “End Time.” If “Start Time” and “Duration” is selected, the “End Time” is
calculated; if “Start Time” and “End Time” are selected, the “Duration” is calculated.
MovieRecorder 2.2 - User Manual vers 1
The Scheduled Recording list will differentiate the entries by indicating the specific
date or the day(s) of the week.
Additional entries that are required on the programming page for Scheduled
Recordings include the Recording Name, the name of the file to be saved, and the
destination of the recordings (where the file will be recorded to).
You can not create back to back schedules. To be on the safe side,
you have to leave around 10 seconds between two recordings. But
this can be lower depending on your configuration. The reason is that
MovieRecorder needs to have time to close the previous recording
before starting the new one.
44
Exporting / Importing Schedules
With MovieRecorder you can Export and Import Schedules.
• To Export a Schedule, go to File > Export > Export Schedule as XML.
• To import a Schedule, go to File > Import > Import Schedule as XML
The Export and Import File Format is in XML. To know how to format the XML file,
the best thing is to export one sample Schedule and see how it is formated.
MovieRecorder 2.2. - User Manual vers 1
45
Metadata
9
Metadata is often defined by data about data. You can associate information with
one file, giving for example the copyright, keywords, etc.. that describe your data so
it can easily be found when searched for.
MovieRecorder 2.2 - User Manual vers 1
MovieRecorder can write Metadata in the Quicktime file, provided you have
purchased the Pro option. Metadata is not written to a separate XML file but directly
bundled in the Quicktime file. Some of the regular metadata can be shown directly
by Quicktime, other metadata will be read by other Media Asset Management
software such as Final Cut Server.
To modify the metadata associated with your recording, click on the Metadata
button on the main User Interface. This window will show up:
You can then decide which Metadata set you want to use. Each metadata set holds
the default metadata fields for different use. These metadata set can be customized,
and you can have as many set as you want, but by default, you will have 3 choices:
46
The 3 different types of default Metadata set:
• Final Cut Pro : a set of metadata keys that should be used in conjunction with
Final Cut Server. Be aware that this metadata information will NOT be read by
Final Cut Pro because Final Cut Pro doesn’t read this metadata from the file.
• Quicktime : a set of metadata that will be read by Quicktime (for example the
Title metadata will change the title of the window in Quicktime.
• Custom : is an empty set in which you can add your own value.
If you change to another metadata set, the value you entered will be
deleted from the field to revert to the default value.
The value of your metadata are not kept if you quit and restart the
application. The only way to keep values (such as copyright) between
sessions is to set default metadata values.
How do you create custom metadata keyset?
• open the application bundle by right-clicking on it from the Finder and selecting
“Show package contents”,
• go into the “Resources” folder,
• go into the “English.lproj” folder,
• find the key preset files, (They are named “QuickTime.keyset”, “Final Cut Pro.
keyset” etc...)
• copy one of these files, edit it with any text editor and change/add/remove the
keys that you like, you can also add default values to the keys there.
• finally, save the file under a different name, (anything will do as long as the
extension is .keyset)
Then, restart the app, it will offer your custom keyset in the metadata window.
Exporting / Importing Metadata
With MovieRecorder you can Export and Import Metadata.
• To Export Metadata, go to File > Export > Export Metadata as XML.
• To import Metadata, go to File > Import > Import Metadatat as XML
The Export and Import File Format is in XML. To know how to format the XML file,
the best thing is to export one sample Metadata and see how it is formated.
47
MovieRecorder 2.2. - User Manual vers 1
If you do nothing, the metadata is saved at 2 different moments : when the
Movie is created at the beginning of the recording and when the Movie duration is
updated at the end of the recording. It means you can still fill in metadata while
it is recording. Also if one application needs the metadata before the recording is
finished, you can click on the “Save to movie” button and it will add the metadata
you currently have entered in the Movie.
MovieRecorder 2.2 - User Manual vers 1
VTR Control &
Batch Capture
10
With MovieRecorder, you can control a VTR using the RS422 port of your Video card.
To control the VTR, you first need to set your preferences so that the Timecode
source is set to Sony RS422 protocol.
If you click on the VTR Control button (only available if you have the Pro option),
this window will show up:
Set in/out points
Device Timecode
VTR Controls
Batch List
Add/remove
Capture Controls
VTR Status
48
To control your VTR, you must make sure first that the connection is established.
For that, you can check the VTR status at the bottom of the UI. If it states “Not
connected”, you must check the the Timecode source preference is set to RS422
Sony protocol, also check that the cable is properly plugged in.
If it is properly connected you can have different status :
• IDLE : the VTR is Idle
• NOT IN REMOTE : VTR should be put in Remote mode to be controlled
• NO TAPE : no tape is in the VTR
• PLAYING
• REWINDING
• FAST FORWARDING
• CUEING : when you clicked on “Capture”, the vTR will cue to the desired in point.
You can add Batch items to be Captured later on by clicking the Add/Remove
buttons at the bottom left of the UI. When adding a Batch item, this window will
pop up :
Once you have entered all the Batch event, you can still modify them by selecting
a line and clicking on the Mark in and Mark out buttons. Once you are ready to
Capture, click on the “Capture” button.
MovieRecorder will then cue the VTR and require for each different Reel required
for the capture. Once captured, the status of each Batch item will be changed to
“Captured”, so each item that is already “Captured” will not be captured again later
on. You can reset the Status of each Batch item if you right click on the status of
each item.
49
MovieRecorder 2.2. - User Manual vers 1
You will have to enter this information :
• In Point - Duration - Out Point
• Recording Name
• Reel Name = Tape Name
Exporting / Importing Batch List
With MovieRecorder you can Export and Import Batch List.
• To Export a Batch List, go to File > Export > Export Batch Capture as XML.
• To import a Batch List, go to File > Import > Import Batch List as XML
MovieRecorder 2.2 - User Manual vers 1
The Export and Import File Format is in XML. To know how to format the XML file,
the best thing is to export one sample Batch List and see how it is formated.
50
MovieRecorder 2.2. - User Manual vers 1
51