1
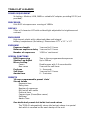
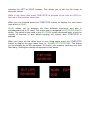
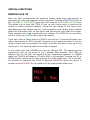
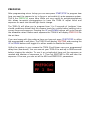
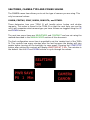
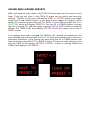
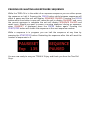
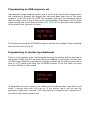
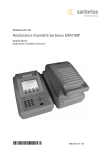
The TOGA
Intervalometer
from TWO OLD GUYS ASTROGEAR
The TOGA Intervalometer (TOGA IV) is a fullfunctioned exposure management tool for
astro-photographers or terrestrial
photographers who do multiple exposure projects. This manual will help you to
get started using the TOGA IV to it's fullest potential.
Before you start you will have to put a battery into your unit (sorry, batteries not
included... shipping you know). The battery door is on the back of the unit. Press
on the down arrow symbol and slide the door to the rear. You can now insert a
standard 9v battery into the battery holder..
Next you'll need a suitable cable. Canon Rebel series and Pentax DSLR cameras
require a 3.5mm stereo to 2.5mm stereo cable wired straight through. Other
cameras may require the modification of an inexpensive cable remote. See more
at the end of this document.
Once you have a battery and a cable you are ready to enter the realm of 'doing
nothing'. You can sit back and enjoy the vistas of the night sky while the TOGA IV
takes care of all your exposures (telescope, mount and auto-guider sold
separately).
The Two Old Guys can be reached at [email protected] or [email protected]
All text and graphics Copyright © 2011, Two Old Guys Astrogear
PHYSICAL DESCRIPTION
The TOGA IV's enclosure is a rubber-sided
high-impact plastic unit which measures
4.75” x 3.1” x 1.3”. It is light enough to
either hang from a telescope mount or
tripod and can be operated with one
hand, even in gloves.
The power switch and camera connector
are located on the top of the unit.
On the front are the 2 x 8 character LCD
display with red backlight ( we don't want
to kill your night vision) which is covered
by a clear plastic plate for protection.
Below the display are the FOCUS and
START/STOP buttons and then a standard
diamond. The buttons all provide tactile
feedback.
On the rear of the unit is the access door
to the battery compartment.
BATTERY INSTALLATION
When you insert a battery take the time
to ensure that you have it installed correctly. Forcing a battery in with reversed
polarity may damage the unit and void your warranty.
FIRMWARE
Your TOGA IV shipped with the latest firmware, but from time to time as new
camera models appear new firmware for the TOGA IV may be available. Contact
the Two Old Guys should you need the new utility.
WARRANTY
The TOGA IV carries a full one year parts and labour warranty. If your problem is
no t something the Two Old Guys can fix via email just ship us your unit (no
RMAs.. we hate red tape) and we'll fix it and return it to you shipping paid.
TOGA IV AT A GLANCE
POWER REQUIREMENT
9v battery. Alkaline, LiON, NiMH or suitable AC adapter providing 8-12V (not
provided).
PROCESSOR
8-bit RISC microprocessor running at 16MHz.
DISPLAY
2 line x 8 character LCD with red backlight adjustable for brightness and
contrast.
ENCLOSURE
High-impact plastic with rubberized sides and integral
battery compartment (9v battery). Dimensions 4.75” x 3.1” x 1.3”
EXPOSURE
Exposure length
1 second to 12 hours
Between exposure delay 1 second to 12 hours
Number of exposures
1-999 or 'continuous'
SPECIAL FUNCTIONS
HDR Sequencing
Shutter Lag Adjust
Mirror Lockup
Canon
Non-canon
Prefocus
Self-timer
Awake time
Two or three programmed sequences
Up to 200ms
Double-press with 1-9 second settle
2 second for self-timer
1 – 9 seconds
1 second to 12 hours
0 – 5 minutes
PRESETS
10 user programmable preset 'slots'
Stored values
Exposure time
Delay time
Number of exposures
MLU on/off with settle
Prefocus time
Camera type (Canon/Non-canon)
Selftimer
Awake Time
One dedicated preset slot holds last used values
The TOGA IV automatically stores the last set values in a special
slot which is recalled on the next startup of the unit.
CAMERA CONNECTOR
3.5mm stereo phone plug
IV-OPTION CONNECTOR (IV+ Only)
6 pin mini-DIN
STARTING UP THE TOGA IV
To turn on the TOGA IV insert a 9v battery and flip the switch on the top. Ensure
that the battery is installed correctly.
On power up the TOGA IV displays a welcome screen with the current firmware
version that has been installed. This screen serves to inform you that the unit has
powered up correctly. Then the unit indicates whether it has auto-save values to
load after which it will display it's main menu, or, IV READY, along with the mode
that the unit is currently in; MANUAL or AUTO.
This is your cue to either start an automatic exposure sequence or to use the unit
as a manual remote control. Note: Some of the display text shown in the graphics
may be from a previous firmware version.
MODE SELECTION
At the main menu screen you can use the UP and DOWN buttons to cycle through
the TOGA IV's two modes. MANUAL and AUTO.
Pressing the FOCUS or START/STOP button when the mode selection is displayed
will allow you to proceed into the programming menus.
MANUAL MODE
In MANUAL MODE (bootup mode) the TOGA IV acts like a 'dumb' remote shutter
release.
When IV READY is displayed pressing the FOCUS button will enable your camera's
auto-focus and exposure metering systems while pressing the START/STOP button
will activate the shutter. If your camera is in 'bulb' mode holding the START/STOP
button down will keep the shutter open for as long as you hold the button down. A
handy counter will tell you how many seconds you have held the shutter open.
If MODE MANUAL is displayed the manual mode menu is available to you by
pressing the START/STOP button. This will allow you to adjust the brightness and
contrast of the display for your conditions. When either the BRIGHTNESS or
CONTRAST menu items are displayed press the UP or DOWN buttons to adjust the
value. When you are done hold the START/STOP button down for longer than ½
second to return to IV READY.
AUTOMATIC MODE
Automatic mode is the heart and soul of the TOGA IV. When IV READY is
displayed press the UP or DOWN button until MODE AUTO is displayed. Then press
and release the START/STOP button to access the AUTOMATIC MENU.
As with Manual Mode pressing Focus will move to the previous menu item.
The first item you will be presented with is the EXPOSURE LENGTH menu item.
This allows you to set an exposure length of up to 12 hours. One of the digits will
have an underscore below it. This is the digit you are currently working with.
Pressing the UP button will increase the value while pressing DOWN will decrease
it. You can't set a value of 00:00:00. Move the underscore to another digit by
pressing the LEFT or RIGHT buttons. This allows you to set the full range of
exposure values.
While in any menu item press START/STOP to proceed to the next or FOCUS to
back up to the previous menu item.
When you are finished press the START/STOP button to display the next menu
item which is DELAY.
DELAY allows you to program the time between exposures and also is
programmable up to 12 hours. This menu item is navigated as EXPOSURE LENGTH
above. This value is also used in the SELFTIMER mode (discussed later) to set the
number of seconds to wait before tripping the shutter after START/STOP is
pressed.
When you have set the delay time to your liking again press the START/STOP
button to display the next menu item, or, NUMBER OF EXPOSURES. This allows
you to schedule up to 999 exposures. Of course, your memory card may not hold
that many. Setting the number of exposures is as above.
SPECIAL FUNCTIONS
MIRROR LOCK UP
After you have programmed the exposure length, delay time and number of
exposures you can now program special functions. Pressing START/STOP while in
the NUMBER OF EXPOSURES menu item will bring up the MIRROR LOCKUP item.
This allows you to have the TOGA IV lock up your mirror prior to opening the
shutter to reduce induced vibration. There are two modes to this menu item
depending upon the camera you use. Canon cameras use a 'double press' method
where the first press locks up the mirror and the second press trips the shutter.
Other cameras use a two-second self-timer scheme. The TOGA IV can use either
and it is set by the CAMERA menu item (see below).
If you don't have a Canon then the TOGA IV will use the '2 second self-timer' that
many cameras use for MLU and add 2 seconds to your exposure times. If you are
using a Canon then you program the 'settle' time after the mirror locks up to any
value from 1 to 9 seconds before the shutter is tripped.
In any mode other than CANON you can only ON and OFF. The camera will be
expected to lock up the mirror in it's 2 second timer function. IThe TOGA IV
displays MLU for the first two seconds of the lengthened exposure. In CANON
mode the TOGA IV will display OFF when MLU is not enabled. Pressing the UP or
DOWN buttons allows you to cycle through the settle times from 1 to 9 seconds.
On starting an exposure the TOGA IV displays MIRRORUP when the mirror is
locked up and MLU REST for the duration of the programmed settle time.
PREFOCUS
After programming mirror lockup you can now press START/STOP to program how
long you want the camera to try to focus or set enable it's auto-exposure system.
This is the PREFOCUS menu item. While not very useful for astrophotographers
this allows terrestrial photographers to have the TOGA IV adjust focus and
exposure for each shot should light levels change.
The TOGA IV will allow you to program from 1 to 9 seconds of 'prefocus' time
should conditions dictate that the camera hunts for a while before settling into a
correct focus and exposure. Pressing the UP and DOWN buttons will cycle through
the allowable values. Before each exposure the TOGA IV will display PREFOCUS for
the set time.
If you are happy with the prefocus time you have set press START/STOP to utilize
the programmed in self-timer. The TOGA IV will display SELFTIME and pressing the
UP or DOWN buttons will toggle it to either enable or disable the feature.
Unlike the system in your camera the TOGA IV self-timer uses your programmed
delay time (see above). You can now set your TOGA IV to wait up to 9999 seconds
before tripping the shutter. To use it as a single-shot timer set the exposure as
needed and number of exposures to 1. Then set SELFTIME to ON and take the
exposure. Of course, you can set all the MLU and PREFOCUS parameters.
SELFTIMER, CAMERA TYPE AND POWER SAVING
The CAMERA menu item allows you to set the type of camera you are using. This
only has several values:
CANON, PENTAX, SONY, NIKON, MINOLTA, and OTHER.
These determine how your TOGA IV will handle mirror lockup and shutter
requests.. This value is stored in the TOGA IV so that the next time you use the
unit it will remember what camera type you have. Values are toggled using the UP
and DOWN buttons.
The next two menu items are BRIGHTNESS and CONTRAST and are set using the
method described in the MANUAL MODE section of this document.
The final configuration menu item is provided to set the 'awake time' of the TOGA
IV. This controls how many minutes after the last keypress the display will stay
awake before turning off the backlight to save power. Pressing the START/STOP
button after setting the contrast will display WAKETIME WT 2 Min. Two minutes is
the default. Use the UP and DOWN buttons to cycle through the values.
SAVING AND LOADING PRESETS
When you have set your values in the TOGA IV will prompt you if you wish to store
them. There are ten 'slots' in the TOGA IV where you can store your favourite
settings. TOGA IV's SAVE menu will display SAVE? <> YES/NO and you can toggle
using the UP and DOWN buttons. If you wish to save toggle the display until it
shows YES and then press either LEFT or RIGHT. You will now be shown the SLOT
SELECTION which will display PRESET0x. Use the UP or DOWN buttons to select
the slot, 1 through 10, and then again press the LEFT or RIGHT button to save the
setting. The TOGA IV will then display SETTING SAVED and return you to the IV
READY screen.
If no settings have been changed the TOGA IV will, instead of showing you the
save settings item will show you the LOAD FM item which allows you to retrieve a
previously stored set. Cycle through the slots using the UP or DOWN buttons and
load the values using the LEFT or RIGHT buttons. If there are valid settings in the
slot the TOGA IV will display SETTINGS LOADED. If there is nothing stored the
TOGA IV will display LOAD ERROR.
PAUSING OR HALTING AN EXPOSURE SEQUENCE
While the TOGA IV is in the midst of an exposure sequence you can either pause
the sequence or halt it. Pressing the FOCUS button while between exposures will
effect a pause and the unit will display SEQUENCE PAUSED. Pressing the FOCUS
button while the shutter is open will cause the unit to display PAUSESET and once
the current exposure is complete the unit will display SEQUENCE PAUSED and
await input. Should you want to pause a running sequence during an exposure,
when PAUSESET is displayed press the FOCUS button again. Pressing the
START/STOP button will restart the sequence at the next exposure number.
While a sequence is in progress you can halt the sequence at any time by
pressing the START/STOP button. Restarting the sequence after this will reset the
number of exposures to 0.
You are now ready to use your TOGA IV. Enjoy and thank you from the Two Old
Guys.
Programming an HDR sequence set
High-dynamic range imaging usually uses a set of three 'bracketed' images which
are combined to produce one image that has more data than each of the three
originals. To do this with the TOGA first program and store the exposure values
that you wish to use in any of the preset slots available. Then while in AUTO mode
move through the menu items to select HDR SEQUENCING and enter the numbers
of the preset slots you wish to shoot.
This is done by using the UP/DOWN arrows to set the slot needed. If only selecting
two leave the last one at 00.
Programming in shutter lag adjustment
There is in all cameras some 'lag' between pressing the button and the opening of
the shutter. While this isn't an issue with most imaging, in striving for accuracy we
at TOGA have added this adjustment. Program shutter lag by selecting that menu
item in AUTO mode and using the UP/DOWN buttons to set the value you wish
from 0 to 200ms in 10ms steps.
To determine the best connect your camera to the software that came with it and
shoot 3 second shots with the cap on. If the shutter lag is set too low the
exposures might say 2 seconds. The value where it changes from 2 seconds to 3
seconds is the correct value to use.
TOGA IV CABLES
Canon Rebel (300/350/400/450) and Pentax
These cameras use a 2.5mm stereo plug for remote cable function. The
TOGA IV has a 3.5mm stereo plug for shutter control. Therefore you need to
build a 3.5mm to 2.5mm stereo patch cable. The wiring is straight through
tip->tip, ring->ring and sleeve->sleeve. Purchase a 3.5mm patch cord from
your favourite cable outlet (RS etc.) along with some 2.5mm inline plugs.
Cut one connector off and strip the cables. You can then use your multimeter or ohm-meter to determine which wire goes where and solder the
2.5mm plug onto the end of the cable.
Nikon
The Nikon DSLRs (check which models) use a proprietary Nikon plug. Cables
are available from TOGA at a small cost.
Other Nikon cameras use a similar remote but with a different connector to
the camera, these can be modified in the same manner.
Canon 10D, 20D...
Cables using the proprietary Canon N3 connector are available from TOGA
at a small cost.
Modifying a remote
This method can be used on virtually any digital camera that uses either a 2-wire
or 3-wire remote. Some cameras use two wires and measure a difference in
voltage to determine whether to trip the shutter or to auto-focus but most use 3
wires and just short the wire needed for the function. We can determine what you
need if you send us your remote.
Compatible cameras
Nikon
•
•
•
•
•
D1, D1X, D1H
D2, D2Xs, D2H
D3
D70, D80
D100 (battery grip required), D200, D300
Fuji
•
•
These use the same connector as the Nikon D1 etc.
S3 Pro
S5 Pro
Kodak
•
This uses the same connector as the Nikon D1 etc.
DCS Pro
Canon
•
•
300D, 350D (XT), 400D (XTi), 450D (XSi)
1D, 5D, 10D, 20D, 20Da, 30D, 40D
Pentax DSLR
•
These cameras use the same connector as the Canon Rebel Series
All models
Sony/Minolta
These cameras are compatible but need a custom cable built. This can be
done by us or by you. Ask when you order.
Should you wish the Two Old Guys to do the modifications for you we'll gladly modify
your remote for you if you ship it to us.
A Canon Rebel/Pentax cable can be provided for $15.00 when you purchase your TOGA
IV. Modification of a remote is $30 plus return shipping.
Nikon and Canon N3 cables are available for $30.