1
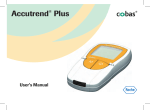
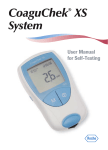
ccxs_user_EN.book Seite 1 Samstag, 29. März 2008 5:30 17
CoaguChek XS
®
User’s Manual
Manuale per l’uso
ccxs_user_EN.book Seite 2 Samstag, 29. März 2008 5:30 17
On the packaging, on the type plate of the monitor and in the User’s
Manual you may encounter the following symbols and abbreviations
shown here with their meaning:
Use by/Expiry date
LOT
Lot number
IVD
For in vitro diagnostic use
0123
This product fulfills the requirement of Directive 98/79/EC
on in vitro diagnostic medical devices.
Catalogue number
Please consult instructions for use
Caution (refer to accompanying documents). Please refer
to safety-related notes in the manual accompanying this
instrument.
Manufacturer
Store at
2
ccxs_user_EN.book Seite 3 Samstag, 29. März 2008 5:30 17
The CoaguChek XS System
The CoaguChek XS System
Self-monitoring and self-adjustment of oral coagulation therapy using
coagulation values determined with the aid of the CoaguChek XS System
may only be undertaken after consultation with your doctor and comprehensive instruction by a qualified healthcare professional. Your pharmacist / specialist supplier can provide you the training and/or put you in
touch with associations or institutions offering training in coagulation
self-monitoring. Please read the special notes on INR self-monitoring in
the package insert accompanying the test strips.
The CoaguChek Softclix lancing device is intended only for
patient self-monitoring by a single person. It must not be
used to collect blood in a multi-patient setting as it does
not incorporate any features to guard against crossinfection.
Please note: This manual contains all the information you need to
operate and care for the CoaguChek XS System. Please read this entire
manual carefully before you use the monitor.
Last update user information: 2008-03
3
English
The CoaguChek XS System is used for quantitative monitoring of coagulation values (common terms: thromboplastin time, PT, Quick value) with
CoaguChek XS PT test strips.
ccxs_user_EN.book Seite 4 Samstag, 29. März 2008 5:30 17
The CoaguChek XS System
4
ccxs_user_EN.book Seite 5 Samstag, 29. März 2008 5:30 17
The CoaguChek XS System
3
English
Introduction
9
The CoaguChek XS System ...................................................................... 9
Test principle ................................................................................................... 10
Contents of the pack .................................................................................. 10
Operating conditions .................................................................................. 11
Quality control ................................................................................................ 12
About this manual
13
Manual format ................................................................................................ 13
The CoaguChek XS monitor
16
The CoaguChek XS monitor ................................................................... 17
Batteries.............................................................................................................. 18
Starting up
19
Inserting the batteries ................................................................................ 20
Code chip
23
Inserting the code chip ............................................................................. 24
Monitor setup
26
Settings summary ......................................................................................... 27
Setting up the monitor (Set Mode) .................................................... 28
Setting the date format ............................................................................. 31
Setting the date.............................................................................................. 32
Setting the time format ............................................................................. 34
Setting the time .............................................................................................. 35
Selecting the unit .......................................................................................... 36
Setting the beep tone ................................................................................. 37
Setting the therapeutic range (INR) .................................................. 38
5
ccxs_user_EN.book Seite 6 Samstag, 29. März 2008 5:30 17
Testing a capillary blood sample
43
Important notes .............................................................................................. 44
Getting a good capillary blood sample ............................................ 46
Preparing to test ............................................................................................ 47
Performing a test ........................................................................................... 48
Notes concerning the results display ............................................... 59
Testing by healthcare professionals .................................................. 62
Getting a good capillary blood sample
in a healthcare setting ............................................................................... 63
Disposal by healthcare professionals ............................................... 63
Memory
65
Viewing test results...................................................................................... 65
Erasing memory ............................................................................................. 68
Cleaning
71
Cleaning the housing ................................................................................. 71
Cleaning the test strip guide .................................................................. 72
Cleaning by healthcare professionals .............................................. 74
Error messages
75
Error messages overview.......................................................................... 76
Error messages after turning the monitor on .............................. 78
Error messages when preparing to test ........................................ 80
Error messages after the code number was confirmed ........ 84
Error messages during or after blood application .................... 86
Error message during infrared downloads .................................... 92
Display information and symbols
6
94
ccxs_user_EN.book Seite 7 Samstag, 29. März 2008 5:30 17
Further information
97
Ordering ............................................................................................................. 97
Product limitations ....................................................................................... 97
Guarantee
101
Alphabetical index
102
English
Product specifications
98
Operating conditions and technical data ....................................... 98
Sample material ............................................................................................. 99
Storage and transport conditions ....................................................... 99
Disposal of the CoaguChek XS monitor ......................................... 99
Information service ................................................................................... 100
Repairs ............................................................................................................. 100
7
ccxs_user_EN.book Seite 8 Samstag, 29. März 2008 5:30 17
8
ccxs_user_EN.book Seite 9 Samstag, 29. März 2008 5:30 17
Introduction
Introduction
The CoaguChek XS System (CoaguChek XS monitor and CoaguChek XS
PT test strips) quantitatively determines prothrombin time (PT/Quick
value/INR) using capillary blood from a fingertip or untreated venous
whole blood. The CoaguChek XS System makes coagulation testing easy.
The CoaguChek XS monitor guides you through the test step by step
using the symbols in the display. The code chip accompanying the test
strips contains lot-specific information about these test strips, including
calibration data that allow the correct results to be calculated, and the
expiry date for the test strips. You only need to insert the code chip, turn
the monitor on, insert the test strip, and apply a blood sample. When the
CoaguChek XS monitor is ready for a measurement, the result will be
displayed about 1 minute after application of the sample. After the measurement, the monitor automatically stores the result in memory.
If you have any questions about the CoaguChek XS monitor, please contact your local customer support and service centre. You will find contact
details on page 100.
Please note: Before you use the monitor for the first time (i.e. after
you have first inserted the batteries), you must set the date and time
correctly to allow you to carry out measurements properly. Each time
you replace the batteries you need to check (and, if necessary adjust)
the date and time.
9
English
The CoaguChek XS System
ccxs_user_EN.book Seite 10 Samstag, 29. März 2008 5:30 17
Introduction
Test principle
The CoaguChek XS PT test strip contains a lyophilized reagent (reagent
in dried form). The reactive components of this reagent consist of thromboplastin and a peptide substrate. When a sample is applied, thromboplastin activates coagulation, which leads to the formation of thrombin.
At the same time the monitor starts to measure the time. The enzyme
thrombin cleaves the peptide substrate, generating an electrochemical
signal. Depending on the time elapsed when it first appears, this signal is
then converted by means of an algorithm into customary coagulation
units (INR, %Quick, seconds) and the result is displayed.
Contents of the pack
■
CoaguChek XS monitor
■
4 alkali-manganese batteries, 1.5 V, type AAA
■
CoaguChek Softclix lancing device with instructions for use
■
CoaguChek Softclix Lancet
■
System carry-case
■
User's Manual
10
ccxs_user_EN.book Seite 11 Samstag, 29. März 2008 5:30 17
Introduction
Operating conditions
■
Only use the monitor at a room temperature between 18°C and 32°C.
■
Only use the monitor at a relative humidity between 10% and 85%.
■
When testing, place the monitor on a level, vibration-free surface or
hold it so it is roughly horizontal.
■
If the monitor is to remain unused for a longer period of time, keep it
in the carry-case supplied.
■
Use the monitor only up to a maximum altitude of 4300 metres.
Electromagnetic interference
Strong electromagnetic fields may interfere with the proper
operation of the monitor. Do not use the monitor near strong
electromagnetic fields.
11
English
To ensure that your CoaguChek XS System functions properly, please
observe the following guidelines:
ccxs_user_EN.book Seite 12 Samstag, 29. März 2008 5:30 17
Introduction
Quality control
The CoaguChek XS System has a number of inbuilt quality-control
functions such as:
■
A check of the electronic components and functions every time the
monitor is turned on.
■
A check of the test strip temperature while a test is in progress.
■
A check of the expiry date and lot information on the test strip.
■
A quality control function is incorporated into the test strip. Quality
control and system checks using control test solutions that you may
be familiar with from other systems are no longer required.
12
ccxs_user_EN.book Seite 13 Samstag, 29. März 2008 5:30 17
About this manual
About this manual
The layout of this User’s Manual has been specially designed to help you
locate the most important information quickly and easily. Where illustrations are used, they always appear on the left side of the page with the
accompanying explanation text on the right.
All instructions that require you to actively do something as well as
especially important information appear on a blue background.
This symbol draws attention to the possible risk of sustaining
injury or of damaging your health.
13
English
Manual format
ccxs_user_EN.book Seite 14 Samstag, 29. März 2008 5:30 17
About this manual
Example:
This column contains an illustration.
This column states what you
should do at this point.
1
14
Press the On/Off button.
ccxs_user_EN.book Seite 15 Samstag, 29. März 2008 5:30 17
About this manual
Example:
pm
28:88 am
18:88
88-88-88
error
set
code
mem
888
%Q
Sec
INR
QC
This column contains information
linked to the display screen.
Each time you turn on the monitor, it runs a full display check,
briefly showing all the symbols
that might be displayed.
To prevent reading errors, check
regularly that all segments of the
symbols are showing.
C
15
English
This column contains an illustration of the display screen.
ccxs_user_EN.book Seite 16 Samstag, 29. März 2008 5:30 17
The CoaguChek XS monitor
The CoaguChek XS monitor
A
F
H
B
C
D
E
G
I
H
16
ccxs_user_EN.book Seite 17 Samstag, 29. März 2008 5:30 17
The CoaguChek XS monitor
A Display
Shows results, information,
symbols and results recalled
from memory.
B M (memory) button
Press this button to recall
results from memory and to
change the monitor settings.
You also press this button to
confirm the code number displayed before each test.
C On/Off button
Press this button to turn the
monitor on or off.
D Measurement chamber
cover
Remove this cover to clean
the test strip guide.
E
Test strip guide
Insert the test strip here.
F
Battery compartment
cover
Covers the battery compartment (4 1.5 V alkali-manganese batteries type AAA).
G Code chip slot
Insert the code chip here.
H Set button
Press this button to enter or
change the monitor settings.
I
Infrared window
You can transfer data stored
in memory via this infrared
interface.
17
English
The CoaguChek XS monitor
ccxs_user_EN.book Seite 18 Samstag, 29. März 2008 5:30 17
The CoaguChek XS monitor
Batteries
To save power, the CoaguChek XS monitor automatically turns itself off
after 3 minutes unless a button has been pressed or a new test strip has
been inserted. When the monitor turns itself off, all results obtained up to
that point remain in memory. The monitor briefly indicates the battery
power level when it is turned on. The battery symbol is divided into four
segments which correspond to the battery power level.
When replacing the batteries you must insert the new batteries within
one minute of removing the old ones, to keep the date and time settings. If you take longer than this, you must re-enter the date and time.
Use only alkali-manganese batteries type AAA.
The CoaguChek XS monitor is shipped with high quality batteries.
Since quality varies among different battery brands, Roche recommends replacing your used batteries with new batteries of a similar
high quality and not mixing different brands. Do not mix new and
already used batteries.
Please be aware that battery life may be affected by many factors,
such as battery quality, operating conditions (e.g. ambient temperature), frequency of use, and test duration.
Results are retained in memory together with the date and time even
when no batteries are inserted. All other settings are retained, too.
Think of the environment. Dispose of used batteries sensibly.
Do not throw batteries onto a fire. They may explode!
18
ccxs_user_EN.book Seite 19 Samstag, 29. März 2008 5:30 17
Starting up
Starting up
1
Insert the batteries
2
Insert the code chip (you can also carry out this step immediately
before testing)
3
Set the current date and time
4
Select the coagulation unit in which the results are to be displayed
19
English
Before using the monitor for the first time, carry out the following steps:
ccxs_user_EN.book Seite 20 Samstag, 29. März 2008 5:30 17
Starting up
Inserting the batteries
1
With the monitor turned off,
turn it over.
2
Gently press the tab on the
battery compartment cover
towards the centre of the
monitor and lift off the cover.
3
Insert the four batteries in the
battery compartment as indicated. Pay attention to the
positions of “+” (top of battery) and “-” (flat end). Once
you have inserted the batteries, the monitor turns itself on
after about 5 seconds.
Only use alkaline manganese
batteries (1.5 V, AAA). Think
of the environment. Dispose
of used batteries sensibly.
20
ccxs_user_EN.book Seite 21 Samstag, 29. März 2008 5:30 17
Starting up
Close the battery compartment.
5
Check that all of the display
symbols are displayed properly. Results may be misread
if a segment is missing.
English
4
pm
28:88 am
18:88
88-88-88
error
set
code
mem
888
%Q
Sec
INR
QC
C
Tip
If the display check when you
turn on the monitor is too
quick, you can put it “on hold”
by pressing and holding
down the On/Off button
the next time you turn the
monitor on.
For as long as you keep the
button pressed, the display
remains frozen.
21
ccxs_user_EN.book Seite 22 Samstag, 29. März 2008 5:30 17
Starting up
11:23
16-05-08
6
If these have not yet been set
or if they have been lost
(because the batteries were
removed from the monitor for
more than one minute), your
CoaguChek XS monitor now
automatically enters Set
Mode. After you have set the
date and time, the monitor
enters Test Mode. If you wish
to enter any further settings,
turn to the chapter Setting up
the monitor (Set Mode) starting on page 28.
31-12-00
set
7
22
On the next screen that
appears check that the date
and time are correctly set.
Turn the monitor off again
when the settings are correctly entered.
ccxs_user_EN.book Seite 23 Samstag, 29. März 2008 5:30 17
Code chip
The code chip provides the monitor with important information which it
needs to perform the coagulation test. The chip contains information
about the test method, the lot number and the expiry date. The monitor is
ready to use once the code chip has been inserted.
■
Each time you test, check that the correct code chip is inserted in the
monitor.
■
When you start each new pack of test strips you must remember to
remove the old code chip from the monitor and replace it with the new
code chip supplied with the test strips.
■
Each code chip belongs to a particular lot of test strips. Only remove
the code chip when you are testing with test strips taken from a new
pack (with a new code chip).
■
Protect the code chip from moisture and equipment which produces
magnetic fields.
23
English
Code chip
ccxs_user_EN.book Seite 24 Samstag, 29. März 2008 5:30 17
Code chip
Inserting the code chip
1
Remove the old code chip, if
one is inserted in the monitor.
Discard the old code chip
with your household waste.
2
Always make sure that the
number on the code chip
matches the number on the
label of the test strip container.
Using the wrong code chip can produce incorrect results.
24
ccxs_user_EN.book Seite 25 Samstag, 29. März 2008 5:30 17
Code chip
Slide the new code chip into
the slot on the side of the
monitor as shown until you
feel it snap into place.
English
3
Every time you insert a test strip in the monitor, the display shows the
number of the code chip that is presently inserted. Always compare the
code number you see on the display with the number that is printed on
the test strip container. If the two numbers are identical, confirm by
pressing the M button (see page 51).
If the code numbers are not identical, turn the monitor off and insert the
correct code chip. Discard the old code chip to prevent mix-ups.
If the code chip is missing or incorrectly inserted, Error and Code appear
in the display (please refer also to the chapter Error messages starting on
page 75).
25
ccxs_user_EN.book Seite 26 Samstag, 29. März 2008 5:30 17
Monitor setup
Monitor setup
Please note: If you have not set the date (after turning on for the
first time or because the batteries were removed from the monitor
for more than one minute), you cannot perform a test. In that case
turning on the monitor takes you immediately to Set Mode, where
you must set the date and time. Once you have set date and time the
monitor automatically enters Test Mode.
26
ccxs_user_EN.book Seite 27 Samstag, 29. März 2008 5:30 17
Monitor setup
Settings summary
Setting
Options
Presetting *
Date format
Day-Month-Year (31-12-00)
Month-Day-Year (12-31-00)
Year-Month-Day (00-12-31)
31-12-00
Time format
31-12-00
24-hour format (24h)
12-hour format (12h)
with a.m./p.m.
Time
English
Date
24h
12:00
Unit
%Q
Sec
INR
INR
Beep tone
On
Off
On
Therapeutic range
(only INR)
On
Off
Off
Set range [INR]
Lower range (1.5 – 3.5)
Upper range (2.5 – 4.5)
1.5 INR
2.5 INR
* “Presetting” means the setting that is in the monitor when it leaves the
factory.
27
ccxs_user_EN.book Seite 28 Samstag, 29. März 2008 5:30 17
Monitor setup
Setting up the monitor (Set Mode)
All settings are entered with the Set button and the M button.
1
If the monitor did not automatically enter Set Mode
when you turned it on, press
the Set button (on the left
side of the monitor) to put it
in Set Mode.
You can also press the
Set button to change to
Set Mode when the monitor
is already turned on.
2
28
If the currently displayed setting is correct (e.g. the date is
correct and you only wish to
change the time), you can
press the Set button to move
on to the next setting,
or
ccxs_user_EN.book Seite 29 Samstag, 29. März 2008 5:30 17
3
Press the M button to change
the setting that is currently
flashing. You may press the
M button repeatedly (or
press it and hold it down)
until you have reached the
correct setting. Settings
where there are only two
options (time format, beep
tone) can be toggled on and
off with the M button.
4
Press the Set button again to
confirm the current setting
(which is saved to memory)
and move on to the next one.
29
English
Monitor setup
ccxs_user_EN.book Seite 30 Samstag, 29. März 2008 5:30 17
Monitor setup
5
30
You can only move forward
from one setting to the next,
not backward. Corrections
can only be made by repeating the settings. You can exit
the settings procedure at any
time by pressing the On/Off
button
. All settings you
have already entered are
retained.
ccxs_user_EN.book Seite 31 Samstag, 29. März 2008 5:30 17
Monitor setup
Setting the date format
First, select the date format (the entire date display flashes). The
display options are as follows:
31-12-00 (= presetting) Day-Month-Year
■
12-31-00 Month-Day-Year
■
00-12-31 Year-Month-Day
English
■
When elements in the display are surrounded by a halo, it indicates
that they are flashing in the monitor’s display.
Pressing the Set button takes you to Set Mode. This is indicated by the
word “set” in the display.
1
Press the M button to select
the date format. 31-12-00
flashes in the display. You can
now select the date format.
2
Press the Set button to save
this setting and continue with
the date setting. The display
automatically moves on to
the date setting.
31-12-00
set
31
ccxs_user_EN.book Seite 32 Samstag, 29. März 2008 5:30 17
Monitor setup
Setting the date
The next three settings involve entering first the year, then the month,
and finally the day.
3
Press the M button to change
the number that is currently
flashing and set the current
year.
4
Press the Set button to save
the year. The display then
automatically moves on to
the month setting.
5
The preset month flashes.
Press the M button until the
correct month is displayed.
6
Press the Set button to save
the setting. The display then
automatically moves on to
the day setting.
31-12-00
set
31-12-08
set
32
ccxs_user_EN.book Seite 33 Samstag, 29. März 2008 5:30 17
7
The preset day flashes.
Press the M button until the
correct day is displayed.
8
Press the Set button to save
the setting. The display then
automatically moves on to
the time format setting.
31-05-08
set
33
English
Monitor setup
ccxs_user_EN.book Seite 34 Samstag, 29. März 2008 5:30 17
Monitor setup
Setting the time format
Now select the time format. You can choose between the 24-hour time
format (presetting) and the 12-hour time format with “a.m.” or “p.m.”.
9
24 h
set
12 h
set
34
Press the M button to toggle
between 24-hour and 12hour format.
10 Press the Set button to save
the correct setting and continue with the time setting.
The display automatically
moves on to the time setting.
ccxs_user_EN.book Seite 35 Samstag, 29. März 2008 5:30 17
Monitor setup
Setting the time
11:23
set
12:23
11:23 am
set
12:23
pm
11 Press the M button to change
the number that is currently
flashing. Press the Set button
to confirm. You can now set
the minutes (again using the
M button).
If you have selected the 12hour time format, “a.m.”
changes to “p.m.” and vice
versa when you reach “12:xx”.
12 Press the Set button to save
this setting and continue with
selection of the unit for
reporting the result.
35
English
First you set the hour, then the minutes.
ccxs_user_EN.book Seite 36 Samstag, 29. März 2008 5:30 17
Monitor setup
Selecting the unit
Choose the coagulation unit you wish the monitor to use to display the
result. The options are:
■
%Q
■
Sec
■
INR (presetting)
Ask your doctor if you are not sure which unit to select.
The current coagulation unit flashes.
13 Press the M button to cycle
through the three options.
set
set
INR
%Q
set
14 Press the Set button to save
the correct unit. The display
then automatically moves on
to the beep tone setting.
Sec
If you have selected “INR” as your coagulation unit, you have the option
of entering your therapeutic target range. If you enter this, you will be
able to see after every test whether the result is within your therapeutic
target range (see page 38).
36
ccxs_user_EN.book Seite 37 Samstag, 29. März 2008 5:30 17
Monitor setup
Setting the beep tone
■
when it detects a test strip,
■
when pre-heating of the test strip is complete and you need to apply
a sample,
■
when it detects a sample,
■
when the result is displayed and
■
if an error occurs (three short beeps).
We recommend you leave the beep tone turned on.
set
0n
15 Press the M button to toggle
between “OFF” and “On”
(“On” is the presetting).
16 Press the Set button to save
the chosen setting. The display automatically moves on
to the next setting option.
37
English
After you have set the unit, you can choose whether you want the beep
tone “On” or “OFF”. If you have selected “On,” the monitor will beep in the
following situations:
ccxs_user_EN.book Seite 38 Samstag, 29. März 2008 5:30 17
Monitor setup
Setting the therapeutic range (INR)
What happens next depends on the coagulation unit you have chosen for
your results. If you selected “%Q” or “Sec”, the settings are now complete,
and “End” appears in the display (see page 40).
If you selected “INR” as the unit, you can now choose whether you want
a further element to be displayed if the result is outside (above or below)
your therapeutic target range. If you switch on this display option, an up
or down arrow is displayed whenever the result is above or below the
target range you have set. This highlights the fact that the result is outside your target range.
17 Press the M button to toggle
between “OFF” and “On”.
set
0FF
18 Press the Set button to save
the chosen setting and continue with the monitor setup.
If you have activated this display option (“On”), you are now able to enter
the limits of your target range. Consult your doctor about what target
range is appropriate for you.
38
ccxs_user_EN.book Seite 39 Samstag, 29. März 2008 5:30 17
Monitor setup
15
INR
set
25
INR
20 Press the Set button to save
the chosen lower limit and
continue with the upper limit
setting.
21 Now press the M button to
set the upper limit (symbolized by the up arrow) within
the range 2.5 – 4.5 INR. The
selectable range will be at
least 0.1 INR above the lower
limit you have selected.
22 Press the Set button to save
the chosen upper limit and
close the monitor setup.
39
English
set
19 Press the M button to set the
lower limit (symbolized by
the down arrow) within the
range 1.5 – 3.5 INR.
ccxs_user_EN.book Seite 40 Samstag, 29. März 2008 5:30 17
Monitor setup
The monitor setup is now complete.
set
End
11:23
40
16-05-08
This display screen appears automatically after you have completed the last setting and
remains for a few seconds to indicate that the setup procedure is
now complete.
After that the monitor automatically enters Test Mode.
ccxs_user_EN.book Seite 41 Samstag, 29. März 2008 5:30 17
Monitor setup
English
If you do not wish to perform a
test at this point, turn the monitor
off.
You can exit the monitor setup procedure at any time (e.g. if you have
made an incorrect entry) by pressing the On/Off button
. Then enter
the monitor setup again by turning on the monitor with the Set button,
and press the Set button repeatedly until you reach the setting you wish
to change.
41
ccxs_user_EN.book Seite 42 Samstag, 29. März 2008 5:30 17
Monitor setup
42
ccxs_user_EN.book Seite 43 Samstag, 29. März 2008 5:30 17
Testing a capillary blood sample
Testing a capillary blood sample
■
CoaguChek XS monitor
■
The code chip already inserted in the monitor (each test strip
container has its own code chip)
■
Test strips belonging to the code chip mentioned above
■
Lancing device (e.g. CoaguChek Softclix)
■
Lancet (e.g. CoaguChek Softclix Lancet)
■
Lint-free swab or paper tissue
English
What you need
43
ccxs_user_EN.book Seite 44 Samstag, 29. März 2008 5:30 17
Testing a capillary blood sample
Important notes
Always …
■
… close the container immediately after having removed a test strip.
■
… operate the monitor at an ambient temperature between 18°C and
32°C.
■
… place the monitor on a level, stable surface (table) or hold it so it
is roughly horizontal.
■
… follow the information on correct handling of test strips in the
package insert.
■
… keep the test strip guide and housing clean. See also the chapter
entitled Cleaning (page 71).
44
ccxs_user_EN.book Seite 45 Samstag, 29. März 2008 5:30 17
Testing a capillary blood sample
Never …
… store the monitor at extreme temperatures.
■
… store the monitor in damp or humid conditions without protection.
■
… remove or insert the code chip while the monitor is performing a
test.
■
… use the code chip from a pack other than the one in use.
■
… touch or remove the test strip during a test.
■
… wait more than 15 seconds after lancing the fingertip before applying the blood.
■
… add more blood after the test has begun.
■
… perform a test with a drop of blood from a previous puncture.
English
■
Failure to comply with the above may lead to inaccurate results.
45
ccxs_user_EN.book Seite 46 Samstag, 29. März 2008 5:30 17
Testing a capillary blood sample
Getting a good capillary blood sample
To get a suitable drop of blood:
■
Wash your hands in warm water and dry thoroughly.
Residues of water on the skin can dilute the drop of blood and
so produce false results.
■
Let your hand hang at your side before lancing your finger.
■
Immediately after lancing, massage gently along the side of your
finger to obtain a sufficiently large blood drop without pressing or
squeezing too hard.
The CoaguChek Softclix lancing device is intended only for
patient self-monitoring by a single person. It must not be
used to collect blood in a multi-patient setting as it does
not incorporate any features to guard against crossinfection.
46
ccxs_user_EN.book Seite 47 Samstag, 29. März 2008 5:30 17
Testing a capillary blood sample
1
Have the test strip container
to hand.
2
Make sure that the code chip
belonging to these test strips
is inserted in the monitor.
3
Prepare the lancing device by
inserting a fresh lancet.
Do not lance your finger until
asked to do so further on in
this description.
47
English
Preparing to test
ccxs_user_EN.book Seite 48 Samstag, 29. März 2008 5:30 17
Testing a capillary blood sample
Performing a test
1
Wash your hands with soap
and warm water. Dry them
thoroughly.
Residues of water on
the skin can dilute the
drop of blood and so
produce false results.
28:88
18:88
pm
am
88-88-88
error
set
code
mem
888
%Q
Sec
INR
QC
48
C
2
Place the monitor on a level,
vibration-free surface or hold
it in your hand so it is
roughly horizontal. Turn the
monitor on by pressing the
On/Off button
. Alternatively, you can insert a test
strip to turn it on.
3
Check that all of the display
symbols are displayed properly as shown on the picture.
Results may be misread if a
segment is missing.
ccxs_user_EN.book Seite 49 Samstag, 29. März 2008 5:30 17
11:23
11:23
16-05-08
16-05-08
4
Check the battery level. If
there are no bars left in the
battery symbol, you cannot
perform any more tests.
5
Check that the date and time
are correct. Correct any
wrong entries as described
from page 28 onwards.
6
The flashing test strip symbol
prompts you to insert a test
strip. Remove a test strip from
its container. Immediately
after removing a test strip,
close the container again
with the stopper.
Exposure to external influences (e.g. humidity) may deteriorate
the test strips and may lead to error messages.
49
English
Testing a capillary blood sample
ccxs_user_EN.book Seite 50 Samstag, 29. März 2008 5:30 17
Testing a capillary blood sample
7
Hold the test strip so the
lettering “CoaguChek XS PT”
is facing upward.
8
Slide the test strip into the
test strip guide in the
direction indicated by the
arrows.
Slide the test strip in as far as
it will go. A beep tone indicates that the monitor has
detected the test strip (provided the beep tone is turned
on in the settings).
50
ccxs_user_EN.book Seite 51 Samstag, 29. März 2008 5:30 17
11:23
16-05-08
code
111
The code number of the code
chip inserted in the monitor
flashes in the display. Make sure
that this number is identical with
the code number printed on the
test strip container.
9
If the two numbers are identical, confirm by pressing the
M button.
The code number stops
flashing.
If the code numbers are not
identical, remove the wrong
code chip and insert the code
chip that was supplied with
the test strips you are using.
Using the wrong code chip can produce inaccurate results.
51
English
Testing a capillary blood sample
ccxs_user_EN.book Seite 52 Samstag, 29. März 2008 5:30 17
Testing a capillary blood sample
11:24
16-05-08
The hourglass symbol shows that
the test strip is warming up.
When the warming-up process is
complete, a further beep tone
(provided the beep tone is turned
on) indicates that you can now
apply blood.
11:25
16-05-08
The blood drop symbol and the
application area flash to indicate
that the monitor is ready to perform the test and is waiting for
blood to be applied.
107
Sec
52
At the same time a 120-second
countdown begins. You must
apply the drop of blood to the test
strip within this time, otherwise
you will receive an error message
(error, and “000” where the
result would normally be displayed).
ccxs_user_EN.book Seite 53 Samstag, 29. März 2008 5:30 17
Testing a capillary blood sample
English
10 Now lance the side of a
fingertip with the lancing
device.
We recommend obtaining the
capillary blood from the side of
the fingertip as this causes least
pain.
Massage the lanced finger until a
drop of blood is formed. Do not
press or squeeze the finger.
Apply the first drop of blood
from the finger.
The CoaguChek Softclix lancing device is intended only for
patient self-monitoring by a single person. It must not be
used to collect blood in a multi-patient setting as it does
not incorporate any features to guard against crossinfection.
53
ccxs_user_EN.book Seite 54 Samstag, 29. März 2008 5:30 17
Testing a capillary blood sample
11 Apply the blood directly from
the finger to the semicircular,
transparent sample application area of the test strip.
54
ccxs_user_EN.book Seite 55 Samstag, 29. März 2008 5:30 17
Alternatively, you can touch
the blood drop against the
side of the sample application area (instead of applying
it to the centre from above).
The test strip draws up the
blood by capillary action.
During this process you must
hold the blood drop to the
test strip until the flashing
blood drop symbol has disappeared and the monitor
beeps (provided the beep
tone is turned on).
Apply the blood drop to the test
strip within 15 seconds of lancing the fingertip. Applying blood
after this period of time would
falsify the result, as the coagulation process would already have
begun.
55
English
Testing a capillary blood sample
ccxs_user_EN.book Seite 56 Samstag, 29. März 2008 5:30 17
Testing a capillary blood sample
11:27
16-05-08
You hear a beep tone when you
have applied enough blood (provided the beep tone is turned on).
The blood drop symbol disappears and the test starts.
Do not add more blood. Do not touch the test strip until the
result is displayed.
11:28
16-05-08
The monitor now performs an
automatic quality control check
on the test strip. “QC” appears in
the display.
Following a successful outcome
of the quality control check, a tick
appears after “QC”.
QC
56
ccxs_user_EN.book Seite 57 Samstag, 29. März 2008 5:30 17
11:28
16-05-08
It is at this point that the coagulation measurement begins. The
hourglass flashes until the monitor has the result.
QC
11:29
16-05-08
30
INR
The result is displayed in the unit
you chose when setting up the
monitor. It is automatically saved
to memory. You can change the
unit if you wish by pressing the
Set button while the result is displayed (see page 60).
Enter the test result in your
patient logbook. When interpreting your result, please also read
the test strip package insert carefully.
57
English
Testing a capillary blood sample
ccxs_user_EN.book Seite 58 Samstag, 29. März 2008 5:30 17
Testing a capillary blood sample
12 Remove the test strip from
the measurement chamber.
13 Turn the monitor off.
14 Discard the used lancet and
test strip with your regular
household waste.
15 Clean the monitor if this
becomes necessary (see
page 71).
58
ccxs_user_EN.book Seite 59 Samstag, 29. März 2008 5:30 17
Testing a capillary blood sample
11:29
16-05-08
50
If your results are displayed in
INR and you have activated the
relevant option, values that are
outside a defined target range
are flagged with an up arrow (too
high) or a down arrow (too low).
INR
11:29
16-05-08
13
INR
59
English
Notes concerning the results display
ccxs_user_EN.book Seite 60 Samstag, 29. März 2008 5:30 17
Testing a capillary blood sample
11:29
16-05-08
25
INR
C
A “c” is displayed along with the
result.
This may occur if the haematocrit
value is very low or due to
erroneous blood collection (e.g.
wet hands). Repeat the measurement and make sure that your
hands are dry. If the message
persists, please contact your
healthcare professional for a
haematocrit check.
You can temporarily change the
unit in which the result is presented by pressing the Set
button while the result is displayed.
Each press of the button takes
you to the next available unit (%Q
- Sec - INR - …).
When you next perform a test, the
result is again displayed in the
standard unit you selected during
setup.
60
ccxs_user_EN.book Seite 61 Samstag, 29. März 2008 5:30 17
Testing a capillary blood sample
16-05-08
80
INR
The valid measuring ranges for
CoaguChek XS PT test strips are:
■
INR: 0.8-8.0
■
%Q: 120-5
■
Sec: 9.6-96
Results that are outside the
measuring range are indicated by
the symbols > (greater than) or <
(smaller than) and flashing. In
this case, refer to the section Test
limitations and known interferences in the package insert
supplied with the test strips, and
repeat the test.
61
English
11:23
ccxs_user_EN.book Seite 62 Samstag, 29. März 2008 5:30 17
Testing a capillary blood sample
Testing by healthcare professionals
Follow the appropriate infection control guidelines in force in your facility.
■
Wear protective gloves.
■
Wash or disinfect the patient's finger and allow it to dry thoroughly.
Residues of water or disinfectant on the skin can dilute the
drop of blood and so produce false results.
■
Use only a lancing device that is approved for use by healthcare professionals (for example, the Safe-T-Pro Plus lancing device from
Roche shown below). Follow the manufacturer’s instructions for use
in a multi-patient setting.
■
Follow all health and safety regulations in force locally.
62
ccxs_user_EN.book Seite 63 Samstag, 29. März 2008 5:30 17
There is a potential risk of infection. Healthcare professionals using the CoaguChek XS monitor to perform tests in more
than one patient must be aware that any object coming into
contact with human blood is a potential source of infection.
Healthcare professionals must also be aware that any crosscontamination is a potential source of infection for patients.
(See: Clinical and Laboratory Standards Institute: Protection of
Laboratory Workers from Occupationally Acquired Infections;
Approved Guideline - Third Edition; CLSI document M29-A3,
2005).
Getting a good capillary blood sample in a healthcare setting
■
Select and lance a puncture site along the side of a fingertip.
■
Use gentle pressure, massage the finger towards the fingertip to
encourage a drop of blood to form (approx. 10 µL).
■
Follow the procedure for testing as outlined from page 47. Use only a
lancing device that is approved for use by healthcare professionals
(for example, the Safe-T-Pro Plus lancing device from Roche).
Disposal by healthcare professionals
Dispose of used items in line with the disposal policy of your hospital,
institute or medical practice.
63
English
Testing a capillary blood sample
ccxs_user_EN.book Seite 64 Samstag, 29. März 2008 5:30 17
Testing a capillary blood sample
64
ccxs_user_EN.book Seite 65 Samstag, 29. März 2008 5:30 17
Memory
Memory
Viewing test results
10:15
06-04-08
mem
20
INR
1
Place the monitor on a level,
vibration-free surface or hold
it in your hand so it is roughly
horizontal.
2
Press the M button to turn
the monitor on in Memory
Mode.
The monitor runs the usual display check and displays the most
recent result. The display also
shows mem, signifying that this
is a result from memory and not
one that has just been obtained
by testing.
The date and time of testing are
also shown.
65
English
The CoaguChek XS monitor has a 100-value memory for saving results
together with time and date.
ccxs_user_EN.book Seite 66 Samstag, 29. März 2008 5:30 17
Memory
3
When you have reached the
oldest result, the monitor displays
a blank entry.
mem
When all memory locations are
full, the oldest result is erased to
make way for the most recent
one.
--0
mem
---
INR
66
Press the M button again to
move one result back in time.
If no result has yet been saved,
the display looks similar, but has
a “0” in the top right corner.
ccxs_user_EN.book Seite 67 Samstag, 29. März 2008 5:30 17
You can temporarily change the
unit in which the result is displayed (in the same way as
directly following a test) by pressing the Set button while viewing
a result in memory. Each press of
the button takes you to the next
available unit (see page 60).
Results can be downloaded from memory via an inbuilt infrared interface.
Please note: When downloading results via the infrared interface,
avoid strong stray light, as this can cause the download to break off
(see page 92).
For more information on downloading results to a suitable system (such
as a PC), please call your local customer support and service centre (see
page 100).
67
English
Memory
ccxs_user_EN.book Seite 68 Samstag, 29. März 2008 5:30 17
Memory
Erasing memory
You can erase the entire memory from your CoaguChek XS monitor. You
cannot, however, erase individual results.
1
Place the monitor (which
must be turned off) on a level,
vibration-free surface or hold
it so it is roughly horizontal.
2
To turn the monitor on,
–
–
–
68
first press and hold
down the M button,
then press the On/Off
button as well, and
hold down both buttons
for at least 5 seconds.
ccxs_user_EN.book Seite 69 Samstag, 29. März 2008 5:30 17
56
mem
clr
The monitor runs the usual display check and then displays
mem (flashing) and clr. The
number of results in memory is
shown in the top right corner of
the display.
3
Press the M button to confirm that you wish to erase
the entire memory.
To exit Erase Mode without
erasing the results, press the
On/Off button instead.
69
English
Memory
ccxs_user_EN.book Seite 70 Samstag, 29. März 2008 5:30 17
Memory
The hourglass flashes while the
results are being erased.
mem
clr
0
mem
---
INR
70
The counter is set to “0” and three
bars are displayed, indicating that
there are no results saved in
memory (the entire memory has
been erased).
ccxs_user_EN.book Seite 71 Samstag, 29. März 2008 5:30 17
Cleaning
Cleaning
Cleaning the housing
English
Clean the monitor whenever it becomes dirty. Turn off the monitor before
cleaning it.
Use only the following items for cleaning:
■
Ordinary lint-free swabs (available at pharmacies)
■
Warm water with or without washing-up liquid
■
Soft lint-free moistened cloth or cotton bud
Do not use sprays of any sort, as these may enter the monitor
and damage it.
1
Clean the outside of the
monitor with a lightly
moistened cloth.
2
Then dry the monitor with a
fresh cloth.
71
ccxs_user_EN.book Seite 72 Samstag, 29. März 2008 5:30 17
Cleaning
Cleaning the test strip guide
Check the test strip guide regularly for signs of soiling. If the test strip
guide has become soiled with blood or any other material, you must
clean this area.
1
Remove the measurement
chamber cover by pressing
upwards from the front (e.g.
using your thumb-nail). You
can rinse the detached measurement chamber cover (separately from the monitor) with
water.
2
Clean the easily accessible
white areas with a lint-free
swab or a moistened cotton
bud.
Make sure that no liquid
enters the monitor. Do not
insert any objects in the test
strip guide. Doing so may
damage the electrical contacts behind the test strip
guide.
72
ccxs_user_EN.book Seite 73 Samstag, 29. März 2008 5:30 17
Cleaning
3
Let the inside of the test strip
guide dry for about 10
minutes.
4
After this time, re-attach the
measurement chamber cover
to the housing, ensuring that
the test strip holder is in the
correct position and properly
attached.
5
Make sure that the cover is
properly closed. You will hear
it snap into place.
test strip holder
73
English
On completion of cleaning:
ccxs_user_EN.book Seite 74 Samstag, 29. März 2008 5:30 17
Cleaning
Cleaning by healthcare professionals
Use 70% ethanol or isopropyl alcohol to clean the monitor. We recommend a mixture of 1-propanol, 2-propanol and glutaraldehyde, sold in
some countries under the brand name “Bacillol plus”.
■
Make sure the meter is off
■
Gently wipe the meter’s surface.
■
Cotton buds, wipes and cloths lightly moistened with disinfectant are
all suitable for cleaning the meter.
■
Allow areas you have wiped time to dry thoroughly.
■
Remove any fluff or lint that may remain.
Refer to the section “Cleaning” (page 71) for further information.
Observe the following precautions to avoid damaging the system:
■
Make sure that no liquid enters the meter.
■
Do not spray anything onto the meter and do not immerse it in
liquid. Doing so may damage the meter’s internal components
and stop it from working properly.
■
74
Observe the disinfection guidelines of your institution.
ccxs_user_EN.book Seite 75 Samstag, 29. März 2008 5:30 17
Error messages
Depending on the circumstances an error message may appear on the
display of your monitor. Your first step on receiving an error message
should be to try the solution suggested for that error. If the problem persists, please contact your local customer support and service centre (see
page 100).
A complete list of display messages and symbols is provided in this
User’s Manual starting on page 94.
75
English
Error messages
ccxs_user_EN.book Seite 76 Samstag, 29. März 2008 5:30 17
Error messages
Error messages overview
Error message (always
prefaced by error)
Brief description
Test strip
symbol
flashing
Test strip in monitor or
78
test strip unusable or the test
strip is not a CoaguChek XS PT
test strip
82
Temperature symbol
flashing
Monitor too warm or too cold
78
Battery symbol flashing
Battery level too low
80
Cover symbol
flashing
Measurement chamber cover
open
80
IR symbol
flashing
Infrared download error
92
Quality control: test strip
unusable
88
Code chip error
82
QC symbol flashing
Code symbol
flashing
76
QC
code
Refer
to
page
ccxs_user_EN.book Seite 77 Samstag, 29. März 2008 5:30 17
Error messages
Brief description
Refer
to
page
Error number: 000
Allowed time for blood
application exceeded
86
Error number: 3
Beyond expiry date
84
Error number: 4
Test strip unusable
84
Error number: 5
Blood application error
86
Error number: 6
Measurement error
88
Error number: 7
Measurement error
90
Error number: 8
Diagnostic testing error
92
English
Error message (always
prefaced by error)
Error numbers 1 and 2 are reserved for internal purposes by Roche.
77
ccxs_user_EN.book Seite 78 Samstag, 29. März 2008 5:30 17
Error messages
Error messages after turning the monitor on
Display
11:23
Description of error
16-05-08
error
11:23
16-05-08
error
78
Error: test strip
A test strip was already inserted
when the monitor was turned on
with the On/Off button.
Error: ambient temperature
The monitor is too cold or too
warm to measure correctly.
ccxs_user_EN.book Seite 79 Samstag, 29. März 2008 5:30 17
Error messages
Solution
English
Remove the test strip. The error message disappears, the monitor is ready.
Turn the monitor off and allow it to stand for about 30 minutes at room
temperature (+18°C to +32°C).
79
ccxs_user_EN.book Seite 80 Samstag, 29. März 2008 5:30 17
Error messages
Display
11:23
Description of error
16-05-08
Error: battery
Battery level too low
error
Error messages when preparing to test
11:23
16-05-08
error
80
Error: cover
The measurement chamber cover
is not properly closed.
ccxs_user_EN.book Seite 81 Samstag, 29. März 2008 5:30 17
Error messages
Solution
English
Insert new batteries as described on page 20.
Close the measurement chamber cover. The error message disappears,
the monitor is ready.
81
ccxs_user_EN.book Seite 82 Samstag, 29. März 2008 5:30 17
Error messages
Display
11:23
Description of error
16-05-08
error
11:23
code
82
16-05-08
error
Error: test strip
The test strip is unusable or
the test strip is not a
CoaguChek XS PT test strip.
Error: code chip
The code chip is missing, not
properly inserted in the monitor,
or damaged.
ccxs_user_EN.book Seite 83 Samstag, 29. März 2008 5:30 17
Error messages
Solution
English
Remove the test strip and repeat the test with a new or correct test strip.
Insert the code chip, or remove it and re-insert it.
83
ccxs_user_EN.book Seite 84 Samstag, 29. März 2008 5:30 17
Error messages
Error messages after the code number was confirmed
Display
Description of error
error
Error: test strip
The test strip is beyond its expiry
date.
3
Error: test strip
The test strip is unusable.
error
4
84
ccxs_user_EN.book Seite 85 Samstag, 29. März 2008 5:30 17
Error messages
First check whether the date setting is correct in the monitor. If it is not,
set the correct date.
If the date is correct: turn the monitor off, remove the code chip and test
strip. Use a test strip from a new lot of test strips and insert the code chip
that came with the new lot.
Turn the monitor off, remove the test strip and re-insert it. If the error message appears again, discard the unusable test strip and use a new one.
85
English
Solution
ccxs_user_EN.book Seite 86 Samstag, 29. März 2008 5:30 17
Error messages
Display
Description of error
error
Error: time exceeded
The maximum allowed time of
120 seconds for applying blood
has been exceeded.
000
Error messages during or after blood application
error
5
86
Error: blood application
Error applying blood to the test
strip.
ccxs_user_EN.book Seite 87 Samstag, 29. März 2008 5:30 17
Error messages
Turn the monitor off, remove the test strip and start a new test using the
same test strip.
Turn the monitor off and remove the test strip. Re-read the instructions
about applying blood (starting on page 43) and repeat the test with a new
test strip.
87
English
Solution
ccxs_user_EN.book Seite 88 Samstag, 29. März 2008 5:30 17
Error messages
Display
Description of error
Error: measurement
Measurement error
error
6
Error: quality control
The test strip failed the internal
quality control check. The test
strip is unusable.
88
ccxs_user_EN.book Seite 89 Samstag, 29. März 2008 5:30 17
Error messages
Turn the monitor off and remove the test strip. Repeat the test with a new
test strip. Do not touch or remove the test strip when a test is in progress.
Turn the monitor off and remove the test strip. Repeat the test with a new
test strip. In case the error occurs again call Roche customer service.
89
English
Solution
ccxs_user_EN.book Seite 90 Samstag, 29. März 2008 5:30 17
Error messages
Display
Description of error
error
7
90
Error: measurement
Measurement error resulting
from the blood sample.
ccxs_user_EN.book Seite 91 Samstag, 29. März 2008 5:30 17
Error messages
Turn the monitor off and remove the test strip. Repeat the measurement
using a new test strip and blood taken from a new puncture site at the tip
of another finger. Do not touch or remove the test strip when a test is in
progress.
Note on Error 7 “Measurement”: The CoaguChek XS PT test strip may
be used for patients under a combination therapy of oral anticoagulants
plus heparin injections. For maximum heparin concentrations which do
not interfere with the test, please refer to the package insert. Under no
circumstances, however, should heparinized capillary tubes be used for
sample application. If capillaries are used, please use only the dedicated
CoaguChek capillary tubes. Be sure to apply the blood drop to the test
strip within 15 seconds of lancing the fingertip.
This error message (7) can occur in rare cases, i.e. in patients
with long coagulation times (> 8 INR, < 5% Quick). If this error
message appears again when you repeat the test, your results
must be checked using another method. Please contact the
doctor treating you immediately.
91
English
Solution
ccxs_user_EN.book Seite 92 Samstag, 29. März 2008 5:30 17
Error messages
Display
Description of error
error
Error: diagnostic test
Error during the internal diagnostic test which the monitor performs.
8
Error message during infrared downloads
11:23
16-05-08
error
92
Error: infrared interface
Error during communication via
the infrared interface caused by
stray light.
ccxs_user_EN.book Seite 93 Samstag, 29. März 2008 5:30 17
Error messages
Turn the monitor off and remove the batteries. Wait at least one minute
before re-inserting the batteries in the battery compartment, and then set
the date and time as described starting on page 26.
Repeat the test. If the error message persists, the monitor has a fault.
Please call your local customer support and service centre (see page
100).
Data downloads are performed via the infrared interface and can be disturbed by bright surrounding light, especially if the light shines directly
into the infrared window on the monitor or at the receiving end (e.g. on a
computer).
Keep away from sources of stray light when downloading results.
93
English
Solution
ccxs_user_EN.book Seite 94 Samstag, 29. März 2008 5:30 17
Display information and symbols
Display information and symbols
These symbols may appear on the display. They have the meanings
shown:
Symbol
Meaning
Test strip (without sample application area)
Test strip (with sample application area)
Apply sample
User must wait until the monitor has completed an action.
24 h
12 h
12-hour time format
am
Time between midnight and noon (in 12-hour
time format)
pm
Time between noon and midnight (in 12-hour
time format)
%Q
Results are displayed as a Quick percentage
value.
Sec
INR
94
24-hour time format
Results are displayed in seconds.
Results are displayed in INR units.
ccxs_user_EN.book Seite 95 Samstag, 29. März 2008 5:30 17
Display information and symbols
Meaning
0n
0FF
Beep tone is turned on
Beep tone is turned off
Result is above the chosen therapeutic range
(only with INR as unit)
Result is below the chosen therapeutic range
(only with INR as unit)
888
•
Results in the chosen unit
•
Error numbers
---
Memory contains no results or no further
results
28:88
18:88
88-88-88
set
code
Time in the format hour : minutes.
Date in the format day-month-year,
month-day-year, or year-month-day
The monitor is in Setup Mode.
Gives the code number of the code chip
presently inserted.
Result in the chosen unit is above the
measuring range.
Result in the chosen unit is below the
measuring range.
95
English
Symbol
ccxs_user_EN.book Seite 96 Samstag, 29. März 2008 5:30 17
Display information and symbols
Symbol
Meaning
Battery status:
• When the batteries still have their full
charge, all segments are lit.
• Individual segments disappear one by
one as the batteries become weaker.
• When there is no segment remaining,
you can no longer perform a test. You
can, however, still access the monitor's
memory.
mem
The monitor is in Memory Mode.
Automatic quality control completed successfully
QC
C
error
Result for this blood test is flagged with a “c”
due to a low haematocrit value or wet hands.
Reports an error (see Error messages)
Room or monitor temperature is outside the
acceptable range.
Communication is taking place via the infrared interface
Measurement chamber cover is open.
96
ccxs_user_EN.book Seite 97 Samstag, 29. März 2008 5:30 17
Further information
Further information
Ordering
CoaguChek XS PT Test,
24 test strips
REF 0 4625358
CoaguChek XS PT Test,
2 x 24 test strips
REF 0 4625315
CoaguChek Softclix Lancet,
50 lancets
REF 0 3506509
English
Please contact your pharmacist or specialist supplier.
Product limitations
Please read the information in the package insert supplied with the test
strips for detailed product data and limitations.
97
ccxs_user_EN.book Seite 98 Samstag, 29. März 2008 5:30 17
Product specifications
Product specifications
Operating conditions and technical data
Temperature range
+18°C to +32°C
Relative humidity
10 to 85% (no condensation)
Maximum altitude
4300 m
Position
Place the monitor on a level, vibration-free surface or hold it so it is roughly horizontal.
Measuring range
%Q: 120 - 5
SEC: 9.6 - 96
INR: 0.8 - 8.0
Memory
100 test results with date and time
Interface
Infrared interface, LED/IRED Class 1
Battery operation
4 x 1.5 V batteries (alkali-manganese) type
AAA
Number of tests per set Up to 2 years or up to 300 tests (depending on
of batteries
frequency of use)
Safety class
III
Automatic power-off
After 3 minutes
Dimensions
138 x 78 x 28 mm
Weight
127 g (without batteries)
98
ccxs_user_EN.book Seite 99 Samstag, 29. März 2008 5:30 17
Product specifications
Sample material
Capillary whole blood or non-anticoagulated,
venous whole blood.
Sample size
At least 10 µL
Interactions
Refer to test strip package insert
English
Sample type
Storage and transport conditions
Temperature range
-25°C to +70°C
Relative humidity
10 to 85% (no condensation)
Disposal of the CoaguChek XS monitor
During measurements the monitor itself may come into contact with
blood. Used monitors therefore carry a risk of infection. Please dispose of
your used monitor - after removing the batteries and cleaning the monitor - according to the regulations applicable in your country. For information about correct disposal please contact your local council.
The monitor falls outside the scope of the European Directive 2002/96/
EC (Directive on waste electrical and electronic equipment (WEEE)).
For healthcare professionals:
Dispose of the monitor in line with your facility's procedures for dealing
with potentially biohazardous waste.
99
ccxs_user_EN.book Seite 100 Samstag, 29. März 2008 5:30 17
Product specifications
Information service
If you have any further questions, please contact your local customer
support and service centre.
United Kingdom
Roche Diagnostics Ltd.
Charles Avenue
Burgess Hill, RH15 9RY
CoaguChek Careline
0808 100 7666
Australia
Roche Diagnostics
Australia Pty Ltd.
31 Victoria Ave
Castle Hill NSW 2154
Telephone 02-98997999
Canada
Roche Diagnostics
201 Boulevard Armand-Frappier
Laval, Québec H7V 4A2
Coagulation Info-Line
Telephone 1-877-4-COAGUCHEK
New Zealand
Roche Diagnostics N.Z. Ltd.
15 Rakino Way
Mt. Wellington
Auckland
Telephone 09-2764157
Repairs
Please note that repairs and other modifications to the monitor may only
be performed by persons authorized by Roche Diagnostics.
100
ccxs_user_EN.book Seite 101 Samstag, 29. März 2008 5:30 17
Guarantee
Guarantee
English
The statutory guarantee provisions on rights in consumer goods sales in
the country of purchase shall apply.
The following U.S. Patents have been granted for the CoaguChek XS
System (meter and test strips): 6,662,439; 7,073,246; 6,645,368; 6,881,378;
6,207,000; 7,049,131; 7,084,251; 5,625,036; 7,338,639. Additional U.S. Patents pending.
COAGUCHEK and SOFTCLIX are trademarks of Roche.
© 2008 Roche Diagnostics. All rights reserved.
101
ccxs_user_EN.book Seite 102 Samstag, 29. März 2008 5:30 17
Alphabetical index
Alphabetical index
A
Altitude (operating conditions) ..............................................................................11
Applying blood .............................................................................................................54
B
Batteries
inserting ...........................................................................................................20–22
types ..................................................................................................................18, 20
Beep tone .......................................................................................................................52
setting ......................................................................................................................37
Blood sample (testing) .......................................................................................43–63
C
Capillary blood sample (testing) ....................................................................43–63
Cleaning ..................................................................................................................71–74
by healthcare professionals ............................................................................74
test strip guide .....................................................................................................72
Coagulation process ..................................................................................................55
Coagulation units ..........................................................................................36, 57, 60
Code chip .........................................................................................................23–25, 51
code number .................................................................................................24, 51
inserting ..................................................................................................................24
Collecting blood ..........................................................................................................46
102
ccxs_user_EN.book Seite 103 Samstag, 29. März 2008 5:30 17
D
Date .................................................................................................................................. 32
Date format ................................................................................................................... 31
Display
function check ..............................................................................................21, 48
symbols ............................................................................................................94–96
Disposal ...................................................................................... 18, 20, 24, 25, 58, 99
E
Electromagnetic interference ................................................................................. 11
Error messages .....................................................................................................75–93
F
Fingertip ......................................................................................................................... 53
G
Guarantee ....................................................................................................................101
H
Humidity ......................................................................................................................... 11
I
Information service ...................................................................................................100
Infrared interface .................................................................................................67, 92
L
Lancing (your finger) ................................................................................................. 53
103
English
Alphabetical index
ccxs_user_EN.book Seite 104 Samstag, 29. März 2008 5:30 17
Alphabetical index
M
M button ..................................................................................................................29, 65
Measurement chamber cover ................................................................................72
Measuring range .........................................................................................................61
Memory ....................................................................................................................65–70
erasing .............................................................................................................68–70
Monitor
setup .................................................................................................................26–41
Monitor guide ...............................................................................................................17
O
Operating conditions ..........................................................................................11, 98
Ordering .........................................................................................................................97
P
Prothrombin time .......................................................................................................... 9
Q
Quality control ..............................................................................................................56
R
Result ...............................................................................................................................57
selecting the coagulation unit ........................................................................36
104
ccxs_user_EN.book Seite 105 Samstag, 29. März 2008 5:30 17
S
Set button ...................................................................................................................... 28
Setup ........................................................................................................................26–41
beep tone ............................................................................................................... 37
date .......................................................................................................................... 32
date format ............................................................................................................ 31
setting up the monitor ...................................................................................... 28
summary ................................................................................................................. 27
therapeutic range ........................................................................................38–39
time .......................................................................................................................... 35
time format ............................................................................................................ 34
unit ........................................................................................................................... 36
Starting up ..............................................................................................................19–25
Stray light ................................................................................................................67, 92
Symbols
blood drop ............................................................................................................. 52
clr .............................................................................................................................. 69
error ..................................................................................................................75–93
hourglass .................................................................................................52, 57, 70
mem ......................................................................................................................... 65
on packaging .......................................................................................................... 2
summary ..........................................................................................................94–96
type plate ................................................................................................................. 2
105
English
Alphabetical index
ccxs_user_EN.book Seite 106 Samstag, 29. März 2008 5:30 17
Alphabetical index
T
Target range ..........................................................................................................38, 59
setting ...............................................................................................................38–39
Technical data ..............................................................................................................98
Telephone number (information service) ....................................................... 100
Temperature range ..............................................................................................11, 44
Test
performing ......................................................................................................48–58
preparing ................................................................................................................47
principle ..................................................................................................................10
Test strip
inserting ..................................................................................................................50
symbol .....................................................................................................................49
Therapeutic target range ..................................................................................38, 59
setting ...............................................................................................................38–39
Time .................................................................................................................................35
Time format ...................................................................................................................34
U
Unit
changing temporarily .................................................................................60, 67
results (INR, %Quick, seconds) .......................................................36, 57, 60
106