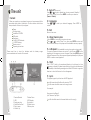
1
Important information
InspirationWorks UK Ltd
4 Beaumont House
Sutton Road
St Albans
Herts
AL1 5HH
Tel: 0870 898 8923
www.kidsdelight.co.uk
© 2007. All right reserved
Warranty:
Should you in the unlikely event experience any problems with this product all our
products have a six month guarantee. In the first instance, return the product back to the
place of purchase where a replacement will be issued.
ARGOS MK9 2NW
V.00
April. 2007
Made in China
Printed in China
PRODUCED AFTER 13th AUGUST 2005.
WASTE ELECTRICAL PRODUCTS SHOULD NOT BE
DISPOSED OF WITH HOUSEHOLD WASTE. PLEASE
RECYCLE WHERE FACILITIES EXIST. CHECK WITH YOUR
Hg
LOCAL AUTHORITY FOR RECYCLING ADVICE
S0740
instruction manual
This product complies with the essential requirements of European directives 88/378/
EEC, directives 89/336/EEC, 92/31/EC, 93/68/EEC, 2004/108/EC, 2002/96/EC, 2003/108/EC
and 2002/95/EC
Important information
Your player is a device that stores and plays multi-format digital
audio files including MP3, WMA, and WAV files. Please read this manual
carefully before using this product for the first time.
The descriptions and characteristics given in this document are given
as a general indication and not as a guarantee. In order to provide
the highest quality product possible, we reserve the right to make any
improvement or modification without prior notice.
1 - Important information
This player is suitable for children aged 6 years & over.
Please retain this manual for further reference.
WARNING: All packing materials such as internal bags, plastic collars,
plastic films, carton inserts are not part of this product and should be
discarded for your child’s safety.
IMPORTANT: for additional safety, check toys regularly for signs of
damage during use.
Not suitable for children under 36 months. Presence of small parts which
can be swallowed.
2 - Copyright:
Distributing copies of MP3, WMA, WMA with DRM tracks without permission
is a violation of international copyright laws.
This product is for your personal use only. Unauthorised recording or
duplication of copyrighted material may infringe upon the rights of third
parties and may be contrary to copyright laws.
Please note the important points below when using
batteries to power this product :
• Batteries should be inserted and removed by an adult.
• Only use the type of batteries specified in this user manual, or equivalent
type. We recommend the use of alkaline batteries.
• Keep small batteries out of the reach of young children
• CAUTION. Danger of explosion if battery is incorrectly replaced. Replace only
with the same or equivalent type of battery
• Follow the polarity diagram inside the battery compartment and the polarity
markings on the batteries.
• An incorrect location may either damage the toy, or cause battery leakage, or,
to an extreme degree, lead to battery explosion.
• Do not try to charge non-rechargeable batteries, as they may leak or explode.
• Replace all batteries at the same time.
• Do not mix new with old batteries
• Do not mix different types of batteries (i. e. alkaline and zinc carbon).
• Remove the batteries during long periods of non-use. Always remove exhausted
batteries from the product. Battery leakage and corrosion can damage the
product.
• Do not short-circuit the supply terminals. Store batteries away from metal objects.
• Do not dispose of batteries in fire, as they may leak or explode. Never disassemble
batteries.
• Rechargeable batteries should not be used.
• When rechargeable batteries are used anyway :
Rechargeable batteries shall be charged only under the supervision of
an adult.
Rechargeable batteries shall be removed from the toy before being
charged (if they can be removed).
• If a battery is swallowed, consult a Doctor or Medical Facility, don’t forget to take
the product with you
• If battery leakage occurs and come in contact with the skin or eyes, wash
immediately with lots of water.
Trouble shooting
3 - Precautions of use
Vibration experienced during walking or exercising will not affect the
player. However, dropping the player or dropping a heavy object on
the player may result in damage or sound distortion.
Avoid spilling any liquid onto or into the player. Clean the unit with a
soft cloth or a damp chamois leather. Never use solvents.
Do not leave the player in a location near heat sources; in a location
subject to direct sunlight, excessive dust, sand, moisture, rain or
mechanical shock; on an unlevel surface; or in a car with the windows
closed during periods of excessive heat.
Do not use the unit immediately after transportation from a cold
place to a warm place: condensation problem may result.
Do not operate or store unit in places with frequent static electricity
or electrical noise (e.g. speaker, TV set).
1
Symptom
Cause
Solutions
Press
1. No battery in the compartment.
2. Battery is out of power.
1. Insert the battery.
2. Replace a new battery.
No sound.
1. Low volume or no music file inside
the memory.
2. Battery is out of power.
3. MP3/WMA/WAV music file is
damaged.
1. Adjust the volume.
2. Replace a new battery.
3. Download other music files.
Can not play the MP3/
WMA file that is made
by user
Player only support playback of
compressed audio file in MP3/WMA
format, please do not download
non-standard audio file into the
player.
Re- download the standard MP3/
WMA file.
No function on buttons.
HOLD is switched to arrowhead
direction.
Slide HOLD switch to the opposite
direction to unlock.
but no display.
10
How to install batteries
Remove the Battery Compartment by
pressing in on the tab and then sliding the
compartment out.
Install a CR2025 battery, paying attention to the
polarity diagram in the Battery Compartment
(positive side up).
Replace the Battery Compartment.
Insert battery into the player
To insert battery, open the battery door on back of unit.
Insert 1 x 1.5V-AAA-LR03-AM4 batteries into the compartment ensuring
they are installed the correct way around. The polarities are marked inside
the battery compartment
Close the door to the battery compartment.
Note:
Refer to the power level indicator on display for battery level.
Replace with new battery when the indicator is empty.
Insert battery into the docking station
To insert battery, open the battery door on back of the docking station.
Insert 4 x 1.5V-AAA-LR03-AM4 batteries into the compartment ensuring
they are installed the correct way around. The polarities are marked inside
the battery compartment
Close the door to the battery compartment.
Using an adaptor with the docking station
The docking station can be powered using an AC/DC adaptor suppling in
output of 6V DC - 500 mA min. (not supplied)
The plug shall be a 3.5 mm center positive connector.
When player is docked and station plugged to adaptor, batteries will be
saved on both item.
Please note the important points below when using an adapter
to power this product:
• Only use an adapter like the one recommended in this user manual or an
equivalent type.
• The adapter is not a toy, it is to be handled with appropriate care.
• The adapter must be regularly controlled to detect any deterioration of
the cord, the plug, the cabinet or any other part. If something is damaged,
the adapter must not be used.
• Unplug the adapter before cleaning the MP3 player.
• Unplug the adaptator if the MP3 player is not in use.
• Not suitable for children below 36 months.
9
Keep product out of direct sunlight. Exposure to direct sunlight or
extreme heat (such as inside a parked car) may cause damage or
malfunction.
This unit may temporarily cease to function if subjected to electrostatic
disturbance. To resume normal operation, it may be necessary
to cycle the power off and back on or to remove and reinstall the
batteries.
The unit must only be opened by qualified personnel.
4 - Road safety:
Do not use headphones while driving, cycling or operating any motorised
vehicle. It may create a traffic hazard and it is illegal in some areas. It
can be potentially dangerous to play your headset at a high volume while
walking, especially at pedestrian crossings. You should exercise extreme
caution or discontinue use in potentially hazardous situations.
5 - User safety information
With volume at highest level, the continuous listening of the player may
damage the user’s hearing.
Caution While Driving
Use of headphones while operating an automobile or moving
vehicle is not recommended and is unlawful in some areas. Be
careful and attentive on the road. Stop operation of the unit if you
find it disruptive or distracting while driving.
Headset Safety
Have a Blast- Just Not in Your Eardrums.
- Make sure you turn down the volume on the unit before you put
on headphones. Increase the volume to the desired level only after
headphones are in place.
- Do not play your headset at a high volume. Hearing experts warn
against extended high volume play.
- If you experience a ringing in your ears, reduce volume or discontinue
use.
- You should use extreme caution or temporarily discontinue use in
potentially hazardous situations. Even if your headset is an open-air
type designed to let your hear outside sounds, don’t turn up the volume
so high that you are unable to hear what is around you.
2
11 - Auto off (Power set)
The unit
Press
or
to select desired time of auto power-off: disable, 1
mins, 2 mins, 5 mins, 10 mins. Press MODE to confirm your selection.
(Preset = Disable)
Content
When you unpack your new player, be sure you have removed all the
accessories and product information. The items below should have
been packed in the box with your player:
Player
Docking station
Installation CD-ROM
USB cable
Earphones
5 x AAA / LR03 batteries
1 x CR2025 battery
Remote control
Operating instructions
12 - Language
Press
confirm.
or
to select your desired language. Press MODE to
13 - Exit
Return to last menu.
14 - About memory size
Press MODE for two seconds to enter main menu.
Press
or
to select “About” icon, then press MODE to enter and
check the total memory of the player and the available memory capacity.
Please read how to insert the batteries and the battery usage
recommendations at the end of this manual.
15 - A-B repeat (Only available in music play mode or voice mode)
To repeat a sequence between two points A and B, press MODE at the
beginning of the sequence you want to repeat. Then press MODE again at
the end of sequence. Then the sequence is played repeatedly until you press
MODE to resume normal playback.
16 - Hold
Slide “ HOLD ” switch to the arrowhead direction to lock player. Lock icon
appears on display. This deactivates all buttons’ functions and eliminates
the possibility of accidentally pressing buttons. Slide HOLD switch to opposite
direction to unlock all buttons. Lock icon disappears.
17 - Lyrics
This player supports lyrics function with MP3 playback.
Lyric file format should be files with extension *.LRC.
Lyric file name should be same as the song’s name.
For example:
Song name: Jay-Sky.mp3
Lyric file name : Jay-Sky.lrc
3
1. Previous/Rewind
2. USB
3. Earphone plug
4. Next/Fast forward
5. Play / pause
6. Volume Up
7. Volume Down
8. LCD display
9. Hold switch
10. Mode button
11. Battery door
Lyric file should be saved in the same folder as in the song’s.
8
4 - Play Music
Press and hold
to turn the unit ON and enter music standby
mode.
Press
to start music playback. Icon “
” appears on display.
Note: Use this button to suspend momentarily the playing track. Icon
“ II ” will appear on display. Press
again to resume normal
playback.
Press
to skip forward to the next track or repeatedly to skip
forward several tracks. Press
to skip backward to the previous track
or repeatedly to skip backward several tracks. Press and hold
or
to search quickly within a track.
To adjust the volume level, press VOLUME +/- button.
In playing or pause mode, press
for two seconds to enter stop
mode. Music playback stops. Press
to resume.
5 - Delete file
In stop mode, press MODE for two seconds to enter main menu.
Press
or
to select “Delete” icon. Press Mode to enter “Delete”
mode.
P re ss
or
to select the file (Music/All Music/Voice/All Voice) you
want to delete. Press MODE, select “yes” and press MODE to confirm delete;
select “no” and press MODE to jump to the next file.
Note: “Read-only” music file can not be deleted.
6 - Settings
Press MODE for two seconds to enter main menu.
Press
or
to select “ Setting” icon. Then press MODE to confirm
and enter submenu.
7 - Equalizer
Press
or
to select equalizer mode: Normal, Rock, Jazz, DDB, POP,
Classic. Press MODE to confirm your selection.
8 - Play mode
Press
or
to select desired play mode : Normal, Repeat one,
Repeat All, Random, Random All.
Note: Random: Playback will stop after all tracks have been randomly played.
Random All: Random play continuously.
9 - Contrast
Press
setting.
or
to adjust LCD contrast. Press MODE to confirm your
10 - Backlight
7
Press
or
to select backlight time : 0 secs, 5 secs, 10 secs, 20
secs, 30 secs, 40 secs, 50 secs, 60 secs. Press MODE to confirm your
selection. (Preset = 5 secs)
12. Power ON/OFF switch
13. DC jack
14. Power ON/OFF indicator
15. Battery door
16. Remote Control sensor
System requirements
To be able to run smoothly with the device, your computer should comply
with the following minimum requirements:
Pentium III 500MHz or higher recommended
Macintosh iMac G3 or higher
Windows 98SE, Me, 2000, or XP
Mac OS X Version 10.1.5 or higher
Internet Explorer 4.0 or higher
Internet access (optional)
100MB free hard disk space for the software
64MB RAM (128 MB recommended)
CD-ROM drive capable of digital audio extraction
USB port (2.0 recommended)
Sound card
4
How to transfer content
to the player
After purchasing and downloading music to your PC or if you have
your own WAV/WMA/MP3 files, you are now ready to move content to
your player. To transfer the music, you must use Windows Media Player
or any application recommended by your online music download
service.
Services and applications must be Windows Media audiocompliant and support Digital Rights Management. Please check
this particular point before purchasing songs for this player.
Note :
Make sure the tracks are encoded in mp3 or Windows Media formats with supported
bit rates. Bit rates supported by the player are:
Mp3 - 8 to 320 kbps
Wma - 5 to 192 kbps
1 - Connecting the Player to your Computer
Insert the small end of the cable USB plug into the socket on the unit tightly,
then insert the large end to the socket of the computer.
System Requirements for Software Installation
If the OS running on your computer is WIN98, PRIOR TO connection to the
computer, make sure the player’s support software has been installed in
your computer. Insert the installation CD in the CD-ROM, open and execute
the setup file .
Once connected, your device will start and display a computer screen
linked to a portable device.
It shall be identified by the system as Portable device MTP player or a
similar description.
2 - Adding content to the player
Direct transfer
You can directly copy your wav/mp3 or wma files (if these are not DRM
files) into the player’s memory.
To do so, select your files then make a copy.
Go to the file explorer and then select MTP player/Internal storage/
Music directory.
Once in this directory, paste the files.
Once the copy is finished, the files are available for playing in the
device.
5
Windows Media Player 10 or higher
You can add WMDRM 10 content, as well as PDDRM (Windows Media
DRM 9) content, to the MTP player using the procedures described
in this section. As a result of each procedure, WMDRM 10 licensing
information is transferred and stored on the device.
You can use the WMP 10 or higher Sync feature to add WMDRM 10
and PDDRM content to the player. This feature introduces the ability to
customise the way content is managed on the MTP player. The Smart
Jukebox Sync feature is fully customisable and allows you to manually or
automatically download selected content. To select the synchronisation
method, click the Set Up Sync button located on the WMP 10 Sync tab. For
more information about Sync feature and other Smart Jukebox features,
visit the Microsoft Web site at the following URL:http://www.microsoft.com/
windows/windowsmedia/mp10/jukebox.aspx
Operating System required: Microsoft Windows XP Home Edition, Windows
XP Professional, Windows XP Media Center Edition, or Windows XP Tablet
PC Edition.
Note:
Synchronised content is placed in the Music folder according to the artist and folder
information.
You must profile your contents on your PC after file transfer in order for the new files to
appear in the Navigation Menus.
Secure music download files must be transferred to your player through Windows Media
Player or the application recommended by the online music download service. Please
visit the online music download service’s website where you purchased your content from
for more details on transferring secure music to your player. For more information on
Windows Media Player, visit http://www.microsoft.com/windows/windowsmedia.
1 - Using Headphones
Operations
Insert phone plug into the headphones jack ( ) on the player for listening.
Have a Blast - Just Not in Your Eardrums. Make sure you turn down the
volume on the unit before you put on headphones. Increase the volume to
the desired level only after headphones are in place.
2 - Turn the player ON/OFF.
Press
button to turn the unit ON.
Press and
hold button to turn the unit OFF.
Warning: Do not turn off the player while it is downloading data/music. Otherwise,
data loss and data damage may be caused.
3 - Select Menu
Press
to turn the unit ON and enter music standby mode.
Press and hold MODE to enter main menu.
Press
or
to select the desired menu.
Press MODE to confirm your selection.
6