1
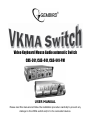
Video Keyboard Mouse Audio automatic Switch
CAS-241, CAS-441, CAS-441-PM
USER MANUAL
Please read this manual and follow the installation procedure carefully to prevent any
damage to the VKMA switch and/or to the connected devices.
2
Video Keyboard Mouse Audio automatic Switch
Disclaimer
• We spared no efforts to make sure that the information in this manual is correct
and complete. However no liability is accepted for any errors or omissions. Gembird
Electronics reserves the right to change the specifications of the hardware and software
described in this manual without prior notice.
• No part of this manual may be reproduced, transmitted or translated in any
language in any form, by any means, without the prior written permission of Gembird
Electronics Ltd.
• Gembird Electronics makes no warranties for damages resulting from corrupted or
lost data due to a mistaken operation or malfunction of the switch.
Copyright © 2007 Gembird Electronics Ltd. All rights reserved.
3
Video Keyboard Mouse Audio automatic Switch
TABLE OF CONTENTS
1. Features ......................................................................
2. Hardware requirements ................................................
3. Specifications ...............................................................
4. Installation ...................................................................
5. Operation .....................................................................
6. Preventing Radio and TV Interference ............................
4
Video Keyboard Mouse Audio automatic Switch
1. Features
1. Features
1. PS/2 and AT keyboard and mouse emulation.
2. Stereo audio channels switching.
3. Sound event notification and translation.
4. Plug and Play keyboard and mouse.
5. Hot plugging of computers without need to reboot.
6. Standard PS/2 mouse, 3 buttons, Scrolling Wheel, Microsoft®, Logitech®, A4Tech®,
Genius® 4,5 buttons mice support.
7. Keyboard LEDs status saving and restoring.
8. Mode and event LED indication.
9. PC switching via front panel pushbuttons or keyboard Hot Keys.
10. AutoScan mode with intervals 4,10,30 secs.
11. Computer suspend mode blockage in AutoScan.
12. Video resolution is up to 2048x1536, video bandwidth 250 MHz, DDC, DDC2, DDC2B.
13. No software required.
14.* Control sockets through the PM interface, turning On or Off server etc.
15.* Indicate status of the socket with sound event.
Note: * For CAS-441-PM only
5
Video Keyboard Mouse Audio automatic Switch
2. Hardware requirements
Console:
VGA, SVGA, or Multi sync monitor capable of the highest resolution that you will be using
on any PC in the installation.
PS/2 Mouse.
PS/2 Keyboard.
Computers:
VGA, SVGA or Multisync video card.
6 pin mini-DIN (PS/2 Style) mouse port.
6 pin mini-DIN (PS/2 Style) keyboard port.
Cables:
Male-to-male VGA cables.
Male-to-male Mini-DIN 6 pin cables.
Male-to-male 3.5 mm stereo plug audio cables.
Cat-5 cable1 with straight-through cable pin out (T568B or T568A)
Note: 1 for connecting CAS-441-PM to SiS-PM-841
6
Video Keyboard Mouse Audio automatic Switch
3. Specifications
MODEL
CAS-241
CAS-441
CAS-441-PM
Number of Switching Computers
2
4
4
Mouse and Keyboard Protocol
PS/2 keyboard, PS/2 mouse,
Emulation
PC/AT1 keyboard
Case Design
Desktop
Case Housing
Metal, Plastic
Computer Selection
Pushbutton switches or Hot Keys
Computer side connectors
HD 15Mx2
HD 15Mx4
MD 6F x4
MD 6F x8
HD 15Mx4
MD 6F x8
3.5 mm stereo
3.5mm stereo
3.5mm stereo
audio jack x 2
audio jack x 4
audio jack x 4
RJ45 x 1
Console side connectors
HD-15Mx1
MD-6Fx2 3.5 mm stereo audio jack x
1
Front panel LEDs per channel
"Link/Event"
"Active/Scan"
Audio Channels Type
Stereo
Audio Frequency Bandwidth
20 Hz - 20 kHz
Minimal PS/2 and audio
15 m
transmission distance2
Video Resolution up to
2048 x 1536 pixels
7
Video Keyboard Mouse Audio automatic Switch
Video Protocol
DDC, DDC2, DDC2B
Video Bandwidth
250 MHz
Power Consumption
From PS/2 PC ports,
Spare AC-DC adapter +9V, 300mA3
Dimensions (LxWxH), mm
146x35x45
245x135x45
245x135x45
Weight up to, Kg
0.65
1.3
1.3
Notes:
1
Connect PC/AT keyboard is possible trough an PC/AT-PS/2 adapter (not enclosed).
2
Depends on quality of audio cables.
3
AC-DC adapter is not enclosed, it may be necessary if PS/2 ports supplies other devices
(external hard drives, etc) in addition.
4. Installation
1. Connect the console monitor to the switch first and power it on.
2. Connect the mouse and keyboard to the switch.
3. Connect the audio speakers to console audio out on the front panel.
4. Connect the AC-DC adaptor (9V 300mA) to the switch power jack and insert adaptor to
the AC mains, if necessary1.
5.Connect the computers (keyboard, mouse, VGA, audio connectors) to the switch by
cables and turn them on.
6. Connect CAS-441-PM to SiS-PM-841 with Cat5 cable with straight-through pinout.
8
Video Keyboard Mouse Audio automatic Switch
Notes:
1. See Note 3 of the Specifications section.
2. After installing the VKMA switch the settings are set as defaults.
The default settings are shown in the Table 1.
Table 1. Default VKMA switch settings after reset.
Setting option
Default value
Beep
On
Sound event latching
On
Sound event translation
On
AutoScan mode
ON
AutoScan mode scan
4 sec
interval
Suspend mode blockage
On
9
Video Keyboard Mouse Audio automatic Switch
5. Operation
Computer booting up
Before booting up the computer keyboard and mouse must be connected to the
VKMA switch. When computer is connected to the VKMA switch, the "Link/Event" LED of
the corresponding channel lights. Note, that at some non-ATX computers this LED will not
light until the computer is powered on. On boot up stage the VKMA switch emulates the
keyboard and the mouse, so at the same time you can work on the another channel, which
is selected as an active. On this stage "Active/Scan" red LED on the emulated channel may
blink fast, meaning that the computer initializes PS/2 keyboard and mouse.
Computer selection
Only after computer has booted up, you can select the corresponding channel as an
active channel. You can do it as by pushing:
• the channel pushbutton on the front panel of the VKMA switch.
• using Hot Key combination (see the appendix 2). The "Active/Scan" red LED
indicates which channel is an active. On selection a short beep sounds, if turned on. Beep
can be turned on/off by Hot Key combination.
Computer and console equipment replacement1
If computers have already been booted up with mouse and keyboard connected, you
can connect and disconnect computers to the VKMA switch while the switch operates with
other computers. It does not interrupt their work. When mouse jumps on the screen after
selecting a computer, unplug the mouse and plug it back. You can plug and unplug mouse
10
Video Keyboard Mouse Audio automatic Switch
and keyboard without need to reset the VKMA switch and reboot computers connected.
Note: 1. For full support of computer Hot Plugging, keyboard and mouse Plug'n'Play
features use latest mouse drivers or Microsoft mouse drivers.
AutoScan mode
In AutoScan mode the VKMA switch will reselect channels in loop automatically
without sound beep. Only channels with computers connected are scanned. During this
process "Active/Scan" red LED blinks slowly on current channel selected. You can activate
this mode by pushing:
• any two channel pushbuttons on the front panel simultaneously.
• Hot Key combination (see the Appendix 2). Scan time interval between selections
can be set as 4, 10 or 30 sec, and equals 4 sec by default. To toggle between intervals in
loop you have to repeat Hot Key combination or hold pushbuttons pressed on the front
panel. Blinking LEDs on the keyboard will indicate scan interval in this mode (see the
Appendix 1). To leave AutoScan mode it is sufficiently to press "Esc" key on the keyboard
or any pushbutton on the VKMA switch front panel. When the switch is in the AutoScan
mode, computers may go to the suspend mode if suspend mode blockage option is turned
off. When suspend mode blockage option is turned on, then the VKMA switch prevents
computers from going to suspend mode and to start screensavers. This option is turned on
by default.
11
Video Keyboard Mouse Audio automatic Switch
Sound event notification and translation
You can be informed about and hear sound events, which appear on non-active
channels. It can be useful for various purposes, such as working at one computer and
listening audio applications, running on another computer simultaneously, or notification
about process competition on non-active computer: software errors, e-mail arriving, etc.
When sound event on non-active channel will occur, "Link/Event" LED will blink for 5
seconds if the sound event latching option is on. If the sound event latching option is on,
then "Link/Event" LED will blink after event till this channel will have been selected as an
active. The sound event latching option is on by default. To toggle on/off sound event
latching press Hot Key (see the Appendix 2).
You can also listen sounds on non-active channels, setting on the sound event
translation option. The sound event translation is on by default, so you can hear only the
sound of the active channel. To toggle on/off sound event translation from all computers to
console speakers press Hot Key (see the Appendix 2).
The sound event latches and translates when the sound reaches a definite volume
level. This level must be tuned at volume control panel on each computer individually.
Controlling power sockets
(CAS-441-PM only)
Four sockets of SiS-PM-841 can be controlled by using hotkeys of CAS-441-PM. User
can read the status (voltage present) of each controlled socket. This feature lets control
power supply of connected equipment (computers, servers, monitors, lamps, etc.) through
the KVM switch. CAS-441-PM should be connected to SiS-PM-841 with Cat-5 cable
(maximum length of Cat-5 cable should be no more than 15m).
Hotkey assignment is shown in Hotkey combination table. Status of the socket
12
Video Keyboard Mouse Audio automatic Switch
(voltage present) is indicated by beep when the needed hotkey is pressed. Long beep
means "voltage present", short beep means "voltage absent".
WARNINGS:
1. Make sure all the computers which were turned on have completed their boot up before
switching between them.
2. If the computer is switched off wait for 5 seconds before turning it on again.
3. It might be possible that the 4-5 button mice would not work properly under Windows®
95 and NT® 4.0. In this case you should install the latest versions of the mouse drivers.
4. For best video quality at distances more than 5 feet long using of high quality video
cables is strongly recommended.
TROUBLESHOOTING: Appendix 2. Hot Key combinations table
Problem description
Suggested solution
• Check whether the device is plugged into the correct
Mouse or\and keyboard
does not respond
PS/2 connector
• Unplug the device from the switch and plug it in again
• Restart PC
• Change the device to the known good one
• Connect the device to PC directly and check PC
Hotkeys does not work
• Reboot or disconnect the PC at the active channel
13
Video Keyboard Mouse Audio automatic Switch
Appendix 1. LED state meaning table
LED State
Meaning
"Active/Scan" lights
Channel is active
"Active/Scan" blinks fast
Computer is booting up, initializing PS/2
devices
"Active/Scan" blinks slowly
AutoScan mode, channel is selected
"Link/Event" lights
Computer is connected
"Link/Event" blinks
Audio Event on the channel occurred
"Num Lock" blinks only
AutoScan mode, 4 sec scan interval
"Num Lock" and "Caps Lock"
AutoScan mode, 10 sec scan interval
blinks only
"Num Lock", "Caps Lock",
AutoScan mode, 30 sec scan interval
"Scroll Lock" blinks
Hot Key combination
Meaning
Ctrl + [Num1, Num2, …]
Select channel [1, 2, …]
Ctrl + Num+
Set AutoScan mode, toggle between 4, 10,
30 sec scan intervals in AutoScan
Ctrl + Num
Turn beep on/off
Ctrl + Num Del
Turn Sound Event translation on/off
Ctrl + Num*
Turn Sound Event latching on/off
Ctrl+ Num Lock
Turn Suspend mode blockage on/off
14
Video Keyboard Mouse Audio automatic Switch
For CAS-441-PM only
Press and hold 'Ctrl' then press and release
[Ch N] then press ' * '
Press and hold 'Ctrl' then press and release
[Ch N] then press ' - '
Switch on the socket with [Ch N] number
Switch off the socket with [Ch N] number
Press and hold 'Ctrl' then press and release
Beep indicates the voltage state on the
[Ch N] then press ' . '
socket with [Ch N] number
Note: 1. When option is toggled on a short beep sounds, and when option is toggled off a
long beep sounds.
2. While sound event indicates the status of the socket: long beep means "Switched On",
short beep means "Switched Off".
3. When beep is disabled by Ctrl+'-', only "Switched On" long beep can be heard.
15
Video Keyboard Mouse Audio automatic Switch
6. Preventing Radio and TV Interference
WARNING!!! This equipment generates, uses, and can radiate radio frequency energy and
if not installed and used in accordance with the instructions from this MANUAL, may cause
interference to radio communications. It has been tested and found to comply with the
limits for a Class A computing device pursuant to Subpart J of part 15 of FCC Rules, which
are designed to provide reasonable protection against such interference when operated in
a commercial environment. Operation of this equipment in a residential area is likely to
cause interference in which case the user at his own expense will be required to take
whatever measures may be required to correct the interference.