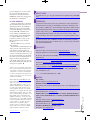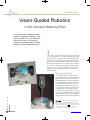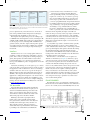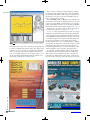
1
Cover - 224.qxp 2/5/2009 9:14 AM Page 1 CIRCUIT CELLAR File Storage Tips (p. 51) • Programmable Robotics (p. 56) • The “8-Bits Story” Revisited (p. 64) www.circuitcellar.com THE MAGAZINE FOR COMPUTER A P P L I C AT I O N S #224 March 2009 ROBOTICS Robot Navigation Control Subsystem Wi-Fi-Enabled Mobile Surveillance Vision-Guided Balancing Robot Networked Timing System $5.95 U.S. ($6.95 Canada) C2.qxp 1/29/2009 10:42 AM Page 1 9.qxp 8/7/2008 11:04 AM Page 1 2.qxp 1/29/2009 10:48 AM Page 1 The Newest Semiconductors The ONLY New Catalog Every 90 Days Experience Mouser’s time-to-market advantage with no minimums and same-day shipping of the newest products from more than 366 leading suppliers. The Newest Products For Your Newest Designs www.mouser.com Over A Million Products Online Mouser_CircuitCellar_3-1.indd 1 (800) 346-6873 1/20/09 5:00:23 PM 3.qxp 2/5/2009 9:30 AM Page 1 (QKDQFHG 5HSODFHPHQW IRU /&' &KDUDFWHU +LJKOLJKW &KDUDFWHU 0DJQLILFDWLRQ ,QFUHDVHG 0HVVDJH &DSDELOLW\ 0XOWLSOH ,QWHUIDFH 6ROXWLRQV /DUJHVW 9LHZLQJ $QJOH ,QWHUQDWLRQDO )RQW 7DEOHV %ULJKW 'LVSOD\ FGP [ &KDUDFWHUV ZLWK 'HVFHQGHU :LGHVW 7HPSHUDWXUH 5DQJH WR & ZZZQRULWDNHHOHFFRP &OHDUEURRN 'U $UOLQJWRQ +HLJKWV ,/ ,QYHQWRU RI WKH 9DFXXP )OXRUHVFHQW 'LVSOD\ T ASK MANAGER Design Evolution March 2009 – Issue 224 A 4 s I’ve said here before, most quality new designs are the sum total of dozens, perhaps hundreds, of earlier projects, applications, and programs. When you see a project in this magazine, you can think of it as a single point in the long timeline of technological evolution. Looking ahead, you should consider each project, idea, and program described in these pages as a contribution to future projects. You and your fellow readers will take what you learn and put it to good use during your upcoming endeavors. This month, we feature interesting robotics applications. These robots are the progeny of countless other robotics applications that are easy to find and study. Look no further than your stack of past Circuit Cellar magazines to read about many of the designs that influenced the development of the robots we use today. A few Circuit Cellar articles immediately come to mind: J. Bingham and L. Magnusson, “Inertial Rolling Robot” (Circuit Cellar 200, 2007); E. Leland, et al, “Robot Localization and Control” (Circuit Cellar 188, 2006); M. Chao and L. Ming, “GPS-GSM Mobile Navigator,” (Circuit Cellar 151, 2003); M. Dvorsky, “Fighting Fire with Robots: How to Build a Mobile Robot Base,” (Circuit Cellar 128, 2001); J. Stefan, “Navigating With GPS,” (Circuit Cellar 123, 2000); B. Reynolds, “MicroBot: Programming Intel’s 8749 for Robotic Control” (Circuit Cellar 92, 1998); I. Cyliax, “Robot Navigation Schemes,” (Circuit Cellar 81, 1997); and C. McManis, “Sensing Obstacles with Mobile Robots,” (Circuit Cellar 73, 1996). In this issue, Guido Ottaviani contributes to the development of new robotics control systems. In the first part of his series titled “Robot Navigation and Control,” he describes how to design a navigation control subsystem (p. 14). Starting on page 22, Hanno Sander describes a novel vision-guided robotics application. His exciting balancing robot design was on display at the Embedded Systems Conference in San Jose, CA, last year. Perhaps you saw it in action? In “Wireless Mobile Robotics,” Scott Coppersmith presents a compact, Wi-Fi-enabled mobile robot (p. 41). He mounted a webcam on the top of the robot so it can transmit real-time images to a remote laptop. In the final robotics-related article, Jeff Bachiochi introduces the topic of programmable robotics (p. 56). He describes how to upgrade and develop an existing robotics platform. If you’re interested in timing applications, Thomas Bereiter’s article is right up your alley. In “Networked Timing,” he explains how he built a timer with advanced planning tools (p. 31). The irrigation control system generates handy information such as zone activity. Turn to page 51 for a review of the FAT file system. In this first part of the series, George Martin covers the process of opening files and performing operations. Tom Cantrell closes the issue with an article about one of his favorite topics: 8-bit chips (p. 64). Although 32-bit chips get a lot of attention these days, Tom explains that 8-bit chips are alive and well. Good luck starting your next project. Feel free to share your ideas and design experiences on the Circuit Cellar Discussion Board: http://bbs.circuitcellar.com/phpBB2/. [email protected] CIRCUIT CELLAR ® THE MAGAZINE FOR COMPUTER APPLICATIONS FOUNDER/EDITORIAL DIRECTOR Steve Ciarcia CHIEF FINANCIAL OFFICER Jeannette Ciarcia MANAGING EDITOR C. J. Abate MEDIA CONSULTANT Dan Rodrigues WEST COAST EDITOR Tom Cantrell CUSTOMER SERVICE Debbie Lavoie CONTRIBUTING EDITORS Jeff Bachiochi Ingo Cyliax Robert Lacoste George Martin Ed Nisley CONTROLLER Jeff Yanco ART DIRECTOR KC Prescott GRAPHIC DESIGNERS Grace Chen Carey Penney NEW PRODUCTS EDITOR John Gorsky PROJECT EDITORS Gary Bodley Ken Davidson David Tweed STAFF ENGINEER John Gorsky ASSOCIATE EDITOR Jesse Smolin ADVERTISING 860.875.2199 • Fax: 860.871.0411 • www.circuitcellar.com/advertise PUBLISHER Sean Donnelly Direct: 860.872.3064, Cell: 860.930.4326, E-mail: [email protected] ADVERTISING REPRESENTATIVE Shannon Barraclough Direct: 860.872.3064, E-mail: [email protected] ADVERTISING COORDINATOR Valerie Luster E-mail: [email protected] Cover photography by Chris Rakoczy—Rakoczy Photography www.rakoczyphoto.com PRINTED IN THE UNITED STATES CONTACTS SUBSCRIPTIONS Information: www.circuitcellar.com/subscribe, E-mail: [email protected] Subscribe: 800.269.6301, www.circuitcellar.com/subscribe, Circuit Cellar Subscriptions, P.O. Box 5650, Hanover, NH 03755-5650 Address Changes/Problems: E-mail: [email protected] GENERAL INFORMATION 860.875.2199, Fax: 860.871.0411, E-mail: [email protected] Editorial Office: Editor, Circuit Cellar, 4 Park St., Vernon, CT 06066, E-mail: [email protected] New Products: New Products, Circuit Cellar, 4 Park St., Vernon, CT 06066, E-mail: [email protected] AUTHORIZED REPRINTS INFORMATION 860.875.2199, E-mail: [email protected] AUTHORS Authors’ e-mail addresses (when available) are included at the end of each article. CIRCUIT CELLAR®, THE MAGAZINE FOR COMPUTER APPLICATIONS (ISSN 1528-0608) is published monthly by Circuit Cellar Incorporated, 4 Park Street, Vernon, CT 06066. Periodical rates paid at Vernon, CT and additional offices. One-year (12 issues) subscription rate USA and possessions $23.95, Canada/Mexico $34.95, all other countries $49.95.Two-year (24 issues) subscription rate USA and possessions $43.95, Canada/Mexico $59.95, all other countries $85. All subscription orders payable in U.S. funds only via Visa, MasterCard, international postal money order, or check drawn on U.S. bank. Direct subscription orders and subscription-related questions to Circuit Cellar Subscriptions, P.O. Box 5650, Hanover, NH 03755-5650 or call 800.269.6301. Postmaster: Send address changes to Circuit Cellar, Circulation Dept., P.O. Box 5650, Hanover, NH 03755-5650. Circuit Cellar® makes no warranties and assumes no responsibility or liability of any kind for errors in these programs or schematics or for the consequences of any such errors. Furthermore, because of possible variation in the quality and condition of materials and workmanship of reader-assembled projects, Circuit Cellar® disclaims any responsibility for the safe and proper function of reader-assembled projects based upon or from plans, descriptions, or information published by Circuit Cellar®. The information provided by Circuit Cellar® is for educational purposes. Circuit Cellar® makes no claims or warrants that readers have a right to build things based upon these ideas under patent or other relevant intellectual property law in their jurisdiction, or that readers have a right to construct or operate any of the devices described herein under the relevant patent or other intellectual property law of the reader’s jurisdiction. The reader assumes any risk of infringement liability for constructing or operating such devices. Entire contents copyright © 2009 by Circuit Cellar, Incorporated. All rights reserved. Circuit Cellar is a registered trademark of Circuit Cellar, Inc. Reproduction of this publication in whole or in part without written consent from Circuit Cellar Inc. is prohibited. CIRCUIT CELLAR® • www.circuitcellar.com 47.qxp 1/29/2009 10:58 AM Page 1 >QPQ¹ZUZS 9UO^[O[Z`^[XXQ^_ /[ZZQO`QP BQ^_M`UXQ /[_`QRRQO`UbQ 28-pin SOIC 48-pin LQFP 100-pin LQFP 108-pin BGA cccXaYUZM^eYUO^[O[YZQc^aXQ_ 64-pin LQFP TOC_224.qxp 2/5/2009 9:27 AM Page 6 INSIDE ISSUE 224 March 2009 • Robotics 14 22 p. 14 Mobile Control 31 41 Robot Navigation and Control (Part 1) Construct a Navigation Control Subsystem Guido Ottaviani Vision-Guided Robotics A Next-Generation Balancing Robot Hanno Sander Networked Timing Build a Timer With Advanced Planning Tools Thomas Bereiter Wireless Mobile Robotics A Wi-Fi-Enabled System With a Mounted Webcam Scott Coppersmith p. 22 Balancing Robot Design p. 56 Work from the Inside Out 51 March 2009 – Issue 224 56 6 64 LESSONS FROM THE TRENCHES FAT File System Review (Part 1) Open Files and Perform Operations George Martin FROM THE BENCH Programmable Robotics (Part 1) Build on an Existing Robot Platform Jeff Bachiochi SILICON UPDATE A Really Simple Plan The “8-Bits” Saga Continues Tom Cantrell TASK MANAGER Design Evolution C. J. Abate 4 NEW PRODUCT NEWS edited by John Gorsky 8 TEST YOUR EQ 13 CROSSWORD 71 79 INDEX OF ADVERTISERS 225 Preview PRIORITY INTERRUPT Cloud Computing Steve Ciarcia CIRCUIT CELLAR® • 80 www.circuitcellar.com /11/ Hammer Down Your Power Consumption with picoPower™! THE Performance Choice of Lowest-Power Microcontrollers Performance and power consumption have always been key elements in the development of AVR® microcontrollers. Today’s increasing use of battery and signal line powered applications makes power consumption criteria more important than ever. To meet the tough requirements of modern microcontrollers, Atmel® has combined more than ten years of low power research and development into picoPower technology. picoPower enables tinyAVR®, megaAVR® and XMEGA™ microcontrollers to achieve the industry’s lowest power consumption. Why be satisfied with microamps when you can have nanoamps? With Atmel MCUs today’s embedded designers get systems using a mere 650 nA running a real-time clock (RTC) and only 100 nA in sleep mode. Combined with several other innovative techniques, picoPower microcontrollers help you reduce your applications power consumption without compromising system performance! Visit our website to learn how picoPower can help you hammer down the power consumption of your next designs. PLUS, get a chance to apply for a free AVR design kit! http://www.atmel.com/picopower/ Everywhere You Are® © 2008 Atmel Corporation. All rights reserved. Atmel®, logo and Everywhere You Are® are registered trademarks of Atmel Corporation or its subsidiaries. Other terms and product names may be trademarks of others. picoPower 2008ad indd 1 8/8/2008 8:35:17 AM npn224.qxp 2/5/2009 3:29 PM Page 8 E WS N CT DU R O P EW N Edited by John Gorsky CPLD DEVELOPMENT KIT The new picoUSB development kit for Altera’s MAX3000 and MAX7000 families of CPLDs enables you to economically learn Altera CPLD design. With its USB interface, picoUSB in-system programming can be easily managed from your PC. It is an ideal solution for introductory digital logic design courses. The picoUSB uses a 44-pin PLCC socket to support the MAX3000 and 7000 devices. With the free Quartus II Web Edition design software package and the builtin programmers, you will be programming your own designs into the device quickly. Power is provided either through the USB interface or with an external 9-V, 2.5-mm adapter. The development kit brings your I/O pins out to headers and the voltage is selectable for 5-, 3.3-, or 2.5-V logic levels. The picoUSB comes complete with a user’s manual, reference design, and example HDL code. The picoUSB starts at $145 per kit. Volume and university pricing are also available. Colorado Electronic Product Design, Inc. www.cepd.com POCKET-SIZED LINUX PC WITH GPS AND GPRS ProtoMat® S-Series PCB Milling Machines Electrical engineers agree: with a Protomat S-Series prototyping machine at your side, you’ll arrive at the best solutions, fast. These highly accurate benchtop PCB milling machines eliminate bread-boarding and allow you to create real, repeatable test circuits— including plated vias—in minutes, not days. The AarLogic C10/3 is a breadboard that contains a complete Linux PC on a surface of just 104 mm × 63 mm. A quad-band GPRS module and a SiRF3 GPS module are also on board, as well as interfaces for USB, RS-232, and Ethernet components. An SD card reader enables the trouble-free expansion of the 4 Mb of RAM that comes standard. The heart of the PC is two ARM processors that are responsible on one hand for the GSM component and on the other for applications executable under Embedded Linux. The processor module, including the GSM component, is also available for purchase separately. Despite its small surface area, roughly the size of a matchbox, its 192-pin socket provides a wide array of connectivity options. Aside from keyboards, digital cameras, and reading devices, this also includes WLAN, Bluetooth, and GPS components. The AarLogic C10/3 costs approximately $590. Round Solutions www.roundsolutions.com • Declare your independence from board houses March 2009 – Issue 224 • Affordable, entry-level price tag 8 • The best milling speed, resolution, and accuracy in the industry • Single-sided, double-sided, and multilayered machining without hazardous chemicals • Optional vacuum table and autosearch camera for layer alignment For complete details visit: www.lpkfusa.com or call: 1-800-345-LPKF CIRCUIT CELLAR® • www.circuitcellar.com 2/5/2009 3:29 PM Page 9 AVR AND PIC DEVELOPMENT KITS The XGS AVR 8-bit and XGS PIC 16-bit are new development kits that make learning and development easy. The XGS AVR 8-bit is based on the Atmel ATmega644 AVR processor and is a highly integrated development kit for exploring ATmega AVR processors. The XGS PIC 16-Bit is based on Microchip Technology’s new 16-bit PIC24 processor. Both kits are designed to be serious development kits for schools, students, engineers, and anyone interested in learning programming. The XGS kits give designers a fun way to learn AVR and PIC programming in the context of graphics, audio, and simple game development. So, instead of blinking LEDs and displaying digits on a seven-segment display, designers will develop graphics applications that control the VGA and NTSC screen to learn C and ASM. Each kit comes with a 350-plus-page printed manual covering hardware, software, and numerous programming tutorials; a programmer and USB cable; a 9-V power supply; an A/V cable; a game controller; and a PC serial port to XGS header converter. Also included is a DVD with numerous examples and a complete driver library including graphics, sound, keyboard, SD card, serial communications, mechatronics, and more. Bonus materials on the DVD include electronic copies of numerous game development and electronics gaming hardware books. The XGS AVR 8-Bit costs $139.99 and the XGS PIC 16-Bit costs $159.99. Nurve Networks www.xgamestation.com WIRELESS ENVIRONMENTAL SENSING KIT The CY3271-EXP1 Environmental Sensing Kit is the first of many future expansion offerings for the recently introduced PSoC First Touch Starter Kit with CyFi Low-Power RF. The Environmental Sensing Kit includes two boards: a weather station expansion board—which includes sensors for atmospheric pressure, humidity, temperature, and ambient light (all of which can be operated and monitored simultaneously)—along with a pigtail thermistor board for measuring temperature in remote locations. The new sensing kit is easy to use right out of the box. You can use the “Sense and Control Dashboard” software included in the new FirstTouch Starter Kit to quickly set up and monitor a wired or wireless sensor network through the intuitive visual dashboard. The combination of the Environmental Sensing Kit and the dashboard enable data logging, data aggregation, alarms, and sensor calibration for nearly any type of sensor. In addition, the kit supports custom expansion for designers who want to develop their own applications. The new CyFi Low-Power RF solution delivers the industry’s leading combination of reliable connectivity, power efficiency, and superior range. It is supported by the flexible and easy-to-use PSoC programmable system-on-chip. The PSoC reduces the complexity of quantifying a sensor’s signal by integrating the amplification, filtering, and ADC stages into a single device. Additionally, the PSoC’s analog MUX allows multiple sensors to be connected concurrently. The CY3271-EXP1 Environmental Sensing Kit costs $99.99 and the CY3271 PSoC FirstTouch Starter Kit costs $69.95. Cypress Semiconductor Corp. www.cypress.com NPN www.circuitcellar.com • CIRCUIT CELLAR® March 2009 – Issue 224 S npn224.qxp 9 npn224.qxp 2/5/2009 3:29 PM Page 10 NEW FAMILY OF WIRELESS SINGLE-BOARD COMPUTERS The BL4S100 and BL4S200 are SBCs that feature either Wi-Fi or ZigBee connectivity, a microprocessor, memory, and abundant I/O that enable easy deployment of wireless nodes for industrial, commercial, and medical applications. This unique combination of control, I/O, and connectivity makes it easy for engineers to add wireless connectivity and control to devices like vision systems, wireless industrial control systems, printing systems, automatic meter-reading devices, industrial ventilation systems, and HVAC systems. They also enable design engineers to easily gather and control data from ZigBee nodes and uplink the data to a server via Ethernet, providing an easy-to-deploy ZigBee-to-Ethernet gateway. The BL4S100 series offers both ZigBee and Ethernet connectivity and provides embedded design engineers a simple and straightforward approach for machine control and data acquisition without the burden of cables and wiring harnesses. It enables design engineers to deploy ZigBee nodes at various control points and connect the nodes wirelessly to the BL4S100 board. The BL4S100 SBC can then gather and collate the data from the ZigBee nodes and uplink it to a server via Ethernet. The high-performance BL4S200 series delivers higher clock speeds and twice the I/O as the BL4S100 series and offers a choice of Wi-Fi or ZigBee connectivity. It is ideal for applications that require significant digital and analog I/O such as data logging, instrument reading, and controlling motors, relays, and solenoids. The BL4S100 and BL4S200 development kits are available that include the essential hardware and software tools. The BL4S100 kits cost $199. The BL4S200 kits cost $299. The BL4S100 SBCs are available in 500-plus quantities starting at $98. The BL4S200 SBCs are available in 500-plus quantities starting at $176. Rabbit Semiconductor, Inc. www.rabbit.com March 2009 – Issue 224 NPN 10 CIRCUIT CELLAR® • www.circuitcellar.com npn224.qxp 2/5/2009 3:29 PM Page 11 EMBEDDED LAN MODULE Nano LANReach is an embedded LAN module that quickly and easily connects any embedded device to 10/100BaseT LANs with minimal programming. Based on the CO2144 chip, Nano LANReach offers plug-and-play serial-to-LAN functionality enabling immediate and full–featured LAN connectivity by connecting an Ethernet cable to the onboard RJ-45 connector. In addition, the module includes a full suite of Internet protocols, applications, and security engines. Nano LANReach’s firmware supports two modes of operation. The first is serial-to-LAN bridge mode, which enables transparent bridging of serial data over a LAN using the module’s high-speed UART. The module supports TCP, UDP, or SSL tunneling of serial data. The second is full Internet controller mode, which enables simple microcontrollers to use the module’s rich protocol and application capabilities to perform complex Internet operations, such as e-mail, FTP, SSL, embedded web server, and others. Internet controller mode can be used with any of the hardware interfaces. Nano LANReach includes USB, SPI, and fast UART interfaces for easy integration into existing or new designs. In addition to SerialNET, it supports 10 simultaneous TCP/UDP sockets: two listening TCP sockets; SMTP, MIME, POP3, FTP, Telnet, and HTTP/HTTPS clients; and an HTTP/HTTPS embedded web server with a web site for the host application and one for configuring the module. Nano LANReach also supports AES-128/256, SHA-128/192/256, 3DES, the SSL3/TLS1 protocol for a secure client socket session, and a secure FTP session. The Nano LANReach starts at $38. The $160 II-EVB363ML evaluation board provides an easy environment for developing applications and testing. Connect One www.connectone.com March 2009 – Issue 224 NPN www.circuitcellar.com • CIRCUIT CELLAR® 11 npn224.qxp 2/10/2009 10:42 AM Page 12 VIBRANT THREE-COLOR DISPLAYS READABLE UP TO 600’ The Plant Floor Marquee (PFM) is a series of highly visible, multicolor LED displays optimized for communicating critical machine status and production data instantly across the plant floor. The largest PFM is easily readable at distances up to 600′ (182 m). The PFM series features a graphical three-color display—available in four sizes—that can convey production targets, machine faults, and other custom messages. The PFM takes advantage of the powerful features of a G3 series HMI, Data Station Plus or Modular Controller as a host device to display the text and graphics on the PFM. Red Lion Controls’s host devices and free Crimson software enable the PFM to receive message data from virtually any device on the factory floor, supporting over 170 different protocols and the ability to send and receive data from seven or more device types simultaneously. The PFM using a Red Lion host offers several additional features for enhanced usability and unprecedented flexibility, including vibrant green, yellow, and red LEDs. It has four sizes (ranging from 26″ × 6.6″ at 80 × 16 resolution to 39.3″ × 22.5″ at 120 × 64 resolution) and can send and receive data from seven or more device types simultaneously. it also incorporates bar graphs, custom symbols, and other graphics to display production trends and goals. It presents data from a single device or uses custom calculations to display optimized production data from multiple devices. They also feature an addressable RS-485 port to support multidrop wiring. Please contact Red Lion Controls for pricing. Red Lion Controls, Inc. www.redlion.net 802.11B/G WLAN ACCESS POINT MODULE The WIZ610wi is an 802.11b/g WLAN access point module in a pin-head-type package. Serial to WLAN can be easily implemented with any system that has a UART interface. With the WIZ610wi, development time is reduced because WLAN driver porting is not required. Also, the module guarantees excellent stability as a result of independent operation. The module provides Ethernet-to-wireless bridging, enabling a wired network device to have a wireless communication interface. It also offers a serial interface for “serial to wireless” applications and offers an AP/Station/Gateway mode. The WIZ610wi offers a 54-Mbps data rate and a maximum 20-Mbps effective data transmission rate. The module includes a full-featured network protocol stack and a built-in web server for configuration via a standard web browser. The WIZ610wi (including antenna) costs $41.90 each. The WIZ610wi-EVB evaluation board costs $99 . March 2009 – Issue 224 WIZnet, Inc. www.ewiznet.com 12 CIRCUIT CELLAR® • www.circuitcellar.com eq-224.qxp 2/5/2009 9:24 AM Page 13 CIRCUIT CELLAR Test Your Edited by David Tweed EQ Problem 1—What is a “shell” pr ogram? Give some examples. Problem 3—Explain the concept of a shell “environment.” What, for example, is PATH? Problem 2—What exactly does a shell do? Problem 4—What are some of the key ways in which GUI shells are different from text shells? David Tweed contributed the four problems and answers in this issue. What’s your EQ?—The answers are posted at www.circuitcellar.com/eq/ March 2009 – Issue 224 You may contact the quizmasters at [email protected] www.circuitcellar.com • CIRCUIT CELLAR® 13 2/5/2009 1:18 PM Page 14 F EATURE 2903015_ottaviani.qxp ARTICLE by Guido Ottaviani Robot Navigation and Control (Part 1) Construct a Navigation Control Subsystem Guido built a navigation control subsystem for an autonomous differential steering explorer robot. In the first part of this article series, he describes a robotic platform that drives motors and controls an H-bridge. Guido also presents a communication system that remotely manages the robot. D uring the early stages of my “electronic childhood,” I dreamt of building an autonomous robot. But such a project was too difficult and expensive back then. Now it’s a lot easier with powerful, inexpensive hardware and a development system that can run on a standard computer. Such devices are readily available on the Internet. I recently made my dream come true by building an autonomous robot. In the first part of this article series, I will describe the navigation control subsystem that I designed for a differential steering explorer robot (see Photo 1). The “dsNavCon” system, as I call it, features a Microchip Technology dsPIC30F4012 motor controller and a general-purpose dsPIC30F3013. March 2009 – Issue 224 EXPERIMENTATION 14 I started visiting some amateur explorer robot competitions a few years ago. I was disappointed with the robots I encountered. Many seemed to move around at random. Others seemed to repeat the same path several times. Fortunately, while searching the Internet, I found Johann Borenstein’s technical report, “Where Am I?: Sensors and Methods for Mobile Robot Positioning,”[1] and the SR04 robot by Photo 1— This is the entire navigation control subsystem (as described in Figure 1). It is installed on the Rino robotic platform. CIRCUIT CELLAR® • www.circuitcellar.com 2903015_ottaviani.qxp 2/5/2009 1:18 PM a) Page 15 b) c) Photo 2—These are my first experiments with homemade encoders. a—This is a hacked mechanical mouse. b—I used a different kind of geared motor with mouse parts. c—I used photoreflectors on a printed wheel. BASIC PRINCIPLES The 300-CPR encoders are connected to the motors’ axles. Because the wheels spin at up to 200 RPM and the gear reduction ratio is 30:1, the axles can spin at 6,000 RPM. To catch all of the pulses generated by the encoders in a 4× decoding method (120 kHz), I needed dedi cated hardware for each encoder. After experimenting with the Microchip PIC18F2431 motor control microcontroller, it was time to upgrade to the dsPIC30F digital signal controller series (DSC). A dsPIC30F4012 motor controller for each motor is perfect for controlling wheel position and sp eed and for performing odometry. Data provided by the two motor controllers is collected by a dsPIC30F3013. This generalpurpose DSC has enough power to get data and per form some trigonometry to calculate position coordinates and store data related to the path covered to obtain a map of the field, all at a high rate. This brings me to the dsP IC-based navigation control board, the dsNavCon. This board is designed to be par t of a more complex system. In a complete explorer robot, other boards will control sound, light, and gas sensors, as well as bumpers and ultrasonic ra nge finders for locating targets and avoiding obstacles. A behavior board will decide how to act to reach the goal. As a stand-alone board, th e dsNavCon can be used for a simple line-following robot or various other robotics applications. There is still plenty of free program memory in the super visor dsPIC to add code for such tasks. With minor changes in software (or n one at all), it can also be used by itself f or a remote-controlled vehicle (using the bidirectional RF modem with some ki nd of smart remote control). This remote control can send complex commands such as “move FWD 1 m,” “tur n 15° left,” “run FWD at 50 cm/s,” “go to X, Y coordinates,” o r something similar. SUBSYSTEM The navigation control subsystem is shown in Figure 1. A detailed schematic diagram and pictures of ever y board, as well as t he complete project done with Cadsoft’s Eagle, are available on the Circuit Cellar FTP site. The subsystem includes the dsNa vCon and an STMicroelectronics L298-based dual H-bridge b oard for controlling the geared 12-V motors (Hsiang Neng DC d) a) b) c) Gear Motor Manufacturing’s HN-GH12-1634TR). The circuit of this Hbridge is a classic application of an L298 IC, as you can see in its datasheet and application note. Motion feedback Photo 3—This is a sequence of the mobile platform starting from a square-cut standard piece of expanded PVC. This kind of material comes from a couple of is available on the ’Net. Already cut to 200 mm × 200 mm × 5 mm, it needs just a cutter and a ruler to be shaped in such an easy way. An octagonal-based robot is as easy to drive as a circular one, but it’s much easier to build. 300-CPR quadrature www.circuitcellar.com • CIRCUIT CELLAR® March 2009 – Issue 224 David Anderson.[2] I was impressed by odometr y and dead reckoning. Most of the robots built by amateurs are based on a differential steering system: a couple of driving wheels and a caster. Knowing the space covered by each wheel periodically with enough precision enables you to calculate the position coordinates of the robot at any given moment. As you can see in Photo 2, I tested different quadrature encoders. Any dead-reckoning navigation system is affected by cumulative error. The measuring precision must be high to ensure a small error circle after a long path. After some good results with homemade encoders, I used something better: a couple of 12-V 200-RPM geared motors connected to a couple of 300-count-per-revolution (CPR) quadrature encoders. These parts are available at many online robotics shops. I designed my simple robotic platform with easy-tofind components and parts that didn’t require professional tools or equipment or special skills. I purposely developed a design that is properly sized for several different categories of robotics projects (e.g., exploring robots, linefollowing robots, and collecting robots). I named it “Rino,” which rhymes with Robottino, or “little robot” in Italian (see Photo 3). 15 2903015_ottaviani.qxp 2/5/2009 1:18 PM Page 16 Rotary encoder 1 LEDs NiMh Battery pack 12 × AA cells 2,700 mAh Motion feedback 14.4 V QEI/IC 5V PWM H-Bridge 1 Motion controller 1 14.4 V Motor 1 ADC VREF Current sensing OSC 0 INT 0 RB3 INT 1 RX TX Preregulator 9V 3.3 V Serial 2 (RX2/TX2) RF Modem CS 1 TX EN 1 9V 5V 5V OSC 7.37 MHz On-board power supply Clock 1 ms Supervisor TX 1 RX 1 LEDs I2C VREF CS 2 TX EN 2 Main board 3.3 V OSC 0 INT 0 RB3 INT 1 RX TX 14.4 V 5V PWM Navigation control system H-Bridge 2 Motion controller 2 VREF ADC Motor 2 Current sensing QEI/IC Motion feedback LEDs Rotary encoder 2 March 2009 – Issue 224 Figure 1—This is the navigation control subsystem. 16 encoders (US Digital E4P-300-079-HT miniature optical kit encoder). A 12-AA NiMH cell battery pack, with a nominal voltage of 14.4 V and 2,700 mAh, supplies the power (see Photo 4). This ensures the correct voltage for the motors after the loss of the H-bridge. A couple of LM7809 regulators drop down the 14.4 V to 9 V for a logic board’s power supply. The voltage regulators are decoupled with a capacitor-input (Pi) filter on each one. This system reduces interference from the motors and enables the use of a smaller heatsink for the 5-V regulators on each individual board. The power supply on the dsNavCon board also provides 3.3 V for the ZigBee RF modem (MaxStream’s (now Digi International) XBee module) and 2.7-V reference voltage for the motor controllers’ ADC. This converter is used to read the motors’s current through a 0.27-Ω shunt resistor on each H-bridge and a couple of op-amps with a gain of 1 0 on the dsNavCon board. The supervisor communicates with the behavior board of the robot through an I 2C bus and with a remote PC via a ZigBee RF modem for telemetry (UART2–RX2/TX2). The supervisor drives both motor controllers (MCs) through UART1 (RX1/TX1) communication, sending commands and reading information (space, speed, and motor cur rent). The motor controllers have no oscillator hardware; the supervisor provides them with a 7.3728-MHz signal obtained by an Output Compare simple PWM peripheral. A 1-ms timing signal is also provided by the super visor to synchronize every operation. The supervisor controls motor controllers communications and other operations through the use of chip-select I/O signals. DESIGN EVOLUTION New components are always hitting the market. My first PID program was developed on a Microchip PIC16F877 microcontroller with a quadrature encoder inter face performed in Photo 4—These are the motors, the encoders, and the H-bridges. The metal box at the top contains a battery pack, 9-V preregulators, and PI filters. It also acts as a heatsink. CIRCUIT CELLAR® • www.circuitcellar.com 2/5/2009 1:18 PM Page 17 much simpler. There is no need for high-speed communication between the supervisor and motor controllers to exchange navigation parameters. Every process is simple to synchronize because it’s on the same chip. The peripheral pin select capability of the dsPIC33F series further simplifies the PCB, enabling an internal connection of peripherals and greater flexibility (see Figure 2). For example, the IC capture modules are internally connected to QEI pins, saving two precious pins. Moreover, the COMM-1 port used for XBee connection can be software switched from UART to I 2C or SPI communication with no hardware modifications. Note that every one of the 28 pins is used on this board. Figure 2—This is the new board featuring the Microchip Technology dsPIC33F. software. When I started porting the software on a PIC18F2431, the hardware QEI interface looked like the perfect solution. The math cap ability of the dsPIC30F series aros e as a useful option for trigonometric c alculi needed for odometry. There are dualin-line versions of this DSC and they are faster. When the board and th e programs were almost completed, Microchip brought out a new, powerful 28-pin SPDIP in the dsPIC33F series for both motor controller (MC) and general-purpose (GP) versions. They are significantly faster than the dsPIC30F, they have a lot mo re available program memory and RAM (useful for field mapping), they require less power (good for a batter y-operated robot), and their DMA capabilities simplify many I/O operations. Most importantly, these are the first Microchip motor controllers with two QEIs on the same chip. Let’ s start a new port again! The logical block diagram is similar to Figure 1 f or the previous board, but the hardware and software are www.circuitcellar.com • CIRCUIT CELLAR® Specializing in Quickturn Proto's Internet pioneers with 15 years experience Instant online Quotations & Ordering From Singlesided to 6 layers ML Leadtimes from 48 hrs Full DRC included on all orders High Quality prototypes at LOW cost's Simply send your layout files and order online www.pcb-pool.com TollFree USA: 1877 3908541 Email: [email protected] March 2009 – Issue 224 2903015_ottaviani.qxp 17 2903015_ottaviani.qxp 2/5/2009 1:18 PM Page 18 The number of components and connections is dramatically reduced. On a board that i s the same size as the previous one, there i s enough room for a second GP series DSC that will manage all of the robot’ s sensors. Photo 5 shows the development board used for porting. At the end of the sof tware porting process, I confirmed my first impression: one dsPIC33FJ64MC302 is powerful enough to manage all of the navigation tasks. I had to take care just for the high rate of the input capture interrupts. But with the timing chosen for the different PIDs, the program spends more than 80% of its time idling in the main loop. I’ll cover this in more d etail in the second part of this ar ticle series. TELEMETRY Any kind of closed-loop control (i.e., PID or other) requires a fine setup to achieve its purpose. If you really want to ask “Where am I?” any parameter of the program must be fine-tuned. Several groups of parameters must be tested before finding the right sequence. Believe me, the most boring method is to change values in code, recompile, and burn the flash memory of the dsPIC over and over with the hex file. You absolutely need an I/O system to read and write numbers to and from the program. It’s common to install a simple LCD on a robot. A standard display (e.g., 4 × 20) compatible with the Hitachi 44780 protocol is inexpensive and easy to March 2009 – Issue 224 a) 18 Photo 5—The new board based on the Microchip dsPIC33F is a lot simpler—in terms of both hardware and software—than the previous one. program. But it’s not easy to use. It cannot show a lot of infor mation at the same time and it is slow . Plus, it is attached to a moving vehicle. Excluding graphic displays for the same reason and because they are expensive and hard to program, a good solution would be a wireless system that exchanges data with a computer , on which it’s easy to display the numbers, even in graphical for mat, and to store large amount of bytes. Serial communication is a good way to connect a w ireless system. Two serial ports on the DSC and a simple protocol, such as the one I will describe later, can be used. Using a couple of XBee modules in transparent mode, serial communication can be made wireless w ithout the need for any oth er protocol or special configuration. On the dsPIC side, just RX and TX pins are needed. An affordable adapter is available to b) Photo 6a—The navigation panel shows the robot’s current position and the path. The knob and input fields enable you to control navigation. b—The details panel shows the present value for each motor’s current and a graph with the trend of the speed values for both wheels. CIRCUIT CELLAR® • www.circuitcellar.com 2/9/2009 9:50 AM connect an XBee module to a PC via USB. They are versatile, reliable, and easy to use, with just one problem. For some reason, the MaxStream developers decided to install an unusual contact strip with a 2-mm metric pitch instead of a standard 100-mil pitch. Fortunately, someone designed a board that adapts the XBee pins to a standard strip connector, adding an LDO 3.3-V regulator and some signaling LEDs in a footprint that is a little bit bigger than XBee itself. Refer to the Resources section for more information about the XBee simple board and XBee USB board adapters. Because you have the physical layer and the protocol for communication, you need an application layer that shows the results on a computer screen. A good tool would be the National Instruments LabVIEW (graphical development) or LabWindows/CVI (C language compiler and IDE), with all of the easy-to-use widgets and primitives to develop a control panel or a virtual instrument. But its price is “professional,” which means it is costly. Still, I recommend looking at the full working timed demo. I used my own widgets and instruments with a simpler development system. I wrote the console with the Processing open-source programming language and environment, and with the aid of the Interfascia graphical user interface library. (Refer to the Resources section at the end of this article for more information.) Processing is a simple, multiplatform environment that produces Java executables for Windows, Mac OS X, and Linux operating systems. It fits my requirements for software sharing perfectly. Three panels make up the console. The main panel (or navigation panel) controls the robot’s movements. You can set values with a knob (for angle) or input fields for speed, distance, or target coordinates (see Photo 6a). Instruments return the actual values for mean speed, total current for both motors, and orientation. The graph shows the current position and the path. www.circuitcellar.com • CIRCUIT CELLAR® Page 19 The configuration panel contains the input fields for all of the constant parameters used to set up the program. Values are stored in the DSC’s flash memory once they are sent. They can be saved in a file on the computer side. The details panel shows the speed and current values for each motor (see Photo 6b). The graphical representation of speed is essential to set up Speed PID K parameters because it reveals how the motors respond to variations in load or required velocity. CALIBRATION PROCEDURES Once the right communication procedure and display of data is running, you can start the setup. There are many online documents about the proper calibration procedures for the PID constants, both theoretical and practical. Most of them are valid. A simple method that is applicable in this situation is explained in Microchip’s code example CE019.[3] NOW WITH DYNAMIC LIVE 3D PCB DESIGN Streamline the entire electronics design process within a single unified solution. > Rapid prototyping using a live, interactive, reconfigurable hardware development system > A smooth path from concept exploration through live 3D PCB design and out to successful manufacture > Easy connection to company-wide systems Seeing is believing. Visit Altium’s next generation electronics design solutions today. www.altium.com/view-demo March 2009 – Issue 224 2903015_ottaviani.qxp 19 2903015_ottaviani.qxp 2/5/2009 1:18 PM March 2009 – Issue 224 There are four PID algorithms in this software that control the navigation. Two for speed of the wheels, one for orientation, and one to control the distance from the target. The four PIDs are independent, so they can be set up separately. First of all, you can take care of the speed PID of one motor controller, changing the Kp, Ki, and Kd values in sequence until the motor r uns smoothly, responding quickly to the commands and without overshoot. The other 20 Page 20 motor will probably r un fine with the same constants. After the speed can be regulated accurately, the right K values for angle PID first and distance PID later can be found with the same logic. The axle size and wheel diameter can be measured on the robot with a caliper, but they must be fine-tuned to make the vehicle go straight, turning the right angle and r unning the right distance. You can achieve the first tuning by comparing the RTC COMPETITION As design engineers, we all need a goal. By “goal” I mean, a target that justifies the amount of time we spend debugging and tr ying to make our circuits work like they did in the simulations. In an effort to get more people interested in the goal of building robots, a bunch of us members of the Roboteck Internet Discussion Group recently spent some time designing a competition. As mechanical insects walked around our meeting table (among all the pizza, beer, and red wine), we drafted a set of r ules for the Robo Tolomeo Cup (RTC) competition. We named it the Robo Tolomeo Cup in order to reference the great Greek car tographer. Remember: navigation is key for any mobile robotics system. The rules are simple. Each robot must start from point A, navigate to point B at least 10 m away, and then retur n to point A. This must be done with pure dead reckoning—without any external reference—while avoiding a few convex obstacles just so the path is not a straight line. The score is inversely propor tional to the distance from the marked returning point at the end of the session. A Rino-like system, the dsNavCon board, and the theor y behind it are all an entrant needs to build a robot for this kind of competition. The first experimental competition is scheduled to take place this year. We are intentionally keeping it low-profile without sponsors or prizes. The only prize is the satisfaction of finishing a project. If there are enough participants who submit interesting designs, we may plan another , more involved, competition. The RTC could be considered an indoor version of—or stepping stone toward—a larger event such as the Robo-Magellan outdoor robotics competition. Who knows what the future will bring? CIRCUIT CELLAR® • www.circuitcellar.com 2/5/2009 1:18 PM position displayed on console with the position really measured on field. A more accurate method is UMBmark, which was developed at the University of Michigan. [4] UP AND RUNNING The robotic platform is considered up and running when the motors are spinning the wheels, the H-bridge is driving the motors, the board that controls the H-bridge is functioning (in the dsPIC30F or dsPIC33F versions), and the communication system needed for remote management is complete. When the system is ready and you have a goal (e.g., the RTC Competition) you can star t working. But wait. What else do you need? The software! Next month, I will describe the software you need on the board to navigate the robot. I will cover how to control the speed with PID closed-loop control. You will also lear n how to use the encoder information to determine the robot’s position with dead reckoning by odometry. (Be prepared for some math.) Lastly, I’ll cover the overall software architecture that glues all of the pieces together. I Author’s note: Along with other members of the Roboteck Internet Discussion Group, I helped create a design competition for robotics enthusiasts. For more information about the Robo Tolomeo Cup (RTC), refer to the RTC Competition sidebar. Guido Ottaviani ([email protected]) has worked with electronics and ham radios for years. After working as an analog and digital developer for an Italian communications company for several years, Guido became a system integrator and then a technical manager for a company that develops and manages graphic, prepress, and press systems and technologies for a large Italian sports newspaper and magazine publisher. A few years ago, he dusted off his scope and soldering iron and started making autonomous robots. Guido is currently an active member in a few Italian robotics groups, where he shares his experiences with other electronics addicts and evangelizes amateur robotics. www.circuitcellar.com • CIRCUIT CELLAR® Page 21 P ROJECT FILES To download code, go to ftp://ftp.circuitcellar .com/pub/Circuit_Cellar/2009 /224. R EFERENCES [1] J. Borenstein, H. R. Everett, and L. Feng, “Where am I?: Sensors and Methods for Mobile Robot Positioning,” Technical Report, University of Michigan, 1996. [2] D. Anderson, “SR04 Robot,” Roy M. Huffington Depar tment of Earth Sciences, Southern Methodist University, www.geology.smu.edu/~dpa-www/robots/sr04/. [3] Microchip Technology, Inc., “dsPIC30FCode Examples: CE019—Proportional Integral Derivative (PID) controllers & closed-loop control,” 2005, www.microchip.com/stellent/idcplg?IdcService=SS_GET_PAGE&nodeId= 2620. [4] J. Borenstein and L. Feng, “UMBmark: A Method for Measuring, Comparin g, and Correcting Odometry Errors in Mobile Robots,” 1994, www-personal.umich. edu/~johannb/umbmark.htm. R ESOURCES B. Fry and C. Reas, “Processing web site,” www .processing.org. Interfascia graphical user interface library, http://superstable.net/interfascia. Droids SAS, “XBee Simple Board 990.001,” www.droids.it/data_sheets/990.001% 20datasheet.pdf. ———, “XBee USB Board,” www.droids.it/data_sheets/990.002%20datasheet.pdf. G. Ottaviani, www.guiott.com/Rino/index.html. Roboteck Discussion Group, http://it.groups.yahoo.com/group/roboteck/ (Italian) or http://groups.yahoo.com/group/roboteck_int/ (English) STMicroelectronics, “Application Note: Applications of Monolithic Bridge Drivers,” AN240/1288, 1995. ———, “L298: Dual Full-Bridge Driver,” 2000. S OURCES Eagle Software CadSoft Computer | www.cadsoftusa.com HN-GH12-1634TR Motor Hsiang Neng DC Gear Motor Manufacturing Corp. | www.hsiangnengmotors. com.tw XBee Module Digi International, Inc. | www.digi.com PIC16F877 Microcontroller, PIC18F2431 microcontroller, dsPIC30F3013 digital signal controller, dsPIC30F4012 motor controller, and dsPIC33FJ64MC802 microcontroller Microchip Technology, Inc. | www.microchip.com LabVIEW and LabWindows/CVI National Instruments Corp. | www.ni.com/labview E4P-300-079-HT Miniature optical kit encoder US Digital | www.usdigital.com March 2009 – Issue 224 2903015_ottaviani.qxp 21 2/5/2009 1:11 PM Page 22 F EATURE 2903017_Sander.qxp ARTICLE by Hanno Sander Vision-Guided Robotics A Next-Generation Balancing Robot Are you interested in building a sophisticated, vision-guided, balancing r obot that can interact with its environment? Hanno shows you how to tackle this project with a Parallax Propeller, a handy design kit, and an inexpensive camera. I a) t’s time to build the next generation of robots. W ith today’s technology, our robots should be tall enough to look us in the eye and interact with us through sight. Two years ago, I star ted experimenting with the latest microprocessor from Parallax, a camera, and a vision. In this article, I’ll explain how to integrate vision technology in a project. As I describe the balancing robot design you see in Photo 1, I’ll cover parallel processing, visual debugging, vision algorithms, and robot control with computer vision. PARALLAX PROPELLER March 2009 – Issue 224 b) 22 I started my project after my dad gave me a Parallax Propeller for Christmas. Parallax is best known for its Boe-Bot robot and BASIC Stamps, but its Propeller chip is quickly becoming popular with engineers and hobbyists because of its power and simplicity. Its eight identical processors (cogs) share common resources, such as global memory and an I/O por t, but each can run its own program. It was perfect for my application because I needed to sample many different sensors at different rates, perform intensive filter calculations, Photo 1a—This is the base of the DanceBot with wheels mounted on motors with quadrature encoders, the logic board powered by the Parallax Propeller, and the miniature camera with an ADC module. b—This autonomous balancing robot uses vision to interact with users. Here it’s getting ready to balance a champagne flute for a month. CIRCUIT CELLAR® • www.circuitcellar.com 2/5/2009 1:11 PM Page 23 position robustly in any environment is not easy. The first lesson I lear ned was that unlike the inverted pendulum problem, a tr ue balancing robot Drive two motors Quadrature encoder Position, velocity Fuzzy PID loop to requires two control loops: one control loop to keep balance and achieve the robot from falling and another to keep the robot target position Gyroscope Tilt, rate of turn Accelerometer from losing its position. This combination also lets you move it programmatically. A significant milestone for building a balancing robot involves taking a simple Figure 1—The DanceBot gets information from its environment through its sensors: a camera, a step, accelerating to a set speed, travelling, and then quadrature encoder, a gyroscope, and an accelerometer. It processes this data to find its dance decelerating to a stop. The DanceBot uses what’ s partner, current position, and tilt. Fuzzy logic is used to balance and to maintain a set distance known as a “hybrid fuzzy logic cascading PID confrom its partner by driving the wheel motors. troller” to precisely carry out this and other advanced maneuvers. In the algorithm, the inputs to the PID conprocess captured video, and control motors. I focused on trollers are first processed by a fuzzy logic engine to make the parts of the problem and later integrated ever ything by control algorithm more robust and easier to tune. The PID assigning different algorithms to their own cogs. controllers, which correct the error between a measured variThe Propeller has eight 32-bit processors r unning at up able and its setpoint by calculating a cor rective action, are to 80 MHz. It has shared global resources, including 32 KB arranged in a cascade with the output of one used as the setof RAM, 32 KB of ROM, and 32 I/O pins. It has dedicated point in the second. resources per processor, including 2 KB of RAM and two general counters, and video output. The Propeller operates Second, while it’s possible to determine tilt by optically at 3.3 VDC (each pin can sink up to 40 mA). It is available measuring the distance to the floor, this technique isn’t on Parallax’s web site for $12.99 per chip and $29.99 per robust. The DanceBot measures rate of turn using a ceramic ProtoBoard. gyroscope and integrates this signal to calculate tilt. Fusing the calculated tilt value with measurements from an accelerometer with a Kalman filter yields an accurate tilt ViewPort reading with no drift. This combination lets the DanceBot Parallax offers a free tool to load programs written in stay balanced in any environment. assembly or a high-level language called Spin to the ProThe DanceBot is controlled like a car: it requires two peller. This is fine for getting star ted writing simple prochannels of information (see Figure 1). Channel 1, speed, grams, but I quickly deter mined that I needed a more controls how fast the robot should travel. Channel 2, turn powerful debugging tool to develop and configure my rate, controls how quickly the robot should turn about its vision-powered balancing robot—an application I now call own axis. The DanceBot manages the speeds of its two ViewPort. motors to stay balanced and to achieve the position orientaI started by dedicating one of the eight cogs to continution and velocity goals given by its higher level plan ner. ously share data stored in the Propeller ’s memory with a Unlike a car, the robot is capable of turning in place. At PC application. This enabled me to mon itor and change first, I controlled my robot with a remote control, but I variables while the other seven cogs ran at full speed. quickly realized that it would be much more fun if it could When I added a module that sampled all 32 I/O pins at interact with others as well—just by watching what they 80 MHz, other designers became interested in using my were doing. The first step to guide the robot with vision application to debug their integration code—and V iewPort was to build a frame grabber. was born. Since then, I’ve added other capabilities to the ViewPort application to tur n it into a complete debugging package. You can download a free 30-day trial of ViewPort FRAME GRABBER at http://mydancebot.com. The DanceBot’s vision is controlled by a small grayscale Electronics123.com C-Cam-2A miniature video camera. It is just 16 × 16 × 16 mm, uses less than 100 mW, and costs less THE DanceBot After watching friends demonstrate their iRobot Roomba robotic vacuum cleaners at a party, I wondered if I could build a balancing robot that could dance—not just with me, but with anyone in any environment. I wanted to build a robot that could dance with people and seem almost human. Balancing robots make a great platform for mobile robots. They are highly maneuverable, have great traction, and move more smoothly and naturally than other designs. They can turn on a dime, navigate precisely, and are a pleasure to watch while they keep their balance. UnfortunateFigure 2—This is the frame grabber hardware. The C-Cam-2A outputs an NTSC composite signal in pin 3. This is digitized by the ADC08100 whose output D4..D7 is fed to the Parallax Propeller. ly, building a robot that balances and maintains Sensors Camera www.circuitcellar.com Preprocess Location of person • CIRCUIT CELLAR® Logic Find person and set target position Actuators March 2009 – Issue 224 2903017_Sander.qxp 23 2903017_Sander.qxp 2/5/2009 1:11 PM Page 24 Photo 2—ViewPort shows raw NTSC signal from the camera, as digitized by the ADC. March 2009 – Issue 224 than $20. It has five pins, three of which provide ground and 5-V power, a gamma mode, and an output. The output signal consists of a 1-V PP composite video signal when terminated with a 75-Ω resistor to ground. To watch the camera’s output, you can simply plug it into the composite input of your TV. It’s that simple! Understanding what the camera sees is a bit harder, so I’ll take it one step at a time. First, you have to digitize the analog signal. T o sample slower waveforms with the Propeller, you would typically use delta-sigma modulation with a capacitor and a resistor . But because you need to resolve the individual pixels in a frame, you need a faster solution. The ADC08100 is a 20- to 100-Msps, 8-bit ADC. W ith a clock signal, it will output the digital equivalent of its input voltage on its eight digital outputs. We’ll use one of the Propeller’s 16 hardware counters to clock the ADC at 10 MHz and read the result from the Propeller’s I/O port (see Figure 2). At this point, your robot is ready to take its first peak at the world—one scan line at a time (see Photo 2). Listing 1 is a short program that uses ViewPort to trigger and display the NTSC wavefor m generated by the camera. The program starts by configuring the Propeller ’s clock to run at 80 MHz and including the three objects you need. The vp commands register is a component that will quickly sample the state of the I/O por t and configure the ViewPort interface. Finally, the Freq.Synth call generates a 10-MHz clock to drive the ADC. Photo 2 shows the oscilloscope with a timescale of 10 µs/division. The wavefor m represents a horizontal trigger followed by a color burst and 50 µs of data. A pixel’s brightness is proportional to the signal’s value. To complete your frame grabber object, your algorithm must detect the horizontal and ver tical sync marks and then compress the pixel data into memor y. Vertical and horizontal sync marks differ in the amount of time the signal stays at the lowest level. After detecting a ver tical sync 24 CIRCUIT CELLAR® • www.circuitcellar.com 2/5/2009 1:11 PM Page 25 Listing 1—This Spin program sets the Propeller’s clock to run at 80 MHz and includes several objects: “Conduit” to graph the ADC’s waveform via ViewPort on the PC, “QuickSample” to sample the Propeller’s I/O pins, and “Synth” to generate the 10-MHz clock signal for the ADC. Running this on the Propeller enables you to display the NTSC waveform, as sampled by your frame grabber on the PC. CON OBJ _clkmode _xinfreq = xtal1 + pll16x = 5_000_000 vp : "Conduit" 'transfers data to/from PC qs : "QuickSample" 'samples INA up to 80Mhz Freq : "Synth" pub demoADC|a,frame[1600+6] 'frame stores 1600 samples+configuration vp.register(qs.sampleINA(@frame,1 )) vp.config(string("var:io,adc(decode=io[0..7])")) vp.config(string("dso:view=adc,trigger=adc<15,timescale=50us")) vp.share(0,0) Freq.Synth("A",8, 10_000_000) repeat mark, the code initializes a new frame and processes one video line at a time. For each line, it detects the horizontal sync, skips past the color burst, and then samples the ADC’s value every five instructions—for a line length of 240 pixels. To fit a complete video frame into the Propeller ’s global memory, I store 4 bits of brightness information for each pixel. This data is accessible by all eight cogs on the Propeller. In the DanceBot, one cog is dedicated to run this program continuously to sample video from the camera at 30 fps with a resolution of 240 pixels × 200 lines × 4 bits/pixel. Listing 2 is an example program that uses the VideoCapture object. This program configures the clock and imports some objects and then star ts the video cog to capture frames. Then, it configures ViewPort to display the streamed video. The Spin code draws a thick black line in the middle of the frame by setting parts of the array to 0. Photo 3 shows the project’s first view of the world. REAL-TIME TRACKING You know how to create the infrastructure to digitize video from a camera into the Propeller ’s memory using an ADC and one of the Propeller ’s eight cogs. You have 24 KB of visual data updated 30 times per second. Now you need a filter that can analyze the video and give you just two variables to control the robot. Start by implementing a filter that identifies the location of the brightest spot in each frame. It’s easy to search for the maximum value in your array of pixel brightness values. Just remember www.circuitcellar.com • CIRCUIT CELLAR® that you’re working on 4-bit pixel values compressed into 32-bit longs (A 32-bit long on the Propeller is the basic unit of memory space) (see Listing 3). This filter processes one pixel ever y five instructions. Because the filter processes only data, not sync marks or color bursts, you can process video at 40 fps. So the filter can easily keep up with the frame grabber object and update the position of the brightest spot in real time. To integrate this code with the rest of your DanceBot, simply keep this filter code running in its own cog. The cog will continually filter the data provided by the frame grabber and write the x,y location of the brightest spot into the main memor y. You now have two channels of information updated at 30 times/second with which you can drive the two control channels of your robot—speed and direction. Use the x position of the spot to control the tur ning rate of the robot. If the spot is in the middle, you don’t need to do anything. However, if it’s on the left side of the image, the algorithm tells the robot to turn left, until the spot is in the center and the robot is facing the source of the spot. A similar technique controls the robot’s speed using the ver tical position of the spot. The algorithm’s goal is to keep the spot’ s position centered in the image. So, when the spot is too low, the robot is instructed to move forward, which brings the robot closer to the spot’ s source. Because your camera is looking up at the spot, it will raise the spot in the image. Conversely, if the spot is too high, your robot is too Standards Make Sense Standards improve quality and enable designers to share components across different projects.Today, ARM® Cortex™-M profile processors, combined with the Cortex Microcontroller Software Interface Standard (CMSIS) and optimized middleware from the industry’s largest ecosystem, are setting the hardware and software standards for microcontrollers. These standards enable leading vendors such as Luminary Micro, NXP, and STMicroelectronics to supply advanced microcontrollers, while maximizing code reuse across multiple platforms. Cortex-M3 Microcontrollers Make Sense “We based our award-winning Stellaris® microcontrollers on Cortex-M3 to provide users with 32-bit performance while eliminating future architectural upgrades or software tool changes.” Jean Anne Booth Chief Marketing Officer, Luminary Micro For more information visit www.onARM.com Find us at Embedded Systems Conference, San Jose, March 30 - April 3rd. ARM – Stand 1502 Luminary – 1802 The Architecture for the Digital World © ARM Ltd.AD158-2 | 01.09 ® March 2009 – Issue 224 2903017_Sander.qxp 25 2903017_Sander.qxp 2/5/2009 1:11 PM Page 26 March 2009 – Issue 224 close, so it’s commanded to drive backwards. Translating this algorithm into code is simple, just scale and offset the x,y location of the spot to control the robot. The complete control program for the robot is posted on the Circuit Cellar FTP site. To illustrate the tracking ability of this filter, I can use ViewPort to display the streamed video with a superimposed trail showing the position returned from the filter over the last minute. Photo 4 shows the grayscale image, as seen by the camera, with a yellow trail showing the path the bright source took. 26 Listing 2—This Spin program sets the Propeller’s clock and includes two objects to find a blob: “Conduit” to stream the video signal to the PC and “VideoCapture” to grab the frame. By continually setting videoFrame[3010] to 0 with the ~ operator, we will have an eight-pixel horizontal black line in the center of the image. CON OBJ _clkmode _xinfreq = xtal1 + pll16x = 5_000_000 vp : "Conduit" 'transfers data to/from PC video: "VideoCapture" 'capture video signal pub findblob|videoFrame[6000],a,blob vp.register(video.start(@videoFrame,video#HIVIDEO)) vp.config(string("start:video")) vp.share(@blob,@blob) repeat repeat videoFrame[3010]~ robot would do. It will become apparent that a good algorithm involves averaging the location of the darkest pixel in each line. This is quite robust, easy to program, and gives a good control signal to the robot. Again, integrating this filter with the rest of the DanceB ot is straightforward. Just use the average position of the line to control the direction of the robot while it’s moving along at a set speed (see Listing 4). look around and imagine what type of pattern would stand out in our typical cluttered world. For most people, a bar LINE FOLLOWING WITH A CAMERA code-like pattern of repeated black and You can control the behavior of the white lines should do relatively well. robot by shining a bright light at the Of course, this patter n won’t suit camera. This works in some environeveryone (e.g., Zebra lovers may need ments where you can control the to find another patter n). But this patlighting and ensure that no other tern doesn’t occur often, and it can be objects reflect or create light to the identified reasonably easily with a camera that’s brighter than your flashchain of simple vision filters. light. It’s also an active method, where you have to power the flashlight. I’ll Before you analyze the individual filnow describe a filter that is less ters, analyze how ViewPort manages a TRACK A PATTERN restrictive and uses a passive method You’ve gone from tracking an active, chain of vision filters. Because the Proto steer the robot. peller’s memory is a limited resource, bright spot to following a passive line Most line-following robots use two you can afford only to keep one image on an artificial background. Now it’s phototransistors to stay on a line. in memory at a time. To visualize the time to track a passive patter n in the They’re programmed to ensure that effects of different filters, segment the real world. The goal for this section is one detector is on the dark line while image array into four vision buffers: top to develop an algorithm and patter n the other is on the lighter background. left, top right, bottom left, and bottom that will steer the robot in any enviMore sophisticated robots use addiright. Both the frame grabber and ronment. As an experiment, take a tional detectors to detect vision objects support the robot’s exact position both the full-size and on the line to look ahead the segmented modes. or even to recognize juncFilters operate on buffers tions. In this section, in that they read data you’ll build a filter that from one place and write uses your existing frame their result to another. grabber to perform line The DanceBot uses one following with a camera. cog to continuously process image data with Again, your frame graba number of filters—one ber gives you too much at a time. Configuring information, so you need the filter’s order, paramto design a filter that will eters, and values is steer a robot in the middle high-level Spin language. of a line. Tilt the robot’s Streaming all four vision camera so its field of view buffers to ViewPort is from below the horizon enables you to watch to just in front of the robot. how each filter manipuNow, you can stream the lates the video in real video to ViewPort and anatime. lyze what the video of a Photo 3—This is the system’s first picture of a fire truck. Notice the black line at the cross hairs. properly programmed Now that you CIRCUIT CELLAR® • www.circuitcellar.com 2/5/2009 1:11 PM Page 27 Listing 3—This Propeller assembly function finds the brightest pixel in the video frame. Thirty-two bits of data are read using the rdlong command. This represents eight pixels, which are inspected one by one by rotating the bits with the ror instruction. The location of the brightest pixel is written to the address pointed to by cmdPtr. doMax '2 ptrs :src, dnp '2 value:old, dn 'setup ptrs to positions rdlong add mov add sub mov mov :loop rdlong add rdlong add val,cmdPtr cmdPtr,#4 dnp,src dnp,bytesNline n,#15 dest,#0 'seexy sum,#0 'max value old,src src,#4 dn,dnp dnp,#4 mov m,# 8 mov new,#0 'input: old,dn have pixel in 0..3, new has data 'output: old,dn rol by 4 mov tmp,old and tmp,#15 'tmp=pixelvalue in mid mov t1,dn and t1,#15 't1=pixel down add tmp,t1 'tmp=two rows cmp tmp,sum wc 'c if tmp<sum jmp #:notMax mov dest,m shl dest,#8 mov dest,sum shl dest,#16 add dest,n mov sum,tmp 'reset max ror dn,#4 ror old,#4 djnz m,#:dodiffb djnz n,#:loop wrlong dest,val jmp #cmdLoop :dodiffb if_c ' ' :notMax it, replace each pixel with the absolute value of the difference of its horizontal neighbors. Next, you need to design a filter that will identify regions with multiple strong transitions. The algorithm I chose keeps a running total of the last eight edges by adding the strength of the next edge and subtracting the last. This running total is saved to the appropriate location in the buffer. Your last filter finds the location of the maximum in the buffer you just calculated. You can use the same algorithm that you developed to track a bright spot. By chaining these three filters together, you find the location of the maximum running total of vertical transitions. In other words, you can Photo 4—The DanceBot is tracking the path of a flashlight in real time. understand how ViewPort vision filters work, build a filter to look for transition edges in your video. Looking at relative changes in value improves the robustness of your algorithm, especially when lighting conditions change. The horizontal Soebel filter is quick to implement and does a good job of detecting vertical edges. To compute www.circuitcellar.com • CIRCUIT CELLAR® Standards Make Sense Standards improve quality and enable designers to share components across different projects.Today, ARM® Cortex™-M profile processors, combined with the Cortex Microcontroller Software Interface Standard (CMSIS) and optimized middleware from the industry’s largest ecosystem, are setting the hardware and software standards for microcontrollers. These standards enable leading vendors such as Luminary Micro, NXP, and STMicroelectronics to supply advanced microcontrollers, while maximizing code reuse across multiple platforms. Cortex-M3 Microcontrollers Make Sense “The strengths of ARM processor-based NXP microcontrollers are fundamentally changing digital products by combining ease-of-use with high connectivity and low power consumption.” Geoff Lees Vice President and General Manager, Microcontroller Product Line For more information visit www.onARM.com Find us at Embedded Systems Conference, San Jose, March 30 - April 3rd. ARM – Stand 1502 NXP – 1010 The Architecture for the Digital World © ARM Ltd.AD158-2 | 01.09 ® March 2009 – Issue 224 2903017_Sander.qxp 27 2903017_Sander.qxp 2/5/2009 1:11 PM Page 28 find a black/white striped patter n. To make your pattern visible at different distances, repeat the patter n at various scales. When you place this patter n on your belt, you can star t dancing with your robot. Stepping closer to the robot makes the image of your patter n move up in the robot’s field of vision. This causes the robot to move backwards and maintain a set distance from you. Stepping to one side of the robot causes the pattern to move horizontally, which commands the robot to tur n and face you. While dancing with my robot, I discovered some interesting behavior that I hadn’t planned on. When I jumped up or crouched down, the robot would change its set distance to me. When I tur ned around, thereby covering the patter n, the robot also turned around. It no longer detected the pattern and went into search mode where it tur ned on its axis. FIND A BEER BOTTLE March 2009 – Issue 224 I believe all robot vision ar ticles should include the beer-finding problem. Finding a specially colored beer bottle with a color camera is quite 28 Listing 4—This Propeller assembly function sums the horizontal position of the darkest pixel to steer the robot along a black line. For each horizontal line, it uses t3 to track the location of the minimum brightness and adds this to t2 at the end of the line. doLowest rdlong add mov :loopLines :loop :limit ' if_c ' if_c if_c if_c if_c ' t1,cmdPtr 't1 is the address of the result variable. We’ll write the x position of the line here. cmdPtr,#4 t2,#0 't2 is sum of pos mov mov sub mov rdlong add mov mov n,linesNpanel x,longsNline x,#2 val,#15 old,src src,#4 m,#8 new,#0 mov and cmp add mov add sub mov ror djnz tmp,old tmp,#15 tmp,val wc new,#15 val,tmp new,#15 val,#1 t3,x old,#4 m,#:limit wrlong add djnz add add add djnz wrlong jmp new,dest dest,#4 x,#:loop t2,t3 src,#8 dest,#8 n,#:loopLines t2,t1 #cmdLoop 'loop over panel 'loop over line 'reset val 'loop over longpixels 'c set if v1<v2 't3 is pos of lowest item ror new,#4 'loop over longpixels 'loop over lines doable; however, you’re limited to a grayscale camera. You’re also not guaranteed that the beer bottle will be the brightest object in the room. There’s no line to follow. The beer bottle doesn’t have a distinctive pattern. The only available trait is the actual shape of the beer bottle. Use the correlation algorithm to find the shape of the beer bottle in a typical cluttered environment, u. This algorithm uses brute force to match a desired template to all possible locations in the image. The location of the best match is the location of the beer bottle. The degree of match at any given point is the sum of absolute differences between the pixels of the template and the cor responding pixels of the area to match. To improve the robustness of the algorithm against changes in brightness and contrast, I preprocess the template and ever y possible match with an auto-level algorithm. This algorithm does a good job of finding beer bottles. Photo 5 shows the target identified in a complex environment. However, the image of the bottle must be a close match to the template (i.e., its scale and orientation must be CIRCUIT CELLAR® • www.circuitcellar.com 2/5/2009 1:11 PM Page 29 Depending on the performance required, I could write the code in the high-level, objectoriented Spin language or dive down to assembly to write completely deterministic code. The logic to configure and control the robot ended up being programmed in Spin, while the frame grabber and vision filters are programmed in assembly. Even though resources are limited, it’s possible Photo 5—The DanceBot is finding the location of a beer bottle. to carry out advanced vision processing with it. In today’s age identical). With additional processing of multilevel architectures relying on power, multiple templates could be outside libraries, drivers, and operating searched in succession or parallel to systems, it was a breath of fresh air to more robustly identify the bottle. Once program the entire chain, from decoding identified, a faster, less processor-taxing the NTSC waveform to controlling the algorithm could be used to steer the robot. Visually debugging the DanceBot robot to the beer bottle in real time. with ViewPort greatly simplified its development by showing me exactly WRAP UP what was going on with my robot. It I’ve had a lot of fun building the acted like a black box when the robot vision-guided DanceBot with the Paralfell down, and showed me what the lax Propeller and ViewPort. The Procamera and filters were processing peller’s unique architecture of eight when I was teaching it to dance. It identical cogs made it easy to split my should be straightforward to adapt the goal of guiding a balancing robot with code and filters presented in this article vision into manageable pieces (see Photo 1b). to other robots. Good luck! I Hanno Sander ([email protected]) has been working with computers since he programmed a lunar lander game for the z80 when he was six. Since then, he graduated from Stanford University with a degree in computer science and then started his corporate career as an Internet entrepreneur. Hanno moved to New Zealand in 2005 to spend time with his growing family and develop sophisticated, yet affordable, robots—starting with the DanceBot. His technical interests include computer vision, embedded systems, industrial control, control theory, parallel computing, and fuzzy logic. P ROJECT FILES To download code, go to ftp://ftp.circuitcellar .com/pub/Circuit_Cellar/2009 /224. S Standards Make Sense Standards improve quality and enable designers to share components across different projects.Today, ARM® Cortex™-M profile processors, combined with the Cortex Microcontroller Software Interface Standard (CMSIS) and optimized middleware from the industry’s largest ecosystem, are setting the hardware and software standards for microcontrollers. These standards enable leading vendors such as Luminary Micro, NXP, and STMicroelectronics to supply advanced microcontrollers, while maximizing code reuse across multiple platforms. Cortex-M3 Microcontrollers Make Sense “STM32 microcontrollers revolutionize the market by combining high performance and low power with a scalable product range that fits every developer's needs.” Daniel Colonna Microcontrollers Division Marketing Director For more information visit www.onARM.com Find us at Embedded Systems Conference, San Jose, March 30 - April 3rd. ARM – Stand 1502 ST – Stand 1412 OURCES C-Cam-2A Miniature video camera Electronics123.com, Inc. | www.electronics123.com ADC08100 ADC National Semiconductor Corp. | www.national.com Propeller Parallax, Inc. | www.parallax.com www.circuitcellar.com • CIRCUIT CELLAR® The Architecture for the Digital World © ARM Ltd.AD158-2 | 01.09 ® March 2009 – Issue 224 2903017_Sander.qxp 29 41.qxp 10/27/2008 11:11 AM Page 1 Jameco_CC_Dec08 10/8/08 8:37 AM Page 1 Experience a Faster Way to Search for Components! Jameco Electronics’ new catalog and enhanced Jameco.com website are two tools that are designed to work together to give electronic professionals faster access to the hottest components in the industry. Color coded references throughout the catalog assist you in analyzing a wide range of brand choices (from franchise sourced to house brands to factory overruns) offering you more pricing options than you'll see anywhere else. Web codes allow you to quickly jump from catalog to website to view additional specifications, application notes, photos and more products. You'll find exactly what you're looking for without having to wade through hundreds of thousands of products on a complicated website or wielding a twenty pound catalog. With a flip of the page or a click of the mouse, you have all the tools you need at your fingertips. Reach for Jameco first and order your catalog today. Order your web-enabled catalog today! Call 1-800-831-4242 or Visit www.Jameco.com/Speed for the ride of your life! 2/5/2009 1:10 PM Page 31 F EATURE 2903018_Bereiter.qxp ARTICLE by Thomas Bereiter Networked Timing Build a Timer With Advanced Planning Tools Precision irrigation control is now a reality. Thomas’s irrigation timer with advanced planning (ITAP) is a truly novel irrigation control system. The easy-to-use system, which directs user interaction into a standar d web browser, pr ovides useful information such as watering schedules and zone activity. Photo 1—This is the completed circuit board. The WIZnet WIZ810MJ is the red board with the RJ-45 connector. A solenoid valve connected to a manifold is to the left of the circuit board. www.circuitcellar.com • CIRCUIT CELLAR® March 2009 – Issue 224 E lectronics are supposed to simplify our lives, but all too often, the reverse is tr ue. While researching irrigation timers, I was str uck by how the evolution from an electromechanical design to an electronic design had actually made the device less usable. Early irrigation timers were based on the simple rotar y motor design still popular in plug-in appliance timers. A geared motor slowly tur ned a wheel with on/off pins. If you wanted water at 6 A.M. in zone 2, you simply pushed in the pins for zone 2 and 6 A.M. The wheels and pins also ser ved as crude analog gauges. A glance at the wheel would give you a pretty good idea of when things would next tur n on and for how long. In the electronic age, th e wheels and pins are gone. They have been replaced by a tiny LCD and a small keypad. The e lectronics have added significant new capabilities, but at the cost of requiring significant data entry with a tiny keypad. The visual feedback about what you’ve programmed is also gone. To ensure that you have not accidentally programmed a 4-h flood, you need to page through identical screens, taking note of ea ch setting. As you can see in Photo 1, I designed 31 2903018_Bereiter.qxp 2/5/2009 1:10 PM Page 32 Browser — view Schedule and zone table “What if” calendar report Today live view Network Hardware — model and control WIZnet network module Webserver data model RTC and control Solenoid driver Low-voltage wiring Valve manifold Figure 1—This shows the interaction between the browser pages, the hardware, and the physical zone valves. ITAP DESIGN The design philosophy was to not consider the IT AP as a networked or web-enabled device, but rather to use the March 2009 – Issue 224 an Irrigation Timer with Advanced Planning capability (ITAP). The challenge was to incorporate moder n functionality, yet keep the design as simple to use as the old electromechanical design. Because the biggest problem was entering and displaying large amounts of data, I selected a web browser for the user inter face. I considered various USB-based ways of connecting to a browser , but they invariably required some type of installation on a host PC. Around that time, I saw the WIZnet iEther net Design contest 2007 announcement and decided to build my timer design around the WIZnet WIZ810MJ network module. A potential design trap in a network-enabled device is the temptation to do too much with the network. An irrigation timer should be a simple device. It is, after all, just a timer and some solenoid valves. The network interface is present in the design because it is the best way to connect to a web browser . I have always been drawn to simple, low-cost designs, so I used the network interface to save money by eliminating an LCD and keyboard. Others might use the network inter face as an excuse to jam in seldom-used features and boost the end product’s price. Once I star ted building a web browser interface, I realized that this was a good oppor tunity to show that web technologies, which are nor mally associated with large enterprise deployments, can also be used effectively on micro devices. 32 CIRCUIT CELLAR® • www.circuitcellar.com 65.qxp 11/28/2008 2:53 PM Page 1 2903018_Bereiter.qxp 2/5/2009 1:11 PM Page 34 Figure 2—Connectors H1 and H2 are for the WIZ810MJ module. In SPI mode, few of the WIZ810MJ’s pins need to be connected. two is a fancy LCD and keyboard that plugs into box one whenever a change of schedule is required. Box two, of course, is really a laptop with a web browser. The hardware box represents the headless control unit (see Figure 1). A microcontroller maintains a data model in EEPROM that is used by the timer-control firmware to deter mine when to tur n on and tur n off solenoid water valves. A WIZ810MJ network module is used by the web server firmware to accept requests March 2009 – Issue 224 network as a better serial line. Conceptually, the ITAP has two boxes. Box one is a headless control unit that mounts in the garden and is hard-wired to zone solenoids. It also has an inter nal calendar and timer that run the watering schedule. Box 34 CIRCUIT CELLAR® • www.circuitcellar.com 2903018_Bereiter.qxp 2/5/2009 1:11 PM Page 35 the ATmega168 largely because of its 16 KB of flash memor y and because it is easily available in a #!/bin/sh DIP package, simplifying prototypFILES="error.html index.html edit.html common.js cal.html ing. Timer 2 is used with an exterday.html" nal 32-kHz crystal in real-time clock ( for f in $FILES; do mode. The SPI master controls the id=`echo $f | tr '.' '_'` WIZ810MJ. Other than a handful of echo "prog_uchar $id[] = {" I/O lines, none of the microcongzip -9 -v $f | xxd -i troller’s other features are used. echo "};" done Although it seems like a shame to ) > gz_data.inc use so few features, it would be pointless to complicate the design. SCK1 The WIZ810MJ is a network mod__builtin_write_OSCCONL(OSCCON | 0x40); //lock ule that takes care of most of the complexity of adding TCP/IP netand not on a PC. If the device from a standard web browser . The working to a design. In SPI mode, requires a PC installation, it stops only a handful of the 56 pins are browser pages provide data entr y and being a stand-alone device and needed. The rest can be left as no display capabilities of the watering becomes yet another peripheral schedule, as well as calendar-based connects. The version of the module ready to break when you modify that I worked with has a known planning tools. The entire design is your PC. problem in that it continues to drive self-contained. There are no extra the SPI lines even when its *SS is files, scripts, or drivers that need to unasserted. The work-around is to be installed on a PC. HARDWARE drive the module pin SPI_EN low , An irrigation timer is not someThe hardware was designed to which will free up the other SPI thing you reprogram often. After an include the fewest number of par ts. lines. The ATmega168 uses the SPI initial period of fine-tuning, the unit The essential parts are an Atmel lines for serial programming, so I is expected to work, unattended, for ATmega168, a WIZ810MJ network had to do the SPI_EN trick even the rest of the season. I did not need module, and a ULN2803 Darlington though there are no other SPI to add any daily repor ting, only a array (see Figure 2). I do all of my devices. The WIZ810MJ draws a fair minimal status page. This emphadevelopment work in Linux. The amount of current, so I did not want sizes the design point that the netexcellent AVR toolchain available for to leave it powered up continuously . work connection is only there for Linux is one of the reasons I prefer I toyed with the idea of adding cirreprogramming the device. Fancy Atmel microcontrollers. With Linux cuitry to power the module on and reports and real-time status pages command line tools, I can do all of my off. Because the network link LED are engaging for the first few weeks firmware development at my desk, status is available on a module pin, I of ownership, but then for most peonot hunched over the lab bench. An could periodically power on the ple the excitement of watching the old laptop sits on the lab bench and module, check for an active link, grass grow begins to fade. serves as a network-to-USB gateway and turn it off. In the end, I just put The long periods of time between for the in-circuit programmer. I chose in a toggle switch, which reprogramming make it was crude but effective. so you don’t have to A ULN2803 is used as install any infor mation the solenoid driver. It is an on a PC. It is usually not eight-driver package with a problem to pop in an internal clamping diodes. installation CD when you The inputs are logic-level first buy a product. and were connected directly Assuming there are no to port pins on the micromissing drivers or system controller. Each driver can conflicts, the first install sink 500 mA, which is is easy. The problem ample for a typical ir rigacomes six months later, tion solenoid valve drawing after you have upgraded about 200 mA at 12 VDC. your PC and cannot find The solenoids are 24 VAC, the installation CD. For but are quite content r unthe same reason, it is Photo 2—The irrigation schedule is the main browser page. Four solenoid valves are ning on 12 VDC. Conveimportant that all HTML represented by zones a–d. The three different programs determine at which time and niently, inputs and outputs pages live on the device on which days the zones will be active. www.circuitcellar.com • CIRCUIT CELLAR® March 2009 – Issue 224 Listing 1—This shell script compresses the HTML and JavaScript files as part of building the firmware image. The compressed files reside in the Atmel ATmega168’s flash memory. 35 2903018_Bereiter.qxp 2/5/2009 1:11 PM Page 36 March 2009 – Issue 224 program, including start times and run length times, for each zone. All times are kept in minutes rather than hours and minutes. Inter nally, this simplifies storage and comparisons. A running count is kept of the day of the year in addition to the day of the month. The for mer is used for computing every N day cycles. The latter is used for odd/even days of the month. 36 limit current inrush problems, the software sets the values bit by bit with a small delay in between. In a similar software rather than hardware role, the WIZ810MJ’s reset line is controlled by a por t pin rather than RC logic. In addition to par ts savings, this allows for a full par t reset. The network code is designed for the specific task of communicating with the one browser that it expects to find on a private network. The SOFTWARE main loop polls the WIZnet sockets The software divides into microfor a page request. Only HTTP GET controller support, network code, Photo 3—The program details on the main page are requests are honored. The request data model access, file storage, and read-only. Clicking “edit” brings up an editable version. can be for either a file stored in the timer logic. The microcontroller flash memory file system or for a support code is minimal. The only are on opposite sides of the DIP data page built on the fly . Changes interrupt is the Timer 2 overflow, package, making layout much easier to the data model are accomplished which is configured as a 4-Hz R TC. on a single-sided board. with arguments of the page request. Everything else is done by polled The only user feedback from the In a system where a browser I/O. Every couple of seconds the hardware are the WIZ810MJ’s two request causes some action, such as main loop checks if the WIZ810MJ network status LEDs and an LED writing EEPROM or switching on a has been powered up. A simple read driven by the microcontroller. The sprinkler, minimize the chance that of the last byte of the IP address is microcontroller-driven LED blinks a user unintentionally repeats the performed. If the module is off, the out either a hint at the IP address or action by clicking the REFRESH butbyte will read as 0xFF. If the byte an indication of solenoid status. ton. The method used here is to matches the expected value stored in clean up the location line by retur nEEPROM, the WIZnet module is ing a 307 REDIRECT result code. assumed to be present and it is reiniDATA MODEL With no arguments to the page tialized. There are a number of ways to request, pressing REFRESH will simThe ATmega168’s PORT D conorganize a watering schedule. Severply reload the page with no additionnects pin for pin to the ULN2803 al vendors have agreed on a single al actions. solenoid controller. Thus, pin zero of model, which is the one used here. When using the WIZ810MJ as a PORT D corresponds to solenoid First, there are zones , which correweb server, there is a potential trap zero, pin one to solenoid one, and so spond to a physical r un of pipe conif the pages being ser ved are comon. At each program step, there is trolled by a solenoid valve. Then plex. The W5100 can suppor t a maxthe possibility that you might there are programs, which indicate imum of four simultaneous connecrequest all zones to switch on. T o which days of the week and at what tions. If the HTML page rentime of the day to star t an dered by the browser has action. Make a table and put more than four subelements the zones in the rows and (e.g., <image> or <script> the programs in the tags), the browser will likely columns. At the intersecissue simultaneous requests. tions, decide if and for how If a WIZnet socket is in LISlong a zone should be on for TEN state, it will accept a each program. This can get connection. If the browser somewhat complex, but it attempts a connection for provides a good deal of flexiwhich there is no listening bility for things like long, socket, the browser will get a slow soakings and for folconnection-refused error. lowing community Depending on the browser, odd/even watering restricthis could result in either a tions. reported error or a noticeable The ITAP’s internal data delay before a retr y. The model consists of an ar ray of Photo 4—The calendar view shows what will happen this month. The bars in the workaround is to keep the program structures that keep bar graph correspond to the zones. The height of the bar shows the relative pages simple, with few all of the specifics for a time that the zone will be on that day. CIRCUIT CELLAR® • www.circuitcellar.com 2/5/2009 1:11 PM subelements. Newer chips, such as the WIZnet W5300, suppor t up to eight sockets. An early design trade-off in a project like this is deciding how much flash memory to devote to storing HTML page data. It would have been easier in many ways to just wire in a 1-GB SD flash memor y card and fill it with the output from a web site builder tool. However, this would have negated the strong desire I had to show by example that an attractive, useful, and feature-complete UI could be implemented on a smallfootprint device. Accepting the limitations of finite storage, the question was how to stay as small as possible. Early in the design process, I considered keeping HTML templates in some sor t of compressed form. The plan was to decompress the templates, fill in the actual values, and then ser ve this modified data to the browser . The final design is better in ever y way. If the pages are not modified but instead have static content, they can be highly precompressed with the gzip utility and simply copied, unmodified, from flash memor y to the network. No compression code is needed. The pages are just a payload. Modern browsers already accept gzipped data, so nothing additional is required. Using JavaScript makes static content possible. The JavaScript language has constructs for dynamically building pretty much anything that can be done with HTML. All of the ITAP tables and for ms are dynamically built. The data needed to fill in the tables and for ms is for matted using JavaScript Object Notation (JSON) and resides in a separately loadable JavaScript file. The file is Page 37 built on the fly each time a ser ver request is made for “pdata.js.” In a larger system, data would likely be passed as XML. XML is a bulky format intended for data exchange between unrelated systems. XML really has no place in point-to-point micro applications. The nice thing about using JSON is that it is automatically parsed as it is read by the browser. Additional parsing is not required. Another important benefit associated with putting all of the UI building code in JavaScript is that there is a clean separation between the UI view and the data model. The data model is maintained by the IT AP firmware. The fir mware knows nothing of UI layout. A change to the UI does not require a fir mware change. COMPRESSED FILES Looking through the WIZnet sample code, I noticed copyright notices around the code that accesses flash memory-based files. Thus, I thought it would be useful to show my standard tools approach to compiling files into flash memory (see Listing 1). This Linux shell script takes each file, compresses it, conver ts it to ASCII hexadecimal, and wraps the result in a data declaration ready for a C language #include statement. USER INTERFACE Photo 2 shows the ITAP’s main schedule page. To keep the size small, only standard buttons and standard fonts were used. The schedule page is implemented as one large HTML FORM. Inside the FORM is a TABLE built dynamically with JavaScript. Only a small bit of HTML is used to define the basic Photo 5—Clicking on a specific day in the calendar view brings up this page, which shows when the zone will be active. www.circuitcellar.com • CIRCUIT CELLAR® March 2009 – Issue 224 2903018_Bereiter.qxp 37 2903018_Bereiter.qxp 2/5/2009 1:11 PM table and headings. Each page in the UI contains the same first line: March 2009 – Issue 224 <script language="JavaScript" type="text/javascript" src="pdata.js"></script> 38 This code loads the cur rent program and zone data. Based on the number of programs and zones, columns and rows are dynamically added and populated with their values. JavaScript functions take care of details like converting between minutes and hour and minute values. There are three programs and four zones in Photo 2. The empty fields indicate that the corresponding zone is off during that program. To keep the main schedule page from getting too cluttered, only a summary of the program values is shown, and they are all read-only . Clicking an Edit button brings up a program edit page (see Photo 3). Both program tables are generated by the same JavaScript code. A flag tells the JavaScript to hide or desensitize certain fields in read-only mode. The basic program inter val can be set to either a fixed number of days or odd/even days. The check box by day of week is just an aid. It is no different than selecting a one-day interval. The days of the week check boxes are used to modify the basic interval. In an earlier design, I had two rows of check boxes, one for days when the program should r un and a second for days when the program should not r un. This was not necessary because a “not Friday” program is logically the same as selecting every day except Friday. There is always a trade-off between convenience and UI clutter. The Program active check box is used with the planning tools. To see what a particular program contributes to the overall totals, it can be temporarily disabled. As you can see, there is plenty of flexibility, but also plenty of opportunity to make a mistake. The planning tools are a simple, but effective innovation that gives a glimpse into the future. Based on the cur rently active programs, the fir mware runs Page 38 the clock forward to deter mine how much water each zone will get each day. This summary data is used to construct the calendar page (see Photo 4). Each day in the calendar contains a small bar char t. The letters and colors of each column correspond to a zone from the main schedule page. For simplicity, the height of the bar is limited to one of four discrete steps. The bar graph is not a GIF or JPEG image. Instead, it is implemented in JavaScript as a four-row table with variable ROWSPAN elements. As with the rest of the UI, the fir mware reports only the data. The JavaScript makes all display and layout decisions. The final page is the Day page, which drills down from a calendar bar chart to show when (during the day) the water will r un (see Photo 5). Each tick mark cor responds to a 15min. interval. The tick marks are constructed from TABLE rows with a small white border to highlight the individual tick. Together the Day and Calendar pages make for accurate “what if” planning. I did not originally plan to have status view or zone on/off over ride buttons because I did not expect to have the network connected except during reprogramming. I later added these features mainly for debugging and demonstration purposes. The status and override are implemented with the JavaScript XMLHttpRequest() facility, the cor nerstone of AJAX. IMPROVEMENTS The ITAP was a fun project to build. It was much more of a software project than a hardware project. The design has proven to be simple to use and easy to explain to others. There is still a learning curve to understand what zones and programs are all about, but this knowledge is also required for any timer. The fact that there is no expensive LCD sitting idle in the garden is continuously comforting. One serious drawback with the current design is having a stati c IP address for the ITAP. I did not want the ITAP to get its address by DHCP, because I expect to have a laptop plugged into the ITAP while standing in the garden. A reasonable alter native would be for the ITAP to play DHCP server for a laptop client. WIZnet has released two additional modules, the WIZ830MJ and WIZ812MJ. I have not worked with either, but both appear to be better choices for new designs. The WIZ830MJ has the W5300 chip. The WIZ812MJ is a redesign of the WIZ810MJ. Both new modules have 2.54-mm headers. I Editor’s note: This project won First Place in the 2007 WIZnet iEther net Design contest. For more information about this design and the other winning projects, go to www.circuitcellar.com/wiznet. Thomas Bereiter ([email protected]) has written software for ever ything from microcontrollers to huge distributed systems. He has a B.S. in computer science from the University of Illinois. Thomas currently designs prototype systems in Umbria, Italy. P ROJECT FILES To download code, go to ftp://ftp.circuitcellar .com/pub/Circuit_Cellar/2009 /224. S OURCES ATmega168 Microcontroller Atmel Corp. | www.atmel.com WIZ810MJ Network module and W5100/5300 Ether net controller WIZnet, Inc. | www.wiznet.co.kr/en/ CIRCUIT CELLAR® • www.circuitcellar.com 3.qxp 12/29/2008 11:48 AM Page 1 2/5/2009 4:32 PM Page 40 F EATURE 2903014_Coppersmith.qxp ARTICLE Wireless Mobile Robotics by Scott Coppersmith A Wi-Fi-Enabled System With a Mounted Webcam Scott used a microcontroller, an embedded Ethernet board, and a wireless router in an innovative control system for a compact mobile r obot. The robot features a mounted webcam that transmits r eal-time pictures to a r emote laptop. Scott explains how he planned the project, assembled the pieces, and created the control software. March 2009 – Issue 224 R 40 Photo 1—This is the assembled WiFi-PIC-Bot with obots are everywhere. They are used to build a webcam. Pan and tilt servos are located just cars. They are sent to poke at rocks on Mars. below the camera. Small rovers can vacuum your pool or your house, and there are several different models at the local toy store. I’ve played with RC cars, boats, planes, and helicopters But since then, the robot has gone through a few upgrades. for many years, but after seeing TV shows like BattleBots You can view the project as it was then (www .circuitcellar. and Junkyard Wars, I had an itch to build something bigcom/wiznet/winners/DE/001106.html). ger and better to play with . The WiFi-PIC-Bot is a modified RC ClodBuster (dualIn 2001, I volunteered as a mentor for a FIRST Robotics motor, four-wheel drive with four-wheel steering) monster Competition at Penn High School in Mishawaka, IN. It truck. I replaced the RC ser vo receiver with a WIZnet was an incredible experience. (If you like building mechanWIZ810MJ embedded Ethernet board controlled by a ical devices, I recommend that you consider becoming a Microchip Technology PIC24FJ64GA002. The WIZnet mentor.) The FIRST robots use controllers similar to stanboard is connected to a Netgear WGR614 wireless router dard RC types, which are capable of telemetr y and feedthat transfers steering and throttle ser vo data as UDP packback, but they are a bit pricey for ets back and forth to a remote lapthe average designer. These days, top. The PC program reads a joyhowever, you can pick up a W i-Fi stick, sends the servo commands router for approximately $30 and a out through its Wi-Fi card, and disused laptop for as little as $100. plays a real-time picture from a The two of these, along with a fast Linksys WVC54GC Internet-ready Microchip Technology PIC microwebcam mounted on the robot. controller and a WIZnet embedded One of the latest upgrades was pan Ethernet board, make a nice platand tilt servos for the Linksys form for a robot project. camera. In this article, I will describe how I built a robotics system—which I MODIFICATIONS call the “WiFi-PIC-Bot”—along Making an RC monster tr uck with the control software and interinto a robot isn’t a simple task. Photo 2—In the control box, battery packs are at the top, power face electronics (see Photo 1). I Each issue had to be addressed sepsupplies are at the bottom (left), and speed control is in the midentered this project in the WIZnet arately. Many of the original design dle (left). A Microchip DM300027 development board with a WIZnet WIZ810MJ Ethernet board is in the lower right. iEthernet Design Contest 2007. components had to be modified to CIRCUIT CELLAR® • www.circuitcellar.com 42.qxp 12/27/2008 11:55 AM Wi-Fi and Ethernet Versions Page 1 69.qxp 1/9/2009 1:37 PM Page 1 .L[KV^UVUV\YZOV^ÅVVY ESC is the expo and conference for embedded design. Check it out. Tear it down. Put it back together. Keep it real. Register Today. embedded.com/esc/sv Learn today. Design tomorrow. Do the Tear Down See our experts take apart the latest products and systems. 2903014_Coppersmith.qxp 2/5/2009 4:32 PM Page 43 Figure 1—This is the WiFi-PIC-Bot. the frame. It had enough room inside for most of the electronics and batteries. I mounted power supply and speed control cooling fans, power LEDs, and switches to the outside of the box. I drilled for ser vo wire access, a programming connector, and network cable por ts. I added a multiterminal, high-amperage connector for on-system batter y charging with bank selection. I attached the Inter net camera with its pan and tilt ser vos along with the Wi-Fi router to the top of the box. Both stock drive motors were already changed to highperformance models, so I left them as they were. I changed the transmission gears to the highest gear ratio I could find to slow down the robot for indoor use and to add torque for moving the extra weight around. I added hard r ubber supports inside the springs to the suspension system shocks to accommodate Listing 1—This is servo control output compare 1 setup code. the added weight of all the batteries // Output compare pin setup and new electronics. RPOR3bits.RP6R = 18; // Make Pin RP6(RB6) OC1 The main motor drive speed control OC1CONbits.OCTSEL = 0; // Use Timer 2 data had an interesting set of issues to OC1CONbits.OCM2 = 1; // Use PWM mode OC1CONbits.OCM1 = 1; // OCFA fault detection disabled resolve. Two parallel high-performance OC1CONbits.OCM0 = 0; motors operating at high torque require OC1R = 0x0400; a high-current controller with reverse, OC1RS = 0x0c00; // Set timer compare value for servo center position IFS0bits.OC1IF = 0; // Clear interrupt flag and I didn’t have one. However, I had a IEC0bits.OC1IE = 1; // Enable the interrupt Novak T-4 electronic speed control in my stash of RC par ts and a collection of // Timer 2 setup TMR2 = 0; // Clear the timer high-current MOSFETs. It was time for PR2 = 0x9000; // Set the servo update time for 20 ms a bit of reverse engineering. Under the T2CONbits.TCKPS1 = 0; // Set the timer prescale 1:8 hood of the original T-4, the circuit had T2CONbits.TCKPS0 = 1; T2CONbits.T32 = 0; // Set the timer for 16 bit mode six small FETs in parallel for for ward IFS0bits.T2IF = 0; // Clear interrupt flag speed, and one FET for braking, with no IEC0bits.T2IE = 1; // Enable the interrupt reverse. After a day of head scratching T2CONbits.TON = 1; // Turn the timer on and PCB probing with my oscilloscope, www.circuitcellar.com • CIRCUIT CELLAR® March 2009 – Issue 224 make the toy into a reliable and sturdy robot platfor m. The ClodBuster’s single 7.2-V battery wasn’t sufficient to run the vehicle for more than a few minutes, and I couldn’ t use it for running the new processor, adding servos, the webcam, and the wireless router. The stock body and suspension system couldn’t carry much weight. The original motor gears were fine for zipping around the yard, but were a bit too fast for indoor use. The stock motor control was just a four-position mechanical switch operated by a small ser vo. Slow speed was accomplished by switching a resistor in series with the motors. Each of these issues had to be addressed separately . The first parts to go were the wimpy plastic body , the RC receiver, the mechanical speed control, and the stock batter y packs. An aluminum 8″ × 12″ × 2.5″ box fit nicely on top of 43 March 2009 – Issue 224 2903014_Coppersmith.qxp 44 2/5/2009 4:32 PM Page 44 constructed an additional 5-V steering, camera pan, and tilt are wired to supply from two 9.6-V RC car a Microchip DM300027 16-bit, 28-pin NiCd packs and another development board (see Figure 1). I LM350T regulator circuit simreplaced the original cr ystal with an ilar to the one for the 8-MHz crystal to gain some speed and PIC24FJ64GA002. A smart installed a PIC24FJ64GA002 procescharging station with tempersor. The WIZnet board is connected to ature probes and maybe some the DM300027 development board by Lithium polymer battery wire wrapping the header connector packs will have to go on my pins directly. The two boards commuWiFi-PIC-Bot “upgrade-somenicate via the SPI bus. RB10 is used as the slave select pin. RB5 and RB6 are day” list. Photo 2 shows the the PWM outputs from OC1. OC2 is inside of the control box with some of the battery packs, speed used for throttle and steering ser vo control. OC3 and OC4 are used for control, PIC24FJ64GA002 PCB, camera pan and tilt ser vo control. I and WIZ810MJ PCB installed. also wired RB3 with a resistor divider Cooling fans are mounted on Photo 3—This is a PC control program joystick setup and calibration form. (10:1) and a 3.3-V Zener clamp for a the sides of the box for the battery voltage monitor. The resistor power supplies and speed condivider is required because the three trol circuits and run off of the 12-V I determined that I could remake this battery packs in series at full charge supply. A switch for the speed control controller into a full-bridge speed conalong with switches for the power sup- can be up to 27 V. troller without too much effor t. I plies and fans are also mounted on the carved some custom heatsinks for the sides of the box. I left a connector new International Rectifier IRFP048 SOFTWARE inside to disconnect the motor supply MOSFETs from an old Pentium There are two separate software batteries while I fiddle around with heatsink and added a cooling fan on packages in this system. The first is software and such so the robot won’ t the outside of the box to complete the the embedded code for the PIC, and drive off the table unexpectedly from a new speed control system. the second is the UDP client on the code error. A table-top robot hoist will Three stacks of standard NiCd RC external laptop. The RC ser vos operalso have to go on the to-do list. I left car packs power the robot. The first ate from pulses produced by the the original RC connectors on the supply is for the main drive motors. It PIC24FJ64GA002’s timers. They are speed control and steering ser vos so I is a parallel stack of two 7.2-V packs. available on the output compare regiscould still drive the robot around with Those enable the robot to r un for ter pins. The published RC ser vo pulse the RC transmitter and receiver and about 30 min. at slow speeds before width specification is 1 to 2 ms, test the speed control by itself, if needing a charge. The second supply is although I’ve found that some ser vos needed. for the router and the PIC/WIZnet need a larger range of pulse widths for electronics. I didn’t want the control control of their full span capability. If electronics and motors to share the you send a pulse that is too small or EMBEDDED CONTROLLER same battery packs for a reason. I too large, however, some servos will The embedded Ethernet board, speed knew the motor batteries would most keep their internal motors on and control, and servos for controlling likely be the first to r un down, and I still wanted control over the ser vos at Listing 2—This is the main loop timer routine (executed every 250 ms). all times. If you’ve ever had an RC car or plane “run away” because the ser vo procedure TForm1.Timer1Timer(Sender: TObject); begin power went dead before the drive LJoyEx.dwSize:= sizeof(LJoyEx); power, you know what I mean. I also LJoyEx.dwFlags:= LJoyEx.dwFlags and JOY_RETURNALL; didn’t want to worry about conducted joygetpos(JoystickID,@LJoy); joyGetPosEx(JoystickID,@LJoyEx); EMI from the motors into the other UpdateJoystick; power supplies. The Netgear router UpdateCalibration; requires 12 V, and the rest of the conUpdateTelemetry; end; trol electronics need 5 VDC. I used a stack of three 7.2-V NiCd packs in series with two LM350T regulator cirListing 3—This code is for servo axis data calibration, scaling, and inversion. cuits to supply these voltages. The addition of the webcam and if checkbox9.Checked=True then SteeringPercent:=100-(trunc(SteeringValue/(StMax-StMin)*100)) two more servos was too much curelse rent draw for the 5-V supply because SteeringPercent:=trunc(SteeringValue/(StMax-StMin)*100); the camera alone requires 2 A. So, I CIRCUIT CELLAR® • www.circuitcellar.com 2903014_Coppersmith.qxp 2/5/2009 4:32 PM eventually cause internal damage to the motor or gears, so keep that in mind when writing RC ser vo code. If Page 45 the servo is humming, but not moving, you may have gone too far . The servo control pulse must also be Listing 4—This is the UDP packet format and transmit routine. if (UDPLinkActive=True) then begin UDPString[1]:= char(170); //10101010; UDPString[2]:= char(SteeringPercent); UDPString[3]:= chr(ThrottlePercent); UDPString[4]:= chr(PanPercent); UDPString[5]:= chr(TiltPercent); UDPString[6]:= char(85); //01010101 IdUDPClient1.Send(UDPString); end; Listing 5—Receiving battery voltage telemetry from the robot. WIZnet & Wi-Fi Controlling the PICBot is achieved by sending UDP packets back and forth from a remote laptop to a WGR614 wireless router. The Linksys Internet camera and the WIZnet PCB March 2009 – Issue 224 if (UDPLinkActive = True) then begin VBATT_Value:=IdUDPClient1.ReceiveString(IdTimeoutDefault); if (VBATT_Value[1]='V') then begin Vbyte1:=byte(VBATT_Value[6]); Vbyte2:=byte(VBATT_Value[7]); VBATT_Number:=3.3*((Vbyte1*256)+Vbyte2)/1024; VBATT.Text:=format('%2.1f VDC',[VBATT_Number]); end; end else VBATT.Text:='No Data'; end; repeated every 20 ms for the ser vo control IC to stay awake. Controlling one servo is rather simple. But when you have several ser vos, the timer interrupts can conflict, so it’s best to have one timer inter rupt routine resetting all the others for the main 20-ms loop. An oscilloscope can be handy for checking pulse widths and timing. The PIC24FJ64GA002 has five internal 16-bit timers. Section 14 of the document, “PIC24 Family Reference Manual,” shows all of the registers involved with the timers. This microcontroller has programmable I/O pins, so you must also tell the device what pin is to be used as what function during code initialization. The set-up code for one of the ser vo control output pins and the associated timer registers is in Listing 1. www.circuitcellar.com • CIRCUIT CELLAR® 45 2903014_Coppersmith.qxp 2/5/2009 4:32 PM March 2009 – Issue 224 are connected to the router using short Cat 5 cables. The router is also used as the DNS ser ver, even though the camera could operate as its own Wi-Fi server, if needed. The UDP datagram is arranged in the UDP Datagram.doc file posted on the Circuit Cellar FTP site. When the WIZnet board receives a UDP message, the PIC24FJ64GA002 first checks byte 1 and byte 6 to determine if the packet is valid. It then adjusts each servo pin timer value corresponding to the associated PWM channel. The steering and throttle timer values give the cor rect range of servo movement span from 1,472 to 4,672 (0x05C0 to 0x1240 hex) for a total of 3,200 counts. So, the equation for the steering servo timer value is ((percent × 32) + zero offset) and the equivalent PIC24FJ64GA002 code would be OC1RS = ((Rx_Buffer[1] × 32) + 0x05C0). 46 Page 46 Listing 6—This code is used to open an Internet browser window to show the robot camera video. if (panel4.Visible = False) then begin panel4.Visible :=True; Webbrowser1.Visible := True; Button2.Caption := 'Click for Setup'; OpenDialog1.Title:= 'Open BotCam HTML File:'; OpenDialog1.FileName:= 'capperbotcam2.html'; If OpenDialog1.Execute then WebBrowser1.Navigate('file://'+ OpenDialog1.FileName) else WebBrowser1.Navigate('about:Error Opening File'); end end; required, and calculated/calibrated from the raw data to obtain a set of 0–100 percent values (see Photo 3). The destination IP address and por t is selected to match the WIZnet configuration. When the Link button is activated, UDP datagrams are sent ever y 250 ms with all of the data to control the robot servos. At the same time, an HTML page is loaded into an integrated browser panel that polls the camera for a real-time video stream. The camera’s IP address and video setup information is located in the HTML file. In Listing 2, the first four lines poll the Microsoft multimedia driver for the current status of all the potentiometers and switches on the selected joystick. The UpdateJoystick procedure then updates the raw data to each servo control variable and shows the status of the joystick buttons and switches. The raw joystick axis values are displayed with edit boxes, and the status of the joystick switches are shown using checkboxes. The mapping of joystick axis to the robot control ser vo variable is done with up/down spin buttons and a case statement. The UpdateCalibration procedure takes this raw data and changes it into percentage values for the UDP client (inverted if needed). If the client is active, it sends the data out over the network to the robot at the PC SOFTWARE designated IP address and por t (see The UDP client software for the Listing 3 and Listing 4). The laptop control is written in Borland UpdateTelemetry procedure checks Delphi Pascal. The code uses the for any data sent back from the robot Microsoft multimedia library rou(currently just one batter y voltage) tines in Mmsystem.dll to poll the and refreshes the edit box for that joystick driver for available joysticks value (see Listing 5). and their parameter tables. I have colJust as important as having an lected several joysticks over the oscilloscope handy for diagnosing years, and all of them worked for the electrical hardware issues, a good netrobot until I added the camera pan work analyzer is a must for watching and tilt servos. Not all joysticks have packet data. Ethereal (now called four axis controls; however, the conWireShark) is a GNU open-source troller for my RealFlight simulator protocol analyzer program that has five axes and several switchworks great for watching ever y es with a convenient USB conbyte that slips into and out of nector. I’ve found that the older your network ports. analog joysticks were a bit noisy The camera video is shown on for robot control, and it’s just a panel that pops up over the about impossible to find a laptop joystick settings panel when you with an analog game por t on it press the Click for BotCam butthese days. I haven’t used any of ton at the top of the for m (see the joystick switches to control Photo 4). A file-open dialog box anything yet, but I can imagine is used to pick the HTML file to the next robot upgrade will have use for the camera panel (see something to do with lasers or Listing 6). maybe some bottle rocket launchers or Nerf guns (safer for The HTML file downloads and work). runs a JavaScript file from the Once a joystick is selected from camera that streams video at a the main set-up form, the controls maximum of 30 frames per second for various servos are mapped to at a maximum size of 640 × 480 the output channels, inverted if pixels. The fun part is that I can Photo 4—This is a runtime form with a PICBotCam video screen. CIRCUIT CELLAR® • www.circuitcellar.com 41.qxp 1/7/2009 3:07 PM Page 1 2903014_Coppersmith.qxp 2/5/2009 4:32 PM let anyone on the ’Net log in and watch the video while the robot is r unning. I just need to give a viewer the IP address and log-in credentials. I can also set the Wi-Fi security to keep hackers out. AM I DONE YET? No way! There’s a never-ending list of gadgets and features for a “FutureBot.” Now that the robot has a camera, it needs some sort of VoIP to communicate with the people it encounters during its travels. Have I mentioned all of the control buttons that need to control something? A high-resolution (approximately 8 megapixels) still camera could be useful for getting a good shot of something the Inter net camera finds interesting. Maybe I’ll rent it out to the fire department for search-andrescue operations in tiny crawl spaces. It could putz up and down the beach with an attached metal detector and tiny treasure scoop. I need a job at NASA so I can do this full time. I hope you enjoyed reading about the PICBot. Have fun building your own. (I know you want one.) I Page 48 Scott Coppersmith ([email protected]) holds a BSEE from Michigan Technological University and is currently working as a senior engineer for Robert Bosch LLC. He also teaches evening classes at Ivy Tech Community College in South Bend, IN. Scott’s hobbies include Tesla coils, fusors, lasers, embedded systems, and Delphi programming. P R S ROJECT FILES To download code, go to ftp://ftp.circuitcellar .com/pub/Circuit_Cellar/2009 /224. ESOURCE Microchip Technology, Inc., “PIC24 Family Reference Manual,” DS39704A, 2006. OURCES IRFP048 MOSFETs International Rectifier | www.irf.com WVC54GC Wireless Internet video camera Linksys | www.linksys.com DM300027 Development board and PIC24FJ64GA002 microcontroller Microchip Technology, Inc. | www.microchip.com WGR614 Wireless router Netgear | www.netgear.com WIZ810MJ Network module WIZnet, Inc. | http://wiznet.co.kr/en/ } Keep abreast of the latest news from your industry, delivered free to your desktop Sign-up today at www.electronicstalk.com March 2009 – Issue 224 With a library of more than 49,000 articles from more than 3,000 companies, we are the number one destination for people making purchasing decisions! 48 Electronicstalk matching buyers with sellers www.electronicstalk.com CIRCUIT CELLAR® • www.circuitcellar.com 49.qxp 2/5/2009 4:57 PM Page 1 APRIL 15-16, 2009 HYNES CONVENTION CENTER JOIN THESE LEADING COMPANIES AT 2009 ROBOBUSINESS Produced By BOSTON,MASSACHUSETTS www.robobusiness.com Join the International Business Development Event for the Personal, Service, & Mobile Robotics Industry REGISTER NOW SAVE $300 ON YOUR FULL CONFERENCE PASS! USE PRIORITY CODE RBCC BUILDING THE ROBOTICS INDUSTRY Now in its sixth year, RoboBusiness Conference & Exposition is the must-attend event for those involved in the business and technical issues related to the development of the personal, service and mobile robotics industry. The emphasis of RoboBusiness is on what technologies and applications are emerging with the greatest opportunity to be commercially successful. Founding Sponsor Premier Sponsor Silver Sponsors WORLD CLASS CONFERENCE RoboBusiness 2009 features two days of keynotes and general sessions delivered by internationally recognized leaders from business, government and academia. RoboBusiness conference tracks: s"USINESS$EVELOPMENTAND)NVESTMENT s4ECHNOLOGYAND3TANDARDS s3ECURITY$EFENSEAND&IRST2ESPONDER2OBOTICS s#ONSUMER2OBOTICS s2OBO-EDICUS(EALTHCARE2OBOTICS s!UTONOMYAND-OBILITY EXPOSITION & SPECIAL EVENTS s%VENING.ETWORKING2ECEPTION3PONSOREDBY s3PEAKER-EET'REET s"IRDSOFA&EATHER$ISCUSSIONS s%XPOmOORFEATURINGDOZENSOFLEADINGCOMPANIESFROM around the world FOR COMPLETE EVENT DETAILS VISIT WWW.ROBOBUSINESS.COM OR CALL 800-305-0634 Academic Sponsor Association Sponsors RoboBusiness is a professional, trade event. All attendees must be at least 18 years old to attend. For Information on Sponsorship and Exhibiting Opportunities, contact Ellen Cotton at [email protected] or 508-663-1500 x240 Media Co-Sponsors Listing as of Jan. 30. For a current list of Sponsors & Exhibiting Companies, visit www.robobusiness.com. 63.qxp 1/7/2009 3:20 PM Page 1 2903013 martin.qxp L 2/5/2009 1:19 PM Page 51 ESSONS FROM THE TRENCHES by George Martin FAT File System Review (Part 1) Open Files and Perform Operations If you are designing a system with a removable memory device, try using a file storage system such as the FAT file system. George describes how to open files with the system, use a CompactFlash card, and perform other basic operations. F or the past two years, we’ve been exploring the C language and specifically how to use it in embedded systems. I’ve introduced you to the language and described how to use it to construct typical systems. I’ve also described how to include more aspects of a design such as flowcharts, UML diagrams, and other development tools. Well, it’s time to move on from the lower-level details of the language and move up a level or two, although from time to time I’ll revisit the basics. Feel free to e-mail me if you have questions about embedded C systems. FAT FILE SYSTEM Listing 1— Basic C file operations FILE *fopen(const char *path, const char *mode); int fclose(FILE *fp); int fgetc(FILE *fp); // read one character int fputc(int c, FILE *fp); // write one character www.circuitcellar.com • CIRCUIT CELLAR® March 2009 – Issue 224 If you’re planning an embedded system, it’s probably not going to be a simple design with just a push button as an input and an LED as an output. In today’s environment, it’s going to be rather complicated and full of features. How in the heck do you design such a system? I will answer that question indirectly because I don’t believe there is a simple single answer. There are families of answers (or approaches) to the design. My goal is to present you with several alternatives. Your goal is to understand each one and decide how they might best fit your application. 51 2903013 martin.qxp 2/5/2009 1:19 PM Page 52 If you’ve been reading Circuit Cellar for the past few years, you may remember reading articles about the FAT file system. A few of the ar ticles are listed at the end of this ar ticle. In fact, Jeff Bachiochi recently completed a two-part series on the topic (“Access SD Memor y Cards,” Circuit Cellar 222 and 223, 2009). For many of today’s embedded systems, it’s likely that one feature on the requirements list is a removable memory device. Years ago, we actually put EPROMs on plug-in memor y cards. (Remember the early video games?) Today you would either use a CompactFlash card or a MultiMediaCard (SD/MMC). To meet that requirement, you need a hardware interface to the card, and you have to design your own file system or use an existing file system. If you want to design your own file system, good luck. You’ve got a lot of work ahead of you and you’ll need it. If, on the other hand, you want to leverage the PC with W indows, MAC with OS X, and other off-the-shelf computers (some using Linux), then look into using an existing file system. With DOS, Microsoft created a file system, the same system that first appeared on floppy disks and evolved onto hard disks. As disk capacity grew, the file system changed to make room for larger capacity disks. That file system is refer red to as FAT, FAT12, FAT16, and FAT32. Somewhere in the mix of designs, long file names were included. (Refer to the Resources at the end of the article for infor mation about the file systems.) If you purchase a CF or SD/MMC Listing 2—Alternative C file operations char* fgets(char *string, int length, FILE fp); int fputs(const char *string, FILE *fp); memory card, it will come preformatted in one of the F AT file systems. The problem you are going to run into using the off-the-shelf cards is the same problem you had with EPROM memory devices. The size of the devices keeps growing and the one you designed with is no longer available or is available only at a higher cost. Try to purchase a 1-KB EPROM (or even a 32-KB device). If you need only 32 MB on a memor y card, that’s great today. But someday you’ll find that size is no longer manufactured. As the device card grows, an older file system won’ t be able to access the entire available memory. And changing file systems is a big task. It looks like I’ve come up with more issues than answers (or even the hope of answers). So, let’ s get into the next par t: “What are we going to do?” From the top of the design pile, if you look at the C language, you’ll find it suppor ts file I/O. You’ll find a good description at http://en.wikipedia.org/wiki/C_file_ input/output). FILE OPs & PROTOTYPES The most basic file operations are open, close, read, and write. Their prototypes in C are in Listing 1. There are alter natives to the basic reading and writing of one character at a time. One common pair of procedures is reading and writing a string (see Listing 2). March 2009 – Issue 224 Listing 3—Pointers pointing to 8-bit data in 16-bit elements 52 typedef struct { int unsigned char unsigned char int unsigned char unsigned char unsigned short } FILE; level; flags; fd; hold; bsize; *buffer *curp; istemp; token; // // // // // // // // // fill/empty level of buffer File status flags File descriptor Ungetc char if no buffer Buffer size Data transfer buffer Current active pointer Temporary file indicator Used for validity checking By now, you should be star ting to understand what these prototypes mean. The new constr uct in all of these prototypes is the FILE *fp. It is a pointer to a str ucture that can be seen in Listing 3. Every time you open a file using C, you are creating a str ucture and filling in the details. The str ucture is all that is needed to per form all the file operations that the C language has to offer. This is a simple straightforward interface, and you should be suspicious that it’s too easy. I suspect that there is a lot of code to support the simplicity of this interface. For example, *buffer is a pointer to a character buffer . What’s up with that? Where is that buffer stored and how big is it? A useful assignment that would give you a lot of insight into this problem is to find and review the Linux file I/O code. OPEN A FILE Let’s examine how to open a file. The fopen procedure takes two parameters. The first is the complete file name including the path. So E:\Data\CCI\Code\Test\TestFile.txt is a string that can be used as a complete reference to the file. Note that it’s a string and you pass a pointer to that string. If you are r unning C on a PC, the OS takes care of translating that path and file name into a specific hardware location. If you’re designing an embedded system, you’re responsible for that translation. The second parameter is the mode that you are using to open the file. Different modes are “r” (read), “w” (write), and “a” (append). W ith these and other characters, you can specify operations, such as append, start from the beginning, and open for both reading and writing. The return parameter from the fopen procedure is a pointer to the FILE data structure. If the pointer is NULL (a C-defined constant), the CIRCUIT CELLAR® • www.circuitcellar.com 2/5/2009 1:19 PM Page 53 Listing 4—The lowest level CF interface routines INT16 Init_CF(void); INT16 INT16 INT16 INT16 CFCheck_RDY(void); Wait_RDY(void); CFCheck_RDY_ALT(void); Wait_RDY_ALT(void); UINT16 UINT16 UINT16 UINT16 ReadRegB(UINT16 *addr); ReadRegW(UINT16 *addr); WriteRegW(UINT16 *addr); WriteRegB(UINT16 *addr); void void void void ReadCF_SectorB(UINT8 *dest, UINT32 LBALocation); ReadCF_SectorW(UINT16 *dest, UINT32 LBALocation); WriteCF_SectorB(UINT8 *dest, UINT32 LBALocation); WriteCF_SectorW(UINT16 *dest, UINT32 LBALocation); void void ReadIdentityInfoW(UINT16 *buff); ReadIdentityInfoB(UINT16 *buff); UINT16 UINT8 UINT16 UINT32 CFByteSwap(UINT16 data); Get8Bits(UINT8 *Buffer, UINT16 addr); Get16Bits(UINT8 *Buffer, UINT16 addr); Get32Bits(UINT8 *Buffer, UINT16 addr); command failed to open the file. Aren’t you glad you read and paid close attention to my ar ticles on structures and pointers! (Refer to Circuit Cellar issues 198, 200, 202, 204, 206, 208, 210, 212, and 214.) I am going to skip over the middle of the FAT file system design and examine the lowest level inter face to the hardware. It’s the only other piece of infor mation that’s solid at this point. Again using the Inter net, I came up with several links to CompactFlash information. CompactFlash There are several ways to design a hardware interface around a CF card. One simple method has eight registers (using three address lines) that provide commands, data, and status infor mation. Also, either an 8- or 16-bit data interface is available. The hardware interfacing to an SD/MMC card basically uses the serial peripheral interface (SPI) for mat. I have not yet done this type of design work, so I’ll say no more at this point about SD/MMC card interfacing. Again, refer to Jeff’s articles for details about an SD hardware inter face. The lowest level of CompactFlash hardware and software inter face can be accomplished in the routines in www.circuitcellar.com • CIRCUIT CELLAR® Listing 4. The Init_CF() routine grounds the RESET pin on the CompactFlash card. Note that not all cards respond correctly or completely to this reset. Some require that power actually be removed. Some designs have a high-side FET actually disconnecting the power supply. So look out. The next four routines— CFCheck_ RDY(), Wait_RDY(), CFCheck_RDY_ ALT(), and Wait_RDY_ALT()—look at a ready or alter nate ready signal from the CF card. This signal is the reply that indicates that the CF card has completed the previous operation. Sometimes you just want to look at the signal (the check procedures); other times, you want to wait until the previous operation has completed (the wait procedures). Be careful. You will hang the system if you are waiting for a ready signal that never materializes. This probably is not a good situation in an embedded system. The next four routines—ReadRegB(), ReadRegW(), WriteRegW(), and WriteRegB()—all read and write to a register in the CF card. Again, check the literature about CompactFlash cards. The CF hardware interface provides for an 8- or 16-bit data path. If you’ve got a smaller system, an 8-bit interface might make the most sense. If, on the other hand, you’re looking for maximum performance, the 16-bit data path is available. The next four routines— ReadCF_ SectorB(), ReadCF_SectorW(), WriteCF_SectorB(), and WriteCF _SectorW()—read from and write to a sector on the CF card. The basic information is accessed in 512 × 8 bit or 256 × 16 bit blocks. A special routine ReadIdentityInfoW() reads words from a specific card location to get the identification infor mation about the CF card. I included the prototype for reading bytes ReadIdentityInfoB(), but I didn’t code that one because I have a 16-bit interface. The next four routines— CFByte Swap(), Get8Bits(), Get16Bits(), and Get32Bits()—deal with manipulating the data that has been read from the card. CFByteSwap deals with the Big Endian/Little Endian issues. This concer ns the byte order used when saving data. Murphy’s law says it won’t be what you want it to be. If these Endian issues are a new topic to you, please look them up. The GetnBits() routines return the specified amount of data from the buffer. Different parameters are saved as 8, 16, or 32 bits for efficiency. They are packed with no padding between parameters. Any size parameter could start at any memor y location. The LBALocation is a 32-bit number specifying the location (address) on the CF card. Disk drives use heads, cylinders, tracks, and sectors to get to a specific location on a drive. The CF card uses a for mula that equates the LBALocation to a head, cylinder, or sector notation. The LBALocation is the head (8 bits), cylinder (16 bits), and sector (8 bits), all combined into a 32-bit number . APPLICATION REQUIREMENTS I think we’ve got both the highlevel and the low-level ends of the design covered. All you have to do next is fill in the middle. I originally wanted to write this ar ticle as a call for a FAT file system design (sor t of March 2009 – Issue 224 2903013 martin.qxp 53 March 2009 – Issue 224 2903013 martin.qxp 54 2/5/2009 1:19 PM Page 54 a “roll our own” project). But I came to my senses and decided this was too big a project to tackle. There are so many CF cards and I should also deal with SD and MMC cards. Also, each application has its own resources and requirements. One such requirement is how many files can be open. Each open file has a FILE structure associated with it and probably buffers for data. If you’re building a simple system, or just using the card for program updates, then a fancy file system makes no sense. On the other hand, if you’ve got one of the new ARM CPUs with an Ether net interface built in (all for about $5) and lots of system memory, then you would want and could use a much more robust file system. Let’s explore the FAT file system in more detail, as designed by Microsoft and extended by the card manufacturers and others. The Wikipedia reference is a good condensed explanation of the different FAT versions. The original FAT, sometimes referred to as FAT12, is probably old enough that you don’ t need to support it. The FAT16 version supports volumes up to 2 GB, and that’s probably sufficient for today’s designs. But when will you no longer be able to purchase 2-GB CF cards? When will the larger capacity cards be less expensive? It probably won’t happen next year, but it probably will in the next four to five years. So designing a system compatible with FAT16 has a shelf life and you better consider F AT32 as a real possibility. Why not design or plan for both? Another consideration is long file name support. This is one decision that’s clearly application-dependent. The systems I’m working on can require all file names to be in the 8.3 format (eight characters for the name and three for the extension). And also any director y names can be limited to eight characters. If your system can’t meet these requirements, you need to include suppor t for long file names. The last major consideration is the requirement that the CF or SD/MMC card for mat be compatible with another computer system. A straightforward example is that the card be readable and writable in your embedded system and in a PC. Then the questions become: Which OS is the PC running? Does that OS support the same file system as your embedded system does? If you are going to read and write memor y cards only in your system, compatibility with an existing OS in not an issue. WORKING WITH THE SYSTEM So how does one work with the FAT file system? I urge you to search the ’Net and get as much infor mation as you can stand. And there is a lot available. You’ll find that you need to detect and initialize the card, read the identity infor mation, and build the infor mation that you will use to access the card from the identity information. Jeff described this process for an SD card. In the files section of this article, I took code from a 2005 Circuit Cellar article by Ivan Sham, William Hue, and Pete Rizun and passed it through SourcePublisher from Scientific Toolworks (“Portable FAT Library for MCU Applications,” Circuit Cellar 176, 2005). I used this program to document my work and help organize other C code. I included the original files and the output from SourcePublisher. Together with these links and Jeff ’s most recent columns, you now have an introduction to a file system. But wait. There’s more. Next time, I’ll get into the hear t of some C code for a file system. I George Martin ([email protected]) began his career in the aerospace industry in 1969. After five years at a real job, he set out on his own and co-founded a design and manufacturing firm (www.embedded-designer.com). His designs typically include servo-motion control, graphical input and output, data acquisition, and remote control systems. George is a charter member of the Ciarcia Design Works Team. He’s currently working on a mobile communications system that announces highway info. He is also a nationally ranked revolver shooter. P ROJECT FILES To download code, go to ftp://ftp.circuitcellar .com/pub/Circuit_Cellar/2009 /224. R ESOURCES CompactFlash Association, “CF+ and CompactFlash Specification Revision 2.0,” 2003. Compu Phase, “Implementing FAT on CompactFlash cards, SD/MMC cards and USB sticks,” 2008, www.compuphase.com/mbr_fat.htm. Microsoft Corp., “Microsoft Extensible Fir mware Initiative FAT32 File System Specification,” 2000. C. Quirke, “Understanding FAT,” http://users.iafrica.com/c/cq/cquirke/fat.htm. M. Samuels, “PIC a CompactFlash Card,” Circuit Cellar Online 127, 2001. I. Sham, W. Hue, and P. Rizun, “Portable FAT Library for MCU Applications,” Circuit Cellar 176, 2005. Wikipedia, “CompactFlash,” http://en.wikipedia.org/wiki/CompactFlash. ———, “File Allocation Table,” http://en.wikipedia.org/wiki/File_ Allocation_Table. CIRCUIT CELLAR® • www.circuitcellar.com 55.qxp 1/23/2009 4:19 PM Page 1 Conference: June 8 - June 10, 2009 Exhibits: June 9 - June 10, 2009 Donald E Stephens Convention Center Rosemont, Illinois www.sensorsexpo.com Advances in Measurement, Monitoring, Detection & Control New Approaches • New Technologies • New Applications • New Ideas Don’t Miss the Sensors Opening Keynote Cassini: Five Years at Saturn Dr. Kevin Grazier Investigation Scientist & Science Planning Engineer, Cassini/Huygens Mission to Saturn & Titan, NASA’s Jet Propulsion Laboratory (JPL) This Year’s Conference Program Covers 18 Tracks • Sensor Interfaces & Sensor Integration • Sensor Systems Design • RF Sensing • Wireless Sensor Networks • Energy Harvesting • Energy Conservation • Low-Power Sensing • Harsh Environments • Position Sensing • Fiber Optics • Machine Health & Predictive Maintenance • Smart Materials • Novel Approaches to Measurement & Detection • Environmental Monitoring • Business Trends & Issues • Wireless Standards • Location-Aware Sensing • Novel Approaches to Biodetection Register Today for Your Conference Pass at the Early Bird Rates! Or, Sign Up Now for a FREE Expo Hall Pass! Visit www.sensorsexpo.com or call 877-232-0132 or 972-620-3036 (Outside U.S.). Don’t Forget to Use Your Source Code: 303M Produced by: Sensors09_CircuitCellarAd.indd 1 Official Publication: Silver Sponsor: Media Sponsor: 1/20/2009 2:18:10 PM 2903002-bachiochi.qxp F 2/10/2009 1:45 PM Page 56 ROM THE BENCH by Jeff Bachiochi Programmable Robotics (Part 1) Build on an Existing Robot Platform If you want to work on a robot but don’t have to time build one from scratch, check out iRobot’s Create. The robot incorporates several customizable features, including a command module for on-board programming, a serial cable to send individual commands, 10 built-in demos, over 30 built-in sensors, and a 25-pin expansion port. a) O b) c) March 2009 – Issue 224 d) 56 e) ccasionally, I get dragged to the nearest mall, especially around Christmas time. Few of the stores interest me. But Brookstone is different. It is a nation-wide specialty retailer with an assortment of consumer products that are functional in purpose, distinctive in quality and design, and not widely available from other retailers. Years ago, I was drawn in by a Frisbeeshaped gizmo wandering around on the floor near the store’s entrance. It was an iRobot Roomba vacuuming robot. iRobot’s literature described it as the first practical and affordable home robot. You may have heard of iRobot, which developed robots like the PackBot that was used to search the rubble of the World Trade Center in New York after the September 11 terrorist attacks. It is now used by the U.S. military overseas. Apparently, iRobot quickly sold more than 1 million Roomba units. This success led to a line of similar robotic appliances used for vacuuming, sweeping, washing floors, and cleaning pools and gutters. As you can imagine, when the robots started becoming popular, hacking sites sprang up with information about ways to use these platforms for unintended purposes. iRobot took advantage of this growing frenzy and developed an offshoot based on the Roomba’s proven technology. Photo 1— The Create’s Power, Play, and Advance buttons and LEDs (a) and wall sensor and IR receiver (b) along with every other sensor can be disconnected from the interface board (c). Motor gearboxes with optical encoders (d) give the Create (e) a movement resolution of 1 mm. Angle is determined to 1° of rotation based on the left and right encoder values. CIRCUIT CELLAR® • www.circuitcellar.com 2/5/2009 12:46 PM The Create was born with two basic models. In this ar ticle, I will discuss what iRobot provides as a system and how you can use the technology. PROGRAMMABLE ROBOT The Create mobile robot platfor m is for educators and developers alike. It’s mobile out of the box. There is no need to assemble the drive system or worry about low-level code. The basic unit includes a serial cable for sending individual commands from a PC or writing basic scripts of up to 100 open-interface commands, which can be stored on the robot. T en builtin demos perform various preprogrammed behaviors. More than 30 built-in sensors enable the robot to react to both inter nal and external events (see Photo 1). In addition to a serial communications port, there is a 25-pin expansion por t, to which you can connect your own electronics (sensors, actuators, wireless connections, computers, cameras, or other hardware). The cargo bay has various threaded holes for securely mounting your own brand of hardware. You can add a fourth wheel to improve the stability of larger payloads, but this slightly reduces its ability to adapt to changes in grade. The advanced unit includes the iRobot Command Module for onboard (autonomous) programming. The Create is fully compatible with all iRobot Roomba accessories, including rechargeable batteries, a power supply, a home base, a remote control, and virtual walls. The Command Module screws onto the 25-pin expansion port at the front of the cargo bay. It contains an Atmel ATmega168 microcontroller that communicates with the Create through a serial connection in the expansion port. It is programmed via a USB port. Let’s begin with a look at the basic unit’s array of peripheral I/O devices. UNDER THE HOOD The Create is preprogrammed with an operating system that enables access to all of its input and output devices by passing commands via a serial communications port (default www.circuitcellar.com • CIRCUIT CELLAR® Page 57 speed of 57,600 bps). Commands include an opcode (128–159) followed by a number of data bytes, depending on the opcode. Table 1 lists the opcodes and data requirements of each. I color-coded the table so you can see the groups. Five commands place the Create into special modes. The Create begins in Off mode and remains there until a Start command is received. The Start command places the Create into passive mode ready for additional commands. From the passive mode, the Create accepts only the Baud, Safe, or F ull commands. Safe and Full are similar commands that give you complete control using any of the oth er commands. Safe mode, as its n ame implies, has some automatic s elfpreservation actions, which prevent it from falling off an edge, for instance. In Full mode, if you don’ t pay attention to its cliff sensor, for instance, it would attempt to fly right off a ledge (thereb y needlessly March 2009 – Issue 224 2903002-bachiochi.qxp 57 2903002-bachiochi.qxp 2/5/2009 12:46 PM March 2009 – Issue 224 testing its poor aerodynamic characteristics). The built-in demo programs can be called through the open inter face using the commands in rows 6–8 and row 15 (see Table 1). Note that while Cover, Cover and Dock, and Spot are available as individual commands, the Demo command (with a data byte of 0–9) lets you choose any of the built-in demos. For instance, the Cover and Dock demo instr ucts the Create to use random bounce, wall following, and spiraling to cover a room’s floor area. If it sees an IR signal from its home base, it will zero in on home base, dock with it, and recharge its batteries. This brings us to the real nitty-gritty. The commands in rows 2, 9–14, 16–22, and 26–29 have to do with the Create’s I/O. The Create’s outputs are left and right motors, LEDs, tone, and output bits on the 25-pin expansion connector (6 bits, three digital, and three PWM). On the input side, there are wheel drop sensors, bumpers, wall sensors, cliff sensors, vir tual wall (IR) 58 Page 58 Figure 1—This is the idle flowchart I wrote by reviewing the code in the example DRIVE.C on the CD that came with the Create. Initialization Y LEDS_COUNT >= 100? Alternate LED pattern sensors, overcurrent sensors (for wheel and PWMs), buttons, distance, angle, charging state, battery voltage, system current, battery temperature, battery charge, battery capacity, and inputs from the 25-pin expansion connector (four digital bits and one 10-bit analog input). You can refer to the “Open Interface Specification” in the Resources section for more infor mation on all of this, but I want to touch on it briefly. There are two ways to move the Create. N Clear LEDS_COUNT LEDS_COUNT = LEDS_COUNT + 1 Update sensor info N User button pushed? Y Play start song Update sensor info Y User button pushed or other safety error? Update sensor info N Do movement Stop motors Play stop song The drive command requires 2 data bytes, a velocity of ±500 mm/s, and a radius of ±2,000 mm. That’s a maximum speed of approximately 1 MPH! This mode is similar to driving a car using the gas pedal for speed control and the steering wheel for direction control. The drive direct command requires 2 data bytes, a right velocity of ±500 mm/s, and a left velocity of ±500 mm/s. This mode is similar to driving a bulldozer or tank using independent forward and reverse levers for each wheel. Feedback on movement comes from the wheel encoders as values for distance (–32,768 mm to 32,767 mm) and angle (–32,768° to 32,767°). The distance is the total distance covered by each wheel’s encoder divided by two. If the Create is spinning in place, its distance remains at zero. The angle is a relationship of the distances traveled by each wheel. The distance between wheels is 260 mm. If only one wheel is moving, that wheel must travel 2πR, or 1,634 mm (i.e., 2 × π × 260 mm), to get back to where it started, so 1,634/360 = 4.5 mm/degree. CIRCUIT CELLAR® • www.circuitcellar.com 2/5/2009 12:46 PM Page 59 For every 4.5 mm difference in travel distance between the two wheels, the ori entation will change 1°. With anything other than point c ontact (of thin wheels), you can guesstimate only the actual turning radius. This will vary greatly depending on which part of a wide wheel is making contact with the floor . That’s why navigation by “dead reckoning” loses accuracy over time. This could be corrected by using an electronic compass to deter mine direction instead of dead reckon ing. Compasses aren’t necessarily perfect either. So, in the big scheme of things, it’s best to not put all of your eggs in one basket. This is getting beyond the scope of this ar ticle, so let me just caution you: in most cases, you can rely on the angle for immediate results (i.e., turning around), but don’t depend on it to keep track of your direction over the long ter m (i.e., trying to set up parallel sweeps to cover a large area). Let me make one last n ote about the commands in rows 23–25 (see Table 1). The Script commands enable you to record and play back a number of consecutive commands. When used in conjunction with the W ait commands, you can have the Create per form a preprogrammed sequence of events. Here is an example: wait distance (1,000 mm), wait angle (90), wait distance (1,000 mm), wait Do movement angle (90), wait distance (1,000 mm), wait angle N (90), wait distance Turning? (1,000 mm), and wait Y angle (90), which when played back commands the Backing? N Create to drive in a 1 m × Y 1 m square pattern. SERIAL TETHER The Create can play any of the demos via push button selections after you press the Power button. However, to get the Create (basic unit) to do your bidding using the open interface commands, you need a serial link to something that can send these commands via the link. This can be done with a terminal emulator (e.g., RealTerm) running on your favorite computer with a serial inter face. While running RealTerm on your PC with the Create connected via the serial cable, you can use your keyboard to www.circuitcellar.com • type in commands (in decimal with spaces separating input values). The Create will execute the commands in the order they are received. If you type “128 132 139 2 0 0 <cr>,” you will tur n on the Play (>) LED. If you enter a drive command, support the system under neath with its wheels off the floor (full mode). The Create will most likely rip your serial cable out as it bolts across the floor unless you have a long tether . I know what you are thinking: “Not user friendly , this tether.” Well, there is of course a better way . You can eliminate the tether by supplying an RF link. I want to stop from going down this path for the remainder of this column. Instead, I want to focus on the Create’ s advanced unit, adding the command module to the 25-pin expansion connector in the for ward end of the cargo bay. COMMAND MODULE You can use a PC to enter open inter face commands that the Create can receive via its serial por t and execute in its operating system. The command module uses an ATmega168 flash memory microcontroller to send commands to the Create. This is accomplished by writing a control program and programming it into the microcontroller. The control program uses the open interface commands to access the Create’s functions. How is this any different than typing commands to the Create Y through the tethered Any bumper? Y serial port? It’s not! Left? N However, the complicated answer is much more N Motors forward satisfying. Remaining distance Turn counter< –5 mm? clockwise The most obvious difN Turn clockwise Y ference is that the tether disappears because the Not Backing Command Module rides Backing turning Motors forward piggyback on the Create. Second, I don’t know Random angle about your typing speed Y (or accuracy for that Turning Play bump song clockwise? matter), but the microN controller can send comN Remain angle N mands at blazing speeds. less than 0 degrees? Remain angle Here comes the most greater than 0 degrees? important fact. Even if I Y Y could type a drive and read sensor commands Not turning fast enough, I would not be able to check all of Motors forward the important sensor states and decide to stop Return before I hit the wall on the other side of the room (or ripped out the Figure 2—This is how the example DRIVE.C code handles the movement of Create. I based tether). The Command my assembly code on this flowchart. CIRCUIT CELLAR® March 2009 – Issue 224 2903002-bachiochi.qxp 59 2903002-bachiochi.qxp 2/5/2009 Command 12:46 PM Page 60 Opcode Data bytes 1 Start Baud Control Safe Full Spot Cover Demo 128 129 130 131 132 134 135 136 Drive 137 Low-side drivers LEDs 138 139 Song 140 Song number (0–15) Play Sensors Cover and dock PWM Low-side drivers 141 142 143 144 Song number: (0–15) Packet ID: (0–42) Drive direct 145 Digital outputs 147 Stream 148 Query List 149 Stream 150 Send IR Script Play script Show script Wait time 151 152 153 154 155 Wait distance 156 Wait angle 157 Wait event 158 2 3 4, Etc. Baud code: (0–11) Demos (–1 to 9) Velocity (–500 to 500 mm/s) Output bits (0–7) LED Bits (0–10) Radius (–2,000 to 2,000 mm) Power LED Color (0–255) Song length (1–16) Power LED intensity (0–255) Note number 1 (31–27) Low-side driver 2 duty cycle (0–128) Low-side driver 1 duty cycle (0–128) Low-side driver 0 duty cycle (0–128) Right wheel velocity (–500 to 500 mm/s) Output bits (0–7) Number of packets packet ID 1 (0–42) Packet ID 1 (0–42) Range: 0–1 Byte (0–255) Script length: (1–100) Left wheel velocity (–500 to 500 mm/s) Note duration 1 (0–255) Note number 2, etc. Packet ID 2, etc. Packet ID 2, etc. Pause/Resume Command opcode 1 Command data byte 1 Command opcode 2, etc. Time (0–255 seconds/10) Distance (–32,767 to 32,768 mm) Angle (–32,767° to 32,768°) Event ID (1 to 20 and –1 to –20) March 2009 – Issue 224 Table 1—The Create’s basic unit runs an operating system that enables you to manipulate behavior by controlling and monitoring its I/O devices through its serial port. The commands listed here can be sent by any device capable of serial communications. 60 Module has plenty of flash memor y storage space to hold a useful control program. Before I get into the programming of the Command Module, I need to mention that the Command Module passes the I/Os available on the 25-pin expansion connector to the user along with a bevy of extra I/O controlled directly from the microcontroller. These are accessed via four ePorts (DB9F). In addition to the extra I/Os, there is a RESET button, a User button, and a USB device por t. The USB port provides a programming tether to a PC. The RESET button jump-starts the Command Module. If a USB cable is plugged in, the microcontroller goes into Bootload mode to accept code via USB. If RESET is pushed without the USB cable plugged in, it will begin executing the downloaded code. COMMANDING THE SYSTEM The Command Module’s CD installs a development CIRCUIT CELLAR® • www.circuitcellar.com 2/5/2009 12:46 PM Page 61 Listing 1—Each sensor has its own formatting code. Note that the first line of each routine has a rem’d statement that allows the routine to be skipped by removing the ; (rem). Both of these routines use a conversion to decimal format on the 16-bit data in r1 and r0. ; DoDebug_SenDist: ; jmp DoDebug_SenAng Ldi char2send, ‘D’ call byteTx ldi char2send, ‘=’ call byteTx lds r1, SENSORS_OUT+SenDist1 lds r0, SENSORS_OUT+SenDist0 call SendDecimal ; DoDebug_SenAng: ; jmp DoDebug_SenChargeState Ldi char2send, ‘A’ call byteTx ldi char2send, ‘=’ call byteTx lds r1, SENSORS_OUT+SenAng1 lds r0, SENSORS_OUT+SenAng0 call SendDecimal ; DoDebug_SenChargeState: system on your PC, which enables you to develop programs in C using the provided programmer’s notepad IDE (editor), GNU GCC (compiler), and AVRDude (downloader). After installing this software, you can explore the three example programs on the CD. The first example, DRIVE, shows how to make the Create move around and react to an object when its bumper signals come in contact with it. The second example, INPUT, teaches you how to interact with the Create’s I/O and the Command Module’s extra I/O. The third example, LIGHT, introduces you to the process of adding exter nal sensors. In this example, an added CDS light sensor (to the command module) is monitored while the Create wanders the area. When a significant increase in light is detected, the Create stops and plays a song. This might be where we par t company. As you probably know, I like getting down and dir ty, so I’m going to finish up this column by discussing using assembly language with the Command Module, which I couldn’t find much about on any of the Create-related sites or for ums I visited. Although I think you get a great little development system here for the Create with the Command Module, there is a missing piece that is important to me when I develop something: debugging. A debugging www.circuitcellar.com • CIRCUIT CELLAR® connector could have been added to the Command Module, which would have made in-circuit debugging simple. There are a few mentions of how to use the USB por t for feedback, but there is conflicting infor mation and there aren’t any examples. I’m going to show you how to do this. Although I’ll be working in assembler, this can be done in C as well. AVR Studio I’ve used AVR Studio (IDE) in the past for development work with Atmel parts. It includes a simulator (which I use from time to time to check routines) and other tools for debugging (i.e., in-circuit emulation). Because I didn’t have access to the debug port on the ATmega168 used in the Command Module (I’m sure they wouldn’t want the user to accidentally wipeout the bootloader), I couldn’ t use this tool. Using the C code as a guide, I went through the DRIVE example and came up with a flowchar t. Figure 1 shows the initialization and idle loop waiting for a User button push. The movement routine in Figure 2 then takes over until a second push or any safety issues, such as a cliff sensor , are detected. Items in round bubbles are calls made to other routines. These can easily become a librar y of calls used over and over by your programs (just like a librar y in C). A couple of the routines are wor th mentioning. When a bumper is detected, a turn is requested with the direction based on the bumper so Create turns away from the collision. My random angle routine uses the 7 least significant bits of the T imer1 register counter (which increments rapidly with no prescaler). The constant 53 is added to this value (0–127) to allow angles between 53° and 180° (or –53° and –180° degrees when rotating clockwise). A drive command is then issued using a velocity of 200 mm/s with either radius of 0xFFFFmm (for clockwise rotation) or 0x0001mm (for counterclockwise rotation). The random angle value becomes the requested angle and is compared to the angle retur ned by Create to determine when the tur n is completed. The update routine requests a full complement of data to be retur ned by Create. Refer back to the Sensors command in Table 1. This command requires 1 data byte (0–42). There are in fact only 36 sensor values that you can ask for, so why isn’t the data byte (0–35)? The first seven values (0–6) request groups of sensors to be sent. Value 0 requests the first 20 sensors, 1 requests the first 16, 2 requests sensors 11–14, 3 requests sensors 15–20, 4 requests sensors 21–28, 5 requests sensors 29–36, and 6 requests all 36 sensors. This makes using this command quick. Because the commands going to and sensor data being returned from Create happen asynchronously (i.e., your program may execute numerous instructions while the sensor data is being received), you must be cautious about when you rely on new data. For this reason, once all the sensor data has been received, it is copied into a working bank of registers for you to access. This approach assures each time you access sensor data it is complete. There is sensor data received (e.g., distance and angle) that must be used appropriately each time it is received. These items indicate a change since the last request and are cleared internally (within Create’s OS) when sent. If you use the drive command to rotate counterclockwise, you must March 2009 – Issue 224 2903002-bachiochi.qxp 61 2903002-bachiochi.qxp 2/5/2009 12:46 PM continually add the sensor angle values to determine when you’ve rotated the proper amount. You must then use the drive command to halt the motors (velocity = 0). Distance works the same way. While the value of every sensor available is not used in this program, I ask for it all any way , just as an exercise. It also makes the next section more interesting, as you will see shortly. March 2009 – Issue 224 DEBUGGING 62 You don’t have a way of getting inside the microcontroller and singlestepping execution or looking at register values, but you can get the next best thing. The single UART in the ATmega168 is actually directed by external circuitry toward either the USB port for bootloading your program or Create’s serial port, via the 25-pin expansion connector, to respond to your program’s command requests. The control that does this switching is an output bit on the ATmega168. You have access to this, which means from your program you can flip back and for th between destinations. Because the microcontroller is set up to go into bootload mode whenever a USB cable is plugged into the Command Module’s USB port, swapping destinations is impossible unless you know the secret. Note that holding down the User button while resetting the microcontroller can deactivate this function. For debugging purposes, I can write a routine to send the sensor data out of the USB por t each time the sensor data is copied into the working registers. Note that even though you can check the UART to see if any characters remain in the transmitter , you should add a delay of at least one character before switching the serial output destination to ensure that you are not interfering with a transmission in process. To view the debugging data, you can use a ter minal emulator like RealTerm. Because you are now anchored again with tether, you will want to place the Create up on a support to keep its drive wheels off the ground. You will also need to comment out the safety checks within Page 62 the program so the Do Movement loop isn’t exited when one of the cliff sensors is triggered. I use conditional assembly with a Debug mode that eliminates certain code. I started by just sending the data bytes as received. While RealTerm enables you to see the data in various formats such as ASCII, binar y, or HEX, there are a few problems with this, as you might expect. Not all of the data makes sense in any one for mat. And some sensor values are multibyte representations of a word value. It makes sense to for mat each sensor value appropriately and send the value as ASCII characters. For bytes used as bit flags, binar y might be appropriate. For signed word values, a + or – sign would be appropriate, and so on. You can get as fancy as you wish. A name or an alias that helps to identify it would also be useful. You don’t have to limit the data to just the Create’s sensor values. You can display any variables your program is calculating. Be careful what you choose to display. Too much data can be just as bad as too little. Your screen can fill quickly. Logging to a file will be helpful in some instances. The idea is to help you narrow down where to look for a bug in your code. When the robot backs up and rotates forever, it might not be so obvious where to start looking in your code. I filled my debug output routine with every possible piece of data to export. I added a jmp instruction at the beginning of each section of code for o utputting that particular piece of data (see Listing 1). I can quickly REM out the jmp instruction of any sections I want to include in the debug display. Photo 2 shows power-related data I monitored from the Create. Note that the number of variables you choose to display (total characters sent) will impact the execution loop speed of the program. In AVR Studio, I created a project with three files. The first file, m168def.inc, is the register/bit definitions file for the ATmega168. The second file, CreateCmdDef.inc, is used to hold the definitions for all of the items directly relating to the Create. I also placed the callable routines I made to suppor t the Create’s commands and my Debug code. This kept the ugliness out of the main file. The last file, iRobotCreateTest1.asm, is the main file. This is the control program. It is the only file that must be written for a new project. Assuming all of the commands have working code in CreateCmdDef.inc, the main code has includes that link the first two files. One of the nice things about using AVR Studio is that it contains a simulator. I often use the simulator to calculate routine timing using the integrated Photo 2—RealTerm is displaying some of the internal register values that have to do with power. OC = 0 (no overcurrents), CS = 0 (not charging), V = 14,973 (battery = 14.973 V), mA = –1,231 (batteries supplying 1.231 A), BT = 18 (battery temperature = 18°C), CRG = 2,698 (2.698 A/h remain), CAP = 272 (battery capacity is down by 0.272 A), and CA = 00000000 (no source). CIRCUIT CELLAR® • www.circuitcellar.com 2903002-bachiochi.qxp 2/5/2009 12:46 PM stopwatch. I even use it to lear n a routine I’ve copied from somewhere else. After assembling the code, I use AVRDude (installed with the Create CD) to download my .HEX file to the Create through the command module’s USB port. If I have the Create up on blocks, I can execute from here by holding down the User button while pressing the Reset button. This can be done when the Create is off, because the Command Module has its own power switch. When the Command Module begins execution, it can check the status of the Create (through the 25-pin expansion connector) and turn it on, if necessary! In this state, you can r un it all while the wheel spins without floor contact, pressing buttons and bumpers and watching for proper responses. Of course, you’ll want to pull out the tether and try it on the floor even if it is misbehaving. But use caution. If you aren’t paying attention to safety issues, the Create may tr y to run over the cat if the bumper routine doesn’ t work. Or it might continue backing up if you aren’t paying attention to distance because there “are no bumpers in the rear.” Now I need to think about what kind of external sensors I might want to add to suppor t a mapping project. This should be interesting. Page 63 jump-start your robotics research, product development, or technical education! Next month, I will explain how to replace the Command Module with a microcontroller. You are well on your way to developing your first application. I Jeff Bachiochi (pronounced BAH-key-AH-key) has been writing for Circuit Cellar since 1988. His background includes product design and manufacturing. You can reach him at [email protected] or at www.imaginethatnow.com. R ESOURCES iRobot Corp., “iRobot Create Open Inter face Specification,” 2006, www.irobot. com/filelibrary/pdfs/hrd/create/Create%20Open%20Interface_v2.pdf. ———, “Command Module Owner’s Manual,” 2007, www.irobot.com/filelibrary/ pdfs/hrd/create/Command%20Module%20Manual_v2.pdf. ———, Create projects, http://store.irobot.com/family/index.jsp?categoryId= 2591511&ab=CMS_IRBT_CreateSuperCat_LearnMore_110408. S OURCES ATmega168 Microcontroller Atmel Corp. | www.atmel.com Create programmable robot iRobot | www.irobot.com RealTerm Terminal emulation software RealTerm | http://realterm.sourceforge.net If you want to check out some of the projects others are working on, visit the Create projects link in the Resources section. You will find a bevy of third-party add-ons that were developed for the Create. Refer to http://forums.irobot.com/irobothome and www.avrfreaks.net for discussions about iRobot and A tmel-related things. If you want to work with an affordable robotic platform without having to deal with building and testing hardware from scratch, this is an ideal vehicle. If you want to begin with a proven design and add your own sensors, this is an ideal platfor m. While the top-of-the-line Create with more stuff than I’ve discussed here costs $300, the basic unit begins at approximately $100. It can really help www.circuitcellar.com • CIRCUIT CELLAR® March 2009 – Issue 224 ARE YOU CREATIVE? 63 2903003-cantrell.qxp S 2/5/2009 12:59 PM Page 64 ILICON UPDATE by Tom Cantrell A Really Simple Plan The “8-Bits” Saga Continues Thirty-two-bit microcontrollers are becoming more popular, but 8-bit chips still have their place in the market. Tom says major companies will be finding uses for the simple and inexpensive chips for years to come. a) 7 0 A Accumulator 7 0 Register B 15 0 Index register IX 15 0 Stack pointer SP 15 0 Program counter PC 7 0 Condition code register 1 1 H I N Z V C b) 7 CCR 0 A Accumulator 16-Bit index register H:X H Index register (high) 15 Index register (low) 8 7 Stack pointer SP 15 0 Program counter PC 7 0 Condition code register V 1 1 H I N Z C c) 7 0 A Accumulator March 2009 – Issue 224 13 64 X 0 8 7 Program counter 0 PC 13 0 Shadow program counter Condition code register Z C SPC CCR CCR “8 -bits is dead.” That’s what a micro marketing exper t told me. What’s funny is that he said that 30 years, and an untold billions of 8-bit chips, ago. But hold on. The stor y gets even better. A few years later, I bumped into this fellow again and learned he had moved on to a new job at a different chip company. Things were going quite well and he was making lots of money—selling 8-bit micros! You’ve heard me tell that stor y before, and no doubt I will tell it again. Yes, 32-bit MCUs are on the march and growth is explosive. And it’s true there’s an ever-shifting gray area between “high-end” 8-/16-bit chips and “low-end” 32-bit chips where it makes perfect sense for the latter to replace the for mer. But the problem with the 8-bit eulogies is that they’re based on the premise that silicon is a zero-sum game. If 32-bit MCUs go up, that means 8-/16-bit MCUs must go down, right? Zero sum may be the way it is for some businesses, but not silicon. As long as “Moore for Less” is the name of the game, everybody wins. And don’t forget to look at the big picture. How many 8-/16-bit MCUs touch your life? They’re in virtually every electronic gadget. Now consider developing societies on a global scale. Those folks are going to want lots of gadgets too . There’s one more bit of evidence that’s testimony to the staying power of our little friends. The fact i s all the major players in the 8-/16-bit MCU biz continue to roll out n ew parts. That’s Figure 1—Judging by the similarity between the original Freescale Semiconductor MC6800 (a) and the modern MC9S08 (b) you wouldn’t guess 30 years separates them. By contrast, the new Freescale MC9RS08 (c) is noticeably different. CIRCUIT CELLAR® • www.circuitcellar.com 2/5/2009 12:59 PM Figure 2—The ’RS08 memory map reveals details about the architecture. The direct address space is only 256 bytes ($0–FF), so higher addresses are accessed via a 64-byte “paging window” ($C0–FF). New TINY and SHORT addressing modes access low memory including fast access RAM, the emulated X index register, and the most frequently used I/O and control registers. $0000 $000D $000E $000F $0010 Fast access RAM 14 Bytes D[X] Register X Frequently used registers $001E $001F $0020 Pagesel RAM 48 Bytes $004F Unimplemented $00C0 Paging window $00FF Unimplemented $0200 High page registers $023F Unimplemented $3C00 $3FFB $3FFC $3FFD Flash 1,020 Bytes NVOPT Flash $3FFF MC9RS08KA1 hardly symptomatic of a “dead” market. Freescale Semiconductor is no exception. They’ve been one of the top players in the MCU market since the very beginning. And judging by the fact that they’ve introduced a brand new 8-bit processor core, the ’RS08, they plan on keeping it that way. FORWARD TO THE PAST To get a better understanding of what the new ’RS08 core $0000 is all about, let’s start with a bit of a history lesson. Like many other $000E popular MCUs, the $000F ’RS08 has roots that go way back, Address indicated in register X Figure 3—The X index register hasn’t gone missing. Instead, it’s emulated using a pair of memory locations (X and D[X]) in the TINY address space. www.circuitcellar.com • Page 65 $00FF $0100 CIRCUIT CELLAR® all the way to the 1970s when Freescalethen-Motorola introduced their first micro, the MC6800. The architecture of the MC6800 was blessedly simple, comprising little more than two 8-bit registers (A and B), an index register (X), and the usual stack pointer (SP), program counter (PC), and condition code (CC) registers (see Figure 1a). Over the following decades (i.e., 1980s and 1990s), Motorola introduced a number of variations on the MC6800 theme. Along the way, there was a fork in the road with classic favorites like the MC68HC11 taking the high road and the down-sized MC68HC05 taking the low. While the MC68HC11 and MC68HC05 remain mainstays in the catalog, the modern era (roughly corresponding to the Freescale spinout) has been centered on the core known as the ’S08. What’s remarkable after some 30 years is how true the ’S08 remains to the original (see Figure 1b). The menu has grown to include hundreds (heck, maybe thousands at this point) of distinct par ts crafted from a few basic ingredients. Given that history, the new ’RS08 stands out by virtue of the fact that it’s noticeably different, something immediately apparent with a glance at the programmers model (see Figure 1c). The D[X] Register X Content of the location can be accessed via D[X] Register X can specify any location between $0000 and $00FF March 2009 – Issue 224 2903003-cantrell.qxp 65 March 2009 – Issue 224 2903003-cantrell.qxp 66 2/5/2009 12:59 PM MC6800 and its descendants were lean and mean, but the ’RS08 is positively anorexic. You’ve all seen the movie Back to the Future, right? Well the ’RS08 is kind of a “For ward to the Past” scenario, with Freescale introducing a core today that’s architecturally simpler than the circa-1970s original. After a glance at the programmers model, the first question that arises is how in the heck can the ’RS08 get anything done? Yeah, there’s an accumulator (A), but just how are you supposed to get data into or out of it with the disappearance of the index (X) register? The answer is a combination of direct addressing (i.e., memory address included in the instruction), paging, and an X index register in drag. Here’s how it works. The entire address space for the ’RS08 is 16 KB, comprising 256 pages of 64 bytes (see Figure 2). But the direct addressing range tops out at just 256 bytes (i.e., 8-bit address) and the only instr uctions that can specify a longer address (i.e., the full 14 bits) are JMP and JSR. To provide data access to the entire 16 KB, the top 64 bytes of the direct address space (i.e., page 3, direct addresses $C0-FF) are used as a window to any other page as specified with a page select (PAGESEL) register. Index register X didn’t really disappear, it just morphed into a memor ymapped emulation. As you can see in Figure 3, location $000F doubles as the X register (8 bits as in the MC68HC05) and location $000E in tur n acts as a holder for the data addressed. Indeed, this scheme can partially emulate MC68HC05-indexed addressing (albeit more slowly) to the point that the assembler accepts some traditional X register mnemonics as “psuedoinstructions” and automatically converts them to ’RS08 equivalents (i.e., access via locations $000E and $000F). Now let’s focus a little on the “R,” as in “reduced,” aspects of the ’RS08. While the maximum direct address is 8 bits, there are new “SHORT” (5-bit) and “TINY” (4-bit) direct-addressing modes that work with cer tain instructions. Carefully craft your data layout to put the most frequently accessed data in the TINY space (first 16 bytes). Meanwhile, the most frequently used I/O and Page 66 Instruction INC DEC ADD SUB CLR LDA STA Addresses $00—$0F $00—$0F $00—$0F $00—$0F $00—$1F $00—$1F $00—$1F Table 1—Thanks to new SHORT and TINY addressing modes, the lower 32 bytes of the address space are uniquely accessible with single-byte versions of the most common instructions. control registers (including the aforementioned PAGESEL register) are mapped into the remaining SHORT space (bytes 17–32). In retur n for taking full advantage of the scheme, you get the speed and code density advantages of single-byte instructions (see Table 1). SP is gone, and as you might imagine, so is the stack. Instead, there’s just a “Shadow PC” register (SPC) that acts as a single-level stack for inter rupts and subroutine calls. In a pinch (e.g., you need nested subroutine calls), instr uctions to move data between the accumulator and the high and low bytes of SPC give you hooks to mimic a hardware stack (i.e., PUSH and POP macros). Without getting sidetracked by the now rather tired RISC-versus-CISC debate, it’s pretty clear that the ’RS08 is still a CISC because instr uctions can operate directly on memory. It’s just a “Complex Instruction Set Computer” that happens to have a “Reduced Instruction Set.” Given what you’ve seen so far, it is no surprise that entire categories of traditional (i.e., ’S08) instructions (such as those having to do with SP and X) are vaporized. Fur ther, even the instructions that remain have fewer variants (e.g., no 16-bit direct address mode, only zero-offset indexing). We’re not talking about a minor weight loss. Considering both the number of basic instructions, as well as all possible opcodes (i.e., combinations of instr uction and addressing mode), the ’RS08 instruction repertoire is slashed to well under half the ’S08. According to Freescale, the ’RS08 core is fully 30% smaller than the ’S08. INTERRUPTS DISABLED As you might expect, the absence of a “real” (i.e., hardware stack) poses a challenge for dealing with inter rupts. The ’RS08 has a straightforward approach to the problem. If interrupts are a hassle, ditch them altogether. You heard me Listing 1—The way the ’RS08 handles interrupts is simple. It doesn’t. Instead, an interrupt simply sets a bit in a flag register and wakes up the processor. It’s up to software to figure out what’s going on and what to do about it. InfLoop: sta SRS ;Bump COP wait P1: P2: P3: P4: P5: Bra brset SIP1_MTIM,SIP1,MTIM_ISR brset SIP1_ACMP,SIP1,ACMP_ISR brset SIP1_KBI,SIP1,KBI_ISR brset SIP1_RTI,SIP1,RTI_ISR brset SIP1_LVD,SIP1,LVD_ISR InfLoop MTIM_ISR: ;... <ISR bra ACMP_ISR: ;... <ISR bra KBI_ISR: ;... <ISR bra RTI_ISR: ;... <ISR bra LVD_ISR: ;... <ISR bra ;5 ;5 ;5 ;5 ;5 bus bus bus bus bus cycles cycles cycles cycles cycles coding> ... InfLoop coding> ... InfLoop coding> ... InfLoop coding> ... InfLoop coding> ... InfLoop CIRCUIT CELLAR® • www.circuitcellar.com 2/5/2009 12:59 PM Page 67 Photo 1—The ’RS08 six-pin DFN package is so small it will erase your board space concerns. right. The ’RS08 simply doesn’t do interrupts, at least in the conventional sense. There is a measure of attention-getting capability from the usual sources (i.e., internal peripherals and external pins). However, unlike a conventional interrupt scheme, a source request doesn’t affect a running program. Rather, it does only two things. First, it sets a flag bit in a register, signifying the source. Second, it wakes up the processor if it’ s sleeping. Needless to say, without true interrupts, there’s certainly no need for the fancy add-ons such as vector, priority, and nesting schemes. If you’ve already thrown out the baby, you may as well go ahead and throw out the bathwater. Instead, what passes for interrupt handling boils down to a combination of waking up (periodically and/or in response to an internal or external source event) and polling the event flag bits to determine the source. Listing 1 shows a likely application software scenario. The program is an infinite loop (InfLoop) that simply waits (WAIT instruction) in low-power mode until awoken by an inter nal or external event. Then the program proceeds (P1) to scroll through the list of possible sources, checking the event flags and branching (via the BRSET branch-if-bit-set instruction) to the handler for the event that generated the wake-up call. After the handler does its thing, it returns to the beginning of the loop and goes back to sleep to wait for another call to action. The polling order has two ramifications. First, it’s a way to br ute force the issue of priority because events higher up the list will be polled and, if pending, handled before those further down the list. It also means latency between the www.circuitcellar.com • CIRCUIT CELLAR® occurrence of the source event and entering the associated handler varies depending on the event’s polling position. In the example shown here, at top speed (10-MHz bus cycle), the latency grows from about 1 to 3 µs between the first (MTIM timer) and last (LVD lowvoltage detect) events in the polling order. Actual latency may be stretched even further depending on device-specific wake-up delays, such as the time it takes for an on-chip voltage regulator or clock generator to power-up and stabilize. Is it conceivable to craft clever software to mimic the fancy features of a hardware interrupt controller? Sure, a pro could probably even cobble together some kind of midget R TOS. Is it a good idea? Probably not. If in doubt, I’d say you’re better off going with a bigger-ticket part (e.g., ’S08) that has a real stack and interrupts. On the other hand, there are many, many applications that can easily get by with the ’RS08’s simple scheme. When ever y penny counts, why pay for stuff you don’t need? MINI-MEM The initial parts in the ’RS08 line-up come with just 1 KB (MC9RS08KA1) or 2 KB (MC9RS08KA2) of flash memor y. Follow-on parts have more, as you’ll see shortly, but remember the architecture itself accommodates only a 16-KB address space. Notwithstanding the fact that ’RS08 code density is enhanced by the 1-byte TINY and SHORT instructions, bloatware aspirations will surely be better served by a higher-end MCU. Many flash memory MCUs feature in-application programming capability that enables code updates in the field and also allows portions of the flash memory to be used as a “psuedo-EEPROM” for data storage. By contrast, it’s important to note that the ’RS08 flash memory is really intended to be programmed just once as it goes out of your factory door. There are a number of datasheet specs that make this conclusion obvious. Unlike flash memory parts that can typically be written 10,000 or more times, the ’RS08 flash memory write endurance spec is just 1,000 cycles. In their frenzy to jettison ballast, the ’RS08 designers also tossed the charge pump needed to generate the higher flash memory programming voltage (12 V), so you’re responsible for providing it externally. And while the flash memory is organized and programmed on a 64-byte row basis, there’s only an all-or-nothing mass-erase capability. That means using the flash memory for multiple in-application writes would require a “rolling” update scheme that writes only once to a given location. For example, if you have 2 bytes of nonvolatile data you’d like to update from time to time, allocating a 64-byte row of the flash memory would allow for 32 updates. Nevertheless, anything is possible and Freescale even has an application note describing such a “pseudo-EEPROM” scheme.[1] It relies on moving a small flash-programming routine from flash memory into RAM for execution because flash memory access (e.g., instruction fetch) is not allowed during programming. The technique is rather scary and fraught with peril because once flash memory programming is underway, any hiccup (“Oops, I forgot to disable the watchdog timer”) could leave the part brain-dead. And while it’s nice that code can be executed from RAM, don’t get too excited because the MC9RS08KA1 and MC9RS08KA2 give you only 48 bytes to play with. SMART DUST Sticking with the “small is beautiful” theme, the MC9RS08KA1 and MC9RS08KA2 come with just six or eight pins. The largest (if you can call roughly 6 mm × 10 mm large) of these is a vintage eight-pin DIP, which is useful for prototyping or cheap (e.g., singlesided through-hole) PCBs. You can cut the DIP’s already small footprint in half by going surface mount with the optional eight-pin leaded SOIC package at just March 2009 – Issue 224 2903003-cantrell.qxp 67 2903003-cantrell.qxp 2/5/2009 12:59 PM Page 68 VDD R 4 k7 On-chip comparator + – ADC In C 47 nF March 2009 – Issue 224 Figure 4—The MC9RS08KA analog comparator can mimic a conventional ADC. Software discharges the RC and then the MTIM timer measures how long it takes to recharge to the level of the psuedo-ADC input. 68 safe for programmers by busting code that’s up to no good (e.g., illegal opcode, invalid address). Because no one has figured out how to get rid of powe r and ground, the built-in I/O has just four (DFN package) or six (SOIC, DIP) pins to play with. Naturally, any or all can be used as parallel I/O with pull-up and pulldown options, as well as slew-rate control. Any or all can also ser ve as inputs to a keyboard interrupt module (KBI). Recalling that the ’RS08 really doesn’t have “interrupts” per se, the KBI’s most likely use is to catch edges (rising, falling, either) and other wise serve as a means to wake-up the processor from a low-power state. Similarly, there’s an analog comparator using up to three pins that can compare two external voltages to each other or to an inter nal reference voltage. You can choose to trigger on the rising, falling, or either edge of a comparator transition, and the comparator output can be routed to a pin. Freescale application note 3266 describes how to use the comparator to implement a poor man’s ADC using the familiar R/C charge timing scheme (see Figure 4).[2] The ADC emulation also uses the final piece of the I/O pie, the MTIM timer module. It’s a simple unit with an 8-bit prescaler (1, 2, 4…256 divide ratio) fronting an 8-bit counter. Various internal clock sources can be selected as the counter input or a pin can be devoted to the cause. Note that the MTIM module is not capable of waking up the processor from lowpower mode. Fortunately, you can 5 mm × 6 mm. If you’re willing to give up a couple of pins, the six-pin (actually no pins, just pads) dual flat nonleaded (DFN) package represents a new low in board space. This Chihuahua is amazingly small at just 3 mm on a side and 1 mm thick (see Photo 1). Consider that you can cram half a dozen of the DFN parts in the footprint of the “large” eight-pin DIP. Needless to say, with so few pins, there’s no need for a bunch of fancy I/O. We’re talking just the basics, split between general system functions and pin-oriented peripherals. The list starts with an on-chip regulator so the ’RS08 will run on any voltage you care to provide between 1.8 and 5.5 V. There’s also a built-in clock system based on an on-chip 32-kHz oscillator and a bypassable frequency-locked loop. The clock is trimmable to achieve 2% accuracy across the entire voltage and temperature (–40° to 85°C) range. Given the cost-cutting bias and dearth of pins, I’m not surprised there’s no option for exter nal clocking. For robustness, there’s a watchdog timer, low-voltage detection, and a multisource RESET controller that accommodates the usual suspects such as power-up, power fail, watchdog timeout, and optionally even a pin. The RESET Photo 2—Freescale’s introduction of the ’RS08 “L” series, and the evaluation kit controller also that goes with it, proves that blue-collar technology (i.e., 8-bit MCUs and segment LCDs) lives on. keeps the street CIRCUIT CELLAR® • www.circuitcellar.com 2/5/2009 12:59 PM configure the processor’s own clock module to generate a periodic (e.g., 1 ms) wake-up call. Let’s not overlook the small matter of debug. The ’RS08 background debug mode (BDM) provides the basic commands (e.g., read/write registers and memory, breakpoints, single-step) to get a handle on things. It’s like a simple ROM monitor, but it is less intr usive (e.g., memory can be accessed without stopping the user program) and consumes no resources (e.g., flash memory or RAM) beyond the single pin (BKGD) used for host communication and flash memory programming. MARKET SEGMENT With the MC9RS08KA1 and MC9RS08KA2 staking their claim at the entry level, Freescale recently announced two high-integration ’RS08s, the ’LE4 and the ’LA8. In terms of the processor core itself, everything you’ve read so far applies, except there’s more memory (4 or 8 KB of flash memory and 256 bytes of RAM) and larger 28- and 48-pin packages. Page 69 The real difference, and reason for the extra pins, is a significant boost in the on-chip I/O capability with MCU mainstays such as UART, SPI, fancier timers, and a multichannel 10-bit ADC. The final I/O add-on, and raison d’etre for the ’L par ts, is a built-in segment LCD controller. Now I’m quite sure there’s an LCD marketing expert somewhere that has pronounced “Segment LCDs are dead.” Yes, it’s true that bitmap graphics LCDs (e.g., 1/4 VGA) are all the rage and don’t require any upfront NRE for custom glass, a big advantage for lowvolume applications. But don’t think the success of bitmap displays sounds the death knell for segment LCDs. They are still the best solution for high-volume apps where requirements for low unit cost and long batter y life prevail. And that’s not to say segment LCDs can’t do eye candy. Witness some of the cool things being done in automotive dashboard displays, including free-form (i.e., nonrectangular) panels. Take a look around and you’ll see segment LCDs are still a big deal Photo 3—The CodeWarrior ’RS08 toolchain that comes with the evaluation kit includes a full-featured simulator that encompasses software, hardware (MCU pins and peripherals), and even external I/O devices like the LCD. www.circuitcellar.com • CIRCUIT CELLAR® March 2009 – Issue 224 2903003-cantrell.qxp 69 March 2009 – Issue 224 2903003-cantrell.qxp 70 2/5/2009 12:59 PM in applications such as appliances, thermostats, calculators, glucose meters, not-so-smart phones, and hand-held test equipment (e.g., digital VOM). The list goes on. And just as with 8-bit MCUs in general, if segment LCDs are dead, why is it that heavyweights like Freescale and all of the other major players (Atmel, Microchip Technology, Texas Instruments, and more) keep introducing new segment LCD par ts? For the simplest (i.e., fewest segment) apps, you may be able to get away with a software bit-banging “static” approach that devotes a pin to each segment. But the number of segments (and thus pins) required can balloon fast. For example, a single alphanumeric digit requires up to 16 segments. Enter the “multiplexed” alter native, which like a core memor y of yore, uses an XY (frontplane and backplane in LCD-speak) electrode scheme, where a single pin controls multiple segments in a time division fashion, slashing the number of pins required. For instance, with 24 pins, a static controller can handle 24 segments. By switching to a multiplexed scheme with four back planes and 20 front planes, the same 24 pins can accommodate 80 segments. The approach ups the ante in ter ms of processing and electronics complexity. LCD glass can be finicky with its demands for phase-shifting AC and carefully controlled voltage levels to avoid creating nearby “ghost” segments. Highsegment-count multiplexed LCD control is one of those duties where a little hardware can go a long way to make life easier for designers. Featuring 4:1 and 8:1 mux options, the 28-pin MC9RS08LE and 44-pin MC9RS08LA can handle up to 112 and 168 segments, respectively. Embellishments include a pin-mapping feature that facilitates PCB and connector layout to reduce EMI and crosstalk. There are also a variety of power options that accommodate connection with different flavors of glass (e.g., 3 V, 5 V, ST, and STN). Another nice touch is a blink attribute that handles that annoying chore (e.g., the blinking colon on a digital clock) without bothering the processor. Page 70 Freescale makes kicking the tires easy for you, and your budget, with the MC9RS08LE and MC9RS08LA evaluation kits that are a real bargain (see Photo 2). For just $59, you get a board with an LCD plus the usual trimmings (buttons, LEDs, a buzzer, and more). And the boards have the USB debugger interface built-in, so you don’t need a separate pod. The kits also come with the venerable CodeWarrior suite and, because the code size restriction for the evaluation version is 32 KB (i.e., larger than the flash memory on any ’RS08), you’re essentially getting a proven and production-worthy ’RS08 toolchain for free. Just before going to print, one of the MC9RS08LA kits appeared on my doorstep. I didn’t have time to do more than install the tools, fire it up, and poke around a bit. Once I jumped through the obligatory install hoops (install CodeWarrior, install the service pack, install USB drivers, download the demo project from the web, and configure CodeWarrior/project options), everything I tried (compile, download, debug, and more) worked without a hitch. One feature that stood out was that the toolchain has a simulator that goes beyond just opcodes to include “full-chip” (i.e., pins) and even a measure of “system” simulation capability (see Photo 3). While studying the MC9RS08LA board, I made an interesting discover y. Look closely at the right edge and you’ll see a Freescale three-axis MEMS accelerometer. It is shown on the schematic, but otherwise isn’t mentioned anywhere in the documen tation. It’s all the more a bargain to get two evaluation kits for the price of one. KEEP IT SIMPLER There is no doubt that some folks think all of this meat-and-potato technology is boring. But not me. I see the cost savings of these under-a-buck MCUs (well under for the smallest parts) passed on as a global “Tech Tax” cut for the masses. I see the milliamps-across-megaunits power savings as a green tsunami sweeping away a zillion batteries that would otherwise consume resources only to end up in a landfill. Dare I say I think this stuff is sexy and sure to spawn innovative applications. I applaud Freescale (and for that matter, all the other MCU suppliers hopping on the keep-it-real bandwagon) for standing up to the “experts” and naysayers who are enamored only with primadonna technology. My only advice to Freescale and the others is remember to keep it simple. And then remember you’re supposed to remember to keep it simple. There are already plenty of feature-creeped, 8-bit MCUs to choose from. Don’t get me wrong, the higher-end parts are wonderful too and I’m not necessarily against reinventing the wheel. But like putting fat tires and tail fins on a go-kar t, tarting up a mini-me MCU isn’t the way to do it. I apologize to readers who’ve had to sit through my “8-Bit Lives” stor y before. And let me apologize in advance, because it’s a story I suspect I’ll be telling again and again . I Tom Cantrell has been working on chip, board, and systems design and marketing for several years. You may reach him by e-mail at [email protected]. R EFERENCES [1] J. Shi, “AN3741: Implement an In-Application-Programmable Data-Storage on the MC9RS08KA8,” Freescale Semiconductor , Inc., 2008. [2] V. Ko, “AN3266: Getting Star ted with RS08,” Freescale Semiconductor, Inc., 2006. S OURCE MC9RS08KA, MC9RS08LA, and MC9RS08LE Microcontrollers Freescale Semiconductor, Inc. | www.freescale.com CIRCUIT CELLAR® • www.circuitcellar.com crossword2.qxp 2/5/2009 4:54 PM Page 71 CROSSWORD 1 2 3 4 5 6 7 8 9 10 11 12 13 14 15 16 17 18 19 20 2. 4. 7. 8. 11. 13. 14. 17. 19. 20. <B> … </B> Transforms DC to AC Seconds per cycle Helical Impedance Z Live current! Identifies wires 106 Bq Normal V x,y The answers are available at www.circuitcellar.com/crossword. Down 1. 3. 5. 6. 9. 10. 12. 15. 16. 18. The “3” in the data sample: [9, 2, 3, 3, 3, 3, 8, 6, 6, 6, 1, 1] CERN’s city The “O” in OLED Mass × acceleration Init Software added to a pr ogram to improve it ASCII: End of transmission The last color in the visible spectr um Converter to drop V Balanced/unbalanced March 2009 – Issue 224 Across 71 72.qxp 8/11/2008 2:02 PM Page 1 Embedded Single Board Computers High-End Performance with Embedded Ruggedness TS-7800 500 MHz ARM9 Unbrickable design 229 $ Low power - 4W@5V qty 100 128MB DDR RAM 269 $ 512MB high-speed (17MB/sec) onboard Flash qty 1 12K LUT programmable FPGA Internal PCI Bus, PC/104 connector shown w/ optional SD Cards 2 host USB 2.0 480 Mbps 3x faster and backward compatible with TS-72xx Gigabit ethernet 2 SD sockets 10 serial ports 110 GPIO 5 ADC (10-bit) 2 SATA ports Sleep mode uses 200 microamps Boots Linux in < 2 seconds Linux 2.6 and Debian by default Low Price, Low Power, High Reliability using Linux development tools 200 MHz ARM9 Power as low as 1/4 Watt 8 boards, over 2000 configurations TS-7200 shown with optional A/D converter, Compact Flash and RS-485 as low as $ Fanless, no heat sink SDRAM - up to 128MB 99 qty 100 129 $ Flash - up to 128MB onboard qty 1 10/100 Ethernet - up to 2 DIO lines - up to 55 2 USB ports COM ports- up to 10 SD card option VGA video LCD ready options include: Programmable FPGAs onboard temperature sensor, A/D Converter 8 channel 12 bit, Extended Temperature, Battery Backed Real Time Clock, USB Flash, USB WiFi Linux, Real Time extension, Debian Over 20 years in business Open Source Vision Never discontinued a product Engineers on Tech Support Custom configurations and designs w/ excellent pricing and turn-around time Most products stocked and available for next day shipping Design your solution with one of our engineers (480) 837-5200 73.qxp 8/11/2008 2:12 PM Page 1 Featured Products and PC/104 Peripherals TS-TPC-7390 200MHz ARM9 Touch Panel Computer Low Power, Industrial Quality Design Mountable aluminum frame 64MB SDRAM (128MB opt) 512MB Flash w/ Debian Linux Programmable FPGA- 5K LUT 7” Color TFT-LCD Touch-Screen 800x480 customizable video core $ 449 qty 1 Dedicated framebuffer- 8MB RAM Audio codec with speaker Boots Linux 2.6 in about 1 second Unbrickable, boots from SD or NAND Runs X Windows GUI applications Runs Eclipse IDE out-of-the-box TS-RELAY8 TS-ADC16 ADC, DAC and Digital I/O Eight Software Controlled Relays 8 SPDT relays Software controlled 16 16-bit ADCs Up to 277 VAC @ 5A 40mA draw per coil Up to 100Ksps (10us) Up to 30 VDC@ 5A I/O jumpers 1KB ADC RAM-FIFO $ 169 qty 1 4 ADC voltage ranges Prog. pacing clock $ 89 qty 1 Externally triggered 4 inputs, 1 output 4 12-bit DACs 4 16 bit counters see our see website our website for x86forSBCs, more peripherals boards and and option option details details Technologic Systems We use our stuff. Visit our TS-7800 powered website at www.embeddedARM.com ib-224.qxp 2/5/2009 I 11:38 AM Page 74 DEA BOX THE DIRECTORY OF PRODUCTS AND SERVICES AD FORMAT: Advertisers must furnish digital submission sheet and digital files that meet the specifications on the digital submission sh eet. ALL TEXT AND OTHER ELEMENTS MUST FIT WITHIN A 2 " x 3" FORMAT. Call for current rate and deadline information. E-mail adcopy@cir cuitcellar.com with your file and digital submission or send it to IDEA BOX, Cir cuit Cellar , 4 Park Street, V ernon, CT 06066. For more information call Shannon Barraclough at (860) 875-2199. The Vendor Directory at www.circuitcellar.com/vendor/ is your guide to a variety of engineering pr oducts and services. USB Add USB to your next project—it’s easier than you might think! v USB-FIFO up to 8 mbps v USB-UART up to 3 mbps v USB/Microcontroller boards pre-programmed with firmware v 2.4GHz ZigBee™ & 802.15.4 v RFID Reader/Writer Absolutely NO driver software development required! March 2009 – Issue 224 www.dlpdesign.com 74 CIRCUIT CELLAR® • www.circuitcellar.com 2/5/2009 11:39 AM Page 75 ARM7 MODULAR TOOLSET Add support for Atmel, NXP or STMicro’ ARM7 variants to Base Package to suit your requirements and budget C/C++ Code Wizards G Debugging G Simulation G G Advanced software tools since 1984 www.crossware.com [email protected] March 2009 – Issue 224 Tools for Embedded Development CROSSWARE ® ib-224.qxp www.circuitcellar.com • CIRCUIT CELLAR® 75 ib-224.qxp 2/5/2009 11:39 AM Page 76 Wireless Analog ! 4-channel analog input wireless module 433/868/915MHz. Low power, serial interface. Easy to configure. 24 bit ID to avoid cross-talk. 2 digital output. Unique stamp-sized, v low power multipoint an/dig input 400/928MHz Tx/Rx module. Transmits to 50 feet. Ideal for toys, loggers, mobile eqt. 24-bit security. Networkable for relative position tracking. EmbedRF Module $59 EmbedRF DevKit $299 1-888-7SAELIG [email protected] www.saelig.com Adapt9S12XDP512 Modular Prototyping System * Robotics and Mechatronics * Electronic Fuel Injection * Freescale 9S12XDP512 * RTOS-capable Starting at $125! Evaluate * Educate * Embed Program in Assembler, BASIC, C, and Forth March 2009 – Issue 224 www.TechnologicalArts.com 76 CIRCUIT CELLAR® • www.circuitcellar.com ib-224.qxp 2/5/2009 11:39 AM Page 77 /9 0D[6RQDU 8OWUDVRQLF5DQJLQJLV(= /90D[6RQDU3URGXFWV +LJK TXDOLW\ /RZFRVW /RZ SRZHU99P$ DYJ (DV\ LQWHUIDFLQJ 6HULDO SXOVH ZLGWKDQDORJ YROWDJH RXWSXWV 5HOLDEOH DQG VWDEOH UDQJH PHDVXUHPHQW 1R GHDG ]RQH /90D[6RQDU(= &KRLFHRIEHDP SDWWHUQV 7LQ\ VL]HFXELF LQFK /LJKWZHLJKWJUDPV /90D[6RQDU:5,3 ,QGXVWULDOSDFNDJLQJ :HDWKHU UHVLVWDQW 6WDQGDUGô´ILWWLQJ 4XDOLW\ QDUURZ EHDP ZZZPD[ERWL[FRP •Mechatronics and Robotics • Advanced 16-bit MCU • RTOS-capable Get started for as little as $29! SCI 32K Flash SPI Key Wakeup Ports Background Debug 8 ch. 10-bit A-to-D 16-bit Timer up to 6 channels PW PWM Program in Assembler, BASIC, C, and Forth www.NanoCore12.com www.circuitcellar.com • CIRCUIT CELLAR® March 2009 – Issue 224 CAN 2.0 A/B HCS12 CPU 2K RAM Vreg (3.3V to 5V) 77 2/5/2009 11:39 AM Page 78 March 2009 – Issue 224 ib-224.qxp 78 CIRCUIT CELLAR® • www.circuitcellar.com 79-advertiser's index.qxp 2/10/2009 10:44 AM Page 79 I NDEX OF ADVERTISERS Page The Index of Advertisers with links to their web sites is located at www.circuitcellar.com under the current issue. Page Page Page 75 AAG Electronica, LLC 20 ExpressPCB 32 AP Circuits 10 ezPCB 78 LinkSprite Technologies, Inc. 75 All Electronics Corp. 74 FDI-Future Designs, Inc. 24 19 Altium Ltd. 78 FlexiPanel Ltd. 76 Apex Embedded Systems 11 Front Panel Express LLC 25, 27 ARM 28 29 ARM 7 13, 76 Lemos International 78 Pulsar, Inc. 41, 48 Rabbit, A Digi International Brand Linx Technologies 76 Rabbit, A Digi International Brand Luminary Micro 76 Reach Technology, Inc. 77 MCC (Micro Computer Control) 76 Renesas Technology General Circuits 45 MachinePIER 49 RoboBusiness Expo 13 Grid Connect, Inc. 77 Maxbotix 76 Saelig Co. Atmel 39 HI-TECH Software LLC 78 microEngineering Labs, Inc. 12 Sealevel Systems 33 CWAV 69 HobbyLab LLC 57 CadSoft Computer, Inc. 34 Calao Systems 63 Comfile Technology, Inc. 1 75 Crossware Products, Inc. 75 Custom Computer Services, Inc. 74 5 2 47, 50 ICbank Inc. C2 77 IMAGEcraft 3 Mouser Electronics 9 SEGGER Microcontroller Systems LLC NetBurner 55 Sensors Expo & Conf. Noritake Co., Inc. 74 TAL Technologies C3 Tech Tools Imagineering, Inc. 37 Nurve Networks LLC 78 Ironwood Electronics 75 Ontrak Control Systems 72, 73 Technologic Systems 32, 34 JKmicrosystems, Inc. 77 PCBCore 76, 77 Technological Arts DLP Design 75 JKmicrosystems, Inc. 17 PCB-Pool 76 Tern, Inc. 69 DesignNotes 30 Jameco C4 Parallax, Inc. 75 Trace Systems, Inc. 11 EMAC, Inc. 37 Jeffrey Kerr, LLC 77 Phytec America LLC 74 Triangle Research Int’l, Inc. 42 ESC-West 58 Keil Software 74 Picofab Inc. 68 Trinity College Robot Contest 77 Earth Computer Technologies LPFK Laser & Electronics 78 Pioneer Hill Software 74 Vantec 48 Electronicstalk 37 Lakeview Research 65 Pololu Corp. 24 Elprotronic 77 Lawicel AB 45 PROPOX Sp. z o.o. P REVIEW 8 of April Issue 225 Theme: Embedded Programming Construct a USB GPIO Pod (Part 1): No Parallel Port, No Problem A TTENTION A DVERTISERS May Issue 226 Deadlines Space Close: Mar. 13 Material Close: Mar. 20 Robot Navigation and Control (Part 2): Software Development THE DARKER SIDE Time Domain Reflectometry: Detect, Measure, and Locate Impedance ABOVE THE GROUND PLANE Solar Data Capture: PCB Layout Woes, Inductor Design, and More FROM THE BENCH Programmable Robotics (Part 2): Application Development SILICON UPDATE ZStar Trek: A Healthy Mix of MCUs, Sensors, and Wireless Technology www.circuitcellar.com • CIRCUIT CELLAR® Theme Measurement & Sensors Bonus Distribution Sensors Expo Call Shannon Barraclough now to reserve your space! 860.875.2199 e-mail: [email protected] March 2009 – Issue 224 Digital Decoding: A Design for Decoding Periodic Signal Transmissions 79 Steve_224_Edit_Ver1.qxp 2/5/2009 1:38 PM Page 96 RIORITY PINTERRUPT by Steve Ciarcia, Founder and Editorial Dir ector Cloud Computing March 2009 – Issue 224 Y 80 ou know, a lot of what people are describing today as the future of the Internet sounds like déjà vu to me. Way back when, I remember having dumb terminals all over the place that time-shared the services of a remote-located mainframe computer. I loaded my data into programs that were batch processed on the central computer and then sent back to the terminals. While highly effective when it came to getting more computing power than a slide ruler, it was terribly ineffective when it came to time management, data privacy, and asset control. It’s no wonder why we all zealously jumped on the distributed processing bandwagon of personal computing. At least then we were in complete control, limited only by how much processing power we could jam in the box on our own desk. I call that progress. Unfortunately, technology has now progressed to the point where we seem to be heading in reverse again. By whatever lack of historical perspective, people are thinking that big service companies, shared software applications, and remote computing are better than local services and local control. This isn’t a rant. Personally, I see benefits and detriments on both sides of the argument. Specifically, I’m talking about cloud computing and its ramifications. While some use this term to describe virtual client servers on the Internet, I prefer the more accepted description that cloud computing is all the real-time software and subscription-based services that you use via the Internet. This includes things like Google Docs, virtual data storage, video viewing/posting services, Google Maps, etc., etc. It’s a long list and the “cloud” gets bigger every day. I attribute the move toward cloud computing as an addictive escalation in all the connectivity that everyone seems to be seeking. It’s not enough to just have a cell phone number where we can be reached any more. Now we have to have constant live downloads to steroid-stuffed communication devices designed to enhance every aspect of the things we see, touch, or do. Look at a subway map and all the schedule information suddenly streams from the cloud into our Apple iPhone. At the same time our GPS location goes out to the cloud along with “tweets” (i.e., posts on Twitter), text messages, and blog updates that make a private life everything but. And, unlike we skeptics, devotees of the new faith have no fear of completely trusting all the software services in the cloud. Of course, it doesn’t hurt that most of these applications are free but, at this point in its evolution, I wonder how many of these free services are really virtual heroin. ;-) The other side of the equation is that putting all your computing capability in assorted boxes is complex and expensive. When we only had a single desktop, it was less complex because we needed only a single software license for the operating system and programs we used. As we progressed to having a couple of desktops and two or more laptops per house (last count I had six total), the issue became the inordinate cost involved with all the single-platform licenses, software updates, and communication services needed to support the “farm.” Enriching Microsoft at every turn isn’t a crowd pleaser any more than my having to buy six copies of the same virus protection software every year. The attractiveness of the uncorrupted cloud concept is that people can supposedly use lower-function computers (i.e., cheaper) with perhaps an open-sourced OS and no single license-indigenous applications. Instead, each box would simply connect to web sites in the cloud (think virtual mainframes) and execute subscription or pay-by-use application software, as needed. Instead of purchasing schematic design programs or Microsoft PowerPoint for each computer, companies simply sign on to application resources and do everything online for pennies. This is nirvana for a medium-sized outfit facing the purchase of a couple hundred new desktops for its staff; but it is certainly a bummer if you live in Redmond, WA, and work for a company trying to think up new ways of peddling more copies of Microsoft Vista and Microsoft Office (grin). Good or bad, acceptance and extensive utilization of cloud computing in our future is as inevitable as multicore processors, because the more computer applications we exercise, and the more social connectivity we enjoy, the more everyone wants. I don’t see myself starting a MySpace page and Twittering readers between bites at lunch, but I do see the merits in being able to try many more software applications simply because using a virtual mainframe eliminates all the crash-and-burn terror of physically adding new software to an otherwise stable PC. The caution is that cloud computing is still a cute and cuddly concept in its infancy, but it can be easily monopolized or corrupted if we don’t look at history when guiding the future. Fanatical acceptance and hasty growth of cloud computing is being driven by an abundance of free and low-cost applications that, in my opinion, are all about market share. Beware that we may be trading one land-based monopoly for new monopolies in the cloud based on computing power and services (think Amazon and Google). I’ll be back. [email protected] CIRCUIT CELLAR® • www.circuitcellar.com C3.qxp 3/30/2007 1:38 PM Page 1 C4.qxp 1/28/2009 Mar09_CC-Robots.indd 1 2:30 PM Page 1 1/20/09 4:21 PM