1
Navigation software
Navitel Navigator
User manual
(For personal digital assistant)
The Join Stock Company "CNT", 2007. All rights reserved.
The contents of this Guide, as well as any attached demo materials, are the sole proprietorship of the Join Stock Company "CNT". Any commercial usage of this Guide may
be carried out only with written permission from the Join Stock Company "CNT". The
information in this document shall not be changed without prior notice given to the Join
Stock Company "CNT".
Contents
1.
2.
3.
4.
Introduction................................................................................5
General Info ...............................................................................5
Technical requirements.................................................................8
Navitel Navigator installation..........................................................9
4.1. Software installation................................................................................9
4.1.1. Windows Mobile installation ............................................................9
4.1.2. Android installation using DVD........................................................11
4.1.3. Android installation using Market ....................................................13
4.1.4. Symbian OS installation..................................................................15
4.2. Maps and components installation ..........................................................16
4.3. Navitel Navigator registration ..................................................................17
4.3.1. Software online registration ............................................................17
4.3.2 Web registration..............................................................................18
5. Interface....................................................................................20
5.1. “Drive” interface .....................................................................................20
5.2. “Map” interface ......................................................................................22
6. Pages........................................................................................24
6.1. “Map” page ............................................................................................24
6.1.1. Map scrolling .................................................................................24
6.1.2. Zooming ........................................................................................24
6.1.3. Map slope......................................................................................24
6.1.4. GPS-cursor ....................................................................................24
6.1.5. Compass .......................................................................................25
6.1.5.1. Map rotation..........................................................................25
6.1.5.2. Map view mode .....................................................................25
6.1.5.3. Day/Night view mode ............................................................25
6.1.6. Information pannel ........................................................................26
6.2. “Dashboard” page ..................................................................................26
6.2.1 Gauges list......................................................................................27
6.3. “Satellites” Page .....................................................................................32
6.4. “Route” Page..........................................................................................33
6.5. “Weather” page ......................................................................................34
7. Main Menu .................................................................................35
7.1. Find........................................................................................................35
7.2. Route .....................................................................................................35
7.2.1. Stop Route Guidance .....................................................................35
7.2.2. Go Next Via Point...........................................................................35
7.2.3. Demo route ...................................................................................36
7.2.4. Show route ....................................................................................36
7.2.5. Route properties ............................................................................36
7.3. Pages.....................................................................................................36
2
7.4. Information .............................................................................................37
7.5. Settings..................................................................................................38
7.5.1. Map...............................................................................................38
7.5.1.1. Map ......................................................................................38
7.5.1.2. Detail ....................................................................................39
7.5.1.3. Map rotation..........................................................................40
7.5.1.4. Visual Effects.........................................................................40
7.5.1.5. POI filter................................................................................40
7.5.1.6. Other maps ...........................................................................41
7.5.2. Navigation......................................................................................42
7.5.2.1. Vehicle ..................................................................................42
7.5.2.2. Route ....................................................................................42
7.5.2.3. Zoom settings .......................................................................43
7.5.2.4. Guidance...............................................................................43
7.5.2.5. Lock on road.........................................................................43
7.5.2.6. Reset position .......................................................................43
7.5.3. Regional settings ...........................................................................44
7.5.3.1 Language ...............................................................................44
7.5.3.2 Voice......................................................................................44
7.5.3.3 Keyboard ...............................................................................44
7.5.4. Online services ..............................................................................45
7.5.4.1. Application Update ................................................................45
7.5.4.2. Traffic jams ...........................................................................46
7.5.4.3. Navitel.Events ........................................................................46
7.5.4.4. Data Exchange ......................................................................46
7.5.4.5. Weather ................................................................................46
7.5.4.6. Online POI info ......................................................................47
7.5.5. Satellites ........................................................................................47
7.5.6. Interface settings ...........................................................................48
7.5.6.1. Skin ......................................................................................48
7.5.6.2. Interface................................................................................49
7.5.6.3. Hide elements .......................................................................50
7.5.6.4. Inertial list scrolling................................................................50
7.5.6.5. Exit confirmation....................................................................50
7.5.7. Device ...........................................................................................50
7.5.7.1. Sound ...................................................................................50
7.5.7.2. Screen orientation .................................................................50
7.5.7.3. Power control ........................................................................51
7.5.7.4. Clock settings .......................................................................51
7.5.7.5. Folders’ settings....................................................................51
7.5.8. Alerts .............................................................................................51
7.5.9. Track’s setting ...............................................................................52
3
7.5.9.1. Track record .........................................................................52
7.5.9.2. Track’s format .......................................................................52
7.5.9.3. Track’s folder ........................................................................52
7.5.9.4. Track visualization .................................................................52
7.5.10. Profiles ........................................................................................52
8. Functionality ...............................................................................53
8.1. Routes ...................................................................................................53
8.1.1. Autorouting ....................................................................................53
8.1.2. Autorouting using search................................................................53
8.1.3. Manual route creation ....................................................................54
8.1.4. Route editing .................................................................................54
8.1.5. Edit route waypoints.......................................................................55
8.1.6. Route properties ............................................................................55
8.2. Track......................................................................................................56
8.3. Waypoints...............................................................................................56
8.4. Traffic Jams ...........................................................................................58
8.5. Speed Cameras......................................................................................59
8.6. Search ...................................................................................................60
8.6.1. By Address ....................................................................................60
8.6.2. Nearest places...............................................................................61
8.6.3. “Waypoints” search ........................................................................62
8.6.4. “History” search .............................................................................62
8.6.5. “Favorites” search ..........................................................................63
8.6.6. Search “By coordinates” ...............................................................63
8.6.7. “Navitel.SMS” search .....................................................................63
8.6.8 Crossings search ............................................................................64
8.7. 3D-models..............................................................................................65
8.8. Navitel. SMS .........................................................................................65
8.9. Optional color schemes (Skins)...............................................................65
8.10 Navitel.Events ........................................................................................66
9. Troubleshooting ..........................................................................67
9.1 Problems and solutions............................................................................67
9.2. Running the program after a crash .........................................................69
10. Updating software and maps........................................................70
10.1. Updating Navitel Navigator ....................................................................70
10.2. Updating maps for Navitel Navigator .....................................................70
11. Glossary ..................................................................................71
4
1. Introduction
Navitel Navigator is a navigation software aimed at efficient search of the shortest route
on a map. Voice hints will allow you to navigate the route, not paying attention to the
display, and “Navitel. Traffic Jams” function will help you to overcome any formed traffic
jam on your way.
This document is the user's guide to the navigation program “Navitel Navigator”. It contains full information about the elements of the user interface, the basic functions of the
navigation program, and also the right order of user’s actions in performance of typical
operations.
2. General Info
GPS (Global Positioning System) is a satellite system for high-precision determination
of static and moving objects. To successfully use the navigation software based on GPS
technology, it is necessary to understand some peculiarities of this system.
GPS System also called NAVSTAR (NAVigation System using Timing And Ranging), is
based on the satellites moving around the Earth on orbital trajectories. 24 satellites provide 100 % serviceability of the system in any point of the globe, but cannot always provide maximum reception and good calculation of a position. Therefore, for increase of
accuracy of positioning and a reserve in case of failures, the greater numbers of satellites are maintained in orbit it is supported in a lot. The maximal possible number of
simultaneously working satellites in system NAVSTAR is limited to 32.
GPS is a passive system of navigation which allows to receive signals of satellites, however excludes the possibility of transfering a signal. The signal of GPS satellites has frequencies of 1.227 and 1.575 GHz. It means, that metal and wooden surfaces, some
kinds of plastic, concrete can block electromagnetic wave of such frequency. For this
reason it is impossible to catch satellites in a ferro-concrete building, for this purpose
it is necessary to change the location of the device to a more favourable for the reception of a signal.
Attention! The most precise results are got when the signal goes into an open area
from at least 4 satellites at one time. Satellites should be uniformly placed in the sky
and the navigator should be fixed.
The quality of position finding depends on that set of satellites which the device currently works with. If the receiver has an opportunity to choose the best signals from a
variety of accepted, it will have a positive effect on quality of definition of coordinates.
5
If the choice is not possible, accuracy of work will be difficult to predict.
After activating the GPS-receiver the navigating system starts preparing for launch.
Navigating messages transmitted from satellites contain two types of the data —
ephemeris and the almanac of satellites. The almanac contains parameters of an orbit
making possible to calculate an approximate location of the satellites but with rather big
error.
The almanac is stored in memory of the receiver and constantly updates, since each
satellite transfers the data of the almanac for the entire group of satellites. The
almanac's lifetime makes 2-3 months. Further, the size of the integrated error in calculations will be inadmissible.
Ephemeris data contains parameters which allow to calculate current location of the
satellites more precisely. Unlike the almanac, each of the satellites transfers only it's
own ephemeris. Ephemeris lifetime does not exceed 4-6 hours.
The received information on the ephemeris and the almanac data is constantly corrected. It occurs once a day (and more if necessary). The network of ground stations
receives the information from satellites and analyzes measurements similar to regular
users then compares it with main data followed by adjusting amendments calculation
and transferring them to the main station from which data transmission to satellites is
carried out.
Starting process time necessary for the navigating receiver to define the position after
activation depends on the initial information available in memory. There are several
modes :
• ”Cold start” — time, position, almanac and ephemeris are unknown. The possible
reason is the device being switched off during long time (more than 70 hours) or
his(its) moving in the switched off condition on the big distance. In this case it is
necessary for the device to load the new almanac and ephemeris. This process can
last for more than 20 minutes.
• ”Warm start” — position and ephemeris are unknown, time and the almanac are
known. The device begins data gathering about ephemeris then can carry out a fixing. Usually “Warm start” lasts for some minutes.
• ”Hot start” — the almanac, ephemeris are known, time and a position are known
with some mistakes. This is the fastest kind of system start and it is accessible if
the device was switched off for less than 4 hours. Last data is actual except for
small inaccuracies which the system eliminates in less than a minute.
6
Navitel Navigator is a navigation software developed for personal navigation devices
(PND), pocket PC and PDA working on OS Windows Mobile and equipped with the builtin or external GPS-receivers.
The Software allows loading detailed maps of cities and regions containing house numbers, street names, metro stations and other important information. Among other things,
the satellite navigation software supports voice guidance on a chosen route. The software is optimized for small PDA screen resolutions, it has fast map scaling and scrolling, as well as automatic switching between maps having various scales.
Advantages of the Navitel Navigator in comparison with other similar software:
1. Fast map scaling and scrolling;
2. Maps auto switching;
3. Possibility to choose map orientation — on a direction of movement, on a direction
of a route or on a direction to the north;
4. Fullscreen mode;
5. Apart from 2D map viewing mode, there is also the pseudo 3D mode, which supports three-dimensional image of road overpasses and significant objects of architecture;
6. Pop-up help;
7. Supports traffic jams information upload.
The primary functions of the program are: acquisition and display of current position on
map, automatic and manual route creation, various objects search options, calculation
and display of a plenty of the travelling information, display and record of a trajectory
of movement as a track and many other things.
7
3. Technical requirements
Device operating system:
1.
2.
3.
4.
5.
6.
7.
8.
iOS;
Windows Mobile 5.0;
Windows Mobile 6.0;
Windows Mobile 6.1;
Windows Mobile 6.5;
Android OS 1.5 or higher;
Symbian OS;
Samsung Bada OS.
RAM:
From 10 MB of operative memory (depends on the size of the loaded map).
Display:
1. Min. resolution: 240x240
2. Max. resolution: 1280x800
GLONASS/GPS-receivers:
1. NMEA-0183 protocol;
2. SiRF binary protocol;
3. Garmin protocol;
4. External receivers can be connected via serial port, USB, BlueTooth, CompactFlash,
SDIO
8
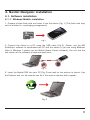
4. Navitel Navigator installation
4.1. Software installation
4.1.1. Windows Mobile installation
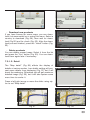
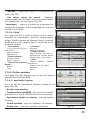
1. Prepare a blank flash card and insert it into the device (Fig. 1) (The flash card may
not be included in a packaging arrangement);
Fig. 1
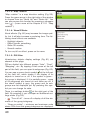
2. Connect the device to a PC using the USB cable (Fig. 2). Please, use the MS
ActiveSync software to synchronize the PC and the device (If you are using Windows
Vista or Windows 7 please use the Mobile Device Center software). You can find the
last version of the software at www.microsoft.com;
Fig. 2
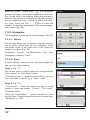
3. Insert the Navitel DVD into your PC (Fig. 3) and wait for the autorun to launch. Use
the Exlporer and run the autorun.exe file if the autorun window didn’t appear;
Fig. 3
9
4. Select the “Software installation” in the starting screen and press the “Windows
Mobile installation”. You can also use the Exlporer to open the \Install\Navitel
Navigator\WinMobile\NaviTel-setup_PPC-x.x.x.xxx.exe;
5. Next screen holds the list of the system requirements needed to install the software.
Press the “Next” button;
6. Next screen is the license agreement. Please read it and check the “I Agree” item if
you accept all the terms listed. Press “Next” to continue;
7. Select the components which you wish to install on your device. “Navitel Navigator”
is selected by default;
8. The components transfering process will begin;
9. After the components transfering process is finished you will see a message on the
screen. The installation will countinue on the device now;
10. You will be offered to select the install destination: “\Flash Disk” or “\Memory Card”
if your device model supports such. It is recomended to select the “\Memory Card”.
“\Memory Card” can be named differently. For example Storage card or SD-card;
11. The installation process will now begin;
12. Press the “Ok” button after the installation process is finished.
10
4.1.2. Android installation using DVD
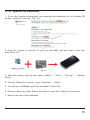
1. Go to the “Settings” —> “Applications” menu and check the “Unknown sources” item
(Fig. 4). This will allow to install the Navitel Navigator software on the device;
Fig. 4
2. Go to “Settings” — “Location” and check the “GPS satellites” item. This will allow the
usage of GPS satellites for possitioning apart from GSM base stations (Fig. 5)
Fig. 5
3. Connect your device to the PC using the USB-cable (Fig. 6);
Fig. 6
11
4. Insert the Navitel DVD into your PC DVD-rom (Fig. 7) and wait for the start window
to appear. If the start window didn’t appear, please use the Explorer to run the
autorun.exe file on the DVD (Fig. 19);
Fig. 7
5. Select the “Software Installation” in the installation window and select the “Andriod”
item. You can also use the Explorer to launch the Navitel-5.x.x.xxx.exe file in
“\Install\Navitel Navigator\Android\” catalog.
6. Please read the system requirements and press “Next” to copy the installation components to the device;
7. The installation process will begin on the device (Fig. 8). Press “Install”;
8. You will see information screen (Fig. 9) after the installation process is finished.
Press an “Open” button to launch the application, or a “Finish” one to close the window;
Fig. 8
12
Fig. 9
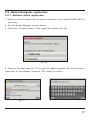
4.1.3. Android installation using Play Store
1. The Internet connection is required for this installation (GPRS, 3G, Wi-Fi or any
other). The installation file size is more than 10Mb so it’s recommended to use a Wi-Fi
connection.
2. Start the “Play Store” application from the device menu. (Fig. 10)
;
Fig. 10
3. Press the “Search” button and type “Navitel” in the appeared window. Select the
“Navitel Navigator” item from the found software. (Fig. 11);
Fig. 11
13
4. The window with an information about the program will appear. (Fig. 12). Learn it and
select the “Install” item;
Fig. 12
5. This window (Fig. 13) shows which of the system functions are used by the Navitel
Navigator. Press the “OK”button to continiue;
6. The download and install process will begin. You can control on them in the
“Downloads” menu in the “Market” application (Fig. 14).
Fig. 13
14
Fig. 14
4.1.4. Symbian OS installation
1. Go to http://navitel.su/download/ and download the installation file for Symbian OS
named “navitel_X.x.x.xxx.sis” (Fig. 15);
Fig. 15
2. Copy the “navitel_X.x.x.xxx.sis” to your SD (microSD) card and insert it into your
device (Fig. 16);
Fig. 16
3. Open the memory card on your device (“Menu” — “Tools” — “File mgr” — “Memory
Card”) ;
4. Find the “Navitel_X.x.x.xxx.sis”, press “Functions” — “Open”;
5. You will see a notification about the installation. Press “OK”;
6. Choose a place for install. Ensure, that there is more than 15Mb of a free space;
7. Wait for the end of the installation.
15
4.2. Maps and components installation
1. Select the “Maps installation” item in the installation screen or use the Exlporer to
open the DVD content;
2. Remove the memory card from the device and use a card-reader device connected
to a PC to access the memory card storage. You can also change the device connection method so it can be connected to a PC as a card-reader;
3. Copy the “NavitelContent” folder to the root catalog of the SD-card;
Note: “NavitelContent” folder holds:
•
•
•
•
•
•
•
License — folder with license files;
Maps — folder with map files;
Models — 3D models;
Tracks — exported routes;
Skins — optional skins;
Speedcams — speedcams file (speed bumps, police posts, etc.);
Voices — optional voice packages.
4. Return the memory card to the device if you used an external card-reader (Fig. 17);
Fig. 17
16
4.3. Navitel Navigator registration
4.3.1. Software online registration
1. Make sure that the device have an active connection to the Internet (GPRS, Wi-Fi or
any other);
2. Run the Navitel Navigator on your device;
3. Select the “Complete mode” in the registration window (Fig. 18);
Fig. 18
4. Press on the blank field (Fig. 19) to open the digital keyboard (Fig. 20) and enter a
license key for the software. Press the “Ok” button to confirm;
Fig. 19
Fig. 20
17
4.3.2 Web registration
1. Please, register at the http://navitel.su/ (Fig. 21);
Fig. 21
2. Enter the site using your login and password (Fig. 22);
Fig. 22
18
3. Enter the “Activate a key” section, select the “Activate software key” option, enter the
device’s name, ID and a license key for the Navitel Navigator (Fig. 23);
Fig. 23
4. Press the “Activate” button;
5. Enter the “My Devices” section and download the activation file (Fig. 24);
Fig. 24
6. Copy the “Navitel Activation Key.txt” file to the \NavitelContent\License\ folder on
your device’s flash card.
19
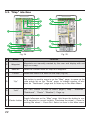
5. Interface
5.1. “Drive” interface
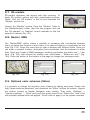
This figure shows all the interface elements.
Device used for this example is not default,
recommended or advertized. Model you use
and it's screen orientation may be different
from this figure but element's functionality
will remain the same.
Fig. 23
#
Name
Function
1
Next maneuver
A next maneuver on the way and a distance up to it. Press this icon
to open a route options menu
2
Compass
Press the compass icon to edit the map rotation mode, the map
view and the day/night mode.
3
Sound
4
Information
panels
5
6
20
Press this button to open the sound effects menu.
Displays a time until the end of the trip, a total route length, and
an arrival time.
When you approach a speed camera with visual warnings activated
Speedcam win- the window will appear in upper right corner of the screen. This
dow
window shows you permitted speed and distance left. Press the
window to turn On/Off speed exceeding sound warnings.
Route
A route you are currently navigating displays as a wide blue line.
#
Name
Function
7
Map slope
Press "Up"/"Down" to slope the map. Available if the scale is
between 5 and 300 m only.
8
Search
Press this button to enter the search menu and to find a specific
address or object (you can find more info about Search in
"Functionality" section).
9
Information
panel
Shows the name of the street you are currently driving along.
Available only if GPS/GLONASS connection is established. If there
is no street name, the direction will be shown.
10
MENU
Press to enter the Main Menu.
11
Scale
Map current scale.
12
Zoom Out
Decrease a map scale.
13
Zoom In
Increase a map scale.
Press this button to place an event message on the map. Learn
14 Navitel.Events more at the chapter 8.10 Navitel.Events for an additional information.
15
GPS-cursor
16
Autoscale
17
If GPS connection is established displays your current location.
If you zoom in/out with "Autozoom" function activated, this function
will be deactivated for a period according to settings. Press this
button to activate the "Autozoom" function manually.
You can see the green arrow at the top of the screen if the map
Return to curwas moved relative to your position. Press it to return view to your
rent location
current location.
18
GPS
GPS connection button. Green icon - connection enabled, white
icon - function disabled. Green icon also has a dot of different
color: red - no connection, yellow - poor connection, green - connection established.
19
Battery
Icon displays a battery life. Press it to open a window with a full
information about a battery life and remaining memory.
20
Speed
Current speed. Available with a GPS connection established only.
21
Information
panel
Street name followed by the next maneuver.
21
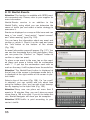
5.2. “Map” interface
Fig. 24
Fig. 25
#
Name
Function
22
Waypoint
Waypoints are manually created by the user and display with red
flags on a map.
23
“Save WP”
Saves the current mark on map as a waypoint.
24
“Cursor”
Shows the menu of a mark on the map (Fig.54)
25
“Up”
This button is used to zoom in on the "Map" page, to move up the
route points list on the "Route" page, to change number of windows on "Dashboard" page and to move up in the Main Menu.
26
“Left”
The "Left" button is used to switch pages ("Map", "Satellites",
"Dashboard", "Route", “Weather”). Page up.
Toggle fullscreen on the “Map” page. Hold down the botton to cre27 Center button ate a waypoint in current location. Clockwise the wheel — Zoom In,
backing the wheel — Zoom Out. Select an item in the Main menu.
22
#
Name
Function
28
“Down”
This button is used to zoom out on the "Map" page, to move down
the route points list on the "Route" page, to changethe number of
the windows on the "Dashboard" page and to move down in the
Main Menu.
29
“Right”
"Right" button is used to switch pages ("Map", "Route",
"Dashboard", "Satellites", “Weather”). Page down.
30
Mark on the
map
Touch the screen with a stylus to set a mark. You can save this
mark as a waypoint, add it to the route or see an object's characteristics on which the mark was set on.
31
Track record. Green icon — track record enabled, white icon —
Track record function disabled. You can find more info about track recording in
"Functionality" section of this manual.
32
Traffic Jams
Press this icon to set up the "Navitel.Traffic Jams" function.
33
Navitel.SMS
This button is used to read/send SMS-messages and to work with
coordinates given there. Figure near the icon displays a number of
unread messages.
34
Software
date
up-
This button shows if any updates are available.
35 Maps update
Allows you to enter the maps update menu.
36
“Go To”
“Mark on the map” becomes the end point of the route.
37
Insert
“Mark on the map” becomes the middle point of the route
38
“Add”
“Mark on the map” becomes the end point of the route, whereas
previous end point becomes middle point.
39
Object of inter- Different objects on the map (traffic lights, metro stations, petrol
est
stations etc.).
40
Back
41
42
Info
Back to map
43
“Start”
Depends on way you got to this screen (Fig. 25), returns back to
“Map” screen or to the find menu.
Info about a current “Mark on the map” position. Tap it to see more.
Returns to the “Map” page
“Mark on the map” becomes the start point of the route. You
should turn off your GPS/GLOANASS-reciever.
Warning!: Set of buttons that you see on display depends on the interface settings. To
edit this settings, go to the Main Menu — Settings — Interface. You can find more information about interface settings in the "Main Menu" section.
23
6. Pages
6.1. “Map” page
The "Map" page (Fig. 26) is used to display your
current location on a map and carries most of the
road information. You can create and edit routes,
waypoints, search for objects and many other things.
6.1.1. Map scrolling
Press and hold it in any point on a map and drag the
map to any side of screen. After this a new zone of
the map will be revealed.
Fig. 26
6.1.2. Zooming
You can zoom in with the “ “ key and zoom out with the “ “ key. The scale is set to
5 meters with maximum zoom and is set to 2000 km, with minimum zoom. It is possible to set the scale to 5 m, 8 m, 12 m, 20 m, 30 m, 50 m, 80 m, 120 m, 200 m, 300
m, 500 m, 800 m, 1,2 km, 2 km, 3 km, 5 km, 8 km, 12 km, 20 km, 30 km, 50 km, 80
km, 120 km, 200 km, 300 km, 500 km, 800 km, 1200 km and 2000 km. Press the
“ “/” “ key ones to change the scale to the next/previous value. You can also hold
down this keys to change the scale quickly.
6.1.3. Map slope
Press the “ “/” “ arrows to change the map slope. The “ “ arrow increases the
slope. When map reaches the maximum slope it switches to pseudo-3D mode which
works only on scales from 5 m to 300 m. The “ “ arrow decreases the slope. A possible map slope depends on its scale — the closer the map is, the more slope you can
get.
6.1.4. GPS-cursor
GPS-cursor displays on map with GPS-connection established and shows your current
location on map. Cursor can take 1 of 2 states: "Moving" ( ), or "Stop” — ( ). Green
arrow points at current direction. If movement speed is less than 2,5 km/h cursor
changes to green circle. And if GPS-connection is missing or "Off", the GPS-cursor will
not display.
24
6.1.5. Compass
Press the button to open the map settings menu (Fig.
27).
6.1.5.1. Map rotation
•
•
•
Route rotation;
Guidance rotation;
North up (Static mode).
Fig. 27
6.1.5.2. Map view mode
•
•
3D view mode;
2D view mode.
Note: 3D mode is inaccessible if the scale is more than 300 m.
6.1.5.3. Day/Night view mode
This option allows you to switch between day and night view modes. Use night view
mode when it is dark. It will protect your eyes from tiredness and make the device more
comfortable to maintain. You can set this option to one of three positions.
•
Day view mode (Fig. 28);
•
Night view mode (Fig. 29);
•
Automatic mode allows the device to switch between day and night view modes
automatically subject to sunrise and sunset time in your region and when entering a
tunnel.
Fig. 28
Fig. 29
25
6.1.6. Information pannel
There are several information panels on the “Map”
page. The bottom panel displays a current street
name or a driving direction (Fig. 30). The top panel
shows a street name followed by the next maneuver
(Fig. 31).
Note: a control panel or an information screen can
occupy the bottom of the screen. To hide just put a
mark anywhere on a map or press the map button.
While you navigate a route you can see an information panel in the left side of the screen displaying a
next maneuver icon, calculated travel time, route
overall length and destination achievement time.
Press the next maneuver icon to display a route settings menu.
Fig. 30
Fig. 31
Note: The set of buttons in this menu depends on a
demo mode: is it on or off? If you press the maneuver icon with demo-mode turned Off, you will see a
Fig. 32 (a). Otherwise you will see a Fig. 32 (b).
More information on working with routes can be
found in “Functionality” section of this manual.
Fig. 32 (a)
6.2. “Dashboard” page
A “Dashboard page” (Fig. 33) is used to display various navigational info. It consists of a number of windows consisted of different types of information.
Windows layout depends on a screen type and orientation. You can control a windows display mode by
moving joystick “Up”/”Down”. The “Previous page”
button (“Route page”) is located in the bottom left
side of the screen and the “Map” page button is in
the bottom right corner.
Fig. 32 (b)
Fig. 33
26
Choose an item and press on it. The “Dashboard”
page settings menu will appear on the screen (Fig.
34):
• Select gauge — select a gauge from the list.
New gauge will replace the one you selected to
an open settings menu. Gauges are separated
into groups to ease the search. Detailed info on
the each gauge can be found in the “Gauge list”
Fig. 34
table;
• Reset gauge — resets the current gauge. System will demand an acknowledge;
• Reset all gauges — reset all the gauges. System will demand an acknowledge;
• Default gauges — apply a default set of gauges. System will demand an acknowledge.
• Big/Small dashboard — Each gauge increases/decreases in size at the cost of
an overall number of the gauges on the screen. System automatically chooses the
most common gauges to display, but you can create a set manually.
6.2.1 Gauges list
Name
Function
1. Trip computer 1
1.1. Stopping time
1.2. Moving time
Overall number of stops made since last trip computer reset.
Overall moving time since last trip computer reset.
1.3. Measurement time
Overall measurement time since last trip computer reset.
1.4. Trip Odometer
Distance passed since last trip computer reset.
1.5. Overall Av Spd
Avarage speed including all the measurement time period
since last trip computer reset.
1.6. Moving Av Spd
Avarage speed including only movement time since last trip
computer reset.
2.1. Stopping time. (2)
Overall number of stops made since last trip computer reset.
2. Trip computer 2
2.2. Moving time (2)
Overall moving time since last trip computer reset.
2.3. Measurement time (2) Overall measurement time since last trip computer reset.
2.4. Trip Odometer (2)
Distance passed since last trip computer reset.
2.5. Overall Av Spd (2)
Avarage speed including all the measurement time period
since last trip computer reset.
2.6. Moving Av Spd (2)
Avarage speed including only movement time since last trip
computer reset.
27
Name
3.1. Max Descent
3.2. Max Ascent
3.3. Max speed
Function
3. Max values
Maximal descent speed measured since last gauge reset
Maximal ascent speed measured since last gauge reset
Maximal speed measured since last gauge reset
3.4. Min Altitude
Minimal altitude measured since last gauge reset
3.5. Max Altitude
3.6. Odometer
4.1. 5 s Ave.Speed
4.2. Bearing
Maximal altitude measured since last gauge reset
Overall distance travelled (unresetable gauge)
4. Navigation
Average moving speed for the last 5 seconds
Next waypoint azimuth relative to current location
4.3. Waypoint Final
Final waypoint name
4.4. Waypoint Next
Next waypoint name
4.5. To final point
4.6. To the next
point
4.7. ETA Current
Distance between final waypoint and current location
4.8. ETE Final
Final waypoint moving time estimation
4.9. ETE Current
Next waypoint moving time estimation
4.10.
4.11.
4.12.
4.13.
4.14.
4.15.
4.16.
Final waypoint arrival time estimation
Next maneuver on active route and distance left
Nearest waypoint pointer and distance to it
Current location time zone
Next waypoint approaching speed
Sunset time for current location
Sunrise time for current location
5. GPS data
Greenwich GPS data
Greenwich GPS time
Formed date according to GPS and recalculated to local time
Formed time according to GPS and recalculated to local time
Comparative moving speed
WGS-84 longitude (or any other datum GPS-receiver works with)
WGS-84 latitude (or any other datum GPS-receiver works with)
Comparative moving direction azimuth. Magnetic azimuth if using
magnetic compass and NMEA-0183 protocol.
5.1.
5.2.
5.3.
5.4.
5.5.
5.6.
5.7.
5.8.
28
ETA Final
Next Turn
Pointer
Time zone
VMG
Sunset
Sunrise
Date GMT
Time GMT
Date
Time of day
Speed
Longitude
Latitude
Heading
Distance between next waypoint and current location
Next waypoint arrival time estimation
Name
6.1. Vertical Speed
6.2. Climb angle
6.3. Glide Ratio
6.4. Height of Geoid
6.5. Altitude
Function
6. Altitude
Current vertical speed
Angle between current driving direction and horizontal level
Horizontal speed comparative to vertical speed. Available
only if using Garmin and SiRF protocols.
8.1. DGPS station
Geoid’s height (average sea level) above WGS84 ellipsoid
Altitude above geoid (above sea level)
7. GPS data precision
Vertical coordinate precision with 95% probability. Available
only if using Garmin protocol
Vertical coordinates precision deterioration factor reflecting
geometric satellites configuration. Value exceeding 10 means
low precision. Available only if using NMEA-0183
Magnetic Variation — difference between true meridian
(north direction) and magnetic. Available only if using NMEA0183 protocol
Number of satellites used during last position determination
Horizontal coordinates precision, 95% probability. Available
only on Garmin devices.
Horizontal coordinates precision deterioration factor reflecting geometric satellites configuration. Value exceeding 10
means low precision. Available only if using NMEA-0183
Coordinates determination method – 3D (all coordinates are
known), 2D (only horizontal coordinates are known), differential, etc.
8. DGPS Data
Number of station used to make differential correction data
8.2. DGPS age
Time passed from last received differential correction data
7.1. Vertical EPE
7.2. VDOP
7.3. Magnetic Variation
7.4. Used Satellites
7.5. EPE
7.6. HDOP
7.7. GPS Fix Quality
9.1. Area
10.1. Temperature
10.2. Depth
9. Area
Figure area consisting of motion path and a section, connecting start and end points.
10. Sonar data
Water temperature. Available only if NMEA-0183 protocol
compatible temperature sensor is connected
Depth. Available only if NMEA-0183 protocol compatible
sonar is connected
29
Name
Function
11. Map
11.1. Rendering 3D
TIme spent for rendering 3D models
11.2. Indexation
Atlas last loaded indexation time
11.3. Check atlas time
Time spent to check atlas integrity
11.4. First element search
Time spent to find first object from “Nearest places”
11.5. First element search
Time spent to find first object “City”
(city)
11.6. First element search
Time spent to find first object “Street”
(street)
11.7. First element search
Time spent to find first object “Building”
(building)
Time spent to find nearest object on a map to display
11.8. Map infotip
pop-up help window after pressing it using stylus
11.9. Maps in Cache
Current number of maps loaded in cache. This value
affects on consumable memory
11.10. Map Zoom Level
Map detalization level (0—maximum detalization)
11.11. File name
Map file displaying at the moment. If several map files are
in use, only one of them will be displayed in this gauge
11.12. Map Rendering
Number of maps rendering on the screen
11.13. Blocks
Number of rendered blocks
11.14. Labels in objects
Number of labels on the map after rendering
11.15. Points in objects
Number of points in objects rendered on a map
11.16. Objects
Number of points/polylines/polygons appeared on a
screen after last rendering
11.17.
11.18.
11.19.
11.20.
11.21.
Text redraw time
Label redraw time calculation
Time spent on last route rendering
Time spent on last waypoints rendering
Time spent on last track rendering
Text redraw
Label redraw
Routes Rendering
Wpts Rendering
Trk Rendering
11.19. Jams Draw.
11.20. Map Rendering
11.21. Map Opening
11.22. Map Covering
30
Time spent on last traffic jams rendering
Time spent on last map rendering. If the value exceeds 1
second, the special map optimization is required.
Map opening time
Current map and region match time
Name
12.1. Routing
12.2. Redraw
12.3. Data Failures
12.4. Battery
12.5. Free Memory
12.6. Lock on Road
12.7. Initialization
12.8. CPU Usage
12.9. Clock Fix-ups
12.10. Clock Drift
12.11. Kalman
12.12. Current Phone Cell
13.1. Temperature
13.2. Pressure
13.3. Wind
13.4. Cloudiness
13.5. Weather forecast+1 day
13.6. Weather forecast+2 day
13.7. Weather forecast+3 day
13.3. Weather forecast+4 day
13.1. Total.All
13.2. Outgoing. All
13.3. Incoming. Total
13.4. Total. Current
13.5. Outcoming. Current
13.6. Incoming. Current
Function
12. System
Time spent on autorouting
Image redraw time
Number of failures during GPS-data receiving. If this value
is increasing, poor electrical contact may have occured
Main battery charge (value determined by operational
system)
Amount of RAM available to run aplications.
Time spent on finding an anchor point to lock on road
Program loading time
Amout of CPU resourses involved in runing process
System time adjustment counter with GPS time
Current system time deviation
Kalman filter working time (used to boost position finding
precision)
Code of current GSM cell. It is used for netmonitoring and
consists of MCC (Mobile Country Code), MNC (Mobile
Network Code), LAC (Local Area Code) and CELL ID.
13. Weather
Current temperature
Current pressure
Wind speed and direction
Current precipitation
Weather forecast for tomorrow
Weather forecast for the day after tomorrow
Weather forecast for 3-rd day
Weather forecast for 4-rd day
13. Internet traffic
Overall internet traffic from the first program initialization
Outgoing internet traffic from the first program initialization
Incoming internet traffic from the first program initialization
Overall internet traffic from the current program initialization
Outgoing internet traffic from the current program initialization
Incoming internet traffic from the current program initialization
31
6.3. “Satellites” Page
A “Satellites” page (Fig. 35) is used to display
GPS/GLONASS signal status, number of satellites
and their position. Schematic sky map with directions
is in the upper left corner of the screen.
Note: GLONASS receiver is necessary to show
GLONASS signal status.
Hemisphere center corresponds with zenith and cirFig. 35
cumference – with horizon line. If GPS-connection is
enabled, satellites are displayed on the hemisphere as green and yellow icons. Green
color means higher quality than yellow. You can see current data transfer protocol and
COM-port used under the hemisphere.
At the bottom of the page there is a graphical scheme with information on satellites.
Signal strength is displayed with green and yellow columns with personal satellite number under each column. The higher the column is, the stronger signal is being received
by this satellite.
In the right side of the screen you can see some useful information:
• Latitude and longitude.
• Number of satellites used. This value is determined by GPS-receiver. Only 12 satellites can be used at the same time.
• Coordinates determination method.
There are three buttons at the bottom of the page. Green arrow – move to previous
page (“Dashboard” page), central button – GPS settings menu, and globe icon – move
to “Map” page.
If Navitel Navigator is minimized, Navitel plug-in for “Today” screen displays GPS-connection status. Yellow icon means GPS-connection is established, but position is not
determined. Green icon – GPS-connection established and position is known.
Note: this function is avaliable on Windows Mobile-based devices only if it’s on and supported.
Note: to activate this icon, press “Start” — “Settings” — “Today” — “Element” and check
“Navitel Today” item. Press “Ok” to apply changes made. For more information about
“Today” function, please refer to user guide supported with your device..
32
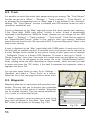
6.4. “Route” Page
The page (Fig. 36) is available with active route only. It shows all the route’s maneuvers.
Detailed information about the next maneuver is at the top of the page. You can see a
list of maneuvers with destination and street names below it. Also, there are 4 gauges in
the “Next maneuver” information window. The default gauges are: ETA Final, ETE Final,
To Final Point and Speed. You can select another gauge by pressing any gauge to open
a popup menu (Fig. 37):
• Select gauge — select a gauge from list. New gauge will replace the one you selected to open settings menu. Gauges are separated into groups to ease the search. A
detailed info on each gauge can be found in “Gauge list” table;
• Reset gauge — reset current gauge. System will demand an acknowledge.
• Reset all gauges — reset all gauges. System will demand an acknowledge.
• Default gauges — apply a default set of gauges. System will demand an acknowledge;
More information on using gauges you can find in the 9.2. “Dashboard page” section.
Fig. 36
Fig. 37
Press the current maneuver icon in the top left side
of the screen to enter route settings menu. The set
of buttons in this menu depends on demo: is it on or
off? If you press the maneuver icon with demo-mode
turned On, you will see Fig. 38 (a). Otherwise you will
see Fig. 38 (b). Followed functions are presented in
this menu:
•
Stop Route Guidance;
•
Demo route;
•
Go Next Via Point;
•
Show route;
•
Maneuvers;
•
Settings.
Note: detailed information on working with this menu
can be found in the 8.1. “Routes” section.
Fig. 38 (a)
Fig. 38 (b)
33
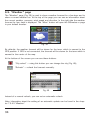
6.5. “Weather” page
The “Weather” page (Fig. 39) is used to show a weather forecast for a few days and to
show a current weather too. At the top of the page you can see an information about
the current weather, pressure, wind speed and direction. In the right side the weather
forecast for four days is displayed. The “More” button will open the GISmeteo.ru page
in your default browser.
Fig. 39
By defaults, the weather forecast will be shown for the town, which is nearest to the
GPS position. If GPS is not connected, the forecast will be shown for the town which is
nearest to the center of the map.
At the bottom of the screen you can see these buttons:
“City select” — using this button you can change the city (Fig. 40);
“Refresh” — refresh the forecast manually.
Fig. 40
Instead of a manual refresh, you can set an automatic refresh.
Note: information about the setting of an automatic update can be found in the chapter 7.5.4.5 “Weather”.
34
7. Main Menu
You can find the Main Menu icon ( ) in the bottom
right corner of the “Map” and “Route” pages. Press
it to open system main menu and carry out any
changes or see information you require. In the bottom of every menu page you can find 2 buttons:
green arrow ( ) – return to previous menu page,
globe icon ( ) – move to the “Map” page (Fig. 41).
Fig. 41
7.1. Find
This menu item is used to find different objects on the map. A detailed information can
be found in the chapter 8.6 “Search”.
7.2. Route
This menu item is used to manage active route and
waypoints. Press it to enter the route management
screen with a set of buttons which depends on active
route presence and demo-route mode status.
If you press a “Route” menu item with an absent
route on a map, a menu will appear with “Route
properties” function available only (Fig. 42 (a)).
However, you may import a route and work with it.
Fig. 42 (a)
If you press a “Route” menu item with a demo-route
mode turned off, all the functions will be available in
the opened window (Fig. 42 (b)).
If you press a “Route” menu item with a demo-route
mode turned off, the “Demo route” button will disappear, while the “Stop Route Guidance” will change to
the “Stop demo” – (Fig. 42 (c)).
7.2.1. Stop Route Guidance
Fig. 42 (b)
Press this button to stop the active route guidance.
Also it will disappear from the map;
7.2.2. Go Next Via Point
Press this button to navigate to the next point if you
missed a current point or decided not to visit it. This
menu item us available with active route only.
Fig. 42 (c)
35
7.2.3. Demo route
This menu item is available with a GPS-connection turned off only. Press it to activate
the demo mode. It may help you to reveal all the unfavourable and dangerous route
sections and to change the route if needed.
7.2.4. Show route
Press this button to show a full route, including a start, a finish and all middle points.
The scale will be changed, so you can see the full route.
7.2.5. Route properties
All the waypoints in an active route list with turns and intermediate waypoints filters are
showed in this menu. Also, it is possible to import, export or reroute using this menu.
Note: for more information on track import and working with route please refer to the
“Functionality” section of this manual.
7.3. Pages
Use a “Pages” menu item to select one of five main system pages (Fig. 43):
Fig. 43
You can find a detailed information on each of this pages in the “System pages” section.
Note: in the page display mode the “Map” page is showed first, then the “Route”,
“Dushboard” and “Satellites” pages are displayed. Press the green arrow ( ) at the bottom of the screen see previous page in the order. So, if you the press green arrow on
the “Satellites” page you will move to the “Dashboard” page etc.
36
7.4. Information
Use the “Information” page to see a various system data. This menu consists of 3 items
(Fig. 44):
•
“About” — this page holds information on the
software version, license key, device serial number,
technical support telephone number and “Navitel”
company web site (Fig. 45 (a)).
•
“About Map” — this page shows path to file currently being used, map name and its creation data,
and copyrights (Fig. 45 (b)).
Fig. 44
•
“Copyright” — list of rightholders of all the
terms used (Fig. 45 (c)).
•
“Map activation” — you can activate any additional map using this page (Fig. 45
(d));
Fig. 45 (a)
Fig. 45 (b)
Fig. 45 (c)
Fig. 45 (d)
37
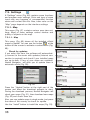
7.5. Settings
A “Settings” menu (Fig. 46) contains some functions
and program main settings. Color and type of some
icons may vary because of corresponded function
status and current Skin-file. Also, icons color on the
“Map” page depends on the interface settings.
7.5.1. Map
Fig. 46
This menu (Fig. 47) contains various map view settings. Most of these settings control number and
quality of objects on the map.
7.5.1.1. Map
This menu (Fig. 48) shows all the installed official
maps by Navitel. You can use the button
at the
bottom of the screen to activate a context menu (Fig.
49):
Fig. 47
• Check for updates
If you select this item, the software will automatically connect to the server with updates (Internet connection is required) and check if your installed maps
are up-to-date. If any of your maps are outdated,
Navitel Navigator will offer you to update them in
automatic mode (Fig. 50).
Fig. 48
Fig. 49
Press the “Update” button at the right part of the
screen and allow the download process to start.
During the download process, Navitel Navigator will
check your maps (Fig. 51), then download new maps
(Fig. 52) and check them too.
Fig. 50
Also, you can update maps in single mode: just press
the name of the country to check for update.
Use the “Install” button to install the maps (Fig. 53).
38
Fig. 51
Fig. 52
Fig. 53
• Download new products
If you have license for some maps, you can download it at www.navitel.su or using this menu. Select a
country to download (Fig. 54), then wait for download (Fig.52) and for check (Fig. 52). After the download process finished, press the “Install” button (Fig.
53).
Fig. 54
• Delete products
You can delete unused maps. Select it from the list
and press the “Yes” button (Fig. 55). You can download them again later if necessary.
7.5.1.2. Detail
The “Map detail” (Fig. 56) affects the display of
details at various scales. Low details setting will prevent some details from displaying (Fig. 57) but it will
boost the rendering. Otherwise you will get maximum
detailed image (Fig. 58), but it will take system some
more time to render it.
Fig. 55
Press a left/right arrow or move the slider using stylus to set “Map detail”
Fig. 56
Fig. 57
Fig. 58
39
7.5.1.3. Map rotation
“Map rotation” is a map direction setting (Fig. 59).
Press the green arrow in the right side of the window
to choose from tne “North Up” and “Route Up”. You
can also access this function by pressing a compass
icon ( ). (Learn more at the chapter 6.1.5.1 “Map
rotation”).
Fig. 59
7.5.1.4. Visual Effects
Visual effects (Fig. 60) may increase the image quality, but it will also increase a rendering time. The following visual effects are available:
•
•
•
•
Highlight objects;
Object border smoothing;
Show 3D models;
Smooth motion.
Fig. 60
To turn on/off an effect, press on its name.
7.5.1.5. POI filter
Infrastucture objects display settings (Fig. 61) are
showed at this page.
POI are divided into different groups: “Auto”, “Food”,
“Shopping”, etc. By tapping a blue arrow at the left
part of the field, you can open its subgroups (Fig. 62).
You can see a green check symbol
at the left part
of the field too, which shows if the display of its
objects is turned on or off. If the symbol is green the group is displayed, if it is partially green - some
of its subgroups are turned on and some are off. If
the check symbol is grey, the group and its subgroups are not displayed yet. By pressing this symbol you can change its state.
Fig. 61
Fig. 62
There is a settings button
at the right part of the
field. By pressing it you can open an additional settings menu (Fig. 63).
•
“Turn off all” - turns off a display of all the elements of the group/subgroup.
• “Seen on scales” — minimum and maximum scale
where POIs from this group/subgroup are displayed.
40
Fig. 63
• “Labels seen on scales” (Fig. 64) — if you check a “Show POI names” item, you can
set a maximum scale of displaying POI name, not its icon.
•
“Restore defaults” restores group/subgroup
settings to defaults. If you press this button, a popup
will appear. Press the “Yes” (
) button to change
settings or “No” (
) to cancel.
Using the “All types” group you can set all the POI
display settings. This filters works like a limiter: for
example, you can turn of display of the names of all
the POI, but if you want to turn them all on - you
should check it in every group and subgroup.
Fig. 64
7.5.1.6. Other maps
Atlas is a set of maps and one of the main elements
of the system (Fig. 65). Press this menu item to open
an atlas management window where you can edit
current set of maps or create a new one. Also you
can see its name, directory and number of maps in
existing atlas.
Fig. 65
To edit an atlas, press its name field and the following buttons will appear (Fig. 66):
•
Select — if you have several Atlases, you can
select one of them. Press this button to apply selected atlas for system usage.
•
Reindex — after editing an atlas (adding/deleting map-files, for example) press this button to reindex it and apply changes.
•
Delete — delete the selected atlas.
•
Cancel — close menu.
Fig. 66
If an atlas is missing, you should add it. Please press
the button in the bottom of the screen ( ) and a
search menu will appear (Fig. 67). First, select a root
folder on your device by pressing the green arrow on
Fig. 67
the top of the screen. Then lay a path to an atlas
folder with set of maps you need: select a catalog and press “Enter” (
). When you
reach the desired folder, press its name field and select the “Create Atlas” ( ) item.
Press an “Up” button ( ) to get back to previous catalog. Press the “Cancel” ( ) button to close this window.
41
When you press “Create Atlas” ( ), the indexation
process will begin. Its duration depends on the number of map files in the catalog. When the process is
finished, you will see a window (Fig. 68) with information on indexation time, number of maps and directory path. Press the “Ok” ( ) button to close the
window. A new atlas will appear in the atlas management menu (Fig. 65).
Fig. 68
7.5.2. Navigation
The navigation system and a route settings (Fig. 69).
7.5.2.1. Vehicle
The function allows you to optimize a system according to vehicle being used for the navigation. Press
the green arrow in the right side of the screen to
choose an option (Fig. 70):
Fig. 69
Pedestrian; Bicycle; Car/Motorcycle; Taxi; Bus;
Emergency; Delivery; Truck.
7.5.2.2. Route
A route settings: using the two following pages you
can set your route options:
Page 1 (Fig. 71):
Fig. 70
The “Route style” is used to select a routing method:
“Use routing” or “Use direct routes”.
“Calculation style” — guided by this setting, the system calculates a “Quick” or a “Short” route.
Page 2 (Fig. 72)
“Try to avoid” – check the items you want to avoid
during a route calculation: “U-turns”, “Toll roads”,
“Unpaved roads”.
Fig. 71
“Off-route recalculation” – system reaction on leaving the route. Press the green arrow to choose from:
“Automatic” or “Off”.
Fig. 72
42
7.5.2.3. Zoom settings
The system defines the best map scale while navigating a route depending on the environment and a
speed (Fig. 73). Press the item to turn it On/Off.
“Automatic zoom” — enables the automatic zoom.
“Smooth zoom” — enables the smooth zoom.
Fig. 73
“Restore autozoom” – time setting before the
Automatic zoom is activated if you have changed it manually. The options available: 5
s, 10 s, 15 s, 20 s, “Never”.
“Min./Max.” – the automatic zoom functionality limits.
“Preferred zoom” – when the automatic zoom is turned on, you can set a preferred
zoom, from a high detailed (Max.) to a less detailed (Min).
7.5.2.4. Guidance
The “Guidance prompt” sets a time for system to
inform you about the incoming maneuver (Fig. 74).
You can set slider to 1 of 5 positions from the “More
distance” to the “Less distance”.
“Off route sensevity” — you can set how to calculate
a new route when you leave the old one: immediately (“High” mode) or to try to return to the old route.
7.5.2.5. Lock on road
Fig. 74
This function (Fig. 75) braces the active route to the
road, helping you to keep closer to the them if a
GPS-connection became week or if you have decided to bypass an obstacle.
Options: “Don’t lock” (the function is off); Closer 20
m; Closer 50 m; Closer 100 m; Closer 200 m; Closer
500 m; Auto.
Fig. 75
7.5.2.6. Reset position
If you have moved the map while navigating a route,
this function moves it back to your current location in
the set amount of seconds. You can choose from 5
s, 10 s, 15 s, 20 s, and “never” (function off)
(Fig. 76).
Fig. 76
43
7.5.3. Regional settings
On this page you can choose a language, a voice
package, a keyboard layout and a set of units
(Fig. 77).
7.5.3.1 Language
Press the green arrow on the right side of the field
and select a language from the list. Russian, English,
Spanish, Turkish and other languages are supported.
Fig. 77
7.5.3.2 Voice
This menu contains a set of the voice prompts used
to inform you about different events. You can change
the set by pressing this button, then select another
set from list (Fig. 78). To download an optional voice
sets, please visit http://www.navitel.su/download.
Unpack the archive to the \NavitelContend\Voice\
catalog in your SD card. The folder name must be
like “0409” for English, or “0419” for Russian.
Fig. 78
7.5.3.3 Keyboard
Keyboard layout and supported language options.
Fig. 79
The “Keyboard layout” sets the type of a keyboard
layout appearing on the screen (Fig. 79) which
appears after pressing a text window or when you
are searching for a specific address or an object.
Available keyboard layout options:
• QWERTY 1 — is a standard PC keyboard layout.
The first top left letters are qwerty (Fig. 80);
Fig. 80
• QWERTY 2 — this keybord layout is similar to the
previous option, but additional symbols are displayed
at the bottom of the screen (Fig. 81);
Fig. 81
44
• ABCDEF — Letters are settled in the alphabetical
order (Fig. 82);
• Use celluar layout for search - Keyboard
reflects mobile phone layout: there are several letters
that are binded to a one figure (Fig. 83).
“Languages” – there is a button on a keyboard to
change the language. Check languages you want to
include in this chain.
Fig. 82
7.5.3.4 “Units”
The page (Fig. 84) is used to select units of measurement of coordinates, azimuth, length/speed,
height/ depth, area and an address format. Press the
green arrow in the desired field to reveal the list of
probable variants.
• “Azumuth”:
• “Coordinates”,
L a t i t u d e / L o n g i t u d e : Degrees;
Cardinal direction.
ddd.ddddd°;
• “Lenght, speed”:
ddd°mm.mmm’;
Metric (meters, km, km/h);
ddd°mm’ss.s”.
Nautical (feet, n.miles, knots);
• “Postal address”:
Statute (feet, miles, mph).
Number, street;
• “Area”:
Street, number.
• “Elevation/altitude, Square Meters, Square
Kilometers;
depth”:
Square Feet, Sq. Miles;
Meters;
Hectares;
Feet.
Acres.
Fig. 83
Fig. 84
7.5.4. Online services
This page (Fig. 85) allows a user to set the Internetservices and a Navitel.SMS.
7.5.4.1. Application Update
You can set an automatical software update at this
page (Fig. 86).
Fig. 85
• Enable auto updates;
• Download through GPRS - you can set an update
permissions to use a GPRS/3G Internet connection;
• Application update in roaming - roaming update
settings;
• Check updates - sets the frequency of updates;
• Check now - check for updates immidiately.
Fig. 86
45
If a Navitel Navigator finds a new version, it will ask
you to download and install it (Fig. 87). This process
is similar to a map update process (chapter 7.5.1.1).
7.5.4.2. Traffic jams
Page 1 (Fig. 88):
“Use for automatic routing” – activate the function for
system to take into account a traffic jams data during
the route calculation.
If the “Show on map” function is activated, traffic
jams will be displayed on a map with lines of different colors.
Use the “Update data” field to configure an automatic data update function. Press the green arrow to set
the time for automatic data update.
You can use the “Update” button any time to update
the traffic jams data.
Fig. 87
Fig. 88
Page 2 (Fig. 89):
“Connection with Internet” – Internet connection is
required to update the traffic jams data. Use this
item to control the system access to the Internet.
“Traffic jams update in roaming” allows you to control the internet connection if you are in roaming.
7.5.4.3. Navitel.Events
Fig. 89
At this page you can turn on or off the Navitel.Events
service. Learn more at the chapter 8.10
Navitel.Events.
7.5.4.4. Data Exchange (Fig. 90)
“Allow Navitel.SMS receipt” – Check this item if you
want to receive SMS from other users;
“Show a pop-up window automatically” – if the function is active, a window appears on the screen
informing you about a received SMS. Otherwise,
press the
symbol at top of the “Map” page;
Fig. 90
7.5.4.5. Weather
Using this page (Fig. 91) you can set the weather
forecast service:
“Automatic” — sets the automatic update mode;
“Manual” — sets the manual update mode.
46
Fig. 91
7.5.4.6. Online POI info
Some POI have a dynamic information: gas prices,
cinema showtimes, etc (Fig. 92). If the function is
turned on, you can see this data. Full partner list you
can learn at the www.navitel.su
7.5.5. Satellites
This page containts a GPS-connection settings
(Fig. 93).
“Autodetect settings” – this function allows the system to detect GPS-settings automatically according
to your device and its adjustments.
Fig. 92
“Source” - select one of the options below:
•Option 1: “Operating system” (Fig. 94)
“Troubleshooting” — the log-file record function is
used for troubleshooting. Activate this function in
case of inappropriate functionality of a GPS-receiver
or by the request of our technical support only.
Fig. 93
•Option 2: “COM-ports” (Fig. 95)
“BlueTooth” activates a Bluetooth before the connection is established;
“Troubleshooting” — is similar to option 1.
Also, if “COM-ports” source is selected, you will see
COM-ports, protocol, data rate and data read
method on the page 1.
Fig. 94
•Option 3: “Demo track” (Fig. 96)
“Track file” – select a demo track. Press the field to
open file selection menu. Folder selection window is
in the top left corner and format selection window is
in the top right corner. Use it to apply a filter on displaying files: “All formats” (no filter), *.gpx, *.plt,
*.gdb, *.mps. Then, select a file by pressing folders.
Press the “Back” button to move one step backwards.
“Play rate” — 1x (normal speed), 2x, 4x, 8x.
“Start at” — Demo track replay starting point.
Measured in percent (100% = full track’s length).
You can select one of the following values: 0%, 10%,
20%, ..., 100%.
“Loop” — Activate this function to auto repeat playing demo track at the end of each circle.
Fig. 95
Fig. 96
47
7.5.6. Interface settings
Interface settings (Fig. 97) allow you to use the “Map” and other pages and all their elements at maximum efficiency.
Fig. 97
7.5.6.1. Skin
In this menu (Fig. 98) you can set the interface color scheme. Press the green arrow in
the right side of the field to select a scheme from the list. To download optional color
schemes, please visit http://www.navitel.su/download/. Unpack the archive to the
\NavitelContent\Skins\ folder on your SD card.
Fig. 98
The “Skin type” option allows you to switch between the day and night view modes. Use
the night view mode when it is dark. It will protect your eyes from tiredness and make
the device more comfortable to maintain. You can set this option to one of three positions.
• Day view mode;
• Night view mode;
• Automatic mode allows the device to switch between day and night view modes automatically subject to sunrise and sunset time in your region and when entering a tunnel.
This function is duplicated in “Compas”
48
menu.
7.5.6.2. Interface
The “Map” page control panel settings (Fig. 99).
Interface settings allow you to use the “Map” page
and all its elements at maximum efficiency. You can
edit every element displaying under the different
state of the corresponded function.
There is a
symbolat the left of each element, and
if can take different color depending on the element
display settings. Green color means button will display under each state of correspond function. If the
color is grey – the button display is disabled. Half
colored symbol means that under the certain circumstances of the button it won’t be displayed. Press the
symbol to On/Off button display on “Map” page fully.
Press the settings button in the right side of each
field to open the display settings under the corresponded function state menu (Fig. 100). Press
the
symbol to turn On/Off the button display
under current state.
Fig. 99
Fig. 100
At the bottom of the interface settings menu there is
a (_._) button, that allows you to edit display of all the
buttons (Fig. 101):
•
“Turn on all” — turns on all the button display
on the “Map” page;
•
“Turn off all” — turns off all the button display on the “Map” page;
•
“Default settings” — returns to a factory default set of buttons displaying on the
“Map” page. System will ask you a confirmation;
•
“Cancel” — closes the menu.
Fig. 101
49
7.5.6.3. Hide elements
On this page (Fig. 102) you can set a hiding of some
elements on the map page. All of them will appear
again after your activity, for example, after the
screen tap.
“Hide buttons” — sets hiding
“Cursor”
and the “Save WP”
time of the
buttons.
“Hide” — sets hiding time of the “Menu”
, the
“Find”
button,
the
“Compas”
,
“GPS”
elements, etc.
Fig. 102
7.5.6.4. Inertial list scrolling
If the function is active (Fig. 103) you will have an
opportunity to create an impulse by your finger or
stylus by rapidly moving it up/down and release after
it. List will continue to scroll what way slowly decelerating.
Fig. 103
7.5.6.5. Exit confirmation
Program will close instantly after pressing the “Exit”
button if this function is disabled. Otherwise, the exit
menu will appear on the screen (Fig. 104).
7.5.7. Device
Overall functional device settings (Fig. 105)
Fig. 104
7.5.7.1. Sound
On this page (Fig. 106) you can set the software
sound effects.
“Turn off sound” – the function allows you to turn off
all the sound effects and a voice guidance completely;
“Keep volume” – Navitel Navigator volume will be
equal to the operating system settings if the function
is active.
Fig. 105
7.5.7.2. Screen orientation
This function rotates image on a certain angle.
Orientations available: “Keep system”, “Portrait”,
“Portrait (rotate)”, “Landscape (left)”, “Landscape
(right)”.
Fig. 106
50
7.5.7.3. Power control
This is the power management page (Fig. 107).
“Keep power on while the application is active” – your device will not turn off or go to
a sleep mode automatically if the Navitel Navigator is
running;
“Keep screen backlight on while the application is
active” – for the purpose of saving battery life, the
screen backlight turns off after the definite time if the
device is idle. Activate the function to backlight on;
“Turn off GPS in sleep mode” – activate this function
for the purpose of saving the battery. GPS-receiver
will be turned off in a sleep mode;
Fig. 107
7.5.7.4. Clock settings
Clock setting page (Fig. 108).
“Correct system clock using GPS time” sets the automatic clock adjustment using a GPS time function;
“Update time zone automatically” – activate this
function if you move from one time zone to other frequently. System will make corresponded changes
automatically.
Fig. 108
7.5.7.5. Folders’ settings
You can use this menu item (Fig. 109) to set the folder where a map files are stored. The
\NavitelContent\Maps\folder is used by default.
Fig. 109
7.5.8. Alerts
Voice and visual alert settings (Fig. 110).
“Turn off sound alert” – activate this function to turn
off a sound alert that appears when you approach
railroad crossings, speed cameras, sleeping policemens, etc.
You can select the alerting method: “Voice alert” or
“Signal alert”.
Fig. 110
Also it is possible to set conditions of activating alert: “Do not alert”, “Always alert”,
“Overspeed is 0 km/h, 10 km/h, 20 km/h, … , 100 km/h).
51
7.5.9. Track’s setting
You can save your track in different formats to view
it afterwards. (Fig. 111).
7.5.9.1. Track record
Activate this function if you want to record your track.
7.5.9.2. Track’s format
Fig. 111
Select a track record format (Fig. 112). It can be
saved in *.mps or *.gpx file formats.
7.5.9.3. Track’s folder
Select a folder to write a track. (Fig. 113).
7.5.9.4. Track visualization
If you check this item, the last 10 000 points of your
track will be shown on the map via violet line.
Fig. 112
7.5.10. Profiles
With this menu item (Fig. 114) you can create different settings profiles and change one to other quickly. A profile saves all the user’s settings.
“Reset” - the function is used to reset all the system
settings to defaults. This can be useful if you have
changed a lot of settings and want to return to the
default settings in one click. After the function is
enables, the software will relaunch automatically.
Fig. 113
“Add” saves a current settings profile.
If you press the profile’s name, some other options
will appear:
Fig. 114
“Load” applies the profile to the current system’s
state;
“Delete” deletes the selected profile;
“Rename” - if you want to change a profile name, use this option;
“Save” saves the current system’s state to the selected profile.
52
8. Functionality
8.1. Routes
A route creation function was included in the software functionality to plan the forthcoming way and to monitor the accuracy following it. There are several ways to create a
route: using the “search” function, from your current location to any point, and from a
point A to point B.
Buttons:
“Go To” — Press this button to lay a route from the first point of the existing
route or the start point to the selected point, deleting all the waypoints between;
“Start” — Add a point as a start point. You should turn off your GPS reciever.
“Drive before” -Add a point between the two points of the existing route. The
last added point (if several were added), becomes the second priority point in
the current route;
“Add to route” — Point is added to the end of a route and continues it;
“Info” — Highlighted point properties. Tap to see more.
8.1.1. Autorouting
In order to create a route automatically, from the current position to the destination
point, tap on the place on the map where the final point is, tap on the “Cursor” button
and in the context menu choose "Go to" (Fig. 115). The calculated route will be shown
on the map in blue color with highly visible dark border (Fig. 116). Please, note that in
case of non-routable maps, the route will represent a straight green line from your position to the destination point, ignoring the existing buildings, roads, etc.
Fig. 115
Fig. 116
8.1.2. Autorouting using search
Find an object of interest using a “Search” and press on its name, then select a “Go
To” item from the menu. Apart from this item there are also an “Insert” item wich adds
a point between the two points of an existing route, and an “Add” item wich adds a point
to the end of the route and continues it. Both items are available with an existing route
only.
53
8.1.3. Manual route creation
The difference of this route creation method from the previous two ones is what you
can set a start point and a destination point.
To create a route, press on the selected place on the map, press the “Cursor” (Fig. 117)
button and a “Start” button after the menu appears (Fig. 118). Then find the destination point and press a “Cursor” — “Go To” (Fig. 119). If you are using maps that support autorouting, route will be created referring to this data and will be the shortest or
the quickest. Otherwise the waypoints will be connected with a strait green line.
Please note! If a GPS-receiver is active, you cannot set the start point!
Fig. 117
Fig. 118
Fig. 119
8.1.4. Route editing
Press the maneuver window to open a route editing menu. The following functions are
available:
“Stop Route Guidance” — delete a route from the map and stop following it.
“Demo route” — This function available only if the GPS receiver is turned off. Use it to
observe the forthcoming path, U-turns and some general route information. Such full
demonstration allows you to reveal all the dangerous and unfavourable sections and
correct the route if it is needed.
“Go next via point” — press this button to go to the next waypoint if you missed the current one or decided not to visit it.
“Show route” — Press this to show the full route, including the start, the finish and all
the middle points. The scale will be changed so you can see the route.
“Maneuvers” — Fast access to the “Route” page.
“Settings” — Fast access to the “Menu” —> “Settings” —> “Navigation” page.
You can also edit a route using waypoints. Press any place on map and then press a
“Cursor” while navigating a route to create a waypoint. The following buttons will appear
at the bottom of the page: “Go To”, “Insert”, “Add”, “Start”, “Info”.
54
Fig. 120
Fig. 121
8.1.5. Edit route waypoints
You can edit different waypoints using the “Search” —
“Waypoints” item. After pressing an any waypoint a
menu will appear with a set of possible actions
(Fig. 122).
“Show on map” show the current waypoint and its
properties on the map (Fig. 120):
Fig. 122
“Go To” creates a route to the current waypoint
“Include” reroutes including the current waypoint;
“Add” adds the current waypoint to the end of the existing route (Fig. 121);
“Edit waypoint” — the main waypoint’s properties edit menu (coordinates, name, etc.);
“Delete waypoint” deletes the waypoint even if a route is created or not;
“Send Navitel.SMS” — Send an SMS with the waypoint
coordinates;
“Cancel” returns to the waypoint list;
Use the “Back” and the “Next” buttons to switch pages
with possible actions.
8.1.6. Route properties
Fig. 123
The Software allows a basic route edit functions. Enter
the “Route” —> “Route properties” item (Fig. 123).
This page reflects the route points with the different filters. The general route length is indicated at the top of
the page. Press the context menu button at the bottom
of the page to view the menu for rerouting, importing,
and exporting the route. "Reroute" and "Export"
(Fig. 124) options are availiable only during automatic
route navigation.
Fig. 124
55
8.2. Track
It is possible to record the actual track passed during your moving. The “Track Record”
function can be set in “Menu” — “Settings” — “Track’s settings” — “Track Record”, or
by pressing the corresponded icon on “Map” page if it was enabled in the “Interface”
settings. The “Track Record” function is available with GPS-receiver turned on and a
connection established only.
A track is displayed on the “Map” page with purple line, which repeats your trajectory,
if the “Show latest 10000 track points” function is active. A track is automatically
recordsed in the MapSource (.MPS) file format. However you can change it to the .GPX
in “Menu” — “Settings” — “Track’s settings” — “Track fromat”. Track files are saved in
the “\NavitelContent\Tracks\” folder in your device’s flash card memory. Additional
service files are stored in the “My documents/GPS Tracks and Way points” folder in the
device main memory.
A track is displayed on the “Map” page limited with 10000 points. A track record is limited only with an available memory. A recorded track in the sequel can be imported as
a route. Besides tracks created by the system, tracks of other types can be imported
– OziExplorer Tracks or a Garmin GPS Database. To import a track go to “Route” —
“Route Properties” menu item, then press the context menu icon and select an “Import
Track” item. A file list will appear on the screen. Go to the “\NavitelContent\Tracks\”
folder (catalog name can differ depending on device model), select the track you want
to import and press the “Ok” button. If the track is separated into segments, select a
segment and press “Ok”.
You can also replay tracks on map. Go to “Settings” —
“Satellites” and select a “Demo Track” as a source.
Select the file on the next page and start a demo track.
8.3. Waypoints
Waypoints allow you to mark places with specified coordinates. This may help you to improve your orientation
in the city and to check places of interest. Waypoints
can be created manually. They are named automatically in a chain of a three-digit format.
Fig. 125
To create a waypoint, press any place on a map. A big
grey circle will appear in that place. Then press “Save
WP” button in the bottom of the page (Fig. 125).
Fig. 126
56
After this operation a waypoint edit menu will appear on the screen (Fig. 126). Use this
menu to edit a name, description, coordinates type, preference display method of the
waypoint, to paste coordinates from the clipboard and sat a distance to the current
point for notifications.
The waypoints types are divided into the several groups (for example: Outdoors,
Business, Civil etc.) to ease the search of the specific waypoint. In order to select the
waypoint type, press the “Type” icon and select a type.
A full waypoints list you can learn in the “Search” — “Waypoints” menu. Using this page
you can make some general operations with waypoints: add a waypoint, delete all,
export or import a waypoint by pressing button at the bottom of the page.
To export a waypoint, enter the “Waypoints” menu then press context menu button at
the bottom of the page and select the “Export” (Fig. 127) item. A list of files will appear.
Select the catalog and press the “Ok” button to export all waypoints to it. Make the similar actions to import waypoints. After the import process is finished, a window will
appear on screen and inform you about the amount of imported waypoints.
Fig. 127
It is possible to manage each point individually by pressing its name in the list (Fig. 128).
More information on this menu you can learn in the “Route” section. It is also possible
to edit a waypoint right on the map. Find it visually and press on it (Fig. 129). To edit
the waypoint press the “Cursor” — “Info” button. You can delete a waypoint by pressing “Remove WP” button (Fig. 130).
Fig. 128
Fig. 129
Fig. 130
57
8.4. Traffic Jams
Attention! The function is available with a GPRS-module connected only. Please, refer
to your supplier for more information.
Using the “Navitel.Traffic Jams” service, your device will be able to show you an information on traffic jams in all the territories covered by official maps.
To activate the service, go to “Settings” — “Online Services” — “Traffic Jams” and turn
on the service. Learn more at the chapter “Main Menu” — “Settings” — “Online
Services”.
The corresponding to this service icon is displayed at the top of the screen. It can take
one of three colors: green (information is available and up to date), yellow (information
is available, but wasn’t refreshed in time), and red (service is unavailable, i.e. no connection). The icon will take a grey color if the “Use for automatic routing” and the “Show
on map” items are unchecked in settings.
Note: Interface settings are also affect on the icon display.
Note: GPRS-traffic is paid individually in compliance with a carrier charge rate.
Traffic jams are displayed with polygons of different colors wich depend on the traffic
rate. The highways and roads are displayed with the following colors:
• Red — a traffic jam;
• Pink — a movement is complicated;
• Yellov — a movement is a bit complicated;
• Green — a favourable traffic.
The status depends on overall segment load and roads adjoined, traffic lights, road
works, traffic accidents, emergency line availability and other factors which can influence on traffic intensity. With the “Use for automatic routing” function activated, traffic
jams will be taken into account when laying a route. Such route may be longer, but it
will pass you through the less loaded roads (guided by the Navitel system information).
An optimal route takes into an account the maximum speed that is allowed on the different road segments and your route settings – the shortest or the fastest one.
58
8.5. Speed Cameras
The speed camera alert function is supported by Navitel Navigator since the 3.2.1.7443
version. Please visit http://www.navitel.su/download/ and enter your license key to
download this update. For further information on updating program, please refer to
“Software and maps updating” section of this manual.
A device alerts a driver with a sound signal and shows maximum speed that allowed at
this road section. Near the speed camera icon you can see the arrows which will show
you the speed camera direction. When you enter a speed camera range (1000 m) – the
arrow becomes red.
Speed cameras information editing:
1. Open the SpeedCam.txt file in text editor;
Field name
Description
IDX
Serial number
X
Horizontal/Longitude (E/W) coordinate
Y
Vertical/Latitude (N/S) coordinate
Camera type:
1-static camera;
2-traffic lights camera;
3-red lights crossing camera;
4-speed camera;
5-mobile camera (ambush);
TYPE
101-speed limit;
102-speed bump;
103-poor road;
104-dangerous corner;
105-dangerous crossroads;
106-other dangers.
SPEED
DIRTYPE
DIRECTION
Speed limit
Speed camera direction:
0all directions (360°);
1define direction (see Direction field);
2two directions (forward/backward)
Viewing angle (between 0° and 359°, 0°-North, 90°—East,
180°—South, 270°-West)
2. Fields description:
Field names can consist of capital or small letters. The last two fields can skipped – in
that case camera will be considered as the “All directions” type.
59
Changes should look like this example:
IDX, X, Y, TYPE, SPEED, DIRTYPE, DIRECTION
1,18.9429837,47.4521967,1,100,2,90
Please note, that the coordinate format in file is Latitude/Longitude ddd.ddddd°, but it
can be changed in “Menu” — “Settings” — “Regional settings” — “Units”.
Speed cameras information removal
1. Delete the SpeedCam.txt file from the main program catalog;
2. Run the program and make sure that the speed cameras information disappeared.
Exampre: N55°52,866' E37°26,728'.
8.6. Search
Navitel Navigator is able to find objects of interest
under different conditions (Fig. 131). Press the
“Search” button on map page. The object you have
found can be shown on the map or added to the current route using the different methods. Use the keyboard to set the search conditions. You can hide the
keyboard by pressing the button in the upper right
corner of the screen.
When you are using keyboard in some search methods, a list of appropriate names for already entered
letters is displayed at the screen. If you made a mistake during the name input, press a Backspace.
When a list fits to a single screen, the keyboard will
be closed automatically. Then select an object from
the list by pressing its name.
Fig. 131
Fig. 132
8.6.1. By Address
Buildings and houses search if address is known.
• “Country Search”
At the top of the search page there is a button
(Fig. 132) “Select country”. If you want to select
a country, press it. Select a coutnry from the
appeared list using the keyboard (Fig. 133). If the
keyboard is not required it can be hidden by
pressing the button in the top right corner. When
the list of the countries will fit to a single screen,
the keyboard will close automatically. Press a
country name to select it.
After this you will see the “Select city”, “Select
street” and “Select building” buttons (Fig. 134). If
you want to change the country, press on it’s
name.
60
Fig. 133
Fig. 134
• “City Search” and “Street search”
City and street search tools are absolutly similar
to the country search tool. Use the keyboard to
enter the street name with an object of interest
(Fig. 135). Streets with different names will disappear step-by-step while you entering letters.
Also, the probable next letters will be highlighted
on the keyboard. When the list of names will fit
to a single screen, the keyboard will be closed
automatically so you can select the street you’ve
been searching for.
Fig. 135
• “House search”
The “House search” is similar to the “Street
search (Fig. 136)”. Enter the house number. If
there is only one building with such number you
will be moved to the next step. Press the green
arrow at the bottom left corner to make a backward step.
Fig. 136
•”Result”
After the object is found you can look at it on map
and lay a route to it. Also if there is already an
active route, you can add the object to the route
as a next point (“Insert”) or to the end of the route
(“Add”) (Fig. 137).
Fig. 137
8.6.2. Nearest places
Search for the nearest to the current point objects. This method is also consists of the
several steps. Apart from the objects type there also is a nearest objects search history (Fig. 138).
• “Selecting reference point”
A reference point is the principal in the “Nearest
places” search. System will search for the nearest
selected object types relative to the reference point.
You should choose one of the following reference
points: “Current location” – search for POI near the
Fig. 138
current location; “Postal address” – search for nearest places relative to the selected address; “By the route” - search for an object near
the route line, “History” – one of the objects from overall search history can be selected as a reference point; “Finish” – items are available only with active route; “Cursor”
– the distance is measured between search point and current position.
61
• “Selecting search type”
There are several groups of objects (Fig. 139).
You can start the search process by pressing a
magnifying glass icon at the right part of the field
(Fig. 140). You can open the subgroups by
pressing a blue arrow at the left. If you want to
search from all the types at the same time, select
the “All” item.
Fig. 139
• “Search for specific object”
After you have selected a group of POI, page
with all the needed types sorted by a distance to
reference point will be opened. The closest
objects will appear at the top of the page. Press
the button at the bottom of the page to search
for an object by name. Keep entering letters until
the needed object’s name appears at the screen
(Fig. 141).
Fig. 140
• “Result”
After the object was found you can learn it on the
map, lay a route, and “Insert” or “Add” to the
route if there is already an active route – similar
to other search modes (Fig. 142).
Fig. 141
8.6.3. “Waypoints” search
The full waypoints list can be opened from the
“Search” menu. Waypoints are searched by their
names. Also, a distance is displayed in each waypoint field. The waypoint can be used to create a
Fig. 142
route or you can open it on the map. You can also
edit a waypoint using this menu, delete a waypoint or even delete all waypoints, send
a Navitel.SMS, import and export waypoints.
8.6.4. “History” search
List of all the objects that were ever been found using any methods of search. The last
searched objects are at the top of this list. You can delete all the objects, lay a route
to the selected object or look at it on map
62
8.6.5. “Favorites” search
This search method is aimed at finding the most frequent used objects. As opposed to
the “History” search method, objects in this list are
sorted by the frequency of using.
8.6.6. Search “By coordinates”
Search for the specified object by coordinates (Fig.
143). Coordinates can be entered manually or you
can paste them by pressing the button in the right
side of the screen after copying them from the
object’s properties on the “Map” page. Press the
button at the bottom of the page to open the coordinates editing menu.
Fig. 143
“Show on map” shows waypoint with the specified
coordinates on map with following options:
“Go To” creates route to the selected point (Fig.
144);
Fig. 144
“Insert” adds the point to the route as a next point;
“Add” adds the point to the route as a final point;
“Start” adds the point to the route as a start point;
“Add waypoint” creates a waypoint with specified coordinates;
“Cancel” — exit from the menu;
Use “Back”/”Next” buttons to switch between the pages.
8.6.7. “Navitel.SMS” search
Attention! The function is available with GSM-module
connected only. Please, refer to your supplier for
more information.
The page contais the list of received Navitel.SMS.
Messages are sorted by date – the last received
Fig. 145
message are at the top of the list. Press an item to
open the message edit menu. Press the button at the bottom of the page to delete all
messages or mark them all as read (Fig. 145).
63
8.6.8 Crossings search
Crossings search is similar to the address search
(Learn more at the chapter 8.6.1. “Address search).
•”Country and city search”
First of all, you should select a city and a country (Fig. 146) where you want to find a crossing.
Similarly to the address search, press the “Select
country” button and enter its name, then do the
same for the “City search”.
Fig. 146
•”Street search”
After you selected a country and a city, “Street
search” field will be available. Press it to search
for one of a needed streets and enter its name
(Fig. 147).
Fig. 147
•”Crossing search”
After you selected the first street, you can begin
to search a crossing. This menu (Fig. 148) is
similar to the street search, except for the number of the available streets. If you don’t know the
exact name of it, you can minimize the keyboard
by pressing the icon at the right top of the screen
and scroll the list manually (Fig. 149)
Fig. 148
•”Result”
Afret the crossing search, Naitel Navigator will
display the result on the map. You can create a
route to it, and, similarly to other types of search,
add it to the existing route or create a middle
point (Fig. 150).
Fig. 149
Fig. 150
64
8.7. 3D-models
3D-models replicates real objects with high accuracy. To
apply 3D models, please visit http://www.navitel.su/downloads/. Find the “3D models” in the list and download the
“Models” archive file.
Unpack the “Models” archive. Copy the “Models” folder to
the \NavitelContent\ folder, then run the program and use
the “By address” or “Nearest” search methods to find the
objects of interest (Fig. 151).
Fig. 151
8.8. Navitel. SMS
The “Navitel.SMS” option makes it possible to exchange with coordinates between
users, to define the location of each other or to show an object by coordinates on the
map (Fig. 152). Press this menu item to open a window with different fields. Here you
can enter a recipient number, description and coordinates. Use the keyboard to enter
data. There are 2 types of SMS-messages: sending coordinates to another user – “I am
here” (Fig. 153), and request for another user coordinates – “Where are you?” (Fig.
154). Press the button at the bottom of the page to change the message mode.
Fig. 152
Fig. 153
Fig. 154
8.9. Optional color schemes (Skins)
It is possible to change the interface color scheme by adding new skins. Please visit
http://www.navitel.su/download/ and download the “Skins” archive file archive. Unpack
the archive content to Navitel Navigator main catalog. Then press “Settings” —
“Interface settings” — “Skins” and press the green arrow in the “Select skin” field. A list
with possible optional skins will appear. Press a skin to apply it to the system interface.
65
8.10 Navitel.Events
Attention! The function is available with GPRS-module connected only. Please, refer to your supplier for
more information.
Navitel.Events service is an addition to the
Navitel.Traffic, using which you can determine the
cause of traffic jam and select a better strategy to
overcome it.
Fig. 155
Events are displayed on a map as little icons and can
have a “car crash”, “road works”, “speed camera”
and “other warning” type (Fig. 155).
You can learn the information about any event and
confirm or refute it. Check it on the map and press
the “Info” button at the bottom of the screen
(Fig. 156).
An event information page will appear (Fig. 157). You
can see the timestamp and a text description. Also,
you can press the “Confirm” or “Reject” button to
confirm or reject an event.
To place a new event to the map, tap on the needed place and press a button with an exclamation
mark “!”. If you tap the exclamation mark with no
mark on the map, it will be placed near the scale line.
Fig. 156
Fig. 157
Attention! The Navitel.Event button is displayed at
the left top of the screen in landscape mode only. It
is displayed at the right middle of the screen in portrait mode.
Select a tipe of the event (Fig. 158). If a “car crash”
is selected, you can quickly add info about lane
using the hotkeys. Also, you can add a text description by tapping on the input field (Fig. 159).
Fig. 158
Attention! Every user can place not more than 3
events in 10 minutes. Also, you can’t place an event
closer than in 100 m to other. If you try to violate this
rule, Navitel Navigator will show you an exception.
Attention! GPRS traffic is paid according to your
carrier’s tariffs.
Fig. 159
66
9. Troubleshooting
9.1 Problems and solutions
Problem
Possible Solution
1. Reinstall the software. Please visit http://www.navitel.su/
update/hidden-secure-page, enter your license key and download the update. Then install it following the instructions given on
Program do not
web site.
start
2. Please check the SD (micro SD) – card (if the software is stored
on it). Backup all the data and format the card.
3. Please check the screen operability.
1. Please make sure the GPS-connection is On. The satellite icon
should be green color with a dot.
2. Update your maps and software version. Please visit
http://www.navitel.su/ update/hidden-secure-page, enter your
license key and download correspond file archive. Follow the
instructions given on the web site to install it.
3. Press “Menu” — “Pages” — “Satellites”. If you see yellow icon –
No connection
the GPS settings are correct. The device should be left on open
with satellites
territory (or windowsill, balcony, dashboard), then without moving
the device, wait until GPS-connection is enabled.
4. Make sure none of the other software is using the same COMports with GPS-receiver.
5. Reset the GPS settings to factory defaults. Please, refer to
authorized service center.
6. If all steps above didn’t help, please refer to the authorized service center to check the GPS receiver operability.
When laying a route:
1. Delete the DataRoute.bin file (main catalog or Navi folder if using
PND).
When recording a track:
1. Update
your
software
version.
Please
visit
http://www.navitel.su/update/hidden-secure-page, enter your
Program is closslicense key and download correspond file archive. Follow the
ing due to sysinstructions given on the web site to install it.
tem error
Other cases:
1. Update
your
software
version.
Please
visit
http://www.navitel.su/update/hidden-secure-page, enter your
license key and download correspond file archive. Follow the
instructions given on the web site to install it;
2. Please check the SD (micro SD) – card (if the software is stored
on it). Backup all the data and format the card.
67
Problem
Possible Solution
1. Make sure the NaviTel Activation Key.txt file is in the main catalog;
Program runs in
demo mode after 2. Send the request to [email protected] with following content:
the device main- Subject: Please reregister the software.
tenance, OS
Required content:
changed,
firmware down- 1. Software license key (22-digit number) or activation file;
load.
2. Name and contact number.
Photos of software license key envelope should be attached to
the letter.
1. Make sure the NaviTel Activation Key.txt file is in the main cataCan’t activate the
log;
software:
2. In case of OEM-version, please make sure the software is being
registered to the supplied device.
Different IDs are
Make sure in MultiDID software absence. If not – delete it and
shown with each
program initializasend the reregistration request (learn the information above).
tion.
1. Please make sure /Wav/ folder is in the main catalog;
2. Press “Menu” — “Settings” — “Advanced” — “Other settings” —
No sound
“System” — page №2 and make sure the “Turn off sound” option
is disabled.
1. Please make sure the set of maps is installed and the software
version is updated (“Menu” — “Information”);
2. Please make sure the set of maps corresponds to software version. New set of maps can be downloaded from http://www.navitel.su/update/hidden-secure-page after entering your license
Problem with
key;
maps while software is working 3. Please make sure the unofficial maps is missing in the “Atlas”
folder. If you have such maps on your device, please move them
to different folder and index it later if needed;
4. Send a letter to [email protected] with your problem or make a
call: +7 (495) 23-23-137.
Navitel plug-in for 1. Press “Start” — “Settings” — “Today”;
today screen
2. Select the “Elements” page and uncheck the “Navitel Today”
can’t be turned
item.
off
To change the plug-in size, press “Settings” and select the needed format.
Attention! Never delete the software and maps activation files.
68
9.2. Running the program after a crash
If the software was stopped incorrectly (for example, a battery of your device was low
and it turned off), during the next run you will see an after-crash information (Fig. 160).
Fig. 160
In this mode, you can choose one of the following options:
“Start application” – if the software starts in a after-crash mode for the first time, select
this option. In this case, Navitel Navigator will save all your settiong, but there is a probability that during the incorrect stop a mistake appeared, so the Navitel Navigator will
work incorrectly. If the software doesn’t start correctly when you select this option, try
one from the options below.
“Restore settings from last successful start” – Navitel Navigator automatically saves all
the user data and settings when it works with no exceptions. You can use them to start
the software after crash. Note, that the last changes, like settings, last places and
favorites lists that were changed during the last work session could be missed.
“Reset all settings” – if no of the options above didn’t make Navitel Navigator start correctly, use this menu item. Note, that History, Favorites lists, all the settings will be
missed, but waypoints and Navitel.SMS will be saved.
If the program doesn’t start after all, please, contact our technical support:
[email protected].
69
10. Updating software and maps
10.1. Updating Navitel Navigator
Attention! The Windows Mobile version of the software can be updated in the automatical mode. Learn
more at the chapter 7.5.4.1. “Application Update”.
1. Copy the activation file for the program "NaviTel
Activation Key.txt" to a desktop computer;
Fig. 161
2. Uninstall the software and remove all the files
from a folder with the program, except NaviTel Activation Key.txt;
3. Go to the update page http://www.navitel.su/downloads/, find a file for your device’s
operating system and download it to your computer;
4. Install the *.exe file using your PC, or copy the *.cab (Windows Mobile), *.apk
(Android) or *.sis (Symbian) to your’s device SD and run it.
5. Copy the "NaviTelAuto Activation Key.txt" to \NavitelContent\License\ folder on your
device’s flash card.
Attention! Android version of the software can be updatet in automatical mode if it was
installed using Android Market. If it didn’t, you can visit “Download” page in Android
Market application and update Navitel Navigator manually.
Attention! GPRS traffic is paid according to your carrier’s tariffs. Software package is
more than 10 Mb.
10.2. Updating maps for Navitel Navigator
Attention! You can update maps in the automatical mode. You can learn more at the
chapter 7.5.1.1 “Map”
1. Remove from the folder \NavitelContent\Maps\ (or other folder in which the archive
with maps which you update is stored) all the files with expansion *.nm3;
2. Download the updated maps on a site in section of updating (http://navitel.su/authorization/devices/) You will need to authorize at the site. If you have no login and password, you will need to register there. Add a device to the list, if you didn’t do it before.
You will need to enter a license key which you can find out in the program Main Menu
—> the Information —> About the program (Fig. 140);
Attention! The size of the given archive can exceed 500 Mb. It is recommended to use
the high-speed channel of the Internet for download.
3. Copy maps to the folder "\NavitelContent\Maps\" at your SD;
4. Carry out procedure of indexation of the atlas (see item 7.5.1.6. “Other maps”).
70
11. Glossary
Accuracy – the parameter which depends on various factors: number of visible satellites, signal quality, interferences, reflected signals, of the navigator moving speed etc. Most exact readings are
expected when reception is carrying out from more than 4 satellites, uniformly located in the sky,
and the navigator stands still. The accuracy used for calculation of your current coordinates can be
displayed on the screen.
Active route segment — a segment of a route which you are currently move on. Also, this is the
distance between any of the two waypoints in a route.
Almanac — these is the data about the orbit parameters of all the satellites. Each satellite transmits
these data for all others. Unlike the ephemeris data, this data carry a general picture of satellites'
location, and they are valid for several months. The almanac of satellites allows the GPS-receiver to
quickly find and receive the signals from satellites, without performing a cold start.
Autorouting (automatic route navigation) – an important feature of the Software, allowing to produce
a route to the destination point in automatic mode. It means, that it is enough for the user to just
specify the destination point, and the Software will generate the shortest and most convenient route.
To take advantage of the autorouting feature it is necessary to have routable maps.
Azimuth — the heading towards the destination point from the current position, measured in degrees
and counted clockwise from the direction to the North. The azimuth can be graphically displayed on
the PDA screen.
Cold start – is when you switch on the GPS-receiver for the first time, or after it moved far away
from its previous location. In such case the receiver does not have any almanac and ephimeris data,
or these data must be updated. Hence, the GPS-receiver starts loading the almanac, then the
ephimeris. This process takes time — several minutes or more.
Datum – system of coordinates, based on ellipsoid. In such coordinates, when one specifies the latitude and longitude of some point in the area, this is actually referred to as the coordinates of the
projection of this point on the ellipsoid. In different countries, a bit different ellipsoids are used. For
this reason, it is not sufficient to specify the coordinates of some point in order to assess its location exactly. It is also needed to specify in what datum these coordinates are set. A wrong datum
can generally lead to errors from 10 m to 1 km. Popular Russian maps, as a rule, are published in
"Pulkovo-1942" coordinates system, while the GPS uses the datum WGS84.
Distance — length (in miles, meters, feet, etc.) between two waypoints, or from your current position to a waypoint.
Ephemeris — are the data used for precise correction of orbit parameters and time for each satellite. Each satellites transmits its own data only. These data quickly become outdated. Thus, the
almanac gives to the navigator some general idea about the location of satellites, while the ephimeris
provides very precise information.
Estimated time of arrival — estimated time of the day/night when you will arrive to the next waypoint
71
or to the destination. It is possible to see this time on the GPS screen while moving.
Estimated time of the trip – estimated time needed to reach a certain waypoint, or the next point in
a route. It is possible to see this time on the GPS screen while moving. Calculation is made according to the current speed and heading.
Go to – function leading to the required point on the map both during the autorouting and search.
While moving, the screen will show the remaining distance to the waypoint.
GPS (Global Positioning System)—is a global system used for location identification. The navigation
system uses the data received from the satellites, which are continuously transmitting the navigation signals. The purpose of GPS is to provide high precision data on navigation and time to mobile
and stationary objects in the air, on ground and on water.
Heading towards Northern magnetic pole — the heading shown by a regular magnetic compass.
Hot start – the process of starting the GPS-receiver which had been turned off for less than 30 minutes. The initialization of the navigator when it's switch on is done in a fast manner, because the
receiver immediately starts to search for satellites using the almanac, and there is no need to collect the ephemeris data.
Route – broken line, connecting an initial and final points, passing through some via points, where
the direction changes. It is possible to include existing waypoints into a route, or to enter them
directly from the map displayed on the screen. When calculating the route, the Software will automatically replace the current destination point, once it's reached, with the next waypoint.
Stylus pen – a tool, which looks like a pencil, used for interacting with PDA's display.
Track — is the actual track passed, a path, or a log file, which is recorded by the GPS-receiver when
it is on. The track consists of many points (their number shows how often the GPS-receiver marks
the current position, usually it does it once per second, but the newer models may do it more precise). The number of points in a track (volume of track log) tells us about the maximum number of
points that one track can have. Each point of a track contains information about the coordinates,
altitude over ocean level, time and moving speed of the GPS-receiver.
True heading towards North — direction from any point on Earth towards the geographical North
Pole.
Warm start — the process of starting the GPS-receiver which had been turned off for more than 30
minutes. It takes more time to initialize, because the ephimeris data are outdated and the GPS
receiver has to gather the ephemeris data from each satellite.
Waypoint — is a point on Earth surface which has its coordinates recorded in PDA's memory.
Coordinates of a point can be obtained either through a map calibration process, or by manual input
of their values taken, for example, from a topographic paper map. Waypoint can be assigned a name
by default (e.g. 001, 002 and so on) or you can choose a custom name (e.g. "House", "Work"),
and a custom symbol (from the list provided). The navigator has a function to search through the
waypoints (to find the nearest or to find points by name). Also, it is possible to plot the point on the
map screen, or to see its coordinates.
72
Notes
The Join Stock Company "CNT", 2007. All rights reserved.
The contents of this Guide, as well as any attached demo materials, are the sole proprietorship of the Join Stock Company "CNT". Any commercial usage of this Guide may
be carried out only with written permission from the Join Stock Company "CNT". The
information in this document shall not be changed without prior notice given to the Join
Stock Company "CNT".