1
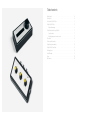
USER’S MANUAL
Table of contents
Getting started . . . . . . . . . . . . . . . . . . . . . . . . . . . . . . . . . . .
Power options . . . . . . . . . . . . . . . . . . . . . . . . . . . . . . . . . . .
Get to know DitoGear™ DryEye . . . . . . . . . . . . . . . . . . . . . . . . . . .
Using DitoGear™ DryEye . . . . . . . . . . . . . . . . . . . . . . . . . . . . . .
Battery drain warnings . . . . . . . . . . . . . . . . . . . . . . . . . . . . .
Detailed instructions for using DryEye Pro. . . . . . . . . . . . . . . . . . . . . . .
Operations basics . . . . . . . . . . . . . . . . . . . . . . . . . . . . . . .
Adjusting heaters power in manual mode . . . . . . . . . . . . . . . . . . . .
Kit contents . . . . . . . . . . . . . . . . . . . . . . . . . . . . . . . . . . . .
Technical specifications table . . . . . . . . . . . . . . . . . . . . . . . . . . . .
Using 3rd party power adapters . . . . . . . . . . . . . . . . . . . . . . . . . . .
Using DitoGear™ Power Packs . . . . . . . . . . . . . . . . . . . . . . . . . . .
Obtaining Support . . . . . . . . . . . . . . . . . . . . . . . . . . . . . . . . .
Limited Warranty . . . . . . . . . . . . . . . . . . . . . . . . . . . . . . . . . .
Privacy . . . . . . . . . . . . . . . . . . . . . . . . . . . . . . . . . . . . . . .
Miscellaneous . . . . . . . . . . . . . . . . . . . . . . . . . . . . . . . . . . .
4
4
5
5
6
7
7
7
8
9
10
10
10
11
14
14
1. Getting started
Product version information
Thank you very much for purchasing the
DitoGear™ DryEye. We hope that the device will
meet your expectations bringing a great value to your
productions.
DitoGear™ DryEye has been designed to prevent dew
condensation or freezing of the camera lenses during longterm shooting in humid or low temperature conditions.
This manual refers to DitoGear™ DryEye Lite (All versions)
and DitoGear™ DryEye Pro V1.
It can control 3 different heaters independently. The
maximum temperature of the heater is around 50°C so
it is completely safe for the optics and strong enough to
prevent dew condensation or lens freezing in all conditions.
The DitoGear™ Dry Eye Pro main advantage, comparing
to manually controlled DitoGear™ Dry Eye Lite, is an
automatic temperature offset control.
This unit has a built-in temperature and humidity sensors
and therefore it is able to automatically calculate the dew
point and keep the optics temperature at the desired offset
above the dew point to prevent dew condensation and lens
freezing with minimal power consumption.
Please ensure to carefully read the safety instructions and
precautions contained in this manual prior to use of the
device.
Should you need any assistance or support do not hesitate
to contact us at [email protected].
4
2
3
Note: Unless specific version of the product is
mentioned (Pro or Lite) the DitoGear™ DryEye refers to
all versions of the device in this manual.
Instructions referring exclusively to a specific version of
the product are marked either with [Lite] or [Pro] marks.
2. Power options
The DitoGear™ DryEye is powered using any 12V DC
power source capable of delivering 2.5A current. Average
power consumption of the device is lower.
The power connector standard is a 2.5 x 5.5mm jack,
which is common for many power adapters available on
the market.
The DitoGear™ DryEye comes with one of the following
power cable types:
1
DitoGear™ OmniPower Cable - used to connect
the device to DitoGear™ Power Packs or for use in
conjunction with DitoGear™ motion control devices
such as OmniSlider, OmniHead or other equipped
with Power Splitters connected to the power source.
5.5mm x 2.5mm jack to gel type battery ports power
cable - may be used with 3rd party gel type batteries
or be modified to match other power sources.
5.5mm x 2.5mm jack to cigarette plug power cable may be used with 3rd party power banks or used with
the car power supply. Please note that if you intend to use
it that way, you may need a power cable extender.
3. Get to know
DitoGear™ DryEye
DitoGear™ DryEye is equipped with the following connectors and features:
DitoGear™ DryEye Lite
1
1x power supply socket (5.5mm x 2.5mm jack socket)
located on the right side of the device.
2
3x heater connector on the front face of the device
(chinch type).
3
3
3x heater connector on the front face of the device
(chinch type).
4
An LCD display located on the top plate of the
device.
5
A 2-way clickable encoder located on the top plate
of the device.
4. Using DitoGear™ DryEye
The DitoGear™ DryEye Lite should be mainly used to prevent
dew condensation and/or lens freezing during outdoor shooting
in humid conditions or during night shoots. However it may be
also used to clean the lens that has already got frost or when the
dew already condensed on the lens surface.
Please follow the instructions in this chapter
to set up and operate the DryEye Lite or Pro.
Detailed operation instructions for DryEye Pro are contained in
the next chapter of this manual.
1
Unpack your device, heaters, temperature sensor [Pro] and
prepare your power supply.
2
Connect one or more lens heaters to heating
channels of the controller. It does not make any
difference where you connect it since all channels
are identical operationally.
3
Wrap the heater(s) around your lens and fix it with
a velcro. The heater should be located as close to
the front of the lens as possible.
3x heater power adjustment dials located on the top
plate of the device.
DitoGear™ DryEye Pro
1
1x power supply socket (5.5mm x 2.5mm jack socket)
located on the right side of the device.
2
1x temperature sensor located on the front side of
the device.
5
4
5
6
7
8
Make sure to secure the heater cable so that it
does not disturb you operating the camera and can’t
be damaged accidentally especially while working with
motion control rigs.
Make sure the heater is not attached directly to the
zoom, focus or iris adjustment rings of the lens. If
there’s no other option and it needs to cover one of
the adjustment rings, it is recommended that you fix
them with the gaffer tape so that the focus or other
rings can’t be accidentally moved by the heater.
[Pro] Attach the lens temperature sensor to the lens
close to the front lens or directly under the heater. You
may simply put it in between the lens and the heater
or secure it with a gaffer tape.
13 [Pro] Follow detailed instructions contained further
in this manual to set up the DryEye Pro for optimal
operation.
14 [Pro] Make sure that the ambient temperature
and humidity sensor located at the bottom of the
device (you’ll see a small hole in the enclosure) is
not directly covered. You should avoid putting it
directly on the ground or on a flat surface as this
may confuse the parameters readout.
4.1 Battery drain warnings
1
Connect the power.
[Lite] The DryEye Lite should show a red LED
lighting.
2
9
[Pro] The DryEye Pro will show the options on the
display.
10 Adjust the power of the channels and operating
mode for DryEye Pro.
11
[Lite] Use 50% power setting for each of connected
channels. It should be sufficient to prevent dew
condensation under most conditions.
12 If you want to remove the dew that has been already
condensed on the lens or the frost you may need to
temporarily set the power to 100%. As soon as the
lens is cleaned, set the power back to 50%.
6
[Pro] The DryEye Pro has a low battery indicator.
It will alert you with an audible signal when the
battery level is low (10.5V threshold). Although it
is possible to continue operation when the warning
is heard, it is not recommended and may damage
your battery if it is depleted below certain level
(depending on the battery type).
[Lite] The DryEye Lite does not have any low
battery warning. Be sure to operate it on a fully
charged battery and avoid discharging your
batteries completely. Some batteries may get
damaged if discharged below certain level!
5. Detailed instructions
for using DryEye Pro.
5.1 Operations basics
The DitoGear™ DryEye Pro is operated using a 2-way
clickable encoder a with a button. Turn the encoder to
navigate across menus. Pres the encoder to select option.
Press the encoder for 3 seconds to trigger extra functions.
Accessing settings menu
If the temperature sensor is not connected or damaged
instead of O: readout the word “SENSOR” appears.
Automatic operation modes are not supported unless the
sensor is connected.
This state is referred to as Home Screen further in the
manual. All further instructions assume that you start from
the Home Screen.
5.2 Adjusting heaters power in manual
mode
1
Press the encoder once to access channel
selection menu.
2
Select one of the channels to be adjusted and press
the encoder button to enter channel operation
mode menu.
3
You can switch between OFF, MANUAL and AUTO
operation modes.
4
Select MANUAL mode.
5
Adjust the heater power using the encoder and click
to confirm your setting.
6
The controller will return to Home Screen.
7
Repeat this process for each of channels you want
to use in manual mode.
8
In order to turn off a channel enter the channel
operation menu mode and select OFF option.
In order to access the settings menu press and hold the
encoder button while connecting power.
Changing the device settings
The settings menu allows you to set the temperature
readout units (Kelvin, Fahrenheit or Celsius), turn on and
off the signal sounds and turn on and off the LCD display
backlight.
Main screen
As soon as the device is connected, the main screen shows
the following information:
1. T: Ambient temperature.
2. D: Dew point temperature
3. H: Humidity
4. O: External temperature on the sensor
7
Setting the automatic operation mode
In order to prevent dew condensation it is not necessary
to warm up the lens too much. It is absolutely sufficient to
keep the optics temperature slightly above the dew point.
6
7
DryEye Pro can automatically control one of the channels
keeping the lens temperature at the desired offset above
the ambient temperature to prevent dew condensation.
Recommended value is about 1.5°C above the ambient
temperature.
To set automatic operation mode for the selected channel:
Please note that when you exit the Auto operation
mode, this channel will be switched off. If you
want to keep using auto mode for example after
modifying other channels adjustments, you need
to enter Auto mode again.
1
2
Select the AUTO mode for the channel you want
to operate automatically and press the encoder to
enter Automatic Operation Screen.
Economy: 1x Controller, 1x Heater (35cm), 1x Power
Cable
2
Standard: 1x Controller, 1x Heater (35cm), 1x Power
Cable, 1x Transport Soft Case
Press the encoder once to enter temperature offset
adjustment menu.
3
XL2: 1x Controller, 2x Heater (35cm), 1x Power Cable, 1x Transport Soft Case
Set the desired temperature offset and confirm by
pressing the encoder.
4
XL3: 1x Controller, 3x Heater (35cm), 1x Power Cable, 1x Transport Soft Case
5
The device will remain at the Automatic Operation
Screen, but the offset won’t be editable so it can’t
be changed accidentally. All other channels will
continue to operate basing on manual settings.
Power consumption of 35cm heater
0.6A at 100% power per channel
Power consumption of 100cm heater
0.75A at 100% power per channel
Power consumption of the controller
max 0.05A
Power supply
9V – 14.4V DC
Operating temperature
-40°C to 60°C
Operating humidity
0 to 100%
Depending on the bundle and product variant, the kit contains:
Set other channels to manual operation mode if you
want to use them simultaneously.
4
7. Technical specifications table
6. Kit contents
1
3
8
To exit Auto mode press and hold the encoder for
3 seconds. You will return to Home Screen and you
can modify other channels settings from there.
DitoGear™ DryEye Pro Package contains additionally a
power temperature sensor.
9
8. Using 3rd party power adapters
11. Limited Warranty
DitoGear recommends using original DitoGear™ AC/DC power adpaters and batteries.
While using a 3rd party adapter make sure it meets the requirements detailed in technical specifications table.
DitoGear One (1) Year Limited Warranty
For DitoGear Products Only
Caution!
DitoGear is not responsible for any damage or failures caused by the use of a 3rd party power supply adapter.
Consumer rights and restrictions.
9. Using DitoGear™ Power Packs
DitoGear™ Power Pack 7Ah/14Ah and DitoGear™ PowerBox include gel type lead acid batteries, that have a low
voltage operating limit. When you discharge the battery below that limit, the irreversible chemical processes occur and
the recharging performance can be affected. It is recommended not to fully discharge the battery.
The lead acid battery will self-discharge slowly over time. Leaving the battery for more than 3 months without recharging
may result in damage. Remember to recharge the battery at least every 3 months.
10.Obtaining Support
In case of any technical issues that can’t be solved by carefully reading the manuals do not hesitate
to contact us at [email protected]
For consumers, who are covered by consumer protection laws or regulations in their country of purchase or, if different,
their country of residence, the benefits conferred by this warranty are in addition to all rights and remedies conveyed
by such consumer protection laws and regulations. This warranty does not exclude, limit or suspend any rights of
consumers arising out of non-conformity with a sales contract. However, as described below, DitoGear disclaims
statutory and implied warranties to the extent permitted by law, and in so far as such warranties cannot be disclaimed, all
such warranties shall to the extent permitted by law be limited in duration to the duration of the express warranty described
below and to the repair or replacement service as determined by DitoGear in its sole discretion. Some states (countries and
provinces) do not allow limitations on how long an implied warranty or condition may last, so the limitations described
above may not apply to you. This warranty gives you specific legal rights, and you may also have other rights that vary
from state to state (or by country or province). This limited warranty is governed by and construed under the laws of the
country in which the product purchase took place. DitoGear, the warrantor, under this limited warranty stands for DitoGear™ Robert
Paluch, ul.Krańcowa 30, 62-002 Suchy Las, Poland.
Warranty.
DitoGear’s warranty obligations for this hardware product are limited to the terms set forth herein. DitoGear
warrants this DitoGear-branded hardware product against defects in materials and workmanship under
normal use for a period of one (1) year from the date of retail purchase by the original end-user purchaser
(“Warranty Period”). If a hardware defect arises and a valid claim is received within the Warranty Period,
at its option and to the extent permitted by law, DitoGear will either (1) repair the hardware defect
at no charge, using new or refurbished parts that are equivalent to new in performance and reliability, (2)
exchange the product with a product that is new or refurbished that is equivalent to new in performance
and reliability and is at least functionally equivalent to the original product, or (3) refund the purchase
price of the product. DitoGear may request that you replace defective parts with user-installable new
or refurbished parts that DitoGear provides in fulfillment of its warranty obligation. A replacement product or part, including a user-installable part that has been installed in accordance with instructions
provided by DitoGear, assumes the remaining warranty of the original product or ninety (90) days from the date of
replacement or repair, whichever provides longer coverage for you.
When a product or part is exchanged, any replacement item becomes your property and the replaced item
becomes DitoGear’s property. Parts provided by DitoGear in fulfillment of its warranty obligation must
be used in products for which warranty service is claimed. When a refund is given, the product for which the refund is
provided must be returned to DitoGear and becomes DitoGear’s property.
Exclusions and limitations.
To the extent permitted by law, this warranty and the remedies set forth above are exclusive and in lieu
of all other warranties, remedies and conditions, whether oral, written, statutory, express or implied.
As permitted by applicable law, DitoGear specifically disclaims any and all statutory or implied warranties, including,
without limitation, warranties of merchantability and fitness for a particular purpose and warranties against hidden or latent
defects. If DitoGear cannot lawfully disclaim statutory or implied warranties then to the extent permitted by law, all such
warranties shall be limited in duration to the duration of the express warranty and to the repair or replacement service as
determined by DitoGear in its sole discretion. Some states (countries and provinces) do not allow limitations on how long
an implied warranty or condition may last, so the limitations described above may not apply to you. No DitoGear reseller,
agent, or employee is authorized to make any modification, extension, or addition to this warranty. If any term is held to be
illegal or unenforceable, the legality or enforceability of the remaining terms shall not be affected or impaired.
This Limited Warranty applies only to hardware products manufactured by or for DitoGear. The Limited Warranty does
not apply to any non-DitoGear hardware products even if packaged or sold with DitoGear hardware. Manufacturers or
suppliers, other than DitoGear, may provide their own warranties to the end user purchaser, but DitoGear, in so far as
permitted by law, provides their products “as is”.
DitoGear does not warrant that the operation of the product will be uninterrupted or error-free. DitoGear is not
responsible for damage arising from failure to follow instructions relating to the product’s use.
This warranty does not apply: (a) to consumable parts, such as batteries, unless damage has occurred due to a defect in
materials or workmanship; (b) to cosmetic damage, including but not limited to scratches, dents and broken elements on
ports; (c) to damage caused by use with non-DitoGear products; (d) to damage caused by accident, abuse, misuse, liquid
contact, fire, earthquake or other external causes; (e) to damage caused by operating the product outside the permitted
or intended uses described by DitoGear; (f) to damage caused by service (including upgrades and expansions) performed
by anyone who is not a representative of DitoGear; (g) to a product or part that has been modified to alter functionality or
capability without the written permission of DitoGear; (h) to defects caused by normal wear and tear or otherwise due to
the normal aging of the product.
Except as provided in this warranty and to the extent permitted by law, DitoGear is not responsible for direct,
special, incidental or consequential damages resulting from any breach of warranty or condition, or under any other
legal theory, including but not limited to loss of use; loss of revenue; loss of actual or anticipated profits (including loss of
profits on contracts); loss of the use of money; loss of anticipated savings; loss of business; loss of Opportunity; loss of
goodwill; loss of reputation; loss of, damage to or any indirect or consequential loss or damage howsoever caused including the
replacement of equipment and property. The foregoing limitation shall not apply to death or personal injury claims, or
any statutory liability for intentional and gross negligent acts and/or omissions. Some states (countries and provinces) do
not allow the exclusion or limitation of incidental or consequential damages, so the above limitation or exclusion may not
apply to you.
Obtaining warranty service.
DitoGear will provide warranty service either (i) at an DitoGear Retail or DitoGear Authorized Service Provider (“ASP”)
location, where service is performed at the location, or the DitoGear Retail or ASP may send the product to an DitoGear
repair service location for service, (ii) by sending you prepaid way bills (and if you no longer have the original packaging,
DitoGear may send you packaging material) to enable you to ship the product to DitoGear’s repair service location for
service, or (iii) by sending you customer installable new or refurbished replacement product or parts to enable you to
service or exchange your own product (“DIY Service”). Upon receipt of the replacement product or part, the original
product or part becomes the property of DitoGear and you agree to follow instructions, including, if required, arranging the
return of original product or part to DitoGear in a timely manner. When providing DIY Service requiring the return of the
original product or part, DitoGear may require a credit card authorization as security for the retail price of the replacement
product or part and applicable shipping costs. If you follow instructions, DitoGear will cancel the credit card authorization,
so you will not be charged for the product or part and shipping costs.
If you fail to return the replaced product or part as instructed or the replaced product or part is not eligible for warranty
service, DitoGear will charge the credit card for the authorized amount.
Please access and review the online help resources at the DitoGear website (www.ditogear.com) and contained in the
product manual before requesting warranty service. If the product is still not functioning properly after making use of these
resources, please contact DitoGear at [email protected].
Service options, parts availability and response times may vary according to the country in which service is requested.
Service options are subject to change at any time. You may be responsible for shipping and handling charges if the
product cannot be serviced in the country in which service is requested. If you seek service in a country that is not the
country of purchase, you will comply with all applicable import and export laws and regulations and be responsible for all
custom duties, VAT. and other associated taxes and charges. For international service, DitoGear may repair or exchange
defective products and parts with comparable products and parts that comply with local standards. In accordance with
applicable law, DitoGear may require that you furnish proof of purchase details before receiving warranty service.
12.Privacy
DitoGear will maintain and use customer information in accordance with the DitoGear Customer Privacy Policy available
at ditogear.com/legal/privacy-policy/.
13.Miscellaneous
Trademarks and copyrights
DitoGear™, DitoGear™ OmniController, DitoGear™ Evolution, DitoGear™ Trito , DitoGear™ OmniSlider, DitoGear™
OmniHead and DitoGear™ LensDrive, DitoGear™ Modulo are trademarks of Dito Gear Robert Paluch ul.Krańcowa 30,
62-002 Suchy Las, Poland. Unauthorised use is strictly prohibited. All other trademarks referenced in this manual are used
only for informative purposes and are property of their respective owners.
Disposal and recycling information
The device and all batteries included with it must be disposed of properly according to local laws and regulations. The product
must be disposed of separately from the household waste. When your product reaches its end of life, contact DitoGear or your
local authorities to learn about recycling options.
W W W. DITOGE AR .COM