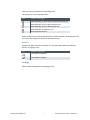
1
AscenLink User Manual LinkOS V7.1 Fortinet Technologies Inc. 1 AscenLink User Manual – LinkOS V7.1 AscenLink User Manual - LinkOS V7.1 March 6, 2014 Reversion 1 Copyright© 2014 Fortinet, Inc. All rights reserved. Fortinet® , FortiGate® , and FortiGuard® , are registered trademarks of Fortinet, Inc., and other Fortinet names herein may also be trademarks of Fortinet. All other product or company names may be trademarks of their respective owners. Performance metrics contained herein were attained in internal lab tests under ideal conditions, and performance may vary. Network variables, different network environments and other conditions may affect performance results. Nothing herein represents any binding commitment by Fortinet, and Fortinet disclaims all warranties, whether express or implied, except to the extent Fortinet enters a binding written contract, signed by Fortinet’s General Counsel, with a purchaser that expressly warrants that the identified product will perform according to the performance metrics herein. For absolute clarity, any such warranty will be limited to performance in the same ideal conditions as in Fortinet’s internal lab tests. Fortinet disclaims in full any guarantees. Fortinet reserves the right to change, modify, transfer, or otherwise revise this publication without notice, and the most current version of the publication shall be applicable. Safety Cautions and Warnings Environmental specifications Operating Temperature – 0 to 40°C (32 to 104°F) If this device is installed in a closed or multi-unit rack assembly, the rack’s ambient temperature may be greater than the room’s ambient temperature. Make sure the rack environment is compatible with the manufacturer’s maximum rated ambient temperature (Tma) . Température ambiante élevée — 0 à 40 ° C (32 à 104 ° F) Si cet appareil est installé dans un cabinet fermé, la température ambiante du cabinet peut être supérieure à la température ambiante de la pièce . Assurez- vous que l’environnement dans le cabinet est compatible avec la température ambiante maximale du fabricant (Tma) . Storage temperature — -25 to 70°C (-13 to 158°F) Température d’entreposage — 25 à 70 ° C (-13 à 158 ° F) Humidity — 5 to 95% non-condensing Humidité — 5 à 95% sans condensation Operating altitude — < 2250 m (7380 ft) Altitude opérationnelle — <2250 m (7380 pi) Air flow – For rack installation, make sure that the amount of air flow required for safe operation of the equipment is not compromised. For free-standing installation, make sure that the appliance has at least 2 inches (5 cm) of clearance on each side to allow for adequate air flow and cooling. Ventilation — Pour une installation dans un cabinet, assurez-vous que la ventilation nécessaire au fonctionnement de l’équipement n’est pas compromise. Pour une installation autonome, assurez-vous que l’appareil dispose d’au moins 2 pouces (5 cm) de dégagement de chaque côté pour permettre l’écoulement de l’air et un refroidissement adéquat. Circuit overloading – To avoid overloading, use the ratings on the label. Consider the equipment’s connection to the supply circuit and the effect that circuit overloading might have on current protection and supply wiring. For redundant power sources, connect each to an IEC/UL Listed power source whose output rating is greater than or equal to the equipment. Surtension – Pour éviter de surcharger le circuit d’alimentation, référez-vous aux notes sur l’étiquette de l’équipement . Envisagez l’effet que la surtension du circuit pourrait avoir sur la protection de surtension et le câblage d’alimentation . Pour les sources d'alimentation redondantes, connectez chacun à une source d'alimentation Mis CEI / UL dont la cote de rendement est supérieur ou égal à l'équipement. Reliable earthing – Make sure all rack-mounted equipment is grounded. This includes supply connections (e .g . power strips), not only direct connections to the branch circuit. Mise à la terre – Assurez-vous que tout l’équipement est mis à la terre . Ceci comprend les connexions d’alimentation (par exemple, les barres d’alimentation) en plus des connexions directes au circuit de dérivation. Interference – If possible, use Shielded Twisted Pair (STP) Ethernet cables instead of Unshielded Twisted Pair (UTP) . Interférence – Si possible, utilisez des câbles Ethernet de paire torsadée blindée (STP) plutôt que de paire torsadée non blindée (UTP). Safety Mechanical loading – To avoid personal injury or damage to the appliance, Fortinet recommends that 2 or more people together install the appliance into the rack. Balance the equipment to avoid uneven mechanical loading and tipping. Do not place heavy objects on the appliance. Installation – Pour éviter des blessures ou des dommages à l’appareil, Fortinet recommande que deux personnes ou plus installent ensemble cet équipement dans un cabinet. L’installation du matériel à l’intérieur de la baie doit être effectuée de façon à éviter toute situation dangereuse liée à une installation non conforme . Ne placez pas d’objets lourds sur l’appareil, celui-ci n’étant pas conçu pour soutenir un poids additionnel. Moving parts — Hazardous moving parts. Keep away from moving fan blades. Pièces mobiles – Pièces mobiles dangerouses. Se tenir éloigné des pales de ventilateurs mobiles. Electric shock / fire — To avoid risk of damage to your equipment, personal injury, or death, disconnect cables while servicing. Do not connect or disconnect cables during lightning. Do not use this product near water for example, near a bathtub, washbowl, kitchen sink or laundry tub, in a wet basement or near a swimming pool. Do not use a telephone to report a gas leak while near the leak. Do not install this equipment in a home or public area accessible to the general population. When installed in schools, this equipment must be installed in a location where access is restricted to trained personnel. Battery – Risk of explosion if the battery is replaced by an incorrect type. Do not dispose of batteries in a fire. They may explode. Dispose of used batteries according to your local regulations. IMPORTANT: Switzerland: Annex 4.10 of SR814.013 applies to batteries. Batterie – Risque d’explosion si vous remplacez la batterie par un modèle incompatible. Jetez les piles usagées selon les réglementations locales en vigueur. IMPORTANT: Suisse: Annexe 4.10 de SR814.013 s’appliquant aux batteries. 警告 本電池如果更換不正確會有爆炸的危險 請依製造商說明書處理用過之電池 Grounding — To prevent damage to your equipment, connections that enter from outside the building should pass through a lightning / surge protector, and be properly grounded. Use an electrostatic discharge workstation (ESD) and/or wear an anti-static wrist strap while you work. In addition to the grounding terminal of the plug, on the back panel, there is another, separate terminal for earthing. Mise à la terre — Pour éviter d’endommager votre matériel, assurez-vous que les branchements qui entrent à partir de l’extérieur du bâtiment passent par un parafoudre / parasurtenseur et sont correctement mis à la terre. Utilisez un poste de travail de décharge électrostatique (ESD) et / ou portez un bracelet anti-statique lorsque vous travaillez. Ce produit possède une borne de mise à la terre qui est prévu à l’arrière du produit, à ceci s’ajoute la mise à la terre de la prise. Regulatory Compliance Federal Communication Commission (FCC) – USA This device complies with Part 15 of FCC Rules. Operation is subject to the following two conditions: (1) this device may not cause harmful interference, and (2) this device must accept any interference received; including interference that may cause undesired operation. This equipment has been tested and found to comply with the limits for a Class A digital device, pursuant to Part 15 of the FCC Rules. These limits are designed to provide reasonable protection against harmful interference when the equipment is operated in a commercial environment. This equipment generates, uses, and can radiate radio frequency energy, and if it is not installed and used in accordance with the instruction manual, it may cause harmful interference to radio communications. Operation of this equipment in a residential area is likely to cause harmful interference, in which case the user will be required to correct the interference at his own expense. WARNING: Any changes or modifications to this product not expressly approved by the party responsible for compliance could void the user’s authority to operate the equipment Industry Canada Equipment Standard for Digital Equipment (ICES) – Canada CAN ICES-3 (A) / NMB-3 (A) This digital apparatus does not exceed the Class A limits for radio noise emissions from digital apparatus set out in the Radio Interference Regulations of the Canadian Department of Communications. Le présent appareil numérique n’emet pas de bruits radioélectriques dépassant les limites applicables aux appareils numeriques de la classe A préscrites dans le Règlement sur le brouillage radioélectrique édicte par le ministère des Communications du Canada. European Conformity (CE) - EU This is a Class A product. In a domestic environment, this product may cause radio interference, in which case the user may be required to take adequate measures. Voluntary Control Council for Interference (VCCI) – Japan この装置は、クラスA情報技術装置です。 この装置を 家庭環境で使用すると電波妨害を引き起こすこと があります。 この場合には使用者が適切な対策を講ずるよう要求されることがあります。VCCI-A Bureau of Standards Metrology and Inspection (BSMI) – Taiwan 這是甲類的資訊產品,在居住的環境中使用時,可能會造成射頻干擾,在這種情況下,使用者會被要求採 取某些適當的對策。 China 此为 A 级产品,在生活环境中,该产品可能会造成无线电干扰。这种情况下,可能需要用户对其采取切实 可行的措施。 Table of Contents Quick Start .............................................................................................................................3 Installation Prerequisites ................................................................................... 3 Accessing the Web UI ...................................................................................... 3 Web UI Overview .............................................................................................. 5 How to Use Web UI .......................................................................................... 6 Basic Network Settings ..................................................................................... 8 Typical Network Structure with Multiple WAN Links .........................................11 Public IP Pass-through ....................................................................................14 Hardware Installation .......................................................................................15 AscenLink in HA (High Availability) Mode ........................................................15 System.................................................................................................................................. 17 Summary .........................................................................................................17 Network Settings .............................................................................................18 DNS Server .......................................................................................................... 19 VLAN and Port Mapping ...................................................................................... 19 WAN Settings ....................................................................................................... 24 WAN/DMZ Private Subnet.................................................................................... 37 LAN Private Subnet .............................................................................................. 44 WAN Link Health Detection .............................................................................49 Optimum Route Detection................................................................................50 Port Speed/Duplex Settings .............................................................................52 Backup Line Settings .......................................................................................52 IP Grouping .....................................................................................................53 Service Grouping .............................................................................................54 Busyhour Settings ...........................................................................................55 Diagnostic Tools ..............................................................................................56 Date/Time ........................................................................................................60 Remote Assistance ..........................................................................................60 Administration ..................................................................................................60 Service.................................................................................................................................. 64 Firewall ............................................................................................................64 NAT .................................................................................................................68 Persistent Routing ...........................................................................................72 Auto Routing ....................................................................................................77 Virtual Server ...................................................................................................84 Inbound BM .....................................................................................................90 Outbound BM ..................................................................................................95 Connection Limit ..............................................................................................99 Cache Redirect ..............................................................................................103 Tunnel Routing ..............................................................................................106 Multioming .....................................................................................................119 Internal DNS ..................................................................................................127 DNS Proxy .....................................................................................................129 SNMP ............................................................................................................130 IP-MAC Mapping ...........................................................................................131 Statistics ............................................................................................................................ 132 Traffic ............................................................................................................132 BM .................................................................................................................133 Persistent Routing .........................................................................................133 WAN Link Health Detection ...........................................................................134 Dynamic IP WAN Link ...................................................................................134 DHCP Lease Information ...............................................................................135 RIP & OSPF Status .......................................................................................135 Connection Limit ............................................................................................135 Virtual Server Status ......................................................................................136 FQDN ............................................................................................................136 Tunnel Status ................................................................................................137 Tunnel Traffic.................................................................................................137 Log ....................................................................................................................................... 138 View ..............................................................................................................138 Control ...........................................................................................................138 Notification .....................................................................................................140 Link Report ....................................................................................................142 Deployment Scenarios ................................................................................................ 143 Various WAN Types and Scenarios ...............................................................143 Exploring Auto Routing ..................................................................................150 Various Auto Routing Mechanisms ................................................................154 Virtual Server .................................................................................................154 Multihoming ...................................................................................................155 Introduction to DNS .......................................................................................155 High Availability (HA) Scenarios ....................................................................157 Appendix ........................................................................................................................... 159 Appendix A.1 Default Values .........................................................................159 Appendix A.2 Console Mode Commands ......................................................160 Appendix A.3 Firmware Update .....................................................................162 Appendix A.4 Configuration File.....................................................................163 Appendix A.5 Rack Mount Means ..................................................................165 Appendix A.6 Caution ....................................................................................167 Fortinet Technologies Inc. 2 AscenLink User Manual – LinkOS V7.1 Quick Start The Quick Start will help you install AscenLink, and get familiar with user interface. Installation Prerequisites This section lists requirements for installing and working with AscenLink. Be aware that the position of LAN port may vary depending on models. AscenLink 700, for example, has five network interfaces, with its fourth interface as LAN port and fifth as DMZ port. By default, LAN port IP address is 192.168.0.1. Change the PC IP address to 192.168.0.2 (or 192.168.0.x). Connect the PC to AscenLink LAN port with cross-over cable. Once it has been successfully connected, the LED of LAN port lights on. Access the Web UI. Type https://192.168.0.1 in web browser, preferably Internet Explorer 6.0 and later, Mozilla 2.0 and later. AscenLink is optimized for 800 x 600 resolution and above. Log in to Web UI using the default username/password combinations of "Administrator/1234" and "Monitor/5678". Before setting up AscenLink in your network, ensure the following are taken care of: Check network environment and make sure the following are ready before AscenLink installation and setup: well-structured network architecture, and proper IP allocation. Use cross-over to connect PC to AscenLink LAN port instead of straight-through. Accessing the Web UI To set up and start AscenLink successfully, you have to connect PC to LAN port with cross-over cable. AscenLink has a few physical network interfaces, among which the second-last one is the LAN port. 1. Connect the PC LAN port to AscenLink LAN port with cross-over cable. Administrators can project network interfaces as WAN, LAN, or DMZ port, based on specific needs. 2. Switch on AscenLink, and it emits 3 beeps, indicating AscenOS is initialized and activated. Meanwhile, the indicator light at LAN port blinks, indicating a proper connection. 3. Change the PC LAN interface IP to 192.168.0.2, and subnet mask to 255.255.255.0. 4. Disable the proxy settings of web browser. Open Internet Explorer. Select Fortinet Technologies Inc. 3 AscenLink User Manual – LinkOS V7.1 "Internet Option" on "Tools" menu, click the "Connection" tab, click "LAN settings" and open "Local Area Network Settings" dialog box, then disable "Proxy server". 5. Enter https://192.168.0.1 in browser to access the Web UI. Ensure it is "https" instead of "http". For security concern, communication sessions between PC and AscenLink are encrypted. 6. Log in to Web UI using the default username/password combinations of "Administrator/1234" and "Monitor/5678". Two user accounts are: Administrator which has privileges to monitor and modify system parameters. Monitor which can monitor ONLY. AscenLink only allows 1 administrator and 5 monitors to access concurrently. If a second administrator logs in, the first administrator will automatically be relegated to monitor status. It is strong recommended that the passwords be changed ASAP, and store it in a safe and secure location. Fortinet Technologies Inc. 4 AscenLink User Manual – LinkOS V7.1 Web UI Overview As soon as you log in, you will view the dashboard with five main functions: System Service Statistic Log Language They are located at the left side of the Web UI menu. Details of these functions will be elaborated in following chapters. Next thing we will introduce you to How to change password and language. Changing Password Log in as Administrator, and change password in [System][Administration]: Next time you log in, use the new password. Note: Store the new password in a safe and secure location. Be the password lost or forgotten, use Null Modem Cable to connect PC RS-232 series port to AscenLink console port. Execute HyperTerminal, and log in to console interface with default user account/password combination of Administrator/ascenlink, then perform “resetpasswd” command to restore password to factory default settings. For information on console commands, look up Appendix. Changing Language Select a desired language from [Language] menu, to change the language display. Fortinet Technologies Inc. 5 AscenLink User Manual – LinkOS V7.1 How to Use Web UI Once you log in, you will see the operating menu on AscenLink Web UI. Operating Menu The menu consists of five main functions: System, Service, Statistics, Log, and Language. Each function is divided into submenus. [System/Summary] shown above indicates page contents are displayed of [System] [Summary], and [[email protected]] indicates Administrator account log in from IP 10.12.97.118. The purpose of buttons is explained below. Button Purpose / Description Click this button, to perform configurations or save configuration changes to memory. Before switching page, remember to click [Apply]. Otherwise, changes will NOT be stored. Click this button, to reload page contents. Click this button, to display online help for current page. Managing Rule/Filter/Policy Orders of Rules/Filters/Policies AscenLink manages most of its rules/filters/policies with top-down evaluation method Fortinet Technologies Inc. 6 AscenLink User Manual – LinkOS V7.1 where the rules are prioritized in descending order. The purpose of icons is explained below. Icon Purpose / Description Click this button, to add a new rule below the current rule. Click this button, to move the rule down a row. Click this button, to move the rule up a row. Click this button, to delete the rule. Write a note for this rule. Newly created rules are placed right below the currently selected rule. Moving the rules up or down can change how AscenLink prioritizes the rule. Checkbox Checkbox is rather common on the web UI. A red check sign inside can enable the function, or logging, if any. Icon Purpose / Description The function is disabled. The function is enabled. Language Select a desired language from [Language] menu. Fortinet Technologies Inc. 7 AscenLink User Manual – LinkOS V7.1 Basic Network Settings Let's go through an example to illustrate how to configure basic network structure for AscenLink. Based on the structure (shown above), we shall first project how to use network interfaces. As AscenLink interfaces allow flexible setup, an interface can be projected being a WAN, LAN, or DMZ port based on specific networking needs. In this example, Port 1 is set as LAN port, Port 2 WAN port, and Port 5 DMZ port. Configure network interfaces in [System][Network Settings][VLAN and Port Mapping]. WAN Port Configuration After [VLAN and Port Mapping] has been set up, the next thing comes to configure WAN port. Data from LAN to the Internet shall go through AscenLink WAN port to router, thus a public IP is needed to configure the WAN port. Such information obtained from your ISP as public IP, netmask, and gateway is necessary to complete the Fortinet Technologies Inc. 8 AscenLink User Manual – LinkOS V7.1 following setup. On [System][Network Settings] page, click [WAN Settings] tab, and follow the steps below. Select a WAN link. If there are multiple links, configure one by one. Check [Enable] to enable the WAN link. In [Basic Setting], select [Routine Mode] from [WAN Type]. Options may vary, depending on the following things. If you obtain a subnet with a group of public IP addresses from ISP, then select [Routing Mode]. If you obtain one single public IP address, then select [Bridge Mode: One Static IP]. Enter the physical port number the WAN link is connected to, for example, Port2. This is the physical port on AscenLink. Enter bandwidth limit values in [Up Stream] and [Down Stream] for the WAN link, for example, 25000 Kbps and 25000 Kbps. Enter the gateway’s IP address in [IPv4 Gateway]. In this example, it is the router's IP address, 211.30.10.9. Specify the package size for transfer in [MTU]. Field WAN Type WAN Port Down Stream Up Stream MTU IPv4 Gateway Configuration Routing Mode Port2 25000 25000 1500 211.30.10.9 The next thing comes to [IPv4 Basic Subnet]. Select [Subnet in WAN and DMZ] from [Subnet Type], which is used frequently in networks. Enter the IP addresses of WAN port on AscenLink in [IP(s) on Localhost]. These IP addresses have been obtained from your ISP. In this example, AscenLink binds two IP addresses to port 2, 211.30.10.11 and 211.30.10.12. You may add a new IP address by clicking on the “+” icon, or specify 211.30.10.11-211.30.10.12 to denote an IP arrange. Enter WAN IP addresses in [IP(s) in WAN]. In this example, there are two, 211.30.10.9 for default gateway and 211.30.10.13 for host in WAN. Enter the netmask 255.255.255.248. Specify the DMZ port number in [DMZ Port] as port 5. It has been configured in [VLAN and Port Mapping]. Check [Enable DHCP] in case that AscenLink serves as DHCP server to assign IP address dynamically to PCs in WAN. Then specify [Starting Address] and [Ending address] in [DHCP Range], which is to be allocated to client end. In other case where PCs in WAN use static IP addresses, specify the IP in [IP Address], and the MAC address in these PCs' WAN port in [MAC Address]. Fortinet Technologies Inc. provided 9 by ISP in [Netmask], for example, AscenLink User Manual – LinkOS V7.1 Press [Apply] to write these configuration settings to memory. Field Subnet Type IP(s) on Localhost IP(s) in WAN Netmask DMZ Port Enable DHCP Configuration Subnet in WAN and DMZ 211.30.10.11 211.30.10.12 211.30.10.9 211.30.10.13 255.255.255.248 Port5 Check LAN Port Configuration In [System][Network Settings], click [LAN Private Subnet] tab to configure private IP addresses which are commonly used by LAN/Intranet. AscenLink DMZ port features Public IP Pass-through. Thus, assign a public IP to a PC in DMZ ,and it makes WAN transparently accessible for data packets from this PC. The steps to configure LAN port are: 1. Enter LAN port IP and netmask in [IP(s) on Localhost] and [Netmask]. In this example, they are 192.168.100.254 and 255.255.255.0 respectively. 2. Select LAN port number from [LAN Port]. 3. Enable [NAT Subnet for VS], to avoid packets bypassing AscenLink and going directly to internal server. This works especially when LAN users access virtual server's WAN IP. 4. Check [Enable DHCP] in case that AscenLink serves as DHCP server to assign IP address dynamically to PCs in LAN. Then specify DNS server IP to resolve address. Generally DNS server is deployed on the same LAN with AscenLink, and the server's address shall be communicable for AscenLink. Next enter [Starting Address] and [Ending address] in [DHCP Range], which is to be allocated to client end. In other case where PCs in LAN use static IP addresses, specify the IP in [IP Address], and the MAC address in these PCs' WAN port in [MAC Address]. 5. Click [Apply] to write these configuration settings to memory. Fortinet Technologies Inc. 10 AscenLink User Manual – LinkOS V7.1 Field IP(s) on Localhost Netmask LAN Port NAT Subnet for VS Enable DHCP Domain Name Server Domain Name Suffix DHCP Range Static Mapping Configuration 192.168.100.254 255.255.255.0 Port1 Check Check ALL ALL Starting Address 192.168.100.175 MAC Address 00:10:a4:c6:21:18 00:50:22:00:b5:6f Ending Address 192.168.100.199 IP Address 192.168.100.103 192.168.100.169 Typical Network Structure with Multiple WAN Links AscenLink exerts the most influence in network structure with multiple WAN links. This sector illustrates how AscenLink is going to work in a structure with two WAN links (see the topology below). WAN1 and WAN2 are linked to ISP1 and ISP2 respectively, both using public IP addresses. LAN port uses private IP address, making AscenLink the gateway. DMZ port uses private IP address as well, serving as a second gateway. And hosts on internal network using 192.168.0.100 and 192.168.0.200 will access the Internet with NAT or NAPT (Network Address/Port Translation) through AscenLink WAN ports. The structure (shown above) involves configuring 4 panels in [system][Network Settings] [VLAN and Port (WAN/LAN/DMZ) Mapping] which determines the [WAN Settings] which configures two WAN links [WAN/DMZ Private Subnet] which configures the DMZ port [LAN Private Subnet] which configures the LAN port AscenLink ports The following moves one by one from [VLAN and Port Mapping] to [LAN Private Subnet]. Configuring [VLAN and Port Mapping] Port1---maps to WAN Port2---maps to WAN Port3---maps to LAN Port4---maps to DMZ Fortinet Technologies Inc. 11 AscenLink User Manual – LinkOS V7.1 Configuring [WAN Settings] The figure below configures WAN1, assuming 512 kbps for upstream and downstream respectively and 255.255.255.248 for netmask. Field WAN Type WAN Port Down Stream Up Stream MTU IPv4 Gateway Configuration Routing Mode Port1 512 512 1500 211.21.38.41 Field Subnet Type IP(s) on Localhost IP(s) in WAN Netmask DMZ Port Enable DHCP Configuration Subnet in WAN and DMZ 211.21.38.42 211.30.38.41 255.255.255.248 Port4 Check Fortinet Technologies Inc. 12 AscenLink User Manual – LinkOS V7.1 Move to WAN 2 for next step. Field WAN Type WAN Port Down Stream Up Stream MTU IPv4 Gateway Configuration Routing Mode Port2 512 512 1500 211.20.121.185 Field Subnet Type IP(s) on Localhost IP(s) in WAN Netmask DMZ Port Enable DHCP Configuration Subnet in WAN and DMZ 211.20.121.186 211.20.121.185 255.255.255.248 Port4 Check Configuring [WAN/DMZ Private Subnet] The configuration focuses on DMZ port settings. As the port has been assigned with a private IP, it acts as the gateway for the network that is linked to it. Field Subnet Type IP(s) on Localhost Netmask DMZ Port Enable DHCP Configuration Subnet in DMZ 192.168.10.254 255.255.255.0 Port4 Check Configuring [LAN Private Subnet] Finally, it comes to configure the LAN port. In the figure below, DHCP server has been enabled to assign addresses to hosts in LAN. Field IP(s) on Localhost Netmask LAN Port NAT Subnet for VS Enable DHCP Domain Name Server Domain Name Suffix DHCP Range Fortinet Technologies Inc. Configuration 192.168.0.254 255.255.255.0 Port3 Check Check ALL ALL Starting Ending Address Address 192.168.0.1 192.168.0.200 00 13 AscenLink User Manual – LinkOS V7.1 Public IP Pass-through Public IP Pass-through allows to minimize the adaptation of network structure to the least possible extent. For internal network with both public and private IP addresses, devices using public IP or IP range can be deployed in DMZ directly. This saves the need to do additional or extra adaptation.. In the topology below, the PC in DMZ has been assigned with a public IP 211.21.38.43, in the same IP range with port1. Public IP Pass-through actually indicates port4 has been transparently connected to port1 (shown in dotted line). Thus, the PC in DMZ takes port1's gateway as its own gateway. AscenLink Cooperating with Firewall AscenLink can cooperate with Firewall in the network environment. Simply connect the Firewall to the device's DMZ port, without any change to the existing settings of the Firewall. AscenLink can even work with a Firewall which has been set with a public or private IP address or subnet. Fortinet Technologies Inc. 14 AscenLink User Manual – LinkOS V7.1 Hardware Installation Racking and Mounting AscenLink AscenLink is shipped with screws for standard industrial racks. Use the shipping accessory to assemble. Connecting AscenLink to Other Network Devices Depending on the network environment, AscenLink may use cross-over cable and/or straight-through cable to assemble. Device Cable Router Cross-Over Firewall Cross-Over Server Cross-Over Hub Straight-Through Switch Straight-Through AscenLink in HA (High Availability) Mode Installing AscenLink in HA mode When two AscenLink units work together, they can be configured to HA (High Availability) double-device backup mode. This setup allows two AscenLink units to server as backup for each other. The master is the main functioning unit, while the slave is the backup unit in standby. Fortinet Technologies Inc. 15 AscenLink User Manual – LinkOS V7.1 An AscenLink unit alone already has built-in fault tolerance mechanism. All its OS and control applications are stored in Flash Memory, so sudden loss of electricity will not damage the system. But when the network must provide non-stop service for mission-critical applications, the HA mode becomes a must. With HA, AscenLink serves a significant solution to accomplish network fault tolerance. AscenLink's double-device backup setup is easy to use. Simply connect a 9-pin RS-232 Serial Null Modem Cable (standard shipping accessory) to both HA port in two AscenLink units. Setting Up HA AscenLink supports hot backup in HA. When both AscenLink are on, one unit (the master) performs operations, with the other (the slave) in standby. If the master fails for power failure or hardware failure, hot backup performs a switch-over to the slave. This function logically promotes the slave to activate HA and to resume the role of the master. The HA hot-backup solution significantly limits the downtime, and secures uninterrupted operation for critical applications. Activating HA Mode 1. Install the master AscenLink. 2. Connect the slave AscenLink to the master with 9-pin RS-232 Serial Null Modem Cable. 3. Switch on the slave. After HA mode has been activated, the Master emits 4 beeps, and the Slave does 3. The status of the Slave is displayed under [System][Summary][Peer Information] on the master's web UI. Once the master is down, the slave emits 1 beep and resumes the role of the master to keep network alive. Note: Ensure the cable is solidly plugged in both units. Otherwise, it may cause errors. After the master locates the slave, system will activate HA mode. Fortinet Technologies Inc. 16 AscenLink User Manual – LinkOS V7.1 System This chapter elaborates on [System] and its submenus. Simple examples are given to illustrate how to configure [system] settings. Summary As soon as you log in to the web UI, you will see the [System/Summary].It shows you basic information on the system, including [System Information], [Peer Information], [WAN Link State], and [License Information]. [Peer Information] is populated as soon as HA mode becomes active. As is mentioned in Chapter1, HA (High Availability) is hot backup. In HA mode, one AscenLink is the primary system while the other is the backup system. System Information / Peer Information Category Field Purpose / Description System Information Version The firmware version of the device Serial Number The serial number of the device Uptime The time the device has been up and running Connections The number of connections CPU Usage % The CPU usage in percentage Packets/Second The number of the packets that are processed per second VRRP State The state of VRRP (Virtual Router Redundancy Protocol) - whether it is enabled. Note: When VRRP is enabled, HA will be disabled, and vice versa. Category Field Purpose / Description Peer Information Version The firmware version of the slave Serial Number The serial number of the slave Uptime The time the slave has been up and running State The "State" is always being “Slave” Note: Connections may exceed 100 when AscenLink is started, but will return to normal in a while. This happens because AscenLink sends out ICMP packets to test the network. Note: Once HA becomes active, settings of master unit will be synchronized to slave unit automatically. Fortinet Technologies Inc. 17 AscenLink User Manual – LinkOS V7.1 WAN Link State [WAN Link State] shows you the number of WAN links enabled and their current status. The number of WAN links available for each AscenLink may vary depending on models. In [WAN Link State], each WAN link is color-coded to indicate its status. See the colorcoding scheme below: Green: Active WAN link Blue: Backup WAN link Red: Broken WAN link Category Field Purpose / Description WAN Link State WAN Enabled WAN Link State Current connection status IPv4 / IPv6 Address The IPv4 or IPv6 address of the WAN port (see configurations in [System > Network Setting]). Note The notes for the WAN link (see configurations in [System > Network Setting]) License Information License Control provides users with all the License Key configurations, and all the license information is shown here. Please refer [Administration] section for more information. Category Field Purpose / Description License Information Name Displays the license name in use: System and Bandwidth Upgrade. License Displays the status of the license: Yes, No. Remarks Remarks to the license. Network Settings This section enables administrators to configure WAN, LAN settings from Web UI. Explore the following to know more about the five submenus in [System/Network Settings]: [DNS Server]: The IP address of the DNS server in the network can be entered or modified. Fortinet Technologies Inc. 18 AscenLink User Manual – LinkOS V7.1 [VLAN and Port Mapping]: The feature enables administrators to map AscenLink ports to WAN, LAN, or DMZ. In network that is using VLAN Switch (Virtual LAN Switch), AscenLink ports can even be mapped to VLAN Switch ports. In big network that is segmented into smaller groups of subnets by VLAN Switch, AscenLink allows data to exchange between these subnets. Through [VLAN Tags] settings, VLAN Switch ports can even perform as DMZ, WAN or LAN. [WAN Setting]: This feature includes several configuration settings of WAN link. [WAN/DMZ Private Subnet]: This feature includes several configuration settings of WAN/DMZ port that has private subnets. [LAN Private Subnet]: This feature includes several configuration settings of LAN port that has private subnets. Configuration File: Configuration file can be imported or exported and stored as “.txt” file. Note: Only Administrator has the privilege to perform this function. DNS Server [DNS Server] feature enables administrators to define the host name of the DNS Server in the network, the IPv4/IPv6 address of DNS Server, and the suffix of the domain name. The following lists Web UI functions that may use DNS Server. [System/Diagnostic Tools]: Ping and Trace [Log/Control]: SMTP and FTP Server Settings [Log/Notification]: SMTP Server Settings [Serial Console]: Ping and Traceroute Commands Note: Incomplete DNS server configurations will not influence the performance of the functions listed above. Only IP address is necessary instead of the FQDN. Configuration File: Configuration file can be imported or exported and stored as “.txt” file. Note: Only the Administrator has the privilege to perform this function. VLAN and Port Mapping [VLAN and Port Mapping] AscenLink supports IEEE 802.1Q (also known as VLAN Tagging), but it does not support Cisco’s ISL. Prior to its deployment, it is better to get ports mapped, for example. Port1 mapped to WAN port. Fortinet Technologies Inc. 19 AscenLink User Manual – LinkOS V7.1 To better use AscenLink with VLAN Switch in the network, see the structure below: As described, AscenLink Port 1 is connected to VLAN switch, and VLAN tagging is required in the network. Thus administrators can map the tags in [Mapping] and configure tagging in [VLAN Tag]. See below: Tag 101 --- WAN Tag 102 --- WAN Tag 103 --- LAN Tag 104 --- DMZ After this configuration, AscenLink port1 will no longer accept untagged VLAN packets. Port1.101 and port1.102 on VLN Switch are directly connected with WAN links, while port1.103 is connected with PCs in LAN and port1.104 is connected with PCs in DMZ. In this network, AscenLink acts as the role of Router. PCs in DMZ can be assigned with public IP addresses, with their packets transparently passing through AscenLink to WAN. Apart from AscenLink ports, it is necessary to configure VLAN Switch as well, like the settings of tags and IP addresses. Port VLAN Tag Mapping VRID Port1 101 WAN # 1, 2, 3, ... 102 WAN # 1, 2, 3, ... 103 LAN # 1, 2, 3, ... 104 DMZ # 1, 2, 3, ... Port2 No VLAN Tag None # 1, 2, 3, ... Port3 No VLAN Tag None # 1, 2, 3, ... Port4 No VLAN Tag None # 1, 2, 3, ... Fortinet Technologies Inc. 20 AscenLink User Manual – LinkOS V7.1 Note: This field is only available when VRRP mode is enabled in Lan Private Subnet settings. The VRID indicates the virutal router identifier for every VR. [Redundant LAN/DMZ Port] and [Aggregated LAN/DMZ Port] Why redundant LAN port and redundant DMZ port are necessary? Because without these two ports, when AscenLink is working in HA mode, single point failure can still occur over links connecting LAN/DMZ and LAN/DMZ ports on AscenLink. AscenLink bridges the connections of redundant LAN port and redundant DMZ port. It supports the Spanning Tree algorithm and sets the highest 0xffff as bridge priority. The configurations thus manage to avoid network failure caused by the possible packet looping. In addition, the aggregation of both ports can be used to increase 1x bandwidth, while also offer HA backup support. Category Field Purpose / Description Redundant LAN Port Label The logical label of the redundant LAN port pair that is grouped by a selection of two ports. The label is used for later reference in other configurations. The label can only contain letters of “0-9 a-z A-Z .-_”, and will display in LAN settings as one option. Mapping Select two LAN ports and group them as redundant LAN port pair. Label The logical label of the redundant DMZ port pair that is grouped by a selection of two ports. The label is used for later reference in other configurations. The lable can only contain letters of “0-9 a-z A-Z .-_”, and will display in DMZ settings as one option. Mapping Select two DMZ ports and group them as redundant DMZ port pair. Label The logical label of the aggregated LAN port pair that is grouped by a selection of two ports. The label is used for later reference in other configurations. The label can only contain letters of “0-9 a-z A-Z .-_”, and will display in LAN settings as one option. Mapping Select two LAN ports and group them as aggregated LAN port pair. Label The logical label of the aggregated DMZ port pair that is grouped by a selection of two ports. The label is used for later reference in other configurations. The lable can only contain letters of “0-9 a-z A-Z .-_”, and will display in DMZ settings as one option. Redundant DMZ Port Aggregated LAN Port Aggregated DMZ Port Fortinet Technologies Inc. 21 AscenLink User Manual – LinkOS V7.1 Select two DMZ ports and group them as aggregated DMZ port pair. Mapping Example 1 Redundant LAN Port and/or redundant DMZ port: Single AscenLink As illustrated in the topology below, AscenLink port1 are mapped to WAN port. Port2 and port3 are configured as the redundant LAN ports which are connected to Switch1, port4 and port5 as the redundant DMZ ports which are connected to Switch2. In this case, once one of the two LAN/DMZ links breaks down, AscenLink will enable the other LAN/DMZ link to resume the traffic. Configure [VLAN and Port Mapping] from the Web UI. In this example, Port 1 is set as WAN, Port 2 and Port 3 as HA LAN port pair and Port 4 and 5 as HA DMZ port pair. Each of the LAN/DMZ pair is connected via a single switch (switch 1 or switch 2). This will remove the chance of single point failure on the switch, and the entire system will be in ‘HA’. VLAN and Port Mapping Port VLAN Tag Mapping Port1 No VLAN Tag WAN Port2 No VLAN Tag LAN Port3 No VLAN Tag LAN Port4 No VLAN Tag DMZ Port5 No VLAN Tag DMZ Fortinet Technologies Inc. 22 AscenLink User Manual – LinkOS V7.1 Redundant LAN Port Label Mapping Bridge-LAN Port2 Port3 Redundant DMZ Port Label Mapping Bridge-DMZ Port4 Port5 Example 2 Redundant LAN Port and/or redundant DMZ port: AscenLink in HA mode As illustrated in the topology below, two AscenLink units work in HA mode, with one active and the other in standby. Port1 and port2 acts as redundant LAN port for each other, putting the two units into hot backup mode. This mode offers a significant solution against single point failure in LAN/DMZ. Topology: Configuring [VLAN and Port Mapping] from the UI: Fortinet Technologies Inc. 23 AscenLink User Manual – LinkOS V7.1 VLAN and Port Mapping Port VLAN Tag Mapping Port1 No VLAN Tag LAN Port2 No VLAN Tag LAN Port3 No VLAN Tag None Port4 No VLAN Tag None Port5 No VLAN Tag WAN Redundant LAN Port Label Mapping Bridge-LAN Port1 Port2 Configuring [LAN Private Subnet] from the UI: Field Value IP(s) on Localhost 10.17.0.1 Netmask 255.255.192.0 LAN Port Bridge: Bridge-LAN WAN Settings [WAN Settings] feature lets you configure several settings of WAN link. If your network has several WAN links, you have to configure one after another. Select any link from [WAN link] and check [Enable] to start a configuration of the WAN connection. The Note field allows administrators to input a note for the selected WAN link, which will appear on the WAN Link State table of System Summary page. One of the first considerations in starting a WAN link configuration is deciding the WAN type. Configuration may vary depending on [WAN Type] in [Basic Settings]. The [WAN Type] could be one of: Routing Mode Bridge Mode: One Static IP Bridge Mode: Multiple Static IP Bridge Mode: PPPoE Bridge Mode: DHCP Client As mentioned previously, the UI may change looks as you switch between WAN types. And for AscenLink, it may have two different subnets as well. One is subnets are directly connected to AscenLink. This happens when the Fortinet Technologies Inc. 24 AscenLink User Manual – LinkOS V7.1 subnets are on the same network segment, and it does not need any router to transfer packets between subnets. In this case, settings are configured from [Basic Subnet] on the UI The other is subnets are connected to a router (or an L3 Switch) and then to AscenLink. This happens when the subnets are on different network segments, and it needs a router or switch to transfer packets between subnets. In this case, settings are configured from [Static Routing Subnet]. Routing Mode [Basic Settings] Select [Routing Mode] from [WAN Type], and configure parameters in [Basic Settings]. Field Purpose / Description WAN Port The AscenLink physical port used to connect the WAN link e.g, port 3 Note: The port has to be mapped to [WAN] beforehand in [VLAN and Port Mapping] Down Stream The WAN link's transfer speed at which you can download data from the Internet e.g. 512Kbps Up Stream The WAN link's transfer speed at which you can upload data to the Internet e.g. 512Kbps MTU (Maximum Transmission unit) refers to the size of the largest packet or frame that a given layer of a communications protocol can pass onwards. It allows dividing the packet into pieces, each small enough to pass over a single link. IPv4 Gateway The IPv4 address of the default gateway e.g. 211.21.40.254 PS: this is mandatory IPv6 Gateway The IPv6 address of the default gateway e.g. 2001:1:1::254 PS: this is optional. Support IPv4 or IPv4/IPv6 dual stack [Basic Subnet] and [Static Routing Subnet] Next comes to configure the [Basic Subnet] and [Static Routing Subnet]. As mentioned previously, there are two different types of subnets for AscenLink. The two settings are configured from [Basic Subnet] and [Static Routing Subnet]. AscenLink supports both IPv4 and IPv6. Subnets to be configured in [IPv4 Basic Subnet] / [IPv4 Static Routing Subnet] and [IPv6 Basic Subnet] / [IPv6 Static Routing Subnet] are respectively IPv4 and IPv6 public subnets. Fortinet Technologies Inc. 25 AscenLink User Manual – LinkOS V7.1 The subnet type in [IPv4 Basic Subnet] and [IPv6 Basic Subnet] could be one of: Subnet in WAN Subnet in DMZ Subnet in WAN and DMZ Subnet on Localhost (Not support in [IPv6 Basci Subnet]) Noteworthy among these is [Subnet in WAN and DMZ], which is frequently used. The subnet type in [IPv4 Static Routing Subnet] and [IPv6 Static Routing Subnet] could be one of: Subnet in WAN Subnet in DMZ A few examples to further illustrate configurations in [Basic Subnet] and [Static Routing Subnet]: 1. [Basic Subnet]: Subnet in WAN This topology is frequently found where cluster hosts on a IPv4 public subnet are deployed in WAN. As described in the topology, AscenLink uses port2 as WAN port with IP range 211.21.9.1~211.21.9.5. Note that when a port is assigned an IP range of continuous IP addresses, it shall follow the format explicitly like 211.21.9.1-211.21.9.5. Its netmask obtained from ISP is 255.255.255.0, and the router's IP address 211.21.9.254. AscenLink assumes that IP addresses that are unlisted in [IP(s) on localhost] are Fortinet Technologies Inc. 26 AscenLink User Manual – LinkOS V7.1 all in the subnet in WAN. After these configurations, the UI looks like: Basic Setting Field Value WAN Type Routing Mode WAN Port Port2 Down Stream 512 Up Stream 512 MTU 1500 IPv4 Gateway 211.21.9.254 IPv4 Basic Subnet Field Value Subnet Type Subnet in WAN IP(s) on Localhost 211.21.9.1-211.21.9.5 Netmask 255.255.255.0 Similarly, the configuration to deploy a IPv6 public subnet in WAN looks like: IPv6 Basic Subnet Field Value Subnet Type Subnet in WAN IP(s) on Localhost 2009::2 Prefix Length 64 2. [Basic Subnet]: Subnet in DMZ This topology is frequently found where cluster hosts on an IPv4 public subnet are deployed in DMZ. Fortinet Technologies Inc. 27 AscenLink User Manual – LinkOS V7.1 As described in the topology, since cluster hosts are deployed in DMZ. AscenLink port5 has to be mapped to DMZ with IP address 140.112.8.254. Thus cluster hosts in DMZ take the default gateway as 140.112.8.254. Check [Enable DHCP] if hosts in the subnet in DMZ require DHCP service. And enter the starting and ending address in [DHCP Range]. If any host in the subnet uses static IP address, then in [Static Mapping], enter its IP and MAC address. After these configurations, the UI looks like: IPv4 Basic Subnet Field Value Subnet Type Subnet in DMZ IP(s) on Localhost 140.112.8.254 Netmask 255.255.255.0 DMZ Port Port5 Enable DHCP Checked DHCP Range Starting Address Ending Address 140.112.8.10 140.112.8.20 MAC Address IP Address 00:0A:02:0B:03:0C 140.112.8.30 Static Mapping Fortinet Technologies Inc. 28 AscenLink User Manual – LinkOS V7.1 Similarly, the configuration to deploy a IPv6 public subnet in DMZ looks like: IPv6 Basic Subnet Field Value Subnet Type Subnet in DMZ IP(s) on Localhost 2009::2 Prefix Length 64 DMZ Port Port5 Note: AscenLink assumes that IP addresses that are unlisted in the range are all in DMZ. 3. [Basic Subnet]: Subnet in WAN and DMZ This topology is frequently found where cluster hosts on a public subnet are deployed in both WAN and DMZ. As described in the topology, port2 and port5 are connected in dotted line, indicating an IP range on the same subnet 139.8.1.x spreads across WAN (port2) and DMZ (port5). And AscenLink employs Proxy ARP to connect the whole subnet together. In addition, IP 139.8.1.254 has been configured as the default gateway, thus it is located on the WAN. Fortinet Technologies Inc. 29 AscenLink User Manual – LinkOS V7.1 IPv4 Basic Subnet Field Value Subnet Type Subnet in WAN and DMZ IP(s) on Localhost 139.8.1.20-139.8.1.30 IP(s) in WAN 139.8.1.10-139.8.1.19 139.8.1.254 Netmask 255.255.255.0 DMZ Port Port5 Enable DHCP Checked DHCP Range Starting Address Ending Address 139.8.1.31 139.8.1.40 MAC Address IP Address 00:0A:02:0B:03:0C 139.8.1.41 Static Mapping When you select [Subnet in WAN and DMZ] from [Subnet Type], AscenLink will assume the IP addresses that are unlisted in the range are all in DMZ. Thus, in this example, all the IP addresses 139.8.1.x, except 139.8.1.10~19, 139.8.1.254 and 139.8.1.20~30, are assigned to DMZ for Public IP Pass-through. Check [Enable DHCP] if hosts in the subnet in DMZ require DHCP service. And enter the starting and ending address in [DHCP Range]. If any host in the subnet uses static IP address, then in [Static Mapping], enter its IP and MAC address. Similarly, the configuration to deploy an IPv6 public subnet in WAN and DMZ looks like: IPv6 Basic Subnet Field Value Subnet Type Subnet in WAN and DMZ IP(s) on Localhost 2001:a:b:cd01::1-2001:a:b:cd01::9 IP(s) in WAN 2001:a:b:cd01::10-2001:a:b:cd01::19 2001:a:b:cd01::20 Prefix Length 64 DMZ Port Port5 Fortinet Technologies Inc. 30 AscenLink User Manual – LinkOS V7.1 4. [Basic Subnet]: Subnet on Localhost This topology is found where subnet is designated on AscenLink to better use Virtual Server. IPv4 Basic Subnet Field Value Subnet Type Subnet on Localhost Network IP 210.33.50.0 Netmask 255.255.255.0 As described in the UI, the subnet as a whole is assigned to Virtual Server for use. Enter subnet IP address in [Network IP] and netmask 255.255.255.0 in [Netmask]. Fortinet Technologies Inc. 31 AscenLink User Manual – LinkOS V7.1 5. [Static Routing Subnet]: Subnet in WAN This topology is rarely seen in actual network where static routing subnet is located on the WAN. In other words, the subnet in WAN does not connect to AscenLink directly, but needs a router instead to transfer packets. In this example, a subnet 139.3.1.x is located on the WAN and connects to router 140.4.1.254, while another subnet 140.4.1.x is located on the WAN as well, but connects to AscenLink directly. The configurations here indicate how AscenLink to route packets to subnet 139.3.1.x. IPv4 Static Routing Subnet Field Value Subnet Type Subnet in WAN Network IP 139.3.1.0 Netmask 255.255.255.0 Gateway 140.4.1.254 Proxy ARP Checked As described in the UI, AscenLink transfers packets to the gateway 140.4.1.254 to deliver them to subnet 139.3.1.0/255.255.255.0. Similarly, the configuration to deploy an IPv6 static routing subnet in WAN looks like: IPv6 Static Routing Subnet Field Value Subnet Type Subnet in WAN Subnet 2001:a:b:cd01::/127 Gateway 2001:a:b:cd03::13 Fortinet Technologies Inc. 32 AscenLink User Manual – LinkOS V7.1 6. [Static Routing Subnet]: Subnet in DMZ This topology is similar with the one in last example [Static Routing Subnet]: Subnet in WAN. The only difference is subnet is in DMZ this time. IPv4 Static Routing Subnet Field Value Subnet Type Subnet in DMZ Network IP 139.3.1.0 Netmask 255.255.255.0 Gateway 140.4.1.253 Proxy ARP Checked As described in the UI, AscenLink transfers packets to the gateway 140.4.1.253 to deliver them to subnet 139.3.1.0/255.255.255.0. Similarly, the configuration to deploy a IPv6 static routing subnet in WAN looks like: Fortinet Technologies Inc. 33 AscenLink User Manual – LinkOS V7.1 IPv6 Static Routing Subnet Field Value Subnet Type Subnet in DMZ Subnet 2001:a:b:cd01::/127 Gateway 2001:a:b:cd03::13 Bridge Mode: One Static IP [Bridge Mode: One Static IP] is used when ISP gives one IP to a static user. This topology is widely seen where a user gets one static IP from ISP. The user has applied for a static ADSL and IP, with upstream and downstream being 512Kbps respectively. ATUR, therefore, works in Bridge Mode. Basic Setting Field Value WAN Type Bridge Mode: One Static IP WAN Port Port1 Down Stream 512 Up Stream 512 MTU 1500 Localhost IP 211.21.40.32 Netmask 255.255.255.0 Default Gateway 211.21.40.254 Fortinet Technologies Inc. 34 AscenLink User Manual – LinkOS V7.1 Bridge Mode: Multiple Static IPs [Bridge Mode: Multiple Static IPs] is used when you have applied for a group of static IP addresses from ISP and your network has been configured into bridge mode. This topology can be seen where a group of valid IP addresses ranging 211.21.40.32~211.21.40.34 have been given by ISP and assigned to port1 on AscenLink. And their default gateway is 211.21.40.254 given by ISP as well. Basic Setting Field Value WAN Type Bridge Mode: Multiple Static IP WAN Port Port1 Down Stream 512 Up Stream 512 MTU 1500 IP(s) on Localhost 211.21.40.32-211.21.40.33 IP(s) in WAN No address IP(s) in DMZ 211.21.40.34-211.21.40.36 Netmask 255.255.255.0 Default Gateway 211.21.40.254 DMZ Port Port5 Fortinet Technologies Inc. 35 AscenLink User Manual – LinkOS V7.1 If there are other hosts deployed on the WAN, then configure their IP addresses in [IP(s) in WAN]. And if there are hosts deployed on the DMZ, then configure their IP addresses in [IP(s) in DMZ]. Check [Enable DHCP] if hosts in the subnet in DMZ require DHCP service. And enter the starting and ending address in [DHCP Range]. If any host in the subnet uses static IP address, then in [Static Mapping], enter its IP and MAC address. Field Value Enable DHCP Checked DHCP Range Starting Address Ending Address 211.21.40.34 211.21.40.35 MAC Address IP Address 00:0A:02:0B:03:0C 211.21.40.36 Static Mapping Bridge Mode: PPPoE [Bridge Mode: PPPoE] is used for an ADSL WAN link. In [Basic Settings], you shall configure upstream and downstream, user name, password and service name given by ISP. Left [IP Address] blank if you are assigned an ADSL dynamic IP address; otherwise, enter your ADSL static IP address. Select an AscenLink WAN port to which ADSL Modem is connected, e.g. port1. Checks [Redial Enable] to enable redial. As some ISPs automatically reconnect to the network within a certain time interval, [Redial Enable] will avoid simultaneous redialing of WAN links, which properly staggers WAN redial time. In case of connecting several DHCP/PPPoE WAN links to the same ISP, the connections might fail if they are deployed on the same physical WAN port via VLAN because the same MAC address. Via [Clone MAC Enable] you can configure MAC address clone on AscenLink for this deployment. Basic Setting Field Purpose / Description WAN Type Select [Bridge Mode: PPPoE] WAN Port Select the WAN Port to connect Down Stream The downstream (inbound) bandwidth of the WAN link,e.g.512 (Kbps) Up Stream The upstream (inbound) bandwidth of the WAN link,e.g.512 (Kbps) MTU Administrators are allowed to define the packet size. MTU allows dividing the datagram into pieces, each one small enough to pass over the single link. User Name Fill in the Username provided by ISP. Password Fill in Password provided by ISP. Service Name Fill in service name provided by ISP. Left it blank if ISPs do not require it. IP Address Fill in the IP provided by ISP. Left it blank if ISPs do not require it. Fortinet Technologies Inc. 36 AscenLink User Manual – LinkOS V7.1 Redial Enable Since some ISPs tend to turn off PPPoE connection at a certain schedule, AscenLink will automatically re-establish every disconnected PPPoE link when detected. In order to prevent simultaneous re-connection of multiple links, different re-connection schedules can be configured for different WAN links to avoid conjunction. After reconnection schedule is configured (HH:MM), the system will perform PPPoE reconnection as scheduled daily. Clone MAC Enable Configure MAC address clone. Bridge Mode: DHCP Client [Bridge Mode: DHCP Client] is used when AscenLink WAN port gets a dynamic IP address from DHCP host. Basic Setting Field Purpose / Description WAN Type Select [Bridge Mode: PPPoE] WAN Port Select the WAN Port to connect Down Stream The downstream (inbound) bandwidth of the WAN link,e.g.512 (Kbps) Up Stream The upstream (inbound) bandwidth of the WAN link,e.g.512 (Kbps) MTU Administrators are allowed to define the packet size. MTU allows dividing the datagram into pieces, each one small enough to pass over the single link. Clone MAC Enable Configure MAC address clone. WAN/DMZ Private Subnet After having gone through public subnet configurations, let's move to private subnet settings. This section lists a few typical topology structures for private subnet. Similarly, AscenLink supports two different types of private subnet according to the deployment, direct or indirect connecting to AscenLink.The two settings are configured from [Basic Subnet] and [Static Routing Subnet]. AscenLink supports both IPv4 and IPv6 for the two private subnet types. On its UI, [IPv4 Basic Subnet] and [IPv6 Basic Subnet] could be one of: Subnet in WAN Subnet in DMZ Subnet in WAN and DMZ Subnet on Localhost (Not support in [IPv6 Basci Subnet]) Fortinet Technologies Inc. 37 AscenLink User Manual – LinkOS V7.1 And [IPv4 Static Routing Subnet] and [IPv6 Static Routing Subnet] could be one of: Subnet in WAN Subnet in DMZ [Basic Subnet]: Subnet in WAN This topology is frequently found where cluster hosts in the IPv4 private subnet are located on the WAN. In this example, AscenLink port2 has been mapped to WAN port, with IP 192.168.3.1. Select [Subnet in WAN] from [Subnet Type] in [Basic Subnet]. Then enter 192.168.3.1 in [IP(s) on Localhost] and the netmask offered by ISP in [Netmask]. Note: AscenLink assumes that IP addresses that are unlisted in [IP(s) on Localhost] are all in WAN. IPv4 Basic Subnet Field Value Subnet Type Subnet in WAN IP(s) on Localhost 192.168.3.1 Netmask 255.255.255.0 WAN Port Port2 Fortinet Technologies Inc. 38 AscenLink User Manual – LinkOS V7.1 Similarly, the configuration to deploy an IPv6 private subnet in WAN looks like: IPv6 Basic Subnet Field Value Subnet Type Subnet in WAN Subnet 2001:a:b:cd01::1 Prefix Length 128 WAN Port Port2 [Basic Subnet]: Subnet in DMZ This topology is frequently found where cluster hosts in IPv4 private subnet are located on the DMZ. In this example, AscenLink port5 has been mapped to DMZ port, with private IP 192.168.4.254. And subnet 192.168.4.X is located on the DMZ as a whole. From UI, select [Subnet in DMZ] from [Subnet Type] in [Basic Subnet]. IPv4 Basic Subnet Field Value Subnet Type Subnet in DMZ IP(s) on Localhost 192.168.4.254 Netmask 255.255.255.0 DMZ Port Port5 Fortinet Technologies Inc. 39 AscenLink User Manual – LinkOS V7.1 Check [Enable DHCP] if hosts in the subnet in DMZ require DHCP service. And enter the starting and ending address in [DHCP Range]. If any host in the subnet uses static IP address, then in [Static Mapping], enter its IP and MAC address. Similarly, the configuration to deploy an IPv6 private subnet in DMZ looks like: IPv6 Basic Subnet Field Value Subnet Type Subnet in DMZ Subnet 2001:a:b:cd02::13 Prefix Length 128 DMZ Port Port5 Note: AscenLink assumes IP addresses that are unlisted in [IP(s) on Localhost] are all in DMZ. Thus there is no need to configure them. [Basic Subnet]: Subnet in WAN and DMZ This topology is found where cluster hosts in IPv4 private subnet are located in both WAN and DMZ. AscenLink hereby assumes IP addresses that are unlisted in [IP(s) on Localhost] and [IP(s) in WAN] are all in the DMZ. Port2 and port5 are connected in dotted line, indicating the subnet spreads across WAN (port2) and DMZ (port5). AscenLink employs Proxy ARP to connet the whole subnet togther. In this example, more than one IP addresses are needed for AscenLink in bridging. These IP addresses therefore have to be on the same network segment. Enter 192.168.5.20-192.168.5.30 in [IP(s) on Localhost], and 192.168.5.10-192.168.5.19 in [IP(s) in WAN]. Fortinet Technologies Inc. 40 AscenLink User Manual – LinkOS V7.1 IPv4 Basic Subnet Field Value Subnet Type Subnet in WAN and DMZ IP(s) on Localhost 192.168.5.20-192.168.5.30 IP(s) in WAN 192.168.5.10-192.168.5.19 192.168.5.254 Netmask 255.255.255.0 WAN Port Port2 DMZ Port Port5 Similarly, the configuration to deploy an IPv6 private subnet in WAN and DMZ looks like: IPv6 Basic Subnet Field Value Subnet Type Subnet in WAN and DMZ IP(s) on Localhost 2001:a:b:cd05::1-2001:a:b:cd05::10 IP(s) in WAN 2001:a:b:cd05::20-2001:a:b:cd05::30 2001:a:b:cd05::13 Prefix Length 64 WAN Port Port2 DMZ Port Port5 [Basic Subnet]: Subnet on Localhost This topology is found where a whole IPv4 private subnet is designated on AscenLink. And the IP addresses in this subnet can be utilized by Virtual Server. An IPv6 private subnet is not supported for this subnet type. IPv4 Basic Subnet Field Value Subnet Type Subnet on Localhost Network IP 192.168.6.0 Netmask 255.255.255.0 [Static Routing Subnet]: Subnet in WAN This topology is found where IPv4 private static routing subnet is located on the WAN. In other words, the private subnet on the WAN does not connect to AscenLink directly. Instead, it connects to a router which helps to transfer its packets. Fortinet Technologies Inc. 41 AscenLink User Manual – LinkOS V7.1 Hence, in [Static Routing Subnet], [Gateway] IP address is that of the router. IPv4 Static Routing Subnet Field Value Subnet Type Subnet in WAN Network IP 192.168.1.0 Netmask 255.255.255.0 Gateway 140.4.1.254 Similarly, the configuration to deploy an IPv6 private static routing subnet in WAN looks like: IPv6 Static Routing Subnet Field Value Subnet Type Subnet in WAN Subnet 2001:a:b:cd06::/127 Gateway 2001:a:b:cd05::13 Fortinet Technologies Inc. 42 AscenLink User Manual – LinkOS V7.1 [Static Routing Subnet]: Subnet in DMZ In this topology, in DMZ you create an IPv4 private subnet using one router (its IP, say, 192.168.34.50). But the subnet (its IP 192.168.99.0/24) does not connect to AscenLink directly. Configure the subnet on AscenLink to process its packets. IPv4 Static Routing Subnet Field Value Subnet Type Subnet in DMZ Network IP 192.168.99.0 Netmask 255.255.255.0 Gateway 192.168.34.50 Similarly, the configuration to deploy an IPv6 private static routing subnet in DMZ looks like: IPv6 Static Routing Subnet Field Value Subnet Type Subnet in DMZ Subnet 2001:a:b:cd07::/127 Gateway 2001:a:b:cd05::13 Fortinet Technologies Inc. 43 AscenLink User Manual – LinkOS V7.1 LAN Private Subnet [Basic Subnet] Among the submenus in [Network Settings], [LAN Private Subnet] is second only to [WAN Settings] as the most commonly used tab. If any AscenLink port has been mapped to LAN port, [LAN Private Subnet] is where you come and configure LAN settings. A simple example is given below to demonstrate how to configure typical LAN environment via [Basic Subnet] on this user interface. As described in the topology, AscenLink port3 has been mapped to LAN port, with private IP 192.168.34.254. Enter this IP address in [IP(s) on Localhost]. For PCs in LAN, the IP serves as gateway as well. Check the field in [Enable DHCP], to allocate IP address (any of 192.168.34.175~192.168.34.199) dynamically via DHCP to PCs in LAN. If any hosts in LAN require static IP addresses, then enter in [Static Mapping] the IP addresses to designate, and MAC addresses of the PCs as well. Check the field in [NAT Subnet for VS], which is an optional choice. When users in LAN or DMZ access the WAN IP of virtual server, their packets may bypass AscenLink and flow to internal server directly. This function can translate the source IP address of the users' packets into IP address of AscenLink, to ensure the packets flow through AscenLink. If no check is made, the system will determine which IP address it may translate into by itself. Fortinet Technologies Inc. 44 AscenLink User Manual – LinkOS V7.1 IPv4 Basic Subnet Field Value IP(s) on Localhost 192.168.34.254 Netmask 255.255.255.0 LAN Port Port3 NAT Subnet for VS Checked Enable DHCP Checked Domain Name Server 10.17.0.3 Domain Name Suffix ALL DHCP Range Starting Address Ending Address 192.168.34.175 192.168.34.199 MAC Address IP Address 00:20:ed:18:58:16 192.168.34.173 Static Mapping Similarly, to deploy an IPv6 private LAN on AscenLink port4 which has been mapped to LAN port, with IPv6 address 2001:a:b:cd08::1 served as gateway for PCs in LAN, the configuration is as bellow: IPv6 Basic Subnet Field Value IP(s) on Localhost 2001:a:b:cd08::1 Prefix Length 127 LAN Port Port4 Check the field in [Enable SLAAC] or [Enable DHCPv6 Service] to allocate IP addresses dynamically to PCs in LAN. [NAT Subnet for VS] is not supported in IPv6 private LAN. [Static Routing Subnet] [Static Routing Subnet] is useful when in LAN a router .is used to cut out a separate subnet which does not connect to AscenLink directly. The topology is similar to [Static Routing Subnet: Subnet in DMZ] mentioned previously, and the only difference is this example is set in LAN rather than in DMZ. In this topology below, a subnet 192.168.99.x is located in the LAN and connects to router 192.168.34.50, while another subnet 192.168.34.x is located on the LAN port as well, but connects to AscenLink directly. The configurations here indicate how AscenLink to route packets to subnet 192.168.99.x. Fortinet Technologies Inc. 45 AscenLink User Manual – LinkOS V7.1 IPv4 Static Routing Subnet Field Value Network IP 192.168.99.0 Netmask 255.255.255.0 Gateway 192.168.34.50 Similarly, the configuration to delpoy an static routing subnet for IPv6 private LAN looks like: IPv6 Static Routing Subnet Field Value Subnet 2001:a:b:cd09::/127 Gateway 2001:a:b:cd08::13 [RIP] AscenLink supports the Routing Information Protocol (RIP v1, v2), RIP employs hot count as the metric, and uses timer broadcast to update the router. As RIP features configuration simplicity and operation convenience, it has been widely used across all fields. RIP version 1 (v1)1 was designed to suit the dynamic routing needs of LAN technology-based IP internetworks, and to address some problems associated with RIP v1, a refined RIP, RIP version 2 (v2) was defined. RIP v2 supports sending RIP announcements to the IP multicast address and supports the use of authentication mechanisms to verify the origin of incoming RIP announcements. Fortinet Technologies Inc. 46 AscenLink User Manual – LinkOS V7.1 Check the field in [RIP] if you have enabled RIP on your private subnet router. Check the field in [RIP v1] if you have enabled RIP v1 on your private subnet router behind AscenLink. Thus, AscenLink can forward packets from the RIP v1-enabled private subnet. Otherwise, check the field in [RIP v2] if you have enabled RIP v2 on your private subnet router. Thus, AscenLink can forward RIP v2 packets. Moreover, if you have enabled RIP v2 authentication, type the password in [Password]. Otherwise, keep [Password] blank. [OSPF Settings] Apart from RIP, AscenLink also supports OSPF (Open Shortest Path First), to assign LAN port router with given preference. Like RIP, OSPF is designated by the Internet Engineering Task Force (IETF) as one of several Interior Gateway Protocols (IGPs). Rather than simply counting the number of hops, OSPF bases its path descriptions on "link states" that take into account additional network information. Using OSPF, a host that obtains a change to a routing table or detects a change in the network immediately multicasts the information to all other hosts in the network so that all will have the same routing table information. Field Purpose / Description OSPF Interface Displays the LAN port in the network. Check the box to enable OSPF over the port. Area Settings Network is logically divided into a number of areas based on subnets. Administrators can configure area ID, which accepts numbers or IPs only. Authentication Type Routers in different areas require authentication to communicate with each other. Authentication types: Null, Simple Text Password, MD5. Router Priority Set router priority. Router that sends the highest OSPF priority becomes DR (Designated Router). The value of the OSPF Router Priority can be a number between 0 and 255. Hello Interval Set the interval, in seconds, to instruct the router to send out OSPF keepalive packets to inform the other routers. Dead Interval Set the length of time, in seconds, that OSPF neighbors will wait without receiving an OSPF keepalive packet from a neighbor before declaring the neighbor router is down. Retransmit Interval Set the interval, in seconds, between retransmissions of Link ups. When routers fail to transmit hello packets, it will retransmit packets in the defined interval. Fortinet Technologies Inc. 47 AscenLink User Manual – LinkOS V7.1 Authentication Type This specifies whether the router will perform authentication of data passing the LAN. Choices are: Null, Simple Text Password, MD5. [VRRP Setting] VRRP is a Virtual Router Redundancy Protocol that runs on a LAN port. A system can switch between VRRP or HA mode; when switched, the system will reboot first for changes to take effect. When VRRP mode is enabled, the HA mode will be automatically disabled, and also a VRID field will appear available for input in [VLAN and Port Mapping] setting page. In general, VRRP is faster in detecting the master unit compared to HA mode. Although AscenLink's VRRP implementation is based on VRRP version 3, some restrictions may apply: 1. Always in non-preempt mode. 2. Always in non-accept mode. 3. IPv6 is not supported. 4. Active-active mode is not supported. 5. When AscenLink switches to master mode, it automatically starts WAN link health detection. When it switches to backup mode, it automatically stops WAN link health detection and sets WAN status to "failed". In addition, DHCP servers in LAN and DMZ should let clients use AscenLink virtual IP and the default gateway (as AscenLink's DHCP service does). If RIP and OSPF is used in LAN, AscenLink uses real IP at OSPF and virtual IP at RIP to exchange route information. Clone-MAC settings will be ignored if VRRP function is enabled. AscenLink doesn't exchange NAT table with VRRP peers. When VRRP master changes, existing connection might break. Fortinet Technologies Inc. 48 AscenLink User Manual – LinkOS V7.1 Field Purpose / Description Local Priority The priority field specifies the sending VRRP router's priority for the virtual router. Select a number from 1 to 254 as the priority for the VR. Advertisement Interval Set the time interval in centisecond between advertisements. (Default is 100) Virtual address Enter a virtual IP address for the virtual router. Double-check Link Click the checkbox to enable. When enabled, the backup router will check whether the master is responding ARP on the specified WAN port. WAN Link Health Detection [WAN Link Health Detection] offers you insight into the health status of WAN links. It allows you to set up specific health detection criteria against each individual WAN link in network of multiple links. AscenLink detects the connection status of the WAN link by sending out ICMP and TCP packets, and determines the connection quality with data that reports back. [WAN Link Detection] lists a few fields to fulfill. Ignore Inbound Traffic Once [Ignore Inbound Traffic] is enabled, AscenLink will not utilize WAN traffic to determine WAN link status. Or it can be disabled, but as long as AscenLink detects WAN traffic on the WAN, it will not send out ICMP and TCP packets and hereby determine the WAN connection is in good condition. Detection timeout in milliseconds This indicates the timeout period for every detection in milliseconds. If no packets are detected during this period, the system will consider the detection failed. WAN Link The WAN link to be configured health detection criteria to. Configure the WAN links individually by selecting them from the list. Detection Protocal Two prototals used to perform WAN link detection are available: ICMP and TCP. Detection Period in Second The time interval between ICMP or TCP packets sending for detection. The unit is second. A shorter interval configuration can detect connection condition earlier, but it consumes more bandwidth resource. Number of Hosts Picked out per Detection The number of hosts that is picked out from Ping List or TCP Connection List for detection. When AscenLink starts checking the link health, it will send out ICMP and Fortinet Technologies Inc. 49 AscenLink User Manual – LinkOS V7.1 TCP packets to the IP address of the hosts that has been picked out. Number of Retries The number of times AscenLink retries if a detection being indicated failed. once all the retries in the number of times fail, AscenLink claims the WAN connection fails. In ICMP packet detection, the optional list is: Ping List Lists the data of hosts (Destination IP: IPv4 or IPv6) available to ping detection. Each detection sends one ping packet to the IP address of a host that has been picked out randomly from the list. The TTL (Time to Live) of the ping packet is determined by Hops and generally defined as "3". In TCP packet detection, the optional list is: TCP Connect List Lists the data of hosts (Destination IP: IPv4 or IPv6) available to TCP connect detection. Each detection performs TCP connect test for a host that has been picked out randomly from the list, and assigns a value to the TCP port. Configuration File: Configuration file can be imported or exported and stored as “.txt” file. Note: Only the Administrator has the privilege to perform this function. Optimum Route Detection [Optimum Route Detection] serves to optimize connection between multiple ISPs, enabling users to access optimum route and to maximize WAN efficiency. From this UI, administrators configure [Static IP Table] and [Dynamic Detect] settings to detect the optimum route. AscenLink then checks network connection status with ICMP and TCP packets, calculates by optimum route algorithm, and finally determines which WAN link is the optimum route. Field Value Purpose / Description Optimum Route Policy Static IP Table Dynamic Detect Static, Dynamic Dynamic, Static Options for optimum route detection: - Static IP Table: uses static IP table only - Dynamic Detect: uses dynamic detection only - Static, Dynamic: uses static detection first, then switches over to dynamic detection after static detection has failed. [Static, Dynamic] is the default detection method. - Dynamic, Static:: uses dynamic detection first, then switches over to static detection after dynamic detection has failed. [Static IP Table] enables to match the IP address entries in the table to work out the optimum route. Administrators can add, delete or inquire the desirable IP entry in the table. Fortinet Technologies Inc. 50 AscenLink User Manual – LinkOS V7.1 Field Value Purpose / Description Table Name Assign a name to the Static IP Table. Upload Click "Browse" to locate static IP table files. Then click "upload". Subnet Address <IP Address> Enter a subnet addresses to add to or remove from the table. The format is: 202.99.0.0/255.255.255.0 or 202.99.0.0/24. Note: It is unacceptable to add a single IP or add such subnet mask as "/255.255.255.255" or "/32". Action <add to> <remove from> Add to: Add a subnet address to the static IP table. Remove from: Remove a subnet address from the static IP table. Parameter WAN1 WAN2... Check the field of WAN link the static IP table uses. IP Query <IP Address> Inquire if a single IP address is in the static IP table. The format is 202.99.96.68. [Dynamic Detect] Field Purpose / Description Detection Protocol Choose protocol ICMP or TCP for Optimum Route Detection. (Default: ICMP). Detection Period, in Seconds The interval to resume optimum route detection after system has failed to receive any response in detection. The interval settings help to gain an overall insight into connection status. (Default: 3 seconds) Number of Retries The number of retries after system has failed to receive any response in detection. After system has resumed detection, it will stop retrying as long as a retry is successful. (Default: 3 retries) Cache Aging Period, in Minutes The period of time to keep a cache of optimum route. After this period, system will redetect optimum route based on specific needs. (Default: 2880mins, ie. 2days). Weight of Round Trip Time: Weight of Load A parameter used to calculate the optimum route. It shows how much round trip time (RTT) and link load account for in calculating the optimum route, Note: The smaller the field value is, the less it accounts for in optimum route calculation. Configuration File: Configuration file can be imported or exported and stored as “.txt” file. Note: Only the Administrator has the privilege to perform this function. Fortinet Technologies Inc. 51 AscenLink User Manual – LinkOS V7.1 Port Speed/Duplex Settings [Port Speed/Duplex Settings] enables to configure port speed and duplex transfer mode. Generally it is set to auto-detect by default which works properly in most cases. Manual speed/duplex mode configuration is still necessary in event that some old devices are either not supporting auto-detect, or incompatible with AscenLink. Field Purpose / Description Port Name The list of all physical ports on AscenLink. Status The physical connection status of the port. It shows whether the port has been connected to other detectable network devices e.g. a hub. Speed The current speed of the port. It can be a value either manually set or auto-detected. Duplex The current duplex of the port. It can be a value either manually set or auto-detected. Settings You can opt for desirable settings, which can be manually set or auto-detected. MAC Address The MAC address of the port. Click to enable HA (switch between master and slave units) based on the status of network ports. While HA is enabled in AscenLink, the port status of both master and slave AscenLink units will be compared to determine which unit should be selected as master. Once the number of functioning network ports on the master unit becomes lower than that on the slave unit, the slave unit will then be switched as master instead. (Only the status of selected network ports will be compared.) HA Note: This field is not available if VRRP has been enabled in [Networking Setting > LAN Private Subnet] setting page. Configuration File: Configuration file can be imported or exported and stored as “.txt” file. Note: Only the Administrator has the privilege to perform this function. Backup Line Settings In the deployment of multiple links, a link might serve as backup line which is inactive unless it matches the enabling criteria. The choice of backup lines mostly depends on cost, especially in areas where charges are based on data traffic. Backup lines in standby do not cost a cent, thus only basic fees are charged. Contrary to backup lines, main lines are lines commonly in use. The concept is to be used below. Fortinet Technologies Inc. 52 AscenLink User Manual – LinkOS V7.1 Threshold Parameters Field Purpose / Description Backup Line Enable Time The interval to enable backup lines after main lines have broken down Backup Line Disable Time The interval to disable backup line after main lines have returned to normal Backup Line Rules table Field Purpose / Description Main Line Select main lines, which can be multiple links. Backup Line Select backup lines. Algorithm 5 options to activate backup lines: All fail: when all lines defined in [Main line] are down One fails: when one of the lines defined in [Main line] is down Inbound bandwidth usage reached: when the inbound bandwidth consumption of all lines defined in [Main Line] reaches the defined level Outbound bandwidth usage reached: when the outbound bandwidth consumption of all lines defined in [Main Line] reaches the defined level Total traffic reached: when the total bandwidth consumption of all lines defined in [Main Line] reaches the defined level Parameter When the latter 3 options are chosen in [Algorithm], you can define here the bandwidth usage of the main lines over which backup lines are to be enabled. Configuration File: Configuration file can be imported or exported and stored as “.txt” file. Note: Only the Administrator has the privilege to perform this function. IP Grouping [IP Grouping] lets you create and manage IP groups exclusively and efficiently. These predefined IP groups are available and easy to use in the drop-down list of the fields of [Source] and [Destination] on such [Service] submenus as [Firewall], [NAT], [Persistent Routing], [Auto Routing], [Inbound BM], [Outbound BM], [Connection Limit], and [Cache Redirect]. This section walks you through the steps to create an IP group. IP Grouping Table: Field Purpose / Description Group Name Assign a name to an IP group. The name will show in the drop-down list of [Source] and [Destination] in [Service] submenus mentioned previously. Enable Check the field to enable an IP group. Once the IP group has been enabled, it will show in the drop-down list of [Source] and [Destination] in [Service] submenus Fortinet Technologies Inc. 53 AscenLink User Manual – LinkOS V7.1 mentioned previously. Show/Hide IPv4/IPv6 Detail Click the button to show or hide the IPv4/IPv6 table details. After Hide Detail has been clicked, the table only shows the name of the IP group and whether it has been enabled. After you have clicked [Show IPv4/IPv6 Detail], [IPv4/IPv6 Rules Settings] table displays. You can click [Hide IPv4/IPv6 Details] to close the table. IPv4/IPv6 Rule Settings Table: Field Purpose / Description E Check the field to add the list of IP addresses to the current IP group IP Address Enter a single IPv4/IPv6 address, IPv4/IPv6 range, IPv4/IPv6 subnet or FQDN Action Two options, to belong and not to belong, to determines whether an IP address defined in [IP Address] belongs to the IP group For exceptions in an IP range or subnet that belongs to the IP group, the action of not to belong makes the configuration easier than separating an IP range or subnet into several groups. Configuration File: Configuration file can be imported or exported and stored as “.txt” file. Note: Only the Administrator has the privilege to perform this function. Service Grouping [Service Grouping] lets you create and manage service groups exclusively and efficiently. You can group an ICMP, a TCP/UDP Port, and a group of TCP/UDP Ports, particular applications and server ports. These predefined service groups are available and easy to use in the drop-down list of the fields of [Source] and [Destination] on such [Service] submenus as [Firewall], [NAT], [Virtual Server], [Auto Routing], [Inbound BM], [Outbound BM]. Field Purpose / Description Group Name Assign a name to a service group e.g. MSN File Transfer. The name will appear in the drop-down list of [Source] and [Destination] in [Service] submenus mentioned previously. Enable Check the field to enable a service group. Once the service group has been enabled, it will show in the drop-down list of [Source] and [Destination] in [Service] submenus mentioned previously. Show/Hide IPv4/IPv6 Detail Click the button to show or hide the table details. After Hide Detail has been clicked, the table only shows the name of the service group and whether it has been enabled. Fortinet Technologies Inc. 54 AscenLink User Manual – LinkOS V7.1 IPv4/IPv6 Rule Settings Table: Field Purpose / Description E Check the field to add the list of services to the current service group Service Enter a single or a set of ICMP / ICMPv6 or TCP / UDP ports. Single port follows the the format: port (xxx). A set of ports follow the format: xxx-yyy e.g. 6891-6900. Action Two options, to belong and not to belong, to determines whether service port defined in [Service] belongs to the service group For exceptions in a set of service ports that belongs to the service group, the action of not to belong makes the configuration easier than separating the set of service ports into several groups. Here is an example to elaborate on how to configure [Service Grouping]. Create a service group "MSN File Transfer", which uses TCP 6891-6900. Then enter TCP@6891-6900 in the [Service] field. Configuration File: Configuration file can be imported or exported and stored as “.txt” file. Note: Only the Administrator has the privilege to perform this function. Busyhour Settings [Busyhour Settings] plays a crucial role in managing bandwidth. .Generally opening hours Mon-Fri: 09h00 to 18h00 is configured to be busy hours, for this period sees the advent of bandwidth-intensive applications in both intranet and extranet. Field Purpose / Description Default Type Time segment unspecified in [Rules] below fall into this Default type either as idle or busy hours Rules Defines time segment. The time segments are matched in sequence on a first-match basis. If none of the rules match, the default type is used. If time segment in [Default Type] is defined as idle hours, then unspecified time segment in this [Rules] is taken as idle hours as well. E Check the field box to add time segments in this list to [Rules] Day of Week Select a day of the week From Start time. To End time. Type Defines the time segment, either busy or idle hours. Fortinet Technologies Inc. 55 AscenLink User Manual – LinkOS V7.1 Example As is shown in the figure, Sunday and hours beyond Mon-Sat: 09h00-18h00 are set to be idle hours. Remaining hours of the week belong to busy hours. Configuration File: Configuration file can be imported or exported and stored as “.txt” file. Note: Only the Administrator has the privilege to perform this function. Diagnostic Tools Click the tabs [IPv4] and [IPv6] on the upper side to choice diagnostic tools for IPv4 and IPv6. [IPv4] Field Purpose / Description IPv4 ARP Enforcement [ARP Enforcement] forces AscenLink's attached PCs and other devices to update ARP table. Click [Enforce] and system will send out ARP packets force ARP updates throughout the attached devices. Generally the function is used only when certain devices in DMZ cannot access the Internet after AscenLink has been installed initially. IP Conflict Test [IP Conflict Test] checks if any PC's IP address runs into conflict with that in WAN or DMZ settings in [Network Settings]. Click [Test] to start testing. And IP conflict message may be one of: Clean IPv4 Session Table Fortinet Technologies Inc. - Test completed, no IP conflict has been found. - There is an IP conflict with a PC in WAN; a public IP has been assigned to DMZ in [Network Settings] is now used in WAN, for example. And the MAC address of this IP is also listed in the message. There is an IP conflict with a PC in DMZ, a public IP which has been assigned to WAN in [Network Settings] is now used in DMZ, for example. And the MAC address of this IP is also listed in the message. The function is used to clean up non-TCP session 56 AscenLink User Manual – LinkOS V7.1 (Only Non-TCP Sessions) tables in AscenLink. In AscenLink, protocols are managed with a session timer. Old sessions may be continuously retried by users that they keep unexpired. These old sessions, are always being valid and active instead of new ones. Hence, new sessions will not get into use unless session tables are cleaned up. Tcpdump Tcpdump can capture AscenLink data packets and download captured packets to local host for analysis and debug. Firstly, select an interface from [Interface] to capture packets. In its drop-down list, tunnel will display if Tunnel Routing has been configured. Option [Any] enables all interfaces to capture packets. Then set [Timeout] value. Once time is over, capture will stop. Lastly, click [Start] to start capturing and download intercepted packets to local host. It should be noted that AscenLink does not store the Tcpdump packets. Click [Stop] to stop capturing. IPv4 Ping & Trace Route Ping [Ping] is used to detect network status. Enter an IP address or host name of target device. Select a port (WAN, LAN, or DMZ). If WAN port is selected, specify the WAN link number index. Details of ICMP error message and ping are outside the scope of this manual. Please refer to other documents for more information. Note: If you ping a domain name, ensure DNS server have been specified in [System][Network Settings][DNS Server]. Trace Route [Trace Route] is used to trace the route path of a packet from a specific port to destination host. Enter an IP address or host name of target device in [Target]. Select a link port (WAN, LAN, or DMZ). If WAN port is selected, specify the WAN link number index. [Host] can be an IP address or domain name of the target device. Note: If you trace route with a domain name, ensure DNS server has been specified in [System][Network Settings][DNS Server]. Arping [Arping] is used to detect the MAC address of a PC. Enter an IP address or host name of target device. Select a port (WAN, LAN, or DMZ). If WAN port has been Fortinet Technologies Inc. 57 AscenLink User Manual – LinkOS V7.1 selected, specify the WAN link number index. Details of ARP and error message are out of the scope of this manual; please refer to other documents for more information. Note: If you arping with a domain name, ensure DNS server has been specified in [System][Network Settings][DNS Server]. IPv4 ARP Table Show & Clear [IPv4 ARP Table Show & Clear] is used to display or clear the ARP information of certain port. Select a [port] and click [Show], to display the ARP information of this port. Or select a [port], click [Clear] to clean up the ARP information of this port, and confirm the message to clear. After this, a message shows that ARP table has been cleared successfully. Nslookup Tool [Nslookup Tool] is used to inquire domain name of hosts. Enter a host in Target Domain. Select a host type from optical [Type] list: Any, A, CNAME, HINFO, MX, NS, PTR, SOA; and select a server from optical [Server] list: Internal DNS, Multihoming, etc. Click [NSlookup] to start the inquiring session, and the domain name of target host will show in the field. Click [Stop] to halt the session. [IPv6] Field Purpose / Description IPv6 Neighbor Discovery Enforcement When IPv6 Neighbor Discovery is enforced, AscenLink will send out a “neighbor discovery” packet to neighbor servers or network devices within the same network to request for a reply of IPv6 and MAC address of devices found. Clean IPv6 Session Table (Only Non-TCP Sessions) The function is used to clean up non-TCP session tables in AscenLink. In AscenLink, protocols are managed with a session timer. Old sessions may be continuously retried by users that they keep unexpired. These old sessions, are always being valid and active instead of new ones. Hence, new sessions will not get into use unless session tables are cleaned up. Tcpdump Tcpdump can capture AscenLink data packets and download captured packets to local host for analysis and debug. Firstly, select an interface from [Interface] to capture packets. In its drop-down list, tunnel will display if Tunnel Routing has been configured. Option [Any] enables all interfaces to capture packets. Then set [Timeout] value. Once time is over, capture will stop. Fortinet Technologies Inc. 58 AscenLink User Manual – LinkOS V7.1 Lastly, click [Start] to start capturing and download intercepted packets to local host. It should be noted that AscenLink does not store the Tcpdump packets. Click [Stop] to stop capturing. IPv6 Ping & Trace Route IPv6 Neighbor Table Show & Clear Fortinet Technologies Inc. Ping [Ping] is used to detect network status. Enter an IP address or host name of target device. Select a port (WAN, LAN, or DMZ). If WAN port is selected, specify the WAN link number index. Details of ICMP error message and ping are outside the scope of this manual. Please refer to other documents for more information. Note: If you ping a domain name, ensure DNS server have been specified in [System][Network Settings][DNS Server]. Trace Route [Trace Route] is used to trace the route path of a packet from a specific port to destination host. Enter an IP address or host name of target device in [Target]. Select a link port (WAN, LAN, or DMZ). If WAN port is selected, specify the WAN link number index. [Host] can be an IP address or domain name of the target device. Note: If you trace route with a domain name, ensure DNS server has been specified in [System][Network Settings][DNS Server]. Arping [Arping] is used to detect the MAC address of a PC. Enter an IP address or host name of target device. Select a port (WAN, LAN, or DMZ). If WAN port has been selected, specify the WAN link number index. Details of ARP and error message are out of the scope of this manual; please refer to other documents for more information. Note: If you arping with a domain name, ensure DNS server has been specified in [System][Network Settings][DNS Server]. [IPv6 Neighbor Table Show & Clear] is used to display or clear the IPv6 and MAC address of neighbor servers or devices. Select a [port] and click [Show], to display the neighbor information of this port. 59 AscenLink User Manual – LinkOS V7.1 Or select a [port], click [Clear] to clean up the neighbor information of this port, and confirm the message to clear. After this, a message shows that neighbor table has been cleared successfully. Nslookup Tool [Nslookup Tool] is used to inquire domain name of hosts. Enter a host in Target Domain. Select a host type from optical [Type] list: Any, A, CNAME, HINFO, MX, NS, PTR, SOA; and select a server from optical [Server] list: Internal DNS, Multihoming, etc. Click [NSlookup] to start the inquiring session, and the domain name of target host will show in the field. Click [Stop] to halt the session. Date/Time [Date/Time] lets you configure time, date, and time zone. [Date] follows the year/month/day date format, and [Time] uses 24-hour time system in the hour:minute:second format. [Time Zone] is represented by continent and city, [America] and [New York], for example. AscenLink uses NTP time server for accurate time synchronization, simply by clicking the [Synchronize Time] button. And other time servers are also included in the dropdown list which can be added or deleted at your preference. Remote Assistance Enabling this function allows Fortinet's technical support specialist to enter your system for further troubleshooting when assistance is needed. AscenLink allows technical support specialist to access the Web UI and backend system remotely, so as to assist users promptly upon the occurrence of problems. Remote assistance opens both TCP ports 443 for web UI and 23 for SSH debug. Note: To enter the backend system via SSH login, a debug patch file is required. Field Purpose / Description Enable Click the checkbox to enable Remote Assistance. Server Enter the server IP address given by Fortinet's technical support specialist. Security Code Displays the security code required for remote logins. This security code is automatically generated after clicking Apply to complete Remote Assistance settings, and is updated after every system reboot. Administration [Administration] lets you perform administrative tasks, including changing passwords of Administrator and Monitor. Every AscenLink is shipped with the same default passwords. For security concerns, it is thus strongly recommended that the passwords Fortinet Technologies Inc. 60 AscenLink User Manual – LinkOS V7.1 shall be changed. By default, AscenLink uses 443 as the Web UI login port. And it allows administrators to change the port, to avoid possible port conflict caused for virtual server services. [Update/downgrade] section enables to update or downgrade firmwares once new firmwares are available (from our website or dealers). Simply click the [Update/Downgrade] button and follow exactly the on-screen instructions. [Configuration Files] gives you the ability to back up configuration files, by clicking the [Save] button. Or you can click [Restore] to reload the previous backup files to AscenLink. System configurations can be recovered from failures via the backup configuration files. In [Maintenance], you can restore factory default configurations and reboot AscenLink. Due to the limitation of HTML syntax, no hint displays after reboot has been completed. Thus you have to wait about two minutes before navigating to Web UI in browser. Administrator Password: Create, modify and delete the account and password for Administrators. Field Purpose / Description Select Account You can select and configure an account (old or new). If you select the current login account, [Add Account] button will change to [Set Account]. New Account Allows you to add a new account. Enter the new account ID here. New Password Enter the new password after you have added or modified an account. Password Verification Confirm the new password. Monitor Password: Create, modify and delete the account and password for Monitors. Field Purpose / Description Select Account You can select and configure an account (old or new). If you select the current login account, [Add Account] button will change to [Set Account]. New Account Allows you to add a new account. Enter the new account ID here. New Password Enter the new password after you have added or modified an account. Password Verification Confirm the new password. RADIUS Authentication: Click the checkbox to enable Radius Authentication. Choose an option from the dropdown menu of Priority (this determines how network access should be authorized: matching login information with Radius first then localhost, or matching with localhost first then Radius). Enter Radius server's IP address at Server IP, and Radius server's Fortinet Technologies Inc. 61 AscenLink User Manual – LinkOS V7.1 port number at Server Port. Enter a passcode at Secret for login authentication. Enter an AscenLink's IP address at NAS IP, and enter AscenLink's port number (port 0 by default) at NAS Port. Click Apply for changes to take effect. Firmware Update: Click [Update/Downgrade] and follow the on-screen instructions to perform firmware update/downgrade. For more information, please refer to Appendix. Configuration File: Click [Save] to back up the current configurations in files on your PC. For more information, please refer to Appendix. Maintenance: Click [Factory Default] to reset configurations to factory default. Or you can perform “resetconfig” command in console. Click [Reboot] to reboot AscenLink. For information on console command, please refer to Appendix. Web UI Port: Type the port number in [New Port] and then click [Setport]. Enter the new port number when you log in again into Web UI. Additionally, the new port shall avoid conflict with AscenLink reserved ports when configuring the port. Otherwise, AscenLink will display error message of port settings failure and resume to the correct port number that was configured last time. Port 1 7 9 11 13 15 17 19 20 21 22 23 25 37 42 43 53 77 79 87 95 101 Service tcpmux echo discard systat daytime netstat qotd chargen ftp-data ftp-cntl ssh telnet smtp time name nicname domain priv-rjs finger ttylink supdup hostriame Port 102 103 104 109 110 111 113 115 117 119 123 135 139 143 179 389 465 512 513 514 515 526 Service iso-tsap gppitnp acr-nema pop2 pop3 sunrpc auth sftp uucp-path nntp NTP loc-srv/epmap netbios imap2 BGP ldap smtp+ssl print/exec login shell printer tempo Port 530 531 532 540 556 563 587 601 636 993 995 1111 1900 2005 2049 2223 2251 3535 3636 4045 6000 49152 Service courier Chat netnews uucp remotefs nntp+ssl ldap+ssl imap+ssl pop3+ssl AscenLink reserved AscenLink reserved AscenLink reserved nfs AscenLink reserved AscenLink reserved AscenLink reserved AscenLink reserved Lockd x11 AscenLink reserved License Control: License Control provides users with all the License Key configurations, including: Bandwidth Upgrade License: AscenLink provides various bandwidth capabilities for individual model. Bandwidth Fortinet Technologies Inc. 62 AscenLink User Manual – LinkOS V7.1 upgrade on models is supported via a license key. You could ask your distributor for bandwidth upgrade license keys. - AscenLink 700 provides 60Mbps, 100Mbps and 200Mbps bandwidth capability. - AscenLink 5000 provides 0.5Gbps, and 1Gbps. - AscenLink 6000 provides 1Gbps, 2Gbps, and 3Gbps bandwidth capability. Product Model AscenLink 700 AscenLink 5000 AscenLink 6000 Bandwidth Capability 60 Mbps / 100 Mbps / 200 Mbps 0.5 Gbps / 1 Gbps 1 Gbps / 2 Gbps / 3 Gbps Note: Conditional bandwidth upgrade is provided for old models. Please contact customer support to gain further information. Firmware Upgrade License: A license key is necessary to upgrade AscenLink LinkOS. You could ask your distributor for firmware upgrade license keys. Fortinet Technologies Inc. 63 AscenLink User Manual – LinkOS V7.1 Service This chapter explains the services which help administrators improve network efficiency and productivity. The figure below lists the various functions of AscenLink, and revolves around five key functions i.e. Multihoming, Tunnel Routing (TR), Auto Routing, Bandwidth Management (BM) and Firewall. These functions will be illustrated with examples to maximize the performance of this device. Firewall This section introduces how to set up the firewall. Unlimited number of rules can be added to the firewall rule list. The rules are prioritized from top to bottom that is rules at the top of the table will be given higher precedence over lower ranked ones. [IPv4 Rules] and [IPv6 Rules] are for configurations of IPv4 and IPv6 respectively. Field Value Purpose / Description E Enable (checked) Disable (unchecked) Check the box to enable the rule. When Busy Idle All-Time Three options available: Busy hour, Idle hour and All-Time. See [System]->[Date/Time] in Chapter 2 to learn more. Source IPv4/IPv6 Address IPv4/IPv6 Range IPv4/IPv6 Subnet WAN WAN # LAN DMZ Tunnel Any Address FQDN < IPv4/IPv6 Grouping Name> Packets sent from specified source will be matched: - IPv4/IPv6 Address: matches packets from a single IP e.g. 192.168.1.4 or 2001:a:b:cd01::1 - IPv4/IPv6 Range: matches packets from a continuous range of IPs. e.g. 192.168.1.10-192.168.1.20 or 2001:a:b:cd01::1-2001:a:b:cd01::10 - IPv4/IPv6 Subnet: matches packets from a subnet. e.g. 192.168.1.0/255.255.255.0 or 2001:a:b:cd01::/64 - WAN: matches all the packets from WAN. - WAN #: match all packets that come from the specified WAN link. - LAN: matches all the packets from LAN. - DMZ: matches all the packets from DMZ. - Tunnel: matches all the packets from any tunnel. - Any Address: matches all the packets from any source. - FQDN: matches connections Fortinet Technologies Inc. 64 AscenLink User Manual – LinkOS V7.1 established from FQDN Predefined IP groups will also show on the list. Refer to [System]->[IP Grouping] to establish IPv4/IPv6 groups. Destination IPv4/IPv6 Address IPv4/IPv6 Range IPv4/IPv6 Subnet WAN LAN DMZ Localhost Any address FQDN < IPv4/IPv6 Grouping Name> Packets sent to a specific destination will be matched. This field is the same as the “Source” field, except that packets are matched with specified destination. Similarly all IP group setups in [System]->[IP Grouping] will also show here. Service FTP(21) SSH (22) TELNET(23) SMTP(25) DNS(53) HTTP(80) POP3(110) H323 (1720) ICMP/ICMPv6 TCP@ UDP@ Any < Service Grouping Name> The TCP/UDP service type to be matched. Select the matching criteria from publicly known service types (e.g. FTP), or enter the port number in TCP/UDP packets and specify the range. Type the starting port number plus hyphen “-“ and then the ending port number. e.g. “TCP@123-234”. Action Accept Deny Choose the actions when the rule is matched: Accept: The firewall will let the matched packets pass. Deny: The firewall will drop the matched packets. L Enable Disable Check to enable logging. Whenever the rule is matched, the system will record the event to the log file. Note: Default firewall settings allow all packets to pass through. Configuration File: Configuration file can be imported or exported and stored as “.txt” file. Note: Only the Administrator has the privilege to perform this function. Fortinet Technologies Inc. 65 AscenLink User Manual – LinkOS V7.1 Example 1 AscenLink Firewall Network Architecture Rules for Filtering Packets The users from the internet (WAN) can only access FTP Server 211.21.48.195 through port 21. The users from LAN can access all servers and hosts on the internet (WAN) through port 25 (SMTP), port 80 (HTTP), port 21 (FTP), and port 110 (POP3). All other packets are blocked. The rules table for the example will look like this: Source WAN WAN LAN LAN LAN LAN LAN Fortinet Technologies Inc. Destination 211.21.48.195 DMZ WAN WAN WAN WAN WAN 66 Service FTP (21) Any HTTP (80) SMTP (25) FTP (21) POP3 (110) Any Action Accept Deny Accept Accept Accept Accept Deny AscenLink User Manual – LinkOS V7.1 Example 2 AscenLink Firewall Network Architecture Rules for Filtering Packets The users from the internet (WAN) can access server 211.21.48.195 inside DMZ through TCP port 7000. The hosts 192.168.0.100 – 192.168.0.150 in the LAN can access the Internet (WAN) but the others cannot. Users from the Internet (WAN) cannot connect to the port 443 on AscenLink (i.e. Web Administration on AscenLink). Note: “Localhost” represents the address of AscenLink host machine. Users from LAN can access FTP server 192.168.10.1 through port 21. Users from the internet cannot ping AscenLink . Note: To intercept ping messages, users can deny “ICMP” protocol in service type because ping is a type of “ICMP”. Users from the LAN cannot access DMZ. Users from the internet (WAN) cannot access LAN and DMZ. The rules table for the example will look like this: Fortinet Technologies Inc. 67 AscenLink User Manual – LinkOS V7.1 Source WAN 192.168.0.100-192.168.0.150 WAN LAN WAN LAN WAN WAN Destination 211.21.48.195 WAN Localhost 192.192.10.1 Localhost DMZ DMZ LAN Service TCP@7000 Any TCP@443 FTP (21) ICMP Any Any Any Action Accept Accept Deny Accept Deny Deny Deny Deny NAT AscenLink is an edge server that is usually placed on the boundary between WAN and LAN. When a connection is established from a private IP address (in LAN or DMZ) to the internet (WAN), it is necessary to translate the private IP address into one of the public IP addresses assigned to AscenLink. This process is called NAT (Network Address Translation). AscenLink's NAT makes configuration more flexible. By default, NAT can translate any private IP address to a fixed public IP address assigned to a given WAN link. It works on a "first match" principle for rules, i.e. rules are matched top down. Non-NAT is used for Private Network and MPLS Network where the host in WAN can directly access the host in DMZ, and where AscenLink is used to balance VPN load and backup lines. Field Value Purpose / Description Enable NAT Enable the function, and NAT will translate any private IP to a fixed public IP assigned to a given WAN link. Disable the function; AscenLink will act as a general router for the host in WAN to directly access the host in DMZ. WAN The WAN link to which to apply NAT rules. 1-to-1 NAT Rules: To define the 1-to-1 translation method for the bi-directional IP range (or subnet) in both internal and external networks. E Enable Disable Enable 1-to-1 NAT rule or not. When Busy Idle All-time Select the time when to apply the 1to-1 NAT rule, including three options: Busy, Idle and All-Time. Internal Address IP Range Subnet Select the internal IP address where the 1-to-1 NAT rule shoule be applied to, including IP Range and Subnet. (Note: Internal IP Address must be an IP address of the internal network or DMZ port.) Fortinet Technologies Inc. 68 AscenLink User Manual – LinkOS V7.1 Service Select a service port where the 1-to1 NAT rule should be applied to, such as TCP, UDP, ICMP or any of the predefined network service groups. External Address IP Range Subnet Select the external IP address where the 1-to-1 NAT rule shoule be applied to, including IP Range and Subnet. (Note: External IP Address must be an IP address obtained upon WAN link connection.) L Enable Disable Check to enable logging. Whenever the rule is matched, the system will record the event to the log file. NAT Rules: Customized rules for NAT. E Enable Disable Enable NAT rule or not. When Busy Idle All-time The predefined time periods during which the rules will apply. Options are Busy, Idle, All-Times. Please refer to Chapter 2. Source IPv4 Address IPv4 Range Any Address <IPv4 Grouping Name> The packets sent from the source will be matched: - IPv4 Address: all packets from this IPv4 address. - IPv4 Range: all packets from a continuous range of IPv4 addresses. - Any Address: all packets regardless of source. Apart from the options listed above, predefined IPv4 groups will also be shown in the list. Please See [System]->[IP Grouping] for setting up IP groups. Note: The source IPv4 to be translated must be the IPv4 address assigned to the LAN or DMZ. Destination IPv4 Address IPv4 Range Any Address <IPv4 Grouping Name> The packets sent to the destination will be matched: - IPv4 Address: all packets to this IPv4 address. - IPv4 Range: all packets to a continuous range of IPv4 addresses. - Any Address: all packets no matter where they're sent to. Apart from the options listed above, predefined IPv4 groups will be shown in the list as well. Please See [System]->[IP Grouping] for setting Fortinet Technologies Inc. 69 AscenLink User Manual – LinkOS V7.1 up your own IP groups. Service FTP (21), etc <Service Grouping Name> The packets with the service port number to which users would like NAT to apply. It can be the TCP/UDP port, or Predefined service groups from [System]->[Service Grouping]. Translated IPv4 Address IPv4 Range The public IPv4 address or a range of public IPv4 addresses that users would like the private addresses to be translated to, or No NAT if no translation is needed. L Enable Disable Check to enable logging. Whenever the rule is matched, the system will record the event to the log file. IPv6 NAT Rules: Customized rules for Ipv6-to-IPv6 NAT. E Enable Disable Enable NAT rule or not. When Busy Idle All-time Select the time when to apply the 1to-1 NAT rule, including three options: Busy, Idle and All-Time. Source IPv6 Address IPv6 Range Any Address <IPv6 Grouping Name> The packets sent from the source will be matched: - IPv6 Address: all packets from this IPv6 address. - IPv6 Range: all packets from a continuous range of IPv6 addresses. - Any Address: all packets regardless of source. Apart from the options listed above, predefined IPv6 groups will also be shown in the list. Please See [System]->[IP Grouping] for setting up IP groups. Note: The source IPv6 to be translated must be the IPv6 address assigned to the LAN or DMZ. Destination IPv6 Address IPv6 Range Any Address <IPv6 Grouping Name> The packets sent to the destination will be matched: - IPv6 Address: all packets to this IPv6 address. - IPv6 Range: all packets to a continuous range of IPv6 addresses. - Any Address: all packets no matter where they're sent to. Apart from the options listed above, predefined IPv6 groups will be shown in the list as well. Please See [System]->[IP Grouping] for setting Fortinet Technologies Inc. 70 AscenLink User Manual – LinkOS V7.1 up your own IP groups. Service FTP (21), etc <Service Grouping Name> The packets with the service port number to which users would like NAT to apply. It can be the TCP/UDP port, or Predefined service groups from [System]->[Service Grouping]. Translated IPv4 Address IPv4 Range The public IPv6 address, or a range of public IPv6 addresses that users would like the private addresses to be translated to, or No NAT if no translation is needed. Note: Translated must be an IPv6 address obtained upon public DMZ subnet and with 64-bit or lower prefix length. L Enable Disable Check to enable logging. Whenever the rule is matched, the system will record the event to the log file. Enable NAT Example: To translate packets from local machine 192.168.123.100 to public IP address 172.31.5.51, check “Enable NAT”, and select WAN #1, then check “Enable”. The NAT rule settings look like: Disable NAT Disable NAT sets Ascenlink to Non-NAT mode whereby all the WAN hosts can acccess DMZ hosts directly with proper routing setup. In this mode, Ascenlink acts as a router connecting multiple subnets. Note: Once NAT is disabled, it is disabled on all the WAN Links. Fortinet Technologies Inc. 71 AscenLink User Manual – LinkOS V7.1 Configuration File: Configuration file can be imported or exported and stored as “.txt” file. Note: Only the Administrator has the privilege to perform this function. Example: Non-NAT Settings Network Architecture Non-NAT is commonly used on Private Network and MPLS network, which makes possible for the hosts of the branch office to directly access the headquarters. In case that ISP 1 is down, AscenLink will automatically route the link to ISP 2, and, accordingly, serve as VPN load balancer based on the status of each link. Persistent Routing Persistent routing is used to secure subsequent connections of source and destination pairs that are first determined by Auto-Routing in Ascenlink. It is useful for applications require secure connection between the server and client whereby client connection will be dropped if server detects different source IP addresses for the same client during an authenticated and certified session. PR ensures that the source IP address remains unchanged in the same session. Field Value Purpose / Description Timeout <second> For every session (pair of source and destination), if there is no packets occured during the timeout period, records of persistent route of the session will be cleared. That means the next coming connection of the session will be routed by the auto-routing rules first. Fortinet Technologies Inc. 72 AscenLink User Manual – LinkOS V7.1 IPv4/IPv6 Web Service Rules: Sets persistent routing rules on Web services. Enable this function, and all the http and https connections established from source IP specified below to destination port 80 and port 443 are governed by Web Service Rules. E Enable (checked) Disable (unchecked) Check the box to enable the rule. When Busy Idle All-Time Options: Busy hour, Idle hour, and All-Time. Please refer to Chapter 2 for more details. Source IPv4/IPv6 Address IPv4/IPv6 Range IPv4/IPv6 Subnet LAN DMZ Localhost Any Address FQDN < IP Grouping Name> Established connections from the specified source will be matched: - IPv4/IPv6 Address: matches connections from a single IPv4/IPv6 address. e.g. 192.168.1.4. - IPv4/IPv6 Range: matches connections from a continuous range of IPv4/IPv6 addresses. e.g. 192.168.1.10-192.168.1.20. - IPv4/IPv6 Subnet: matches connections that come from a subnet. e.g.192.168.1.0/255.255.255.0. - LAN: matches connections from LAN. - DMZ: matches connections from DMZ. - Localhost: matches connections from AscenLink. - Any Address: matches all the connections regardless of its source. - FQDN: matches connections from FQDN. Predefined IP groups will be also show in the list. Action Do PR No PR Do PR: the matched connections will be routed persistently. No PR: the matched connections will NOT be routed persistently. (The Default) L Enable Disable Check to enable logging: Whenever the rule is matched, system will record the event to log file. IPv4/IPv6 IP Pair Rules: Sets persistent routing rules on IPv4/IPv6 addresses. Enable this function, and all connections established from the source IPv4/IPv6 to destination IPv4/IPv6 specified below are governed by IPv4/IPv6 IP Pair Rules. E Enable (checked) Check the box to enable the rule. Disable (unchecked) When Fortinet Technologies Inc. Busy Idle Options: Busy hour, Idle hour, and All-Time. Please refer to Chapter 2 73 AscenLink User Manual – LinkOS V7.1 All-Time for more details. Source IPv4/IPv6 Address IPv4/IPv6 Range IPv4/IPv6 Subnet LAN DMZ Localhost Any Address FQDN < IP Grouping Name> Established connections from the specified source will be matched: - IPv4/IPv6 Address: matches connections from a single IPv4/IPv6 address. e.g. 192.168.1.4 or 2001:a:b:c::1. - IPv4/IPv6 Range: matches connections from a continuous range of IPv4/IPv6 addresses. e.g. 192.168.1.10-192.168.1.20 or 2001:a:b:c::1-2001:a:b:c::10. - IPv4/IPv6 Subnet: matches connections that come from a subnet. e.g.192.168.1.0/255.255.255.0 or 2001:a:b:c::/64. - LAN: matches connections from LAN. - DMZ: matches connections from DMZ. - Localhost: matches connections from AscenLink. - Any Address: matches all the connections regardless of its source. - FQDN: matches connections from FQDN. Predefined IPv4/IPv6 groups will be also show in the list. Destination IPv4/IPv6 Address IPv4/IPv6 Range IPv4/IPv6 Subnet WAN FQDN <IP Grouping Name> The connections to the specified destination will be matched. This field is the same as the “Source” field, except it matches packets with the specified destination. - IPv4/IPv6 address: matches connections to a single IPv4/IPv6 address. - IPv4/IPv6 Range: matches connections to a continuous range of IPv4/IPv6 addresses. - IPv4/IPv6 Subnet: matches connections to the IPs in a subnet. - WAN: matches connections to the WAN. - FQDN: matches connections from FQDN. Predefined IPv4/IPv6 groups will be also show in the list. Action Do PR No PR Do PR: the matched connections will be routed persistently. (The Default) No PR: the matched connections will NOT be routed persistently. Fortinet Technologies Inc. 74 AscenLink User Manual – LinkOS V7.1 L Enable Disable Check to enable logging: Whenever the rule is matched, system will record the event to log file. Persistent routing is often used when destination servers check source IP. The function is performed on most secure connections (e.g. HTTPS and SSH). To prevent the connections from being dispatched over a diverse range of WAN links, persistent routing serves the best solution for maintaining connections over a fixed WAN link. See below for how auto-routing is related to persistent-routing: Once a connection is established, auto-routing rules are applied to determine the WAN link to be used. Subsequent connections with the same destination and source pair obey the rules formulated in the persistent routing table. Note that the device will consult the rule table whenever established connections are to be sent to new destinations. Auto-routing will be reactivated once in persistent routing the interval between two successive connections are longer than timeout period. A second connection will be considered as a "new" one. Then auto-routing will secure the connection to go through a different WAN link. Configuration File: Configuration file can be imported or exported and stored as “.txt” file. Note: Only the Administrator has the privilege to perform this function. Example 1: IP Pair Rules Network Architecture: The persistent routing policies to be established accordingly: In LAN, established connections from IP address 192.168.0.100 to 192.168.10.100 are NOT to be routed persistently. Established connections from DMZ to LAN are NOT to be routed persistently. Established connections from LAN to the host IP ranging from 10.10.1.1 ~ 10.10.1.10 are NOT to be routed persistently. Since the default action by IP Pair rules is Do PR, if no rule is added, all connections will use persistent routing. Then persistent routing table will look like: Source 192.168.0.100 DMZ LAN Fortinet Technologies Inc. Destination 192.192.10.100 WAN 10.10.1.1-10.10.1.10 75 Action No PR No PR No PR AscenLink User Manual – LinkOS V7.1 Eample 2. Web Service Rules Network Architecture: The persistent routing policies to be established accordingly: HTTP and HTTPs connections from the subnet 192.168.0.0/24 in LAN use persistent routing. HTTP and HTTPs connections from WAN use persistent routing. As there is no default action set by Web Service Rules, if no rule is added, all connections will be based on IP Pair Rules to determine whether to use persistent routing. The persistent routing table should look like: Source 192.168.0.0/255.255.255.0 WAN Action Do PR Do PR Example 3: Advanced Persistent Routing Network Architecture: The persistent routing policies to be established accordingly: HTTP and HTTPs connections from LAN hosts with IP range 192.168.0.10~192.168.0.20 use persistent routing, but this does not apply to other services except IP address 192.168.0.15. HTTP and HTTPs connections from subnet 192.168.10.0/24 to 192.192.10.100 use persistent routing. But this does not apply to other connections. Connections from IP address 211.21.48.196 in DMZ to the WAN subnet 10.10.1.0/24 in WAN do NOT use persistent routing. Since the default action by IP Pair Ruels is Do PR, if no rule is added, all connections will use persistent routing. Then persistent routing table will look like: Source 192.168.0.10-192.168.0.20 192.168.10.0/255.255.255.0 Source 192.168.0.15 192.168.0.10-192.168.0.20 192.168.10.0/255.255.255.0 211.21.48.196 Action Do PR Do PR Destination WAN WAN ANY 10.10.1.0/255.255.255.0 Action Do PR No PR No PR No PR Note: Rules are matched top down. Once one rule is matched, the rest will be ignored. In this case, the connections from 192.168.0.15 may meet the criteria of the first and second IP Fortinet Technologies Inc. 76 AscenLink User Manual – LinkOS V7.1 Pair rules, only the first rule will be applied. Hence the rules will not perform NoPR on 192.168.0.15 even though it matches the second rule.It shall be noted that Web Service Rules are prioritized over IP Pair Rules. As 192.168.10.0/255.255.255.0 is configured to be NoPR in IP Pair Rules, but DoPR in Web Service Rules, HTTP connections will still apply persistent routing. Auto Routing It allows administrators to determine the way traffic is routed to WAN links. Multiple WAN links have a variety of ideal auto-routing methods for any network environment. Auto routing is configured in 2 steps: Policies and Filters. Policies allow administrators to select load balancing algoritm to be deployed in the Filters. Each policy can be named accordingly and administrator can decide which WAN links to be used before adding in the filters table. Ascenlink will base on the filters table to manage the outbound traffic by matching them in top-down order. After this, Auto Routing will consult the filtering table and check if the connection to be established matches any filter in the table. If the connection matches the conditions specified in the filter, the routing policy assigned to that filter will decide which WAN link the connection will use. Flexibility in AR allows administrators to determine the best fixed policies in different environments. A download/upload threshold configuraiton is now available for administrators to set up for every WAN link specifically. WAN links with traffic beyond configured thresholds will be considered as not usable, and traffic flow will be re-directed to other WAN links based on its failover policy..Click Show Detail button to expand the threshold table for further configurations (as shown below): Threshold Field Value Purpose / Description WAN 1,2,3,4,5,… This indicates the number of WAN links, which varies upon models. Administrators can select a WAN link from the list for further configurations. Downstream (Kbps) <Input the threshold value for download traffic (Kbps)> When the WAN link’s download traffic is over this threshold value, Fortinet Technologies Inc. 77 AscenLink User Manual – LinkOS V7.1 this link will be considered as not usable, while its traffic will be redirected to other WAN links based on its failover policy. Upstream (Kbps) <Input the threshold value for upload traffic (Kbps)> Policies Field Value Purpose / Description Label < name for the Policy> Assigning name to auto routing policy. T Enable (checked) Disable (unchecked) Click the checkbox to enable Threshold configurations. Algorithm Fixed Round-Robin By Connection By Upstream Traffic By Downstream Traffic By Total Traffic By Optimum Route Parameter <Select WAN link(s) for the algorithm, or define a weight on each WAN link> Algorithms for Auto Routing: - Fixed: routes connections through fixed WAN links. - By Round-Robin: routes connections through WAN link by weight. - By Connection: compares the number of connections on each WAN link and routes data based on specified connection ratio. - By Downstream Traffic: routes connections though the WAN link with lightest downstream traffic load. - By Upstream Traffic: routes connections through the WAN link with lightest upstream traffic load. - By Total Traffic: routes connections through the WAN link with lightest traffic load. - By Optimum Route: routes connections through the bestconditioned WAN link based on the evaluation of “Optimum Route Detection”. The parameter in use depends on the chosen algorithm. For “Fixed”, “By Upstream traffic”, “By Downstream traffic”, and “By Total Traffic” algorithm, select the WAN links to which the algorithm will be applied. For “RoundRobin” algorithm, define the weight on each WAN link. Example: The figure below shows the first four policies use algorithm “Fixed” . Numbering scheme represents WAN link number. Check the box under the Fortinet Technologies Inc. 78 When the WAN link’s upload traffic is over this threshold value, this link will be considered as not usable, while its traffic will be redirected to other WAN links based on its failover policy. AscenLink User Manual – LinkOS V7.1 number to apply the algorithm to the WAN link. The fifth policy applies algorithm “Round-Robin”, with weight “1” on WAN1, weight “1” on WAN2, and weight “3” on WAN3. This policy rules that if there are five connections to be established, the first one will be established through WAN1, the second one through WAN2, and the last three through WAN3. IPv4/IPv6 Filters Field Value Purpose / Description E Enable (checked) Disable (unchecked) Check the box to enable the rule. When Busy Idle All-Time Options: Busy hour, idle hour, and All-times. Please refer to Chapter 2 for more details. Source IPv4/IPv6 Address IPv4/IPv6 Range IPv4/IPv6 Subnet LAN DMZ Localhost Any Address FQDN <IP Grouping Name> Established connections from specified source will be matched: - IPv4/IPv6 Address: matches connections from a single IPv4/IPv6 address. e.g. 192.168.1.4. - IPv4/IPv6 Range: matches connections from a continuous range of IP addresses. e.g. 192.168.1.10192.168.1.20. - IPv4/IPv6 Subnet: matches connections from a subnet. e.g.192.168.1.0/255.255.255.0. - LAN: matches connections from LAN. - DMZ: matches connections from DMZ. - Localhost: matches connections from AscenLink. - Any Address: matches all connections regardless of its source. - FQDN: matches connections from FQDN. Predefined IP groups will also show in the list. Destination IPv4/IPv6 Address IPv4/IPv6 Range IPv4/IPv6 Subnet The connections to specified destination will be matched. This Fortinet Technologies Inc. 79 AscenLink User Manual – LinkOS V7.1 WAN FQDN <IP Grouping Name> field is the same as the “Source” field, except it matches packets with specified destination. - IPv4/IPv6 Address: matches connections to a single IPv4/IPv6 address. e.g.: 211.21.33.88 - IPv4/IPv6 Range: matches connections to a continuous range of IPv4/IPv6 addresses. - IPv4/IPv6 Subnet: matches connections to the IPs in a subnet. - WAN: matches connections to WAN. - FQDN: matches connections from FQDN. Predefined IP groups will also show in the list. Service FTP(21) SSH(22) TELNET(23) SMTP(25) DNS(53) HTTP(80) POP3(110) H323(1720) ICMP/ICMPv6 TCP@ UDP@ Any The type of TCP/UDP service to be matched. Select the matching criteria from the publicly known service types (e.g. FTP), or choose the port number in TCP/UDP packets. Routing Policy <Select a policy from policy table> Fail-over Policy Policy defined in policy table Policy of Tunnel Routing NEXT-MATCH NO-ACTION Defines the way connections to be routed. The display policies here are the ones defined in policy table. Once all the WAN links associated with the routing policy fail, this failover policy will take effect. The display policies here are the ones defined in policy table. Note: 1. Policies of Tunnel Routing is available only when Tunnel Routing is enabled. 2. If [NEXT-MATCH] is selected as the Fail-Over Policy, the system filter will ignore the routing policy and move on to the next matched policy where packets fall into. L Fortinet Technologies Inc. Enable Disable Check to enable logging. Whenever the rule is matched, system will record the event to log file. 80 AscenLink User Manual – LinkOS V7.1 Configuration File: Configuration file can be imported or exported and stored as “.txt” file. Note: Only the Administrator has the privilege to perform this function. Example 1: Simple Auto Routing Network Architecture: The auto routing policies to be established accordingly: Always route connections through WAN#1, which is an ADSL WAN link with 512k downstream/512k upstream. Always route connections through WAN#2, which is an ADSL WAN link with 1.5M downstream/384k upstream. Route connections with algorithm "Optimum Route". Route connections based on the current downstream traffic of WAN links. Route connections based on the total traffic of each WAN link. Policy table will look like: Label WAN1 (512/512) WAN2 (1536/384) By Optimum Route By Downstream By Total Algorithm Fixed Fixed By Optimum Route By Downstream Traffic By Total Traffic Parameter Check WAN#1 Check WAN#2 Check both WAN #1 and WAN #2. Check both WAN #1 and WAN #2. Check both WAN #1 and WAN #2. Note: Labeling the policies alone does not mean the policy has been set up. Configuring WAN link bandwidth must be done under [System] -> [Network Settings]. Fortinet Technologies Inc. 81 AscenLink User Manual – LinkOS V7.1 Defining filters for the following: When LAN users access web server on the internet, use policy "By Optimum Route" to route connections to the best-conditioned link. When LAN users access the FTP server on the internet, use policy "WAN1(512/512)" to route connections. If WAN#1 fails, the connections will be routed "By Optimum Route". Note: In this case, "By Optimum Route" will only route connections through WAN#2 as WAN #1 has failed. The connections from 211.21.48.195 in DMZ to SMTP server on the internet will be routed by policy "WAN1 (512/512)". If WAN#1 fails, it will be routed by "WAN2 (1536/384)". The connections from 211.21.48.195 in DMZ to POP3 server on the internet will be routed by "WAN1 (512/512)". If WAN#1 fails, no action will be taken. Note: When WAN #1 fails, connection to the external POP server will also fail. Source LAN LAN 211.21.48.195 211.21.48.195 Destination WAN WAN WAN WAN Service HTTP(80) FTP(21) SMTP(25) POP3(110) Routing Policy By Optimum Route WAN1(512/512) WAN1(512/512) WAN1(512/512) Fail-Over Policy No Action By Optimum Route WAN2 (1536/384) No Action Example 1: Simple Auto Routing Network Architecture: The auto routing policies to be established accordingly: Fortinet Technologies Inc. 82 AscenLink User Manual – LinkOS V7.1 Always route connections through WAN#1 (fixed algorithm). Always route connections through WAN#2 (fixed algorithm). Always route connections through WAN#3 (fixed algorithm). Route connections evenly among the three WAN links with "Round-Robin". Route connections through the three WAN links by "Round-Robin" with weight ratio WAN#1:WAN#2:WAN#3 = 1:2:3. Note: if there are six connections to be established, the first connection will be routed through WAN#1, the second and third through WAN#2, and the last three through WAN#3. Route connections through WAN#1 and WAN#2 depending on the bandwidth left in the downstream traffic of each WAN link. Route connections through WAN#2 and WAN#3 depending on the bandwidth left in the total traffic of each WAN link. Label WAN1 WAN2 WAN3 Round-Robin 1:1:1 Round-Robin 1:2:3 By Downstream By Total Algorithm Fixed Fixed Fixed Round-Robin Round-Robin By Downstream By Total Traffic Parameter Check WAN #1 Check WAN #2 Check WAN #3 Enter “1” for WAN #1, WAN #2, and WAN #3. Enter “1” for WAN #1, “2” for WAN #2, etc. Check both WAN #1 and WAN #2 Check both WAN #2 and WAN #3 Defining filters for the following: The connections from 192.168.0.100 to FTP 210.10.10.11 are routed by the policy "WAN3". If WAN #3 fails, they will be routed by policy "by Downstream". The connections from sub-network 192.168.10.0/24 to web servers on the internet are routed by the policy "Round-Robin1:1:1". The connections from 192.168.0.100~192.168.0.200 to sub-network 192.192.0.0/24 on TCP port 8000 are routed by the policy "WAN2". If WAN #2 fails, they will be routed by the policy "WAN3". The connections from the LAN to the Internet are routed by the policy "by Downstream". If both WAN #1 and WAN #2 fail, they will be routed by "WAN3". The connections from 211.21.48.196 to FTP 210.10.10.11 are routed by policy "Round-Robin1:2:3". The connections from 211.21.48.195 to any SMTP server on the internet are routed by policy "WAN3". If WAN #3 fails, they will be routed by "WAN3". Note: In this case, the host at 211.21.48.195 will not be able to establish connections to any SMTP server on the internet when WAN #3 fails, even though some other WAN links still keep alive. For more details, refer to “Fail-over” policy. The connections from DMZ to the internet are routed by policy "By Downstream". If both WAN #1 and WAN #2 fail, it will be routed by "By Total". Fortinet Technologies Inc. 83 AscenLink User Manual – LinkOS V7.1 Note: Usually, when both WAN #1 and WAN #2 fail, fail-over policy will take effect. Somehow in the case above when both WAN links fail, then all traffic will be routed to WAN #3. The connections from an arbitrary host to the hosts at 60.200.10.1~60.200.10.10 will be routed by policy "WAN2". If WAN #2 fails, they will be routed by "WAN1". The connections from an arbitrary host to any host on the Internet will be routed by the policy "by Downstream". Filter table will look like: Source 192.168.0.100 192.168.10.0/ 255.255.255.0 192.168.0.100 ~192.168.0.20 0 LAN 211.21.48.196 211.21.48.195 DMZ Any Any Destination 210.10.10.11 WAN Service FTP(21) HTTP(80) Routing Policy WAN3 Round-Robin 1:1:1 Fail-Over Policy By Downstream No Action 192.192.0.0/ 255.255.255. 0 WAN 210.10.10.11 WAN WAN 60.200.10.1~ 60.200.10.10 WAN TCP@8000 WAN2 WAN3 Any FTP(21) SMTP(25) Any Any By Downstream Round-Robin 1:2:3 WAN3 By Downstream WAN2 WAN3 No Action WAN3 By Total WAN1 Any By Downstream No Action Virtual Server Virtual Server makes intranet (LAN) servers accessible for the internet (WAN). The private IP addresses assigned to intranet servers will become invisible to the external environment, making services accessible for users outside the network. Then AscenLink is available to redirect these external requests to the servers in LAN or DMZ. Whenever an external request arrives, AscenLink will consult the Virtual Server table and redirect the packet to the corresponding server in LAN or DMZ. The rules of Virtual Server tables are prioritized top down. If one rule is similar to another in the table, only the higher ranked one will be applied, and the rest will be ignored. In addition, Virtual Server enables to balance load on multiple servers, which is to distribute traffic over a group of servers (server cluster), making services highly accessible. IPv4 Virtual Server Field Value Purpose / Description E Enable (checked) Disable (unchecked) Check the box to enable the rule. When Busy Idle All-Time Options: Busy hour, Idle hour, and All-Time. Please refer to Chapter 2 for more details. WAN IP IPv4 Address <WAN IP> For external internet users, the virtual server is presented as a public IP (IPv4) on WAN port. This WAN IP is the "visible" IP for the virtual server in external Fortinet Technologies Inc. 84 AscenLink User Manual – LinkOS V7.1 environment. Select a public IP, and in "Routing Mode", either enter the IP manually or select the IP obtained from WAN link; In "Bridge Mode One Static IP", insert WAN IP and the public IP assigned by ISP; Or choose "dynamic IP at WAN#", if WAN type is none of the above. FTP(21) SSH(22) TELNET(23) SMTP(25) DNS(53) HTTP(80) POP3(110) H323(1720) ICMP TCP@ UDP@ Any... Round Robin By Connection By Response Time Hash The type of TCP/UDP service to be matched. Select matching criteria from publicly known service types, or choose port number from TCP/UDP packets. To specify a range of port numbers, type starting port number plus hyphen “-“ and ending port number, e.g. “TCP@123-234”. <Seconds> Check the box to keep session after a connection has been established. If the session is to be stored, then enter a time period. Default value is 30s. Server IP <IP Address> The real IP (IPv4) of the server, most likely in LAN or DMZ. Detect <ICMP> <TCP@> No-Detect Choose the protocol for detecting server status: ICMP, TCP@, and NoDetect. Note: port number must be specified for “TCP@”. Service FTP(21) SSH(22) TELNET(23) The type of TCP/UDP service to be matched. Select matching criteria from publicly known service types Service Algorithm Keep Session Algorithms for server load balancing: - Round-Robin: routes connections to virtual server by weight. - By Connection: compares the number of connections on each virtual server and routes data based on specified connection ratio. - By Response Time: compares the average response time on each virtual server and routes data based on the lowest response time. - Hash: routes connections to the virtual server by the hash algorithm Server Pool Fortinet Technologies Inc. 85 AscenLink User Manual – LinkOS V7.1 SMTP(25) DNS(53) HTTP(80) POP3(110) H323(1720) ICMP TCP@ UDP@ Any... (e.g. FTP), or choose port number from TCP/UDP packet. To specify a range of port numbers, enter starting port number plus hyphen “-“ and ending port number, e.g. “TCP@123234”. Weight 1, 2, 3... Weight determines which server responds to the incoming requests. The higher the weight, the greater the chance is for the corresponding server to be used. L Enable Disable Check to enable logging: Whenever the rule is matched, system will record the event to log file. IPv6 Virtual Server Field Value Purpose / Description E Enable (checked) Disable (unchecked) Check the box to enable the rule. When Busy Idle All-Time Options: Busy hour, Idle hour, and All-Time. Please refer to Chapter 2 for more details. WAN IP IPv6 <WAN IP> For external internet users, the virtual server is presented as a public IP (IPv6) on WAN port. This WAN IP is the "visible" IP for the virtual server in external environment. Select a public IP, and in "Routing Mode", either enter the IP manually or select the IP obtained from WAN link; In "Bridge Mode One Static IP", insert WAN IP and the public IP assigned by ISP; Or choose "dynamic IP at WAN#", if WAN type is none of the above. Service FTP(21) SSH(22) TELNET(23) SMTP(25) DNS(53) HTTP(80) POP3(110) H323(1720) ICMPv6 TCP@ UDP@ Any... The type of TCP/UDP service to be matched. Select matching criteria from publicly known service types, or choose port number from TCP/UDP packets. To specify a range of port numbers, type starting port number plus hyphen “-“ and ending port number, e.g. “TCP@123-234”. Fortinet Technologies Inc. 86 AscenLink User Manual – LinkOS V7.1 Server IP <IP Address> The real IP (IPv6) of the server, most likely in LAN or DMZ. L Enable Disable Check to enable logging: Whenever the rule is matched, system will record the event to log file. Configuration File: Configuration file can be imported or exported and stored as “.txt” file. Note: Only the Administrator has the privilege to perform this function. Example 1: Virtual Server Network Architecture: The settings for virtual servers look like: Assign IP address 211.21.48.194 to WAN1. Refer to [System] -> [Network Settings] -> [WAN Settings] for more regarding WAN IP configurations. Assign IP address 211.21.33.186 to WAN2. Forward all HTTP requests (port 80) through WAN1 or WAN2 to the two HTTP servers 192.168.0.100 and 192.168.0.101 in LAN. Forward all FTP requests (port 21) through WAN1 or WAN2 to two FTP servers 192.168.0.200 and 192.168.0.201 in LAN. Assign 211.21.48.195 and 211.21.33.189 to WAN 1 and WAN2. Forward all Fortinet Technologies Inc. 87 AscenLink User Manual – LinkOS V7.1 requests to 211.21.48.195 or 211.21.33.189 to two SMTP servers 192.168.0.200 and 192.168.0.201 in LAN. Forward all requests from 211.21.48.197 to 192.168.0.15 in LAN. Note: 1. AscenLink can auto-detect both active and passive FTP servers. 2. All public IPs must be assigned to WAN 1. To configure these IPs, go to "IP(s) on Localhost of the Basic Subnet" table in [System] -> [Network Settings] -> [WAN Settings] -> [WAN Link 1]. 3. 211.21.48.197 does not belong to any physical host, and it must be assigned to WAN port. Virtual server table for the above settings: WAN IP Service 211.21.48.194 HTTP (80) 211.21.33.186 HTTP (80) 211.21.48.194 FTP (21) 211.21.33.186 FTP (21) 211.21.48.195 SMTP (25) 211.21.33.189 SMTP (25) 211.21.48.197 Any Fortinet Technologies Inc. Server IP 192.168.0.100 192.168.0.101 192.168.0.100 192.168.0.101 192.168.0.200 192.168.0.201 192.168.0.200 192.168.0.201 192.168.0.200 192.168.0.201 192.168.0.200 192.168.0.201 192.168.0.15 88 Server Pool Detect Service ICMP HTTP (80) TCP@80 HTTP (80) ICMP HTTP (80) TCP@80 HTTP (80) ICMP FTP (21) TCP@21 FTP (21) ICMP FTP (21) TCP@21 FTP (21) ICMP SMTP (25) TCP@25 SMTP (25) ICMP SMTP (25) TCP@25 SMTP (25) ICMP Any Weight 1 1 1 1 1 1 1 1 1 1 1 1 1 AscenLink User Manual – LinkOS V7.1 Example 2: Virtual Server Network Architecture: The settings for virtual servers look like: Forward all the TCP port 1999 requests established between external network and public IP 211.21.48.194 to FTP Server@ TCP port 1999 at 192.168.0.100 in LAN. Note: Due to the nature of ftp protocol, in port style ftp-data connection, when ftp-control is used in port 1999, port 1998 will be taken by ftp-data. Enable external users to access WAN IP 211.21.33.186, and connect PcAnywhere to .LAN hosts. Note: PcAnywhere uses TCP port 5631 and UDP port 5632. Refer to PcAnywhere software manual for more details. Enable external users to access WAN IP 211.21.48.194, and forward packets of TCP/UDP range 2000-3000 to host 192.168.0.15. Note: Port range redirecting is supported as well. Fortinet Technologies Inc. 89 AscenLink User Manual – LinkOS V7.1 Virtual server table for the settings above: WAN IP Service 211.21.48.194 TCP@1999 211.21.33.186 211.21.33.186 211.21.48.194 TCP@5631 TCP@5632 TCP@ 2000-3000 UDP@ 2000-3000 211.21.48.194 Server IP 192.168.0.100 192.168.0.101 192.168.0.15 192.168.0.15 192.168.0.15 192.168.0.15 Server Pool Detect Service ICMP TCP@1999 TCP@1999 TCP@1999 ICMP TCP@5631 TCP@5632 TCP@5632 ICMP TCP@ 2000-3000 ICMP UDP@ 2000-3000 Weight 1 1 Inbound BM Bandwidth Management (BM) allocates bandwidth to applications. To secure the bandwidth of critical applications, AscenLink Bandwidth Management (BM) defines inbound and outbound bandwidth based on traffic direction, i.e. take AscenLink as the center, traffic flows from WAN to LAN is inbound traffic, otherwise, it is outbound traffic. The section will mainly explain how to guarantee bandwidth based on priority settings, and how to manage inbound traffic by configuring busy/idle hours, data source/destination, and service type, etc. Inbound BM consists of Classes and Filters. Their settings look like: Click "Expand Link Settings" or "Collapse Link Settings" to show or hide configuration details of links and bandwidth limit. Classes Field Purpose / Description Enable BM Tick the check box to enable Inbound Bandwidth Management and Outbound Bandwidth Management. Name Assign a name to bandwidth class. Better use simple names to avoid confusion, e.g. “HTTP” to manage the bandwidth of HTTP service. Link Busy Hour Settings The WAN link number to which bandwidth limit will be applied. Guaranteed The guaranteed bandwidth for this class. Kbps This secures bandwidth allocated as defined Fortinet Technologies Inc. 90 AscenLink User Manual – LinkOS V7.1 Note: See [System] > [Busyhour Settings] in chapter 2 for more details. for WAN link in peak hours. This is significant to guarantee the service quality especially for critical applications like VoIP. Max Kbps Priority Idle Hour Settings Note: See [System] > [Busyhour Settings] in chapter 2 for more details. Guaranteed Kbps The maximum bandwidth for WAN link. Maximum bandwidth is often allocated to services like WWW and SMTP that consume large bandwidth. The priority of the connections on the WAN link. It can be High, Normal, or Low. The connections with higher priority will first be allocated bandwidth. The guaranteed bandwidth for this class. This secures bandwidth allocated as defined for WAN link in peak hours. This is significant to guarantee the service quality especially for critical applications like VoIP. Max Kbps The maximum bandwidth for WAN link. Maximum bandwidth is often allocated to services like WWW and SMTP that consume large bandwidth. Priority The prioritized order to allocate bandwidth to connections. It can be High, Normal, and Low. The higher priority the connections are, the more bandwidth they get. IPv4/IPv6 Filter It helps to maintain bandwidth usage through filtering traffic. Field Value Purpose / Description E Enable (checked) Disable (unchecked) Check the box to enable the rule. Source IPv4/IPv6 Address IPv4/IPv6 Range IPv4/IPv6 Subnet WAN FQDN < IPv4/IPv6 Grouping Name> Matches connections from a specified source: - IP Address: matches connections from a single IP. e.g. 192.168.1.4 or 2001:a:b:c::10. - IP Range: matches connections from a continuous range of IPs. e.g. 192.168.1.10-192.168.1.20 or 2001:a:b:c::10-2001:a:b:c::20. - Subnet: matches connections from a subnet. e.g. 192.168.1.0/255.255.255.0 or 2001:a:b:c::/64. - WAN: matches connections from WAN. - FQDN: matches connections from FQDN. Predefined IP groups will also show in the list. Refer to [System]->[IP Fortinet Technologies Inc. 91 AscenLink User Manual – LinkOS V7.1 Grouping] to set up IP groups. Destination Service Classes L IPv4/IPv6 Address IPv4/IPv6 Range IPv4/IPv6 Subnet WAN LAN DMZ Localhost Any address FQDN < IPv4/IPv6 Grouping Name> FTP(21) SSH (22) TELNET(23) SMTP(25) DNS(53) HTTP(80) POP3(110) H323 (1720) ICMP/ICMPv6 TCP@ UDP@ Any... <Name> Matches connections to a specified destination. This field is the same as the “Source”, except that it matches packets with the specified destination. Predefined IP groups will also show in the list. Refer to [System]->[IP Grouping] to set up IP groups. Enable Disable Check to enable logging: Whenever the rule is matched, system will record the event to log file. Matches the type of TCP/UDP service. Select matching criteria from publicly known service types (e.g. FTP), or choose port number from TCP/UDP packet. To specify a range of port numbers, type the starting port number plus hyphen “-“ and the ending port number. e.g. “TCP@123234”. The bandwidth class to be imposed. Defined in the bandwidth class table mentioned earlier. Configuration File: Configuration file can be imported or exported and stored as “.txt” file. Note: Only the Administrator has the privilege to perform this function. Fortinet Technologies Inc. 92 AscenLink User Manual – LinkOS V7.1 Example 1: Inbound BM Network Architecture The maximum bandwidth limited for internet users to transfer emails to mail server 211.21.48.197 in DMZ during both busy and idle periods is 128K on WAN1, 64K on WAN2, and 128K on WAN3. The guaranteed bandwidth on WAN1, WAN2 and WAN3 is zero. The maximum bandwidth limited for hosts in LAN zone to download data from internet web servers during both busy and idle periods is 128K on WAN1, 64K on WAN2, and 64K on WAN3. The guaranteed bandwidth on WAN1, WAN2 and WAN3 is zero. During the busy period, the maximum bandwidth limited for 192.168.0.100 to download data from internet FTP servers is 50K on WAN1, 30K on WAN2 and WAN3. The guaranteed bandwidth on WAN1 is 20K, and zero on WAN2 and WAN3. During the idle period, the maximum bandwidth limited for 192.168.0.100 to download data from internet FTP servers is 50K on WAN1, 200K on WAN2 and WAN3. The guaranteed bandwidth is 20K on WAN1, 100K on WAN2 and WAN3. The bandwidth is prioritized as "High" during both busy and idle periods. During the busy period, the maximum bandwidth limited for internet users to upload data to FTP server 211.21.48.198 in DMZ is 500K on WAN1, 256K on WAN2 and WAN3. The guaranteed bandwidth on WAN1 is 200K, and zero on WAN2 and WAN3. During the idle period, the maximum bandwidth limited for internet users to upload data to FTP server 211.21.48.198 in DMZ is 500K on WAN1, 300K on WAN2 and WAN3. The guaranteed bandwidth is 200K on WAN1, WAN2 and WAN3. The bandwidth is prioritized as "Low" during both busy and idle periods. Settings for BM classes above Fortinet Technologies Inc. 93 AscenLink User Manual – LinkOS V7.1 Name Mail Server For LAN Zone For 192.168.0. 100 FTP Server Link WAN1 WAN2 WAN3 WAN1 WAN2 WAN3 WAN1 WAN2 WAN3 WAN1 WAN2 WAN3 Busy Hour Settings Guaranteed Max Kbps Kbps 0 128 0 64 0 128 0 128 0 64 0 64 20 50 0 30 0 30 200 500 0 256 0 256 Priority Normal Normal Normal Normal Normal Normal High High High Low Low Low Idle Hour Settings Guaranteed Max Kbps Kbps 0 128 0 64 0 128 0 128 0 64 0 64 20 50 100 200 100 200 200 500 200 300 200 300 Priority Normal Normal Normal Normal Normal Normal High High High Low Low Low Filter Settings Source WAN WAN WAN WAN Destination 211.21.48.197 LAN 192.168.0.100 211.21.48.198 Service SMTP(25) HTTP(80) FTP(21) FTP(21) Classes Mail Server For LAN Zone For 192.168.0.100 FTP Server There are two possible scenarios for inbound data. One is local host downloading data from a remote FTP server in WAN, the other is a remote user in WAN uploading data to FTP in LAN. In both two scenarios data are sent from WAN to LAN. Thus it is necessary to configure BM rules for the scenarios on the Inbound BM page. Example 2: Inbound BM The requirements for managing inbound bandwidth During the busy period, the maximum bandwidth limited for hosts in LAN zone to download data from FTP server 192.192.10.10 is 128K on WAN1, 128K on WAN2, and 64K on WAN3. During the idle period, the maximum bandwidth limited for hosts in LAN zone to download data from FTP server 192.192.10.10 is 512K on WAN1, WAN2 and WAN3. The guaranteed bandwidth on WAN1, WAN2 and WAN3 is zero during both busy and idle periods. During the busy period, the maximum bandwidth limited for hosts 192.168.0.10 ~ 192.168.0.50 in LAN zone to download data from internet web servers is 128K on WAN1, 256K on WAN2 and WAN3. The gauranteed bandwidth is zero on WAN1, 128K on WAN2 and 64K on WAN3. During the idle period, the maximum bandwidth limited for hosts 192.168.0.10 ~ 192.168.0.50 in LAN zone to download data from internet web servers is 128K on WAN1, 512K on WAN2 and WAN3. The guaranteed bandwidth is zero on WAN1, WAN2 and WAN3. The bandwidth is prioritized as "Low" on WAN2 and WAN3 during both busy and idle periods. During the busy period, the maximum bandwidth limited for hosts in a subnet 192.168.100.0/24 in LAN to download data from internet FTP servers is 50K on WAN1, 64K on WAN2 and WAN3. The guaranteed bandwidth on WAN1 is 20K, and zero on WAN2 and WAN3. During the idle period, the maximum bandwidth limited for hosts in a subnet 192.168.100.0/24 in LAN to download data from Fortinet Technologies Inc. 94 AscenLink User Manual – LinkOS V7.1 internet FTP servers is 20K on WAN1, 128K on WAN2 and WAN3. The guaranteed bandwidth is 20K on WAN1, 32K on WAN2 and WAN3. The bandwidth is prioritized as "High" during both busy and idle periods. Configuring inbound BM class table Name For LAN Zone For 192.168.0. 10-50 For 192.168.10 0.0/24 Link WAN1 WAN2 WAN3 WAN1 WAN2 WAN3 WAN1 WAN2 WAN3 Busy Hour Settings Guaranteed Max Kbps Kbps 0 128 0 128 0 64 0 128 128 256 64 256 20 50 0 64 0 64 Priority Normal Normal Normal Normal Low Low High High High Idle Hour Settings Guaranteed Max Kbps Kbps 0 512 0 512 0 512 0 128 0 512 0 512 20 50 32 128 32 128 Priority Normal Normal Normal Normal Low Low High High High Filter Settings Source 192.192.10.10 WAN WAN Destination LAN 192.168.0.10-192.168.0.50 192.168.100.0/255.255.255.0 Service SMTP(25) HTTP(80) FTP(21) Classes For LAN Zone For 192.168.0.10-50 For 192.168.100.0/24 Outbound BM Outbound BM (Bandwidth Management) controls network streams that flow from Intranet (LAN) to Internet (WAN), which is opposite to Inbound BM. Their configurations are almost alike. Classes Field Purpose / Description Enable BM Tick the check box to enable Inbound Bandwidth Management and Outbound Bandwidth Management. Name Insert a name for this bandwidth class. It is recommended that simple self-explanatory names are used to avoid confusions in the filter table. E.g., bandwidth class “HTTP” to manage the bandwidth of HTTP services. Link Busy Hour Settings The WAN link for bandwidth limit to be applied. Guaranteed The guaranteed bandwidth for this class. Kbps This ensures the WAN link will be allocated with the specified bandwidth. Ideal for applications where quality of service is vital (e.g. VoIP). Note: See [System] > [Busyhour Settings] in chapter 2 for more details. Fortinet Technologies Inc. Max Kbps 95 This defines the maximum bandwidth allowed for the WAN link. It is recommended that maximum bandwidth be allocated for services AscenLink User Manual – LinkOS V7.1 Priority Idle Hour Settings Note: See [System] > [Busyhour Settings] in chapter 2 for more details. Guaranteed Kbps like WWW or SMTP for high volume traffic. The priority of the connections on the WAN link. It can be High, Normal, or Low. The connections with higher priority will first be allocated bandwidth. The guaranteed bandwidth for this class. This ensures the WAN link will be allocated with the specified bandwidth. Ideal for applications where quality of service is vital (e.g. VoIP). Max Kbps This defines the maximum bandwidth allowed for the WAN link. It is recommended that maximum bandwidth be allocated for services like WWW or SMTP for high volume traffic. Priority The priority of the connections on the WAN link. It can be High, Normal, or Low. The connections with higher priority will first be allocated bandwidth. IPv4/IPv6 Filter In the filter table, the rules for filtering outside connections with a specific set of characteristics can be configured as well as assigning BM class that will limit the bandwidth use. Field Value Purpose / Description E Enable (checked) Disable (unchecked) Check the box to enable the rule. Source IPv4/IPv6 Address IPv4/IPv6 Range IPv4/IPv6 Subnet LAN DMZ Localhost Any FQDN < IPv4/IPv6 Grouping Name> Check the box to enable the rule. - IPv4/IPv6 Address: match connections from a single IPv4/IPv6. e.g. 192.168.1.4 or 2001:a:b:c::10 - IPv4/IPv6 Range: match connections from a continuous range of IPs. e.g. 192.168.1.10192.168.1.20 or 2001:a:b:c::102001:a:b:c::20 - IPv4/IPv6 Subnet: match connections that come from a subnet. e.g. 192.168.1.0/255.255.255.0 or 2001:a:b:c::/64 - LAN: match connections from the LAN - DMZ : match connections from DMZ. - Localhost: match connections from AscenLink. - Any Address: match all connections from any source. - FQDN: match connections from Fortinet Technologies Inc. 96 AscenLink User Manual – LinkOS V7.1 FQDN. Predefined IP groups will also be shown in the list. Refer to [System]>[IP Grouping] for setting up IP groups. Destination IPv4/IPv Address IPv4/IPv Range IPv4/IPv Subnet WAN FQDN <IP Grouping Name> Connections to the specified destination will be matched. This field is the same as the “Source” field, except it matches packets with the specified destination. Predefined IP groups will also be shown in the list. Refer to [System]>[IP Grouping] for setting up IP groups. Service FTP(21) SSH (22) TELNET(23) SMTP(25) DNS(53) HTTP(80) POP3(110) H323 (1720) ICMP/ICMPv6 TCP@ UDP@ Any... <Name> The TCP/UDP service type to be matched. Select the matching criteria from the publicly known service types (e.g. FTP), or choose the port number in TCP/UDP packet. To specify a range of port numbers, type the starting port number plus hyphen “-“ and the ending port number. e.g. “TCP@123-234”. Enable Disable Check to enable logging: If the box is checked, logging will be enabled. Whenever the rule is matched, the system will record the event to the log file. Classes L The bandwidth class to be imposed. Defined in the bandwidth class table mentioned earlier. Configuration File: Configuration file can be imported or exported and stored as “.txt” file. Note: Only the Administrator has the privilege to perform this function. Fortinet Technologies Inc. 97 AscenLink User Manual – LinkOS V7.1 Example 1: Outbound BM Network Architecture During the busy period, the maximum bandwidth limited for internet users to download data from FTP server 211.21.48.198 in DMZ is 128K on WAN1 and WAN2, and 64K on WAN3. During the idle period, the maximum bandwidth limited for internet users to download data from FTP server 211.21.48.198 in DMZ is 512K on WAN1, WAN2 and WAN3. The guaranteed bandwidth on WAN1, WAN2 and WAN3 is zero during both busy and idle period. During the busy period, the maximum bandwidth limited for internet users to receive emails from mail server 211.21.48.197 in DMZ is 128K on WAN1 and WAN2, and 256K on WAN3. During the idle period, the maximum bandwidth limited for internet users to receive emails from mail server 211.21.48.197 in DMZ is 128K on WAN1 and WAN2, and 512K on WAN3. The guaranteed bandwidth on WAN1, WAN2 and WAN3 is zero. The bandwidth is prioritized as "Low" during both busy and idle periods. During the busy period, the maximum bandwidth limited for internet users to download data from a virture FTP server 192.168.0.100 in LAN is 200K on WAN1, 100K on WAN2 and WAN3. The guaranteed bandwidth on WAN1 is 100K, and 50K on WAN2 and WAN3. During the idle period, the maximum bandwidth limited for internet users to download data from a virture FTP server 192.168.0.100 in LAN is 512K on WAN1, WAN2 and WAN3. The guaranteed bandwidth is on WAN1, WAN2 and WAN3 is zero. Note: When configuring filters on virtual servers, specify the private IP assigned to the virtual server and not the translated public IP. During the busy period, the maximum bandwidth limited for hosts in a remote subnet 10.10.10.0/24 to download data from FTP server 211.21.48.198 in DMZ is 128K on WAN1 and WAN2 and 256K on WAN3. During the idle period, the maximum bandwidth limited for hosts in a remote subnet 10.10.10.0/24 to download data from FTP server 211.21.48.198 in DMZ is 256K on WAN1 and WAN2, and 512K on WAN3. The guaranteed bandwidth is zero on WAN1, WAN2 and WAN3, and the bandwidth is prioritized as "Low" during both busy and idle Fortinet Technologies Inc. 98 AscenLink User Manual – LinkOS V7.1 periods. Settings for BM classes above Name FTP Server Mail Server (POP3) For 192.168.0. 100 For 10.10.10.0 Link WAN1 WAN2 WAN3 WAN1 WAN2 WAN3 WAN1 WAN2 WAN3 WAN1 WAN2 WAN3 Busy Hour Settings Guaranteed Max Kbps Kbps 0 128 0 128 0 64 0 128 0 128 0 256 100 200 50 100 50 100 0 128 0 128 0 256 Priority Normal Normal Normal Low Low Low Normal Normal Normal Low Low Low Idle Hour Settings Guaranteed Max Kbps Kbps 0 512 0 512 0 512 0 128 0 128 0 512 0 512 0 512 0 512 0 256 0 256 0 512 Priority Normal Normal Normal Low Low Low Normal Normal Normal Low Low Low Filter Settings Source 211.21.48.198 211.21.48.197 192.168.0.100 211.21.48.198 Destination WAN WAN WAN 10.10.10.0/255.255.255.0 Service FTP(21) POP(110) FTP(21) Any Classes FTP Server Mail Server (POP3) For 192.168.0.100 For 10.10.10.0 Two possible scenarios for upstream data: e.g. FTP (scenario 1), is that local host uploads data from a remote FTP server in the WAN. The other scenario is a remote user in WAN downloads data from a FTP server in the LAN. Both of these scenarios are sending data from LAN to WAN. Thus configuring BM rules for these two scenarios on the inbound BM page is necessary. Connection Limit Connection Limit is a feature that restricts the number of connections to remain below a certain specified limit. When the number of connections exceeds that limit, the system will automatically log the event (if logging is enabled). Connection limit can detect exceptionally high volumes of traffic caused by malicious attacks. AscenLink protects the network by rejecting connections above the threshold. Configurations of Connection Limit are divided into 2 sections: Count Limit and Rate Limit. Configuration of Count Limit is aimed to limit the number of total connections biult by one IP address simultaneously; that is to say the request of new connection via this IP address will be denied, once the count of connections reaches the connection number specified in this section. On the other hand, configuration of Rate Limit is aimed to restrict the number of connections built by one IP address every second. The source of connection can be from any of the following options: IP address, IP Range, Subnet, WAN, LAN, DMZ, Localhost, and any specific IP address. Fortinet Technologies Inc. 99 AscenLink User Manual – LinkOS V7.1 Log Interval Field Value Purpose / Description Log Interval <second> The log interval determines how often the system records when the number of the connections exceeds the limit defined in the rules table. Rules – Count Limit Field Value Purpose / Description Source IPv4 Address IPv4 Range IPv4 Subnet WAN LAN DMZ Any Address FQDN <IPv4 Grouping Name> Match connections from a specified source: - IPv4 Address: match connections from a single IPv4 address. e.g.: 192.168.1.4 - IPv4 Range: match connections from a continuous range of IPv4 addresses. e.g.: 192.168.1.10-192.168.1.20 - IPv4 Subnet: match connections that come from a subnet. e.g. 192.168.1.0/255.255.255.0 - LAN: match connections from LAN - DMZ: match connections from DMZ. - Localhost: match connections from AscenLink. - Any Address: match all connections from any source. - FQDN: match connections from FQDN. Predefined IP groups will also be shown in the list. Refer to [System]->[IP Grouping] for setting up IP groups. Count <The number of connections> Set the limit for maximum number of the connections L Enable Disable Check to enable logging. If the box is checked, logging will be enabled. Whenever the rule is matched, the system will record the event to the log Fortinet Technologies Inc. 100 AscenLink User Manual – LinkOS V7.1 file. Rules – Rate Limit Field Value Purpose / Description E Enable Disable Enable: This rule can be matched. Disable: This rule does not need to be matched. When Busy Idle All-Time All of these three options are applicable 24 hours a day. Please refer to [System]→[ Busyhour Setting] for details of Busy and Idle configurations. Source IPv4 Address IPv4 Range IPv4 Subnet WAN LAN DMZ Any Address FQDN <IPv4 Grouping Name> Match connections from a specified source: - IPv4 Address: match connections from a single IPv4 address. e.g.: 192.168.1.4 - IPv4 Range: match connections from a continuous range of IPv4 addresses. e.g.: 192.168.1.10-192.168.1.20 - IPv4 Subnet: match connections that come from a subnet. e.g. 192.168.1.0/255.255.255.0 - LAN: match connections from LAN - DMZ: match connections from DMZ. - Localhost: match connections from AscenLink. - Any Address: match all connections from any source. - FQDN: match connections from FQDN. Predefined IP groups will also be shown in the list. Refer to [System]->[IP Grouping] for setting up IP groups. Destination IPv4 Address IPv4 Range IPv4Subnet WAN LAN DMZ Any Address FQDN <IPv4 Grouping Name> Match connections to specified Destination: This field is the same as the “Source” field, except that connections are matched with specified destination. Similarly all IP group setups in [System]>[IP Grouping] will also show here. Service FTP(21) SSH (22) TELNET(23) SMTP(25) DNS(53) HTTP(80) The TCP/UDP service type to be matched. Select the matching criteria from publicly known service types (e.g. FTP), or enter the port number in TCP/UDP packets and specify the range. Type the starting port number plus Fortinet Technologies Inc. 101 AscenLink User Manual – LinkOS V7.1 POP3(110) H323 (1720) ICMP TCP@ UDP@ Any < Service Grouping Name> hyphen “-“ and then the ending port number. e.g. “TCP@123-234”. Conn/Sec <The number of connections per second> Specify the number of connection allowed per second, under the conditions of [When], [Source], [Destination], and [Service] defined. L Enable Disable Check to enable logging. If the box is checked, logging will be enabled. Whenever the rule is matched, the system will record the event to the log file. Configuration File: Configuration file can be imported or exported and stored as “.txt” file. Note: Only the Administrator has the privilege to perform this function. Example The connection numbers cannot exceed 500 for every host in subnet 192.168.1.0/24. If any passes the limit, an event will be recorded every 5 seconds. AscenLink localhost is limited to accept 10 DNS (53) connections every second. Log Interval Settings Log Interval 5 Count Limit Settings Source 192.168.1.0/255.255.255.0 Conns 500 Rate Limit Settings When All-Time Fortinet Technologies Inc. Source Any Address Destination Localhost 102 Service DNS (53) Conn / Sec 10 AscenLink User Manual – LinkOS V7.1 Cache Redirect AscenLink is capable of working with external cache servers. When a user requests a page from a web server on the internet, AscenLink will redirect the request to the cache server. If the requested web page is already on the cache server, it will return the page to the user, thus saving time on data retrieval. Note: Cache Server can be in DMZ. Cache servers are configured here. However, cache servers have to support caching in transparent mode. The screenshot below shows cache redirect settings: Cache Group The first table configures cache server groups. Multiple groups can have different sets of rules which are then created on the second table. In addition, the number of cache servers is not limited to one. Therefore it is possible to have multiple cache servers with different weights in the cache server group. Field Value Purpose / Description Group Name < Group Name> Assign a name for this cache server group. IP <IPv4 address> The IPv4 address of the cache server Port Eg: 80 The port number of the cache server Weight Eg: 1,2… The weight for redirecting the requests to this cache server. A higher value means a greater the chance. Associated WAN NO, 1, 2… Select WAN link associated with the cache server. Cache redirect works only when both the selected WAN link and the cache server are available. Selecting "NO" means cache redirect is not associated with WAN links. No matter a WAN link is available or not, cache redirect can work if the cache server is available. Fortinet Technologies Inc. 103 AscenLink User Manual – LinkOS V7.1 Redirct Rule Field Value Purpose / Description Source IPv4 Address IPv4 Range IPv4 Subnet LAN DMZ Any Address <IPv4 Grouping Name> The source where the request originates and it will be redirected to the cache server. Specify the IP(s) when selecting “IPv4 Address”, “IPv4 Range” and/or IPv4 subnet. Destination IPv4 Address IPv4 Range IPv4 Subnet WAN <IPv4 Grouping Name> The destination where the request will be sent and it will be redirect to the cache server. Specify the IP(s) when selecting “IPv4 Address”, “IPv4 Range” and/or IPv4 subnet. Port Eg: 80 The service port number and it will be redirected to the cache server. Group NO REDIRECT or| <Group Name> Select “NO REDIRECT” for requests not to be directed. Or assign pre-existing group to redirect the requests. L Enable Disable Enable logging or not: If the box is checked, the logging will be enabled. Whenever the rule is matched, the system will write the event to the log file. Redirect rules can be established to match requests that will be redirected to the specific cache server group. Configuration File: Configuration file can be imported or exported and stored as “.txt” file. Note: Only the Administrator has the privilege to perform this function. Fortinet Technologies Inc. 104 AscenLink User Manual – LinkOS V7.1 Example 1: The Requested Web Page is NOT on the Cache Server When AscenLink receives a request from a client, the request will be redirected to the cache server. The cache server will determine if the data requested already exists or not. If not, then the request will be performed on behalf of the client with the data returned from the web server to the client. Example 2: The Requested Web Page is on the Cache Server When AscenLink receives a request from a client, the request will be redirected to the cache server. In this case, the data requested already exists on the cache server. Fortinet Technologies Inc. 105 AscenLink User Manual – LinkOS V7.1 Therefore it will return the data requested to the client without passing the actual request to the internet. Tunnel Routing Tunnel Routing (TR) is a technique that builds a special connection between two AscenLink units. TR delivers link aggregation and fault tolerance over multiple links ideally tailored for multinational intranet systems. TR breaks data down to packets and allows data to be prioritized during transfer while boosting the performance of critical services such as VPN and live video streaming while avoiding delays and data loss. The advantage of TR is that when a WAN link fails, the packets sent from the designated groups can still be routed to other AscenLink machines to leave the transfer undisturbed. Since version 5.1, AscenLink supports tunnels with dynamic IPs, Central Routing and TR/AR backup. Therefore if TR fails, then the traffic can fall back to the remaining WAN links using Auto Routing. Another enhancement of TR is TR/AR backup. In other words, when TR failed (possibly due to all of the WAN links in the TR failed), then the traffic can fall back to the remaining WAN links using the Auto Routing configuration. For a set of branch offices all connecting to the HQ, AscenLink’s TR function can further support routing of traffic among branch offices via the HQ. The page features two tabs: setting and benchmark. Setting: This page allows administrators to configure tunnel routing policies. Benchmark: After establishing tunnel routing, administrators can test packets dropping and latency of two ends. Note: A license key is required in order to use Tunnel Routing. Any further questions, please contact your local distributor or Fortinet for further assistance. Tunnel Routing---Setting Tunnel Routing settings page include three main configurations, Tunnel Route Log, Local Host ID, and Key The basic settings are located here: enabling or disabling Tunnel Route logging, define names and entering tunnel routing activation key. Field Value Purpose / Description Tunnel Route Log Enable/Disable Enable or disable logging. Local Host ID e.g. 12xyz.b_d-xxx Assign a name for this unit Key e.g. 1234 Enter the activation key. Confirm e.g. 1234 Confirm the key above. Tunnel Group In this table, the designated groups can use TR by entering source or destination IPs. It is possible to assign multiple tunnels to a single group. Fortinet Technologies Inc. 106 AscenLink User Manual – LinkOS V7.1 Field Value Purpose / Description Group Name <group name> Assign group name. Remote Host ID Eg:11xyz.b_d-yyy Enter the Host ID of the Remote machine in the Tunnel Algorithm Round-Robin By Traffic Round-Robin: Route the connections in every tunnel by weight. By Traffic: Route the connections to the tunnel with the lightest traffic flow. Note: Please specify the weight value of “Group Tunnels” when selecting “Round-Robin”. Local IP IP Address (NAT) IP Address Dynamic IP (NAT) Dynamic IP Enter the local/source address if the WAN has fixed IP. (NAT) IP Address: Static IP translated via NAT. Select <Dynamic IP> if the WAN link is Dynamic IP. (NAT) Dynamic IP: Dynamic IP translated via NAT. Remote IP IP Address Dynamic IP Enter remote/destination IP if the WAN has fixed IP. Select <Dynamic IP> if the WAN link is of Dynamic IP. Weight Eg: 1,2… The weight/priority of the tunnel. The higher the weight, the more likely it will use tunnels. Encrypt Check the box to enable encryption. Enables encrypted tunnel routing. Group Tunnels Default Rule Fortinet Technologies Inc. When the new tunnel has not yet been established, it will follow two default rules: first from LAN, the other from DMZ. Administrators are able to configure on two units to build up the tunnel. When the default rule is enabled, all the tunnels whose rules are not configured will perform this default rule. E Check the box to enable Default Rule. Check to enable the rule. Source IP Address IP Range Subnet LAN DMZ The source of the connection: -Format of a single IP on a single server: xxx.xxx.xxx.xxx -Format of a range of IP addresses on multiple servers: xxx.xxx.xxx.xxxyyy.yyy.yyy.yyy -Format for subnet address: xxx.xxx.xxx.xxx/yyy.yyy.yyy.yyy -Format of LAN address -Format of DMZ address -Any address Fail-over No Action Auto Routing Select a policy from the list. When WAN failure occurs, traffic will be 107 AscenLink User Manual – LinkOS V7.1 Tunnel: New Group diverted to back up tunnels based on Fail-over policies. Routing Rules Field Value IP Address IP Range Subnet LAN DMZ Any Address Purpose / Description Destination IP Address IP Range Subnet WAN The destination of the connection: -Format of a single IP on a single server: 192.168.1.4 -Format of a range of IP addresses on multiple servers: 192.168.1.10-192.168.1.20 -Format for subnet address: xxx.xxx.xxx.xxx/yyy.yyy.yyy.yyy -Format of WAN address Service FTP SSH TELNET SMTP DNS HTTP POP3 H323 ICMP TCP@ UDP@ Protocol# Any The TCP/UDP service type to be matched. The default is "Any". Administrators can select from the publicly known service types (e.g. FTP), or can choose the port number in TCP/UDP packet. To specify a range of port numbers, type starting port number plus hyphen "-" and then end port number. e.g. "TCP@123-234". Group No action Group The group permitted to use the tunnel. Fail-Over No action Auto Routing Group. This field defines the fail-over policy when the WAN links in the ‘Group’ for the Routing Rule fails. Possible options are: -NO-ACTION: AscenLink will ignore the link failure. -Auto-Routing: Packet will fall back to the Auto Routing policies -Tunnel Group: Packets will fall back to the selected tunnel groups. Note: when selecting the original tunnel group the name is the same as ‘NO-ACTION’ Source Fortinet Technologies Inc. The source of the connection: -Format of a single IP on a single server: 192.168.1.4 -Format of a range of IP addresses on multiple servers: 192.168.1.10-192.168.1.20 -Format for subnet address: 192.168.1.0/255.255.255.0 -Format of LAN address -Format of DMZ address -Any address 108 AscenLink User Manual – LinkOS V7.1 Persistent Rules Field Value IP Address IP Range Subnet LAN DMZ Any Address Purpose / Description Destination IP Address IP Range Subnet WAN The destination of the connection: -Format of a single IP on a single server: 192.168.1.4 -Format of a range of IP addresses on multiple servers: 192.168.1.10-192.168.1.20 -Format for subnet address: xxx.xxx.xxx.xxx/yyy.yyy.yyy.yyy -Format of WAN address Service FTP SSH TELNET SMTP DNS HTTP POP3 H323 ICMP TCP@ UDP@ Protocol# Any The TCP/UDP service type to be matched. The default is "Any". Administrators can select from the publicly known service types (e.g. FTP), or can choose the port number in TCP/UDP packet. To specify a range of port numbers, type starting port number plus hyphen "-" and then end port number. e.g. "TCP@123-234". Source The source of the connection: -Format of a single IP on a single server: 192.168.1.4 -Format of a range of IP addresses on multiple servers: 192.168.1.10-192.168.1.20 -Format for subnet address: xxx.xxx.xxx.xxx/yyy.yyy.yyy.yyy -Format of LAN address -Format of DMZ address Tunnel Routing---Benchmark In testing, set one AscenLink as server end and the other servers as client end by default. Simply click “Start Test Server” on one device to set it as server end. Testing over tunel groups is conducted on client end. Click the button to start or stop test. Users are able to choose one or all tunnels to perform test. Click Stop to stop the test. Field Test Port Value e.g.: 65535 Purpose / Description Defines test port number for the device. Start Test Server Click it to set the device as server end. Test Click to start test. Show Test Result Click the button to view test results. Fortinet Technologies Inc. 109 AscenLink User Manual – LinkOS V7.1 DO NOT SWITCH THE PAGE OR TURN OFF THE WINDOW when AscenLink is running test. Refer to the testing page table below. Field Tunnel Group Purpose / Description Tunnel Displays all tunnels in this tunnel group. Administrators are allowed to test one or all tunnels in this group. Displays name of testing group. Status Without Traffic With Traffic Test is not started or test is complete. Waiting for test. Testing. Test is failed. RTT Displays RTT value of both ends of tunnel. This value is tested with zero traffic load. Packet Loss Displays packet loss percentage. This percentage is tested with zero traffic load. Bandwidth Displays bandwidth of test result of this tunnel. RTT Displays RTT value of both ends of tunnel. This value is tested with full traffic load. Packet Loss Displays packet loss percentage. This percentage is tested with full traffic load. Configuration File: Configuration file can be imported or exported and stored as “.txt” file. Note: Only the Administrator has the privilege to perform this function. Fortinet Technologies Inc. 110 AscenLink User Manual – LinkOS V7.1 Example 1 A company’s headquarter and two branch offices are located in different cities. Each office has a LAN, multiple WAN links and a DMZ with VPN gateway: WAN1 WAN2 WAN3 LAN Headquarter 1.1.1.1 3.3.3.3 Dynamic IP 192.168.1.0/24 Branch 1 2.2.2.2 4.4.4.4 N/A 192.168.2.0/24 Branch 2 6.6.6.6 8.8.8.8 10.10.10.10 192.168.3.0/24 The settings for the headquarters: Set the Local Host ID as HQ. Tunnel Group Group Name Remote Host ID B1 Algorithm HQ-Branch1 Backup HQ-Branch2 B1 Round-Robin B2 Round-Robin HQ-Branch2 Backup B2 Round-Robin HQ-Branch1 Fortinet Technologies Inc. Round-Robin 111 Tunnels Local IP 1.1.1.1 1.1.1.1 3.3.3.3 3.3.3.3 1.1.1.1 3.3.3.3 Dynamic WAN Remote IP 2.2.2.2 4.4.4.4 2.2.2.2 4.4.4.4 6.6.6.6 8.8.8.8 10.10.10.10 Weight 1 1 1 1 1 1 1 AscenLink User Manual – LinkOS V7.1 Routing Rules Source 192.168.1.1192168.1.10 192.168.1.1192.168.1.10 1.1.1.11 1.1.1.11 Destination 192.168.2.1192.168.2.10 192.168.3.1192.168.3.10 2.2.2.22 6.6.6.66 Service Any Group HQ-Branch1 Any HQ-Branch2 Any Any HQ-Branch1 HQ-Branch2 Fail-Over HQ-bBranch1 Backup HQ-Branch2 Backup AR No-Action The settings for the branch1 Set the Local Host ID as B1 Tunnel Group Group Name Branch1-HQ Remote Host ID HQ Algorithm Round-Robin Tunnels Local IP 2.2.2.2 2.2.2.2 4.4.4.4 4.4.4.4 Remote IP 1.1.1.1 3.3.3.3 1.1.1.1 3.3.3.3 Weight 1 1 1 1 Routing Rules Source 192.168.2.1192168.2.10 2.2.2.22 Destination 192.168.1.1192.168.1.10 1.1.1.11 Service Any Group Branch1- HQ Fail-Over No-Action Any Branch1- HQ AR The settings for the branch2 Set the Local Host ID as B2 Tunnel Group Group Name Branch2-HQ Remote Host ID HQ Algorithm Round-Robin Tunnels Local IP 6.6.6.6 6.6.6.6 8.8.8.8 8.8.8.8 10.10.10.10 Remote IP 1.1.1.1 3.3.3.3 1.1.1.1 3.3.3.3 Dynamic IP Weight 1 1 1 1 1 Routing Rules Source 192.168.3.1192168.3.10 6.6.6.66 Fortinet Technologies Inc. Destination 192.168.1.1192.168.1.10 1.1.1.11 112 Service Any Group Branch2- HQ Fail-Over No-Action Any Branch2- HQ AR AscenLink User Manual – LinkOS V7.1 According to example 1, any data sent from 1.1.1.11 (or 192.168.1.1-192.168.1.10) to 2.2.2.22 will be wrapped and sent as a GRE packet. If 1.1.1.1 experiences a WAN link failure, the packet will still be sent from 3.3.3.3 to continue the transfer. NOTE: When using tunnel routing in AscenLink, the settings must correspond to each other or else tunnel routing will not perform its function. For example, if AscenLink in Taipei has removed the values 2.2.2.2 to 3.3.3.3 in their routing rule settings, then the AscenLink in Taichung will not be operational. Example 2: Tunnel Routing with Dynamic IP A company operates a branch office oversea. In the headquarter, two WAN links are deployed: a fixed IP WAN and a dynamic IP WAN; in the branch, two dynamic IP WAN. Requirements As illustrated in the diagram below, a tunnel is established between LAN1 and LAN2. Packets are transferred via two WAN links evenly. Summary of the Network WAN1 WAN2 LAN Headquarter 211.21.33.186 Dynamic IP 192.168.1.0/24 Branch Dynamic IP Dynamic IP 192.168.2.0/24 The settings for the headquarters: Set the Local Host ID as HQ. Tunnel Group Group Name HQ-Branch Remote Host ID Branch Algorithm Round-Robin Tunnels Local IP 211.21.33.186 Dynamic IP at WAN2 Fortinet Technologies Inc. 113 Remote IP Dynamic IP at WAN1 Dynamic IP at WAN2 Weight 1 1 AscenLink User Manual – LinkOS V7.1 Routing Rules Source 192.168.1.0/255.255. 255.0 Destination 192.168.2.0/255.255. 255.0 Service Any Group HQ-Branch Fail-Over No-Action The settings for the branch1 Set the Local Host ID as Branch Tunnel Group Group Name Branch-HQ Remote Host ID HQ Algorithm Round-Robin Tunnels Local IP Dynamic IP at WAN1 Dynamic IP at WAN2 Remote IP 211.21.33.186 Weight 1 Dynamic IP at WAN2 1 Routing Rules Source 192.168.2.0/255.255. 255.0 Destination 192.168.1.0/255.255. 255.0 Service Any Group Branch-HQ Fail-Over No-Action Example 3: Forwarding of Tunnel Routing A company operates two branch offices oversea. Each office deploys a public line to access internet. Each branch office sets up an individual tunnel with the headquarter to access the corporate intranet. Requirements The LAN links in branch 1 and branch 2 can communicate with each other via the tunnel established with the headquater. Fortinet Technologies Inc. 114 AscenLink User Manual – LinkOS V7.1 Headquarter WAN1 WAN2 WAN3 LAN Branch 1 1.1.1.1 Branch 2 2.2.2.2 3.3.3.3 192.168.1.0/24 192.168.2.0/24 The settings for the headquarters: Set the Local Host ID as HQ. Tunnel Group Group Name HQ-Branch1 HQ-Branch2 Remote Host ID Branch1 Branch2 Algorithm Round-Robin Round-Robin Tunnels Local IP 3.3.3.3 3.3.3.3 Remote IP 1.1.1.1 2.2.2.2 Weight 1 1 Service Any Group HQ-Branch2 Fail-Over No-Action Any HQ-Branch1 No-Action Routing Rules Source 192.168.1.0/255.255. 255.0 192.168.2.0/255.255. 255.0 Destination 192.168.2.0/255.255. 255.0 192.168.1.0/255.255. 255.0 The settings for the branch1 Set the Local Host ID as Branch1 Tunnel Group Fortinet Technologies Inc. 115 AscenLink User Manual – LinkOS V7.1 Group Name Branch1-HQ Remote Host ID HQ Algorithm Round-Robin Tunnels Local IP 1.1.1.1 Remote IP 3.3.3.3 Weight 1 Group Branch1-HQ Fail-Over No-Action Remote IP 3.3.3.3 Weight 1 Group Branch2-HQ Fail-Over No-Action Routing Rules Source 192.168.1.0/255.255. 255.0 Destination 192.168.2.0/255.255. 255.0 Service Any The settings for the branch2 Set the Local Host ID as Branch2 Tunnel Group Group Name Branch2-HQ Remote Host ID HQ Algorithm Round-Robin Tunnels Local IP 2.2.2.2 Routing Rules Source 192.168.2.0/255.255. 255.0 Fortinet Technologies Inc. Destination 192.168.1.0/255.255. 255.0 116 Service Any AscenLink User Manual – LinkOS V7.1 Example 4: Central Routing of Tunnel Routing A company operates two branch offices oversea. Intranet is established throughout the three locations, but the branch 1 does not have any public links to the internet and uses tunnel routing to connect to the internet via the WAN in the headquarter. The branch 2 uses a public WAN link for internet. In the event of WAN link failure, the tunnel between branch 2 and headquarter office will be the backup line for internet connection. Headquarter WAN1 WAN2 WAN3 WAN4 WAN5 LAN Branch 1 1.1.1.1 Branch 2 2.2.2.2 3.3.3.3 4.4.4.4 5.5.5.5 192.168.2.0/24 192.168.1.0/24 The settings for the headquarters: Set the Local Host ID as HQ. Tunnel Group Group Name HQ-Branch1 HQ-Branch2 Fortinet Technologies Inc. Remote Host ID Branch1 Branch2 Algorithm Round-Robin Round-Robin 117 Tunnels Local IP 3.3.3.3 3.3.3.3 Remote IP 1.1.1.1 2.2.2.2 Weight 1 1 AscenLink User Manual – LinkOS V7.1 Routing Rules Source Any Address Any Address Destination 192.168.2.0/255.255.255.0 192.168.1.0/255.255.255.0 Service Any Any Group HQ-Branch2 HQ-Branch1 Fail-Over No-Action No-Action Auto Routing Settings Policies Label WAN4 Algorithm Fixed Parameter Default Policy By Downstream Traffic Tick the box “4” Tick all boxes “1”, “2”, “3”, “4” ... Filters Source Tunnel Any Address Destination WAN WAN Service Any Any Routing Policy WAN4 Default Policy Fail-Over No-Action No-Action The settings for the branch1 Set the Local Host ID as Branch1 Tunnel Group Group Name Branch1-HQ Remote Host ID HQ Algorithm Round-Robin Tunnels Local IP 1.1.1.1 Remote IP 3.3.3.3 Weight 1 Group Branch1-HQ Fail-Over No-Action Remote IP 3.3.3.3 Weight 1 Group Branch2-HQ Fail-Over No-Action Routing Rules Source Any Address Destination WAN Service Any The settings for the branch2 Set the Local Host ID as Branch2 Tunnel Group Group Name Branch2-HQ Remote Host ID HQ Algorithm Round-Robin Tunnels Local IP 2.2.2.2 Routing Rules Source 192.168.2.0/255.255. 255.0 Fortinet Technologies Inc. Destination 192.168.1.0/255.255. 255.0 118 Service Any AscenLink User Manual – LinkOS V7.1 Auto Routing Settings Policies Label WAN5 Algorithm Fixed Parameter Default Policy By Downstream Traffic Tick the box “5” Tick all boxes “1”, “2”, “3”, “4” ... Filters Source Any Address Any Address Destination WAN WAN Service Any Any Routing Policy WAN5 Default Policy Fail-Over Tunnel: Branch2-HQ No-Action Multioming Auto-routing is a trunking technology that provides load balancing and fault tolerance for all outbound requests, but it does not apply to inbound requests. These are handled by a unique technology called SwiftDNS, a multihoming service which includes load balancing and fault tolerance for inbound requests. The minimum requirements for multihoming are networks must have multiple WAN links and registered domain names for publicly accessible servers. When AscenLink receives a DNS query, it replies with a public IP assigned to one of the WAN links based on the settings of the answering policies. Therefore, subsequent requests to server will be sent to a public IP of the WAN link based on AscenLink’s previous response. The policies are based on weight for each WAN link and are definable. Multihoming is also capable of automatically detecting the best links by “Optimum Route”, and if WAN link failure occurs, the public IP assigned to that failed link will not be returned even though the servers are still reachable via other links. AscenLink offers two options for Multihoming: Internal DNS and DNS Relay. The details of will be explained in this section. Prerequisites for Multihoming In order to multihome properly, review the requirements below. Prerequisites for Multihoming: Multiple WAN links (minimum of 2). Registered domain names for public servers. Public servers must be configured as virtual servers, or have public IPs Multihoming Settings The section explains how to configure Multihoming. First, check the box to enable Multihoming in "Enable Multihoming"]. Multihoming supports Backup mechanism. To enable this function, check “Enable Backup” and enter the IP of the backup server. Fortinet Technologies Inc. 119 AscenLink User Manual – LinkOS V7.1 "Disable relay" Mode When relay is disabled, AscenLink performs DNS analysis on local host. There are three tables for configuring multihoming settings: global settings, policy settings and domain name settings. Global Settings: IPv4 / IPv6 PTR Record Field Value <TTL> Purpose / Description Zone Name <Zone Name> Reverse domain name of the subnet the host belongs to. For example, enter 0-8.3.3.3 in Zone Name if subnet is 3.3.3.0-8. IP Number <IP Number> Enter IP number of the host. For example, enter 3 in IP Number if the host is 3.3.3.3 in the subnet 3.3.3.0-8. Host Name <Host Name> Enter the host name to which DNS will respond. TTL Set DNS query response time. TTL (Time To Live) Specifies the amount of time other DNS servers and applications are allowed to cache the record. Policy Settings A / AAAA Record Policy Field Purpose / Description Enable Multihoming Value Enable Disable Policy Name <Policy Name> For assigning name to policies. It is recommended to give descriptive names to avoid future confusion. T Check Box Check to enable threshold function to the policy. Administrators can configure the downstream and upstream threshold of each WAN link on the configuration page of Auto Routing. WAN links with traffic that exceeds the threshold values will be considered as failed to MultiHoming, and the other WAN links will be replied according to the configured A / AAAA Record Policy. Algorithm By Weight By Downstream By Upstream By Total Traffic By Optimum Route By Static The algorithm for selecting WAN links,for DNS queries: - By Weight: answer DNS queries by weight. - By Downstream: answer DNS queries by selecting the WAN link with the lightest downstream traffic load. - By Upstream: answer DNS queries by selecting the WAN link with the lightest 120 AscenLink User Manual – LinkOS V7.1 Fortinet Technologies Inc. Enable or disable multihoming. upstream traffic load. - By Total Traffic: answer DNS queries by selecting the WAN link with the lightest total traffic load. - By Optimum Route: answer DNS queries by selecting the best WAN link according to “Optimum Route Detection”. -By Static: answer DNS queries by replying A records of specified static IPs. WAN Link <Link Number> The WAN link to be answered by DNS resolver. IPv4 / IPv6 Address <IP Address> The public IP addresses on this WAN link. Weight Weight The weight of each WAN link. It is available only when algorithm of By Weight is in use. Domain Settings The table below configures Domain Settings: multihoming domain names, DNS servers names (for querying domain), and answering policies to be applied when being given a prefix of the domain name. Field Purpose / Description Domain Name Enter domain names for multihoming. Press “+” to add more domains. TTL Assign DNS query response time. Responsible Mail Enter domain administrator's email. Primary Name Server Enter primary server's name. IPv4 Address Query IPv4 address. It can be: IPv4 single address, range, subnet, or predefined IPv4 group. IPv6 Address Query IPv6 address. It can be: IPv6 single address, range, subnet, or predefined IPv6 group. NS Record Name Server Enter server name's prefix . For example: if a server’s FQDN is "nsl.abc.com", enter “nsl”. IPv4 Address Enter the IPv4 address corresponding to the name server. IPv6 Address Enter the IPv6 address corresponding to the name server. A Record Host Name Enter the prefix name of the primary workstation. For example: if the name is "Hwww.abc.comH", enter “www”. When Options: All-Time/Busy/Idle IP Address Enter the IP address of the primary workstation. To Policy Select the policy used for domain settings. TTL TTL (Time To Live) specifies the amount of time that A Record is allowed to be cached. Fortinet Technologies Inc. 121 AscenLink User Manual – LinkOS V7.1 AAAA Record Host Name Enter the prefix name of the primary workstation. For example: if the name is "Hwww.abc.comH", enter “www”. When Options: All-Time/Busy/Idle IP Address Enter the IP address of the primary workstation. To Policy Select the policy used for domain settings. TTL TTL (Time To Live) specifies the amount of time that A Record is allowed to be cached. CName Record Alias Enter the alias of the domain name. For example, if "www1.abc.com" is the alias of "Hwww.abc.comH", (domain name), enter “www1” in this field. Target Enter the real domain name. For example, if "www1.abc.com" is the alias of "Hwww.abc.comH", enter “www”. TTL TTL (Time To Live) specifies the amount of time that CName Record is allowed to be cached. DName Record Alias Enter the alias of the domain name. For example, if "www.a.abc.com" is the alias of "www.abc.com" (domain name), enter “a” in this field. Target Enter the prefix of the domain name. for example, if "www.a.abc.com" is the alias of "www.abc.com", enter “abc.com" as the prefix. TTL TTL (Time To Live) specifies the amount of time that DName Record is allowed to be cached. MX Record TTL TTL (Time To Live) specifies the amount of time that MX Record is allowed to be cached. Host Name Enter the prefix of the mail server’s domain name. For example, if domain name is "mail.abc.com", enter “mail”. Priority Enter the priority of the mail servers. The higher the priority is, the lower the number is. Mail Server Enter the IP address of the mail server. TXT Record TTL TTL (Time To Live) specifies the amount of time other DNS servers and applications are allowed to cache the record. Host Name Enter the prefix of the mail server. For example, when mail server is “mail.abc.com”, enter “mail” in Host Name field; whereas, when mail server is abc.com, leave Host Name field blank. SPF Specify SPF value the host uses. It is an effective antispam tool. For example, SPF record v=spf1 a:mail ip4:10.16.130.2/24 ~all means emails sent from domain IP 10.16.130.2/24 are effective, Fortinet Technologies Inc. 122 AscenLink User Manual – LinkOS V7.1 while emails sent from other IPs are assumed as spams. External Subdomain Record (available only in non-relay mode) Subdomain Name NS Record Enter the name of an external subdomain. To add an additional subdomain, press +. Name server - Enter the prefix of domain name (e.g. if the FQDN of the host is "ns1.abc.com", enter "ns1") IP address - Enter the corresponding IP address of the domain name. "Enable Relay" Mode When Relay is enabled, AscenLink will not analyze the requests it receives but relay them to other hosts for DNS analysis and transmit analysis results to client end. After Relay is enabled, “Global Settings” will hide. Field Purpose / Description Domain Name Enter the domain names for multihoming. Press “+” to add domain names. TTL TTL (Time To Live) defines the amount of time that other DNS servers and applications are allowed to cache the record. Name Servers Enter the domain of the administrator’s email. A Record Host Name Enter the prefix of the primary workstation’s name. For example: for "www.abc.com", the prefix will be “www”. H H When Options are "Busy", "Idle", and "All-Time". Refer to [System]->[Date/Time] for more information. Source IP The source of the DNS queries. All DNS queries will respond to this source IP. To Policy Select the domain setting policy to be used. TTL TTL (Time To Live) specifies the amount of time A Record is allowed to cache the record. A Record Host Name Enter the prefix of the primary workstation’s name. For example: for "www.abc.com", the prefix will be “www”. H H When Options are "Busy", "Idle", and "All-Time". Refer to [System]->[Date/Time] for more information. Source IP The source of the DNS queries. All DNS queries will respond to this source IP. Fortinet Technologies Inc. 123 AscenLink User Manual – LinkOS V7.1 To Policy Select the domain setting policy to be used. TTL TTL (Time To Live) specifies the amount of time A Record is allowed to cache the record. Enable Backup AscenLink Multihoming employs Backup mechanism to provide disaster recovery approach for network across various regions. Under this mechanism, the same backup service is set up across different regions. Therefore, when master site is down, backup site will immediately take over to resume the service. Administrators can check "Enable Backup" on the Slave AscenLink Web UI and specify the IPv4 address of the Master AscenLink. Then the Slave unit will detect the state of the Master unit periodically with its built-in Dig tool. When the Master's Multihoming works properly, the Slave's Multihoming will get into non-active mode; when the Master's Multihoming is down, the Slave will get into active mode and take over to resume Multihoming. After takeover, the Slave will continuously detect Master's state. Once the Master recovers, the Slave will return Multihoming service back to Master and get into non-active mode. This is how the Backup mechanism offers disaster recovery function. Configuration File Configuration file can be imported or exported and stored as “.txt” file. Note: Only the Administrator has the privilege to perform this function. Fortinet Technologies Inc. 124 AscenLink User Manual – LinkOS V7.1 Example 1 Network Architecture To access internet, a web server should be installed in intranet and be configured as virtual server. Settings of virtual server look like below (For more details, refer to section Virtual Server.). WAN IP 211.21.33.186 61.64.195.150 Server IP 192.168.0.100 192.168.0.100 Service HTTP(80) HTTP(80) This web server is bound to two WAN ports. For more information, see [System] -> [Networking settings] -> [WAN Settings]. Multihoming settings in the example A Record Policy Settings Policy Name Algorithm web By Upstream Policy Advance Setting WAN Link IPv4 Address 1 211.21.33.186 2 61.64.195.150 Domain Settings Domain Name TTL Responsible Mail Domainname.com 30 Abc.domainname.com Name Server ns1 Host Name www Primary Name Server ns1 IPv4 Address 192.168.0.10 IPv4 Address 192.168.0.10 When All-Time Source IP Any To Policy Web TTL 30 Note: DNS server IP can be public IP and private IP. Fortinet Technologies Inc. 125 AscenLink User Manual – LinkOS V7.1 Example 2 Network Architecture Configure virtual server before setting multihoming. Its configuration looks like below in this example. WAN IP 211.21.33.186 61.64.195.150 Server IP 192.168.0.200 192.168.0.200 Service SMTP(25) SMTP(25) Multihoming settings in the example A Record Policy Settings Policy Name Algorithm smtp By Weight Policy Advance Setting WAN Link IPv4 Address 1 211.21.33.186 2 61.64.195.150 Domain Settings Domain Name TTL Responsible Mail Domainname.com 30 Abc.domainname.com Name Server ns1 When All-Time TTL 30 Host Name mail Fortinet Technologies Inc. IPv4 Address 192.168.0.10 IPv4 Address 192.168.0.10 Host Name mail TTL 30 Primary Name Server ns1 Weight 1 1 Host Name Source IP Any Priority 1 To Policy smtp TTL 30 Mail Server mail TXT v=spf1 ip4:211.21.33.186 ip4:61.64.195.150 ~all 126 AscenLink User Manual – LinkOS V7.1 Note: 1. Refer to [System]->[Networking Settings]->[WAN Settings] and assign public IPs to WAN ports. 2. The example has configured multihoming for virtual server “mail.domainname.com”. Internal DNS To streamline DNS server settings and save cost, AscenLink has built in DNS server. Activate DNS function by configuring fields below: Global Settings: IPv4 / IPv6 PTR Record Field Value Purpose / Description Enable Internal DNS Turn on/off internal DNS server. IPv4 PTR Record TTL <TTL> Specifies the amount of time other DNS servers and applications are allowed to cache the record. IPv4 Address <IP Address> Enter the reverse lookup IPv4 address. Host Name <Host Name> Enter the corresponding FQDN for the reverse IP. TTL <TTL> Specifies the amount of time other DNS servers and applications are allowed to cache the record. IPv6 Address <IP Address> Enter the reverse lookup IPv6 address. Host Name <Host Name> Enter the corresponding FQDN for the reverse IP. IPv6 PTR Record Domain Settings Field Purpose / Description Domain Name Enter domain names for multihoming. Press “+” to add more domains. TTL Assign DNS query response time. Responsible Mail Enter domain administrator's email. Primary Name Server Enter primary server's name. IPv4 Address Query IPv4 address. It can be: IPv4 single address, range, subnet, or predefined IPv4 group. IPv6 Address Query IPv6 address. It can be: IPv6 single address, range, subnet, or predefined IPv6 group. NS Record Name Server Fortinet Technologies Inc. Enter server name's prefix . For example: if a server’s FQDN is "nsl.abc.com", enter “nsl”. 127 AscenLink User Manual – LinkOS V7.1 IPv4 Address Enter the IPv4 address corresponding to the name server. IPv6 Address Enter the IPv6 address corresponding to the name server. A Record Host Name Enter the prefix name of the primary workstation. For example: if the name is "Hwww.abc.comH", enter “www”. When Options: All-Time/Busy/Idle IP Address Enter the IP address of the primary workstation. To Policy Select the policy used for domain settings. TTL TTL (Time To Live) specifies the amount of time that A Record is allowed to be cached. AAAA Record Host Name Enter the prefix name of the primary workstation. For example: if the name is "Hwww.abc.comH", enter “www”. When Options: All-Time/Busy/Idle IP Address Enter the IP address of the primary workstation. To Policy Select the policy used for domain settings. TTL TTL (Time To Live) specifies the amount of time that A Record is allowed to be cached. CName Record Alias Enter the alias of the domain name. For example, if "www1.abc.com" is the alias of "Hwww.abc.comH", (domain name), enter “www1” in this field. Target Enter the real domain name. For example, if "www1.abc.com" is the alias of "Hwww.abc.comH", enter “www”. TTL TTL (Time To Live) specifies the amount of time that CName Record is allowed to be cached. MX Record TTL TTL (Time To Live) specifies the amount of time that MX Record is allowed to be cached. Host Name Enter the prefix of the mail server’s domain name. For example, if domain name is "mail.abc.com", enter “mail”. Priority Enter the priority of the mail servers. The higher the priority is, the lower the number is. Mail Server Enter the IP address of the mail server. External Subdomain Record Subdomain Name NS Record Enter the name of an external subdomain. To add an additional subdomain, press +. Name server - Enter the prefix of domain name (e.g. if the FQDN of the host is "ns1.abc.com", enter "ns1") IPv4 address - Enter the corresponding IPv4 address of the domain name. Fortinet Technologies Inc. 128 AscenLink User Manual – LinkOS V7.1 IPv6 address - Enter the corresponding IPv6 address of the domain name. Configuration File Configuration file can be imported or exported and stored as “.txt” file. Note: Only the Administrator has the privilege to perform this function. DNS Proxy AscenLink’s DNS Proxy redirects a DNS request sent from LAN or DMZ to the external DNS servers with better response time. There are two phases included in the DNS Proxy, auto routing among multiple WAN links and redirecting a DNS request to the DNS servers specified on the WAN link. Usually, the DNS servers specified on the WAN link are located in the ISP’s network which the WAN link connects to. Therefore, DNS Proxy routes a DNS request to a WAN link with the best quality and sends it to the DNS servers specified on the WAN link whatever the original destination is. Field Purpose / Description Enable DNS Proxy Turn on/off DNS Proxy. Algorithm 4 algorithms for routing: By Weight: route the connections on every WAN link by weight. By Down Stream: always route the connection to the WAN link that has the lightest downstream traffic. By Up Stream: always routes the connection to the WAN link that has the lightest upstream traffic. By Total Traffic: always route the connection to the WAN link that has the lightest total traffic. WAN Select the WAN links for specifying DNS servers and weight. Weight Give a weight on each WAN link. This field is visible when By Weight is selected in Algorithm. Server 1 Specify the first DNS server on the WAN link. Server 2 Specify the second DNS server on the WAN link. This is an optional. Server 3 Specify the third DNS server on the WAN link. This is an optional. Source Connections established from the specified source will be matched. Domain Name DNS requests for the specified domain name will be matched. Fortinet Technologies Inc. 129 AscenLink User Manual – LinkOS V7.1 SNMP SNMP (Simple Network Management Protocol) is often used in managing TCP/IP networks by providing statistical data regarding network performance and security. SNMP v1 to v3 protocols are supported in AscenLink. SNMP v1/2 Field Purpose / Description Community Enter the community which the SNMP belongs to. System Name Enter a string to represent this system. System Contact Enter a string to represent a person in charge of this system. System Location Enter a string to represent the location of this system. SNMP v3 Field Value Purpose / Description Community Enter the community which the SNMP belongs to. System Name Enter a string to represent this system. System Contact Enter a string to represent a person in charge of this system. System Location Enter a string to represent the location of this system. Username Enter user name used for authentication. Password Enter the password used for authentication. Privacy Key Enter the privacy key code. Eg: 12345678, ABCDEFGHUI.etc. AuthProtocol MD5 SHA Select the authentication protocol used for transferring the authenticated password, either MD5 or SHA. PrivProtocol DES Select the authentication protocol used for transferring the authenticated privacy key. Authentication Auth No Priv Auth with Priv Select the authentication method for user and privacy key, either authentication with or without privacy. Configuration File Configuration file can be imported or exported and stored as “.txt” file. Note: Only the Administrator has the privilege to perform this function. Fortinet Technologies Inc. 130 AscenLink User Manual – LinkOS V7.1 IP-MAC Mapping Users can specify the IP-MAC table by classifying periods like peak hours and idle hours. Once the IP-MAC table is set up, a packet from a certain IP address can pass through AscenLink only when its MAC address matches the table list and time period. Field Value E When Purpose / Description Enable/Disable Busy Idle All-Time Select the time period: busy hour, idle hour and all time. All time is defined in 24-hour system. For details, refer to [System] -> [Busyhour Settings]. IP Address Enter the IP address of the network interface card. MAC Address Enter the MAC address of the network interface card. L Enable Disable Check it to activate the rule and record results in log file. Otherwise, the rule is inactive and data will not be stored. Configuration File Configuration file can be imported or exported and stored as “.txt” file. Note: Only the Administrator has the privilege to perform this function. Fortinet Technologies Inc. 131 AscenLink User Manual – LinkOS V7.1 Statistics This chapter deals with AscenLink network surveillance system. Comprehensive statistics are collected to monitor networking status, bandwidth usage of traffic class, and dynamic IP WAN link. These data offer deep insight into the network, and help detect unexpected network failures, boosting network reliability and efficiency. Traffic It sorts and displays real-time traffic of traffic class over WAN link. Select traffic direction (inbound/outbound) in Traffic Type to view statistics. The table below shows 3 sorts of statistics: Maximum/Minimum bandwidth allocation and priority Traffic for the last 3 seconds Traffic for the last minute The statistics are analyzed based on individual WAN connection and traffic direction. To view statistics, select from Traffic Type (Inbound/Outbound), traffic direction and WAN Link number. Field Value Purpose / Description Traffic Type Inbound Outbound Traffic flow direction: inbound and outbound. WAN Link 1, 2... The number of WAN links for inspection. Automatic Refresh Every 3 Seconds Every 6 Seconds Every 9 Seconds... Time interval to refresh statistical table. Traffic Class The name of the traffic class defined on Inbound/Outbound Bandwidth Management page. Among these, unclassified classes are labeled as “Default Class”. Min. ~ Max.(Priority) Kbps ~ Kbps The maximum/minimum traffic volume allowed for a specific traffic class of differenet priority levels. 3-Second Statistics Packets, Kbps Displays packet numbers or traffic flow volume in Kilobyte/sec for the last 3 seconds. 1-Minute Statistics Packets, Kbps Displays packet numbers or traffic flow volume in Kilobyte/sec for the past 60 seconds. Top 10 Fortinet Technologies Inc. Displays the data flow for the last five seconds with corresponding IP address. Statistics can be ranked by By Source and By Destination. 132 AscenLink User Manual – LinkOS V7.1 BM Unlike traffic statistics in previous section that focuses on real-time monitor of network status, statistics in BM (Bandwidth Management) is intended for long-term analysis. For particular traffic class in a given traffic direction, administrators can view bandwidth usage in bar graph during the past 60 minutes, 30 hours, 50 days, and 20 months. Field Value Purpose / Description Traffic Type Inbound Outbound Traffic flow direction: inbound or outbound traffic. Traffic Class WAN Link The name of the traffic class defined on the Inbound/Outbound Bandwidth Management page or the sum of all traffic classes. 1, 2... Refresh The number of WAN links users to inspect. Click to refresh statistical charts. Persistent Routing It shows details with respect to persistent routing status. With persistent routing, administrators can view connections and manually reset these connections as well. Field Purpose / Description Clear All Clear all the connections via persistent routing. Automatic Refresh Time interval to refresh persistent routing data. IPv4/IPv6 IP Pair IP Pair Entrry Shows connection entries that match IP Pair Rules. Source IP Source IP of the current persistent routing connection. Destination IP Destination IP of the current persistent routing connection Count Number of connections that the current persistent routing rule applies to Timeout Length of time to lapse before the current connection times out WAN The WAN link through which the current persistent routing connection travels. IPv4/IPv6 Web Service Web Service Entry Shows connection entries that match Web Service Rules. Source IP Source IP of the current persistent routing connection. Count Number of connections that the current persistent routing rule applies to Timeout Length of time to lapse before the current connection times out WAN The WAN link through which the current persistent routing connection travels. Fortinet Technologies Inc. 133 AscenLink User Manual – LinkOS V7.1 Note that IP Pair and Web Service show at most 50 entries respectively. WAN Link Health Detection It shows WAN link health detection results regarding the reliability of a specific WAN connection. The data are derived based on ping results from destination IP list configurations in [System] -> [WAN Link Health Detection]. It enables to observe the number of sent requests, number of received responses, and the success ratio for a given destination. These statistics assist administrators in further analyzing network status and user behavior. Field Purpose / Description WAN Link The WAN link to be monitored. Automatic Refresh Time interval for refreshing tables. Destination IP The destination IP address to which ping requests will be sent. Number of Requests The number of requests sent to the destination IP so far. Number of Replies The number of ICMP responses received so far from the destination in WAN. Success Ratio (%) The percentage of responses divided by requests. The higher the percentage, the greater the reliability. Dynamic IP WAN Link It shows dynamic IP WAN link details like its IP address obtained via PPPoE or DHCP. It also enables to create new IP addresses by re-establishing connections to the WAN. Field Purpose / Description Re-Connect All Reconnect all WAN links via PPPoE or DHCP. Automatic Refresh Time interval to refresh table results. WAN WAN connected by either PPPoE or DHCP IP Address IP allocated to current WAN link. Gateway Gateway’s IP address for current WAN link. Netmask Sub network mask. DNS Dynamic DNS Server IP Connected Time Duration of WAN connectivity Reconnect Reconnect a WAN link via PPPoE or DHCP. Fortinet Technologies Inc. 134 AscenLink User Manual – LinkOS V7.1 DHCP Lease Information It shows data DHCP lease assigns, i.e. lease IP and MAC address, client-hostname, and expiration time. Once option of DHCP server is selected, a list regarding all existing DHCP servers in the network will display. Option Automatic Refresh sets the time interval to regularly update DHCP servers. Field Purpose / Description DHCP Server Displays the DHCP server and IP range to be assigned. Automatic Refresh The time interval after which the table of DHCP leases information is updated. Lease IP WAN connected by either PPPoE or DHCP IP Address Shows the IPv4 address assigned to the client’s machine. MAC Address Shows the MAC address of the client’s machine. Client-Hostname Shows the name of the client machine. Expiration Time Shows the time period when the IP address is valid. DHCPv6 Server Displays DHCP server and range of IPv6 addresses which can be assigned. Lease IP Shows the IPv6 address assigned to client's machine. Client ID Shows the ID assigned to the lease IPv6 address. Expire Time Shows the time period during which the IPv6 address is valid. RIP & OSPF Status It shows RIP status based on RIP and OSPF settings in [System] -> [Network Settings] -> [LAN Private Subnet]. Data on this page are used to inspect private subnet’s Network IP, Netmask, and gateway list. Field Purpose / Description Type Select from the list to view RIP or OSPF routing. Automatic Refresh Select auto-refresh interval, or disable the function. Network IP Shows the Network IP of the private subnet. Netmask Shows the Netmask of the private subnet. Gateway Shows the Gateway of the private subnet. Connection Limit It enables administrators to inspect the number of established connections in real-time and to justify the maximum number of connections allowed on [Service] -> [Connection Limit] page, to avoid network congestion. Fortinet Technologies Inc. 135 AscenLink User Manual – LinkOS V7.1 Field Purpose / Description Automatic Refresh Select auto-refresh interval, or disable the function. No. Numbering of IP addresses based on the number of connections established. IP Shows the source IP of the connection. Connections Shows the number of connections established. Virtual Server Status It displays status and statistics regarding virtual server defined in Service/Virtual Server. Field Purpose / Description Automatic Refresh Enable it and choose time interval for refreshing. Virtual Server Status = OK = Failed WAN IP Displays WAN IPs defined in the rules on Service/Virtual Server page. Service Displays services defined in the rules on Service/Virtual Server page. These services are those available for virtual servers. Server IP Displays server IPs defined in the rules on Service/Virtual Server page. The server IPs denote those in real network usage. Detect Displays detection method, TCP or ICMP. Status Displays detection result. FQDN The IPv4 and IPv6 addresses of the FQDNs that connected via AscenLink are shown in this page. IPv4 FQDN Field Purpose / Description FQDN The FQDN connected via AscenLink. IPv4 Address IPv4 addresses of the FQDN connected via AscnLink. It maintains 20 addresses at most. IPv6 FQDN Field Purpose / Description FQDN The FQDN connected via AscenLink. IPv6 Address IPv6 addresses of the FQDN connected via AscnLink. It maintains 20 addresses at most. Fortinet Technologies Inc. 136 AscenLink User Manual – LinkOS V7.1 Tunnel Status It shows tunnel routing status based on the settings in [Service] -> [Tunnel Routing]. Here administrators are able to monitor tunnel’s working status and view its statistics in the last 3 Seconds, 1 Minute, etc. Administrators can enable Automatic Refresh and choose a suitable time interval to refresh statistics automatically. Field Purpose / Description Tunnel Group Select the tunnel group from the menu. Automatic Refresh Enable it and choose time interval for refreshing. Tunnel Status = OK = Failed Tunnel Shows all the tunnels the selected tunnel group includes. 3-Second Statistics Shows statistics obtained in the last 3 seconds. 1-Minute Statistics Shows statistics obtained in the last 60 seconds. Status Shows tunnel status. Default Rule Subnets Local Subnet Shows local unit subnet used in tunnel routing default rules. Opposite Subnet Shows opposit unit subnet used in tunnel routing default rules. Tunnel Traffic It collects inbound/outbound traffic statistics regarding tunnel routing in the past 60 minutes, 24 hours, and 30 days. Statistics are displayed on chart. Field Value Purpose / Description Traffic Type Outbound Inbound Traffic flow direction. Time 60 Mins 24 Hours 30 Days Collect statistics in the past 60 minutes, 24 hours, and 30 days. Tunnel Routing Group <Group Name> Select a group from the list. Depending on N tunnels the group gets, N statistical charts will show. Fortinet Technologies Inc. 137 AscenLink User Manual – LinkOS V7.1 Log The Chapter deals with how to configure logging and how to forward logs. Log records keep AscenLink data and are capable of storing a wide variety of data concerning System, Firewall, Routing, and bandwidth management, etc. Log files can be forwarded to other servers for archiving or for notifying events via emails. Additionally, AscenLink offers a powerful reporting and analysis tool: LinkReport. The web-based analysis software running on an independent machine enables administrators to gain insights into network traffic without manually filtering through large volumes of log data. View View has a sub-menu of 13 log types (see the table below). Choose the desired log type, and its corresponding events will show in display window. Click the Refresh button to get the latest log records. Please be aware that this page is only for online viewing of current events. For log data pushing and archiving, see the Control in next section. Field Log Type Purpose / Description Recent Event Log events listed in time order. Refresh Refresh to get the latest log events. Clear Clean up log records. Choose log type to view its events in display window. The log types are: System Log Firewall Log NAT Log Auto & Persistent Routing Log Virtual Server Log BM Log Connection Limit Log Cache Redirect Log Multihoming Log Backup Line Log Dynamic IP Log IP-MAC Mapping Log Tunnel Routing Log Control Control sets to forward data from AscenLink to servers via FTP, E-mail and Syslog (protocol) for archiving and analysis. Configure log push method one log type by another, or use “Copy Settings to All Other Log Types”. It copies and applies settings of one log type to others avoiding unnecessary duplicating of settings. Fortinet Technologies Inc. 138 AscenLink User Manual – LinkOS V7.1 Field Log Type Value Purpose / Description System Log Firewall Log NAT Log Auto & Persistent Routing Log Virtual Server Log BM Log (Bandwidth Management) Connection Limit Log Cache Redirect Log Multihoming Log Backup Line Log Dynamic IP Log IP-MAC Mapping Log Select log type to be forwarded to servers. Copy Settings to All Other Log Types Copy and apply settings of a log type to other ones. Method E-Mail FTP Syslog Note <Note > See below Push Now Push Log When Out of Space Click this button and logs are pushed immediately. Enable Disable Check Enable to avoid losing data in case of space shortage. Enable Scheduled Push Check to enable pushing schedule. Initial Time <Year/Month/Day/Hour/Min ute/Second> Start time for scheduled push. Period <Day/Hour/Minute> Duration for scheduled push Methods AscenLink transfer logs with FTP, Email and Syslog. It either forwards logs to external FTP server, administrator’s mail account via SMTP or a remote syslog servers. FTP Field Server Value Purpose / Description <IP> or <Domain Name> FTP Server’s IP or domain name Account <FTP Account> FTP user account Password <Account’s Password> FTP user password Path <Path> FTP server path Fortinet Technologies Inc. 139 AscenLink User Manual – LinkOS V7.1 E-Mail Field SMTP Server Value Purpose / Description <IP> or <Domain Name> SMTP server for logging Account <SMTP Account> Authenticated account for mail server Password <Account’s Password> Authenticated password for mail server Mail From <e-mail address> Sender Mail To <e-mail address> Receiver(s). Separate receivers with “,” or “.”. Syslog Field Server Value Purpose / Description <IP> IP address of remote syslog server Facility Local0 Local1 Local2 Local3 Local4 Local5 Local6 Local7 Assign a facility to the logging message to specify the program type. Configuration File Configuration file can be imported or exported and stored as “.txt” file. Note: Only the Administrator has the privilege to perform this function. Notification Notification sets methods for the email notifications to be sent out for important system events. It is similar to previous section’s email account settings. Press “Send Test EMail Now” to test if the configurations work. As illustrated below, it takes 3 steps to configure notification: Fortinet Technologies Inc. 140 AscenLink User Manual – LinkOS V7.1 E-Mail Settings The table below summarizes the event notification mail setup: Field SMTP Server Purpose / Description Account Authenticated account for the mail server Password Authenticated password for the mail server Mail From Sender Mail To Receiver(s). Separate receivers with “,” or “.”. Send Test E-mail Now Click the button to immediately begin testing. SMTP Server SNMP Trap Settings Event notification can also be sent via SNMP traps. These can only be sent if there is an existing SNMP managing device for receiving AscenLink’s SNMP traps. Field Destination IP Value Purpose / Description <IP Address> The SNMP managing device IP Community Name <Community Name> Community name Types of Events to Notify Field Event Types to Notify Fortinet Technologies Inc. Value Purpose / Description WAN link failure and recovery Account change HA slave failure and recovery HA takeover VRRP takeover Number of connections reaches ___ Rate of connections reaches___ / sec Total WAN traffic reaches ___ Kbps Check to select the events. Enter the threshold to number of connections, rate of connections and total WAN traffic to trigger the notification. 141 AscenLink User Manual – LinkOS V7.1 Select All Click to check all the event types Clear All Click to uncheck all the event types Configuration File Configuration file can be imported or exported and stored as “.txt” file. Note: Only the Administrator has the privilege to perform this function. Link Report It controls the way AscenLink log communicates with LinkReport server. The original log file AscenLink produces contains raw data which is yet to be processed, and LinkReport can organize and analyze these data into readable statistics. Administrators need create a connection to send log files to LinkReport-manned computer. Analysis of the log files will be performed on this computer, instead of on the Web UI. Settings are illustrated below: Field Enable Link Report Value Purpose / Description Enable it and push logs to specific LinkReport Server. Recipient IP Address Events Fortinet Technologies Inc. LinkReport server IP address. Firewall Virtual Server Bandwidth Usage Connection Limit Multihoming 142 Select the log type for AscenLink to send to LinkReport. AscenLink User Manual – LinkOS V7.1 Deployment Scenarios Various WAN Types and Scenarios This Section provides various network scenarios for the different WAN types and explains how AscenLink can easily be integrated into any existing networks. WAN Type: Bridge Mode with a Single Static IP Single Static IP is a common and simple WAN network scenario, where the ISP provides a single public static (fixed) IP for the WAN link. Note: ISP often provides ATU-R, sometimes known as ADSL Modems with bridge model. Single Static IP’s network topology Sample configuration: In this example it is assumed that WAN port 1 is connected to the bridge-mode ATU-R. ISP network settings: ISP provides an ATU-R with bridge mode setup, the assigned public IP is 211.100.3.35, gateway is 211.100.3.254, and netmask is 255.255.255.0. Hardware configuration: Please refer to the ATU-R User manual provided by your ISP to connect the ATU-R to AscenLink’s WAN #1. Connect LAN to AscenLink’s LAN port via a switch or hub. In this example, AscenLink’s Port2 is treated as LAN port. Please map AscenLink’s LAN port to the Port2 in [System] → [Network Setting] → [VLAN and Port Mapping]. Note: AscenLink is treated as a normal PC when connecting to other networking equipments. Fortinet Technologies Inc. 143 AscenLink User Manual – LinkOS V7.1 WAN configuration: Enter AscenLink's Web-based UI. Go to [System] → [Network Setting] → [WAN Settings]. In the WAN LINK scroll menu, select "1", and choose "Enable" in the Basic Settings. In the WAN type scroll menu, select [Bridge Mode: One static IP]. Select [Port 1] in the WAN Port field. Enter the up/down stream bandwidth associated with this WAN link. Example: If the ADSL Line on WAN1 is 512/64, then enter [64] and [512] in the Up Stream and Down Stream fields respectively. Note: The up/down stream values entered will ONLY affect the BM and statistics reporting. Bandwidth will not increase if the values are greater than the actual bandwidth. Enter [211.100.3.35] in the Localhost IP field. Enter [255.255.255.0] in the Netmask field. Enter [211.100.3.254] in the Default Gateway IP field.. Finalize the bridge mode configuration. If the configuration above has been correctly established, in the [System] →[Summary] page, the status color on the WAN Link State for WAN Link #1 will turn green. LAN configuration: Go to [System] → [Network Setting] → [LAN Private Subnet]. Enter [192.168.1.254] in the IP(s) on Localhost field. Enter [255.255.255.0] in the Netmask field. Select [Port2] in the LAN Port field. Check NAT Subnet for VS. Configuration complete. Virtual Server Configuration: Assume an SMTP server with IP 192.168.1.1 provides SMTP services to the outside via the virtual server. AscenLink will perform NAT on this machine so that the outside clients can get SMTP services via AscenLink’s public IP on WAN1. The settings for this are in [Service] → [Virtual Server]. Click [+] to create a new rule. Check [E] to enable this rule. Select [All-Time] in the "When" field. Enter [211.100.3.35] in the WAN IP field. Select [SMTP(25)] in the Service field. Select [Round-Robin] in the Algorithm field. Fortinet Technologies Inc. 144 AscenLink User Manual – LinkOS V7.1 Click [+] to create a new server in Server Pool. Enter [192.168.1.1] in the Server IP field. Select [SMTP(25)] in the Service field. Enter [1] in the Weight field. Selection of the L field is optional. (If an Administrator wishes to log Virtual Server activities, please select "L"). Configuration complete. Administrators can set up different types of services inside the LAN and use the Virtual Server to make these services available to public once the configurations are completed. WAN Type: Routing Mode Routing Mode Configuration Example 1 This is a typical example where ISP provides a network segment (a class C segment for example) to the user. Under such a condition, AscenLink use one or more IP addresses, while the rest of the public IP addresses (from the assigned segment) will be under DMZ. Servers with public IP addresses can be deployed in two places in the network (as illustrated in the figure below). It can be deployed either between the ATU-R and AscenLink, i.e., behind the ATU-R but in front AscenLink or inside the AscenLink DMZ segment. In this example, the router is assumed to be connected to AscenLink’s WAN port1. Fortinet Technologies Inc. 145 AscenLink User Manual – LinkOS V7.1 Network Information from ISP Client side IP segment is 211.102.30.0/24, Gateway (i.e. the IP for the router) is 211.102.30.254, while the netmask is 255.255.255.0. AscenLink's IP is assumed as 211.102.30.253. Servers in between ATU-R and AscenLink occupy the IP range between 211.102.30.70-100.102.30.99. WAN port is on port #1. DMZ port is on port #2. ISP supplies the router. Hardware Configuration Connect the router with AscenLink in WAN1 by referring to router's user manual. Note: AscenLink is viewed as a normal PC when connected to other network equipment. Configuration Steps Log onto the AscenLink Web UI. Go to [System] → [Network Settings] → [WAN Settings]. Under the WAN Link menu, select "1" and select "Enable" in Basic Settings. In the WAN Type scroll menu, select [Routing Mode]. Set WAN port to port #1. Enter the corresponding up/down stream bandwidth. For example, if the type of ADSL connection is 512/64K, then enter [64] and [512] in the Up Stream and Down Stream parameter fields respectively. Note: The Up and Down Stream parameters will not affect the physical bandwidth provided by the ISP. It will only affect the BM and Statistical pages. Set the IPv4 Gateway to 211.21.30.254. Since WAN and DMZ each has its own subnet, therefore in the IPv4 Basic Subnet section select the Subnet Type as “Subnet in WAN and DMZ”, as follows: For IP(s) on Localhost field, enter [211.102.30.253]. For IP(s) in WAN field, enter [211.102.30.70-211.102.30.99]. In the Netmask field, enter [255.255.255.0]. In the DMZ Port field, enter [Port 2]. Configuration complete. Note: This example shows all addresses are in DMZ (211.102.30.1-211. 102.30.69, 211.102.30.100-211.102.30.252), except those specified in the “IP(s) in WAN” . Fortinet Technologies Inc. 146 AscenLink User Manual – LinkOS V7.1 Routing Mode Configuration Example 2 This example shows the scenario where a private subnet between the WAN router and AscenLink. In addition, the public IP subnet inside the AscenLink DMZ port requires a router. Sample Configuration: Assume the private IP subnet (192.168.0.0/24) is between the WAN link router and AscenLink WAN port. AscenLink's port 1 IP (192.168.0.253) is connected to the WAN link router (192.168.0.254). AscenLink's Port 3 is DMZ with a public IP subnet (211.20.103.254/24). The LAN part behind AscenLink has another public IP subnet (211.20.104.0/24 behind a router (211.20.103.253). Configuration Steps: In the UI: [System] → [Network Settings] → [WAN Settings] sub-function. Select "1" on the WAN Link menu and select [Enable]. In the WAN Type scroll menu, select [Routing Mode]. In the WAN Port field, enter [Port 1]. Enter the corresponding up and down stream bandwidths. In the IPv4 Gateway field, enter [192.168.0.254]. In the IPv4 Basic Subnet function, use [+] to create new rules, and select [subnet in DMZ] in the Subnet Type field. In the IP(s) on Localhost field, enter [211.20.103.254]. In the Netmask field, enter [255.255.255.0]. In the DMZ Port field, enter [Port 3]. In the IPv4 Static Routing Subnet field, use [+] to add new rules with Subnet Fortinet Technologies Inc. 147 AscenLink User Manual – LinkOS V7.1 Type as [Subnet in DMZ]. In this example, there is a router in the DMZ port for the public IP subnet and the subnet does not connect to the AscenLink directly. Therefore the subnet info should be filled in the "Static Routing Subnet" field. In the Network IP field, enter [211.20.104.0]. In the Netmask field, enter [255.255.255.0]. In the Gateway field, enter [211.20.103.253]. Go to [WAN/DMZ Private Subnet] sub-function page and select [+] in the IPv4 Basic Subnet and add the following rules: Set the Subnet Type as "Subnet in WAN". In the IP(s) on Localhost field, enter [192.168.0.253]. In the Netmask field, enter [255.255.255.0]. In the WAN Port field, select [Port 1], and the configuration is complete. Routing Mode Configuration Example 3 In this example, both WAN links have its own routers and AscenLink is connected to these routers using private IP addresses, as illustrated below. In addition, AscenLink Port 3 has been assigned another private IP connecting to the LAN Core Switch (L3 switch), therefore there is a public IP subnet connected behind the Core Switch inside the LAN. Configuration Example: AscenLink Port 1 (192.168.0.254/24). (192.168.0.253) is connected to WAN1's router AscenLink Port 2 (192.168.1.254/24). (192.168.1.253) is connected to WAN2's router AscenLink Port 3 (192.168.2.253) is connected to the LAN Core Switch Fortinet Technologies Inc. 148 AscenLink User Manual – LinkOS V7.1 (192.168.2.254/24). WAN1's Public IP subnet is placed behind the Core Switch as (211.70.3.0/24). WAN2's Public IP subnet is also placed behind the Core Switch as (53.244.43.0/24). Configuration Steps: Go to AscenLink Web UI: [System] → [Network Settings] → [WAN Settings] management page. Select [1] in the WAN Link menu. Click Enable to activate the WAN link. Select [Routing Mode] in the WAN Type menu. Select [Port 1] in the WAN Port field. Enter the corresponding up/down-stream bandwidth. In the IPv4 Gateway field, enter [192.168.0.254]. In the Static Routing Subnet field, use [+] to add a new rule with Subnet Type as "Subnet in DMZ". In this example, there is a Core Switch in the DMZ port for the public IP subnet and the subnet does not connect to the AscenLink directly. Therefore the subnet info should be filled in the "Static Routing Subnet" field. In the Network IP field, enter [211.70.3.0]. In the Netmask field, enter [255.255.255.0]. In the IPv4 Gateway field, enter [192.168.2.254]. In the WAN Link menu, select 2 to switch to WAN2. Click on Basic Settings to enable the WAN link. In the WAN type menu, select [Routing Mode]. In the WAN Port field select [Port 2]. Enter the corresponding up and down stream bandwidth parameters. In the IPv4 Gateway field, enter [192.168.1.254]. In the Static Routing Subnet field, use [+] to add a new rule with the Subnet Type field as "Subnet in DMZ". In the Network IP field, enter [53.244.43.0]. In the Netmask field, enter [255.255.255.0]. In the Gateway IP field, enter [192.168.2.254]. WAN/DMZ Private Subnet Management Page In the WAN and DMZ ports, all three subnets should be completed as below: In the IPv4 Basic Subnet field, click on [+] to add a new rule with 192.168.0.0/24 as the IP, and select "Subnet in WAN" under Subnet Type. In the IP(s) on Localhost field, enter [192.168.0.253]. In the Netmask field, enter [255.255.255.0]. Fortinet Technologies Inc. 149 AscenLink User Manual – LinkOS V7.1 In the WAN port field, select [Port 1]. WAN Port 1 settings are complete; proceed onto WAN Port 2. In the IPv4 Basic Subnet field, click on [+] to add a new rule with 192.168.1.0/24 as the subnet IP address, and select "Subnet in WAN" under Subnet Type. In the IP(s) on Localhost field, enter [192.168.1.253]. In the Netmask field, enter [255.255.255.0]. In the WAN port field, select [Port 2]. The WAN Port2 settings are complete, proceed onto the DMZ port. In the IPv4 Basic Subnet field, click on [+] to add a new rule. Select "Subnet in DMZ" under Subnet Type. In the IP(s) on Localhost field, enter [192.168.2.253]. In the Netmask field, enter [255.255.255.0]. In the DMZ Port field, select [Port3]. Configuration is complete. The example above illustrates a common AscenLink deployment scenario where a private IP subnet is placed inside a WAN and DMZ, and a public IP subnet is connected to AscenLink DMZ via a Core Switch. Exploring Auto Routing Auto Routing Auto Routing is a load balancer for outbound traffic, i.e. traffic originating from the LAN. Inversely, Multihoming handles the inbound traffic from WAN to LAN. WAN Link Fault Tolerance With the rapid proliferation and decreasing prices of broadband solutions, more and more small and medium enterprises are opting for the use of multiple WAN links from various ISPs. The benefits include: Single link failure does not result in a total loss of internet connectivity, thus WAN reliability increases. Traffic can be evenly dispersed across multiple WAN links, resulting in increased efficiency and improved performance of bandwidth. Multiple WAN links for fault tolerance and load balancing has two advantages: The outbound traffic, i.e. traffic originating from LAN traveling outwards, can be load-balanced across multiple WAN links. This is Auto Routing. Traffic from the WAN, i.e. traffic originating from WAN traveling towards the LAN, can be load-balanced across multiple WAN links. This is Multihoming. Advantages of Auto Routing Auto Routing Mechanism Fortinet Technologies Inc. 150 AscenLink User Manual – LinkOS V7.1 Auto Routing load-balances the outbound traffic across multiple WAN links according to a pre-defined routing policies. During WAN link failures, auto routing will also adjust the routing methods to distribute the outbound traffic ONLY among the WAN links in fit and working conditions, thus avoiding the failed link(s). The traditional method of backing up WAN links by having a secondary WAN link taking over the failed link. Basically having a main line and a second line as backup, aided by any standard router’s backup policy, minimum fault tolerance can be achieved. This kind of approach means certain lines remain idle for most of the time and it is a waste of resources. In addition, the router configurations can be tedious. Another approach for multiple WAN links backup is by dividing the LAN into multiple segments, each doing its own thing as they are all independent WAN links. Under standard conditions, each segment has its own way using separate routers. When one of the WAN links fails, the administrator has to change the router configuration to bypass the failed link. The obvious drawback to this approach is the unnecessary workload for administrators. Whenever WAN link status changes, the LAN environment settings (such as gateway, netmask, router policies, proxy settings, etc) all need to be adjusted. AscenLink Fault Tolerance Mechanism As previously stated, without WAN load-balancer such as AscenLink, the traditional way of using multiple WAN links always involves human intervention. AscenLink has an internal “Virtual Trunk” circuit, which is essentially a combination of the multiple WAN links. Auto routing is capable of adjusting the ‘Virtual Trunk” to include only the WAN links that are functioning normally and to direct outbound traffic through the “Virtual Trunk circuit” without human intervention. Network users will therefore not be able to notice any change of status in WAN links. Fortinet Technologies Inc. 151 AscenLink User Manual – LinkOS V7.1 The figure above illustrates auto routing securing uninterrupted connection to the internet even during WAN link failures. Compared to the traditional multiple WAN link usage, auto routing can effectively use all available WAN links to balance outbound traffic even when all the WAN links are in perfect working condition. Auto routing cannot prevent data loss on a WAN link when it fails, but all subsequent sessions will be automatically routed to other working links. AscenLink offers six unique types of auto routing policies for administrators to select the best policy to match their environment. Types of Auto Routing Fortinet Technologies Inc. 152 AscenLink User Manual – LinkOS V7.1 Field Purpose / Description Fixed Direct the traffic to a specific WAN link Round-Robin Evenly distribute the traffic over all WORKING WAN links according to the specified weights By Connection Compares the number of connections on each WAN link and routes data based on the specified connection ratio in WAN. By Downstream Traffic Direct the new traffic to the WAN link with the lowest inbound traffic By Upstream Traffic Direct the new traffic to the WAN link with the lowest outbound traffic By Total Traffic Direct the new traffic to the WAN link with the lowest combined traffic (both up and down stream) Note: All the routing policies (except the fixed one) will ONLY use working WAN links and by-pass the failed ones. For example: In Round-Robin policy, if the ratio between WAN1:WAN2:WAN3 is 6:3:1, but when WAN3 failed, the Round-Robin policy will be automatically adjusted between WAN1 and WAN2, with the ratio of 6:3. Persistent Routing and Auto Routing Persistent Routing and Auto Routing are related. If both routing policies are set on the same server (or LAN IP), AscenLink will do the following: The first outbound traffic from the server/IP will be determined via the auto routing policy on this server/IP. Once the route is decided (e.g. through WAN link 3), subsequent traffic will follow the Persistent Routing rule. If there is a need to clear the existing persistent routing effects, go to [Statistics] → [Persistent Routing] and click on [Clear All] to clear all current persistent routing sessions. When AscenLink discovers WAN link failure(s), the actions of persistent routing and auto routing will be: Auto Routing will automatically remove the failed link, even if there is a "fixed" routing policy for this link. In other words, regardless of the auto routing policy, backup procedure will always be invoked. Multihoming mechanism will also remove the failed link as a response to the DNS request so inbound traffic will not use the failed link. Fortinet Technologies Inc. 153 AscenLink User Manual – LinkOS V7.1 Various Auto Routing Mechanisms AscenLink has five different methods or algorithms for deployment flexibility by using multiple WAN links to achieve high availability (HA) and faster response time for both inbound and outbound requests. AscenLink uses two criteria when calculating the best auto routing decisions: The auto routing algorithm calculation The WAN link status checking and health detection The five different algorithms will be discussed in more details below: Fixed - Select a fixed WAN link. By Round Robin - Distribute connections based on their weights. By Connection - Compare the number of connections on each WAN link and routes data based on the specified connection ratio in WAN. By Downstream Traffic - Dynamically selects the WAN link with the least downstream traffic. By Upstream Traffic - Dynamically selects the WAN link with the least upstream traffic. By Total Traffic - Dynamically selects the WAN link with the least total traffic. Fault Tolerance is therefore a unique algorithm which detects the health of WAN links. This algorithm combines detection results from ICMP and TCP queries and compares it with actual traffic flow on a link to determine if the link is working properly. Virtual Server Virtual Server is a method for single gateway machine to act as multiple servers while the real servers sit inside corporate network to process requests passed in from the gateway machine. Inbound traffic does not have to know where the real servers are, or whether there are just one or many servers. This method prevents direct access by users and therefore increases security and flexibility. AscenLink has built in virtual server and is capable of supporting various virtual server mapping methods. For example, different public IP addresses can be mapped to various real servers in LAN or DMZ. Or ports can be mapped to public IP address on different servers. Virtual server are configured by designating and adjusting virtual server rules. Each rule specifies a mapping condition. It maps WAN IP address and a service (port or ports) to an internal server IP. The order of virtual server rules is like any other rule tables in AscenLink as it also uses the “first match scheme”, viz. the first rule of request matched is the rule to take effect. For example, a public IP address 211.21.48.196 and wants a web server on 192.168.123.16 to handle all the web page requests coming to this public IP address. To do this, a virtual server rule must be created with 211.21.48.196 to be its WAN IP, 192.168.123.16 to be its Server IP, and HTTP(80) to be its Service. Fortinet Technologies Inc. 154 AscenLink User Manual – LinkOS V7.1 Multihoming Multihoming is a technique when external users request any server’s IP address; Multihoming promptly returns DNS response according to the link quality. This provides unmatched availability of bandwidth and load-balances incoming traffic across the multiple ISP lines. Simultaneously using multiple IP address provided by the ISP connections can result in problems with inbound traffic. For example, if the network is currently using an IP provided by ISP1, and a problem occurs with this ISP, then the inbound query will not be received because the external traffic only knows the IP address provided by ISP1. Also, by using the IP provided ISP1, ISP2 cannot manage the inbound traffic of ISP1. Therefore the concern with multiple ISP links is how to effectively display IP address to the external environment. Multihoming uses DNS fault-tolerance technique to resolve this problems with the simultaneous use of multiple ISP connections. For example, if the web server for external traffic uses a single ISP connection, then any problems with that connection will affect the network. However, if the DNS periodically assigns different IP addresses provided by different ISP connections, then the external traffic will always have a valid IP to connect to. The actual implementation is assigning a name of different IP, and any query to this name will receive an IP address. As a result, different users can access the web server through different IPs, which is the purpose of Multihoming. Assuming, there are three WAN links (therefore three different IPs) for the web site of www.example.com, the DNS record has three entries: www IN A 211.21.10.3 www IN A 63.98.110.123 www IN A 192.136.1.243 All DNS requests to www.example.com will be sent to AscenLink. Multihoming will constantly measure the health conditions as well as the state of each WAN link and compute the optimal return answer to the DNS queries, defined as the SwiftDNS technology. The SwiftDNS technology will not only ensure fault tolerance for inbound traffic, it also supports powerful and flexible load balancing algorithms as in the Auto Routing mechanism to enable users with heavy web presence to maximize the reliability and efficiency of their web services. The SwiftDNS Multihoming mechanism requires network administrators to understand the details of the system behavior. The fundamental concept of the DNS mechanism is shown in the next section. A step by step deployment tutorial will also be provided. Introduction to DNS DNS server differs from the host file based on name resolution. Host file contains information of IP address mapping information. It is only useful for intranet where the information of host machines is relatively static. Name resolution by DNS server is dynamic because it can adapt to changes easily. The way it works is based on DNS server hierarchy on the Internet. If a DNS server cannot resolve a name (the information is not in its cache), it will ask other DNS servers. There is a protocol on how and where to ask other DNS servers. Fortinet Technologies Inc. 155 AscenLink User Manual – LinkOS V7.1 A name resolution request may go through a number of DNS servers. When an answer is found, it will be saved in cache so that the same request can be answered immediately without asking other DNS servers again. Each name resolution result saved in cache has a TTL (Time To Live). After the period of TTL, it will be discarded in order to avoid stale information. The whole internet has a large DNS hierarchy. The top of the hierarchy is called Root. It consists of a set of Root DNS servers coordinated by ICANN. The next level below Root is Top Level Domain (TLD). TLD registration database contains information about top level domains such as CA, COM, EDU, GOV, NET, etc. The next level below TLD is Second Level Domain (such as whitehouse.gov, Microsoft.com, inforamp.net, etc.) followed by Third Level Domain, and so on. You can apply for domains for your organization. First, go to the Internet’s Network Information Center (InterNIC) to find out if the domain has been registered already. You can also consult the ICANN-accredited registrar database. Second, register the domain with a registrar. You have to provide at least two DNS servers to serve DNS requests. If your registration has been approved, then any DNS request to your domain will be forwarded to the DNS servers you are registered with. For example, xtera.com is registered and InterNIC has put the name “xtera” into the COM DNS servers. Once the domain is registered, sub-domains can be created. Example: a part or the network can be named “sales.xtera.com”. InterNIC’s approval is not required for creating sub-domains. However, it is important to put DNS information about sales.xtera.com into the DNS servers of xtera.com. Here is an example of how DNS hierarchy works. A user at a university sees a link to sales.xtera.com on a web page and clicks it. The browser will ask the local DNS server dns.utexas.edu about sales.xtera.com. Suppose it is not in the cache of dns.utexas.edu. The DNS server goes to a Root DNS server to find the DNS server for COM TLD. The DNS server for COM TLD tells dns.utexas.edu to go to dns1.xtera.com. Finally dns.utexas.edu is given the IP address of sales.xtera.com by dns1.xtera.com. SwiftDNS One of the problems with traditional DNS servers are facing is TTL. A long TTL means a long update time when IPs have been changed. Before the update time is up (i.e. TTL is expired), DNS requests may be answered with incorrect information. AscenLink employs SwiftDNS for multihoming based on the health state of the link and a traffic re-directing algorithm. SwiftDNS dynamically answers DNS requests to prevent broken or congested links. In order to solve the TTL issue stated above, SwiftDNS maintains a very short TTL and actively sends out updates to internal DNS in case of link status changes. How does SwiftDNS work? Here is an example to illustrate how SwiftDNS works. When Multihoming is enabled, SwiftDNS becomes active. In this case, the upper level DNS server for example.com has two NS records and they are for Primary DNS server at 210.58.100.1 and Secondary DNS server at 210.59.100.1. Both of them are pointing to AscenLink. In this case, a web site at 192.168.100.1 in LAN is exposed to these two IPs. When both ISP links are working properly, AscenLink replies to DNS requests for Fortinet Technologies Inc. 156 AscenLink User Manual – LinkOS V7.1 www.example.com with 210.58.100.1 and 215.59.100.1 at ratio of 1:2 (weight ratio). Assuming ISP1 is down and a DNS request for www.example.com comes in, it would not be able to go through 210.58.100.1 but it will be able to reach 215.59.100.1. Multihoming detects the link status of WAN1 and answer the request with 215.59.100.1. High Availability (HA) Scenarios Firmware Update Procedure in HA Deployment The firmware update procedure in HA deployment differs from the non-HA (single unit) procedure: Log onto the Master AscenLink as Administrator, go to [System]→[Summary] and double check and make sure the peer device is under normal condition. Select [Synchronize Configuration] to ensure the configuration file on the Slave device is the same as that on the Master. Execute the firmware update. Please wait as this may take a while. During the upgrade, do not turn off the system, unplug the power or repeatedly click the Submit button. The message “Update succeeded” will appear after the upgrade is completed. Please reboot the system afterwards for the firmware to take effect. Make sure when the Master device firmware update is done, turn off the Master, and wait for Slave switching to Master. Note: The slave will beep once. Log onto AscenLink Web UI. Make sure "Peer Info" data is "none". Then execute firmware update procedure again. Make sure the firmware update steps are done. Switch off the system. Fortinet Technologies Inc. 157 AscenLink User Manual – LinkOS V7.1 Switch on the Master system, wait for 5 seconds, and then switch on the Slave system. Login the Master Web UI, go to [System] → [Summary], and make sure the system firmware is the latest version. Also make sure the peer machine firmware is up to date. Note: If there are abnormal behaviors in the DMZ or public IP servers, go to [System] → [Diagnostic Tools] →[ARP Enforcement] and execute [Enforce] for troubleshooting. Also notice that if the HA serial cable between the master and slave is removed or disconnected. If abnormal behaviors appear consistently, please remove the network and HA serial cables, and perform the firmware update procedure again to both system individually.Then reconnect them to the network as well as the HA deployment. If repetitive errors occur during the firmware update process, DO NOT ever switch off the device and contact your dealer for technical support. HA Fallback to Single Unit Deployment The steps to fallback to single unit deployment from HA are: Log onto Web UI via Administrator account. Go to [System] → [Summary], select [Synchronize Configuration] to ensure the configuration for Master and Slave are synchronized. Turn the Master off if the Master is to be removed. The Slave will take over the network immediately without impacting services. If the Slave is to be removed, then simply turn the Slave off. Remove the device and the associated cables. Steps of the Slave Take Over are: In the HA setup, the Master unit is in an active state and serving the network at the meanwhile the Slave unit is monitoring the Master. In the case of unit failover (Hardware failure, Power failure, HA cable failure, etc), the Slave takes over the network and beeps once when the switchover is completed. The switchover requires 15 seconds or so since negotiations for states. The switched Master unit becomes the Slave unit in the HA deployment even it is repaired from failures. You can power cycle the Master unit to have another switchover to the units. Fortinet Technologies Inc. 158 AscenLink User Manual – LinkOS V7.1 Appendix Appendix A.1 Default Values In console, enter the command ‘resetconfig’, or on the Web UI select “Factory Default” to do a hard reset and restore all settings to factory default. Users cannot change the console’s default account and password. The default username and password is “administrator“ and ”ascenlink“ respectively. Please use lowercase letters only. When restored to factory default, the Web UI accounts and passwords will also be reset to: Account Administrator Monitor Password 1234 5678 The Web UI login port will be restored to the default port 443. AscenLink also supports SSH logins. The interface for SSH login is the same as the console with identical username and password. WAN Link Health Detection Default Values: System default values contain 13 fixed servers IPs for health detection. Values for all Port Speed and Duplix Settings will also be reset. All ports are restored back to AUTO state. Network default Values: Port 1: WAN1 IP: 192.168.1.1 Netmask : 255.255.255.0 IP in DMZ 192.168.1.2~192.168.1.253 Default Gateway 192.168.1.254 DMZ at Port 5 Port 2: WAN2 IP: 192.168.2.1 Netmask: 255.255.255.0 IP in DMZ 192.168.2.2~192.168.2.253 Default Gateway 192.168.2.254 DMZ at Port 5 Port 3: WAN3 IP: 192.168.3.1 Netmask: 255.255.255.0 IP in DMZ 192.168.3.2~192.168.3.253 Default Gateway: 192.168.3.254 DMZ at Port 5 Port 4: LAN IP: 192.168.0.1 Netmask: 255.255.255.0 Fortinet Technologies Inc. 159 AscenLink User Manual – LinkOS V7.1 DHCP Server Disabled Port 5: DMZ Fields such as Domain Name Server, VLAN and Port Mapping, WAN/DMZ Subnet Settings are all cleared Service Category Default Values: Firewall: default security rules apply Persistent Routing: Disabled Auto Routing: By Downstream Traffic as default Virtual Server: Disabled Inbound BM: Disabled Outbound BM: Disabled Cache: Redirection Disabled Multihoming: Disabled All fields in the Log/Control Category are cleared Appendix A.2 Console Mode Commands This section provides further details on the Console mode commands. Before logging onto serial console via HyperTerminal, please ensure the following settings are in place: Bits per second: 9600; Data bits: 8; Parity: None; Stop bits: 1; Flow control: None. help: displays the help menu Type "help [COMMAND]" to show a list of console commands. arping: Find the corresponding MAC address of an IP address Type "arping [HOST] [LINK] [INDEX]" [Enter] to show the MAC address of an IP address. Host is the IP of the machine or domain name whose MAC address is of interest. Link is the type of interface used, i.e. WAN, LAN and DMZ. If WAN is selected, please indicate the WAN port number. Example: "arping 192.168.2.100 lan" [enter] will send out an ARP packet from LAN port to query the MAC address of the machine whose IP address is 192.168.2.100. Note: If domain name is to be used in the HOST parameter, the DNS Server must be set in the Web UI [System]->[Network Settings]->[DNS Server]. For more on ARP related error messages, please refer to other ARP materials. enforcearp: Force AscenLink's surrounding machines to update their ARP tables Type "enforcearp" [Enter] and the sytem will send ARP packets to update their ARP tables. This is for cases where after the initial installation of AscenLink, machines or servers sitting in the DMZ are unable to be able to connect to the internet. Example: enforcearp [Enter] logout: exit Console mode Type "logout" [Enter] to exit the Console mode. The system will re-confirm, press [y] to proceed or [n] to cancel. ping: test network connectivity Fortinet Technologies Inc. 160 AscenLink User Manual – LinkOS V7.1 Type "ping" [HOST] [LINK] [IDX] [Enter] to ping a HOST machine to detect the current WAN link status. HOST is the machine/device to be pinged. The LINK parameter can be WAN, LAN or DMZ. If the LINK is WAN then also specify the WAN port number. Example: "ping www.hinet.net wan 1" [Enter] to ping www.hinet.net via WAN #1. Note: If domain name is used in the HOST parameter, DNS Server must be set in the Web UI [System]->[Network Settings]->[DNS Server]. For more on ICMP related error messages please refer to other ICMP/PING materials. reboot: restart AscenLink Type "reboot" [Enter] to restart AscenLink. Type "reboot -t X" [Enter] to restart the AscenLink after X amount of seconds. Example: :reboot -t 5" [Enter] to restart the system in 5 seconds. resetconfig: restore to factory defaults Type "resetconfig" [Enter] and the system will re-confirm, press [y] to proceed or [n] to cancel. resetpasswd: reset AscenLink's Administrator and Monitor passwords to factory default Type "resetpasswd" [Enter] and the system will re-confirm, press [y] to proceed or [n] to cancel. disablefw: disable firewall Type "disablefw" [Enter] and the system will re-confirm, press [y] to proceed or [n] to cancel. setupport: configure the transmission mode for all the AscenLink port(s) Type "setupport show" [Enter] to show the current transmission modes for all the network ports. Type "setupport change" [INDEX], then type "auto" [Enter] to change the index network port into AUTO mode. Type "port-config change" [INDEX] [SPEED] [MODE] [Enter] to change the index network port into a specific transmission mode. INDEX: 1, 2, 3... SPEED: 10, 100, 1000 MODE: half, full Example: "setupport show" [Enter] "setupport change 1 auto" [Enter] "setupport change 2 100 full" [Enter] Note: Not all network devices support full 100M speed. This command has no effect on fiber interface. The INDEX is the port number of the AscenLink port interface; exact number varies according to product models. Fortinet Technologies Inc. 161 AscenLink User Manual – LinkOS V7.1 shownetwork: show the current status of all the WAN links available Type "shownetwork" [Enter] to display WAN Type, Local/WAN/DMZ, Netmask, Gateway, and WAN/DMZ Port. Bandwidth, IP(s) on Example: "shownetwork" [Enter] Note: This Console command can only show the current network status. This setting can be changed in the Web UI under “Network Settings”. sysinfo: display information regarding AscenLink's CPU and memory Type "sysinfo" [Enter] to display the status of AscenLink’s CPU, memory and disk space. sysctl: controls the system parameters - [sip_helper] and [h323_helper]. sip_helper: to enable [1] or disable [0] SIP application gateway modules. h323_helper: to enable [1] or disable [0] H323 application gateway modules. Example: “sysctl sip_helper=0”[Enter] to disable the SIP application gateway modules. Note: SIP and H323 application gateway modules excute NAT transparent for SIP and H323. Since NAT transparent is a built-in function for some SIP and H323 devices, it is suggested to disable the SIP or H323 gateway module in AscenLink. traceroute: shows the packet routes between AscenLink's port to a specified destination Type "traceroute" [HOST] [TYPE] [INDEX] [Enter] to show the packet routes between the [INDEX] WAN ports to the [HOST] destination. [HOST] can be based on IP or domain name. The LINK parameter can be WAN/LAN/DMZ. If the TYPE is WAN, then port number must also be specified. Example: "traceroute www.hinet.net wan 1" [Enter] to show the trace routes from WAN link1 to www.hinet.net. Note: If the domain name is used in the HOST parameter, then the DNS Server must be set in the Web UI [System]->[Network Settings]->[DNS Server]. Appendix A.3 Firmware Update Updating the AscenLink Firmware: Before proceeding with the firmware update, ALWAYS back up system configurations. Obtain the latest firmware updage pack from user SI or VAR. Log onto the Web UI with administrator account and go to [System]→ [Administration]. Click on "Update". Use [Browse...] to select the path of the new firmware image, then select [Upload]. The firmware update will take a while so be patient. During the update process be sure NOT to turn off the system or unplug the power adapator. DO NOT click on the [Upload] button more than once. Update is completed when the "Update succeeded" message appears. At this time please reset the system. Fortinet Technologies Inc. 162 AscenLink User Manual – LinkOS V7.1 Errors that occur during the update can be caused by any reason below: General error – Please contact your dealer if this happens repeatedly. Invalid update file – Please make sure the new image file was updated correctly. MD5 checksum error – Image file is corrupted. Please reload and try again. Incompatible version/build – Firmware version incompatible. Check with your dealer for the correct firmware version. Incompatible model/feature – Firmware image does not match the AscenLink system. Check with your dealer for the correct model and version. Incompatible platform – Firmware image does not match the current AscenLink platform. Check with your dealer for the correct model and version. Incompatible region - Firmware image does not match the current AscenLink product for the specific geographical region. Check with your dealer for the correct model and version. Update error –If this error message appears during firmware update, please do not turn off the device and contact your dealer immediately. Unknown error – Contact your dealer. Appendix A.4 Configuration File Configuration File Backup and Restore: Log on to AscenLink as administrator. On the web UI, click [Export Configuration] to back up the configuration in a text file. To restore to the previously saved config file, click [Browse] on the web UI to select the config file previously saved, and then click [Import Configuration] to restore previous configurations. Do NOT to turn off the power while restoring the config file, or repetitively clicking on the [Import Configuration] button. Restart AscenLink. During the config file restoration process, if an error occurs, it is most likely the result of one of the following: The total WAN bandwidth setting in the restored config file exceeds the max bandwidth defined for the current system. The bandwidth can be either upload stream and download stream. The restored config file contains port numbers exceeding the port numbers defined by the system. The restored config file contains VLAN parameters not supported by the machine. The total number of WAN links in the restored config file exceeds the current system definition. Incompatible versions and/or systems. Note: The Configuration File is in binary format and should NOT be editted outside of AscenLink tools and systems. AscenLink does not guarantee full compatibility of configuration files for different models. After the firmware upgrade, it is encouraged to backup the configuration file. Configuration file backup and restore are available in the following function page: Fortinet Technologies Inc. 163 AscenLink User Manual – LinkOS V7.1 Function Page [System > Network] [System > WAN Link Health Detection] [System > Optimum Route Detection] [System > Port Speed / Duplex Setting] [System > Backup Line Setting] [System > IP Grouping] File name network.txt wan-link-health-detection.txt [System > Service Grouping] 1. Click [Import] & [Export], you may backup and restore configurations of service list in a file named service_list.txt. 2. Click [Import Configuration] & [Export Configuration], you may backup and restore configurations of Service Grouping saved in service-group.txt. busy-hour.txt firewall.txt nat.txt persistent-routing.txt auto-routing.txt virtual-server.txt inbound-bandwidth-management.txt outbound-bandwidth-management.txt connection-limit.txt cache-redirect.txt multihoming.txt Internal-nameserver.txt snmp.txt ip-mac-mapping.txt log-control.txt (This file includes Mail/FTP passwords.) notification.txt (This file includes email/password) link-report.txt [System > Busyhour Setting] [Service > Firewall] [Service > NAT] [Service > Persistent Routing] [Service > Auto Routing] [Service > Virtual Server] [Service > Inbound BM] [Service > Outbound BM] [Service > Connection Limit] [Service > Cache Redirect] [Service > Multihoming] [Service > Internal DNS] [Service > SNMP] [Service > IP-MAC Mapping] [Log > Control] [Log > Notification] [Log > Link Report] Fortinet Technologies Inc. optimum-route.txt port-speed.txt backup-line.txt 1. Click [Import] & [Export], you may backup and restore configurations of ip list in a file named ip-list.txt. 2. Click [Import Configuration] & [Export Configuration], you may backup and restore configurations of IP Grouping saved in ip-group.txt. 164 AscenLink User Manual – LinkOS V7.1 Appendix A.5 Rack Mount Means AL 700 Description: 1. Rack mount bracket / RoHS x 2 2. M4*0.7*6L (Nylok brass cross recessed flat head screw) x 9 Assembly: Use M4*0.7*6L screw to fasten both the rack mount brackets at the red circle as shown below. AL5000 Description: 1. M4*0.7*6L (Nylok brass cross recessed flat head screw) x 12 Fortinet Technologies Inc. 165 AscenLink User Manual – LinkOS V7.1 2. 3. 4. 2U rack mount (8#-32) x 2 Rear locking plate for AL5000/RoHS x 2 M3*0.5*L5 (Nylok brass cross recessed flat head screw) x 12 5. Rear rack mount bracket for AL5000/RoHS x 2 Assembly: 1. Use M4*0.7*6L screws to mount the 2U bracket at the red circle (as shown below). 2. Mount the 2U bracket at the red circle (as shown below). 3. Use M3*0.5*L5 screws to fasten the Rear locking plate for AL5000/RoHS at the red circle (as shown below). Insert the Rear rack mount bracket for AL5000/RoHS (as shown in the red square below). Fortinet Technologies Inc. 166 AscenLink User Manual – LinkOS V7.1 Appendix A.6 Caution 1. Risk of explosion if battery is replaced by an incorrect type dispose of used batteries according to the instructions. 2. For AL5000/6000 series, a mini GBIC module must be inserted in one of the slots, in order for AscenLink to function. The type of mini GBIC module required varies upon the wiring deployment in your network. Fortinet Technologies Inc. 167 AscenLink User Manual – LinkOS V7.1