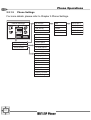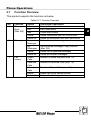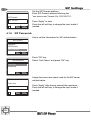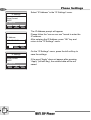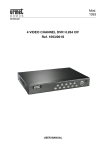
1
WIFI SIP PHONE
BOSST51
User manual Version: 1.3
Thank you for your purchase of WIFI SIP PHONE
Product Name/ WIFI SIP PHONE
Notice regards WLAN electromagnetic waves
"
Users with artificial heart pacemaker implants should not make use of this device.
This device emits radio waves, which could interfere with the correct functionality of
such medial devices, and be potentially harmful to their users.
"
Do not use this device near any medical equipment.
"
Do not use this device a near microwave ovens. Electromagnetic waves generated by
appliances such as microwave ovens could interfere with functionality of this device.
Notice regarding 2.4GHZ WLAN Electromagnetic ware interference
"
The bandwidth of this device is identical to the bandwidth for RFID readers using in
factory production line (wireless transmission station permit required), low-power
wireless transmission stations (wireless transmission station permit required).
"
Before using this device, please ensure that there are no RFID, specific low-power
wireless transmission stations, or amateur wireless transmission stations nearby. If
this device is interfering with RFID readers, please change bandwidth or stop use
immediately, and contact your sales representative.
L
The names of other products and brand names mentioned herein may be trade names,
service marks, or trademarks that belong to their respective registered owners.
Operation Safety Guide
Safety-related precautions
The following are some safety-related precautions. Please read carefully.
"
Please follow the instructions and procedures in this document to perform the
operations properly.
"
Please be sure to follow this product’s and this manual’s precaution items. Omitting
these items can cause bodily harm or damage to the device.
"
Do not operate the device in methods not stated in this manual.
"
For questions regarding this product or this manual, please inquire the place of
purchase or the sales clerk.
"
This manual contains precaution items that may need further review. It does not
guarantee it contains all the situations that might occur.
"
It is recommended to not only follow the instructions contained in this document, but
to handle the product carefully at all times.
"
The safety related precaution items are listed below. They include “Warnings”
“Cautions” and “Notes”.
This precaution signal is utilized in titles and safety related situations, to
enhance attention
"
Indicates that if not handle carefully, can lead to an imminently hazardous situation,
which might result in death or serious injury.
"
Indicates a potentially hazardous situation, which if not avoided, could result in death
or serious injury.
"
Indicates a potentially hazardous situation, which if not avoided, may result in minor
or moderate injury.
L
Notice:
Provides important information unrelated to security.
Operation Safety Guide
Safety related general precaution items:
Danger【General】
"
Always use the original AC adapter or charger unit that comes with your phone.
Always use the AC adapter or charger unit delivered with your phone. Liquid leakage,
fire, excessive heat, rupture, or damage to the phone could occur as a result of the use
of an unauthorized and incompatible AC adapter.
Danger【Battery Pack】
"
"
"
"
"
"
Do not dispose battery in a fire
Do not dispose the battery in a fire for it may explode.
Always immediately remove your phone away from the vicinity of any open flame to
prevent battery liquid leakage, generation of excessive heat, rupture, or phone damage.
Never attempt to disassemble or make any modification to the battery.
Do not dispose the battery in a fire for it may explode. Always immediately remove
your phone away from the vicinity of any open flame to prevent battery liquid leakage,
generation of excessive heat, rupture, or phone damage.
Keep away from metallic objects.
Never attempt to disassemble, repair, or make any modification to the battery.
Disassembly, modification or any attempt at repair could cause battery liquid leakage,
ignition, generation of excessive heat, or rupture, leading to bodily injury or damage to
the phone itself.
Do not force the battery into the battery compartment.
Please ensure the proper direction of the battery before installing it.
Do not force the battery into the battery compartment as it may result in battery liquid
leakage, ignition, excessive heat, rupture, or damage to the phone.
Do not rub eyes if battery liquid comes in contact with eyes.
Never touch any fluid that might leak from the battery.
Should the liquid come into contact with the eyes, irrigate the eyes thoroughly with
clean water, and immediately seek medical attention.
The battery liquid could cause sight loss.
Never stick metallic objects into your phone, and never hit it with a hammer.
Never stick metallic objects such as nails into your phone, and never hit it with a
hammer.
These actions could cause battery liquid leakage, generation of excess heat or fire,
rupture, and even lead to device malfunction.
Operation Safety Guide
Warning【General】
"
Never place the phone in heating devices such as a microwave oven or inside any
high-pressure container.
Do not place the battery, phone, charger (AC adapter and charging cradle unit) in
heating devices, such as a microwave oven, or inside high-pressure containers, for it
may result in battery liquid leakage, ignition, excessive heat, smoke, rupture, as well as
damage to the phone.
"
Prevent severe shock.
Never subject the phone to severe shock for it may cause battery liquid leakage,
excessive heat or fire, rupture, as well as damage to the phone.
"
Keep away from high-risk fire areas.
Never use the phone in high-risk fire areas such as gas stations, refueling points, or
areas where the air contains chemicals or particles, such as grain, dust, or metal
powders. Using the phone in such areas could cause an explosion.
"
Do not place in unstable location.
Do not place phone on slanting or unstable tables, and other unstable spots for this
product may fall, causing serious damage to the device.
"
Keep away from high humidity.
In case the phone is immersed in water, power off the phone immediately. Continued
use of the phone under this condition could cause fire or exposure to electric shock.
"
Do not expose to high temperature.
Do not expose to high temperature heat sources such as stoves or ovens, for they might
generate excessive heat or fire and cause damage to the phone.
"
Never attempt to perform modifications to the phone.
Never attempt to make any modifications to the phone. Disassembly or modification
could cause ignition, electric shock, as well as damage to the phone itself.
"
Never attempt to disassemble the phone cover or AC adapter cover.
Never attempt to disassemble the phone cover or the AC Adapter cover. Disassembly
or modification could cause ignition, electric shock, as well as damage to the phone
itself.
Operation Safety Guide
Warning【Mobile phone】
"
Power off phone in prohibited areas.
When on planes, in hospitals or other areas where mobile phones are restricted, please
power off the phone for safety reasons. The phone might interfere with electronic or
medical equipment. Please follow the regulations in medical institutions for proper use
of the phone. Switch phone off before boarding an aircraft. Use could lead to legal
action against the user.
L
"
Power off when near high-precision equipment or electronics that can receive/send.
Weak signals.
Mobile phone signals could interfere with the following devices: hearing aids, artificial
heart pacemakers, and other small devices implanted in the human body. They may
also cause other medical equipment, fire alarm systems, automatic doors, automatic
control systems, and so on, to send out incorrect signals and commands.
"
Be aware of the vibration alert and the ring volume.
Weak heart patients should be aware of the vibration alert and the ring volume for it
might affect the operation of the heart.
"
L
"
Do not touch the phone when lightning occurs.
Please power off and shift to a safe location to reduce risk of electric shock.
Do not insert other objects into phone.
Do not insert metallic or inflammable objects into the phone for it might cause ignition
or electric shock. If an object is accidentally inserted your phone, please power off
immediately and consult the place of purchase or sales clerk.
"
Do not place objects on top of phone.
Do not place objects such as vases, pots, glasses, medicine bottles, or containers on top
of the phone. These objects might either cause rupture to the phone, or leak liquids that
might penetrate the phone and lead to fire or electric shock. Placing the phone on an
unbalanced table, causing the phone to drop, will also damage to the phone.
Operation Safety Guide
Warning 【Battery】
"
Stop use when battery liquid comes in contact with clothes or skin.
In the case of contact of skin or clothes with battery leaked liquids, remove
contaminated clothes and wash off with clean water immediately for it might be
harmful for the skin.
"
Do not over charge the battery.
If the battery has already been charged for a long time, please discontinue the charging
process. Charging the battery for a prolonged time might cause battery fluid leakage,
leading to fire, excessive heat, or rupture.
"
Discontinue the use of the phone if any unusual conditions occur.
If battery is leaking fluid, emitting gas, producing a peculiar smell, or making strange
sounds, discontinue use immediately for this may cause ignition or electric shock.
Please remove the battery immediately for safety reasons.
Warning 【AC Adapter (Charging Cradle)】
"
Do not use accessories from other manufacturers.
Using accessories that are not compatible could cause ignition, electric shock or
damage to the phone.
"
Do not use AC adapters from other manufacturers.
Do not use AC adapters other than the one included with your phone for they could
cause ignition, electric shock or damage to the phone.
"
Do not insert plug into an outlet with voltage other than AC100V.
Do not insert plug into an outlet with voltage other than AC100V for it could cause
ignition, electric shock or damage to the phone.
"
Do not unplug adapter during the charging process.
Do not unplug AC adapter, or use your finger or any body part to touch the AC adapter
while the battery is being charged for it might lead to fire, electric shock or damage to
the phone.
"
Do not use the phone in a damp environment.
Exposing the AC adapter and base charger unit to a damp environment and charging a
battery that has been immersed in water could lead to electric shock.
Operation Safety Guide
"
Do not touch the plug or electrical cord with damp hands.
Do not touch the plug or electrical cord with damp hands to prevent electric shock.
"
Always maintain the charger in a clean status.
Please ensure there is no dust on the power cord before plugging it to the outlet to
prevent electric shock.
"
Please place the phone on a stable location while charging.
Please place the phone on a stable location and never cover the adapter or charger with
cloth or other material for it might cause ignition or electric shock.
"
Please hold the plug when pulling out of outlet.
Please hold the plug when pulling out of outlet because pulling on the power cord
excessively might lead to damage, electric shock, fire, or damage to the phone.
"
Do not damage the power cord.
Do not damage, tug, or make modifications to the power cord. Do not bend the power
cord to prevent damage. Do not expose the power cord to heat and never place heavy
equipment onto the power cord. Pulling the power cord excessively might also lead to
ignition or electric shock.
"
Please ensure the AC adapter is plugged in correctly.
Please ensure the plug is inserted correctly to the outlet. Do not plug adapter into a
tottering outlet. Both these conditions could cause fire or electric shock.
Operation Safety Guide
Caution【General】
"
"
"
"
Do not expose the phone in unfavorable environment conditions.
Do not expose the phone near gas leakage. Keep the phone in a clean, dust-free
environment. Avoid exposure to smoke, erosive gases. Avoid placing the phone in
locations subject to severe vibration. Do not expose phone directly to sunlight. Keep
away from heat sources such as stoves, or other products that produce heat. Do not
expose the phone to fire or high temperature for this could shorten the lifetime of the
phone.
Keep away from reach of children.
Keep away from reach of children. The phone may cause injuries, or may contain
small parts that could be accidentally swallowed.
Do not combine or integrate with other equipment or hardware.
Do not combine or integrate with other equipment or hardware for it might cause fire
or damage to the phone.
No not expose the phone to high pressure.
Never leave the phone in your back pocket when you sit. Do not place the phone at the
very bottom of your bag to reduce risk of being crushed by another object. Keep phone
away from contact with other metallic objects, Heavy weight could cause phone
damage.
Caution 【Mobile Phone】
"
"
"
"
Do not use phone in a vehicle.
Do not use this phone in a vehicle for your own driving safety. Due to the difference of
Vehicle models, the phone might interfere with the electronic equipment in the vehicle.
Keep away from magnetic cards.
Keep phone away from credit cards, ATM cards and other magnetic objects for the
data inside the cards could be accidentally erased.
Please make additional backups of data in phone.
Please save the Phone Book and other information in the phone separately. The
manufacturer will not be responsible for lost data or the consequence of theft.
Please do not place the phone into a pocket during a call.
Please do not be concerned should your phone heat up during a call. This is not a
malfunction. Do not place the phone inside pocket during a call. This action could
generate excessive heat that can damage the phone.
Operation Safety Guide
Caution【Battery】
"
Discarding the battery.
Do not dispose battery as trash for it could cause fire or environmental contamination.
Please return the obsolete battery to the place of purchase or to the nearest recycling
facility.
Caution【AC Adapter (Charging Cradle Unit)】
"
Do not place heavy equipment onto the AC adapter.
Do not place heavy equipment onto AC adapter for it might lead to fire or damage.
"
Please pull out plug when not in use.
For your safety, unplug the battery charger from wall outlet if it will not be used for a
long time in summer; otherwise it may cause fire.
"
Pull out plug when in movement.
When in movement, please ensure the plug has been pulled out of the outlet.
Operation Safety Guide
The warning labels are adhered the phone and the AC adapter in the parts shown in
the figure below:
(1) Phone
(a) Back View
(b) Warning Label
(2) Battery (Battery Cover)
(a) Bottom of Battery Cover
(b) Warning Label
Operation Safety Guide
(3) Battery Charging Cradle Unit
(a) Bottom of Charger Unit
(b) Warning Label
(4) AC adapter
(a)Bottom of AC adapter
(b) Warning Label
Table of Contents
1 Important Safety Precautions............................................................ 1
1.1 Warning/Caution ....................................................................... 1
1.2 Applicable machine type ........................................................... 2
1.3 Confirm objects contained in package ...................................... 2
1.4 External Appearance................................................................. 3
1.5 Mobile Phone Specification....................................................... 6
1.6 Inserting the battery pack.......................................................... 7
1.7 Charge the battery .................................................................... 8
1.8 WLAN Safety Notice/ Precautions .......................................... 12
2 Phone Operations ........................................................................... 13
2.1 Icons displayed on the LCD .................................................... 13
2.2 Main Menu functions ............................................................... 14
2.3 Power On/Off .......................................................................... 18
2.4 Clock Setting ........................................................................... 21
2.5 Keypad Operation ................................................................... 23
2.6 Keypad Input Mode ................................................................. 26
2.7 Function Overview .................................................................. 28
3 Basic Operations............................................................................. 32
3.1 Making /Receiving a call ......................................................... 32
3.2 Phone Book Settings .............................................................. 38
3.3 IM (Instant messages)............................................................. 45
3.4 Call History.............................................................................. 49
4 SIP Settings .................................................................................... 55
4.1 SIP Profiles ............................................................................. 55
4.2 Select AP Profile ..................................................................... 63
4.3 Max Ringing Time ................................................................... 63
4.4 Audio Settings ......................................................................... 63
4.4 DTMF Signaling ...................................................................... 64
5 Phone Settings................................................................................ 65
5.1 WLAN Settings........................................................................ 65
5.2 IP Settings............................................................................... 74
5.3 Phone Profile........................................................................... 81
6 Add. Functions ................................................................................ 91
6.1 Alarm Set ................................................................................ 91
6.2 Registration time ..................................................................... 93
6.3 Power saving........................................................................... 93
Table of Contents
6.4 System Info ............................................................................. 94
6.5 Utilities..................................................................................... 95
6.6 USB Settings......................................................................... 102
6.7 FTP Settings ......................................................................... 104
6.8 Reset Default ........................................................................ 106
7 Troubleshooting............................................................................. 108
7.1 Is your phone malfunctioning? .............................................. 108
FEDERAL COMMUNICATIONS COMMISSION INTERFERENCE
STATEMENT ......................................................................................110
Phone Operations
1
1.1
Important Safety Precautions
Warning/Caution
This manual is for use with the BOSST51 only.
z The manufacturer disclaims any ability for damage resulting as a
consequence of improper use, or damage due to external causes,
such as power outage, or unfavorable environmental conditions.
Please handle your phone with care.
z The repair and maintenance of this product must be handled by a
qualified professional service technician.
z Please be noted that by not being done by a qualified technician might
violate the law or result in an accident.
z This product generates, uses, and can radiate radio frequency energy
might cause interference to radio or television signals when near these
devices. The user is encouraged to increase the distance between the
phone and the other devices.
z This product a phone that can make/receive calls, and is equipped with
SIP functions. Please contact the place of purchase for information on
SIP providers.
z Please read all instructions and safety precautions described in this
document before operating the product/appliance. Please follow the
instructions carefully and ensure you are aware of correct handling
procedures.
z It is recommended that this manual is kept at a proper location for
quick reference. If misplaced or damaged, please request a new one
from the place of purchase (dealer).
z The contents in this manual are subject to change without notification.
z When using the phone for the first time, please follow the following
steps to recharge the phone and adjust the clock settings:
【1.6 Inserting the battery pack】
【1.7 Battery Charging】
【2.3 Power On/Off】
【2.4 Clock Setting】
1
Important Safety Precautions
Regarding some advice in this manual
(1) This label indicates minor injuries or potential serious harm could be
caused when the phone is not operated correctly.
(2)
(3)
This label indicates caution items or restrictions regarding the use of
this product.
1
2
This label is used for items the user should pay attention to when
using or setting this product.
3
4
1.2
Applicable machine type
Product Name
Type Model
WIFI SIP Phone
BOSST51
1.3
Title of this
manual
WIFI SIP Phone
5
Technical Standard
Identification Number
6
Confirm objects contained in package
7
Please ensure the package contains the following items:
Please contact the place of purchase if any items are missing.
Contents
Handset (Phone)
Quick Start Guide booklet
Battery
AC Power Adapter
Charging Cradle
8
WIFI SIP Phone
1
1
1
1
1
2
Phone Operations
1.4
External Appearance
1.4.1
Front View
Figure 1.4.1 Front View
3
Important Safety Precautions
Chart 1.4.1
NO.
c
d
Name
LED
Navigator
e
Left soft key
f
g
h
i
j
k
l
Talk Key
Earphone jack
Microphone
USB interface
Earpiece
LCD display
Right soft key
○
11
Power
○
12
OK
○
13
○
14
○
15
Keypad
Keypad Lock
Tone Lock
Functions Distribution
Description
Flashing LED Incoming call alert
This key is used to scroll up and down through menu
lists
Can be used also in:
Phone book
Received calls
Dialed Calls
Missed Calls
Function operating key
This key is used to perform the function indicated on
the screen above it
Terminate Call/ Answer Call
Connect to earphone
Talk on phone
Connect to power adapter to charge battery
Listen
Display screen
Function operating Key
This Key is used to perform the function indicated on
the screen above it
Power on/Power off
Press and hold for 3 seconds to switch off phone
Can be used also to:
‧ Delete entered text
‧ Return to Main Menu
‧ Display User settings
‧ Terminate call
Confirm an action
Confirm entered phone numbers or text
(The words ”OK” will e displayed at the bottom of the
Display screen)
Enter phone numbers, and text
Disable/Enable enter phone numbers
Disable/Enable ring tone and Keypad tone
4
1
2
3
4
5
6
7
8
Phone Operations
1.4.2
Back View
Figure 1.4.2 Back View
Table 1.4.2 Phone Back component names
NO.
c
d
1.4.3
5
Name
Battery Cover Snap
Battery Cover
Description
To install and remove battery
Battery Cover
This is delivered separately from the phone.
Please read section 1.6.1 Inserting the battery to
install the battery onto the phone.
Charging Cradle unit appearance
Important Safety Precautions
1.5
Mobile Phone Specification
Table 1.5.1 Mobile Phone Specification
Item
Specification
USB 1.1 (Battery Charging)
External Interface
2.5 mm Earphone jack
Transmission
Supports CSMA/CA Wireless IEEE 802.11b
Technology
11, 5.5, 2, 1 (Mbit/s), Auto-fallback
Range
>50 meters indoors
Frequency
2.4GHz ~2.497GHz
DSSS
WLAN
CCK (11Mbit/s, 5.5Mbit/s)
Modulation
(WLAN
DQPSK (2 Mbit/s)
interface)
DBPSK (1 Mbit/s)
US (1~11Ch), Europe (1~13Ch), Japan
Channel
(1~14Ch)
Output
Output power: 20mW ~ 100mW
Network
Infrastructure mode
mode
LCD
1.4inch STN LCD with Backlight
Display
Keypad Backlight function/ Dial success
LED
notification
21 keys in total
4 multi-function keys
4 quick access keys
Keypad
1 OK key
12 Input keys
(Numbers, English/Japan characters)
Standby time
Approx, 60 hours (Depends on Environment)
Talk time
Approx, 3.5 hours (Depends on Environment)
Adaptor
100~240 VAC
Power supply
Phone
DC 5.5V
Power consumption (VA)
10 (via adaptor)
Battery Charging time
6 hours (Power off)
Size (L x W x H)
Approx. 42×19×108
Weight
80g (with battery installed)
Environmental
Temperature
0~40 °C
Conditions
Humidity
15~85% RH (Non-Condense Condition)
1
2
3
4
5
6
7
8
6
Phone Operations
1.6
Inserting the battery pack
Please switch the phone off before inserting or removing the battery.
1.6.1
Installing the battery
Turn to the back of the phone to the battery compartment.
Align the battery to the battery compartment of the phone and press
battery down until it clicks into place. (Do not force battery into battery
compartment)
7
Important Safety Precautions
1.6.2 Replace the Battery
Since battery power is easily consumed, if you find the battery power
diminishes quickly after full charging. Please replace your battery. After
replacing the battery, your will need to reset the date and time.
1
2
3
1.
2.
In standby mode, switch the phone off by pressing and holding
Power button.
(Otherwise, some user settings will be lost.)
Remove the battery cover.
With the back of the phone facing you, press the battery cover
release button and lift the cover off in the direction of the arrow.
4
5
6
Attention: Do not discard battery as ordinary trash for it could cause fire,
or environmental contamination. Please return the battery to the place of
purchase, and follow local regulations for disposal and recycling of
batteries.
1.7
7
Charge the battery
8
Though the battery can be charged when the phone is switched on, the
time it takes to fully charge the battery takes longer than charging with the
phone switched off. Charging the battery with the phone switched on
might also reduce the battery lifetime.
When the battery power is low and needs recharging, the battery
indicator will flash continuously, and the phone will flash continuously,
and the phone will sound a low battery alarm (if the alert tone is set to On),
reminding your that the battery is running low and the phone will be
switched off automatically. To charge the battery, follow the steps below:
8
Phone Operations
1.7.1
Charge Cradle Unit Safety notice
Please put the base in the place of the
level.
If the battery is charged on the charger unit
directly or inside a phone placed on a
charger unit, do not cover with cloth for it
will cause phone temperature to rise and
damage the phone.
1.7.2
Connecting the adapter to the Charging Cradle Unit
Please insert connector into slot at the back
of the charger unit. Insert the connector
face up into the USB interface following the
figure on the left.
(If inserted face down, the adapter will not
be inserted properly).
After inserting the adapter to the phone,
please plug the adapter to a 100V – 220V
outlet.
9
Important Safety Precautions
1.7.3
Placing the phone on the Charging Cradle Unit
Follow the instructions in section 1.6.1.Inserting the battery to into phone
first. Insert the phone into to the Charging Cradle unit.
1
Insert the phone
(with battery
installed) to the
Charging Cradle
unit.
2
3
4
5
6
The icon on the left will be displayed on the
LCD, which indicates the battery is charging.
7
The icon blinking indicates that the battery is
charging. When the icon stops blinking, it
means that the battery is fully charged.
8
If the phone is powered on during charging,
and there is an incoming call, please remove
the phone from the charger to accept the call.
Standard charge time: 6 hours.
(Charging with the phone switched off)
10
Phone Operations
1.7.4
Connecting the adapter to the phone
Connect the charger to an AC wall outlet
(100-240V AC).
The icon on the left will be displayed on
the LCD, which indicates the battery is
charging.
The icon blinking indicates that the
battery is charging. When the icon stops
blinking, it means that the battery is fully
charged.
If the phone is powered on during
charging, and there is an incoming call,
please remove the phone from the
charger to accept the call.
Standard charge time: 6 hours.
(Charging with the phone switched off)
11
Important Safety Precautions
1.8
WLAN Safety Notice/ Precautions
The signal strength on the WiFi network and the parameters set by the
network operator will greatly affect the talk and standby times of the
phone, as well as the range and quality of the phone call.
Please read the following precaution items carefully:
(1) Communication Range
When using a WiFi phone, the phone settings will affect the
communication range and quality.
Suggest keeping with in 30 meters.
(2) Electromagnetic interference (EMI) from a 2.4 GHz wireless network.
The bandwidth of this device is identical to the bandwidth for RFID
readers using in factory production line (needs licensed wireless
transmission station), low-power wireless transmission stations
(needs licensed wireless transmission station).
1. Before using this phone, please ensure there are not RFID readers,
specific low-power wireless transmission stations, or amateur
wireless transmission stations nearby.
2. If this device is interfering with RFID readers, and you are forced to
change bandwidth or stop use, please contact the dealer.
NO.
1
2
3
4
Table 1.8.1 Phone WLAN Settings
Item
Description
Bandwidth
2.4 GHz Wireless Device
Modulation
DSSS mode
Default Interference
Under 40m
Change bandwidth
Uses full bandwidth. Avoid RFID readers and
low-power wireless transmission station bandwidths.
The content on the above table are displayed on the Warning label at the
back of the phone.
Indicates the 2.4GHz Bandwidch is used.
Indicates the DS-SS mode is used.
Indicates the interference distance is 40m.
Indicates the full Bandwidch is used.
Figure 1.8.1 Label notation
12
1
2
3
4
5
6
7
8
Phone Operations
2
2.1
Phone Operations
Icons displayed on the LCD
The functions displayed on the LCD screen, are as follows:
Figure 2.1 Icons displayed on the LCD
Table 2.1.1 Types of Icons
Icon
Description
Indicate signal strength
(No AP detected)
Indicate signal strength
(Low)
Indicate signal strength
(Medium)
Indicate signal strength
(Perfect)
Indicates the alarm has
been activated
Indicates you have a missed
call
Received new message
Keypad lock
Tone ring lock
13
Icon
Description
Registered to the SIP
Not Connected to earphone
Indicate battery strength (Empty)
Indicate battery strength (Low)
Indicate battery strength (Medium)
Indicate battery strength (Full)
Indicates battery-charging status.
Blinks when battery is charging.
Phone number which belongs to
this phone (Internal number)
Phone Operations
2.2
Main Menu functions
By selecting “menu” (pressing the left Soft key) on the Standby screen
shown on Figure 2.1.1.
Icons on the LCD display (Standby screen), 6 Function options will be
displayed on the screen.
2
3
OK
4
Back
5
Figure 2.2.1 Selecting a function
No.
c
d
e
f
g
h
Table 2.2.1 Description of Main Menu Functions
Name
Operation
Details
Phone Book
User personal Phone Book use
Refer to section 2.2.1.1
and setting
Messages
Edit new messages, Send
Refer to section 2.2.1.2
messages, View new received
messages and so on
Call History
Dialed Calls, Received Calls,
Refer to section 2.2.1.3
Missed Calls
SIP Settings
SIP function settings
Refer to section 2.2.1.4
Phone Settings
IP address, WLAN and other
Refer to section 2.2.1.5
network configurations
Ring tone settings
Clock Setting
Refer to section 2.2.1.6
Add. Functions
Alarm settings, Registration
Time, Power Saving, System
Info, Utilities, USB Settings, FTP
Settings, Reset Default
6
7
8
14
Phone Operations
To view the details of each option in the main menu, please refer the
following steps to enter a specific function menu.
To view the functions provided by the “Quick” option (pressing right Soft
key) in the Standby screen (show on Figure 2.1.1 Icons on the LCD
display (standby screen), please refer to 2.2.1.7 Selecting “Quick” option
from Standby Screen.
2.2.1 Options in each main function
Clicking the main function icons in the main menu will display more
detailed options.
2.2.1.1 Phone Book Menu
For more details, please refer to Section 3.2 Phone Book Settings.
Phone Book
View
Edit
Add
Delete
OK
Back
Delete All
2.2.1.2 Message Menu
For more details, please refer to Section 3.3 Message Settings.
Messages
New Message
My Messages
Delete
OK
15
Back
Delete All
Phone Operations
2.2.1.3 Call History Menu
For more details, please refer to Section 3.4 call History.
Call History
Dialed Calls
Received Calls
Missed Calls
Delete
OK
Back
2
Delete All
2.2.1.4 SIP Settings
For more details, please refer to Section 4.1 SIP Settings.
3
SIP Settings
4
5
OK
Back
SIP Profiles
SIP Profile 1 x
Profile Name
Max Ringing time
SIP Profile 2
Display Name
Audio Ssttings
SIP Profile 3
User Name
DTMF Signaling
SIP Profile 4
Registrar
SIP Profile 5
SIP Domain
6
7
SIP Password
8
STUN Settings
Outbound Proxy
16
Phone Operations
2.2.1.5
Phone Settings
For more details, please refer to Chapter 5 Phone Settings.
Phone Settings
OK
Back
AP Profiles
Add
AP Profile 1
Current Status
Edit
AP Profile 2
Site Survey
Delete
AP Profile 3
TX Rate
Delete All
AP Profile 4
Profile Scan
AP Profile 5
Show Current
DHCP
IP Address
WLAN Settings
Subnet Mask
IP Settings
Default Gateway
1st DNS Server
Phone Profile
2nd DNS Server
Power OFF
Ringing On/Off
Ringtone Tones
Ringtone Volume
Speaker Volume
Vibrator
Keypad Password
Phone Password
Display Contrast
Clock Setting
17
Phone Operations
2.2.1.6
Add. Functions menu
For more details, please refer to Section 6.1 Alarm Settings.
Alarm Settings
Add. Functions
SIP Settings
Power Saving
System Info
Utilities
2
USB Settings
OK
Back
FTP Settings
Reset Default
2.2.1.7
3
Selecting “Quick” option from Standby Screen
The following options will be provided when selecting the “Quick” option
(pressing right quick access Key) on the Standby Screen (shown in
Figure 2.1.1)
Site Survey
Phone Profile
Date Time Set
Power Saving
4
5
Power OFF
Ringing On/Off
Ringing Tones
6
Ringtone Volume
Speaker Volume
Vibrator
Menu
Quick
Keypad Password
7
Phone Password
Display Contrast
Clock Setting
8
Time Set
Date Set
2.3
Power On/Off
You must fully charge the battery before using your phone for the first
time. Use only approved AC adapter and charger.
The time and date are not set on newly purchased phones.
Please perform the time/date setup in “Clock Setting”.
After switching the phone on, please check the battery –charging status
on your LCD.
18
Phone Operations
c Ready for use.
d Please use the charger unit or adapter to charge the phone. Low
battery indicator.
2.3.1
Power On
Press Power button.
Power Button
Please press and hold “Power button” for 3 seconds
until the word “Welcome” is displayed.
The screen on the left will be displayed when the phone
is switched on.
Menu
Quick
If “SIP” is not displayed indicates the phone is not
connected to the network. Either the settings in “Phone
Settings” or the “SIP Settings” is not correct. Please
contact your service provider for more information.
」 Indicates the battery power level is low.
「
Please charge the battery immediately.
19
Phone Operations
2.3.2
Power Off
Please press and hold “Power button” for 3 seconds
until the figure as left is displayed.
Profile
Select
2.3.2.1
2
Back
3
Power Off from the Phone Profile setting.
Press Power button.
4
5
Power Button
Then, Select “Power OFF” in the “Phone Profile” menu.
6
Quick
Site Survey
Phone Profile
7
Date Time Set
OK
Back
Profile
Select
8
The display results and handling procedures will be
shown as left.
Back
20
Phone Operations
2.4
Clock Setting
The following options will be provided where selecting the “Clock Setting”
option (pressing Menu key or Quick key) on the Standby Screen (shown
in Figure 2.1.1)
2.4.1
Clock Settings from the main menu
If from Figure 2.1.1 Standby Screen and press the left soft key, please
follow the step as below:
Select “Phone Settings”.
Phone Settings
OK
Back
Phone Profile
Press “OK” key and scroll the navigator to choose
“Clock Setting” function, and then press “OK” key.
Phone Password
Display Contrast
Clock Setting
OK
Back
Enter “Date Time Set” and select “Time Set”.
Clock Setting
Time Set
Date Set
OK
21
Back
Phone Operations
Please enter the desired time.
Use the 24-hour format.
Entering is not necessary as it will be displayed
automatically.
Time Set
20:30
Apply
1
Clear
2
Press “Apply” to save the settings.
Clock Setting ...
1
OK
3
4
Back
Select “Date Set” from the “Clock Setting” option list.
5
Clock Setting
Time Set
6
Date Set
OK
Back
7
Press “Apply” and the screen on the right will be
displayed.
Wednesday
05.09.07
1
Apply
8
Enter the desired date.
Follow the Year/ month/ date format to enter the date.
Clear
The right figure shows an example entering 05.09.07.
Entering 5.9.7 will result the same as entering
05.09.07.
The date of week will be displayed automatically after
we press “Apply” and re-enter “Date Settings”.
22
Phone Operations
Press “Apply” to save settings.
Press “Back” to go back to the Standby screen to
confirm the date change.
Date Setting ...
Apply
1
2.4.2
Clear
Setting the clock from “Quick” menu
Quick Settings
Press “Quick” in the main menu.
Use the navigator to scroll to the desired item.
Scroll to “Date Time Set” and press “OK” key.
Site Survey
Phone Profile
Date Time Set
OK
Back
Clock Settings
Time Set
Select “Time Set” from the “Date Time Set” screen.
The succeeding steps are the same as 2.4.1 Setting
the clock from Main Menu.
Date Set
OK
2.5
Back
Keypad Operation
2.5.1 Soft key Operation
The words “OK”, “Back” options will be displayed at the bottom of the
screen when in the Standby screen or performing a setting. The keys to
execute these functions are called the “Soft keys”.
23
Phone Operations
OK
Left Soft key
Apply
The following functions
showing on the LCD, soft keys
and “OK” key are as left.
Back
Right Soft key
2
Executing “Save” function.
When a “Menu” is displayed on the Standby screen, press the left
Soft key to display the main menu. The left Soft key can also be used
to switch input modes.
3
4
Executing “Save” and “Search” functions.
Executing “Back” and “Clear” functions.
When “Clear is displayed, pressing the key once will clear on letter
on the screen. Pressing and holding the key will clear all words in a
specified field. When the word “Quick” is displayed on the Standby
screen, pressing the right Soft key will display the Function Menu.
2.5.2
5
6
Navigator button Operation
7
Scroll to a function using the navigator.
(
)
Press the “OK” key in the center when
reaching a desired item.
2.5.2.1
8
Select function from Main Menu
Use the navigator to scroll to the desired function, the selected icon will
be enlarged. (The following figure uses “Phone Settings” as example).
After selecting the desired item, press “OK”.
24
Phone Operations
Phone Book
OK
Phone Settings
Back
OK
The “Phone Book” will be displayed
when first entering the main menu.
2.5.2.2
Back
The icon will appear enlarged when
selected, using “Phone Settings” as an
example.
Select Setting Options
Use the navigator to scroll to the desired item. The item selected will
appear highlighted. The following figure is and example of “Phone
Settings”, “IP Settings”. After choosing the desired item, press “OK”.
Phone Settings
IP Settings
WLAN Settings
Phone Profile
OK
Back
The first item will appear highlighted
when first entering the “Phone Settings”
screen.
Scrolling to “IP Settings” with the
navigator.
2.5.3 Keypad lock operation
Press and hold the # key to lock the phone.
Press and hold the # key to lock the phone. The lock
SIP
2005.09.07
Menu
25
Quick
icon 「
」 indicates the phone is now locked.
Phone Operations
Press # until the lock 「
phone.
SIP
」disappears to unlock the
2005.09.07
Menu
2.5.4
Quick
2
Tone lock operation
Press and hold the * key to lock the tones (ring, keypad
SIP
tone). The lock icon 「
Menu
」 indicate all the tones (right,
4
keypad tone) are locked.
2005.09.07
3
Quick
Press * until the lock disappears 「
phone.
SIP
」 to unlock the
5
6
2005.09.07
Menu
2.6
7
Quick
Keypad Input Mode
2.6.1 Input Mode Category
This product supports the following input modes. The input mode may not
be changed in certain setting options.
Chart 2.6.1 Input Mode Category
Type
Half Size
Display after selection (Input mode)
A
Half Size Upper Case English Character
a
Half Size Lower Case English Character
1
Half Size Number
26
8
Phone Operations
2.6.2
Switching the input mode
Use the left soft key to switch the input mode.
Use the left Soft key to switch the input mode from
Alphabetical Character to others, under the Phone
Book Editing name option.
Edit User Name
a
Apply
Back
Press the left soft key once.
The input mode in the “Edit User Name” screen will
switch to 123.
Edit User Name
1
Apply
Clear
Press left soft key again. The input mode will switch to
ABC.
Edit User Name
A
27
Apply
Clear
Phone Operations
2.7
Function Overview
This product supports the functions as below:
Table 2.7.1 Function Overview
NO.
1
2
3
Function
Phone
Book
(Max 200)
Messages
Call
History
Option
View
Edit
Add
Delete
Delete All
New
Message
My
Messages
Delete
Delete All
Dialed
Calls
Received
Calls
Missed
Calls
Delete
Delete All
Sub-option/ Description
Display Phone Book
Edit Phone Book
Create new contact
Delete information from the Phone Book
Delete all information from the Phone Book
Edit and transmit message
2
3
4
View received messages/ Reply function
(Max 100)
Delete one of received messages
Delete all received messages
Number of dialed numbers (max. 10)
5
6
Number of Received Calls (max. 10)
Number of Missed Calls (max. 10)
7
Delete one of call history records
Delete all call history records
8
28
Phone Operations
4
SIP
Setting
SIP
Profiles
Max
Ringing
time
Audio
Settings
DTMF
Signaling
29
Profile Name
The name of SIP
Profile
Display Name
Configure the SIP
Display Name
User Name
Set User Name
Registrar
Setup Registrar
Server
Address/Port, and
Enable/Disable
Register Function
SIP Domain
Domain of the SIP
Registrar
SIP
Auth User
Set user name
Password Password
Set password
STUN Settings
Setup STUN
Server
Address/Port, and
Enable/Disable
Register Function
Outbound Proxy
Setup Outbound
Proxy
Address/Port, and
Enable/Disable
Register Function
Set Maximum Ringing time
PCMU/ 8000
PCMA/ 8000
G729/ 8000
rfc2833
G.711 μ-law
G.711 A-law
G.729
Support RFC2833
Outband Signaling
Inband
Support Inband
Signaling
Phone Operations
5
Phone
Settings
WLAN
Settings
AP Profile
Current Status
Site Survey
TX Rate
IP
Settings
Show Current
DHCP
IP Address
Subnet Mask
Default Gateway
1st DNS Server
2nd DNS Server
Setup the SSID and
Security Settings of AP
Displays current
connection status
-Wireless Network
Status
-SSID (Service Set
Identifier)
-BSSID (Basic Service
Set Identifier)
-Channel
Search for Access
Points
Wireless Network
Speed:
11 Mbps
Auto
Show current IP settings
2
3
4
5
-MAC Address
-DHCP enabled/
disabled
-IP Address
-Subnet Mask
-Default Gateway
On/ Off
Set IP address
Set Subnet Mask
Set Default Gateway
Set Primary DNS Server
Set Secondary DNS
Server
6
7
8
30
Phone Operations
6
Add.
Functions
Alarm
Settings
SIP
Settings
Power
Saving
System
Info
Utilities
USB
Settings
FTP
Settings
Reset
Default
Alarm Time Set
Disable Alarm
Registration Time
On/ off
System Uptime, Serial Number, MMI Version,
BSP Version, MAC Version, Bootrom Version
Ping (*1) Firmware/ file directory setting/ Phone
Book file directory upload and download (*1)
USB Settings (*1)
Set FTP connection (*1)
Restore the settings to Default
(*1) For store using only, please do not use.
31
Set Alarm time
Disable Alarm Clock
Set registration time
Basic Operations
3
Basic Operations
3.1
Making / Receiving a call
3.1.1
Making a call
3.1.1.1
Entering phone number using keypad
To make a call, use the “Talk” key or “OK” key on the
navigator.
Alphabet
3
4
Talk key
Enter the phone number in the Standby screen shown
on the left.
5
If the phone number is not digit, but alphabet, then
press Alphabet soft key to select the needed alphabet.
2005.09.07
6
Number
Call
Clear
7
Press “Talk” key or “OK” key after having entered the
phone number.
8
or
The Dialing screen on the left figure will be displayed.
Proceeding
Caller Number
32
Basic Operations
“Call Ringing” will be displayed while waiting for the
called party to answer the phone.
Call Ringing
Caller Number
When the call party answers the phone, the message?
“Talking” will be displayed.
SIP
Talking
Caller Number
Hold
Xfer
Table 3.1.1 Messages displayed on Caller side
Message
Proceeding
Call Ringing
Call Cancelled
Talking
Call Held by us
Unholding with
Call terminated
Disconnected
Call Declined
Held by remote
Callee is
unholding
Callee replied
busy
33
Description
Dialing
Waiting for the answer
Hang up before the called party answers
Call in progress
Call holding
Cancel holding
Call ended
The called party terminated the call
The called party doesn’t answer and ends the call
The called party puts this call on hold
The called party unholds the call
The called party is talking to somebody
Basic Operations
3.1.1.2
Select from Phone Book
The called party can be selected from the Phone Book contacts list.
Select “View” option I the “Phone Book” menu.
3
Contact names in the Phone Book will be displayed.
Scroll to the desired name.
4
The name and phone number will be displayed, after
clicking “OK”.
5
Press “Talk” key or “OK” key on the navigator after
phone number is dialed.
6
7
Dialing the number.
The name in the Phone Book will be displayed during
the dialing process.
The succeeding operation steps are the same as
section 3.1.1.1 Entering phone number using keypad.
8
You can also use the Call History to make a call.
To use the Dialed calls Mode, please refer to 3.4.1 viewing Dialed Calls
To use the Calls Received, please refer to 3.4.2 Viewing Received Calls.
To use the Missed Calls, please refer to 3.4.3 Viewing Missed Calls.
34
Basic Operations
3.1.2
Receiving a call
Proceeding
Caller Number
Accept
Whenever there is an incoming call, the screen will
display the message on the left.
(If the caller number had already been saved in the
Phone Book, the name in the Phone Book associated
with the number will be displayed.)
OK
Press the “Talk” key or the “OK” key on the navigator.
The message “Talking “indicates the call is proceeding.
Talking
Caller Number
Hold
Xfer
Table 3.1.2 Messages displayed on the receiver side
Message
Proceeding
Talking
Call Cancelled
Call Held by us
Call terminated
Disconnected
Held by remote
Callee is unholding
35
Description
Incoming call
Call in progress
Caller cancelled the call
Call holding
Call ended
The calling party terminated the call
This call is on hold by the caller
The caller is unhoding the call
Basic Operations
3.1.3
Call holding and unholding
Press “Hold” (left soft key) to set a call in holding status.
(If the caller number had already been saved in the
Phone Book, the name in the Phone Book associated
with the number will be displayed.)
The message on the left screen indicated the current
call is on hold.
To unhold a call, press “Unhold” (left soft key)
3
4
(If the caller number had already been saved in the
Phone Book, the name in the Phone Book associated
with the number, will be displayed.)
3.1.4
5
Call transfer
6
Press “Xfer” (right soft key) to transfer a call.
7
(If the caller number had already been saved I the
Phone Book. the name in the Phone Book associated
with the number will be displayed.)
8
Enter the number this call will be transferred to and
press “Dial” (left soft key).
To change the transfer number, press “Clear” (right soft
key).
(If the caller number had already been saved in the
Phone Book, the name in the Phone Book associated
with the number will be displayed.)
36
Basic Operations
Waiting for the transferred party to accept the call.
The message on the left figure indicates the transfer
party is able to accept the call.
To transfer the call, press “Xfer” (right soft key).
Display “Call Transferring” message.
!
When the “Call Transferring” message is displayed, the
original incoming phone call will be set on hold.
Call Held by us
Caller Number
37
If the caller number had already been saved in the
Phone Book, the name in the Phone Book associated
with the number will be displayed.
Basic Operations
When the call has been transferred successfully, the
message “Call transferred” will be displayed, and this
call can be disconnected.
User Number
It could also display “call held by us” (Original number)
instead of the “Call transferred” message.
In this case, press the “Power button to disconnect the
call.
Press the Power button to disconnect the call.
3.2
3
Phone Book Settings
Select “Phone Book” from the main menu.
4
Displayed selected function.
Phone Book
5
Displayed selected function.
6
7
OK
Back
8
The functions of this option list are as follow:
Option
View
Edit
Add
Delete
Delete All
Description
Display saved phone numbers
functionality
Update saved phone number
Create new contact in Phone Book
Delete single entry in Phone Book
Delete all entry in Phone Book
and
provide
search
38
Basic Operations
3.2.1
Display Phone book
Select “View” in “Phone Book” menu.
The “View” screen will be shown.
The figure on the left displays an empty Phone Book.
[ADD]
The figure on the left displays a “Phone Book” with
contact Information.
Use the navigator to scroll to the desired record, and
press “OK” to show the number and the name.
3.2.2
Searching in the Phone Book
Select “View” in “Phone Book” menu.
Press “Find” (left soft key)
39
Basic Operations
Display “Find” keyword entering screen.
Enter search keyword and press “OK” key.
Find
a
Find
Clear
The search function can be used in the “View”, “Edit”
and “Delete” menu, by using English letters as search
keywords.
Please key in the keywords in English letters before
using the search function.
Press the left soft key to change the input mode if
needed.
The matched results will be displayed.
3
4
5
3.2.3
Adding a new contact
Phone Book
6
To add a new contact to the Phone Book, select “Add”
in the “Phone Book” menu.
7
View
Edit
Add
OK
8
Back
The “New contact” screen will be displayed.
New Contact
User Name:
SIP URL:
OK
Back
40
Basic Operations
Enter User Name of contact when prompted.
Press “Apply” to input the entered information.
Press the left soft key to change the input mode if
needed.
Edit User Name
a
Apply
Clear
New contact information is added.
New User
User Name:
xxx
SIP URL:
OK
Back
Use the navigator to select the “SIP URL” and press
“OK” key.
New User
User Name:
xxx
SIP URL:
OK
Back
Enter phone number when prompted.
Enter full number when the external number is used.
Or enter extension number when the internal number is
used.
Edit SIP URL
1
Apply
Clear
Press “Apply” in the input screen to return to the “New
User” screen.
Press the left soft key to change the input mode if
needed.
41
Basic Operations
Press “OK” and come back to “New User”.
New User
User Name:
xxx
SIP URL:
OK
Back
Must use the navigator to select “Apply” then the New
User could be added successfully.
New User
3
Full Name:
Apply
OK
3.2.4
4
Back
5
Editing the Phone Book
Phone Book
To edit a phone number, please select “Edit” in the
“Phone Book” menu.
6
View
Edit
7
Add
OK
Back
Edit
xxx
Find
OK
8
The “Edit” screen will be displayed along with the
Phone Book contents.
To perform a search, select “Find” (left soft key).
Back
42
Basic Operations
After selecting a contact, the screen on the left will be
displayed. Use the navigator to scroll to the item to be
updated.
(The figure on the left uses the “User Name” field as an
example).
User Info
User Name:
SIP URL:
OK
Back
After selecting the item to be edited, the screen on the
left will be displayed.
Press the left soft key to change the input mode if
needed.
The operation related to the phone number is the same
as the “Add” function.
Edit User Name
a
Apply
3.2.5
Clear
Deleting an entry from the Phone Book
Phone Book
To delete a contact, select “Delete” in the “Phone Book”
menu.
Edit
Add
Delete
OK
Back
The information to be deleted will be displayed in the
“Delete” screen.
For search options, select “Find” (left soft key).
Delete
xxx
Find
43
OK
Back
Basic Operations
The left screen will be displayed after selecting the
contact to be deleted. Use the navigator to scroll to the
item to be deleted.
(The figure on the left uses the “Contact” field as an
example).
Contact
User Name
xxx
SIP URL
Delete
Back
Display “Delete?” message.
User Info
To delete, press “OK”.
To cancel, press “Back” (right soft key).
When the deletion is completed, the “Delete” screen will
be displayed.
User Name?
xxx
SIP URLDelete ?
Yes
3.2.6
No
4
5
Deleting All Phone Book entries
To delete all entries in the Phone Book, select “Delete
All?” in the Phone Book screen.
Phone Book
3
6
Add
Delete
7
Delete All
OK
Back
8
The “Delete All ?” message will be displayed.
Phone Book
To delete, press “OK”.
The contents of the Phone Book will be deleted.
To cancel the deletion, press “Back” (right soft key).
?
Add
Delete
All ?
DeleteDelete
All
Yes
No
44
Basic Operations
3.3
IM (Instant Messages)
Select the “Message” from the main menu.
Messages
OK
Menu
Mew Message
My messages
Delete
Delete All
3.3.1
Back
Description
Create and send new message
All received messages (Max 100)
Delete Message
Delete all Messages
Create and send new message
Select “New Message” in the “Messages” menu.
Enter message text
After entering the message, press “OK” key.
The “Apply” option will not be displayed if the Message
content is empty.
Press the left soft key to change the input mode.
45
Basic Operations
The screen will be displayed.
Send
“To”: Key in called ID.
“PhoneBook”: Select from the Phone Book.
To
PhoneBook
OK
Back
Enter the destination address or phone number.
IM To:
[email protected]
1
OK
Clear
Send
IM Sending
Press the left soft key to switch the input mode if
needed.
3
The “Transfer Mode” option will not be displayed if the
address field is empty.
4
The message on the left will be displayed after entering
the address or phone number and pressing “OK” key.
5
The “IM Accepted” message indicates that the recipient
has completed receiving the message.
6
7
The phone will return to the screen on the left after the
transmission of the message has been completed.
Send
8
To
PhoneBook
OK
Back
46
Basic Operations
3.3.2. My Messages
Select “My messages” in the “Messages” menu.
Select recipient from the received IM list.
After receiving the message, press “OK” key to confirm.
Hello
OK
Back
Initiate instant messaging session.
xxx:[email protected]
Reply
OK
47
Back
Basic Operations
Enter reply message.
After entering the message, press “OK” the send.
Press the left soft key to switch the input mode if
needed.
When the reply message is being sent to selected
person, the “IM Sending” message will be displayed on
the screen.
The “Message From” message indicates the message
has been received by the recipient.
3
4
The phone will return to the screen on the left when the
message transmission has been completed.
5
6
7
3.3.3
Delete Single Message
8
Select “Delete” in the “Messages” menu.
Messages
My Messages
Delete
Delete All
OK
Back
48
Basic Operations
Instant Messages
<xxx:[email protected].
OK
Scroll to the item to be deleted from the received
messages list (in IP address format) and press “OK”
key.
Back
Instant Messages
?
<xxx:[email protected].
The message to be deleted will be displayed.
To delete, press “Yes” key.
To cancel the deletion, press “No” (right soft key).
Delete ?
Yes
3.3.4
No
Delete All Messages
Select “Delete All” in the “Messages” menu.
The message to be deleted will be displayed.
To delete, press “Yes” key.
To cancel the deletion, press “No” (right soft key).
3.4
Call History
Select “Call History” from the main menu.
49
Basic Operations
Call History
Display selected function
Display selected function
OK
Back
The following options can be selected:
Menu
Dialed Calls
Received Calls
Missed calls
Delete
Delete All
Description
Display Dialed Calls
Display Received Calls
Display Missed Calls
Delete single record
Delete all records
max. 10 calls
max. 10 calls
max. 10 calls
Use the navigator to display the items in following list
in the Standby screen.
Phone book
Received Calls
Dialed Calls
Missed Calls
3.4.1
3
4
5
6
7
8
Dialed Calls
In the “Call History” menu, use the navigator to scroll to
“Dialed Calls” and press “OK” key.
50
Basic Operations
Display “Dialed Calls”.
Use the navigator to scroll to the number in Dialed
Calls.
Press “Call” or the “Talk” key after the selection.
To save the dialed call number to the Phone Book,
Press “View” (left soft key).
(For detailed operation information on saving data to
the Phone Book, refer to 3.2.3 Adding a new contact)
The dialing screen is shown on the left.
3.4.2
Viewing Received Calls
Scroll to “Received Calls” in the “Call History” menu and
press “OK” key.
Display “Received Calls”.
Use the navigator to scroll to the number you wish to
dial.
Select “Call” or press the “Talk” key.
To save the Dialed Call number to the Phone Book,
press “View” (left soft key).
(For detailed operation in formation on saving data to
the Phone Book, refer to section 3.2.3 Adding a new
contact).
51
Basic Operations
The dialing screen is shown on the left.
3.4.3
Viewing Missed Calls
Use the navigator to scroll to the “Missed calls” option
in the “Call History” menu, press “OK” key.
3
4
5
xxxxxx
Missed calls will be displayed.
Use the navigator to scroll to the number you wish to
dial.
Select “Call” or press the “Talk” key after phone number
selection.
To save the Dialed Call number to the Phone Book,
press “View” (left soft key).
(For detailed operation information on saving data to
the Phone Book, refer to 3.2.3 Adding a new contact).
The dialing screen is shown on the left.
52
6
7
8
Basic Operations
3.4.4
Delete a Single Record
Call History
Use the navigator to scroll to the “Delete” option in the
“Call History” menu and press “OK” key.
Received Calls
Delete
Delete All
Delete
Dialed Calls
Select the record to be deleted and press “OK” key.
(The screen on the left uses deleting a Dialed Calls
record as an example)
Received Calls
Missed Calls
Scroll to the record to be deleted, press “OK” key.
Dialed Calls
xxxxxx
yyyyyy
Dialed Calls
xxxxxx
?
yyyyyy
Delete ?
3.4.5
53
The “Delete?” message will be displayed.
To delete, press “Yes” key.
To cancel, press “No” (right soft key).
After deleting a record, the screen will return to the
“Delete” menu.
Delete all Records
Basic Operations
Use the navigator to scroll the “Delete All” option in the
“Call History” menu and press “OK” key.
The “Sure to Delete All?” message will be displayed.
To delete, press “Yes” Key.
The “Dialed calls”, “Received Calls”, “Calls Missed”
data will be completely deleted.
After deleting a record, the screen will return to the “Call
History” menu.
3
4
5
6
7
8
54
SIP Settings
4
SIP Settings
Select “SIP Settings” from the main menu. (The main menu icon below
will be displayed).
SIP Settings
Display selected function
Display selected function
OK
Menu
SIP Profiles (Max 5)
Max Ringing time
Audio Settings
DTMF Signaling
4.1
Back
Description
1.
Setup SIP Information
2.
Select the SIP Profile user want to use
Max Ringing Time
Setup preferred codec priority
Dual Tone Multi-Frequency Signaling Settings
SIP Profiles
Press “OK” key to enter “SIP Profiles”.
SIP Setting
SIP Profiles
Max Ringing Time
Audio Settings
OK
Back
Select “SIP Profile 1”.
SIP Profiles
SIP Profile 1 x
SIP Profile 2
SIP Profile 3
Apply
55
OK
Back
SIP Settings
Menu
Profile Name
Display Name
User Name
Registrar
SIP Domain
SIP Passwords
STUN Settings
Outbound Proxy
4.1.1
Description
The name of the Profile
SIP Display Name settings
SIP User Name setting
1. Specify IP address & port number of SIP
settings.
2. Enable/Disable Register Function
Setup Domain of SIP Registrar
Setup Auth Username and Password
1. Specify IP address & port number of
STUN settings.
2. Enable/Disable STUN Function
1. Specify IP address & port number of
Outbound Proxy settings.
2. Enable/Disable Outbound Proxy
4
5
Profile Name
Select “Profile Name” in the “SIP Profile 1” menu.
6
SIP Profile 1
Profile Name
Display Name
User Name
OK
7
Back
The screen on the left will be displayed after “OK” key is
pressed.
(It will show “xxxxxx” when enter in.)
Press the left soft key to change the editing mode if
needed.
Press “Apply” to go back to the “SIP Settings” menu.
Profile Name
xxxxxx
1
Apply
Clear
56
8
SIP Settings
4.1.2
Display Name
Select “Display Name” in the “SIP Profile 1” menu.
SIP Profile 1
Profile Name
Display Name
User Name
OK
Back
SIP Display Name
xxxxxx
Apply
1
4.1.3
The screen on the left will be displayed after “OK” key is
pressed.
(It will show “xxxxxx” when enter in.)
Press the left soft key to change the editing mode if
needed.
Press “Apply” to go back to the “SIP Settings” menu.
Clear
User Name
Select “User Name” in the “SIP Profile 1” menu.
SIP Profile 1
Display Name
User Name
Registrar
Apply
Clear
The screen on the left will be displayed after “OK” key is
pressed.
Enter SIP phone username (internal number).
SIP Username
xxxxxx
1
57
Apply
Clear
Press the left soft key to change the input mode if
needed.
Press “Apply” to go back to the “SIP Settings” menu.
SIP Settings
4.1.4
Registrar
Select “Registrar” in the “SIP Profile 1” menu.
SIP Profile 1
Display Name
User Name
Registrar
OK
Back
Then, select “Registrar Address”.
SIP Registrar
Registrar Address
4
On/Off
Apply
Clear
SIP Registrar
XXX.XXX.XXX.XXXǺZZZZ
1
4.1.5
Apply
Clear
The screen on the left will be displayed after “OK” key is
pressed.
Enter the IP Address to register to the SIP Server.
Please enter the SIP Registrar Address following the
“xxx.xxx.xxx.xxx:zzzz” format.
Press the left soft key to change the input mode if
needed.
Press “Apply” to return to the “SIP Settings” menu.
SIP Domain
Select “SIP Domain” in the “SIP Profile 1” menu.
SIP Profile 1
User Name
Registrar
SIP Domain
OK
Back
58
5
6
7
8
SIP Settings
Set the SIP Domain address.
Enter SIP Domain address following the
“xxx.xxx.xxx.xxx” format. Ex: 192.168.10.1.
SIP Domain
192.168.10.1
Apply
1
4.1.6
Clear
Press “Apply” to save.
Press the left soft key to change the input mode if
needed.
SIP Passwords
Use to set the information for SIP authentication.
SIP Profile 1
Registrar
SIP Domain
SIP Password
OK
Back
Set Password
Press “OK” key.
Select “Auth Name” and press “OK” key.
Auth User
Password
OK
Back
Assign the same user name used for the SIP server
authentication.
Auth User
1
59
Apply
Press “Apply” after having entered the username.
Press the left soft key to change the input mode if
needed.
Clear
SIP Settings
Select “Password” and press “OK” key.
Set Password
Auth User
Password
OK
Back
Enter the password needed for SIP login
authentication.
Press “Apply” after entering the password.
Be sure to enter the same password used for SIP
Server login.
4
Press the left soft key to change the input mode if
needed.
4.1.7
5
STUN Settings
6
Select “STUN Settings” in the “SIP Profile 1” menu.
7
8
Select “STUN Address”.
60
SIP Settings
Set the STUN Server.
Enter the STUN server address.
Press “OK” to sure.
Press the left soft key to change the input mode if
needed.
STUN Server
xxx.xxx.xxx.xxx : zzzz
Apply
1
Clear
Select “On/Off” in the “STUN Settings” menu.
Select item “On” to turn on STUN client.
Select item “Off” to turn off STUN client.
Press “OK” to sure.
STUN On/Off
On
Off x
OK
4.1.8
Back
Outbound Proxy
Select “Outbound Proxy” in the “SIP Profile 1” menu.
61
SIP Settings
Select “Proxy Address”.
Set the Outbound Proxy.
Enter the address and press “OK” to sure.
Press the left soft key to change the input mode if
needed.
Outbound Proxy
XXX.XXX.XXX.XXXǺZZZZ
Apply
1
4
Clear
Select “On/Off” in the “Outbound Proxy” menu.
5
6
Select item “On” to turn on Outbound Proxy.
Select item “Off” to turn off Outbound Proxy.
Press “OK” to sure.
STUN On/Off
On
Off x
OK
7
8
Back
62
SIP Settings
4.2
Select SIP Profile
Press “OK” key to enter “SIP Profiles”.
SIP Setting
SIP Profiles
Max Ringing Time
Audio Settings
OK
Back
Move the highlight bar to the SIP Profile we want to
use. Then press “Apply”. Then, handset would turn off
automatically and the SIP Profile will take effect when
you turn on the handset again.
SIP Profiles
SIP Profile 1 x
SIP Profile 2
SIP Profile 3
Apply
4.3
OK
Back
Max Ringing Time
Select “Max Ringing Time” in the “SIP Settings” menu.
SIP Settings
SIP Profiles
Max Ringing Time
Audio Settings
OK
Back
Max Ringing Time
Assign the maximum call time.
Usually this is set to 120secs.
Press “Apply” to return to the “Call Settings” menu.
120
1
4.4
63
Apply
Clear
Audio Settings
SIP Settings
Select “Audio Settings” in the “SIP Settings” menu.
SIP Settings
SIP Settings
Max Ringing Time
Audio Settings
OK
Back
Set preferred codec priority.
For example:
PCMU/8000
PCMA/8000
G729/8000
Codecs
PCMU/8000
PCMA/8000
G729/8000
OK
4.4
4
Back
DTMF Signaling
5
Select “DTMF Signaling” in the “SIP Settings” menu.
SIP Settings
6
Max Ringing
Audio Settings
7
DTMF Signaling
OK
Back
DTMF Signaling
rfc2833
Inband x
OK
8
Setting the transmission method of DTMF signals.
Please select from the following 2 options:
rfc2833
Inband
Back
64
Phone Settings
5
Phone Settings
For user related settings, please select “Phone settings” in the menu.
Phone Settings
Display selected function
Display selected function
OK
Menu
WLAN Settings
IP Settings
Phone Profile
5.1
Back
Description
Set WLAN related parameters.
Set Network related parameters.
Set the Ring Tones or speaker volume,
keypad password lock…etc.
WLAN Settings
Select “WLAN Settings” in the “Phone Settings” menu.
Phone Settings
WLAN Settings
IP Settings
Phone Profile
OK
Back
The screen on the left will be displayed after pressing
“Apply”.
65
Phone Settings
Menu
AP Profiles (Max 10)
Current Status
Site Survey
TX Rate
5.1.1
Description
1.
Setup AP Profiles, each Profile
contains a set of WLAN
configuration. For example: SSID,
WEP Key, WPA…etc.
2.
Select the AP Profile user want to
use.
Display WLAN status information
Search for Access point
WLAN transmission rate settings
AP Profiles
Select “AP Profiles” in the “WLAN Settings”.
WLAN Settings
AP Profiles
Current Status
5
Site Survey
OK
Back
AP Profiles
6
The screen on the left will be displayed after pressing
“OK” key. Press “Option” key to enter more functions.
7
default x
Option
Join
AP Profiles
Add
Edit
Delete
OK
8
Back
The functions of each options are as below.
Add: To add a new AP Profile.
Edit: To edit your AP Profile.
Delete: Delete a existed AP Profile.
Delete All: Delete all existed AP Profiles.
Profiles Scan: To search AP in the AP Profiles List.
Back
66
Phone Settings
Press “Join” to associate other AP.
AP Profiles
default x
Jason_AP
Option
Join
5.1.1.1
Back
Security Settings
Select “Security Settings” in the “AP Profiles” menu.
AP Profiles
SSID
Security Settings
OK
Apply
Back
WLAN Security
The screen on the left will be displayed after pressing
“OK” key.
Disable x
WEP
WPA-PSK
OK
Back
Menu
Disable
WEP
WPA-PSK
67
Description
Disable Security
WEP Key Settings
WPA-PSK password settings
Phone Settings
5.1.1.2
WEP Settings
Select “WEP” in the “WLAN Security” menu.
WLAN Security
Disable x
WEP
WPA-PSK
OK
Back
WLAN Security
To modify the “WEP” settings, press “OK” key.
To cancel, press “Back” (right soft key).
?
Disable
WPA Security Select
WEP?
WEP
OK
Back
WLAN Security
5
The screen on the left will be displayed after pressing
“OK” key.
6
Disable x
WEP
WPA-PSK
OK
(1)
7
Back
8
Type and Length (WEP key type and key length)
Menu
Type and Length
Used Key
WEP Key String
Description
Set key type (HEX/ASCII) & key length (64/128bits)
Select key set
WEP key settings
68
Phone Settings
The screen on the left will be displayed after pressing
“OK” key.
Type and Length
HEX 64 bit x
HEX 128 bit
ASCII 64 Bit
OK
(2)
Back
Used Key
After setting the key type and key length,
Select the key to be used in the “WEP Key Setting”
option.
Used Key
Key#1
Key#2
Key#3
OK
(3)
Assign the WEP key type and key length.
Please select one of the following options:
Disable
HEX 64 bit
HEX 128 bit
ASCII 64 bit
ASCII 128 bit
Back
WEP Key Setting
Select “WEP Key Setting” in the “WEP Options” menu.
69
Phone Settings
After selecting the key number to be used, the screen
on the left will be displayed. (Example: Select 64bit
Key#1).
Enter key code.
Press the left shortcut key to change the editing mode.
AP Profiles
Back to AP Profile Sheet.
Then press “Apply” to Save settings.
SSID
Security Settings
Apply
OK
5.1.1.3
Back
WPA-PSK Settings
5
Select “WPA-PSK” in the “WLAN Security” menu.
WLAN Security
6
Disable
WEP
WPA-PSK
OK
7
Back
WLAN Security
To modify the “WPA-PSK” settings, press “OK” key.
To cancel, press “Back” (right soft key).
8
?
Disable
WPA Security Select
WPA?
WEP
OK
Back
70
Phone Settings
Select Key Type.
The screen on the left will be displayed after pressing
“OK” key.
(When the ASCII key format is selected)
Press the left shortcut key to change the editing mode.
Back to AP Profile Sheet.
AP Profile
Then press “Apply” to Save settings.
SSID
Security Settings
Apply
OK
Back
5.1.2 Current Status
This is used to display the WLAN SSID and used channel number.
Select “Current Status” in the “WLAN Settings”.
WLAN Settings
AP Profile
Current Status
Site Survey
OK
71
Back
Phone Settings
Current Status
WLAN Status
Associated
SSID:
Back
5.1.3
The screen on the left will be displayed after pressing
“OK” key.
The WLAN Setting will be displayed.
The details displayed are as follows:
WLAN Status: WLAN Status (Scanning/ Associated)
SSID: Displays the Extended Service Set Identifier
(ESSID)
BSSID: Displays the Basic Service Set Identifier
(BSSID)
Channel: x (Number)
Site Survey
Select “Site Survey” in the “WLAN Settings” menu.
WLAN Settings
AP Profiles
Current Status
5
Site Survey
OK
Back
The screen on the left indicates the phone is searching
for an Access Point.
6
7
8
The search results are displayed.
Jason_AP
Select the AP want to associate, then press “OK”.
LP_AP
Teenie_AP
72
Phone Settings
Jason_AP
Signal (rssi): 12
Channel: 11
The AP information including SSID, Signal Strength,
Channel, Security On/Off are shown.
Press “Join” to associated with this AP.
Security: Off
Jason_AP
Signal
(rssi): 12
Joining...
Channel: 11
Security: Off
Jason_AP
Signal (rssi):?12
For the Security Off AP, it shows “Joining”. DUT is
associating the AP.
For the Security On AP, we need to setup WEP or WPA.
Please refer to 5.1.1.1
Message “Save the AP Profile?” is shown up. Press
“OK” to save the one entry in AP Profiles and Press
“Back” to give up saving.
Channel: 11
Save the
Security:
APOffProfile?
5.1.4
TX Rate Settings
Used to set the Wireless Network transmission rate.
Select “TX Rate” in the “WLAN Settings” menu.
Current Status
Site Survey
73
Phone Settings
After selecting the key number to be used, the screen
on the left will be displayed.
11Mbps is the current setting.
11Mbps is recommended.
5.2
IP Settings
Select “IP Settings” in the “Phone Settings” menu.
Phone Settings
WLAN Settings
IP Settings
Phone Profile
OK
Back
5
The screen on the left will be displayed after pressing
select.
IP Settings
6
Show Current
DHCP
7
IP Address
Apply
OK
Back
8
Menu
Show Current
DHCP
IP Address
Subnet Mask
Default Gateway
1st DNS Server
2nd DNS Server
Description
Display Current Settings
Enable/ Disable DHCP
Phone IP address Setting
Subnet Mask Setting
Default Gateway Setting
Primary DNS Server
Secondary DNS Server
74
Phone Settings
5.2.1
Show Current
Select “Show Current” in the “IP Settings” Menu.
IP Settings
Show Current
DHCP
IP Address
Apply
OK
Back
Current IP Set Up
MAC Address:
00C20041C3D
DHCP:
Back
Select “Show Current” in the “IP Settings” menu.
The current IP Settings details listed below will be
displayed.
Use the navigator to scroll to the item to be displayed.
MAC Address: Phone MAC Address
DHCP: DHCP Client Status (Enabled/ Disabled)
IP Address: Phone IP Address◆
Subnet mask: Phone Subnet Mask◆
Default Gateway: Phone Default Gateway◆
◆ When DHCP is enabled, the values assigned by the
DHCP server will be displayed. When DHCP is
disabled, the current IP settings will be displayed.
5.2.2
DHCP Settings
When this function is enabled, the phone IP address, default gateway and
other settings will be assigned automatically by a DHCP server. In the “IP
Settings” menu, select “DHCP”.
75
Phone Settings
Pressing “OK” key will display the screen on the left.
This screen indication that current status is enabled.
On x
Off
To disable the DHCP.
Use the navigator to scroll to “On” option and press
“OK” key.
On x
5
6
Off
7
On the “IP Settings” menu, press the left soft key to
save the settings.
8
If the word “Apply” does not appear after pressing
“Apply” (left soft key), the entered data will not be
saved.
5.2.3
IP Address
When the DHCP function is disabled, follow the following steps to
configure the IP address.
The IP can be a value within the Access Point’s subnet.
76
Phone Settings
Select “IP Address” in the “IP Settings” menu.
IP Settings
Show Current
DHCP
IP Address
Apply
OK
Back
The IP Address prompt will appear.
Please follow the “xxx.xxx.xxx.xxx” format to enter the
IP address.
After entering the IP Address, press “OK” key and
return to the “IP Settings” menu.
IP Address
192.168.10.20
Apply
1
Clear
On the “IP Settings” menu, press the left soft key to
save the settings.
IP Settings
Show Current
DHCP
If the word “Apply” does not appear after pressing
“Apply” (left soft key), the entered data will be not
saved.
IP Address
Apply
77
OK
Back
Phone Settings
5.2.4
Subnet Mask Settings
When the DHCP function is disabled, follow the following steps to
configure the Subnet Mask. Ensure the IP address of phone and the IP of
access point are in the same subnet network.
Select “Subnet Mask” in the “IP Settings” menu.
IP Settings
DHCP
IP Address
Subnet Mask
Apply
OK
Back
The Subnet mask prompt will appear.
Enter the subnet mask following the “xxx.xxx.xxx.xxx”
format.
Subnet Mask
255.255.255.0
Apply
1
Clear
DHCP
IP Address
7
If the word “Apply” does not appear after pressing
“Apply” (left soft key), the entered data will not be
saved.
Subnet Mask
OK
6
On the “IP Settings” menu, press the left soft key to
save the settings.
IP Settings
Apply
5
After entering the IP Address, press “OK” key and
return to the “IP Settings” menu.
8
Back
78
Phone Settings
5.2.5
Default Gateway Settings
When the DHCP function is disabled, follow the following steps to
configure the Default Gateway.
Select “Default Gateway” in the “IP Settings” Menu.
The default Gateway prompt will appear.
Enter the subnet mask following the “xxx.xxx.xxx.xxx”
format.
After entering the IP Address, press “OK” key and
return to the “IP Settings” menu.
On the “IP Settings” menu, press the left soft key to
save to settings.
If the word “Apply” does not appear after pressing
“Apply” (left soft key), the entered data will not be
saved.
5.2.6 1st DNS Server
The SIP Registrar Server (SIP proxy server), STUN server and Outbound
Proxy could be set in domain name. So, the BOSST51 need to resolve the
domain names into IP address while operation. And, this is to set the IP
address of the DNS (Domain Name Service) Server. There are two DNS
st
servers could be set. The BOSST51 will consult the 1 DNS server first, and
nd
st
then the 2 one if there’s no response from the 1 one, to resolve the
domain name into IP address.
79
Phone Settings
Select “1st DNS Server” in the “IP Settings” menu.
Please keep in the IP address of the primary DNS
Server.
1st DNS Server
xxx.xxx.xxx.xxx
Apply
1
5.2.7
Clear
5
2nd DNS Server
Select “2nd DNS Server” in the “IP Settings” menu.
6
IP Settings
Default Gateway
DNS Server Pri
7
2nd DNS Server
Apply
OK
Back
8
Please keep in the IP address of the secondary DNS
Server.
2nd DNS Server
xxx.xxx.xxx.xxx
1
Apply
Clear
80
Phone Settings
5.3
Phone Profile
Selecting from the “Menu”.
Select “Phone Settings” in the “Menu”.
Phone Settings
OK
Back
Press “OK” and use the navigator to scroll to “Phone
Profile”, then you’ll see the image as left.
Menu
Power OFF
Ringing On/Off
Ringtone Tones
Ringtone Volume
Speaker Volume
Vibrator
Keypad Password
Phone Password
Display Contrast
Phone Password
81
Description
Power Off
Enable or Disable ring tone
Select ring tone
Ring tone volume
Speaker volume
Enable / Disable the vibration alert
Set keypad lock password
Enter password used to modify settings
Set LCD contrast ratio
Enter password used to modify settings.
Ex: WLAN Settings, IP Settings, SIP Settings…etc.
Phone Settings
5.3.1
Power Off
Select “Power off” in the “Phone Profile” menu.
Phone Profile
Pressing “OK” will display the “Powering Down”
Message and the phone will power off.
5
5.3.2
Ring tone on/off
Select “Ringing” in the “Phone Profile” menu.
6
Phone Profile
Power OFF
Ringing On/Off
7
Ringtone Tones
OK
8
Back
Pressing “OK” will display the screen on the left.
Phone Profile
This screen indicates that the current Ring tone
Setting is “Enabled”.
On x
Off
OK
Back
82
Phone Settings
5.3.3
Ring tones
Select “Ringing Tones” in the “Phone Profile” menu.
Phone Profile
Power OFF
Ringing On/Off
Ringtone Tones
OK
Back
Ringtone Tones
RingTone 1 x
The screen on the left will be displayed after pressing
“OK” key.
Use the navigator to scroll to the Ring Tone 1-5.
RingTone 2
RingTone 3
5.3.4
Ring tone Volume
Phone Profile
Select “Ring tone Volume” from the “Phone Profile”
menu.
Ringing On/Off
Ringtone Tones
Ringtone Volume
OK
Back
The screen on the left will be displayed.
Use the navigator to scroll and select the ring volume.
Left (Decrease volume)
Right (Increase volume).
83
Phone Settings
Press “OK” key to save the current settings.
5.3.5
Speaker Volume
Phone Profile
Select “Speaker Volume” from the “Phone Profile”
menu.
Ringtone Tones
Ringtone Volume
Speaker Volume
OK
5
Back
The screen on the left will be displayed.
6
Use the navigator to scroll and select the ring volume.
Left (Decrease volume)
Right (Increase volume).
7
8
Press “OK” key to save the current settings.
84
Phone Settings
5.3.6
Vibration
Select “Vibration” in the “Phone Profile” menu.
Phone Profile
Ringtone Volume
Speaker Volume
Vibrator
OK
Back
The screen on the left will be displayed after pressing
“OK” key.
Vibrator
On x
Off
Use the navigator to enable to disable this option.
OK
Back
Press “OK” key to save the current setting.
Vibrator
Saving
x ...
Enable
Disable
OK
5.3.7
Back
Keypad Password
Phone Profile
Speaker Volume
Vibrator
Keypad Password
OK
85
Back
Select “Keypad Password” in the “Phone Settings”
menu.
Phone Settings
The screen on the left will be displayed after pressing
“OK”
Enter the current password. (Default Password is null.
Just leave it blank if this is 1st time you want to modify
password.)
Enter the new password.
If no password is desired, leave the password field
blank and press “Apply” key.
Re-enter the password to confirm.
5
6
7
Press “Apply” to save the content.
8
Saving ...
86
Phone Settings
5.3.8
Phone Password
Select “Phone Password” in the “Phone Profile” menu.
Phone Profile
Vibrator
Keypad Password
Phone Password
OK
Back
The screen on the left will be displayed after pressing
“OK”
Enter the current password. (Default Password is null.
Just leave it blank if this is 1st time you want to modify
password.)
Enter the new password.
If no password is desired, leave the password field
blank and press “Apply” key.
Re-enter the password to confirm.
87
Phone Settings
Press “Apply” to save the current settings.
5.3.9
Contrast Volume
Select “Contrast Volume” in the “Phone Profile” menu.
Phone Profile
Keypad Password
Phone Password
Display Contrast
OK
Contrast
Back
5
The screen on the left will be displayed after pressing
“OK”
Use the navigator to make the adjustment and press
“OK” key.
6
7
8
Save the current setting.
Contrast
88
Phone Settings
5.3.10 Clock Setting
Select “Clock Setting” in the “Phone Profile” menu.
Phone Profile
Phone Password
Display Contrast
Clock Setting
Select “Time Set” to set the hour / minute.
Press “Apply” to set the time.
Select “Date Set” to set the Year /Month / Day.
89
Phone Settings
Press “Apply “to set the time.
Date Set
06.03.10
1
OK
Back
5
6
7
8
90
Add. Functions
6
Add. Functions
For user related settings, please select “Add. Functions” in the main
menu.
Add. Functions
Display selected function
Display selected function
OK
Back
Setting options in the Application menu
Menu
Alarm Settings
SIP Settings
Power Saving
System Info
Utilities
USB Settings
FTP Settings
Reset Default
6.1
Alarm Set
6.1.1
Alarm Set
Description
Alarm Time Set
Setup Registration Interval.
Set the power-saving mode.
Display information about this product.
Vender-reserved function. Do not use.
Vender-reserved function. Do not use.
Vender-reserved function. Do not use.
Set Default parameter.
Select “Add. Functions” from the main menu.
Add. Functions
OK
91
Back
Add. Functions
Select “Alarm Set” from the “Add. Functions” menu.
Add. Functions
Alarm Settings
SIP Settings
Power Saving
OK
Back
Alarm Settings
Select “Alarm Time Set” from the “Time Reminder”
menu.
Alarm Time Set
Disable Alarm
OK
Back
Enter the Alarm time in 24-hour format.
Press the left soft key to charge the input mode if
desired.
24H Format only
08:30
1
OK
Back
Press “Apply” to save the current settings and return to
the
“Alarm Time Set” menu.
The “Alarm” sign will be displayed in Standby screen if
the alarm time has been set.
6
7
8
92
Add. Functions
6.2
Registration time
Select “SIP Settings” from the “Add. Functions” menu.
Add. Functions
Alarm Settings
SIP Settings
Power Saving
OK
Back
Select “Registration time” in the “SIP Settings” menu.
Assign the Registration time.
Press “Apply” to save.
6.3
Power saving
Select “Power Saving” in the “Add. Functions” menu.
Add. Functions
Alarm Settings
SIP Settings
Power Saving
OK
93
Back
Add. Functions
Use the navigator to enable or disable this function.
Add. Functions
Alarm Settings
SIP Settings
Power Saving
OK
Back
Add. Function
!
A
S
Active After
Power Saving
Restart
Yes
Back
To return to the Network Settings menu, press “Back”
(right soft key).
The message on the right will be displayed after
pressing “Yes” key. (Please refer to the memo below)
Regarding the Power Saving function
When changes have been made to the Power-Save mode, please restart
the Phone so the changes become effective.
6.4
System Info
7
Display information about this product, such as version information.
Select “System Info” in the “Add. Functions” menu.
8
Add. Functions
SIP Settings
Power Saving
System Info
OK
6
Back
94
Add. Functions
System Summary
System Uptime
01:20:03
Serial Number:
Back
6.5
Display phone information.
The display items are as follows.
Use the navigator to select the item to be displayed.
System Uptime: Elapsed time since power-on.
Serial Number: Phone serial number
Memory Free: Remaining memory capacity in phone
MMI Version: MMI Application
BSP Version: BSP version
MAC Version: MAC version
Bootroom Version: Boot room version
Utilities
6.5.1
Network
A network utility for checking if a host is alive.
Select “Utilities” in the “Add. Functions” menu.
Add. Functions
Power Saving
System Info
Utilities
OK
Back
Select “Network” to key in the host.
Utilities
Network
Software Update
Software Upload
OK
95
Back
Add. Functions
Press “Apply” to set the host.
Image Name
1
Apply
Clear
6.5.2
Software Update
Input a file name for updating image file. (Put the image file to flash.)
Select “Software Update” in the “Utilities”.
Utilities
Network
Software Update
Software Upload
OK
Back
Select “Update Image” to key in the image name.
Software Upload
6
Update Image
Upfate Bootrom 1
Upfate Bootrom 2
OK
7
Back
8
Press “Apply” key the save.
Image Name
1
Apply
Clear
96
Add. Functions
6.5.3
Update Bootrom
Software Upload
Update Image
Input a file name for updating bootrom1.
(Put the bootrom1 file to flash.)
Select “Update Bootrom1” in the “Software Update”.
Update Bootrom 1
Update Bootrom 2
OK
Back
Press “Apply” key after entered the Bootrom name.
Press the left soft key to change the input mode if
needed.
Bootrom1 Name:
bootrom1.bin
1
Apply
Clear
Software Upload
Update Image
Input a file name for updating bootrom2.
(Bootrom2 is the backup of bootrom1.)
Select “Update Bootrom2” in the “Software Update”.
Update Bootrom 1
Update Bootrom 2
OK
Back
Press “Apply” key after entered the Bootrom name.
Press the left soft key to change the input mode if
needed.
Bootrom2 Name:
bootrom2.bin
1
97
Apply
Clear
Add. Functions
6.5.4
Software Upload
Input a file name for uploading image file. (Get the image file from flash.)
Select “Software Upload” in the “Utilities”.
Utilities
Network
Software Update
Software Upload
OK
Back
Software Upload
Select “Upload Image” to key in the image name.
Press “Apply” key to upload.
Update Image
Upfate Bootrom 1
Upfate Bootrom 2
OK
6.5.5
Back
Upload image
Input a file name for uploading Bootrom.
Software Upload
6
(Get the Bootrom file from flash.)
Update Image
Update Bootrom 1
Update Bootrom 2
OK
Back
Apply
8
Press “Apply” key after entered the Bootrom name.
Press the left soft key to change the input mode if
needed.
Bootrom1 Name:
1
7
Select “Upload Bootrom1” in the “Software Upload”.
Clear
98
Add. Functions
Software Upload
Update Image
Input a file name for uploading bootrom2.
(Get the bootrom2 file from flash.)
Select “Upload Bootrom2” in the “Software Upload”.
Update Bootrom 1
Update Bootrom 2
OK
Back
Press “Apply” key after entered the Bootrom name.
Press the left soft key to change the input mode if
needed.
Bootrom2 Name:
Apply
1
6.5.6
Clear
Configure Update
Software Upload
Software Update
Input a file name for updating configuration.
(Put the configuration data to flash.)
Select “Configure Update” in the “Utilities”.
Software Upload
Configure Update
OK
Back
Press “Apply” key after entered the file name.
Press the left soft key to change the input mode if
needed.
File Name:
config.bin
a
99
Apply
Clear
Add. Functions
6.5.7
Configure Upload
Input a file name for uploading configuration.
(Get the BOSST51’s configuration from flash.)
Select “Configure Upload” in the “Utilities”.
Press “Apply” key after entered the file name.
Press the left soft key to change the input mode if
needed.
6.5.8
PhoneBook Update
Input a file name for updating Phone Book.
(Put the Phone Book data to flash.)
Select “PhoneBook Update” in the “Utilities”.
6
7
8
Press “Apply” key after entered the file name.
Press the left soft key to change the input mode if
needed.
100
Add. Functions
6.5.9
PhoneBook Upload
Input a file name for uploading Phone Book.
(Get the Phone Book data from flash.)
Select “PhoneBook Upload” in the “Utilities”.
Press “Apply” key after entered the file name.
Press the left soft key to change the input mode if
needed.
6.5.10
SIP Update
Input a file name for updating SIP setting.
(Put the SIP setting data to flash.)
Select “SIP Update” in the “Utilities”.
Press “Apply” key after entered the file name.
Press the left soft key to change the input mode if
needed.
File Name:
sip.bin
a
101
Apply
Clear
Add. Functions
6.5.11
SIP Upload
Input a file name for uploading Phone Book.
(Get the Phone Book data from flash.)
Select “SIP Upload” in the “Utilities”.
Press “Apply” key after entered the file name.
Press the left soft key to change the input mode if
needed.
File Name:
sip.bin
a
6.6
Apply
Clear
USB Settings
6.6.1
USB Status
Setting the status of USB interface.
6
Select “USB Settings” in the “Add. Function”.
Add. Functions
7
System Info
Utilities
USB Setting
OK
8
Back
Select “USB Status” in the “USB Settings”.
102
Add. Functions
Select “Disable” and press “OK” to set the status.
On x
Off
6.6.2
IP Address
Setting IP address of USB interface.
Select “IP Address” in the “USB Settings”.
USB Settings
USB Status
IP Address
Sunboot Mask
OK
Back
Press “Apply” after entered the IP address.
USB IP Address
192.168.1.1
1
OK
Back
6.6.3
Subnet Mask
Setting subnet mask of USB interface.
Select “subnet Mask” in the “USB Settings”.
USB Settings
USB Status
IP Address
Sunnet Mask
OK
103
Back
Add. Functions
Press “Apply” after entered the Subnet Mask.
USB Subnet Mask
255.255.255.0
1
6.7
OK
Back
FTP Settings
6.7.1
FTP Server
Set IP address of FTP server.
Select “FTP Settings” in the “Add. Function”.
Add. Functions
Utilities
USB Setting
FTP Setting
OK
Back
6
Select “FTP Server” in the “FTP Settings”.
7
8
Press “Apply” after entered the server name.
Press the left soft key to change the input mode if
needed.
104
Add. Functions
6.7.2
FTP Username
Set user name. (When login FTP server need an account, including a
user name and a password.)
Select “FTP Username” in the “FTP Settings”.
Press “Apply” after entered the user name.
Press the left soft key to change the input mode if
needed.
6.7.3
FTP Password
Set password. (When login FTP server need an account, including a user
name and a password.)
Select “FTP Password” in the “FTP Settings”.
105
Add. Functions
Press “Apply” after entered the password.
Press the left soft key to change the input mode if
needed.
6.8
Reset Default
Clear the “Phone Settings” and “SIP Settings” values.
Select “Reset Default” in the “Phone Settings” menu.
Phone Settings
Utilities
Profile
Reset Default
OK
Back
To clear the setting values, press “OK”.
Phone Settings
Utilities
FTP
?
Yes or No ?
Reset Default
OK
6
To cancel, press “Back” (right soft key).
The screen on the left indicates the values are being
restored.
7
Back
Phone Settings
8
When the restore in completed, the phone will display
the screen on the right and power off automatically.
Utilities
Processing ...
Profile
Reset Default
OK
Back
106
Add. Functions
Regarding the “Reset Default” function.
Phone Settings
Utilities
Powering Down
Profile
Reset Default
OK
Back
Regarding the “Reset Default” function.
The phone will automatically power off after executing this function.
107
Troubleshooting
7
7.1
Troubleshooting
Is your phone malfunctioning?
Please refer to the following solutions if you encounter problems with
your phone:
Symptom
Solution
No
Insufficient power in battery.
Power
Please charge the battery.
Recharging does not
Please replace the battery.
work
Cannot be recovered
Please consult the dealer.
Does not function
Power on or Power off.
Cannot be recovered
Please consult the dealer.
Cannot
The signal status is “X”
Please search for a base station.
make/
receive
Cannot locate base
Please confirm the following with the service
calls
station
provider:
Is the base station enabled?
Is it in active mode?
Whether the same channel number is used
by multiple base stations?
SIP signal not
Is the “Registrar” in the “SIP Settings”
displayed On LCD
enabled?
Please enable and login.
Is the connected Access Point correct?
Ensure the following settings are correct:
SIP User Name
SIP Password/Auth User
SIP Password/Password
Registrar
SIP Domain
108
7
8
Troubleshooting
Go to Phone Settings > IP Settings > Show
Current and
Make sure the DHCP has been enabled or
whether the phone has an IP address:
DHCP enabled:
Is it able to get an IP address, subnet mask
and default gateway?
Is the DHCP server function disabled at the
Access Point?
DHCP disabled:
Are the Values of IP Address, Subnet Mask,
and Default Gateway set correctly?
Is the DHCP server function disabled at the
Access Point?
Cannot
make/
receive
calls
The network
connection Is lost
Cannot make call
109
The SSID is the same as the Access Point
SSID.
The WLAN Settings are the same as the
Access Point.
WEP used; Encoding is the same as the
settings at the Access Point.
WPA used: Using the same PSK as the
Access Point.
Confirm the called party phone number.
The called party phone number must be
registered.
FCCC INTERFERENCE STATEMENT
FEDERAL COMMUNICATIONS COMMISSION
INTERFERENCE STATEMENT
This equipment has been tested and found to comply with the limits for a Class B
digital device, pursuant to Part 15 of the FCC Rules. These limits are designed to
provide reasonable protection against harmful interference in a residential
installation .This equipment generates, uses and can radiated radio frequency
energy and, if not installed and used in accordance with the instructions, may cause
harmful interference to radio communications. However, there is no guarantee that
interference will not occur in a particular installation. If this equipment does cause
harmful interference to radio or television reception, which can be determined by
turning the equipment off and on, the user is encouraged to try to correct the
interference by one or more of the following measures:
-- Reorient or relocate the receiving antenna.
-- Increase the separation between the equipment and receiver.
-- Connect the equipment into an outlet on a circuit different from that to which the
receiver is connected.
-- Consult the dealer or an experienced radio/TV technician for help.
CAUTION:
Any changes or modifications not expressly approved by the grantee of this device
could void the user’s authority to operate the equipment.
The user manual or instruction manual for an intentional or unintentional radiator
shall caution the user that changes or modifications not expressly approved by the
party responsible for compliance could void the user’s authority to operate the
equipment.
FCC RF Radiation Exposure Statement
This equipment complies with FCC RF radiation exposure limits set forth for an
uncontrolled environment under all conditions at zero Centimeter.
SAR maximum values
Max. SAR Measurement (1g)
802.11b: 0.815 W/ kg
CE: 0.141 W/ kg (10g)
802.11g: 0.466 W/ kg
FCC: 0.272 W/ kg (1g)
Head 802.11b: 0.272W/kg
Body 802.11b: 0.141W/kg
110
8
FCC INTERFERENCE STATEMENT
111