Transcript
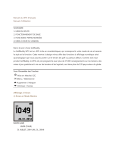
Quick Overview of your GolfBuddy
Advance Operations
Time Setting.
Green View Screen
button to see the current time.
button to set the time.
OFF
1
1
2
3
3
2
4
4
Hole No.
Green View
Par Information
Left Green
Volume
Button
Right Green
USB Data Cable
Switching to the Alternate Green
Press and hold the
play screen.
Power Off
Slide the button
to OFF position.
Silicon Case
1
Quick Start Guide
Thank you for choosing GolfBuddy.
GolfBuddy Voice provides golf course information for you to
ensure you enjoy the very best golfing experience.
Press both the
button and the
buttons at the same
time to bring up the hole selection. Then use the
button
to change to the desired hole.
2
5
1
2
3
3
4
4
5
Quick Start Guide
Hole No.
Meter (Yardage when not shown)
Front/Center/Back of the Green
Remaining distance to the Green.
Battery indicator
Have the unit turned off. While holding down the
turn on the unit to bring up the language selection.
Use the
buttons to select your language.
button while on the
Changing the Distance Unit (Yard/Meter)
Press and hold the
play screen.
Language Selection
Screen Description
Changing Holes
Slide the button to
ON position.
OFF
Power Adaptor
OFF
GolfBuddy Voice
Power On
ON
Main / ESC
Button
Position Mark Button
Power On/Off
Once you’re at the course, simply power on to start playing as
the unit will locate your course for you automatically.
ON
Press the
button then press and hold the
button for
3 seconds to start measuring.
Once you have arrived at the desired location, press the
button to finish measuring and you can view the measured
distance.
Pressing the
button will give you the distance to the
center of the green.
Press
button once: Voice information to the center.
Press and hold
button: Voice information to the front.
Press and Hold
button again: Voice information to the back.
Basic Operations
Power
On/Off
Button
Measuring Distance
www.gpsgolfbuddy.com
Voice Information
of the Distance to the Green
USB Port
ON
Pressing the
button gives you the green view screen. The
green shape changes as you move to the different sides of
the green. The screen also provides the hole number, par
information, and left/right green information.
Press and hold the
Press and hold the
Getting Started
Plug the data cable to the power adapter to charge the unit.
Visit our website (www.gpsgolfbuddy.com) and check your course
in our “course library” and download if necessary.
Please refer to the GB manager for the latest course and firmware
updates.
button while on the
button,
Main Button Operation
Pressing the
main button gives you the voice information
of the current screen.
Volume Control
Use the
buttons to control the volume.
Mute
Press the
to mute.
buttons at the same time