1
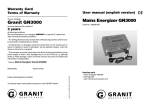
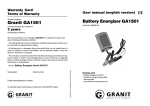
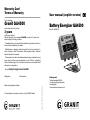
Warranty Card
Terms of Warranty
User manual (english version)
To your energizer
Granit GA4500
Battery Energizer GA4500
we issue warranty for a period of
Best. Nr.: 580580106
3 years
at following conditions:
We issue warranty to your energizer GA4500 for a period of 3 years from
date of selling at following conditions:
The selling date has to be proved by this certificate of guarantee, which has to
be accurately completed by your dealer.
All deficiencies or damages during this period that can be traced back to
faults of material or faults of fabrication, will be repaired costless, when the
device is returned to us prepaid.
This warranty cannot be issued when the device is being connected to wrong
power supply or when it was damaged due to an Act of God (e. g. lightning
stroke or water damage). It also cannot be issued in any case of unauthorized
intervention or maloperation.
Device: Battery Energizer Granit GA4500
Serial number:
Dealer stamp/signature of dealer:
To execute repair works please contact your local GRANIT dealer:
86283C_BAL_GA4500_Granit_ENGLISCH.p65
Selling date:
Packing unit:
1 battery energizer GA4500
1 set fence and grounding cable
1 warning plate
1 user manual and warranty card
Mounting
Mount the energizer Granit GA4500 upright at a wooden rod, at a wall or in an
appropriate housing or case. Protect the energizer from water.
Hit two grounding rods deeply into the ground at a humid place directly nearby your
fence, having a distance of 3 feet to each other. Connect the two grounding rods with
an appropriate earthing cable and connect them also to the ground connector of the
energizer. For connections always use corrosion-resistant grounding cable. Note that
the most performance and output power of your energizer can only be achieved
by best grounding and fence isolation conditions.
Connect your fence and the fence connector of your energizer using the red fencing
cable. Connect the energizer to the 12V battery in the right connection order of the
battery clamps (red clamp +, black clamp -). Now the green battery control LED in the
energizer should light constantly and the energizer should start working.
❍
Ground test connector
❍
Using the battery, deep-discharging protection
The energizer GA4500 protects the battery with an in-built deep-discharging protection.
If the battery voltage sinks below 10,8V the deep-discharging protection turns off the
energizer and the green battery control LED blinks. Please note:
❍ 12V lead-acid-batteries must be charged approx. every 6 months, even when
they are not in use.
❍ If the green battery control LED does not light constantly after connecting the
energizer to the battery probably the battery is not charged well or the battery is
not suitable for the energizer.
❍ When the green battery control LED starts flashing during normal operation of the
energizer the battery has to be charged.
❍ Keep the battery terminals clean and grease them lightly with battery grease.
❍ The most performance and output power of your energizer is achieved by proper
grounding conditions.
Connectors, fence control and energizer control
The energizer GA4500 has two fence connectors.
❍ Fence connector 1 (strong) puts out maximum impulse energy. It is used for
long fences and non-sensitive animals.
❍ Fence connector 2 (reduced power output) puts out half the impulse energy of
fence connector 1. It is used for shorter fences and sensitive animals.
❍ Both fence connector 1 and 2 can be used at the same time and independant to
each other. Note that if one fence connector is shorted to ground then this can
affect the power output of the other fence connector in negative way.
The energizer GA4500 has both an integrated fence control and an energizer control.
❍ The red energizer control LED flashes shortly with each energy impulse and shows
correct working of the energizer and good fence isolation. If the energy driven into
the fence is being transferred into ground (e. g. by animal touching or by plants
touching the fence or by fouling) the red energizer control LED is lit for a longer
period while flashing.
The fence control bar indicates the voltage at the fence connector 1 by
each fence impulse. If the control bar flashes completely green then voltage
at fence connector 1 is above 5000 volts. The last yellow bar flashes at
approx. 4000V and when the voltage sinks below 2000 volts then no bar
will flash. In this case you will not be able to herd animals any more due to
the low output voltage of the electric fence.
If you notice changes in the amplitude of the fence control bar then changes
in the fencing conditions or bad isolators could be a reason.
The ground test connector is designed to control the grounding conditions
permanently. Use a separate groundig rod, hit it into the ground separated 3
to 6 feet away from the normal grounding rods. When the yellow grounding
control LED flashes then grounding conditions are normally suitable.
Safety informations
Not following the safety instructions and an incorrect energizer setup could
lead to hazard and may cause technical malfunction of the energizer. Please
observe strictly following items:
❍
❍
❍
❍
❍
Connect your energizer GA4500 only to a 12V battery
Always use proper fencing material when using flexible fencing wire.
Wire of low quality is not recommended.
Your energizer GA4500 cannot be used for herding sensitive animals.
Build up your fence solidly. Avoid your animals from getting tangled in
your electric fence. Check the condition of your fence and your energizer
daily.
Check the condition of your 12V battery daily and charge it if required.
Avoid deep-discharging! Consider that a 12V lead-acid battery discharges
slowly by itself even if it is not used.
Power-saving
The energizer GA4500 is also fitted with an in-built power-saving circuitry:
connected to a good fence (without faults and without arc-overs) and to a good
grounding the power consumption is being reduced to a minimum. The more
impulse energy is transferred into ground by bad fence isolation, animals touching
or fouling, more power is taken out of the battery by the energizer. Below is
shown how long a battery could operate the energizer depending on the fence
conditions.
capacity
min. operating time
max. operating time
36Ah
3 days
20 days
44Ah
4 days
28 days
88Ah
7 days
50 days