1
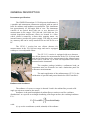
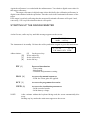
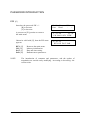
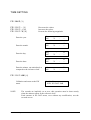
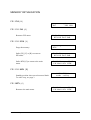
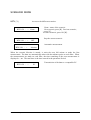
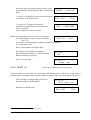
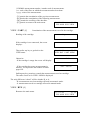
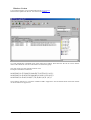
CIMEL ELECTRONIQUE
172 rue de Charonne - 75011 Paris France
Tel: +33 - 1 43 48 79 33
Fax: +33 - 1 43 48 62 61
http://www.cimel.fr
User Manual
Radiancemeter CE 313
Version 2.0
Printed: February 2002
TABLE OF CONTENTS
GENERAL DESCRIPTION .................................................................................................... 3
STARTING UP THE RADIANCEMETER ............................................................. 5
PASSWORD INTRODUCTION ........................................................................................ 6
TIME SETTING ................................................................................................................................. 7
PARAMETER SETTING .......................................................................................................... 8
MEMORY INITIALISATION............................................................................................ 10
SCENARIO MODE ...................................................................................................................... 11
RADIANCE MEASUREMENT........................................................................................ 12
DATA READING........................................................................................................................... 14
PC TRANSFER................................................................................................................................. 16
Cimel Electronique Radiancemeter User’s manual
2
GENERAL DESCRIPTION
Instrument specifications
The CIMEL Electronique 313 field spectral radiometer is
a portable and autonomous instrument equipped with an optical
head for radiance and irradiance measurement. This instrument
has approximately 10° full angle field of view. The instrument
consists of an optical head with one or two detectors for
measurement in the ranges 350-1100 and 1100-1800 nm. Ion
assisted deposition interference filters are located in a filter
wheel, which is rotated by a direct drive stepping motor. An
internal battery provides the power supply. The data are stored
in a memory and can be easily transferred in an ASCII file on a
PC.
The CE313-1 version has one silicon detector for
measurements in the 350-1100 nm range and can be equipped
with up to 9 user adjustable filters.
The CE 313-2 version is equipped with two detectors :
one silicon detector for measurements in the 350-1100 nm band
and one InGaAs detector for measurement in the infrared range
from 1100 to 2500 nm. Up to nine user adjustable filter can be
mounted on the instrument.
The complete package includes a radiometer head, an
instrument mast, an electronic box and a lambertian panel for
reflectance measurements.
The main application of the radiancemeter CE 313 is the
calibration of spectral band passes identical to SPOT satellite’s.
Radiance and irradiance
The radiance of a source or target is denoted L and is the radiant flux per unit solid
angle per unit area normal to the source.
Irradiance is the total hemispherical radiant flux per unit area and for a radiance
distribution L at a specific wavelength irradiating a flat target surface, the resulting irradiance
E is :
π
2π 2
E = ∫ LcosθdΩ= ∫ ∫ Lcosθ sinθdϖdϕ
2π
0 0
with :
(θ, ϕ) are the coordinates (zenith, azimuth) of the radiance
Cimel Electronique Radiancemeter User’s manual
3
Ω is the solid angle (str)
If the radiance has a constant distribution, E expresses as :
E = L ∫cosθdΩ=Lπ
2π
Reflectance
The directional reflectance factor ρ writes as :
ρ =πL
E
Reflectance measurement in the field
To measure the reflectance, the standard procedure consists of measuring the radiance
L with one calibrated instrument and the irradiance E with another one. Then, the reflectance
expresses as :
ρ =πL
E
However, there is a convenient way of measuring reflectance that can be carried out
with a single instrument plus a panel of known reflectance.
If the target Lt and panel Lp radiance are measured by the same radiance-meter under
the same geometrical and environmental conditions, the target reflectance ρt can be calculated
from the ratio of the two measurements :
ρt =πLt
E
ρ p =πLp
E
ρt = ρ p Lt
Lp
In this equation, only the panel reflectance properties must be known.
These measurements can also be made with two instruments, the first one measuring
the panel radiance and the second one measuring the target radiance.
Example : Description of a reflectance experiment
Here is a description of a reflectance experiment :
·
Set up an illumination source ( a lamp when indoors or the sun when outside) to
illuminate the calibration surface. Use a special surface called 'spectralon' that has the
property of reflecting light equally in all directions (or a white paper bonded on a plane
support). The light from the illuminating source is then reflected by the calibration surface
and the reflectance is measured by the field radianceometer. You obtain a digital count value
for this calibration reflectance
·
Next, a source (a rock, water or whatever) is placed where the calibration surface was.
The same light source illuminates the target and this light is subsequently reflected by it.
Cimel Electronique Radiancemeter User’s manual
4
Again the reflectance is recorded with the radiancemeter. You obtain a digital count value for
this target reflectance
·
The target reflectance in digital count is then divided by the calibration reflectance in
digital count obtained with the spectralon. Then the result is the fractionnal reflectance of the
target.
If the target is perfectly reflecting then the measured fractional reflectance will equal 1 and,
conversely, if it is a perfect absorber then it will equal 0.
STARTING UP THE RADIANCEMETER
At the first use, strike any key until this message appears on the screen:
** STANDBY **
awake : red key
The instrument is in standby. Release the red key and strike it again to get to the main menu:
31 / 12 / 98
23 : 59
PW MAN SCN VIEW
Abbreviations:
[W]
[Y]
[R]
NOTE:
[G]
for the green key.
for the white key.
for the yellow key.
for the red key.
PW [G]
Password introduction:
- Time setting.
- Initialisation.
- Constants and parameters setting.
MAN [W]
Access to the manual sequences:
- LUM: the FLum gains are applied.
SCN [Y]
Access to the programmed scenarios.
VIEW [R]
Access to the visualisation parameters:
- Of the recorded results.
- Of the battery voltage.
After a minute without the keyboard being used, the screen automatically dies
away.
Striking any key makes the main menu appear on the screen.
Cimel Electronique Radiancemeter User’s manual
5
PASSWORD INTRODUCTION
PW [G]
Introduce the password: PW = 1
[R] to increase.
[Y] to decrease.
23 : 59 : 59
Pass Word
A pressure on [W] permits to return to
the main menu
31 / 12 / 98
23 : 59
PW MAN SCN VIEW
Otherwise valid with [G], then the PW menu
appears:
23 : 59 : 59
RTN INI DAT PAR
RTN [G]
INI [W]
DAT [Y]
PAR [R]
NOTE:
PW
-
0
+
Return to the main menu.
Memory initialisation.
Date and time setting.
Radiancemeter parameters.
The introduction of constants and parameters, and the update of
magnitudes are carried out by modifying - increasing or decreasing - the
current value.
Cimel Electronique Radiancemeter User’s manual
6
TIME SETTING
PW / DAT [Y]
PW / DAT / - [Y]
PW / DAT / + [R]
PW / DAT / X [W]
Decreases the values.
Increases the values.
Presents the following magnitude.
Enter the year.
Year
OK
:
Enter the month.
Month
OK
X
Enter the day.
Day
OK
X
Enter the hour.
Hour
OK
X
Enter the minute, one unit ahead, as
compared to the reference clock.
Minute
OK
X
X
-
98
+
-
12
+
-
31
+
-
23
+
-
59
+
:
:
:
:
PW / DAT / OK [G]
Validation and return to the PW
menu.
NOTE:
23 : 59 : 59
RTN INI DAT PAR
The seconds are implicitly set at zero, this operation must be done exactly
when the minutes appear at the reference clock.
Each entrance in the DAT menu, even without any modification, sets the
seconds at zero.
Cimel Electronique Radiancemeter User’s manual
7
PARAMETER SETTING
PW / PAR [R]
Reading EPROM ...
Identification of the radiancemeter
by its country code.
PW / PAR / - [Y]
PW / PAR / + [R]
PW / PAR / X [W]
Country
(from 0 to 255)
OK
X
+
Decreases the parameter value.
Increases the parameter value.
Goes to the following parameter.
Identification of the radiancemeter by
its district code.
District
OK
Identification of the radiancemeter by
its assigned number.
Number
(from 0 to 15)
OK
X
+
Set the time interval between two loop Period s
measurements.
OK
Compensation of the zero offset of the
temperature detector (from -0.8°C to
+0.7°C). This parameter is set in the
factory.
(from 0 to 9999)
X
+
X
-
20
+
T Offset
OK
X
-
+0.0
+
-
50
+
-
5
+
Origin of the first filter with regard to the Org.offset
starting plot on the filter holder wheel OK
X
(from 1 to 255 steps). Permits a precise
placing of the filters. This parameter is set in the factory.
Sensitivity multiplying factor to be Flum1
applied to the LUM measurements with OK
filter 1 (1 - 50).
Cimel Electronique Radiancemeter User’s manual
X
8
Idem to FLum1 for the other filters.
Flum5
OK
X
-
5
+
PW / PAR / OK [G]
Validation of the values of the different Valid ?
parameters.
NO
YES
PW / PAR / OK / NO [G]
Return to PW menu.
23 : 59 : 59
RTN INI DAT PAR
PW / PAR / OK / YES [R]
Save the parameters in non-volatile Writing
memory.
Return to PW menu.
Cimel Electronique Radiancemeter User’s manual
EEPROM
23 : 59 : 59
RTN INI DAT PAR
9
MEMORY INITIALISATION
PW / INI [W]
purge memory ?
NO
YES SBY
PW / INI / NO [G]
Return to PW menu:
23 : 59 : 59
RTN INI DAT PAR
PW / INI / YES [Y]
purge success
Purge the memory.
RTN
Strike [W], [Y] or [R] to return to
PW menu.
23 : 59 : 59
RTN INI DAT PAR
Strike RTN [G] to return to the main
menu.
31 / 12 / 98
23 : 59
PW MAN SCN VIEW
PW / INI / SBY [R]
Standby position: then screen becomes blank.
To wake it up, see page 3.
** STANDBY **
awake : red key
PW / RTN [G]
Return to the main menu.
Cimel Electronique Radiancemeter User’s manual
31 / 12 / 98
23 : 59
PW MAN SCN VIEW
10
SCENARIO MODE
SCN [Y]
Access to the different scenarios.
RTN GO - + Name
Name : name of the scenario.
Next scenario, press [R]. Previous scenario,
press [Y].
To start a scenario, press GO [W].
Stop the current scenario.
RTN GO - +
OFF
Automatic measurement.
RTN GO - +
MesAut
When the scenario MesAut is started, it waits the next full minute to make the first
measurement. The data are automatically taken with the radiance gains on each filter. When
the measurements are made on each filter, the time remaining to the next measurement is
displayed: t = nn. The total time is the time entered in the parameter Period.
Transmission of the data to a compatible PC.
RTN GO - +
PC
Cimel Electronique Radiancemeter User’s manual
11
RADIANCE MEASUREMENT
MAN [W]
31 / 12 / 98
RTN SVK7
or MAN / LUM [R]
23 : 59
LUM
Measurement sequence with LUM gains.
Search the starting plot : reference position
of the filter holder wheel.
Searching
starting plot
...
* If the starting plot is found, the first filter is
nncc =
xxxx yyyy
ready for the measurement.
ABO < > RUN NEXT
nn: measurement number (1 to 7).
L if LUM measurement.
BG if Black Germanium measurement.
xxxx: in LUM, maximal value of the measurements.
yyyy: current value.
MAN / LUM / ABO [G]
Abortion of the sequence.
Returns to the MAN menu and places the filter
wheel at its origin position.
MAN / LUM / NEXT [R]
Turns to the next filter.
31 / 12 / 98
RTN SVK7
23 : 59
LUM
Selection of the next filter.
nncc =
xxxx yyyy
ABO < > RUN NEXT
MAN / LUM / RUN [Y] Launch an automatic measurement cycle (all the filters).
Cimel Electronique Radiancemeter User’s manual
12
Keeps the data from filters already turned (if any)
and records the data defiling the filters until the last
filter.
nncc =
ABORT
* A strike on ABORT [G] stops the data collection
and returns to the MAN menu.
31 / 12 / 98
RTN SVK7
* A strike on [Y] stops the automatic
measurement and displays the measurement
where it stopped.
xxxx is always the value recorded.
nncc =
xxxx yyyy
ABO < > RUN NEXT
xxxx yyyy
autorecord
23 : 59
LUM
When the measurements are over, this screen appears:
I = xxx /nnT1 = tt.t
xxx: identification of the set of measurement
RTN ID
Store
(0 to 127).
nn: number of measurements including identification number.
tt.t: temperature value.
RTN: returns without saving the data.
ID: modifies the identification number.
The identification number is useful to identify
different field trip campaign.
ID = xxx
OK
-
+
Store: saves the data.
23 : 59 : 59
Storing
data
MAN / SVK71 [W]
...
Saves on a cartridge the data in memory.
If the cartridge is on, the data are saved after each measurement. Otherwise, at the end of a
measurement, a cartridge can be inserted and the recording of the data can be made with SVK7.
1
If the cartridge is being loaded, you will see
this additional screen that blinks
23 : 59 : 59
don’t touch cart
Return to the MAN menu.
31 / 12 / 98
RTN SVK7
LUM
Only available in the previous instrument version
Cimel Electronique Radiancemeter User’s manual
13
DATA READING
VIEW [R]
31 / 12 / 98
23 : 59
RTN BAT CART MEM
VIEW / BAT [W]
Consultation of different parameters.
Instantaneous value of the internal battery's
voltage. The voltage should always be greater
than 5.10 V.
Press [R] to go to the next parameter.
Press [Y] to go to the previous parameter.
23 : 59 : 59
Ba
5.20
Instantaneous value of the photometer's detectors'
temperature.
23 : 59 : 59
T
22.0
Humidity value. Meaningless on radiancemeter
CE 313.
23 : 59 : 59
HH 0
Instantaneous value of the LUM measurement.
Should indicate 0 when no filter is in the front.
23 : 59 : 59
SK xxx
A strike on [G] permits a return to the
main menu
31 / 12 / 98
23 : 59
PW MAN SCN VIEW
The measurements are stored in a buffer before being transferred to the cartridge.
When ten blocks are in memory, or at midnight, even if the measurements in the buffer
occupy less than ten blocks (a data block = 256 bytes), the data are transferred to the
cartridge.
VIEW / MEM [R]
Consultation of the measurements saved in the buffer.
* XX: scenario or sequence code:
XX Y 31 -> 12 23 : 59
INI when the buffer is empty.
NN/MM
cc
yyyy
* Y: defines the mode:
- M: measurement saved in memory in automatic mode.
- m: measurement saved in memory in manual mode.
Cimel Electronique Radiancemeter User’s manual
14
* NN/MM: measurement number / number total of measurements.
* cc: code of the filter on which the measurement has been done.
* yyyy: value of the measurement.
- [Y] permits the consultation of the previous measurement.
- [R] permits the consultation of the following measurement.
- [W] permits the scrolling of the data bloc.
- [G] permits to return to the main menu.
31 / 12 / 98
23 : 59
PW MAN SCN VIEW
VIEW / CART [Y]
Consultation of the measurements saved in the cartridge.
Reading of the cartridge.
If the cartridge is not connected, the screen
displays:
Then strike any key to get back to the
VIEW menu.
reading cart ...
cart : none
31 / 12 / 98
23 : 59
RTN BAT CART MEM
Otherwise:
- If the cartridge is empty the screen will display:
cart : fresh
- If the cartridge has some measurements in
memory, xxx represents the number of blank
pages left.
cart : xxx/127
Striking any key permits to consult the measurements saved on cartridge.
The same screen as for VIEW / MEM is displayed.
The only difference is that Y will be whether K, or k :
- K: measurement saved on cartridge effected in automatic mode.
- k: measurement saved on cartridge effected in manual mode.
VIEW / RTN [G]
Return to the main menu.
Cimel Electronique Radiancemeter User’s manual
31 / 12 / 98
23 : 59
PW MAN SCN VIEW
15
PC TRANSFER
The data recorded in the memory or on a cartridge can be transferred to a PC.
1. Plug the control unit to the PC with the PC-DCP cable. Plug the cable on the telephone
socket on the charger on the control unit to com1 or com2 on the back of the PC.
DOS Version
2. Simply run ASTP by typing:
astp /p=com1 or astp /p=com2
whether you use com1 or com2. The following menu appears:
Files
Read K7
Display Transfer Ascii output
Display hExa
Hours
Tools End
At the bottom of the table, the following menus appears:
Files :
Open / Save .K7 file
Read K7 :
Read the K7
Display :
Display events stored in the memory
Transfer :
Data acquisition from the instrument
Ascii output : Writing ASCII files
Display hExa: Display / Exit data in HEXA format
Hours:
Read hours
Tools :
Terminal, ....
End :
End of program (version)
From the menu, choose "Transfer". Choose the operating mode "PC" on the CE 313
and press GO [W] to start the data transfer. The data transfer takes about 4 to 5 min.
3. At the end, "Strike a key to continue". Go in "Files", select "Save file .K7" and enter a file
name for your .K7 file. This process generates a .K7 file, which contains the true
content of the buffer. It is in machine language.
4. At the end, "Strike a key to continue". Go in "Ascii output" and give a file name for your
ascii files. "Strike a key to continue". This process generates a .sta, .cll, .lum and .k7
files. A file, called ascii.ast, is always created and is a trash file: it is useless for the
user. At the end, exit the program with "End".
The ascii files have all the same header which is:
File
Filename.ext
Instrument Identification
Country : xx
District : xx
Cimel Electronique Radiancemeter User’s manual
Number : xx
16
Filename is the ascii file name you entered. ext is .sta, .lum or .k7.
The values xx are the ones entered by the user to identify the instrument.
The general format of the ascii files is a series of columns with the following data:
dd mm yy
hh mm ss
L1
L2
L3
L4
L5
BG
Tt.t
Idh
Idl
Ref
No
date the data were recorded in day/month/year
time the data were recorded in hour:minute:second
measurement with filter 1 in Digital Counts
(850 nm WB 91 nm with Si detector)
measurement with filter 2 in Digital Counts
(650 nm WB 53 nm with Si detector)
measurement with filter 3 in Digital Counts
(550 nm WB 85 nm with Si detector)
measurement with filter 4 in Digital Counts
(450 nm WB 40 nm with Si detector)
measurement with filter 5 in Digital Counts
(1650 nm WB 165 nm with Ge detector)
black measurement with Ge detector
temperature in Celsius
not used ( = 0)
Identification number (0 - 127)
= 0 for automatic measurement,
= 1 when not used,
= 2 for manual measurement
= 256*Ref + number of the measurement
However, each file contains different data.
.STA displays the date, time and type of status recorded. It shows as follows:
dd mm yy
hh mm ss
status
....
Status is a letter indicating the recorded status: r (reset), h (humidity), b (mechanics),...
.LUM display the series of data made with the Lum gains. It shows as follows:
dd mm yy
hh mm ss
Tt.t L1
L2
L3
L4
Cimel Electronique Radiancemeter User’s manual
L5
L6
BG
Idh
Idl
Ref
No
17
Windows Version
Use AstpWin software. You can download it from www.cimel.fr.
Install Cimel Update from the site. You’ll have free updates
To create ASCII files compatible Excel select File/Convert ASCII. Then select the .K7 file to convert and the
name of the ASCII file. For more information use the Stowing help.
This will create a text file with the extension .lum.
Example of ASCII file Lum5a.lum
06/02/2003,10:55:34,4432,1060,658,70,10782,0,21.9,0,2,1
06/02/2003,10:56:05,4359,1046,645,68,10811,0,22.0,0,2,2
06/02/2003,10:58:42,1919,457,276,28,4811,0,22.1,0,2,3
Note: Starting with the 5.3 version the calibration Cal is suppressed. Also the measurement of the filter 835nm
on the Ge detector is suppressed.
Cimel Electronique Radiancemeter User’s manual
18