1
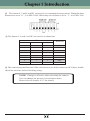
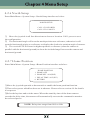
HD-SDI PTZ SPEED DOME
CAMERA
User Manual
• Please read this instruction carefully for correct use of the product
and preserve it for future reference purposes
Disclaimer:
► This manual is provided for user reference only, without legal restraint.
► The content of this manual is subject to change without prior notice, and the updates
will be added into the new version of this manual.
► This manual may contain several technically incorrect places or printing errors,
please feel free to let us know. We will readily improve or update the products or
procedures described in the manual.
Notes on Safety
■ Please use the specified power supply to connect(supports AC24V/2A or DC12V/3A ).
■ Do not attempt to disassemble the cameramodule ; in order to prevent electric shock,
do not remove camera module screws or covers .
■ There are no user-serviceable parts inside. Please contact Security Merchants as
soon as possible if there is any failure.
■ Avoid from incorrect operation, shock vibration, heavy pressing which can cause
damage to product.
■ Do not use corrosive detergent to clean main body of the camera. If necessary, please
use soft dry cloth to wipe dirt; for hard contamination, use neutral detergent. Any cleanser
for high grade furniture is applicable.
■ Avoid aiming the camera directly towards extremely bright objects such as sun, as this
may damage the image sensor.
■ Please follow the instructions to install the camera. Do not mount the camera upright
image will be reversed.
■ Do not operate it in high temperature, humidity and power supply are beyond the
limited stipulations.
■ Keep away from heat sources such as radiators, heat registers, stove, etc.
■ Do not expose the product to the direct airflow from an air conditioner. Otherwise, it
may cause moisture condensation inside the clear dome due to temperature difference
between internal and external of the dome camera.
CONTENTS
1 Introduction
1.1 Overview.........................................................................................................1
1.2 Characteristics.................................................................................................1
1.3 Dip Switch Setup.............................................................................................2
2 Installation Guide
2.1 Interfaces and parts..........................................................................................4
2.2 How to Install..................................................................................................5
2.3 Connection......................................................................................................8
3 Basic Operation Guide
3.1 Startup and Shutdown.....................................................................................10
3.2 Keyboard Setup..............................................................................................10
4 Menu Setup
4.1 System Information........................................................................................11
4.2 System Setup.................................................................................................11
4.2.1 Auto PanTilt Flip....................................................................................11
4.2.2 Language..............................................................................................11
4.2.3 RS422/485 Setup....................................................................................11
4.2.4 Time Setup...........................................................................................12
4.2.5 Title Setup............................................................................................12
4.2.6 North Setup..........................................................................................13
4.2.7 Home Position......................................................................................13
4.3 Camera Setup................................................................................................14
4.3.1 Camera Control....................................................................................14
4.3.2 Image Setup.........................................................................................15
4.3.3 Focus Near Limit...................................................................................15
4.3.4 Zoom Speed..................................................................................16
4.3.5
Digital
Zoom............................................................................................16
4.3.6
Video
Format....................................................................................16
4.4 Preset Setup..................................................................................................16
4.5 Dome Function..............................................................................................17
4.5.1 Patrol Setup..........................................................................................17
4.5.2 Task Setup............................................................................................18
4.5.3 Alarm Setup..........................................................................................19
4.5.4 Trace Setup...........................................................................................20
4.5.5 Day & Night..........................................................................................21
4.5.6 New Password and Change Password......................................................21
4.6 Display Setup...............................................................................................22
4.7 Load Default................................................................................................23
Appendix A Troubleshooting..................................................................24
Appendix B Specification.......................................................................25
Chapter 1 Introduction
1.1 Overview
This speed dome camera is front-end equipment used for video capture. Its digital flip
technology makes omni-directional and non-blind-spot monitoring into reality. Equipped
with an IP66-rated housing, embedded auto thermostatic device, 3-level lightning-proof
and surge-proof design, the unit is able to adapt to severe environment. Intelligent
3D positioning functions. What's more, OSD menu mode clearly displays the functions
of camera, and this speed dome camera is easy to operate.
1.2 Characteristics
► Internal Decoder
• Support RS422 or RS485 protocol
• Support PELCO_D, PELCO_P protocol
• Support address setup via hardware and software
► Internal Camera
• Auto/Manual focus;
• Auto/Manual white balance; auto brightness;
• Auto Day/Night (low illumination);•
► Internal PTZ
• The advanced stepping motor drive enables the dome to rotate smoothly, position
precisely, and respond quickly.
• Adopting synchronous belt drive ensures lower noise and stable image during operation.
• Support 360° pan and 90° tilt continuous rotation with non-blind-spot monitoring.
• Pan /tilt preset speed up to 400°/S.
• Pan/Tilt manual speed up to 0.5°~ 120°/S.
• High speed and accurate preset can be called.
• ZAP function is profitable to adjust the speed depending on the change of zoom length
which ensures to get clear image at any time.
► Others
• Built-in heater and fan enable to adapt to any severe environment.
• Adopt IP66 waterproof structure which meets international standard.
• Built-in lightning-proof components prevent the dome from damage by lightning
strike and surge.
1
Chapter 1 Introduction
1.3 Dip Switch Setup
Before installing the camera, the dome address, communication protocol and baud rate
should be confirmed. The default dome address, protocol and baud rate are 1, PELCO-D
and 2400 respectively.If you want to change, please power off the camera firstly and open
the camera cover to find the dip switches. The steps are followings:
① SW2 is used to set dome address. The buttons from 1 to 8 are equivalent to bit 0~bit 7
respectively; “ON” status of each button means 1, while “OFF” means 0.
n-1
The ID address adopts binary system coding: 2 . which “ n” stands for the button
number in SW2. For example: the button 1 is set to “ON” status , while others are set to
“OFF” status, the address is 2 1-1=1; the button 2 is set to “ON” status , while others are
set to “OFF” status, the address is 2 2-1=2, and so on. Please refer to the below chart.
Button
1
2
3
4
5
6
7
8
Dome ID
1
2
4
8
16
32
64
128
● For example: If you want to set dome address as “73", 73=1+8+64 means the button
1, 4, 7 should be set to “ON” status.
● For example: If you want to set dome address as “5", 5=1+4 means the button 1, 3
should be set to “ON” status.
NOTE: Please set the Dip switch correctly according to the binary system,
we do not list one by one, only above examples.
2
Chapter 1 Introduction
② The button 6, 7 and 8 in SW1 are used to set communication protocol. When the three
buttons are set to “0” , it is PELCO-D; When any one of them is set to “1”, it is PELCO-P.
③ The button 3, 4 and 5 in SW1 are used to set baud rate
SW1
Baud Rate
3
4
5
0
0
0
1200
1
0
0
2400
0
1
1
0
4800
1
0
9600
0
0
1
9600
1
0
1
9600
0
1
1
9600
1
1
1
9600
④ The camera may malfunction if the switches are not fully turned on/off. Please double
check the switches before finishing setup.
NOTE: Change is effective after rebooting the camera
You can change the protocol via software menu.
Please refer to chapter 4.2.3 for details.
3
Chapter 2 Installation
2.1 Interfaces and Parts
①
②
③
④
⑤
⑥
⑦
⑧
⑨
⑩
①
④
⑦
⑩
Power supply connection ② CVBS (PAL) Video Out ③ HD-SDI Video Out
⑥ Steel Wire (safety)
⑤ RS422/RS485
Alarm in/out
⑨ Buckle Wire (safety)
⑧ Outer Cover
Base Tray
Transparent cover
4
Chapter 2 Installation
2.2 How to install
WARNING
• Please make sure the wall is able to bear the
dome camera’s weight!
• Please make sure the dome camera is powered
off during installation!
• Please install the dome camera according to
the below steps!
Step 1
① Carefully take out the dome camera and ③ Loosen three screws and separate the
its attachments from the carton;
tube from the base tray.
② Loosen the fixing screws; separate the
body from the base tray. (Fig 1)
(Fig 1)
Pendant mount bracket example shown .
Step 2
① Fix the frame on the ceiling by
using bracket, nuts or other similar
parts.
② Fasten the tube (coupler) to the frame.
Tube
(Fig 3)
(Fig 4)
5
Chapter 2 Installation
③ Pull the cables through the frame.
④ Fix the base tray to the tube with fixing
screws; fill the gap between the frame and
tube with water-proof materials
(recommend teflon tape, not supplied) .
Water-proof material
Step 3
Set the communication protocol of dome.
(please refer to section 1.3 for steps)
Step 4
① Make the arrow of “START” point to the
bending part of the spring leaf.
Screws
cables
Base Tray
Bending part
Spring
Leaf
(Fig 5)
(Fig 6)
③ Reassemble the base tray with the body.
② Hook the steel wire on the frame.
a----move the camera upwards and make
the guide pins match with the guide holes.
b ----turn the camera clockwise to fasten.
Steel Wire
Base Tray
Outer Cover
Turn Clockwise
(Fig 7)
LOCK
OPEN
(Fig 8)
6
Chapter 2 Installation
c----Fasten three screws.
Step 5
① Loosen four screws under the bottom
cover.
three screws
four
screws
(Fig 9)
(Fig 10)
② Remove the protective material and lens cap as below picture (fig 11).
③ Reassemble the transparent cover with the body according to figure 10 and then fasten
the screws.
lens cap
camera pad
camera
protector
transparent cover
(Fig 11)
7
Chapter 2 Installation
2.3 Connection
Connection End(AC 24V)
Alarm in/out
RS422/RS458
Video Wire
CVBS
H D-SDI
Power Supply
Power Connection(DC 12V)
Power Connection(AC 24V)
Red + Input
AC Input
Earth
AC Input
Black - Input
12V DC
24V AC
Alarm Connection
1. Alarm Input
Alarm in/out
a) There are four independent alarm input ports (ALM-IN1~ALM-IN4) and one common
port (ALM-COM).
b) Alarm input: connect DC5V~DC12V voltage between the alarm input port ALM-Inx
(x=1~4) and the common port (ALM-COM).
8
Chapter 2 Installation
c) Disconnect the voltage between alarm input port(ALM-Inx(x=1~4) and common
port (ALM-COM) to cancel the alarm.
2. Alarm Output
a) Support 1CH alarm output including OUT1,OUT2 connections; support two input
modes namely NO, NC.
b) Alarm output: support only one passive switch for user to connect alarm devices;
the alarm output state will be auto on/off according to your setting.
3.
c) Please refer to below chart for the dome output state.
Output Mode
NO Output
NC Output
Whether to output
Connection between OUT 1 and OUT 2
No
Open Circuit
Yes
Short Circuit
No
Short Circuit
Yes
Open Circuit
Input connection
Examples
Output Mode
Output Connection
OUT 1
ALM-IN
NO
OUT 2
DC5V~DC12V
ALM-COM
OUT 1
NC
OUT 2
No Alarm Input
OUT 1
ALM-IN
NO
OUT 2
DC5V~DC12V
ALM-COM
OUT 1
NC
Alarm Input
OUT 2
2.4 RS422/485 Connection
RS422 / RS485 connection:
The difference between RS422 and RS485 is :
1. RS485 has two cable , and each cable can send & receive.
2. RS422 has four cable (2 for sending, 2 for receiving)
RS485 to RS422 connection:
PTZ RS422 R+ connect DVR (RS485+) A port (ta port of TruVue KB) PTZ
PTZ RS422 R- connect DVR (RS485-) B port (tb port of TruVue KB)
PTZ only receives signal from DVR or Keyboard when using RS485.
9
Chapter 3 Basic Operation Guide
3.1 Startup and Shutdown
Before running your camera, please make sure all the connections are done correctly.
Startup: After the power supply is connected, the camera will automatically started up
and then the system of the speed dome will perform a self-check. The PTZ cannot be
operated until it has successful completed self-check.
Shutdown: Disconnect the power cable.
3.2 Keyboard Setup
The address, communication protocol and baud rate of the keyboard should be consistent
with that of dome camera. Since different keyboards have different ways to set protocol,
please refer to relevant user manual of keyboard for details.
Panning and tilting: use the joystick of the controller
Controlling zoom: move the joystick clockwise (Tele) or counterclockwise (Wide)
OSD commands:
Joystick Up----move to the above menu
Joystick Down---- move to the below menu
Joystick Right----select the sub-menu/exit
Joystick Left----return to the previous menu and save the setting
NOTICE: Please refer to the user manual of keyboard for operation decription.
Call 95 preset to enter the main menu interface:
1
2
3
4
5
6
7
0
MAIN MENU
SYSTEM INFORMATION ↓
SYSTEM SETUP ↓
CAMERA SETUP ↓
PRESET SETUP ↓
DOME FUNCTION ↓
DISPLAY SETUP ↓
LOAD DEFAULT ↓
EXIT
NOTE:The arrow “↓”icon means there is submenu to operate.
10
Chapter 4 Menu Setup
4.1 System Information
You can check the version, camera, manufacture, temperature, date, dome ID, protocol,
baud rate, etc. of the speed dome camera in system information interface.
4.2 System Setup
Enter Main Menu→System Setup as below:
1
2
3
4
5
6
7
0
SYSTEM SETUP
AUTO PT FLIP: OFF
LANGUAGE SETUP↓
RS422 SETUP↓
DATE SETUP↓
TITLE SETUP↓
NORTH SETUP↓
HOME POSITION↓
RETURN
4.2.1 Auto PT Flip
This function is useful to monitor moving objects or people passing directly under the
camera.
① Enable “AUTO PT FLIP” and then exit menu.
② Keep on moving downwards so that the PTZ can follow the object from one side to
another side, ensuring an object or a person passing directly under the dome is always
monitored.
4.2.2 Language
Our product supports two languages: Chinese and English.
4.2.3 RS422 Setup
Enter Main Menu→System Setup→RS422 Setup as below:
11
Chapter 4 Menu Setup
1
2
3
4
0
RS422 SETUP
RS422/ID SEL: H/W
DOME ID:
001
PROTOCOL:
PELCO-D
BAUD RATE:
2400
RETURN
RS422 Selection: H/W (hardware) and F/W (software) are selectable. It is effective to
set the communications when selecting F/W. Otherwise the dome communication is in
accordance with dial switches.
Dome ID: Range from 001 to 255.
Protocol: Support PELCO-D and PELCO-P.
Baud Rate: The baud rate is selectable from 1200bps to 9600bps.
NOTICE: The change to communication setup will take effect after rebooting.
The communication of keyboard should be modified correspondingly.
4.2.4 Date Setup
Enter Main Menu→System Setup→Time Setup interface as below:
DATE SETUP
2012-06-01 12:00:00
CALL 1 TO STORED
CALL 2 TO CANCEL
① Move the joystick of the controller in all four directions to select the desired
parameters.
② Call 1 to save the setting.
4.2.5 Title Setup
The steps to set dome title are same with that of time setup. Please refer to section 4.2.4
for details.
12
Chapter 4 Menu Setup
4.2.6 North Setup
Enter Main Menu→System Setup→North Setup interface as below:
NORTH SETUP
CALL 1 TO STORED
CALL 2 TO CANCEL
① Move the joystick in all four directions to choose a location. Call 1 preset to save
the configuration.
② The horizontal angle will treat the north position as a reference; otherwise it will
treat the horizontal origin as a reference to display the clockwise rotation angle of camera.
③ The vertical PTZ will treat its highest point as a reference (when the camera is
parallel with the horizontal ground) to show the included angel between the camera and
horizontal ground.
4.2.7 Home Position
Enter Main Menu→System Setup→Home Position interface as below:
1
2
3
0
HOME POSITION
HOME: OFF
HOME SET : 001(PRE)
DELAY TIME : 007(SEC)
RETURN
①Move the joystick upwards or downwards to enable the home position function.
②Then select preset which has been set in advance. Please refer to section 4.4 for details
to set preset.
③Select delay time and exit the menu. When the stand-by time of the dome camera
exceeds the delay time, the camera will automatically execute the command to monitor
the selected preset.
NOTE: Delay time range from 005s to180s
13
Chapter 4 Menu Setup
4.3 Camera Setup
Entering Main Menu→Camera Setup brings the following screen.
1
2
3
4
5
6
0
CAMERA SETUP
CAMERA CONTROL↓
IMAGE SETUP↓
FOCUS NEAR LIMIT:
ZOOM SPEED:
DZOOM:
PAL/NTSC:
RETURN
1M
FAST
OFF
PAL
4.3.1 Camera Control
1
2
3
4
5
6
7
8
0
CAMERA CONTROL
BLC:
OFF
HLC:
OFF
HLC LEVEL:
20
3D-DNR:
Low
COLOR LEVEL:
06
SHARPNESS:
06
IMAGE FLIP:
OFF
GAMMA:
DEFAULT
RETURN
BLC: Improve the brightness of the foreground when back light is so stronger that the
foreground is dark.
HLC: Effectively control the phenomenon of large halation and vague images caused
by the high light sources from the camera lens. Meanwhile, this function can also
compensate the highlight area to get more clear images.
HLC Level: Select high light control level.
3D-DNR: Reduce the noise of the brightness and chroma of the image in low
illumination condition.
Color Level: Adjust the screen level.
14
Chapter 4 Menu Setup
Sharpness: Set the image definition.
Image Flip: Flip the image.
Gamma: Measurement the contrast of an image.
4.3.2 Image Setup
1
2
3
4
5
6
7
8
0
IMAGE SETUP
BRIGHTNESS:
AGC:
SHUTTER MODE:
SHUTTER:
WB MODE:
MWB RED GAIN:
MWB BLUE GAIN:
DAY NIGHT MODE:
RETURN
10
05
AUTO
01
ATW
12
15
AUTO
Brightness: Range from 00 (darkest) to 20 (brightest). Adjust the screen brightness.
AGC: Select the level of automatic gain.
Shutter Mode: You can choose auto or manual mode.
Shutter: The lower the value of shutter is, the brighter the image is.
WB Mode: The auto, manual and ATW mode are available. The whitebalance menu
adjusts the balance of the screen colors under different lighting conditions.
MWB Red Gain: operates when white balance is on the manual mode.
MWB Blue Gain: operates when white balance is on the manual mode.
Day Night Mode: Support day, night and auto mode.
--auto: operate in day most time. And switch to night mode if l light level is detected
during nighttime.
--day: operate in day mode at all time.
--night: operate in night mode at all time.
4.3.3 Focus Near Limit
Set the nearest distance of focus.
15
Chapter 4 Menu Setup
4.3.4 Zoom Speed
Adjust zoom speed.
4.3.5 DZoom
To turn on/ off the D-zoom mode. After enabling digital zoom mode, digital zoom will be increased
on the basis of optical zoom.
4.3.6 Video Format
.To choose video format: PAL/NTSC.
4.4 Preset Setup
This function is used to memorize the specific position of pan, tilt, zoom and focus,
giving much convenience for quick return to this position by calling preset.
① Return to the live and move the joystick to select a location. Then call 95 preset to
enter the main menu interface. Selecting the preset setting menu brings up a screen as
shown below:
1
2
3
4
5
0
PRESET SETUP
TITLE DISP:
OFF
CUR PRESET NO: 001
PRESET SETTING↓
DEL CUR PRESET…
DEL ALL PRESET↓
RETURN
② Select the current preset number.
③ Enter Preset Setting interface as below:
.
PRESET SETTING
PRESET NO: 001
TITLE:
---------CALL 1 TO STORED
CALL 2 TO CANCEL
16
Chapter 4 Menu Setup
④ Move the joystick in all four directions to select the numbers or letters for setting the
title. The title will display on the screen when passing though the preset if the title display
has been enabled
NOTE: There is another way to set preset: Number+Preset(please refer to the user
manual of the keyboard you are using. This shortcut does not support title setup.
4.5 Dome Function
Dome function includes seven sub-menus: Patrol Setup, Task Setup, Alarm Setup, Trace
Setup, Day Night, New Password and Change Password.
4.5.1 Patrol Setup
Enter Main Menu→Dome Function→Patrol Setup as below:
1
2
3
4
0
PATROL SETUP
PATROL NO:
1
EDIT CUR PATROL↓
RUN CUR PATROL…
DEL CUR PATROL↓
RETURN
In this interface, by programing presets in patrol list in advance, the system will keep
calling those presets at the set time in sequence when executing patrol command so that
non-stop monitoring between multiple important positions can be achieved.
Steps are following:
① Enter the “Edit Current Patrol” interface as below. This camera supports 8 patrols
with 16 presets each set.
② Move the joystick upward or downward to control the cursor; move the joystick right
or left to change the parameter. The preset ranges from 001~255 and the dwell time ranges
from 05~240s.
③ When setting the patrol, pressing “IRIS OPEN” will increase the value by 10. pressing
“IRIS CLOSE” will decrease the value by 10. Call 1 to save the setting.
17
Chapter 4 Menu Setup
FORMAT: PRE NO. /TIME (SEC)
01: 001/007 02: 002 /005
03: 000/005 04: 000/005
05: 000/005 06: 000/005
07: 000/005 08: 000/005
09: 000/005 10: 000/005
11: 000/005 12: 000/005
13: 000/005 14: 000/005
15: 015/005 16: 000/005
CALL 1 TO STORED
CALL 2 TO CANCEL
④ In the patrol setup interface, select “Run The Current Patrol” item to execute the
command. The camera will automatically keep running according to the patrol you set
until new command is received. The corresonding operating information will display on
the screen when the camera is running.
4.5.2 Task Setup
Enter Main Menu→Dome Function→Task Setup as below:
1
2
3
0
TASK SETUP
TASK: OFF
TASK SETTING↓
DEL CUR PATROL↓
RETURN
By dividing 24 hours into several periods and appointing different commands for each
period, the camera system will automatically execute the commands according to the set
time if there is no operation.
① Enable the task function;
② Enter the task setting interface as below. Move the joystick in all four directions to
change the parameters.
Time Format: Start Time--End Time. The tasks will be automatically arranged in order
depending on the start time so that each task will be executed one by one.
Task Type: RSC, ASC, PRE, PAT, TRA.
18
Chapter 4 Menu Setup
T ASK SETTING
1 08:00 – 11:59 : PRE : 99
2 12:00 – 13:59 : PAT : 01
3 00:00 – 00:00 : NON: 01
4 00:00 – 00:00 : NON: 01
5 00:00 – 00:00 : NON: 01
6 00:00 – 00:00 : NON: 01
7 00:00 – 00:00 : NON: 01
8 00:00 – 00:00 : NON: 01
CALL 1 TO STORED
CALL 2 TO CANCEL
.
NOTE: The home position function will be disabled if enabling task setting.
4.5.3 Alarm Setup
Enter main menu→dome function→alarm setup as below:
1
2
3
4
5
6
7
0
ALARM SETUP
IN1 ALARM:
OFF
IN1 CALL:
001
IN2 ALARM:
OFF
IN2 CALL:
002
IN3 ALARM:
OFF
IN3 CALL:
003
NEXT SETUP↓
RETURN
① Enable “IN1 alarm”. Then the first channel is allowed to input alarm, otherwise it is
prohibited to input alarm.
② Select preset under “IN1 Call”. When the first channel alarm is triggered, the camera
will automatically monitor the selected preset . The steps to set IN2 Alarm , IN3 Alarm
and IN4 Alarm are same with that of IN1 Alarm.
③ Enter the next screen setup. Select alam output type(OFF/NC/NO).
19
Chapter 4 Menu Setup
1
2
3
4
0
ALARM SETUP
IN4 ALARM:
OFF
IN4 CALL:
004
ALARM OUTPUT: NC
OUT CONDITION: ANY
RETURN
④ Select “Out Condition”. When the alarm output channel raises the alarm, the alarm
information of the corresponding channel will display on the screen.
⑤ Alarm priority: the channel No. is higher, the priority level is lower. For example:
IN1 Alarm is higher than IN2 Alarm, so on and so forth. If high priority channel and low
priority channel trigger alarm simultaneously, the preset of the latter will not be called,
but if you have set the alarm output for the latter, its alarm information will be displayed.
For example: when IN1 alarm and IN2 alarm channel which has enabled “Out Condition”
almost trigger alarm at the same time, the alarm information of IN2 alarm channel is
allowed to output but the preset of it will not be called.
NOTICE: if the dome is on the menu state when alarm is triggering ,
any command is negative.
4.5.4 Trace Setup
Enter Main Menu→Dome Function→Track Setup interface as below:
1
2
3
4
TRACE SETUP
TRACE NO: 1
TRACE SETTING↓
TRACE RUN…
DELETE TRACE↓
0 RETURN
This function is used to memorize the operation to PTZ, zoom, focus so that repeating
operation process can be realized by running trace.
① Choose the current trace number;
② Enter the trace setting. Press “IRIS-“ and move the joystick in all four directions to
control the dome camera. Then call No. 1 preset to save the setting.
20
Chapter 4 Menu Setup
Notice: Each trace can memorize up to 180s. If the time exceeds 180s, the system
will automatically save the operation data and return to the previous menu. In
addition, up to 360 commands can be memorized for each trace. If exceeding
360 commands, the system will automatically save the first 360 commands and
then exit the current interface. The recording time is related to the operating
frequency. The more frequent the operation is , the shorter the memory time is .
③ Select “Trace Run…” item to perform the command.
4.5.5 Day & Night
Enter the Main Menu→Dome Function→Day Night interface as below:
DAY NIGHT
1 DAY NIGHT: OFF
2 BW ON TIME:
19:00
3 COLOR ON TIME:
07:00
CALL 1 TO STORED
CALL 2 TO CANCEL
① Move cursor by controlling joystick left and right; change the parameter by moving
the joystick upward and downward.
② Enable “Day& Night” and respectively set the B/W time and color time.
③ Call 1 preset to save the setting. Then the camera will automatically switch from
B/W to color at the set time.
Notice: Day/Night mode in image setup( section 4.2.3) is disabled if enabling this
function.
4.5.6 New Password and Change Password
New Password:
21
Chapter 4 Menu Setup
NEW PASSWORD
ENTER PASSWORD:
-----CONFIRM PASSWORD:
------CALL 1 TO STORED
CALL 2 TO CANCEL
Set password by preset: Preset+N+Enter(please refer to the instruction of the keyboard
for details)
Numbers from 1 to 9 are available. The password should be 6 characters.
Empty password is invalid when creating new password.
Password need to be input when you log in next time.
Change Password
CHANGE PASSWORD
ENTER PASSWORD:
******
ENTER NEW PASSWORD:
-----CONFIRM PASSWORD:
-----CALL 1 TO STORED
CALL 2 TO CANCEL
Input the current password and then input the new password twice (entering empty new
password means to delete the current password).
4.6 Display Setup
You can enable title display, time display, temperature display, camera OSD display,
orientation display or system display if you need.
22
Chapter 4 Menu Setup
4.7 Load Default
Master Reset: Restore the camera state and active menu to factory default but do not
clear those parameters such as dome title, dome ID, protocol, baud rate, preset, patrol
and so on.
Master Clear: Restore the camera to factory default.
System Reboot: Reboot the camera.
Firmware Update: It is used for updating the dome camera system by RS422 BUS.
Firmware update will delete the dome system software, which will result in failure to work .
Please be cautious! If you want to update the camera’s system, please make contact with
us to obtain a new software package firstly!
PS: Preset Description
Call NO.90 Preset
Run trace 1
Call NO.91 Preset
Run patrol 1
Call NO.92 Preset
Run patrol 2
Call NO.93 Preset
Run patrol 3
Call NO.94 Preset
Run patrol 4
Call NO.95 Preset
OSD menu
Call NO.97 Preset
Enable random scan
Call NO.99 Preset
Enable P-P SCAN
Set NO. 91 preset
Set random scan, TASK auto call the
beginning point
Set NO. 92 preset
Set left border of P-P SCAN
Set NO. 93 preset
Set right border of P-P SCAN
Call Preset
Set Preset
23
Appendix A Troubleshooting
Problem
No image and no action
when power is input
Cause and Solution
Check if the power cable is normal or misconnected
Check if the video cable is properly connected
The image is not stable
Check if the power supply is enough
The image is vague
The image has a lot of
noise
Normal Self-check
but no image
Check if the dome cover or the lens is stained with dirt
Check if there is strong interference source
surrounding the dome
Remove the protective cover of the camera lens
Check if the video cable is properly connected
Check if the RS422 bus is properly connected
Normal Self-check
but out of control
Abnormal self-check
Not stable control
Check if the Dome ID, communication protocol setup
is right
Check if the protective foam is removed
Check if the power meets the requirement.
Check if the alarm device is working
The alarm output or
preset is not working
Check if the alarm in/out cable is connected
Check if alarm input is enabled
24
Appendix B Specification
Camera
System
PTZ
Image Sensor
1/3 Inch Progressive CMOS
Effective Pixel
Horizontal Resolution
1920(H) x 1080 (V) 2 Mega Pixel
Min. Illumination
0.5 Lux(Day), 0.1Lux(Night), 0.05Lux (DSS ON)
Lens
SNR
20 x Zoom, f = 4.7-94mm, F1.6 ~ F3.5
>50dB
Focus Mode
Auto/Manual
Day/Night
Auto/Manual/Timing
BW
Alarm Input
Auto, indoor, outdoor, ATW, manual
Alarm Output
1CH
Auto Flip
YES
Preset
255
Patrol
8
Trace
4
Scan
Area
2
8
Home Position
Yes
Task
Yes
Pan Range
360°endless rotation
Pan Speed
Preset: 400°/s,Manual Control Speed: 0.5~120°/s
Tilt Range
0~90°(auto-rotation)
Tilt Speed
Preset: 400°/s,Manual Control Speed: 0.5~90°/s
OSD
Input Voltage
English
AC24V/2A , DC12V/3A(option)
Video Output
Control Method
General
1000 TVL
4CH
HD-SDI: 1.0Vp-p, 75Ω, PAL/NTSC
CVBS: 1.0Vp-p, 75Ω, PAL/NTSC
RS422/RS485
Power Consumption
9W / Max 24W(heater on)
Working Environment
- 20°C~60 °C / Less than 95%(RH)
Protection Level
Weight
IP66
3.5KG
25
450013000067 A0