1
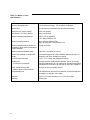
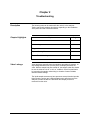
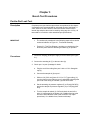
User’s Manual Edition 1/2007
OPTICHROM TM
Model 11 Valve
pro
ces
s
p
GAS CHROMATOGRAPHY
Optichrom®
Model 11 Valve
For Stock Numbers
2000627-002
2000627-003
2000627-004
2000627-005
2000627-006
2000627-007
2000627-008
2000627-009
2000627-010
2000627-011
2000627-012
2000627-013
2000627-014
External Loop, Stainless Steel
External Loop, Monel
External Loop, Hastelloy
Internal Loop (2 uL), Stainless Steel
Internal Loop (2 uL), Monel
Internal Loop (2 uL), Hastelloy
Internal Loop (5 uL), Stainless Steel
Internal Loop (5 uL), Monel
Internal Loop (5 uL), Hastelloy
Internal Loop, Stainless Steel, Flat Top Plungers
External Loop, Monel, Flat Top Plungers
External Loop, Hastelloy C, Flat Top Plungers
Internal Loop (2 uL), Stainless Steel, Flat Top Plungers
Revised Printing – January 2007
Repair Manual
M06115
Copyright Notice
© 1999-2007 by Siemens
All rights reserved.
This publication is for information only. The contents are subject to change without notice and should not
be construed as a commitment, representation, warranty, or guarantee of any method, product, or device
by Siemens.
Reproduction or translation of any part of this publication beyond that permitted by Sections 107 and 109
of the 1976 United States Copyright Act without the written consent of the copyright owner is unlawful.
Inquiries regarding this manual should be addressed to:
Siemens Energy & Automation, Inc.
7101 Hollister Road
Houston, TX 77040
U.S.A.
Safety Practices and Precautions
Safety First
This product has been designed and tested in accordance with IEC
Publication 1010-1, Safety Requirements for Electronic Measuring
Apparatus, and has been supplied in a safe condition. This manual
contains information and warnings which have to be followed by the user
to ensure safe operation and to retain the product in a safe condition.
Terms in This Manual
WARNING statements identify conditions or practices that could result in
personal injury or loss of life.
CAUTION statements identify conditions or practices that could result in
damage to the equipment or other property.
Terms as Marked on
Equipment
DANGER indicates a personal injury hazard immediately accessible as
one reads the markings.
CAUTION indicates a personal injury hazard not immediately accessible
as one reads the markings, or a hazard to property, including the
equipment itself.
Symbols in This
Manual
This system indicates where applicable cautionary or
other information is to be found.
Symbols Marked on
Equipment
DANGER - High voltage
Protective ground (earth) terminal
ATTENTION - Refer to Manual
Safety Practices and Precautions, Continued
Correct Operating
Voltage
Before switching on the power, check that the operating voltage listed on
the equipment agrees with the available line voltage. Ensure that the
power supply switch is to the correct input voltage.
Danger Arising From
Loss of Ground
Any interruption of the grounding conductor inside or outside the
equipment or loose connection of the grounding conductor can result in a
dangerous unit. Intentional interruption of the grounding conductor is not
permitted.
Safe Equipment
If it is determined that the equipment cannot be operated safely, it should
be taken out of operation and secured against unintentional usage.
Use the Proper Fuse
To avoid fire hazard, use only a fuse of the correct type, voltage rating
and current rating as specified in the parts list for your product. Use of
repaired fuses or short circuiting of the fuse switch is not permitted.
Safety Guidelines
DO NOT open the equipment to perform any adjustment,
measurements, maintenance, parts replacement or repairs until all
power supplies have been disconnected.
Only a properly trained technician should work on any equipment with
power still applied.
When opening covers or removing parts, exercise extreme care "live
parts or connections can be exposed".
Table of Contents
Section 1
Section 2
Section 3
Section 4
Section 5
Introduction
1
Overview
Capabilities and Applications
Functional Description of the Model 11 Valve
Filtering
Purging Below the Seal Disc
1
1
2
2
2
Troubleshooting
5
Description
Valve Leakage
Plugged Valve
Ruptured Sealing Disc
Slow or Erratic Switching
5
5
6
6
6
Bench Test Procedures
7
Port-to-Port Leak Test
7
Repair
15
Description
Cleaning of Flow Passages
Disassembly and Inspection
Cleaning
Reassembly
15
15
16
16
18
Drawings and Parts List
21
i/ii
Chapter 1
Introduction
Overview
The Model 11 Valve Maintenance Manual has preventative
maintenance, repair and test information for trained plant personnel who
are responsible for in-plant maintenance of the Model 11 Chromatograph
Valve.
In This Chapter
This Chapter covers the following topics:
Topic
Capabilities and
Applications
Page
Capabilities and Applications
1
Functional Description
2
Filtering
2
Purging Below the Seal Disc
2
The Model 11 valve can be applied in process chromatographs as a
liquid or vapor sample valve, column switching valve, or a column
backflush valve. It provides the uniform sample volume, high reliability
(500,000 cycle life on clean gas), low internal volume, and high speed
(switching time in milliseconds) required by process chromatography.
Plus it provides the added benefits of minimum wear (critical parts move
only thousandths of an inch for switching), dependable reproducibility
and simplified construction for easy maintenance. See Table 1-1 for
detailed specifications.
The Model 11 valve body and cap are constructed so cleaning or
replacement of sealing and cushion discs can be done without removing
the valve from the chromatograph oven. Removal of three bolts allows
access to the disc with no special tools required (see Chapter 4, Repair
for detailed procedures). The specially constructed manifold eliminates
leakage of air used for valve actuation. This feature is especially
beneficial when bottled helium or nitrogen is used in place of instrument
air.
1
Functional
Description of the
Model 11 Valve
The Model 11 valve is a 6-port, two-position, air-actuated valve. The six
ports are arranged in a circular configuration as show in Figure 1-1.
Between each two ports is a plunger that opens or closes the passage
between these two ports. A Teflon™ disc seals, prevents process fluids
from contacting other components of the valve. This arrangement is
shown in Figure 1-2. Six plungers operate in two sets of three. Each set
of plungers is controlled by a spring-loaded, air-actuated piston so that
one set closes three passages between ports as the other set opens
three passages between ports. Passages between ports 1 and 6, ports 5
and 4, and ports 3 and 2 are normally closed. The other three passages
between ports 1 and 2, ports 3 and 4, and ports 5 and 6 are normally
open. The two operating positions of the valve are shown in Figures 12A and 1-2C.
The two actuating pistons are spring loaded in a manner that assures
that all six passages are momentarily closed during the switching
operation (both energized and de-energized). This feature prevents
unwanted mixing of streams during the switching cycle. The plungers
and disc move only a few thousandths of an inch to permit flow through
the passages.
For external loop sample valve applications, ports 2 and 5 are connected
externally by means of tubing as shown in Figure 1-1. The standard
sample volume is 170 microliters.
For internal loop sample valve applications, ports 2 and 5 are connected
internally by means of a machined passage in the valve cap as shown in
Figure 1-3. The standard sample volumes are: 2 and 5 microliters.
Filtering
The Model 11 valve must be protected against dirt, filings, column
packing material, or anything else that might affect the Teflon-to-metal
seal. Filter elements should be 5 micrometer or finer.
Purging Below the
Seal Disc
Purging below the seal disc area may be necessary in a trap valve, when
permeation through the seal disc causes air peaks or in a sample valve,
when corrosive gases attack the seal disc cushion and/or other valve
parts. (In the latter case the expected mean time between failure can be
increased significantly.)
Purging is normally accomplished with the carrier gas. 1/16 tube fittings
are provided as inlet and outlet connections for the purge gas. Typically
a tee can be placed in the carrier inlet line and a needle valve can be
used to regulate the flow at 5 cc/min.
2
EXTERNAL SAMPLE LOOP
Figure 1-1
SECTIONAL VIEW
Figure 1-2
INTERNAL SAMPLE LOOP
Figure 1-3
3
Table 1-1: Model 11 Valve
Specifications
4
Internal loop sample size:
2 and 5 microliters standard. Other sizes on special request.
External loop sample size:
15 microliters and larger. 170 microliters is standard.
Sample filter:
5 micrometer recommended (not furnished with valve).
Cap screw (33) Torque Setting:
35±1 inch pounds
Base Screw (12) Torque Setting:
6.5±1 inch pounds
Maximum operating temperature:
250°F (122°C) standard
15°F (66°C) 2000627-014
Maximum sample pressure:
Up to 300 psig (2068.4 kPa).
Up to 60 psig (413.7 kPa) 2000627-014
Minimum sample pressure before it is
necessary to apply vacuum assistance
to lower chamber:
5 psig (34.5 kPa).
Maximum leak rate between ports:
Less than 1 microliter per minute.
Construction material in contact with
sample:
316 stainless steel and Teflon, standard. Monel and Teflon, or
Hastelloy and Teflon available on request.
Connection size and type:
1/16 in. O. D. tubing, with Swagelok® fittings.
Actuating air:
(Lower port on manifold)
50 psig (345 kPa) instrument air standard. Helium or nitrogen
may be substituted for air. 20 milliliters (at standard temperature
and pressure) of actuating air required for each valve operation.
Lower Seal Disc Purge Gas:
(Upper 2 ports on the manifold)
5 cc/min of carrier (normally helium).
Total switching time:
150 milliseconds (total time from initiation of command signal to
completion of change in valve state).
Body size:
2.25 in. (57.2 mm) diameter by 3 in. (76.2 mm) height.
Mounting:
Clamp type.
Chapter 2
Troubleshooting
Description
The following tests can be made while the valve is in the analyzer.
Testing may require analyzer shut down, depending on the installation.
Valve ports will need to be disconnected.
Chapter Highlights
Valve Leakage
Topic
Page
Description
5
Valve Leakage
5
Plugged Valve
6
Ruptured Sealing Disc
6
Slow or Erratic Switching
6
Vapor analyzers generally have the sample at atmospheric pressure, so
any leakage would be from a carrier port to a sample port within the
valve. With the sample inlet flow turned off, the sample outlet flow should
be zero in either the “air off” or “air on” condition. Check for small leaks
by immersing the sample outlet tubing in a beaker of water. Bubbles
indicate internal leakage.
The liquid sample streams may have pressures several hundred pounds
higher than the carrier gas. Leaking between ports will show up on the
analyzer recorder as base-line shift when the sample pressure is
removed from the valve.
5
Plugged Valve
Plungers in the valve are pressed upward by air or spring action, but
when released depend on their own weight and sample pressure to drop
them to the “open” position. Very small sample pressures--1 to 10 oz.
(0.4 to 4.3 kPa)--may be insufficient to open the flow path if the sealing
disc has been held against the cap for a long time (such as a valve in
storage). Check flow across alternate flow paths--air on and air off. It
may be necessary to temporarily increase the sample pressure to get the
flow started and then reduce it to normal after a few cycles.
Ruptured Sealing
Disc
To test for a ruptured sealing disc apply air to valve ports, one at a time,
while sealing off all others. Place a small amount of soap solution such
as Leak Tec™ over the upper control port’s bleed tube (see callout 24 on
Figures 5-1 and 5-2). Any escaping air at this point indicates a ruptured
disc. If this occurs, proceed with a disc replacement.
If the disc does not appear to be ruptured, remove the valve from service
and proceed with a bench test as described in Section 3, Bench Test
Procedures.
Slow or Erratic
Switching
Excessive friction on the actuating pistons of the valve can be caused by
lack of lubricant, or dirt or contamination on the O-rings. As a result, the
valve may switch erratically, switch slowly or not switch at all. These
conditions can cause a leak port to port (across the sealing disc), double
sampling, or complete closing off of flow between two or more ports.
To correct poor switching conditions:
1.
2.
3.
4.
5.
6.
6
Disassemble the valve body.
Discard the old O-rings.
Thoroughly clean all the components.
Lubricate components.
Install new O-rings.
Reassemble the valve.
Chapter 3
Bench Test Procedures
Port-to-Port Leak Test
Description
IMPORTANT
Procedures
Complete port-to-port leak test procedures are explained in this chapter.
A complete test is recommended for a thorough check of the Model 11
valve; however, a short version of the test for either external loop or
internal loop sample valves can be made by doing step 9 or 10 only. All
tests shall be run with the valve assembled per specifications.
•
The numbers in parenthesis in the following steps refer to similar
numbered callouts on Figure 3-1, Test Stand Assembly.
•
Figures 3-2, Test Flow Diagram, can help you visualize the flow
at various ports when the actuating air switch (6) is operated.
1. Connect a 100 psig (69 kPa) air supply to the test stand (see Figure
3-1).
2. Connect the actuating air (7) to the test valve (8).
3. Check port 1 to port 6 passage for leaks.
a. Plug the end of the tubing from port 2 with a 1/16 in. Swagelok
cap (3).
b. Connect the sample air (9) to port 1.
c.
Slide an 8 in. [20.3 mm] piece of 1/16 in. I.D. Tygon tubing (11)
over the ferrule on the tubing to port 6, and slightly submerge the
open end of the tubing in a beaker (10) half full of water.
d. Set the actuating air pressure regulator (5) to 50 psig [345 kPa],
and set the sample air pressure regulator (12) to 100 psig [690
kPa].
e. Turn the sample air switch (2) “ON” and check the end of the
tube (11) submerged in the beaker (10). Bubbles forming at the
end of the tube indicates a leak (refer to section 4 for repair
procedures). If no bubble forms, continue with step f.
7
Port-to Port Leak Test, Continued
f.
Turn the actuating air switch (6) “ON” and “OFF” several times
while observing the end of the bubble tube (11) submerged in
the beaker (10). In the “ON” position, bubbles should flow from
the tube. In the “OFF” position, no bubbles should flow. Allow at
least one minute for a bubble to form at the end of the tube. A
bubble indicates a leak (refer to Section 4 for repair procedures).
If no bubble forms, continue with step 4.
4. Check port 1 to port 2 passage for leaks:
a. Remove the bubble tube (11) from tubing to port 6.
b. Remove the Swagelok cap (3) from the tubing to port 2, and
install it on the tubing to port 6.
c.
Slide the bubble tube (11) over the ferrule on the tubing to port 2,
and slightly submerge the open end of the tube in a beaker (10)
half full of water.
d. Turn the actuating air switch (6) “ON” and “OFF” several times
while observing the end of the bubble tube (11) submerged in
the beaker (10). In the “OFF” position, bubbles should flow from
the tube. In the “ON” position, no bubbles should flow. Allow at
least one minute for a bubble to form at the end of the tube. A
bubble indicates a leak (refer to Section 4 for repair procedure).
If no bubble forms, continue with step 5.
5. Check port 3 to port 2 passage for leaks.
a. Turn the sample air switch (2) “OFF”.
b. Remove the sample air (9) from port 1, and connect it to port 3.
c.
Remove the Swagelok cap (3) from the tubing to port 6, and
install it on the tubing to port 4.
d. Leave the bubble tube (11) on the tubing to port 2, and slightly
submerge the open end of the tube in a beaker (10) half full of
water.
e. Turn the sample air switch (2) “ON” and check the end of the
bubble tube (11) submerged in the beaker (10). Bubbles from
the end of the tube indicates a leak (refer to Section 4 for repair
procedures). If no bubble forms, continue with step f.
8
Port-to-Port Leak Test, Continued
f.
Turn the actuating air switch (6) “ON” and “OFF” several times
while observing the end of the bubble tube (11) submerged in
the beaker (10). In the “ON” position, bubbles should flow from
the tube. In the “OFF” position, no bubbles should flow. Allow at
least one minute for a bubble to form at the end of the tube. A
bubble indicates a leak (refer to Section 4 for repair procedures).
If no bubble forms, continue with step 6.
6. Check port 3 to port 4 passage for leaks.
a. Remove the bubble tube (11) from tubing to port 2.
b. Remove the Swagelok cap (3) from the tubing to port 4, and
install it on the tubing to port 2.
c.
Slide the bubble tube (11) over the ferrule on the tubing to port 4,
and slightly submerge the open end of the tube in a beaker (10)
half full of water.
d. Turn the actuating air switch (6) “ON” and “OFF” several times
while observing the end of the bubble tube (11) submerged in
the beaker (10). In the “OFF” position, bubbles should flow from
the tube. In the “ON” position, no bubbles should flow. Allow at
least one minute for a bubble to form at the end of the tube. A
bubble indicates a leak (refer to Section 4 for repair procedure).
If no bubble forms, continue with step 7.
7. Check port 5 to port 4 passage for leaks.
a. Turn the sample air switch (2) “OFF”.
b. Remove the sample air (9) from port 3, and connect it to port 5.
c.
Remove the Swagelok cap (3) from the tubing to port 2, and
install it on the tubing to port 6.
d. Leave the bubble tube (11) on the tubing to port 4, and slightly
submerge the open end of the tube in a beaker (10) half full of
water.
e. Turn the sample air switch (2) “ON” and check the end of the
bubble tube (11) submerged in the beaker (10). Bubbles from
the end of the tube indicate a leak (refer to Section 4 for repair
procedures). If no bubble forms, continue with step f.
9
Port-to-Port Leak Test, Continued
f.
Turn the actuating air switch (6) “ON” and “OFF” several times
while observing the end of the bubble tube (11) submerged in
the beaker (10). In the “ON” position, bubbles should flow from
the tube. In the “OFF” position, no bubbles should flow. Allow at
least one minute for a bubble to form at the end of the tube. A
bubble indicates a leak (refer to Section 4 for repair procedures).
If no bubble forms, continue with step 8.
8. Check port 5 to port 6 passage for leaks.
a. Remove the bubble tube (11) from the tubing to port 4.
b. Remove the Swagelok cap (3) from the tubing to port 6, and
install it on the tubing to port 4.
c.
Slide the bubble tube (11) over the ferrule on the tubing to port 6,
and slightly submerge the open end of the tube in a beaker (10)
half full of water.
d. Turn the actuating air switch (6) “ON” and “OFF” several times
while observing the end of the bubble tube (11) submerged in
the beaker (10). In the “OFF” position, bubbles should flow from
the tube. In the “ON” position, no bubbles should flow. Allow at
least one minute for a bubble to form at the end of the tube. A
bubble indicates a leak (refer to Section 4 for repair procedure).
e. Turn the sample air switch (2) “OFF”.
f.
Remove the sample air (9) from port 5.
g. Remove the bubble tube (11) from the tubing to port 6.
h. Remove the Swagelok cap (3) from the tubing to port 4.
9. For valves with external loop caps only [stock no’s 2000627-002,
2000627-003, and 2000627-004], a shorter version of the test given
in steps 3 through 8 can be performed by doing the following:
a. Hook up the test stand and valve as described in steps 1 and 2.
b. Connect the tubing from port 2 to the tubing from port 5 using a
1.16 in. Swagelok union.
c.
Plug the ends of the tubing from ports 6 and 3 with 1/16 in.
Swagelok caps (3).
d. Connect the sample air (9) to port 1.
10
Port-to-Port Leak Test, Continued
e. Slide the bubble tube (11) over the ferrule on the tubing to port 4,
and slightly submerge the open end of the tube in a beaker (10)
half full of water.
f.
Set the actuating air pressure regulator (5) to 50 psig [345 kPa],
and set the sample air pressure regulator (12) to 100 psig [690
kPa].
g. Turn the sample air switch (2) “ON” and check the end of the
tube (11) submerged in the beaker (10). Bubbles from the end of
the tube indicate a leak (refer to Section 4 for repair procedures).
If no bubble forms, continue with step h.
h. Turn the actuating air switch (6) “ON” while observing the end of
the bubble tube (11) submerged in the beaker (10). When the
loop between ports 2 and 5 is switched from the pressure side to
the outlet side, a slug of air should escape from the bubble tube,
then shut off completely. When the actuating air switch is turned
“OFF”, switching the loop back to the pressure side, no air
should escape. Bubbles forming at the end of the submerged
tube indicate a leak (refer to Section 4 for repair procedures).
10. For valves with internal loop caps only [stock no’s 2000627-005,
2000627-006, 2000627-007, 2000627-008, 2000627-009, 2000627010, and 2000627-014], a shorter version of the test given in steps 3
through 8 can be performed by doing the following:
a. Hook up the test stand and valve as described in steps 1 and 2.
b. Plug the ends of the tubing from ports 6 and 3 with 1/16 in.
Swagelok caps (3).
c.
Connect the sample air (9) to port 1.
d. Slide the bubble tube (11) over the ferrule on the tubing to port 4,
and slightly submerge the open end of the tube in a beaker (10)
half full of water.
e. Set the actuating air pressure regulator (5) to 50 psig [345 kPa],
and set the sample air pressure regulator (12) to 100 psig [690
kPa].
f.
Turn the sample air switch (2) “ON” and check the end of the
tube (11) submerged in the beaker (10). Bubbles from the end of
the tube indicate a leak (refer to Section 4 for repair procedures).
If no bubble forms, continue with step g.
11
Port-to-Port Leak Tests, Continued
g. Turn the actuating air switch (6) “ON” while observing the end of
the bubble tube (11) submerged in the beaker (10). When the
internal loop between ports 2 and 5 is switched from the
pressure side to the outlet side, a slug of air should escape from
the bubble tube, then shut off completely. When the actuating air
switch is turned “OFF”, switching the loop back to the pressure
side, no air should escape. Bubbles forming at the end of the
submerged tube indicate a leak (refer to Section 4 for repair
procedures).
12
Port-to-Port Leak Test, Continued
ITEM NO.
1
2
3
4
5
6
7
8
9
10
11
12
13
SAMPLE AIR PRESSURE GAUGE 0-100 psig (0-695 kPa)
SAMPLE AIR SWITCH
1/16 in. SWAGELOK CAP
ACTUATING AIR PRESSURE GAUGE 0-60 psig (-414
kPa)
ACTUATING AIR PRESSURE REGULATOR
ACTUATING AIR SWITCH
ACTUATING AIR CONNECTION
MODEL 11 SAMPLE VALVE
SAMPLE AIR CONNECTION
BEAKER OF WATER
BUBBLE TUBE (TYGON)
SAMPLE AIR PRESSURE REGULATOR
ADAPTER TUBE
Figure 3-1: Model 11 Valve Test Stand Assembly (Stock No. V05000)
13
Port-to-Port Leak Test, Continued
Figure 3-2: Model 11 Valve Test Flow Diagram
14
Chapter 4
Repair
Description
Under normal operating conditions the Model 11 valve will perform a
minimum of 500,000 cycles without failure. However, contamination or
abuse will drastically shorten the operating life of the valve. Process
upsets, improper filtering, or improper maintenance procedures which
introduce foreign material into the valve can cause component damage
or complete valve failure.
When valve trouble is diagnosed to be port-to-port leakage, or low flow
rate (plugging), the valve may be cleaned without disassembly.
However, if the cause of trouble is not found, or is diagnosed to be a
ruptured disc, proceed as outlined in the Disassembly and Inspection
section.
Chapter Highlights
Cleaning of Flow
Passages
Topic
Page
Cleaning of Flow Passages
15
Disassembly and Inspection
16
Cleaning
17
Reassembly
18
The valve must be cleaned if the trouble with the valve is leakage port-toport, or if the valve fails to allow flow port-to-port when the passage is
switched to open. The trouble may be dirt or contamination in the flow
passages, or excess friction in the lower section of the valve.
Dirt and contamination may possibly be removed by the following
methods:
1. Using a large syringe fitted with a tubing adapter, fill it with a
cleaning fluid such as hexane, acetone, or methanol. Prepare a
small beaker approximately half full of the fluid.
2. Connect the syringe to port 1 on the valve. Place Tygon tubing from
port 2 into the beaker containing cleaning fluid. With the syringe,
force cleaning fluid back and forth through the passage between port
1 and port 2.
15
3. Remove the Tygon tubing from port 2 and install it on port 6 and into
the beaker. Apply actuating air to switch the valve. Use the syringe
and force the cleaning fluid back and forth through the passage
between port 1 and port 6. Remove actuating air pressure.
4. Attach the syringe to port 3 and place the Tygon tubing from port 4
into the beaker. With the syringe, force cleaning fluid back and forth
through the passage between port 3 and port 4.
5. Place the Tygon tubing from port 2 into the beaker. Apply actuating
air to switch the valve. Use the syringe to force the cleaning fluid
back and forth through the passage between port 3 and port 2.
Remove the actuating air.
6. Attach the syringe to port 5 and place the Tygon tubing from port 6
into the beaker. Use the syringe to force cleaning fluid back and forth
through the passage between port 5 and port 6.
7. Place the Tygon tubing from port 4 into the beaker. Apply actuating
air to switch the valve. Use the syringe to force the cleaning fluid
back and forth through the passage between port 5 and port 4.
8. Bench test the valve to determine if the cleaning corrected the valve
problem.
Disassembly and
Inspection
NOTE
Cap Disassembly
The Model 11 valve can be disassembled and inspected by the following
methods:
•
The numbers in parenthesis below refer to similarly numbered
callouts on Figures 5-1 and 5-2.
1. Relieve the pressure on the base screw (12) by turning it
counterclockwise until it turns easily.
2. Remove the three socket head screws (33) and separate the cap
(37) from the body (26).
3. Inspect the sealing disc (34) and cushion disc (35) for dirt or breaks.
4. If the discs are brittle or dirty, but not ruptured, or ruptured but clean,
visually inspect the rest of the valve. If it is clean and in good order,
install new discs and reassemble the cap (follow instructions given in
subsection 4.5). If the valve actuating assembly is contaminated or
malfunctioning, continue disassembly.
16
Body Disassembly
1-4 Same as steps given in Cap Disassembly.
5. Plungers (9 or 10) may be removed by inverting the valve base (26)
and shaking it so that the plungers fall into the palm of your hand. If
the plungers are stuck, delay removing them until after the pistons
(18 and 21) are removed, then force them out from the bottom.
CAUTION
Do not allow the plungers (10) to fall into any hard surface because nicks
can ruin them.
6. Remove the manifold (24).
7. Remove the retaining ring (13).
8. Remove the retainer base (14), compression plate (15), compression
spring (16), and compensation plate (17) from the bottom of the
valve body.
9. Remove pistons (18 and 21) with retaining ring pliers.
10. Inspect the interior of the valve body (26), the pistons (18 and 21),
and the O-rings (19, 20 and 25) for contamination, odor, or
mechanical wear.
Cleaning
The Model 11 valve can be cleaned by the following methods:
1. Clean the valve cap using a hypodermic syringe to force cleaning
fluid back and forth through each of the tubes while keeping the cap
submerged. A strong detergent solution, hexane, acetone, or
methanol is satisfactory. An ultrasonic cleaner is a good aid for
loosening particles in port holes.
CAUTION
Do not allow the polished face of the valve cap to rest on the bottom of
an ultrasonic cleaner container or against any object in the container.
Rinse and shake out the tubes, then let the cap air dry before
reassembly.
2. Wipe off grease and contamination from all other valve parts and
clean as described in step 1 above.
CAUTION
Do not wash O-rings in hexane or other solvents.
Do not allow anything to rest on the top surface (polished surface) of the
body while in the ultrasonic cleaner.
Allow the parts to air dry.
17
Reassembly
NOTES
The Model 11 valve can be reassembled by the following methods:
•
All parts need to be clean before reassembly. Clean hands,
clean tools, and a clean, dust-free area in which to work are
recommended.
The numbers in parenthesis below refer to similarly numbered callouts
on Figures 5-1 and 5-2.
Body Reassembly
1. If the valve body was disassembled, reassemble it by following the
steps described below, and then proceed with the cap reassembly.
2. Apply a bead of KRYTOX 240 AC grease in both O-ring grooves of
the spring-loaded piston (18). Install silicone O-rings (19 and 20),
and apply grease to their outer surfaces.
3. Apply KRYTOX 240 AC grease to each of the six fingers of the finger
spring on the air-loaded piston (21).
4. Place the air-loaded piston (21) over the small diameter of the
spring-loaded piston (18) with the finger spring outside, and position
with the guide pin. Apply a bead of KRYTOX 240 AC grease to the
O-ring groove. Install silicone O-ring (19). Apply grease to the O-ring
outer surface.
5. Apply a thin film of KRYTOX 240 AC grease to the inside of the valve
body (26), where the pistons will be sliding.
6. Inset both pistons into the bottom of the cylinder. Use retaining ring
pliers to position pistons with the guide pin in the hole of the body.
CAUTION
Be careful not to damage the O-rings when sliding them past the lower
retaining ring groove.
7. Place the spring (16) on the compression plate (15). Apply KRYTOX
240 AC grease to the beveled cone of the compression plate (15),
and insert the ball (28) into the greased cone. Insert both of these
into the retainer base (14). Apply KRYTOX 240 AC grease to the
base screw (12), and then screw it into the retainer base (14). Place
the compensation plate (17) over the spring (16). Apply a thin film of
KRYTOX 240 AC grease to the outside of the compensation plate
(17) and inside of the retainer base (14) before final assembly.
8. Place the assembly containing the spring (16), compression plate
(15), set screw (12), base (14), and compensation plate (17) in the
valve body (26).
9. Reinstall the retaining ring (13).
10. Reinstall the manifold (24) with 3-o-rings (25).
18
Cap Reassembly
1. If the valve body was disassembled, reassemble it by following the
steps given in the Body Reassembly section, then proceed with the
cap reassembly as described below.
2. Place the valve body (26) on a clean surface with the two pins up.
3. Check to see if the plungers (9 or 10) protrude above the top surface
of the body (26). If they do not, tighten the base screw (12) until the
plungers protrude about 1/16 in. (1.6 mm). It is normal for three of
the plungers to protrude slightly farther then the other three. Do not
tighten the base screw beyond the point where the plungers rise
readily.
4. Place one drop of KRYTOX 143 AY oil in the narrow space between
each pair of plungers (9 or 10).
5. Using tweezers, move each plunger (9 or 10) up and down to
lubricate it thoroughly. Leave any excess oil to be soaked up by the
cushion disc (35).
6. Loosen the base screw (12) until the plungers no longer protrude
above the top surface of the body (26). This is necessary to make
sure that a plunger will not cut through the discs (34 and 35) when
the valve is fully assembled.
7. Install the silicone rubber O-ring (31) in the groove surrounding the
plungers (9 or 10). This O-ring is for static sealing, and it does not
require a lubricant.
8. Pick up the cushion disc (35) and flick it with your fingers to remove
any lint or dust particles. Position the cushion disc on the body over
the plungers (9 or 10).
9. Pick up the seal disc (34) and clean it by sliding it between your
index finger and middle finger. Make certain the disc is free of any oil
or dirt. Place the seal disc over the cushion disc (35), and align both
discs over the plungers (9 or 10).
10. Carefully align the cap (37) with the two guide pins on the body (26),
and place the cap on the body.
11. Put the three cap screws (33) and six washers (32) into the cap, and
tighten rotationally in the following sequence:
a. Finger tight.
b. 15-inch-pound (1.69 N•m).
c. 35-inch pounds (3.95 N•m)
12. Adjust the base screw (12) to give proper spring compression by
turning it clockwise to a torque setting of 6.5 inch-pounds (0.73
N•m).
19
Chapter 5
Drawings and Parts Lists
Description
This Chapter contains drawings and parts lists for the Model 11 valve.
Table 5-1 lists complete valve assemblies and corresponding cap stock
numbers.
An exploded view of the valve is used to identify its parts (see Figures 51 and 5-2). The numerical callouts on the drawings refers to item
numbers on the same parts list (see Table 5-2). Also included are the
related parts list for the Model 11 valve repair kit (see Table 5-3) and the
tool and test kit (see Table 5-4). The repair kit contains items most
commonly used to repair Model 11 valves, plus tools possibly difficult to
obtain from other suppliers. The tool and test kit contains all items found
in the repair kit (some in greater quantity), plus items for valve testing,
useful common fittings and tools, and a few valve parts occasionally
required.
Chapter Contents
How to Order Parts
Topic
Page
Description
21
How to Order Parts
21
To order parts, the following procedure is recommended:
1. On the purchase order clearly state your company name, contact
person, phone number, fax number, and order number or
purchase authority.
2. Specify the mode of transportation you prefer for shipping parts.
3. Write out the quantity (and in parenthesis the number). Then
identify the part with a description and complete stock number.
4. Identify the valve model number. For example:
Purchase Order #12345
Ship by Parcel Post:
One (1) Seal Disc, Stock No. D40005
Four (4) Cushion Disc, Stock No. D40000
For Model 11 valve.
21
Drawing and Parts List, Continued
5. On the envelope in the lower left corner mark:
EXPEDITE--PARTS ORDER.
6. Send the parts order to:
Siemens Energy & Automation, Inc.
408 US Highway 60
Bartlesville, Oklahoma 74003
7. Or phone/fax in your order by calling:
Tel: (800) 448-8224 (USA)
Tel: 001 918-662-7030 (International)
Fax: (918) 662-7482 (USA)
Fax: 001 918-662-7482
8. Parts to be sent in for repair or returned for other reasons must
also be identified with a pre-approved RETURN
AUTHORIZATION number.
22
Drawing and Parts List, Continued
Figure 5-1: Model 11 Valve Assembly Detail Exploded View
23
Figure 5-2: Model 11 Valve Assembly Without Cap Sectional View
24
Drawing and Parts List, Continued
Table 5-1: Model 11 Valve
Stock Numbers
Complete Valve
Cap only
Description
2000627-002
2000627-003*
2000627-004*
C04200
C04201*
C04202*
External Loop Stainless Steel
External Loop Monel
External Loop Hastelloy “C”
2000627-005
2000627-006*
2000627-007*
C04206
C04207*
C04208*
2μl Internal Loop Stainless Steel
2μl Internal Loop Monel
2μl Internal Loop Hastelloy “C”
2000627-008
2000627-009*
2000627-010*
C04209
C04210*
C04211*
5μl Internal Loop Stainless Steel
5μl Internal Loop Monel
5μl Internal Loop Hastelloy “C”
2000627-011
C04200
2000627-012*
C04201
2000627-013*
C04202
External Loop Stainless Steel Flat
Top Plungers
External Loop Monel Flat Top
Plungers
External Loop Hastelloy C Flat
Top Plungers
2000627-014
C04206
2μl Internal Loop Stainless Steel
Flat Top Plungers
C04221*
C04226*
10μl Internal Loop Stainless Steel
20μl Internal Loop Stainless Steel
*(Special) Deliveries on these #’s may be longer than normal.
25
Drawings and Parts List, Continued
Table 5-2: Parts List Model 11 LDV Valve
ITEM
1
2
3
4
5
6
7
8
9***
10
11*
12
13
14
15
16
17
18
19
QTY
20
1
21
22**
23
24
25
1
A/R
1
1
3
26
27
28
30
31
32
1
1
1
1
6
33
34
35
37
3
1
1
-
NOTES
26
6
6
A/R
1
1
1
1
1
1
1
2
DESCRIPTION
The following parts are used on all Model 11 valves:
PLUNGER, Valve, Flat Top
PLUNGER, Valve, Dish Top
GREASE, KRYTOX 240 AC, 2 oz. (5.9 mL)
SET SCREW, Socket Head, Cup Point, 3/8-24 UNF-3A x 3/8” SST.
RING, Retaining, Model IX valve, Truarc N5000-200-S-MD
BASE, Retaining
PLATE, Compression
SPRING, Compression
PLATE, Compensation
PISTON, Spring Loaded
O-RING, Silicon Rubber, Size 2-133, 1.810” (46.0 mm) I.D., 0.100”
(2.5 mm) W. Nom.
O-RING, Silicon Rubber, Size 2-133, 1.810” (46.0 mm) I.D., 0.100”
(2.5 mm) W. Nom.
PISTON, 303 Air Loaded, SST. or equivalent, Model X valve
OIL, KRYTOX 143 AY, 4 oz. (11.8 mL)
SCREW, Cap Socket, #8-32 x ½” SST.
MANIFOLD, Air Signal
O-RING, Silicon Rubber, Size 4, 0.070” (1.8 mm) I.D., 0.070” (1.8
mm) W. Nom.
BODY, Model 11 valve
SCREW, Cap Socket, #8-32 x 3/8” (.5 mm) Lg., SST
BALL, 5/32” (4.0 mm) Dia.
O-RING, Silicon Rubber, Size 24
WASHER, Spring, SST., 0.190” (4.8 mm) I.D., 0.375” (9.5 mm) O.D.,
0.020” (0.5 mm) Th.
SCREW, Cap Socket, #10-32 x 7/8” (22.2 mm) Lg., SST.
DISC, Teflon Seal
DISC, Dacron, Cushion
See Table 5-1 for Various Cap #’s
STOCK NO.
V16055
P56705
G87004
H10648
V16030
B00065
P49500
S52000
P49510
V16023
V16040
V16040
V16022
074995
H09607
2000625-001
050247
2000626-001
H09601
V16052
034024
W10000
H09614
D40005
D40000
*DuPont KRYTOX 240 AC grease is used to lubricate O-rings.
**DuPont KRYTOX 143 AY oil is used to lubricate plungers (item 9
and 10).
***See Table 5-1 where Item 9 is used.
Drawings and Parts List, Continued
Table 5-3: Repair Kit Model 11 Valve Stock No.
K21040
NOTE
ITEM
1
2
3
4
5
6
7
8
9
10
11
12
13
14
15
16
17
18
19
21
22
QTY
10
5
4
10
10
1
1
1
1
1
1
1
5
1
1
1
1
1
6
2
6
23
24
6
2
DESCRIPTION
O-RING, Silicone Rubber, Size 133
O-RING, Silicone Rubber, Size 10
O-RING, Silicone Rubber Size 4
DISC, Teflon, seal
DISC, Dacro, Cushion
GREASE, KRYTOX 240 AC, 2 oz. (5.9 mL)
OIL, KRYTOX 143 AY, 4 oz. (11.8 mL)
WRENCH, Allen, 9/64” for #8-32 Screw
WRENCH, Allen, 5/32” for #10-32 Screw
WRENCH, Allen, 3/16” for 3/8” Base Screw
PLIERS, Ret Ring
SCREWDRIVER, Torque, Preset to 35 in. lbs
O-RING, Silicone Rubber, Size 24
ADAPTER, ¼” Sq. Female Drive to 5/34” Hex
SCREWDRIVER, Torque Limiting 6.5 in. lbs.
BIT, Adapter, Torque Screwdriver to 3/16” Hex
REPAIR MANUAL, Model 11 Valve
BOX, Union Steel, #6316
PLUNGER, Dish Top
SCREW, Cap Socket, #8-32 x 3/8” SST.
WASHER, Spring, SST.,
0.190” (5 mm) I.D.,
0.375” (10 mm) O.D.,
0.020” (0.5 mm) Th.
VALVE, Plunger, Flat Top
BALLS, 5/32” (4.0 mm)n Dia.
STOCK NO
V16040
V16038
050247
D40005
D40000
G87004
074995
T10754
T10758
T10757
V16031
V05100
034024
1631005-701
V05110
T10691
2000615-009
B08025
P56705
H09601
W10000
Fig 5-1
Item 19
Item 20
Item 25
Item 34
Item 35
Item 11
Item 22
V16055
V16052
Item 9
Item 28
Item 31
Item 10
Item 27
Item 32
An optional part is the Model 11 Valve Test Stand Assembly (Stock No.
V05000) shown in Figure 3-1.
27
Drawings and Parts List, Continued
Table 5-4: Tool and Test
Kit - Model 11 Valve
Stock No. K21041
ITEM
1
2
3
4
5
6
7
8
9
10
11
12
13
14
15
16
17
18
19
20
21
22
23
24
25
26
27
28
29
30
31
32
33
34
35
36
37
38
39
40
28
QTY
1
2
1
1
1
1
1
4
4
1
5
1
2
DESCRIPTION
BOX, Union Steel, #6316
FITTING, SST. Cap, 1/16T
FITTING, SST, Ferrule-Back, 1/16T
FITTING, SST, Ferrule-Front, 1/16T
FITTING, SST, Nut, 1/16T
FITTING, SST, Union, 1/16T
GREASE, KRYTOX 240 AC, 2 oz. (5.9 ml)
SCREW, Sap Socket, #8-32 x 3/8”, SST.
SCREW, Cap, Socket, #10-32 x 7/8” SST.
REPAIR MANUAL, Model 11 Valve
O-RING, Silicone Rubber, Size 24
OIL, KRYTOX 143 AY, 4 oz. (11.8 ml)
SYRINGE, Plastic, B-D, Plastipak, 20 cc
1
1
1
1
2
3.75 ft*
3 ft.**
1
1
1
3
SYRINGE, 10 cc, Glass, B-D, #2312
SYRINGE, Plastic, B-D, #5570
WRENCH, Allen, 9/64” for #8-32 Screw
WRENCH, Allen, 5/32” for #10-32 Screw
WRENCH, Open End, 5/16” x 1/4”
TUBING, #316 SS, 1/16” O.D. x 0.015” Wall
TUBING, Tygon, 1/16” x 1/8” O.D.
SCREWDRIVER, Torque Limiting, 35 in. lbs. (3.95 Nm)
ADAPTER, 1/4” Sq. Female Drive to 5/32 in. Hex
SCREWDRIVER, Torque Limiting 6.5 in. lbs.
SPRING, Finger, 15/16” (23.8 mm) I.D.,
1.550” (39.4 mm) O.D. Nom
PLIERS, Retaining Ring
SPRING, Compression
BALLS, 5/32” (4.0 MM) Dia.
O-RING, Silicone Rubber, Size 10
O-RING, Silicone Rubber, Size 133
WASHER, Spring, SST,
O-RING, Silicone Rubber, Size 4
PLUNGER, Valve, Flat Top
PLUNGER, Valve, Dish Top
DISC, Teflon, Seal
DISC, Dacron, Cushion
WRENCH, Allen, 3/16” for 3/8” Base Screw
VALVE, Syringe to Tubing
1
3
2
5
10
6
9
6
6
50
50
1
2
STOCK
NO.
B08025
F32601
F35701
F35901
F36801
F39401
G87004
H09601
H09614
2000615-009
034024
074995
S90000
S90002
S90005
T10754
T10758
T10800
T85995
T94000
V05100
1631005-701
1631005-001
V11100
V16031
S52000
V16052
V16038
V16040
W10000
050247
V16055
P56705
D40005
D40000
T10757
V14502
TABLE
5-3
ITEMS
18
6
21
20
17
13
7
FIG
5-1
ITEMS
11
27
33
31
22
8
9
12
14
15
11
24
2
1
22
3
23
19
4
5
10
16
28
20
19
32
25
9
10
34
35
Drawings and Parts List, Continued
ITEM
41
42
43
NOTE
QTY
1
1
1
DESCRIPTION
BIT, Adapter, Torque Screwdriver to 3/16” Hex
PISTON, 303 air loaded, SST. or equivalent
PISTON, Spring Loaded
STOCK
NO.
T10691
V16022
V16023
TABLE
5-3
ITEMS
16
FIG
5-1
ITEMS
21
18
An optional part is the Model 11 Valve Test Stand Assembly (Stock No.
V05000) shown in Figure 3-1.
29
Siemens Energy & Automation, Inc.
7101 Hollister Road,
Houston, TX 77040
Phone +1 (713) 939-7400, Fax +1 (713) 939-9050
1/2007 Edition M06115
Siemens Energy & Automation, Inc.
7101 Hollister Road, Houston, TX 77040
United States
Phone +1 (713) 939-7400
Fax +1 (713) 939-9050
www.usa.siemens.com/ia