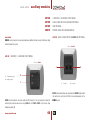
1
english user's manual
Dear customer,
Thank you for choosing EGi Sound & Domotic
System for your home.
DOMOS2 System enables you to enjoy high
quality audio in any room of your home, as
well as intercom and domotic services that
make your everyday life easier and safer.
The latest technology has been applied to
product design and manufacture. With a strong
emphasis on high quality, the system offers a
great number of services that you will discover
through this manual.
We hope you enjoy the services of your EGi
installation, designed to give you years of
exceptional and reliable service.
YOUR INSTALLATION
Domos2 Series is based on a modular structure.
The main module of the installation is the
CENTRAL UNIT for DIN rail mounting (or Ø
60 mm box).
This module distributes audio and manages
all additional services provided by the series.
It is usually installed with the main audio
equipment. Central units for Ø 60 mm box have
the same function as central units for DIN rail
mounting, but they must be combined in order
to have similar features.
You will find an EGi CONTROL UNIT installed
in each room. This module allows you to listen
to the audio programs of the system in the
room, turn the volume up/down, change the
audio program, intercom with other rooms, etc.
There are other modules available that give
additional services to the installation when
connecting them to the Central Unit, for
instance: door phone intercom, domotic
services, lighting control, GSM communication,
GPS clock, etc.
This manual gives a detailed description of each
module and describes how to configure them.
simbols
Turned on
Intercom function
Flooding alarm
Turned off
Clock
Intruder alarm (1 and 2)
OK
Timer
Miscellaneous
Cancel
Alarm clock
Lighting atmospheres (1,2,3 and 4)
Forward
Carillon
Awning
main features
of the DOMOS2 series
•
Up to 5 audio programs.
•
Remote control over the audio sources.
•
Control over the installation with a remote
control.
•
GPS Clock.
•
Acoustic surveillance of rooms (baby sitter).
Backward
Talk
Blind
•
Door phone control
Menu key
Listen
Heating
•
General call and room-to-room intercom,
up to 50 zones.
Menu exit key
Do not disturb
Thermostat
•
SOS Function.
Turn the volume up
Surveillance/Baby sitter
Relay
•
Message recorder.
•
Carillon service.
Turn the volume down
Open door phone
Press the key
•
Access control system.
General function
Cancel door phone
Hold the key
•
Remote control over the installation
through a mobile.
Local function
Messages
Long key press
•
Alarm status and intruder access report
via telephone.
Domotic functions
SOS Alarm
(it appears below the symbol for instance,
the intercom function)
•
Lighting control and adjustment.
Audio function
Fire alarm
•
Management up to 8 local or general relays.
Compatible with Konnex-EIB standards.
Listen function
Gas alarm
Product in development process.
3
www.egiaudio.com
information
ABOUT THIS MANUAL
We have taken all efforts to make the contents of this manual reliable and updated. However, EGi does not
guarantee the accuracy of the contents which are subject to change without previous notice.
COPYRIGHT INFORMATION
This manual in whole or in part, and any product or software described herein, may not be reproduced,
transmitted, saved in data recovery systems, or translated into any language in any form or by any means,
except all documents saved by the user to make security copies; without the previous written consent of the
manufacturer.
All products or corporate names herein may (or not) be registered trademarks or copyright of their respective
companies and are used for identification or explanatory reasons only, and in interest of the owner without
the intention of infringing any regulation or rule.
Copyright © 2007. All rights reserved.
SAFETY INFORMATION
Your Domos2 system has been designed and manufactured in order to comply with the latest security
standards for domestic electronic equipments. However, it is important to follow the security instructions
herein in order to ensure safe use of the product.
TECHNICAL SUPPORT
Si durante el uso de su sistema se encuentra con un problema, y no puede solucionarlo consultando el
manual, por favor, contacte con su instalador. Puede también consultar la página web donde encontrará
información actualizada y otros recursos para dar solución a su problema.
www.egiaudio.com
4
INFORMACIÓN EMC
Domos2 devices comply with the ER,EN 55022 regulations. Operation is
subject to the following two conditions:
1. This device may not cause harmful interference.
2. This device must accept any interference received, including interference
that may cause undesired operation.
This equipment has been tested and found to comply with the limits for a Class
B digital device, according to ER,EN 55022 regulations. These limits are
designed to provide reasonable protection against harmful interference in
residential installations.
This equipment generates, uses, and can radiate radio-frequency energy and,
if not installed and used in accordance with the instructions, may cause harmful
interference to radio communications.
However, there is no guarantee that interference will not occur in a particular
installation.
If this equipment does cause interference to radio or television reception, which
can be determined by turning the equipment off and on, the user is encouraged
to try to correct the interference by one or more of the following measures:
•
Reorient or relocate the receiving antenna.
•
Increase the separation between the equipment and receiver.
•
Connect the equipment into an outlet on a circuit different from that to
which the receiver is connected.
•
Consult the dealer or an experienced radio/TV technician for help.
index
40010, 40020, 40040, 40050, 40060
Simbols
3
Information
4
Central units for DIN rail mounting
6
Central units for Ø60 mm box
17
Controls units
24
40410, 40420, 40520
Interface modules
61
40140, 40150, 40160, 40610, 40510
Auxiliary modules
68
Accessories
78
40070, 40080, 40090, 40200
40230, 40240, 40250, 40260, 40270, 40280, 40620
5
www.egiaudio.com
central units
for DIN rail mounting
40010, 40050
40010
40050
1 RCA AUDIO INPUT (1 AUDIO PROGRAM)
3 RCA AUDIO INPUT (3 AUDIO PROGRAMS)
overview
Central units in a DOMOS2 installation, distribute audio and manage additional services provided by the series.
Central Units can manage up to 50 zones and, depending on the model, distribute up to 3 general stereo
audio programs.
EGi ref. 40050
Central Units ref.40010/40050 have the following specifications:
•
1/ 3 stereo audio programs (RCA audio input).
•
Acoustic surveillance (baby sitter).
•
Clock (manages the installation clock system. It must be adjusted from the control units).
•
Intercommunication (The Central Unit manages this service).
•
Message recorder (20 sec. maximum recording time) if the installation provides this service.
•
Sound system remote control ( IR Link, infrared remote control for sound system from any room
where a control unit is installed, using EGi ref.40130 or 40100 or the sound system remote control).
NOTE: This service may not work with all remote control units.
•
Bell (a tone is generated in all the installation when the door bell rings).
NOTE: This service must be activated wiring the door bell to the Central Unit.
1
2
3
5
•
SOS: Alerts about a dangerous situation or someone in need of help.
•
Door entry phone: You can answer a call to the door entry phone from any room with a control unit.
www.egiaudio.com
4
6
6
1 Active module.
4 RCA audio input.
2 Audio signal present.
5 Power connector.
3 IR link for remote control.
6 Bell connector.
working description
The central module must be connected to a power supply unit (EGi ref. 40710,
40720 or 40730) that provides the needed power for proper function of the
system.
These units have been designed to distribute stereo audio from an audio source
(MP3, CD player, radio…) to the DOMOS2 installation.
before starting
Once the DOMOS2 system has been correctly installed, the different modules
must be configured for proper performance whitin the system. Each room is
called a ZONE.
This procedure will assign a zone to each control unit, so that the central unit
will detect and assign functions to each control unit, and intercomm will be set.
To reset or change the configuration on a system using the central unit
module EGi ref. 40050 or 40010, the control unit configuration manual
must be checked.
AUDIO
The central unit provides 1 (40010) or 3 (40050) RCA audio inputs (input
A, input B, input C), where a music source (walkman®, sound system, MP3…)
can be connected.
The central unit provides audio to the installation. To correctly listen the audio
provided by this unit, please refer to the control unit manual.
7
ACOUSTIC SURVEILLANCE
This function does not need any interaction from the user in this module. Please refer to the control unit
manual for detailed working instructions.
DOOR ENTRY PHONE
This function does not need any interaction from the user in this module. Please refer to the control unit
manual for detailed working instructions.
CLOCK
This function does not need any interaction from the user in this module. Please refer to the control unit
manual for detailed working instructions.
MESSAGE RECORDER
This function does not need any interaction from the user in this module. Please refer to the control unit
manual for detailed working instructions.
Message recording is allowed when using control units EGi ref. 40250, 40260, 40270 and 40280. Please
refer to the control unit manual for details.
SOS
This function alerts about a dangerous situation or someone in need of help. The system generates an audio
signal in the zone where the alarm is generated. If not cancelled, the alarm spreads to the rest of the installation
for 2 minutes.
BELL
The unit manages the bell function by connecting the door entry bell to the central unit (6).
www.egiaudio.com
central units
central units
for DIN rail mounting
40010, 40050
central units
for DIN rail mounting
40010, 40050
REMOTE CONTROL
The RCA inputs in the central unit connect to the music source. This music source can be controlled through
the infrared capsule EGi ref. 40110, using the sound system own remote or EGi 40100 or 40130 from
the room where it is being listened, just pointing the remote control to the EGi in-wall control unit.
www.egiaudio.com
8
central units
central units
for DIN rail mounting
40020, 40040, 40060
40020
40040
40060
12
5
EGi ref. 40060
11
13
6
7
OK/+ 8
NO/– 9
10
4
3
17
14
15
16
1
2
1 RCA AUDIO INPUT (1 PROGRAM + FM + IR)
1 RCA AUDIO INPUT (2 PROGRAMS + FM + IR)
1 RCA AUDIO INPUT (3 PROGRAMS + FM + IR)
overview
Central units in a DOMOS2 installation, distribute audio and manage additional services provided by the
series. Central Units can manage up to 50 zones and, depending on the model, distribute up to 3 general
stereo audio programs.
The central module must be connected to a power supply unit (EGi ref. 40710, 40720 or 40730) that
provides the needed power for proper function of the system.
These units have been designed to distribute stereo audio from a sound source (MP3, CD player, radio…)
to the DOMOS2 installation.
Central Units ref.40010/40050 have the following specifications:
•
Up to 3 FM programs and 1 stereo audio channel.
•
Acoustic surveillance (baby sitter).
•
Clock.
•
Intercommunication.
1
Power connector
10 Audio.
•
Message recorder (20 sec. maximum recording time) if the installation provides this service.
2
Bell connector
11 General function.
•
3
IR Link output
12 Listen function.
4
RCA audio input.
13 Carillon.
Sound system remote control (IR Link, infrared remote control for sound system from any room
where a control unit is installed, using EGi ref. 40130 and 40100 or the sound system remote control).
5
FM antenna.
14 Messages.
•
Door entry phone: You can answer a call to the door entry phone from any room with a control unit.
6
MENU key.
15 SOS.
•
Bell.
7
MENU exit key.
16 Clock.
8
OK/+.
17 Door phone.
•
SOS.
9
NO/–.
•
Carillon.
9
www.egiaudio.com
central units
for DIN rail mounting
40020, 40040, 40060
before starting
Once the DOMOS2 system has been correctly installed, the different modules must be configured for proper
performance whitin the system. Each room is called a ZONE.
This procedure will assign a zone to each control unit, so that the central unit will detect and assign functions
to each control unit, and intercom will be set.
From the Central Unit ref. 40020, 40040 or 40060, the installation can be reset. It will also inform about
the number of ZONES present in the installation.
RESET SYSTEM ZONES
If a reset of the installation has to be done, please proceed as follows:
1. Press MENU key
CLOCK CONFIGURATION
One of the central unit main functions is to manage the services provided by
the system. To make some of the services work properly, clock installation
must be correctly configured.
1. Press MENU key
until CLOCK appears on the screen. From here, the
installation clock can be activated or deactivated by using (OK/+) or (NO/–).
2. For time adjustment, press (OK) to activate installation clock and (OK)
again for clock adjustment (HOUR will flash).
3. Modify the hour pressing (OK/+) or (NO/–).
4. Press MENU key
several times until MISC appears on the screen.
NOTE: You can abandon the programming at any time by pressing CANCEL
several times.
2. Press (OK/+), and press the same key (OK/+) for 2 seconds.
3. GAIN appears on the display.
4. Press repeatedely MENU key
until SETUP appears on the screen. Then, press OK for 2 seconds.
The assigned zone assigned to the module will flash on the display.
5. Navigate until RESET appears. Then, press OK for 2 seconds.
MISCELL
S E T- U P
GA I N
AU TO
1
www.egiaudio.com
1st
2nd
to modify MINUTES the same way.
SETUP
1st
1
2nd
RESET
––––
10
clock
yes
1st
2nd
HOur
1 1 : 15
MINUTeS
1st
2nd
1 1 : 15
1st
2nd
audio functions
Depending on the model, 1 (40020), 2 (40040) or 3 (40060) audio programs
can be configured in the system.
SELECT A RADIO STATION OR RCA AUDIO FOR A PROGRAM
Once the program that is tuning a radio station is selected, if you want to change this radio station, please
do as follows:
These audio programs can be different radio stations or Central Unit RCA
stereo input.
1. Select the PROGRAM following the steps described at “Change programs”.
CHANGE PROGRAMS
To select any of the programs:
1. Press MENU key
until AUDIO appears on the screen. From this menu,
audio can be activated or deactivated using (OK/+) or (NO/–).
2. With AUDIO in YES position, press (OK/+) again to go to program 1,
2 or 3 (if available).
AU D I O
YES
1st
2nd
P RO G R A M
aUD
2. Press MENU key
. Now, using (+) and (–) check the different stored radio stations for the program.
The RCA audio input can also be selected here (AUD appears on the screen).
3. If you want to listen a radio station that is not stored, press MENU again and SEARCH will appear
on the display. Press (+) or (–) for 2 seconds to perform an automatic search, or short pressings for
manual search.
4. If a non stored radio station is tuned, the frequency value flashes. Pressing MENU key
again, you
have the chance to store it. Press (+) or (–) shortly to select the memory position (1 to 9) where you want
it stored and press (OK/+) for 2 seconds. SAVED appears on the display.
P RO G R A M
9 2 . 02
1st
2nd
SAV E
9 1. 36
11
2nd
1st
1st
2nd
M E M O RY 3
9 2 . 82
1st
2nd
S E A RC H
89.7
1st
2nd
SAV E D
9 1. 3
www.egiaudio.com
central units
central units
for DIN rail mounting
40020, 40040, 40060
central units
for DIN rail mounting
40020, 40040, 40060
DELETE A STORED RADIO STATION
To configure this service:
1. Press MENU key
1. Press MENU key
until AUDIO appears on the screen. From this menu, audio can be activated or
deactivated using (OK/+) or (NO/–).
2. With AUDIO in YES position, press (OK/+) again to go to program 1, 2 or 3 (if available).
3. In the chosen program, press MENU key
4. Press now MENU key
and then use (+) and (–) to select the memory position to be deleted.
until CARILLON appears on the screen. Use (OK/+)
or (NO/–) to activate or deactivate the service .
2. To adjust the starting and finishing time, and the signal frequency,
press (OK).
3. Using (OK/+) and (NO/–), select the starting time.
a few times until DELETE appears on the display.
5. Then, press (OK/+).
4. After this, press MENU key
To modify the finishing time. Use (OK/+)
or (NO/–) to adjust the time.
6. DELETED appears on the display.
5. Then, press MENU key
P RO G R A M
8 M9E.M51
2nd
to select the frequency for the musical tune. Pressing
(OK/+) and (NO/–) you can choose between 1 hour, 30 min. or 15 min.
DELETE
DELETED
6. Pressing now MENU key
, you will be able to adjust the tune volume
between 0 and 64, using (OK/+) and (NO/–).
1st
carillon
SI
1st
2nd
st
time
9:00
intercom functions
Altough most of these functions are used from the control units, the Central unit manages the service.
If a service is not authorized by the central unit, it can not be used from the control unit.
MODe
CARILLON FUNCTION
Using this service, a musical tone will be produced for the installation every 15, 30 or 60 minutes.
www.egiaudio.com
12
1:00
2nd
1st
VO LU M E
49
2nd
1st
end time
22:00
2nd
1st
central units
central units
for DIN rail mounting
40020, 40040, 40060
ENTRY DOOR PHONE FUNCTION
Using this service, you will be able to answer a call to the entry phone from
anywhere in the installation.
To activate the service, do as follows:
Press MENU key
several times until MESSAGE appears. From this menu, the service can be activated
or deactivated using (OK/+) or (NO/–).
To use this service, your installation must have the entry phone module EGi
ref. 40410 (40420 for EDS systems) installed and a compatible door entry
phone.
DOORPHONE SERVICE
MESSAGE FUNCTION
D O O R- P H O
M E S SAG E
YES
Please refer to the door entry phone module manual for detailed information.
This service is used from the control units, altough it must be activated in the
central unit.
YES
To activate the service, do as follows:
1. Press MENU key
several times until DOOR-PHO appears. From this
menu, the service can be activated or deactivated using (OK/+) or (NO/–).
BELL FUNCTION
The unit manages the bell function by connecting the door entry bell to the
central unit (2).
surveillance functions
Your EGi DOMOS2 system can control and listen any zone of the installation.
This service is used from the control units, altough it must be activated in the central unit.
Please refer to the control unit manual for detailed information and configuration.
To activate the service, do as follows:
MESSAGE RECORDER
Using this service, up to 20 seconds voice messages can be left to other user.
This service is used from the control units, altough it must be activated
in the central unit.
To use this function, compatible control units must be installed. Please refer
to your control unit manual for details.
1. Press MENU key
several times until SURVEIL appears. From this menu, the service can be activated
or deactivated using (OK/+) or (NO/–).
SOS FUNCTION
This function alerts about a dangerous situation or someone in need of help. The system generates an audio
signal in the zone where tha alarm is generated. If not cancelled, the alarm spreads to the rest of the installation
for 2 minutes.
This service is used from the control units, altough it must be activated in the central unit.
13
www.egiaudio.com
central units
for DIN rail mounting
40020, 40040, 40060
To activate the service, do as follows:
1. Press MENU key
several times until SOS appears. From this menu, the service can be activated
or deactivated using (OK/+) or (NO/–).
SURVEILLANCE
TUNER GAIN ADJUSTMENT
Once GAIN appears on the screen, use the keys (OK/+) or (NO/–) to change
the values choosing from 0 to 3 or AUTO (the tuner gain is automatically
adjusted this way).
SOS FUNCTION
S U RV E I L
BLOCKING RADIO STATION MODIFICATION
This parameter, if activated, allows the change of radio station for the selected
program only to the control unit that set it first. This way, changing the preset
station by another user is avoid. If the service is deactivated, any control unit
can change the radio station tuned.
SOS
YES
YES
To activate the service, do as follows:
more adjustments
On top of the previous services, your DOMOS2 central unit provides the following parameters and services.
To configure the rest of adjustments, please follow the procedure ahead:
1. Press MENU key
1. Follow steps 1 and 2 described on “More adjustments”.
2. Press MENU key
several times until BLOCK appears. From this menu,
the service can be activated or deactivated using (OK/+) or (NO/–).
several times until MISCELL appears.
2. Press (OK/+). ADJUSTMS appears on the screen.
miscell
3. Keep (OK/+) pressed until GAIN appears on the screen.
miscell
1st
2nd
a dj u st m s
a dj u st m s
2nd
ga i n
AU TO
ga i n
AU TO
www.egiaudio.com
1st
14
pr block
yes
2nd
1st
AUTOSCAN
The AUTOSCAN service automatically scans the FM band and stores
the radio stations with the highest signal level.
OFFSET
OFFSET is a function used to compensate the internal clock of the system and correct the fluctuations that
might appear due to temperature or other evironmental conditions.
The amount of radio stations stored depends on the memory positions that
are available in the central unit.
This adjustment is expressed in minutes per month. (A positive value indicates added minutes).
CENTRAL UNIT
40020
40040
40060
To set this parameter, do as follows:
1. Follow steps 1 and 2 described on “More adjustments”.
FM MEMORIES
9
18
27
2. Press MENU key
several times until OFFSET appears on the display. Press (OK/+) to add minutes
or (NO/–) to remove them until the central unit clock is accurate.
NOTE: For proper adjustment, the clock must be working normally for one month. After this time, check the
offset and correct it following the previous procedure.
To perform an Autoscan, proceed as follows:
1. Follow steps 1 and 2 described on “More adjustments”.
MISCELL
1st
A DJ U ST M S
offset
2nd
2. Press MENU key
several times until AUTOSCAN appears on the
display. Press (OK/+) to start.
1st
2
2nd
NOTE: All stored stations will be overwritten by this process.
MISCELL
1st
2nd
A DJ U ST M S
au to s c a n
8 7 . 51
1st
2nd
LANGUAGE SELECTION
The menu language can be changed following this procedure:
1. Press MENU key
several times until MISCELL appears.
2. Press (OK/+). ADJUSTMS appears on the screen.
3. Keep (OK/+) pressed until GAIN appears on the screen.
4. Press MENU until the menu language appears (Spanish by default).
15
www.egiaudio.com
central units
central units
for DIN rail mounting
40020, 40040, 40060
central units
for DIN rail mounting
40020, 40040, 40060
5. To change the language, press (OK/+) or (NO/–) to choose from the available languages.
MISCELL
1st
2nd
A DJ U ST M S
GA I N
AU TO
ENGLISH
2nd
1st
TECHNICAL SERVICE INFORMATION
If you need technical support on the product, it is possible that you are asked
about the software version and other parameters. All this values can be found
in the MISCELL menu.
1. Follow steps 1 and 2 described on “More adjustments”.
2. Press MENU key
several times until VER appears on the screen,
showing a number with the software version
3. Press MENU key
SYSTEM INFORMATION
To display information about system configuration and available audio programs, the option PR LOCAL
indicates the program number (1 for 40020, 2 for 40040 and 3 for 40060). PR INS indicates other technical
value that varies depending on your installation.
some more times until IR NUM and IR CODE appears,
in case you are experiencing problems whith the remote control unit.
miscell
0
16
A DJ U ST M S
2nd
VER
www.egiaudio.com
1st
-3
IR NUM
0
GA I N
AU TO
central units
for Ø 60mm box
40070, 40080, 40090, 40200
overview
The function of the DOMOS2 central units ref. 40070 and 40080 is to give
additional audio programs to a system based on a central unit for DIN rail
mounting. 40090 Central unit gives the following services: radio, clock,
intercom and surveillance (baby sitter). A system can support up to a maximum
of 4 central units for Ø 60 mm box (3 audio programs + 40090 central unit).
1 RCA AUDIO INPUT (1 AUDIO PROGRAM + IR)
1 AUDIO PROGRAM + FM
CLOCK + INTERCOM + SURVEILLANCE + SOS + DOOR PHONE
1 USB INPUT
40090 Central unit gives additional services to your DOMOS2 installation. It provides the clock for the
installation and manages room-to-room intercom, acoustic surveillance (baby sitter) and SOS function.
40200 Central unit allows your system to play music in MP3 format thanks to its USB connector.
40070 1 RCA AUDIO INPUT (1 AUDIO PROGRAM + IR)
WARNING: The services that are activated/deactivated on the central unit will
affect the whole installation. Therefore, the menus displayed on the control units
will change depending on the services activated on the central units.
Each central unit for Ø 60 mm box (EGi ref. 40070, 40080, 40090 and
40200) must be connected to a power supply (EGi ref. 40710, 40720 or
40730) through the system bus. Central units for Ø 60 mm box allow several
services depending on the central unit model.
40070 Central unit has 1 RCA stereo audio input to connect audio sources
through 0501 or 0502 wire. It has also 1 IR output for 40110 IR transmitter
wire, which allows the remote control of the audio source (provided it is compatible
with the system) from any room with a DOMOS2 in-wall control unit, using the
remote control of the audio source (CD, DVD, audio equipment, etc.).
EGi ref. 40070
3
1
Infrared output (IR) for 40110 IR transmitter wire.
2
RCA Stereo audio input.
3
LED Indicator for audio detection.
1
2
2
40080 Central unit gives a FM program with 9 presets that are stored on the module.
Connect your audio equipment to the installation using 0502 connection wire, if your audio source has a
RCA connection, or using 0501 connection wire, if your audio source has a 3.5 mm jack output connector.
Gradually, turn the volume up on the audio source until the LED indicator for audio detection blinks.
17
www.egiaudio.com
Ø60mm central units
40070
40080
40090
40200
40070, 40080, 40090, 40200
central units
for Ø 60mm box
WARNING: If you turn the volume quite high, the installation will deliver distorted sound, losing quality. If this
situation happens, turn the volume down on the audio source until distortion disappears.
Connect a 40110 wire to the IR connector of the 40070 central unit and put the capsule on the audio source
sensor in order to control the audio source from any room with a DOMOS2 in-wall control unit, using the
remote control of the audio source or 40100/40130 remote control.
WARNING: This function may not be available for all remote control models.
CHANGE A STORED RADIO STATION
1. Press the MENU key
several times until AUDIO is displayed.
2. Press (OK/+) or (NO/–) to navigate through the stored radio stations
(from MEM 1 to MEM 9).
RADIO STATION SEARCH
To search for a radio station by frequency, do as follows:
1. Press the MENU key
several times until AUDIO is displayed.
2. Press (OK/+) or (NO/–).
3. Press
again. SEARCH is displayed.
4. Use(OK/+) and (NO/–), to search up or down through the radio band. To
start automatic search, hold the keys. To start manual search, press the
keys shortly, and it will start searching up/down through the radio band
every 50 KHz.
40080 1 AUDIO PROGRAM + FM
EGi ref. 40080
1
Menu key.
2
Menu exit key.
5
3
OK/+ key.
4
3
4
NO/– key.
2
1
5
LCD display.
MANUAL
2nd
CHANGE STORED
RADIO STATION
RADIO STATION
SEARCH
MEM 4
MEM 4
10 3 . 2 6
2nd
2nd
1st
2nd 2nd
2nd
1st
1st
40080 Central unit has a FM program with 9 presets.
AUTO
10 3 . 2 6
2nd
2nd
1st
www.egiaudio.com
18
40070, 40080, 40090, 40200
central units
for Ø 60mm box
several times until SAVE is displayed.
2nd
SAV E
several times until ADJUSTMS is displayed.
2. Press the (OK/+) key for a few seconds.
3. LIGHT will be displayed.
3. Hold (OK/+) until SAVED is displayed.
MEM 4
DISPLAY BACKLIGHT ADJUSTMENT IN STAND-BY MODE
1. Press the MENU key
1. Follow the steps of “Radio station search” process.
2. Press the MENU key
other configurations
4. Press (OK/+) or (NO/–) to adjust the light intensity.
SAV E D
2nd
1st
GAIN ADJUSTMENT
EGi control units are factory calibrated to deliver optimum performance. Nevertheless, there might be
situations, where FM reception is not good enough. In those situations, manual gain adjustment could sort
out the problem. To perform this operation, do as follows:
1. Press the MENU key
several times until ADJUSTMS is displayed.
DELETE A STORED RADIO STATION
To delete a stored radio station, please do as follows:
2. Press the (OK/+) key for a few seconds.
1. Search the memory that you want to delete following the steps of “Change
a stored radio station” process.
4. Use (OK/+) or (NO/–) to increase or decrease the value.
2. Press the MENU key
3. Press the MENU key
several times until DELETE is displayed.
MEM 4
2nd
BACKLIGHT ADJUSTMENT
LIGHT
3. Press (OK/+).
delete
deletd
several times until GAIN is displayed.
GAIN ADJUSTMENT
LIGHT
A DJ U ST M
GA I N 3
2nd
2nd 2nd
2nd
1st
1st
1st
2nd
1st
19
www.egiaudio.com
Ø60mm central units
STORE A RADIO STATION
To store the radio station that you have tuned in the previous step, please do
as follows:
central units
40070, 40080, 40090, 40200
for Ø 60mm box
BLOCKING FUNCTION
Using this funtion, only one control unit will control the program.
If you select NO, any control unit can change the radio station of the program at any moment.
SOFTWARE VERSION
If you need technical support on the product, it is possible that you are asked
about the software version. To check this parameter, do as follows:
If you select YES, only the first control unit that is connected to the program can change the radio station.
1. Press the MENU key
2. Press the (OK/+) key for a few seconds.
To activate this service, please do as follows:
1. Press the MENU key
3. Press the MENU key
several times until VERS is displayed. The
number that appears on the display is the software version number.
several times until ADJUSTMS is displayed.
2. Press the (OK/+) key for a few seconds.
3. Press the MENU key
several times until ADJUSTMS is displayed.
several times until BLOCK is displayed.
light
4. Use (OK/+) or (NO/–) to activate or deactivate this service.
VERS 1
2nd
AUTOSCAN
The autoscan service automatically finds the strongest available 9 FM stations. To activate this function,
please do as follows:
1. Press the MENU key
several times until ADJUSTMS is displayed.
PROGRAM ADJUSTMENT
2. Press the (OK/+) key for a few seconds.
3. Press the MENU key
WARNING: The installation can stop working when modifying the
parameters of this menu.
Modify this menu following the indications of your installer only.
several times until AUTOSCA is displayed.
4. Use (OK/+) to start the autoscan.
BLOCK ADJUSTMENT
1st
AUTOSCAN
2nd 2nd
2nd
2nd
2nd
An installation based on 40080 module can provide up to 3 programs. This
function allows you to choose the number of the program that is going to be
distributed through the installation.
1st
1st
1st
1st
1. Press the MENU key
light
B L O ck y
light
AU TO S CA
several times until ADJUSTMS is displayed
2. Press the (OK/+) key for a few seconds.
www.egiaudio.com
20
40070, 40080, 40090, 40200
central units
for Ø 60mm box
several times until SET PR is displayed.
40090 CLOCK + INTERCOM + SURVEILLANCE + SOS + DOOR PHONE
lIGHT
SET PR
PR 2
2nd
1st
EGi ref. 40090
1
Menu key.
2
Menu exit key.
5
3
OK/+ key.
4
3
4
NO/–key.
5
LCD display.
2
1
LANGUAGE SELECTION
The menu language can be selelected. To choose your language, please do as
follows:
1. Press the MENU key
several times until ADJUSTMS is displayed .
2. Press the (OK/+) key for a few seconds.
3. Press the MENU key
several times until LANGUAGE is displayed.
4. Press (OK/+) and (NO/–) to select the language.
40090 Central unit for Ø 60 mm box gives additional services to your installation such as clock, room-toroom intercom, acoustic surveillance (baby sitter) and SOS function.
Intercom services are automatically configured when the module is connected and they are managed from
the control units. However, the colck service must be manually configured, please do as follows:
1. Press the MENU key
several times until ADJUSTMS is displayed.
2. Press the (OK/+) key for a few seconds.
light
l a ng
e ng l i s h
3. Press the MENU key
several times. TIME ADJ is displayed.
2nd
4. Press (OK/+), and adjust the hour by pressing (OK/+) or (NO/–) again
1st
5. Once the hour has been adjusted, press the MENU key
in order to adjust the minutes.
6. Press (OK/+), and adjust the minutes by pressing (OK/+) or (NO/–)again.
NOTE: This central unit for Ø 60 mm box is not compatible with a central unit for DIN rail mounting.
21
www.egiaudio.com
Ø60mm central units
3. Press the MENU key
4. Press (OK/+) and (NO/–) to select the number of the program between
1 and 3.
central units
40070, 40080, 40090, 40200
for Ø 60mm box
other configurations
BACKLIGHT ADJUSTMENT
1. Press the MENU key
SOFTWARE VERSION
If you need technical support on the product, it is possible that you are asked
about the software version. To check this parameter, do as follows:
several times until ADJUSTMS is displayed.
1. Press the MENU key
2. Press the (OK/+) key for a few seconds.
3. LIGHT will be displayed.
3. Press the MENU key
several times until VERS is displayed. The
number that appears on the display is the software version number.
4. Press (OK/+) or (NO/–) to adjust the light intensity.
TIME DELAY ADJUSTMENT
Although the clock of the 40090 central unit is adjusted at factory, a slightly time delay may occur due
to installation ambient conditions. It is possible to move the time forward or backward monthly through
a menu option.
1. Press the MENU key
several times until ADJUSTMS is displayed.
2. Press the (OK/+) key for a few seconds.
LIGHT
VERS 1
2nd
1st
several times until ADJUSTMS is displayed.
2. Press the (OK/+) key for a few seconds.
3. Press the MENU key
several times until OFFS is displayed.
4. Move the time backward (+) or forward (–) using (OK/+) to increase or (NO/–) to decrease the time.
BACKLIGHT ADJUSTMENTS
TIME ADJUSTMENTS
LANGUAGE SELECTION
The menu language can be selected. To choose your language, please do as
follows:
1. Press the MENU key
light
light
Light
OFFS 1
2nd
2nd
1st
1st
www.egiaudio.com
2nd
several times until ADJUSTMS is displayed.
2. Press the (OK/+) key for a few seconds.
2nd
3. Press the MENU key
1st
4. Press (OK/+) and (NO/–) to select the language.
22
several times until LANGUAGE is displayed.
40070, 40080, 40090, 40200
central units
for Ø 60mm box
WARNING: If you change the language on the central unit, all control
units configured in AUTO mode will also change the language.
Light
l a ng
e ng l i s h
40200 1 USB INPUT
EGi ref. 40200
1
Track –.
2
Folder fwd.
3
Track +.
4
USB connector.
4
3
1
2
2nd
1st
This central unit allows your system to play music in MP3 format thanks to its USB connector.
To use it, insert the pen-drive into the USB connector (4).
The music will automatically start to play consecutively.
Press TRACK + (3) to go to the next track or press TRACK – (1) to go to the previous track.
If your music is organised in folders, press FWD FOLDER (2) to move forward through the folders.
23
www.egiaudio.com
Ø60mm central units
NOTE: You can abandon the programming at any time by pressing the
Exit MENU key
several times.
40230, 40240
control unit
40230
40240
3 AUDIO PROGRAMS + IR
3 AUDIO PROGRAMS + LOCAL FM + IR
overview
EGi ref. 40230 and 40240 control units allow the configuration of a wide variety of audio and other functions,
that DOMOS2 provides.
The information is displayed using a high bright 7 segments device, the model EGi ref. 40240 includes a
local FM tuner and they can supply up to 3 audio programs.
Using these control units, the following services can be accessed:
•
Up to 3 stereo audio programs (depending on the central unit)and a local FM program (only for EGi
ref. 40240).
•
Acoustic surveillance (baby sitter).
•
Local alarm clock.
•
General or local intercom.
•
Sound system remote control (IR Link, infrared remote control for sound system from any room
where a control unit is installed, using EGi ref.40130 and 40100 or the sound system remote control).
NOTE: This service may not work with all remote control units.
•
Bell (a tone is generated in the installation when the door bell rings).
NOTE: This service must be activated wiring the door bell to the Central Unit.
•
SOS: Alerts about a dangerous situation or someone in need of help.
•
Door phone: You can answer a call to the door entry phone from any room with a control unit.
•
30 minutes timer.
www.egiaudio.com
24
EGi ref. 40240
14
9
13
12
10
11
2
1
4
3
6
5
8
7
1
OK/+ key. Control Power ON.
8
Entry phonbe cancel.
2
OFF/- key. Control power OFF.
9
Intercomm.
3
Volume UP.
10 Baby sitter ON.
4
Volume DOWN.
11 Surveillance active.
5
Menu key.
12 Alarm clock.
6
Menu exit key.
13 Timer.
7
Door phone.
14 Do not disturb.
control unit
before starting
Once the installation is finished, the control units must be configured for them
to work properly in the system.
You only have to press (OK) in the following one for it have that area assigned and repeat the operation until
all the control units have an area assigned.
SWITCHING THE CONTROL UNIT ON AND OFF
To activate the control unit, press (ON). When powered on, the control unit
retrieves the last values before switching off.
For swithing off, keep the key (OFF) pressed.
From the central unit:
ZONE ASSIGNMENT
Each room is known as a ZONE.
NOTE: This process can be aborted at any time by pressing the MENU exit key
.
If your installation includes a central unit EGi ref. 40020, 40040 y 40060, the installation reset can be
made from this unit. Please refer to your central unit manual for detailed information.
–Adj
This procedure will assign a zone to each control unit, so that the central unit
will detect and assign functions to each control unit, and intercomm will be set.
–SET
01
2nd
2nd
1st
1st
01
To assign a ZONE to a control unit, do as follows.
From the control unit:
1. Press MENU key
and pass AUD > INT >VIG > until you reach ADJ.
2. Press (OK/+/ON) for 2 seconds.
3. Press MENU key
several times until SET appears.
4. Press (OK) for a few seconds and navigate using (OK/+) and (OFF/–)
until the selected zone number appears on the display. Then, press (OK).
5. The number on the display stops flashing. The zone has been assigned
to the control unit.
When doing this, all the control units in the installation, will configure in
SETUP mode. Automatically the following number to the assigned one will
flash in the rest of the control units. (If the zone chosen for the example is 10,
the other control units will display 11).
25
RESET SYSTEM ZONE ASSIGNMENT
If you need to SETUP the installation, you must reset (from the control unit) the installation. Follow the
instructions to do so.
1. Press the MENU key
3 times, AUD > INT > SUR > until ADJ is displayed.
2. Press (OK/+/ON) for 2 seconds.
3. Press the key MENU
several times until SET appears.
4. Press (OK) for a few seconds and navigate using (OK/+) and (OFF/–) until RSET appears on the display.
5. Keep (OK/+) pressed for some time and after about 3 seconds, RSET will stop flashing and ST01
appears on the control units display.
The installation has been reset. Now, assign a new number to each zone following the procedure “Zone
assignation”.
control unit
40230, 40240
40230, 40240
control unit
NOTE: This process can be aborted at any time by pressing the MENU exit key
VOLUME
.
PROGRAM CHANGE
–AVD
–Adj
–SET
RSET
2nd
2nd
1st
1st
audio functions
From your EGi ref. 40230 and 40240 control unit, you will have control over the audio programs in your
installation.
VOLUME CONTROL
To modify the volume in the room where the control unit is installed, press (OK/+) to increase or (OFF/-)
to decrease the volume.
PROGRAM CHANGE
Depending on the central unit and the control unit of your system, up to 3 programs can be chosen. (Three
general and a local one, depending on the control unit).
To change between available programs, press the MENU key
until AUD appears on the display. Then,
using (OK/+) check the available programs.
NOTE: You can exit to the main menu at any point by pressing EXIT MENU key
www.egiaudio.com
PR.–1
ST01
RADIO STATION TUNING AND MEMORIZATION
To select a radio station in the local tuner or the central unit, please do as
follows:
1. Press repeatedly the MENU key
until AUD appears on the display.
2. Then, press (OK/+) to visualize PR-1. (If you are tuning a local program,
L will appear).
3. Press the MENU key
again and M followed by the memory position
of the tuned station.
4. If you press (OFF/–) or (OK/+) then, you will see the memory position
and frequency for the stored radio stations.
5. By pressing the MENU key
again, SCAN will appear on the display.
6. Press shortly (OFF/–) or (OK/+) to increase or decrease the tuned
frequency manually. If you make that press longer, the search will be
performed automatically, and SRCH will appear on the display.
7. Once the radio station has been chosen, pressing the MENU key
twice.
present SAVE on the display.
26
will
control unit
8. Choose the memory position to store the radio station pressing (OFF/–)
or (OK/+) shortly. Once you have chosen the memory position, press
(OK/+) for 2 seconds. The frequency will stop flashing and AUD appears
on the display.
ECUALIZATION (bass and treble), BALANCE AND VOLUME CONFIGURATION
If you want to make modifications to the audio, please follow these instructions:
DELETE A PRESET STATION
1. To delete a preset station, select the memory position following the
procedure described previously (points 3 and 4).
3. Press (OFF/–) or (+/OK) to enhance or soften low frequencies.
2. After this, press MENU key
5. To choose the balance level, press again the MENU key
until DEL appears.
a few times until AUD appears on the display.
to navigate the menus until B appears.
4. Once the low frequencies are adjusted, press again the MENU key
to do the same with high
frequencies (T appears on the display) repeating 3.
and use (OFF/–) and (ON/+) to send power
to the left or right speaker.
3. Press (OK/+) to confirm deletion.
NOTE: You can exit to the main menu at any point by pressing EXIT MENU
key
1. Press MENU key
2. Press (+/OK) and use MENU key
6. By pressing the MENU key
again, the volume function (V-) appears on the display. Use (OFF/–)
and (ON/+) to adjust it.
twice.
NOTE: You can exit to the main menu at any point by pressing EXIT MENU key
–AVD
twice.
n.–1
–AVD
1st
b. 3
2nd
2nd
1st / 3rd
ScAN
1st
control unit
40230, 40240
1st
T. 3
BA.R 3
1st 1st
1st 1st
1st
2nd
2nd
2nd
SA v3
1st
2nd
2nd
2nd
3rd
1st
27
www.egiaudio.com
40230, 40240
control unit
intercommunication functions
3. Press MENU key
until CH appears. Press (OFF/–) or (OK/+) to
choose NO (deactivated) or YES (activated).
COMMUNICATE WITH DIFFERENT ZONES
An added feature of the DOMOS2 system is the ability to intercommunicate to any zone of the installation.
1. Press MENU key
–ADJ
a few times until INT appears on the display.
cA–5
2nd
2. Then, press repeatedly (+/OK) to see the available zones. If you want to speak to the whole installation,
choose zone 0 (GENERAL).
2nd
1st
2nd
1st
3. Keep pressed the key TALK in the control unit. TALK and the zone number appears on the display.
4. To return the main menu, press the EXIT MENU key
––iNT
shortly.
DOOR PHONE
This function only appears in the control unit, if the phone door module
EGi ref. 40410 or 40420 is installed and activated in the central unit.
tA04
2nd
1st
The function will allow answering a call from the door entry system from any
zone of the installation. Up to 3 different doors can be connected to the system.
When the door entry system detects a call, the procedure will be as follows:
1. PO–1 will appear on the control unit display (if the call comes from door 1;
the installer will properly configure the system).
CARILLON FUNCTION
This function appears when the service is active in the Central unit.
2. You can answer the call pressing the INTERCOM key
and talking.
To allow answering, release the INTERCOM key . There will be 90
seconds to get the reply from the street.
3. To open the door, press the
key. To cancel the communication, press
the
key.
Using this service, a musical tone will be produced for the installation every 15, 30 or 60 minutes.
To activate or deactivate the service (if available), please do as follows:
1. Press MENU key
4 times AUD > INT > VIG > until ADJ.
2. Press (OK/+/ON) for 2 seconds.
www.egiaudio.com
28
40230, 40240
control unit
surveillance functions
po–1
1st
2nd
BABY SITTER FUNCTION
Using this function, you will be able to listen any room in the installation and check easily if a baby is resting
quietly or an ill person is in need.
3rd
1. Press MENU key
several times until VIG appears on the display.
BELL FUNCTION
All the DOMOS2 Central units are ready to have the door bell connected.
2. Then, press (OK/+). VIGL appears.
When the door bell is rang, a tune is generated in the areas of the installation
with the service activated.
4. The zone under surveillance LED lights
3. Press (OFF/–)and (OK/+) to select YES (activated) or NO (deactivated).
.
1. Press MENU key
ViGL
4 times AUD > INT > VIG > ADJ.
ViGL
2nd
2. Press (OK/+/ON) for 2 seconds.
3. Press the MENU key
control unit
To activate this service: :
1st
several times until BE-Y appears.
4. Press (OFF/–) or (OK/+) to choose NO (deactivated) or YES (activated).
–Adj
be-y
2nd
1st
29
www.egiaudio.com
40230, 40240
control unit
LISTEN FUNCTION
When the baby sitter configuration is finished, another control unit must be set to listen the surveilled zones.
This way, you will listen any sound coming from these zones.
If the baby sitter function is active in more than one room, the system will poll them every 10 seconds. On
the display, the zone under surveillance will appear.
3.
4.
Press MENU key
a few times until LS appears on the display.
Press (OFF/–) and (OK/+) to select YES (activated) or NO
(deactivated).
–AJV
ES–S
To configure this do as follows:
2nd
1. Press MENU key
1st
several times until VIG appears on the display.
2. Then, press (OK/+). VIGL appears.
3. Press MENU key
. LSN appears on the display.
4. Press (OFF/–) and (OK/+) to select YES (activated) or NO (deactivated).
5. The listen LED lights
oth e r f u n c t i o n s
.
NOTE. To use this services, “NO DISTURB” must be deactivated. (please, refer to “Other functions” ).
lsn
lsn
DO NOT DISTURB
This function mutes any communication from the bell, entry phone or intercom
in the zone where the control unit is. To configure this, please do as follows.
1. Press EXIT MENU key
2. Press (OFF/–)and (OK/+) to select YES (activated) or NO (deactivated).
1st
3. The do not disturb LED lights
To allow or not the zone surveillance, please do as follows:
.
priv
2nd
1. Press MENU key
several times until ADJ appears.
2. Then, press (OK/+) for two seconds.
www.egiaudio.com
until PRIV appears.
2nd
2nd
1st
30
control unit
ALARM CLOCK FUNCTION
The control unit has an embedded alarm clock that will let you connect the
audio system at the given time or switch on a buzzer.
AUTO SWITCH OFF (SLEEP)
The control unit includes an auto timer. If this function is ON, the control unit will automatically switch off
in 30 minutes.
To configure this utility:
To activate this, do as follows:
1. Press MENU key
4 times AUD > INT > VIG >ADJ.
1. Press the EXIT MENU key
3 times.
2. Then, press (OK/+) for two seconds.
2. SLE appears.
3. ALRM appears on the display.
3. Press (OFF/–) and (OK/+) to select YES (activated) or NO (deactivated).
4. Press (OK/+) again to configure the time. The hour blinks.
5. Adjust the time with (OK/+) or (OFF/–). Press MENU key
4. If the service is activated, the clock LED lights
the minutes the same way.
alrm
2nd
-Adj
.
to configure
0 9 : 31
alrm
1st
2nd 2nd
1st 2nd
1st
1st
3rd
2nd
tnr
2nd
2nd
2nd
1st
more adjustments
Once the alarm clock is configured, you can connect or disconnect it in an easy way:
1. Press the EXIT MENU key
BACKLIGHT ADJUSTMENT
Using this, you will modify the intensity of the display light.
.
2. ALRM appears.
3. Press (OFF/–)and (OK/+) to select YES (activated) or NO (deactivated).
1. Press MENU key
4. If the alarm clock is activated, the bell LED lights
2. Then, press (OK/+) for two seconds.
.
31
4 times AUD > INT > VIG > ADJ.
www.egiaudio.com
control unit
40230, 40240
control unit
40230, 40240
3. Press (OFF/–)and (OK/+) to select YES (activated) or NO (deactivated).
4. If the service is activated, the clock LED lights.
-Adj
LANGUAGE SELECTION
The menu language can be selected. To choose your language, please do
as follows:
1. Press MENU key
Lgt
2nd
2nd
1st
2. Then, press (OK/+) for two seconds.
1st
3. Press again (OK/+) several times until LENG appears on the display.
Press (OFF/–) or (OK/+) to choose from Spanish, English, Potuguese
or auto. In auto mode, th control units take the language from the Central
Unit. Check the Central Unit user manual for details.
TIME ADJUSTMENT
The control unit can set the time for the installation or get it from the Central Unit.
If you need to adjust the time from the control unit, do as follows:
1. Press MENU key
2nd
2. Then, press (OK/+) for two seconds.
1st
3. Press again (OK/+) several times until HOUR appears on the display.
4. Press (OK/+) again to configure the time. The hour blinks.
5. Adjust the time with (OK/+) or (OFF/–). Press MENU key
1st
www.egiaudio.com
to configure the minutes the same way.
0 9 : 21
2nd
2nd
LanG
-Adj
4 times AUD > INT > VIG > until ADJ.
-Adj
4 times AUD > INT > VIG > until ADJ.
2nd
0 9 : 21
2nd
1st
2nd
2nd
1st
32
2nd
2nd
1st
40230, 40240
control unit
SOFTWARE VERSION
If you need technical support on the product, it is possible that you are asked
about the software version.
To check this parameter:
1. Press MENU key
4 times AUD > INT > VIG > until ADJ.
2. Then, press (OK/+) for two seconds.
3. Press again (OK/+) several times until V appears on the display.
4. The number that appears on the display is the software version.
V 1
control unit
-Adj
2nd
1st
33
www.egiaudio.com
40250, 40260
control units
40250
40260
LCD. 3 AUDIO PROGRAMS + IR
LCD. 3 AUDIO PROGRAMS + LOCAL FM + IR
overview
EGi ref. 40250 y 40260 control units allow the configuration of a wide variety of audio and other functions,
that DOMOS2 provides.
The information is displayed using a LCD display, the model EGi ref. 40260 includes a local FM tuner and
they can supply up to 3 audio programs.
Using these control units, the following services can be accessed:
EGi ref. 40260
13
14
12
11
10
9
•
Up to 3 stereo audio programs (depending on the central unit) and a local FM program (only for EGi
ref. 40260).
2
•
Acoustic surveillance (baby sitter).
4
3
•
Local alarm clock.
6
•
General or local intercom with zone name visualization.
8
5
7
•
Message recorder.
•
Sound system remote control (IR Link, infrared remote control for sound system from any room
where a control unit is installed, using EGi ref. 40130 and 40100 or the sound system remote control).
•
Bell (a tone is generated in the installation when the door bell rings).
NOTE: This service must be activated wiring the door bell to the Central Unit.
•
SOS: Alerts about a dangerous situation or someone in need of help.
•
Door phone: You can answer a call to the door entry phone from any room with a control unit.
•
•
Timer
Carillon
www.egiaudio.com
34
1
1
OK/+. Power ON.
8
Cancel door phone.
2
OFF/–. Power OFF.
9
Communication.
3
Volume UP.
10 Baby sitter ON.
4
Volume DOWN.
11 Alarm clock.
5
Menu key.
12 Do not disturb.
6
Exit menu.
13 Timer.
7
Door phone.
14 Surveillance active.
control units
before starting
Once the installation is finished, the control units must be configured for them
to work properly in the system.
SWITCHING THE CONTROL UNIT ON AND OFF
To activate the control unit, press (OK/+/ON). When powered on, the control
unit retrieves the last values before switching off.
For swithing off, keep the key (OFF/-) pressed.
When doing this, all the control units in the installation, will configure in SETUP mode. Automatically the
following number to the assigned one will flash in the rest of the control units. (if the zone chosen for the
example is 10, the other control units will display 11).
You only have to press (OK/+/ON) in the following one for it have that area assigned and repeat the operation
until all the control units have an area assigned.
NOTE: This process can be aborted at any time by pressing the EXIT MENU key
.
From the central unit:
ZONE ASSIGNMENT
Each room is known as a ZONE.
If your installation includes a central unit EGi ref. 40020, 40040 and 40060, the installation reset can be
made from this unit.
This procedure will assign a zone to each control unit, so that the central unit
will detect and assign functions to each control unit, and intercomm will be set.
Please refer to your central unit manual for detailed information.
To assign a ZONE to a control unit, do as follows.
–miscel
From the control unit:
1. Press MENU key
and pass AUDIO> INTCOM >SURVEIL > until you
adjustm
SETUP
03
2nd
2nd
2nd 1st
1st
1st
1st
1st
2nd
reach MISCEL.
2. Press (OK/+/ON).
3. Press the MENU key
twice and ADJUST will appear on the display.
4. Press (OK/+/ON) for 2 seconds.
5. Press the MENU key
several times until SETUP appears.
6. Press (OK/+) for a few seconds and navigate using (OK/+/ON) and
(OFF/–) until the selected zone name and number appears on the display.
Then, press (OK/+/ON).
7. The number on the display stops flashing. The zone has been assigned
to the control unit.
35
RESET SYSTEM ZONE ASSIGNMENT
If you need to SETUP the installation, you must reset (from the control unit) the installation. Follow the
instructions to do so.
1. Press the MENU key
3 times, AUDIO > INTERC > SURVEIL > until MISCEL is displayed.
2. Press (OK/+/ON) for 2 seconds.
3. Press the MENU key
several times until SET appears.
www.egiaudio.com
control units
40250, 40260
40250, 40260
control units
4. Press (OK/+/ON) for a few seconds and navigate using (OK/+/ON) and (OFF/–) until RSET appears
on the display.
5. Keep (OK/+/ON) pressed for some time and after about 3 seconds, RSET will stop flashing and ST01
appears on the control units display.
The installation has been reset. Now, assign a new number to each zone following the procedure “Zone
assignation”.
NOTE: You can exit to the main menu at any time pressing EXIT MENU key
PROGRAM CHANGE
Depending on the central unit and the control unit of your system, up to 3 programs
can be chosen. (3 general and a local one, depending on the control unit).
To change between available programs, press the MENU key
until AUD
appears on the display. Then, using (OK/+) check the available programs.
NOTE: To exit to the main menu at any time, just press EXIT MENU key
VOLUME CONTROL
–MISCEL
ADJUSTM
PROGRAM CHANGE
AUDIO
RESET
SETUP
2nd
2nd
2nd 1st
1st
1st
1st
twice.
several times.
1st
P RO G R L
2nd
audio functions
From your EGi ref. 40250 and 40260 control unit, you will have control over the audio programs in your
installation.
VOLUME CONTROL
To modify the volume in the room where the control unit is installed, press (OK/+/ON) to increase or (OFF/–)
to decrease the volume. Keeping (OFF/-) pressed, switches off the control unit.
RADIO STATION TUNING AND MEMORIZATION
To select a radio station in the local tuner or the central unit, please do as
follows:
1. Press repeatedly the MENU key
until AUDIO appears on the display.
2. Then, press (OK/+) to visualize the selected program. (If you are tuning
a local program, L will appear).
3. Press the MENU key
again and MEM followed by the memory
position of the tuned station.
4. If you press (OFF/–) or (OK/+/ON) then, you will see the memory position
and frequency for the stored radio stations.
www.egiaudio.com
36
5. By pressing the MENU key
control unit
again, SCAN will appear on the display.
s e a rch
6. Press shortly (OFF/–) or (OK/+/ON) to increase or decrease the tuned
frequency manually. If you make that press longer, the search will be
performed automatically, and SRCH will appear on the display.
7. Once the radio station has been chosen, pressing the MENU key
2nd
sav e 0 6
2nd
2nd
2nd
1st
3rd
1st
will
present SAVE on the display.
8. Choose the memory position to store the radio station pressing (OFF/–) or
(OK/+/ON) shortly. Once you have chosen the memory position,press (OK/+)
for 2 seconds. The frequency will stop flashing and AUD appears on the display.
NOTE: If a non stored station is tuned, a R appears on the display next to the
frequency (e.g. 98.6R).
ECUALIZATION (bass and treble), BALANCE AND VOLUME CONFIGURATION
If you want to make modifications to the audio, please follow these instructions:
1. Press MENU key
a few times until AUDIO appears on the display.
2. Press (OK/+/ON) and use MENU key
to navigate the menus until BASS appears.
3. Press (OFF/–) or (OK/+/ON) to enhance or soften low frequencies.
4. Once the low frequencies are adjusted, press again the MENU key
DELETE A PRESET STATION
1. To delete a preset station, select the memory position following the
procedure described previously (points 3 and 4).
5. To choose the balance level, press again the MENU key
2. After this, press MENU key
6. By pressing the MENU key
until DELETE appears.
and use (OFF/–) and (OK/+/ON) to send
power to the left or right speaker.
again, the volume function (VOL) appears on the display. Use (OFF/–)
and (OK/+/ON) to adjust it.
3. Press (OK/+/ON) to confirm deletion.
NOTE: You can exit to the main menu at any point by pressing EXIT MENU
key
to do the same with high
frequencies (TREBLE appears on the display) repeating step 3.
NOTE: You can exit to the main menu at any point by pressing EXIT MENU key
twice.
twice.
AU D I O
P RO G L
2nd
1st
2nd
ba s s
2nd
MEM 1
2nd
1st / 3rd
1st
treble
BALANCE
1st 1st
1st 1st
1st
2nd
2nd
2nd
1st
37
www.egiaudio.com
control units
40250, 40260
40250, 40260
control unit
GAIN ADJUSTMENT (only for 40260 control unit)
EGi control units are factory calibrated to deliver optimum performance.
intercommunication
Nevertheless, there might be situations, where FM reception is not good enough. In those situations, manual
gain adjustment could sort out the problem.
To perform this operation, do as follows:
1. Press the MENU key
1. Press MENU key
3 times, AUDIO > INTCOM > SURVEIL > until MISCELL is displayed.
2. Press (OK/+/ON)
3. Press the MENU key
COMMUNICATE WITH DIFFERENT ZONES
An added feature of the DOMOS2 system is the ability to intercommunicate
to any zone of the installation.
several times until ADJSTM appears.
a few times until INTCOM appears on the display.
2. Then, press repeatedly (OK/+/ON) to see the available zones. If you want
to speak to the whole installation, choose zone 0 (GENERAL).
4. Press (OK/+/ON) for 2 seconds
3. Keep pressed the key TALK in the control unit. TALK and the zone number
appears on the display.
5. Press MENU key
4. To return the main menu, press the EXIT MENU key
a few times until GAIN appears.
6. Use (OK/+/ON) or (OFF/–) to increase or decrease the value between 0 and 3. When A appears, the
gain adjustment is set automatically.
– I N T CO M
ta l k 0 0
2nd
miscell
www.egiaudio.com
GA I N
GA I N 3
2nd
2nd
1st
1st
1st
38
shortly.
40250, 40260
control unit
CARILLON FUNCTION
DOOR PHONE
This function only appears in the control unit, if the phone door module EGi ref. 40410 or 40420 is
installed and activated in the central unit.
Using this service, a musical tone will be produced for the installation every
15, 30 or 60 minutes.
To activate or deactivate the service (if available), please do as follows:
1. Press the MENU key
3 times, AUDIO > INTCOM > SURVEI > until
MISCEL is displayed.
2. Press (OK/+/ON).
3. Press the MENU key
The function will allow answering a call from the door entry system from any zone of the installation. Up to
3 different doors can be connected to the system.
When the door entry system detects a call, the procedure will be as follows:
1. PO–1 will appear on the control unit display (if the call comes from door 1; the installer will properly
configure the system).
2. You can answer the call pressing the INTERCOM key
several times until ADJSTM appears.
INTERCOM key
4. Press (OK/+/ON) for 2 seconds
and talking. To allow answering, release the
. There will be 90 seconds to get the reply from the street.
3. To open the door, press the key
. To cancel the communication, press the key
.
5. Press the MENU key
until CARLL appears. Press (OFF/–) or (OK/+/ON)
to choose NO (deactivated) or YES (activated).
–miscel
A dj u st m
When the door bell is rang, a tune is generated in the areas of the installation with the service activated.
CA R L L ys
2nd
2nd
1st
1st
2nd
BELL FUNCTION
All the DOMOS2 Central units are ready to have the door bell connected.
2nd
To activate this service:
1st
1. Press the MENU key
3 times, AUDIO > INTCOM > SURVEI > until MISCEL is displayed.
2. Press (OK/+/ON).
3. Press the MENU key
several times until ADJSTM appears.
4. Press (OK/+/ON) for 2 seconds.
39
www.egiaudio.com
control units
This function appears when the service is active in the Central unit.
40250, 40260
5. Press the MENU key
control unit
LISTEN FUNCTION
When the babysitter configuration is finished, another control unit must be set
to listen the surveilled zones. This way, you will listen any sound coming from
these zones.
several times until BELL appears.
6. Press (OFF/–) or (OK/+/ON) to choose NO (deactivated) or YES (activated).
DOOR PHONE
BELL
port 1
A DJ U ST M
If the babysitter function is active in more than one room, the system will poll
them every 10 seconds. On the display, the zone under surveillance will appear.
BELL
2nd
2nd
1st
1st
To configure this do as follows:
1. Press MENU key
several times until VGLA appears on the display.
2. Then, press (OK/+/ON). VIGLDO appears
3. Press MENU key. LSN appears on the display.
surveillance functions
4. Press (OFF/–)and (OK/+/ON) to select YES (activated) or NO (deactivated).
BABY SITTER FUNCTION
Using this function, you will be able to listen any room in the installation and check easily if a baby is resting
quietly or an ill person is in need.
1. Press MENU key
5. The listen mark appears on the display.
NOTE. To use this services, “NO DISTURB” must be deactivated.
(Please, refer to “Other functions”).
several times until VIGIL appears on the display.
2. Then, press (OK/+/ON). VIGL appears.
LSN–N
3. Press (OFF/–) and (OK/+/ON) to select YES (activated) or NO (deactivated).
4. The zone under surveillance indicator triangle is on.
LSN–S
2nd
1st
SURVEIL
SURV-Y
2nd
1st
www.egiaudio.com
40
40250, 40260
control unit
other functions
5. WAKE-UP appears on the display.
DO NOT DISTURB
This function mutes any communication from the bell, entry phone or intercom
in the zone where the control unit is. To configure this, please do as follows.
1. Press EXIT MENU key
7. Adjust the time with (OK/+/ON) or (OFF/–). Press MENU key
8. Press now MENU key
to configure the minutes the same way.
to reach the BUZZR menu.
9. Press (OFF/–) and (OK/+/ON) to select YES (activated) or NO (deactivated).
until PRIV appears.
2. Press (OFF/–) and (OK/+/ON) to select YES (activated) or NO (deactivated).
3. The PRIVATE mark
6. Press (OK/+/ON) again to configure the time. The hour blinks.
If the alarm clock is active, and BUZZER is deactivated, the audio program will be connected by the alarm clock.
appears on the display.
PRIV ys
2nd
2nd
A DJ U ST M
WA K E - U P
M 0 8 : 31
2nd
2nd 2nd
2nd 1st
1st
1st
1st
1st
2nd
1st
To easily connect or disconnect the alarm clock:
ALARM CLOCK FUNCTION
The control unit has an embedded alarm clock that will let you connect the
audio system at the given time or switch on a buzzer.
1. Press EXIT MENU key
until WAKE appears.
2. Press (OFF/–) and (OK/+/ON) to select YES (activated) or NO (deactivated).
3. The ALARM CLOCK mark
appears on the display.
To configure this utility:
1. Press the MENU key
3 times, AUDIO > INTCOM > SURVEI > until
MISCEL is displayed.
2. Press (OK/+/ON).
3. Press MENU key
WAKEYS
2nd
1st
several times until ADJSTM appears.
4. Press (OK/+/ON) for 2 seconds.
41
2nd
control units
–miscel
control unit
40250, 40260
AUTO SWITCH OFF (TIMER)
The control unit includes an auto timer. If this function is ON, the control unit will automatically switch off
in 30 minutes.
MESSAGE RECORDER
An added value of your control unit, is the message recording with a maximum
of 20 secs.
To activate this, do as follows:
1. Press the MENU key
1. Press the MENU key
3 times, AUDIO > INTCOM > SURVEI > until
MISCELL is displayed.
3 times, AUDIO > INTCOM > SURVEI > until MISCEL is displayed.
2. Press (OK/+/ON)
2. Press (OK/+/ON).
3. Press the MENU key
3. RECORD appears.
several times until ADJSTM appears.
4. Keep pressed (OK/+/ON) as you talk. TALK appears on the screen.
4. Press (OK/+/ON) for 2 seconds
5. WAKE-UP appears on the display.
6. Press the MENU key
shortly until SL appears on the display:
–MISCELL
until TIMER appears.
2. Press (OFF/–)and (OK/+/ON) to select YES (activated) or NO (deactivated).
When a message is recorded, MESSAGE appears on the display. If you want
to listen a left message:
3. The TIMER mark appears on the display.
TIMER CONFIGURATION
–MISCELL
1. Press the MENU key
CONNECT IMER
A DJ U ST M
S L : 31
2nd
2nd
1st
1st
2nd
2. Press (OK/+/ON).
TIMR SI
2nd
2nd
1st
1st
3 times, AUDIO > INTCOM > SURVEI > until
MISCEL is displayed.
2nd
3. LISTEN appears.
4. Press (OK/+) to listen the message.
5. To delete the message, press (OFF/–) when
LISTEN appears on the display.
www.egiaudio.com
TA L K
1st
Once the TIMER is configured, it has to be connected.
1. Press EXIT MENU key
REC
2nd
7. Press (OK/+/ON) or (OFF/–) to choose the disconnection time between 1 and 59 minutes.
42
LISTN M
2nd
1st
40250, 40260
control unit
other adjustments
TIME ADJUSTMENT
The control unit can set the time for the installation or get it from the Central Unit.
BACKLIGHT ADJUSTMENT
Using this, you will modify the intensity of the display light when it is on
standby:
1. Press the MENU key
3 times, AUDIO > INTCOM > SURVEI > until
1. Press MENU key
4 times AUDIO > INTCOM > SURVEI > until MISCEL.
2. Then, press (OK/+/ON) for two seconds.
3. Press again (OK/+/ON) several times until HOUR appears on the display.
MISCELL is displayed.
4. Press (OK/+/ON) again to configure the time. The hour blinks.
2. Press (OK/+/ON).
3. Press the MENU key
If you need to adjust the time from the control unit, do as follows:
5. Adjust the time with (OK/+/ON) or (OFF/–). Press MENU key
several times until ADJSTM appears.
to configure the minutes the same way.
5. ALRM appears on the display.
6. Press the MENU key
–miscell
shortly until LIGHT appears on the display:
7. Press (OFF/–)and (OK/+/ON) to select the desired intensity.
miscell
A DJ U ST M
A DJ U ST M
time adj
2nd
2nd
1st
1st
2nd
M 08:41
2nd 2nd
2nd
1st
1st
– l i g h t-
2nd
2nd 2nd
2nd
1st
1st
1st
43
www.egiaudio.com
control units
4. Press (OK/+/ON) for 2 seconds.
control unit
40250, 40260
4. Press (OK/+/ON) for 2 seconds
LANGUAGE SELECTION
The menu language can be selected. To choose your language, please do as follows:
5. WAKE-UP appears on the display.
1. Press the MENU key
6. Press again (OK/+/ON) several times until VERS appears on the display.
3 times, AUDIO > INTCOM > SURVEI > until MISCELL is displayed.
7. The number that appears on the display is the software version.
2. Press (OK/+/ON).
3. Press the MENU key
several times until ADJSTM appears.
4. Press (OK/+/ON) for 2 seconds.
miscel
5. WAKE-UP appears on the display.
6. Press again (OK/+/ON) several times until the language appears on the display.
7. Press (OFF/–) or (OK/+/ON) to choose from Spanish, English, Potuguese or auto. In auto mode, the
control units take the language from the Central Unit. Check the Central Unit user manual for details.
–miscel
A DJ U ST M
L A N G UA
2nd
2nd
1st
1st
2nd
e ng l i s h
2nd 2nd
2nd
1st
1st
SOFTWARE VERSION
If you need technical support on the product, it is possible that you are asked about the software version.
To check this parameter:
1. Press the MENU key
3 times, AUDIO > INTCOM > SURVEI > until MISCEL is displayed.
2. Press (OK/+/ON)
3. Press the MENU key
www.egiaudio.com
several times until ADJSTM appears.
44
a dj u st M
VER
2nd
2nd
1st
1st
1
control unit
40270
40280
DOMOTIC LCD. 3 AUDIO PROGRAMS + IR
DOMOTIC LCD. 3 AUDIO PROGRAMS + LOCAL FM + IR
overview
EGi ref. 40270 and 40280 control units are the most advanced solution in the series. They allow the configuration
of a wide variety of audio and domotic functions, that DOMOS2 provides.
EGi ref. 40280
7
6
9
11
10
1
3
8
2
4
The information is displayed using a blue backlighted LCD display and controlled through a swing system for easy
menu access. The model EGi ref. 40280 includes a local FM tuner and they can supply up to 3 audio programs.
Using these control units, the following services can be accessed:
•
Up to 3 stereo audio programs (depending on the central unit) and a local FM program (only for
EGi ref. 40280).
•
Acoustic surveillance (baby sitter).
•
Local alarm clock.
•
General or local intercom with zone name visualization.
•
Message recorder.
•
Sound system remote control (IR Link, infrared remote control for sound system from any room
where a control unit is installed, using EGi ref.40130 and 40100 or the sound system remote control).
NOTE: This service may not work with all remote control units.
•
Bell (a tone is generated in the installation when the door bell rings).
NOTE: This service must be activated wiring the door bell to the Central Unit.
•
In-door and out-door thermometer (out-door thermometer using EGi ref. 40530).
17
16
15
18
14
5
12
13
1
OK/+. Power ON.
10 Timer.
2
Power OFF.
11 Baby sitter.
3
Volume UP.
12 Cancel door phone.
4
Volume DOWN.
13 Open door phone.
5
Menu key.
14 SOS.
6
Menu exit key.
15 Audio function.
7
Intercomm function.
16 General function.
8
Alarm clock.
17 Listen funciton.
9
Do not disturb.
18 Other functions.
45
•
Thermostat
•
SOS: Alerts about a dangerous situation or someone in need of help.
•
Door phone: You can answer a call to the door entry phone from any room with a control unit.
•
Timer
•
Carillon
control unit
40270, 40280
40270, 40280
control unit
before starting
Once the installation is finished, the control units must be configured for them to work properly in the system.
SWITCHING THE CONTROL UNIT ON AND OFF
To activate the control unit, press (OK/+/ON). When powered on, the control unit retrieves the last values
before switching off. For swithing off, keep the key (OFF/-) pressed.
You only have to press (OK) in the following one for it have that area
assigned and repeat the operation until all the control units have an area
assigned.
NOTE: This process can be aborted at any time by pressing the EXIT MENU
key
.
From the central unit:
ZONE ASSIGNMENT
Each room is known as a ZONE.
This procedure will assign a zone to each control unit, so that the central unit will detect and assign functions
to each control unit, and intercomm will be set.
If your installation includes a central unit EGi ref. 40020, 40040 and 40060,
the installation reset can be made from this unit. Please refer to your central
unit manual for detailed information.
To assign a ZONE to a control unit, do as follows.
From the control unit:
1. Press MENU key
and pass AUDIO> INTERCOM >SURVEI > until you reach MISCEL.
miscell
A d j u st m
2. Press (OK/+/ON).
3. Press the MENU key
twice and ADJUSTM will appear on the display
2nd
4. Press (OK/+/ON) for 2 seconds.
5. Press the MENU key
2nd
1st
several times until SET-UP appears.
1st
6. Press (OK/+/ON) for a few seconds and navigate using (OK/+/ON) and (OFF/–) until the selected zone
name and number appears on the display. Then, press (OK/+/ON).
SETUP
7. The number on the display stops flashing. The zone has been assigned to the control unit.
When doing this, all the control units in the installation, will configure in SETUP mode.
Automatically the following number to the assigned one will flash in the rest of the control units (if the
zone chosen for the example is 10, the other control units will display 11).
www.egiaudio.com
46
SETUP
2nd
1st
1st
7
1st
2nd
40270, 40280
control unit
RESET SYSTEM ZONE ASSIGNMENT
If you need to SETUP the installation, you must reset (from the control unit)
the installation.
S E T- U P
Follow the instructions to do so.
reset
––––
2nd 1st
1. Press the MENU key
3 times, AUDIO > INTERCOM > SURVEIL >
until MISCELL is displayed.
2nd
1st
1st
3. Press the MENU key
several times until SET appears.
4. Press (OK/+/ON) for a few seconds and navigate using (OK/+/ON) and
(OFF/–) until RSET appears on the display.
audio functions
From your EGi ref. 40270 and 40280 control unit, you will have control over the audio programs in your
installation.
5. Keep (OK/+/ON) pressed for some time and after about 3 seconds, RESET
will stop flashing and ST01 appears on the control units display. The
installation has been reset. Now, assign a new number to each zone
following the procedure “Zone assignation”.
VOLUME CONTROL
To modify the volume in the room where the control unit is installed, press (OK/+/ON) to increase or (OFF/–)
to decrease the volume. Keeping (OFF/–) pressed, switches off the control unit.
NOTE: You can exit to the main menu at any time pressing EXIT MENU key
several times.
miscell
1st
To change between available programs, press the MENU key
A d j u st m
2nd
PROGRAM CHANGE
Depending on the central unit and the control unit of your system , up to 3 programs can be chosen (3 general
and a local one, depending on the control unit).
until AUDIO appears on the display. Then,
using (OK/+/ON) check the available programs.
NOTE: To exit to the main menu at any time, just press EXIT MENU key
2nd
1st
47
twice.
control unit
2. Press (OK/+/ON) for 2 seconds.
control unit
40270, 40280
VOLUME CONTROL
AU D
1
AU D
2nd
1st
8. Choose the memory position to store the radio station pressing (OFF/–)
or (OK/+/ON) shortly. Once you have chosen the memory position, press
(OK/+/ON) for 2 seconds. The frequency will stop flashing and AUD
appears on the display.
PROGRAM CHANGE
A
87. 6
1st
NOTE: If a non stored station is tuned, a R appears on the display next to the
frequency (e.g. 98.6R).
1st
1st
AU D I O
RADIO STATION TUNING AND MEMORIZATION
To select a radio station in the local tuner or the central unit, please do as follows:
1. Press repeatedly the MENU key
until AUDIO appears on the display.
1st
1st 1st
9 0 . 93
1st
2nd
again and MEM followed by the memory position of the tuned station.
4. If you press (OFF/–) or (OK/+/ON) then, you will see the memory position and frequency for the
stored radio stations.
AUTOSEARCH
5. By pressing the MENU key
s e a rc h
again, SCAN will appear on the display.
6. Press shortly (OFF/–) or (OK/+/ON) to increase or decrease the tuned frequency manually. If you make
that press longer, the search will be performed automatically, and SEARCH will appear on the display.
7. Once the radio station has been chosen, pressing the MENU key
www.egiaudio.com
PRESET
L
2nd
2. Then, press (OK/+/ON) to visualize the selected program. (If you are tuning a local program, L will appear).
3. Press the MENU key
P RO G R A M
will present SAVE on the display.
48
sav e
2nd 2nd
2nd
1st
sav e d
92.7
92.5
2nd
1st
L
1st
40270, 40280
control unit
ECUALIZATION (bass and treble), BALANCE AND VOLUME CONFIGURATION
If you want to make modifications to the audio, please follow these instructions:
1. Press MENU key
MEDIUM
a few times until AUDIO appears on the display.
2. Press (OK/+/ON) and use MENU key
to navigate the menus until
BASS appears.
3. Press (OFF/–) or (OK/+/ON) to enhance or soften low frequencies.
TREBLE
3
2nd
1st
BA L A N C E
2nd 2nd
2nd 2nd
1st
L
R
VO LU M E
0
L
2nd 2nd
1st
2nd
1st
4. Once the low frequencies are adjusted, press again the MENU key
intercommunication function
5. To choose the balance level, press again the MENU key
COMMNICATE WITH DIFFERENT ZONES
An added feature of the DOMOS2 system is the ability to intercommunicate to any zone of the installation.
6. By pressing the MENU key
1. Press MENU key
and use
(OFF/–) and (OK/+/ON) to send power to the left or right speaker.
again, the volume function (VOL) appears
on the display. Use (OFF/–) and (OK/+/ON) to adjust it.
NOTE: You can exit to the main menu at any point by pressing EXIT MENU
key
twice.
a few times until INTCOM appears on the display.
2. Then, press repeatedly (+/OK) to see the available zones. If you want to speak to the whole installation,
choose zone 0 (GENERAL).
3. Keep pressed the key TALK in the control unit. TALK and the zone number appears on the display.
4. To return the main menu, press the EXIT MENU key
shortly.
2nd
AU D I O
BA S S
2nd
1st
I N T E R CO M
L
2nd
1st
ZONE
1st
2nd
1L
1st
1st
49
www.egiaudio.com
control unit
to do the same with medium and high frequencies (MEDIUM and TREBLE
appears on the display) repeating step 3.
40270, 40280
control unit
CARILLON FUNCTION
When the door entry system detects a call, the procedure will be as follows:
1. DOOR PHONE 1 will appear on the control unit display (if the call
comes from door 1; the installer will properly configure the system).
This function appears when the service is active in the Central unit.
Using this service, a musical tone will be produced for the installation every 15, 30 or 60 minutes.
2. You can answer the call pressing the INTERCOM key
To activate or deactivate the service (if available), please do as follows:
1. Press the MENU key
3 times, AUDIO > INTERCOM > SURVEIL > until MISCELL is displayed.
2. Press (OK/+/ON).
allow answering, release the INTERCOM key .
There will be 90 seconds to get the reply from the street.
To open the door, press the MENU key
3. Press the MENU key
several times until ADJUSTM appears.
press the EXIT MENU key
4. Press (OK/+/ON) for 2 seconds.
5. Press MENU key
until CARILLON appears. Press (OFF/–) or (OK/+/ON) to choose NO (deactivated)
and talking. To
CALL
. To cancel the communication,
.
ANSWER
or YES (activated).
door
MISCELL
A D J U ST M
2nd
1st
YES
2nd 2nd
1st
2º
CARILLON
2nd
1st
DOOR PHONE
This function only appears in the control unit, if the phone door module EGi ref. 40410 or 40420 is
installed and activated in the central unit.
The function will allow answering a call from the door entry system from any zone of the installation.
Up to 3 different doors can be connected to the system.
www.egiaudio.com
50
OPEN
END COMM
40270, 40280
control unit
BELL FUNCTION
All the DOMOS2 Central units are ready to have the door bell connected.
When the door bell is rang, a tune is generated in the areas of the installation
with the service activated.
To activate this service:
3 times, AUDIO > INTCOM > SURVEIL > until
MISCELL is displayed.
several times until SURVEIL appears on the display.
2. Then, press (OK/+/ON). MONITORD appears
4. The zone under surveillance
several times until ADJSTM appears.
4. Press (OK/+/ON) for 2 seconds
5. Press the MENU key
1. Press MENU key
3. Press (OFF/–)and (OK/+/ON) to select YES (activated) or NO (deactivated).
2. Press (OK/+/ON).
3. Press the MENU key
BABY SITTER FUNCTION
Using this function, you will be able to listen any room in the installation and check easily if a baby is resting
quietly or an ill person is in need.
several times until BELL appears.
6. Press (OFF/–) or (OK/+/ON) to choose NO (deactivated) or YES (activated).
indicator triangle is on.
LISTEN FUNCTION
When the babysitter configuration is finished, another control unit must be set to listen the surveilled zones.
This way, you will listen any sound coming from these zones.
If the babysitter function is active in more than one room, the system will poll them every 10 seconds. On
the display, the zone under surveillance
MISCELL
A D J U ST
BELL
To configure this do as follows:
1. Press MENU key
2nd
1st
will appear.
2nd
several times until SURVEIL appears on the display.
2. Then, press (OK/+/ON). MONITORD appears
1st
3. Press MENU key
. LISTEN appears on the display.
4. Press (OFF/–)and (OK/+/ON) to select YES (activated) or NO (deactivated).
5. The listen
mark appears on the display.
NOTE. To use this services, “NO DISTURB” must be deactivated. (please, refer to “Other functions”)
51
www.egiaudio.com
control unit
1. Press the MENU key
surveillance functions
control unit
40270, 40280
SURVEILLED ZONE
S U RV E I L
LISTEN FUNCTION
M N I TO R E D
S U RV E I L
YES
ALARM CLOCK FUNCTION
The control unit has an embedded alarm clock that will let you connect the
audio system at the given time or switch on a buzzer.
L I ST E N
YES
2nd
1st
To configure this utility:
2nd
2nd
1st
1. Press the MENU key
3 times, AUDIO > INTERCOM > SURVEIL >
until MISCELL is displayed.
2. Press (OK/+/ON)
3. Press the MENU key
4. Press (OK/+/ON) for 2 seconds
other functions
DO NOT DISTURB
This function mutes any communication from the bell, entry phone or intercom in the zone where the
control unit is.
To configure this, please do as follows.
1. Press EXIT MENU key
5. WAKE-UP appears on the display.
6. Press (OK/+/ON) again to configure the time. The hour blinks.
7. Adjust the time with (OK/+/ON) or (OFF/–). Press MENU key
to reach the BUZZER menu.
9. Press (OFF/–)and (OK/+/ON) to select YES (activated) or NO (deactivated).
If the alarm clock is active, and BUZZER is deactivated, the audio program
will be connected by the alarm clock.
appears on the display.
1st
D - N - D I ST
MISCELL
YES
2nd
2nd
A DJ U ST M
L
2nd
1st
www.egiaudio.com
to
configure the minutes the same way.
8. Press now the MENU key
until D-N-DIST appears.
2. Press (OFF/–) and (OK/+/ON) to select YES (activated) or NO (deactivated).
3. The D-N-DIST mark
several times until ADJUSTM appears.
52
1st
2nd
40270, 40280
control unit
2. Press (OK/+/ON).
2nd
7 : 1 53
ALARM
BUZZER
7: 15
2nd 1st
1st - 3rd
3. Press the MENU key
NO
1st 1st
2nd
4. Press (OK/+/ON) for 2 seconds.
1st
shortly until TIMER appears on the display:
7. Press (OK/+/ON) or (OFF/–) to choose the disconnection time between 1 and 59 minutes. Once the
TIMER is configured, it has to be connected.
until WAKE-UP appears.
2. Press (OFF/–) and (OK/+/ON) to select YES (activated) or NO (deactivated).
3. The BELL mark
5. WAKE-UP appears on the display.
6. Press the MENU key
2nd
To easily connect or disconnect the alarm clock:
1. Press EXIT MENU key
several times until ADJUSTM appears.
MISCELL
appears on the display.
3
1st
YES
TIMER
2nd
2nd
1st
wa k e - u p
2nd
A D J U ST M
1st
40
2nd
2nd
1st
Once the TIMER is configured, it has to be connected
2nd
1. Press EXIT MENU key
until TIMER appears.
2. Press (OFF/–)and (OK/+/ON) to select YES (activated) or NO (deactivated).
AUTO SWITCH OFF (TIMER)
The control unit includes an auto timer. If this function is ON, the control unit
will automatically switch off in up to 59 minutes.
3. The TIMER mark
appears on the display.
1st
TIMER
To activate this, do as follows:
1. Press the MENU key
3 times, AUDIO > INTERCOM > SURVEIL >
until MISCELL is displayed.
53
YES
2nd
2nd
www.egiaudio.com
control unit
ALARM
40270, 40280
control unit
more adjustments
MESSAGE RECORDER
An added value of your control unit, is the message recording with a maximum of 20 secs.
1. Press the MENU key
3 times, AUDIO > INTERCOM > SURVEIL > until MISCELL is displayed.
2. Press (OK/+/ON).
3. RECORD appears.
BACKLIGHT ADJUSTMENT
Using this, you will modify the intensity of the display light when it is on
standby:
1. Press the MENU key
3 times, AUDIO > INTERCOM > SURVEIL >
until MISCELL is displayed.
4. Keep pressed (OK/+) as you talk. TALKING MESSAGE appears on the screen.
2. Press (OK/+/ON)
MISCELL
REC MESS
3
3. Press the MENU key
TA L K
M E S SAG E
2nd
5. WAKE-UP appears on the display.
6. Press the MENU key
1st
When a message is recorded, MESSAGE appears on the display. If you want to listen a left message:
1. Press the MENU key
several times until ADJSTM appears.
4. Press (OK/+/ON) for 2 seconds.
MISCELL
shortly until LIGHT appears on the display:
A D J U ST M
LIGHT
3 times, AUDIO > INTERCOM > SURVEIL > until MISCELL is displayed.
3
2. Press (OK/+/ON).
2nd 2nd
2nd
2nd
3. PLAY MES appears.
1st
4. Press (OK/+) to listen the message. MESSAGE LISTEN appears on the display.
5. To delete the message, press (OFF/-) for two seconds when LISTEN appears on the display.
M E S SAG E
1 5 : 4 83
www.egiaudio.com
MISCELL
P L AY M E S
54
1st
1st
control unit
LANGUAGE SELECTION
The menu language can be selected. To choose your language, please do as follows:
TEMPERATURE ADJUSTMENT AND VISUALIZATION
EGi ref. 40270/40280 control unit, includes a temperature probe.
1. Press the MENU key
By default, the value registered by this probe is shown when the control unit is on stand-by.
3 times, AUDIO > INTERCOM > SURVEIL >
until MISCELL is displayed.
2. Press (OK/+/ON).
3. Press the MENU key
If you do not want it to be seen on stand-by, follow these steps:
1. Press the MENU key
several times until ADJUSTM appears.
4. Press (OK/+/ON) for 2 seconds
3. Press the MENU key
5. WAKE-UP appears on the display.
7. Press (OFF/–) or (OK/+/ON) to choose from Spanish, English, Potuguese
or auto. In auto mode, the control units take the language from the Central
Unit. Check the Central Unit user manual for details.
5. WAKE-UP appears on the display.
6. Navegue Press again (OK/+/ON) several times until TEMPERAT appears on the display.
7. Press (OFF/–)and (OK/+/ON) to select YES (activated) or NO (deactivated).
MISCELL
A D J U ST M
3
several times until ADJSTM appears.
4. Press (OK/+/ON) for 2 seconds.
6. Press again (OK/+/ON) several times until the language appears on the display.
MISCELL
3 times, AUDIO > INTERCOM > SURVEIL > until MISCELL is displayed.
2. Press (OK/+/ON).
A D J U ST M
3
2nd
1st
2nd
1st
1st
2nd
T E M P E R AT
YES
2nd
1st
2nd
2nd
1st
Altough the probe is calibrated, it might be possible that you have to adjust the probe for optimal performance.
L A N G UAG E
1. Repeat steps 1 to 3 of the previous procedure.
ENGLISH
2nd 1st
2. Press MENU key
as many times as neccessary until TEMP ADJUSTMNT appears.
3. Press (OFF/–) and (OK/+/ON) to adjust the temperature.
1st
1st
55
www.egiaudio.com
control unit
40270, 40280
40270, 40280
MISCELL
A D J U ST M
3
1st
SOFTWARE VERSION
If you need technical support on the product, it is possible that you are asked
about the software version. To check this parameter:
A D J U ST M
2nd 2nd
2nd
control unit
O
2
7
T E M P E R AT
1. Press the MENU key
3 times, AUDIO > INTERCOM > SURVEIL >
until MISCELL is displayed.
2nd
1st
1st
2. Press (OK/+/ON).
3. Press the MENU key
several times until ADJSTM appears.
THERMOSTAT FUNCTION (only with relay module in local mode)
The control units can activate a local relay when temperature drops under a certain value. To activate this
service, proceed as follows.
4. Press (OK/+/ON) for 2 seconds.
1. Press the MENU key
6. Press again (OK/+/ON) several times until VERS appears on the display.
3 times, AUDIO > INTERCOM > SURVEIL > until MISCELL is displayed.
7. The number that appears on the display is the software version.
2. Press (OK/+/ON)
3. Press the MENU key
5. WAKE-UP appears on the display.
several times until ADJSTM appears.
4. Press (OK/+/ON) for 2 seconds
MISCELL
5. WAKE-UP appears on the display.
6. Navegue Press again (OK/+/ON) several times until THERMOSTAT appears on the display.
3
7. Use (OK/+/ON) or (OFF/–) to activate or deactivate the service.
8. If the service is active, press the MENU key
to adjust the trigger temperature for relay number 3
(relay 1 on the remote control unit). This temperaure can be adjusted using (+) and (–).
miscell
a d j u st m
3
1st
www.egiaudio.com
2nd
Thermost
2nd
1st
2nd
A D J U ST M
2nd
1st
56
1st
2nd
VERS 1
2nd
1st
control unit
domotic functions
The technology provided by this control unit integrates audio and domotics
services offered by DOMOS2 series.
AWNING CONTROL
To control this service, follow these instructions:
If your installation comprises a domotic central unit or modules, you will be
able to control the devices connected to them..
2. Press (OK/+/ON) to enter the menu.
NOTE: The menus presented on the control unit, depend on the
installation configuration.
1. Press the MENU key
3. Press the MENU key
NOTE: For this function to be available, it is neccessary to have a domotic
module, linked to the area where the control unit is installed. Please,
refer to the manual for the EGi ref. 40540 unit.
If your DOMOS2 installation includes a relay module 40540 inthe zone where
the control unit is installed, you will be able to control the devices locally
connected.
a few times until AWNING appears on the display.
4. Press the side buttons (OFF/–) and (OK/+/ON) to position the awning.
BLINDS UP
AWNINGS UP
MISCELL
BLINDS UP AND DOWN
a few times until MISCELL appears on the display.
BLINDS
—
2nd 2nd
1st
MISCELL
—
—
—
2nd 2nd
2nd
1st
AW N I N G S
2nd
1st
1st
To control these services, proceed as follows:
RELAY ACTIVATION
If the DOMOS2 installation includes a relay module EGi ref. 40540 linked to the 0 zone (GENERAL), the
control unit will be able to activate or deactivate the relays for the GENERAL SERVICES 7, 8, 9 and 0
(please refer to the domotic module EGi ref. 40540 documentation).
1. Press the MENU key
To control these services:
until MISCELL appears on the display.
2. Press OK to enter the menu.
3. Press a few times the MENU key
1. Pulse Press the MENU key
until BLINDS appear on the display.
4. Press the side buttons (OFF/–) and (OK/+/ON) to put the blind of the
room up or down.
57
a few times until MISCELL appears on the display.
2. Then, press (OK/+/ON) until GENERAL SERVICE 7 appears.
3. Use (OK/+/ON) or (OFF/–) to activate or deactivate the service.
www.egiaudio.com
control unit
40270, 40280
40270, 40280
4. Pressing again the MENU key
control unit
, GENERAL SERVICE 8 appears.
5. Use (OK/+/ON) or (OFF/–) to activate or deactivate the service.
6. Repeat the proccess for the remaining GENERAL SERVICES.
MISCELL
S E RV I C E S
2nd
1st
2nd
YES 8
2nd
1st
ALARM VISUALIZATION
If your DOMOS2 installation includes a Domotic Central Unit or domotic modules, when an alarm is generated
by a sensor connected to them, the control unit will display the alarm type generated. FIRE, WATER, GAS
or INTR will come up on the display.
SOS FUNCTION
This function alerts about a dangerous situation or someone in need of help. The system generates an audio
signal in the zone where tha alarm is generated. If not cancelled, the alarm spreads to the rest of the installation
for 2 minutes.
www.egiaudio.com
58
control unit
40620
overview
This system will allow you to create up to 4 lighting atmospheres, controlling
up to a maximum of 4 luminaires in each atmosphere. The system will enable
you to adjust different light intensities depending on the type of atmosphere
that it is going to be created (working, resting, lighting zones, etc..).
40620 Lighting control unit acts over 40550 module, which actually activates
the lamps. Your installer will correctly configure this equipment.
LCD. LIGHTING CONTROL UNIT – 4 ATMOSPHERES
atmosphere creation
When creating a lighting atmosphere, you will be able to control 4 lamps at different light intensities each
one. If you select a lighting atmosphere, all luminaires programmed for this atmosphere will be activated.
First select the number of the lighting atmosphere that it is going to be created. Please do as follows:
1. Press the
key on the top (atmosphere 1), press the
key on the right (atmosphere 2), press the
key on the bottom (atmosphere 3) or press the
key on the left (atmosphere 4). ATMO with its
corresponding number is displayed on the top, and time is displayed in the middle of the screen.
2. Once the atmosphere has been selected, press the MENU key
to configure the intensity of the first
lamp programmed for this atmosphere
EGi ref. 40620
3. Press (NO/–) to decrease the light intensity or press (OK/–) to increase the light intensity from 0 (switch
off) to 10 (max. luminosity).
1
4. Once the intensity of lamp 1 has been adjusted, press shortly the MENU key
in order to program
the intensity of lamp 2. Repeat this step to configure lamps 3 and 4.
4
2
5. To continue programming atmospheres, please go back to step no. 1.
1st
3
at m o
Light
12 : 31
1
Atmosphere 1 / Exit menu key.
3
Atmosphere 3 / Menu key.
2
Atmosphere 2 / +/OK key.
4
Atmosphere 4 / –/NO key.
1st
2nd
59
7
1
1st
2nd
www.egiaudio.com
control unit
40620
control unit
40620
other adjustments
40620 Lighting control unit allows you to make more adjustments, apart from programming lighting
atmospheres.
SOFTWARE VERSION
To know the software version of the product, do as follows:
ZONE ADJUSTMENT
The lighting control system is assigned to one zone. To configure that zone, do as follows:
2. Short press on the MENU key
1. Long press on the MENU key
1. Long press on the MENU key
twice. ZONE will be displayed.
2. Select the zone using (NO/–) or (OK/+) to change the value.
ZONE
BACKLIGHT ADJUSTMENT
To adjust the backlight, do as follows:
1. Long press on the MENU key
2. Short press on the MENU key
ZONE
5
twice. ZONE will be displayed.
1
2nd
1st
x2
again until LIGHT is displayed.
LANGUAGE SELECTION
1. Long press on the MENU key
BACKLIGHT ADJUSTMENT
ZONE
2. Short press on the MENU key
x2
twice. ZONE will be displayed.
again until ENGLISH is displayed.
3. Use (NO/–) or (OK/+) to change the language of the control unit and
navigate through the available languages. To select the language of the
central unit, select ID AUTO.
LIGHT
5
2nd
x2
VER
5
2nd
3. Adjust the backlight intensity using (NO/–) or (OK/+) to change the value.
ZONE ADJUSTMENT
twice. ZONE will be displayed.
again until VER is displayed. Adjust
the backlight intensity using (NO/–) or (OK/+) to change the value.
2nd
1st
ZONE
ENGLISH
5
2nd
x2
www.egiaudio.com
60
2nd
1st
40410, 40420
interface modules
40410
40420
overview
40410 Door phone interface module allows door opening and intercom from
any control unit of the installation.
It allows you to open the door or cancel the intercom using the DOMOS2 inwall control units.
DOOR PHONE INTERFACE MODULE
ADS DOOR PHONE INTERFACE MODULE
interface module configuration
Once you have installed the door phone interface, you must follow three steps to adapt it to your needs.
DOOR NUMBER ASSIGNMENT (1st STEP)
Each installation allows the connection of 3 door phones in order to control up to 3 different doors. Each
door would be a different zone.
To assign a door number to the door phone interface, do as follows:
EGi ref. 40410
1. Press the MENU key
4
. The LED light on the right starts blinking.
2. This LED indicates the position (from 1 to 3) of the door phone in the installation.
5
3. Press OK to change this position. Once the correct position has been selected, press the MENU key
3
.
6
2
SETUP/
1
MENU
P 1
/
OK
8
9
1
Configure/MENU and OK key.
6
Listen mode.
2
+ Key.
7
Door opening option.
3
LED Display.
8
Birdge for FERMAX® door phones.
4
Call from the door phone.
9
Bridge for TEGUI® – EGF1 door phones.
5
Intercom mode.
61
P –1
P 2
interface modules
7
40410, 40420
interface modules
MELODY SELECTION (2 nd STEP)
It is possible to choose between 5 different melodies. The selected melody will be played when the
doorbell rings.
2. Press the MENU key again
To select a melody, do as follows:.
4. Once you have found the correct brand name, press the MENU key
1. Press the MENU key
to confirm.
. The LED light on the right will start blinking.
2. Press the MENU key again
until t -1 is displayed.
3. Use the OK key to find the door phone of your installation according to
the following chart.
.
3. Select the melody by pressing OK.
4. Once the melody has been selected, press the MENU key
.
D 1
D 1
D –1
D –1
In case that the brand name of your door phone is not included on the list or your door phone interface does
not work properly, after selecting the correct brand name; please contact EGi Technical Assistance Service.
Our technical department will help you to configure it in tb User mode:
www.egiaudio.com
T –1
D 3
DOOR PHONE SYSTEM SELECTION (3 rd STEP)
The third step allows you to set the type of the door phone installed in your home. The following chart shows
a wide variety of door phone brand names.
1. Long press on the MENU key
D –1
. The LED light on the right starts blinking.
62
DOOR PHONE
INTERFACE
BRAND
NAME
t1
t2
t3
t4
t5
t6
t7
t8
t9
tA
tb
TEGUI®
GUINAZ®
GOLMAR®
FARFISA®
AUTA®
FERMAX®
CEMELIT®
NIESSEN®
NIESSEN VIDEO®
BTICINO®
User defined
T 6
interface modules
door phone use
The use of the module in a everyday situation is described below.
2. Select communication with the zone number, that has been previously assigned to the door phone
(please consult “Module Configuration”).
NOTE: All messages and symbols may vary depending on the control
unit model of your installation. For more details, please consult your
control unit manual.
3. Hold the
key to initiate communication.
4. Release the key to go into the “listen” mode.
5. Press the
6. Press the
. key to finish communication.
key to open the door.
1. If someone activates the door phone, the 40410 module assigned to that
door phone will play the selected melody through the installation. Your
control unit will display DOOR or DOOR CALLING (please consult your
control unit manual to know the exact message).
40420
2. Press the
40420 ADS door phone interface module has been designed for FERMAX® door phones.
key to answer the door phone call. Keep this key pressed
when talking.
3. Release this key to go into the “listen” function in order to listen to the visitor.
4. Press the
5. Press the
key to open the door.
ADS DOOR PHONE INTERFACE MODULE
40420 Interface module works in a similar manner to 40410 interface module, although you will be able to adjust
the volume of both loudspeaker and microphone. To do so, follow these steps:
Press the MENU key
until the output volume appears on the LED display and adjust the volume by
pressing OK. Repeat these steps to adjust the input volume.
key to cancel the intercom and door opening.
additional services
If you have a FERMAX® door phone in your installation, you will be able to initiate
communication from any control unit without previously having received a call.
To use this function, do as follows:
1. Select the intercom service on your control unit (please consult the control
unit manual to know how to access to this service).
63
NOTE: Your installer will verify the correct configuration of your system. You will not need to use
the SETUP menu. This may cause unproper system operation.
interface modules
40410, 40420
40520
interface modules
40520
GSM INTERFACE MODULE
overview
This module allows you to know the status of the domotic services of the
system, interact over it by activating or deactivating the domotic services, and
listen to the status of the system alarms through fixed telephone or mobile.
1
2
3
Alarm notices to alert your mobile or wireless fixed telephone (prerecorded voice messages).
• Up to 5 telephone numbers for incoming messages and 5 telephone
numbers for outgoing messages to give alerts.
• Fire alarm notice.
• Gas alarm notice.
• Flooding alarm notice.
• Intruder alarm notice (2 areas).
• Electrical supply failure notice.
• SOS alarm notice.
EGi ref. 40520
Home electrical appliances control (4 general relays + 1 internal relay).
Communication through telephone.
• Intercom to communicate with the DOMOS2 system zones (from 0
to 9) through telephone.
4
1
Connection to the main BUS.
3
Status LED indicator.
2
LPower ON LED indicator.
4
Internal relay.
www.egiaudio.com
64
interface modules
functions
GSM interface module interacts over:
Access
Deactivate the alarm that has gone off.
0
•
alarm menu
Arm intruder alarm.
1
Intercommunication.
Disarm intruder alarm.
2
Relays.
Go back to the main menu
Talk to the selected zone (one key press
*
•
•
FUNCTION
Alarms.
KEY
1
Access
In two situations:
intercom menu
1. An alarm goes off (alarm sensor, electrical supply failure, etc.)
2
2. The user calls the installation to interact over it.
MENU FUNCTION
to talk, one key press to listen).
Go back to the main menu.
This module works through menus of pre-recorded messages. To navigate
through the menus, use the keyboard.
Access
relay menu
ALARM
If any other alarm goes off, the system calls the first telephone number on the
list and sends a pre-recorded message indicating the alarm type.
SMS
In case of electrical supply failure, the system will call the configured telephones
(please see “Module Configuration”). If the electrical supply is restored, the
system will inform the user via SMS.
If the system finds the first configured telephone engaged, it will send a notice
via SMS. In this case, the first telephone would receive the SMS indicating the
alarm type and the system will try to call the following telephone on the list.
3
Access main menu
Activate/deactivate the corresponding relay.
• The GSM module internal relay
corresponds to relay no. 6. The GSM
module general relays correspond to relays
no. 7, 8, 9 and 0.
• Press the corresponding key once to
change the status (open-close or closeopn). The system has been activated or
deactivated.
KEY
0...9
*
6...0
*
Module configuration
On the central unit:
To configure the GSM interface module, a domotic central unit of ref. 40510 or a central unit of ref. 40020,
40040 or 40060 must be installed. On this module, do as follows:
65
interface modules
40520
interface modules
40520
1. Press the MENU key until GSM is displayed.
The message must be as follows:
2. Press (OK) to access to the screen. Introduce the PIN code of the card that has been inserted into the
GSM module.
3. Press (OK/+) and (NO/–) to search the number that corresponds to the first digit of the PIN code. Press
MENU to confirm the first digit and search the second one. Repeat this step for the third and fourth digits.
4. Long press on (OK/+) to transmit the PIN code to the GSM module.
GSM
1st
2nd
PIN
0000
2nd
PIN
1st
5671
Incoming The telephone can call the module.
Outgoing The telephone can receive calls from the module.
b
Both.
The telephone can receive calls from the module and call it.
The phone numbers are sent in priority order via SMS text message. An
example is given below:
•
PIN OK
•
After a few seconds, PIN OK confirmation message or an error message will be displayed.
If the error message shows 1, the PIN code has been incorrectly introduced. Check the PIN code.
If the error message shows 2, the time allowed for the process has been exceeded. Try to repeat the process
again. If the problem persists, contact your installer.
The second step is to activate the GSM option and SMS messaging. Please do as follows:
1. Press the MENU key until GSM is displayed.
Write the SMS message with the following text:
i655432111 i699876543 b693214569 o660123456 o987654321
Send the SMS text message to your GSM module.
INCOMING
OUTGOING
(the module will accept calls
from these phone numbers)
(the module will call to these
phone numbers)
655432111
693214569
699876543
660123456
693214569
987654321
NOTE: The phone numbers are used only as an example. (You must write
the SMS with the phone numbers of your choice).
2. Long press on (OK/+) until SET SMS is displayed.
3. The following step is to configure the list with the incoming/outgoing telephone numbers via SMS
messaging. Please do as follows:
•
Press the MENU key until SET GSM is displayed.
•
Long press on (OK/+) until SET SMS is displayed.
•
Then, the GSM module will receive the numbers authorized to call the GSM module and the
numbers authorized to receive calls from it via SMS.
www.egiaudio.com
i
o
66
3. If everything is correct, SET GSM OK will be displayed; if an error has
occurred, NOOK will be displayed.
40520
GSM
SET SMS
interface modules
1st
2nd
SET GSM
1st
2nd
GSM OK
interface modules
WARNING: Your installer has inserted a SIM card into the GSM interface
module. Check that you have all documents and the card PIN number.
67
40140, 40150
auxiliary modules
40140
40150
40160
40610
overview
DOMOS2 auxiliary modules have been designed to give additional functions to your installation or adapt
external modules to the system.
1 AUDIO INPUT + 1 HEADPHONES OUTPUT MODULE
IN-WALL CONNECTOR FOR THE 40160 TABLETOP MODULE
TABLETOP MODULE
INTRUDER SENSOR AND CARD READER MODULE
40150
IN-WALL CONNECTOR FOR THE 40160 TABLETOP MODULE
EGi ref. 40150
40140 1 AUDIO INPUT + 1 HEADPHONES OUTPUT MODULE
EGi ref. 40140
1
1
3.5 mm jack audio input.
2
Headphones output.
2
1
1
40140 Auxiliary module has one stereo audio input (1) through a 3.5 mm jack connector. It allows the
connection of an external audio source using the EGi wire of ref. 0501 or 0503. It also has one stereo
headphones output (2).
www.egiaudio.com
2
68
Connector 1.
2
Connector 2.
40150 Auxiliary module allows the connection of the 40160 tabletop module
(for control units, central units for Ø 60 mm box and loudspeakers) to the
DOMOS2 system
40160, 40610
40160
auxiliary modules
40610
TABLETOP MODULE
EGi ref. 40160
INTRUDER SENSOR AND CARD READER MODULE
EGi ref. 40610
(front view)
2
1
3
1
Activation of area 1.
2
Activation of area 2.
3
Record card (REC).
4
Card correctly recorded (OK).
3
4
1
2
5
4
(back view)
back view
1
2" loudspeaker grid.
3
3.5 mm. jack input connector.
2
Place to put the control unit or
central unit for Ø 60 mm.
4
3.5 mm jack headphones output.
5
Connector for 40150 module.
This module acts as a presence sensor, detecting motion in the room in which is installed, and card reader
to control the access to your room or home. It activates or deactivates the security alarm system.
40160 Auxiliary module allows the installation on a table of any of the following
EGi control units: 40230, 40240, 40250, 40260, 40270 or 40280 (2).
This module has also an in-built 2” loudspeaker (1).
On the back, this module features: one connector in order to connect the device
to the installation through the 40150 module (5), one 3.5 mm jack headphones
output, and one stereo audio input (through a 3.5 mm. jack connector) to adapt
any audio source using the EGi wire of ref. 0501 or 0503. It is possible to
connect 2 modules of EGi ref. 40160.
69
Intruder detector.
• It can activate/deactivate the 40610 module in 1 or 2 areas (for instance, 1st floor and 2nd floor).
• It can arm/disarm the intruder sensor with the proximity card.
Card reader.
• It can record up to 8 cards (for 8 different users).
• It can arm/disarm the 40610 sensor with the proximity card.
• It can read up to 8 different access cards to register home entries/exits..
auxiliary modules
front view
40610
auxiliary modules
card reader configuration
The module has two different types of cards. The MASTER card allows you to make or cancel user cards.
The system allows up to 8 user cards
MAKE A NEW USER CARD
1. Pass the MASTER card over the module.
2. Then, before 10 seconds, pass the user card over the module. The REC LED indicator lights up.
3. Now, the user card is programmed to be used in the installation.
DELETE USER CARDS FROM THE SYSTEM
1. Pass the MASTER card over the reader twice in 10 seconds.
2. OK and REC LED indicators blink. The user cards have been deleted form the system.
To program again user cards, consult “Make a new user card”.
USE THE CARDS TO ACTIVATE/DEACTIVATE THE SYSTEM
The activation/deactivation is made through the user cards.
1. With the system deactivated, pass the user card over the reader.
2. 1, 2 or 1+2 blink on the control unit, depending on the latest activation of the system.
3. Press on the right or left to select the area to be surveilled: 1, 2, or 1+2.
www.egiaudio.com
70
auxiliary modules
40510
16
EGi ref. 40510
15
2
3
6
7
OK/+ 8
NO/– 9
10
1
14
4
13
12
11
5
DOMOTIC CENTRAL UNIT + PC CONNECTION
overview
Your domotic central unit can manage different sensors for detecting fire, gas, flooding or intruders.
It also allows the configuration of different domotic scenes, home access control, and communication with
other modules of the installation, such as 40520 GSM interface module – which will allow you to interact
remotely with the installation through fixed telephone or mobile.
This central unit manages 6 inputs (additional inputs through 40610 and 40630 modules) and 1 output
(additional inputs through 40540 and 40640 modules). It has a LCD display and keyboard to configure and
program all domotic functions. This can be done using the keyboard or connecting a computer.
It can also be connected to a battery, so the system continues activated in case of electrical power supply failure.
Intruder alarms.
• Up to 2 areas for intruder detection.
• Arm/disarm through card reader and fixed telephone or mobile (with 40520 GSM interface module).
• Partial or total arm (1 area or 2 areas).
Emergency alarms.
• External sensors to detect flooding, fire and gas escape.
• Output for alarm siren or valve connection.
• Power failure detection and stand-by mode featuring low power consumption.
• Additional alarms can be added.
1
Fire alarm indicator.
9
2
Gas alarm indicator.
10 Scene selection.
3
Flooding alarm indicator.
11 Output relay.
4
Intruder alarm indicator no. 1.
12 Battery connector.
5
Intruder alarm indicator no. 2.
13 Power supply connector.
6
MENU key.
14 DB9 connetion for PC.
7
MENU exit key.
15 Connection to the installation BUS.
8
OK/+ Key.
16 External sensors connection.
NO/- Key.
Presence simulator.
Entry and exit registration.
Scene configuration (activation/deactivation and relay programming).
71
auxiliary modules
40510
40510
auxiliary modules
alarms
Your domotic central unit can manage different sensors for detecting fire, gas, flooding or intruders. To
configure it, do as follows:
FIRE ALARM
It allows the fire sensor to determine whether or not generate an alarm. To activate this service, do as follows:
1. Press the MENU key
3. When the service is activated, the corresponding indicator triangle is displayed
(1).
5. To modify this parameter (from 1 to 5 minutes), use the (OK/+) or (NO/–) key.
3. When the service is activated, the corresponding indicator triangle is displayed
2. Activate or deactivate the service by pressing OK/+ (activated) or NO/– (deactivated).
3. Cuando el servicio está activado, aparece el triángulo correspondiente en el display
SI
www.egiaudio.com
2nd
SI
1st
2nd
FLOOD
SI
:03
1st
2nd
T GO OUT
:02
1st
2nd
Intruder alarm activation:
When passing the proximity card over the sensor to activate the alarm, ALARM ON is
displayed and the central unit activates the countdown time programmed to leave home.
When this time is finished, ALARM SET is displayed on the domotic central unit display.
(3).
When the system detects presence, ALARM ACT is displayed and the central unit
activates the countdown time programmed to enter home.
1st
If the countdown is over and nobody has passed the proximity card over the sensor,
an acoustic alarm is generated for 2 minutes through the whole installation. After
this time, the acoustic alarm is deactivated but if the intruder alarm has a relay
assigned to it, the relay continues activated until it is manually deactivated.
FLOODING
GA S
T GO IN
(2).
. FLOOD will be displayed.
GAS
1st
2nd
FLOODING ALARM
It allows the flooding sensor to determine whether or not generate an alarm. To activate this service, do as follows:
1st
6. Press CANCEL to go back to the main menu.
I N T RU D E R
2. Activate or deactivate the service by pressing OK/+ (activated) or NO/– (deactivated).
FIRE
2. When pressing (OK/+), T. GO IN is displayed (available time to deactivate
the alarm system when entering your home).
now, T. GO OUT will be displayed (available
time to deactivate the alarm system when leaving your home).
. GAS will be displayed.
FIRE
. INTRUDER is displayed.
4. Press the MENU key
GAS ALARM
It allows the gas sensor to determine whether or not generate an alarm. To activate this service, do as follows:
1. Press the MENU key
1. Press the MENU key
3. To modify this parameter (from 1 to 3 minutes), use the (OK/+) or (NO/–) key.
. FIRE will be displayed.
2. Activate or deactivate the service by pressing OK/+ (activated) or NO/– (deactivated).
1. Press the MENU key
INTRUDER ALARM
It allows to configure the intruder sensors.
2nd
72
auxiliary modules
services
The domotic central unit allows you to program the connection of one or more
relays of 40540 module. It is possible to program the time for the service activation
and deactivation. To configure this, do as follows:
1. Press the MENU key
s e rv i c e
07
1st
2nd
n s e rv i c
yes 7
1st
2nd
1st
s e rv i c e
7 - m s7
2nd
time on
15 : 2 5
1st
2nd
several times until SERVICE is displayed.
2. Press OK.
3. SERVICIE 07 is displayed. The number 07 blinks. To select other service,
press (OK/+) or (NO/–).
4. Press MENU key . The display shows N SERVIC with the number of
the selected relay down on the right.
5. You may activate (OK/+) o not activate (NO/–) the SERVICE (relay).
6. If the MENU key
is pressed now, SERVICE will be displayed, and 5-MF will
blink. Use (OK/+) and (NO/–) to select the days or the alarm type to be
activated by this output of the 40540 relay module.
5-MF: Monday to Friday.
6-MS: Monday to Saturday.
2-SS: Saturday and Sunday.
7-MS: Monday to Sunday.
FIRE
GAS
FLOOD
INTR
NONE
7. Once the SERVICE has been configured, press MENU to configure the
activation time of the relay. ON TIME is displayed.
time on
1 5 : 2 57
1st
2nd
time off
1 6 : 2 37
time off
1 7 : 2 37
presence simulation
The domotic central unit allows the system to simulate the presence of people at home, giving you home
security when nobody is at home. Program your control units and the domotic central unit will turn them on,
when the presence simulation mode is activated.
The domotic central unit can reproduce its own working pattern or use the LEARNING mode. Using the learning
mode, the central unit learns the daily use of the control units and reproduces it when the presence simulation
mode is activated. To activate the presence simulation mode, do as follows:
1. Press the MENU key
until SIMULAT is displayed.
2. Press (OK).
Press (OK/+) and (NO/–) to adjust the hour. Once the hour has been
3. Select (OK/+) to activate the automatic simulation or (NO/–) to deactivate it.
adjusted, press MENU key
4. If you select (NO/–), and press MENU, you can select between 10 memory positions, which correspond
to the control units with zone no. 1…10 of the installation.
to adjust the minutes in the same way.
8. Press MENU key
again to configure the deactivation time of the relay.
OFF TIME will be displayed.
Press (OK/+) and (NO/–) to adjust the hour. Once the hour has been
adjusted, press MENU key
to adjust the minutes in the same way.
73
5. Select the corresponding memory position and press MENU key
.
6. A menu to activate or not activate the presence simulation mode will be displayed. Press (OK/+) to select
YES and then press MENU key
.
auxiliary modules
40510
40510
auxiliary modules
7. TIME ON is displayed. Use (OK/+) and (NO/–) to adjust the time for the activation of the presence
simulation mode in the selected memory position. Once this has been done, press MENU key
.
8. TIME OFF is displayed. Use (OK/+) and (NO/–) to adjust the time for the deactivation of the presence
simulation mode in the selected memory position. Once this has been done, press MENU key
S I M U L At
1st
S I M AU T O
1st
01
No
2nd
S I M U L At
.
access control
Your domotic central unit allows access control and presence detection through
40610 module. To view the registry with home entries and exits, do as follows:
1. Press the MENU key
until REGISTRY is displayed.
2. Press (OK).
1st
3. On this step, you will be able to view the type of registry (entry or exit)
with the corresponding card.
2nd
4. Use (OK/+) and (NO/–) to view the home entries and exits.
on time
8 : 0 01
1st
2nd
off time
2 2 : 0 01
1st
R E G I S T Ry
2nd
1st
2nd
1 7 - 7 - 07
1 0 : 3 62
10 : 3 6
ii
: Entry
: Exit
ii
Card number
(up to 8)
Should you wish an automatic simulation and activate the learning mode, do as follows:
1. Repeat the previous steps 1 and 2.
2. Select SIM AUTO by pressing (OK/+).
3. Press MENU key
scene
By creating a domotic scene, you can program the domotic services of your
system in order to activate them simultaneously at a specified time. For instance,
you can program your sound equipment to be turned on at the same time as
the blinds are rolled up and the garden sprinklers are turned off; without the
need of programming each service individually.
again; LEARNING will be displayed.
4. Select (OK/+) or (NO/–) to activate or deactivate the learning mode.
5. It will register 40 entries for switching on/off the control units.
S I M U L At
1st
2nd
www.egiaudio.com
S I M AU T O
yes
1st
1st
l e a r n i ng
yes
2nd
These domotic scenes must be programmed setting the status of the
corresponding outputs.
1st
74
40510
auxiliary modules
To configure a domotic scene, do as follows:
1. Press the MENU key
several times until SCENE is displayed.
SCENe
1st
2nd
2. Press (OK).
s e rv- 7
1st
y eD sC B A
3. SERV-7 is displayed. a is displayed on the lower part of the screen. This
a corresponds to one of the 4 domotic scenes (a, b, c and d).
2nd
blinds
d o w nA
1st
2nd
time
yes A
1st
2nd
scene
change
4. It is possible to activate (OK/+) or not activate (NO/-) the SERVICE (relay)
7 for the corresponding domotic scene (a).
time ON
5. Once SERVICE 7 has been configured, press MENU key
to configure
SERVICE-8, SERVICE-9 and SERVICE-0 in the same way (and up to
11-14 services more through 40540 module).
1 3 : 0 8A
1st
2nd
time ON
1 3 : 0 8A
1st
2nd
time OFF
1 5 : 0 8A
1st
2nd
time OFF
1 5 : 2 1A
1st
2nd
6. If, after configuring SERV-0, you press MENU key
7. If, after programming the blinds, you press MENU key
again, you
will be able to program the awnings (only if 40640 auxiliary module is
installed). Press (OK/+) or (NO/-) to select UP, DOWN or NONE.
8. Then, press MENU again to define if the domotic scene must be activated
by a timer or not. Press (OK/+) or (NO/-) to activate or not activate the timer.
9. If you select YES and press MENU key
, then you will be able to
configure TIME ON on the following screen. Use (OK/+) and (NO/–) to
adjust the hour (blinking).
10. Once the hour has been adjusted, press MENU key
and adjust the minutes.
. Repeat steps 8 and 9 to adjust the ending
hour of the domotic scene.
11. Press MENU key
12. Press SCENE at any time to configure the service for each domotic scene
(a, b, c and d).
75
GSM
40510 domotic central unit configures 40520 GSM interface module. Through this module, you will be able
to interact remotely over your installation through fixed telephone or mobile.
For configuration details, please consult 40520 GSM interface module manual.
adjustments
On this menu, it is possible to change other parameters of the domotic central unit.
The parameters that can be changed are the following:
•
Date and time (including weekday and year).
•
Alarm to activate the local relay.
auxiliary modules
again, you will
be able to program the blinds. Press (OK/+) or (NO/-) to select UP,
DOWN or NONE.
40510
•
Module software version.
•
Language selection.
auxiliary modules
RELAY ASSIGNMENT
40510 Domotic central unit has a local relay that can be activated if a specific
alarm goes off or any of them. To configure this parameter, do as follows:
To configure these parameters, do as follows:
1. Press MENU key
DATE ADJUSTMENT
several times until ADJUSTMS is displayed.
2. Press (OK/+) for at least 2 seconds. TIME is displayed and the hour digit blinks.
1. Press MENU key
several times until ADJUSTMS is displayed.
3. Press MENU key
2. Press (OK/+) for at least 2 seconds. TIME is displayed and the hour digit blinks.
3. Press (OK/+) and (NO/–) to adjust the hour and press MENU key
several times until RELAY OUT is displayed.
4. Press (OK/+) and (NO/–) to program the relay in order to activate it, if
a specific alarm goes off (fire, intruder, gas, etc.), or any/none of them.
.
4. MINUTES is displayed. Adjust the minutes following step 3 and then, press MENU key
again
to adjust the day, month, weekday and year.
A d j u st m
A D J U ST M
1st
2nd
TIME
10 : 0 3
2nd
1st
MINUTES
10 : 0 3
2nd
1st
D AT E
12 : 7
1st
R E L ay
GA S
2nd
2nd
1st
2nd
1st
SOFTWARE VERSION
MONTH
10 : 7
2nd
1st
T H U R S DAY
12 : 7
2nd
1st
YEAR
2007
2nd
1. Press MENU key
several times until ADJUSTMS is displayed.
2. Press (OK/+) for at least 2 seconds. TIME is displayed and the hour digit blinks.
1st
3. Press MENU key
several times until VERS is displayed.
A D J U ST M
1st
2nd
www.egiaudio.com
76
1
V E R- 1
1st
2nd
40510
auxiliary modules
LANGUAGE SELECTION
1. Press MENU key
several times until ADJUSTMS is displayed.
2. Press (OK/+) for at least 2 seconds. TIME is displayed and the hour
digit blinks.
3. Press MENU key
several times until ENGLISH is displayed.
4. To change the language, press (OK/+) and (NO/–). If you select ID AUTO,
the language will be set by default.
1st
2nd
ENGLISH
1st
2nd
77
auxiliary modules
A D J U ST M
accessories
loudspeakers
The modules described in this manual are complemented with a loudspeaker system, specially designed to make the
most of DOMOS2 series.
remote controls
40100 and 40130 remote controls allow control over many domotic and
audio services of your DOMOS2 system.
It is possible to choose between basic equipments such as the G13U loudspeaker for in-wall mounting in Ø 60 mm
box or the G14A loudspeaker for in-ceiling mounting, which delivers exceptional quality sound.
These universal remote controls can program your home devices, so you will
be able to control them from your EGi remote control, without using the remote
controls of each device.
We present 40440 and 40450 models as the latest innovation. These units have been designed for in-wall
mounting and can easily be integrated into any room, delivering exceptional quality sound (coming soon product).
G28N/16
2" IN-CEILING LOUDSPEAKER
Power: 2 W.
Dimensions: Ø60 mm.
G14A/16
5" IN-CEILING LOUDSPEAKER
Power: 6 W.
G13U/16
40130
2" IN-WALL LOUDSPEAKER
REMOTE CONTROL
Power: 2 W.
Dimensions: Ø60 mm.
Audio + domotics
Dimensions: 195 x 57 x 13.1 mm.
G17F/16
G18F/16
40100
REMOTE CONTROL
5” IN-CEILING OR INWALL LOUDSPEAKER
LCD + audio + domotics (backlighted)
Dimensions: 193 x 78.2 x 31.5 mm.
Power: 6 W.
www.egiaudio.com
78
guarantee
EGi guarantees its electronic and electroacoustic products against any
manufacturing defect that affects its operation for 24 months from the
production date (indicated in every manufacture), taking the commitment
of repairing or replacing the faulty modules which failure, always to the
discretion of EGi, is caused by a manufacturing defect, without any charge for
spare parts.
This guarantee does not include charges for the shipping and handling of the
modules, nor the labour charges for the replacement in the installation of the
aforementioned electronic and electroacoustic modules. The guarantee will
not cover in any case the damages or breakings of the trimming pieces (lattices,
trims, masks, frames...).
This guarantee refers only to the concept of replacement in factory of the
modules produced by EGi, excluding any other cover or responsibility on the
rest of the materials or the whole of the installation that is put at the user disposal,
but that is not supplied nor executed by EGi.
c. The malfunctions caused by the wrong installation of the modules, or by an installation with
inappropiate cables.
d. The malfunctions caused by the intervention of a person non-authorised by EGi.
e. The consequences of mixing with equipment from other sources, and also adaptations, modifications,
adjustments and/or adjustment attempts, irrespectively of those that have been performed in a technically
correct way, provided that there is not an express authorisation by EGi.
f.
The consequences of accidents, natural catastrophes or any cause beyond EGi control, including but
not limited to lightning, water and public disturbances.
In all these cases that are excluded from the guarantee, and every time that the modules are not considered
as faulty by EGi, the sender should take responsibility of the full amount of the repair, and in the event
of a visit from our technicians, the requesting person will bear the expenses originated without a cause
justified in the guarantee.
ATTENTION: If you notice any problem in your EGi installation, our Customer Support Service will
attend you from 9h. to 13h (Central European Time).
Therefore this guarantee does not cover:
a. The fitting up and the interconnection between the modules.
b. The results from the abuse or misuse of the product, including but not
limited to:
b.1.
Not using the product for usual purposes, or not following the
instructions from EGi for the correct use and maintenance of the
product.
b.2.
The installation or use of the products in a way that is not concordant
with the technical or security rules now in force.
www.egiaudio.com
005585
Avda. Almozara, 79
50003 Zaragoza - SPAIN
Tel. +34 976 40 53 56
Fax +34 976 40 53 54
http//: www.egiaudio.com
e-mail: [email protected]