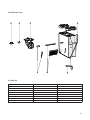
1
Advance
Installer manual
Contents
1. Introduction 1.1 1.2 Configuration Heatrae Sadia conditions 2. Safety 2.1 2.2 2.3 General Liability of the installer Liability of the occupant/user 3
3
3
4
4
4
4
6. Commissioning 6.1 6.2 6.3 Manual potentiometers
low boost speed Middle speed Commissioning data 15
15
15
16
7. Wiring diagram 17
5
6
8. Trouble shooting 19
4. Description controller functions
7
9. Maintenance and spare parts
20
5. Installation 8
10. Appendix
22
3. Technical data 3.1 3.2 4.1 4.2 4.3 5.1 5.2 5.3 5.3.1 5.3.2
5.4 5.5 5.6 5.7 5.8 5.9 2
Dimensions and weight Performance Fan motor speed control Frost protection Remote controller Ledgend for pictograms Unpacking the mounting bracket Wall mounting Ceiling mounting Floor mounting Clearances required Wall/floor/ceiling requirements Unpacking the unit Mirroring the unit Fit the unit into the bracket Condensate Drain Connection 5
7
7
7
8
8
8
9
10
11
11
11
12
13
14
7.1 7.2 8.1 9.1 9.1.1 9.1.2 9.1.3 9.2 9.3 Hard wired speed selector RFT-remote controllers FAQ’s for the installer Maintenance Cleaning the unit outside covers Filter replacement and cleaning Cleaning the motor and fan Exploded view Part list 10.1 Guarantee 10.2 Manufacturer declaration 10.3 Installer conformity declaration 17
18
19
20
20
20
20
21
21
22
23
24
1. Introduction
Indoor air quality and energy efficiency are very important considerations in dwellings today. The Heatrae
Sadia Advance Heat Recovery Ventilation Unit has been developed to meet these demands offering controlled
ventilation for a healthy and comfortable indoor climate in full compliance with current building regulations,
while retaining the heat to an efficiency of up to 90%.
For the home owner or occupier:
This document explains the working principle of the ventilation system and how to operate and maintain
this unit. Never switch off the ventilation by disconnecting the power cord from the mains supply, (except for
service and maintenance intervals.)
For the installer:
This document explains how to install and commission the unit.
It is very important to read these instructions and to obtain all regulations for the ventilation of dwellings.
Refer in England and Wales to table 5.1a of the Building Regulations for clarification on the extract rates and
5.1b for the minimum low rate table.
For Northern Ireland refer to the technical Guidance Document F, Ventilation.
For Scotland refer to the Technical Handbook 3.14, Ventilation.
NOTE
• Read this manual carefully.
• Failure to follow these instructions could cause an adverse effect on the health of the
occupier.
• Leave these instructions with the user.
1.1 Configuration
The Advance has been developed for apartments and small houses with an internal floor area of up to 115m².
It can be fitted as a wall, floor or ceiling mounted unit (for example in the space of a kitchen cupboard).
Dimensions 597mm width x 280mm depth x 760mm height.
1.2 Heatrae Sadia conditions
Heatrae Sadia does not accept any liability for damage caused by non-observance of the installation
instructions. Service activities must exclusively be carried out by Heatrae Sadia or by registered installers
using original Heatrae Sadia parts.
3
2. Safety
2.1 General
•
•
•
•
•
•
•
Do not use this appliance for functions other than those described in this booklet.
Never touch the appliance with wet or damp hands or when barefoot.
Do not store inflammable products in the neighbourhood of the unit.
The unit is only suitable for 230 VAC/50Hz electric mains.
Never modify the fan or electronics by yourself.
Never plug in the power cord if the motor part is not placed into the unit.
WARNING
• Always disconnect the electric power cord before you remove the motor and control
box unit.
2.2 Liability of the installer
•
•
•
•
•
•
Balancing and commissioning of the installation.
Report measured air volumes on the grilles.
Compliance to requirements and local additional rules.
Explanation of the ventilation system to the user.
Warning for the user, to check or replace the air filters on time.
All the above, as set out in the latest edition of the Domestic Ventilation Compliance Guide and the
Appendix Q - Installation Guide and Checklist.
• Instructions to be left with customer.
2.3 Liability of the occupant/user
• Cleaning or replacement of the filters in the Advance unit at the correct time. See section 9 Maintenance (p.20).
• Cleaning the grilles in the rooms at regular intervals.
Note:
• The grilles should always be placed back in their original location and position. If the grilles are
changed or placed in a wrong position the ventilation volumes will no longer be correct and the
ventilation system might not work properly.
WARNING
• Clean and/or replace the filters on time.
• Filter pollution could damage your health.
4
3. Technical data
3.1 Dimensions and weight
122
786
760
597
425
74
132
74
280
86
Supply
230/240 ~ 50Hz
External fuse
3A
Covers / Insulation Material
Dimensions of unit (mm)
Clearances for servicing (mm)
EPP Foam
Height
786
Width
597
Depth
280
Sides
10
Top
Weight
Moisture protection
(ducting)
Below
150
Front
650
Ex fixing bracket
Inc fixing bracket
Insulation Class
86
11 Kg
12.5 Kg
Class ii / Double
insulated
IP30
5
3.2 Performance
Description:
units
Kitchen + 1
Kitchen + 2
Kitchen + 3
Kitchen + 4
Maximum
wet room
wet rooms
wet rooms
wet rooms
performance
2 × 15 l/s Heat recovery efficiency 2 × 21 l/s
2 × 27 l/s 2 × 33 l/s 2 × 42 l/s
–
%
90 89 88 87 Specific fan power (SFP) W/l/s 0.37 0.48 0.65 0.83 –
230 VAC current consumption Amp. 0.02 0.04 0.07 0.12 0.61
230 VAC power consumption Watt 5.5 10.1 17.5 27.0
3 79
Fan speed rpm 1020 1290 1560 1860 2700
Pa 14/16 15/22 18/31 26/50 155/148
Sound Power Lw,a Radiant dB(A) 42.0 42.5 47.5 51.0 61.5
Supply dB(A) 34.0 36.5 43.0 45.0 59.0
Exhaust dB(A) 35.0 38.0 42.5 47.0 58.5
Pressure available for external
supply/exhaust duct Capacity qv [m³/h]
6
4. Description controller functions
4.1 Fan motor speed control
The Advance unit has a 3-speed controlled fan motor. The low and boost speed can be adjusted by a manual
potentiometer at the top of the unit. (See section 6.1 commissioning p.15).
The middle speed is a result of a factory setting and the manual adjusted low and boost speed.
4.2 Frost protection
Note for the user:
When the outside temperature is below -1 °C the Advance unit has a built-in temperature sensor located
within the supply air from outside to switch-off the fan motor. If this occurs the fan motor will switch off for a
short period and will automatically restart itself when the temperature rises.
For uninterrupted air supply and extract volumes in regions with low outside temperatures (‹ –10 °C for more
than 24 hours), please install a pre-heater in the supply air from outside to the dwelling.
Characteristics:
• Fan motor ‘off’, if sensor ‹ –1.5 °C.
• 2 hours ‘off’ time.
• 30 minutes ‘on’ time, fan motor at 450 rpm’s.
• Fan motor ‘on’ to normal selected position, if sensor › –1 °C.
4.3 Remote controller
The RFT (radio frequency transmitter) has a 3-speed control and a timer for boost speed function.
Maximum twenty RFT-remote controllers can be connected to one Advance unit.
CAUTION
The range of the RFT operation (transmitter) is 100 metres in a free field.
The distance at which the RFT operation switch can function properly depends on the obstacles
interfering with the RFT signal, i.e, the walls and floors between the RFT operation switch and
the receiver.
7
5. Installation
5.1 Legend for pictograms
•
5.3 Wall mounting
Fresh air from outside
A
•
Stale air to outside
•
Fresh air to dwelling
a) Fit the mounting bracket A horizontally to the wall,
using appropriate fixings.
B
A
•
Stale air from dwelling
b) Fit the two duct adapters B to each end of the
mounting bracket A.
Insulate the ducts to and from outside to
avoid condensation on the ducts. Insulate
all ducts and also the condensate drain,
if the unit is mounted outside the thermal
envelope of the building.
A
C
A
B
C
c) Ensure that the adapters B are placed flush to
each end of the mounting bracket A and the
spigot seals C are secured firmly on top of each spigot.
D
B
A - mounting bracket (×1)
B - duct adapter (×2)
C - spigot seal (×4)
D - ceiling mounting strip (×1)
d) Install the four air ducts on the spigots.
Option 1; stale air to outside and fresh air from outside on the left.
Note: Insulate all ducts and also the condensate
drain, if the unit is mounted outside the thermal
envelope of the building to avoid condensation
forming on the ducts.
8
Option 2; stale air to outside and fresh air from outside on the right.
c) Ensure that the adapters B are placed flush to
each end of the mounting bracket A and the
spigot seals C are secured firmly on top of each spigot.
A
B
C
d) Duct connections
The Advance unit must not be mirrored when
fixed to the ceiling
5.3.1 Ceiling mounting
Only stale air to outside and fresh air from outside
on the right is possible.
a) Fit mounting bracket A to the ceiling,
using appropriate fixings.
=
A
b) Fit the two duct adapters B to each end of the
mounting bracket A.
A
B
9
A
A
C
C
c) Ensure that the adapters B are placed flush to
each end of the mounting bracket A and the
spigot seals C are secured firmly on top of each spigot.
50mm
d) Ductconnections
Only stale air to the outside and fresh air from
outside on the right is possible
The Advance unit must not be mirrored when it is fixed 50 mm on the floor
B
A
10
5.4 Clearances required
597
132
425
Ducts (x4):
Ø 125 mm
760
280
150
Free
Space
650
298.5
Condensate drain & hose:
Ø 14 mm (inside)
Ø 18 mm (outside)
5.5 Wall/floor/ceiling requirements
It is important to fit the bracket on a solid flat wall or board with at least 200 kg/m³ density to ensure that the
sound exposure is not too high for dwelling requirements.
5.6 Unpacking the unit
Open the carton on the marked side. Pull out the unit from the carton by the handle on the unit.
The package contents:
• Advance unit.
• Two side bars.
• Installer manual.
• User manual
• Condensation hose.
11
5.7 Mirroring the unit
a) Loosen the duct adapters from the unit.
• Put a screw driver in front of the duct connectors.
Note:
The duct connection kit is supplied in its own box and even if fitted at the same time as the unit this procedure is the one to follow.
b) Disconnect the duct connector from both the left and right sides.
12
c) Pull the plastic duct connector out of the Advance
unit.
• Make your choice for the front of the Advance
unit according to duct connections on left or
right side (see section 5.2 p.8).
• Place back the plastic duct connector into
the Advance unit with the profile backwards
curved as shown on the picture. This is the
only way to slide the unit into the duct connectors.
5.8 Fit the unit into the bracket
c) Both duct connectors are correctly sealed when you hear a "Click".
a) Place both iron side bars in the hole at the bottom
of the Advance unit.
Click
b) Slide the unit backwards into the duct connecters
at the top.
13
5.9 Condensate Drain Connection
On the bottom of the unit there are two drain connections. In case of floor and ceiling mounting use
the lowest connection. For wall mounting, use the
connection at the wall side.
C)
Important
IMPORTANT
Please
Pleaseensure
ensurethat
thatwhichever
whicheverconnection
connection is
is
used
is sealed
notnot
used
is sealed
off. off.
A) Open the drain connection
Open the plastic stitched tongue for the drain connection.
D) Put the flexible hose into the condensate trap.
IMPORTANT
• Be sure that there is at least 50
mm water level in the trap.
• Be sure that the condensate water
is not blocked by a sharp bend in
the flexible hose.
• Be sure that the flexible hose has
been installed downwards.
• Ensure flexiable hose is sealed
into waste pipe to stop air leakage.
B) Install the flexible hose
Put the flexible hose on the connection.
14
6. Commissioning
6.1 Manual potentiometers low and boost
speed
I. Low speed
Range: 800 - 2100 rpm
II. Middle speed
Range: see chapter 6.2.
III. Boost speed
Range: 2100 - 2700 rpm 6.2 Middle speed
Middle speed has been set in the controllers software by the manufacturer and cannot be changed.
Setting:
Middle Speed = ((rpm’s boost - rpm’s low) X 40%) +
rpm’s low
15
6.3 Commissioning data
Extract Ventilation Rates
Speed 1 (Constant)
Room reference
(location of
terminals)
Measured air flow
Low rate (l/s)
Design air flow
Low rate (l/s)
Refer to table 5.1a
in ADF
Speed 3 (Boost)
Measured air flow
High rate (l/s)
Design air flow
High rate (l/s)
Refer to table 5.1a
in ADF
Kitchen
WC
Bathroom
En suite
Other...
Other…
Other…
Other...
Other...
Building Total
Supply Ventilation Rates
Speed 1 (Constant)
Room reference
(location of
terminals)
Living Room
Living Room 2 (if
present)
Dining Room
Bedroom 1
Bedroom 2
Bedroom 3
Bedroom 4
Bedroom 5
Study
Other...
Other...
Other...
Building Total
16
Measured air flow
Low rate (l/s)
Design air flow
Low rate (l/s)
Refer to table 5.1a
in ADF
Speed 3 (Boost)
Measured air flow
High rate (l/s)
Design air flow
High rate (l/s)
Refer to table 5.1a
in ADF
7. Wiring diagram
7.1 Hard wired speed selector
The Advance unit has been equipped with a 4-core electric power cord without plug. In case of an external wired
speed controller connect:
•
•
•
•
Brown to live.
Blue to neutral.
Black to boost position selector switch.
Grey to middle position selector switch.
Advance
N
L1
Advance (switc h by other s)
B
M
N
L1
B
M
B
M
L
2
230V N
50 Hz L1
C
1
230V
50 Hz
N
L1
3- position
switch
3-position
switch HR S- 3
NOTE
• If there is no wired speed selector, you are allowed to cut off the black and grey wire.
• The Advance is a double insulated unit and doesn’t need an earth wire.
17
7.2 RFT-remote controllers
Buttons function:
The Advance unit has a RFT-receiver on board. The
remote controller must be paired to the Advance unit.
It is possible to connect more remote controllers to
one Advance unit (maximum 20 remote controllers).
Pairing:
• Disconnect the electric power cord from the
mains supply for at least 15 seconds.
• Push Button ( + ), or ( + ) together
within 120 seconds after plugging in the electric power cord of the Advance unit.
Low speed
Middle speed
Boost speed
Timer, 10 minutes/step (up to 30 minutes)
Tip
Pairing the remote controller to the Advance
unit in the direct vacinity of the unit makes the
job easier to do.
Disconnecting:
In the situation of wrongly paired remote controllers
or reinstalling installation parts, first disconnect the
remote controller(s) before you start the pairing procedure:
• Disconnect the electric power cord from the
mains supply for at least 15 seconds.
• Push Button ( + + + ) together
within 120 seconds after plugging in the electric power cord of the Advance unit.
Conditions for good operation:
• Max length receiver/transmitter 25 metre indoor.
• No metal shield in ceiling or wall. 18
8. Trouble shooting
8.1 FAQ’s for the installer
a) The fan has stopped unexpectedly.
• Mains voltage failure, check the Fuse Spur in
the distribution board cabinet/meter cupboard.
• Plug in the power cord.
• Frost protection active, wait for several minutes and the fan will be switched on automatically.
b) The unit makes a lot of noise.
Gurgling noise coming out the unit.
• The condensate trap below the unit has a low
water level, fill it up with water.
• The flexible condensate hose is not completely in the condensate trap, push it deeper.
Rattling noise coming out the unit.
• Fan motor fault, open the motor unit and
check or clean the fan. Do not change the
balance clips.
Swishing sound coming out of the grilles.
• There is too much air pressure drop in the
duct and grilles, clean both filters in the Advance unit and the grilles in the rooms and
check if the grilles are in their original position.
• Check the air volumes.
c) I want to switch off the unit at night.
• Not possible, you also need fresh air during
the night.
d) Unpleasant smell.
I smell the cooking in the whole house.
• Air extract rates are too low, switch on boost
speed at cooking time.
• The filters are polluted, clean or replace both
filters.
• The grilles are dirty, clean all grilles.
Near the unit.
• Condensate trap below the unit is empty, fill it
with water.
• The flexible condensate hose is not completely in the condensate trap, push it in deeper.
Near the supply air grilles.
• The unpleasant air comes from outside, not
a ventilation fault but to be sure, check and
clean supply air filter.
e) Too much condensation in the bathroom.
• Too low exhaust air volume, switch on boost
speed while showering or bathing. Check and
clean filters and grille.
f) Water leakage near the unit.
• Condensate trap is clogged, clean it.
• Condensate flexible hose is clogged or twisted, clean it and replace it into the trap.
g) No speed change after pushing the button on the RFT remote controller.
• Disconnect and bind the remote controller to
the unit again (see section 7.2 p.18 ).
• Replace the battery in the remote controller
(type CR2032 Li-Mn).
h) Condensation or water leaking on the supply air duct.
• A non rain proof outside air grille has been installed.
• The duct is not damp proof insulated.
19
9. Maintenance and spare parts
9.1 Maintenance
B)
• Pull the complete motor part out of the unit.
• Clean the fan with a vacuum cleaner.
9.1.1 Cleaning the unit outside covers
Keep the unit surface free from dust.
9.1.2 Filter replacement and cleaning
For the user, maintenance is limited to cleaning and
replacing the filters.
These will need to checked annually and either
cleaned or replaced.
This may differ per situation depending on environmental pollution from industry or traffic and also the
activities in the house.
9.1.3 Cleaning the motor and fan
A)
• Disconnect the electric power cord from the
mains supply.
• Remove both screws of the motor part.
WARNING
Do not displace the fan balance clips.
C)
• Put it all back again and fasten screws, reconnect to power.
20
9.2 Exploded view
1
2
3
7
4
5
6
9.3 Part list
Exploded view no.
Description
Part no.
1
PCB Advance unit
95615089
2
Frost protection sensor
95607725
3
Motor service module complete
95607724
4
Filter cover set
95607728
5
G4 filter set
95970009
F7 filter set
95970010
6
Ceiling mounting bracket
95607726
7
Mounting wire set
95607727
21
10. Appendix
10.1 Guarantee
Warranty
The Advance warranty is valid for 2 years after the installation date.
Disclaimer
This warranty does not apply to:
• Disassembly and assembly costs.
• Faults which are caused by incorrect treatment.
• Negligence or accident.
• Faults that have been caused by repairs by third parties without authorisation from Heatrae Sadia Heating.
If the appliance does not function correctly or develops a fault please contact Heatrae Sadia Heating immediately.
Ensure that only genuine spares are used for repairs.
22
10.2 Manufacturer declaration
EC declaration of conformity
According to Low Voltage Directive 2006/95/EC and the EMC Directive 2004/’06/EC.
Declaration of Incorporation
According to Annex IIB of the Machinery Directive 2006/42/EC.
Heatrae Sadia Heating
Hurricane Way Norwich NR6 6EA
Hereby declare under our sole responsibility that the following products:
Heat Recovery Ventilation System
Type Advance
Is in conformity with the following EC Council Directives:
Low Voltage Directive 2006/95/EC
EMC Directive 2004/108/EC
and Applied Harmonised Standards:
•
•
•
•
•
EN60730-1
EN61000-3-2
EN61000-6-1
EN61000-6-3
RoHs/Weee
and must be regarded as partly completed machinery and is intended to be incorporated in a machine or to be
assembled with other machines into a single machine or system to which the Machinery Directive 2006/42/EC
applies.
We want to alert you that the product to be incorporated in a ventilation system and that the partly completed
machine must not be put into service until the final machinery into which it is to be incorporated is in conformity
with the provisions of Machinery Directive 2006/42/EC for which the most important instructions can be found
in the manual.
We explicitly state that the CE marking on the product only refers to the Low Voltage Directive 2006/95/EC and
the EMC Directive 2006/108/EC.
After the submission of a declaration according to Annex IIA of the Machinery Directive for the entire installation,
the CE marking on the device also refers to the Machinery Directive 2006/42/EC.
23
10.3 Installer conformity declaration
According to Annex IIA of the Machinery Directive 2006/42/EC
We:
Name of installer:
Full address and country:
Hereby declare under our own responsibility, to have installed the following product with type designation:
Heat Recovery Ventilation
Type: Advance
to which this declaration refers. We declare the entire installation (being a single machine) in conformity with the
Machinery Directive.
Place:
Date:
Name:
Position:
Signature: 24
Company Stamp:
Notes
25
26
27
HEATRAE SADIA HEATING
Hurricane Way, Norwich NR6 6EA
www.heatraesadia.com
SERVICE
0844 8711535
SERVICE FAX
0844 8711528
EMAIL
[email protected]
36006180_issue_01