1
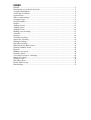
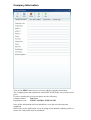
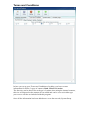
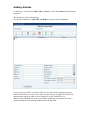
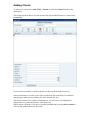
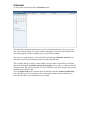
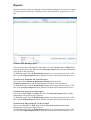
Ents Booking 2011
User Guide
INDEX
INDEX ...........................................................................................................................2
Running the set-up for the first time ..............................................................................3
Company Information....................................................................................................4
Terms and Conditions ....................................................................................................5
System Setup..................................................................................................................6
Other system settings .....................................................................................................7
Company Logo...............................................................................................................8
Word Templates.............................................................................................................9
Profiles .........................................................................................................................11
Adding Artistes ............................................................................................................12
Adding venues .............................................................................................................13
Adding Clients .............................................................................................................14
Making a new booking.................................................................................................15
Calendar .......................................................................................................................17
Printing.........................................................................................................................18
Tracking a booking ......................................................................................................19
Search for a booking ....................................................................................................20
Editing a booking.........................................................................................................21
Deleting a booking.......................................................................................................22
What are the feedback forms?......................................................................................23
Printing feedback forms...............................................................................................24
Reports .........................................................................................................................25
Making a new quote.....................................................................................................26
Printing a Quote ...........................................................................................................27
Converting a quote to a booking..................................................................................28
Search for a quote ........................................................................................................29
Editing a quote .............................................................................................................30
Deleting a quote ...........................................................................................................31
Phone dialler set-up......................................................................................................32
Data Backup.................................................................................................................33
Running the set-up for the first time
Before you run the program you must make sure of the following.
1. The Date separator MUST be set to / for the program to run correctly.
2. Your computer clock set to 24 Hour. The date and time formats can be set
under the regional setting in the control panel.
Before you can use Ents booking program it must be configured.
Run the booking program, from the top menu select TOOLS > SETUP AND
OPTIONS.
The Setup and Options window will open. All areas of the setup must be filled in in
order for the Ents booking program to work
Company Information
Click on the EDIT button and you can now add the company information.
The Company name and registration code MUST MATCH the ones you have been
given.
If you are running the trial version please use the following
Company Name:
Trial User
Registration code:
1920767-21650643-12798716-3553
Once all the information has been added move on to the next tab terms and
conditions.
NOTE only use the Add button if you are going to run mutable company profiles, a
licence for each profile must be purchased
Terms and Conditions
In here you set up your Terms and Conditions of trading, you have to enter
information for all the 3 types of contract, Dual, Client and Artiste
The font size can be altered for each type of contact when using the internal contacts,
this size will depend on the amount of text added and can be set to suit either type
your own or edit the set included with this program.
Once all the information has been added move on to the next tab, System Setup
System Setup
Contract Prefix – This is what the contact numbers will be Prefixed with, this prefix
is added to both automatic contract numbering and manual.. You can add a prefix to it
like the first 3 letters of your company name making the contract number ABC1000,
ABC1001, ABC1002 etc.
Most Events have a standard set of times, you can set these defaults in the
Default start time – Standard start time
Default end time – Standard finishing time
Other system settings
Currency Symbol – Designed for use in multiple currencies
Automatic contract numbers – tick this is you wish Ents Booking program to
Automatically generate contact numbers, if un-ticked the user has to enter their own
contact number.
Add entries to Outlook – If ticked when you save a contact it will prompt you and
ask if you wish to add it to the Outlook calendar
Please note this feature does not work on cloud based outlook systems such as
office 365
The bottom half of the general information section has four areas to setup the
Occasion, Dress code, Artiste Type and Music Type
To add, edit or remove items use the buttons next to each section
Once all the information has been added either click the save or move on to the next
tab Company Logo
Company Logo
Clicking on the CHANGE LOGO brings up an open file dialog. Navigate to your
logo and click open. The logo must be a Bitmap (.bmp) format and no more that
105x105 pixels in size.
After all the fields in the setup have been filled in, click the SAVE and then exit to
return to the main program.
Word Templates
Templates are used when printing to a word document. Each profile requires 8
templates, they are: Artiste-Contract1.rtf
Artiste-Invoice1.rtf
Client-Contract1.rtf
Client-Invoice1.rtf
Commission-Agreement1.rtf
Dual-Contract1.rtf
Post-Event-Feedback1.rtf
Quotes1.rtf
for printing ‘Artiste Contact’ for bookings
for printing a ‘Artiste Invoice’ for bookings
for printing a ‘Client Contact’ for bookings
for printing a ‘Client Invoice’ for bookings
for printing a ‘Commission-Agreement’ for bookings
for printing a ‘Dual Contact’ for bookings
used to send a survey form after the event
for printing a ‘Quote’ for quotes
You will find default ones in the ‘Templates’ directory where the Ents Booking
program was installed (default - C:\<USER NAME>\My Documents\ Ents Booking
2011). Each template can be altered and set out to your requirements. You can design
and change anything as if you were creating any word document, so bold, underline,
tables, colours etc will work. They must be saved as ‘rtf’. To do this, after creation
select as ‘save as’ from the menu.
If you have the Ents Booking Program running with multiple profiles, you will need
to create new templates for each profile. The main profile templates end with ‘1’, the
next new profile with end with ‘2’ and so on for each profile.
e.g.
Dual-Contract1.rtf for main profile
Dual-Contract2.rtf for the next profile
How does it work?
When printing to a word document, the program opens up the relevant word template
and replaces ‘Tags’ with the information on that booking, e.g. to get the Client name
you would put the following in the word document \ClientName\ including the back
slashes. When the document opens, the program replaces this with the Clients Name
for that booking. If you make the ‘tag’ bold and red it will come out like this.
The word document is automatically saved in the ‘word doc’ directory, which is in
the sub directory where the Ents Booking 2011 Program was installed. The name of
the word document is a combination of the contract prefix and the contract number
followed by what type it is.
e.g. Say you were printing contract 1002 and your contract prefix was ABC you
would end up with the following:
ABC1002-D.doc
ABC1002-A.doc
ABC1002-C.doc
ABC1002-I.doc
ABC1002-Q.doc
Word output for the Dual contract
Word output for the Artiste contract
Word output for the Client contract
Word output for the Invoice
Word output for the Quote (when printing a quote)
All the default templates show the information ‘tag’ and how to display it; it’s best to
work from these when creating you own.
List of Tags
CompanyName
CompanyAddress1
CompanyAddress2
CompanyAddress3
ContractNumber
QuoteNumber
BookingDate
Occasion
CompanyCounty
CompanyPostCode
CompanyTel
CompanyFax
CampanyMobile
CompanyWeb
CompanyEmail
CompanyVATNumber
CompanyAddressList
CompanyAddressRow
ChequesPayable
ClientName
ClientAddress1
ClientAddress2
ClientAddress3
ClientCounty
ClientPostCode
ClientTelephone
ClientMobileNo
ClientEmail
ClientaddressRow
ClientaddressList
ClientInvoiceNumber
Artiste
ArtisteActName
ArtisteType
ArtisteAddress1
ArtisteAddress2
ArtisteAddress3
ArtisteCounty
ArtistePostCode
ArtisteDayNo
ArtisteEveNo
ArtisteMobileNo
ArtisteAddressRow
ArtisteAddressList
ArtisteInvoiceNumber
DressCode
VenueName
VenueRoomname
VenueAddress
VenueTel
VenueAccess
SpecialInfo
EventDate
StartTime
FinishTime
SetupTime
Price
AdvancePayment
Balance
PaymentTerms
NoGuests
Commission
VAT
CommissionVAT
TotalCommission
Travel
TheInvoiceDate
Notes
DualContractTerms
ClientContractTerms
ArtisteContractTerms
Profiles
Profiles are simply the information set in the SET UP about your company. The Ents
Booking program can run multiple profiles. When a new profile is added the program
automatically creates new databases for the bookings and quotes. This new profile
still uses common information like the Artistes, Venues, Clients, Occasions, Artiste
type, Dress code and Music type.
After the first profile has been added the set up menu will display a NEW button, use
this to add new profiles.
Why have Profiles?
Having multiple profiles enables you to trade under different company names
Adding Artistes
To add a new Artiste select Add / Edit > Artiste or Click the Artiste button from the
top menu
This brings up Artiste Information.
Use the menu buttons to Add, Edit and Remove Artistes from the database
If you want to search for an Artiste in the list, use the search navigator at the top.
Select which index (or order) you wish to search from by using the 'Search By' list
and then start typing in what you are looking for in the 'Search For' box.
While in non-edit mode if you press the Phone symbol by the number and have a
modem installed it will dial the number shown in that field.
Adding venues
To add a new venue select Add / Edit > Venues or click Venues Button on the top
menu
This brings up the Venue Information window. Use the menu at the top to
add/edit/remove Venues from the database.
If you want to search for a venue in the list use the search navigator at the top.
Select which index (or order) you wish to search from the 'Search By' list and then
start typing in what you are looking for in the 'Search For' box.
While in non edit mode if you press the phone symbol and have a modem installed it
will dial the number shown in that field
Adding Clients
To add a new client select Add / Edit > Clients or click the Clients Button on the
main menu
This brings up the window. Use the menu at the top to add/edit/remove Venues from
the database.
If you want to search for a client in the list use the search navigator at the top.
Select which index (or order) you wish to search from the 'Search By' list and then
start typing in what you are looking for in the 'Search For' box.
The clients section is for regular clients that use you, this saves you adding their
information every time they book a Artist from you.
While in non-edit mode if you have a modem installed and press the phone symbol it
will dial the number shown in that field.
Making a new booking
To add a new booking, click the NEW button
There are three sections to complete; the contract number and the booking date are set
automatically.
The other three sections are as follows: Client Details
Venue
Event Details
Client Details
If you have added clients to the Client Database use the drop down list to select the
client you wish and the details will be filled in for you. If not add the client details as
required, to add the Clients Details to database for use later click the Save Client
Details button below the Email address box
If you add an email address to the Clients information, the word Email address will
change colour and be underlined. Pressing this will open up your default e-mail
program ready for you to send an email to this client.
Venue Details
Select the venue where the event is to be held from the drop down list. To add new
venues to the list, click the Add New Venue button to open up the Venue Details
Page
Event Details
The Event Details show all the information regarding the event. In here there are a
number of points that you should be aware of. Every time the new booking button is
pressed the following happens: -
The date is set to the current date, this helps to prevent you selecting the wrong year
when taking on a booking.
The start time is set to the default start time as set in the Setup
The end time is set to the default end time as set in the Setup
The setup by time is set to the default start time. The ‘setup by time’ is used to show
what time the Artiste must be ready for the event e.g. set by 14:00 but start at 20:00.
To change the times use the up/down buttons by the time or highlight the time a type
it in.
Payment terms are set as ‘Cash on the night’ by default, although this can be
changed as required.
Occasion – list of occasions as set in the Setup
Dress Code – list of dress codes as set in the Setup
Artiste – list of Artiste names as save in the Artist Database, this will pop up another
window where you can find the artiste, select the type and then the Artistes Name,
you can just double click to get back to the booking
Special Clauses – Any Special Clauses the Artiste should be aware of.
Calendar
To access the calendar click the Calendar button
The calendar is designed to help you see who is booked and who is free on a given
date. The calendar opens in its own window meaning it can be left open along with
the main program window enabling you to swap between them.
There are two main features, selected a date and clicking on Booked Artistes a list
will show of all Artistes booked you have booked for that date.
The second is design to find a Artiste within Category that is not booked, selected a
date and clicking on Available Artistes by Category, now select a category from the
drop down list, this will not display a list of all Artistes with that Category that are not
booked on the selected date.
You can right click on the Artistes name and select book this Artiste for this Date,
this will open up a new booking for the selected date add the Artistes details to it,
ready for the other event information to be added.
Printing
Click on the Print button, this brings up the printing window. From here you can
print a Contract, Invoice, or Envelope to either the Client or Artiste, or create a word
document via the word Templates (See Word Templates sections for further
information)
There are three types of contract you can print, they are:
1)
Dual- this contract is between the Client and the Artiste. It will have the client
and Artiste name on it, and have costings for the Client
2)
Client – this contract is between you (your company name) and the client. It
will have costings for the Client. You then send an Artiste contract to the Artiste.
3)
Artiste – this contract is between you (your company name) and the Artiste. It
will have costings for only the Artiste. You then send a Client contract to the client.
Select what you wish to print and the press the Print button, you will see a preview of
the contract or envelopes to print. If you press the Word button, this will open up
word and add the information on the current event to Word Templates.
Once you have finished, press the Done button.
Tracking a booking
The booking tracking is used for you to know what stage a contact is at. E.g. When
you have sent the contact out to the client to sign tick the ‘Sent to client’.
Search for a booking
There are two ways to find a booking. You can either use the arrows on the booking
navigation bar or click on the Search button, this brings up the booking search
window.
Select which index (or order) you wish to search by from the 'Search By' list and
then start typing in what you are looking for in the 'Search For' box.
After you have found the booking you require, double click on it and the search
window will close and take you back to the main bookings screen, showing the
details of that booking.
Editing a booking
Find the booking you wish to edit by using arrows on the booking navigation bar or
click on the Search button
Press the Edit button and edit the details as you wish then press the Save button.
Note you can not edit a booking after it’s been invoiced
Deleting a booking
Find the booking you wish to delete by using arrows on the booking navigation bar or
click on the Search button
Press the Delete button and then confirm you wish to delete this record.
Note you can not delete a booking after it’s been invoiced
What are the feedback forms?
Feedback forms are designed to help you gather additional information about the
event such as a wedding.
There are six in total: Wedding
Birthday
Wedding Anniversary
General Party
Ladies Night
Retirement
Printing feedback forms
To print a form select Feedback Form from the Tools menu, this brings up the
feedback form window.
Select what you wish to print and the press the Print button. You will see a preview
of the form before it prints, to confirm the printing press the Print button.
Reports
Reports are there to help you manage Artiste bookings though to end of year accounts
or track payment and invoices. Reports can be either printed or exported out to CSV
file.
Generate new Booking report
First select the start and end dates, then either select the Artiste and or a Hotel from
the drop down lists or tick All, click the Generate report button and the information
will appear in the grid above.
To Print the report click the Print Report button or to export the report in to a CSV
file, click the Export Report button, add the file name and location and click save
Generate new Payments not received report
First select either Advanced Payments or Balance then click the
Generate report button and the information will appear in the grid above.
To Print the report click the Print Report button or to export the report in to a CSV
file, click the Export Report button, add the file name and location and click save
Generate new Invoices not Sent report
First select either Client or Artiste then click the Generate report button and the
information will appear in the grid above.
To Print the report click the Print Report button or to export the report in to a CSV
file, click the Export Report button, add the file name and location and click save
Generate new Out or Date PLI or PAT report
First select either PLI or PAT then click the Generate report button and the
information will appear in the grid above.
To Print the report click the Print Report button or to export the report in to a CSV
file, click the Export Report button, add the file name and location and click save
Making a new quote
To add a new quote click the Quotes Button from the main menu, this shows the
quotes section of the program, sections and information are laid out and work in the
same way as the bookings page.
To exit quotes press the Bookings button.
Printing a Quote
Click on the Print button.
Select what you wish to print and the press the Print button. You will see a preview of
the contract or envelope before it prints, to confirm the printing press the Print
button. If you press the Word button, this will open up word and adds the information
on the current quote to the Word template,
Once you have finished press the Done button
To exit quotes press the Bookings button.
Converting a quote to a booking
To make a Quote a confirmed booking, open up the quotes, find the quote you wish to
use and click the Use Quote button, this takes the current quote showing, and
transfers it over to the booking screen to make a confirmed booking.
NOTE: Once a quote has been transferred then it is deleted from the quotes section.
To exit quotes press the Bookings button.
Search for a quote
There are two ways to find a quote. You can either use the arrows on the quotes
navigation bar or click on the Search button, this brings up the quote search window.
Select which index (or order) you wish to search by from the 'Search By' list and
then start typing in what you are looking for in the 'Search For' box.
After you have found the quote you require, double click on it and the search window
will close and take you back to the main quote screen, showing the details of that
quote.
Editing a quote
Find the quote you wish to edit by using arrows on the quote navigation bar or click
on the Search button
Press the Edit button and edit the details as you wish then press the Save button.
Deleting a quote
Find the quote you wish to delete by using arrows on the quote navigation bar or click
on the Search button
Press the Delete button and then confirm you wish to delete this record.
Phone dialler set-up
Select Tools > Phone Dialler Setup from the top menu. The phone dialler setup is
there to test your modem with the program. Type in a number (somebody who will
not mind you calling them) and press the Dial Above Number button. This should
make your modem dial that number (if compatible!).
Next to the telephone and mobile number there is a small picture of a phone pressing
this will dial the number.
You must have modem installed for this feature to work!
Data Backup
To back up you data you must first set the backup directory in the Setup section
Once this is done just select data backup from the Tools Menu
You will be prompted to back up your Data every 28 days