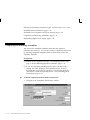
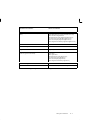
1
Oracler Work in Process User’s Guide Release 11 March 1998 OracleR Work in Process User’s Guide Release 11 The part number for this book is A57765–01. Copyright E 1996, 1998, Oracle Corporation. All Rights Reserved. Major Contributors: Louis Bryan, Nancy Kane, Susan Ramage Contributors: Stephen Chen, Jenny Gu, Rolf Kaiser, Joseph Kent, Lenore Siegler, Daniel Soosai The Programs (which include both the software and documentation) contain proprietary information of Oracle Corporation; they are provided under a license agreement containing restrictions on use and disclosure and are also protected by copyright, patent and other intellectual property law. Reverse engineering of the Programs is prohibited. The information contained in this document is subject to change without notice. If you find any problems in the documentation, please report them to us in writing. Oracle Corporation does not warrant that this document is error–free. No part of this document may be reproduced or transmitted in any form or by any means, electronic or mechanical, for any purpose, without the express written permission of Oracle Corporation. Restricted Rights Legend Programs delivered subject to the DOD FAR Supplement are ’commercial computer software’ and use, duplication and disclosure of the Programs shall be subject to the licensing restrictions set forth in the applicable Oracle license agreement. Otherwise, Programs delivered subject to the Federal Acquisition Regulations are ’restricted computer software’ and use, duplication and disclosure of the Programs shall be subject to the restrictions in FAR 52.227–14, Rights in Data –– General, including Alternate III (June 1987). Oracle Corporation, 500 Oracle Parkway, Redwood City, CA 94065. The Programs are not intended for use in any nuclear, aviation, mass transit, medical, or other inherently dangerous applications. It shall be licensee’s responsibility to take all appropriate fail–safe, back–up, redundancy and other measures to ensure the safe use of such applications if the Programs are used for such purposes, and Oracle disclaims liability for any damages caused by such use of the Programs. Oracle is a registered trademark, and Developer/2000, Oracle8, Oracle Alert, Oracle Application Object Library, Oracle Financials, Oracle Quality, SQL*Forms, SQL*Plus, SQL*QMX, SQL*Report, and SQL*ReportWriter are trademarks or registered trademarks of Oracle Corporation. All other company or product names are mentioned for identification purposes only, and may be trademarks of their respective owners. Contents Preface ....................................................... Audience for This Guide . . . . . . . . . . . . . . . . . . . . . . . . . . . . . Other Information Sources . . . . . . . . . . . . . . . . . . . . . . . . . . . . About Oracle . . . . . . . . . . . . . . . . . . . . . . . . . . . . . . . . . . . . . . . xiii xiii xiii xx Chapter 1 Overview of Work in Process . . . . . . . . . . . . . . . . . . . . . . . . . . . . 1 – 1 Overview . . . . . . . . . . . . . . . . . . . . . . . . . . . . . . . . . . . . . . . . . . . . . . 1 – 2 Chapter 2 Setting Up . . . . . . . . . . . . . . . . . . . . . . . . . . . . . . . . . . . . . . . . . . . . . Overview . . . . . . . . . . . . . . . . . . . . . . . . . . . . . . . . . . . . . . . . . . . . . . Setup Steps . . . . . . . . . . . . . . . . . . . . . . . . . . . . . . . . . . . . . . . . . WIP Parameters . . . . . . . . . . . . . . . . . . . . . . . . . . . . . . . . . . . . . . . . . Defining WIP Parameters . . . . . . . . . . . . . . . . . . . . . . . . . . . . . WIP Accounting Classes . . . . . . . . . . . . . . . . . . . . . . . . . . . . . . . . . Defining WIP Accounting Classes . . . . . . . . . . . . . . . . . . . . . Shop Floor Statuses . . . . . . . . . . . . . . . . . . . . . . . . . . . . . . . . . . . . . . Defining Shop Floor Statuses . . . . . . . . . . . . . . . . . . . . . . . . . . Defining Schedule Groups . . . . . . . . . . . . . . . . . . . . . . . . . . . . . . . . Defining Labor Rates . . . . . . . . . . . . . . . . . . . . . . . . . . . . . . . . . . . . Production Lines . . . . . . . . . . . . . . . . . . . . . . . . . . . . . . . . . . . . . . . . Defining Production Lines . . . . . . . . . . . . . . . . . . . . . . . . . . . . Standard Documents . . . . . . . . . . . . . . . . . . . . . . . . . . . . . . . . . . . . Defining Job and Schedule Documents . . . . . . . . . . . . . . . . . 2–1 2–2 2–6 2–9 2 – 16 2 – 22 2 – 27 2 – 30 2 – 30 2 – 32 2 – 34 2 – 36 2 – 36 2 – 39 2 – 39 Contents iii Defining Operation Documents . . . . . . . . . . . . . . . . . . . . . . . . 2 – 40 Profile Options . . . . . . . . . . . . . . . . . . . . . . . . . . . . . . . . . . . . . . . . . . 2 – 41 Security Functions . . . . . . . . . . . . . . . . . . . . . . . . . . . . . . . . . . . . . . . 2 – 53 Chapter 3 Discrete Manufacturing . . . . . . . . . . . . . . . . . . . . . . . . . . . . . . . . . Overview . . . . . . . . . . . . . . . . . . . . . . . . . . . . . . . . . . . . . . . . . . . . . . Setting Up . . . . . . . . . . . . . . . . . . . . . . . . . . . . . . . . . . . . . . . . . . . . . . Discrete Manufacturing Process Diagram . . . . . . . . . . . . . . . . . . Creating Discrete Jobs . . . . . . . . . . . . . . . . . . . . . . . . . . . . . . . . . . . Planned Discrete Jobs . . . . . . . . . . . . . . . . . . . . . . . . . . . . . . . . Final Assembly Orders . . . . . . . . . . . . . . . . . . . . . . . . . . . . . . . Open Job and Schedule Interface . . . . . . . . . . . . . . . . . . . . . . WIP Accounting Class Defaults . . . . . . . . . . . . . . . . . . . . . . . . Build Sequencing . . . . . . . . . . . . . . . . . . . . . . . . . . . . . . . . . . . . Defining Discrete Jobs Manually . . . . . . . . . . . . . . . . . . . . . . . Linking ATO Sales Orders and Discrete Jobs . . . . . . . . . . . . Project Jobs . . . . . . . . . . . . . . . . . . . . . . . . . . . . . . . . . . . . . . . . . . . . . Building Discrete Jobs . . . . . . . . . . . . . . . . . . . . . . . . . . . . . . . . . . . Finding Discrete Jobs . . . . . . . . . . . . . . . . . . . . . . . . . . . . . . . . . Releasing Discrete Jobs . . . . . . . . . . . . . . . . . . . . . . . . . . . . . . . Printing Reports for Current Discrete Jobs . . . . . . . . . . . . . . Viewing Discrete Jobs . . . . . . . . . . . . . . . . . . . . . . . . . . . . . . . . . . . . Viewing Discrete Job Information . . . . . . . . . . . . . . . . . . . . . . Viewing Pending Job Transactions . . . . . . . . . . . . . . . . . . . . . Updating Discrete Jobs . . . . . . . . . . . . . . . . . . . . . . . . . . . . . . . . . . . Changing Discrete Jobs . . . . . . . . . . . . . . . . . . . . . . . . . . . . . . . Mass Changing Discrete Job Statuses . . . . . . . . . . . . . . . . . . . Simulating and Saving Simulated Jobs . . . . . . . . . . . . . . . . . . . . . Completing Discrete Jobs . . . . . . . . . . . . . . . . . . . . . . . . . . . . . . . . . Discrete Job Close . . . . . . . . . . . . . . . . . . . . . . . . . . . . . . . . . . . . . . . Closing Discrete Jobs . . . . . . . . . . . . . . . . . . . . . . . . . . . . . . . . . Discrete Job Purge . . . . . . . . . . . . . . . . . . . . . . . . . . . . . . . . . . . . . . . Purging Discrete Jobs . . . . . . . . . . . . . . . . . . . . . . . . . . . . . . . . Specifying Purge Options . . . . . . . . . . . . . . . . . . . . . . . . . . . . . Processing Pending Jobs and Schedules . . . . . . . . . . . . . . . . . Chapter 4 Non–Standard Discrete Jobs . . . . . . . . . . . . . . . . . . . . . . . . . . . . . 4 – 1 Overview . . . . . . . . . . . . . . . . . . . . . . . . . . . . . . . . . . . . . . . . . . . . . . 4 – 2 Standard Versus Non–Standard Discrete Jobs . . . . . . . . . . . . . . . 4 – 4 iv Oracle Work in Process User’s Guide 3–1 3–2 3–5 3–6 3–7 3–7 3–8 3–9 3 – 10 3 – 11 3 – 12 3 – 21 3 – 24 3 – 25 3 – 25 3 – 28 3 – 29 3 – 31 3 – 31 3 – 33 3 – 36 3 – 36 3 – 40 3 – 43 3 – 47 3 – 50 3 – 51 3 – 56 3 – 57 3 – 59 3 – 63 Business Scenarios . . . . . . . . . . . . . . . . . . . . . . . . . . . . . . . . . . . . . . Rework Assemblies . . . . . . . . . . . . . . . . . . . . . . . . . . . . . . . . . . Field Service Repairs . . . . . . . . . . . . . . . . . . . . . . . . . . . . . . . . . Upgrade Assemblies . . . . . . . . . . . . . . . . . . . . . . . . . . . . . . . . . Disassemble Assemblies . . . . . . . . . . . . . . . . . . . . . . . . . . . . . . Maintain Plant or Equipment . . . . . . . . . . . . . . . . . . . . . . . . . . Build Engineering Prototypes . . . . . . . . . . . . . . . . . . . . . . . . . Track Other Projects . . . . . . . . . . . . . . . . . . . . . . . . . . . . . . . . . 4–7 4–7 4–8 4 – 10 4 – 12 4 – 14 4 – 16 4 – 19 Chapter 5 Flow Manufacturing . . . . . . . . . . . . . . . . . . . . . . . . . . . . . . . . . . . . Overview . . . . . . . . . . . . . . . . . . . . . . . . . . . . . . . . . . . . . . . . . . . . . . Setting Up . . . . . . . . . . . . . . . . . . . . . . . . . . . . . . . . . . . . . . . . . . . . . . Performing Work Order–less Completions . . . . . . . . . . . . . . 5–1 5–2 5–4 5–5 Chapter 6 Repetitive Manufacturing . . . . . . . . . . . . . . . . . . . . . . . . . . . . . . . Overview . . . . . . . . . . . . . . . . . . . . . . . . . . . . . . . . . . . . . . . . . . . . . . Setting Up . . . . . . . . . . . . . . . . . . . . . . . . . . . . . . . . . . . . . . . . . . . . . . Production Line and Assembly Associations . . . . . . . . . . . . . . . . Associating Lines and Assemblies . . . . . . . . . . . . . . . . . . . . . Deleting Line/Assembly Associations . . . . . . . . . . . . . . . . . . Repetitive Manufacturing Process Diagram . . . . . . . . . . . . . . . . . Creating Repetitive Schedules . . . . . . . . . . . . . . . . . . . . . . . . . . . . Planned Repetitive Schedules . . . . . . . . . . . . . . . . . . . . . . . . . Defining Repetitive Schedules Manually . . . . . . . . . . . . . . . . Building Repetitive Schedules . . . . . . . . . . . . . . . . . . . . . . . . . . . . Finding Repetitive Schedules . . . . . . . . . . . . . . . . . . . . . . . . . . Releasing Repetitive Schedules . . . . . . . . . . . . . . . . . . . . . . . . Printing Reports for Current Repetitive Schedules . . . . . . . Viewing Repetitive Schedules . . . . . . . . . . . . . . . . . . . . . . . . . . . . . Viewing Repetitive Schedule Information . . . . . . . . . . . . . . . Updating Repetitive Schedules . . . . . . . . . . . . . . . . . . . . . . . . . . . . Changing Repetitive Schedules . . . . . . . . . . . . . . . . . . . . . . . . Mass Changing Repetitive Schedule Statuses . . . . . . . . . . . . Completing Repetitive Schedules . . . . . . . . . . . . . . . . . . . . . . . . . . Repetitive Schedule Purge . . . . . . . . . . . . . . . . . . . . . . . . . . . . . . . . Purging Repetitive Schedules . . . . . . . . . . . . . . . . . . . . . . . . . 6–1 6–2 6–5 6–6 6–6 6 – 10 6 – 11 6 – 12 6 – 12 6 – 13 6 – 18 6 – 19 6 – 21 6 – 21 6 – 24 6 – 24 6 – 27 6 – 27 6 – 31 6 – 34 6 – 39 6 – 40 Chapter 7 Material Control . . . . . . . . . . . . . . . . . . . . . . . . . . . . . . . . . . . . . . . . 7 – 1 Overview . . . . . . . . . . . . . . . . . . . . . . . . . . . . . . . . . . . . . . . . . . . . . . 7 – 2 Contents v Chapter 8 Setting Up . . . . . . . . . . . . . . . . . . . . . . . . . . . . . . . . . . . . . . . . . . . . . . Material Requirements Control . . . . . . . . . . . . . . . . . . . . . . . . . . . By–Product Recovery . . . . . . . . . . . . . . . . . . . . . . . . . . . . . . . . Material Requirements . . . . . . . . . . . . . . . . . . . . . . . . . . . . . . . . . . . Adding and Updating Material Requirements . . . . . . . . . . . Deleting Material Requirements . . . . . . . . . . . . . . . . . . . . . . . Viewing Material Requirements . . . . . . . . . . . . . . . . . . . . . . . Viewing Component Requirements . . . . . . . . . . . . . . . . . . . . Viewing Component ATP Information . . . . . . . . . . . . . . . . . . Material Control Process Diagram . . . . . . . . . . . . . . . . . . . . . . . . . Component Issues and Returns . . . . . . . . . . . . . . . . . . . . . . . . . . . Repetitive Component Issues and Returns . . . . . . . . . . . . . . Component Issue and Return Transaction Options . . . . . . . WIP Material Transaction Types . . . . . . . . . . . . . . . . . . . . . . . Issuing and Returning Specific Components . . . . . . . . . . . . . Issuing and Returning All Push Components . . . . . . . . . . . . Supply Subinventory and Locator Replenishment . . . . . . . . . . . Supply Subinventory and Locator Replenishment Options Replenishing Supply Subinventories and Locators . . . . . . . Replenishing Higher Level Supply . . . . . . . . . . . . . . . . . . . . . Backflush Transactions . . . . . . . . . . . . . . . . . . . . . . . . . . . . . . . . . . . Repetitive Production Line Backflushes . . . . . . . . . . . . . . . . . Lot and Serial Number Backflushing . . . . . . . . . . . . . . . . . . . Assembly Pull Backflush Transactions . . . . . . . . . . . . . . . . . . Backflush Transaction Rules . . . . . . . . . . . . . . . . . . . . . . . . . . . Backflush Transaction Options . . . . . . . . . . . . . . . . . . . . . . . . Assembly Completions and Returns . . . . . . . . . . . . . . . . . . . . . . . Assembly Over–completions and Over–returns . . . . . . . . . . Assembly Completion and Return Options . . . . . . . . . . . . . . Completion Transaction Types . . . . . . . . . . . . . . . . . . . . . . . . . Completing and Returning Assemblies . . . . . . . . . . . . . . . . . Viewing Job Lot Compositions . . . . . . . . . . . . . . . . . . . . . . . . WIP Inventory Accuracy . . . . . . . . . . . . . . . . . . . . . . . . . . . . . . . . . 7–6 7–7 7–8 7–9 7–9 7 – 12 7 – 13 7 – 15 7 – 17 7 – 19 7 – 20 7 – 22 7 – 24 7 – 25 7 – 26 7 – 30 7 – 38 7 – 40 7 – 41 7 – 44 7 – 47 7 – 49 7 – 49 7 – 50 7 – 50 7 – 51 7 – 53 7 – 55 7 – 56 7 – 57 7 – 58 7 – 62 7 – 65 Shop Floor Control . . . . . . . . . . . . . . . . . . . . . . . . . . . . . . . . . . . . . Overview . . . . . . . . . . . . . . . . . . . . . . . . . . . . . . . . . . . . . . . . . . . . . . Setting Up . . . . . . . . . . . . . . . . . . . . . . . . . . . . . . . . . . . . . . . . . . . . . . Routings and Operations . . . . . . . . . . . . . . . . . . . . . . . . . . . . . . . . . Intraoperation Steps . . . . . . . . . . . . . . . . . . . . . . . . . . . . . . . . . Operations . . . . . . . . . . . . . . . . . . . . . . . . . . . . . . . . . . . . . . . . . . . . . 8–1 8–2 8–4 8–5 8–8 8 – 11 vi Oracle Work in Process User’s Guide Chapter 9 Adding and Updating Operations . . . . . . . . . . . . . . . . . . . . . Deleting Operations . . . . . . . . . . . . . . . . . . . . . . . . . . . . . . . . . . Viewing Operations . . . . . . . . . . . . . . . . . . . . . . . . . . . . . . . . . . Viewing Job and Schedule Operations . . . . . . . . . . . . . . . . . . Move Transaction Process Diagram . . . . . . . . . . . . . . . . . . . . . . . . Move Transactions . . . . . . . . . . . . . . . . . . . . . . . . . . . . . . . . . . . . . . Interoperation Moves . . . . . . . . . . . . . . . . . . . . . . . . . . . . . . . . Intraoperation Moves . . . . . . . . . . . . . . . . . . . . . . . . . . . . . . . . Operation Completion Moves . . . . . . . . . . . . . . . . . . . . . . . . . Move Completion/Return Transactions . . . . . . . . . . . . . . . . Production Line Moves . . . . . . . . . . . . . . . . . . . . . . . . . . . . . . . Open Move Transaction Interface . . . . . . . . . . . . . . . . . . . . . . Move Transaction Options . . . . . . . . . . . . . . . . . . . . . . . . . . . . Move Transaction Types . . . . . . . . . . . . . . . . . . . . . . . . . . . . . . Performing Move Transactions . . . . . . . . . . . . . . . . . . . . . . . . Operation Pull Backflush Transactions . . . . . . . . . . . . . . . . . . Backflushing Pull Components . . . . . . . . . . . . . . . . . . . . . . . . Move Completion/Return Rules . . . . . . . . . . . . . . . . . . . . . . . Performing Move Completion/Return Transactions . . . . . . Viewing Move Transactions . . . . . . . . . . . . . . . . . . . . . . . . . . . Shop Floor Management . . . . . . . . . . . . . . . . . . . . . . . . . . . . . . . . . Outside Processing . . . . . . . . . . . . . . . . . . . . . . . . . . . . . . . . . . Rework Production . . . . . . . . . . . . . . . . . . . . . . . . . . . . . . . . . . Assembly Scrap . . . . . . . . . . . . . . . . . . . . . . . . . . . . . . . . . . . . . Scrapping Assemblies . . . . . . . . . . . . . . . . . . . . . . . . . . . . . . . . Dispatch Reports . . . . . . . . . . . . . . . . . . . . . . . . . . . . . . . . . . . . Pending Move Transactions . . . . . . . . . . . . . . . . . . . . . . . . . . . . . . Processing Pending Move Transactions . . . . . . . . . . . . . . . . . Shop Floor Statuses . . . . . . . . . . . . . . . . . . . . . . . . . . . . . . . . . . . . . . Assigning and Viewing Shop Floor Statuses . . . . . . . . . . . . . 8 – 11 8 – 16 8 – 19 8 – 21 8 – 23 8 – 24 8 – 25 8 – 28 8 – 29 8 – 30 8 – 31 8 – 32 8 – 32 8 – 34 8 – 35 8 – 41 8 – 42 8 – 45 8 – 46 8 – 49 8 – 51 8 – 51 8 – 51 8 – 53 8 – 56 8 – 58 8 – 59 8 – 59 8 – 65 8 – 68 Resource Management . . . . . . . . . . . . . . . . . . . . . . . . . . . . . . . . . . Overview . . . . . . . . . . . . . . . . . . . . . . . . . . . . . . . . . . . . . . . . . . . . . . Setting Up . . . . . . . . . . . . . . . . . . . . . . . . . . . . . . . . . . . . . . . . . . . . . . Resource Charge Types . . . . . . . . . . . . . . . . . . . . . . . . . . . . . . . . . . Resource Requirements . . . . . . . . . . . . . . . . . . . . . . . . . . . . . . . . . . Adding and Updating Resource Requirements . . . . . . . . . . Deleting Resource Requirements . . . . . . . . . . . . . . . . . . . . . . . Viewing Resource Requirements . . . . . . . . . . . . . . . . . . . . . . . Resource Transactions . . . . . . . . . . . . . . . . . . . . . . . . . . . . . . . . . . . 9–1 9–2 9–4 9–5 9–8 9 – 10 9 – 15 9 – 16 9 – 19 Contents vii Open Resource Transaction Interface . . . . . . . . . . . . . . . . . . . Resource Transaction Options . . . . . . . . . . . . . . . . . . . . . . . . . Charging Resources Manually . . . . . . . . . . . . . . . . . . . . . . . . . Charging Resources with Move Transactions . . . . . . . . . . . . Viewing Resources Transactions . . . . . . . . . . . . . . . . . . . . . . . Pending Resource Transactions . . . . . . . . . . . . . . . . . . . . . . . . . . . Processing Pending Resource Transactions . . . . . . . . . . . . . . 9 – 20 9 – 21 9 – 22 9 – 25 9 – 27 9 – 30 9 – 30 Chapter 10 Job and Repetitive Schedule Statuses . . . . . . . . . . . . . . . . . . . . . Overview . . . . . . . . . . . . . . . . . . . . . . . . . . . . . . . . . . . . . . . . . . . . . . Discrete Job Status Control . . . . . . . . . . . . . . . . . . . . . . . . . . . . . . . Discrete Job Statuses . . . . . . . . . . . . . . . . . . . . . . . . . . . . . . . . . . . . . Repetitive Schedule Status Control . . . . . . . . . . . . . . . . . . . . . . . . Repetitive Schedule Statuses . . . . . . . . . . . . . . . . . . . . . . . . . . . . . . Job and Repetitive Schedule Status Changes . . . . . . . . . . . . . . . . Transaction and Process Control By Status . . . . . . . . . . . . . . . . . . Transaction Control By Status . . . . . . . . . . . . . . . . . . . . . . . . . ECO Implementation By Status . . . . . . . . . . . . . . . . . . . . . . . . Planning Control by Status . . . . . . . . . . . . . . . . . . . . . . . . . . . . Reporting by Status . . . . . . . . . . . . . . . . . . . . . . . . . . . . . . . . . . Business Scenarios . . . . . . . . . . . . . . . . . . . . . . . . . . . . . . . . . . . . . . 10 – 1 10 – 2 10 – 4 10 – 7 10 – 10 10 – 12 10 – 15 10 – 18 10 – 18 10 – 19 10 – 20 10 – 20 10 – 23 Chapter 11 Work in Process Costing . . . . . . . . . . . . . . . . . . . . . . . . . . . . . . . . . Overview . . . . . . . . . . . . . . . . . . . . . . . . . . . . . . . . . . . . . . . . . . . . . . Setting Up . . . . . . . . . . . . . . . . . . . . . . . . . . . . . . . . . . . . . . . . . . . . . . Work in Process Costs . . . . . . . . . . . . . . . . . . . . . . . . . . . . . . . . . . . Work in Process Valuation and Variances . . . . . . . . . . . . . . . . . . . Work in Process Valuation . . . . . . . . . . . . . . . . . . . . . . . . . . . . Work in Process Cost Variances . . . . . . . . . . . . . . . . . . . . . . . . Cost Reports . . . . . . . . . . . . . . . . . . . . . . . . . . . . . . . . . . . . . . . . 11 – 1 11 – 2 11 – 5 11 – 6 11 – 8 11 – 8 11 – 10 11 – 10 Chapter 12 Work in Process Scheduling . . . . . . . . . . . . . . . . . . . . . . . . . . . . . Overview . . . . . . . . . . . . . . . . . . . . . . . . . . . . . . . . . . . . . . . . . . . . . . Discrete Scheduling . . . . . . . . . . . . . . . . . . . . . . . . . . . . . . . . . . . . . Detailed Scheduling . . . . . . . . . . . . . . . . . . . . . . . . . . . . . . . . . . . . . Discrete Rescheduling . . . . . . . . . . . . . . . . . . . . . . . . . . . . . . . . . . . Repetitive Line Scheduling . . . . . . . . . . . . . . . . . . . . . . . . . . . . . . . Repetitive Line Rescheduling . . . . . . . . . . . . . . . . . . . . . . . . . . . . . 12 – 1 12 – 2 12 – 5 12 – 7 12 – 11 12 – 13 12 – 18 viii Oracle Work in Process User’s Guide Repetitive Line Capacity Changes . . . . . . . . . . . . . . . . . . . . . . . . . 12 – 20 Chapter 13 Descriptive Flexfields . . . . . . . . . . . . . . . . . . . . . . . . . . . . . . . . . . . Overview . . . . . . . . . . . . . . . . . . . . . . . . . . . . . . . . . . . . . . . . . . . . . . Setting Up Descriptive Flexfields . . . . . . . . . . . . . . . . . . . . . . . . . . Using Descriptive Flexfield Information . . . . . . . . . . . . . . . . . . . . Business Scenarios . . . . . . . . . . . . . . . . . . . . . . . . . . . . . . . . . . . . . . Management of Quality Information . . . . . . . . . . . . . . . . . . . Management of Outside Processor Sterilization . . . . . . . . . . 13 – 1 13 – 2 13 – 4 13 – 6 13 – 11 13 – 11 13 – 13 Chapter 14 Reports and Processes . . . . . . . . . . . . . . . . . . . . . . . . . . . . . . . . . . . AutoCreating Final Assembly Orders . . . . . . . . . . . . . . . . . . . . . . Closing Discrete Jobs Using Submit Requests . . . . . . . . . . . . . . . Discrete Job Data Report . . . . . . . . . . . . . . . . . . . . . . . . . . . . . . . . . Discrete Job Dispatch Report . . . . . . . . . . . . . . . . . . . . . . . . . . . . . Discrete Job Listing Report . . . . . . . . . . . . . . . . . . . . . . . . . . . . . . . Discrete Job Pick List Report . . . . . . . . . . . . . . . . . . . . . . . . . . . . . . Discrete Job Routing Sheet . . . . . . . . . . . . . . . . . . . . . . . . . . . . . . . Discrete Job Shortage Report . . . . . . . . . . . . . . . . . . . . . . . . . . . . . Discrete Job Value Report – Standard Costing . . . . . . . . . . . . . . . Discrete Shop Packet . . . . . . . . . . . . . . . . . . . . . . . . . . . . . . . . . . . . Employee Rates Listing . . . . . . . . . . . . . . . . . . . . . . . . . . . . . . . . . . Expense Job Value Report . . . . . . . . . . . . . . . . . . . . . . . . . . . . . . . . Importing Jobs and Schedules . . . . . . . . . . . . . . . . . . . . . . . . . . . . Job Lot Composition Report . . . . . . . . . . . . . . . . . . . . . . . . . . . . . . Job and Schedule Interface Report . . . . . . . . . . . . . . . . . . . . . . . . . Move Transaction Report . . . . . . . . . . . . . . . . . . . . . . . . . . . . . . . . . Production Line Report . . . . . . . . . . . . . . . . . . . . . . . . . . . . . . . . . . Purging Jobs and Schedules . . . . . . . . . . . . . . . . . . . . . . . . . . . . . . Purge Report . . . . . . . . . . . . . . . . . . . . . . . . . . . . . . . . . . . . . . . . . . . Repetitive Line Report . . . . . . . . . . . . . . . . . . . . . . . . . . . . . . . . . . . Repetitive Pick List Report . . . . . . . . . . . . . . . . . . . . . . . . . . . . . . . Repetitive Routing Sheet . . . . . . . . . . . . . . . . . . . . . . . . . . . . . . . . . Repetitive Schedule Data Report . . . . . . . . . . . . . . . . . . . . . . . . . . Repetitive Schedule Shortage Report . . . . . . . . . . . . . . . . . . . . . . . Repetitive Shop Packet . . . . . . . . . . . . . . . . . . . . . . . . . . . . . . . . . . . Repetitive Value Report . . . . . . . . . . . . . . . . . . . . . . . . . . . . . . . . . . Resource Performance Report . . . . . . . . . . . . . . . . . . . . . . . . . . . . . 14 – 1 14 – 3 14 – 6 14 – 9 14 – 11 14 – 13 14 – 15 14 – 17 14 – 19 14 – 22 14 – 26 14 – 27 14 – 29 14 – 32 14 – 34 14 – 36 14 – 37 14 – 39 14 – 40 14 – 45 14 – 46 14 – 47 14 – 49 14 – 50 14 – 51 14 – 54 14 – 55 14 – 58 Contents ix Resource Transaction Report . . . . . . . . . . . . . . . . . . . . . . . . . . . . . . Shop Floor Statuses Report . . . . . . . . . . . . . . . . . . . . . . . . . . . . . . . Schedule Group Listing . . . . . . . . . . . . . . . . . . . . . . . . . . . . . . . . . . WIP Account Distribution Report . . . . . . . . . . . . . . . . . . . . . . . . . WIP Account Summary Report . . . . . . . . . . . . . . . . . . . . . . . . . . . WIP Accounting Classes Report . . . . . . . . . . . . . . . . . . . . . . . . . . . WIP Location Report . . . . . . . . . . . . . . . . . . . . . . . . . . . . . . . . . . . . WIP Offsetting Account Report . . . . . . . . . . . . . . . . . . . . . . . . . . . WIP Outside Processing Report . . . . . . . . . . . . . . . . . . . . . . . . . . . WIP Parameters Report . . . . . . . . . . . . . . . . . . . . . . . . . . . . . . . . . . WIP Value Report . . . . . . . . . . . . . . . . . . . . . . . . . . . . . . . . . . . . . . . 14 – 60 14 – 62 14 – 63 14 – 64 14 – 67 14 – 68 14 – 69 14 – 71 14 – 72 14 – 73 14 – 74 Appendix A Windows and Navigator Paths . . . . . . . . . . . . . . . . . . . . . . . . . . . A – 1 Appendix B Comparison of Manufacturing Methods . . . . . . . . . . . . . . . . . . B – 1 Appendix C Supply Types . . . . . . . . . . . . . . . . . . . . . . . . . . . . . . . . . . . . . . . . . . C – 1 Appendix D Work in Process Planning . . . . . . . . . . . . . . . . . . . . . . . . . . . . . . . D – 1 Appendix E Attachments . . . . . . . . . . . . . . . . . . . . . . . . . . . . . . . . . . . . . . . . . . . E – 1 Appendix F Outside Processing and Work in Process . . . . . . . . . . . . . . . . . . F – 1 Appendix G Special Menu Options . . . . . . . . . . . . . . . . . . . . . . . . . . . . . . . . . . G – 1 Glossary Index x Oracle Work in Process User’s Guide Preface Welcome to the OracleR Work in Process User’s Guide, Release 11. This user’s guide includes the information you need to work with Oracle Work in Process effectively. It contains detailed information about the following: • Overview and reference information • Specific tasks you can accomplish using Oracle Work in Process • Oracle Work in Process setup • Oracle Work in Process functions and features • Oracle Work in Process windows • Oracle Work in Process reports and processes This preface explains how this user’s guide is organized and introduces other sources of information that can help you. Preface xi About This User’s Guide This guide contains overviews as well as task and reference information about Oracle Work in Process. This guide includes the following chapters: • Chapter 1.introduces Work in Process and describes its integration with other Oracle Manufacturing Applications. • Chapter 2 provides information about setting up Oracle Work in Process as well as other integrated Oracle Manufacturing Applications. Note: Implementation information and procedures are contained in this chapter. • Chapter 3 explains how to use and define discrete jobs. • Chapter 4 explains the differences between non–standard and standard discrete jobs and illustrates how non–standard discrete jobs can be used. • Chapter 5 explains how to use work order–less completions and flow manufacturing. • Chapter 6 explains how to use and define repetitive schedules. • Chapter 7 explains how work in process materials are transacted, controlled, and tracked. • Chapter 8 explains how assemblies are moved, controlled, and tracked on the shop floor. • Chapter 9 explains work in process resources are managed. • Chapter 10 describes how discrete job and repetitive schedules statuses can be used to control production activities. • Chapter 11 explains how job and schedule costs are tracked. • Chapter 12 explains how jobs and repetitive schedules are scheduled. • Chapter 13 explains how descriptive flexfields are used in Oracle Work in Process. • Chapter 14 explains how to submit requests for reports and processes and briefly describes each report and process. xii Oracle Work in Process User’s Guide Audience for This Guide This guide assumes you have a working knowledge of your business area’s processes and tools. It also assumes you are familiar with Work in Process. If you have never used Work in Process, we suggest you attend one or more of the Work in Process training classes available through World Wide Education. For more information about Work in Process and Oracle training, see: Other Information Sources. Do Not Use Database Tools to Modify Oracle Applications Data Because Oracle Applications tables are interrelated, any change you make using Oracle Applications can update many tables at once. But when you modify Oracle Applications data using anything other than Oracle Applications, you may change a row in one table without making corresponding changes in related tables. If your tables get out of synchronization with each other, you risk retrieving erroneous information and you risk unpredictable results throughout Oracle Applications. When you use Oracle Applications to modify your data, Oracle Applications automatically checks that your changes are valid. Oracle Applications also keeps track of who changes information. If you enter information into database tables using database tools, you may store invalid information. You also lose the ability to track who has changed your information because SQL*Plus and other database tools do not keep a record of changes. Consequently, we STRONGLY RECOMMEND that you never use SQL*Plus or any other tool to modify Oracle Applications data unless otherwise instructed. Other Information Sources Here are some other ways you can increase your knowledge and understanding of Work in Process. Online Documentation All Oracle Applications documentation is available online on CD–ROM, except for technical reference manuals. There are two online Preface xiii formats, HyperText Markup Language (HTML) and Adobe Acrobat (PDF). All user’s guides are available in HTML, Acrobat, and paper. Technical reference manuals are available in paper only. Other documentation is available in Acrobat and paper. The content of the documentation does not differ from format to format. There may be slight differences due to publication standards, but such differences do not affect content. For example, page numbers and screen shots are not included in HTML. The HTML documentation is available from all Oracle Applications windows. Each window is programmed to start your web browser and open a specific, context–sensitive section. Once any section of the HTML documentation is open, you can navigate freely throughout all Oracle Applications documentation. The HTML documentation also ships with Oracle Information Navigator (if your national language supports this tool), which enables you to search for words and phrases throughout the documentation set. Related User’s Guides Work in Process shares business and setup information with other Oracle Applications products. Therefore, you may want to refer to other user’s guides when you set up and use Work in Process. If you do not have the hardcopy versions of these manuals, you can read them online using the Applications Library icon or Help menu command. Oracle Applications User’s Guide This guide explains how to enter data, query, run reports, and navigate using the graphical user interface (GUI) available with this release of Work in Process (and any other Oracle Applications products). This guide also includes information on setting user profiles, as well as running and reviewing reports and concurrent processes. You can access this user’s guide online by choosing ”Getting Started with Oracle Applications” from any Oracle Applications help file. Oracle Applications Demonstration User’s Guide This guide documents the functional storyline and product flows for Global Computers, a fictional manufacturer of personal computers products and services. As well as including product overviews, the xiv Oracle Work in Process User’s Guide book contains detailed discussions and examples across each of the major product flows. Tables, illustrations, and charts summarize key flows and data elements. Oracle Automotive User’s Guide This guide describes how to add commodity code, customer item, trading partner, and customer address information to information already defined in various Oracle Applications. This guide also describes how to import and export information into and out of Oracle Automotive, as well as how to process the information once it has been imported into Oracle Automotive. Oracle Bills of Material User’s Guide This guide describes how to create various bills of materials to maximize efficiency, improve quality and lower cost for the most sophisticated manufacturing environments. By detailing integrated product structures and processes, flexible product and process definition, and configuration management, this guide enables you to manage product details within and across multiple manufacturing sites. Oracle Capacity User’s Guide This guide describes how to validate a material plan by verifying that there are resources sufficient to perform the planned work for repetitive and discrete jobs. Using finite capacity planning techniques, you learn how to use rough–cut capacity planning to validate a master schedule and capacity planning to validate the material plan. Oracle Cost Management User’s Guide This guide describes how to use Oracle Cost Management in either a standard costing or average costing organization. Cost Management can be used to cost inventory, receiving, order entry, and work in process transactions. It can also be used to collect transaction costs for transfer to Oracle Projects. Cost Management supports multiple cost elements, multiple subelements, and activity–based costing. It also provides comprehensive valuation and variance reporting. Oracle Inventory User’s Guide This guide describes how to define items and item information, perform receiving and inventory transactions, maintain cost control, Preface xv plan items, perform cycle counting and physical inventories, and set up Oracle Inventory. Oracle Master Scheduling/MRP and Oracle Supply Chain Planning User’s Guide This guide describes how to anticipate and manage both supply and demand for your items. Using a variety of tools and techniques, you can create forecasts, load these forecasts into master production schedules, and plan your end–items and their component requirements. You can also execute the plan, releasing and rescheduling planning suggestions for discrete jobs and repetitive schedules. Oracle Order Entry/Shipping User’s Guide This guide describes how to enter sales orders and returns, copy existing sales orders, schedule orders, release orders, plan departures and deliveries, confirm shipments, create price lists and discounts for orders, and create reports. Oracle Project Manufacturing User’s Guide This guide describes the unique set of features Oracle Project Manufacturing provides for a project–based manufacturing environment. Oracle Project Manufacturing can be tightly integrated with Oracle Projects; however, in addition to Oracle Projects functionality, Oracle Project Manufacturing provides a comprehensive set of new features to support project sales management, project manufacturing costing, project manufacturing planning, project manufacturing execution and project quality management. Oracle Purchasing User’s Guide This guide describes how to create and approve purchasing documents, including requisitions, different types of purchase orders, quotations, RFQs, and receipts. This guide also describes how to manage your supply base through agreements, sourcing rules and approved supplier lists. In addition, this guide explains how you can automatically create purchasing documents based on business rules through integration with Oracle Workflow technology, which automates many of the key procurement processes. xvi Oracle Work in Process User’s Guide Oracle Quality User’s Guide This guide describes how Oracle Quality can be used to meet your quality data collection and analysis needs. This guide also explains how Oracle Quality interfaces with other Oracle Manufacturing applications to provide a closed loop quality control system. Oracle General Ledger User’s Guide This guide explains how to plan and define your chart of accounts, accounting period types and accounting calendar, functional currency, and set of books. It also describes how to define journal entry sources and categories so you can create journal entries for your general ledger. If you use multiple currencies, use this manual when you define additional rate types, and enter daily rates. This manual also includes complete information on implementing Budgetary Control. Oracle HRMS User’s Guide This manual explains how to enter your employees. It also explains how to set up organizations and site locations. Even if you do not install Oracle HRMS, you can set up your employees, site locations, and organization using Oracle HRMS forms. Oracle Projects User’s Guide This user’s guide explains how to set up projects for use in project manufacturing and project accounting. Reference Manuals Oracle Automotive Implementation Manual This manual describes the setup and implementation of the Oracle Applications used for the Oracle Automotive solution. Oracle Manufacturing, Distribution, Sales and Service Open Interfaces Manual This manual contains up–to–date information about integrating with other Oracle Manufacturing applications and with your other systems. This documentation includes open interfaces found in Oracle Manufacturing. Preface xvii Oracle Applications Message Reference Manual This manual describes all Oracle Applications messages. This manual is available in HTML format on the documentation CD–ROM for Release 11. Oracle Project Manufacturing Implementation Manual This manual describes the setup steps and implementation for Oracle Project Manufacturing. Oracle Self–Service Web Applications Implementation Manual This manual describes the setup steps for Oracle Self–Service Web Applications and the Web Applications dictionary. Installation and System Administration Oracle Alert User’s Guide This guide explains how to define periodic and event alerts to monitor the status of your Oracle Applications data. Multiple Reporting Currencies in Oracle Applications If you use the Multiple Reporting Currencies feature to record transactions in more than one currency, use this manual before implementing Work in Process. This manual details additional steps and setup considerations for implementing Work in Process with this feature. Multiple Organizations in Oracle Applications If you use the Oracle Applications Multiple Organization Support feature to use multiple sets of books for one Work in Process installation, this guide describes all you need to know about setting up and using Work in Process with this feature. Oracle Applications Implementation Wizard User’s Guide If you are implementing more than one Oracle product, you can use the Oracle Applications Implementation Wizard to coordinate your setup activities. This guide describes how to use the wizard. xviii Oracle Work in Process User’s Guide Oracle Applications Developer’s Guide This guide contains the coding standards followed by the Oracle Applications development staff. It describes the Oracle Application Object Library components needed to implement the Oracle Applications user interface described in the Oracle Applications User Interface Standards. It also provides information to help you build your custom Developer/2000 forms so that they integrate with Oracle Applications. Oracle Applications Flexfields Guide This guide provides flexfields planning, setup and reference information for the Work in Process implementation team, as well as for users responsible for the ongoing maintenance of Oracle Applications product data. This manual also provides information on creating custom reports on flexfields data. Oracle Applications Installation Manual for Windows Clients This guide provides information you need to successfully install Oracle Financials, Oracle Public Sector Financials, Oracle Manufacturing, or Oracle Human Resources in your specific hardware and operating system software environment. Oracle Applications Product Update Notes If you are upgrading your Oracle Applications, refer to the product update notes appropriate to your update and product(s) to see summaries of new features as well as changes to database objects, profile options and seed data added for each new release. Oracle Applications Upgrade Preparation Manual This guide explains how to prepare your Oracle Applications products for an upgrade. It also contains information on completing the upgrade procedure for each product. Refer to this manual and the Oracle Applications Installation Manual when you plan to upgrade your products. Oracle Applications System Administrator’s Guide This manual provides planning and reference information for the Work in Process System Administrator. Preface xix Other Sources Training We offer a complete set of formal training courses to help you and your staff master Work in Process and reach full productivity quickly. We organize these courses into functional learning paths, so you take only those courses appropriate to your job or area of responsibility. You have a choice of educational environments. You can attend courses offered by Oracle Education Services at any one of our many Education Centers, or you can arrange for our trainers to teach at your facility. In addition, Oracle training professionals can tailor standard courses or develop custom courses to meet your needs. For example, you may want to use your organization structure, terminology, and data as examples in a customized training session delivered at your own facility. Support From on–site support to central support, our team of experienced professionals provides the help and information you need to keep Work in Process working for you. This team includes your Technical Representative, Account Manager, and Oracle’s large staff of consultants and support specialists with expertise in your business area, managing an Oracle8 server, and your hardware and software environment. About Oracle Oracle Corporation develops and markets an integrated line of software products for database management, applications development, decision support, and office automation, as well as Oracle Applications, an integrated suite of more than 45 software modules for financial management, supply chain management, manufacturing, project systems, human resources and sales and service management. Oracle products are available for mainframes, minicomputers, personal computers, network computers and personal digital assistants, allowing organizations to integrate different computers, different operating systems, different networks, and even different database management systems, into a single, unified computing and information resource. xx Oracle Work in Process User’s Guide Oracle is the world’s leading supplier of software for information management, and the world’s second largest software company. Oracle offers its database, tools, and applications products, along with related consulting, education, and support services, in over 140 countries around the world. Thank You Thank you for using Work in Process and this user’s guide. We value your comments and feedback. At the end of this guide is a Reader ’s Comment Form you can use to explain what you like or dislike about Work in Process or this user’s guide. Mail your comments to the following address or call us directly at (650) 506–7000. Oracle Applications Documentation Manager Oracle Corporation 500 Oracle Parkway Redwood Shores, CA 94065 U.S.A. Or, send electronic mail to [email protected] . Preface xxi xxii Oracle Work in Process User’s Guide CHAPTER 1 Overview of Work in Process T his chapter introduces Oracle Work in Process and describes its integration with other Oracle Applications. Overview of Work in Process 1–1 Overview Oracle Work in Process is a complete production management system. Work in Process is part of Oracle Applications, an integrated suite of business solutions. Work in Process supports discrete, project, repetitive, assemble–to–order, work order–less, or a combination of manufacturing methods. Inquiries and reports give you a complete picture of transactions, materials, resources, costs, and job and schedule progress. Manufacturing Support • Build discrete jobs, both standard and non–standard (prototype, rework, maintenance, and special projects) • Build project jobs, both standard and non–standard • Build repetitive schedules by production line/assembly • Build final assembly orders for configure–to–order • Complete assemblies without having to create a job or schedule Production Scheduling • Load and sequence repetitive production by assembly and production line • Schedule start and stop times to the minute • Schedule fixed, variable, and overlap time elements • Use forward, backward, manual, and midpoint rescheduling • Update the master production schedule automatically Material Control • Issue and return components from and to inventory • Replenish supply subinventories by item, job, or day • Backflush components automatically using operation or assembly completion • Generate bill of material requirements using standard and alternate bills and revisions • Modify job and schedule material requirements as required • Control engineering change implementation • Issue and build serial number, lot–controlled, and revision controlled components and assemblies 1–2 Oracle Work in Process User’s Guide • Scrap components and assemblies • Control MRP netting (production quantities can be non–nettable quantities) • Display on–hand and available to transact quantities during material transactions • Setup transaction processing options as required Shop Floor Control • Move assemblies between and within operations • Use outside suppliers • Combine move and completion transactions • Charge resources and overheads automatically • Generate routing operations using standard and alternate routings and revisions • Modify routing operations as required • Setup transaction processing options as required Resource Tracking • Charge labor, machine, and outside resources automatically or manually • Charge resources at standard, employee, or actual rates • Charge labor by resource or employee • View and report efficiency, usage, and transaction history Costing • Cost discrete jobs using standard or weighted average costs • Segregates costs for project jobs • Track costs by product line Import • Import move transactions from data collection devices, factory floor machines or controllers using the Open Move Transaction Interface • Import material transactions (component issue/return, assembly completion/return, replenishment) from data collection devices, Overview of Work in Process 1–3 custom data entry forms, and other manufacturing inventory systems using the Open Inventory Transaction Interface • Import resource transactions from data collection devices and labor tracking systems using the Open Resource Cost Transaction Interface • Import planned orders, update recommendations, and planned repetitive schedules directly from external sources using the Open Job and Schedule Interface • Update scheduling dates at the operation or resource level using the WIP Scheduling Interface Increase Productivity You can setup Oracle Applications and Work in Process to automate manufacturing information processing: • Eliminate the need to define and update orders after each planning run by loading and rescheduling shop floor activity based on master schedule and material plans • Eliminate excess navigation within windows by setting first field defaults that correspond to your primary manufacturing environment (discrete, repetitive, or assemble–to–order) • Eliminate the need to transact at non–critical operations by defining them as no count point or no autocharge operations • Eliminate the need to manually define job names by using the automatic sequence generator • Eliminate the need to manually assign and verify lots during transaction processing by specifying default lot selection and verification rules See Also Comparison of Manufacturing Methods: page B – 2 1–4 Oracle Work in Process User’s Guide CHAPTER 2 Setting Up T his chapter provides information about setting up Oracle Work in Process as well as other integrated Oracle Applications, including these topics: • Overview: page 2 – 2 • Setup Prerequisites: page 2 – 3 • Setup Checklist: page 2 – 5 • Setup Steps: page 2 – 6 • WIP Parameters: page 2 – 9 • WIP Accounting Classes: page 2 – 22 • Shop Floor Statuses: page 2 – 30 • Defining Schedule Groups: page 2 – 32 • Defining Labor Rates: page 2 – 34 • Production Lines: page 2 – 36 • Standard Documents: page 2 – 39 • Profile Options: page 2 – 41 • Security Functions: page 2 – 53 Setting Up 2–1 Overview This section contains an overview of each task you need to complete to set up Oracle Work in Process. Oracle Applications Implementation Wizard If you are implementing more than one Oracle Applications product, you may want to use the Oracle Applications Implementation Wizard to coordinate your setup activities. The Implementation Wizard guides you through the setup steps for the applications you have installed, suggesting a logical sequence that satisfies cross–product implementation dependencies and reduces redundant setup steps. The Wizard also identifies steps that can be completed independently––by several teams working in parallel––to help you manage your implementation process most efficiently. You can use the Implementation Wizard as a resource center to see a graphical overview of setup steps, read on–line help for a setup activity, and open the appropriate setup window. You can also document your implementation, for further reference and review, by using the Wizard to record comments for each step. Set Up Oracle Applications Technology The setup steps in this chapter tell you how to implement the parts of Oracle Applications specific to Oracle Work in Process. The Implementation Wizard guides you through the entire Oracle Applications setup, including system administration. However, if you do not use the Wizard, you need to complete several other setup steps, including: • performing systemwide setup tasks such as configuring concurrent managers and printers • managing data security, which includes setting up responsibilities to allow access to a specific set of business data and complete a specific set of transactions, and assigning individual users to one or more of these responsibilities Also, if your product uses Oracle Workflow to, for example, to manage the approval of business documents or to derive Accounting Flexfield values via the Account Generator, you need to set up Oracle Workflow. 2–2 Oracle Work in Process User’s Guide Before You Begin Before you set up Oracle Work in Process, you should: • Set up an Oracle Applications System Administrator responsibility. See: Setting Up Oracle Applications System Administrator, Oracle Applications System Administrator’s Guide. • Set up your Oracle Applications Set of Books. See: Defining Sets of Books, Oracle General Ledger User’s Guide. See Also Oracle Applications Implementation Wizard User’s Guide Oracle Applications System Administrator’s Guide Oracle Workflow Guide Setup Prerequisites Before you set up Work in Process, you must complete the setup for the following: products Oracle Inventory Make sure you set up Inventory as described in Overview of Setting Up Inventory, Oracle Inventory User’s Guide. Ensure that all the following steps have been completed: ❑ Create your organizations ❑ Define your organization parameters ❑ Define your items and item costs ❑ Launch your transaction managers ❑ Define your account aliases (Optional) ❑ Define your transaction reason codes (Optional) ❑ Define your units of measure (UOMs) ❑ Define your transaction types (Optional) ❑ Define your subinventories Setting Up 2–3 ❑ Define your stock locators Oracle Bills of Material Make sure you set up Bills of Material as described in Overview of Setting Up Bills of Material, Oracle Bills of Material User’s Guide. In addition to the set up, ensure that all the following steps have been completed: ❑ Create your bills of material ❑ Define your resources ❑ Define your departments ❑ Define your standard operations ❑ Create your routings (Optional) ❑ Calculate your manufacturing lead times (Optional) ❑ Create your workday calendar Oracle Engineering Make sure you set up Engineering as described in Overview of Setting Up Engineering, Oracle Engineering User’s Guide. ❑ Define your engineering change orders(Optional) ❑ Define your engineering bills of material and routings(Optional) Oracle Cost Management Make sure you set up Cost Management as described in Overview of Setting Up Cost Management, Oracle Cost Manauagement User’s Guide. ❑ Define your cost types ❑ Define your resource activities and activity costs ❑ Define your default WIP accounting classes for categories (Optional) Oracle Project Manufacturing Make sure you set up Project Manufacturing 2–4 Oracle Work in Process User’s Guide Oracle MRP/Master Scheduling and Supply Chain Planning Make sure you set up MRP/Master Scheduling and Supply Chain Planning as described in Overview of Setting Up MRP/Master Scheduling and Oracle Supply Chain Planning,Oracle MRP/Master Scheduling and Oracle Supply Chain Planning User’s Guide. ❑ Define your demand classes (Optional) Setup Checklist After you log on to Oracle Work in Process, complete the following steps, in the order shown, to set up Oracle Work in Process: Step # Description Discrete Repetitive Projects Work Order–less Schedules 1 Define Work in Process Parameters Required Required Required Required 2 Define WIP Accounting Classes Required Required Required Required 3 Set Work in Process Profile Options Required Required Required Required 4 Define Production Lines Optional Required Optional Optional 5 Associate Lines and Assemblies NA Required N/A Optional 6 Define Schedule Groups Optional NA Optional Optional 7 Define Employees (Optional if using resources) Optional Optional Optional Optional 8 Define Labor Rates (Optional if using resources) Optional Optional Optional Optional 9 Define Shop Floor Statuses (Optional if using resources) Optional Optional Optional NA Table 2 – 1 (Page 1 of 2) Setting Up 2–5 Step # Description Discrete Repetitive Projects Work Order–less Schedules 10 Define Job and Schedule Documents Optional Optional Optional NA 11 Define Operation Documents Optional Optional Optional NA Table 2 – 1 (Page 2 of 2) Setup Steps Step 1 Define your Work in Process Parameters You must define modes of operation that affect other functions in Oracle Work in Process and assign default values before you can perform any transactions in your organization. You must also enable the intraoperation steps you want to use in your routings to allow detailed tracking within operations on the shop floor. Oracle Work in Process always enables queue for each operation and To Move for the final operation in a routing. See: Defining WIP Parameters: page 2 – 16. Step 2 Define your WIP Accounting Classes You must define your work in process accounting classes before you can define discrete jobs and repetitive assemblies. You must define separate accounting classes for standard discrete jobs, non–standard expense jobs, non–standard asset jobs, and repetitive assemblies. Accounting classes include the elemental valuation and variance accounts you use to cost discrete and repetitive production. See: Defining WIP Accounting Classes: page 2 – 27. Step 3 Set your Work in Process Personal Profiles (Optional) Profile options specify how Work in Process controls access to and processes data. In general, profile options can be set at one or more of the following levels: site, application, responsibility, and user. See: Profile Options: page 2 – 41. 2–6 Oracle Work in Process User’s Guide Step 4 Define your Production Lines (Optional) You can associate production lines with repetitive assemblies, discrete jobs, and work order–less completions. A production line describes a unique set of operations, departments, and/or manufacturing cells that produce one or more of your products. You can build different repetitive assemblies on the same production line. This allows you to use production lines to aggregate, by production line, material requirements for a number of assemblies. You can also build the same assembly on different production lines. Step 5 Define your Repetitive Assemblies (Optional) If you manufacture assemblies repetitively, you must define your repetitive assemblies and associate them with production lines. You must do this before you can define repetitive schedules. See: Associating Lines and Assemblies: page 6 – 6. Step 6 Define Schedule Groups (Optional) You can define schedule groups then assign them to jobs or work order–less completions. For example, you can define a schedule group then assign that schedule group to a group of jobs that are being built on a specific production line and that must be completed on a specific date for a planned departure. See: Defining Schedule Groups: page 2 – 32. Step 7 Define your Employees (Optional) If you do not install Oracle Human Resource Management Systems with Oracle Work in Process, you use the Enter Employees form to define employees whose labor rates you want to charge. See: Enter Persons, Oracle Human Resources. Step 8 Define your Employee Labor Rates (Optional) If you want to charge employee labor rates in Oracle Work in Process, you must define the hourly labor rate of your employees. Oracle Work in Process uses employee rates when you manually charge Person type resources to jobs or repetitive schedules which do not charge at standard, and when you associate an employee number with the resource you are charging. See: Defining Labor Rates: page 2 – 34. Setting Up 2–7 Step 9 Define your Shop Floor Statuses (Optional) If you want to optionally prevent move transactions from steps within an operation, you can define shop floor statuses which prevent moves and assign them to operations and intraoperation steps within discrete jobs or repetitive schedules. You can also use these statuses to record more detailed information regarding assemblies at a particular step within an operation. See: Defining Shop Floor Statuses: page 2 – 30. Step 10 Define Job and Schedule Documents (Optional) You can define standard job and schedule documents and then attach them to jobs and repetitive schedules. See: Defining Job and Schedule Documents: page 2 – 39. Step 11 Defining Operation Documents (Optional) You can define operation documents then attach them to work in process routing operations. See: Defining Operation Documents: page 2 – 40. 2–8 Oracle Work in Process User’s Guide WIP Parameters You can use WIP parameters to define modes of operation and to assign default values for various work in process functions. You can only define one set of WIP parameters per organization. The following table summarizes WIP parameters and their defaults: Parameters Required? Default Value Default Discrete Class Optional Null Default Lot Number Required Job Name Respond to Sales Order Changes Required Always Recognize Period Variances Optional All Schedules Autorelease Days Optional 0 Optional Null Default Completion Cost Source Required System Calculated System Option Cond. Required Use Predefined Resources Cost Type Cond. Required Null Auto Compute Final Completion Optional No Shop Floor Status for PO Move Resources Optional Null Require Scrap Account Optional Disabled Allow Creation of New Operations Optional Disabled Allow Moves Over No Move Shop Floor Statuses Optional Enabled Discrete Repetitive ATP Component ATP Rule Average Costing Move Transactions Table 2 – 2 (Page 1 of 2) Setting Up 2–9 Parameters Required? Default Value Supply Subinventory Optional Null Supply Locator Optional Null Lot Selection Method Optional Expiration Date Lot Verification Optional All Optional All are enabled Backflush Default Intraoperation Steps Intraoperation Steps Table 2 – 2 (Page 2 of 2) Discrete Parameters The following parameters affect discrete manufacturing. Default Discrete Class If Category Default WIP Classes are not setup and you are defining a standard discrete job or completing a work order–less schedule, this parameter determines which accounting class is used as the default. See: Default WIP Classes: page 3 – 10 and Associating WIP Accounting Classes with Categories, Oracle Cost Management User’s Guide. You can only select an active, standard discrete accounting class when defining this parameter. See: Discrete Accounting Classes: page 2 – 22, Defining Discrete Jobs Manually: page 3 – 12, and Autocreating Final Assembly Orders: page 14 – 3. Default Lot Number Type Parameter Determines how lot numbers are assigned to discrete jobs. The options are as follows: 2 – 10 Job Name Base job lot numbers on the job name you enter when you define the job. This is the default. Based on Inventory Rules Base job lot numbers on the lot number rules you defined in Oracle Inventory. See: Lot Control, Oracle Inventory User’s Guide and Defining Revision, Lot, Serial Parameters, Oracle Inventory User’s Guide. Oracle Work in Process User’s Guide Respond to Sales Order Changes Determines if and how the system responds to changes to assemble–to–order (ATO) sales orders and their related discrete jobs. The options are as follows: Never If you implement changes to a sales order in Oracle Order Entry, and that sales order is linked to one or more discrete jobs, the system ignores the sales order change and does not stop the current production for the discrete job. Always If you unassign the configuration item from the sales order using the ATO Configurable Item window in Oracle Order Entry/Shipping and if the linked jobs are Unreleased, then the statuses of the linked jobs are changed to On Hold. See: Linking ATO Configurations, Oracle Order Entry/Shipping User’s Guide. When Linked 1 to 1 If you implement changes to a sales order in Oracle Order Entry, and that sales order is the only sales order linked to a single discrete job, Oracle Order Entry automatically changes the status of the discrete job to On Hold. You can then update it to reflect the changes to the sales order. Repetitive Parameters The following parameters affect repetitive manufacturing. Recognize Period Variances Determines which repetitive schedule variances are posted to the general ledger when an accounting period is closed. The options are as follows: All Schedules Post variances for all repetitive schedules. Cancelled and Complete– No Charges Only Post variances for repetitive schedules with statuses of Cancelled or Complete–No Charges. Autorelease Days Determines the time period within which the system automatically releases the next Unreleased schedule. Setting Up 2 – 11 When you complete a repetitive schedule, the system searches within the autorelease time frame for an Unreleased schedule, or for a schedule with a status of Released, Complete, or On Hold. If one exists, the status of the newly completed schedule changes to Complete–No Charges and the future schedule is automatically released. If no such schedule exists, the status of the schedule changes to Complete. If more than one schedule exists within the autorelease time frame, only one schedule is released. ATP Parameter The following parameter affects material availability checking. Component ATP Rule Determines which ATP Rule is used as the default when checking the material availability of component requirements. You can enter any user–defined ATP rule. See: Viewing Component ATP Information: page 7 – 17 and Defining ATP Rules, Oracle Inventory User’s Guide. Average Costing Parameters These parameters affect how WIP assembly completion transactions are costed. The Default Completion Cost Source, Cost Type, and System Option parameters are defaulted when you define standard and non–standard accounting classes in the WIP Accounting Classes window. They can be overridden at the account class level. The Auto Compute Final Completion parameter is defaulted when you complete jobs. It also can be overridden. Additional Information: You can only set these parameters if your current organization has been defined as an average cost organization in the Oracle Inventory Organization Parameters window. See: Organization Parameters Window, Oracle Inventory User’s Guide and Defining Costing Information, Oracle Inventory User’s Guide. Default Completion Cost Source This parameter determines how resource costs are determined as assemblies are completed from jobs into inventory. System Calculated 2 – 12 Oracle Work in Process User’s Guide If this option is set, resources can be costed at either the actual resource costs or at the resource predefined cost depending on how the System Option parameter is subsequently set. When completing assemblies from a non–standard job with no routing, the resource rate associated with the Average Rates cost type is used. User–Defined If the option is set, you must choose a user–defined cost type using the Cost Type Parameter. This cost type is then used to determine the resource cost for the assemblies being completed. Additional Information: If there are uncleared costs left in the job, they are posted to the job variance accounts when the job is closed. Residual costs could be left in the job if: 1) the Auto Compute Final Completion option is set, but not all assemblies are completed or scrapped or 2) the job earns costs between the last final completion and the close transaction. System Option If you select the System Calculated completion cost source, you must select a System Option. The available options are as follows: User Actual Resources Resources costs are determined based on the actual costs that have been charged to the job. Use Predefined Resources Resources costs are determined using the predefined resource cost. Cost Type Determines which cost type to use as the default when the Default Completion Cost Source is User–Defined. You can only select a Cost Type if the Default Completion Cost Source parameter is set to User Defined. See: Defining a Cost Type, Oracle Cost Management User’s Guide. Auto Compute Final Completion Determines whether the Final Completion in the Completion Transaction window defaults to checked (Yes). Move Transaction Parameters The following parameters affect move transactions. Shop Floor Status for PO Move Resources Determines which ’no move’ shop floor status is assigned when assemblies are moved into the Queue intraoperation step of an outside Setting Up 2 – 13 processing operation that has PO Move resources assigned to it. See: Defining Shop Floor Statuses: page 2 – 30. Moves from, but not to, outside processing steps with this status are disallowed except when the move transaction is launched by the receipt of a purchase order in Oracle Purchasing. This ensures that the same number of assemblies are moved into and out of Queue at an outside processing step. Problems in tracking work in process and cost variances are thus avoided. See: Outside Processing and Work in Process: page F – 2. Require Scrap Account Determines whether a scrap account is required when you move assemblies into and out of the Scrap intraoperation step of an operation. It also determines how scrap transactions are processed. If you do not specify that a scrap account is required, it is optional. If you enter a scrap account as you move assemblies into a Scrap intraoperation step, the system debits this account and credits the job or repetitive schedule elemental accounts at standard through this operation. If you enter a scrap account as you move assemblies out of a scrap intraoperation step, the system credits this account and debits the job or repetitive schedule elemental accounts at standard through this operation. If you do not provide a scrap account, the cost of scrap remains in the job or schedule until job or period close and is written off as variance. Allow Creation of New Operations Determines whether you can or cannot add an operation to a discrete job work in process routing during a move transaction. For example, you may want to add an operation to keep track of rework you were not expecting. Allow Moves Over No Move Shop Floor Statuses Determines whether moves are disallowed if an intraoperation step that disallows moves exists at an autocharge operation and intraoperation step between the From and To operations or at intervening intraoperation step at the From and To operations if they are direct charge. If an intraoperation step that disallows moves is found, a warning message is displayed and the move is disallowed. Additional Information: The Move Transactions: Allow Skipping Over No Move Statuses security function can be set to override ’no move’ shop floor statuses. See: Security Functions: page 2 – 53. 2 – 14 Oracle Work in Process User’s Guide Direct charge operations between the From and To Operations are not considered when the system checks for ’No Move’ shop floor statuses. Scrap and Reject intraoperation steps at autocharge operations are also not considered. See: Shop Floor Statuses: page 8 – 65. Backflush Default Parameters The following parameters affect backflush transactions. Supply Subinventory Determines which supply subinventory and, if required by the subinventory, locator are used when backflushing Operation Pull and Assembly Pull components that do not have defaults defined at the bill of material component or at the inventory item level. You can select an expense subinventory, if the Oracle Inventory Allow Expense to Asset Transfer profile option is set to Yes. See: Inventory Profile Options, Oracle Inventory User’s Guide. Supply Locator Determines which supply subinventory and, if required by the subinventory, locator are used when backflushing Operation Pull and Assembly Pull components that do not have defaults defined at the bill of material component or at the inventory item level. Lot Selection Method Determines how lot controlled Assembly Pull and Component Pull component items are selected during backflush transactions. The options are as follows: Expiration Date Backflush lots are automatically selected based on their expiration date and the first in–first out (FIFO) method or, if the lot is not under shelf life control, the receipt date and the first in–first out (FIFO) method. Manual Backflush lots must be manually selected. Receipt Date Backflush lots are selected based on their inventory receipt date using the first in–first out (FIFO) method. Additional Information: This parameter does not apply to components that are under both lot and serial control. When you backflush a component under both lot and serial control, you must enter both the lot and the serial number. Setting Up 2 – 15 Lot Verification Determines how lots are verified during backflush transactions. The options are as follows: All Verify that the lots automatically selected were the ones consumed by the assemblies. Exceptions Only Verify exceptions only. If the lot requirement for the component cannot be filled automatically using the FIFO method, you can assign lots to components manually. Intraoperation Steps Parameter Determines which intraoperation steps are enabled in your WIP routing operations. The options are Queue, Run, To Move, Reject and Scrap. See: Intraoperation Steps: page 8 – 8. The Queue intraoperation step is automatically enabled for all operations and cannot be disabled. The To Move intraoperation step, even if disabled here, is automatically enabled for the final operations in routings so that assemblies can be completed into inventory. See Also Defining WIP Parameters: page 2 – 16 Defining WIP Parameters WIP parameters define modes of operation and default values that affect Work in Process. Caution: You cannot define WIP parameters if the current organization shares costs with another organization. If the current organization does share costs, you must change the organization’s control level for the Costing Enabled and Inventory Asset Value item attributes (Costing Group) to Item/Organization. This can be done using the Item Attribute Controls window in Oracle Inventory. Before changing these attributes, however, you must confirm that item costs have been defined in the current organization. See: Cost Organizations and Shared Costs, Oracle Cost Management User’s Guide and Defining Item Attribute Controls, Oracle Inventory User’s Guide. 2 – 16 Oracle Work in Process User’s Guide Prerequisites ❑ Define a discrete accounting class. See: Defining WIP Accounting Classes: page 2 – 27. ❑ Optionally, define a shop floor status that disallows moves of PO resources. See: Defining Shop Floor Statuses: page 2 – 30. " To define and update work in process parameters: 1. Navigate to the Work in Process Parameters window. See: WIP Parameters: page 2 – 9. 2. In the Discrete alternative region, enter the Default Discrete Class. See: Default WIP Classes: page 3 – 10. 3. Select the Default Lot Number Type. Determines how lot numbers are assigned to discrete jobs. 4. Select one of the Respond to Sales Order Changes options. Determines if and how the system responds to changes to assemble–to–order (ATO) sales orders and their related discrete jobs. 5. In the Repetitive alternative region, select the Recognize Period Variances option. Determines which repetitive schedule variances are posted to the general ledger when an accounting period is closed. Setting Up 2 – 17 6. Enter the number of repetitive Autorelease Days. Determines the time period within which the system automatically releases the next Unreleased schedule. 7. In the ATP alternative region, select a default ATP Rule. See: ATP Parameter: page 2 – 12. 8. In the Average Costing alternative region, select a Default Completion Cost Source. The options are System Calculated and User Defined. See: Average Costing Parameters: page 2 – 12. ☞ 2 – 18 Attention: You can only set parameters in the Average Costing alternative region if your current organization has been defined as an average cost organization in the Oracle Inventory Organization Parameters window. See: Organization Parameters Window, Oracle Oracle Work in Process User’s Guide Inventory User’s Guide and Defining Costing Information, Oracle Inventory User’s Guide. 9. If you select the System Calculated as your default completion cost source, you must select a System Option. The options are Use Actual Resources and Use Predefined Resources. 10. Select a Cost Type. Determines which Cost Type is defaulted for when completing jobs. You must select a cost type if the Default Completion Cost Source parameter is User Defined. 11. Check the Auto Compute Final Completions check box to indicate whether the system should automatically determine when a completion transaction completes a job (quantity complete + scrap quantity = job quantity) and calculates completion costs by taking the incurred job costs and dividing them by the completion quantity. 12. In the Move Transactions alternative region, select the Shop Floor Status for PO Move Resources. Determines which ’no move’ shop floor status is assigned when assemblies are moved into the Queue intraoperation step of an outside processing operation that has PO Move Resources assigned to it. 13. Select or deselect the Require Scrap Account check box. Determines whether a scrap account is required when you move assemblies into and out of the Scrap intraoperation step of an operation. 14. Select or deselect the Allow Creation of New Operations check box. Determines whether you can or cannot add an operation to a discrete job work in process routing during a move transaction. Setting Up 2 – 19 15. Select or deselect the Allow Moves Over No Move Shop Floor Statuses. Determines whether moves are disallowed if an intraoperation step that disallows moves exists at an autocharge operation and intraoperation step between the From and To operations and intraoperation steps. 16. In the Backflush Defaults alternative region, select a default backflush Supply Subinventory and, if required by the Supply Subinventory, a Supply Locator. These two parameters determines which supply subinventory/ locator is used when backflushing Operation Pull and Assembly Pull components that do not have defaults defined at the bill of material component level or at the item level. You can select an expense subinventory, if the Oracle Inventory Allow Expense to Asset Transfer profile option is set to Yes. See: Inventory Profile Options, Oracle Inventory User’s Guide. 17. Select a backflush Lot Selection Method. Determines how lot controlled Assembly Pull and Component Pull component items are selected during backflush transactions. 18. Select a backflush Lot Verification Method. Determines how lots are verified during backflush transactions. 19. In the Interoperation Steps alternative region, enable Intraoperation Steps as required. Determines which intraoperation steps are enabled in your WIP routing operations. 2 – 20 Oracle Work in Process User’s Guide See Also WIP Parameters: page 2 – 9 Setting Up 2 – 21 WIP Accounting Classes You can define any number of accounting classes. The valuation and variance accounts that are associated with these accounting classes determine which accounts are charged and when. Discrete Accounting Classes You can define accounting classes for each type of discrete production you use: standard discrete, asset non–standard discrete, and expense non–standard discrete. You must assign an accounting class to every discrete job. Standard Discrete Standard discrete accounting classes can be used to group job costs. For example, if you build subassemblies and finished goods, you can define your accounting classes so that you can separately value and report the costs associated with subassembly and finished goods production. Standard discrete accounting classes can be automatically defaulted when you create discrete jobs. See: Product Line Accounting Setup, Oracle Cost Management User’s Guide and Discrete Parameters: page 2 – 10. When you define an accounting class, you must assign valuation and variance accounts to it. When you issue materials to a job that uses this accounting class, the appropriate valuation accounts are charged. When the job is closed, final costs and variances are calculated and posted to the variance and valuation accounts. When the accounting period is closed, these journal entries are automatically posted to the general ledger. Non–Standard Discrete Non–standard discrete accounting classes can be used to group and report various types of non–standard production costs, such as field service repair or engineering projects. For example to track recurring expenses — machine maintenance or engineering projects — with non–standard jobs, you can define and assign an accounting class with a type of expense non–standard to these jobs. The valuation accounts carry the costs incurred on these expense jobs as an asset during the period and automatically writes them off to the variance accounts at period close. On the other hand, if you use non–standard discrete jobs to track production costs as assets, you can define and assign an accounting 2 – 22 Oracle Work in Process User’s Guide class with a type of asset non–standard. Asset non–standard discrete jobs are costed the same as standard discrete jobs. Valuation accounts are charged when material is issued to a job and final costs and variances are calculated and posted to the appropriate variance and valuation accounts when the job is closed. Repetitive Accounting Classes Repetitive accounting classes are used to group production costs and must be assigned to each repetitive line/assembly association that is created. Every schedule for that assembly on that line uses these accounts. The accounts are charged whenever you transact against the line/assembly association. Repetitive accounting classes can be automatically defaulted when you associate repetitive assemblies with production lines. See: Product Line Accounting Setup, Oracle Cost Management User’s Guide. You can analyze repetitive manufacturing costs by assembly regardless of the line on which it was manufactured by using the same accounting class for all lines that build that assembly. You can use the same class for all assemblies on a line to do line based cost reporting or you can use a different accounting class for every line/assembly association. Valuation and Variance Accounts WIP accounting class valuation accounts are charged when you issue components, move assemblies, complete assemblies, and charge resources. Variance accounts associated with Standard Discrete and Non–standard Asset accounting classes are charged when jobs are closed. Variance accounts associated with Expense Non–standard Discrete, and optionally Repetitive accounting classes, are charged when accounting periods are closed. As noted in the following table, different valuation and variance accounts are required under standard versus average costing: Account Valuation Variance Material Standard and Average Standard and Average Material Overhead Standard and Average Standard and Average Table 2 – 3 Standard Versus Average Costing Valuation and Variance Accounts (Page 1 of 2) Setting Up 2 – 23 Account Valuation Variance Resource Standard and Average Standard and *Average Outside processing Standard and Average Standard and *Average Overhead Standard and Average Standard and *Average Standard Cost Standard Only Bridging Average Only Expense Average Only *Applicable only if you are using the new cost processor. See: Setting Up Inventory Average Costing and Setting Up Manufacturing Average Costing, Oracle Cost Management User’s Guide Table 2 – 3 Standard Versus Average Costing Valuation and Variance Accounts (Page 2 of 2) Valuation Accounts WIP accounting class valuation accounts are defined as follows: Material Normally an asset account this account tracks material costs. Under standard costing, it is debited at standard when you issue material to a job or schedule and credited at standard when you complete assemblies from a job or schedule, close a job, or close an accounting period. Under average costing, this account is debited at the average cost in effect at the time of the issue transaction and is credited when you complete assemblies from a job. Material Overhead Normally an asset account this account tracks material overhead (burden) costs. Under standard costing, it is charged/debited at standard when you issue material with material overhead to a job or schedule and relieved at standard when you complete assemblies from a job or schedule, close a job, or close an accounting period. Under average costing, this account is debited at the average cost in effect at the time of the issue transaction. Note: When a job is completed and material overhead is earned, this account is not charged /credited. Instead, the material overhead account for the completion subinventory is debited. 2 – 24 Oracle Work in Process User’s Guide Resource Normally an asset account this account tracks resource costs. Under standard costing, it is charged/debited at standard when resources are charged to a job or schedule and relieved/credited at standard when you complete assemblies from a job or schedule, close a job, or close an accounting period. Under average costing, this account is debited and credited at the resource rate in effect at the time the resource is charged. Outside Processing Normally an asset account this account tracks outside processing costs. Under standard costing it is debited at the standard or purchase order cost when you receive items for a job or schedule in Oracle Purchasing. It is credited at standard when you complete assemblies from a job or schedule, close a job, or close an accounting period. Under average costing when you move job or repetitive schedule assemblies through an outside processing operation, it is debited at the resource’s predefined rate or at the purchase order cost. See: Performing Move Transactions: page 8 – 35. Overhead Normally an asset account this account tracks resource or department overhead cost. Under standard costing it is debited at standard when resources are charged to a job or schedule. It is relieved at standard when you complete assemblies from a job or schedule, close a job, or close an accounting period. For additional information about how elemental accounts are charged under standard and average costing see: Work in Process Average Cost Transactions, Oracle Cost Management User’s Guide and Work in Process Standard Cost Transactions, Oracle Cost Management User’s Guide. Variance Accounts WIP accounting class variance accounts are defined as follows: Material This account tracks variances that occur when the previous level material costs charged to the job or schedule do not equal the previous level material costs that are relieved. This calculation gives you a net material usage and configuration variance. Resource This account tracks variances that occur when the this level resource costs charged to the job or Setting Up 2 – 25 schedule do not equal the this level resource costs that are relieved. If you charge actual labor without creating resource rate variances (resource standard rate is set to No), the resource variance includes any rate, efficiency, and method variances. If you recognize rate variances or charge resources at standard, the resource variance includes resource efficiency, and any method variances. Outside Processing This account tracks the variances that are occur when the this level outside processing costs charged to the job or schedule do not equal the this level outside processing costs that are relieved. If you do not calculate purchase price variance (resource standard rate is set to No), the outside processing variance includes any rate, efficiency, and method variances. If you recognize purchase price variance, this account includes efficiency and any method variances. Overhead This account tracks the variances that are occur when the this level overhead costs charged to the job or schedule do not equal the this level overhead costs relieved from the job or schedule. These variances include both efficiency and method variances. Standard Cost Applies only to standard discrete and non–standard asset. This account is charged for the sum of all the elemental standard cost adjustments when you perform a standard cost update that impacts an active job. Cost updates are not performed for repetitive schedules or expense non–standard jobs. Bridging This field is optional. Expense Normally an expense account, this account is debited and credited when issuing and completing non–standard expense jobs under both standard and average costing. See Also Work in Process Costs: page 11 – 6 2 – 26 Oracle Work in Process User’s Guide Defining WIP Accounting Classes You can define and update WIP accounting classes. Accounting classes are assigned when jobs are defined and when repetitive assemblies are associated with production lines. " To define accounting classes in a standard costing organization: 1. Navigate to the WIP Accounting Classes window. 2. Enter a unique accounting Class name and description. You cannot update the class name after you save your changes. 3. Select an accounting class Type. The options are Standard Discrete, Repetitive Assembly, Asset Non–standard, and Expense Non–standard. Production costs and variances are tracked in the valuation and variance accounts associated with these classes. 4. Enter the Inactive On date As of this date, you can no longer use this accounting class. The Inactive On date can be greater than or equal to the current date. If you do not enter an Inactive On date, the accounting class is active indefinitely. 5. In the Accounts alternative region, select the general ledger accounts each required Valuation and Variance account. See: Valuation and Variance Accounts: page 2 – 23. Setting Up 2 – 27 " To define accounting classes in a average costing organization: 1. Navigate to the WIP Accounting Classes window. 2. Enter a unique accounting Class name and description. You cannot update the class name after you save your changes. 3. Select an accounting class Type. The options are Standard Discrete, Asset Non–standard, and Expense Non–standard. Production costs and variances are tracked in the valuation and variance accounts associated with these classes. 4. Enter the Inactive On date As of this date, you can no longer use this accounting class. The Inactive On date can be greater than or equal to the current date. If you do not enter an Inactive On date, the accounting class is active indefinitely. 2 – 28 5. In the Accounts alternative region, select the general ledger accounts each required Valuation and Variance account. See: Valuation and Variance Accounts: page 2 – 23. 6. In the Average Costing region, select a Default Completion Cost Source. Oracle Work in Process User’s Guide The default completion cost source defined in the WIP Parameters window is defaulted but can be overridden. The options are System Calculated and User Defined. 7. If you select the System Calculated as your default completion cost source, you must select a System Option. The options are Use Actual Resources and Use Predefined Resources. 8. Select a Cost Type. Determines which Cost Type is defaulted for when completing jobs. You must choose a cost type if the Default Completion Cost Source parameter is User Defined. 9. Save your work. See Also WIP Accounting Classes: page 2 – 22 Setting Up 2 – 29 Shop Floor Statuses Shop floor statuses can be used to control shop floor move transactions. You can define as many shop floor statuses as are required. Shop floor statuses can be assigned to the intraoperation steps of work in process routing operations. When assigned to an intraoperation step of an operation that is associated with a particular repetitive line and assembly, the status applies to all repetitive schedules building that assembly on that line. Defining Shop Floor Statuses " To define shop floor statuses: 1. Navigate to the Shop Floor Statuses window. 2. Enter an alphanumeric Status name. For example, enter WIPHold to signify that shop floor assemblies are on WIP hold or, QAHold to signify that the shop floor assemblies are on quality assurance hold. 3. Enter a Status description. Descriptions can be used to identify shop floor statuses on standard reports. They can be up to 240 characters of alpha numeric text. 2 – 30 Oracle Work in Process User’s Guide 4. Uncheck Allow Moves so that you can use this status to control move transactions. Allow Moves defaults to checked. 5. Enter the Inactive On date. As of this date, you can no longer use this status. 6. Save your work. See Also Overview of Shop Floor Control: page 8 – 2 Assigning and Viewing Shop Floor Statuses: page 8 – 68 Shop Floor Statuses Report: page 14 – 62 Setting Up 2 – 31 Defining Schedule Groups You can define schedule groups then assign them to the jobs that you create. For example, you can define a schedule group then assign that schedule group to a group of jobs that are being built on a specific production line and that must be completed on a specific date for a planned departure. You can update schedule groups. You cannot delete schedule groups that are not assigned to jobs. " To define a schedule group: 1. Navigate to the Schedule Groups window. 2. Enter an alphanumeric name to identify the Schedule Group. Schedule groups are used to group jobs. You can assign schedule groups as you define and update jobs. For example, you can create a Week01 schedule group to identify which jobs are to be released and built during the first week of your current production cycle. Schedule group names can be up to 30 characters and must be unique within the organization. 3. Enter a schedule group Description. Descriptions can be up to 240 characters of alphanumeric text. 4. Enter an Inactive On date. As of this date, you can no longer use this schedule group. 2 – 32 Oracle Work in Process User’s Guide See Also Build Sequencing: page 3 – 11 Schedule Group Listing Report: page 14 – 63 Setting Up 2 – 33 Defining Labor Rates You can add, delete, and update the effective date of the hourly labor rates for person–type resources (employees). You can define multiple hourly labor rates for the same employee, as long as each rate has a different effective date. If you use actual costing, the hourly labor rate rather than the standard rate is used to compute the actual cost of person–type resources charged to discrete jobs and repetitive schedules. You can enter an employee number when performing a person–type resource transaction in the Resource Transactions window or the Resource Transaction Open Interface process. The employee’s most current hourly labor rate is used to compute the actual cost of the transaction. Prerequisites ❑ Enter at least one employee. See: Enter Persons, Oracle Human Resources User’s Guide. " To define or update the hourly labor rate of an employee: 1. 2 – 34 Navigate to the Employee Labor Rates window. Oracle Work in Process User’s Guide 2. Select the employee Name or Number. 3. Select the Effective Date for each hourly labor rate. The hourly rate remains effective until the next effective date or until the inactive date of the employee. You can only update or delete future effective dates. 4. Enter the Hourly Labor Rate for the employee. You can define multiple hourly labor rates for the same employee as long as they have different effective dates. You can define a labor rate to the smallest currency denomination. For example, you can define a US dollar rate to the penny. You can only update or delete future labor rates. 5. Save your work. See Also Resource Requirements: page 9 – 8 Setting Up 2 – 35 Production Lines You can define and update, but not delete, production lines. A production line describes a unique set of operations, departments, and/or manufacturing cells that produce one or more of your products. You can associate production lines with repetitive assemblies, discrete jobs, and work order–less completions. See Also Associating Lines and Assemblies: page 6 – 6 Defining Discrete Jobs Manually: page 3 – 12 Performing Work Order–less Completions: page 5 – 5 Defining Production Lines " To define a production line: 1. Navigate to the Production Lines window. 2. Enter the production line Name. For example, enter LINE1 to signify production line number 1, or BOARD to signify the PC board assembly line. 2 – 36 Oracle Work in Process User’s Guide 3. Enter the production line Description. 4. Enter the Minimum Hourly Rate. This represents the minimum number of assemblies the line can produce per hour. The minimum hourly rate must be greater than 0 and less than or equal to the maximum rate. 5. Enter the Maximum Hourly Rate. This represents the maximum number of assemblies the line can produce per hour. The maximum hourly rate must be greater than or equal to the minimum rate. 6. Enter the production line Start time. This is the time at which your production line starts running every day. You can update this field at any time. 7. Enter the production line Stop time. This is the time at which your production line stops running every day. You can update this field at any time. The difference between the Start and Stop times represents the amount of time per day a line is available. If the Start and Stop times are the same, the production line is considered to be available 24 hours per day. 8. Select the Lead Time Basis. If the lead time varies by assembly, you can schedule the repetitive production time based on the routing of the assembly the line is building. You can set a fixed lead time if the lead time is determined by the production line and does not vary by assembly. You can update this field at any time. Fixed: The system schedules the first unit completion date and the operations of all repetitive schedules on this production line based on the fixed lead time hours you enter for the production line. Scheduling is done regardless of actual capacity or the lead time of the routing of the repetitive assembly. Routing–Based: The system schedules the first unit completion date and the operations of all repetitive schedules on this production line using the detailed shop floor scheduling algorithm, the routing of the assembly, and a quantity of 1. 9. If the lead time basis is fixed, you must enter the Fixed Lead Time, in hours per assembly, for the production line. This is the amount of time it takes to produce the first assembly, from start to finish on the production line. The daily quantity from that point on is set Setting Up 2 – 37 when you define individual repetitive schedules and must be less than or equal to the maximum hourly rate. The fixed lead time entered here is used to schedule repetitive schedules produced on this production line. You can update this field at any time. You cannot enter a value in this field for a routing–based production line. ☞ Attention: For lines with a lead time basis of Routing–based, the lead time is calculated by applying the detailed shop floor scheduling algorithm to the routing of the assembly. 10. Enter the Inactive On date. The Inactive On date can be greater than or equal to the current date. If you do not enter an Inactive On date, the production line is active indefinitely. You cannot update any repetitive schedule that uses this production line, nor can you assign this production line to a new repetitive schedule as of this date. 11. Save your work. See Also Associating Lines and Assemblies: page 6 – 6 Defining Repetitive Schedules Manually: page 6 – 13 Defining Discrete Jobs Manually: page 3 – 12 Performing Work Order–less Completions: page 5 – 5 2 – 38 Oracle Work in Process User’s Guide Standard Documents You can define standard documents for discrete jobs, repetitive schedules, and job/schedule operations. Standard documents can then be attached to discrete jobs, repetitive schedules, and operations as required. Defining Job and Schedule Documents You can use this window to create a catalog of standard job and schedule documents. You can then attach these documents to your jobs and repetitive schedules. See: Adding an Attachment, Oracle Applications User’s Guide. " To define standard job and schedule documents: H Navigate to the Job and Schedule Documents window. See Also Working with Attachments, Oracle Applications User’s Guide Attaching Files to Jobs, Schedules, and Operations: page E – 2 Setting Up 2 – 39 Defining Operation Documents You can use this window to create a catalog of standard operation documents. You can then attach these documents to your work in process routing operations in the Operations window. See: Adding an Attachment, Oracle Applications User’s Guide. " To define standard operation documents: H Navigate to the Operation Documents window. See Also Working with Attachments, Oracle Applications User’s Guide Attaching Files to Jobs, Schedules, and Operations: page E – 2 2 – 40 Oracle Work in Process User’s Guide Profile Options Oracle Work in Process personal profile options control field access and defaults as well as WIP specific data processing modes. The following table list all WIP profile options, the level at which they can be updated, whether they are required, their default values, and type of manufacturing they are applicable to: Key n You can update the profile option. D, R, P The profile is applicable to discrete, repetitive, and project manufacturing. WO The profile is applicable to flow manufacturing (work order–less) manufacturing. Profile Option User System Administrator Requirements User User Resp App Site Required ? Default Value Applies To TP:WIP Background Shop Floor Material Processing n n n n n Required On–line processing All TP:WIP Completion Material Processing n n n n n Required On–line processing D, R, P TP:WIP Completion Transaction Form n n n n n Required On–line processing D, R, P TP:WIP Completion Transactions First Field n n n n n Required Job D, R, P TP:WIP Concurrent Message Level n n n n n Required Message level 0 D, R, P TP:WIP Material Transaction Form n n n n n Required On–line processing D, R, P TP:WIP Material Transactions First Field n n n n n Required Job D, R, P TP:WIP Move Transaction n n n n n Required On–line processing D, R, P TP:WIP Move Transactions First Field n n n n n Required Job D, R, P TP:WIP Move Transaction Quantity Default n n n n n Required None D, R, P TP:WIP Operation Backflush Setup n n n n n Required On–line processing D, R, P Table 2 – 4 (Page 1 of 2) Setting Up 2 – 41 Profile Option User System Administrator Requirements TP:WIP Resource Transactions First Field n n n n n Required Job All TP:WIP Shop Floor Material Processing n n n n n Required On–line processing All TP:WIP:Workorderlesss Completion Default n n n n n Required Unscheduled WO WIP: Default Job Start Date n n n n n Required No D, P WIP: Define Discrete Job Form n n n n n Required Interactive definition D, P WIP: Discrete Job Prefix n n n n n Required None D, P, WO WIP: Exclude Open ECOs n n n n n Required Yes D, R, P, WO n n n n Required Yes D, P WIP: Job Name Updatable WIP: Move Completion Default n n n n n Required No D, R, P WIP: Requirement Nettable Option n n n n n Required View all subinventories D, R, P, WO WIP:See Engineering Items n n n n n Required Yes D, R, P, WO Table 2 – 4 (Page 2 of 2) TP:WIP:Background Shop Floor Material Processing This profile option is used only when the TP:Move Transaction profile is set to Background processing and only then if the move transactions being processed backflush operation pull components as well as move assemblies. If both of these conditions are met, the move transaction processor processes the assembly move portion of the transaction. How the shop floor material (backflush) portion of the transaction is processed is controlled by this profile. Available values are listed below: 2 – 42 Background processing When set to background, shop floor material transactions are processed by the inventory transaction processor on a periodic basis. Concurrent processing When set to concurrent, the inventory material transaction processor is launched to process the shop floor material transactions. Oracle Work in Process User’s Guide The concurrent request number, representing the concurrent process executing the shop floor material transaction, is displayed. On–line processing When set to On–line, the move transaction processor processes both the move and shop floor material portions of these transactions. TP:WIP:Completion Material Processing Controls material processing of assembly completion, assembly return, and assembly completion backflush transactions initiated using the Completion Transactions window. Available values are listed below: Background processing When you save a completion transaction, control is returned to you immediately. Assembly completions and returns and their associated backflush transactions are processed on a periodic basis. Do not use background processing if you are backflushing lot controlled components that require manual entry of lot numbers. Manual entry could be required because of insufficient inventory or because the WIP Backflush Lot Selection parameter is set to Manual. See: Lot and Serial Number Backflushing: page 7 – 49. Concurrent processing When you save a material transaction, a concurrent processes is spawned and control is returned to you immediately. The concurrent request number, representing the concurrent process executing the material transactions for the job or repetitive schedule, is displayed. On–line processing ☞ ☞ When you save a material transaction, the transaction is processed while you wait and control is returned once transaction processing is completed. Attention: If you set TP:WIP:Completion Transactions option to Background processing, this profile option is disregarded. Attention: If you are using average costing, and the TP:INV: Transaction Processing Mode profile option in Oracle Inventory is set to Form level processing, you must set this profile option Setting Up 2 – 43 to On–line to ensure that transactions are processed in the proper sequence. On–line processing is recommended if you are backflushing components under serial number control or manual lot control entry. TP:WIP:Completion Transaction Form Determines whether completion transactions are processed on–line or in the background when transacting completions using the Completion Transactions window. A completion transaction includes updating the completion quantity of a job or repetitive schedule, identifying the component items and quantities to be backflushed, and transferring reservations from the final assembly order to appropriate sales order lines and deliveries. Available values are listed below: Background processing When you save a completion transaction, control is returned to you immediately. Completion transactions are then processed on a periodic basis. On–line processing When you save a completion transaction, it is processed while you wait and control is returned once transaction processing is completed. ☞ Attention: If you are using average costing, and the TP:INV: Transaction Processing Mode profile option in Oracle Inventory is set to Form level processing, you must set this profile option to On–line to ensure that transactions are processed in the proper sequence. TP:WIP:Completion Transactions First Field Determines which field the cursor defaults to when you first enter the Completion Transactions window. Set this option based on your predominant manufacturing environment: assemble–to–order, project or discrete job, or repetitive. The available first field values are Line, Assembly, Job, or Sales Order. You can navigate to another field to override the default. ☞ 2 – 44 Attention: You can only enter a Sales Order name if you have an ATO sales order linked to a job. Oracle Work in Process User’s Guide TP:WIP:Concurrent Message Level Determines the level of detail reported in the move transaction concurrent log file during move transaction validation and processing. Available values are listed below: Message level 0 Reports errors only. Message level 1 Reports processing activities and errors. Message level 2 Reports and time stamps processing activities and errors. TP:WIP:Material Transaction Form Controls the processing of component issue and return transactions entered in the WIP Material Transactions window. Available values are listed below: Background processing When you save a material transaction, control is returned to you immediately. Transactions are then processed on a periodic basis. Concurrent processing When you save a material transaction, a concurrent process is spawned and control is returned to you immediately. The concurrent request number representing the concurrent process executing the issue or return transactions for the job or repetitive schedule is displayed. On–line processing ☞ When you save a material transaction, the transaction is processed while you wait and control is returned once transaction processing is completed. Attention: If you are using average costing, and the TP:INV: Transaction Processing Mode profile option in Oracle Inventory is set to Form level processing, you must set this profile option to On–line to ensure that transactions are processed in the proper sequence. TP:WIP:Material Transactions First Field Determines which field the cursor defaults to when you first enter the WIP Material Transactions window. Set this option based on your predominant manufacturing environment: assemble–to–order, project or discrete job, or repetitive. Setting Up 2 – 45 The available first field values are Line, Assembly, Job, or Sales Order. You can navigate to another field to override the default. ☞ Attention: You can only enter a Sales Order name if you have an ATO sales order linked to a job. TP:WIP:Move Transaction Determines whether move transactions performed using the Move Transactions window are processed on–line or in the background. Available values are listed below: Background processing When you save a move transaction, control is returned to you immediately. Transactions are then processed on a periodic basis. On–line processing When you save a transaction, the transaction is processed while you wait and control is returned once transaction processing is completed. ☞ Attention: If you have this option set to On–line processing, you cannot move more assemblies than exist in an operation step. However, if you have this option set to Background processing, you can move any number of assemblies, but validates the quantity in the background. You can correct any errors using the Pending Move Transactions window. ☞ Attention: If you are using average costing, and the TP:INV: Transaction Processing Mode profile option in Oracle Inventory is set to Form level processing, you must set this profile option to On–line to ensure that transactions are processed in the proper sequence. TP:WIP:Move Transactions First Field Determines which field the cursor defaults to when you first enter the Move Transactions window. Set this option based on your predominant manufacturing environment: assemble–to–order, project or discrete job, or repetitive. The available first field values are Line, Assembly, Job, or Sales Order. You can navigate to another field to override the default. ☞ 2 – 46 Attention: You can only enter a Sales Order name if you have an ATO sales order linked to a job. Oracle Work in Process User’s Guide TP:WIP:Move Transaction Quantity Default Indicates if and how move transaction quantities are defaulted. Available values are listed below: None No transaction quantity is defaulted. Minimum Transfer Quantity When you perform a move transaction, the transaction quantity defaults to the minimum transfer quantity if the minimum transfer quantity is less than or equal to the available quantity. If the minimum transfer quantity is greater that the available quantity, and the available quantity is not zero, then the available quantity is defaulted. Available Quantity When you perform a move transaction, if the available quantity is not zero, the transaction quantity defaults to the available quantity TP:WIP:Operation Backflush Setup Controls processing of operation completion backflush setup in the Move Transactions window. This setup includes identifying component items and quantities to be backflushed and determining lot number assignments. Available values are listed below: Background processing When you save a move transaction, control is returned to you immediately. The setup of operation backflushing is processed in the background on a periodic basis. Use this option if automatically assignment of lot numbers is required. On–line processing When you save a move transaction, the setup of operation backflushing is processed while you wait and control is returned once the setup processing is completed. Use this option so that lot number can be manually assigned. ☞ Attention: If you set the TP:WIP:Move Transactions profile option to Background processing, this profile option is disregarded and executes operation backflush setup in the background. ☞ Attention: You should set this profile to On–line processing if you are backflushing lot, using manual entry, and serial controlled components. Setting Up 2 – 47 ☞ Attention: If you are using average costing, and the TP:INV: Transaction Processing Mode profile option in Oracle Inventory is set to Form level processing, you must set this profile option to On–line to ensure that transactions are processed in the proper sequence. TP:WIP:Resource Transactions First Field Determines which field the cursor defaults to when you first enter the Resource Transactions window. Set this option based on your predominant manufacturing environment: assemble–to–order, project or discrete job, or repetitive. The available first field values are Line, Assembly, Job, or Sales Order. You can navigate to another field to override the default. ☞ Attention: You can only enter a Sales Order name if you have an ATO sales order linked to a job. TP:WIP:Shop Floor Material Processing Controls processing of operation and assembly pull backflushes, assembly scrap, and completion transactions on the Move Transactions window. Available values are listed below: Background processing When you save a move transaction, control is returned to you immediately. The operation and assembly pull backflush, assembly scrap, and completion transactions are then processed on a periodic basis. Do not use background processing if you are backflushing lot controlled components that require manual entry of lot numbers either because of insufficient inventory or because the WIP Backflush Lot Selection parameter is set to Manual. See: Lot and Serial Number Backflushing: page 7 – 49. Concurrent processing When you save a move transaction, a concurrent process is spawned and control is returned to you immediately. The concurrent request number representing the concurrent process executing the move transactions for the job or repetitive schedule is displayed. 2 – 48 Oracle Work in Process User’s Guide On–line processing When you save a move transaction, operation and assembly pull backflush, assembly scrap, and completion transactions are processed while you wait and control is returned once transaction processing is completed. ☞ Attention: For operation backflushes, assembly scraps and completions, if you set the TP:WIP:Move Transactions or the TP:WIP:Operation Backflush Setup profile option to Background processing, the Move Transactions window disregards this profile option and executes the operation backflush, assembly scraps, and completions in the background. ☞ Attention: If you are using average costing, and the TP:INV: Transaction Processing Mode profile option in Oracle Inventory is set to Form level processing, you must set this profile option to On–line to ensure that transactions are processed in the proper sequence. On–line processing is recommended if you are backflushing components under serial number control or manual lot control entry. TP:WIP:Work Order–less Default Completion Determines the default for the Scheduled flag in the Work Order–less Completions window. Set this profile according to your business requirements. The default can be overridden. Available values are listed below: Scheduled The Schedule flag defaults to checked. Use this option if most of your work order–less completions are based upon flow schedules generated by the Line Scheduling Workbench. Unscheduled The Scheduled flag defaults to unchecked. Use this option if most of your work order–less completions are manually entered and not based upon flow schedules generated by the Line Scheduling Workbench. WIP:Default Job Start Date Determines whether the start dates for jobs default to the current date and time or not at all when defining jobs in the Discrete Jobs window. The options are Yes or No. Setting Up 2 – 49 WIP:Define Discrete Job Form Indicates how to load the bill of material and routing information when defining jobs in the Discrete Jobs window. Available values are listed below: Concurrent definition When you save a job, a concurrent process is spawned and control is returned to you immediately. The concurrent request number representing the concurrent process is displayed. You can view the status of the process in the Concurrent Requests window. The concurrent process updates the job status to Pending Bill Load, and if the bill of materials load succeeds, updates the job status to Pending Routing Load. The process then loads the routing information (if you defined a routing for the bill). If the routing load succeeds, the job status is updated to the choice you specified for the job (Unreleased, Released, or On Hold), and then loads the costing information. When all costing information is loaded, you can update the discrete job information and transact against it. Concurrent definition produces an output report that indicates the job, assembly, relevant dates, and successful completion of each step (bill of materials load, routing load, and costing load). If the concurrent process fails, the status of the discrete job indicates the source of the problem (Failed bill of material load or Failed routing load). If the bill of material or routing load fails you can resubmit the job once you change the job status to Unreleased, Released, or On Hold. Interactive definition ☞ 2 – 50 When you save a job, job definition occurs immediately. The bill of material and routing are loaded while you wait and control is returned when the definition process is completed. Attention: If you have complex bills of material and long routings, concurrent processing is recommended. Oracle Work in Process User’s Guide WIP:Discrete Job Prefix Specifies the job prefix to use when autogenerating job names in the Discrete Jobs, Simulate Discrete Jobs, Import Jobs and Schedules, and AutoCreate windows in Work in Process, and in the Planner Workbench window in Oracle Master Scheduling/MRP and Oracle Supply Chain Planning. Work in Process concatenates this prefix with a value from the sequence WIP_JOB_NUMBER_S to create a default discrete job name. WIP:Exclude Open ECOs Determines whether engineering change orders (ECOs) with Open statuses are excluded when you define jobs and schedules. If you exclude Open ECOs, only ECOS with Release, Schedule, and Implement statuses are implemented when you choose a bill of material revision or revision date and the bill of material is exploded. If you do not exclude Open ECOs, Open ECOs are included with Release, Schedule, and Implement ECOs. See: ECO Statuses, Oracle Engineering User’s Guide and ECO Implementation by Status: page 10 – 19. This profile option also controls whether you can select revisions associated with open ECOs in the WIP Material Transactions window. WIP:Job Name Updatable Determines whether you can update the names of existing jobs in the Discrete Jobs window. WIP:Move Completion Default Determines the default transaction type for the Move Transactions window. If you specify Yes, the transaction type defaults to Complete. Otherwise, the transaction type defaults to Move. Note that you cannot specify that the Return transaction type be used as the default. See: Move Transaction Types: page 8 – 34. WIP:Requirement Nettable Option Determines which subinventories to include when displaying on–hand quantities in the Material Requirements and View Material Requirements windows. Available values are listed below: Setting Up 2 – 51 View only nettable subinventories Include only nettable subinventories when displaying on–hand quantities. View all subinventories Include all subinventories (nettable and non–nettable) when displaying on–hand quantities. WIP:See Engineering Items Determines whether you can define jobs and schedules for engineering items and whether you can add engineering items as material requirements. See Also Oracle Inventory Profile Options, Oracle Inventory User’s Guide Overview of User Profiles, Oracle Applications User’s Guide Setting Your Personal User Profile, Oracle Applications User’s Guide 2 – 52 Oracle Work in Process User’s Guide Security Functions Security function options specify how Oracle Work in Process controls access to and processes data. The system administrator sets up and maintains security functions. Define Discrete Jobs: Close Discrete Jobs (WIP_WIPDJMDF_CLOSE) Determines whether you can unclose jobs using the Close Discrete Jobs window. When this function security parameter (UNCLOSE) is added and set to Y, the Unclose option appears in the Special Menu. See: Closing Discrete Jobs: page 3 – 51. The default for this option is N. Move Transactions: Allow Skipping Over No Move Statuses (WIP_WIPTXSFM_OVERRIDE_NO_MOVE) Determines whether you can override ”no move” shop floor statuses when performing a move transaction. If the WIP Allow Moves Over No Move Shop Floor Statuses parameter is set to N and this function security parameter (OVERRIDE_NO_MOVE_NO_SKIP) is set to Y, you can move assemblies over ”no move” shop floor statuses. See: Move Transaction Parameters: page 2 – 13. The default for this option is N. Move Transactions: No Completion Transactions (WIP_WIPTXSFM_NO_CMP) Determines whether you can perform assembly completion and return move transactions using the Move Transactions window. When this function security parameter (ALLOW_CMP) is set to N, the Complete and Return options do not appear in the Transaction Type region of the Move Transactions window. See: Move Transaction Types: page 8 – 34. The default for this option is Y. Move Transactions: No Resource Transactions (WIP_WIPTXSFM_NO_RSC) Determines whether you can initiate a manual resource transaction from the Move Transactions window. When this function security parameter (RESOURCE_TXNS) is set to N, the Resources button does not appear in the Move Transactions window. See: Charging Resources with Move Transactions: page 9 – 25. The default for this option is Y. Setting Up 2 – 53 Completion Transactions: No Final Completions (ALLOW_FINAL_COMPLETIONS) Determines whether you can perform WIP final completions in an average costing organization. When this function security parameter (ALLOW_FINAL_ COMPLETIONS) is set to N, the Final Complete check box does not appear in the Completion Transactions window. See: Completing and Returning Assemblies: page 7 – 58. The default for this option is Y. See Also Overview of Function Security, Oracle Applications User’s Guide 2 – 54 Oracle Work in Process User’s Guide CHAPTER 3 Discrete Manufacturing T his chapter explains how to use and define jobs, including: • Overview: page 3 – 2 • Setting Up: page 3 – 5 • Discrete Manufacturing Process Diagram: page 3 – 6 • Creating Discrete Jobs: page 3 – 7 • Project Jobs: page 3 – 24 • Building Discrete Jobs: page 3 – 25 • Viewing Discrete Jobs: page 3 – 31 • Updating Discrete Jobs: page 3 – 36 • Simulating and Saving Simulated Jobs: page 3 – 43 • Completing Discrete Jobs: page 3 – 47 • Discrete Job Close: page: page 3 – 50 • Discrete Job Purge: page: page 3 – 56 • Processing Pending Jobs and Schedules: page 3 – 63 Discrete Manufacturing 3–1 Overview You can use Oracle Work in Process to produce assemblies in discrete batches, also known as discrete jobs. Standard Versus Non–Standard Jobs Standard discrete jobs control the material, resources, and operations required to build an assembly and collect its manufacturing cost. Non–standard discrete jobs control material and collect costs for miscellaneous manufacturing activity. They may or may not build an assembly. This type of activity can include rework, field service repair, upgrade, disassembly, maintenance, engineering prototypes, and other projects. Shop Floor Control Shop floor control helps you manage the flow of production inside the plant. Routings can be used to schedule job production activities and create requirements. You can use reports and views to help you control these activities. Material Control Material control helps you manage the flow of component material from inventory to jobs. Bills of material can be used to create job material requirements. You can use reports and views to help you control material activities. Non–Standard Job Bills of Material and Routings You can assign a predefined bill of material or routing to a non–standard job or create one manually. You may use any bill or routing for the job, including one that does not match the assembly item of the job. Engineering Bills and ECOs You can build released as well as unreleased revisions and engineering items. You can also add engineering items as material requirements. The system can automatically update your jobs following an engineering change order (ECO). Processing Options When you define discrete jobs, you can create discrete job operations, resource requirements, and material requirements either concurrently or interactively. Interactive processing loads all bill of material and 3–2 Oracle Work in Process User’s Guide routing information while you wait, returning control to you after the process is complete. Concurrent processing spawns a background process that loads all bill of material and routing information and returns control to you immediately. Lot and Serial Control You can build jobs for assemblies under lot control, serial control, or both lot and serial control. There is a complete set of job lot composition inquiries and reports within Work in Process. Planning Standard Discrete Jobs Master Scheduling/MRP and Supply Chain Planning plans standard discrete jobs and their material requirements. You can automatically create standard jobs from these planned orders. Master Scheduling/MRP and Supply Chain Planning can also reschedule standard jobs. Master Scheduling/MRP and Supply Chain Planning does not plan non–standard discrete jobs. However, Master Scheduling/MRP and Supply Chain Planning nets non–standard jobs if you choose. Open Job and Schedule Interface You can import planned order and planned order update recommendations for discrete jobs from external systems into Work in Process. Requirements and Assembly Netting You can specify whether a job’s material requirements are included as demand in the MRP netting process. You can also specify whether the assemblies you build on a job are included as supply. MPS Relief When you build an MPS–Planned item using a job, the master schedule for the quantity you define is automatically updated (relieved). Simulate Discrete Jobs You can simulate a standard job to determine what materials, operations, and operation resources are required to support that job. You can convert your simulated job into an actual job. See: Simulating and Saving Simulated Jobs: page 3 – 43. Discrete Manufacturing 3–3 Available–to–Promise Materials You can view component available–to–promise (ATP) information as you define, simulate, and view discrete jobs. Final Assembly Orders You can manually or automatically define jobs (final assembly orders) to build custom configurations for assemble–to–order products. You can allocate your discrete production by sales channel using demand classes. You can retain as–built configuration histories for quality and customer service tracking. Job Close You can close several standard and non–standard discrete jobs simultaneously. You can also close individual discrete jobs. See: Discrete Job Close: page 3 – 50. Job Costs You can cost standard and non–standard asset discrete production by job. You can report job cost on a period–to–date and cumulative–to–date basis. Job Purge You can purge all information associated with discrete jobs including job header records and job detail and transaction information. You can also selectively purge some or all of the following job related information: job details (material requirements, resource requirements, and operations), ATO configurations, move transactions, and resource cost transactions. See Also Overview of Non–Standard Discrete Jobs: page 4 – 2 Comparison of Manufacturing Methods: page B – 2 Overview of Work in Process Scheduling: page 12 – 2 Discrete Job and Repetitive Schedule Costs: page 11 – 6 Open Job and Schedule Interface, Oracle Manufacturing, Distribution, Sales and Service Open Interfaces Manual, Release 11 3–4 Oracle Work in Process User’s Guide Setting Up • For a listing of setups that affect discrete manufacturing see: Setup Prerequisites: page 2 – 3. • For a listing of setup steps within Work in Process see: Setup Check List: page 2 – 5. • For additional information about discrete parameters and accouting classes see: Discrete Manufacturing Parameters: page 2 – 10 and Discrete Accounting Classes: page 2 – 22. • For a listing of profile options that affect discrete manufacturing see: Profile Options: page 2 – 41. Discrete Manufacturing 3–5 Discrete Manufacturing Process Diagram The following diagram illustrates the discrete manufacturing process: Figure 3 – 1 Discrete Manufacturing Process Setup Discrete Manufacturing Plan Discrete Jobs Define Discrete Jobs Issue Components Build Discrete Jobs Complete Discrete Jobs Close Discrete Jobs Purge Discrete Jobs 3–6 Oracle Work in Process User’s Guide Creating Discrete Jobs You can create discrete jobs in the following ways: • manually (both standard and non–standard discrete jobs). See: Defining Discrete Jobs Manually: page 3 – 12. ☞ Attention: Standard discrete jobs for ATO items can be linked to Sales Orders. • manually from a simulation (standard discrete jobs only). See: Simulating and Saving Simulated Jobs: page 3 – 43. • automatically using Oracle Master Scheduling/MRP and Oracle Supply Chain Planning to plan your standard discrete production then using the Planner Workbench to implement your planned orders. See: Planned Discrete Jobs: page 3 – 7. • automatically (standard discrete jobs only) from final assembly orders for specific customer configurations and/or standard assemble–to–order (ATO)/configure–to–order items. See: Final Assembly Orders: page 3 – 8. • using the Open Job and Schedule Interface to import planned orders and updated planned order recommendations. See: Open Job and Schedule Interface: page 3 – 9. Planned Discrete Jobs You can create planned orders and reschedule recommendations using the Planner Workbench in Oracle Master Scheduling/MRP and Oracle Supply Chain Planning. You can modify the due dates and quantities of planned orders. You can also firm plan these orders. You can create new discrete jobs by implementing all or some planned orders. When you create jobs using the Planner Workbench, you can specify the WIP accounting class. Accounting classes can be defaulted. See: Product Line Accounting Setup, Oracle Cost Management User’s Guide, Discrete Parameters: page 2 – 10, and Discrete Accounting Classes: page 2 – 22. If the job being created is for a lot controlled assembly, the WIP Default Lot Number Type parameter is used to determine whether lot numbers are assigned based on the job name or based on the Oracle Inventory lot number rules. Discrete jobs created from planned orders use the planned order quantity as the default job quantity. The primary bill of materials and Discrete Manufacturing 3–7 primary routings for the assemblies are used to create work in process bills and routings. Jobs created from planned orders are backward scheduled from the required completion date. The calculated start date is used to determine the bill and routing revisions and revision dates. Master Scheduling/MRP and Supply Chain Planning takes shrinkage rate, component yield, and safety stock into consideration in the planning process. Once you define the standard job, supply is calculated using the following formula: available supply quantity = (MRP net quantity quantity completed quantity scrapped) (1 item shrinkage rate) You can also use the Planner Workbench to reschedule existing jobs. For example, you can reschedule every assembly in the plan or you can reschedule only certain specific assemblies ☞ Attention: When you implement planned orders and create discrete jobs, Master Scheduling/MRP and Supply Chain Planning does not take into account the WIP:View Only Released ECOs profile option in the Personal Profile Values window. See Also Overview of Implementing Planning Recommendations, Oracle Master Scheduling/MRP and Oracle Supply Chain Planning User’s Guide Work in Process Planning: page D – 2 Discrete Scheduling: page 12 – 5 Detailed Scheduling: page 12 – 7 Final Assembly Orders You can automatically create final assembly orders for ATO (Assemble to Order) items entered in Oracle Order Entry/Shipping. These discrete job orders are created on a single job to single sales order delivery basis. You can also associate sales orders to discrete jobs for ATO items, thereby allocating production to specific customers. Jobs created from final assembly orders are backward scheduled from the order due date to determine the job start date. The calculated start 3–8 Oracle Work in Process User’s Guide date is used to determine the bill and routing revisions and revision dates. See Also Overview of Configure to Order, Oracle Bills of Material User’s Guide Linking ATO Sales Orders and Discrete Jobs: page 3 – 21 AutoCreating Final Assembly Orders: page 14 – 3 Discrete Scheduling: page 12 – 5 Open Job and Schedule Interface You can load planned orders, planned order update recommendations, and suggested repetitive schedules from any source — planning systems, order entry systems, finite scheduling packages, production line sequencing programs, spreadsheets, and even custom entry forms — into the Open Job and Schedule Interface. For example, if your plant directly feeds to your customer’s plant, you can take demands directly from your customer rather than waiting for the next MRP run thus reducing response time and eliminating unnecessary overhead. The Import Jobs and Schedules window is used to launch the WIP Mass Load program which validates records in the Open Job and Schedule Interface table and implements imported records as new discrete jobs, updated discrete jobs, and pending repetitive schedules accordingly. Job and schedule information that fails validation or processing is marked. You can use the Pending Jobs and Schedules window to view, update, and resubmit this information. See Also Open Job and Schedule Interface, Oracle Manufacturing, Distribution, Sales and Service Open Interfaces Manual, Release 11 Overview of Reports and Programs, Oracle Applications User’s Guide Importing Jobs and Schedules: page 14 – 32 Processing Pending Jobs and Schedules: page 3 – 63 Discrete Manufacturing 3–9 WIP Accounting Class Defaults You can set up default WIP accounting classes at several levels: • at the category account level for discrete jobs and repetitive line/assembly associations • at the Default Discrete Class parameter class level for standard discrete jobs • at the project cost group level for project jobs Non–Project Defaults You can set up default WIP accounting classes at the category account level and at the Default Discrete Class parameter level. Non – Project Standard Discrete Jobs The default discrete accounting classes that you have associated with categories in the Default WIP Accounting Classes for Categories window are used when you create standard discrete jobs for items that belong to categories that belong to the product line category set. For example, if you create a job to build Item A, and Item A belongs to a category that belongs to the product line category set, then the WIP accounting class associated with Item A’s category is defaulted. This defaulting logic is applied no matter how jobs are created. See: Creating Discrete Jobs: page 3 – 7. ☞ Attention: If default discrete WIP accounting classes do not exist, the accounting class specified for the Default Discrete Class parameter is used. See Discrete Parameters: page 2 – 10. Non – Project Referenced Work Order–less Completions When you perform work order–less completions, discrete accounting classes that are associated with categories are defaulted if the item being completed belongs to a category that belongs to the product line category set. For example, if you are performing a work order–less completion for Item A, and Item A belongs to a category that belongs to the product line category set, then the WIP accounting class associated with Item A’s category is defaulted. Repetitive Assemblies When you associate repetitive assemblies with production lines, the repetitive accounting classes that you have associated with categories are defaulted if the assembly item being associated belongs to a category that belongs to the product line category set. For example if 3 – 10 Oracle Work in Process User’s Guide you create a repetitive line/assembly association for an assembly Item B, and Item B belongs to a category that belongs to the product line category set, then the WIP accounting class associated with Item B’s category is defaulted. Project Related Defaults Discrete accounting classes can also be defaulted when you define project referenced jobs and perform project referenced work order–less completions. If the assembly item belongs to a category that belongs to the product line category set, then the WIP accounting class associated with the item’s category is defaulted. However, if a default discrete class cannot be found for a project job or work order–less completion based on the assembly item’s category set, the system does not default the accounting class specified for the Default Discrete Class parameter. Instead it uses the WIP accounting class that is associated with the project as defined in the Project Parameters window. Like other accounting class defaults it can be overridden but only with an accounting class that was associated with the project’s cost group in the WIP Accounting Classes for Cost Groups window. See: Assigning Project Parameters, Oracle Project Manufacturing User’s Guide and Defining Cost Groups, Oracle Cost Management User’s Guide. ☞ Attention: If you create a project referenced job or perform a project referenced work order–less completion, and the system can find neither a default accounting class nor a project WIP accounting class, the accounting class is not defaulted and one must be selected. See Also Associating WIP Accounting Classes with Categories, Oracle Cost Management User’s Guide Product Line Accounting Setup, Oracle Cost Management User’s Guide Build Sequencing You can sequence your discrete manufacturing production using schedule groups. You can do this by grouping discrete jobs into schedule groups then sequencing jobs within these groups. Discrete Manufacturing 3 – 11 Schedule Groups You can define schedule groups then assign them to the jobs that you create. For example, you can define a schedule group then assign that schedule group to a group of jobs that are being built on a specific production line and that must be completed on a specific date for a planned departure. Build Sequence You can sequence jobs within a schedule group. For example, you can use sequences to prioritize, by customer, all jobs on a specific production line. Similarly, you can use sequences to insure that jobs are built in reverse departure order thus facilitating truck loading. See Also Defining Schedule Groups: page 2 – 32 Defining Discrete Jobs Manually You can manually define standard, non–standard, and project jobs. You can assign bills and routings to standard discrete jobs to create material requirements, schedule operations, and create resource requirements. You can optionally assign alternate bills of material and/or alternate routings when you define standard discrete jobs. Neither bills of material nor routings are required however. You can assign bill of material references and/or routing references to non–standard discrete jobs to create material requirements, schedule operations, and create resource requirements. You can attach illustrative or explanatory files — in the form of text, images, word processing documents, spreadsheets, video, and so on — to discrete jobs. See: About Attachments, Oracle Applications User’s Guide. After saving a job, you can immediately view the details of the job — material requirements, operations, and operation material and resource requirements — using the Component and Operations buttons. 3 – 12 Oracle Work in Process User’s Guide " To define a discrete job: 1. Navigate to the Discrete Jobs window. The Discrete Jobs Summary folder window appears. See: Customizing the Presentation of Data in a Folder, Oracle Applications User’s Guide. 2. Choose the New button. The Discrete Jobs window appears. You can define discrete jobs one–at–a–time in the Discrete Jobs window. This method is described below. You can, however, also define several jobs simultaneously using the Discrete Jobs Summary folder window. See: Combination Block, Oracle Applications User’s Guide and Navigating Within a Combination Block, Oracle Applications User’s Guide. Caution: The following nine fields that cannot be accessed in the Discrete Jobs Summary folder window even if included in your user folder: bill and routing Alternates, bill and routing Revisions and Revision Dates; Completion Subinventory and Locator; and Supply Type. If you need to change the values that are defaulted into these fields, navigate to the Discrete Jobs detail window. 3. Enter or generate the Job name. You can generate a default Job name by choosing Apply Default Job Name from the Special Menu or by simply pressing the tab key. If you do enter the job name, it must be unique and alphanumeric. Discrete Manufacturing 3 – 13 ☞ Attention: Default job names can only be automatically generated by the automatic sequence generator if a prefix has been specified for the WIP:Discrete Job Prefix profile option. 4. Select the job Type, either Standard or Non–Standard. See: Standard Versus Non–Standard Discrete Jobs: page 4 – 4. 5. If defining a standard discrete job, select the job Assembly. The assembly is the item you are building. If a primary bill of material, primary routing, or both exist for this assembly, they are defaulted. You cannot select an assembly that has a primary routing that is flow related. If you do, a warning is displayed and you are prompted to enter another routing designator. See: Creating a Flow Routing, Oracle Bills of Material User’s Guide. Assemblies are optional for non–standard discrete jobs, however, you must enter them for non–standard discrete jobs with routings if you want to track shop floor move and resource transactions. If you set the WIP:See Engineering Items profile option to Yes, you can define jobs for engineering items. ☞ ☞ 6. Attention: If you are defining a job for an ATO sales order, you must enter an ATO item. Attention: You can define discrete jobs for assemblies that do not have components and for assemblies that have components with disable dates less than or equal to the current date. Select the accounting Class. If a default discrete WIP accounting class can be found, it is used. See: WIP Accounting Class Defaults: page 2 – 10 and Discrete Accounting Classes: page 2 – 22. For non–standard jobs, you can select any active Asset Non–standard or Expense Non–standard accounting class. 7. Select the job Status. When you define a job, its status defaults to Unreleased but can be changed to Released or On Hold. See: Discrete Job Statuses: page 10 – 7. 8. Check the Firm check box to firm your job. You cannot firm a non–standard discrete job. Firming a discrete job prevents MRP from suggesting rescheduling and replanning recommendations when changes to supply or demand occur. If replanning is required, the MRP planning process 3 – 14 Oracle Work in Process User’s Guide creates new jobs to cover the new demand. See: Firm Order Planning, Oracle Master Scheduling/MRP and Oracle Supply Chain Planning User’s Guide. " To define job quantities: 1. Enter the job Start quantity. Standard discrete jobs must have a start quantity greater than zero. When you enter a start quantity for jobs with bills and routings, the component material requirements, department schedules, resource load, and job start and end dates are all determined automatically. For non–standard jobs, if you enter a start quantity of 0 and specify a bill of material reference, the corresponding bill is exploded but material requirements equal to 0 are created. To perform move and completion transactions for a non–standard job, the start quantity must be greater than zero. ☞ 2. Attention: If you link a job to an ATO sales order, the start quantity defaults from the sales order. If you link several sales orders to a single job, the order quantities are totalled and the start quantity is automatically updated. Enter the MRP Net quantity. The MRP net quantity is the number of assemblies that MRP considers as supply on the scheduled completion date. For standard and non–standard discrete jobs with assemblies, the MRP net quantity is derived from the job start quantity. For non–standard discrete jobs without assemblies, the default is zero. ☞ Attention: On standard jobs, do not use MRP net quantity to identify planned shrinkage due to operation yield loss. The MPS and MRP planning processes automatically deduct scrapped assemblies from the quantity as you scrap. Therefore, reducing the MRP net quantity and scrapping assemblies double counts job scrap. ☞ Attention: You can use MRP net quantity to identify planned shrinkage due to operation yield loss on non–standard jobs. Master Scheduling/MRP and Supply Chain Planning does not include quantities scrapped or the item shrinkage factor in determining available supply from a non–standard job. " To schedule a discrete job with a routing: H Enter or select either the Start or Completion date and time. Discrete Manufacturing 3 – 15 If you enter a start date and time the completion date and time are automatically forward scheduled based on the assembly’s routing. Similarly, if you enter a completion date, the start date and time are automatically backward scheduled based on the assembly’s routing. You can enter a past due start date to forward schedule a job that should have started before the current date. You cannot enter a start date and time greater than the completion date and time. You can use the start date of the job to default bill and routing revisions and revision dates. If a start date is not entered, bill and routing revisions and revision dates default based on fixed and variable lead times of the assembly. " To schedule a discrete job without a routing: H Enter or select either the Start and/or Completion date and time. If you enter only one date and time and your job type is standard, the missing date and time is calculated using the fixed and variable lead time of the assembly. If the assembly has both a fixed and variable lead time, the lead time for the job is calculated as job quantity times variable lead time plus fixed lead time. If you enter only one date and time and your job type is non–standard, the other dates and times are calculated using the fixed and variable lead time of the routing reference. If your job is non–standard and has a routing reference, the fixed and variable lead times of the routing reference are used instead of the assembly lead time. If your job is non–standard and you specify no routing reference, you must enter both dates and times. ☞ " Attention: You can use the WIP:Default Job Start Date profile option to specify whether the start date for a job defaults to the current date and time or does not default at all. To assign a bill of material reference to a non–standard discrete job and/or an alternate bill of material/revision to a standard discrete job: 1. Select the bill of material Reference if defining a non–standard discrete job. Bill of material references are used to create material requirements for non–standard discrete jobs, however, they are not required. Instead, you can define the job without material requirements, then customize it by adding only those material requirements that are required. See: Adding and Updating Material Requirements: page 7 – 9. 3 – 16 Oracle Work in Process User’s Guide 2. Select the Alternate bill of material. See: Primary and Alternate Bills of Material, Oracle Bills of Material User’s Guide. You can select an alternate bill if alternates have been defined for the assembly you are building. If the WIP:See Engineering Items profile option is set to Yes, you can also select engineering items as alternates. See: Profile Options: page 2 – 41. For non–standard discrete jobs, you can enter any alternate defined for the bill Reference specified. 3. Select the bill of material Revision. The bill revision and date determines which version of the bill of material is used to create job component requirements. The start date of a standard discrete job can be used to default the bill revision and revision date. If a start date is not selected, the revision and revision date are derived based on fixed and variable lead times of the assembly. You can update the bill revision of a standard discrete job as long as the job remains unreleased. You can update the bill revision for standard bills or alternate bills. See: Item and Routing Revisions, Oracle Bills of Material User’s Guide. You can explode item revisions that have ECOs with Release, Schedule, and Implement statuses against them. If you set the WIP:Exclude Open ECOs profile option to No, you can also explode revisions for ECOs that have an Open status. See: ECO Implementation By Status: page 10 – 19. If you are building a non–standard job and the Revision Control attribute for the assembly item is set to Yes, the revision of the bill reference must be valid for the assembly. See: Defining Items, Oracle Inventory User’s Guide and Inventory Attribute Group, Oracle Inventory User’s Guide. 4. Select the bill Revision date and time. You can select a bill revision date other than the one that is derived for standard bills, alternate bills, or bill references. You can update this date as long as the job remains Unreleased. 5. Select the Supply Type. The supply type defaults to Based on Bill. This supply type indicates that component requirements are supplied based upon their individual supply types. You can override this default by choosing one of the following supply types: Push, Assembly Pull, Operation Pull, Bulk, or Supplier. See: Supply Types: page C – 2. Discrete Manufacturing 3 – 17 " To assign a routing reference to a non–standard discrete job and/or an alternate routing/revision to a job: 1. Select the routing Reference if defining a non–standard job. Routing references can be used to create routings (operations and resource requirements) for non–standard discrete jobs, but are not required. You can optionally define non–standard jobs without routings, then customize them by adding only those operations that are required. See: Adding and Updating Operations: page 8 – 11. ☞ 2. Attention: You can assign any routing to a non–standard job, including one that does not match the assembly you assigned, using the routing reference. Select the alternate Routing. You can select an alternate routing if alternates have been defined for the assembly you are building. If the WIP:See Engineering Items profile option is set to Yes, you can select engineering routings as alternates. See: Profile Options: page 2 – 41 and Primary and Alternate Routings, Oracle Bills of Material User’s Guide. For non–standard job, you can enter any alternate defined for the routing reference specified. 3. Select the routing Revision. See: Item and Routing Revisions, Oracle Bills of Material User’s Guide. The start date of a standard discrete job can be used to derive the routing revision and revision date. If a start date is not selected, the revision and revision date are derived based on fixed and variable lead times of the assembly. You can update the routing revision as long as the job remains unreleased. For standard discrete jobs, the routing revision determines which version of the routing is used to create the job routing (operations and resource requirements). For non–standard discrete jobs, the routing reference determines the routing for the job. The revision you select for the non–standard job applies to the routing reference, not the assembly. 4. Select the routing Revision Date and time. You can update routing revision dates for standard routings, alternate routings, or routing references. You can update routing revision dates as long as the job remains unreleased. 5. 3 – 18 Select the completion Subinventory and, if required by the subinventory, Locator. Oracle Work in Process User’s Guide Assemblies are completed into or returned from this subinventory and locator. If the assembly has a routing, the completion subinventory and locator are defaulted from the routing but can be overwritten. For non–standard discrete jobs, you can select completion subinventories and locators only if you specified an assembly. If the Oracle Inventory INV:Allow Expense to Asset Transaction profile option is set to Yes, you can select an expense subinventory. See: Inventory Profile Options, Oracle Inventory User’s Guide. ☞ Attention: You can override the completion subinventory and locator you specify here when you complete or return assemblies using the Completion Transactions window. Caution: You must specify a completion subinventory and locator if you plan to complete or return assemblies using the Move Transactions window since the subinventory and locator specified here are automatically used for those transactions. Project locator logic is used if you are assigning a completion subinventory to a project job. See: Project Locator, Oracle Project Manufacturing Implementation Guide. " To assign a demand class, lot number, and description: 1. Select the Demand Class. You can select any enabled and active demand class. Demand classes are not required. See: Overview of Demand Classes, Oracle Master Scheduling/MRP and Oracle Supply Chain Planning User’s Guide and Creating Demand Classes, Oracle Master Scheduling/MRP and Oracle Supply Chain Planning User’s Guide. 2. If the assembly is under lot control, select a Lot Number. Lot numbers are automatically assigned based on how the Default Lot Number Type parameter is set, either by job name or based on Inventory lot number rules, but can be overwritten or deleted. See: Discrete Parameters: page 2 – 10. When you complete or return assemblies using the Completion Transactions window, job lot numbers entered here are automatically defaulted but can be changed. Job lot numbers must be entered here before you can move and complete or move and return lot controlled assemblies using the Move Transactions window. 3. Enter the job Description. Discrete Manufacturing 3 – 19 Descriptions can be used to identify jobs on standard reports. They can be up to 240 characters of alpha numeric text. They are optional. " To define schedule group and project information: 1. Select the Schedule Group. You can optionally assign discrete jobs to any active schedule group. See: Defining Schedule Groups: page 2 – 32 2. Enter the Build Sequence identifier. See: Build Sequencing: page 3 – 11. Enter the build sequence identifier. The combination of schedule group and build sequence must be unique for each job. 3. Select a production Line. You can select any active production line. Discrete job production lines are informational only; they cannot be used for scheduling or transactional purposes. 4. Select a Project and, if required, a task. You can only select a project if the current organization’s Project References Enabled parameter is set in Oracle Inventory. You must select a task if the Project Control Level parameter is set to Task and you have entered a project. See: Organization Parameters Window, Oracle Inventory User’s Guide and Defining Project Information, Oracle Inventory User’s Guide. 5. ☞ " See: Updating Discrete Jobs: page 3 – 36. To view pending job information: H 3 – 20 Attention: If you are defining a discrete job, you must save the job before viewing component requirements and operations for that job. To change a saved job: H " Save your work. You can determine if there are any pending transactions or documents for a job using the Transaction Summary window. See: Viewing Pending Job Transactions: page 3 – 33. Oracle Work in Process User’s Guide " To view operations: H " Choose the Operations button. The Operation window appears and the job’s operations are displayed. You can optionally view the components required at a selected operation using the Components button. See: Viewing Job and Schedule Operations: page 8 – 21. To view component requirements: H Choose the Components button. The Material Requirements window appears and the job’s components are displayed. See: Viewing Component Requirements: page 7 – 15 and Viewing Component ATP Information: page 7 – 17. ☞ Attention: When no routing exists, all components default to operation sequence of 1. " To link an ATO sales order to a standard discrete job: H See: Linking ATO Sales Orders and Discrete Jobs: page 3 – 21. See Also Setting up Discrete Manufacturing: page 3 – 5 Updating Discrete Jobs: page 3 – 36 Discrete Job Status Control: page 10 – 4 Discrete Job Statuses: page 10 – 7 Discrete Scheduling: page 12 – 5 Attaching Files to Jobs, Schedules, and Operations: page E – 2 Linking ATO Sales Orders and Discrete Jobs You can link a standard discrete job for an ATO item and an ATO sales order. You can link a single sales order line with many jobs or link multiple jobs to a single sales order line. You can also enter the demand class for the job to help you track production by sales channel. When you are building final assembly orders, the demand class is automatically loaded based on the customer. You can enter any valid demand class. Discrete Manufacturing 3 – 21 Rules for Linking The following rules are applied when linking sales orders and jobs: • the assembly item cannot be a Pick–to–order item • the sales order line item must be demanded, but not yet shipped • the assembly item must be an ATO item, not a model or an option Prerequisites ❑ Define at least one standard discrete job. See: Defining Discrete Jobs Manually: page 3 – 12. " To choose a sales order assembly: 1. Navigate to the Discrete Jobs window. 2. Enter the Job name. ☞ 3. " Attention: Once you chose a job or assign an assembly to a job, you can only select sales order lines that are for that assembly. Choose the Sales Orders button. The Sales Order window appears. To link a discrete job with an ATO sales order: 1. Select a Sales Order that has a line defined for the job’s ATO item and demand class. You can select multiple sales orders as long as the total quantity allocated does not exceed the job quantity. 3 – 22 Oracle Work in Process User’s Guide ☞ 2. Attention: You can attach a sales order to a job before entering an assembly, start quantity, or demand class for a job. Work in Process defaults the assembly, start quantity, or demand class based upon the sales order you specify. Enter the sales order Line. If you enter a line that also specifies a shipment number, the sales order shipment number is entered in the Ship Number field. You can specify a sales order line that does not include a sales order shipment number. 3. Enter the Quantity Allocated. This is the quantity of the sales order, line number, and shipment number combination that the discrete job fulfills. 4. " Save your work. To view an ATO sales order linked with a discrete job: 1. Navigate to the Discrete Jobs window. 2. Choose Find from the Query Menu. See: Finding Discrete Jobs: page 3 – 25. See Also Overview of Configure to Order, Oracle Bills of Material User’s Guide Discrete Manufacturing 3 – 23 Project Jobs Jobs with project or project and task references are known as project jobs. You can add project references to both standard and non–standard discrete jobs. Project jobs make it possible to track the material and manufacturing costs that are specific to a project. You can issue project or common inventory to project jobs. You can also charge resources and overhead to project jobs. Like other discrete jobs, project jobs can created in several ways: • manually defined in the Discrete Jobs window • planned in Oracle Master Scheduling/MRP and Oracle Supply Chain Planning then implemented using the Planner Workbench ☞ Attention: You can add project references to discrete jobs only f the Project References Enabled organization parameter in Oracle Inventory is set. You must also specify a task if the Project Control Level organization parameter is set to Task and the job has a project. See: Organization Parameters Window, Oracle Inventory User’s Guide and Defining Project Information, Oracle Inventory User’s Guide. See Also Assigning Project Parameters, Oracle Project Manufacturing User’s Guide 3 – 24 Oracle Work in Process User’s Guide Building Discrete Jobs Steps involved in building discrete jobs include: • Releasing jobs to production. See: Releasing Discrete Jobs: page 3 – 28. • Issuing components to jobs and, if necessary, returning them back to inventory. See: Issuing and Returning Specific Components: page 7 – 26 and Issuing and Returning All Push Components: page 7 – 30. • Using Shop Floor Control to coordinate, on an as required basis, the following: – Moving assemblies between routing operations and intraoperation step. See: Performing Move Transactions: page 8 – 35. – Scrapping assemblies. See: Scrapping Assemblies: page 8 – 56. – Backflushing or issuing and returning operation pull and assembly pull components automatically with move transactions – Charging resources. See: Charging Resources with Move Transactions: page 9 – 25 and Charging Resources Manually: page 9 – 22. • Changing jobs to accommodate changes in production. See: Changing Discrete Jobs: page 3 – 36 and Mass Changing Discrete Job Statuses: page 3 – 40. See Also Overview of Material Control: page 7 – 2 Overview of Shop Floor Control: page 8 – 2 Finding Discrete Jobs You can find then view, release, change, reschedule, or close discrete jobs. You can also query to find jobs to purge. Discrete Manufacturing 3 – 25 " To find one or several discrete jobs to view, release, change, reschedule, or close: 1. When the Find Discrete Jobs window appears, enter your search criteria. You can query by Job name, job Type (standard or non–standard), Assembly, Schedule Group, a range of Build Sequences, accounting Class, a range of Start Dates, a range of Completion Dates, Sales Order, Project Number, Task Number, or job Status. You can combine or omit criteria as required. Caution: Querying to find jobs does not validate the records returned. For example, querying to find a range of jobs to close does not return only those jobs in that range that can be closed. 2. " To find one or several discrete jobs to include in your purge: 1. 3 – 26 Choose the Find button. When the Find Discrete Jobs window appears, enter your general search criteria. Oracle Work in Process User’s Guide You can by query by Job name, job Type (standard or non–standard), Assembly, Schedule Group, a range of Build Sequences, accounting Class, a range of Start Dates, a range of Completion Dates, Sales Order, Project Number, or Task Number. 2. Select an accounting Period or enter a Cutoff Date for the purge. You can query by closed accounting Period. When you select an accounting period, the end date of that period is defaulted as the purge Cutoff date and cannot be overridden. If you do not select an accounting Period, the cutoff date of the most recently closed accounting period is defaulted. You can override this date with any date in a closed period. ☞ 3. Attention: Only jobs with close dates before or on the purge cutoff date are purged. Choose whether to Include Configurations for jobs that have ATO configurations. If you do not choose to include jobs that have ATO configurations in your query, no jobs that include ATO configurations are returned when you choose Find. If you do include configurations, you still have access to lot and serial information using the Job Lot Compositions window or the Lot Transactions and Transaction Serial Numbers windows in Oracle Inventory. See: Viewing Material Transactions, Oracle Inventory User’s Guide. Discrete Manufacturing 3 – 27 ☞ Attention: If Oracle Bills of Materials purges the configured item that you build in Work in Process, then Oracle Bills of Material replaces the configured item on the job with the model the configuration was based on. You do not want to include configurations if you need this information for customer support. For example, if a customer complains that you did not build the configuration he ordered. See Also Searching for Information, Oracle Applications User’s Guide Releasing Discrete Jobs You must release a job to production before transacting against it. Releasing a discrete job with a routing automatically loads the job quantity into the Queue intraoperation step of the first operation. If PO Move or PO Receipt resource requirements exist at the first operation, purchase requisitions for these resources are automatically generated. " To release a single job: 1. Navigate to the Discrete Jobs window. 2. Find a job. See: Finding Discrete Jobs: page 3 – 25. 3. Change the selected job’s status to Released. See: Discrete Job Statuses: page 10 – 7 ☞ 4. " Attention: You can release discrete jobs in either the Discrete Jobs Summary window or the Discrete Jobs window. See: Combination Block, Oracle Applications User’s Guide and Navigating Within a Combination Block, Oracle Applications User’s Guide. Save your work To release several discrete jobs: H See: Mass Changing Discrete Job Statuses: page 3 – 40. See Also Job and Repetitive Schedule Status Changes: page 10 – 15 Discrete Job Status Control: page 10 – 4 3 – 28 Oracle Work in Process User’s Guide Printing Reports for Current Discrete Jobs If you are in the Discrete Jobs, Close Discrete Jobs, Purge Discrete Jobs, or View Discrete Jobs window, you can print selected reports for the ’active’ or current job. See: Current Record Indicator, Oracle Applications User’s Guide. You can print any one of the following reports: • Discrete Job Routing Sheet: page 14 – 17 • Discrete Job Pick List Report: page 14 – 15 • Discrete Job Shortage Report: page 14 – 19 " To print a report for the current discrete job: 1. From the Discrete Jobs, Close Discrete Jobs, or View Discrete Jobs window choose Print Reports from the Special Menu. See: Special Menu: page G – 2. The Print window appears. 2. Select the name of the report and choose OK When you choose OK, a concurrent request to print the report is submitted. You can view the status of concurrent requests. See: Using the Concurrent Requests Window, Oracle Applications Users Guide. Discrete Manufacturing 3 – 29 See Also Submitting a Request, Oracle Applications User’s Guide 3 – 30 Oracle Work in Process User’s Guide Viewing Discrete Jobs To view discrete job information see: • Viewing Discrete Job Information: page 3 – 31 • Viewing Material Requirements: page 7 – 13, Viewing Component Requirements: page 7 – 15, and Viewing Component ATP Information: page 7 – 17 • Viewing Operations: page 8 – 19 and Viewing Job and Schedule Operations: page 8 – 21 • Viewing Resource Requirements: page 9 – 16 • Viewing Job Lot Composition: page 7 – 62 You can also print a variety of discrete job reports. Viewing Discrete Job Information You can view information for discrete jobs of any status, including jobs that are closed, cancelled or on hold. You can also view operation, material requirement, and resource requirement information associated with discrete jobs. You can view all information for one job in the View Discrete Jobs window or partial information for several jobs using the Discrete Jobs Summary folder window. See: Combination Block, Oracle Applications User’s Guide and Customizing the Presentation of Data in a Folder, Oracle Applications User’s Guide. " To view discrete job information: H Navigate to View Discrete Jobs window. When the Find Discrete Jobs window appears, enter your search criteria. See: Finding Discrete Jobs: page 3 – 25. Jobs are automatically displayed in the View Discrete Jobs Summary folder window. The information you can view in summary window, depends on how your discrete job folder is defined. Using the Summary/Detail option from the Go Menu, you can switch to the View Discrete Jobs window to view all information for a selected job. You can optionally navigate to the View Discrete Jobs window by choosing the Open button from the View Discrete Jobs Summary window. See: Navigating Within a Combination Block, Oracle Applications User’s Guide. Discrete Manufacturing 3 – 31 " To print reports for a job: H " To view operations: H " From either the View Discrete Jobs or View Discrete Jobs Summary windows choose the Operations button. The Operation window appears and displaying the job’s operations. You can optionally view the components required at a selected operation using the Components button. See: Viewing Job and Schedule Operations: page 8 – 21. To view component requirements: H ☞ 3 – 32 You can print reports for the ’active’ or current job. See: Printing Reports for Current Discrete Jobs: page 3 – 29. From either the View Discrete Jobs or View Discrete Jobs Summary windows, choose the Components button. The Material Requirements window appears and the job’s components are displayed. See: Viewing Component Requirements: page 7 – 15 and Viewing Component ATP Information: page 7 – 17. Attention: When no routing exists, all components default to operation sequence of 1. Oracle Work in Process User’s Guide " To view sales orders that are linked to a standard discrete job: H " From either the View Discrete Jobs window, choose the Sales Order button. See: Linking ATO Sales Orders and Discrete Jobs: page 3 – 21. To view pending job information: H You can determine if there are any pending transactions or documents for a job using the Transaction Summary window. See: Viewing Pending Job Transactions: page 3 – 33. Viewing Pending Job Transactions You can use the Transaction Summary window to determine if there are pending transactions or unprocessed documents associated with a job. You cannot purge or close jobs if pending transactions or unprocessed documents exist. In some instances, you also cannot change a job from one status to another. For example, you cannot change jobs from a Released to an Unreleased status if pending information exists. " To view pending transactions and conditions for a job: 1. Select a queried job in the Discrete Jobs, View Discrete Jobs, Close Discrete, or Purge Discrete Jobs window. See: Finding Discrete Jobs: page 3 – 25. 2. Choose Transaction Summary from the Special Menu to invoke the Transaction Summary window. See: Special Menu: page G – 2. Discrete Manufacturing 3 – 33 If a restriction exists, the check boxes indicating the type of restrictions is marked. An explanation of each restrictive condition follows: Material Transactions: Components have been issued to the job and there are records in the WIP_REQUIREMENTS_OPERATIONS table. You can view information about issues material in the Material Requirements. See: Viewing Material Requirements: page 7 – 13 and Viewing Component Requirements: page 7 – 15. Uncosted Material Transactions: There are uncosted transaction records in the MTL_MATERIAL_TRANSACTIONS table. You can check to see if transactions are uncosted, the costed indicator is off, using the Material Transactions window. See: Viewing Material Transactions, Oracle Inventory User’s Guide and Oracle Inventory Technical Reference Manual, Release 11. Pending Material Transactions: There are unprocessed material transaction records in the MTL_MATERIAL_TRANSACTIONS_TEMP table. You can view, update, and resubmit these records in the Pending Transactions window in Oracle Inventory. See: Viewing Pending Transactions, Oracle Inventory User’s Guide and Oracle Inventory Technical Reference Manual, Release 11. Resource Transactions: Resources have been charged and there are records in the WIP_OPERATIONS_RESOURCES table. Pending Resource Transactions: There are pending resource and overhead transaction records in the WIP_COST_TXN_INTERFACE table. You can view and resubmit these records using the Pending 3 – 34 Oracle Work in Process User’s Guide Resource Transactions window. See: Processing Pending Resource Transactions: page 9 – 30 and Oracle Work in Process Technical Reference Manual, Release 11. Pending Move Transactions: There are pending move transaction records in the WIP_MOVE_TXN_INTERFACE table. You can view and resubmit these records using the Pending Move Transactions window. See: Processing Pending Move Transactions: page 8 – 59 and Oracle Work in Process Technical Reference Manual, Release 11. PO Requisitions: There are purchase requisitions in the PO_REQUISITION_LINES table. See: Reviewing Requisition, Oracle Purchasing User’s Guide and Oracle Purchasing Technical Reference Manual, Release 11. Pending PO Requisitions: There are unprocessed records in the PO_REQUISITION_ INTERFACE table. See: Requisition Import Process, Oracle Purchasing User’s Guide and Oracle Purchasing Technical Reference Manual, Release 11. See Also Changing Discrete Jobs: page 3 – 36 Closing Discrete Jobs: page 3 – 51 Purging Discrete Jobs: page 3 – 57 Viewing Discrete Job Information: page 3 – 31 Discrete Manufacturing 3 – 35 Updating Discrete Jobs You can make the following changes to your discrete jobs: • Change the name of existing jobs in the Discrete Jobs window, but only if the WIP:Job Name Updatable is set. See: Profile Options: page 2 – 41. • Change dates, quantities, bills, statuses, and routings. See: Changing Discrete Jobs: page 3 – 36, Rescheduling Discrete Jobs: page 3 – 38, and Mass Changing Discrete Job Statuses: page 3 – 40. • Add, update, and delete operations. See: Adding and Updating Operations: page 8 – 11, Deleting Operations: page 8 – 16, and Midpoint Rescheduling: page 8 – 17. • Add, update, and delete material requirements. See: Adding and Updating Material Requirements: page 7 – 9 and Deleting Material Requirements: page 7 – 12. • Add, change, and delete resource requirements. See: Adding and Updating Resource Requirements: page 9 – 10 and Deleting Resource Requirements: page 9 – 15. • Implement engineering change orders in Oracle Engineering. See: Implementation of ECOs on Discrete Jobs and Repetitive Schedules, Oracle Engineering User’s Guide and ECO Implementation By Status: page 10 – 19. • Add, change, and delete WIP Attachments. See: Attaching Files to Jobs, Schedules, and Operations: page E – 2. See Also Discrete Job Status Control: page 10 – 4 Job and Repetitive Schedule Status Changes: page 10 – 15 Changing Discrete Jobs You can change discrete jobs using the Discrete Jobs and Discrete Jobs Summary windows. The status of the job determines if and what information can be changed. See: Discrete Job Status Control: page 10 – 4. 3 – 36 Oracle Work in Process User’s Guide Quantities You can increase or decrease the job quantity with no restrictions if the job is unreleased. If the job is released and work has begun on the assembly, you cannot decrease the job quantity lower than the number of assemblies that have already passed the Queue intraoperation step of the first operation. If a sales order is linked to the job, you cannot decrease the job quantity lower than the order quantity. The material requirements and job dates are automatically adjusted based upon the quantity change. If the job’s assembly is an MPS–planned item, the update process automatically adjusts the MPS relief quantity. Dates You can reschedule standard and non–standard jobs to respond to changes in plans or unexpected downtime by changing their start and/or completion dates and times. Jobs might require rescheduling when capacity or material schedules change, or when standards change. See: Rescheduling Discrete Jobs: page 3 – 38. Statuses You can change the status of a discrete job although some changes from one status to another are disallowed and others are conditional. See: Job and Repetitive Schedule Status Changes: page 10 – 15. Prerequisites ❑ Define at least one standard or non–standard discrete job. See: Defining Discrete Jobs Manually: page 3 – 12. " To change discrete jobs: 1. Navigate to the Discrete Jobs window. 2. Choose Find from the Query Menu. See: Finding Discrete Jobs: page 3 – 25. 3. Change jobs in either the Discrete Jobs or Discrete Jobs Summary folder window. From the Discrete Jobs Summary window, you can choose the Open button to navigate to the Discrete Jobs window. See: Combination Block, Oracle Applications User’s Guide and Navigating Within a Combination Block, Oracle Applications User’s Guide. Discrete Manufacturing 3 – 37 " To view pending job information: H You can use the Transaction Summary window to determine if pending transactions or conditions exist for a job. Some status changes are disallowed when pending information exists. See: Viewing Pending Job Transactions: page 3 – 33. See Also Defining Discrete Jobs Manually: page 3 – 12 Mass Changing Discrete Job Statuses: page 3 – 40 Rescheduling Discrete Jobs: page 3 – 38 Attaching Files to Jobs, Schedules, and Operations: page E – 2 Rescheduling Discrete Jobs You can reschedule standard and non–standard discrete jobs with and without routings. You can enter job start and completion dates earlier than the current date to maintain relative date priorities for department schedules and material requirements. You can also reschedule discrete jobs by rescheduling their operations. See: Adding and Updating Operations: page 8 – 11 and Midpoint Rescheduling: page 8 – 17. If you change a job quantity, the system automatically prompts you to reschedule the job. Prerequisites ❑ Define at least one discrete job with a status of Released or Complete. See: Defining Discrete Jobs Manually: page 3 – 12. " 3 – 38 To reschedule a standard job with a routing or a non–standard job with a routing reference: 1. Navigate to the Discrete Jobs window. See: Combination Block, Oracle Applications User’s Guide and Navigating Within a Combination Block, Oracle Applications User’s Guide. 2. Enter the Name of the job. 3. In the Dates region, enter either the Start or Completion date and time. Oracle Work in Process User’s Guide For standard jobs, if you enter a start date and time, the completion date and time are automatically forward scheduled based on the assembly’s routing. Similarly, if you enter a completion date and time, the start date and time are automatically backward scheduled based on the assembly’s routing. You can enter a past due start date to forward schedule a job that should have started before the current date. You cannot enter a start date and time greater than the completion date and time. For non–standard jobs, the same forward and backward scheduling logic is applied. However, for non–standard jobs, scheduling is based on the routing reference not the assembly’s routing. Note: If your job is non–standard and has a routing reference that has no routing, the fixed and variable lead times of the routing reference are used to calculate the start or completion date and time. 4. " Save your work. To reschedule a standard job without a routing or a non–standard job without a routing reference: 1. Navigate to the Discrete Jobs window. 2. Select the Job. 3. In the Dates region, enter either the Start or Completion date and time or enter both the Start or Completion date and time. For standard jobs without routings, you can enter either the start date and time or the completion date and time. If you enter a start date and time, the lead time for the job is calculated by adding the job assembly’s fixed and variable lead times and multiplying this sum by the job quantity. The completion date and time are then automatically forward scheduled using this lead time. Similarly, if you enter a completion date and time, the start date and time are automatically backward scheduled using this lead time. Standard jobs can also be manually scheduled by entering both the start and the completion date and time. For non–standard job without routing references, both the start and the completion dates and times must be entered. 4. Save your work. Discrete Manufacturing 3 – 39 " To reschedule a discrete job with a routing after changing a start quantity: 1. After changing your start quantity and saving your work, the Schedule Discrete Job window appears. Select a scheduling method: Forwards from start date: The completion date is cleared and the job is forward scheduled using the start date and time. Backwards from completion date: The start date is cleared and the job is backward scheduled using the completion date and time. Manual: For jobs without routings and operations, you have the option to reschedule by accepting the current job start and completion dates. 2. Choose OK to save your work. See Also Defining Discrete Jobs Manually: page 3 – 12 Changing Discrete Jobs: page 3 – 36 Detailed Scheduling: page 12 – 7 Discrete Rescheduling: page 12 – 11 Mass Changing Discrete Job Statuses You can change the statuses of discrete jobs ’en masse’ using the Change Status option from the Special Menu. This mass change capability can 3 – 40 Oracle Work in Process User’s Guide be used for a variety of purposes such as releasing jobs to production and putting jobs on hold. " To change the status of several discrete jobs: 1. Navigate to the Discrete Jobs window 2. Choose Find from the Query menu. See: Finding Discrete Jobs: page 3 – 25. The Discrete Jobs Summary window appears with the results of the query. 3. In the Discrete Jobs Summary window, select and deselect jobs as required. See: Selecting Multiple Records, Oracle Applications User’s Guide. 4. Choose Change Status from the Special Menu. See: Special Menu: page G – 2. The Change Status window appears. 5. Choose a status. See: Discrete Jobs Statuses: page 10 – 7 and Job and Repetitive Schedule Status Changes: page 10 – 15. 6. Choose OK. 7. Save your work. Discrete Manufacturing 3 – 41 " To view pending job information: H You can use the Transaction Summary window to determine if pending transactions or conditions exist for a job. Some status changes are disallowed when pending information exists. See: Viewing Pending Job Transactions: page 3 – 33. See Also Changing Discrete Jobs: page 3 – 36 Discrete Job Status Control: page 10 – 4 3 – 42 Oracle Work in Process User’s Guide Simulating and Saving Simulated Jobs You can simulate a standard job to determine what materials, operations, and operation resources are required to support that job. You can specifically do all of the following: • vary the job quantity and/or start and completion dates to determine scheduling and requirement constraints • view both on–hand and available to promise quantities for simulated component requirements • vary the bills of material and/or routings and their associated revisions and revision dates When you are satisfied with the simulated job, you can convert it into an actual job and save it. " To simulate a discrete job: 1. Navigate to the Simulate Discrete Jobs window. 2. Select the simulation Assembly. You can only simulate standard discrete jobs with assemblies, although routings are not required. If you set the WIP:See Engineering Items profile option to Yes, you can also simulate jobs for engineering items. You cannot select an assembly that has a primary routing that is flow related. If you do, a warning is displayed and you are prompted to enter another routing designator. See: Creating a Flow Routing, Oracle Bills of Material User’s Guide. 3. Enter the job Quantity. Discrete Manufacturing 3 – 43 4. Enter either a job Start Date and time or a Completion Date and time. You can enter start dates and times earlier than the current date to maintain relative date priorities for department schedules and material requirements 5. Optionally, select an Alternate bill of material. See: Primary and Alternate Bills of Material, Oracle Bills of Material User’s Guide. You can select an alternate bill if alternates have been defined for the assembly you are building. This bill of material is used instead of the assembly’s standard bill of material. 6. Select the bill Revision and Revision Date and time. The bill revision and date determines which version of the bill of material is used to create job component requirements. The start date of a standard discrete job can be used to default the bill revision and revision date. If a start date is not selected, the revision and revision date are derived based on fixed and variable lead times of the assembly. See: Item and Routing Revisions, Oracle Bills of Material User’s Guide. You can explode item revisions that have ECOs with Release, Schedule, and Implement statuses against them. If you set the WIP:Exclude Open ECOs profile option to No, you can also explode revisions for ECOs that have an Open status. See: ECO Implementation By Status: page 10 – 19. 7. Optionally, select an Alternate routing. See: Overview of Routings, Oracle Bills of Material User’s Guide. You can select an alternate routing if alternates have been defined for the assembly you are building. This routing is used instead of the assembly’s standard routing. If the WIP:See Engineering Items profile option is set to Yes, you can select engineering routings as alternates. See: Profile Options: page 2 – 41 and Primary and Alternate Routings, Oracle Bills of Material User’s Guide. 8. If the assembly has a routing, select the routing Revision and Revision Date and time. See: Item and Routing Revisions, Oracle Bills of Material User’s Guide. The start date of a standard discrete job can be used to derive the routing revision and revision date. If a start date is not selected, the revision and revision date are derived based on fixed and variable lead times of the assembly. 3 – 44 Oracle Work in Process User’s Guide " To save a simulated job: 1. Choose Save Simulated Job from the Special Menu. The Save Simulated Jobs window appears. See: Special Menu: page G – 2. 2. Enter the Job Name. If a prefix has been entered for the WIP:Discrete Job Prefix profile option, the automatic sequence generator generates a default job name. This name can be overwritten. See: Profile Options: page 2 – 41. The following fields are defaulted as follows: Class: If a default accounting class can be found, it is used. If one cannot be found, you must assign an accounting class to the job in the Discrete Jobs window. See: WIP Accounting Class Defaults: page 2 – 10 and Discrete Accounting Classes: page 2 – 22. Status: The status defaults to Unreleased. See: Discrete Job Statuses: page 10 – 7. Note: The above defaults can be changed using the Discrete Jobs window. See: Defining Discrete Jobs Manually: page 3 – 13 3. Enter a job Description. Descriptions can be used to identify jobs on standard reports. They can be up to 240 characters of alpha numeric text. They are optional. 4. Optionally, enter the a descriptive flex value for the job. See: Setting Up Descriptive Flexfields: page 13 – 4. 5. Save your work by choosing OK. Discrete Manufacturing 3 – 45 Note: Values for the following fields are derived or defaulted but can be changed using the Discrete Jobs window. See: Defining Discrete Jobs Manually: page 3 – 13 MRP Net Quantity: Derived from the job start quantity. Supply Type: Defaults to Based on Bill. See: Supply Types: page C – 2. Firm Planned option: Defaults to off (not automatically firmed). Completion Subinventory and Locator: For jobs with routings, defaults from the routing. Lot Number: For lot controlled job assemblies, defaults based on how the WIP Default Lot Number Type parameter is set. See: Backflush Default Parameters: page 2 – 15. You can also use the Discrete Jobs window to enter values for optional fields: Demand Class, Project, Task, Schedule Group, Build Sequence, and Production Line. " To view simulated job operations: H " 3 – 46 Choose the Operations button. The Operation window appears displaying the job’s operations. You can optionally view the components required at a selected operation using the Components button. See: Viewing Job and Schedule Operations: page 8 – 21. To view simulated component requirements: H Choose the Components button. The Material Requirements window appears and the job’s components are displayed. See: Viewing Component Requirements: page 7 – 15 and Viewing Component ATP Information: page 7 – 17. ☞ Attention: When no routing exists, all components default to operation sequence of 1. Oracle Work in Process User’s Guide Completing Discrete Jobs You can complete job assemblies into inventory using the Completion Transactions and Move Transactions windows. You can also return completed assemblies back to jobs using these windows. Quantities remaining and completed are automatically updated when you complete or return assemblies. Note: You can also complete WIP assemblies using the Inventory Transaction Interface and the Open Move Transaction Interface. Over–completions and Over–returns You can complete a quantity of assemblies greater than the job start quantity with a completion transaction if the assembly does not have a routing. This feature is useful if your production process yields a few more assemblies than planned. If your job has a routing, you must first increase the job quantity by the over–completion quantity. If you are completing the additional assemblies with a completion transaction, you must move these assemblies from the Queue intraoperation step of the first operation sequence to the To move intraoperation step of the last operation sequence. If you are completing the additional assemblies with a move transaction, you can optionally move them to any operation sequence and intraoperation step except the To move intraoperation step of the last operation sequence. You can now complete the ’over–completion’ quantity. You can return more assemblies than you completed to a job if the job does not have a routing. You can over–return to jobs with routings only if you increase job quantities. Completion Subinventory and Locator You can specify any completion subinventory and, if required, locator when you complete or return assemblies with a completion transaction. If you complete or return assemblies using move transactions, the subinventory and locator that you assigned (if any) to the job is used. You can complete or return partial job or schedule quantities to different subinventories and locators. The status of a discrete job is automatically updated to complete when your cumulative quantity completed equals the job quantity. Discrete Manufacturing 3 – 47 Backflushing When you complete assemblies, all components with the supply type of Assembly pull are automatically backflushed. When components for assemblies under lot control, serial number control, or lot and serial control are backflushed upon assembly completion, you must assign lot and/or serial numbers to the components. Shop Floor Statuses You cannot complete assemblies from a job if a shop floor status that prevents shop floor moves has been assigned the To move intraoperation step of the last operation. In this case, you must assign a status that allows shop floor moves in order to complete the assemblies. Non–Standard Job Completions You must have an assembly and job quantity to complete a non–standard discrete job. For some non–standard jobs, such as those used for disassembly or equipment maintenance, there is no need to complete assemblies. Final Assembly Order Completions When you complete assemblies from final assembly orders using a completion transaction, reservations are automatically transferred from the job to the subinventory and locator based on sales order line delivery due dates. You may override the automatic transfer. When returning completed assemblies back to a final assembly order, you must enter the sales order line and delivery information so that the system knows which reservations to transfer from inventory to WIP. Costing Under standard costing, assemblies are received into inventory at standard cost and the job is relieved of costs at standard. Under average costing, assemblies are received and the job relieved of costs at average. See Also Assembly Completions and Returns: page 7 – 53 Performing Move Completion/Return Transactions: page 8 – 46 Assembly Over–completions and Over–returns: page 7 – 55 Completing and Returning Assemblies: page 7 – 58 3 – 48 Oracle Work in Process User’s Guide Work in Process Costs: page 11 – 6 WIP Valuation: page 11 – 8 Discrete Manufacturing 3 – 49 Discrete Job Close You can close discrete jobs using Close Discrete Jobs (Form) and Close Discrete Jobs (SRS). You can use Close Discrete Jobs (Form) to do the following: • submit and immediately process job close requests • unclose discrete jobs • check and resubmit failed job close requests • view discrete jobs before closing them You can use Close Discrete Jobs (SRS) to do the following: • specify when to submit the close request (concurrent or scheduled processing) • choose when, and if, to resubmit a request Prior to closing discrete jobs, you can review job value information using the Discrete Job Value Report, which lists standard and non–standard asset jobs, or the Expense Job Value Report, which lists non–standard expense jobs. See: Discrete Job Value Report: page 14 – 22 and Expense Job Value Report: page 14 – 29. You can review the concurrent request log file for jobs that fail to close using either Close Discrete Jobs (Form) and Close Discrete Jobs (SRS). Close Costing Closing a job calculates final costs and variances. When you close a job, any remaining costs are automatically removed from the job by creating journal entries and writing the costs to the variance accounts associated with the job. When you close your accounting period, these journal entries are automatically posted to the general ledger. The close discrete jobs process is incompatible with the standard cost update and the period close processes. If you submit a job close request while a period close or standard cost update is running, the concurrent manager does not run the job close process until the period close or standard cost update completes. You can continue to charge material and resource to a job until it is closed or the status of the job is changed to Complete–No charges. Closing a discrete job prevents any further activity on the job. 3 – 50 Oracle Work in Process User’s Guide MPS Relief If you close a job for an MPS–planned item with a quantity complete different from the quantity originally scheduled, the MPS for the actual quantity is automatically updated. See: Schedule Relief, Oracle Master Scheduling/MRP and Oracle Supply Chain Planning User’s Guide. History Information associated with a job is not deleted when the job is closed. You can view information for closed discrete jobs. You also can print reports on closed jobs and closed job values. See: Discrete Job Data Report: page 14 – 9 and Discrete Job Value Report: page 14 – 22. See Also Closing Discrete Jobs: page 3 – 51 Closing Discrete Jobs Using Submit Requests: page 14 – 6 Purging Transaction History, Oracle Inventory User’s Guide Overview of Period Close, Oracle Cost Management User’s Guide Closing Discrete Jobs You can submit requests to close discrete jobs. You can also resubmit failed close requests. You can optionally unclose discrete jobs. ☞ Attention: The option to unclose job is controlled through function security. Only jobs closed in error should be unclosed, and this should be done immediately after the close. If assembly costs are rolled up between the time you close then unclose a job, your costs may be incorrect because the unclose process does not revalue the job. Before closing, unclosing, or resubmitting a job, you can view details (operations, material requirements, and resource requirements) and ATO sales order information for that job. You can also print one or all of the reports in the Discrete Job Packet for the job. See: Current Record Indicator, Oracle Applications User’s Guide and Discrete Shop Packet: page 14 – 26. Close Requirements You cannot close a job that has transactions pending including those that the concurrent manager has not processed. If you attempt to close Discrete Manufacturing 3 – 51 a job which has transactions pending, the close process fails and the job status changes to Failed Close. See: Viewing Pending Job Transactions: page 3 – 33. You also cannot close a job that has one of the following statuses: Pending Bill Load, Pending Routing Load, or Pending Close, or Closed. Unclose Requirements You cannot unclose a job that does not have a status of Closed. You cannot unclose a job that is linked to a sales order. You also cannot unclose a job that was closed in a now closed accounting period. Prerequisites ❑ To Unclose jobs, set the Close Discrete Jobs function security parameter to Y. See: Security Functions: page 2 – 53. " 3 – 52 To find one or more jobs to view or close/unclose: 1. Navigate to the Close Discrete Jobs window. The Find Discrete Jobs window appears. 2. Query to find one or more jobs. See: Finding Discrete Jobs: page 3 – 25. The Close Discrete Jobs Summary window appears with the results of your query. Oracle Work in Process User’s Guide " To close/unclose discrete jobs: 1. From the queried jobs displayed, select which jobs to close or unclose. See: Selecting Multiple Records, Oracle Applications User’s Guide. You can close Unreleased, Released, Complete, Complete–No Charges, and Cancelled jobs. You can only unclose Closed jobs. When you unclose a job, it reverts to its pre–close status. For example, unclosing a job that had a pre–close status of Complete changes its status from Closed back to Complete. See: Discrete Job Statuses: page 10 – 7. 2. Choose Close or Unclose from the Special Menu to submit the request. The system processes (closes or uncloses) only selected jobs with appropriate statuses. When you close jobs, their statuses are changed to Pending Close until the close process completes. When you unclose jobs, their statuses are immediately changed to their pre–close status. Caution: Only the status of a job is changed when it is unclosed. Costing information, historical information, and MPS quantities are not updated. The close process calculates job variances then runs the Discrete Job Value Report. This report lists summary informatin for standard discrete and non–standard asset jobs, but not non–standard expense jobs. ☞ " Attention: The abnormal termination of a close request, either due to a hardware problem or manual termination of a concurrent request, can result in a status of Pending Close. These jobs must be manually resubmitted. To resubmit jobs with a Pending Close status: 1. From the queried jobs displayed, select the jobs to resubmit. You can select and deselect jobs as required. See: Selecting Multiple Records, Oracle Applications User’s Guide. 2. Choose Check Requests from the Special Menu. See: Special Menu: page G – 2. You can use the Check Requests option from the Special Menu to manually resubmit jobs that have failed to close and have a Pending Close status. Resubmitting a job with Check Request does two things; it sets the job’s status back to its original status then Discrete Manufacturing 3 – 53 resubmits it. Resubmitting jobs that have Pending Close statuses because the process has not yet concluded does not interrupt the close process. " To view pending job information: H " To view discrete job information: H " You can use the Transaction Summary window to determine if there are pending transactions or conditions associated with a job. You cannot close jobs if pending transactions or unprocessed documents exist. See: Viewing Pending Job Transactions: page 3 – 33. View jobs in either the Close Discrete Jobs window or the Close Discrete Jobs Summary window. From the Close Discrete Jobs Summary window, you can choose the Open button to navigate to the Close Discrete Jobs window. To view operations for a selected job: H From either the Close Discrete Jobs or Close Discrete Jobs Summary windows choose the Operations button. The Operation window appears and the job’s operations are displayed. You can optionally view the components required at a selected operation using the Components button. See: Viewing Job and Schedule Operations: page 8 – 21. " To view component requirements and their ATP statuses for a selected job: H ☞ " Attention: When no routing exists, all components default to operation sequence of 1. To view sales orders that are linked to a standard discrete job: H 3 – 54 From either the Close Discrete Jobs or Close Discrete Jobs Summary windows choose the Components button. The Material Requirements window appears and the job’s components are displayed. See: Viewing Component Requirements: page 7 – 15 and Viewing Component ATP Information: page 7 – 17. From Close Discrete Jobs Summary window choose the Sales Order button. See: Linking ATO Sales Orders and Discrete Jobs: page 3 – 21. Oracle Work in Process User’s Guide See Also Discrete Job Close: page 3 – 50 Overview of Period Close, Oracle Cost Management User’s Guide Defining Discrete Jobs Manually: page 3 – 12 Discrete Accounting Classes: page 2 – 22 Discrete Manufacturing 3 – 55 Discrete Job Purge You can purge discrete job information using Purge Discrete Jobs (Form) and Purge Discrete Jobs (SRS). You can purge all information associated with discrete jobs including job header records and job detail and transaction information. You can also selectively purge some or all of the following job related information: job details (material requirements, resource requirements, and operations), ATO configurations, move transactions, and resource cost transactions. Selective purging allows you to retain pertinent historical information. For example, you can retain operation information but purge move transactions associated with these operations. Purge Rules A discrete job may not purge if the any of the following information still exists: • material transactions that reference the job You can purge material and completion transaction information in Oracle Inventory. See: Purge Transactions, Oracle Inventory User’s Guide. • purchase transactions, purchase requisitions, or purchase orders that reference the job in Oracle Purchasing • quality results records that reference the job You can delete quality results records in the Oracle Quality. See: Updating and Deleting Quality Results, Oracle Quality User’s Guide. Reporting You can submit a request to print a Purge Report as you purge discrete jobs. When you printed a report as part of the purge process, the output of the report is determined by the defaulted purge parameters used and the level of detail choosen (Full, Summary, or Excepting) in the Purge Options window. The Purge Report can also be submitted independently of the purge process using the Submit Requests window. When submitted independently of the purge process, only the jobs and/or schedules that failed to purge are listed. 3 – 56 Oracle Work in Process User’s Guide See Also Purging Discrete Jobs: page 3 – 57 Purging Jobs and Schedules: page 14 – 40 Specifying Purge Options: page 3 – 59 Purging Discrete Jobs You can use the Purge Discrete Jobs window to purge information associated with discrete jobs that were closed in a now closed accounting period. You can purge all discrete job information or just selected information: details (material requirements, resource requirements, and operations), associated ATO configurations, or associated move and/or resource cost transactions. Before purging a job, you can view detail and ATO sales order information for that job. You can also print one or all of the reports in the Discrete Job Packet for the job. See: and . Prerequisites ❑ You must have at least one closed period for your organization. See: Overview of Period Close, Oracle Cost Management User’s Guide. " To find jobs to purge: 1. Navigate to the Purge Discrete Jobs window. The Find Discrete Jobs window appears. 2. Query to find one or more discrete jobs. See: Finding Discrete Jobs: page 3 – 25. The Purge Discrete Jobs Summary window appears with the results of your query. " To print reports for a selected job: H See: Printing Reports for Current Discrete Jobs: page 3 – 29. Discrete Manufacturing 3 – 57 " To view pending job information: H " You can use the Transaction Summary window to determine if there are pending transactions or conditions associated with a job. You cannot purge jobs if pending transactions or unprocessed documents exist. See: Viewing Pending Job Transactions: page 3 – 33. To view operations and operation requirements for a selected job: H From either the Purge Discrete Jobs or Purge Discrete Jobs Summary window choose the Operations button. The operations, if any, required for the job are displayed. See: Viewing Job and Schedule Operations: page 8 – 21. " To view component requirements for a selected job: H From either the Purge Discrete Jobs or Purge Discrete Jobs Summary window choose the Components button. The component materials, if any, required the job are displayed. See: Viewing Component Requirements: page 7 – 15. ☞ 3 – 58 Attention: When no routing exists, all components default to operation sequence of 1. Oracle Work in Process User’s Guide " To view sales orders that are linked to a standard discrete job: H " From the Purge Discrete Jobs Summary window choose the Sales Order button. See: Linking ATO Sales Orders and Discrete Jobs: page 3 – 21. To select which discrete jobs to purge and/or report: 1. From the jobs displayed, select which to include in the purge. You can select and deselect jobs as required. See: Selecting Multiple Records, Oracle Applications User’s Guide. 2. Choose Purge from the Special Menu. See: Special Menu: page G – 2. The Purge Options window appears. See: Specifying Purge Options: page 3 – 59. See Also Purge Report: page 14 – 45 Transaction Control by Status: page 10 – 18 Changing Discrete Jobs: page 3 – 36 Specifying Purge Options After selecting which jobs/schedules to purge in the Purge Jobs or Purge Repetitive Schedules window, you can choose from the following action type options: Purge and Report Purges the selected jobs/schedules and prints a report. Report Only Prints a report listing the selected jobs/schedules but does not purge them. Purge Only Purges the selected jobs/schedules but does not print a report. If you choose to the print a report, you can choose whether the report is printed in Full, Summary, or Exception format. ☞ Attention: Printing a report before submitting a purge request allows you to view the records you have selected, but does not Discrete Manufacturing 3 – 59 give you any indication of whether the selected jobs/schedules meet the purge conditions. Prerequisites ❑ Select the jobs/schedules to include in your purge. See: Purging Discrete Jobs: page 3 – 57 and Purging Repetitive Schedules: page 6 – 40. " To purge information for the selected jobs or schedules and print a report: 1. From the Purge Options window, choose the Purge and Report action. This is the default option. 2. Choose the level of detail to include in the report. The options are as follows: Full: The report lists all job and/or schedule records selected for the purge, the table and number of rows affected as well as those records that cannot be purged because of purge rule violations. Full is the default option. Summary: The report lists all job and/or schedule records selected for the purge but in a tabular form. The table and row detail is omitted although exception information is included. Exception: The report lists only those job and/or schedule records that cannot be purged because of purge violation rules. Exception information is included. 3. ☞ 3 – 60 Choose OK to submit the purge and print the report. Attention: Once you commit the process, all related information is removed from the database. Oracle Work in Process User’s Guide " To only print a report for the selected jobs or schedules: 1. From the Purge Options window, choose the Report Only action. 2. Choose the level of detail to include in the report. The options are Full, Summary, or Exception (see above). 3. From the Include option group, choose what information to include in the report. The options are as follows: Headers: If you choose to purge Headers, all other options are automatically selected and are, furthermore, required. Purging headers purges all information associated with the selected jobs or repetitive schedules. Details: You can choose to purge job or repetitive schedule details (operations and material and resource requirements). If you choose this option, you can also choose to purge move and resource transactions. Move Transactions: You can choose to purge move transactions. If you choose this option, you can also choose to purge schedule details and resource transactions. Resource Transactions: You can choose to purge resource transactions. If you choose this option, you can also choose to purge schedule details and move transactions. ☞ 4. " " Attention: If you enter a date that is earlier than the repetitive schedule’s complete or cancel date or the discrete job’s close date, the system does not purge any job or schedule information. Choose OK to print the report. To purge without printing a report: 1. From the Purge Options window, choose the Purge Only action. 2. From the Include option group, choose what information to purge. See above. 3. Choose OK to submit the purge and print the report. To view pending job information: H You can determine if there are any pending transactions or conditions for a job using the Transaction Summary window. See: Viewing Pending Job Transactions: page 3 – 33. Discrete Manufacturing 3 – 61 See Also Purge Report: page 14 – 45 Transaction Control by Status: page 10 – 18 Changing Discrete Jobs: page 3 – 36 3 – 62 Oracle Work in Process User’s Guide Processing Pending Jobs and Schedules You can view, update, delete, and resubmit records (rows) that have failed validation and remain in the Open Job and Schedule Interface (WIP_JOB_ SCHEDULE_INTERFACE) table. You can view the error messages associated with failed records. Error messages assist you in updating failed records before resubmission. You cannot insert new job and schedule records into your interface table using this window. Prerequisites ❑ Insert job and schedule data into the Open Job and Schedule Interface table. See: Open Job and Schedule Interface: page 3 – 9. " To find job and schedule interface records: 1. Navigate to the Pending Jobs and Schedules window. The Find Pending Jobs and Schedules window appears. 2. Enter your selection criteria. You can find all records with a specific Group ID. You can also find all records that have a specific Process Phase (Validation, Explosion, Creation, or Complete), Process Status (Pending, Running, Error, or Complete), Source Code, Source Line ID, Load Type (Create Standard job, Create Repetitive Schedule, Update Discrete Job, or Create Non–standard Job), or are for a specific Discrete Manufacturing 3 – 63 Organization. You can also search for a specific Job, Assembly, or Line and Assembly. 3. " Choose the Find button. The Pending Jobs and Schedules window appears with the results of your query. To view job and schedule interface records: For each record, you can view the following information using the Pending Jobs and Schedules window’s alternative regions: Process: Group ID, Phase, Status, Request ID, Source Code, and Source Line (if applicable) Header: Load Type, Organization, Job, Line, Assembly Quantities: Discrete Start and Net Quantities, Repetitive Daily Quantity and processing Days, and Total Quantity (both discrete and repetitive) Discrete: Class, Lot Number, Schedule Group, Build Seq, Project Number and Task More: Status, Firm planned option, Demand Class, Scheduling Method Dates: First Unit Start Date, First Unit Completion Date, Last Unit Start Date, and Last Unit Completion Date Bill: Reference, Alternate, Revision, Revision Date, Supply Type 3 – 64 Oracle Work in Process User’s Guide Routing: Reference, Alternate, Revision, Revision Date, and Completion Subinventory, and Completion Locator Description: Description and Created By " To view error details for failed job and schedule records: 1. In the Pending Jobs and Schedules window, select the failed (Status=Error) record. 2. Choose the Errors button. The Pending Job and Schedule Errors window appears. All errors for the selected record are displayed. The Type indicates whether the failed record produced an Error or a Warning. The Message explains why the transaction failed. Using these messages you can determine what fields need to be updated. " To update job and schedule interface records: 1. Select the record to update. You can only update records with a processing status of Error. You can update all fields except the Group ID, processing Phase, processing Status, Request ID, and Total Quantity. In general, the default values are derived in the same way that they are derived when you manually enter discrete jobs and repetitive schedules in the Discrete Jobs and Repetitive Schedules windows. See: Defining Discrete Jobs Manually: page 3 – 12 and Defining Repetitive Schedules Manually: page 6 – 13. 2. In the Process alternative region, enter the Source Code and Source Line. The Source Code and Source Line identify the source of the interface record. For example, if you load jobs and schedules from different sources, you can use a difference Source Code to identify each. Discrete Manufacturing 3 – 65 3. In the Header alternative region, select the Load Type. The Load Type indicates whether the current interface record is a planned order, update recommendation, or suggested repetitive schedule. Possible values include: 1: Create Standard Discrete Job 2: Create Pending Repetitive Schedule 3: Update Standard or Non–Standard Discrete Job 4: Non–Standard Discrete Job 4. Select the Organization. You can only select enabled organizations. See: Creating an Organization, Oracle Human Resources User’s Guide. 5. Select the Job, Line/Assembly, or Assembly. The assembly is the item you are building. An assembly is optional for non–standard discrete jobs. Select the production Line on which to build the repetitive assembly and the repetitive Assembly to be produced on that line. 6. In the Quantities alternative region, enter the Start Quantity and Net Quantity for discrete jobs or the Daily Quantity and number of Days for repetitive schedules. 7. In the Discrete alternative region, select the class. For records with a Load Type of 4 (Non–Standard Discrete Job), you can select any active Asset Non–standard, Expense Non–standard, or Project accounting class. For records with a Load Type 1 (Create Standard Discrete Job), you can select any active Standard Discrete accounting class. 8. Select the Lot Number. 9. Select the Schedule Group. You can optionally assign discrete jobs to any active schedule group. See: Defining Schedule Groups: page 2 – 32 10. Enter the Build Sequence identifier. See: Build Sequencing: page 3 – 11. The combination of schedule group and build sequence must be unique for each job. 11. Select the Project and, if required, task. 3 – 66 Oracle Work in Process User’s Guide You can only select a project if the current organization’s Project References Enabled parameter is set in Oracle Inventory. You must select a task if the Project Control Level parameter is set to Task and you have entered a project. See: Organization Parameters Window, Oracle Inventory User’s Guide and Defining Project Information, Oracle Inventory User’s Guide. 12. In the More alternative region, select a status for the job or repetitive assembly/line. You can select a status of Unreleased, Released or On Hold for any record. See: Discrete Job Statuses: page 10 – 7 or Repetitive Schedule Statuses: page 10 – 12. 13. Select whether the discrete job or repetitive schedule is Firm. 14. Select the Demand Class. You can select any enabled and active demand class. See: Overview of Demand Classes, Oracle Master Scheduling/MRP and Supply Chain Planning User’s Guide and Creating Demand Classes, Oracle Master Scheduling/MRP and Oracle Supply Chain Planning User’s Guide. 15. For discrete jobs, select the Scheduling Method. You can choose one of the following: Routing: You can schedule discrete jobs using routing lead times, if the Load Type is 1 (Create Standard Discrete Job) or 3 (Update Standard or Non–Standard Discrete Job). Item Lead Time: You can schedule discrete jobs using item lead times, even if the item has a routing, if the Load Type is 1 (Create Standard Discrete Job) or 3 (Update Standard or Non–Standard Discrete Job). Manual: You can manually schedule your discrete jobs by entering start and/or completion dates. 16. In the Dates alternative region, enter a First Unit Start Date (FUSD), First Unit Completion Date, a Last Unit Start Date, or a Last Unit Completion Date (LUCD). If you are using Manual scheduling, enter both a FUSD and a LUCD. 17. In the Bill alternative region, select the bill of material Reference for your non–standard discrete job. Discrete Manufacturing 3 – 67 You can select bill of material reference if the Load Type is 3 (Update Standard or Non–Standard Discrete Job) or 4 (Non–Standard Discrete Job). 18. Select the bill Alternate if creating a discrete job. You can select an alternate bill if alternates have been defined for the assembly. For non–standard jobs, you can enter any alternate defined for the bill Reference specified. 19. Select the bill Revision and bill Revision date. See: Item and Routing Revisions, Oracle Bills of Material User’s Guide. 20. Select the Supply Type. You can select any of the following Supply Types: Push, Assembly Pull, Operation Pull, Bulk, or Supplier. See: Supply Types: page C – 2. 21. In the Routing alternative region, select the routing Reference your non–standard discrete job. Routing references are used to create routings (operations and resource requirements) for non–standard discrete jobs, however, they are not required. 22. Select the routing Alternate if creating a discrete job. You cannot enter a value here unless you have defined alternate routings for the assembly you are building. For non–standard jobs, you can enter any alternate defined for the routing reference you specify. See: Primary and Alternate Routings, Oracle Bills of Material User’s Guide. 23. Select the routing Revision and Revision Date. See: Item and Routing Revisions, Oracle Bills of Material User’s Guide. 24. Select the Completion Subinventory, and if required, locator. You can select a Completion Subinventory if your Load Type is 1 (Create Standard Discrete Job) or if your Load Type is 4 and you have an assembly. 25. In the Description alternative region, enter the Description You can optionally enter a Description that can be used to identify jobs on standard reports. They can be up to 240 characters of alpha numeric text. 26. Enter the Created By identifier. You can update the name of the user that created the transaction is displayed. This field can be updated. 3 – 68 Oracle Work in Process User’s Guide 27. Save your work. " To select and resubmit pending job and schedule records: 1. From the queried records displayed, select which to resubmit. See: Selecting Multiple Records, Oracle Applications User’s Guide. You can only resubmit records with a processing status of Error. If you do not mark a row for resubmission, you can still update it but the WIP Mass Load Program does not process it again when polling the Open Job and Schedule Interface table. 2. Choose the Submit from the Special Menu. Resubmitting records resets their process status flags to 1 (Pending), and nulls their Group ID. The next time the WIP Mass Load Program polls the Open Job and Schedule Interface table, these records are reevaluated. " To delete job and schedule interface records: 1. Select the record to delete. See: Selecting Multiple Records, Oracle Applications User’s Guide. You can only delete records with a processing status of Error. When you delete records, their corresponding error messages are deleted from the Errors table (WIP_INTERFACE_ERRORS). 2. Choose Delete from the Edit menu. See Also Open Job and Schedule Interface: page 3 – 9 Open Job and Schedule Interface, Oracle Manufacturing, Distribution, Sales and Service Open Interfaces Manual, Release 11 Discrete Manufacturing 3 – 69 3 – 70 Oracle Work in Process User’s Guide CHAPTER 4 Non–Standard Discrete Jobs T his chapter explains the differences between non–standard and standard discrete jobs and illustrates how non–standard discrete jobs can be used, including: • Overview: page 4 – 2 • Standard Versus Non–Standard Discrete Jobs: page 4 – 4 • Business Scenarios: page 4 – 7 Non–Standard Discrete Jobs 4–1 Overview Non–standard discrete jobs can be used to control materials and resources and to collect costs for a wide variety of miscellaneous manufacturing activities such as rework, field service repair, upgrade, disassembly, maintenance, and engineering prototypes. Assemblies You can optionally assign an assembly to a non–standard job. For example, if you are using a non–standard job to rework assemblies, you can identify those assemblies on the job. On the other hand, if you are using a non–standard job to track machine maintenance, you do not have to associate the job with an assembly. Quantities You can choose whether to specify a job quantity on a non–standard job. The job quantity enables you to track the assemblies on the shop floor and to plan supplies. You cannot define a job quantity if you have not defined an assembly for the non–standard job. Bills of Material and Routings You can assign bills of material and routings to non–standard discrete jobs, or you can create them manually. You can assign any bill or routing including one that does not match the assembly item of the job. Transactions You can perform move, issue, backflush, resource, scrap, and completion transactions on non–standard discrete jobs with assemblies. For non–standard jobs without assemblies, you can only do issue and resource transactions. Planning Options You can specify how Oracle Master Scheduling/MRP and Oracle Supply Chain Planning plans material requirements and job quantities. For each material requirement on a non–standard job, you can use the MRP Net field to specify whether MRP includes the requirement as a demand. For the assembly, you can specify the MRP net quantity as the number of assemblies you expect the non–standard job to supply on the completion date of the job. 4–2 OracleWork in Process User’s Guide Asset and Expense Accounting Class You can define asset accounting classes for non–standard discrete jobs you want to carry as an asset during the life of the job. Asset classes are costed on a job basis. You can also define expense accounting classes for non–standard jobs you want to expense during each accounting period. Job Close You can manually close non–standard jobs whenever you choose. The system automatically performs an accounting close for non–standard jobs with expense type accounting classes on a periodic basis during the period close process. Job Costs You can charge, value, and report the standard costs of material, material overhead, resources, resource overhead, and outside processing for non–standard discrete jobs. You can charge resource and outside processing at actual cost. Non–standard jobs with expense type accounting classes are not subject to revaluation at cost update. Non–standard jobs do not earn material overhead on Completions. Project Non–Standard Jobs If Project Manufacturing is implemented, you can use project non–standard jobs in the same way that you use common non–standard jobs. See Also Overview of Discrete Manufacturing: page 3 – 2 Discrete Accounting Classes: page 2 – 22 Defining Discrete Jobs Manually: page 3 – 12 Project Jobs: page 3 – 24 Discrete Job Close: page 3 – 50 Overview of Material Control: page 7 – 2 Overview of Shop Floor Control: page 8 – 2 Charging Resources Manually: page 9 – 22 Non–Standard Discrete Jobs 4–3 Standard Versus Non–Standard Discrete Jobs Non–standard jobs are similar to standard jobs, however, there are noteworthy differences including: • Non–standard jobs are more flexible than standard jobs. Because of this they can be used to manage such varying activities as rework, field service repair, upgrades, disassembly, maintenance, engineering prototypes, and other miscellaneous projects. • Oracle Master Scheduling/MRP and Supply Chain Planning does not create planned orders or reschedule recommendations for non–standard jobs. You must manually define and reschedule non–standard jobs. However, if a non–standard job is assigned an assembly bill of material, a routing, or both, Oracle Master Scheduling/MRP and Supply Chain Planning considers the job’s material requirements as demand and its assemblies as supply. Oracle Capacity considers resource load for non–standard jobs. • Oracle Master Scheduling/MRP and Supply Chain Planning does not deduct scrapped assemblies from the MRP net quantity, nor does it gross down the MRP net quantity by the item shrinkage rate for non–standard jobs. As such, you must identify planned assembly shrinkage by entering an MRP net quantity that is less than the job quantity. • Non–standard expense jobs are period costed and are not subject to cost updates, whereas standard discrete and asset type non–standard jobs are costed when closed and are automatically revalued by the cost update. Non–standard discrete jobs do not earn overhead on completion. Instead material overhead at completion is posted directly to the subinventory material overhead account. See: Discrete Job and Repetitive Schedule Costs: page 11 – 6. • Work in Process does not implement engineering change orders (ECOs) on non–standard jobs. See: ECO Implementation by Status: page 10 – 19 • You can use a bill and routing from another assembly. For example, you can set up a standard upgrade routing to use for a group of assemblies. • You can define bill of material loops, that is, you can define the assembly itself as a requirement on its bill. This is useful for upgrade, disassembly, and repair activities. The following table illustrates the differences between non–standard and standard discrete jobs. 4–4 OracleWork in Process User’s Guide Standard Discrete versus Non–Standard Discrete Jobs Standard Discrete Job Non–Standard Discrete Job Name Required Required Type Required Required Description Optional Optional Assembly Required Optional. Enter if you want to perform move and/or completion transactions. Job Class Required Required Status Required Required Quantity Required Required. You can enter 0. Enter a positive number if you want to perform move and/or completion transactions. MRP Net Qty Required. Defaults from Quantity. Required. Defaults from Quantity. If you do not enter an assembly then you cannot enter a value in this field. Start Date Required Required. If a routing exists for the job, then you can enter either a start or a completion date. Otherwise, you must enter both a start and completion date. Completion Date Required Required. If a routing exists for the job, then you can enter either a start or a completion date. Otherwise, you must enter both a start and completion date. Firm Required. Defaults to Yes if item is MPS planned. Otherwise, defaults to No. You cannot enter a value in this field. Defaults to No. Lot Number Optional Optional Table 4 – 1 (Page 1 of 2) Non–Standard Discrete Jobs 4–5 Standard Discrete Job Non–Standard Discrete Job Routing Reference You cannot enter a value in this field. Optional. Enter a value if you want to perform job scheduling based on a routing. Alt. Routing Optional Optional Revision Optional Optional. You must enter a value in this field if you have a routing for the assembly. Revision Date Optional Optional. You must enter a value in this field if you have a routing for the assembly. Completion Sub. Optional Optional Completion Locator Optional Optional Bill Reference You cannot enter a value in this field. Optional. Enter a value if you want to automatically create material requirements based on a bill of materials. Alt. Bill Optional Optional Revision Optional Optional. You must enter a value in this field if you have a bill for the assembly. Revision Date Optional Optional. You must enter a value in this field if you have a bill for the assembly. Supply Type Required. Defaults to Based on bill. Required. Defaults to Based on bill. Table 4 – 1 (Page 2 of 2) See Also Overview of Discrete Manufacturing: page 3 – 2 Overview of Non–Standard Discrete Jobs: page 4 – 2 4–6 OracleWork in Process User’s Guide Business Scenarios Non–standard discrete jobs are very flexible and can be used to control a wide variety of manufacturing activities. The following sections provide various business scenarios that explain how non–standard discrete jobs can be used to manage rework, field service repairs, upgrades, disassembly, maintenance, and engineering prototypes. Rework Assemblies Business Example You are a chair manufacturer that has rejected a lot of 100 completed chairs due to an overly glossy finish. You have decided to rework these chairs on a non–standard discrete job. Assumptions You have 100 rejected chair assemblies in a non–nettable Material Review Board (MRB) subinventory. Since this type of rework occurs frequently, your manufacturing engineers have already defined standard rework operations for stripping, sanding, repainting, and reinspection with appropriate resources. Setup Use the Discrete Jobs window to define a non–standard discrete job for the chair assembly with a job quantity of 100. Since it is highly likely that you will be 100% successful in reworking the chairs, enter 100 in the MRP Net Quantity field. Select an asset type non–standard accounting class since you are building up an asset. Use the Operations window to manually create a routing for the stripping, sanding, repainting, and reinspection operations needed. Use the Material Requirements window to manually create the only component requirement (the chair assembly) at the stripping operation. Enter Push as the supply Type since you will likely push the assembly to the stripping operation, and specify the supply subinventory as the MRB subinventory. Do not check MRP Net if you do not want to create demand for items that are supplied from a non–nettable subinventory. Print the Discrete Job Pick List Report and release the job using the Discrete Jobs window. Non–Standard Discrete Jobs 4–7 Transactions Use the WIP Material Transactions window to issue the chair assembly to the non–standard discrete job. Use the Move Transactions window to move the chairs from operation to operation and to charge resources and overhead. Use the Completion Transactions window to complete the perfectly finished chairs into a nettable finished goods inventory. Costing When all the chairs are completed, the job status changes to Complete. Your cost accountants can run a Discrete Job Value Report to check all the charges. The job must have an ending balance equal to the cost of the resource and overhead charges only. The material charges for the chair assemblies net to a zero balance because the only material on the job was the chair assemblies that you issued to and completed from the job. Ending resource and overhead charge balances are written off as a variance when you close the job. See Also Defining Discrete Jobs Manually: page 3 – 12 Adding and Updating Material Requirements: page 7 – 9 Adding and Updating Operations: page 8 – 11 Issuing and Returning All Push Components: page 7 – 30 Performing Move Transactions: page 8 – 35 Completing and Returning Assemblies: page 7 – 58 Discrete Job Close: page 3 – 50 Field Service Repairs Business Example You are a telecommunications manufacturer that repairs field service returns at one of your manufacturing sites. You have decided to create unique non–standard discrete jobs to manage each return as you repair it. 4–8 OracleWork in Process User’s Guide Assumptions You have one defective telephone returned from a customer on an approved returned material authorization (RMA) and you have placed it in a non–nettable customer returns subinventory. Since returns such as this occur frequently, your manufacturing engineers have defined an alternate routing, named FSRepair. This routing includes several standard repair operations including diagnosis, repair, test, and pack. Additional standard operations are available in case additional repair operations are required. Setup Use the Discrete Jobs window to define a non–standard discrete job for the defective telephone assembly with a job quantity of 1. Enter zero in the MRP Net Quantity field rather than the job quantity since you are not including repair supply in your planning. Select an expense type non–standard accounting class since you are repairing rather than building up WIP assets. Enter the RMA number and customer name in the Description field to simplify tracing the job and the RMA. Enter the telephone and the FSRepair alternate routing into the Routing Reference and Alternate Routing fields respectively to schedule the start and end dates of the job and to create the WIP operations and resources. Use the Material Requirements window to manually create repair component requirements for the telephone. The telephone will likely be a push component at the diagnosis operation. Do not check MRP Net if you do not want to create demand for items that are supplied from a non–nettable subinventory. You can add component requirements during the repair process using the Material Requirements window or by simply issuing more components to the job using the WIP Material Transactions window. Print the Discrete Job Pick List Report and release the job using the Discrete Jobs window. Transactions Use the WIP Material Transactions window to issue the telephone and repair components to the non–standard discrete job. Use the Move Transactions window to move the telephones from operation to operation and to charge resources and overheads. You can also use the Move or Resource Transactions windows to add resources as needed. Use the Completion Transactions window to complete the repaired telephone into a non–nettable inventory for shipment back to the customer. Non–Standard Discrete Jobs 4–9 Costing When the repair is complete, the job status changes to Complete. Your cost accountants can run a Discrete Job Value Report to check all the charges. The job must have an ending balance equal to the cost of repair material, and the resources and overhead charges less the repaired telephone. The balance is written off as a variance when you close the job or at period end when expense type non–standard jobs are automatically expensed. See Also Defining Discrete Jobs Manually: page 3 – 12 Adding and Updating Material Requirements: page 7 – 9 Adding and Updating Operations: page 8 – 11 Charging Resources Manually: page 9 – 22 Issuing and Returning All Push Components: page 7 – 30 Performing Move Transactions: page 8 – 35 Completing and Returning Assemblies: page 7 – 58 Discrete Job Close: page 3 – 50 Upgrade Assemblies Business Example You are a computer manufacturer that wants to upgrade some printed circuit boards from an older revision to the now current revision. You have decided to upgrade these assemblies from revision A to revision C on a non–standard discrete job. Assumptions You have 100 revision A printed circuit board assemblies in a non–nettable spare parts subinventory. From past upgrade efforts, your manufacturing engineers expect 90% success in the upgrade. For this upgrade effort, your manufacturing engineers have defined an alternate bill of material for the revision C of the printed circuit board. This alternate bill, named UpgradeToC, includes all the items that are 4 – 10 OracleWork in Process User’s Guide required for revision C that are not in revision A. In other words, this alternate bill is the upgrade kit. Since upgrades such as this occur frequently, your manufacturing engineers have defined an alternate routing, named Upgrade. This routing includes all the standard printed circuit board upgrade operations including remove, replace, test1, and test2. Setup Use the Discrete Jobs window to define a non–standard discrete job for revision C of the printed circuit board assembly with a job quantity of 100. Since you expect that 90% success when the rework is complete, enter 90 in the MRP Net Quantity field rather than the job quantity. Select an asset type non–standard accounting class since you are building up an asset. Enter the printed circuit board and the Upgrade alternate routing into the Routing Reference and Alternate Routing fields respectively to schedule the start and end dates of the job and to create the WIP operations and resources. Enter the printed circuit board assembly and the UpgradeToC alternate bill in the Bill Reference and Alternate Bill fields respectively in order to get the upgrade kit components onto the non–standard discrete job. Use the Material Requirements window to manually create the component requirement for the printed circuit board. The printed circuit board will likely be a push component at the remove operation. For the printed circuit board, do not check MRP Net since you do not want to create demand for items that are supplied from a non–nettable subinventory. Since the upgrade kit components are supplied from nettable subinventories, check MRP Net for these items. Print the Discrete Job Pick List Report and release the job using the Discrete Jobs window. Transactions Use the WIP Material Transactions window to issue the printed circuit board and upgrade kit components to the non–standard discrete job. Use the Move Transactions window to move the printed circuit boards from operation to operation and to charge resources and overheads. You can also use the Move Transactions window to scrap unfixable printed circuit boards. Use the Completion Transactions window to complete the finished Revision C printed circuit boards into a nettable finished goods inventory. Non–Standard Discrete Jobs 4 – 11 Costing When all the printed circuit boards are completed or scrapped, the job status changes to Complete. Your cost accountants can run a Discrete Job Value Report to check all the charges. The job must have costs incurred equal to the standard cost of the printed circuit board assemblies, plus the cost of the upgrade kit material, plus the standard or actual cost of resources charged, and the standard cost of overhead charged. The costs relieved from the job equal the standard cost of the completed and scrapped printed circuit board assemblies. The balance is written off as a variance when you close the job. See Also Defining Discrete Jobs Manually: page 3 – 12 Adding and Updating Material Requirements: page 7 – 9 Adding and Updating Operations: page 8 – 11 Charging Resources Manually: page 9 – 22 Issuing and Returning All Push Components: page 7 – 30 Performing Move Transactions: page 8 – 35 Completing and Returning Assemblies: page 7 – 58 Discrete Job Close: page 3 – 50 Disassemble Assemblies Business Example You are a custom bicycle manufacturer that has received a cancellation for a custom bike you have recently completed. You have decided to disassemble this bike into its major components so that you can reuse these components on future custom orders. Use a non–standard discrete job to disassemble the bike. Assumptions You have one completed custom bicycle in a nettable finished goods (FGI) subinventory. Your manufacturing engineers have set up a standard operation to disassemble bicycles, called Disassembly, with a single direct charge resource, called Tech1. 4 – 12 OracleWork in Process User’s Guide Setup Use the Discrete Jobs window to define a non–standard discrete job for the bicycle assembly with a job quantity of 1. Since you will not be receiving any finished bicycles as a supply, enter zero in the MRP Net Quantity field rather than the job quantity. Select an expense type non–standard accounting class since you are not building up WIP assets. Use a class with accounts that correspond to the appropriate expense accruals. Use the Operations window to manually create a single operation routing with the Disassembly standard operation as the only operation. Use the Material Requirements window to manually create the component requirements. The first requirement must be the bicycle assembly itself at the Disassembly operation. Enter Push as the supply Type since you will likely push the bicycle assembly to the Disassembly operation and enter the FGI subinventory in the Supply Subinventory field. Check MRP Net since you want to create demand for a bicycle that is supplied from the nettable FGI subinventory. Further, you must create negative component requirements for each of the major components you expect to return to inventory from the bicycle including the frame, seat, handlebars, crank set, wheels, and tires. For these components, check MRP Net so that the MRP planning process sees these negative demands as supply. Print the Discrete Job Pick List Report and release the job using the Discrete Jobs window. Transactions Use the WIP Material Transactions window to issue the bicycle to the non–standard discrete job. Use the Resource Transactions window to charge resource time incurred during the dismantling process. Use the WIP Material Transactions window to return the frame, seat, wheels, and so on to inventory as you dismantle the bicycle. These return transactions fill the negative requirements you created using the Update Requirements window. Do not use the Completion Transactions window since there is nothing to complete. Costing When the disassembly process is over and all the components have been returned to inventory, you must change the job status to Cancelled–no charges. The cost accountants can run a Discrete Job Value Report to check all the charges. Non–Standard Discrete Jobs 4 – 13 The job must have an ending balance equal to the resource and overhead costs incurred during assembly and disassembly and any outside processing costs incurred during assembly. The costs of materials issued and returned must be equal since all the components of the bicycle were returned to inventory. The resource, overhead, and outside processing costs are written off as a variance when you close the job or at period end when expense type non–standard jobs are automatically expensed. See Also Defining Discrete Jobs Manually: page 3 – 12 Adding and Updating Material Requirements: page 7 – 9 Adding and Updating Operations: page 8 – 11 Charging Resources Manually: page 9 – 22 Issuing and Returning All Push Components: page 7 – 30 Performing Move Transactions: page 8 – 35 Completing and Returning Assemblies: page 7 – 58 Discrete Job Close: page 3 – 50 Maintain Plant or Equipment Business Example You are a machine tool manufacturer with large milling machines you carefully maintain. You have decided to manage this maintenance activity using a non–standard discrete job. Assumptions Your manufacturing engineers have already set up a non–stockable item and a primary routing for each of the various types of factory machines. In this case, the mill has a primary routing that includes all the operations and resources required for periodic maintenance. Setup Use the Discrete Jobs window to define a non–standard discrete job with no assembly and with a job quantity of zero. There is no need to enter an assembly since you will not be moving or completing anything. 4 – 14 OracleWork in Process User’s Guide Select an expense type non–standard accounting class for the maintenance activities. Use a class with accounts that correspond to your maintenance expense accruals. Enter the mill routing into the Routing Reference field to create the WIP operations and resources. Since you will not be making moves, you can use the routing as a task reference list and as operations for resource charging. Print the Discrete Job Pick List Report and release the job using the Discrete Jobs window. Transactions Use the Resource Transactions window to charge resource time incurred during maintenance. Use the WIP Material Transactions window to issue any items that the maintenance activities might require, such as lubricants, spare parts, and disposable tools. Costing Since you will do this maintenance on a periodic basis, you can leave this job open for as long as you want. The job must have an ending balance equal to the material, resource, and overhead charges incurred during maintenance in any period. The balance is written off as a variance when you close the job or at period end when expense type non–standard jobs are automatically expensed. See Also Defining Discrete Jobs Manually: page 3 – 12 Adding and Updating Material Requirements: page 7 – 9 Adding and Updating Operations: page 8 – 11 Charging Resources Manually: page 9 – 22 Issuing and Returning All Push Components: page 7 – 30 Performing Move Transactions: page 8 – 35 Completing and Returning Assemblies: page 7 – 58 Discrete Job Close: page 3 – 50 Non–Standard Discrete Jobs 4 – 15 Build Engineering Prototypes You can define prototype bills of material in two ways. The first is to use engineering change orders (ECO) to define future revisions to items on a bill. The second is to create a new engineering item and bill. In either case, you may build a small quantity of these new structures to validate the design and to ensure manufacturability. You can use non–standard jobs to manage the prototype build process for both future revisions and new engineering items. Business Example #1 – Future Revision of an Existing Item You are an automotive parts manufacturer that wants to build a batch of fuel filter prototypes for next year’s model. These fuel filters are only slightly revised from this year’s models and are defined as a future unreleased revision rather than as a new item. You have decided to build these prototype assemblies on a non–standard discrete job. Assumptions Your manufacturing engineers have used engineering change orders to define a future open bill of material for the fuel filters with a revision identifier of 95 and revision date of 01–Jan. You can build the 95 revision in the regular fuel filter production area on a standard fuel filter routing. The engineers may modify the routing on the fly during the build process. Cost accounting has not performed a cost rollup for this future version of the fuel filter. Setup Use the Discrete Jobs window to define a non–standard discrete job for the fuel filter assembly, revision 95 with a revision date of 01–Jan, with a job quantity of 10. Since none of these prototypes will be available as supply, enter zero in the MRP Net Quantity field rather than the job quantity. Select an expense type non–standard accounting class since you are performing engineering activities. Use a class with accounts that correspond to your engineering prototype expense accruals. Enter the current routing into the Routing Reference field to schedule the start and end dates of the job and to create the WIP operations and resources. Enter the 95 revision with the revision date of 01–Jan into the Bill Revision and Revision Date fields respectively to get the correct component requirements into the non–standard discrete job. You must have the WIP:Exclude Open ECOs profile option set to No to allow you to define jobs for open revisions. 4 – 16 OracleWork in Process User’s Guide Print the Discrete Job Pick List Report and release the job using the Discrete Jobs window. Transactions Use the WIP Material Transactions window to issue the components to the non–standard discrete job. Use the Move and Resource Transactions windows to move the fuel filters from operation to operation and to charge resources and overheads. You can also use these windows to add either operations or resources as needed. Use the Completion Transactions window to complete revision 95 of the finished fuel filters into a non–nettable engineering prototypes inventory. Costing When all the fuel filters are completed or scrapped, the job status changes to Complete. Your cost accountants can run a Discrete Job Value Report to check all the charges. The job must have an ending balance equal to the cost of material, resources and overhead charges less the current standard cost for the completed fuel filters (since this future version is not the current standard). The balance is written off as a variance when you close the job or at period end when expense type non–standard jobs are automatically expensed. Business Example #2 – Engineering Items You are an automotive parts manufacturer that wants to build a batch of fuel filter prototypes for a brand new model. These fuel filters are a brand new engineering item that does not meet the same window, fit, or function of any item. You have decided to build these prototype assemblies on a non–standard discrete job. Assumptions Your manufacturing engineers have defined a new engineering item bill of material for the fuel filters with a revision identifier of 95A and revision date of 01–Jan. You can build the new item in the regular fuel filter production area on a standard fuel filter routing. The engineers modify the routing on the fly during the build process. Cost accounting has not performed a cost rollup or a cost update for this new engineering fuel filter. Non–Standard Discrete Jobs 4 – 17 Setup Use the Discrete Jobs window to define a non–standard discrete job for the engineering fuel filter assembly, revision 95A with a revision date of 01–Jan, with a job quantity of 10. Since none of these prototypes will be available as supply, enter zero in the MRP Net Quantity field rather than the job quantity. Select an expense type non–standard accounting class since you are performing engineering activities. Use a class with accounts that correspond to your engineering prototype expense accruals. Enter the standard fuel filter into the Routing Reference field to schedule the start and end dates of the job and to create the WIP operations and resources. Enter the 95A revision with the revision date of 01–Jan into the Bill Revision and Revision Date fields respectively to get the correct component requirements into the non–standard discrete job. You must have the WIP:See Engineering Items profile option set to Yes to allow you to define jobs for engineering items. Print the Discrete Job Pick List Report and release the job using the Discrete Jobs window. Transactions Use the WIP Material Transactions window to issue the components to the non–standard discrete job. Use the Move and Resource Transactions windows to move the fuel filters from operation to operation and to charge resources and overheads. You can also use these windows to add either operation or resources as needed. Use the Completion Transactions window to complete revision 95A of the finished engineering fuel filters into a non–nettable engineering prototypes inventory. Costing When all the fuel filters are completed or scrapped, the job status changes to Complete. Your cost accountants can run a Discrete Job Value Report to check all the charges. The job must have an ending balance equal to the cost of material, resources and overhead charges. No costs were relieved from the job by the completion transaction since the costs of the engineering fuel filter have never been rolled up or updated. The job balance is written off as a variance when you close the job or at period end when expense type non–standard jobs are automatically written off. 4 – 18 OracleWork in Process User’s Guide See Also Defining Discrete Jobs Manually: page 3 – 12 Adding and Updating Material Requirements: page 7 – 9 Adding and Updating Operations: page 8 – 11 Charging Resources Manually: page 9 – 22 Issuing and Returning All Push Components: page 7 – 30 Performing Move Transactions: page 8 – 35 Completing and Returning Assemblies: page 7 – 58 Discrete Job Close: page 3 – 50 Track Other Projects Business Example You are a contract electronics manufacturer who can charge customers for design services as well as production services. You have decided to track their design service projects using non–standard discrete jobs. Assumptions Your manufacturing engineers have already set up a dummy item, named Design_Project, with a number of alternate routings for various types of design projects. In this case, Project7 is the alternate routing that most closely matches this specific project. You can use the Operations window to modify this standard routing to exactly match the major tasks (operations) and responsibilities (resources) for this specific project. Setup Use the Discrete Jobs window to define a non–standard discrete job with no assembly and a job quantity of zero. There is no need for an assembly since you will not be moving or completing anything. Select an expense type non–standard accounting class since you are performing project activities. Use a class with accounts that correspond to your project accruals. Use the job name and description to identify the specific customer and design contract. Enter the Design_Project item and the Project7 alternate routing into the Routing Reference and Alternate Routing fields respectively to create Non–Standard Discrete Jobs 4 – 19 the WIP operations and resources. Since you will not be making moves, the purpose of this routing is to serve as a task reference list and charging point for the individuals who are performing this project. Print the Discrete Job Pick List Report and release the job using the Discrete Jobs window. Transactions Use the Resource Transactions window to charge resources time incurred during the life of the project. You can charge at a standard rate or a rate based on the specifics of your contract. Use the Move or Resource Transactions windows, or the Operations window to modify the operations or resources as required for this particular project. Use the WIP Material Transactions window to issue any items that the project might require. Costing Since you will do this project over several periods, you can leave this job open for as long as you want. The job must have an ending balance equal to the material, resource, and overhead charges incurred during any period. The cost accountants must run a Discrete Job Value report each period to review the charges and bill the customer. The job balance is written off as a variance when you close the job or at period end when expense type non–standard jobs are automatically expensed. See Also Defining Discrete Jobs Manually: page 3 – 12 Adding and Updating Material Requirements: page 7 – 9 Adding and Updating Operations: page 8 – 11 Charging Resources Manually: page 9 – 22 Issuing and Returning All Push Components: page 7 – 30 Performing Move Transactions: page 8 – 35 Completing and Returning Assemblies: page 7 – 58 Discrete Job Close: page 3 – 50 4 – 20 OracleWork in Process User’s Guide CHAPTER 5 Flow Manufacturing T his chapter explains how to use flow manufacturing in Work in Process, including: • Overview: page 5 – 2 • Setting Up: page 5 – 4 • Performing Work Order–less Completions: page 5 – 5 Flow Manufacturing 5–1 Overview You can use flow manufacturing and work order–less completions to do all of the following: Work Order–less Completions You can complete assemblies without referencing a job or repetitive schedule. Work order–less completions automatically backflush all Operation Pull, Assembly Pull, and Push components. Work Order–less Assembly Returns You can also reverse work order–less completions by returning completed assemblies. The components in the assembly’s bill are automatically returned to inventory. Lot and Serial Number Control You can issue, backflush, and complete lot, serial number, and lot and serial number controlled items. See: Lot and Serial Number Backflushing: page 7 – 49. Backflush Lot Selection You can specify how lot controlled components are selected during backflush transactions using the WIP Lot Selection Method parameter. Lots can be selected manually — in other words you specify which lots are used — or they can be selected automatically based on either their inventory expiration or receipt date. See: Backflush Parameters: page 2 – 15. Component Substitutions You can add, delete, and substitute components that are not normally associated with the assembly you are building. Open Material Transactions Interface You can load work order–less completion transaction information from external systems — such as bar code readers and other data collection devices — into the Inventory Transaction Interface. When this data is processed, it is validated, and invalid records are marked so that you can correct and resubmit them. 5–2 OracleWork in Process User’s Guide See Also Comparison of Manufacturing Methods: page B – 2 Performing Work Order–less Completions: page 5 – 5 Oracle Flow Manufacturing, Oracle Bills of Material User’s Guide. Flow Manufacturing 5–3 Setting Up • For a listing of out–of–product setups that affect flow manufacturing see: Setup Prerequisites: page 2 – 3. • For a listing of setups within Work in Process that affect flow manufacturing see: Setup Check List: page 2 – 5. • For additional information about parameters and accounting classes see: WIP Parameters: page 2 – 9 and WIP Accounting Classes: page 2 – 22. • For a listing of profile options that affect flow manufacturing see: Profile Options: page 2 – 41. 5–4 OracleWork in Process User’s Guide Performing Work Order–less Completions You can complete assemblies using the Work Order–less Completions window without having to create a job or repetitive schedule. Assembly Pull, Operation Pull, and Push components are automatically backflushed when you complete assemblies in this window. Lots for backflush components under lot number control can be identified manually or automatically depending on how the WIP Backflush Lot Selection Method parameter is set. For backflush components under serial or lot and serial control, you can manually identify which lots/serial numbers to backflush using the Lot/Serial action in the Components window. If you return assemblies using this window, you must always identify the lot, serial, and lot or serial numbers of the components being returned to inventory. See: Lot and Serial Backflushing: page 7 – 49 and Backflush Default Parameters: page 2 – 15. " To perform work order–less completions: 1. Navigate to the Work Order–less Completions folder window. See: Customizing the Presentation of Data in a Folder, Oracle Applications User’s Guide. 2. Select a transaction Date and time. Flow Manufacturing 5–5 The system date is defaulted but can be overridden. The date and time you select must fall within an open accounting period and cannot be greater than the current date. 3. Select a Transaction Type, either Assembly Completion or Assembly Return. Assembly completion: Use to receive completed assemblies into inventory. If backflush components are under lot or serial number control, the lots and serial control numbers to backflush must be identified. Lots for backflush components under lot number control can be identified manually or automatically based on how the WIP Backflush Lot Selection parameter is set. See: Backflush Default . For backflush components under serial number control or manual lot control, you must manually identify which serial numbers or lot numbers to backflush using the lot/serial number action in the Components window. Assembly return: Return work order–less completed assemblies from inventory back to work in process. All push and pull components are automatically unbackflushed. If the unbackflushed components are under lot or serial number control, the lots and serial numbers to unbackflush must be identified using the Lot/Serial action in the Components window. 4. Select an Assembly. You can select any assembly that has it’s Build in WIP attribute set in Oracle Inventory. See: Defining Items, Oracle Inventory User’s Guide and Work In Process Attribute Group, Oracle Inventory User’s Guide. 5. If the selected assembly is under lot, serial, or lot and serial control, choose the Lot/Serial button to specify a lot/serial number. See: Assigning Lot Numbers, Oracle Inventory User’s Guide and Assigning Serial Numbers, Oracle Inventory User’s Guide. 6. Optionally, select a production Line. You can select any active production line. See: Defining Production Lines: page 2 – 36. 7. Optionally, select a Schedule Group. You can assign any active schedule group. See: Defining Schedule Groups: page 2 – 32. 8. 5–6 Select a UOM. See: Overview of Units of Measure, Oracle Inventory User’s Guide. OracleWork in Process User’s Guide 9. Enter the completion or return Quantity. You can complete or return different assembly quantities into and from different subinventories and locators. 10. Select a completion Subinventory and, if required, a locator. Assemblies are completed into or returned from this subinventory/locator. Completion locators are required if the Locator Control Parameter in Oracle Inventory is set to require a locator. See: Defining Default Inventory Parameters, Oracle Inventory User’s Guide. If a completion subinventory/locator was specified on the routing, it is defaulted but can be overridden. See: Completion Subinventory and Locator Fields, Oracle Bills of Material User’s Guide. ☞ Attention: A project locator is required if you are assigning a completion subinventory to a project referenced work order–less completion. See: Project Locator, Oracle Project Manufacturing Implementation Guide. If the Oracle Inventory INV:Allow Expense to Asset Transfer profile option is set to Yes, you can select an expense subinventory. See: Inventory Profile Options, Oracle Inventory User’s Guide. 11. Select the bill of material Revision. When you select an assembly, the primary bill of material for the assembly is defaulted. If there is more than one revision for the primary bill of material, the transaction date is used to determine the bill revision and revision date. The bill revision and date determines which version of the bill is used to explode work order–less component requirements. See: Item and Routing Revisions, Oracle Bills of Material User’s Guide. If you set the WIP:Exclude Open ECOs profile option to No, engineering change orders with Open statuses, as well as those with Release, Schedule, and Implement statuses, are considered when the bill of material is exploded. See: Overview of Engineering Change Orders, Oracle Engineering User’s Guide, Defining Engineering Change Orders, Oracle Engineering User’s Guide, and ECO Implementation By Status: page 10 – 19. 12. Select a bill Revision date and time. You can select a bill revision date other than the one determined by the transaction date and time. 13. Select the routing Revision. See: Item and Routing Revisions, Oracle Bills of Material User’s Guide. Flow Manufacturing 5–7 When you select an assembly, the primary routing for the assembly is defaulted. If there is more than one revision for the primary routing, the transaction date is used to determine the routing revision and revision date. The routing revision and date determines which version of the routing is used to create work order–less component requirements. 14. Select the routing Revision Date and time. You can select a routing revision date other than the one determined by the transaction date and time. 15. Select the Alternate bill of material. You can select an alternate bill if alternates have been defined for the assembly you are building. If the WIP:See Engineering Items profile option is set to Yes, you can also enter engineering bills as alternates. See: Profile Options: page 2 – 41 and Primary and Alternate Bills of Material, Oracle Bills of Material User’s Guide. 16. Select the alternate Routing. You can select an alternate routing if alternates have been defined for the assembly you are building. If the WIP:See Engineering Items profile option is set to Yes, you can select engineering routings as alternates. See: Profile Options: page 2 – 41 and Primary and Alternate Routings, Oracle Bills of Material User’s Guide. 17. Select a Project, and if required, a task. You can only select a project if the current organization’s Project References Enabled parameter is set in Oracle Inventory. You must select a task if the Project Control Level parameter is set to Task and you have entered a project number. See: Organization Parameters Window, Oracle Inventory User’s Guide and Defining Project Information, Oracle Inventory User’s Guide. 18. Select an accounting Class. Discrete accounting classes are used as defaults for work order–less completions. If a default can be found, it is used. If one cannot be found, you must assign one. See: WIP Accounting Class Defaults: page 2 – 10 and Discrete Accounting Classes: page 2 – 22. 19. Select the Demand Class. You can select any enabled and active demand class. Demand classes are not required. See: Overview of Demand Classes, Oracle Master Scheduling/MRP and Oracle Supply Chain Planning User’s Guide and Creating Demand Classes, Oracle Master Scheduling/MRP and Oracle Supply Chain Planning User’s Guide. 5–8 OracleWork in Process User’s Guide 20. Optionally, select the transaction Reason code. See: Defining Transaction Reasons, Oracle Inventory User’s Guide. 21. Optionally, enter the transaction Reference. References can be used to identify transactions on standard reports. They can be up to 240 characters of alpha numeric text. 22. If you are completing assemblies under lot, serial, or lot and serial control, choose the Lot/Serial button. See: Assigning Lot Numbers, Oracle Inventory User’s Guide and Assigning Serial Numbers, Oracle Inventory User’s Guide. 23. Choose the Transact button to save your work. ☞ " Attention: Assembly Pull, Operation Pull, and Push components are automatically backflushed. Bulk and supplier components are not backflushed. The bills for Phantoms are exploded and the Phantom components are backflushed. The system backflushes these components from the supply subinventory/locator assigned to the components on the bill of materials or the one that the user specified in the window. If no supply subinventory/locator is assigned to the bill components, the system pulls components from the supply subinventory/locator defined for the item. If no item supply subinventory/locator is defined at the item level, items are pulled from the default supply subinventory/locator as determined by the Supply Subinventory and Supply Locator parameters. See: Backflush Parameters: page 2 – 15. To add, delete, or change components or specify component lot/serial information: 1. Choose the Components button. The Components window appears. Flow Manufacturing 5–9 2. Select the Operation at which to make the substitution. If the assembly has no routing, the system displays 1 as the default operation sequence. This value cannot be updated. 3. Select a substitution Type from the following options: Add: Add a component at the operation. Delete: Delete a component from the operation. Change: Substitute one component for another at the operation. Lot/Serial: Specify lot/serial number information for items. H If you are Changing a component, you must select the component to be replaced, select a Substitute component and enter a Quantity. The quantity you enter here is the total quantity for the completion. The Revision for the substitute is defaulted based on the transaction date. The supply subinventory/locator are defaulted from the item. See: Defining Items, Oracle Inventory User’s Guide and Work In Process Attribute Group, Oracle Inventory User’s Guide. If there is no supply subinventory/locator at the item level, the supply Subinventory and, if required, supply Locator, are defaulted based on the values entered for the WIP Supply Subinventory and Supply Locator parameters. See: Backflush Default Parameters: page 2 – 15. 5 – 10 OracleWork in Process User’s Guide H If you are Adding a component, select a component to add and enter a Quantity. The Revision and supply Subinventory/Locator, are defaulted the same as for a Substitute. H If you are Deleting a component, select the component to delete. H To enter Lot/Serial information for a component, select a component then choose the Lot/Serial button. See: Assigning Lot Numbers, Oracle Inventory User’s Guide and Assigning Serial Numbers, Oracle Inventory User’s Guide. 4. Optionally, select the transaction Reason code. See: Defining Transaction Reasons, Oracle Inventory User’s Guide. 5. Optionally, enter the transaction Reference. References can be used to identify transactions on standard reports. They can be up to 240 characters of alpha numeric text. 6. Choose Done to save your work. See Also Backflush Transactions: page 7 – 47 Setting Up Flow Manufacturing: page 5 – 4 Flow Manufacturing 5 – 11 5 – 12 OracleWork in Process User’s Guide CHAPTER 6 Repetitive Manufacturing T his chapter explains how to use and define repetitive schedules, including: • Overview: page 6 – 2 • Setting Up: page 6 – 5 • Production Line and Assembly Associations: page 6 – 6 • Repetitive Manufacturing Process Diagram: page 6 – 11 • Creating Repetitive Schedules: page 6 – 12 • Building Repetitive Schedules: page 6 – 18 • Viewing Repetitive Schedules: page 6 – 24 • Updating Repetitive Schedules: page 6 – 27 • Completing Repetitive Schedules: page 6 – 34 • Repetitive Schedule Purge: page 6 – 39 Repetitive Manufacturing 6–1 Overview You can use Work in Process to produce assemblies on a continuous basis. This is known as repetitive manufacturing. Repetitive Schedules You can control your repetitive production quantities using repetitive schedules. You charge all production costs to the assembly itself, eliminating the need for discrete jobs. Production Lines You can manage repetitive production by production line. Production lines control how you schedule individual assemblies. Material and shop floor transactions are also controlled by production line. You can build an assembly on one or several lines. You can build single or multiple assemblies on a line. Shop Floor Control Shop floor control helps you manage the flow of production inside the plant. Routings can be used to schedule repetitive production activities and create requirements. You can use reports and views to help you control these activities. You can use production lines to separate areas of the shop floor. Material Control Material control helps you manage the flow of component material from inventory onto lines and into repetitive schedules. Bills of material can be used to create repetitive material requirements. You can build different repetitive assemblies on one production line to aggregate material requirements for a number of assemblies. You can use reports and views to help you control material activities. Engineering Bills and ECOs You can build released as well as unreleased revisions and engineering items. You can also add engineering items as material requirements. The system can automatically update your repetitive schedules following an engineering change order (ECO). You always schedule to build the most current revision. Repetitive Line Scheduling You can define minimum and maximum line rates, line start and stop times, and line lead times for repetitive production lines. The system 6–2 Oracle Work in Process User’s Guide uses these rates and times to schedule repetitive production to the minute. Fixed and Variable Speed Production Lines You can specify all the assemblies on a production line to run at the same production rate on your fixed rate lines. You can specify the production rate by assembly for your variable rate lines. Fixed vs. Routing Based Line Lead Time Options You can schedule your repetitive production lead time based on the assembly’s routing or lead time line attributes to best simulate your repetitive production process. Partial Days and Fractional Rates You can define repetitive schedules for any number of processing days, including partial days. You can specify the daily quantity and/or the total quantity as any positive number including decimal quantities (up to 6 decimal places), such as 1.25. Planning Repetitive Production Oracle Master Scheduling/MRP and Supply Chain Planning plans your repetitive production. You can automatically create repetitive schedules from planning’s suggestions. Open Job and Schedule Interface You can import planned repetitive schedules from external systems into Work in Process. Period–Based Costs You can calculate the costs of repetitive production and recognize any variances on a periodic basis by closing accounting periods. You do not need to close repetitive schedules. Repetitive Assembly and Line Costs Repetitive production costs are tracked by assembly so you do not have to review your costs by individual repetitive schedule. You can also track your costs by assembly on a line or by individual line so you can compare costs for your production lines. Repetitive Schedule Purge You can purge all information associated with repetitive schedules including header records and detail and transaction information. You Repetitive Manufacturing 6–3 can also selectively purge some or all of the following schedule related information: schedule details (material requirements, resource requirements, and operations), move transactions, and resource cost transactions. See Also Comparison of Manufacturing Methods: page B – 2 Overview of Work in Process Scheduling: page 12 – 2 Work in Process Costs: page 11 – 6 Open Job and Schedule Interface, Oracle Manufacturing, Distribution, Sales and Service Open Interfaces Manual, Release 11 6–4 Oracle Work in Process User’s Guide Setting Up • For a listing of setups that affect repetitive manufacturing see: Setup Prerequisites: page 2 – 3. • For a listing of setup steps within Work in Process see: Setup Check List: page 2 – 5. • For additional information about repetitive parameters and accounting classes see: Repetitive Manufacturing Parameters: page 2 – 11 and Repetitive Accounting Classes: page 2 – 23. • For a listing of profile options that affect repetitive manufacturing see: Profile Options: page 2 – 41. Repetitive Manufacturing 6–5 Production Line and Assembly Associations You can define, update, and delete line/assembly associations. Associating Lines and Assemblies Line/assembly associations establish a link between an assembly and the production line on which it is manufactured. You can define any number of line/assembly associations. You can also update and delete line/assembly associations. Your repetitive assembly/line associations guide your repetitive production process. You can build the same assembly on different production lines. You can also build different assemblies on the same production line. Building different assemblies on the same production line makes it possible to aggregate, by production line, material requirements for a number of assemblies. For each assembly on a line, you can enter a primary or alternate bill and a primary or alternate routing. If you change routings for an assembly on a line and there are open repetitive schedules, the new routing must have the same operations as the prior routing. Prerequisites ❑ Define and enable one production line. See: Defining Production Lines: page 2 – 36. " 6–6 To add a line/assembly associations: 1. Navigate to the Repetitive Line/Assembly Associations window. The Repetitive Line/Assembly Associations summary window appears. 2. Choose the New button to open the Repetitive Line/Assembly Associations window. Oracle Work in Process User’s Guide ☞ Attention: You can associate several lines and assemblies simultaneously using the Repetitive Line/Assembly Associations Summary window. You can, however, also associate lines and assemblies one–at–a–time in the Repetitive Line/Assembly Associations window. This method is described below. See: Combination Block, Oracle Applications User’s Guide and Navigating Within a Combination Block, Oracle Applications User’s Guide. 3. Select the production Line where you build the repetitive assembly, then the assembly or select the Assembly then the production line. You cannot update the name of a production line after you have assigned it to a repetitive assembly nor can you delete a production line that supports repetitive schedules. " To assign an alternate bill or alternate routing to the line/assembly association: 1. Select the alternate Bill of material. See: Primary and Alternate Bills of Material, Oracle Bills of Material User’s Guide. You can select an alternate bill if alternates have been defined for the assembly. If the WIP:See Engineering Items profile option is set to Yes, you can select engineering items as alternates. See: Profile Options: page 2 – 41. 2. Select the alternate Routing. See Primary and Alternate Routings, Oracle Bills of Material User’s Guide. You can select an alternate routing if alternates have been defined. If the WIP:See Engineering Items profile option is set to Yes, you can select engineering routings as alternates. Repetitive Manufacturing 6–7 " To enter a completion subinventory and locator: H Select the completion Subinventory and, if required by the subinventory, the Locator. Assemblies are completed or returned into or from this subinventory and locator. If the assembly has a routing, the completion subinventory and locator are defaulted from the routing but can be overwritten. ☞ Attention: You can override the completion subinventory and locator you specify here when you complete or return assemblies using the Completion Transactions window. Caution: You must specify a completion subinventory and locator if you plan to complete or return assemblies using the Move Transactions window since the subinventory and locator specified here are automatically used for those transactions. " To enter a supply type, accounting class, line priority, and hourly production rate: 1. Select the Supply Type. See: Supply Types: page C – 2. The supply type defaults to Based on Bill. This supply type indicates that component requirements are supplied based upon their individual supply types. You can override this default by choosing one of the following supply types: Push, Assembly Pull, Operation Pull, Bulk, or Supplier. See: Supply Types: page C – 2. 2. Select the accounting Class. Accounting classes can also be defaulted based on the assembly item’s category default WIP class. You can override these defaults with any active repetitive accounting class. See: Product Line Accounting Setup, Oracle Cost Management User’s Guide and Repetitive Accounting Classes: page 2 – 23. 3. Enter a numeric line Priority. You must specify a line priority for each line/assembly association. Oracle Master Scheduling/MRP and Oracle Supply Chain Planning ‘uses line priority to determine which line to create repetitive schedules on. Repetitive schedules are created on the highest priority line first. For example, if you build the same assembly on two lines and the first line has a priority of 1 and the other a priority of 10, Oracle Master Scheduling/MRP and Oracle Supply Chain Planning creates repetitive schedules on the first line— the one with a priority of 1 — first. 6–8 Oracle Work in Process User’s Guide 4. Enter the Hourly Production Rate of assemblies on the production line. The maximum hourly rate for the production line is the default. The repetitive line scheduling method also uses the production rate to calculate how fast the line runs in terms of completed assemblies per hour. The production rate for any assembly on the line must be less than the maximum hourly rate on the line. 5. Check the Lead Time Line check box to indicate which production line Oracle Bills of Material is to use to calculate the processing lead time for the repetitive assembly. Oracle Master Scheduling/MRP and Oracle Supply Chain Planning uses the calculated lead time in its planning process. Oracle Capacity also uses the lead time line to rollup resource requirements during rough cut capacity planning. If you do not select a lead time line for the repetitive assembly, the lead time rollup process in Oracle Bills of Material does not calculate a lead time for this repetitive assembly. There is no requirement to specify a lead time line. " To change line/assembly associations: 1. Navigate to the Repetitive Line/Assembly Associations Summary window. 2. Choose Find from the Query Menu. 3. In the Find Repetitive Line/Assembly Associations window, select either a Line to find all Line/Assembly associations for that line, select an Assembly to find all Line/Assembly associations for that Assembly, or select a Line and Assembly. 4. Select the Line/Assembly association to change and choose the Open button. 5. Change Line/Assembly association information as required. See Also Defining Repetitive Schedules Manually: page 6 – 13 Deleting Line/Assembly Associations: page 6 – 10 Repetitive Manufacturing 6–9 Deleting Line/Assembly Associations You can delete line/assembly associations that have not been used to define a repetitive schedule. " To delete line/assembly associations: 1. Navigate to the Repetitive Line/Assembly Associations Summary window. 2. Choose Find from the Query Menu. 3. In the Find Repetitive Line/Assembly Associations window, enter your search criteria. The results display in the Repetitive Line/Assembly Associations Summary window. ☞ Attention: You can delete line/assembly associations in either the Repetitive Line/Assembly Associations window or Repetitive Line/Assembly Associations Summary windows. See: Combination Block, Oracle Applications User’s Guide and Navigating Within a Combination Block, Oracle Applications User’s Guide. 4. Select the Line/Assembly association. 5. Choose Delete from the Edit Menu. See Also Associating Lines and Assemblies: page 6 – 6 Defining Repetitive Schedules Manually: page 6 – 13 6 – 10 Oracle Work in Process User’s Guide Repetitive Manufacturing Process Diagram The following diagram illustrates the repetitive manufacturing process: Figure 6 – 1 Repetitive Manufacturing Process Setup Repetitive Manufacturing Plan Production Schedule Production Update Existing Repetitive Schedules Yes Update? No Control Repetitive Material Build Repetitive Assemblies Implement Engineering Change Yes ECO? No Complete Repetitive Schedules Purge Repetitive Schedules Analyze Costs Repetitive Manufacturing 6 – 11 Creating Repetitive Schedules You can create repetitive schedules in the following ways: • manually. See: Defining Repetitive Schedules Manually: page 6 – 13. • automatically using Oracle Master Scheduling/MRP and Oracle Supply Chain Planning to plan your repetitive schedules, then using the Planner Workbench to implement them. See: Planned Repetitive Schedules: page 6 – 12. • using the Open Job and Schedule Interface to import suggested repetitive schedules. See: Open Job and Schedule Interface: page 3 – 9. Planned Repetitive Schedules Oracle Master Scheduling/MRP and Supply Chain Planning creates planned orders and reschedule recommendations. You can choose whether to implement these planned orders. You can use the Planner Workbench in Master Scheduling/MRP and Supply Chain Planning to automatically implement some or all suggested repetitive schedules. When you implement planned schedules, their statuses change to Pending–Mass Loaded. You cannot perform transactions against schedules with this status. Implemented schedules are assigned a default description and load date. You can update the schedule as if it were an unreleased schedule. For example, you can modify the first and last unit start date, the processing days, daily quantity, the production line, and firm plan the schedule. Repetitive schedules are loaded across production lines using the line priorities specified in the Repetitive Line/Assembly Associations window. The bill and routing revisions default to the current revision, alternate bill and routing, supply type, WIP accounting class, and completion subinventory and locator are based on the line/assembly association. Master Scheduling/MRP and Supply Chain Planning does not suggest changes to repetitive schedules, instead it suggests new repetitive schedules to meet the demand. Therefore, it is possible to have pending schedules that overlap existing repetitive schedules. 6 – 12 Oracle Work in Process User’s Guide For example, suppose you have a schedule that starts at the beginning of next week for 10 assemblies a day for the next 5 days. Master Scheduling/MRP and Supply Chain Planning suggests a schedule that starts the beginning of next week for 25 assemblies a day for the next 5 days. When you implement the repetitive schedule in the Planner Workbench, Work in Process assigns a status of Pending–Mass Loaded to the new schedule. In the Repetitive Schedules window, you now have two overlapping schedules with different rates (10 per day and 25 per day), and different statuses (Unreleased and Pending–Mass Loaded). Either cancel the unreleased repetitive schedule and change the status of the pending schedule to Unreleased or Released or, update the rate of the unreleased schedule to match the recommended rate and cancel the pending schedule. See Also Overview of Master Scheduling, Oracle Master Scheduling/MRP and Oracle Supply Chain Planning User’s Guide Work in Process Planning: page D – 2 Repetitive Line Scheduling: page 12 – 13 Repetitive Planning Versus Discrete Planning, Oracle Master Scheduling/MRP and Oracle Supply Chain Planning User’s Guide Defining Repetitive Schedules Manually You can define repetitive schedules to build assemblies repetitively on a production line. Repetitive schedules are used to schedule production, resources, and material requirements, and to collect the costs of manufacturing a repetitive assembly on a production line. You can assign bills and routings to repetitive schedules to create material requirements, schedule operations, and create resource requirements. Neither bills of material nor routings are required however. You can specify the line, the assembly you are building, daily quantity, processing days, and/or total quantity, as well as a date around which to schedule. You can attach illustrative or explanatory files — in the form of text, images, word processing documents, spreadsheets, video, and so on — Repetitive Manufacturing 6 – 13 to repetitive schedules. See: About Attachments, Oracle Applications User’s Guide. Prerequisites ❑ Define at least one production line. See: Defining Production Lines: page 2 – 36. ❑ Define at least one Repetitive Line/Assembly Association. See: Associating Lines and Assemblies: page 6 – 6. " To define a repetitive schedule: 1. Navigate to the Repetitive Schedules window. The Repetitive Schedule Summary window appears. 2. Choose the New button to open the Repetitive Schedules window. ☞ 3. 6 – 14 Attention: You can define several repetitive schedules simultaneously in the Repetitive Schedules Summary window. You can, however, also define repetitive schedules one–at–a–time using the Repetitive Schedules window. This method is described below. See: Combination Block, Oracle Applications User’s Guide and Navigating Within a Combination Block, Oracle Applications User’s Guide. Select the production Line and the repetitive Assembly. Oracle Work in Process User’s Guide You can select any production Line and associated Assembly. The routing, bill, accounting class, supply type, and completion subinventory/locator defined for the Repetitive Line/Assembly Association selected are defaulted. See: Associating Lines and Assemblies: page 6 – 6. 4. Select the schedule Status. When you define a repetitive schedule, its default status is Unreleased but can be changed to Released or On Hold. See: Repetitive Schedule Statuses: page 10 – 12. 5. Enter the Daily Quantity for the repetitive schedule. If you do not enter the daily quantity, enter the number of processing days and the total quantity. The number of completed assemblies you plan to produce on the schedule each day. This quantity is effective from the schedule start date to the schedule end date. 6. Enter the number of Days for the repetitive schedule. Use decimal numbers to indicate partial days (up to 6 decimal places). This is the number of days that the repetitive schedule requires, from the first assembly completion date through the last assembly completion date, to manufacture the total number of assemblies. If you enter the number of days, the total quantity is automatically calculated based on the daily quantity. If you do not enter the number of days, enter the daily quantity and total quantity. 7. Enter the Total Quantity of assemblies that you plan to manufacture with this schedule. If you enter the total quantity, the processing days are calculated based on the daily quantity. If you do not enter the total quantity, enter the daily quantity and number of processing days. 8. Select the Demand Class. You can select any enabled and active demand class. Demand classes are not required. See: Overview of Demand Classes, Oracle Master Scheduling/MRP and Oracle Supply Chain Planning User’s Guide and Creating Demand Classes, Oracle Master Scheduling/MRP and Oracle Supply Chain Planning User’s Guide. 9. Check the Firm check box to firm your schedule. Firming repetitive schedules prevents MRP from suggesting rescheduling and replanning recommendations when changes to supply or demand occur. Firming a repetitive schedule locks in that Repetitive Manufacturing 6 – 15 schedule’s daily quantity as the recommended daily quantity for future schedules using that line/assembly association. See: Firm Order Planning, Oracle Master Scheduling/MRP and Oracle Supply Chain Planning User’s Guide. 10. Enter the Description. Descriptions can be used to identify repetitive schedules on standard reports. They can be up to 240 characters of alpha numeric text. They are not required. " To schedule a repetitive schedule with a routing or a fixed lead time repetitive schedule without a routing: H Select a FUSD or FUCD or a LUSD or LUCD. Only one date (FUSD, FUCD, LUSD, or LUCD) is required for repetitive assemblies with routings and repetitive assemblies without routings that are associated with production lines that have Fixed lead time. The repetitive schedule is automatically forward or backward scheduled based upon the dates entered. " To schedule a repetitive schedule without a routing that has a routing–based lead time: H Select the FUSD and FUCD or select the LUSD and LUCD. A set of start or completion dates is required for repetitive schedules without routings that are associated with production lines that have Routing–based lead times. The system uses the processing days to schedule the dates not entered. " To assign bill of material and routing revisions and dates: 1. Select the bill of material Revision. The bill of material defaults based on the repetitive line and assembly selected. You can however, select an alternate revision and revision date and time if alternates have been defined. You can update the bill revision as long as the repetitive schedule remains unreleased. You can update the revision for standard bills or alternate bills. See: Item and Routing Revisions, Oracle Bills of Material User’s Guide. You can explode item revisions that have ECOs with Release, Schedule, and Implement statuses against them. If you set the WIP:Exclude Open ECOs profile option to No, you can also explode 6 – 16 Oracle Work in Process User’s Guide revisions for ECOs that have an Open status. See: ECO Implementation By Status: page 10 – 19. 2. Select the bill Revision Date and time. You can update the bill revision date for standard bills or alternate bills. You can update the bill revision date as long as the repetitive schedule remains unreleased. 3. Select the routing Revision. The routing defaults based on the repetitive line and assembly selected. You can, however, update the routing revision as long as the schedule remains unreleased. See: Item and Routing Revisions, Oracle Bills of Material User’s Guide 4. Select the routing Revision Date and time. You can update routing revision dates for standard and alternate routings. You can update the routing revision date as long as the schedule remains unreleased. If you do not enter a revision date, the system uses the first unit start date (FUSD). 5. Save your work. See Also Repetitive Manufacturing Setup: page 6 – 5 Changing Repetitive Schedules: page 6 – 27 Repetitive Line Scheduling: page 12 – 13 Rescheduling Repetitive Schedules: page 6 – 29 Attaching Files to Jobs, Schedules, and Operations: page E – 2 Repetitive Manufacturing 6 – 17 Building Repetitive Schedules Steps involved in building repetitive schedules include: • Releasing repetitive schedules to production. See: Releasing Repetitive Schedules: page 6 – 21. • Issuing components to repetitive schedules and, if necessary, returning them back to inventory. See: Issuing and Returning Specific Components: page 7 – 26 and Issuing and Returning All Push Components: page 7 – 30. • Using Shop Floor Control to coordinate, on an as required basis, the following: – Moving assemblies between routing operations and intraoperation steps as required. See: Production Line Moves: page 8 – 31. – Scrapping assemblies. See: Scrapping Assemblies: page 8 – 56. – Backflushing or issuing and returning operation pull and assembly pull components automatically with move transactions. – Charging resources. See: Charging Resources with Move Transactions: page 9 – 25 and Charging Resources Manually: page 9 – 22. • Changing repetitive schedules to accommodate changes in production. See: Changing Repetitive Schedules: page 6 – 27 and Mass Changing Repetitive Schedule Statuses: page 6 – 31. See Also Overview of Material Control: page 7 – 2 Overview of Shop Floor Control: page 8 – 2 Repetitive Component Issues and Returns: page 7 – 22 Repetitive Production Line Backflushes: page 7 – 49 6 – 18 Oracle Work in Process User’s Guide Finding Repetitive Schedules You can find then view, release, change, and reschedule repetitive schedules. You can also find then purge information associated with repetitive schedules. " To find one or several repetitive schedules to view, release, change, or reschedule: 1. When the Find Repetitive Schedules window appears, enter your search criteria. You can query by assembly Line and Assembly, a range of First Unit Start Dates, a range of First Unit Completion Dates, and Status. You can combine or omit criteria as required. Caution: Querying to find repetitive schedules does not validate the records returned. For example, querying to find a range of schedules to release does not return only those jobs in that range that can be released. 2. " Choose the Find button. To find one or several repetitive schedules to include in your purge: 1. When the Find Repetitive Schedules window appears, enter your search criteria. Repetitive Manufacturing 6 – 19 You can query by assembly Line and Assembly, a range of First Unit Start Dates, or a range of First Unit Completion Dates. 2. Select an accounting Period or enter a Cutoff Date for the purge. You can query by closed accounting Period. When you select an accounting period, the end date of that period is defaulted as the purge Cutoff date and cannot be overridden. If you do not select an accounting Period, the cutoff date of the most recently closed accounting period is defaulted. You can override this date with any date in a closed period. ☞ Attention: When purging repetitive schedules, the date a repetitive schedule was changed to Complete–No Charges or Cancelled is compared to the purge cutoff date. Only repetitive schedules that were set to Complete–No Charges or Cancelled on or before the cutoff date are purged. Caution: If you enter a cutoff date that is earlier than the date a repetitive schedule was changed to Complete–No Charges or Cancelled, the system purges only the repetitive schedule detail and transaction information up to the date you enter. 3. Choose the Find button. See Also Searching for Information, Oracle Applications User’s Guide 6 – 20 Oracle Work in Process User’s Guide Releasing Repetitive Schedules You must release a repetitive schedule to production before transacting against it. Releasing a repetitive schedule with a routing automatically loads the total number of assemblies to be built for the repetitive schedule into the Queue intraoperation step of the first operation. If PO Move or PO Receipt resource requirements exist at the first operation, purchase requisitions are automatically generated for these resources. " To release a single repetitive schedule: 1. Navigate to the Repetitive Schedules window. The Repetitive Schedules Summary window appears. 2. Find a repetitive schedule. See: Finding Repetitive Schedules: page 6 – 19. The Repetitive Schedules Summary window appears with the results of the query. 3. Change the selected schedule’s status to Released. See: Repetitive Schedule Statuses: page 10 – 12. ☞ Attention: You can release repetitive schedules in either the Repetitive Schedules Summary or the Repetitive Schedules window. See: Combination Block, Oracle Applications User’s Guide and Navigating Within a Combination Block, Oracle Applications User’s Guide. 4. " Save your work. To release several repetitive schedules: H See: Mass Changing Repetitive Schedule Statuses: page 6 – 31. See Also Job and Repetitive Schedule Status Changes: page 10 – 15 Repetitive Schedule Status Control: page 10 – 10 Printing Reports for Current Repetitive Schedules If you are in the Repetitive Schedules, Purge Repetitive Schedules, or View Repetitive Schedules window, you can print selected reports for Repetitive Manufacturing 6 – 21 the ’active’ or current schedule. See: Current Record Indicator, Oracle Applications User’s Guide. You can print any one of the following reports: • Repetitive Routing Sheet: page 14 – 49 • Repetitive Pick List Report: page 14 – 47 • Repetitive Line Report: page 14 – 46 • Repetitive Schedule Shortage Report: page 14 – 51 • Repetitive Schedule Data Report: page 14 – 50 " To print a report for the current repetitive schedule: 1. From the Repetitive Schedules or View Repetitive Schedules window choose Print Reports from the Special Menu. See: Special Menu: page G – 2. The Print window appears. 2. Select the name of the report and choose OK When you choose OK, a concurrent request to print the report is submitted. You can view the status of concurrent requests. See: Using the Concurrent Requests Window, Oracle Applications User’s Guide. 6 – 22 Oracle Work in Process User’s Guide See Also Submitting a Request, Oracle Applications User’s Guide Repetitive Manufacturing 6 – 23 Viewing Repetitive Schedules To view repetitive schedule information see: • Viewing Repetitive Schedule Information: page 6 – 24 • Viewing Material Requirements: page 7 – 13 and Viewing Component Requirements: page 7 – 15 • Viewing Operations: page 8 – 19 and Viewing Job and Schedule Operations: page 8 – 21 • Viewing Resource Requirements: page 9 – 16 You can also print a variety of repetitive schedule reports. Viewing Repetitive Schedule Information You can view information for repetitive schedules of any status, including schedules that are closed, cancelled, or on hold. You can view one schedule or several. You can also view operation, material requirement, and resource requirement information associated with repetitive schedules. You can view repetitive schedule information in summary or detail. See: Combination Block, Oracle Applications User’s Guide. " To repetitive schedule information: H Navigate to View Repetitive Schedules window. When the Find Repetitive Schedules window appears, enter your search criteria. See: Finding Repetitive Schedules: page 6 – 19. Repetitive schedules are automatically displayed in the View Repetitive Schedules Summary window. Using the Summary/Detail option from the Go Menu, you can switch to the View Repetitive Schedules window to view all information for a selected schedule. You can optionally navigate to the View Repetitive Schedules window by choosing the Open button from the View Repetitive Schedules Summary window. See: Navigating Within a Combination Block, Oracle Applications User’s Guide. 6 – 24 Oracle Work in Process User’s Guide By alternative region, all of the following information can be viewed in View Repetitive Schedules Summary window: Status region: Line, Assembly, Status, Date Released Quantities region: Daily Quantity, Days, Total Quantity, Quantity Completed Start Dates region: First and Last Unit Start Dates Completions Dates region: First and Last Unit Completion Dates Bill Information region: Alternate Bill, Revision, Revision Date, and Supply Type Routing region: Alternate Routing, Routing Revision, and Revision Date Planning, Description region: Firm plan option, Demand Class and Description Current Progress region: Quantity Completed, Quantity Scrapped, and Quantity Ahead, and Days Ahead You can also view, if entered, descriptive flexfield information. See: Setting Up Descriptive Flexfields: page 13 – 4. " To view repetitive schedule operations: H From either the View Repetitive Schedules window or the View Repetitive Schedules Summary window, choose the Operations button. The Operation window appears displaying the repetitive Repetitive Manufacturing 6 – 25 schedules’s operations. You can optionally view the components required at a selected operation using the Components button. See: Viewing Job and Schedule Operations: page 8 – 21. " To view repetitive schedule component requirements: H " To print reports for a repetitive schedule: H 6 – 26 From either the View Repetitive Schedules window or the View Repetitive Schedules Summary window, choose the Components button. The Material Requirements window appears and the repetitive schedule’s components are displayed. See: Viewing Component Requirements: page 7 – 15 You can print selected reports for the ’active’ or current schedule See: Printing Reports for Current Repetitive Schedules: page 6 – 21. Oracle Work in Process User’s Guide Updating Repetitive Schedules You can make the following changes to your repetitive schedules: • Change dates, quantities, bills, statuses, and routings. See: Changing Repetitive Schedules: page 6 – 27 and Rescheduling Repetitive Schedules: page 6 – 29. • Add, update, and delete operations. See: Adding and Updating Operations: page 8 – 11 and Deleting Operations: page 8 – 16. • Add, update, and delete material requirements. See: Adding and Updating Material Requirements: page 7 – 9 and Deleting Material Requirements: page 7 – 12. • Add, change, and delete resource requirements. See: Adding and Updating Resource Requirements: page 9 – 10 and Deleting Resource Requirements: page 9 – 15. • Implement engineering change orders in Oracle Engineering. See: Implementation of ECOs on Discrete Jobs and Repetitive Schedules, Oracle Bills of Material User’s Guide and ECO Implementation By Status: page 10 – 19. • Add, change, and delete WIP Attachments. See: Attaching Files to Jobs, Schedules, and Operations: page E – 2. See Also Repetitive Schedule Status Control: page 10 – 10 Job and Repetitive Schedule Status Changes: page 10 – 15 Changing Repetitive Schedules You can change repetitive schedules using the Repetitive Schedules and Repetitive Schedules Summary windows. The status of the schedule determines if and what information can be changed. See: Repetitive Schedule Status Control: page 10 – 10. Quantities You can update the daily production quantity, the number of processing days and the total quantity of a repetitive schedule. You can reduce or increase the schedule quantity. Changing the daily production rate on a repetitive schedule causes the total quantity to change accordingly based on the processing days. Changing the Repetitive Manufacturing 6 – 27 processing days causes the total quantity to change according to the daily quantity. Changing the total quantity on a schedule does not impact the daily quantity. Instead increasing the total quantity causes the processing days to increase. Conversely, reducing the total quantity decreases the processing days. Once the repetitive schedule is released and work has begun on the assembly, you cannot decrease the total quantity lower than the number of assemblies that have already passed the Queue intraoperation step of the first operation. The material requirements and schedule dates are automatically adjusted based upon the quantity change. If the schedule’s assembly is an MPS–planned item, the update process automatically adjusts the MPS relief quantity. Dates You can change the dates and times on a repetitive schedule. If you change the first unit start date, first unit completion date, last unit start date, or last unit completion date, Work in Process reschedules the repetitive schedule to adjust the remaining start and completion dates. Changing any of the four start and completion dates does not impact the processing days, total quantity, daily quantity, or lead time. Work in Process does not allow you to change dates and times to cause overlapping of schedules for the same assembly on the same line. See: Rescheduling Repetitive Schedules: page 6 – 29. Statuses You can change the status of a repetitive schedule although some changes from one status to another are disallowed and others are conditional. See: Job and Repetitive Schedule Status Changes: page 10 – 15. Prerequisites ❑ Define at least one repetitive schedule. See: Defining Repetitive Schedules Manually: page 6 – 13. " 6 – 28 To change repetitive schedules: 1. Navigate to the Repetitive Schedules window. The Repetitive Schedules Summary window appears. 2. Choose Find from the Query Menu. See: Finding Repetitive Schedules: page 6 – 19. 3. Change repetitive schedules in either the Repetitive Schedules or Repetitive Schedules Summary windows. From the Repetitive Oracle Work in Process User’s Guide Schedules Summary window, you can choose the Open button to navigate to the Repetitive Schedules window. See: Combination Block, Oracle Applications User’s Guide and Navigating Within a Combination Block, Oracle Applications User’s Guide. See Also Defining Repetitive Schedules Manually: page 6 – 13 Mass Changing Repetitive Schedules Statuses: page 6 – 31 Rescheduling Repetitive Schedules: page 6 – 29 Attaching Files to Jobs, Schedules, and Operations: page E – 2 Rescheduling Repetitive Schedules You can reschedule repetitive schedules with and without routings. When you change a repetitive schedule quantity, the system automatically prompts you to choose the date around which you want to reschedule. The number of processing days increases/decreases to reflect the quantity change. When you update the number of workdays, you must choose the date around which you want to reschedule. The current schedule is rescheduled around the date you specify. You can enter first unit/last unit start (FUCD/LUSD) and first unit/last unit completion (FUCD/LUCD) dates and times earlier than the current date and time to maintain relative date priorities for department schedules and material requirements. Prerequisites ❑ Define at least one repetitive schedule with a status of Released or Complete. See: Defining Repetitive Schedules Manually: page 6 – 13. " To reschedule a repetitive schedule with a routing or a fixed lead time repetitive schedule without a routing: 1. Navigate to the Repetitive Schedules window. The Repetitive Schedule Summary window appears. See: Combination Block, Oracle Applications User’s Guide and Navigating Within a Combination Block, Oracle Applications User’s Guide. Repetitive Manufacturing 6 – 29 2. Choose the New button to navigate to the Repetitive Schedules window. 3. Select the production Line and Assembly. 4. Select a FUSD or FUCD or a LUSD or LUCD. Only one date (FUSD, FUCD, LUSD, or LUCD) is required for repetitive assemblies with routings and repetitive assemblies without routings that are associated with production lines that have Fixed lead time. The repetitive schedule is automatically forward or backward scheduled based upon the dates entered. 5. " Save your work. To reschedule a repetitive schedule without a routing that has a routing–based lead time: 1. Navigate to the Repetitive Schedules window. 2. Select the production Line. 3. Select the repetitive Assembly. 4. Select the FUSD and FUCD or select the LUSD and LUCD. A set of start or completion dates is required for repetitive schedules without routings that are associated with production lines that have Routing–based lead times. The system uses the processing days to schedule the dates not entered. 5. " To reschedule a repetitive schedule after changing the daily quantity, the processing days, or the total quantity: 1. 6 – 30 Save your work. After changing the Daily quantity, which updates the Total Quantity based on the number of processing Days; changing the number of processing Days, which updates the Total Quantity based on the Daily Quantity; or changing the Total Quantity, which updates the number of processing Days but does not update the Daily Quantity; and saving your work, the Reschedule Repetitive Schedule window appears. Oracle Work in Process User’s Guide Select a reschedule point option: First Unit Start Date: All other dates and times are cleared and the schedule is forward scheduled using the FUSD and time. First Unit Completion Date: All other dates and times are cleared and the schedule is forward scheduled using FUCD and time. Last Unit Start Date: All other dates and times are cleared and the schedule is backward scheduled using the LUSD and time. Last Unit Completion Date: All other dates and times are cleared and the schedule is backward scheduled using the LUCD and time. 2. Choose the Reschedule button. See Also Defining Repetitive Schedules Manually: page 6 – 13 Changing Repetitive Schedules: page 6 – 27 Repetitive Line Scheduling: page 12 – 13 Repetitive Line Rescheduling: page 12 – 18 Mass Changing Repetitive Schedule Statuses You can change the statuses of repetitive schedules ’en masse’ using the Change Status option from the Special Menu. This mass change capability can be used for a variety of purposes such as releasing schedules to production and putting schedules on hold. Repetitive Manufacturing 6 – 31 " To change the status of several repetitive schedules: 1. Navigate to the Repetitive Schedules window. The Repetitive Schedules Summary window appears. 2. Choose Find from the Query Menu. See: Finding Repetitive Schedules: page 6 – 19. The Repetitive Schedules Summary window appears with the results of the query. 3. In the Repetitive Schedules Summary window, select and deselect schedules as required. See: Selecting Multiple Records, Oracle Application User’s Guide. 4. Choose Change Status from the Special Menu. See: Special Menu: page G – 2. The Change Status window appears. 5. Choose a Status. See: Repetitive Schedules Statuses: page 10 – 12 and Discrete Job and Repetitive Schedule Status Changes: page 10 – 15. 6. Choose OK to save your work. See Also Changing Repetitive Schedules: page 6 – 27 6 – 32 Oracle Work in Process User’s Guide Repetitive Schedule Status Control: page 10 – 10 Repetitive Manufacturing 6 – 33 Completing Repetitive Schedules You can complete repetitive assemblies from repetitive schedules into inventory using the Completion Transactions and Move Transactions windows. You can also return completed assemblies back to schedules using these windows. Note: You can also complete WIP assemblies using the Inventory Transaction Interface and the Open Move Transaction Interface. Routings When you complete an assembly from a repetitive schedule with a routing, assemblies are transacted from the To move intraoperation step in the last operation of the schedule into the completion subinventory and, if required, locator for the line. You cannot complete more assemblies than are in the To move intraoperation step of the last operation. If you did not specify a completion subinventory and locator for the line, then you must specify a subinventory and possibly a locator when you perform the completion transaction. Complete versus Complete–No Charges When the number of assemblies completed equals the number of planned assemblies, the schedule is complete and the status of the schedule changes to either Complete or Complete–No Charges. The difference between these two statuses depends upon whether a future schedule exists. The end date of the schedule does not determine when a schedule is complete, and a repetitive schedule can be active after its end date. If there is a subsequent schedule with a status of Unreleased within the autorelease days time fence, or a schedule with a status of Released, Complete, or On Hold, then the status of the current schedule changes to Complete–No Charges and is automatically released the next schedule if appropriate. If there is no subsequent schedule that meets this requirement, then the status of the current schedule changes to Complete. This keeps the current schedule active so that you can transact any unused or excess material and perform delayed resource and material transactions. Multiple Schedules When you have more than one active schedule open for an assembly on a line at one time, the completion transactions automatically allocate the correct completion quantity to each schedule starting with the oldest schedules. 6 – 34 Oracle Work in Process User’s Guide For example, a repetitive schedule is scheduled to complete 100 assemblies on 10–JAN and 200 assemblies on 11–JAN. On 11–JAN when you complete 200 assemblies, the transaction completes 100 assemblies to the first schedule and the remaining 100 assemblies to the second schedule. Rolling Material Forward When the number of assemblies completed plus the assemblies in the Scrap intraoperation steps equals the number of assemblies planned, the schedule is checked for any excess material. Over–issuing results in excess material. This can occur as a result of pushing too much material to the schedule or from reducing the total quantity of the schedule. If there is any excess material, the system checks to see if there is a future schedule with a status of Unreleased within the autorelease days time frame, or a schedule with a status of Released, Complete, or On Hold following the newly completed schedule. If so, this excess material charge rolls forward to the next schedule, the next schedule is released (if appropriate), and the status of the completed schedule changes to Complete–No Charges. If an appropriate schedule is not found, the status changes to Complete and the excess material charges do not roll forward. You can then analyze the schedule and transact the excess material. Repetitive Manufacturing 6 – 35 Figure 6 – 2 BEFORE THE ROLLFORWARD daily quantity Unreleased Released Units Required: 10 Component A Issued: 12 Component A Assemblies planned: 10 Assemblies completed: 10 Required: 20 Component A Issued: 0 Component A AFTER THE ROLLFORWARD daily quantity Released Complete–No Charges Units Required: 10 Component A Issued: 10 Component A Assemblies planned: 10 Assemblies completed: 10 Required: 20 Component A Issued: 2 Component A Roll forward also occurs if you cancel a schedule and there is an existing Unreleased schedule within the time fence specified by the 6 – 36 Oracle Work in Process User’s Guide Repetitive Autorelease Days Parameter. See: Repetitive Manufactuing Parameters: page 2 – 11. Determines the time period within which the system automatically releases the next Unreleased schedule. When you complete a repetitive schedule, the system searches within the autorelease time frame for an Unreleased schedule, or for a schedule with a status of Released, Complete, or On Hold. If one exists, the status of the newly completed schedule changes to Complete–No Charges and the future schedule is automatically released. If no such schedule exists, the status of the schedule changes to Complete. If more than one schedule exists within the autorelease time frame, only one schedule is released. Stopping Repetitive Schedules Repetitive schedules stop when the number of assemblies completed plus the assemblies in the Scrap intraoperation steps equals the number of planned assemblies. No further action is needed. You do not close repetitive schedules. To prevent accidental charges, change the status of any Complete schedules to Cancelled or Complete–No Charges. Over–completion You can complete more assemblies than are scheduled on a line. For example, if the production process yields a few more assemblies than planned, you can complete the extra assemblies using the Completion Transactions window. Completions are allocated across schedules on a first in–first out basis until only one schedule remains with a status of Complete. If the remaining schedule does not have a routing, you can complete a quantity of assemblies greater than the total quantity on the schedule. If the remaining schedule does have a routing, you must first increase the total quantity on the schedule by either increasing the total quantity, increasing the daily quantity, or by increasing the processing days before you can overcomplete this schedule. You must then move these additional assemblies from the Queue intraoperation step of the first operation sequence to the To move intraoperation step of the last operation sequence. You now have sufficient quantity in the To move intraoperation step of the last operation sequence to complete from the schedule without overcompleting. You can optionally define an additional schedule so you can complete from the line without overcompleting from any schedule. Repetitive Manufacturing 6 – 37 See Also Overview of Period Close, Oracle Cost Management User’s Guide Move Transaction Types: page 8 – 34 Assembly Over–completions and Over–returns: page 7 – 55 Completing and Returning Assemblies: page 7 – 58 6 – 38 Oracle Work in Process User’s Guide Repetitive Schedule Purge You can purge repetitive schedule information using Purge Repetitive Schedules (Form) and Purge Repetitive Schedules (SRS). You can purge all information associated with repetitive schedules including their schedule header records and schedule detail and transaction information. You can also selectively purge the following repetitive schedule information: schedule details (material requirements, resource requirements, and operations), move transactions, and resource cost transactions. Selective purging allows you to retain pertinent historical information. For example, you can retain operation information but purge move transactions associated with these operations. Purge Rules A repetitive schedule may not purge if the any of the following information still exists: • material transactions that reference the repetitive schedule You can purge material and completion transaction information associated with repetitive schedules in Oracle Inventory. See: Purge Transactions, Oracle Inventory User’s Guide. • purchase transactions, purchase requisitions, or purchase orders that reference the repetitive schedule in Oracle Purchasing. • quality results records that reference the repetitive schedule You can delete quality results records associated with repetitive schedules in the Oracle Quality. See: Updating and Deleting Quality Results, Oracle Quality User’s Guide. Reporting You can submit a request to print a Purge Report as you purge repetitive schedules. When you print a report as part of the purge process, the output of the report is determined by the defaulted purge parameters used and the level of detail choosen (Full, Summary, or Excepting) in the Purge Options window. The Purge Report can also be submitted independently of the purge process using the Submit Requests window. When submitted independently of the purge process, only the jobs and/or schedules that failed to purge are listed. Repetitive Manufacturing 6 – 39 See Also Purging Repetitive Schedules: page 6 – 40 Purging Jobs and Schedules: page 14 – 40 Specifying Purge Options: page 3 – 59 Purging Repetitive Schedules You can use the Purge Repetitive Scheules window to purge information associated with Cancelled and Complete–No Charges repetitive schedules. You can purge all repetitive schedule information or just selected information: details (material requirements, resource requirements, and operations), or associated move and/or resource cost transactions. Before purging a repetitive schedule, you can view detail information for that schedule. You can also print one or all of the reports in the Repetitive Schedule Packet for the schedule. See: Current Record Indicator, Oracle Applications User’s Guide and Repetitive Shop Packet: page 14 – 54 Overview of Period Close, Oracle Cost Management User’s Guide. Prerequisites ❑ You must have at least one closed period for your organization. See: Overview of Period Close, Oracle Cost Management User’s Guide. " To find repetitive schedules to purge: 1. Navigate to the Purge Repetitive Schedules window. The Find Repetitive Schedules window appears. 2. Query to find one or more repetitive schedules. See: Finding Repetitive Schedules: page 6 – 19. The Purge Repetitive Schedules Summary window appears with the results of your query. 6 – 40 Oracle Work in Process User’s Guide " To print reports for the queried records: H " Printing Reports for Current Repetitive Schedules: page 6 – 21. To view operations and operation requirements for a selected repetitive schedule: H From either the Purge Repetitive Schedules or Purge Repetitive Schedules Summary window choose the Operations button. The operations, if any, required for the schedule are displayed. See: Viewing Job and Schedule Operations: page 8 – 21. " To view component requirements for a selected repetitive schedule: H From either the Purge Repetitive Schedules or Purge Repetitive Schedules Summary windows choose the Components button. The component materials, if any, required the schedule are displayed. See: Viewing Component Requirements: page 7 – 15. ☞ " Attention: When no routing exists, all components default to operation sequence of 1. To select which repetitive schedules to purge and/or report: 1. From the schedules displayed, select which to include in the purge. See: Selecting Multiple Records, Oracle Applications User’s Guide. Repetitive Manufacturing 6 – 41 2. Choose Purge from the Special Menu. See: Special Menu: page G – 2. The Purge Options window appears. See: Specifying Purge Options: page 3 – 59. See Also Purge Report: page 14 – 45 Transaction Control by Status: page 10 – 18 Changing Repetitive Schedules: page 6 – 27 6 – 42 Oracle Work in Process User’s Guide CHAPTER 7 Material Control T his chapter explains how materials are transacted, controlled, and tracked in Work in Process, including: • Overview: page 7 – 2 • Setting Up: page 7 – 6 • Material Requirements Control: page 7 – 7 • Material Requirements: page 7 – 9 • Material Control Process Diagram: page 7 – 19 • Component Issues and Returns: page 7 – 24 • Supply Subinventory and Locator Replenishment: page 7 – 40 • Backflush Transactions: page 7 – 47 • Assembly Completions and Returns: page 7 – 53 • WIP Inventory Accuracy: page 7 – 65 Material Control 7–1 Overview You can control and monitor which materials are used and how they flow from inventory to discrete jobs and repetitive schedules and from jobs and schedules to inventory. Material Requirements When you define jobs and repetitive schedules, you can combine standard, alternate, or common bills of material and routings to create specific material requirements anywhere in the routing. The job or schedule assembly revision determines which version of the bill of materials is used to create the material requirements. See: Overview of Bills of Material, Oracle Bills of Material User’s Guide and Creating a Bill of Material, Oracle Bills of Material User’s Guide. Synchronizing your Bills of Material and Routings You can specify at which operations component items are required by associating bills of material with routings. When bills and routings are synchronized, material is pushed or pulled onto jobs and schedules only where and when it is needed. This eliminates excess work in process inventory. Push and Pull Requirements You can push (issue) and pull (backflush) components items onto jobs and repetitive schedules. A component’s supply type determines how it is supplied. See: Supply Types: page C – 2, Backflush Transactions: page 7 – 47, and Component Issues and Returns: page 7 – 20. Replenish Supply Subinventories and Locators You can replenish depleted supply subinventory stores. This ensures that materials are available for backflush transactions. See: Supply Subinventory and Locator Replenishment: page 7 – 38. Reverse Transactions Material transactions are reversible. You can return components that have been issued to jobs and schedules back to inventory. You can also return completed assemblies from inventory to jobs and schedules. See: Component Issues and Returns: page 7 – 20 and Assembly Completions and Returns: page 7 – 53. 7–2 Oracle Work in Process User’s Guide Transaction Processing Options You can choose how to process material transactions using WIP transaction processing profile options. For most transactions, the available options are on–line, concurrent, and background processing. See: Profile Options: page 2 – 41. Open Material Transactions Interface You can load work in process material transaction information from external systems — such as bar code readers and other data collection devices — into the Inventory Transaction Interface. When this data is processed, it is validated, and invalid records are marked so that you can correct and resubmit them. Transaction Control The status of a job or schedule indicates what point it has reached in its life cycle. Statuses also control which activities can be performed. For example, when you define a job or schedule, its status defaults to Unreleased. You must change its status to Released before you can transact against it. See: Transaction Control By Status: page 10 – 18. Item Transaction Control In Oracle Inventory, you can allow or disallow material transactions for specific items. Lot and Serial Number Control You can issue, backflush, and complete lot, serial number, and lot and serial number controlled items. For lot controlled assemblies you build using discrete jobs, there are complete lot composition inquiries and reports. See: Lot and Serial Number Backflushing: page 7 – 49. Backflush Lot Selection You can specify how lot controlled components are selected during backflush transactions with the WIP Lot Selection Method parameter. Lots can be selected manually — in other words you specify which lots are used — or they can be selected automatically based on either their inventory expiration or receipt date. See: Backflush Default Parameters: page 2 – 15. Revision Control Oracle Work in Process, Oracle Inventory, Oracle Bills of Material, and Oracle Engineering combine to provide complete revision control. You can define item revisions in either Oracle Inventory, Oracle Bills of Material Control 7–3 Material, or Oracle Engineering. You can build open, released, scheduled, and implemented revisions. You cannot build revisions that have statuses of On Hold. See: Item and Routing Revisions, Oracle Bills of Material User’s Guide. Engineering Items You can choose whether to build engineering items and whether to use engineering items as material requirements. Alternate Units of Measure You can issue components and complete assemblies using alternate units of measure. Transactions are recorded and reported in both the base and transacted units of measure. Nettable Controls You can specify whether assembly quantities are included as supply in the MRP planning process when you define jobs and schedules. You can also specify whether job and schedule material requirement quantities are included as demand in the net requirements calculation. You can specify, using the WIP:Requirement Nettable profile option, whether the quantities in non–nettable subinventories are included when on–hand quantities are displayed in the Material Requirements and View Material Requirements windows. You can also choose to include non–nettable inventories when using the Discrete Job and Repetitive Schedule Shortage Reports to view inventory balances. Requirements Reporting You can view material requirements in a variety of ways including by assembly, by job, by production line, by date required, and by subinventory. Shortages can be highlighted so that planners and buyers can respond. See: Viewing Material Requirements: page 7 – 13. WIP Inventory Accuracy You can maintain accurate inventory balances for components and assemblies using tools provided in Oracle Inventory and Work in Process. See: WIP Inventory Accuracy: page 7 – 65. See Also Work in Process Planning: page D – 2 Setting Up Material Control: page 7 – 6 7–4 Oracle Work in Process User’s Guide Material Requirements Control: page 7 – 7 Open Transaction Interface, Oracle Manufacturing, Distribution, Sales and Service Open Interfaces Manual, Release 11 Material Control 7–5 Setting Up • For a listing of out–of–product setups that affect material processing see: Setup Prerequisites: page 2 – 3. • For a listing of setup within Work in Process that affect material processing see: Setup Check List: page 2 – 5. • For additional information about parameters that affect material processing see: WIP Parameters: page 2 – 9. • For a listing of profile options that affect material processing see: Profile Options: page 2 – 41. 7–6 Oracle Work in Process User’s Guide Material Requirements Control Open material requirements are satisfied when components are issued and backflushed. Open Requirements When you create jobs and repetitive schedules that have bills of material, routings, or both, material requirements for the appropriate components are automatically created. These requirements (demands) are considered ’open’ until they are fulfilled. The MRP planning process and available to promise calculations include open requirements as demand but do not formally allocate them to their parent jobs and repetitive schedules. Shortages Material shortages occur when insufficient inventory exists to cover open requirements. The MRP planning process reports current and projected material shortages and develops a plan to satisfy those shortages. Negative Requirements You can use negative material requirements to recover by–products or other reusable components. Jobs and repetitive schedules supply negative requirements instead of consuming them. See: By–Product Recovery: page 7 – 8. Available–to–Promise Materials You can view available–to–promise (ATP) status of components as you define, simulate, and view discrete jobs and as you view repetitive schedules. See: Viewing Component ATP Information: page 7 – 17 WIP Shortage Reporting The Discrete Job Shortage and Repetitive Schedule Shortage Reports list shortages or open requirements for jobs and repetitive schedules based on requirement date. You can optionally include quantities in non–nettable subinventories in the on–hand quantities displayed on these reports. You can also use these report to view bulk and supplier component requirements. The View Material Requirements window can be used to view the requirements for a component across jobs and schedules. You can view quantities required and issued for each component. Material Control 7–7 Material Requirements Reporting You can supplement materials information provided by WIP reports and inquiries with Oracle Inventory reports and inquiries. For example, you can use Oracle Inventory reports to list on–hand balances and transaction information. See: Oracle Inventory Reports, Oracle Inventory User’s Guide. See Also Overview of Material Requirements Planning, Oracle Master Scheduling/MRP and Oracle Supply Chain Planning User’s Guide Available to Promise, Oracle Master Scheduling/MRP and Oracle Supply Chain Planning User’s Guide Oracle Work in Process Reports: page 14 – 1 By–Product Recovery You can create negative material requirements to support the recovery of by–products and other reuseable or recoverable components. Negative requirements are supplied instead of consumed by jobs and schedules. For example, if you add negative material requirements to a non–standard discrete job that is tracking the disassembly of a completed part, the job supplies component materials rather than consuming them. Negative requirements are considered supply by the MRP planning process. You can define negative requirement usage quantities when you assign components to bills of material in Oracle Bills of Material. Negative requirements can be assigned to lot, serial number, and lot and serial number controlled items. See Also WIP Material Transaction Types: page 7 – 25 Supply Types: page C – 2 Adding and Updating Material Requirements: page 7 – 9 7–8 Oracle Work in Process User’s Guide Material Requirements You can add, update, and delete material requirements. Adding and Updating Material Requirements You can add material requirements to discrete jobs and repetitive schedules with statuses of Unreleased, Released, On Hold, and Complete. Note: You can also add material requirements ’ad hoc’ to jobs and schedules by issuing components not required by the job or schedule. See: Issuing and Returning Specific Components: page 7 – 26. You can also update job and repetitive schedule material requirement information including: Date Required, Required or Per Assembly quantity, MRP Net option, supply Type, supply Subinventory and Locator, and Comments. For repetitive schedules, you can also view, but not update, daily Requirement and Issue Quantities, as well as information regarding a schedule’s progress (Quantity and Days Ahead or Behind). " To add or update material requirements: 1. Navigate to the Material Requirements window. Material Control 7–9 2. Select the Job or repetitive Line and Assembly. You can only select a discrete job or a repetitive line and assembly for a repetitive schedule if the job or schedule has a status of Unreleased, Released, On Hold, or Complete. 3. If you select a line and assembly, choose the repetitive schedule by selecting the first unit start date of that schedule. If you select a discrete job, the system displays the scheduled start date of the job. 4. Optionally, choose the Find button to populate the Material Requirements region. 5. From the Main alternative region of the Material Requirements region, select the Component to update or add. You can add items with Push, Assembly Pull, Operation Pull, Bulk, Phantom, and Supplier supply types. If you add Phantom items, their supply types are changed to Push. Supply types are also changed to Push if you add Assembly Pull items to jobs or schedules without bills of material. Similarly, if you add Operation Pull items to jobs or schedules without routings, their supply types are changed to Assembly Pull. You can add engineering items as requirements if you have the WIP:See Engineering Items profile option set to Yes. See: Profile Options: page 2 – 41 and Engineering Bills of Material and Routings, Oracle Engineering User’s Guide. In the case of non–standard discrete jobs, you can add the primary assembly as a component. In other words, the job assembly requires itself. This is useful when you use non–standard jobs to manage rework or disassembly. See: Rework Assemblies: page 4 – 7 and Disassemble Assemblies: page 4 – 12. You can add items that already exists as job or schedule component requirements if you add them at a different operation sequence. 6. If adding a component, select the Operation Sequence number. See: Overview of Routings, Oracle Bills of Material User’s Guide and Creating a Routing, Oracle Bills of Material User’s Guide. You can only add components at existing operations. The operation sequence identifies where the material is required. If you add a requirement to a job or schedule without a routing, the system displays 1 as the default operation sequence. This value cannot be updated. 7. 7 – 10 Select the Date Required. Oracle Work in Process User’s Guide For jobs with routings, the system displays the start date of the operation as the default. For repetitive schedules with routings, the system displays the first unit start date of the operation as the default. You can update the date required with a date that lies between the start and completion dates of the operation. For jobs and schedules without routings, the systems displays the scheduled start date of the job or the first unit start date of the schedule as the default. You can update the date required with a date and time that lies between the start date and time and completion date and time of the job or schedule. 8. In the Quantities alternative region, enter the Per Assembly Quantity or the Required Quantity for the component. If you are adding a component, the per assembly quantity defaults to 1 and the required quantity is derived from the job or schedule quantity and displayed in the component’s primary UOM. It can be updated. If you update the per assembly quantity, the required quantity is automatically calculated. Conversely if you update the required quantity, the per assembly quantity calculated. You can enter a decimal value, such as 1.25, for both the per assembly and the required quantity. You can also enter a required or per assembly quantity of zero. 9. In the Supply alternative region, select the Supply Type. See: Supply Types: page C – 2. When you add components, the supply type specified for the item in Oracle Inventory is normally defaulted. If the item does not have a supply type, the supply type defaults to Push. Supply type selection is restricted based on the type and makeup of the job or schedule. You cannot, for example, change the supply type of a Push component to Assembly Pull if the job or schedule has no routing. 10. If the component’s supply type is Assembly Pull or Operation Pull, you must select the supply Subinventory, and if required by the supply subinventory, the supply Locator. See: Supply Subinventory and Locator Fields, Oracle Bills of Material User’s Guide. 11. Check the MRP Net check box to include material requirements as demand (Per Assembly Quantity or Required Quantity greater than 0) or supply (Per Assembly Quantity or Required Quantity less than 0) in the calculation of net requirements. See: Net Work in Process, Oracle Master Scheduling/MRP and Oracle Supply Chain Planning User’s Guide. Material Control 7 – 11 If you have entered a negative quantity for a standard discrete job or repetitive schedule, you cannot check the MRP check box. If you have entered a negative quantity for a non–standard discrete job and check the MRP check box, Master Scheduling/MRP and Supply Chain Planning nets the negative requirement as supply rather than demand. 12. In the Comments alternative region, enter or update the Comment. 13. Save your work. See Also Material Requirements Control: page 7 – 7 Setting Up Material Control: page 7 – 6 Deleting Material Requirements: page 7 – 12 Deleting Material Requirements You can delete material requirements from Unreleased discrete jobs and repetitive schedules. Material requirements that have issued quantities of 0 can also be deleted from jobs and schedules with statuses of Released, On Hold, and Complete. You cannot delete material requirements for which there are pending transactions. " 7 – 12 To delete material requirements: 1. Navigate to the Material Requirements window. 2. Select the Job or Line and Assembly. 3. If you select a line and assembly, choose the repetitive schedule by selecting the first unit start date of that schedule. If you have selected a discrete job, the system displays the scheduled start date of the job. 4. Choose the Find button to populate the Material Requirements region. 5. In the Material Requirements region, select the Component. 6. Choose Delete Record from the Edit Menu. 7. Save your work. Oracle Work in Process User’s Guide Viewing Material Requirements You can view material requirements for individual discrete jobs and repetitive schedules using the View Material Requirements window. You can also view material requirements across jobs and schedules using this window. " To find and view material requirements: 1. Navigate to the View Material Requirements window. The Find Material Requirements window appears. You can view requirements for jobs and schedules of a specific status (Unreleased, Complete, Released, On Hold, Complete–No Charges). You can view all requirements for a specific component or all components required from a specific subinventory/locator. You can also view components required on a specific date or within a range of dates. Lastly you can view open or negative requirements. 2. Enter any combination of search criteria and choose the Find button. The results display in the View Material Requirements window. Material Control 7 – 13 You can view the following information in View Material Requirements window’s alternative regions: Main: Operation Sequence, Department, Date Required, Comments Note: You can view Component Descriptions using the Material Requirements window. See: Adding and Updating Material Requirements: page 7 – 9. Quantities: UOM and Per Assembly, Required, Issued, Open, and On Hand quantities Repetitive Quantities: UOM and Per Assembly, Required Today, Issued Today, Ahead and Behind Quantities and Days Supply: supply Type, Subinventory, Locator, and MRP Net flag Job or Schedules: Job or Line/Assembly, and Status ATP: ATP Allowed flag and ATP Rule You can also view, if entered, descriptive flexfield information. See: Setting Up Descriptive Flexfields: page 13 – 4. See Also Searching for Information, Oracle Applications User’s Guide Material Requirements Control: page 7 – 7 7 – 14 Oracle Work in Process User’s Guide Viewing Component Requirements You can view job and repetitive schedule component requirements by choosing the Components button from the Discrete Jobs, Simulate Discrete Jobs, View Discrete Jobs, Close Discrete Jobs, Purge Discrete Jobs, Repetitive Schedules, View Repetitive Schedules, and Purge Repetitive Schedule windows. You can also view component requirements for a specific job or repetitive schedule operation by choosing the Operations then the Components button from any of these windows. From the Discrete Jobs, Simulate Discrete Jobs, and View Discrete Jobs windows you can optionally view ATP component information. " To view component requirements for the current job, schedule or operation: H After choosing the Components button, the Material Requirements window (in view only mode) appears. You can then view detailed information about components in the window’s alternative regions: • Main: Operation Sequence, Department, Date Required, Component Description. • Quantities: UOM and Per Assembly, Required, Issued, Open, and On Hand quantities. Material Control 7 – 15 • Supply: supply Type, Subinventory, Locator, and MRP Net option. • ATP: ATP Allowed flag and ATP Rule Note: This region is accessible only if you are viewing material requirements using a window that allows ATP checking the Material Requirements window, the Check ATP button is enabled only if you have accessed this window from a window that allows ATP checking. • Comment: job Comment Note: You can view material requirements across jobs and schedules using the View Material Requirements window. See: Viewing Material Requirements: page 7 – 13. " To view component ATP for jobs and repetitive schedules: H ☞ If the Check ATP button is enabled in the Material Requirements window, you can check the ATP status of components. See: Viewing Component ATP Information: page 7 – 17. Attention: The Check ATP button is only enabled if you are choose the Components button from the Discrete Jobs, Simulate Discrete Jobs, View Discrete Jobs, or View Repetitive Schedules window or if you choose the Operations button then the Components button from any of these windows. You can only check the ATP status of the components that have their ATP Allowed flag set. This flag is automatically set if the Check ATP attribute for that item is set. See: Defining Items, Oracle Inventory User’s Guide and Order Entry Attribute Group, Oracle Inventory User’s Guide. You can view the ATP status of several component records at one time by choosing multiple records. If you choose Select All from the Edit menu, only those components that have their ATP Allowed flag set are highlighted. If you specifically select components that do not have this flag set, you are warned that the components you have selected are not Check ATP enabled. You must deselect these components before proceeding. See: Selecting Multiple Records, Oracle Applications User’s Guide. See Also Defining Discrete Jobs Manually: page 3 – 12 Simulating and Saving Simulated Jobs: page 3 – 43 7 – 16 Oracle Work in Process User’s Guide Closing Discrete Jobs: page 3 – 51 Viewing Discrete Job Information: page 3 – 31 Purging Discrete Jobs: page 3 – 57 Viewing Repetitive Schedule Information: page 6 – 24 Purging Repetitive Schedules: page 6 – 40 Viewing Component ATP (Available to Promise) Information As you define, simulate, and view discrete jobs and as you view repetitive schedules, you can view their associated components by choosing the Components button. See: Viewing Component Requirements: page 7 – 15. If the displayed components have their Check ATP attribute set, you can optionally view their ATP status by choosing the Check ATP button. See: Defining Items, Oracle Inventory User’s Guide and Order Entry Attribute Group, Oracle Inventory User’s Guide. Note: You do not have to enter ATP Information and ATP Criteria as you do when checking the ATP status of components in Oracle Inventory. This information is automatically derived. However, you can only view the ATP status of a component if an ATP Rule can be found and applied to that component. When searching for an ATP Rule, the system first checks at the WIP parameter level, then at the item attribute level, and finally at the organization parameter level. If an ATP rule cannot be found, an error message is displayed when you Choose the Check ATP button. See: ATP Parameter: page 2 – 12, Organization Parameters Window, Oracle Inventory User’s Guide, and Defining ATP, Pick, Item–Sourcing Parameters, Oracle Inventory User’s Guide. " To view the available–to–promise status of components: 1. After choosing the Check ATP button from the Material Requirements window, the ATP Results window appears and displays current ATP information as follows: Required and Projected region: Displays the job Required Quantity and Required Date, the Available Quantity (current on–hand quantity that is available to promise on the required date), and the Projected Transactable quantity (includes the current available Material Control 7 – 17 quantity, minus reservations, plus all future sources of supply and less all future sources of demand up to the required date). ATP and Early ATP region: Displays the ATP Date (the first date on or after the required date that the required quantity is available), ATP Quantity (the projected on–hand quantity of the item at the ATP date), the Early ATP Date (the earliest date that the required quantity of the item is projected to be available), and the Early ATP Quantity (the quantity of the item available on the earliest ATP date. If the earliest ATP date is the date corresponding to infinite supply, the quantity is displayed as 10,000,000,000). " To view the supply, demand, and ATP item quantities for the periods that fall between the current date and the infinite supply time fence date: H " Choose the Period ATP button. See: Viewing ATP by Period Detail, Oracle Inventory User’s Guide. To view the supply source and demand source used to calculate the ATP quantity for the item: H ☞ Choose the Supply/Demand button. See: Viewing ATP Supply/Demand Detail, Oracle Inventory User’s Guide. Attention: This option is not available if you are viewing ATP material availability for discrete jobs. See Also Entering ATP Criteria, Oracle Inventory User’s Guide 7 – 18 Oracle Work in Process User’s Guide Material Control Process Diagram The following diagram illustrates the flow of materials in Work in Process. Figure 7 – 1 Miscellaneous Issue Floor Stock Account Supplier Bulk Supplier (Outside Processing) Work in Process Complete Jobs Raw & Subassembly Inventory Finished Goods Inventory Push Issue Repetitive Schedules Operation Pull Backflush Assembly Pull Backflush Floor Stock Inventory Replenish Material Control 7 – 19 Component Issues and Returns You can issue components from inventory to jobs and repetitive schedules and return issued components from jobs and schedules to inventory using the WIP Material Transactions window. There are two issue and return options available from this window: All Material and Specific Component. Push and Pull Components You can issue and return both push and pull components. You can ’push’ components from inventory to specific job and repetitive schedule operations. A component’s supply type determines how it is supplied to a job or schedule. See: Supply Types: page C – 2. Negative Component Issues and Returns You can issue components to satisfy negative job and schedule requirements. When you issue negative requirement components, the components are returned from the job or schedule to inventory. You can reverse negative component issues with negative component returns. When you return components that have negative requirements, the components are issued from inventory to the job or repetitive schedule. See: WIP Material Transaction Types: page 7 – 25. Negative Inventory Balances You can set the Allow Negative Balances Parameter in Oracle Inventory so that the inventory balances of items can be driven negative. If this parameter is set, a warning message is displayed to notify you that balances are about to be driven negative. You can continue with the transaction or stop it and fix the condition. Requirement Quantities You can issue partial requirement quantities. You can also over–issue requirements. Material that is required, but not issued, is considered an open requirement. Transaction Criteria You can use the ’All Material’ option to issue push components to specific departments or operations associated with jobs or schedules with routings. When you issue to a job, the assembly quantity specified determines how many push components are issued. When you issue to repetitive schedules, the component quantity is based on the specified start date and the number of days supply. The start date and days are 7 – 20 Oracle Work in Process User’s Guide used to determine the number of days worth of requirements you want to fulfill on the schedule. Ad Hoc Requirements You can issue and return components that do not appear as job or schedule material requirements using the ’Specific Component’ option. When you issue or return components using this option, the system determines if the item is a material requirement for the job or schedule. If the item is not a material requirement, is a backflush component, or is not required at the operation sequence a warning message is displayed, but you can continue with the transaction. Components added in this manner are commonly referred to as ’ad hoc’ components. Bulk, Supplier, and Phantom Components You can issue Bulk, Supplier, and Phantom supply type items, which do not normally appear as requirements in the WIP Material Transactions window, using the ’Specific Component’ option. Alternate Unit of Measure You can issue and return component items in their primary or alternate unit of measure. If you select an alternate unit of measure, the system converts the transaction quantity using the conversion factor you specified when you defined the unit of measure in Oracle Inventory. You can change this quantity. If the material is under serial number control, you can only change the transaction quantity to an integer when expressed in the primary unit of measure. For example, you can issue 0.5 dozen (DZ) if the primary unit of measure is each (EA). Supply Subinventory and Locator You can change default supply subinventories and locators by updating component requirements using the Material Requirements window. You can also change default supply subinventories and locators as you issue components. See: Supply Subinventory and Locator Fields, Oracle Bills of Material User’s Guide. Lot and Serial Control You can issue and return component items that are under lot, serial number, or both lot and serial number control. You must assign lot and serial numbers as you issue and return components. Material Control 7 – 21 Revision Control You can issue and return component items that are under revision control. The system always defaults the component revision to the current revision as of the transaction date. You can select a different revision. See: Item and Routing Revisions, Oracle Bills of Material User’s Guide. See Also Issuing and Returning Specific Components: page 7 – 26 Repetitive Component Issues and Returns: page 7 – 22 Backflush Supply Subinventories and Locators: page 7 – 48 Repetitive Component Issues and Returns To issue components from inventory to repetitive schedules or to return components from repetitive schedules to inventory, you must select a repetitive assembly and line. Repetitive Component Issues When you issue to a repetitive schedule, the system determines which components must be issued based on the start date and number of schedule days entered. Positive Requirements For positive requirements, WIP component issue transactions are automatically allocated to specific repetitive schedules on a first in–first out basis based on the schedule’s start date. If there is more than one open schedule, issues are allocated to each schedule until there are no more open schedules. If you over–issue, the entire over–issue quantity is allocated to the last open schedule. For positive requirements, WIP component return transactions are allocated on a last in – first out basis, based on the schedule’s start date. Negative Requirements For negative requirements, WIP negative component issue transactions are automatically allocated to specific schedules on a first in – first out 7 – 22 Oracle Work in Process User’s Guide basis. WIP negative component issue transactions supply the components to Oracle Inventory as a part of normal production. If there is more than one open repetitive schedule, negative component issues are allocated to each schedule until there are no open schedules to allocate to. If you over–issue a negative component, the entire over–issue quantity is allocated to the last open schedule. Multiple Schedules When you have more than one active schedule for an assembly on a line, material transactions automatically allocate the correct amount of material to each schedule. The system assumes that you work on older schedules first and charges the earliest schedule first followed by the next earliest schedule and so on. For example, suppose a repetitive schedule has been released to produce 100 assemblies ABC on 10–JAN and 200 assemblies ABC on 11–JAN. If you issue 200 assemblies’ worth of components on 11–JAN, then 100 assemblies’ worth of components are charged to the first schedule and the remaining 100 assemblies worth of components to the second schedule. Phantoms Phantom assemblies can be used in repetitive schedules. At the time the schedule is defined, the phantom’s requirements are exploded and added to the schedule at the operation where the phantom was assigned. Repetitive Component Returns When you return components from a repetitive schedule, you must enter a start date and number of schedule days to default the return quantities. Positive Requirements For positive requirements, WIP component return transactions are automatically allocated to specific repetitive schedules on a last in–first out basis. If there is more than one open repetitive schedule, each schedule is allocated until there are no more open repetitive schedules to allocate to. If you over–return, the entire over–return quantity is allocated to the first open repetitive schedule. Material Control 7 – 23 Negative Requirements For negative requirements, WIP negative component return transactions are automatically allocated to specific repetitive schedules on a last in–first out basis. If there is more than one open repetitive schedule, negative component returns are allocated to each schedule until there are no more open repetitive schedules to allocate to. If you over–return, the entire over–return quantity is allocated to the last open repetitive schedule. See Also Issuing and Returning Specific Components: page 7 – 26 Issuing and Returning All Push Components: page 7 – 30 WIP Material Transaction Types: page 7 – 25 By–Product Recovery: page 7 – 8 Component Issue and Return Transaction Options Component issue and return transactions can be launched by: • Issuing and Returning Specific Components: page 7 – 26 and Issuing and Returning All Push Components: page 7 – 30 • Backflushing Pull Components while Completing and Returning Assemblies: page 7 – 58 • Backflushing Pull Components: page 8 – 42Backflushing Pull Components while Performing Move Transactions: page 8 – 35 • Backflushing Pull Components while Entering Receipts. See: Entering Receipt Header Information, Oracle Purchasing User’s Guide Issue, return, and backflush transactions can also be imported through the Oracle Inventory: Open Transaction Interface, Oracle Manufacturing, Distribution, Sales and Service Open Interfaces Manual, Release 11. 7 – 24 Oracle Work in Process User’s Guide WIP Material Transaction Types When you enter material transactions in the WIP Material Transactions window you must select one of the following transaction types: WIP component issue Issues components from inventory to jobs and schedules to fulfill positive material requirements. If you issue components under lot, serial, or lot and serial number control, you must identify which lots and/or serial numbers to issue. WIP negative component issue Issues components from jobs and schedules to inventory to fulfill negative material requirements. When you issue components that have negative requirements, components are returned from the job or schedule to inventory. If you return components under lot, serial, or lot and serial number control, you must identify the lots and/or serial numbers to return. Negative material requirements allow you to recover by–products from your manufacturing processes. WIP component return Returns components from jobs and schedules to inventory. WIP component returns reverse WIP component issues. If you return components under lot, serial, or serial number control, you must identify the lots and/or serial numbers to return. WIP negative component return Returns components to jobs and schedules from inventory to fulfill negative material requirements. WIP negative component returns reverse WIP negative component issues. When you return components that have negative requirements, components are issued from inventory to the job or repetitive schedule. If you issue components that are under lot, serial, or lot and serial number control, you must identify the lots and/or serial numbers to issue. Negative material requirements allow you to recover by–products from your manufacturing processes. Replenishment supply subinventory Replenishes the supply subinventories of Operation Pull or Assembly Pull supply type components. You can transfer components from a ’source’ subinventory/locator to the supply subinventory/locator associated with the Material Control 7 – 25 component specified. If you replenish components under lot, serial, or lot and serial number control, you must identify the lots and/or serial numbers that are used to replenish the supply subinventory/locator. This transaction is similar to a subinventory transfer in Oracle Inventory. See Also Transaction Types, Oracle Inventory User’s Guide Defining and Updating Transaction Types, Oracle Inventory User’s Guide Issuing and Returning Specific Components: page 7 – 26 Issuing and Returning All Push Components: page 7 – 30 By–Product Recovery: page 7 – 8 Replenishing Supply Subinventories and Locators: page 7 – 41 Transferring Between Subinventories, Oracle Inventory User’s Guide Issuing and Returning Specific Components You can use the ’Specific Component’ option to issue and return components of any supply type to and from jobs and schedules. If the job or schedule has a routing, components can be issued and returned to any operation. Ad Hoc Material Requirements You can use the ’Specific Component’ option to issue and return components that are not required on the work in process bills of jobs and schedules. These ad hoc material requirements are created with a required quantity of 0. Prerequisites ❑ Release a job or repetitive schedule. See: Releasing Discrete Jobs: page 3 – 28 and Releasing Repetitive Schedules: page 6 – 21. 7 – 26 Oracle Work in Process User’s Guide " To select sales orders, discrete jobs, or repetitive schedules: 1. Navigate to the WIP Material Transactions window. 2. Select a Sales Order, repetitive Line and Assembly, Assembly, or Job. The cursor defaults to one of these fields based on how the TP:WIP:Material Transactions First Field profile option is set. See: Profile Options: page 2 – 41. You can only select a discrete job or a repetitive line and assembly for a repetitive schedule if the job or schedule has a status of Released or Complete. " To define issue or return transaction header information: 1. In the Transaction region, select the transaction Type: WIP component issue, WIP component return, WIP negative component issue, or WIP negative component return. See: WIP Material Transaction Types: page 7 – 25. 2. Enter the transaction Date and time. The date and time must fall within an open accounting period and cannot be greater than the current date or less than the release date of the job or the earliest valid repetitive schedule. 3. Optionally, select a default supply Subinventory and, if required by the supply subinventory, the supply Locator. See: Supply Subinventory and Locator Fields, Oracle Bills of Material User’s Guide. Material Control 7 – 27 If a supply subinventory/locator is entered here, it is used in the transaction detail window as the default for those components that do not have a supply subinventory/locator defined at the component or item level. If the Oracle Inventory INV:Allow Expense to Asset Transfer profile option is set to Yes, you can select an expense subinventory. See: Inventory Profile Options, Oracle Inventory User’s Guide 4. ☞ 5. Choose the Include Specific Component option. Attention: You cannot enter transaction criteria when issuing or returning specific components. Choose the Transact button. Depending on the transaction type selected, the transaction detail folder window (WIP component issue, WIP component return, WIP negative component issue, or WIP negative component return) appears. See: Customizing the Presentation of Data in a Folder, Oracle Applications User’s Guide. " To transact or add and transact ’ad hoc’ component requirements: 1. 7 – 28 In transaction detail folder window (WIP component issue, WIP component return, WIP negative component issue, or WIP negative component return), select the component Item. Oracle Work in Process User’s Guide You can select Push, Assembly Pull, Operation Pull, Bulk, Supplier and Phantom supply type items. You can select lot, serial, or lot and serial controlled items. You can select components that are required by a job or schedule even though they are not automatically displayed. 2. If the component is under revision control, select the component’s Revision. See: Item and Routing Revisions, Oracle Bills of Material User’s Guide. The item’s current revision is defaulted. 3. Select the supply Subinventory and, if required by the subinventory, the supply Locator. See: Supply Subinventory and Locator Fields, Oracle Bills of Material User’s Guide. If the component does not have an assigned subinventory/locator, the subinventory/locator entered in the WIP Material Transaction window is defaulted. It can be overwritten. If the Oracle Inventory INV:Allow Expense to Asset Transfer profile option is set to Yes, you can select an expense subinventory. See: Inventory Profile Options, Oracle Inventory User’s Guide. 4. If the job or schedule has a routing, select the Operation Sequence. If no routing exists, the operation sequence defaults to 1. ☞ Attention: Do not assign Assembly Pull items to operations that are non–count point/autocharge operations. This can result in Material Control 7 – 29 over–issues at the operation if you do not transact all assemblies that you are completing through the operation. 5. Select the UOM. See: Overview of Units of Measure, Oracle Inventory User’s Guide. 6. Enter the transaction Quantity. You can enter any nonzero quantity including a quantity that result in an over–issue or over–return of a job or schedule’s components requirements. 7. Optionally, select the transaction Reason code. See: Defining Transaction Reasons, Oracle Inventory User’s Guide. 8. Optionally, enter the transaction Reference. References can be used to identify transactions on standard reports. They can be up to 240 characters of alpha numeric text. 9. If the component is under lot, serial, or lot and serial control, choose the Lot/Serial button. See: Assigning Lot Numbers, Oracle Inventory User’s Guide and Assigning Serial Numbers, Oracle Inventory User’s Guide. 10. Choose the Done button to save your work. See Also Component Issues and Returns: page 7 – 20 Setting Up Material Control: page 7 – 6 By–Product Recovery: page 7 – 8 Issuing and Returning All Push Components: page 7 – 30 Adding and Updating Material Requirements: page 7 – 9 Issuing and Returning All Push Components You can use the ’All Material’ option to issue and return Push supply type components to discrete jobs and repetitive schedules. You can only issue and return Push components that already exist on the work in process bill or routing however. 7 – 30 Oracle Work in Process User’s Guide Prerequisites ❑ Release a job or repetitive schedule. See: Releasing Discrete Jobs: page 3 – 28 and Releasing Repetitive Schedules: page 6 – 21. " To select a sales order, discrete job, or repetitive schedule: 1. Navigate to the WIP Material Transactions window. 2. Select a Sales Order, repetitive Line and Assembly, Assembly, or Job. The cursor defaults to one of these fields based on how the TP:WIP:Material Transactions First Field profile option is set. See: Profile Options: page 2 – 41. You can only select a discrete job or a repetitive line and assembly for a repetitive schedule if the job or schedule has a status of Released or Complete. " To define issue or return transaction header information for discrete jobs: 1. In the Transaction region, select the transaction type: WIP component issue, WIP component return, WIP negative component issue, or WIP negative component return. See: WIP Material Transaction Types: page 7 – 25. 2. Enter the transaction Date and time. The date and time must fall within an open accounting period and cannot be greater than the current date or less than the release date of the job. Material Control 7 – 31 3. Select the supply Subinventory and, if required by the subinventory, the supply Locator. See: Supply Subinventory and Locator Fields, Oracle Bills of Material User’s Guide. The supply subinventory/locator is optional. If it is entered here, it is used as the default in the transaction detail window for those components that do not have a supply subinventory/locator defined at the component or item level. If the Oracle Inventory INV:Allow Expense to Asset Transfer profile option is set to Yes, you can select an expense subinventory. 4. Choose the Include All Material option. 5. In the Criteria region, optionally enter any criteria or combination of criteria that is valid for the job: Assembly Quantity, Operation Sequence, or Department. Assembly Quantity: If you enter an assembly quantity, it must be less than or equal to the job quantity. If the job has a routing and you do not enter an assembly quantity, required component quantities — original required quantity minus component quantities already issued — for all push components are calculated and displayed as defaults in the transaction detail folder window. You can change these defaulted quantities. Operation Sequence: If the job has a routing, you can issue push components to or return push components from a specific operation. 7 – 32 Oracle Work in Process User’s Guide If the job does not have a routing and you do not enter an assembly quantity, required component quantities are not automatically displayed in the transaction detail folder window. Department: If the job has a routing, you can issue push components to or return push components from a specific department. Supply Subinventory: If you select a supply Subinventory, only those components that have the same default supply Subinventory are displayed in the transaction detail folder window. This is convenient when assembly components have different subinventories and these subinventories are controlled by different users. ☞ 6. Attention: You can optionally use the ’All Material’ option to add push components to the work in process bill. However, you can only add requirements that already exist on that bill. Conversely, you can return only components that already exist on the work in process bill when you return components. Choose the Transact button. Depending on the transaction type selected, the transaction detail folder window (WIP component issue, WIP component return, WIP negative component issue, or WIP negative component return) appears. " To define issue or return header information for repetitive schedules: 1. After selecting a repetitive schedule, repeat steps 1 through 3 above. 2. Choose the Include All Material option. Material Control 7 – 33 3. In the Criteria region, enter the Start Date and time and the number of Days. Push component requirements are issued or returned to repetitive schedules based on the schedule Start Date and number of Days. The component quantities required to support the number of days entered are calculated and displayed as defaults in the transaction details folder window. You can change these defaulted quantities. When you issue push components to repetitive schedules, all component requirements for the number of days and from the start date you specify — regardless of what you have already issued — are issued. 4. If the schedule has a routing, optionally select the Operation Sequence number, the Department, or both. Operation Sequence: You can issue push components to or return push components from a specific repetitive schedule operation. Department: You can issue push components to or return push components from a specific department of a repetitive schedule operation. Supply Subinventory: If you select a supply Subinventory, only those components that have the same default supply Subinventory are displayed in the transaction detail folder window. This is convenient when assembly components have different subinventories and these subinventories are controlled by different users. 5. Choose the Transact button. Depending on the transaction type selected, the transaction detail window (WIP component issue, WIP component return, WIP negative component issue, or WIP negative component return) appears. " To issue or return push components: 1. 7 – 34 From the transaction detail folder window (WIP component issue, WIP component return, WIP negative component issue, or WIP negative component return), select the component Item. Oracle Work in Process User’s Guide 2. If the item is under revision control, select the item Revision. See: Item and Routing Revisions, Oracle Bills of Material User’s Guide. The item’s current revision is defaulted. 3. Select the supply Subinventory and, if required by the subinventory, the supply Locator. See: Supply Subinventory and Locator Fields, Oracle Bills of Material User’s Guide. If the Oracle Inventory INV:Allow Expense to Asset Transfer profile option is set to Yes, you can select an expense subinventory. See: Inventory Profile Options, Oracle Inventory User’s Guide. 4. Select the UOM. See: Overview of Units of Measure, Oracle Inventory User’s Guide. The available to transact quantity and the current on–hand quantity for the component are displayed in this unit of measure. 5. Enter the transaction Quantity. You can change the default quantity (original required quantity minus component quantities already issued). You can enter any nonzero quantity including a quantity that results in an over–issue or over–return of the job or schedule’s components requirements. You can issue partial quantities or over–issue quantities. For repetitive schedules, if you over–issue or over–return components with positive or negative requirements, quantities are Material Control 7 – 35 appropriately allocated to the first or last open repetitive schedule. See: Repetitive Component Issues and Returns: page 7 – 22 6. Optionally, select the transaction Reason code. See: Defining Transaction Reasons, Oracle Inventory User’s Guide. 7. Optionally, enter the transaction Reference. References can be used to identify transactions on standard reports. They can be up to 240 characters of alpha numeric text. " 8. If the component is under lot, serial, or lot and serial control, choose the Lot/Serial button. See: Assigning Lot Numbers, Oracle Inventory User’s Guide and Assigning Serial Numbers, Oracle Inventory User’s Guide. 9. Choose the Done button to save your work. To display details for components being added or issued: 1. From the transaction detail folder window (WIP component issue, WIP component return, WIP negative component issue, or WIP negative component return), select or add the component Item 2. If you are adding a component, enter the transaction quantity. (See Above). You cannot view component item details until you enter a quantity. 3. Choose Component Item Details from the Special Menu. See: Special Menu: page G – 2. The Component Item Details window appears displaying complete information about the component in a single record format. 7 – 36 Oracle Work in Process User’s Guide See Also Component Issues and Returns: page 7 – 20 Setting Up Material Control: page 7 – 6 By–Product Recovery: page 7 – 8 Issuing and Returning Specific Components: page 7 – 26 Material Control 7 – 37 Supply Subinventory and Locator Replenishment You can replenish supply subinventories and locators to replace components that you have issued to jobs or repetitive schedules and to insure a source of material for backflush transactions. You can replenish components for an entire job or repetitive schedule, or for a specified number of days of repetitive production. Specifically you can do the following: • Replenish supply subinventories and locators by transferring components from any subinventory and locator into the supply subinventory and locator for the job or repetitive schedule. See: Replenishing Supply Subinventories and Locators: page 7 – 41. This method works well if you stage the pull components one job or repetitive assembly at a time. For example, if you wanted to replenish the supply subinventory and locator for all the operation pull material requirements on a job, you would run the Discrete Job Pick List report for pull components. This report identifies material requirements, subinventories and locators with available inventory, and supply subinventories and locators where you backflush from. You would then pick the components using the pick list and transfer them into the appropriate supply subinventories and locators. Repetitive replenishment works the same way except you would replenish for an assembly for a number of days instead of for a job. • Replenish supply subinventories and locators for higher level assemblies by completing lower level assemblies into the next level’s supply subinventory and locator. See: Replenishing Higher Level Supply: page 7 – 44. This method works well if your plant is set up with feeder lines that physically flow to consuming lines. For example, assume you build a subassembly on a feeder line that ends at the consumption point of the subassembly into the higher level assembly. You can set the completion subinventory and locator on the subassembly to be the supply subinventory and locator of the subassembly on the next level bill of material. Then, as you complete the subassembly into its completion subinventory and locator using the Completion Transactions window, Move Transactions window, or the Inventory Transaction Interface, you automatically replenish the supply subinventory and locator on the next level bill of material. • Transfer components from any subinventory and locator into the supply subinventory and locator in Oracle Inventory using 7 – 38 Oracle Work in Process User’s Guide subinventory transfers to replenish supply subinventories and locators. See: Transferring Between Subinventories, Oracle Inventory User’s Guide. This method works well when you are replenishing for more than one job or one assembly on a line. For example, you can run a Repetitive Pick List report for all assemblies on a line to identify all the operation and assembly pull requirements for all repetitive schedules on the line regardless of their parent assembly. You can then use this consolidated pick list to pick the components. Then you can transact the transfer of the components into the supply subinventories and locators. • Requisition material automatically to replenish supply subinventories in Oracle Inventory using internal requisitions. See: Sources of Replenishment, Oracle Inventory User’s Guide and Overview of Inventory Planning and Replenishment, Oracle Inventory User’s Guide. This method works well when you have consistent material flows within your plant and can estimate reasonable floor stock inventory levels. For example, you can set a minimum quantity for a component item in a supply subinventory. As you reduce the balance in the supply subinventory due to push issues or backflushes, Oracle Inventory automatically generates a requisition when the balance for the component reaches the minimum quantity. Then when you fulfill the internal requisition, you replenish the supply subinventory. • Receive components directly from your supplier into supply subinventories and locators in Oracle Purchasing. See: Receipts, Oracle Purchasing User’s Guide. This method works well if you have a smooth flow of raw materials from your suppliers and have space on the shop floor to inventory components you receive. For example, if you purchase a component that is consumed out of a supply subinventory, you could receive that component directly into that supply subinventory and locator using the Enter Receipts window in Oracle Purchasing. This method avoids a subsequent subinventory transfer of the component thereby saving both time and a transaction. Suggestion: You can simplify repetitive line replenishment by ensuring that the supply subinventory and locator for each item is consistent across the assemblies and across the alternate bills for an assembly. By sharing supply subinventories and locators, you can replenish the line with fewer transactions. Material Control 7 – 39 See Also Supply Subinventory and Locator Replenishment Options: page 7 – 40 Supply Subinventory and Locator Replenishment Options Replenishment transactions can be launched by: • Replenishing Supply Subinventories and Locators: page 7 – 41 • Replenishing Higher Level Supply: page 7 – 44 • Transferring Between Subinventories, Oracle Inventory User’s Guide • Internal Requisitions in Oracle Inventory. See: Sources of Replenishment, Oracle Inventory User’s Guide and Overview of Inventory Planning and Replenishment, Oracle Inventory User’s Guide • Receiving Transactions in Oracle Purchasing. See: Receipts, Oracle Purchasing User’s Guide See Also Supply Subinventory and Locator Replenishment: page 7 – 38 7 – 40 Oracle Work in Process User’s Guide Replenishing Supply Subinventories and Locators You can replenish the supply subinventories and locators for push and pull components that are assigned to your jobs and repetitive schedule. You can replenish from any subinventory and locator. Prerequisites ❑ Release a job or repetitive schedule. See: Releasing Discrete Jobs: page 3 – 28 and Releasing Repetitive Schedules: page 6 – 21. " To select a sales order, discrete job, or repetitive schedule to replenish: 1. Navigate to the WIP Material Transactions window. 2. Select a Sales Order, repetitive Line and Assembly, Assembly, or Job. The cursor defaults to one of these fields based on how the TP:WIP:Material Transactions First Field profile option is set. See: Profile Options: page 2 – 41. You can only select a discrete job or a repetitive line and assembly for a repetitive schedule if the job or schedule has a status of Released or Complete. " To define replenishment transaction header information: 1. In the Transaction region, select Replenish supply subinventory as the transaction Type. 2. Enter a transaction Date and time. The date and time must fall within an open accounting period and cannot be greater than the current date or less than the release date of the job or the earliest valid repetitive schedule. 3. Select the Subinventory and, if required by the subinventory, the Locator. This subinventory/locator becomes the default replenish ”from” subinventory/locator in the Replenish supply subinventory window. If the Oracle Inventory INV:Allow Expense to Asset Transfer profile option is set to Yes, you can select an expense subinventory. See: Inventory Profile Options, Oracle Inventory User’s Guide. Material Control 7 – 41 4. In the Criteria region, optionally enter any criteria or combination of criteria that is valid for the job: Assembly Quantity, Operation Sequence, or Department. Assembly Quantity: If you enter an assembly quantity, it must be less than or equal to the job quantity. If the job has a routing and you do not enter an assembly quantity, required component quantities — original required quantity minus component quantities already issued — for all push components are calculated and displayed as defaults in the transaction detail folder window. You can change these defaulted quantities. Operation Sequence: If the job has a routing, you can issue push components to or return push components from a specific operation. If the job does not have a routing and you do not enter an assembly quantity, required component quantities are not automatically displayed in the transaction detail folder window. Department: If the job has a routing, you can issue push components to or return push components from a specific department. Supply Subinventory: If you select a supply Subinventory, only those components that have the same default supply Subinventory are displayed in the transaction detail folder window. This is convenient when assembly components have different subinventories and these subinventories are controlled by different users. 7 – 42 Oracle Work in Process User’s Guide 5. " Choose the Transact button. The Replenish supply subinventory transaction detail folder window appears. See: Customizing the Presentation of Data in a Folder, Oracle Applications User’s Guide. To replenish component supply subinventories and locators: 1. Select the component item. Assembly pull and operation pull components requirements that cannot be fulfilled from their default supply subinventories/locators are automatically displayed. Note: To determine where on–hand inventories exist see: Viewing On–hand Quantities, Oracle Inventory User’s Guide. 2. If the component is under revision control, select the Revision. See: Item and Routing Revisions, Oracle Bills of Material User’s Guide. The current revision for the item is displayed as the default. 3. Select the Subinventory and, if required by the subinventory, the Locator from which to transfer replenishment quantities. The supply subinventory/locator selected in the WIP Material Transactions window is defaulted but can be overridden. If the Oracle Inventory INV:Allow Expense to Asset Transfer profile option is set to Yes, you can select an expense subinventory. See: Inventory Profile Options, Oracle Inventory User’s Guide. Material Control 7 – 43 4. Select the replenish To Subinventory and, if required by the subinventory, the To Locator. If defined, the component’s default supply subinventory/locator is defaulted but can be overridden. See: Supply Subinventory and Locator Fields, Oracle Bills of Material User’s Guide. If the Oracle Inventory INV:Allow Expense to Asset Transfer profile option is set to Yes, you can select an expense subinventory. 5. Select the UOM. See: Overview of Units of Measure, Oracle Inventory User’s Guide. 6. Enter the replenishment Quantity. The component’s open requirement quantity is displayed. You can enter a quantity greater or less than this quantity. 7. Optionally, select the transaction Reason code. See: Defining Transaction Reasons, Oracle Inventory User’s Guide. 8. Optionally, enter the transaction Reference. References can be used to identify transactions on standard reports. They can be up to 240 characters of alpha numeric text. 9. If the component that is being transferred is under lot, serial, or lot and serial control, choose the Lot/Serial button. See: Assigning Lot Numbers, Oracle Inventory User’s Guide and Assigning Serial Numbers, Oracle Inventory User’s Guide. 10. Choose the Done button to save your work. See Also Supply Subinventory and Locator Replenishment Options: page 7 – 40 Replenishing Higher Level Supply: page 7 – 44 Setting Up Material Control: page 7 – 6 Replenishing Higher Level Supply You can complete lower level assemblies into the supply subinventory and locator of higher level assemblies to replenish the higher level supply subinventory and locator. This method works well if your plant is set up with feeder lines that physically flow to consuming lines. 7 – 44 Oracle Work in Process User’s Guide Prerequisites ❑ Release a job or repetitive schedule. See: Releasing Discrete Jobs: page 3 – 28 and Releasing Repetitive Schedules: page 6 – 21. ❑ Move the quantity to be completed for replenishment into the To move intraoperation step of the last operation if you are completing a job or schedule with a routing. This step cannot have a status that prevents moves. See: Performing Move Transactions: page 8 – 35. " To enter higher level supply: 1. Navigate to the Completion Transactions window. 2. Select a Sales Order, repetitive Line and Assembly, Assembly, or Job. The cursor defaults to one of these fields based on how the TP:WIP:Completion Transactions First Field profile option is set. See: Profile Options: page 2 – 41. You can only select a discrete job or a repetitive line and assembly for a repetitive schedule if the job or schedule has a status of Released or Complete. 3. Select the WIP assembly completion Transaction Type. See: Completion Transaction Types: page 7 – 57. 4. Enter a transaction Date and time. The date and time must fall within an open accounting period and cannot be greater than the current date or less than the release date of the job or the earliest valid repetitive schedule. 5. Choose the Transact button. The WIP assembly completion transaction detail window appears. 6. In the WIP assembly completion transaction detail window, select the replenish to Subinventory and, if required by the subinventory, the Locator. See: Completion Subinventory and Locator Fields, Oracle Bills of Material User’s Guide. The completion subinventory must be the supply subinventory for the assembly on the next level bill of material. See: Supply Subinventory and Locator Fields, Oracle Bills of Material User’s Guide. If the Oracle Inventory INV:Allow Expense to Asset Transfer profile option is set to Yes, you can select an expense subinventory. See: Inventory Profile Options, Oracle Inventory User’s Guide. Material Control 7 – 45 7. Select the UOM. See: Overview of Units of Measure, Oracle Inventory User’s Guide. 8. Enter the completion Quantity. The quantity should be in the UOM you are transacting. You can receive partial quantities to different subinventories or locators. 9. Optionally, select the transaction Reason code. See: Defining Transaction Reasons, Oracle Inventory User’s Guide. 10. Optionally, enter the transaction Reference. References can be used to identify transactions on standard reports. They can be up to 240 characters of alpha numeric text. 11. If the assembly is under lot, serial, or lot and serial control, choose the Lot/Serial button. See: Assigning Lot Numbers, Oracle Inventory User’s Guide and Assigning Serial Numbers, Oracle Inventory User’s Guide. 12. Choose the Done button to save your work. See Also Replenishing Supply Subinventories and Locators: page 7 – 41 Supply Subinventory and Locator Replenishment: page 7 – 38 7 – 46 Oracle Work in Process User’s Guide Backflush Transactions Backflush transactions ’pull’ components with Operation Pull and Assembly Pull supply types from inventory onto jobs and repetitive schedules. Backflush transactions can be launched by: • completing assemblies at operations using the Move Transactions window • moving and completing assemblies into inventory using the Move Transactions window • completing assemblies into inventory using the Completion Transactions window • receiving assemblies from an outside processing operation using the Oracle Purchasing, Enter Receipts window Move transactions imported through the Open Move Transaction Interface can also create backflush transactions. Transactions imported through the Oracle Inventory, Inventory Transactions Interface can also create backflush transactions. Additional Information: Backflushing reduces the number of manual material transactions required to process the discrete jobs and repetitive schedules. Reverse Backflush Transactions You can reverse backflush transactions and automatically return backflushed components back to inventory. For example, pull components that are backflushed as you move assemblies forward in a routing are automatically returned to inventory when you move assemblies backwards. Reverse backflush transactions can be created as you do the following: • reverse operation completion transactions using the Move Transactions window • return completed assemblies from inventory to jobs and schedules using the Completion Transactions • move and return assemblies from inventory to jobs and schedules using the Move Transactions window • return or correct transaction receipts in the Enter Returns or Enter Corrections windows in Oracle Purchasing. Move transactions imported through the Oracle Work in Process Open Move Transaction Interface can also reverse backflush transactions as Material Control 7 – 47 can return transactions imported through the Inventory Transaction Interface. Note: You can, if necessary, issue and return pull components to and from jobs and schedules to inventory using the ’Specific Component’ option in WIP Material Transactions window Backflush Supply Subinventories and Locators Sufficient inventory must exist in a component’s source subinventory and locator for backflush transactions to complete successfully. If there is insufficient on–hand inventory to satisfy backflush demand, the supply subinventory balance is forced negative even if the Oracle Inventory Allow Negative Balance parameter is set to No. See: Organization Parameters Window, Oracle Inventory User’s Guide and Defining Default Inventory Parameters, Oracle Inventory User’s Guide. The one exception is if the component you are backflushing is under lot, serial, or lot and serial number control. In this case you cannot complete the backflush transaction until you select a subinventory and locator that contains a sufficient quantity of valid lot and/or serial numbered items. See: Lot and Serial Number Backflushing: page 7 – 49. Supply subinventories and locator can be defined at the item or bill of material component level. If they are not defined, the system uses the supply subinventory and locator specified by the WIP Backflush Supply Subinventory and Locator Parameters when components are backflushed. See: Backflush Default Parameters: page 2 – 15. To ensure adequate supply for backflush transactions, you can replenish supply subinventories and locators as required. See: Supply Subinventory and Locator Replenishment Options: page 7 – 40. Revision Control For component items under revision control, the system always defaults the revision based on the item’s current revision as of the date of the transaction. See: Item and Routing Revisions, Oracle Bills of Material User’s Guide. See Also Assembly Completions and Returns: page 7 – 53 Assembly Pull Backflush Transactions: page 7 – 50 7 – 48 Oracle Work in Process User’s Guide Operation Pull Backflush Transactions: page 8 – 41 Completing and Returning Assemblies: page 7 – 58 Performing Move Completion Transactions: page 8 – 46 Backflush Transaction Options: page 7 – 51 Backflushing Pull Components: page 8 – 42 Supply Types: page C – 2 Resource Charge Types: page 9 – 5 Repetitive Production Line Backflushes For repetitive manufacturing, all backflushes are automatically allocated to the correct repetitive schedule using a FIFO algorithm, based on a first unit start date, and based on the assemblies moved or completed in the transaction that initiated the backflush. See Also Lot and Serial Number Backflushing Assembly and Operation Pull components that are under lot, serial, or lot and serial number control can be backflushed. You can also backflush Push components that are requirements of work order–less schedules. Lot Controlled Components You can use WIP parameters to determine how lot numbers are assigned and verified during backflush transactions. You can use the WIP Lot Selection Method parameter to determines how lot controlled Assembly Pull and Component Pull component items are selected during backflush transactions. You can use the WIP Lot Verification parameter to determines how lots are verified during backflush transactions. If you backflush lot controlled components and the Lot Selection Method parameter is set to Manual, you must specify a valid lot number. You must also manually specify lot numbers if there is not enough on–hand inventory. Material Control 7 – 49 ☞ Attention: If the TP:WIP:Shop Floor Material Processing or the TP:WIP:Completion Material Processing profile option is set to process transactions in the background, transactions for lot–controlled components that require manual entry of lot numbers fail. See: Profile Options: page 2 – 41. Serial Number Controlled Components You must always manually enter serial numbers when backflushing components under serial number control or under both lot and serial number control. See Also Backflush Transactions: page 7 – 47 Backflush Default Parameters: page 2 – 15 Backflush Supply Subinventories and Locators: page 7 – 48 Assembly Pull Backflush Transactions When you complete an assembly that has Assembly Pull components, these components are automatically pulled (backflushed) from their assigned supply subinventories/locators. If the components being backflushed are under manual lot control, serial control, or lot and serial control, you must enter lot and/or serial numbers. If the job is tied to one or more sales orders, the system automatically completes the assembly for those orders. See Also Operation Pull Backflush Transactions: page 8 – 41 Move Completion/Return Transactions: page 8 – 30 Backflush Transaction Rules The following rules are enforced when performing backflush transactions: 7 – 50 Oracle Work in Process User’s Guide • an enabled default supply subinventory and, if required by the subinventory, locator must be defined for the component. See: Backflush Supply Subinventories and Locators: page 7 – 48. • routing references must be specified for non–standard discrete jobs. See: Defining Discrete Jobs Manually: page 3 – 12. • the component item must be transactable. See: Status Attributes and Item Status Control, Oracle Inventory User’s Guide. • the subinventory you are backflushing from must be an asset subinventory if the Oracle Inventory Allow Expense to Asset Transfer profile option is set to No. See: Oracle Inventory Profile Options, Oracle Inventory User’s Guide. See Also Backflush Transactions: page 7 – 47 Backflushing Pull Components: page 8 – 42 Backflush Transaction Options Backflush transaction can be launched from the following windows: • Completion Transactions window. See: Assembly Pull Backflush Transactions: page 7 – 50 • Move Transactions window. See: Operation Pull Backflush Transactions: page 8 – 41 • Enter Receipts window in Oracle Purchasing. See: Entering Receipt Header Information, Oracle Purchasing User’s Guide Transactions which reverse backflush transactions can be launched from the following windows: • Completion Transactions window • Move Transactions window • Enter Corrections in Oracle Purchasing. See: Entering Corrections, Oracle Purchasing User’s Guide • Enter Returns in Oracle Purchasing. See: Entering Returns, Oracle Purchasing User’s Guide Assembly move completion and move return transactions imported through the Open Move Transaction Interface can also create and Material Control 7 – 51 reverse backflush transactions. Similarly, assembly completion and return transaction imported through the Inventory Transaction Interface can create and reverse backflush transactions. See: Open Move Transaction Interface: page 8 – 32. Note: Purchasing transactions initiate backflushes only if they are tied to outside processing resources with an autocharge type of PO Move and only if requirements with a supply type of Operation Pull exist at the outside processing operation. See Also Backflush Transactions: page 7 – 47 7 – 52 Oracle Work in Process User’s Guide Assembly Completions and Returns You can complete assemblies from jobs and repetitive schedules into inventory, and you can return completed assemblies from inventory to jobs and repetitive schedules. Assemblies can be completed and returned using the Completion Transactions and the Move Transactions windows. You can also import assembly completion and return transactions through the Inventory Transaction Interface in Oracle Inventory. Completion Quantities Completing assemblies from a job or schedule with a routing reduces the assembly quantity in the To move intraoperation step of the last operation sequence and increases the job or schedule completed quantity. Return Quantities Returning assemblies to a job or schedule with a routing, increases the assembly quantity in the To move intraoperation step of the last operation sequence and decreases the job or schedule complete quantity. Alternate Units of Measure You can complete and return assemblies in their alternate unit of measure. If you enter an alternate unit of measure for the item, the transaction quantity is converted using the conversion information you specified when you defined the unit of measure in Oracle Inventory. You can change this quantity if desired. Lot and Serial Number Control You must assign a lot or serial number if the assembly is under lot, serial number, or lot and serial number control. For discrete jobs, the lot number you specified when you defined the job as the default displays. If you are completing assemblies that have lot controlled Assembly Pull components and the WIP Backflush Lot Selection parameter is set to Manual, you must manually select which lots to backflush. If you are completing assemblies that have serial controlled or lot and serial controlled components, you must manually select which lots and/or serial numbers to backflush. Material Control 7 – 53 Revision Control When you complete assemblies under revision control, the revision defaults based on the assembly revision of the job or repetitive schedule. For assemblies under revision control, the bill revision is completed from the job or the earliest released repetitive schedule. If there is no bill revision on the job or repetitive schedule, but the assembly is under revision control, the assemblies’ current revision is completed as defined in Oracle Inventory. Completion Subinventory and Locator When you complete assemblies, the completion subinventory defaults from the job or repetitive line/assembly association. For subassemblies, the completion subinventory can be the supply subinventory for higher level assemblies, for final assemblies or finished goods the completion subinventory can be finished goods inventory. You can change the default completion subinventory as you complete assemblies. If you have set your organization, subinventory, or item controls to require locators, you must also enter locator as you complete assemblies. Final Assembly Orders Completion Reservations are automatically transferred from the job to the subinventory and locator as you complete assemblies from final assembly orders. Reservations are automatically transferred based on sales order line delivery due dates. You can override the automatic transfer. When assemblies are returned to a final assembly order, you must enter the sales order line and delivery information so that the system knows which specific reservations to transfer back from inventory. Repetitive Production Lines When you complete repetitive assemblies into inventory from a repetitive production line, the completion transaction is automatically allocated to a specific repetitive schedule on a first in–first out basis. When you return assemblies from inventory to a repetitive schedule line, the transaction is automatically allocated to specific repetitive schedules on a last in–first out basis. See Also Setting Up Material Control: page 7 – 6 7 – 54 Oracle Work in Process User’s Guide Completing and Returning Assemblies: page 7 – 58 Assembly Over–completions and Over–returns You can over–complete and over–return from and to jobs or repetitive schedules without routings without changing the job or schedule quantities. You can over–complete and over–return from and to jobs or repetitive schedules with routings only if you increase the job or schedule quantities. Assembly Over–completions Discrete Jobs You can complete a quantity of assemblies greater than the job quantity if the assembly does not have a routing. This feature is useful if your production process yields a few more assemblies than planned. If your job has a routing, you must first increase the job quantity by the amount you want to over–complete and move these assemblies from the Queue intraoperation step of the first operation sequence to the To move intraoperation step of the last operation sequence. You now have sufficient quantity in the To move intraoperation step of the last operation sequence to complete from the job without actually over–completing. Repetitive Schedules You can over–complete the quantity of assemblies scheduled on a line. Completions are allocated across schedules on a first in–first out basis until only one schedule remains with a status of Complete. At that point, you can complete quantity of assemblies greater than the total quantity of this schedule if you do not have a routing. For example, if your production process yields a few more assemblies than you planned, you can complete the extra assemblies using the Completion Transactions window. If you have a routing and you want to over–complete this schedule, you must first increase the total quantity on the schedule by either increasing the total quantity, increasing the daily rate, or increasing the process days. Then you must move these additional assemblies from the Queue intraoperation step of the first operation sequence to the To move intraoperation step of the last operation sequence. You now have sufficient quantity in the To move intraoperation step of the last Material Control 7 – 55 operation sequence to complete from the schedule without actually over–completing. Assembly Over–returns Discrete Jobs You can return more assemblies than you completed to a non–standard job without a routing. You can also over–return assemblies to jobs without routings without changing job quantities. You can over–return to jobs with routings only if you increase job quantities. Repetitive Schedules You can also over–return assemblies to repetitive schedules without routings without changing schedule quantities. You can over–return to schedules with routings only if you increase schedule quantities. See Also Assembly Completions and Returns: page 7 – 53 Assembly Over–completions and Over–returns: page 7 – 55 Completing and Returning Assemblies: page 7 – 58 Move Transactions: page 8 – 24 Assembly Completion and Return Options Assembly completion and return transactions can be launched by: • Completing and Returning Assemblies: page 7 – 58 • Performing Move Transactions: page 8 – 35 which complete assemblies into inventory or return them to Work in Process jobs or repetitive schedules Completion and move completion transactions can also be imported through the Open Transaction Interface, Oracle Manufacturing, Distribution, Sales and Service Open Interfaces Manual, Release 11 and through the Open Move Transaction Interface: page 8 – 32. 7 – 56 Oracle Work in Process User’s Guide Completion Transaction Types When you enter transactions in the Completion Transactions window you must select one of the following transaction types: WIP Assembly Completion Receives completed assemblies into inventory from discrete jobs and repetitive schedules. Components with a supply type of Assembly Pull are automatically backflushed as you complete assemblies. If backflushed components are under lot or serial number control, the lots and serial numbers to backflush must be identified. Lots for backflush components under lot number control can be identified manually or automatically depending on how the WIP Backflush Lot Selection Method Parameter is set. For backflush components under serial number control, you must manually identify which serial numbers to backflush using the Serial Number Entry window. The completion quantity is limited to the quantity in the To move intraoperation step of the last operation when completing assemblies from discrete jobs and repetitive schedules with routings. When completing from discrete jobs and repetitive schedules without routings, you can complete more than the total quantity of the discrete job or repetitive schedule. WIP Assembly Return Returns completed assemblies from inventory back to discrete jobs and repetitive schedules. Components with a supply type of Assembly Pull are automatically unbackflushed. If the unbackflushed components are under lot or serial number control, the lots and serial numbers to unbackflush must be identified. You can return more assemblies than you completed from inventory to a repetitive schedule or a non–standard discrete job without a routing. For sales orders, you cannot return more assemblies than you completed to that sales order. See Also Transaction Types, Oracle Inventory user’s Guide Material Control 7 – 57 Defining and Updating Transaction Types, Oracle Inventory user’s Guide Backflush Default Parameters: page 2 – 15 Assembly Over–completions and Over–returns: page 7 – 55 Completing and Returning Assemblies: page 7 – 58 Replenishing Higher Level Supply: page 7 – 44 Completing and Returning Assemblies You can receive completed assemblies from jobs and repetitive schedules into inventory. You can also reverse a completion transaction by returning completed assemblies from inventory back to jobs and repetitive schedules. Prerequisites ❑ Release a job or repetitive schedule. See: Releasing Discrete Jobs: page 3 – 28 and Releasing Repetitive Schedules: page 6 – 21. ❑ If you are completing assemblies from a job or schedule with a routing, move the quantity to be completed into the To move intraoperation step of the last operation. This intraoperation step cannot have a status that prevents moves. See: Performing Move Transactions: page 8 – 35. " To define complete transaction header information: 1. 7 – 58 Navigate to the Completion Transactions window. Oracle Work in Process User’s Guide 2. Select a Sales Order, repetitive Line and Assembly, Assembly, or Job. The cursor defaults to one of these fields based on how the TP:WIP:Completion Transactions First Field profile option is set. See: Profile Options: page 2 – 41. You can only select a discrete job or a repetitive line and assembly for a repetitive schedule if the job or schedule has a status of Released or Complete. Note: If you are returning an ATO assembly, you can enter any sales order linked to the job and any sales order you have completed assemblies against. However, you must manually specify which sales order name, line, and delivery you are returning against. 3. Select the WIP assembly completion or WIP assembly return Transaction Type. See: Completion Transaction Types: page 7 – 57. 4. Enter the transaction Date and time. The date and time must fall within an open accounting period and cannot be greater than the current date or less than the release date of the job or the earliest valid repetitive schedule. 5. ☞ " Choose the Transact button to navigate to the WIP assembly completion or WIP assembly return window. Attention: You can only complete jobs or schedules with routings if the displayed Available to Complete quantity, which indicates the number of assemblies in the To Move intraoperation step of the last operation, is greater than zero. To complete or return assemblies: 1. In the WIP assembly completion or WIP assembly return window, select the Subinventory and, if required by the subinventory, the Locator. Assemblies are completed into or returned into or from this subinventory and locator. The completion subinventory and locator you specified for the job or the repetitive line/assembly association is defaulted but can be overwritten. See: Completion Subinventory and Locator Fields, Oracle Bills of Material User’s Guide. Material Control 7 – 59 If the Oracle Inventory INV:Allow Expense to Asset Transfer profile option is set to Yes, you can select an expense subinventory. See: Inventory Profile Options, Oracle Inventory User’s Guide. 2. Select the UOM. See: Overview of Units of Measure, Oracle Inventory User’s Guide. 3. Enter the completion or return Quantity. The quantity should be in the UOM you are transacting. You can complete or return partial job or schedule quantities to different subinventories and locators. You can overcomplete from jobs and schedules that do not have routings. You can complete or return partial job or schedule quantities to different subinventories and locators. If you are completing a serial controlled assembly, you can only enter a quantity that is an integer when expressed in the primary unit of measure. For example, you can complete 0.5 dozen (DZ) if the primary unit of measure is each (EA). 4. Choose the Final Complete check box. If your current organization is an average costing organization, the Final Complete check box is dislayed. The value of the Final Completion option (enabled/disabled) is defaulted based on how the WIP Autocompute Final Completions parameter is set. Using the default eliminates the need to manually 7 – 60 Oracle Work in Process User’s Guide choose the option. Final completions ensure that no residual balance is left in the job after the last assembly has been completed. Residual balances are handled as discussed below under WIP Job Closures. 5. Optionally, select the transaction Reason code. See: Defining Transaction Reasons, Oracle Inventory User’s Guide. 6. Optionally, enter the transaction Reference. References can be used to identify transactions on standard reports. They can be up to 240 characters of alpha numeric text. 7. If you are completing assemblies under lot, serial, or lot and serial control, choose the Lot/Serial button. See: Assigning Lot Numbers, Oracle Inventory User’s Guide and Assigning Serial Numbers, Oracle Inventory User’s Guide. 8. Choose the Done button to save your work. ☞ " Attention: If you are completing assemblies that have Assembly Pull components, the system pulls (backflushes) these components from the supply subinventory/locator assigned to the component requirement. If no supply subinventory/locator is assigned to the component, the system pulls components from the default supply subinventory/locator specified by the WIP Supply Subinventory and Supply Locator parameters. See: Backflush Default Parameters: page 2 – 15. To backflush or return backflushed pull components under lot, serial, or lot and serial control: H See: Backflushing Pull Components: page 8 – 42. See Also Assembly Completions and Returns: page 7 – 53 Assembly Over–completions and Over–returns: page 7 – 55 Replenishing Higher Level Supply: page 7 – 44 Backflush Transactions: page 7 – 47 Setting Up Material Control: page 7 – 6 Material Control 7 – 61 Viewing Job Lot Compositions You can view assembly and component lot numbers used on discrete jobs of any status. If you have an assembly under lot control that has components under lot control, both the assembly and components are displayed. You can also graphically view assembly and component lot numbers on a discrete job of any status. You can graphically view the attributes of your lots and ”drill down” to view multilevel genealogy compositions for a job or lot. You can also print graphical representations of lot composition. Component lot numbers are assigned when you issue or backflush lot controlled components to the job. Assembly lot numbers are assigned when you complete lot controlled assemblies from the job. A negative transaction quantity means that you returned the component item to inventory or completed the assembly. You can perform a single level genealogy composition for a job or lot and view the transactions that created the genealogy. Note: Since the material transaction history is used to create compositions, you should not purge any material transactions which contribute to genealogies you need to retain. " To display component, assembly, or component and assembly lot numbers: 1. 7 – 62 Navigate to the Job Lot Compositions window. Oracle Work in Process User’s Guide 2. Optionally, select the Assembly. If you select an assembly, you must select either a lot or a job to display lot number information. 3. If the job assembly is under lot control and you assigned a lot number to it when you defined the job or when you completed an assembly for job, select a Lot Number. You can also select a Lot Number if you have not entered an assembly. In this case, the assembly and job associated with the lot are defaulted. 4. Select the Job if you did not enter a Lot Number. If you entered a Lot Number and the associated Job is automatically displayed, you can enter another job. If you entered an Assembly, you can only choose jobs associated with that assembly. 5. ☞ Choose the Find button to populate the Lot Number region. Attention: If you enter a lot controlled assembly that has lot controlled components, use the Item (Item = Assembly) to distinguish the assembly from its components in the Lot Numbers region. Material Control 7 – 63 " To graphically view lot numbers components, assemblies or components and assemblies: H " Choose the Display button to invoke Oracle Object Navigator. To view completion or backflush transactions details for a lot controlled assembly or component: 1. In the Lot Number region, select the Item. 2. Choose the Material Transactions button to view work in process material transactions for the component lot or assembly associated with the job. See Also Component Issues and Returns: page 7 – 20 Backflush Transactions: page 7 – 47 Assembly Completions and Returns: page 7 – 53 Purging Jobs and Schedules: page 14 – 40 7 – 64 Oracle Work in Process User’s Guide WIP Inventory Accuracy You can maintain accurate inventory balances for components and assemblies. Oracle Work in Process and Oracle Inventory combine to provide a number of tools to help you monitor and maintain inventory accuracy. Transactions and Balances When components are issued to jobs and repetitive schedules, the system automatically updates the component inventory balances in Oracle Inventory and the component issued quantities in Work in Process. Similarly, when job and repetitive schedule assemblies are completed, the system updates the assembly inventory balances in Oracle Inventory and the job or schedule completed quantities in Work in Process. Component and assembly returns work the same way only in reverse. As you move assemblies on the shop floor, the system also automatically decrements the balance in the From operation sequence and intraoperation step and increments the To operation sequence and intraoperation step. If you enter inaccurate information or delay the entry of transactions, the inventory balances become inaccurate. Performing material and move transactions in a timely manner helps you maintain accurate inventory balances. Cycle Counting WIP Inventories You can use Oracle Inventory’s cycle counting system to cycle count inventory balances in work in process supply and completion subinventories and locators to check that material is being moved in and out of work in process accurately. Physically Inventorying WIP Inventories You can use Oracle Inventory’s physical inventory system to check inventory balances in work in process supply and completion subinventories and locators to check that material is being moved in and out of work in process accurately. Component Reports You can check the timeliness and accuracy of the component balances in jobs and repetitive schedules using the Discrete Job Data Report and the Repetitive Schedule Data Report. Each report provides a complete Material Control 7 – 65 list of material requirements including quantity required and quantity issued. You can use these reports to randomly audit certain jobs or repetitive schedules in search of inaccurate balances. Whenever you find a problem, you can use Oracle Inventory’s transaction reports and inquiries to identify its source. Once you know the source of the problem, you can take proactive steps to eliminate the causes and thereby improve the accuracy of work in process component balances. Assembly Reporting You can check the timeliness and accuracy of assembly balances in jobs and repetitive schedules using the WIP Location Report. This report provides a complete list of assembly balances by operation. You can use this report to randomly audit certain jobs, repetitive schedules, assemblies, or work centers in search of inaccurate balances. Whenever you find a problem, you can use the Move Transaction Report and/or the View Move Transactions and View Resource Transactions windows to identify its source. Once you know the source of the problem, you can take proactive steps to eliminate the causes and thereby improve the accuracy of work in process assembly balances. See Also Overview of Cycle Counting, Oracle Inventory User’s Guide Overview of Physical Inventory, Oracle Inventory User’s Guide Viewing On–hand Quantities, Oracle Inventory User’s Guide 7 – 66 Oracle Work in Process User’s Guide CHAPTER 8 Shop Floor Control T his chapter explains how assemblies are moved, controlled, and tracked on the shop floor, including: • Overview: page 8 – 2 • Setting Up: page 8 – 4 • Routings and Operations: page 8 – 5 • Operations: page 8 – 11 • Move Transaction Process Diagram: page 8 – 23 • Move Transactions: page 8 – 24 • Shop Floor Management: page 8 – 51 • Pending Move Transactions: page 8 – 59 • Shop Floor Statuses: page 8 – 68 Shop Floor Control 8–1 Overview You use shop floor control to manage the flow of production inside your plant. Move Transactions You can move assemblies within operations (intraoperation moves) and between operations (interoperation moves). You can also complete and return assemblies from and to jobs and schedules using move transactions. Move transactions automatically update operation completion quantities, charge appropriate resources and overheads, and backflush pull components. See: Move Transactions: page 8 – 24. Open Move Transaction Interface You can load move transaction information from external systems — such as barcode readers and manufacturing cell controllers — into the Open Move Transaction Interface table. When this data is processed, it is validated, and invalid records are marked so that you can correct and resubmit them. See: Open Move Transaction Interface: page 8 – 32. Shop Floor Statuses You define and assign shop floor statuses. You can control move transactions by assigning these statuses to intraoperation steps on the work in process routing. You can view these statuses during move transactions. See: Assigning and Viewing Shop Floor Statuses: page 8 – 68 and Defining Shop Floor Statuses: page 2 – 30. Dispatch Reporting You can use dispatch reports to help you prioritize work at specific operations, production on specific lines, and to locate assemblies on the shop floor. See: Dispatch Reports: page 8 – 58. Outside Processing You can use Work in Process to automatically create purchase requisitions when you use suppliers to perform part of your manufacturing process. You can control the movement of assemblies to and from your suppliers. See: Outside Processing and Work in Process: page F – 2. Managing Rework Production You can use Reject intraoperation steps, rework operations, or non–standard discrete jobs to rework problem assemblies. You have 8–2 Oracle Work in Process User’s Guide complete control over the material requirements and operations you use to complete rework. See: Rework Production: page 8 – 51. Managing Scrap You can scrap assemblies at any point during the production process. See: Assembly Scrap: page 8 – 53. See Also Overview of Resource Management: page 9 – 9 Setting Up Shop Floor Control: page 8 – 4 Move Transaction Options: page 8 – 32 Shop Floor Control 8–3 Setting Up • For a listing of out–of–product setups that affect shop floor processing see: Setup Prerequisites: page 2 – 3. • For a listing of setups within Work in Process that affect shop floor processing see: Setup Check List: page 2 – 5. • For additional information about parameters that affect shop floor processing see: WIP Parameters: page 2 – 9. – Backflush Default Parameters: page 2 – 15 – Intraoperation Steps Parameter: page 2 – 15 – Move Transaction Parameters: page 2 – 13 • For a listing of profile options that affect shop floor processing see: Profile Options: page 2 – 41. 8–4 Oracle Work in Process User’s Guide Routings and Operations You can define operations and routings in Oracle Bills of Material. Operations and routings are the basis of shop floor control. Operation Sequence Routings define the step–by–step operations required to manufacture an assembly. Routing operations describe a specific portion of the manufacturing process. Work in process routing operations help you locate (through the assigned department) assemblies on the shop floor and identify the quantity complete or remaining at an operation. See: Operations, Oracle Bills of Material User’s Guide. Resource Requirements You can associate multiple resources with a routing operation. For each resource, you can determine if you want to include that resource in scheduling calculations. Resources can be charged and scheduled on an item–by–item or lot basis. The system calculates the time required for all scheduled resources at an operation to get the operation start and end dates and times. The system then calculates the time required for all operations to get the job and repetitive schedule start and end dates and times. See: Resource Requirements: page . Resource Charge Types You can determine how operation resources are charged. You can automatically charge resources as you move assemblies in Work in Process and as you enter purchase receipts for outside processing resources in Oracle Purchasing. You can also manually charge resources. See: Resource Charge Types: page 9 – 5. Outside Processing You can define outside processing resources and assign them to routing operations. Specify Where Material is Used You can specify at what operations are required in the routing. Thus, you only issue (push) or backflush (pull) material where and when it is needed. Backflush Operations You can use the operation backflush option to specify at what point in the routing Operation Pull components are backflushed. Pull Shop Floor Control 8–5 components at non–backflush operation are not backflushed when assemblies are completed at the operation. Instead, they are backflushed when a backflush operation later in the routing is completed. It is often useful to postpone backflushing at time–critical operations. Autocharge/Count Point Operations You can specify whether an operation is a count point and whether it should be automatically charged. The autocharge and count point options for an operation work together. See: Count Point and Autocharge Fields, Oracle Bills of Material User’s Guide. Minimum Transfer Quantities You can define minimum transfer quantities for your operations. If you move fewer assemblies than the minimum quantity, a warning is displayed but you can complete the transaction. Establish Standard Costs You specify the resources required to build an assembly when you define a routing. Resources have costs associated with them. By defining the routing with specific resources, you establish standard resource costs for any item that uses the routing. Alternate Routing You can choose an alternate routing for an assembly when you define a discrete job or repetitive schedule. See: Primary and Alternate Routings, Oracle Bills of Material User’s Guide. Routing Revision You can use routing revisions to control date effective revisions on a routing. You specify the routing revision and the revision date for the assembly when you define discrete jobs and repetitive schedules. See: Item and Routing Revisions, Oracle Bills of Material User’s Guide. Engineering Routing You can set your WIP:See Engineering Items profile option to Yes so that you can use engineering routings. See: Engineering Bills of Material and Routings, Oracle Engineering User’s Guide. See Also Overview of Routings, Oracle Bills of Material User’s Guide 8–6 Oracle Work in Process User’s Guide Creating a Routing, Oracle Bills of Material User’s Guide Intraoperation Steps: page ‘8 – 8 Shop Floor Control 8–7 Intraoperation Steps Intraoperation steps are used to control move and resource transactions within and between operations and to track assemblies within operations. You can only move assemblies to intraoperation steps that are enabled. See: Interoperation Steps Parameter: page 2 – 16. The five intraoperation steps — Queue, Run, Reject, To Move, and Scrap — are defined as follows: Queue Assemblies in the Queue intraoperation step of an operation are waiting for you to perform work on them. Queue is the default intraoperation step for every operation in a routing. When you release jobs and repetitive schedules, the assembly quantity is automatically loaded into the Queue intraoperation step of the first operation. You can move assemblies from the Queue intraoperation step to any other enabled intraoperation step. Run Assemblies in the Run intraoperation step are ready to be worked on. You can move assemblies from the Run step to any other enabled intraoperation step in the routing. To Move Assemblies in the To move intraoperation step of an operation have been completed and are waiting to be moved to the next operation. You can move assemblies from the To move intraoperation step to any other enabled intraoperation step in the routing. Before you can use the Completion Transactions window to complete assembles from jobs and schedules with routings, you must move the ’to be completed’ assemblies into the To Move intraoperation step of the last operation. For this reason, the To Move intraoperation step is automatically enabled for all final routing operations. See: Assembly Pull Backflush Transactions: page 7 – 50. Assemblies in the To Move step are considered complete for the operation. Reject 8–8 Oracle Work in Process User’s Guide Assemblies in the Reject intraoperation step of an operation have been rejected and are waiting to be repaired (reworked) or scrapped. You can move assemblies from the Reject intraoperation step to any other enabled intraoperation step in the routing. Assemblies in the Reject step may not be useable, but they are considered complete for the operation because components and resources have been consumed in their production. Scrap Assemblies in the Scrap intraoperation step are considered unusable. This step is for those assemblies whose yield loss you want to consider as a variance on the discrete job or repetitive schedule. (In some industries, scrap is considered yield loss.) You can incur this variance immediately by entering a scrap account as you move assemblies into this step. However, you can wait until the job is closed (standard and non–standard asset discrete jobs) or the period is closed (repetitive schedules and non–standard expense discrete jobs) to incur the variance. Oracle Master Scheduling/MRP and Supply Chain Planning does not consider assemblies that in Scrap steps in the MRP planning process. Assemblies in the Scrap intraoperation step are usually not useable. They are considered complete for the operation because components and resources have been consumed in their production. They can be recovered from scrap by moving them to another intraoperation or operation step. Complete/Incomplete Operation Steps Assemblies are considered incomplete at an operation if they are in the Queue or Run intraoperation steps. Assemblies are considered complete at an operation if they are in the To Move, Reject, or Scrap intraoperation step. When assemblies are completed at an operation, the system automatically backflushes Operation Pull components and charges resources. See: Operation Completion Moves: page 8 – 29. Using Intraoperation Steps The intraoperation steps that you enable and use depend on your manufacturing environment and your information requirements. Shop Floor Control 8–9 Manufacturing Environment For example, if you are a ’pull’ manufacturer you might enable just the Run and To Move intraoperations. You would do this to simplify the process of pulling assemblies into the Run step of an operation from the To Move step of a prior operation. Conversely, if you are a ’push’ manufacturer you might enable just the Queue and Run intraoperation steps. You would do this to simplify the process of pushing (issuing) components to assemblies in the Queue intraoperation step of the operation before you moving them to the Run step of the same operation. Processing Times As you move assemblies from one intraoperation or interoperation step to another the dates and times of these transactions are recorded. For example, you can use this information to help you determine how long assemblies spend waiting to be worked on (Queue time) and how much time they are actually being worked on (Run time). See Also Open Move Transaction Interface, Oracle Manufacturing, Distribution, Sales and Service Open Interfaces Manual, Release 11 Performing Move Transactions: page 8 – 35 Rework Production: page 8 – 51 Assembly Scrap: page 8 – 53 Overview of Period Close, Oracle Cost Management User’s Guide Discrete Job Close: page 3 – 50 8 – 10 Oracle Work in Process User’s Guide Operations You can add, update, delete, reschedule, and view operations. Adding and Updating Operations You can add operations to discrete jobs with statuses of Unreleased, Released, Complete, or On Hold. You can add operations to repetitive schedules with statuses of Unreleased. You can add operations to jobs and repetitive schedules with or without routings. You can create a routing for a job or schedule that does not have a routing by adding operations to it. When you add the first operation, the system automatically defaults an operation sequence of 1 for the new operation and assigns job or schedule material requirements to this operation. If the job or schedule is already released, the system also loads the job or schedule quantity into the Queue intraoperation step of the new operation. Suggestion: If you add an operation to a job or repetitive schedule, you may want to reschedule the job or repetitive schedule to correctly reflect the start and completion dates. You can update the operations of discrete jobs with statuses of Unreleased, Released, Complete, or On Hold. You can update the operations of repetitive schedules with statuses of Released, Complete, or On Hold as long as there are no other active schedules for the assembly on the line. ☞ Attention: You cannot update operation dates for repetitive schedules of any status. You can attach illustrative or explanatory files — in the form of text, images, word processing documents, spreadsheets, video, and so on — to operations. See: About Attachments, Oracle Applications User’s Guide. Prerequisites ❑ Define at least one standard discrete job, one non–standard discrete job or one repetitive schedule. See: Defining Discrete Jobs Manually: page 3 – 12 and Defining Repetitive Schedules Manually: page 6 – 13. " To add or update an operation: 1. Navigate to the Operations window. Shop Floor Control 8 – 11 2. Select the Job or Line and Assembly. 3. If you select a line and assembly, choose the repetitive schedule by selecting the first unit start date of that schedule. If you have selected a discrete job, the system displays the scheduled start date of the job. 4. Optionally, choose the Find button to populate the Operations region. 5. From the Main alternative region of the Operation region, select the operation Sequence or enter an operation Sequence number to add an operation. 6. Select the Operation Code of a standard operation or leave the Operation Code blank. If you add a standard operation by selecting its Operation Code, the Department, Count point, Autocharge and Backflush options, Minimum Transfer Quantity, and Description are automatically defaulted. Resource requirements that are associated with the standard operation are also defaulted. You can update these defaults at any time. You can update the operation codes of unreleased discrete jobs. If you update the operation code by selecting the operation code of a standard operation, existing operation information is overridden. 8 – 12 Oracle Work in Process User’s Guide If you leave the Operation Code blank, you must manually define the operation. 7. Select the Department. The Department identifies which group — people, machines, and/or suppliers — is performing the operation. Departments are also used for charging resources at an operation and are required even if there are no resources assigned to the operation. If you add a standard operation, the system displays the Department of that operation as the default. If there are resources assigned to the standard operation, you cannot update this field. 8. Check the Count Point check box to make the operation a count point operation. See: Count Point and Autocharge Fields, Oracle Bills of Material User’s Guide. Operations you must always perform, for example, critical, time–sensitive, or bottleneck operations, should be made count point operations. Operations that are not always performed should be made non–count point operations. When you perform move transactions, the system defaults in the next count point operation as the To operation sequence. For example, suppose you have three operations at sequences 10, 20, and 30 defined as count point, non–count point, and count point respectively. When you select operation 10 as the From operation, the system automatically defaults operation 30, the next count point operation, as the To operation. You can override this default and choose operation 20, if required. If you add an operation that is not a standard operation, the system automatically makes the operation a count point operation. If you add a standard operation, the system displays the count point option of that operation as the default. 9. Check the Autocharge check box to make the operation an autocharge operation. See: Count Point and Autocharge Fields, Oracle Bills of Material User’s Guide. Operations you must always charge resources to should be made autocharge operations. Operations that do not always require resource charges should be made non–autocharge operations. See: WIP Move: page 9 – 5. Autocharge operations automatically charge WIP Move resources when you move assemblies through or beyond them. For example, suppose you have three operations at sequences 10, 20, and 30 defined respectively as autocharge, non–autocharge, and Shop Floor Control 8 – 13 autocharge operations. When you move assemblies from the Queue intraoperation step of operation 10 to an intraoperation step that completes assemblies at operation 30 (To Move, Scrap, or Reject), resources at operations 10 and 30 are charged, but those at operation 20 are not. To charge resources to operation 20, you must move assemblies into a completion intraoperation step (To Move, Scrap, or Reject) of that operation. See: Intraoperation Steps: page 8 – 8. The count point and autocharge check boxes work together. Operations can be count point/autocharge, non–count point/non–autocharge operations, or non–count point/autocharge. They cannot be count point/non–autocharge. See: Count Point and Autocharge Fields, Oracle Bills of Material User’s Guide. If you add a standard operation, the system displays the autocharge option of that operation as the default. If you add an operation that is not a standard operation, the system makes the operation a count point operation. 10. Check the Backflush check box to make the operation a backflush operation. Operation Pull components that are assigned to backflush operations are automatically backflushed (pulled) from inventory when assemblies are moved and completed at that operation. Also backflushed are all Operation Pull components that have not been backflushed because they are assigned to non–backflush operations prior to the backflush operation. If you add an operation that is not a standard operation, the system automatically makes the operation a non–backflush operation. Caution: The last operation in a routing must always be a backflush operation. Materials are not backflushed from inventory if the last operation is a non–backflush operation and operations prior to it are non–backflush operations that have Operation Pull components that have not been backflushed. 11. Enter the Minimum Transfer Quantity. If you add a standard operation, the system displays the minimum transfer quantity of that operation as the default. If you add an operation that is not a standard operation, the system displays 0 as the default. See: Creating a Standard Operation, Oracle Bills of Material User’s Guide.. If you attempt to move fewer that the minimum transfer quantity, you receive a warning message but are allowed to continue. 8 – 14 Oracle Work in Process User’s Guide 12. In the Description alternative region, enter the Description. If you add a standard operation, the system displays the description of that operation as the default. 13. Save your work. " To midpoint reschedule a discrete job: H " See: Midpoint Rescheduling: page 8 – 17. To manually schedule/reschedule a discrete job operation: H You can manually schedule/reschedule a discrete job operation by changing one or more of its dates. The job must have a status of Unreleased, Released, Complete, or On Hold. You can change the First Unit Start Date (FUSD), the First Unit Completion Date (FUCD), Last Unit Start Date (LUSD), and the Last Unit Completion Date (LUCD) to any date. Changing the date or dates of an operation does not affect the date or dates of the operations that precede or follow that operation. ☞ " Attention: If you change the LUCD of the last operation to a date that is greater than the job completion date, the job completion date is updated to the LUCD. If you change the FUSD of the first operation to a date earlier than the job start date, the job start date is updated to the FUSD. To update operation resource requirements: H Choose the Resource button. See: Adding and Updating Resource Requirements: page 9 – 10. See Also Working with Attachments, Oracle Application User’s Guide Deleting Operations: page 8 – 16 Operations Control: page 8 – 5 Overview of Routings, Oracle Bills of Material User’s Guide Creating a Routing, Oracle Bills of Material User’s Guide Shop Floor Control 8 – 15 Deleting Operations You can delete operations from jobs and repetitive schedules regardless of the status of the job or schedule. However, you cannot delete an operation if any of the following conditions exist: • assemblies have been completed for the operation • resources have been charged at the operation • pending move and resource transactions exist for the operation • quantities exist in any intraoperation step of the operation • purchase requisitions (either approved or unapproved) or purchase orders exist for outside processing resources assigned to the operation You also cannot delete an operation from a repetitive schedule with a status of Released, Complete, or On Hold if there are other active schedules for the assembly on the line. If you delete an operation, the system reassigns its material requirements to the first operation in the routing or to operation sequence 1 if there are no other operations in the routing. Suggestion: If you delete an operation from a job or repetitive schedule, you may want to reschedule the job or repetitive schedule to correctly reflect the start and completion dates. " 8 – 16 To delete an operation: 1. Navigate to the Operations window. 2. Select the Job or Line and Assembly. 3. If you select a line and assembly, choose the repetitive schedule by selecting the first unit start date of that schedule. If you have selected a discrete job, the system displays the scheduled start date of the job. 4. Choose the Find button to populate the Operations region. 5. In the Operations region, select which operation to delete by selecting its operation Sequence. 6. Choose Delete Record from the Edit Menu. 7. Save your work. Oracle Work in Process User’s Guide Midpoint Rescheduling You can use midpoint rescheduling to reschedule around a bottleneck job operation. When you midpoint reschedule jobs, job start and completion dates and times are automatically updated. The start and completion dates of all other job operations, including operations you added that are not part of the original routing, are also updated. Material and resource requirement dates are also updated. Prerequisites ❑ Define at least one discrete job. See: Defining Discrete Jobs Manually: page 3 – 12 and Defining Repetitive Schedules Manually: page 6 – 13. " To midpoint reschedule operations: 1. Navigate to the Operations window. 2. Select the discrete Job. 3. Choose the Find button to populate the Operations region with the job’s operations. 4. Select the Operation. You can choose any operation since any operation can be a bottleneck operation. 5. Choose the Reschedule button. The Reschedule window appears. 6. Choose either of the following options: First Unit Start Date: Reschedules the operation from its first unit start date (FUSD) and time. Last Unit Completion Date: Reschedules the operation from its last unit completion date (LUCD) and time. Shop Floor Control 8 – 17 7. Enter the reschedule Date and time. The reschedule date and time becomes the new FUSD or LUCD and time of the operation. Operations that are before the operation being rescheduled are backward scheduled from this date and time. Operations that are after it are forward scheduled. Job start and completion dates and times as well as resource and material requirement dates and times are also updated. 8. " Choose OK to save your work. To manually reschedule a job or schedule operation: H See: Adding and Updating Operations: page 8 – 11. See Also Rescheduling Discrete Jobs: page 3 – 38 Detailed Scheduling: page 12 – 7 Discrete Rescheduling: page 12 – 11 8 – 18 Oracle Work in Process User’s Guide Viewing Operations You can view operation information in a variety of ways. You can view all operations associated with a specific job or repetitive line and assembly. You can also view operations across jobs and schedules. " To find and view operations: 1. Navigate to the View Operations window. The Find Operations window appears. You can view operations for jobs and repetitive schedules that start on a specific date or within a range of start dates. You can view all operations for jobs and schedules of a specific status (Unreleased, Complete, Released, On Hold, Complete–No Charges). You can view all operations for a specific department. Lastly you can view all operations that have first unit start or last unit completion dates with specific dates or within a range of dates. 2. Enter any combination of search criteria and choose the Find button. The results display in the View Operations window. Shop Floor Control 8 – 19 You can view the following information in the View Operations window’s alternative regions: Main: Operation Sequence, Operation Code and Department; Count Point, Autocharge and Backflush flags; Minimum Transfer Quantity and Date Last Moved Quantities: In Queue, Running, To Move, Completed, Remaining, and for repetitive lines/assemblies the Quantity Ahead and the Days Ahead ☞ Attention: The Completed quantity is the sum of assemblies in the Scrap, Reject, and To Move intraoperation steps. Remaining quantity is the sum of assemblies in the Queue and Run intraoperation steps. You can view Scrap and Reject quantities using the Operations window. See: Adding and Updating Operations: page 8 – 11. Dates: First Unit and Last Unit Start and Completion Dates Description: Description Job or Schedule: Job or production Line/Assembly, Start Date, and Status Previous Operation: operation Sequence, Department, Last Unit Completion Date, and In Queue, Running, To Move, and Completed Quantities 8 – 20 Oracle Work in Process User’s Guide You can also view, if entered, descriptive flexfield information. See: Setting Up Descriptive Flexfields: page 13 – 4. See Also Searching for Information, Oracle Applications User’s Guide Operations Control: page 8 – 5 Viewing Job and Schedule Operations As you do the following, you can view operations and operation material and resource requirements for the current discrete job or repetitive schedule by choosing the Operations button: • Defining Discrete Jobs Manually: page 3 – 12 • Simulating Discrete Jobs: page 3 – 43 • Closing Discrete Jobs: page 3 – 51 • Viewing Discrete Job Information: page 3 – 31 • Purging Discrete Jobs: page 3 – 57 • Viewing Repetitive Schedule Information: page 6 – 24 • Purging Repetitive Schedules: page 6 – 40 " To view the operations for the current job or schedule: H After choosing the Operations button, the Operations window (in View Only Mode) appears. You can view the following information for each operation using the window’s alternative regions: • Main region: Count Point option, Autocharge option, Backflush option, Minimum Transfer Quantity, Date Last Moved • Quantities region: In Queue, Running, To Move, Rejected, Scrapped, and Completed • Dates region: First Unit Start Date, Last Unit Start Date, First Unit Completion Date, and Last Unit Completion Date • Description region: Description ☞ Attention: You can also view operations across jobs and schedules. See: Viewing Operations: page 8 – 19. Shop Floor Control 8 – 21 " To view operation specific material requirements: H From the Operations window, select an Operation sequence then choose the Components button. The component materials, if any, required at the selected operation are displayed. " To view the operation resource requirements: H From the Operations window, Choose the Resources button. The Resource Requirements window appears. The resources, if any, required at the selected operation are displayed. " To close all open windows after viewing operations and material requirements: H 8 – 22 See: Closing Multiple Windows, Oracle Application User’s Guide. Oracle Work in Process User’s Guide Move Transaction Process Diagram You can move assemblies within an operation (for example, from Queue to Run) or from one operation to the next. You can move assemblies backward and forward within the routing. Figure 8 – 1 MOVE TRANSACTIONS Op Seq 10 Queue Run To Move Reject Scrap Queue Run To Move Reject Scrap Queue Run To Move Reject Scrap Op Seq 20 Op Seq 30 Shop Floor Control 8 – 23 Move Transactions You can move the assemblies you are building from one operation and/or intraoperation step to another using the Move Transactions window (See: Interoperation Moves: page 8 – 25.) You can move assemblies forward and backward within and between operations. (See: Intraoperation Moves: page 8 – 28). Moving assemblies into the To Move, Reject, or Scrap intraoperation step of an operations completes those assemblies at that operation. When assemblies are completed at an operation, the system automatically backflushes Operation Pull components and charges resources (See: Operation Completion Moves: page 8 – 29). Assembly Move Completion and Move Return Transactions If function security permits, you can also complete assemblies from any routing operation into inventory or return completed assemblies from inventory to any routing operation. See: Security Functions: page 2 – 53 and Assembly Move Completion and Move Return Transactions: page 8 – 30. Resource Charges Move transactions which complete assemblies at autocharge operations automatically charge resources and overhead at that operation. If assemblies are completed at an operation, and Manual resources are assigned to that operation, the system notifies you that these resources exist. To charge these resources, use the Resources button to access the Resource Transactions window. See: Charging Resources with Move Transactions: page 9 – 25 Assembly Scrap You can also scrap defective assemblies by moving them into a scrap intraoperation step. If you enter scrap account number or scrap account alias when you scrap assemblies, the cost of the scrapped assemblies is removed from the job or repetitive schedule. If you do not enter a scrap account or select an alias, the cost of the scrap remains in the job or schedule until job or period close. See: Scrapping Assemblies: page 8 – 56. Outside Processing Resource Charges When you move assemblies into the Queue intraoperation step of an operation that has either PO Move or PO Receipt resources assigned to it, the system automatically creates a purchase requisition in Oracle Purchasing. When you receive assemblies back from an outside 8 – 24 Oracle Work in Process User’s Guide processing supplier in Oracle Purchasing, PO Receipt or PO Move resources are automatically charged at the standard or the actual rate. Purchase requisition are also automatically created when you release a job or repetitive schedule if there are PO Move or PO Receipt resources at the first operation. You can track the progress of outside processing assemblies by moving assemblies within the outside operation. Ad Hoc Operations You can also add ’ad hoc’ operations to discrete job using the Move Transactions window. However, you can only add operations if the Allow Creation of New Operations parameter is set and the TP:WIP:Move Transactions profile option is set to on–line processing. See: Move Transaction Parameters: page 2 – 13 and Profile Options: page 2 – 41. Shop Floor Statuses You can view shop floor statuses when performing move transactions. Statuses are removed from intraoperation steps when the quantities at those operations drop to zero. See Also Move Transaction Types: page 8 – 34 Production Line Moves: page 8 – 31 Interoperation Moves When you move assemblies from one operation to another you are performing an interoperation move. You can move assemblies from any enabled intraoperation step to another. For example, you can move assemblies from operation sequence 20 to operation sequence 30, or from operation sequence 50 back to operation sequence 30. Normally, moves follow the forward sequence defined by the routing. You can, however, move assemblies from any operation to any other — even preceding operations. For example, if you intend to move 5 assemblies from operation 10 to 20, but you mistakenly 10, you can correct your mistake by moving 5 assemblies back from operation 20 to 10. The system automatically reverses resource and overhead charges, and component backflushes when you move assemblies backward in the routing. Shop Floor Control 8 – 25 You can add operations using the Operations window. You can also use the Move Transactions window to add ’ad hoc’ operations to discrete jobs. However, you can only add operations as you move discrete assemblies if the WIP Allow Creation of New Operations parameter is set and the TP:WIP:Move Transactions profile option is set to on–line processing. You can move assemblies to outside supplier operations. You receive these assemblies back using either the Enter Receipts window in Oracle Purchasing or the Move Transactions in Work in Process window. The following figure illustrates the flow of interoperation move transactions: 8 – 26 Oracle Work in Process User’s Guide Figure 8 – 2 INTEROPERATION MOVES Op Seq 10 Queue Run To Move Reject Scrap Queue Run To Move Reject Scrap Queue Run To Move Reject Scrap Op Seq 20 Op Seq 30 See Also Performing Move Transactions: page 8 – 35 Intraoperation Steps: page 8 – 8 Shop Floor Control 8 – 27 Intraoperation Moves When you move assemblies from one intraoperation step of an operation to another intraoperation step of the same operation you are performing an intraoperation move. You can move assemblies from any enabled intraoperation step — Queue, Run, To move, Reject, or Scrap — as required. Intraoperation steps are enabled using the WIP Enabled Intraoperation Steps parameter. The follow figure illustrates the flow of intraoperation move transactions: Figure 8 – 3 INTRAOPERATION MOVES Op Seq 10 Queue Run To Move Reject Scrap Queue Run To Move Reject Scrap Queue Run To Move Reject Scrap Op Seq 20 Op Seq 30 8 – 28 Oracle Work in Process User’s Guide See Also Performing Move Transactions: page 8 – 35 Intraoperation Steps: page 8 – 8 Operation Completion Moves You can completion assemblies at operations by: • moving assemblies from the Queue or Run intraoperation step of an operation to the To Move, Scrap or Reject intraoperation steps of the same operation • moving assemblies from the Queue or Run intraoperation steps of an operation to the To Move, Scrap or Reject intraoperation steps of a subsequent operation Assemblies are not completed at Operations by: • moving assemblies between the To Move, Scrap, and Reject intraoperations steps of the same operation • moving assemblies from the To Move, Scrap, or Reject intraoperations steps of the one operation to the Queue or Run intraoperation step of a subsequent operation You can complete any number of assemblies from any operation in a routing. For example if you have 49 assemblies at operation 10, and 51 at operation 20 you can complete the assemblies at operation 10 before completing those at operaton 20 and vice versa. If there are WIP Move resources at an operation that is being completed, the system automatically charges these resources at their standard rate. If there are Operation Pull components at this operation, these components are automatically pulled from inventory. If there are Manual resources at the operation that is being completed, the system notifies you that Manual resources exist at the operation so that you can manually charge them. If you perform a move transaction that reverses an operation completion, the system automatically reverses any associated material and resource charges. See: Resource Charge Types: page 9 – 5. Shop Floor Control 8 – 29 Figure 8 – 4 OPERATION COMPLETION Op Seq 10 Queue Run To Move Reject Scrap Queue Run To Move Reject Scrap Op Seq 20 See Also Operation Pull Backflush Transactions: page 8 – 41 Intraoperation Steps: page 8 – 8 Performing Move Transactions: page 8 – 35 Move Completion/Return Transactions Assembly completion moves automatically do the following: • issue components with a supply type of Assembly Pull to the job or repetitive schedule 8 – 30 Oracle Work in Process User’s Guide • reduce the number of assemblies in the To move intraoperation step of the last operation of the job or repetitive schedule routing • increase the quantity completed on the job or repetitive schedule You can reverse an assembly completion move by: • returning assemblies to the job or repetitive schedule using the Completion Transactions window Assemblies returned with completion transactions are automatically moved to the To move intraoperation step of the last operation of the job or repetitive schedule routing. They must be manually moved to the job or schedule operation they were moved and completed from. • performing an assembly move return transaction using the Move Transactions window Returning assemblies with a move return transaction moves the assemblies first to the To Move intraoperation step of the last operation then to the operation sequence and step that you specify. See Also Assembly Pull Backflush Transactions: page 7 – 50 Performing Move Transactions: page 8 – 35 Performing Move Completion and Move Return Transactions: page 8 – 46 Completing and Returning Assemblies: page 7 – 58 Production Line Moves You can track the production of repetitive assemblies by production line. When you move assemblies being built on a production line, the system groups all transactable repetitive schedules for that assembly on that line. In other words, you can move assemblies and charge resources across multiple schedules. The system automatically allocates move and resource transaction quantities to schedules on a first in–first out basis. For example, if you have 2 released schedules for 100 assemblies each and you move 150 assemblies, the system automatically allocates 100 to the earliest Shop Floor Control 8 – 31 schedule and 50 to the next. When you move repetitive assemblies backward, for example from operation 40 to 30, move quantities are allocated to the last schedule on a last in–first out basis. Open Move Transaction Interface You can load move transaction information into the Open Move Transaction Interface table from external sources such as barcode readers, factory floor machines such as cell controllers, and other manufacturing execution and quality control systems. The move transaction manager, launched in Oracle Inventory, processes and validates this information to ensure accuracy and compatibility with Oracle Applications information. Warning: Move transaction records are automatically inserted into the Open Move transaction Interface when receipts that involve PO Move resources are entered in Oracle Purchasing. If the Move Transaction Manager has not been launched, these records are not processed. Move transaction information that fails validation or processing is marked. You can use the Pending Move Transactions windows to view, update, and resubmit this information. If associated WIP Move resource transactions fail, they can be viewed, updated, and resubmitted using the Pending Resource Transactions window. See Also Transaction Managers, Oracle Inventory User’s Guide Launching Transaction Managers, Oracle Inventory User’s Guide Open Move Transaction Interface, Oracle Manufacturing, Distribution, Sales and Service Open Interfaces Manual, Release 11 Processing Pending Move Transactions: page 8 – 59 Move Transaction Options Move transactions can be launched from the following windows: 8 – 32 Oracle Work in Process User’s Guide • Move Transactions. See: Performing Move Transactions: page 8 – 35 and Performing Move Completion and Move Return Transactions: page 8 – 46. • Receipt Transactions. See: Entering Receipt Header Information, Oracle Purchasing User’s Guide. Move transactions can also be imported through the Open Move Transaction Interface. See: Open Move Transactions Interface: page 8 – 32. See Also Move Transactions: page 8 – 24 Shop Floor Control 8 – 33 Move Transaction Types When you enter move transactions in the Move Transactions window you must choose one of the following transaction types: Move Moves assemblies within (intraoperation) and between (interoperation) routing operations. You can move assemblies forward or backward within and between routing operations. Complete Completes assemblies from any routing operation and intraoperation step into inventory. Assembly move completions move assemblies from the current operation to the To Move intraoperation step of the last operation then complete them into inventory. Assemblies are completed into the default completion subinventory and locator specified for the discrete job or repetitive line/assembly. Where applicable, move completion transactions also charge move based resources and overheads and create backflush transactions for components with supply types of Assembly and Component Pull. Return Returns assemblies from inventory to any routing operation and intraoperation step. Assembly move returns first return assemblies from the discrete job or repetitive line/assembly completion subinventory/locator to the To Move intraoperation step of the last operation then move them into the operation and intraoperation step you specify. Where applicable, move return transactions also create transactions that reverse charges to move based resources and reverse backflush transactions for components with supply types of Assembly and Component Pull. You can specify which move transaction type is used as the default transaction type in the Move Transactions window using the TP:WIP:Move Transactions profile option. See: Profile Options: page 2 – 41. ☞ 8 – 34 Attention: You cannot complete or return lot controlled assemblies with move complete and move return transactions. You also cannot complete or return serial number controlled assemblies unless the Oracle Inventory Serial Generation Oracle Work in Process User’s Guide attribute for the assembly is set to Dynamic entry at sales order issue. See Also Assembly Completions and Returns: page 7 – 53 Performing Move Transactions You can perform move transactions for discrete jobs and repetitive schedules with routings. You can also perform move transaction for non–standard discrete jobs that have assemblies and routing references. See: Move Transactions: page 8 – 24. ☞ Attention: If Oracle Quality is installed and at least one qualified collection plan exists, both the Enter Quality Results option on the Special Menu and the Quality button on the button bar are enabled. Only collection plans that have been associated with the Move Transactions are qualified. Please note that when mandatory collection plans are used, quality results data must be entered and saved before you can save your move transaction. See: Using Oracle Quality with Oracle Work in Process, Oracle Quality User’s Guide. Prerequisites ❑ Release a discrete job or repetitive schedule with a routing or routing reference. See: Releasing Discrete Jobs: page 3 – 28 and Releasing Repetitive Schedules: page 6 – 21. ❑ Confirm that the From intraoperation step has a shop floor status that allows you to move assemblies from one intraoperation step to another. See: Assigning and Viewing Shop Floor Statuses: page 8 – 68. " To select a sales order, line/assembly or job to transact: 1. Navigate to the Move Transactions window. Shop Floor Control 8 – 35 2. Select a Sales Order, repetitive Line and Assembly, Assembly, or Job. The cursor defaults to one of these fields based on how you have the TP:WIP:Move Transaction First Field profile option set. See: Profile Options: page 2 – 41. You can only select a discrete job or a repetitive line and assembly for a repetitive schedule if the job or schedule has a status of Released or Complete. " To perform an interoperation or intraoperation move: 1. Select the Move Transaction Type. See: Move Transaction Types: page 8 – 34. 2. Select the From operation Sequence number. This is the operation sequence number from which you want to move assemblies. 3. Select the From operation Step. This is the intraoperation step from which you want to move assemblies. You must enter a value in this field if you entered a value in the From Op Seq field. You can move assemblies only from intraoperation steps that contain assemblies. See: Intraoperation Steps: page 8 – 8. 8 – 36 Oracle Work in Process User’s Guide You can enable or disable intraoperation steps using the Interoperation Steps parameter. See: Interoperation Steps Parameter: page 2 – 16. You cannot move assemblies from an intraoperation step if it has been assigned a shop floor status that prevents moves. You can optionally prevent moves from an operation and intraoperation step to an operation and intraoperation step if a No Move intraoperation step exists between the two. This is done using the Allow Moves Over No Move Shop Floor Statuses parameter. See: Move Transactions Parameters: page 2 – 13. ☞ 4. Attention: You can view statuses by choosing the Statuses button. Select the To operation Sequence number. The system defaults in the next count point operation as the To operation sequence. For example, suppose you have three operations at sequences 10, 20, and 30 defined as count point, non–count point, and count point respectively. When you select operation 10 as the From operation, the system automatically defaults operation 30, the next count point operation, as the To operation. You can override this default and choose operation 20, if required. If you move assemblies between operations (interoperation), the To operation sequence must be the different from the From operation sequence. You can select any operation on the routing including preceding operations. If you move assemblies within an operation(intraoperation), the To operation sequence must be the same as the From operation sequence. For example, you can move assemblies from the Queue to Reject intraoperation step of the same operation. 5. Select the To operation Step. This can be any operation step in any operation sequence. If you are entering an interoperation move, the To Operation step can be any intraoperation step in an operation before or after the current operation step. If you are entering an intraoperation move, the To Operation step can be any intraoperation step before or after the current intraoperation step. Moves into the To Move, Scrap, or Reject intraoperation steps of an operation, whether transacted as intraoperation or interoperation moves, complete assemblies at that operation. Shop Floor Control 8 – 37 6. Select the UOM. See: Overview of Units of Measure, Oracle Inventory User’s Guide. You can use any valid, alternate unit of measure for the assembly you are moving. 7. Enter the transaction Quantity. The transaction quantity defaults to either the minimum transfer quantity, the available quantity, or not at all depending on how the TP:Move Transaction Default Quantity profile option is set. See: Profile Options: page 2 – 41. If you enter a quantity that is less than the minimum transfer quantity, a warning is displayed but you are allowed to continue. If you selected an alternate unit of measure for the assemblies, you must enter the transaction quantity in the alternate unit of measure. If you have the TP:WIP:Move Transaction profile option set to On–line processing, you cannot move more assemblies than exist in an operation step. However, if this option is set to Background processing, you can move any number of assemblies, but the quantity is validated in the background. You can correct any errors using the Pending Move Transactions window. See: Processing Pending Move Transactions: page 8 – 59. If you have more than one repetitive schedule released for a specified assembly, the system displays the aggregate quantity of these schedules and allocates quantities across schedules using a FIFO (first in–first out) algorithm. Thus transactions against the oldest repetitive schedules are processed first. 8. Enter the transaction Date and time. The date and time must fall within an open accounting period and cannot be greater than the current date and time or less than the release date of the job or the release date of the earliest valid repetitive schedule. Valid repetitive schedules have statuses of Released or Complete. 9. Optionally, select the Reason code. See: Defining Transaction Reasons, Oracle Inventory User’s Guide. 10. Optionally, enter the transaction Reference. References can be used to identify transactions on standard reports. They can be up to 240 characters of alpha numeric text. 11. If Oracle Quality is installed and one or more qualified mandatory collection plans exist, Oracle Quality is invoked and the Find Collection Plans window appears. If no mandatory collection plans 8 – 38 Oracle Work in Process User’s Guide are found you can optionally invoke Oracle Quality by choosing the Quality button from the button bar or the Enter Quality Results option from the Special Menu. See: Entering Quality Data for Move Transactions, Oracle Quality User’s Guide. 12. Choose the Transact button. " To scrap assemblies: H " " To add an operation and move assemblies into this operation: 1. Enter a From operation Sequence number. 2. Enter a From operation Step. 3. Enter a To operation Sequence number for the new operation. 4. Enter an operation Code or Department for the new operation sequence. 5. Enter a To operation Step for the new operation. 6. Follow steps 6 through 11 above. To backflush pull components: H " See: Backflushing Pull Components: page 8 – 42. To charge manual resources: H " See: Scrapping Assemblies: page 8 – 56. Choose the Resources button. See: Charging Resources with Move Transactions: page 9 – 25. To view shop floor statuses: H Choose the Statuses button. See: Assigning and Viewing Shop Floor Statuses: page 8 – 68. See Also Setting Up Shop Floor Control: page 8 – 4 Operation Completion Move Transactions: page 8 – 29 Performing Move Completion and Move Return Transactions: page 8 – 46 Shop Floor Control 8 – 39 Intraoperation Steps: page 8 – 8 Resource Management: page 9 – 2 8 – 40 Oracle Work in Process User’s Guide Operation Pull Backflush Transactions Operation pull backflush transactions automatically pull inventory for all Operation Pull components defined at the operation. They also pulls components for all non–backflush operations between the current operation and the last completed backflush operation. Whether the backflush occurs automatically during a move transaction is determined by the whether the operation is or is not defined as a backflush operation. See: Operations, Oracle Bills of Material User’s Guide. and Creating a Standard Operation, Oracle Bills of Material User’s Guide. Backflush Operations You cannot backflush at operations that are specified as non–backflush operations. If you assign Operation Pull components to non–backflush operations these components are backflushed at a backflushing operation later in the routing. The last operation in the routing should always be defined as a backflush operation to ensure that all Operation Pull components are backflushed by the end of the routing. Count Point and Autocharge Operations When you define operations in Oracle Bills of Material, you can specify whether an operation is a count point and whether resources at that operation should be automatically charged during a move transaction. You can update this information in Work in Process using the Operations window. Operations that are non–count point/autocharge operations must be defined as backflush operations. See: Count Point and Autocharge Fields, Oracle Bills of Material User’s Guide. Negative Requirements Backflushes When Operation Pull components that have negative requirement quantities are backflushed, they are returned to instead of supplied from inventory. See Also Backflush Transactions: page 7 – 47 Lot and Serial Number Backflushing: page 7 – 49 Supply Types: page C – 2 Shop Floor Control 8 – 41 Operation Completion Transactions: page 8 – 29 Backflushing Pull Components As you perform move and completion transactions that complete assembles at an operation or complete assemblies into inventory, the system automatically backflushes pull components not under lot, serial number, or lot and serial control from their respective supply subinventories. Reversing these transactions returns backflushed components back to their subinventories. See: Backflush Transactions: page 7 – 47 and Reverse Backflush Transactions: page 7 – 47. Pull components under lot, serial number, or lot and serial number control are handed somewhat differently. Lot controlled components can also be automatically backflushed but only if the WIP Backflush Lot Selection Parameter is set to auto–FIFO selection — by Receipt Date or Expiration Date — and there is sufficient inventory. Components under serial number or lot and serial control cannot however be backflushed without the manual entry of the applicable lot and/or serial numbers. See: Lot and Serial Number Backflushing: page 7 – 49. Operation and Assembly Pull components are not automatically backflushed when you complete assemblies at an operation or complete job or schedule assemblies into inventory if the following conditions exist: – the operation that assemblies are being completed at is not a backflush operation – the components are under serial number or lot and serial number control – the WIP Backflush Lot Selection Parameter requires manual entry of lot numbers – there is insufficient inventory in the supply subinventory and locator for lot controlled components ☞ Attention: Backflush transactions that do not complete because there is insufficient inventory can be resubmitted using the Pending Transactions window in Oracle Inventory. See: Viewing Pending Transactions, Oracle Inventory User’s Guide. Pull components that are not backflushed can be manually issued using the WIP Material Transactions window. You can use the WIP Material Transaction window to issue these components that were not 8 – 42 Oracle Work in Process User’s Guide backflushed because the backflush transaction was cancelled. See: Issuing and Returning Specific Components: page 7 – 26. " To backflush or return backflushed components under lot, serial, or lot and serial control: 1. ☞ 2. When the Backflush Transactions folder window appears, select the supply Subinventory and, if required by the subinventory, the supply Locator. See: Customizing the Presentation of Data in a Folder, Oracle Applications User’s Guide and See: Supply Subinventory and Locator Fields, Oracle Bills of Material User’s Guide. Attention: The Backflush Transaction folder window automatically appears only if you are backflushing lot controlled pull components and the WIP Lot Selection Method Parameter is set to require manual lot entry. It also appears when you are backflushing serial only or lot and serial controlled components. See: Backflush Default Parameters: page 2 – 15. Select the UOM. See: Overview of Units of Measure, Oracle Inventory User’s Guide. You can use any valid, alternate unit of measure for the component you are backflushing. 3. Enter the transaction Quantity. Shop Floor Control 8 – 43 You can transact less, but not more than the required quantity. If you are transacting components in their primary unit of measure under lot control and the required quantity is a non–integer, you can only transact up to the largest integer. If you enter an alternate unit of measure for the assemblies, you must enter the transaction quantity in the alternate unit of measure. 4. Optionally, select the Reason code. See: Defining Transaction Reasons, Oracle Inventory User’s Guide. 5. Optionally, enter the transaction Reference. References can be used to identify transactions on standard reports. They can be up to 240 characters of alpha numeric text. 6. Choose the Lot/Serial button to assign lot and/or serial numbers. See: Assigning Lot Numbers, Oracle Inventory User’s Guide and Assigning Serial Numbers, Oracle Inventory User’s Guide. 7. Choose Done to save your work. See Also Backflush Transactions: page 7 – 47 Move Transaction Types: page 8 – 34 Performing Move Transactions: page 8 – 35 Performing Move Completion and Move Return Transactions: page 8 – 46 8 – 44 Oracle Work in Process User’s Guide Move Completion/Return Rules The following rules are enforced when performing assembly move completion and move return transactions: • discrete jobs and repetitive schedules must have routings. • non–standard discrete jobs must have assemblies and routing references • default completion subinventories, and locators if required by the subinventory, must be specified for the following: – standard discrete jobs – the repetitive line/assemblies that are used to build repetitive schedules – non–standard discrete jobs with routing references • assemblies under lot control cannot be completed from or returned to repetitive schedules • assemblies under lot control can be completed from and returned to discrete jobs only if you have specified a lot number for the job. See: Defining Discrete Jobs Manually: page 3 – 12 • assemblies under serial number control cannot be completed from or returned to discrete jobs or repetitive schedules unless the item’s Serial Generation attribute in Oracle Inventory is set to dynamic entry At sales order issue. See: Defining Items, Oracle Inventory User’s Guide and Inventory Attribute Group, Oracle Inventory User’s Guide • assemblies cannot be completed from or return to the To Move intraoperation step of the last operation on the routing • assemblies cannot be completed from or return to a discrete job or repetitive schedule if the To Move intraoperation step of the last operation on the routing if that step has a status that disallows transaction The following rules are enforced only when performing move return transactions: • you cannot return more assemblies from inventory to a job or repetitive schedule than have been completed from that job or schedule • you cannot return more assemblies to jobs or repetitive schedules than exist in inventory unless the Oracle Inventory Negative Inventory Balances parameter allows negative inventory Shop Floor Control 8 – 45 balances. See: Default Inventory Parameters, Oracle Inventory User’s Guide • assemblies cannot be returned to discrete jobs or repetitive schedules if the assembly item or its subinventory is under reservation control Performing Move Completion/Return Transactions You can complete assemblies into inventory from jobs and schedules using move complete transactions. You can also return completed assemblies back to jobs or repetitive schedules using move return transactions. ☞ Attention: Whether assembly move completion and return transactions are allowed is controlled by function security. You can also control whether the Move Transaction Type defaults to Complete using the WIP:Move Completion Default. See: Profile Options: page 2 – 41 and Security Functions: page 2 – 53. Prerequisites ❑ Release a job or repetitive schedule. See: Releasing Discrete Jobs: page 3 – 28 and Releasing Repetitive Schedule: page 6 – 21. ❑ Confirm that the From intraoperation step has a shop floor status that allows you to move assemblies from one intraoperation step to another. See: Assigning and Viewing Shop Floor Statuses: page 8 – 68. " To select a job, repetitive schedule, or sales order: 1. Navigate to the Move Transactions window. 2. Select a Sales Order, repetitive Line and Assembly, Assembly, or Job. The cursor defaults to one of these fields based on how you have the TP:WIP:Move Transaction First Field profile option set. See: Profile Options: page 2 – 41. You can only select a discrete job or a repetitive line and assembly for a repetitive schedule if the job or schedule has a status of Released or Complete. 8 – 46 Oracle Work in Process User’s Guide " To move and complete assemblies or return and move assemblies: 1. Choose the Complete or Return Transaction Type. See: Move Transaction Types: page 8 – 34. If you are completing assemblies, information from the last operation of the job or schedule is automatically defaulted into the operation To fields — Sequence, Code, and Department — and the To Move intraoperation step is defaulted for the To Step. If you are returning assemblies, information from the last operation of the job or schedule is automatically defaulted into the operation From fields — Sequence, Code, and Department — and the To Move intraoperation step is defaulted for the From Step. 2. If you are completing assemblies, select the complete From operation Sequence and intraoperation Step. 3. Select the UOM. See: Overview of Units of Measure, Oracle Inventory User’s Guide. You can use any valid, alternate unit of measure for the assembly you are moving. 4. Enter the transaction Quantity. If you are completing assemblies, you can complete any quantity even more that the job or schedule quantity. For example, if you have 49 assemblies at operation 10, and 51 at operation 20 you can complete the assemblies at operation 10 before completing those at operaton 20 and vice versa. If you are returning assemblies, you can return fewer but not more assemblies than the number of assemblies that have been completed from a job or repetitive schedule. You cannot return more assemblies than are in inventory unless the Allow Negative Balances parameter is set in Oracle Inventory. See: Organization Parameters Window, Oracle Inventory User’s Guide. If you enter a quantity that is less than the minimum transfer quantity for the operation, a warning is displayed but you are allowed to continue. If you selected an alternate unit of measure, you must enter the quantity in the alternate unit of measure. 5. Enter the transaction Date and time. The date and time must fall within an open accounting period and cannot be greater than the current date or less than the release date of the job or the earliest valid repetitive schedule. Shop Floor Control 8 – 47 6. Optionally, select the Reason code. See: Defining Transaction Reasons, Oracle Inventory User’s Guide. 7. Optionally, enter the transaction Reference. References can be used to identify transactions on standard reports. They can be up to 240 characters of alpha numeric text. 8. " Choose the Transact button. To backflush pull components: H See: Backflushing Pull Components: page 8 – 42. See Also Setting Up Shop Floor Control: page 8 – 4 Assembly Move Completion Transactions: page 2 – 51 Move Completion/Return Rules: page 8 – 45 Intraoperation Steps: page 8 – 8 Resource Management: page 9 – 2 8 – 48 Oracle Work in Process User’s Guide Viewing Move Transactions You can view move transactions for an individual job or repetitive schedule (line/assembly). You can also view move transactions across jobs and schedules. " To find and view move transactions: 1. Navigate to the View Move Transactions window. The Find Move Transactions window appears. You can query to find move transactions by Transaction Date or date range, by Job, by production Line, by Assembly, by a range of Departments, and by a range of Steps. For example, you might query to find all move transactions that scrapped assemblies (To Step = Scrap). 2. Enter any combination of search criteria and choose the Find button. The results display in the View Move Transactions window. Shop Floor Control 8 – 49 You can view the following move transaction information in Move Transaction window’s alternative regions: Job or Schedule Header: Transaction Date, Job, Assembly, production Line, Transaction ID Operation, Quantities: From Operation Sequence, From Department, From Step; To Operation Sequence, To Department, To Step; as well as the Transaction UOM and Transaction Quantity in both the Transaction and Primary units of measure Scrap, Comments: Scrap Account, Reason, and Reference You can also view, if entered, descriptive flexfield information. See: Setting Up Descriptive Flexfields: page 13 – 4. See Also Searching for Information, Oracle Applications User’s Guide Move Transaction Options: page 8 – 32 8 – 50 Oracle Work in Process User’s Guide Shop Floor Management You can use Work in Process to manage outside supplier processing, rework production, and assembly scrap. Outside Processing You can use the closed loop system provided by Oracle Inventory, Oracle Purchasing, and Oracle Work in Process to do the following: • define outside processing resource requirements for your discrete job and repetitive schedule routings • automatically generate purchase requisitions by moving assembly items to the Queue intraoperation step of an operation that has outside processing resources associated with it • receive assembly items back from outside processing suppliers and automatically charge your outside processing resource costs • control and track progress at outside processing operations See Also Overview of Outside Processing, Oracle Purchasing User’s Guide Outside Processing and Work in Process: page F – 2 PO Move and PO Receipt: page 9 – 6 Rework Production Rework may be necessary when production problems arise. You can often rework or repair defective assemblies to make them usable. Work in Process provides several options for handling rework. The method you choose depends on the product you are building, your manufacturing process, and the nature of the problem. The options available are as follows: • Reject intraoperation steps • Rework operations • Non–standard discrete jobs Shop Floor Control 8 – 51 Reject Intraoperation Step When it is possible to rework defective assemblies at their present routing operation, they can be moved into the Reject intraoperation step of that operation. This isolates them from known ’good’ assemblies at that operation. The system views assemblies moved into the Reject intraoperation step from the Queue or Run intraoperation step of the same operation as complete at that operation and updates operation completion information, backflushes pull components, and charges resource costs and overheads accordingly. You can now perform the rework. When rework is complete you can move the repaired assemblies to the Queue, Run, or To move intraoperation step of the next operation. If you do not want to rework defective assemblies at their present operation, you can alternatively move them to the Reject intraoperation step of a prior operation. This avoids recreating an operation completion (Queue or Run to Reject and Queue, Run, or To Move to the next operation) at the current operation. If necessary, you can move irreparable assemblies into the Scrap intraoperation step of the current operation. Moves from the Reject to the Scrap intraoperation step, do not complete assemblies since rejected assemblies are already considered complete. See: Intraoperation Steps: page 8 – 8. Rework Operations When you regularly rework certain assemblies, you may find it convenient to add ’rework’ operations to the primary routings of these assemblies. You can then move assemblies that need rework into these operations. Good assemblies bypass these operations. Rework operations should be set to count point off/autocharge off so that when good assemblies bypass them, the system does not automatically transact operation completions for these operations. In other words, you only need to move assemblies into these operations if they require rework. Non–Standard Discrete Jobs You can also use non–standard jobs to perform rework activities. Before defining non–standard jobs for rework, you must first complete the defective assemblies by receiving them into a non–nettable rework subinventory. This subinventory helps you to isolate these assemblies from the known good assemblies. 8 – 52 Oracle Work in Process User’s Guide Once you determine the proper rework steps for these assemblies, you can define a non–standard discrete and add the operations and components required for the rework. You can also create a rework routing that specifically addresses this type of rework. See: Rework Assemblies: page 4 – 7. Assembly Scrap You can scrap unusable, partially completed assemblies from jobs and repetitive schedules by moving them into the Scrap intraoperation step of an operation. Scrap Transactions You scrap assemblies by moving them into the Scrap intraoperation step of an operation. You can, if necessary, recover scrapped assemblies by moving them out of the Scrap intraoperation step. You can also move assemblies back to the Scrap intraoperation step of the previous operation from the Queue or Run intraoperation step of the current operation if no work has been completed at the current operation. See: Intraoperation Steps: page 8 – 8. The system views assemblies moved into the Scrap intraoperation step from the Queue or Run intraoperation step of the same operation as complete at that operation and updates operation completion information, backflushes pull components, and charges resource and overhead costs accordingly. Costing Assembly Scrap You can optionally specify whether Scrap transactions require a scrap account or alias using the WIP Require Scrap Account Parameter. If you enter a scrap account or alias as you move assemblies into Scrap intraoperation steps, the scrap account is debited and the job or repetitive schedule elemental accounts, determined by the accounting class, for the accounting class elemental accounts for the cost of the assembly through the scrap operation are credited. This removes the cost of the scrapped assemblies from the job or repetitive schedule. If you do not provide a scrap account, the cost of the scrap remains in the job or schedule until job or period close. If you recover assemblies from scrap, the scrap account is credited and the job or repetitive schedule elemental accounts for the cost of this assembly through this operation are debited. For more information about how assembly cost transactions are costed see: Work in Process Average Cost Transactions, Shop Floor Control 8 – 53 Oracle Cost Management User’s Guide and Work in Process Standard Cost Transactions, Oracle Cost Management User’s Guide. Netting Assembly Scrap For standard discrete jobs, the MRP planning process does not consider assemblies in Scrap intraoperation steps as scheduled receipts, nor does the planning process use these scrapped assemblies when calculating MPS relief. For standard discrete jobs, the planning process deducts scrapped assemblies from the MRP net quantity to determine the available supply. The planning process does not deduct scrapped assemblies from supply on non–standard discrete jobs or repetitive schedules. Effect of Scrap on Backflush Components When you move assemblies into the Scrap intraoperation step, Operation Pull components at subsequent operations that would have been consumed by these assemblies are not backflushed. Also, Assembly Pull components at subsequent operations are not backflushed by assembly completions. You should not expect later moves or completions to backflush components consumed at operations prior to the one where the assemblies are scrapped if these operations are set to delay backflushing until subsequent operations. For example, if you scrap assemblies at a non–backflush operation that has Operation Pull components, the system does not backflush these components nor does it backflush Operation Pull components consumed at prior non–backflush operations. If you scrap assemblies at an operation that has Assembly Pull components, the system also does not backflush the components. In both cases, the system alerts you that your scrap transactions may result in unissued pull components. You can use the WIP Material Transactions window to push (issue) the pull components onto the job or repetitive schedule. You can also update your bills and routings to avoid this problem. See Also Intraoperation Steps: page 8 – 8 Operation Pull Backflush Transactions: page 8 – 41 Move Transaction Parameters: page 2 – 13 8 – 54 Oracle Work in Process User’s Guide Scrapping Assemblies: page 8 – 56 Shop Floor Control 8 – 55 Scrapping Assemblies You scrap assemblies by moving them into a scrap intraoperation step as part of an intraoperation or interoperation move transaction. If you enter a scrap account number or alias, the cost of the assembly through the scrap operation is removed from the job or schedule. See: Assembly Scrap: page 8 – 53. Prerequisites ❑ Release a job or repetitive schedule. See: Releasing Discrete Jobs: page 3 – 28 and Releasing Repetitive Schedule: page 6 – 21. ❑ Confirm that the From intraoperation step has a shop floor status that allows you to move assemblies from one intraoperation step to another. See: Assigning and Viewing Shop Floor Statuses: page 8 – 68. " To select a sales order, line/assembly or job to transact: 1. Navigate to the Move Transactions window. 2. Select a Sales Order, repetitive Line and Assembly, Assembly, or Job. The cursor defaults to one of these fields based on how you have the TP:WIP:Move Transaction First Field profile option set. See: Profile Options: page 2 – 41. You can only select a discrete job or a repetitive line and assembly for a repetitive schedule if the job or schedule has a status of Released or Complete. " To perform an intraoperation scrap move: 1. Select the From operation Sequence and intraoperation Step. 2. Select the To operation sequence and intraoperation step. The To intraoperation step must be Scrap. See: Intraoperation Steps: page 8 – 8. 3. Select the UOM. See: Overview of Units of Measure, Oracle Inventory User’s Guide. You can use any valid, alternate unit of measure for the assembly you are moving. 4. Enter the transaction Quantity. If you selected an alternate unit of measure, you must enter the quantity in the alternate unit of measure. 8 – 56 Oracle Work in Process User’s Guide 5. Enter the transaction Date and time. This date and time must fall within an open accounting period. It cannot be greater than the current date or less than the release date of the job or the earliest valid repetitive schedule. 6. If the WIP Require Scrap Account parameter is set, you must enter a scrap account number or an account Alias. If you do not specify that a scrap account is required, it is optional. See: Move Transaction Parameters: page 2 – 13 and Defining Account Aliases, Oracle Inventory User’s Guide. If you subsequently change the To intraoperation step from Scrap to an intraoperation step other than Scrap, you must clear the scrap account Number or Account Alias. For more information about how scrap transactions are costed see: Work in Process Average Cost Transactions, Oracle Cost Management User’s Guide and Work in Process Standard Cost Transactions, Oracle Cost Management User’s Guide. 7. Optionally, select the Reason code. See: Defining Transaction Reasons, Oracle Inventory User’s Guide. 8. Optionally, enter the transaction Reference. References can be used to identify transactions on standard reports. They can be up to 240 characters of alpha numeric text. 9. " Choose the Transact button. To backflush pull components: H See: Backflushing Pull Components: page 8 – 42. See Also Assigning Lot Numbers, Oracle Inventory User’s Guide Assigning Serial Numbers, Oracle Inventory User’s Guide Setting Up Shop Floor Control: page 8 – 4 Performing Move Transactions: page 8 – 35 Shop Floor Control 8 – 57 Dispatch Reports There are a number of reports that can help you prioritize your shop floor activity, including: • Discrete Job Data Report: page 14 – 9 • Discrete Job Dispatch Report: page 14 – 11 • Discrete Job Listing Report: page 14 – 13 • Repetitive Line Report: page 14 – 46 • Repetitive Schedule Data Report: page 14 – 50 • WIP Location Report: page 14 – 69 8 – 58 Oracle Work in Process User’s Guide Pending Move Transactions You can view move transactions awaiting processing. You can also view, update, delete, and resubmit move transactions that have failed validation or processing. Processing Pending Move Transactions You can view, update, delete, and resubmit move transaction records that have failed validation and remain in the Open Move Transaction Interface table (WIP_MOVE_TNX_INTERFACE). You can also resubmit transactions whose concurrent process has failed and have a processing phase of Complete and process status of Error. You can view error messages associated with failed records. Error messages can assist you in updating failed records before resubmission. Prerequisites ❑ Launch the move transaction manager. See: Transaction Managers, Oracle Inventory User’s Guide and Launching Transaction Managers, Oracle Inventory User’s Guide. " To view pending move transaction records: 1. Navigate to the Pending Move Transactions window. The Find Pending Move Transactions window appears. You can search for records by Transaction Date range, by Organization, by Job or Schedule Name, and production Line. You can also search for records that have a specific Process Phase (Move validation, Move processing, or Backflush setup, Process Status Shop Floor Control 8 – 59 (Pending, Running, or Error), Source Code, Source Line ID, or Transaction ID. 2. " Enter any combination of search criteria and choose the Find button. The Pending Move Transactions window appears with the results of your query. To view pending move transaction records: H For each pending record displayed, you can view the following information using the Pending Move Transactions window’s alternative regions: Processing: Group ID, processing Phase, processing Status Source: Source Code, Source Line (if applicable), Created By Concurrent Request: Request ID, Phase, Status, Message Job or Schedule Name: Organization, Job or Schedule Name, Line Operations: From Operation Sequence, Department, and Step and To Operation Sequence, Department, and Step Transaction: UOM, Quantity, Date and time, Type Comments and Scrap Account: Reason, Reference, and Scrap Account You can also view the descriptive flexfield information entered for the transaction record. See: Setting Up Descriptive Flexfields: page 13 – 4. 8 – 60 Oracle Work in Process User’s Guide " To view error details for failed move transactions: 1. In the Pending Move Transactions window, select the failed record. 2. Choose the Errors button. The Pending Move Transactions Error window appears. All errors for the selected record are displayed. Column indicates the name of the column in the move interface table that failed validation. Message indicates why the transaction failed. Using these messages you can determine what fields need to be updated. Messages that are not specific to a Column, for example processing errors, may also be displayed. In such cases, a Message but no Column is shown. " To update failed move transaction records: 1. Select the record to update. You can update records with a processing status of Error. 2. In the Source alternative region, enter the Source Code, the Source Line, or both. When you insert records into the Open Move Transaction Interface table, you can optionally identity a record’s source using the source code and source line. For example, you can enter a different source code and source line for records from a bar code reader versus those from a radio frequency device. 3. Select the Created By identifier. The name of the user that created the transaction is displayed. This field can be updated. 4. In the Job or Schedule Name alternative region, select the Organization. You can only select enabled organizations. See: Creating an Organization, Oracle Human Resources User’s Guide. 5. Select the Job or Schedule Name. Shop Floor Control 8 – 61 If you select a schedule name, you must enter a production line. If you select a discrete job, and the line field contains a value the system prompts you to delete the line value. 6. In the Operations alternative regions, select the From Operation Sequence. You can enter any operation defined for your job or schedule. 7. Select the From Operation Step. You can update this field with any intraoperation step currently enabled for your organization. See: Intraoperation Steps: page 8 – 8. 8. Select the To Operation Sequence. You can enter any operation sequence that has a valid department for your organization and job or repetitive schedule. 9. Select the To Operation Step. You can select any operation step that is enabled for your organization. If you select the Scrap intraoperation step and the WIP Require Scrap Account parameter is set, you must enter a scrap account. If you update the To Operation step from Scrap to another, non–scrap step and the scrap account field has a value, you must clear the scrap account field. 10. Select the move transaction Type: Move transaction, move and Complete, Return and move. See: Move Transaction Types: page 8 – 34. 11. In the Transaction alternative region, select the UOM. You can use any valid, alternate UOM for the assembly you are moving. See: Overview of Units of Measure, Oracle Inventory User’s Guide. 12. Enter the transaction Quantity. If you enter an alternate unit of measure for the assemblies, you must enter the quantity in the alternate unit of measure. You can update this field with any number. 13. Enter the transaction Date and time. The date and time must fall within an open accounting period and cannot be greater than the current date or less than the release date of the job or the earliest valid repetitive schedule. 14. In the Comments and Scrap Account alternative region, select a transaction Reason code. See: Defining Transaction Reasons, Oracle Inventory User’s Guide. 8 – 62 Oracle Work in Process User’s Guide 15. Enter the transaction Reference. References can be used to identify transactions on standard reports. They can be up to 240 characters of alpha numeric text. 16. If the To intraoperation step is Scrap and the WIP Require Scrap Account parameter is set, you must enter a scrap account Number or an account Alias. If you do not specify that a scrap account is required, it is optional. See: Move Transaction Parameters: page 2 – 13 and Defining Account Aliases, Oracle Inventory User’s Guide. If you subsequently change the To intraoperation step from Scrap to an intraoperation step other than Scrap, you must clear the Scrap Account number or Account Alias. 17. Save your work. " To resubmit individual failed move transaction records: 1. In the Pending Move Transactions window, check the transaction’s Resubmit check box. You can resubmit transactions of any processing status. If you leave the check box unchecked you can still update your transaction record but the transaction manager does not process it again when polling the move interface table. 2. Save your work to resubmit the transaction. When you resubmit a record, the system nulls the Transaction ID, Group ID, and concurrent Request ID and changes the processing status to Pending. The resubmit level of the Move Transaction Manager determines at what specific start date and time or at what specific intervals transactions are processed. " To select and resubmit all failed move transaction records: 1. In the Pending Move Transactions window, chose Select All for Resubmit from the Special Menu. See: Special Menu: page G – 2. You can deselect selected transactions as required. 2. Save your work to resubmit the transactions. When you resubmit transactions, the system nulls their Transaction IDs, Group IDs, and concurrent Request IDs and changes their processing Statuses to Pending. The resubmit level of the Move Transaction Manager determines at what specific start date and time or at what specific intervals transactions are processed. Shop Floor Control 8 – 63 " To delete pending move transaction records: 1. In the Pending Move Transactions window, select the transaction. 2. Choose Delete from the Edit Menu You can delete failed records that have a processing status of Error regardless of their processing phase. When you delete transaction records, their corresponding error messages are also deleted. See Also Open Move Transaction Interface, Oracle Manufacturing, Distribution, Sales and Service Open Interfaces Manual, Release 11 Open Move Transaction Interface: page 8 – 32 Performing Move Transactions: page 8 – 35 Performing Move Completion Transactions: page 8 – 46 Profile Options: page 2 – 41 Searching for Information, Oracle Applications User’s Guide 8 – 64 Oracle Work in Process User’s Guide Shop Floor Statuses You can use shop floor statuses to control move transactions within and between discrete job and repetitive line/assembly operations. For example, if you define a shop floor status that disallows moves when quality problems are detected (e.g., QAHold), you can assign this status to an intraoperation step prevent moves until the problems are resolved. Shop floor statuses can be optionally used to restrict over a ’no move’ intraoperation steps and out of operations that have outside processing resources assigned to them. These two optional uses of shop floor statuses are controlled by WIP parameters and are described below. Restricting Moves Over ’No Move’ Intraoperation Steps When the WIP Allow Moves Over No Move Shop Floor Statuses parameter is not set, the system checks all autocharge operations and To Move, Run and Queue intraoperation steps between the From and To operations and intraoperation steps for ’no move’ statuses. The system also checks the statuses of intervening intraoperation steps at the From and To operations if those operations are direct charge. If a status that can prevent moves is found, the move is disallowed. Direct charge operations between the From and To Operations and statuses at Scrap and Reject intraoperation steps do not prevent moves. Additional Information: The Move Transactions: Allow Skipping Over No Move Statuses security function can be set to override ”no move” shop floor statuses. See: Security Functions: page 2 – 53. The following table and examples illustrate how these rules are applied. Operation Sequence Autocharge / No Direct Charge Enabled Intraoperation Steps Queue Run To Move Scrap Reject 10 autocharge 20 direct No Move 30 autocharge 40 autocharge No Move No Move No Move Table 8 – 1 Application of No Move Shop Floor Status (Page 1 of 1) Shop Floor Control 8 – 65 Parameter On If the WIP Allow Moves Over No Move Shop Floor Statuses parameter is set, standard shop floor status logic is applied and only moves from intraoperation steps that have ’no move’ statuses are prohibited. In this example, you cannot move assemblies from the To Move intraoperation step of operation 20, from the Scrap intraoperation step of operation 30, and from the Run and Reject intraoperation steps of operation 40. Note: You can move assemblies from these operations and intraoperation steps after disabling or deleting their ’no move’ statuses. Parameter Off If the WIP Allow Moves Over No Move Shop Floor Statuses parameter is not set, both standard shop floor status and ’no move’ logic are applied. Again, you cannot move assemblies from the To Move intraoperation step of operation 20, from the Scrap intraoperation step of operation 30, and from the Run and Reject intraoperation steps of operation 40. In addition, the following moves are also prohibited: • You cannot move assemblies from the Queue intraoperation step of operation 10 to the Scrap intraoperation step of operation 20 because of the ’no move’ shop floor status at the To Move intraoperation step of operation 20, a direct charge operation. • You cannot move assemblies backward from the To Move intraoperation step of operation 40 to the Queue intraoperation step of operation 40 because of the intervening ’no move’ at the Run intraoperation step. • You cannot move assemblies from the Queue intraoperation step of operation 10 to the To Move intraoperation step of operation 40 because of the ’no move’ status at the Run intraoperation step of operation 40. • You cannot move and complete assemblies from the Queue intraoperation step of operation 10 to the To Move intraoperation step of the last operation, operation 40, because of the ’no move’ status at the Run intraoperation step of operation 40. The following move transactions, however, are not prohibited: • You can move and complete assemblies from the To Move intraoperation step of operation 40 because the ’no move’ status at the Reject intraoperation step of operation 40 is not considered. 8 – 66 Oracle Work in Process User’s Guide • You can move assemblies from the Queue intraoperation step of operation 10 to the Queue intraoperation step of operation 30 Queue because ’no move’ status at the To Move intraoperation step of operation 20 is on the intraoperation step of an intervening direct charge operation. • You can move assemblies from the Queue intraoperation step of operation 10 to the Reject of operation 30 because the intervening ’no move’ status at the Scrap intraoperation of operation 30 is not considered. • You can move assemblies from the Queue intraoperation step at operation 10 into the Run intraoperation step of operation 40 because you can move into an operation and step with a ’no move’ status without restrictions. Additional Information: Move transactions loaded through the Open Move Transaction Interface are checked for No Move statuses as well. Shop Floor Status for PO Move Resources Parameter Selecting a ’no move’ shop floor status sets the Shop Floor Status for PO Move Resources parameter. When this parameter is set, as you move assemblies into the Queue intraoperation step of an outside processing operation, the specified ’no move’ shop floor status is automatically assigned to the To Move (Queue) intraoperation step. Assemblies are only moved out of this operation and step when a purchase order receipt transaction in Oracle Purchasing launches the move transaction. Using this parameter ensures that the same number of assemblies are moved into and out of Queue at an outside processing step. Problems in tracking work in process and cost variances are thus avoided. See: Outside Processing and Work in Process: page F – 2. See Also Defining Shop Floor Statuses: page 2 – 30 Assigning and Viewing Shop Floor Statuses: page 8 – 68 Shop Floor Statuses Report: page 14 – 62 Move Transaction Parameters: page 2 – 13 Shop Floor Control 8 – 67 Assigning and Viewing Shop Floor Statuses You can assign shop floor statuses to any intraoperation step associated with a job or repetitive line/assembly. Shop floor statuses that are assigned to a repetitive line/assembly are valid for all repetitive schedules being built on that production line. You can assign multiple statuses to an intraoperation step. You cannot, however, assign the same shop floor status to more than one intraoperation step within the same operation. For example you could not assign the same status to the Queue and To Move intraoperation steps of operation sequence 30. You can update shop floor statuses at any time. Statuses are removed from intraoperation steps when the quantities at those operations drop to zero. Viewing Shop Floor Statuses You can view the shop floor statuses that you have assigned to jobs and repetitive schedule operations. You can view statuses directly using this window or indirectly by choosing the Statuses button as you perform move transactions. Viewing statuses as you transact allows you to check the status of intraoperation steps before you attempt to move assemblies into or out of them. Prerequisites ❑ Define shop floor statuses. See: Defining Shop Floor Statuses: page 2 – 30. ❑ Define at least one job or repetitive schedule that has a routing. See: Defining Discrete Jobs Manually: page 3 – 12 and Defining Repetitive Schedules Manually: page 6 – 13. " To assign/update shop floor statuses: 1. 8 – 68 Navigate to the Assign Shop Floor Statuses window. Oracle Work in Process User’s Guide 2. Select the discrete Job or the production Line and repetitive Assembly. You can assign shop floor statuses to jobs or repetitive schedules that have the following statuses: Unreleased, Released, Complete, or On Hold. 3. Choose Find to display all shop floor statuses you have previously assigned to the job or repetitive line/assembly. 4. Select the Operation Sequence of the job or repetitive schedule. You can assign shop floor statuses to any operation in the routing of the job or repetitive schedule. This includes operations you defined using the Operations window. The department associated with the operation sequence is displayed. 5. Select the intraoperation Step to which you want to assign or update a shop floor status. You can only choose an enabled intraoperation step. See: Intraoperation Steps Parameter: page 2 – 16. 6. Select the shop floor Status for the intraoperation step. You cannot enter a shop floor status with an inactive on date less than or equal to the current date. 7. Save your work. Shop Floor Control 8 – 69 See Also Shop Floor Statuses Report: page 14 – 62 8 – 70 Oracle Work in Process User’s Guide CHAPTER 9 Resource Management T his chapter explains how to manage resources in Work in Process, including: • Overview: page 9 – 2 • Setting Up: page 9 – 4 • Resource Charge Types: page 9 – 5 • Resource Requirements: page 9 – 8 • Resource Transactions: page 9 – 19 • Pending Resource Transactions: page 9 – 30 Resource Management 9–1 Overview You can define and control resources (people, machines, and so on) during your production process. Resource Types You can charge resources based upon their charge type: WIP Move, Manual, PO Move, and PO Receipt. Manual Resource Transactions You can manually charge resources associated with discrete job and repetitive schedule operations. Manual resources can be charged as you move assemblies. They can also be charged independent of move transactions resource transaction. You can correct erroneously entered Manual resource charges. Automatic Resource Transactions When you move job and schedule assemblies forward in their routing, pre–assigned WIP Move resources are automatically charged at their standard rate. If you move assemblies backward, WIP Move resource charges are reversed. When you receive purchasing items that are associated with PO Move and PO Receipt resources back from an outside processing supplier, they are automatically charged. In the case or PO Move resources, the purchasing items are also completed at the operation. If you return assemblies to an outside processing supplier or enter correcting receipts for an outside processing supplier, resource charges and moves are reversed. Resource Requirements You can add resources to existing routing operations as well as to operations not on the original routing. Outside Processing Resources You can assign outside processing resources to job and schedule routing operations. You can move assemblies to and receive them back from these outside operations. The system automatically charges outside processing resources, tracks your supplier costs, and directly interfaces with Oracle Purchasing for closed loop control. 9–2 Oracle Work in Process User’s Guide Open Resource Transaction Interface You can load resource transaction information from external systems — such as barcode readers, payroll systems, time cards, routing sheets, and custom data entry forms — into the Open Resource Transaction Interface table. When this data is processed, it is validated, and invalid records are marked so that you can correct and resubmit them. See: Open Resource Transaction Interface: page 9 – 20. Flexible Labor Transactions You can charge person–type resources with or without entering an employee. If you enter an employee, the employee hourly rate is used to calculate the resource charge. Otherwise, the charge is calculated using the standard resource rate. Actual Rate Resource Transactions If you define a resource as costed at an actual rate, you can enter the actual rate during a manual resource transaction using the Open Resource Transaction Interface. If you do not enter an actual rate, the standard rate is used, but it is treated as an actual rate. Automatic Overhead Charging The appropriate overhead costs are automatically charged as you move assemblies through the shop floor. You can charge overheads directly based on move transactions or based on resource charges. Overhead charges are automatically reversed during a backward move transaction. Resource Reporting You can report on resource transactions, efficiencies, and costs by job, repetitive schedule, department, or resource to get a complete history of resource activities. See: Resource Performance Report: page 14 – 58 and Resource Transaction Report: page 14 – 60. See Also Outside Processing, Oracle Purchasing User’s Guide Setting Up: page 9 – 4 Resource Transaction Options: page 9 – 21 Resource Transactions: page 9 – 19 Resource Management 9–3 Setting Up • For a listing of out–of–product setups that affect resource management see: Setup Prerequisites: page 2 – 3. • For a listing of setups within Work in Process that affect resource management see: Setup Check List: page 2 – 5. • For a listing of profile options that affect resource management see: Profile Options: page 2 – 41. See Also Resource Requirements: page 9 – 8 Cost Accounting Prerequisites, Oracle Cost Management User’s Guide Setting Up Manufacturing Standard Costing, Oracle Cost Management User’s Guide 9–4 Oracle Work in Process User’s Guide Resource Charge Types You can specify how to charge resources when you assign resources to routing operations in Oracle Bills of Materials. You can also specify how to charge resources when you add resources to work in process routing operations. There are four resource charge types: WIP Move, Manual, PO Move, and PO Receipt. See Also: Resource Charges, Oracle Cost Management User’s Guide. WIP Move WIP Move resources are automatically charged at their standard rate as you move assemblies forward from the Queue or Run intraoperation step to the To move, Reject, or Scrap intraoperation step of the same operation, or to the next operation. WIP Move resources with a basis of Item are charged upon completion of each assembly in the operation. WIP Move resources with a basis of Lot are charged upon completion of the first assembly at the operation. In both cases, the amount charged is based upon the resource’s usage rate or amount multiplied by the resource’s standard cost at the time of the transaction. You can reverse a WIP Move resource charge by moving assemblies backward from Queue or Run of the current operation to Queue or Run of any prior operation, or by moving assemblies from the To move, Reject, or Scrap intraoperation steps backward to the Queue or Run intraoperation steps of the same operation, or to any intraoperation step of any prior operation. WIP Move resource charges are applied on a first in–first out basis to multiple repetitive schedules on a line based on how the assemblies being moved are allocated. For example, if you have 2 released schedules for 100 assemblies each and you move 150 assemblies, the system automatically allocates 100 to the earliest schedule and 50 to the next. See Also Operation Completion Moves: page 8 – 29 Performing Move Transactions: page 8 – 35 Resource Management 9–5 Manual Manual resources can be charged independent of move transactions using the Resource Transactions window. If you complete an operation with a move transaction, and there are Manual resources assigned to that operation, a message informing you that Manual resources exist at that operation is displayed. You can then charge these Manual resources by choosing the Resources button in the Move Transactions window. ☞ Attention: You can control whether the Resources button appears in the Move Transactions window using function security. See: Security Functions: page 2 – 53. When you charge Manual resources, you must enter the actual resource units applied rather than autocharging the resource’s usage rate or amount based on the move quantity. You can charge Manual resources using that resources unit of measure or any valid alternate unit of measure. If the resource is a person–type resource, you can enter an employee number. Manual resources for repetitive schedules are charged to the first open repetitive schedule on the line. You can create ad hoc resource requirements as you charge resources. Ad hoc resource requirements an be created for any resource that is defined for the department that is associated with the operation. You can reverse Manual resource charges by entering negative resource units. For example, if you intend to charge 8 hours but mistakenly enter 10, you can correct the error by entering an additional resource charge transaction for –2 hours. See Also Operation Completion Moves: page 8 – 29 Charging Resources Manually: page 9 – 22 PO Move and PO Receipt When you move assemblies into the Queue intraoperation step of an operation that has either PO Move or PO Receipt resource assigned to it, the system creates a purchase requisition. Purchase requisitions are also created when you release a job or repetitive schedule that has PO Move or PO Receipt resource at the first operation. When you receive assemblies back from an outside processing supplier in Oracle Purchasing, PO Receipt or PO Move resources, also know as outside processing resources, are automatically charged at the standard or 9–6 Oracle Work in Process User’s Guide the actual rate. If the receipt involves a PO Move resource, the assemblies are also moved from the Queue or Run intraoperation step of the outside processing operation into the Queue intraoperation step of the next operation or into the To move intraoperation step if the outside processing operation is the last operation on the routing. Warning: If the Move Transaction manager in Oracle Inventory has not been launched, the assemblies move transactions are not processed. See: Open Move Transactions Interface: page 8 – 32. You can track the progress of outside processing assemblies that have been sent to a supplier by moving assemblies within the outside processing operation. You can optionally disallow move transactions from an outside processing step unless they are launched by a purchase order receipt. You can do this by using the Shop Floor Status for PO Move Resource parameter. See: Shop Floor Statuses: page 8 – 65. If you return assemblies to an outside processing supplier or enter correcting receipts for an outside processing supplier, Oracle Purchasing creates reversing charges for PO Move and PO Receipt resources associated with the outside processing operation. If the return or correction involves a PO Move resource, the assemblies are also moved from the Queue intraoperation step of the operation immediately following the outside processing operation into the Queue intraoperation step of your outside processing operation. If the outside processing operation is the last operation on the routing, the assemblies automatically move from the To move intraoperation step to the Queue intraoperation step. PO Move resource transactions are applied to multiple repetitive schedules on a line based on how the assemblies being moved are allocated. Moves are allocated across multiple repetitive schedules on a first in–first out basis. PO Receipt resource transactions are allocated across schedules on a first in first (FIFO) out basis. For example, if you have 2 released schedules for 100 assemblies each and you move 150 assemblies, the system automatically allocates 100 to the earliest schedule and 50 to the next. See Also Outside Processing: page 8 – 51 Resource Charges, Oracle Cost Management User’s Guide Detailed Scheduling: page 12 – 7 Resource Management 9–7 Resource Requirements Resources can be assigned to routing operations. Resources are used to cost and schedule jobs and repetitive schedules. Resources A resource is anything of value, except material and cash, required to manufacture, cost, and schedule products. People, tools, machines, outside processing services, machines, and physical space are commonly used resources. See: Defining a Resource, Oracle Bills of Material User’s Guide. Standard versus Non–Standard You can specify whether to charge resources at a standard or non–standard rate. Non–standard resources can be charged manually in Work in Process. If the resource is a non–standard, outside processing resource, its costs are derived from the purchase order it is associated with. Outside Processing Resources You can define a resource as an outside processing resource. Outside processing resources must be associated with the item that they are used to produce. Charge Types You must assign a charge type to each resource. Charge types determine how resources are charged in Work in Process. Resource Activities You can assign the activities you define in Oracle Cost Management to resources. Activities are processes or procedures that consume costs and time. The can be used to assign indirect costs. Resource Basis You can assign a resource basis type of Item to a resource if its per unit usage rate is dependent on the number of assembly items being produced. If the per unit usage rate is fixed, for example labor to setup a machine for a job, you can assign a resource basis of Lot. See: Resource Usage, Oracle Bills of Material User’s Guide. 9–8 Oracle Work in Process User’s Guide Departmental Resources You can identify which resources are available to a department when you define departments. Departments can have multiple resources. Operation Resources You can define routing operations as you create routings in Oracle Bills of Material. You can also add and update job and schedule routing operations in Work in Process. When you define a routing operation you must identify the department at which the operation is performed. You can assign any resource that is defined for that department to the routing operation. See: Assigning Operation Resources, Oracle Bills of Material User’s Guide. Multiple Resources You can assign multiple resources to routing operations. You can sequence these resources as required. If you assign multiple resources, they are scheduled sequentially based on their resource sequence number, or in parallel, based on their scheduled attribute Costing Multiple Resources You can assign multiple resources to charge labor, machine usage, and other activities performed within the operation. For example, if you have costs associated with running a machine and costs associated with the machine operator, you can define them as two resources at the same operation. For each resource you can specify the sequence number of the resource, the usage rate, and the number of resources assigned to the operation working in parallel. Scheduling Multiple Resources Resource requirements are used for detailed scheduling. When multiple resources are assigned to an operation, operation start and end dates and times are scheduled based upon the sum of the times required for each resource. Job and repetitive schedule start and end dates and times are scheduled based upon sum of the time required for each operation. You can assign but not schedule resources at an operation. You can also assign resources used solely for scheduling, even though these resources do not actually provide value added work. See: Detailed Scheduling: page 12 – 7. Resource Management 9–9 See Also Charging Resources Manually: page 9 – 22 Defining a Resource, Oracle Bills of Material User’s Guide Adding and Updating Resource Requirements You can add and update resources as you add and update operations. You can add resources that are not pre–assigned to job or repetitive schedule routing operations. You can add resources to jobs and schedules that do not have operations. You can add resource requirements regardless of their charge type: Manual, PO Move, PO Receipt, or WIP Move. When you add a resource with an charge type of PO Move, PO Receipt, or WIP Move, the resource is added to the job or repetitive schedule as a Manual resource. Prerequisites ❑ You must assign a resource to the department that is associated with the operation before you can add the resource as a requirement at that operation. See: Assigning Resources to a Department, Oracle Bills of Material User’s Guide. " To add or update resource requirements: 1. Navigate to the Operations window. 2. Select the Job or repetitive Line and Assembly. 3. If you select a line and assembly, choose the repetitive schedule by selecting the first unit start date of that schedule. If you have selected a discrete job, the system displays the scheduled start date of the job. 4. Optionally, choose the Find button to populate the Operations region. 5. From the Operations regions, select the operation Sequence. If you are adding a resource, the operation Sequence specifies at which operation to add the resource. 6. 9 – 10 Choose the Resources button. The Resource Requirements window appears. Oracle Work in Process User’s Guide 7. In the Main alternative region of the Resource Requirements window, select or enter the resource Sequence number. Valid sequence numbers range from 1 to 9999 inclusive. 8. Select the resource Name. You can add any resource that is assigned to the department of the operation you have selected. You can also add any multi– departmental resource. When you add a resource, the UOM, basis, activity, charge type, and rate or amount that are associated with the resource are defaulted. See: Assigning Resources to a Department, Oracle Bills of Material User’s Guide and Defining a Resource, Oracle Bills of Material User’s Guide. ☞ 9. Attention: You cannot update a resource if you have charged the resource to a job or schedule. Select the resource Basis. See: Resource Usage, Oracle Bills of Material User’s Guide. Resource basis options are as follows: Item: Charge and schedule the resource on an item–by–item basis. Select Item when resource times and costs are dependent on the job or schedule quantity, such as when charging per unit labor costs. Lot: Charge and schedule the resource on a ’one per’ job or schedule basis. Select Lot when resource times and costs are Resource Management 9 – 11 independent of quantity, such as when setting up a machine to run an entire job. You cannot update the resource basis if you have charged against the resource. 10. Enter the Usage Rate or Amount Value or Inverse. Value: Enter a Value if you know how much of the resource is consumed at the operation (per item or per lot) given the resource UOM. For example, if your manufacturing process consumes a mold (resource UOM=EA) for every 5 items produced, enter a Value of 0.2 (1/5). When you enter the Value of 0.2, the Inverse is automatically calculated as 5. In other words, producing one unit consumes 0.2 of the mold. Inverse: Enter an Inverse if you know the number of units a resource can process given the resource UOM. For example, if you can process 10 units on a Lathe (resource UOM = HR) in an hour, enter an Inverse of 10. When you enter the Inverse of 10 the Value is automatically calculated as 0.1 (1/10). In other words, each unit takes 0.1 hours to process. You cannot enter a quantity less than zero for resources with time–based units of measure. When you enter the usage rate or amount, the inverse usage rate or amount is automatically supplied. " To schedule or reschedule a resource: 1. In the Scheduling alternative region, enter the number of Assigned Units. See: Resource Usage, Oracle Bills of Material User’s Guide. When you add a resource, the number of assigned units default value of 1. The number of Assigned Units must be greater than zero. You cannot update this value if the resource is available 24 hours, such as a drying area. In this case, the default of 1 cannot be changed. The number of assigned units affects the scheduling of jobs and repetitive schedules. If you assign more than the default number of resource units, less elapsed time is scheduled for the operation. For example, if you have an operation that normally takes a machine 10 hours to complete, and you assign 2 machines, then only 5 hours are scheduled for the resource at that operation. You should only assign multiple resource units if they work simultaneously at an operation. 9 – 12 Oracle Work in Process User’s Guide ☞ 2. Attention: You should not assign multiple resource units unless each resource charges at the same rate. For example, if you have 2 person–type resources performing the same task at an operation, you can create 1 resource and assign 2 units if each person works at the same rate, charges at the same rate, and works in parallel on a job or schedule. If not, then you should create 2 separate resources at the operation. Select the Scheduled option. Yes: The resource’s start and completion dates and times are used to schedule the job or repetitive schedule operation. No: The resource’s start and completion dates and times are not used to schedule the job or repetitive schedule operation. Prior: The resource’s completion date and time are scheduled to overlap the completion date and time of the first scheduled resource (Scheduled option is Yes) of the previous operation which is earlier than a Next resource. This option is useful, for example, when applied to setup resources that can work in parallel with work in previous operations. Next: The resource’s start date and time are scheduled to overlap the start date and time of the first scheduled resource (Scheduled option is Yes) of the next operation which is earlier than a Prior resource. This option is useful, for example, when applied to a teardown operation that can work in parallel with work in next operations. 3. " Enter the Start and Completion Dates and times for the resource operation. To enter or update resource cost information: 1. In the Costing alternative region, select the Activity. Activities are processes and procedures that consume costs and time. See: Defining Activities and Activity Costs, Oracle Cost Management User’s Guide. 2. Check the Standard Rate check box to charge the resource at its standard rate. If you choose the standard rate option, the resource is charged at its resource unit cost. If you charge an outside processing resources at the standard, Oracle Purchasing computes any purchase price variance and posts it to the variance account for the resource. Resource Management 9 – 13 If you choose non–standard, you can manually charge the resource at the employee rate or at actual cost. If the resource is a non–standard, outside processing resource, its costs are derived from the purchase order it is associated with. ☞ Attention: Non–standard is recommended if you import charges from an outside labor system and want to enter actual costs or an employee’s labor rate. You cannot change the standard rate option if you have charged the resource to the job or repetitive schedule. 3. Select the Charge Type. See: Resource Charge Types: page 9 – 5. You can select any charge type if the resource is defined as an outside processing resource. However, you can only select PO Receipt if the department of the current operation has a location assigned to it, and you can only select PO Move if the department of the next operation has a location assigned to it. Also, you can only assign one PO Move resource to an operation. Charge types are defined as follows: WIP Move: Resources with this charge type are automatically charged when you complete a job or repetitive schedule operation. See: Charging Resources with Move Transactions: page 9 – 25. Manual: Resources with this charge type must be manually charged. See: Charging Resources Manually: page 9 – 22 PO Receipt: Resources with this charge type are automatically charged when purchase orders are received. However, the assembly items associated with theses resources are not automatically moved to the next operation. They must be manually moved. See: Performing Move Transactions: page 8 – 35 PO Move: Resources with this charge type are automatically charged upon receipt of a purchase order and the assembly items associated with theses resources are moved to the Queue intraoperation step of the next operation, or to the To move intraoperation step if there is no next operation. 4. Save your work. See Also Overview of Work in Process Costing: page 11 – 2 Overview of Work in Process Scheduling: page 12 – 2 9 – 14 Oracle Work in Process User’s Guide Adding and Updating Operations: page 8 – 11 Deleting Resource Requirements You can delete resource requirements as you update operations. If you delete an operation, the resources associated with it are automatically deleted. " To delete resource requirements: 1. Navigate to the Operations window. 2. Select the operation Sequence. The operation Sequence specifies from which operation the resource is to be deleted. 3. Choose the Resources button. The Resource Requirements window appears. 4. In the Main alternative region of the Resource Requirements window, select or enter the resource Sequence number. 5. Select the resource Name. You can delete a resource requirement regardless of the status of the job or repetitive schedule. You cannot delete a resource that has been charged at an operation (applied quantity exists) or that has pending resource transactions. If you delete an operation from a job or repetitive schedule, you may want to reschedule the job or repetitive schedule to correctly reflect the start and completion dates. You cannot delete a PO Move or PO Receipt resources or the operations they are assigned to if purchase requisitions (either approved or unapproved) or purchase orders exist for these resources. 6. Choose Delete Record from the Edit Menu. 7. Save your work. See Also Adding and Updating Operations: page 8 – 11 Deleting Operations: page 8 – 16 Resource Management 9 – 15 Adding and Updating Resource Requirements: page 9 – 10 Resource Requirements: page 9 – 8 Viewing Resource Requirements You can view resource requirements for a specific discrete job or repetitive line and assembly. You can also view resource requirements across jobs and schedules. " To find and view resource requirements: 1. Navigate to the View Resource Requirements window. The Find Resource Requirements window appears. You can query by Job or production Line and Assembly or a range of start dates. You can query to find resource requirements for jobs 9 – 16 Oracle Work in Process User’s Guide and schedules of a specific status. For example, you can query to find only resources for Released jobs and schedules You can also query by Department, Resource, Resource Type, Activity, and/or a range of First Unit and Last Unit Start or Completion Dates. 2. Enter any combination of search criteria and choose the Find button. The results display in the View Resource Requirements window. You can view the following information in View Resource Requirements window’s alternative regions: Main: UOM, Operation Sequence number, Department, Resource Sequence number, Basis, Usage Rate or Amount Value/Inverse Value Quantities: Required, Applied, and Open quantities Scheduling: Assigned Units, Scheduled, Start Date, and Completion Date Costing: Activity, Standard Rate option, Charge Type Job or Schedule: Job/Assembly or production Line/Assembly and Status Type, Description: Resource Type and Description Resource Management 9 – 17 You can also view, if entered, descriptive flexfield information. See: Setting Up Descriptive Flexfields: page 13 – 4. See Also Resource Requirements: page 9 – 8 Searching for Information, Oracle Applications User’s Guide 9 – 18 Oracle Work in Process User’s Guide Resource Transactions Resource charges can be transacted manually, with move or purchase order transactions, or imported from outside data sources or data collection devices. Resources are charged based upon their charge type: Manual, WIP Move, PO Receipt and PO Move. See: Resource Charge Types: page 9 – 5. For all resources you charge either manually or automatically, Oracle Work in Process also records the units applied to the job or repetitive schedule, expressed in the unit of measure of the resource, when you complete an operation. Actual Labor Charges You can charge labor charges at actual in two ways. You can enter an actual rate for the resource using the Open Resource Transaction Interface, or you can use the Persons window. The system computes the resources variances accordingly. Actual Outside Processing Charges Outside processing resources can be charged at standard rate or actual. Oracle Purchasing computes purchase price variances accordingly. Overhead Charging Overhead costs are appropriately charged as you charge resources. You can define overheads to be charged based on Resource units or Resource value, Lot, or Item. Oracle Work in Process calculates the appropriate overhead charge as you charge the resource. Oracle Work Overhead charges are automatically reversed as you reverse underlying resource charges. See: Default Basis Types, Oracle Cost Management User’s Guide. Resource Activity Charging Activity–based costing can be used to record and track how you make and deliver items instead of measuring the cost of what goes into those items. You can use activities as a way to categorize the costs of certain manufacturing functions such as setup, teardown, inspection, and so on. See: Overview of Activity–Based Costing, Oracle Cost Management User’s Guide. As you assign resources that are defined as costed to operations, you can associate activities with them. When you charge these resources, the system records the activity you defined for that resource. Once collected, you can analyze your costs on an activity basis. For example, Resource Management 9 – 19 you can use the activity ”setup” to track the costs of all resources that perform setups in the production plant. Then as you track the cost of setup as part of your manufacturing process improvement program, you can easily review the actual resource charges for ”setup” activities. You can add or change activities when you add or change resource requirements at a routing operation using the Resource Requirements window. For example, if you needed to add a quality inspection resource to a routing to charge some extra inspection costs, you might use an ”inspection” activity. Later when you analyze the cost of quality, you can review as charges for the ”inspection” activity. You can also change the activity associated with a resource requirement when manually enter charge the resource using the Resource Transactions window. See: Defining Activities and Activity Costs, Oracle Cost Management User’s Guide and Assigning Operation Resources, Oracle Bills of Material User’s Guide. See Also Overview of Resource Management: page 9 – 2 Setting Up Resource Management: page 9 – 4 Resource Transaction Options: page 9 – 21 Open Resource Transaction Interface You can load resource transaction information into the Open Resource Transaction Interface table from external sources such as barcode readers and payroll systems. The resource cost transaction manager, launched in Oracle Inventory, processes and validates this information to ensure accuracy and compatibility with other Oracle Applications information. Resource transaction information that fails validation or processing is marked. You can use the Pending Resource Transactions window to view, update, and resubmit this information. See Also Open Resource Transaction Interface, Oracle Manufacturing, Distribution, Sales and Service Open Interfaces Manual, Release 11 9 – 20 Oracle Work in Process User’s Guide Transaction Managers, Oracle Inventory User’s Guide Processing Pending Resource Transactions: page 9 – 30 Resource Transaction Options You can transact resources or reverse resource charges: • In Work in Process by: – Charging Resources with Move Transactions: page 9 – 25 – Charging Resources Manually: page 9 – 22 • In Purchasing by: – Receiving Outside Processing Items, Oracle Purchasing User’s Guide • Through open interfaces: – Open Move Transaction Interface: page 8 – 32 – Open Resource Transaction Interface: page 9 – 20 See Also Resource Transactions: page 9 – 19 Resource Management 9 – 21 Charging Resources Manually Manual resources can be charged to discrete jobs and repetitive schedules that have statuses of Released or Complete. Resources are charged based on how they are defined at the operation they are assigned. Ad Hoc Resource Requirements You can charge resources that are not assigned to job or repetitive schedule routing operations thus creating ad hoc resource requirements. You can choose to add ad hoc resources of any charge type — Manual, PO Move, PO Receipt, or WIP Move — however ad hoc resources are actually added as Manual resources and have with a required quantity of 0. Prerequisites ❑ Define at least one job or repetitive schedule with a routing. See: Defining Discrete Jobs Manually: page 3 – 12 or Defining Repetitive Schedules Manually: page 6 – 13. " To add, charge, or add and charge a resource: 1. Navigate to the Transact Resources window. 2. Select a Sales Order, repetitive Line and Assembly, Assembly, or Job. The cursor defaults to one of these fields based on how the TP:WIP:Resource Transactions First Field profile option is set. See: Profile Options: page 2 – 41. You must select a discrete job or repetitive line and assembly with a status of Released or Complete. 9 – 22 Oracle Work in Process User’s Guide 3. Enter the transaction Date and time. 4. Check the Find Manual Resources check box to find the manual resources operations for the Job or Line/Schedule. ☞ Attention: Be aware that costed, manual resources on the manufacturing routing are part of the standard cost for the assembly you are building. If you do not apply the correct number of resource units, you may have a variance on the job or repetitive schedule. 5. Enter the range of Operation sequence numbers at which you want to transact manual resources. You cannot choose operations if you do not choose to find the manual resources for the Job or Line/Schedule. 6. Check the Count Points Only check box to find only the count point operations for the Job or Line/Schedule. See: Count Point and Autocharge Fields, Oracle Bills of Material User’s Guide. 7. Choose the Transact button. The Resource Transactions window appears. 8. Select the Operation Sequence. 9. Enter or select the Resource Sequence. 10. In the Transaction alternate region, enter or select a resource. You can select any resource associated with the department of the operation or any multi–departmental resource. 11. Optionally, select the Employee. If you enter an employee, you can charge job or schedule resources at the employee’s effective rate. If you do not specify an employee, Resource Management 9 – 23 the resource is charged at the standard rate for the person–type resource. 12. Select the UOM. See: Overview of Units of Measure, Oracle Inventory User’s Guide. You can use any valid, alternate unit of measure for the assembly you are moving. 13. Enter the transaction Quantity. Enter the number of units charged by the resource. If you enter an amount different from the standard for a resource that is part of your standard manufacturing routing, a cost variance is incurred. All charges for ’ad hoc’ resources, represent a cost variance. ☞ Attention: If you add a manual resource, the transaction quantity is blank. The resource is not transacted unless you enter a transaction quantity. 14. Select the Activity. See: Defining Activities and Activity Costs, Oracle Cost Management User’s Guide. The enabled activity, if any, associated with the resource is displayed. " To enter additional resource transaction information: 1. In the Comments alternate region, select the Operation sequence. 2. Optionally, select the Reason code. See: Defining Transaction Reasons, Oracle Inventory User’s Guide. 3. Optionally, enter the transaction Reference. References can be used to identify transactions on standard reports. They can be up to 240 characters of alpha numeric text. See Also Resource Transactions: page 9 – 19 Overview of Work in Process Costing: page 11 – 2 Overview of Work in Process Scheduling: page 12 – 2 Adding and Updating Operations: page 8 – 11 Resource Requirements: page 9 – 8 Adding and Updating Resource Requirements: page 9 – 10 Transaction Control by Status: page 10 – 18 9 – 24 Oracle Work in Process User’s Guide Charging Resources with Move Transactions You can charge manual resources as you move assemblies by choosing the Resources button. The system automatically displays the resources you should charge based upon the move. When you perform a move transaction across more than one repetitive schedule, only manual resources associated with the first schedule are displayed. You can also add and charge resources not already associated with a job or repetitive schedule. You can add a resource regardless of the autocharge type. When you add a resource with an autocharge type of PO move, PO receipt, or WIP move, the system adds the resource to the job or repetitive schedule as a manual resource. If you add a standard operation that has manual resources in the Move Transactions window, then complete assemblies at that operation, the system automatically displays the resources you should charge. Prerequisites ❑ Set the Move Transactions: No Resource Transactions (RESOURCE_TXNS) security function to Y so that the Resources button appears in the Move Transactions window. See: Security Functions: page 2 – 53. " To manually transact a resource with a move: 1. Perform a Move Transaction. See: Performing Move Transactions: page 8 – 35. 2. Choose the Resources button. The Resource Transactions window appears. Resource Management 9 – 25 3. ☞ Perform a Resource Transaction. See: Charging Resources Manually: page 9 – 22. Attention: The Reason, if any, entered for the move transaction is displayed as the default. See Also Setting Up Resource Management: page 9 – 4 Resource Transactions: page 9 – 19 9 – 26 Oracle Work in Process User’s Guide Viewing Resources Transactions You can find and view resource transactions for an individual job or a repetitive line and assembly. You can also view resource transactions across jobs and schedules. " To find and view resource transactions: 1. Navigate to the View Resource Transactions window. The Find Resource Transactions window appears. You can query to find resource transactions by Transaction Date range, Job, or Flow Schedule Name, Line, Department, Resource, Employee Number, Activity, and PO Number. 2. Enter any combination of search criteria and choose the Find button. The results display in the View Resource Transactions window. Resource Management 9 – 27 You can view the following information in the Resource Transactions window’s alternative regions: Job or Schedule Header: Transaction Date, Job, Assembly, Line Transaction ID Operation and Quantities: Operation Sequence, Department, Name, Employee Number, UOM and Quantity in both the transaction and primary units of measure Resource Information: Basis, Usage Rate or Amount, Activity, Autocharge Type, PO Number, Currency Transaction Comments: Transaction Type, Reason, Reference You can also view, if entered, descriptive flexfield information. See: Setting Up Descriptive Flexfields: page 13 – 4. " 9 – 28 To view resource transaction distributions: 1. From the View Resource Transaction window, select the resource transaction. 2. Choose the Distributions button. The results display in the WIP Transactions Distributions window. See: Viewing WIP Transaction Distributions, Oracle Cost Management User’s Guide. Oracle Work in Process User’s Guide See Also Searching for Information, Oracle Applications User’s Guide Resource Transactions Options: page 9 – 21 Resource Management 9 – 29 Pending Resource Transactions You can view resource transactions awaiting processing. You can also view, update, delete and resubmit resource transactions that have failed validation or processing. Processing Pending Resource Transactions You can view, update, delete, and resubmit resource transactions that have failed validation and remain in the Open Resource Transaction Interface table (WIP_RESOURCE_TNX_INTERFACE). You can also resubmit transactions whose concurrent process has failed and have a processing phase of Complete and process status of Error. You can view error messages associated with failed records. Error messages can assist you in updating failed records before resubmission. " To view pending resource transaction records: 1. Navigate to the Pending Resources Transactions window. The Find Pending Resource Transactions window appears. You can find pending records by Transaction Date range, by Organization, by Job, Schedule Name, and production Line. You can also search for records that have a specific Process Phase (Move validation, Move processing, or Backflush setup, Process Status (Pending, Running, or Error), Source Code, Source Line ID, or Transaction ID. 2. 9 – 30 Enter any combination of search criteria and choose the Find button. The Pending Resource Transactions window appears with the results of your query. Oracle Work in Process User’s Guide " To view pending resource transaction records: H For each pending record displayed, you can view the following information using the Pending Resource Transactions window’s alternative regions: Processing: Group ID, processing Phase, processing Status Source: Source Code, Source Line (if applicable), Created By Concurrent Request: Request ID, Phase, Status, Message Job or Schedule Name: Organization, Job, Schedule Name, Line Operations: Operation Sequence, Department, resource Sequence, resource Name, resource Type, Employee Number Resource: Activity, Charge Type, PO Number, Currency, Actual Rate Transaction: UOM, Quantity, Date and Time, Type Comments: Reason and Reference You can also view the descriptive flexfield information entered for the transaction record. See: Setting Up Descriptive Flexfields: page 13 – 4. " To view error details for failed resource transactions: 1. In the Pending Resource Transactions window, select the failed record. Resource Management 9 – 31 2. Choose the Errors button. The Pending Resource Transactions Error window appears. All errors for the selected transaction are displayed. Column indicates the name of the column in the resource transaction interface table that failed validation. Message indicates why the transaction failed. Messages that are not specific to a Column, for example processing errors, may also be displayed. In such cases, a Message but no Column is shown. " To update failed resource transaction records: 1. Select the record to update. You can update records with a processing status of Error. 2. In the Source alternative region, enter the Source Code and Source Line. When you insert records into the Open Resource Transaction Interface table, you can optionally identity a record’s source using the source code and source line. For example, you can enter a different source code and source line for records from a bar code reader versus those from a radio frequency device. 3. Select the Created By identifier. The name of the user that created the transaction is displayed. This field can be updated. 4. In the Job or Schedule Name alternative region, select the Organization. You can only select enabled organizations. See: Creating an Organization, Oracle Human Resources User’s Guide. 5. In the Operations alternative regions, select the Operation Sequence for the resource. You can select any operation defined for the job or repetitive schedule. 9 – 32 Oracle Work in Process User’s Guide 6. Select or enter the resource Sequence. You can update this field with any resource sequence defined for your operation or you can add a resource ad hoc by entering a new resource sequence. If you choose a predefined resource sequence, all fields specific to that resource are automatically populated. 7. Select the Name. If you inserted an ’ad hoc’ resource requirement into the Open Resource Transaction Interface table by entering a new resource sequence, you can select resources associated with the department of the operation or multi–departmental resources. All related fields are automatically populated based on your selection. If you choose a resource of type Person and the employee number has no value, you are prompted to enter an employee number. If you choose a resource type other than Person and the employee number has a value, you are prompted to clear the employee number. 8. Select the Employee Number. If you have entered a person–type resource, you can update this field with any valid employee number. 9. In the Resource alternative region, select the Activity. You can select an activity defined for your organization or an activity that is not tied to any specific organization and is not inactive. 10. Select the Currency code. See: Currencies Window, Oracle Applications System Administrators Guide. 11. Enter the Actual Rate for your resource. This rate is used to determine the cost of a resource when the resource’s standard rate option is set to No. 12. In the Transaction alternative region, select the UOM. See: Overview of Units of Measure, Oracle Inventory User’s Guide. You can update this field with any resource alternate UOM that is not inactive. 13. Enter the transaction Quantity. This is a quantity of the UOM which you are charging to a job or schedule. The job/schedule is costed at the resource standard, the employee rate, or the actual rate. You can update this field with any number. Resource Management 9 – 33 14. Enter the transaction Date and time. The date and time must fall within an open accounting period. It cannot be greater than the current date or less than the release date of the job or the earliest valid repetitive schedule. 15. In the Comments alternative region, select the Reason code. See: Defining Transaction Reasons, Oracle Inventory User’s Guide. 16. Enter the transaction Reference. References can be used to identify transactions on standard reports. They can be up to 240 characters of alpha numeric text. 17. Save your work. " To resubmit individual failed resource transaction records: 1. In the Pending Resource Transactions window, check the transaction’s Resubmit check box. You can resubmit transactions of any processing status. If you leave the check box unchecked you can still update your transaction record but the transaction manager does not process it again when polling the resource interface table. 2. Save your work to resubmit the transaction. When you resubmit a transaction, the system nulls the Transaction ID, Group ID, and concurrent Request ID and changes the processing status to Pending. The resubmit level of the Resource Cost Transaction Manager determines at what specific start date and time or at what specific intervals transactions are processed. " To select and resubmit all failed resource transactions: 1. In the Pending Resource Transactions window, chose Select All for Resubmit from the Special Menu. See: Special Menu: page G – 2. You can deselect selected transactions as required. 2. Save your work to resubmit the transactions. When you resubmit transactions, the system nulls their Transaction IDs, Group IDs, and concurrent Request IDs, and changes their processing Statuses to Pending. The resubmit level of the Resource Cost Transaction Manager determines at what specific start date and time or at what specific intervals transactions are processed. 9 – 34 Oracle Work in Process User’s Guide " To delete pending resource transaction records: 1. In the Pending Resource Transactions window, select the transaction. 2. Choose Delete from the Edit Menu You can delete failed records that have a processing status of Error regardless of their processing phase. When you delete transaction records, their corresponding error messages are also deleted. See Also Open Resource Transaction Interface, Oracle Manufacturing, Distribution, Sales and Service Open Interfaces Manual, Release 11 Open Resource Transaction Interface: page 9 – 20 Resource Transactions: page 9 – 19 Changing Resources Manually: page 9 – 22 Charging Resources with Move Transactions: page 9 – 25 Adding and Updating Resource Requirements: page 7 – 9 Searching for Information, Oracle Applications User’s Guide Resource Management 9 – 35 9 – 36 Oracle Work in Process User’s Guide CHAPTER 10 Job and Repetitive Schedule Statuses T his chapter describes how discrete job and repetitive schedules statuses can be used to control production activities, including: • Overview: page 10 – 2 • Discrete Job Status Control: page 10 – 4 • Discrete Job Statuses: page 10 – 7 • Repetitive Schedule Status Control: page 10 – 10 • Repetitive Schedule Statuses: page 10 – 12 • Job and Repetitive Schedule Status Changes: page 10 – 15 • Transaction and Process Control By Status: page 10 – 18 • Business Scenarios: page 10 – 23 Job and Repetitive Schedule Statuses 10 – 1 Overview Job and repetitive schedule statuses can help you manage manufacturing operations. Job Job statuses describe various stages the life cycle of a job and control job activities. See: Discrete Job Statuses: page 10 – 7. Repetitive Schedule Repetitive schedule statuses describe stages in the life cycle of a repetitive schedule and control schedule activities. See: Repetitive Schedule Statuses: page 10 – 12. Transaction Control Job and repetitive schedule statuses control issue, move, resource, overhead, completion, scrap, job close, period close, and purge transactions. See: Transaction Control by Status: page 10 – 18. Status Control Job and repetitive schedule statuses are automatically updated after certain activities. For example, the status of a job is updated to Complete when you complete all the assemblies on the job. Statuses can also be manually changed although there are some restrictions. ECO Control Job and repetitive schedule statuses control engineering change order (ECO) implementation. See: ECO Implementation by Status: page 10 – 19. Planning Control Oracle Master Scheduling/MRP and Oracle Supply Chain Planning includes supplies and demands from jobs based on their status. See: Planning Control by Status: page 10 – 20. Release Control When you release —by changing the status from Unreleased to Released — a job or schedule with a routing, the release date is automatically set and the Queue intraoperation step of the first routing operation is updated with the job or schedule quantity. You can ’unrelease’ jobs and schedules if there are no net issue, move, resource, completion, or scrap charges against them. 10 – 2 Oracle Work in Process User’s Guide Hold Control Putting jobs and schedules ’on hold’ allows you to respond to changes and to control production by temporarily preventing transactions. You can manually change jobs and repetitive schedules to On Hold. You also set the WIP Respond to Sales Order Changes parameter so that Unreleased jobs building assemble–to–order (ATO) items are automatically changed from Unreleased to On Hold when configuration items are unassigned in Oracle Order Entry/Shipping. See: Discrete Parameters: page 2 – 10. Status Based Reporting Job and repetitive schedule statuses control what information is displayed in various reports and inquiries. See: Reporting by Status: page 10 – 20. Information Management Closed jobs and Complete – No Charges and Cancelled repetitive schedules cannot be updated. Job and schedules with these statuses can be purged. You can change the status of a job or schedule so that it can be updated. Concurrent Processing Support When you define discrete jobs, the WIP:Define Discrete Job form profile option determines whether job bills of material and routings, if any, are created (loaded) concurrently or interactively. The status of the job tracks the progress and outcome of the concurrent load process (e.g., Pending Bill Load, Pending Routing Load, Failed Bill Load, and Failed Routing Load). See: Profile Options: page 2 – 41. Statuses also track the progress of the job close process (e.g., Pending Close and Failed Close). See Also Discrete Job Status Control: page 10 – 4 Repetitive Schedule Status Control: page 10 – 10 Job and Repetitive Schedule Status Changes: page 10 – 15 Job and Repetitive Schedule Statuses 10 – 3 Discrete Job Status Control You cannot update jobs with statuses of Closed, Complete – No Charges, Cancelled, or any processing status (Pending Bill Load, Pending Routing Load, Failed Bill Load, Failed Routing Load, Pending Close, and Failed Close). You can update jobs with statuses of Unreleased, Released, On Hold, or Complete although you may not be able to update all fields. The fields you can update, based on the job’s status, are listed in the following table: Discrete Job Status Field Job Name Unreleased n Released On hold Complete n n n Type Assembly UOM Class n Status n n n n Firm n n n n Start Quantity n n n n MRP Net Quantity n n n n Start Date/Time n n n n Completion Date/Time n n n n Descriptive Flexfield n n n n Attachments n n n n Bill Information Status Field Unreleased Reference n Alternate n Table 10 – 1 Discrete Job (Page 1 of 3) 10 – 4 Oracle Work in Process User’s Guide Released On hold Complete Status Field Unreleased Revision n Revision Date n Supply Type n Released On hold Complete On hold Complete Routing Information Status Field Unreleased Released Reference (for non–standard jobs) n Alternate n Revision n Revision Date n Completion Subinventory n n n n Completion Locator n n n n More Information Status Field Unreleased Released On hold Complete Demand Class n n n n Lot Number n n n n Description n n n n Schedule Group, Project Status Field Unreleased Released On hold Complete Schedule Group n n n n Build Sequence n n n n Line n n n n Project n n n n Table 10 – 1 Discrete Job (Page 2 of 3) Job and Repetitive Schedule Statuses 10 – 5 Status Field Task Unreleased Released n On hold n Complete n n Sales Order Status Field Unreleased Released On hold Complete Sales Order Line Shipment Number Demand Class Quantity Allocated n n n Quantity Completed Table 10 – 1 Discrete Job (Page 3 of 3) See Also Overview of Job and Repetitive Schedule Statuses: page 10 – 2 Overview of Discrete Manufacturing: page 3 – 2 Updating Discrete Jobs: page 3 – 36 Defining Discrete Jobs Manually: page 3 – 12 Discrete Job Statuses: page 10 – 7 10 – 6 Oracle Work in Process User’s Guide Discrete Job Statuses Discrete job statuses describe the various stages in the life cycle of a job and control the activities that you can perform on it. User Controlled Statuses You can manually change user–controlled statuses. For example, you can change a job’s status to Released to initiate the production cycle. Some user–controlled statuses are automatically changed based on other events. For example, when you complete a job, its status is changed to Complete. Released The job is available for production and can be transacted against. When a job is changed to this status, the date released is automatically set to the current date and, if a routing exists, the job quantity is moved to the Queue intraoperation step of the first routing operation. You can change jobs to this status as you define them. Unreleased The job is not released for transaction activity. You can update but cannot transact against it. You can assign a status of Unreleased if there are no net issue, move, resource, completion, or scrap charges associated with the job and no purchase orders or purchase requisitions linked to the job. Complete The job is completed but accepting transactions and charges. Jobs are automatically updated to this status when the quantity completed into inventory equals the job quantity. You can manually assign this status only when you update the job, not when you define it. Complete–No Charges The job is complete and accepting no further activity. You cannot update or transact against it, but you can change its status to Complete. You can assign this status only when you update the job. On Hold You can update the job but cannot transact against it. You can assign this status to a job when you define it. Job and Repetitive Schedule Statuses 10 – 7 Cancelled The job was cancelled before completion. You cannot update the job or transact against it, but you can change its status. You can assign this status only when you update the job. Closed The job is closed and accepting no further activity. Job are automatically updated to this status upon successful completion of the job close process. You can change jobs with this status to another status if the accounting period that the job was completed in is still open and if your functional security setup permits. Processing Statuses Some job statuses are automatically updated by a process. For example, if you have the WIP:Define Discrete Job Form profile option set to concurrent definition, the job status is used to track the progress of the bill of material and routing load process. When you close a job, its status is used to track the progress of the concurrent close process. Pending Bill Load The concurrent process is loading the bill of material for the job. You cannot update the job nor transact against it. For non–standard discrete jobs, this is applicable only if you specified a bill reference. Pending Routing Load The bill of material load was successful and the concurrent process is now loading the routing for the job. You cannot update the job nor transact against it. For non–standard discrete jobs, this option is applicable only if you specified a routing reference. Failed Bill Load The concurrent process was unable to load the bill of material for the job. The load may have failed for a number of reasons. For example, the job start date may be outside the last open accounting period at the time of job creation. You can close the failed job with the Close Discrete Jobs window and open another job for the assembly. Or you can resubmit the job once you change the status to Unreleased, Released, or On Hold. For non–standard discrete jobs, this option is applicable only if you specified a bill reference. 10 – 8 Oracle Work in Process User’s Guide Failed routing load The concurrent process was unable to load the routing for the job. The load may have failed for a number of reasons. For example, the job start or completion date may be outside the organization workday calendar at the time of job creation. You can close the failed job and open another job for the assembly, or you can resubmit the job after changing its status to Unreleased, Released, or On Hold. For non–standard discrete jobs, this option is available only if you specified a routing reference. Pending Close The concurrent process is closing the job. You cannot transact against or update it. If the close process terminates abnormally, you can change the status of the job and resubmit it. Failed Close The concurrent process was unable to close the job. The close may have failed for a number of reasons. For example, there may be pending transactions against the job. You must fix the problems before you can close the job. You cannot transact against it. See Also Overview of Job and Repetitive Schedule Statuses: page 10 – 2 Discrete Job Status Control: page 10 – 4 Mass Changing Discrete Job Statuses: page 3 – 40 Discrete Job Close: page 3 – 50 Defining Discrete Jobs Manually: page 3 – 12 Job and Repetitive Schedule Statuses 10 – 9 Repetitive Schedule Status Control You cannot update repetitive schedules with user controlled statuses of Cancelled, Complete – No Charges or with the Pending – Mass Loaded processing status. You can update repetitive schedules with statuses of Unreleased, Released, On Hold, or Complete although you may not be able to update all fields. The fields you can update, based on the schedule’s status, are listed in the following table: Status and Quantity Information Status Field Unreleased Released On hold Complete Line n n n n Assembly n n n n Status n n n n Daily Quantity n n n n Days n n n n Total Quantity n n n n n n n n Date Released Quantity Completed Descriptive Flexfield Scheduling Information Status Field Unreleased Released Complete First Unit Start Date n n n n Last Unit Start Date n n n n First Unit Completion Date n n n n Last Unit Completion Date n n n n Table 10 – 2 Repetitive Schedules (Page 1 of 2) 10 – 10 On hold Oracle Work in Process User’s Guide Bill and Routing Information Status Field Unreleased Released On hold Complete Alternate Bill Bill Revision n Bill Revision Date n Alternate Routing Routing Revision n Routing Revision Date n Planning Information and Description Status Field Unreleased Released On hold Complete Firm n n n n Demand Class n n n n Description n n n n Descriptive Flexfield n n n n Table 10 – 2 Repetitive Schedules (Page 2 of 2) See Also Overview of Job and Repetitive Schedule Statuses: page 10 – 2 Repetitive Manufacturing: page 6 – 2 Updating Repetitive Schedules: page 6 – 27 Defining Repetitive Schedules Manually: page 6 – 13 Repetitive Schedule Statuses: page 10 – 12 Job and Repetitive Schedule Statuses 10 – 11 Repetitive Schedule Statuses Repetitive schedule statuses describe the various stages the life cycle of a repetitive schedule and control the activities that you can perform on it. User Controlled Statuses You can manually change user–controlled statuses. For example, you can change a repetitive schedule’s status to Released to initiate the production cycle. Some user–controlled statuses are automatically updated based on other events. For example, when you complete all the assemblies on a schedule, its status is changed to Complete or Complete–No Charges. Released The schedule is available for production and can be transacted against. When a schedule is changed to this status and a routing exists, the total number of assemblies to be built are moved to the Queue intraoperation step of the first routing operation. You can change schedules to this status as you define them. Unreleased The schedule is not released for transaction activity. You can update but cannot transact against it. You can change a schedule’s status to Unreleased if it is not the only open schedule on a line, if there are no net issue, move, resource, completion, or scrap charges associated with the schedule, and if there are no purchase orders or purchase requisitions linked to it. Complete The schedule is completed but accepting transactions and charges. The schedule is automatically updated to this status when the number of completed assemblies equals the total quantity of the schedule and there are no subsequent schedules for the assembly on the production line. If there is a subsequent schedule with a status of Unreleased within the autorelease days time fence, or a schedule with a status of Released, Complete, or On Hold, then the status of the current schedule changes to 10 – 12 Oracle Work in Process User’s Guide Complete–No Charges. If there is no subsequent schedule that meets this requirement, the status of the current schedule changes to Complete. This keeps the current schedule active, so that you can transact any unused or excess material and perform delayed resource and material transactions. You can manually assign this status only when you update the schedule, not when you define it. Complete–No Charges The schedule is completed and accepting no further activity. You cannot update or transact against it. The schedule is updated to this status when the number of completed assemblies equals the total quantity of the schedule and another schedule of this assembly on this line is available. If there is a subsequent schedule with a status of Unreleased and within the autorelease days time fence, or a schedule with a status of Released, Complete, or On Hold, the status of the current schedule changes to Complete–No Charges. If there is no subsequent schedule that meets this requirement, the status of the current schedule changes to Complete. This keeps the current schedule active so that you can transact unused or excess material and perform delayed resource and material transactions. Any excess material in the schedule is automatically rolled forward, that is, it is issued to the following schedule. You can manually assign this status only when you update the schedule. If you are changing to this status manually, and there are subsequent schedules, you can choose to roll forward excess material, or you can leave it in the current schedule and write it off as a variance. On Hold You can update the schedule but cannot transact against it. You can assign this status to a schedule when you define it. Cancelled The schedule was cancelled before completion. You cannot update the schedule or transact against it, but you can change its status. You can assign this status only when you update the schedule. Job and Repetitive Schedule Statuses 10 – 13 You can return all remaining material back to inventory before you cancel the schedule or roll it forward to the next available schedule for the repetitive assembly on the line. The next schedule must have a status of Unreleased and be within the autorelease days time fence or have a status of Released, Complete, or On Hold. If there is no such schedule, or if you choose not to roll forward to the next schedule, the excess material is recognized as a variance at period close. Processing Status There is one repetitive schedule status this is automatically updated by a process. Pending–mass loaded Schedule implemented from the Open Job/Schedule Interface or Planner Workbench in Oracle Master Scheduling/MRP and Supply Chain Planning. You can update pending repetitive schedules as if they were unreleased schedules but cannot transact against. You can update schedules with this status to Unreleased, Released, or On Hold when you decide to implement a repetitive schedule. See Also Overview of Job and Repetitive Schedule Statuses: page 10 – 2 Repetitive Schedule Status Control: page 10 – 10 Mass Changing Repetitive Schedule Statuses: page 6 – 31 Defining Repetitive Schedules Manually: page 6 – 13 10 – 14 Oracle Work in Process User’s Guide Job and Repetitive Schedule Status Changes Statuses describe the various stages in the life cycle of a job or repetitive schedule. Statuses are either user or processing controlled. Processing controlled statuses are updated based on the progress and outcome of concurrent processes. User controlled statuses can be updated by the user or are changed based on events such as job or schedule completion. Some status changes are allowed while others are not. Some status changes are conditional. For example, you cannot change jobs and schedules from Released to Unreleased if there are net issue, move, resource, completion, or scrap charges associated with them. You also cannot unclose a job that is linked to a sales order or that was closed in a now closed accounting period. Job and Scedule User Statuses Unreleased Released Complete Complete – No Charges On Hold Cancelled Closed Unreleased N/A Yes Yes No Yes Yes Yes Released Cond N/A Yes No Yes Yes Yes Complete Cond Yes N/A Yes Yes Yes Yes Complete – No Charges (DIS) No No Yes N/A No No Yes Complete – No charges (REP) No No No N/A No No N/A On Hold (DIS) Cond Yes Yes No N/A Yes Yes On Hold (REP) Cond Yes Yes No N/A Yes Yes Cancelled (REP) No No No No No N/A N/A Cancelled (DIS) Cond Yes Yes Yes Yes N/A Yes Pending – Mass Loaded (REP) Yes Yes Yes No Yes Yes N/A Pending Bill Load (DIS) No No No No No No No Failed Bill Load (DIS) Yes Yes No No Yes No Yes Pending Routing Load (DIS) No No No No No No No Failed Routing Load (DIS) Yes Yes No No Yes No Yes Change To USER status From USER Status Table 10 – 3 User Statuses (Page 1 of 2) Job and Repetitive Schedule Statuses 10 – 15 Unreleased Released Complete Complete – No Charges On Hold Cancelled Closed Cond Yes Yes Yes Yes Yes Yes Failed Close (DIS) Yes Yes Yes No Yes Yes Yes Closed (DIS) Yes Yes Yes No No No N/A Pending Bill Load Pending Routing Load Failed Bill Load Failed Routing Load Pending Close Failed Close Unreleased No No No No Yes Yes Released No No No No Yes Yes Complete No No No No Yes Yes Complete – No Charges No No No No Yes Yes On Hold No No No No Yes Yes Cancelled No No No No Yes Yes N/A No Yes Yes No No Failed Bill Load No No N/A No Yes Yes Pending Routing Load Yes N/A Yes Yes No No Failed Routing Load No No Yes N/A Yes Yes Failed Close No No No No Yes N/A Pending Close No No No No N/A Yes Closed (DIS) No No No No No No Change To USER status From USER Status Pending Close (DIS) Table 10 – 3 User Statuses (Page 2 of 2) Job Processing Statuses Change To PROCESSING status From PROCESSING Status Pending Bill Load Table 10 – 4 Processing Statuses for Discrete Jobs (Page 1 of 1) 10 – 16 Oracle Work in Process User’s Guide See Also Discrete Job Close: page 3 – 50 Discrete Job Statuses: page 10 – 7 Repetitive Schedule Statuses: page 10 – 12 Changing Discrete Jobs: page 3 – 36 Changing Repetitive Schedules: page 6 – 27 Mass Changing Discrete Job Statuses: page 3 – 40 Mass Changing Repetitive Schedule Statuses: page 6 – 31 Job and Repetitive Schedule Statuses 10 – 17 Transaction and Process Control By Status Statuses control what transactions can be performed on discrete jobs and repetitive schedules. Discrete job statuses also help you control whether you can close and purge jobs. Statuses can also be used to control ECO implementation and the MRP planning process. Transaction Control By Status Material, Move, and Resource Transactions You can perform issue, completion, move, scrap, and resource transactions for jobs and schedules with Released or Complete statuses. Backflush transactions and overhead charges are indirectly controlled by status since their source move or completion transactions are directly controlled by status. Cost Update Transactions Cost update transactions are created for standard discrete jobs and non–standard asset jobs with the following statuses: Unreleased, Released, Complete, Complete–No Charges, and On Hold. Period Close Transactions When you close an accounting period, accounting transactions for repetitive schedules with statuses of Released, Complete, Complete–No Charges, and On Hold —or just Complete and Complete–No Charges depending on how you set the WIP Recognize Period Variances Parameter — are automatically created. When you close an accounting period, accounting transactions for non–standard expense jobs with statuses of Unreleased, Released, Complete, Complete–No Charges, and On Hold are also automatically created. Job Close Transactions You can close jobs of any status except jobs that are Closed, Pending Close, Pending Bill Load, and Pending Routing Load. Purge Transactions You can purge jobs that were closed in a now closed period. You can also purge repetitive schedules that were changed to statuses of Complete–No Charges and Cancelled in closed periods. 10 – 18 Oracle Work in Process User’s Guide See Also Discrete Job Statuses: page 10 – 7 Repetitive Schedule Statuses: page 10 – 12 Discrete Job Purge: page 3 – 56 Repetitive Schedule Purge: page 6 – 39 Job and Repetitive Schedule Status Changes: page 10 – 15 Overview of Period Close, Oracle Cost Management User’s Guide ECO Implementation By Status Oracle Engineering automatically implements engineering change orders (ECOs) with Release, Schedule, and Implement statuses for jobs with statuses of Unreleased and schedules with statuses of Unreleased, Released, and On Hold. You can optionally choose to implement Open status ECOs using the WIP:Exclude Open ECOs profile option. See: and ECO Statuses, Oracle Engineering User’s Guide. Oracle Engineering does not implement ECOs on non–standard discrete jobs. Unreleased Standard Discrete Jobs and Repetitive Schedules When an ECO is implemented in Oracle Engineering, the system automatically regenerates the bills of material for unreleased jobs and schedules to reflect the impact of the ECO. Released, Complete, or On Hold Repetitive Schedules The impact of an ECO implementation on Released, Complete, or On Hold repetitive schedules depends on whether repetitive assemblies have been moved beyond the Queue intraoperation step of the first routing operation. See Also Overview of Engineering Change Orders, Oracle Engineering User’s Guide Job and Repetitive Schedule Statuses 10 – 19 Planning Control by Status Oracle Master Scheduling/MRP and Oracle Supply Chain Planning includes the assembly supply and component demand of jobs with statuses of Unreleased, Released, Complete, and On Hold. Because Master Scheduling/MRP and Supply Chain Planning uses different planning algorithms for repetitive manufacturing, repetitive statuses do not impact how repetitive schedule supply and demand is viewed. See Also Overview of Material Requirements Planning, Oracle Master Scheduling/MRP and Oracle Supply Chain Planning User’s Guide Overview of Planner Workbench, Oracle Master Scheduling/MRP and Oracle Supply Chain Planning User’s Guide Reporting by Status Job and repetitive schedule statuses determine what information is listed on reports. For example, if a job has a status of Closed, Compete–No Charges, or Cancelled, information about that job and its component requirements is not listed on the Discrete Job Shortage Report since shortages on jobs with these statuses do not need to be filled. You can view discrete job and repetitive schedule information regardless of status. For example, you could view the component material requirements for a closed job using the View Discrete Jobs window. Unrelease d Released Complete Complete – No Charges On Hold Cancelled Closed Pending – Mass Loaded (Rep) Discrete Job Data Report Yes Yes Yes Yes Yes Yes Yes N/A Discrete Dispatch Report Opt Yes Yes No Yes No No N/A Discrete Job Listing Report Yes Yes Yes Yes Yes Yes Yes N/A Discrete Job Pick List Report Yes Yes Yes No No No No N/A Status Report Table 10 – 5 Status Dependent Work in Process Reports (Page 1 of 2) 10 – 20 Oracle Work in Process User’s Guide Unrelease d Released Complete Complete – No Charges On Hold Cancelled Closed Pending – Mass Loaded (Rep) Discrete Job Routing Sheet Yes Yes Yes No Yes No No N/A Discrete Job Shortage Report Yes Yes Yes No Yes No No N/A Discrete Job Value Report Yes Yes Yes Yes Yes Yes Yes N/A Expense Job Value Report No Yes Yes Yes Yes Yes Yes N/A Job Lot Composition Report Yes Yes Yes Yes Yes Yes Yes N/A Move Transaction Report No Yes Yes Yes Yes Yes Yes N/A Repetitive Line Report Yes Yes Yes No Yes No N/A Yes Repetitive Pick List Report Yes Yes Yes No No No N/A N/A Repetitive Routing Sheet Yes Yes Yes No Yes No N/A N/A Repetitive Schedule Data Report Yes Yes Yes Yes Yes Yes N/A Yes Repetitive Schedule Shortage Report Yes Yes Yes No No No N/A N/A Repetitive Value Report No Yes Yes Yes Yes Yes N/A N/A Resource Performance Report No Yes Yes Yes Yes Yes Yes N/A Resource Transaction Report No Yes Yes Yes Yes Yes Yes N/A WIP Account Distribution Report No Yes Yes Yes Yes Yes Yes N/A WIP Account Summary Report Yes Yes Yes Yes Yes Yes Yes N/A WIP Location Report No Yes Yes Yes Yes Yes No N/A WIP Outside Processing Report No Yes Yes Yes Yes Yes No N/A WIP Offsetting Account Report Yes Yes Yes Yes Yes Yes Yes N/A WIP Value Report No Yes Yes Yes Yes Yes No N/A Status Report Table 10 – 5 Status Dependent Work in Process Reports (Page 2 of 2) ☞ Attention: Reports that are printed with processes, such as importing and purging jobs and schedules, are not included in the above table. See Also Viewing Discrete Job Information: page 3 – 31 Discrete Job Statuses: page 10 – 7 Job and Repetitive Schedule Statuses 10 – 21 Repetitive Schedule Statuses: page 10 – 12 10 – 22 Oracle Work in Process User’s Guide Business Scenarios The following business cases illustrate how statuses can be used to manage manufacturing production. Production Start You are ready to define jobs. However, you do not want to kit and assemble these jobs until you have confirmed material availability and production capacity. In this case, you can begin by defining your jobs with a status of Unreleased. Once you are certain that everything is ready, you can change the status of the jobs to Released and print your shop paperwork. See: Changing Discrete Job: page 3 – 36, Mass Changing Discrete Job Statuses: page 3 – 40, Discrete Shop Packet: page 14 – 26, and Discrete Job Dispatch Report: page 14 – 11. To identify which jobs to kit, the stockroom staff can run a report for all jobs with a status of Released. See: Discrete Job Listing Report: page 14 – 13. To identify which assemblies to build, the shop floor staff can run a report that lists assemblies with quantities in the Queue intraoperation step of the first routing operation. See: WIP Location Report: page 14 – 69. Production Stop You need to stop a group of jobs temporarily because a quality problem has developed. You also need to stop a job that is building a configure–to–order item because the customer has just changed the configuration. In the first instance, stopping production on the group of jobs makes it possible for you to address the quality problem. In the second instance, stopping production allows you to evaluate how the customer’s change affects material requirements and operations. You can temporarily stop production on the jobs involved by changing their statuses to On Hold. See: Changing Discrete Jobs: page 3 – 36 and Mass Changing Discrete Job Statuses: page 3 – 40. Suggestion: Jobs can be defined in sequential order using the automatic sequence generator. Sequentially ordered jobs are easier to query and mass change than non–sequential jobs. Once the quality problem is resolved and the impact of the changes to the configure–to–order job have been determined, you can change the statuses of the jobs from On Hold to Unreleased or Released. Job and Repetitive Schedule Statuses 10 – 23 Close Discrete Jobs You are preparing to close your accounting period and must review all jobs that can be closed. You can find and view all Complete, Complete–No Charges, and Cancelled jobs using the View Discrete Jobs window. Using this window, you can also check the disposition of component materials and the status of shop floor operations. See: Viewing Discrete Job Information: page 3 – 31. If all the jobs are in order, you can view job costs either on–line or using reports. See: Viewing WIP Value Summaries, Oracle Cost Management User’s Guide and Discrete Job Value Report: page 14 – 22. Once you are satisfied that your job cost information is correct, you can close your jobs individually or as a group based on their status. See: Discrete Job Close: page 3 – 50. Repetitive Schedule First In – First Out Sequencing You have implemented an ECO on a repetitive schedule in production, and the schedule has automatically split into two repetitive schedules. The first schedule uses the original bill of material and the second uses the new bill with the ECO. See: ECO Implementation by Status: page 10 – 19. Because of the production rates and lead times being used, the schedule split results in having the same assembly with two different bills on the same line at the same time. Since the first in–first out allocations are used when two schedules are released on the line at the same time, you must maintain first in–first out order when moving assemblies. Unfortunately several of the assemblies with the original bill are being may be held for repair at a Reject intraoperation step and assemblies using the new bill are beginning to pass them. This could result in the lose of physical first in–first out (FIFO) flow and improper backflushing. To correct this problem you must separate the assemblies by changing the status of the first schedule to On Hold. This freezes the first schedule removing it from the FIFO algorithm. Later, when the rejected assemblies are ready to go, you can change the status on the first schedule to Released so that assemblies on the first schedule take precedence in the FIFO algorithm. See: Defining Repetitive Schedules Manually: page 6 – 13. See Also Discrete Job Statuses: page 10 – 7 10 – 24 Oracle Work in Process User’s Guide Repetitive Schedule Statuses: page 10 – 12 Job and Repetitive Schedule Status Changes: page 10 – 15 Job and Repetitive Schedule Statuses 10 – 25 10 – 26 Oracle Work in Process User’s Guide CHAPTER 11 Work in Process Costing T his chapter explains how costs are calculated and controlled in Work in Process, including: • Overview: page 11 – 2 • Setting Up: page 11 – 5 • Work in Process Costing Methods: page 11 – 6 • Work in Process Valuation and Variances: page 11 – 8 Work in Process Costing 11 – 1 Overview Oracle Work in Process provides a complete standard cost system to track and report your production costs. WIP Accounting Classes You can use WIP accounting classes to establish your valuation and variance accounts. You can enter separate accounts by cost element and by WIP accounting class for maximum account traceability. You can also enter the same account for more than one cost element. In either case, the system maintains elemental cost visibility. This is true under both standard and average costing. Multiple Cost Elements Through the multiple cost elements (material, material overhead, resource, outside processing, and overhead) that you assign to your accounting classes, the system can track all your production costs to the correct valuation and variance accounts. Flexible Account Distributions You can enter separate accounts by cost element and by WIP accounting class for maximum account traceability. However, if you enter the same account for more than one cost element, the system maintains elemental cost visibility. This is true under both standard and average costing. Standard and Average Costs You can use either standard or average costing. Discrete jobs, project jobs, and work order–less schedules can be costed using weighted average costs. You can only cost repetitive schedules using standard costs. Job Costs You can cost standard and non–standard asset discrete production by job. You can report job costs on a period–to–date and cumulative–to–date basis. Project Costs If you are using Oracle Project Manufacturing Costing, you can cost jobs by project. Project jobs can be specific to a single contract or a group of contracts for a specific customer. 11 – 2 Oracle Work in Process User’s Guide Period Costs You can cost and report your repetitive and non–standard expense production by period. Activity Based Costs You can charge and report resource, outside processing, and overhead costs by activity. You can then report and analyze the costs of various business activities, such as setup, teardown, inspection, and so on. Repetitive Assembly and Line Costs You can track your repetitive production costs by assembly on a line so you do not have to review your costs by individual repetitive schedule. You can also track repetitive costs by assembly across lines or by line so you can compare costs for your production lines. Transaction Based Costs You can track and report costs through the various stages of production. The system calculates all costs and reports move, issue, resource, overhead, completion, scrap, period close, and job close transaction costs. Resource Charging You can charge resources automatically or manually. Overhead Charging You can charge overhead automatically based on resource value charges, resource charges, or operation completions. Fixed and Variable Resource, Outside Processing and Overhead Charging You can set up resources, outside processing, and overheads with a basis of Lot for fixed charges per job or schedule, such as setup and teardown. You can use a basis of Item for resources, outside processing, and overheads that vary based on the job or repetitive schedule quantity. Flexible Resource, Outside Processing, and Overhead Absorption You can assign separate absorption accounts by sub–element, such as individual resources, outside processing resources, and overheads. As you charge resources, outside processing, and overheads, work in process valuation automatically absorbs your payroll, accounts payable accruals, and overhead cost pools. At period end, you can compare Work in Process Costing 11 – 3 absorbed amounts with actual costs incurred in your general ledger cost pools and accounts. Actual Labor Charging You can charge resources at standard resource rates, standard employee rates, or actual rates. Actual Purchase Price Charging You can charge outside resources at predefined or actual purchase prices. Period Close When you close an accounting period, period close costs are calculated. The system costs and transfers all production costs by account to Oracle Financial products. You can transfer in summary and detail depending on your Oracle Inventory option. Variances You can track and report previous level usage variances for materials and this level efficiency variances for resources and overheads. The system calculates standard cost adjustment variances when the standard cost update is run. Valuation Reporting The system can provides complete valuation reporting including current balances, period to date charges, and cumulative to date charges. You can also report your work in process balances by cost element and level. See Also Work in Process Costs: page 11 – 6 Work in Process Valuation: page 11 – 8 Work in Process Cost Variances: page 11 – 10 Overview of Standard Costing, Oracle Cost Management User’s Guide Overview of Average Costing, Oracle Cost Management User’s Guide Flow Manufacturing Costing, Oracle Cost Management User’s Guide 11 – 4 Oracle Work in Process User’s Guide Setting Up Based on your manufacturing and accounting requirements, refer to the appropriate manufacturing (Inventory and Work in Process) section: • Setting Up Manufacturing Standard Costing, Oracle Cost Management User’s Guide • Setting Up Manufacturing Average Costing, Oracle Cost Management User’s Guide Check your WIP Require Scrap Account Parameter and Recognize Period Variance Parameter. See: Work in Process Parameters: page 2 – 9. If you are using average costing, also check your Average Costing Parameters: page 2 – 12. See Also Defining WIP Parameters: page 2 – 16 Defining WIP Accounting Classes: page 2 – 27 Defining Labor Rates: page 2 – 34 Work in Process Costing 11 – 5 Work in Process Costs You use standard and non–standard discrete jobs, project jobs, repetitive schedules, and flow schedules to collect the costs of production. For standard and non–standard discrete jobs, you value and report work in process costs based on jobs. For project jobs, you value work in process costs based on the projects that jobs are associated with. For repetitive schedules, you value and report work in process costs based on assemblies on a line in a period, not on specific repetitive schedules. Costing Methods and Work in Process You can cost standard discrete jobs, non standard discrete jobs, project jobs, and flow schedules in average costing organizations. You can cost repetitive schedules in standard costing organizations only. Costing methods are assigned in the Organization Parameters window in Oracle Inventory. See: Organization Parameters Window, Oracle Inventory User’s Guide and Defining Costing Information, Oracle Inventory User’s Guide . The following table summarize which costing methods can be used with which manufacturing methods. Standard Costing Organization Average Costing Organization Standard Discrete Jobs Yes Yes Non–standard Expense Job Yes Yes Non–standard Asset Jobs Yes Yes Project Jobs No Yes Repetitive Schedules Yes No Flow Schedules Yes Yes Project Flow Schedules No Yes Manufacturing Method Table 11 – 1 (Page 1 of 1) Work in Process Costing Transactions For additional information on Work in Process Cost Transactions please reference the following sections in Cost Management: 11 – 6 Oracle Work in Process User’s Guide • Work in Process Standard Cost Transactions, Oracle Cost Management User’s Guide • Work in Process Average Cost Transactions, Oracle Cost Management User’s Guide Work in Process Costing 11 – 7 Work in Process Valuation and Variances The value of work in process is maintained as transactions are processed. Work in process values include usage, efficiency, and standard cost adjustment variances. Work in Process Valuation Work in Process continually maintains the value of work in process, updating it with each transaction. This means that you can report work in process costs quickly and accurately. Cost Elements Work in Process maintains and reports work in process values by distinct cost element (material, resource, and so on) even if you assign the same general ledger account to each cost element. You can also report work in process value by cost element within specific WIP accounting classes. Accounting Classes and Cost Elements Note: The following discussion provides an overview of how discrete and repetitive costs are calculated and posted. For additional information on these topics and complete descriptions of the resulting accounting entries see the following topics: Standard Discrete Job Costs The WIP accounting class that you assign to a standard discrete job determines which valuation and variance accounts are charged. Valuation accounts are charged when material is issued to a job. When the job is closed, final costs and variances are calculated and posted to the variance and valuation accounts associated with the job. Standard jobs that have not been closed are automatically revalued by the standard cost update. Non–Standard Discrete Job Costs The WIP accounting class that you assign to a non–standard discrete job determines which valuation and variance accounts are charged. There are two types of accounting classes that can be assigned to 11 – 8 Oracle Work in Process User’s Guide non–standard discrete jobs: expense non–standard and asset non–standard. Non–standard expense jobs are costed using period–based costing. Non–standard expense jobs are not revalued by cost updates. Conversely, non–standard asset jobs are costed much like standard discrete jobs and are revalued by cost updates. Non–standard expense and non–standard asset jobs do not earn material overhead when you complete assemblies. Instead material overhead at completion is posted directly to the subinventory material overhead account. Repetitive Costs When you enter a repetitive transaction, costs are charged to the assembly and line rather than to a specific schedule. This is known as flow charging and applies to all repetitive material, resource, and move transactions. Repetitive transactions are allocated to open schedules based upon date the first unit start date (FUSD) starting with the oldest schedule first. Repetitive assemblies are costed using period–based costing. Period costs for a repetitive assembly are calculated by totalling the charges made to an assembly and line during the period and dividing by the number of assemblies you produced on that line during the period. Valuations and variances are calculated when you close a period. You do not need to close repetitive schedules. Repetitive variances are calculated by comparing an assembly’s period cost with its standard cost. Variances can occur due to scrap, additional resource and overhead charges, and changes in daily quantities. The period close process writes the variance values to the variance accounts associated with the WIP accounting class you assigned to the repetitive line/assembly association. You can specify which repetitive schedule variances to post to the general ledger when you close an accounting period using the WIP Recognize Period Variances parameter. See: Repetitive Parameters: page 2 – 11. Journal Entries Whenever a job or schedule is charnged, relieved, or closed, journal entries are created. When transactions are transfered to the general ledger or the accouting period is closed, these journal entries are transaferred to the general ledger. See: General Ledger Transfer, Oracle Inventory User’s Guide and Overview of Period Close, Oracle Cost Management User’s Guide. Work in Process Costing 11 – 9 See Also WIP Accounting Classes: page 2 – 22 WIP Accounting Class Elemental Costs: page 2 – 23 WIP Value Report: page 14 – 74 Discrete Job Value Report: page 14 – 22 Repetitive Value Report: page 14 – 55 Work in Process Cost Variances Work in Process provides usage, efficiency, and standard cost adjustment variances. Usage and efficiency variances result when the total costs charged to a job or schedule do not equal the total costs relieved from a job or schedule at standard. You can transaction the following types of variances: • Material Usage Variance • Resource and Outside Processing Efficiency Variance • Move Based Overhead Efficiency Variance • Resource Based Overhead Efficiency Variance • Standard Cost Adjustment Variance See Also WIP Accounting Classes: page 2 – 22 Cost Reports The following reports can be used to assist you in identifying your discrete and repetitive manufacturing costs: • Discrete Job Value Report: page 14 – 22 (includes costs for standard discrete and non–standard asset jobs) 11 – 10 Oracle Work in Process User’s Guide • Expense Job Value Report: page 14 – 29 • Repetitive Value Report: page 14 – 55 • WIP Value Report: page 14 – 74 See Also Creating Discrete Jobs: page 3 – 7 Creating Repetitive Schedules: page 6 – 12 Overview of Non–Standard Discrete Jobs: page 4 – 2 Discrete Job Close: page 3 – 50 Overview of Period Close, Oracle Cost Management User’s Guide WIP Accounting Classes: page 2 – 22 Viewing WIP Value Summaries, Oracle Cost Management User’s Guide Work in Process Standard Cost Variances, Oracle Cost Management User’s Guide Viewing WIP Value Summaries, Oracle Cost Management User’s Guide Work in Process Costing 11 – 11 11 – 12 Oracle Work in Process User’s Guide CHAPTER 12 Work in Process Scheduling T his chapter explains how discrete jobs and repetitive schedules are scheduled, including: Overview: page 12 – 2 Discrete Scheduling: page 12 – 5 Detailed Scheduling: page 12 – 7 Discrete Rescheduling: page 12 – 11 Repetitive Line Scheduling: page 12 – 13 Repetitive Line Rescheduling: page 12 – 18 Repetitive Line Capacity Changes: page 12 – 20 Work in Process Scheduling 12 – 1 Overview You can use Oracle Work in Process to schedule production resources and materials, to meet customer delivery requirements, and to maintain a smooth production flow. Scheduling establishes expected dates and times for material and resource requirements. Scheduling also establishes expected dates and time for the supply availability of assemblies built on the jobs and repetitive schedules. Work in Process uses two scheduling methods: detailed scheduling and repetitive line scheduling. However, all scheduling is based on the calendars, shifts, departments, resources, and routings you define in Oracle Bills of Material, production lines you define in Work in Process, and capacity modifications you define in Oracle Capacity and Oracle Bills of Material. Date and Time Scheduling You can define the start and completion dates and times for jobs and repetitive schedules. Start and completion dates and times for the operations within these jobs and schedules are scheduled automatically. Forward vs. Backward Scheduling Options If you enter a job or repetitive schedule start date and time, the completion date and time is automatically determined using forward scheduling. Conversely, if you enter a job or repetitive schedule completion date and time, the start date and time is determined using backward scheduling. Fixed and Variable Rate Production Lines You can specify all the assemblies on a repetitive production line to run at the same production rate on your fixed rate lines. You can specify the production rate by assembly for your variable rate lines. Fixed vs. Routing Based Line Lead Time Options You can schedule your repetitive production lead time based on routing or line attributes to best simulate your repetitive production process. Planning Based Rescheduling You can automatically implement discrete reschedule recommendations from Oracle Master Scheduling/MRP and Oracle 12 – 2 Oracle Work in Process User’s Guide Supply Chain Planning or import them from other sources through the Open Job and Schedule Interface. Midpoint Scheduling You can schedule discrete jobs around bottleneck operations using midpoint scheduling. By setting the midpoint operation start or completion date and time you can automatically forward and backward schedule from that midpoint. Multiple Resources per Operation Scheduling You can define multiple resources at an operation to account for labor, machine, and other activities. Resources are automatically scheduled based on their sequence. Fixed and Variable Resource Scheduling You can define resource usage based on job and repetitive schedule quantity for variable resources or for a fixed amount for fixed resources such as setup and teardown. Scheduling is based on resource usage. Resource Availability Scheduling You can assign as many resources to an operation as are available. Further, you can make any resource available by shift or around the clock. Scheduling is based on resource availability. Operation Resource Overlap Scheduling You can schedule resource operations to overlap to account for simultaneous processing of the same job or repetitive schedule in concurrent operations. For example, you can schedule external setup on the next operation to take place while you complete processing at the prior operation. Dispatch Reporting You can monitor and prioritize your shop floor activity to meet customer demands using a variety of standard Work in Process reports. See Also Overview of Oracle Bills of Material, Oracle Bills of Material User’s Guide Overview of Rough Cut Capacity Planning, Oracle Capacity User’s Guide Overview of Capacity Requirements Planning, Oracle Capacity User’s Guide Work in Process Scheduling 12 – 3 Overview of Material Requirements Planning, Oracle Master Scheduling/MRP and Oracle Supply Chain Planning User’s Guide 12 – 4 Oracle Work in Process User’s Guide Discrete Scheduling When you define a job, you must enter either a start or completion date and time. If the job assembly has a routing, dates and times are automatically scheduled for the operations, resources, and material requirements for the job using detailed scheduling. If the job assembly does not have a routing, it can be scheduled in one of two ways. You can manually schedule the jobs by entering both the start and completion dates. You can also enter either a start or completion date and allow the system to calculate the missing date based on the item lead time. Start Date This is the date and time that you plan to start the job. You can choose start dates and times earlier than the current date to maintain relative date priorities for department schedules and material requirements. You can choose start dates that are not on the manufacturing calendar. In this case, the system plans for work to start on the next valid date. When you specify the start date and time, the system forward schedules the job and automatically calculates the job completion date and time using detailed scheduling based on the assembly’s routing. If no routing exists, the system forward schedules using the fixed and variable lead times for the assembly from the item master. If no routing and no lead time exist, you must enter both the start and completion dates. Completion Date This is the date and time on which you plan to complete the job. You can choose completion dates and times earlier than the current date to maintain relative date priorities for department schedules and material requirements. If you choose completion dates that are not on the manufacturing calendar, the system plans for work to complete on the next valid date. When you specify the job completion date and time, the system backward schedules the job and automatically calculates the job start date and time using detailed scheduling based on the assembly’s routing. If no routing exists, the system backward schedules using the fixed and variable lead times for the assembly from the item master. If no routing and no lead time exist, you must enter both the start and completion dates. When you import jobs and schedules or automatically create discrete jobs from planned orders, the system uses the due date from the Work in Process Scheduling 12 – 5 planned order as the scheduled completion date and uses backward scheduling to determine the start date. When the system automatically creates final assembly orders, it also uses backward scheduling from the order due date to determine the job start date. ☞ Attention: The start date that Oracle Master Scheduling/MRP and Supply Chain Planning recommends may not exactly match with the start date of the actual job. Differences between the planning and work in process lead times can arise due to more precise scheduling of shifts and resources by Work in Process. Operations Dates Each operation in the routing is scheduled using detailed scheduling. The start date and time of the first operation generally equals the start date and time for the job. The scheduled completion date and time for the job generally equals the scheduled completion date and time of the last operation in the routing. If the resource is not active on a shift at the start or completion dates and times of the job, the first and last operation dates and times do not match the start and completion dates of the job. In addition, you can manually schedule the first and last operation dates and times to differ from the job start and completion dates and times. Material Requirements Dates The system schedules material requirements so that they are required on the start date and time of the operation where they are consumed. For example, if you use component A in operation sequence 30 and operation sequence 30 is scheduled to start on 01–JAN at 12:15, then the component is required on 01–JAN at 12:15 regardless of the start and completion dates and times of the job. If there is no routing, all material requirements are required on the job start date and time. See Also Detailed Scheduling: page 12 – 7 Discrete Rescheduling: page 12 – 11 Rescheduling Discrete Jobs: page 3 – 38 Importing Jobs and Schedules: page 14 – 32 Final Assembly Orders: page 3 – 8 Planned Discrete Jobs: page 3 – 7 12 – 6 Oracle Work in Process User’s Guide Detailed Scheduling The system uses detailed scheduling to schedule discrete production. The lead time rollup process in Oracle Bills of Material also uses detailed scheduling to calculate lead times used by Oracle Master Scheduling/MRP and Supply Chain Planning. Detailed scheduling applies resource usage defined by routings and resources to resource availability defined by the calendar shifts and exceptions on a minute by minute basis to determine job start and end times (calculated to the minute) and operation start and end times. You provide resource usage information used by detailed scheduling when you assign resources to a routing in Oracle Bills of Material. For example, assume you have defined the following routing and you want to use it to schedule a discrete job for a quantity of 1000 assemblies: Op Seq Res Seq Resource Basis Usage Rate or Amount Activity Scheduled Assigned Units Scheduled Units 10 1 Punch press Item 0.1 Run Yes 1 100 2 Punch press Lot 1 Teardown Next 1 1 1 Queue Lot 4 Queue Yes 1 4 2 Machinist Item 0.05 Labor No 3 0 3 Drill press Item 0.05 Run Yes 3 50 4 Inspector Item 0.01 Quality Yes 1 10 1 Plating preparation Lot 1 Setup Prior 1 1 2 Plating Item 0.01 Run Yes 1 10 20 30 Table 12 – 1 Routing to Schedule Discrete Job (Page 1 of 1) Note: All units of measure are in hours. Multiple Resources You can assign multiple resources per operation to schedule labor, machine, and other activities you perform within an operation. Detailed scheduling schedules multiple resources sequentially based on their resource sequence number. Work in Process Scheduling 12 – 7 In Table 12 – 1, operation sequence 30 has two resources: Plating and Plating preparation. Detailed scheduling schedules these resources sequentially based on their resource sequence number. Lot or Item Basis You can use a resource basis of Lot to schedule fixed resource requirements such as setup or teardown. You can use a resource basis of Item to schedule resources whose requirements change in proportion to the number of assemblies being built. In Table 12 – 1, operation sequence 10 has resource sequence 2, Punch press, with a basis of Lot to schedule one hour of teardown activity for each job. Operation sequence 10, resource sequence 1 has 1 hours of runtime activity for each assembly unit on the job. Therefore, a job for an assembly quantity of 1000 requires 100 hours of runtime activity. Assigned Units You can assign multiple units of a resource to work concurrently at an operation. In Table 12 – 1 for operation sequence 20, resource sequence 3, you have three drill press resources in your plant that you have assigned to the routing. Detailed scheduling schedules assuming all three are applied to the job. In other words, if your job has 50 hours of drill press resource required, detailed scheduling would schedule 16.67 elapsed hours (50 resource hours required/3 resources available). Scheduled Options You can assign resources to an operation, but not have them scheduled. In Table 12 – 1, you might have a machinist resource who periodically checks the progress of the drill press resource. Since the machinist resource is not on the critical path you would not schedule, but you would likely want to cost, the machinist resource. You can assign resources used solely for scheduling, even though these resources do not actually provide value added work. In Table 12 – 1 at operation sequence 20, resource sequence 1, you can simulate 4 hours of queue time to schedule the time assemblies wait before the drill press resource frees up from other scheduled work. ☞ 12 – 8 Attention: Detailed scheduling is not a finite scheduling algorithm. However, you schedule resources to simulate load that other jobs place on a department and resource and thus achieve scheduling results similar to those created by finite scheduling algorithms. Oracle Work in Process User’s Guide You can schedule operations to overlap to account for simultaneous processing of the same job in concurrent operations. For example, you can schedule setup resources of the next operation to overlap with processing resources of the current operation. Or, you can schedule teardown resources at the prior operation to overlap with processing resources at the current operation. In Table 12 – 1, operation sequence 10, resource sequence 2 has one hour of teardown that can be performed after the assemblies have moved to the next operation. As such, the Scheduled field is set to Next. Operation sequence 30, resource sequence 1 has one hour of setup activity that can begin before the assemblies arriving at operation sequence. As such, the Scheduled field is set to Prior. Shift Calendar Detailed scheduling uses the shift calendar to determine resource availability. Therefore, resources can only be scheduled when they are available. If you assume round the clock resource availability, the job for 1000 assemblies, using the routing in Table 12 – 1 would require 141.67 processing hours or approximately 5.6 workdays. On the other hand, if you assume a single 8 hour day, single shift calendar for all resources, the processing hours would remain 141.67 hours, but the workdays would stretch to approximately 17.7. Forward and Backward Scheduling When you forward schedule, detailed scheduling starts at the job start date and time and computes the job completion date and time. When you backward schedule, detailed scheduling ends at the job completion date and time and computes the job start date and time. If the job is scheduled to start at a time when the first scheduled resource in the first operation is not available, the job is scheduled to start before the start time of the first operation, that is no work can take place until the resource becomes available. Likewise for backward scheduling, if the completion date and time for the job does not match the availability of the last resource sequence in the last operation. The following diagram depicts how the detailed scheduler would schedule the routing from Table 12 – 1 assuming round the clock resource availability: Work in Process Scheduling 12 – 9 Figure 12 – 1 Start Op Seq 10 1 2 2 Op Seq 20 1 3 4 1 Op Seq 30 2 End Legend Scheduled Next Not scheduled Prior Note: Not to scale. See Also Overview of Routings, Oracle Bills of Material User’s Guide Creating a Routing, Oracle Bills of Material User’s Guide Overview of Rough Cut Capacity Planning (RCCP), Oracle Capacity User’s Guide Overview of Capacity Requirements Planning, Oracle Capacity User’s Guide Overview of Implementing Planning Recommendations, Oracle Master Scheduling/MRP and Oracle Supply Chain Planning User’s Guide 12 – 10 Oracle Work in Process User’s Guide Discrete Rescheduling You can reschedule discrete jobs by modifying discrete job operations, by importing modified jobs and schedules, and by replanning planned orders using Oracle Master Scheduling/MRP and Oracle Supply Chain Planning. Operation Dates You can reschedule any existing job. You can reschedule around the start or completion date of any discrete job operation. For example, you can do midpoint rescheduling to schedule both forward and backward from any operation within the routing. You can also manually reschedule operation start and completion dates. See: Adding and Updating Operations: page 8 – 11. Discrete Job Changes You can change start and completion dates and times of discrete jobs. The operations and material requirements of the job are automatically forward or backward scheduled depending on the date you changed. This rescheduling is based on the operation and requirements of the job, not the bill and routing you define in Oracle Bills of Material. If you increase or decrease the job quantity, the job is automatically rescheduled based on the revised quantity. If you change the alternate routing, the routing revision, or revision date and time or routing reference (for non–standard jobs only) of a job with a status of Unreleased, the job is rescheduled based on the new routing. Planned Orders You can automatically implement reschedule recommendations from Master Scheduling/MRP and Supply Chain Planning. You can choose the specific jobs you want to reschedule based on the criteria you enter in the Planner Workbench. The system then automatically reschedules job operation and material requirement start and completion dates and times. Job Import You can import suggested repetitive schedules from other planning system into Work in Process. You can choose the specific jobs you want to reschedule based on the criteria you enter in the planning system. Job operation and material requirement start and completion dates and times are automatically rescheduled. See: Open Job and Schedule Interface: page 3 – 9 and Importing Jobs and Schedules: page 14 – 32. Work in Process Scheduling 12 – 11 Capacity Modifications For each resource on a shift, you can override the number of resource units available (such as number of machines) and specify additions or reductions to the amount of time the resource is available on that shift. And, you can group capacity modifications into sets that you can use when you generate a capacity plan to simulate capacity changes. In Work in Process, these capacity modifications are considered when you define new jobs and/or reschedule existing jobs. Workday Calendar and Shifts You can change the workday calendar and modify shifts at any time. The system takes these changes into account when you define new jobs and/or reschedule existing jobs. You can transact on non–workdays as long as they occur in a valid period. See: Overview of Workday Calendar, Oracle Bills of Material user’s Guide. See Also Overview of Capacity Requirements Planning, Oracle Capacity User’s Guide Rescheduling Discrete Jobs: page 3 – 38 12 – 12 Oracle Work in Process User’s Guide Repetitive Line Scheduling Repetitive line scheduling is used to schedule repetitive production. When you define repetitive schedules you must specify the line on which you plan to produce the repetitive assembly and the quantity you plan to build. Then, repetitive line scheduling uses the line start and stop times, production rate, and lead time, along with the workday calendar to schedule your repetitive schedules. Production Lines When you define lines you must specify the start and stop times of the line. You must also specify the minimum and maximum hourly rate on the line. The repetitive line scheduling method uses line start and stop times to calculate how long the line runs each day. For example, if you run the line from 8:00 am to 5:00 pm, you would enter a start time of 08:00 and a stop time of 17:00. The repetitive line scheduling method does not use the shift calendar dates and times you defined in Oracle Bills of Material. The repetitive line scheduling method does use the days on and days off from the workday calendar. Production Rate When you associate a line and assembly you must set the hourly production rate. In other words, you define the hourly production run rate used to schedule that assembly on that line. For line/assembly associations with a fixed lead time rate line, all assemblies should use the same production rate. For variable rate lines, you need to specify different rates for each assembly. The production rate cannot be greater than the maximum rate on the line. Lead Times For lines with a lead time basis of Fixed, you must enter a fixed lead time for the line. For lines with a lead time basis of Routing–based, the lead time is calculated by applying the detailed scheduling algorithm to the routing of the assembly. The lead time for a repetitive schedule is the amount of time it takes to complete the first unit. Repetitive Schedule Quantities You define the daily production quantity, processing days, and total production quantity when you manually define a schedule. Work in Process Scheduling 12 – 13 Daily Quantity The daily quantity is the number of completed assemblies you plan to produce on the schedule each day. The daily quantity can only be a positive number including decimals, such as 1.25. A warning message displays if you define a daily quantity for a schedule that is greater than the line’s maximum hourly rate times the production hours. You can choose a daily quantity that is less than or equal to the daily line capacity: production rate X (line stop time – line start time) In that case, you build the entire daily quantity for that schedule in less than a full day. For example, if the production rate is 100 per hour for 10 hours and the daily quantity for a schedule is 500 per day, you can build the 500 in half a day. The remaining line capacity of 500 is then free for other production. Overschedule Line By Daily Quantity You can temporarily overschedule a production line to simulate overtime or a production rate increase. You can choose a daily quantity greater than the daily line capacity. For example, if the production rate is 100 units per hour for 10 hours, the daily line capacity is 1000 units. You can define a schedule for 1200 units, thereby overscheduling the line. The system warns you that you are overscheduling the line and interprets this overschedule as an increase in the production rate, not a change in start and stop times. In this example, the system would assume a production rate of 120 units per hour for 10 hours to get 1200 units per day. Processing Days Processing days are the number of days you plan to work on the repetitive schedule. Processing days can be any positive number including decimal (partial) days. A full processing day for the schedule on a line may not require the entire capacity of the line if the daily quantity is less than the daily line capacity. For example, a full processing day on a schedule at a daily quantity of 500 on a line with a production rate of 100 per hour and 10 available hours can be built with a half day of line capacity. The total quantity is the number of completed assemblies you plan to produce on the repetitive schedule. The total quantity equals the daily quantity multiplied by the processing days. The total quantity can only be a positive number including decimal quantities. 12 – 14 Oracle Work in Process User’s Guide When you manually define a repetitive schedule, you can enter either the daily quantity or the total quantity. You can enter both if you choose. If you enter either quantity and processing days information, the system automatically calculates the other quantity for you. Lead Times Lead time is the amount of time that it takes to complete the first assembly on a repetitive schedule from start to finish. Lead time equals the difference between the FUSD and the FUCD. The system calculates lead time based on the routing for lines with a lead time basis of Routing based. The system defaults the lead time from the production line for repetitive schedules on production lines with a lead time basis of Fixed. Repetitive Schedule Dates and Days You enter dates First Unit/Last Unit Start and First Unit/Last Unit Completion Dates and times, and processing days when you manually define a repetitive schedule. First Unit/Last Unit Start and First Unit/Last Unit Completion Dates The first unit start date (FUSD) is the date and time you plan to begin production on the first assembly on a repetitive schedule. You can enter a start date and time earlier than the current date to maintain relative priorities. The LUSD (last unit start date) is the date and time you plan to begin production of the last assembly on a repetitive schedule. The FUCD (first unit completion date) is the date and time you plan to complete production of the first assembly on a repetitive schedule. This date equals the FUSD plus the lead time. The LUCD (last unit completion date) is the date and time you plan to complete production of the last assembly on a repetitive schedule. Forward Scheduling For repetitive schedules with routings, if you enter FUSD or FUCD and times, the system uses forward scheduling to calculate the other dates. If you enter FUCD or LUCD and time, the system uses backward scheduling to calculate the other dates. If you do not have a routing for an assembly on a line with a lead time basis of Routing based, you must manually schedule the lead time. In other words, if you enter the FUSD and time, you must enter the FUCD and time to set the lead time for the schedule. Work in Process Scheduling 12 – 15 If you do not have a routing for an assembly on a line with a lead time basis of Routing based, you must manually schedule the lead time. In other words, if you enter the FUSD and time, you must enter the FUCD and time to set the lead time for the schedule. You can also forward or backward schedule a schedule if its assembly has either a fixed or variable lead time or both. If the assembly has both a fixed and variable lead time, the lead time for the repetitive schedule is calculated as follows: (job or schedule quantity X variable lead time) + fixed lead time The following diagram illustrates repetitive schedule dates. Figure 12 – 2 Repetitive Line Scheduling Quantity Comp. per Hour production rate (units/hour) FUCD (date/time) LUCD (date/time) Lead time (hours) Schedule Production Hours (daily quantity/production rate) LUSD (date/time) FUSD (date/time) Time Line Start Time Line Stop Time Line Production Hours You cannot overlap repetitive schedules for the same assembly on the same line. In other words, you cannot have the FUSD of one schedule fall between the FUSD and LUSD of a prior schedule. For example, if the LUSD on the prior schedule is 24–MAY at 12:00, then the FUSD of 12 – 16 Oracle Work in Process User’s Guide the next schedule for that assembly on that line must be at least 24–MAY at 12:01. If you do not have a routing for an assembly on a line with a lead time basis of Routing based, you must manually schedule the lead time. In other words, if you enter the FUSD and time, you must enter the FUCD and time to set the lead time for the schedule. Sequencing Repetitive Assemblies on a Line If you build multiple repetitive assemblies on a single production line, you can sequence production to maximize efficiency and customer service. You can then query all schedules defined for an assembly on the line and check the sequencing based on the schedule dates. You can then reschedule the schedules. To further assist you with sequencing, the system provides several additional features. For example, you can define all schedules for an assembly on a single line. Furthermore, because the system uses both dates and times to schedule repetitive production, you can decide the proper scheduling sequence then schedule production to the minute to match your sequence. Lastly, you can use the Open Job and Schedule Interface to import sequence optimized repetitive planning suggestions. For example, if you have an automated sequencing program, you can insert output records from this program into the Open Job and Schedule Interface table. These records can then be imported into Work in Process. See Also Open Job and Schedule Interface: page 3 – 9 Associating Lines and Assemblies: page 6 – 6 Production Line Report: page 14 – 39 Repetitive Line Report: page 14 – 46 Work in Process Scheduling 12 – 17 Repetitive Line Rescheduling You can reschedule repetitive schedules by changing quantities, dates, and routing revisions. Repetitive Schedule Changes You can change the daily production quantity, processing days, and total quantity of a repetitive schedule. You can change any quantity and the system reschedules all other dates and quantities on that schedule accordingly. For example: • Changing the daily production rate on a repetitive schedule causes the total quantity to change accordingly based on the processing days. • Changing the processing days causes the total quantity to change according to the daily quantity. • Changing the total quantity on a schedule does not impact the daily quantity. Instead increasing the total quantity causes the processing days to increase. Conversely, reducing the total quantity decreases the processing days. If you change repetitive schedule quantities, you must select a date around which to reschedule. The system then keeps this date constant while automatically changing the other dates accordingly. For instance, if you increase the processing days on a repetitive schedule and choose to keep the first unit start and completion dates constant, the system pushes out the last unit start date and last unit completion date and increases the total quantity. Repetitive Schedule Dates You can change the dates and times on a repetitive schedule. When you change dates and times, the system reschedules unreleased and released schedules the same way. If you change the first unit start date, first unit completion date, last unit start date, or last unit completion date, the system reschedules the repetitive schedule to adjust the remaining start and completion dates. Changing any of the four start and completion dates does not impact the processing days, total quantity, daily quantity, or lead time. You cannot change dates and times so that schedules for the same assembly on the same line overlap. You cannot change the lead time on a schedule. For fixed rate lines, the line determines the lead time. For routing–based lines, the routing determines the lead time. When you change dates on a repetitive schedule, all the other attributes of that schedule, such as bill revision, remain the same. 12 – 18 Oracle Work in Process User’s Guide Bill Revisions and Dates You can change the bill revision and dates for any unreleased or pending repetitive schedule. Routing Revisions and Dates If you change the routing revision or revision date for any repetitive schedule with a status of Unreleased or Pending – Mass loaded, the system automatically reschedules based on the new routing. For routing–based lines this may impact the dates. For fixed rate lines, changing the routing does not impact the dates. See Also Creating Repetitive Schedules: page 6 – 12 Production Line Report: page 14 – 39 Repetitive Line Report: page 14 – 46 Work in Process Scheduling 12 – 19 Repetitive Line Capacity Changes You can make repetitive schedule adjustments to your repetitive production capacity to reflect short term issues in matching your repetitive production supply and demand. You can also change line attributes such as start and stop time, and production rate to reflect ongoing changes in your repetitive line capabilities. Temporary Increase in Capacity You have several options for temporarily increasing repetitive production output. You can increase the production hours on a line by working overtime. You can also increase the production rate by adding workers to a line, or you can increase the load on an underutilized line. The system lets you temporarily overschedule a production to simulate overtime or production rate increase. You can choose a daily quantity greater than the daily line capacity when you define a repetitive schedule. Overscheduling is interpreted as an increase in the production rate between the defined line start and stop times, not as an increase in the line’s production hours. You can also increase the load on an underutilized line by simply associating the line with the assembly then manually defining a repetitive schedule for the assembly on that line. Temporary Decrease in Capacity You have several options for temporarily decreasing repetitive production output. You can decrease production hours on a line temporarily by shutting down the line earlier than usual. You can also temporarily decrease the production rate by reassigning workers to other lines or by temporarily shutting down the underutilized line. The system lets you underschedule a line any time you define a repetitive schedule. You can choose a daily quantity less than the daily line capacity. Underscheduling is interpreted as running for a shorter interval at the defined production rate and within the line start and stop time. You can choose not to define schedules on a line if you do not need the supply. As such, the line would likely be underutilized. Permanent Increase in Capacity You have several options for permanently increasing your repetitive production outputs. In real life, you can run existing lines longer, you can speed up production on the line, or you can add lines. 12 – 20 Oracle Work in Process User’s Guide To run lines longer or faster, you can change the start and stop times on a line, add days to the workday calendar, or increase the production rate. All new schedules planned and defined after this change reflect these new attributes. Existing repetitive schedules are not impacted. You can define new lines and associate them with existing repetitive assemblies to increase your repetitive capacity as well. Permanent Decrease in Capacity To permanently decrease your repetitive production capacity, you can shorten your production hours, decrease your production rate, or shut down underutilized lines. The system lets you shorten your production hours by changing line start and stop times or by removing days from the workday calendar. You can also decrease the production rate for a line and all the repetitive assemblies that use the line. All new repetitive schedules planned and defined after this change reflect this new rate. Finally, you can remove a line from production by removing its association to any repetitive assemblies. See Also Creating Repetitive Schedules: page 6 – 12 Production Line Report: page 14 – 39 Repetitive Line Report: page 14 – 46 Work in Process Scheduling 12 – 21 12 – 22 Oracle Work in Process User’s Guide CHAPTER 13 Descriptive Flexfields T his chapter explains how descriptive flexfields are used in Work in Process, including: • Overview: page 13 – 2 • Setting Up: page 13 – 4 • Using Descriptive Flexfield Information: page 13 – 6 • Business Scenarios: page 13 – 11 Descriptive Flexfields 13 – 1 Overview Descriptive flexfields allow you to customize your application to store information specific to your business needs. The following discussion highlights where you can define and view descriptive flexfields and provides business examples of how you might use them. Defining Descriptive Flexfields You can use descriptive flexfields to enter information that is unique to your business. For each descriptive flexfield, you can enter up to 15 segments. For each segment, you can use value sets to control the information you are able to enter. You can also make your descriptive flexfields context–sensitive to control when to enter specific information. You can update descriptive flexfield information at any time. Updating Descriptive Flexfields You can update descriptive flexfield information as you use Work in Process. For example, if you add a descriptive flexfield to a production line that you later associate with an assembly, you can update the production line descriptive flexfield without modifying the original production line flexfield information. Transferring Descriptive Flexfields From Oracle Bills of Material to Work in Process You can enter descriptive flexfield information when you define bill of material components, routing operations, and operation resources in Oracle Bills of Material. The system automatically transfers this information when you use these components, operations, and operation resources in Work in Process. For example, if you add an operation to a job, the system automatically transfers the descriptive flexfield information for that operation from Oracle Bills of Material. Transferring Descriptive Flexfields Within Work in Process You can enter descriptive flexfield information when you define production lines and shop floor statuses. The system automatically transfers this information when you use these lines and statuses within Work in Process. For example, if you assign a shop floor status to the intraoperation step of a job, the system automatically transfers the descriptive flexfield information for that shop floor status to the job. 13 – 2 Oracle Work in Process User’s Guide Upgrading Descriptive Flexfields The system upgrades descriptive flexfield definitions and data when you install new releases. See Also Descriptive Flexfield Concepts, Oracle Applications Flexfields Manual Planning Your Descriptive Flexfield, Oracle Applications Flexfields Manual Descriptive Flexfields 13 – 3 Setting Up Descriptive Flexfields You use the Descriptive Flexfield Segments window to define descriptive flexfield structures. Flexfield structure can contain up to 15 segments. You can customize descriptive flexfields by entering values and value sets for each segment. Values and value sets are used to determine what data can and cannot be entered in descriptive flexfields. The following table lists the source windows where you can enter descriptive flexfields information as well as the where used windows that display this information. Note: Many where used windows are accessed using gateway windows and buttons. These where used windows are documented by giving their navigational path which includes both the gateway window and the button. For example you can access the Material Requirements (where used) window from the View Discrete Jobs window by choosing the Components button. In this case the where used window is documented as View Discrete Jobs [Components]. Also, unless otherwise noted, all source windows are Work in Process windows. Windows are listed in alphabetical order. Flexfield Source Window Where Used Window Bills of Material (Oracle Bills of Material/components flexfield) Material Requirements View Material Requirements Simulate Discrete Jobs [Components] Close Discrete Jobs [Components] View Discrete Jobs [Components] View Repetitive Schedules [Components] Discrete Jobs Close Discrete Jobs Pending Jobs and Schedules Purge Discrete Jobs View Discrete Jobs Labor Rates None Parameters None Pending Move Transactions View Move Transactions Pending Resource Transactions View Resource Transactions Production Lines Associate Lines and Schedules Repetitive Schedules Pending Jobs and Schedules Purge Repetitive Schedules View Repetitive Schedules Table 13 – 1 Defining Descriptive Flexfield Structures (Page 1 of 2) 13 – 4 Oracle Work in Process User’s Guide Flexfield Source Window Where Used Window Resources (Oracle Bills of Material/resources flexfield) Routings (Oracle Bills of Material) Operations [Resources] (Oracle Work in Process) View Resource Requirements Simulate Discrete Jobs [Operations][Resources] Close Discrete Jobs [Operations][Resources] View Discrete Jobs [Operations][Resources] View Repetitive Schedules [Operations][Resources] Resource Transactions View Resources Transactions Schedule Groups None Shop Floor Statuses Assign Shop Floor Statuses Standard Operations (Oracle Bills of Material/operations flexfield) Routings (Oracle Bills of Material) Operations View Operations Simulate Discrete Jobs [Operations] Close Discrete Jobs [Operations] View Discrete Jobs [Operations] View Repetitive Schedules [Operations] WIP Accounting Classes None WIP Material Transactions View Transactions (Oracle Inventory) Table 13 – 1 Defining Descriptive Flexfield Structures (Page 2 of 2) Descriptive Flexfields 13 – 5 Using Descriptive Flexfield Information You can insert, update, and view information using descriptive flexfield structures. Descriptive Flexfield Relationships The following table illustrates the relationships between windows that display descriptive flexfields. It is composed of groups of windows that contain the same descriptive flexfield information. For each window, the base database table containing the descriptive flexfield is shown as well as information on whether you can insert, update, or simply view descriptive flexfields in the window. Note: Windows that are accessed using gateway windows and buttons are documented by giving their navigational path which includes both the gateway window and the button. For example you can access the Material Requirements (Where Used) window from Discrete Jobs window by choosing the Components button. In this case the Where used window is documented as View Discrete Jobs [Components]. Also, unless otherwise noted, all source windows are Work in Process windows. Window Name Base Table Insert Update View Descriptive Flexfields for Move Transactions Move Transactions N/A* Pending Move Transactions wip_move_txn_interface View Move Transactions wip_move_transactions n n n n Descriptive Flexfields for Resource Transactions Resource Transactions wip_cost_txn_interface Pending Resource Transactions wip_cost_txn_interface View Resource Transactions wip_transactions n n n n Descriptive Flexfields for Material Transactions WIP Material Transactions mtl_material_transactions_temp Job Lot Compositions mtl_material_transactions Table 13 – 2 Descriptive Flexfield Relationships (Page 4 of 7) 13 – 6 Oracle Work in Process User’s Guide n n n n Window Name Base Table Insert View Transactions (Oracle Inventory) mtl_material_transactions Update View n Descriptive Flexfields for Completion Transactions n Completion Transactions mtl_material_transactions_temp View Transactions (Oracle Inventory) mtl_material_transactions n Descriptive Flexfields for Discrete Job and Repetitive Schedule Requirements Bills of Materials (Oracle Bills of Material/components flexfield) bom_inventory_components n n n Material Requirements wip_requirement_operations n n n View Material Requirements wip_requirement_operations n Material Requirements Simulate Discrete Jobs [Components] Close Discrete Jobs [Components] Purge Discrete Jobs [Components] View Discrete Jobs [Components] Purge Repetitive Schedules [Components] View Repetitive Schedules [Components] wip_requirement_operations n Descriptive Flexfields for Discrete Job and Repetitive Schedule Operations Standard Operations (Oracle Bills of Material/ operations flexfield) bom_standard_operations n n n Routings (Oracle Bills of Material/sequences flexfield) bom_operation_sequences n n n Operations wip_operations n n n View Operations wip_operations n Simulate Discrete Jobs [Operations] Close Discrete Jobs [Operations] Purge Discrete Jobs [Operations] View Discrete Jobs [Operations] Purge Repetitive Schedules [Operations] View Repetitive Schedules [Operations] wip_operations n Descriptive Flexfields for Discrete Job and Repetitive Schedule Operation Resources Standard Operations (Oracle Bills of Material/ resources flexfield) bom_std_op_resources n n Table 13 – 2 Descriptive Flexfield Relationships (Page 5 of 7) Descriptive Flexfields 13 – 7 Window Name Base Table Insert Update View Routings (Oracle Bills of Material/resources flexfield) bom_operation_resources n n Operations [Resources] wip_operation_resources n n View Resource Requirements wip_operation_resources n Resource Requirements Simulate Discrete Jobs [Operations][Resources] Close Discrete Jobs [Operations][Resources] View Discrete Jobs [Operations][Resources] View Repetitive Schedules [Operations][Resources] wip_operation_resources n n Descriptive Flexfields for Discrete Job Information Discrete Jobs wip_discrete_jobs View Discrete Jobs wip_discrete_jobs n n n Descriptive Flexfields for Repetitive Schedule Information Repetitive Schedules wip_repetitive_schedules View Repetitive Schedules wip_repetitive_schedules n n n Descriptive Flexfields for Production Lines Production Lines wip_lines n n Associate Lines and Assemblies wip_repetitive_items n n Shop Floor Statuses wip_shop_floor_status_codes n n Assign Shop Floor Statuses wip_shop_floor_statuses n n n n Descriptive Flexfields for Shop Floor Statuses Descriptive Flexfields for Discrete Jobs and Repetitive Schedules (Miscellaneous) Work in Process Parameters wip_parameters n n n Work in Process Parameters wip_valid_intraoperation_steps n n n Persons (Oracle Human Resources/employee flexfield) per_people_f n n n Persons (Oracle Human Resources/address flexfield) per_addresses n n n Table 13 – 2 Descriptive Flexfield Relationships (Page 6 of 7) 13 – 8 Oracle Work in Process User’s Guide Window Name Base Table Insert Update View Persons (Oracle Human Resources/assignment flexfield) per_assignments_f n n n WIP Accounting Classes wip_accounting_classes n n n Labor Rates wip_employee_labor_rates n n n Table 13 – 2 Descriptive Flexfield Relationships (Page 7 of 7) Transferring Descriptive Flexfields From Oracle Bills of Material to Work in Process You can transfer the descriptive flexfield information defined in Oracle Bills of Material to Work in Process as you create discrete jobs and repetitive schedules. Work in Process takes a snapshot of the bill of material requirement, operation, and resource descriptive flexfield information as you create jobs and schedules with bills and routings and as those bills and routings are exploded. You can modify this information in Work in Process without affecting the original bill of materials or routing. The following diagram illustrates how descriptive flexfield information is transferred from Oracle Bills of Material to Work in Process. Figure 13 – 1 Bills of Material Requirements Descriptive Flexfields Operations, Resources, Descriptive Flexfields Discrete Jobs Repetitive Schedules Routings Descriptive Flexfields 13 – 9 Transferring Descriptive Flexfields Within Work in Process Work in Process allows you to transfer descriptive flexfield information on production lines, and shop floor statuses when you use these lines and statuses. For example, as you associate a production line with a repetitive assembly in the Associate Lines and Assemblies window, Work in Process takes a snapshot of the production line definition from the Production Lines window and carries it over to the Associate Lines and Assemblies window. The descriptive flexfield that you defined for the production line defaults to the descriptive flexfield in the Associate Lines and Assemblies window. If you change the original descriptive flexfield in the Production Lines window, the descriptive flexfield in the Associate Lines and Assemblies window is not affected. You can change the descriptive flexfield information in the Associate Lines and Assemblies window at any time. 13 – 10 Oracle Work in Process User’s Guide Business Scenarios Descriptive flexfields allow you to easily extend the standard functionality of Oracle Work in Process. The following business examples demonstrate ways that you can use descriptive flexfields to support specific business needs: • Management of Quality Information: page 13 – 11 • Management of Outside Processor Sterilization: page 13 – 13 ☞ Attention: Descriptive flexfields are not required. The objective of these business scenarios is to highlight the flexibility of descriptive flexfields. You should experiment and review the results of different approaches to determine how best to use them. Management of Quality Information Suppose you are an electronics manufacturer that tests printed circuit boards in a plant. You want to use descriptive flexfields to collect test results and failure information. You measure four test results during room temperature testing and two different test results during high temperature testing. You use this information to verify the performance of each board against specifications and collect product and process trend information. If a board fails any of these tests, it is sent to the central debugging department for analysis to determine the cause of the failure and suggested repairs. You perform Pareto analysis on the failure information collected during the debugging process as the basis of your continuous process improvement efforts on the board line. Approach 1 – Using Standard Operation and Move Transaction Flexfields Setup Use the descriptive flexfield in the Standard Operations window in Oracle Bills of Material to set up the fields for each of the pieces of test information you wish to collect at the test and debug operations. For the test operations, you should create a value set that specifies acceptable limits on test results. For the debug operations, you should create a value set that comprises all causes included in the Pareto analysis and one that includes all possible repairs. As such, whenever you use any of Descriptive Flexfields 13 – 11 these operations in a routing, Work in Process includes these descriptive flexfields. Next, you must set up your quality data collection method. You can modify a copy of the Move Transactions window or create your own move transactions window (taking advantage of the Open Move Transaction Interface) to require entry of test results on moves out of a test operation and failure and suggested repair information on moves out of a debug operation. Execution Use the descriptive flexfields on move transactions to store the data you collect. You can validate your test results against acceptable limits to force moves to a debug operation if required. For the failure information, set up the descriptive flexfield to require use of one of the predefined failure reasons, and entry of predefined repairs. Once you have collected the actual test results and failure information, you can use a number of Oracle tools to analyze and report the information. Approach 2 – Using Shop Floor Transaction Flexfield Only Setup Use the descriptive flexfield in the Move Transactions window to set up segments for each of the pieces of test information you wish to collect at the test and debug operations. For the test operations, you should set up a segment with a value set that specifies acceptable limits on test results. For the debug operations, you should set up one segment with a value set that comprises all causes included in the Pareto analysis and another segment that allows entry of suggested repair information. Execution You can use the context–sensitive capabilities of descriptive flexfields to require entry of test results on moves out of a test operation, and failure and suggested repair information on moves out of a debug operation. Once you have collected the actual test results and failure information, you can use a number of Oracle tools to analyze and report the information. 13 – 12 Oracle Work in Process User’s Guide Management of Outside Processor Sterilization Suppose you are a medical device manufacturer that uses a vendor to perform sterilization outside processing. You want to use descriptive flexfields to create labels that indicate whether assemblies have been sterilized. Setup Modify the descriptive flexfield on the Operations window to indicate the need for and number of sterilization labels. Create a value set that specifies an acceptable range of values you can enter for your sterilization labels. Execution When you receive sterilized assemblies from your vendor, use the Move Transactions window to move the assemblies to the next operation and require entry of the number of sterilization labels to be printed. You can use a number of Oracle tools to create a report that prints your actual labels. You can further modify the Move Transactions window to launch that report upon recording the label information. Next, you can set up a printer close to your receipt area to immediately apply the labels to your sterilized material. Descriptive Flexfields 13 – 13 13 – 14 Oracle Work in Process User’s Guide CHAPTER 14 Reports and Processes T his chapter explains how to submit report and process requests and briefly describes each Work in Process report: Oracle Work in Process Reports • AutoCreating Final Assembly Orders: page 14 – 3 • Closing Jobs Using Submit Requests: page 14 – 6 • Discrete Job Data Report: page 14 – 9 • Discrete Job Dispatch Report: page 14 – 11 • Discrete Job Listing Report: page 14 – 13 • Discrete Job Pick List Report: page 14 – 15 • Discrete Job Routing Sheet: page 14 – 17 • Discrete Job Shortage Report: page 14 – 19 • Discrete Job Value Report: page 14 – 22 • Discrete Shop Packet: page 14 – 26 • Employee Rates Listing: page 14 – 27 • Expense Job Value Report: page 14 – 29 • Importing Jobs and Schedules: page 14 – 32 • Job Lot Composition Report: page 14 – 34 Reports and Processes 14 – 1 • Job and Schedule Interface Report: page 14 – 36 • Move Transaction Report: page 14 – 37 • Production Line Report: page 14 – 39 • Purging Jobs and Schedules: page 14 – 40 • Purge Report: page 14 – 45 • Repetitive Line Report: page 14 – 46 • Repetitive Pick List Report: page 14 – 47 • Repetitive Routing Sheet: page 14 – 49 • Repetitive Schedule Data Report: page 14 – 50 • Repetitive Schedule Shortage Report: page 14 – 51 • Repetitive Shop Packet: page 14 – 54 • Repetitive Value Report: page 14 – 55 • Resource Performance Report: page 14 – 58 • Resource Transaction Report: page 14 – 60 • Schedule Group Listing: page 14 – 63 • Shop Floor Statuses Report: page 14 – 62 • WIP Account Distribution Report: page 14 – 64 • WIP Account Summary Report: page 14 – 67 • WIP Accounting Classes Report: page 14 – 68 • WIP Location Report: page 14 – 69 • WIP Offsetting Account Report: page 14 – 71 • WIP Outside Processing Report: page 14 – 72 • WIP Parameters Report: page 14 – 73 • WIP Value Report: page 14 – 74 14 – 2 Oracle Work in Process User’s Guide AutoCreating Final Assembly Orders The AutoCreate Final Assembly Orders load program creates final assembly orders (discrete jobs) from sales order demand, and links each sales order to the final assembly order supplying it. You can create final assembly orders for ATO configuration items or standard ATO items. You can submit the program in prespecified intervals. For example, to submit the program each day at midnight, specify midnight in the Run Options. You can also submit this program using Oracle Bills of Material. See: Autocreating Configuration Items and Final Assembly Orders, Oracle Bills of Material. The Assemble To Order Mass Load Report is automatically printed after you submit the AutoCreate Final Assembly Orders program. This report lists sales orders, by sales order number, that the system was unable to create final assembly orders for. ☞ " Attention: When you autocreate a final assembly order, the sales order line delivery quantity becomes the default quantity for the discrete job and the assembly’s primary bill and routing are used. To autocreate final assembly orders: 1. Navigate to the AutoCreate Final Assembly Orders window. The Parameters window appears. 2. Optionally, select the Sales Order number. A discrete job is created for each sales order shipment number associated with the sales order number. If you enter an order number, you cannot enter Offset Days, Load Type, or Organization. If you do not enter an order number, you must enter Offset Days and Load Type. 3. Enter the number of Offset Days. Reports and Processes 14 – 3 The number of offset days is added to the current date to determine when final assembly orders must be released to the shop floor to be completed by the sales order due date. The final assembly order release date is backwards scheduled using the order from the sales order due date. For example, if the current date is 01–JAN–1996 and you specify 7 offset days, final assembly orders are created that must be released between 01–JAN–1996 and 08–JAN–1996 to meet the due dates of the sales orders they are supplying. Orders that should have been released before the current date are also included. 4. Select one of the following Load Type options. Configured items only: Final assembly orders created from sales orders for ATO configuration items. For example, items you created from a model and options using the AutoCreate Configuration Items program in Oracle Bills of Material. Non–configured items only: Final assembly orders created from sales orders for ATO non–configuration items such as, items where you have a standard part number but which you do not build until you receive a sales order. Both configured and non–configured items: Final assembly orders created from sales orders for both ATO configuration and ATO non–configuration items. 5. Select one of the following job Statuses: Unreleased, Released, or On Hold. See: Discrete Job Statuses: page 10 – 7. 6. Enter the Organization. If you do not enter an Organization, sales order demand across all organizations is examined. 7. Select the accounting Class to be used as the default for the jobs that are created. Default accounting classes may be displayed but can be overwritten. See: Product Line Accounting Setup, Oracle Cost Management User’s Guide, Discrete Parameters: page 2 – 10, and Discrete Accounting Classes: page 2 – 22. 14 – 4 8. Choose OK. 9. Submit the autocreate request. See: Submitting a Request, Oracle Applications User’s Guide. Oracle Work in Process User’s Guide See Also Creating Discrete Jobs: page 3 – 7 Overview of Configure to Order, Oracle Bills of Material Reports and Processes 14 – 5 Closing Discrete Jobs Using Submit Requests Job close requests can be submitted using concurrent or scheduled processing. See: Overview of Concurrent Processing, Oracle Applications User’s Guide and Overview of Standard Request Submission, Oracle Applications User’s Guide. You can check the status of close requests using the Concurrent Requests window. Prerequisites ❑ Define a discrete job with a status of Unreleased, Released, Complete, Complete–No Charges, or Cancelled. See: Discrete Job Statuses: page 10 – 7. " To close discrete jobs: 1. Navigate to the Close Discrete Jobs window using the Close Discrete Jobs (SRS) menu option. The Parameters window appears. 2. Select one of the following accounting Class Types: Standard discrete, Asset non–standard, or Expense non–standard If you do not select a class type, the system closes job for all class types. 3. To select a range of accounting classes, select a From and To Class. If you select a class type, you can only select accounting classes of that class type. If you do not enter a To Class value, all jobs from the From Class value forward are closed. If you do not enter a From Class value, all jobs through the To Class value are closed. 14 – 6 Oracle Work in Process User’s Guide 4. To select a range of jobs, select a From and To Job. If you do not select a To Job value, all jobs from the From Job forward are closed. If you do not select a From Job value, all jobs through the To Job are closed. To close a single job, select the same From and To Job. 5. Select the job Status. You cannot close jobs with the following statuses: Pending Bill Load, Pending Routing Load, Pending Close, or Closed. If you attempt to close a job that has transactions pending, the close process fails and the job status changes to Failed Close. If you do not select a status, all jobs with acceptable statuses are closed. See: Discrete Job Statuses: page 10 – 7. 6. Select the Report Type After computing variances, the close process automatically prints the Discrete Job Value Report if standard and non–standard asset jobs are closed and the Expense Job Value Report if expense non–standard jobs are closed. The level of detail in the Discrete Job Value Report can be controlled by the Report Type option selected: Summary, Detail using planned start quantity, Detail using actual completion quantity. See: Report Type, Discrete Job Value Report: page 14 – 22. You can also select the ’No Report’ option if you do not want to print either the Discrete Job Value or the Expense Job Value Report. 7. Choose OK. 8. Submit the close request. See: Submitting a Request, Oracle Applications User’s Guide. Reports and Processes 14 – 7 Jobs that meet the criteria entered are closed when your request is run. See Also Discrete Job Close: page 3 – 50 Overview of Period Close, Oracle Cost Management User’s Guide Defining Discrete Jobs Manually: page 3 – 12 Closing Discrete Jobs: page 3 – 51 Discrete Accounting Classes: page 2 – 22 14 – 8 Oracle Work in Process User’s Guide Discrete Job Data Report The Discrete Job Data Report lists complete information on discrete jobs. You can use this report to review all details about a job, such as quantities, dates, routing operations, material requirements, resources, instructions, sales orders, comments and accounts. You can sort the report by job name or schedule group and build sequence. Report Submission In the Submit Requests window, select Discrete Job Data Report in the Name field. Report Parameters Sort By Choose one of the following options: Job Sort by job. Schedule Group, Build Sequence Sort by schedule group, then by build sequence. Job From/To To restrict the report to a range of jobs, select a beginning and an ending job. Assembly From/To To restrict the report to a range of assemblies, select a beginning and an ending assembly. Start Dates From/To To restrict the report to a date range, select a beginning and an ending date. Class Select a WIP accounting class. See: WIP Accounting Classes: page 2 – 22 Reports and Processes 14 – 9 Status Choose a status. The available options are Unreleased, Released, Complete, Complete–No Charges, and On Hold. See: Discrete Job Statuses: page 10 – 7 and Reporting by Status: page 10 – 20. Schedule Groups From/To To restrict the report to a range of schedule groups, select a beginning and an ending schedule group. See Also Overview of Discrete Manufacturing: page 3 – 2 Dispatch Reports: page 8 – 58 Submitting a Request, Oracle Applications User’s Guide 14 – 10 Oracle Work in Process User’s Guide Discrete Job Dispatch Report The Discrete Job Dispatch Report lists jobs that must be completed. You can use this report to prioritize the work in each of your manufacturing departments. You can sort this report by operation start date or operation completion date within the department. You can restrict the output by department, date, and schedule group. Information is listed only for jobs with statuses of Released, Complete, and On Hold. Report Submission In the Submit Requests window, select Discrete Job Dispatch Report in the Name field. Report Parameters Sort By Choose one of the following options: Operation start date Sort by operation start date within the department. Operation completion date Sort by operation completion date within the department. Include Unreleased Jobs Select Yes or No to indicate whether to include jobs with a status of Unreleased on the report. Departments From/To To restrict the report to a range of departments, select a beginning and an ending department. Dates From/To To restrict the report to a date range, enter a beginning and an ending date. Schedule Group Select a schedule group. Reports and Processes 14 – 11 See Also Overview of Discrete Manufacturing: page 3 – 2 Dispatch Reports: page 8 – 58 Reporting by Status: page 10 – 20 Submitting a Request, Oracle Applications User’s Guide 14 – 12 Oracle Work in Process User’s Guide Discrete Job Listing Report The Discrete Job Listing Report lists discrete jobs regardless of their status. You can sort the report by assembly, job, scheduled start date, or schedule group and build sequence. You can restrict the output of the report by job, assembly, start date, status, and schedule group. For example, you can use this report to determine which jobs need to be released by restricting it to jobs with a status of Unreleased. Report Submission In the Submit Requests window, select Discrete Job Listing Report in the Name field. Report Parameters Sort By Choose one of the following options: Assembly Sort by assembly. Job Sort by job. This is the default option. Scheduled start date Sort by scheduled start date. Schedule Group, Build Sequence Sort by schedule group, then by build sequence. Jobs From/To To restrict the report to a range of jobs, select a beginning and an ending job. Assemblies From/To To restrict the report to a range of assemblies, select a beginning and an ending assembly. Start Dates From/To To restrict the report to a date range, enter a beginning and an ending date. Reports and Processes 14 – 13 Status Choose a status. You can choose any status. See: Discrete Job Statuses: page 10 – 7. Schedule Group From/To To restrict the report to a range of schedule groups, select a beginning and an ending schedule group. See Also Overview of Discrete Manufacturing: page 3 – 2 Reporting by Status: page 10 – 20 Submitting a Request, Oracle Applications User’s Guide 14 – 14 Oracle Work in Process User’s Guide Discrete Job Pick List Report The Discrete Job Pick List Report lists open component requirements for jobs with statuses of Unreleased, Released, Complete, or On Hold. You can use this report when you pick material from stock to issue to discrete jobs. This report lists component requirements in supply type order; push components first followed by pull, bulk, then vendor components. This report can be sorted by component, date required, supply subinventory/locator, or WIP material transaction. If the report is sorted by component, requirements that are common across jobs are consolidated. This can be particularly useful if you are replenishing backflush subinventories which supply several jobs. Report Submission In the Submit Requests window, select Discrete Job Pick List Report in the Name field. Report Parameters Sort By Choose one of the following options: Component Sort by component. Requirements are consolidated across jobs. Use this option to help you replenish backflush subinventories which supply multiple jobs. You can use the Subinventory Transfer form in Oracle Inventory to transfer the consolidated quantity of each requirement from your warehouse to the backflush subinventories that supply your jobs. Date required Sort by requirement date. Supply subinventory, locator Sort by supply subinventory and locator. WIP material transaction Sort component requirements in WIP Material Transaction order. The system lists components in the order presented in the WIP Material Transactions window. This assists data entry when you use the pick list as hard copy for issuing the components. Reports and Processes 14 – 15 Transactable Only Select Yes or No to indicate whether to exclude discrete jobs with statuses of Unreleased or On Hold. Jobs From/To To restrict the report to a range of jobs, select a beginning and an ending job. Start Dates From/To To restrict the report to a date range, select a starting and an ending date. Schedule Groups From/To To restrict the report to a range of schedule groups, select a beginning and an ending schedule group. Supply Type Choose a Supply Type. The available options are Push, Pull, Bulk, and Vendor. See: Supply Types: page C – 2. Supply Subinventory Select the supply subinventory to include as available material in the Discrete Job Pick List. If you do not enter a value, the system lists requirements of any supply subinventory. See Also Overview of Discrete Manufacturing: page 3 – 2 Overview of Material Control: page 7 – 2 Submitting a Request, Oracle Applications User’s Guide 14 – 16 Oracle Work in Process User’s Guide Discrete Job Routing Sheet The Discrete Job Routing Sheet lists the operations and associated resources and material requirements for jobs with statuses of Unreleased, Released, Complete, and On Hold. You can use the report output as a traveler for the discrete job on the shop floor. Jobs can be sorted by job or schedule group and build sequence. Header information is followed by job details including job operations, resources, operation instructions and material requirements. Report Submission In the Submit Requests window, select Discrete Job Routing Sheet Report in the Name field. Report Options Jobs From/To To restrict the report to a range of jobs, select a beginning and an ending job. Scheduled Start Dates From/To To restrict the report to a range of scheduled start dates, select a beginning and an ending date. Schedule Groups From/To To restrict the report to a range of schedule groups, enter a beginning and an ending schedule group. Sort By Choose one of the following options: Job Sort by job. Schedule Group, Build Sequence Sort by schedule group, then by build sequence within the schedule group. Reports and Processes 14 – 17 See Also Overview of Discrete Manufacturing: page 3 – 2 Viewing Discrete Job Information: page 3 – 31 Viewing Operations: page 8 – 19 Reporting by Status: page 10 – 20 Submitting a Request, Oracle Applications User’s Guide 14 – 18 Oracle Work in Process User’s Guide Discrete Job Shortage Report The Discrete Job Shortage report lists either jobs with open requirements or jobs with component requirements for which there is a shortage. Shortage component requirements can be listed based on the quantities available in all subinventories or based only on the quantities available in the component’s supply subinventory. You can also list shortage components based on all subinventories or only those subinventories that are nettable. Only discrete jobs with statuses of Unreleased, Released, Complete, and On Hold are listed on this report. See: Reporting by Status: page 10 – 20. You can print a job’s open requirements to identify components you need to issue or have not yet backflushed. You can print the shortage report to highlight components you need to expedite. You can sort either report by component, date required, department, job, or by make/ buy option, buyer, and planner. Report Submission In the Submit Requests window, select Discrete Job Shortage Report in the Name field. Report Parameters Report Type Choose one of the following options: Open requirement Lists open material requirements for all jobs. This is the default option. Shortage based on QOH Lists requirements with insufficient quantities as based on all subinventories. If you select Yes in the Include Nettable Only option, then you may see more shortages depending on how much quantity you have available for each requirement in your non–nettable subinventories. Shortage based on supply sub/loc Lists requirements with insufficient quantities as based on each requirement’s supply subinventory and locator. Sort By Choose one of the following options: Reports and Processes 14 – 19 Component Sort the shortages or open requirements by component, and then by job within the component. Date required Sort the shortages or open requirements by requirement date, and then by job within the requirement date. Department Sort the shortages or open requirements by department, and then by job within the department. Job Sort the open requirements by job. This is the default option. Make or Buy, Buyer, Planner Sort the shortages or open requirements by component, and then by job within the component. Order the components by the make or buy code, and then by the buyer, and then by the planner. Include Nettable Only Select Yes to include only nettable subinventories when calculating subinventory quantities and printing shortages. Select No to include nettable and non–nettable subinventories when calculating subinventory quantities and printing shortages. The system determines the quantity onhand for each requirement using this value. Include Bulk Select Yes to indicate whether to include bulk–supplied material requirements. Include Supplier Select Yes to indicate whether to include supplier–provided material requirements. Jobs From/To To restrict the report to range of jobs, select a beginning and an ending job. Components From/To To restrict the report to range of components, select a beginning and an ending component. 14 – 20 Oracle Work in Process User’s Guide Dates From/To To restrict the report to a date range, select a beginning and an ending date. Departments From/To To restrict the report to a range of departments, select a beginning and an ending department. Planners From/To To restrict the report to a range of planners, select a beginning and an ending planner name. Buyers From/To To restrict the report to a range of buyers, select a beginning and an ending buyer name. Make or Buy Select Make or Buy to indicate whether to report on shortages for components that are made or purchased. Requirement End Date Select a date to limit netting the requirements for open jobs. The system nets the requirements required on or before this date. Schedule Group Select a schedule group. See Also Overview of Discrete Manufacturing: page 3 – 2 Overview of Material Control: page 7 – 2 Submitting a Request, Oracle Applications User’s Guide Reports and Processes 14 – 21 Discrete Job Value Report – Standard Costing The Discrete Job Value Report – Standard Costing assists you in analyzing your standard discrete jobs and non–standard asset jobs in a standard costing organzation. You can submit the WIP Value Report before submitting this report to review total variances and charges for your jobs. Then, you can submit this report to analyze a summary of the transactions behind the charges and variances for each job. This report includes summarized information on all cost transactions including material, resource, move and resource–based overheads, scraps, completions, and job close variances. The report also lists period–to–date and cumulative–to–date summary information, as well as complete job header information. You can list information for a group of jobs by specifying a job name range, an accounting class range, an assembly range, and/or a particular job status. Costs are grouped and subtotalled by transaction type. This report provides you with all the information you need to reconcile your standard and non–standard asset jobs before closing them. ☞ Attention: This report does not include expense non–standard jobs. Use the Expense Job Value Report to analyze expense non–standard jobs. Report Submission In the Submit Requests window, select Discrete Job Value Report – Standard Costing in the Name field. This report is automatically submitted when you close standard discrete jobs. You can also submit this report using the Close Discrete Jobs (SRS) window and selecting any of the following Report Types: Summary, Detail using planned start quantity, or Detail using actual completion quantity. See: Closing Discrete Jobs Using Submit Requests: page 14 – 6. Report Parameters Sort By Choose one of the following options: 14 – 22 Oracle Work in Process User’s Guide Assembly, Job Sort by assembly and then by job within the assembly. Class, Assembly, Job Sort by WIP accounting class, then by assembly within the WIP accounting class, and then by job within the assembly. Job Sort by job. Report Type Choose one of the following options: Detail using actual completion quantity Lists each job using the actual completion quantity of the job to calculate the material usage variance. A detail report includes the following: job header, material, resource, resource–based and move–based overhead costs, completion, scrap, and job close variance transactions. It also includes period–to–date and cumulative–to–date summary information. If you push material to a job or backflush material at operation completion and have not completed the assemblies that consumed the material, your material usage variance is overstated. If you backflush material at assembly completion, or you have completed all of the assemblies, any material usage variance is accurate. Use this option if you backflush your requirements at assembly completion, or if you have already completed most of your assemblies. Detail using planned start quantity Lists each job using the planned start quantity of the job to calculate the material usage variance. A detail report includes the following: job header, material, resource, resource–based and move–based overhead costs, completion, scrap, and job close variance transactions. It also includes period–to–date and cumulative–to–date summary information. If you have not transacted each of the items and resources required to produce your assemblies, your variances are understated (you have a favorable variance). You can use this option to analyze the total cost requirements for a job by cost Reports and Processes 14 – 23 element, based on your planned assembly completions. Summary Lists each job and includes job header, period–to–date summary, and cumulative–to–date summary information. The system also lists summary elemental account values for each job. Class Type Choose one of the following options: Asset non–standard Report costs for jobs with a WIP accounting class type of asset non–standard. Standard discrete Report costs for jobs with a WIP accounting class type of standard discrete. Include Bulk Select Yes to indicate whether to include bulk–supplied material requirements. If you have already issued to a particular bulk requirement, the system lists the requirement, regardless of what you select here. Include Supplier Select Yes to indicate whether to include supplier–provided material requirements. If you have already issued to a particular supplier requirement, the system lists the requirement, regardless of what you select here. Classes From/To To restrict the report to a range of accounting classes, select a beginning and an ending accounting class. Jobs From/To To restrict the report to a range of jobs, select a beginning and an ending job. Status Select a status. The available options are Unreleased, Released, Complete, Complete–No Charges, On Hold, Cancelled, Closed, 14 – 24 Oracle Work in Process User’s Guide Pending Close, and Failed Close jobs. See: Discrete Job Statuses: page 10 – 7. ☞ Attention: If you run the Discrete Job Value Report for closed jobs and have changed your standard costs, the transaction summary information uses the latest standard cost and does not balance to the period or cumulative–to–date summaries. Assemblies From/To To restrict the report to a range of assemblies, select a beginning and an ending assembly. ☞ Attention: For discrete jobs, any difference between the cumulative single level variances and the material usage or efficiency variance subtotals is from configuration or method variances. The cumulative–to–date summary compares the costs incurred for the job with the standard bill/routing requirements for completions out of the job. Therefore, the difference between the cumulative variances and the usage/efficiency variance is due to the difference between the standard bill/routing requirements and the work in process bill/routing requirements. To find the configuration variance, you should compare the material usage variance with the single level material variance. To find the methods variance, you should compare the efficiency variance with its corresponding single level variance. For example, you would compare the resource efficiency variance with the single level; resource and outside processing variance added together. You would add the resource–based and move–based overhead efficiency variances and compare it with the single level overhead variance. See Also Discrete Job Close: page 3 – 50 Overview of Discrete Manufacturing: page 3 – 2 Expense Job Value Report: page 14 – 29 Submitting a Request, Oracle Applications User’s Guide Reports and Processes 14 – 25 Discrete Shop Packet The discrete shop packet consists of three reports: • Discrete Job Pick List Report: page 14 – 15 • Discrete Job Routing Sheet: page 14 – 17 • Discrete Job Shortage Report: page 14 – 19 See Also Submitting a Request, Oracle Applications User’s Guide Submitting a Request Set, Oracle Applications User’s Guide 14 – 26 Oracle Work in Process User’s Guide Employee Rates Listing The Employee Rates Listing lists employees and their hourly labor rates. Employees are listed in alphabetical order with their employee number, current labor rate and effective date. You can charge an employee labor rate to a job or repetitive schedule by charging a resource that does not charge at standard and by referencing the employee whose rate you want to charge. The system uses the rate effective on the resource transaction date. Report Submission In the Submit Requests window, select Employee Rates Listing in the Name field. Report Parameters Display in Detail Select Yes or No to indicate whether to print any additional labor rate information. If you select Yes, the system lists any past or future labor rates defined for your employees. Current Only Select Yes or No to indicate whether to print current employees only or all employees. Employees From/To To restrict the report to a range or employees, select a beginning and an ending employee. Dates From/To To restrict the report to a date range, select a beginning and an ending date. See Also Overview of Shop Floor Control: page 8 – 2 Overview of Resource Management: page 9 – 2 Reports and Processes 14 – 27 Defining Labor Rates: page 2 – 34 Submitting a Request, Oracle Applications User’s Guide 14 – 28 Oracle Work in Process User’s Guide Expense Job Value Report The Expense Job Value Report assists you in analyzing your non–standard expense jobs. You can submit the WIP Value Report before submitting this report to review total charges for your jobs. Then, you can submit this report to analyze a summary of the transactions behind the charges for each job. This report includes summarized information on all cost transactions including, material, resource, move and resource based overheads, scraps, completions, and period close variances. The report also prints period–to–date summary information as well as complete job header information. You can list a particular group of jobs by specifying a job name range, an accounting class range, an assembly range, and/or a particular job status. The system groups and subtotals your cost transactions by transaction type. ☞ Attention: Unlike the Discrete Job Value Report, this report prints no standard or variance information. Expense non–standard jobs typically have no standards and are used only to collect and charge costs. See: Discrete Job Value Report: page 14 – 22 Report Submission In the Submit Requests window, select Expense Job Value Report in the Name field. You can optionally print this report when you close expense non–standard discrete jobs. See: Closing Discrete Jobs: page 3 – 51 and Closing Discrete Jobs Using Submit Requests: page 14 – 6. Report Parameters Sort By Choose one of the following options: Assembly, Job Sort by assembly and then by job within the assembly. Class, Assembly, Job Sort by WIP accounting class, then by assembly within the WIP accounting class, and then by job within the assembly. Reports and Processes 14 – 29 Job Sort by job. Report Type Choose one of the following options: Detailed In addition to summary information, the system prints detail cost transaction information on material, resource, move and resource based overheads, completions, scrap, and period close variances. Summary List only summary information, including job header and period–to–date summary information. Period Start Date Select a period start date. The system prints non–standard expense jobs with cost transactions against them that are dated on or after this date. Period Close Date Select a period close date. The system prints non–standard expense jobs with cost transactions against them that are dated on or before this date. Classes From/To To restrict the report to a range of WIP accounting classes, select a beginning and an ending class. Jobs From/To To restrict the report to a range of jobs, select a beginning and an ending job. Status Choose a status. You can print this report for Unreleased, Released, Complete, Complete–No Charges, On Hold, Cancelled, Closed, Pending Close, and Failed Close jobs. See: Discrete Job Statuses: page 10 – 7. 14 – 30 Oracle Work in Process User’s Guide Assemblies From/To To restrict the report to a range of assemblies, select a beginning and ending assembly. See Also Overview of Non–Standard Discrete Jobs: page 4 – 2 Submitting a Request, Oracle Applications User’s Guide Reports and Processes 14 – 31 Importing Jobs and Schedules You can use the Import Jobs and Schedules window to submit the WIP Mass Load program. See: Overview of Reports and Programs, Oracle Applications User’s Guide When the WIP Mass Load program is submitted, the system searches the Open Job and Schedule Interface (WIP_JOB_SCHEDULE_ INTERFACE) table for rows with the specified Group ID. It then creates standard and non–standard discrete jobs, updates existing jobs, and creates pending repetitive schedules for all valid rows. If a row fails validation, an error message is generated. You can view these errors and update failed rows using the Pending Jobs and Schedules window. Note: You can also use the Planner Workbench in Oracle Master Scheduling/ MRP to submit the WIP Mass Load program and perform the same actions on planned orders, reschedule recommendations, or suggested schedules sourced for Oracle Master Scheduling/MRP and Supply Chain Planning. The Job and Schedule Interface Report is automatically printed when the WIP Mass Load program is submitted. This report lists the standard and non–standard jobs that were created, the jobs that were updated, and the repetitive schedules that were created. It also lists the jobs and repetitive schedules rows that failed to process. If you resubmit the Job and Schedule Interface Report after the WIP Mass Load program has cleared the Open Job and Schedule Interface table of successfully processed records, only records for failed rows are listed. " To import jobs and schedules: 1. 14 – 32 Navigate to the Import Jobs and Schedules window. The Parameters window appears. Oracle Work in Process User’s Guide 2. Enter a Group ID number. The system polls the WIP_JOB_SCHEDULE_INTERFACE table for rows with this group identification number. When rows with this number are found, the system validates the data and either creates a job or repetitive schedule, reschedules an existing job, or enters an error message. Rows with errors in them remain in the table and can be updated and resubmitted. See: Processing Pending Jobs and Schedules: page 3 – 63 3. Choose OK. 4. Submit the import request. See: Submitting a Request, Oracle Applications User’s Guide. See Also Open Job and Schedule Interface: page 3 – 9 Reports and Processes 14 – 33 Job Lot Composition Report The Job Lot Composition Report lists assembly and component lot numbers used on discrete jobs of any status. You assign component lot numbers when you issue or backflush lot controlled components to the job. You assign assembly lot numbers when you complete lot controlled assemblies from the job. The system lists all components under lot control consumed by a discrete job as well as lot numbers if you complete assemblies under lot control. You can sort this report by job or lot. Since the system uses the material transaction history to create compositions, you should not purge any material transactions which contribute to genealogies you need to retain. Report Submission In the Submit Requests window, select Job Lot Composition Report in the Name field. Report Parameters Sort By Choose one of the following options: Job Sort by job. The system lists jobs in alphanumeric order. Lot Sort by lot. The system lists jobs by lot number and job name. Assembly Select an assembly. The system lists the lot composition of all jobs that are building this assembly. If you do not select a value, the system lists the lot composition for all assemblies. Dates From/To To restrict the report to a date range, select a beginning and an ending date. 14 – 34 Oracle Work in Process User’s Guide Jobs From/To To restrict the report to a range of jobs, select a beginning and an ending job. Lots From/To To restrict the report to a range of lots, select a beginning and an ending lot. See Also Overview of Discrete Manufacturing: page 3 – 2 Viewing Job Lot Compositions: page 7 – 62 Discrete Job Purge: page 3 – 56 Submitting a Request, Oracle Applications User’s Guide Reports and Processes 14 – 35 Job and Schedule Interface Report The Job and Schedule Interface Report is submitted when the Import Jobs and Schedules window is used to launch the WIP Mass Load program. This report lists the following information for jobs and schedules that are created and/or updated as well as for those that fail to process. Created Jobs Job, Job Type, Assembly, Quantity, Start Date, Completion Date, Process Phase, and Process Status Created Schedules Line, Assembly, Line, Daily Quantity, Days, First Unit Start Date, Last Unit Completion Date. Process Phase, and Process Status Updated Discrete Jobs Job, Assembly, Status, Quantity, Start Date, Completion Date, Process Phase, and Process Status The report is sorted by source code and, where applicable, by organization within that source code. See Also Open Job and Schedule Interface: page 3 – 9 Processing Pending Jobs and Schedules: page 3 – 63 Importing Jobs and Schedules: page 14 – 32 Submitting a Request, Oracle Applications User’s Guide 14 – 36 Oracle Work in Process User’s Guide Move Transaction Report The Move Transaction Report lists move transaction information for discrete jobs and repetitive schedules. You can choose to display transaction details such as reason codes and references. You can also sort this report by date or assembly. Report Submission In the Submit Requests window, select Move Transaction Report in the Name field. Report Parameters Sort By Choose one of the following options: Date Sort by date, then by job or repetitive schedule within the date, and then by operation sequence number within the job or repetitive schedule. Assembly Sort by assembly, then by date within the assembly, then by job or repetitive schedule within the assembly, and then by operation sequence number within the job or repetitive schedule. Show Details Select Yes or No to indicate whether to print the reason and reference for the move transaction. If you select Date in the Sort By field and you choose Yes in this field, the system lists the assembly along with the reason and reference for each move transaction. Jobs /Schedules From and To To restrict the report to a range of jobs or repetitive schedules, select a beginning and an ending job/repetitive schedule. Lines From/To To restrict the report to a range of lines, select a beginning and an ending line. Reports and Processes 14 – 37 Assemblies From/To To restrict the report to a range of assemblies, select a beginning and an ending assembly Dates From/To To restrict the report to a date range, select a beginning and an ending date. Reasons From/To To restrict the report to a range of reasons, select a beginning and an ending reason. See Also Move Transactions: page 8 – 24 Submitting a Request, Oracle Applications User’s Guide 14 – 38 Oracle Work in Process User’s Guide Production Line Report The Production Line Report lists production lines in alphabetical order. The system prints the line attributes as well as the assemblies that you can build on each line. A production line describes a unique set of operations, departments, and/or manufacturing cells that produce one or more of your assemblies. You use production lines to build repetitive assemblies. You can build different repetitive assemblies on the same production line. This means that you can use production lines to aggregate material requirements for a number of assemblies. You can also use lines to define separate area1s of your shop floor for greater management control. Report Submission In the Submit Requests window, select Production Line Report in the Name field. Report Parameters Line From/To To restrict the report to a range of lines, select a beginning and an ending line. See Also Overview of Repetitive Manufacturing: page 6 – 2 Defining Production Lines: page 2 – 36 Associating Lines and Assemblies: page 6 – 6 Submitting a Request, Oracle Applications User’s Guide Reports and Processes 14 – 39 Purging Jobs and Schedules You can purge discrete jobs that were closed in accounting periods that are now closed. You can also purge repetitive schedules that were cancelled or complete with no charges in a closed accounting period. You can purge all detail information — material requirements, resource requirements, and operations — associated with jobs and schedules. You can also purge move and/or resource transactions associated with jobs and repetitive schedules. For quality and customer service tracking purposes, you can choose to retain as–built configuration histories for discrete jobs that build assemble to order items. You can purge all discrete job and repetitive schedule information (details, transactions and headers) by choosing to purge headers. ☞ Attention: Although all purge Yes/No parameters default to No, you should exercise extreme caution when purging. Once you submit a purge request with a Purge Only or Purge and Report action type, all related information is removed from the database. Purge requests can be submitted using concurrent or scheduled processing. See: Overview of Concurrent Processing, Oracle Applications User’s Guide and Overview of Standard Request Submission, Oracle Applications User’s Guide. You can check the status of purge requests using the Concurrent Requests window. Prerequisites ❑ You must have at least one closed period for your organization. See: Overview of Period Close, Oracle Cost Management User’s Guide. " To purge jobs and schedules: 1. 14 – 40 Navigate to the Purge Jobs and Schedules window. The Parameters window appears. Oracle Work in Process User’s Guide 2. Select a Job Type. All Jobs/schedules: Purge information for discrete jobs with statuses of Closed and repetitive schedules with statuses of Cancelled and Complete–No Charges. All Jobs/schedules is the default. Discrete jobs: Purge information for discrete jobs with a status of Closed. Repetitive Schedules: Purge information for repetitive schedules with statuses of Cancelled or Complete–No Charges. 3. Select an Action Type. You can choose from the following: Purge and Report: Purge the selected jobs/schedules and print a report. You can print the report in Full, Summary, or Detail format. If you select Purge and Report, you must select a Report Type. Report Only: Print a report listing the selected jobs/schedules but do not purge them. You can print the report in Full, Summary, or Detail format. If you select Report Only, you must select a Report Type. Purge Only: Purge the selected jobs/schedules but do not print a report. If you choose Purge Only, you must specify that the Report Type is None. Note: Printing a report before submitting a purge request allows you to view the exceptions that might arise and determine how Reports and Processes 14 – 41 many records are to be deleted from related tables as a result of the purge. 4. Specify which discrete jobs, repetitive schedules, or discrete jobs and repetitive schedules to purge by selecting one or more of the following: Jobs From/To: Purge all jobs in this range that have a close date before the purge cutoff date. Line: Purge all repetitive schedules produced on this line that have been closed or cancelled before the purge cutoff date. Assembly: Purge all jobs and repetitive schedules that produce this assembly. If a job range is also specified, only jobs that produce this assembly that are within that range are purged. Similarly, if a production line is specified, only repetitive schedules that produce this assembly on that line are purged. ☞ 5. Attention: When purging discrete jobs, you can enter a production line, however this information is ignored when the purge is submitted. If you enter a job range, when purging repetitive schedules, this information is also ignored. Enter a Cutoff Date. This date must be less than or equal to the close date of the most recently closed accounting period. If you choose to purge details in the Purge Options window, the system purges the details (material requirements, resource requirements, and operations) of Closed jobs and Cancelled and Complete–No Charges repetitive schedules with closed, completed, or cancelled dates less than or equal to this date. If you choose to purge Move, Resource, or Move and Resource Cost Transactions, the system purges transactions with dates less than or equal to this date for Closed jobs and Cancelled and Complete–No Charges schedules. ☞ 6. Attention: If you enter a date that is earlier than the closed, cancelled or completed date of a selected job or repetitive schedule, the system only purges job and repetitive schedule detail and transaction information up to the date you enter. Select Yes for Include Configurations to include discrete jobs that build either configured items or models in the purge. Select No to exclude configured items. If Oracle Bills of Materials purges the configured item that you build in Work in Process, then Oracle Bills of Material replaces the configured item on the job with the model the configuration was 14 – 42 Oracle Work in Process User’s Guide based on. You do not want to include configurations if you need this information for customer support. For example, if a customer complains that you did not build the configuration he ordered. If you do include configurations, you still have access to lot and serial information using the View Job Lot Composition form or the lot and serial transactions in Oracle Inventory. 7. Select whether to purge or not purge Headers. If you purge Headers, all information associated with the parent record and all associated details (material requirements, resource requirements, and operations) and transactions (move and resource transactions) are automatically purged. Shop floor statuses associated with jobs and/or repetitive schedules are also purged. Sales order allocations associated with discrete jobs are also purged. ☞ 8. Attention: When you choose to purge headers, the options to include details, move transactions, and resource transactions are automatically selected. You cannot choose to purge header and choose not to purge details are purged even if you choose not to purge details, move transactions, and resource transactions. Select whether to purge Details. You can selectively purge Details — material requirements, resource requirements, and operations — without purging headers. Selective purging allows you to retain pertinent historical information. For example, you can retain operation information but purge move transactions associated with these operations. 9. Select whether to purge or not purge Move Transactions You can selectively purge Move Transactions associated with the selected discrete jobs, repetitive schedules, or both. If the move transaction date is less than or equal to the cutoff date you entered, move transactions for repetitive schedules with Cancelled and Complete–No Charges statuses or discrete jobs with Closed statuses are purged. 10. Select whether to purge or not purge Resource Transactions associated with jobs and/or repetitive schedules. You can selectively purge Resource Transactions associated with the selected discrete jobs, repetitive schedules, or both. Only resource transactions for repetitive schedules with Cancelled and Complete–No Charges statuses are purged, regardless of whether the transaction date is less than or equal to the cutoff date you entered. Reports and Processes 14 – 43 11. Select one of the following Report Types: Full: The report lists all job and/or schedule records selected for the purge, the table and number of rows affected as well as those records that cannot be purged because of purge rule violations. Full is the default option. Summary: The report lists all job and/or schedule records selected for the purge but in a tabular form. The table and row detail is omitted although exception information is included. Exception: The report lists only those job and/or schedule records that cannot be purged because of purge violation rules. Exception information is included. None: The report lists only the purge options selected (e.g. Headers, Schedule Details, Move Transactions, Resource Transactions), but does not list tables affected and records purged. 12. Choose OK. 13. Submit your purge request. See: Submitting a Request, Oracle Applications User’s Guide. See Also Discrete Job Purge: page 3 – 56 Repetitive Schedule Purge: page 6 – 39 Transaction Control by Status: page 10 – 18 14 – 44 Oracle Work in Process User’s Guide Purge Report The Purge Report can be printed as you purge discrete jobs, repetitive schedules, or both jobs and repetitive schedules using the following windows: • Purge Discrete Jobs (Form) • Purge Repetitive Schedules (Form) • Purge Discrete Jobs/Repetitive Schedules (SRS) When you choose to print a report as part of the purge process, the report option selected in the Purge Options window is defaulted and determines the format of the report. Report options are as follows: Full Lists all job and/or schedule records, the table and number of rows affected as well as those records that cannot be purged because of purge rule violations. Full is the default option. Summary Lists all job and/or schedule records but in a tabular form. The table and row detail is omitted although exception information is included. Exception Lists only those job and/or schedule records that cannot be purged because of purge violation rules. Exception information is included. None Lists only the purge options selected (e.g. Headers, Schedule Details, Move Transactions, Resource Transactions), but does not list which tables are affected and which records purged. ☞ Attention: You can only select the None option when submitting a purge request from the Purge Jobs and Schedules window. It is available only if you select the Purge Only action type in the Purge Options window. Furthermore, you must select this report option if the Purge Only option is selected as no other report option selections are allowed. See Also Submitting a Request, Oracle Applications User’s Guide Purging Discrete Jobs: page 3 – 57 Purging Repetitive Schedules: page 6 – 40 Specifying Purge Options: page 3 – 59 Reports and Processes 14 – 45 Repetitive Line Report The Repetitive Line Report lists repetitive schedules defined for a production line. The system lists effective and pending repetitive schedules separately so you can easily identify which ones to cancel or implement. You can use this report to help you see the overall load on the line. The system lists the production line header followed by all schedules defined on that line. Schedules are listed by assembly and first unit start date. Report Submission In the Submit Requests window, select Repetitive Line Report in the Name field. Report Parameters Lines From/To To restrict the report to a range of lines, select a beginning and an ending line. Assemblies From/To To restrict the report to a range of lines, select a beginning and an ending assembly. Dates From/To To restrict the report to a date range, select a beginning and an ending date. See Also Overview of Repetitive Manufacturing: page 6 – 2 Dispatch Reports: page 8 – 58 Submitting a Request, Oracle Applications User’s Guide 14 – 46 Oracle Work in Process User’s Guide Repetitive Pick List Report The Repetitive Pick List Report lists component requirements for a range of repetitive schedules in your organization with statuses of Unreleased, Released, Complete, or On Hold. You can use this report to pick material from stock to issue to work in process for a schedule. The report lists production lines in alphanumeric order with all their requirements ordered by supply type, including push, pull, bulk and vendor items. This report can be sorted by component, date required, supply subinventory/locator, or WIP material transaction. Report Submission In the Submit Requests window, select Repetitive Pick List Report in the Name field. Report Parameters Sort By Choose one of the following options: Component Sort by component. Supply subinventory, locator Sort by supply subinventory and locator. WIP material transaction Sort component requirements in WIP Material Transaction order. The system lists components in the order presented in the WIP Material Transaction window. This assists data entry when you use the pick list as hard copy for issuing the components. Transactable Only Select Yes or No to indicate whether to exclude repetitive schedules with statuses of Unreleased or On Hold. Start Date Select the start date. The system calculates requirements for your repetitive schedules from this date for the number of days you specified in the Days of Supply report option. Reports and Processes 14 – 47 Days of Supply Select the number of days of supply that you want to calculate requirements for. Lines From/To To restrict the report to a range of lines, select a beginning and an ending line. Assemblies From/To To restrict the report to a range of assemblies, select a beginning and an ending assembly. Supply Type Choose a Supply Type. The available options are Push, Pull, Bulk, and Vendor. See: Supply Types: page C – 2. Supply Subinventory Select the supply subinventory to include as available material in the pick list. If you do not select a value, the system lists requirements of any supply subinventory. See Also Overview of Repetitive Manufacturing: page 6 – 2 Overview of Material Control: page 7 – 2 Submitting a Request, Oracle Applications User’s Guide 14 – 48 Oracle Work in Process User’s Guide Repetitive Routing Sheet The Repetitive Routing Sheet lists operations and associated resources and material requirements for schedules with a status of Unreleased, Released, On Hold, or Complete. You can use the report as a traveler to report production against repetitive schedules on the shop floor. The system displays repetitive assemblies and production lines in alphanumeric order. For each repetitive assembly/line, the system prints schedules ordered by first unit start date and followed by their operations, resources, instructions and requirements. Report Submission In the Submit Requests window, select Repetitive Routing Sheet in the Name field. Report Parameters Assembly Select a repetitive assembly. If you do not select an assembly, the system lists routing information for all schedules defined for the line selected. Line Select a production line. If you do not select a line, the system displays routing information for all schedules defined for the assembly selected. First Unit Start Dates From/To To restrict the report to a range of first unit start dates, select a beginning and an ending date. See Also Overview of Repetitive Manufacturing: page 6 – 2 Submitting a Request, Oracle Applications User’s Guide Reports and Processes 14 – 49 Repetitive Schedule Data Report The Repetitive Schedule Data Report lists repetitive assemblies and production lines in alphanumeric order, and their schedules ordered by first unit start date. You can use this report to review all details about a repetitive schedule, such as quantities, dates, routing operations, material requirements, resources, instructions, comments and accounts. Report Submission In the Submit Requests window, select Repetitive Schedule Data Report in the Name field. Report Parameters Effective Only Select Yes or No. No means list all schedules in the report. Yes means list only the schedules with the following statuses: Unreleased, Released, On Hold, Complete and Pending – Mass Loaded. See: Reporting by Status: page 10 – 20. Assemblies From/To To restrict the report to a range of assemblies, select a beginning and an ending assembly. Lines From/To To restrict the report to a range of lines, select a beginning and an ending line. Start Dates From/To To restrict the report to a date range, select a beginning and an ending date. See Also Overview of Repetitive Manufacturing: page 6 – 2 Dispatch Reports: page 8 – 58 Submitting a Request, Oracle Applications User’s Guide 14 – 50 Oracle Work in Process User’s Guide Repetitive Schedule Shortage Report The Repetitive Schedule Shortage Report lists either open requirements or requirements with inventory shortages for repetitive schedules. You can list requirement shortages based on the quantities available in all subinventories or based on the quantities available in the supply subinventories only. You can also determine shortages using all subinventories or only nettable subinventories. The system lists repetitive schedules with statuses of Unreleased, Released, On Hold, or Complete. You can print a repetitive schedule’s open requirements to identify components you need to issue or have not yet backflushed. You can print the shortage report to highlight components you need to expedite. Report Submission In the Submit Requests window, select Repetitive Schedule Shortage Report in the Name field. Report Parameters Report Type Choose one of the following options: Open requirement List open material requirements for all repetitive schedules. This is the default option. Shortage based on QOH Lists requirements with insufficient quantities as based on all subinventories. If you select Yes in the Include Nettable Only option, then you may see more shortages depending on how much quantity you have available for each requirement in your non–nettable subinventories. Shortage based on supply sub/loc Lists requirements with insufficient quantities as based on each requirement’s supply subinventory and locator. Include Nettable Only Select Yes to include only nettable subinventories when calculating subinventory quantities and printing shortages. Select No to include nettable and non–nettable subinventories when calculating Reports and Processes 14 – 51 subinventory quantities and printing shortages. The system determines the quantity onhand for each requirement using this value. Include Qty Ahead/Behind Select Yes or No to indicate whether to include requirements fulfilled in the past when calculating open requirements and shortages. If you select Yes, the system includes requirements already issued or to be issued in its calculation of open requirements and shortages. If you select No, the system only takes into account today’s quantities in its calculation of open requirements and shortages. Include Bulk Select Yes to indicate whether to include bulk–provided material requirements. Include Supplier Select Yes to indicate whether to include supplier–supplied material requirements. Supply Days Select the number of supply days ahead of today that the system uses to calculate open requirements and shortages for your repetitive schedules. Lines From/To To restrict the report to a range of lines, select a beginning and an ending line. Assemblies From/To To restrict the report to a range of assemblies, select a beginning and an ending assembly. Components From/To To restrict the report to a range of component, select a beginning and an ending component. 14 – 52 Oracle Work in Process User’s Guide See Also Overview of Material Control: page 7 – 2 Submitting a Request, Oracle Applications User’s Guide Reports and Processes 14 – 53 Repetitive Shop Packet The repetitive shop packet consists of four reports: • Repetitive Pick List Report: page 14 – 47 • Repetitive Routing Sheet: page 14 – 49 • Repetitive Schedule Shortage Report: page 14 – 51 • Repetitive Line Report: page 14 – 46 See Also Submitting a Request, Oracle Applications User’s Guide Submitting a Request Set, Oracle Applications User’s Guide 14 – 54 Oracle Work in Process User’s Guide Repetitive Value Report The Repetitive Value Report can be used to analyze your repetitive schedules. You can submit the WIP Value Report before submitting this report to review total variances and charges for your repetitive schedules. Then, you can submit this report to analyze a summary of the transactions behind the charges and variances for each repetitive schedule. This report includes information on all cost transactions including material, resource, outside processing, move and resource–based overhead charges and variances. Relief charges, such as completion, assembly scrap, and period close transactions, are summarized across all schedules building an assembly on a line. The report also lists account summary information as well as repetitive schedule header information. The system groups and subtotals cost transactions by transaction type. Report Submission In the Submit Requests window, select Repetitive Value Report in the Name field. Report Parameters Report Type Choose one of the following options: Detail with requirements based on actual quantity completion Lists each assembly and line using the actual completion quantity of the assembly and line in to calculate all the variances. A detail report includes the following: header, material, resource, resource–based and move–based overhead costs, completion, scrap, and close variance transactions. It also includes account period–to–date and cumulative–to–date summary information. Use this option if you backflush your material requirements at assembly completion or if you have already completed most of your assemblies. Detail with requirements based on planned start quantity Lists each assembly and line using the planned start quantity of the assembly and line to calculate all the variances. A detail report includes the following: header, material, resource, Reports and Processes 14 – 55 resource–based and move–based overhead costs, completion, scrap, and close variance transactions. It also includes account summary information. Use this option to compare your total requirements against your existing transactions for all cost elements using your planned completion quantity. Summary Lists each assembly and line and includes repetitive schedule header and account information. The system also lists summary elemental account values for each repetitive schedule. Include Bulk Select Yes to indicate whether to include bulk–supplied material requirements. If you have already issued to a particular bulk requirement, the system lists the requirement, regardless of what you select here. Include Supplier Select Yes to indicate whether to include supplier–provided material requirements. If you have already issued to a particular supplier requirement, the system lists the requirement, regardless of what you select here. Period Start Date Select a period start date. The system lists the value of repetitive schedules that are dated on or after this date, or that were transacted between the period start date and the period close date. Period Close Date Select a period close date. The system lists the value of repetitive schedules that are dated on or before this date, or that were transacted between the period start date and the period close date. Assemblies From/To To restrict the report to a range of assemblies, select a beginning and an ending assembly. 14 – 56 Oracle Work in Process User’s Guide Lines From/To To restrict the report to a range of production lines, select a beginning and an ending line. Classes From/To To restrict the report to a range of WIP accounting classes, select a beginning and an ending class. ☞ Attention: For repetitive schedules, any difference between the cumulative single level variances and the material usage or efficiency variance subtotals is from configuration or methods variances. The cumulative–to–date summary compares the costs incurred for the schedule with the standard bill/routing requirements for completions out of the schedule. Therefore, the difference between the cumulative variances and the usage/efficiency variance is due to the difference between the standard bill/routing requirements and the work in process bill/routing requirements. To find the configuration variance, you should compare the material usage variance with the single level material variance. To find the methods variance, you should compare the efficiency variance with its corresponding single level variance. For example, you would compare the resource efficiency variance with the single level; resource and outside processing variance added together. You would add the resource–based and move–based overhead efficiency variances and compare it with the single level overhead variance. ☞ Attention: Since repetitive schedules are not revalued by the cost update, these variances also include any standard cost adjustments. The Standard Requirements columns use the latest standards. The Applied Cost columns use the transaction cost without cost update adjustments. See Also Overview of Work in Process Costing: page 11 – 2 Submitting a Request, Oracle Applications User’s Guide Reports and Processes 14 – 57 Resource Performance Report The Resource Performance Report details resource efficiency by department. The system lists all resources within a department with the jobs/schedules charging these resources in alphanumeric order. The system lists the efficiency percentage of each resource as applied to a specific job or schedule and the departmental efficiency of each resource. Report Submission In the Submit Requests window, select Resource Performance Report in the Name field. Report Parameters Resources From/To To restrict the report to a range of resources, select a beginning and an ending resource. Departments From/To To restrict the report to a range of departments, select a beginning and an ending department. Job/Schedule Active Dates From Select a beginning date. To Select an ending date. Minimum Efficiency Select a minimum efficiency percentage. The system lists the resources for which the departmental efficiency is equal to or greater than this value. If you also select a maximum efficiency percentage, displays resources for which the departmental efficiency is equal to or greater than the minimum efficiency percentage and less than or equal to the maximum efficiency percentage. 14 – 58 Oracle Work in Process User’s Guide Maximum Efficiency Select a maximum efficiency percentage. The system lists the resources for which the departmental efficiency is less than or equal to this value. If you also select a minimum efficiency percentage, the system lists resources for which the departmental efficiency is equal to or greater than the minimum efficiency percentage and less than or equal to the maximum efficiency percentage. See Also Overview of Resource Management: page 9 – 2 Submitting a Request, Oracle Applications User’s Guide Reports and Processes 14 – 59 Resource Transaction Report The Resource Transaction Report lists resource transaction information for discrete jobs and repetitive schedules. You can list transaction details such as reason codes and references. You can sort this report by assembly, date, or employee. Report Submission In the Submit Requests window, select Resource Transaction Report in the Name field. Report Parameters Sort By Choose one of the following options: Assembly Sort by assembly, then by date within assembly, then by job or repetitive schedule within the assembly, and then by operation sequence number within the job or repetitive schedule. Date Sort by date, then by job or repetitive schedule within the date, and then by operation sequence number within the job or repetitive schedule. Employee Sort by employee, then by date within the employee, then by job or repetitive schedule within the date, and then by operation sequence number within the job or repetitive schedule. Show Details Select Yes or No to indicate whether to list reason and reference for the resource transaction. If you select Date or Employee in the Sort By field, and you choose Yes in this field, the system also lists the assembly along with the reason and reference for each resource transaction. Jobs /Schedules From and To To restrict the report to a range of jobs/schedules, select a beginning and an ending job or repetitive schedule. 14 – 60 Oracle Work in Process User’s Guide Resources From/To To restrict the report to a range of resources, select a beginning and an ending resource. Lines From/To To restrict the report to a range of production lines, select a beginning and an ending line. Assemblies From/To To restrict the report to a range of assemblies, select a beginning and an ending assembly. Dates From/To To restrict the report to a date range, select a beginning and an ending date. Employees From/To To restrict the report to a range of employees, select a beginning and an ending employee. Reasons From/To To restrict the report to a range of employees, select a beginning and an ending reason. Activities From/To To restrict the report to a range of Activities, select a beginning and an ending activity. See Also Resource Transactions: page 9 – 19 Submitting a Request, Oracle Applications User’s Guide Reports and Processes 14 – 61 Shop Floor Statuses Report The Shop Floor Statuses Report lists shop floor statuses in alphabetical order. The system also lists status descriptions and disable dates and identifies which statuses prevents you from moving assemblies. Shop floor statuses give you control of your shop floor movement by limiting when you can make moves. Once you have released a job or repetitive schedule, you can assign and modify these statuses at the operations on the work in process routing using the Shop Floor Statuses window. You can view these statuses during shop floor moves and report them using job or repetitive schedule data reports. Report Submission In the Submit Requests window, select Shop Floor Statuses Report in the Name field. See Also Assigning and Viewing Shop Floor Statuses: page 8 – 68 Defining Shop Floor Statuses: page 2 – 30 Submitting a Request, Oracle Applications User’s Guide 14 – 62 Oracle Work in Process User’s Guide Schedule Group Listing The Schedule Group Listing lists all information about schedule groups. Report Submission In the Submit Requests window, select Schedule Group Listing in the Name field. Report Parameters Schedule Group From/To To restrict the report to a range of schedule groups, select a beginning and an ending schedule group. See Also Defining Schedule Groups: page 2 – 32 Reports and Processes 14 – 63 WIP Account Distribution Report The WIP Account Distribution Report details account information for work in process cost transactions, including resource, overhead and outside processing charges, cost updates, and period close and job close variances. The system groups your transactions by job or schedule, by transaction type, and orders your transactions by earliest transaction date. You can list detailed account information for specific accounts, general ledger batches, or both to help you reconcile your general ledger. This report does not list material cost transactions such as issues, completions, and scrap. You can list this information using the Material Account Distribution reports in Oracle Inventory. Report Submission In the Submit Requests window, select WIP Account Distribution Report in the Name field. Report Parameters Dates From/To To restrict the report to a range of transaction dates, enter a beginning and ending date. Account Select a specific general ledger accounting flexfield. GL Batch Select a general ledger batch number. The system lists information by account for each account in the selected batch. Job/Schedule Select a specific job or repetitive assembly. Line Select a production line. 14 – 64 Oracle Work in Process User’s Guide Assembly Select an assembly. Transaction Type Choose one of the following options to print work in process cost transaction details for a specific transaction type: Resource transaction Lists resource transaction details. Overhead transaction Lists overhead transaction details. Outside processing Lists outside processing transaction details. Cost update Lists cost update transaction details. Period close variance Lists transaction details for period close variance transactions for expense jobs and certain instances of repetitive schedules. Job close variance Lists job close variance transaction details. Department Select a department name. Activity Select an activity. Class Select a WIP accounting class name. Currency Select a currency. You can run this report for any defined currency. When you select a currency other than the functional currency, item costs are converted to the selected currency. Your functional currency is the default. Reports and Processes 14 – 65 Exchange Rate The system displays the most recent End of period rate but you can choose another period. The rate type used, either period average or the period end, is determine by how the CST:Exchange Rate Type profile option is set. See: Profile Options, Oracle Cost Management. See Also Overview of Period Close, Oracle Cost Management User’s Guide Submitting a Request, Oracle Applications User’s Guide 14 – 66 Oracle Work in Process User’s Guide WIP Account Summary Report The WIP Account Summary Report summarizes account information for work in process cost transactions, including resource, overhead and outside processing charges, cost updates, and period close and job close variances. The system lists debit, credit and net activity by account for each type of cost transaction. You can list information by date. You can also list information for specific accounts, general ledger batches, or both to help you reconcile your general ledger. You can use this report during your pre–close monthly review process. The system does not list material cost transactions, such as issues, completions, and scraps, in this report. You can report this information using the Inventory Account Distribution report in Oracle Inventory. Report Submission In the Submit Requests window, select WIP Account Summary Report in the Name field. Report Parameters Dates From/To To restrict the report to a range of transaction dates, select a beginning and an ending date. Account Select a general ledger accounting flexfield. GL Batch Select a general ledger batch. The system lists information by account for each account in the selected batch. See Also Overview of Period Close, Oracle Cost Management User’s Guide Submitting a Request, Oracle Applications User’s Guide Reports and Processes 14 – 67 WIP Accounting Classes Report The WIP Accounting Classes Report lists the WIP accounting classes you have defined. The class type, disable date and description for each accounting class, as well as the elemental valuation and variance accounts, are listed. You must define separate accounting classes for standard discrete jobs, non–standard expense jobs, non–standard asset jobs, and repetitive assemblies. Each accounting class includes the elemental valuation and variance accounts you use to cost discrete and repetitive production. You must enter an accounting class when you define a discrete job and when you associate production lines with repetitive assemblies. Report Submission In the Submit Requests window, select WIP Accounting Classes Report in the Name field. See Also WIP Accounting Classes: page 2 – 22 Submitting a Request, Oracle Applications User’s Guide 14 – 68 Oracle Work in Process User’s Guide WIP Location Report The WIP Location Report details the locations of the assemblies within the routings of the jobs and repetitive schedules. This includes job and repetitive schedules with statuses of Released, Complete, and On Hold. The system lists only operations that contain assemblies. Report Submission In the Submit Requests window, select WIP Location Report in the Name field. Report Parameters Sort By Choose one of the following options: Assembly, Job/Schedule, Line, Op seq Sort by assembly, then by job or repetitive schedule within the assembly, then by line within the job or repetitive schedule, and then by operation sequence number within the line. Department, Assembly, Job/Schedule, Op seq Sort by department number, then by assembly within the department, then by job or repetitive schedule within the assembly, and then by operation sequence number within the job or repetitive schedule. Job/Schedule, Assembly, Line, Op seq Sort by job or repetitive schedule, then by assembly within the job or repetitive schedule, then by line within the assembly, and then by operation sequence number within the line. Line, Assembly, Job/Schedule, Op seq Sort the report by line, then by assembly within the line, then by job or repetitive schedule within the assembly, and then by operation sequence number within the job or repetitive schedule. Jobs/Schedules From and To To restrict the report to a range of jobs or repetitive schedules, select a beginning and ending job/schedule. Reports and Processes 14 – 69 Lines From/To To restrict the report to a range of production lines, select a beginning and an ending line. Assemblies From/To To restrict the report to a range of assemblies, select a beginning and an ending assembly. Departments From/To To restrict the report to a range of departments, select a beginning and an ending department. See Also Dispatch Reports: page 8 – 58 Viewing Operations: page 8 – 19 Submitting a Request, Oracle Applications User’s Guide 14 – 70 Oracle Work in Process User’s Guide WIP Offsetting Account Report The WIP Offsetting Account Report lists detailed account information for work in process cost transactions, including resource, overhead and outside processing charges; cost updates; and period close and job close variances. Transaction information is grouped by offsetting account, by transaction type, from the earliest transaction date. The system does not list material cost transactions — issues, completions, and scrap transactions — on this report. You can report this information using the Inventory Account Distribution report in Oracle Inventory. Report Submission In the Submit Requests window, select WIP Offsetting Account Report in the Name field. Report Parameters Accounts From/To To restrict the report to a range of accounts, select a beginning and an ending accounting flexfield. Dates From/To To restrict the report to a range of transaction dates, select a beginning and an ending date. See Also Submitting a Request, Oracle Applications User’s Guide Reports and Processes 14 – 71 WIP Outside Processing Report The WIP Outside Processing Report lists outside processing information for jobs or repetitive schedules. The system lists all purchase orders associated outside processing resources. Report Submission In the Submit Requests window, select WIP Outside Processing Report in the Name field. Report Parameters Jobs/Schedules From and To To restrict the report to a range of jobs or repetitive schedules, select a beginning and ending job/schedule. Assemblies From/To To restrict the report to a range of assemblies, select a beginning and an ending assembly. Lines From/To To restrict the report to a range of production lines, select a beginning and an ending line. Status Choose a status. See: Discrete Job Statuses: page 10 – 7 or Repetitive Schedule Statuses: page 10 – 12. Open POs Only Select Yes or No to indicate whether to print all purchase orders except ones that are closed and cancelled. See Also Submitting a Request, Oracle Applications User’s Guide 14 – 72 Oracle Work in Process User’s Guide WIP Parameters Report The WIP Parameters Report lists the Work in Process parameters you have defined. WIP parameters define modes of operation and assign default values that affect other functions in Work in Process, such as backflushing and lot number entry. Report Submission In the Submit Requests window, select WIP Parameters Report in the Name field. See Also WIP Parameters: page 2 – 9 Submitting a Request, Oracle Applications User’s Guide Reports and Processes 14 – 73 WIP Value Report The WIP Value Report details work in process inventory as of a particular accounting period. The system lists the value of discrete jobs and repetitive schedules for the period you specify and lists the ending balance for each discrete job and repetitive schedule in a particular accounting class and subtotals by the accounting class. In addition, the system summarizes each accounting class by cost element and lists a subtotal for each type of accounting class. For example, your can view your WIP inventory value for all standard discrete jobs. You can submit the report using several options to determine your output. You can even list your output in a foreign currency using an exchange rate you specify. ☞ Attention: To ensure accurate ending inventory values for discrete jobs, you must close any open periods before the one you are using for this report. ☞ Attention: The system overstates WIP value by the value in your expense non–standard jobs and repetitive schedules. If you have not closed the period you are reporting on, you have not yet written off the balances in your expense non–standard jobs and repetitive schedules. The system automatically writes these values off to the variance accounts at period close. You can optionally set the WIP Recognize Period Variances Parameter so that only variances for repetitive schedules with statuses of Cancelled or Complete–No Charges are posted at period close. See: Repetitive Parameters: page 2 – 11. Report Submission In the Submit Requests window, select WIP Value Report in the Name field. Report Parameters Report Type Choose one of the following options: Cumulative to Date List WIP inventory values based on transactions entered for all periods, including those Selected before the current period. 14 – 74 Oracle Work in Process User’s Guide For standard discrete jobs and non–standard asset jobs, the system accumulates job costs over the life of the job, which may cover more than one period. This option may be appropriate for these types of jobs Period to Date Lists WIP inventory values based only on transactions entered for a particular period. Optionally for repetitive schedules and always for non–standard expense jobs, the system automatically creates journal entries for valuation costs when you close your accounting period each month. This option may be appropriate for this type of job and repetitive schedules. Period Select an accounting period. Depending on the report type selected, the WIP values may be cumulative or may include only values transacted during this period. Closed Jobs Select Yes to include discrete jobs that were closed during the accounting period you specify. If you select No, the system includes only those jobs that were open at the end of the specified period. Class Type Choose one of the following accounting class options: Asset non–standard List costs for asset non–standard jobs. Expense non–standard List costs for expense non–standard jobs. Repetitive assembly List costs for repetitive assemblies. Standard discrete List costs for standard discrete jobs. Reports and Processes 14 – 75 Classes From/To To restrict the report to a range of WIP accounting classes, select a beginning and ending class. You cannot specify a class range unless you first select a value in the Class Type field. Jobs/Schedules From and To To restrict the report to a range of jobs or repetitive schedules, select a beginning and ending job/repetitive schedule. You cannot specify a job/schedule range unless you first select a value in the Class Type field. For repetitive schedules, you are actually selecting a repetitive assembly value, such as an item number. For discrete jobs, you are selecting a job name. Assemblies From/To To restrict the report to a range of assemblies, select a beginning and an ending assembly. You cannot specify an assembly range unless you first select a value in the Class Type field. If you are reporting values for repetitive schedules, you do not need to select both a job/schedule and assembly range unless you changed a repetitive assembly item number since you defined your repetitive assembly. Currency Code Select a currency code in which you want to report your WIP inventory values. The system defaults the functional currency from the set of books associated with your organization. Exchange Rate Select an exchange rate when you report your WIP inventory values in a foreign currency. You can choose from any valid exchange rates defined for the currency you selected in the previous field. See Also WIP Accounting Classes: page 2 – 22 Submitting a Request, Oracle Applications User’s Guide 14 – 76 Oracle Work in Process User’s Guide APPENDIX A Windows and Navigator Paths T his appendix shows you the default navigator path for each Oracle Work in Process window. Refer to this appendix when you do not already know the navigator path for a window you want to use. Windows and Navigator Paths A–1 Windows and Navigator Paths Brackets ([ ]) indicate a button. For forms described in other manuals: See... Refer to this manual for a complete form description CST Oracle Cost Management User’s Guide Flex Oracle Applications Flexfields Guide HR Oracle Human Resources User’s Guide MRP Oracle Master Scheduling/MRP and Oracle Supply Chain Planning User’s Guide User Oracle Applications User’s Guide Need to follow up on the name of the Change Discrete Job Status window (was just Change Status). Window Name Navigation Path All Reports: 14 – 1 Reports > All Assign Shop Floor Statuses: page 8 – 68 Move Transactions > Shop Floor Statuses > Assign Shop Floor Statuses Move Transactions > Move Transactions > [Statuses] Associate Lines and Assemblies: page 6 – 6 Repetitive > Associate Lines and Assemblies Autocreate: page 14 – 3 Discrete > Autocreate Orders Change Organization (see MRP) Other > Change Organization Change Repetitive Schedule Status: page 6 – 31 Repetitive > Repetitive Schedule > Special menu > Change Status Changing Statuses: page 3 – 40 Discrete > Discrete Jobs > Special menu > Change Status Close Discrete Jobs: page 3 – 51 Discrete > Close Discrete Jobs > Close Discrete Jobs (Form) Close Discrete Jobs: page 14 – 6 Discrete > Close Discrete Jobs > Close Discrete Jobs (SRS) Concurrent Requests (see User) Other > Request A–2 Oracle Work in Process User’s Guide Window Name Navigation Path Completion Transactions: page 7 – 58 Material Transactions > Completion Transactions Component Item Details: page 7 – 30 Material Transactions > WIP Material Transactions > Special menu > Component Item Details Components: page 5 – 5 Material Transactions > Work Order–less Completions > [Components] Discrete Jobs: page 3 – 12 Discrete > Discrete Jobs Distribution (see CST) Resource Transactions > View Resource Transactions > [Distributions] Import Jobs and Schedules: page 14 – 32 Discrete > Import Jobs and Schedules Repetitive > Import Jobs and Schedules Job and Schedule Documents: page 2 – 39 Setup > Job and Schedule Documents Job Lot Compositions: page 7 – 62 Material Transactions > Job Lot Compositions Labor Rates: page 2 – 34 Setup > Employees > Labor Rates Material Requirements: page 7 – 9 Job/Schedule Details > Material Requirements Move Transactions: page 8 – 35 Move Transactions > Move Transactions Operations: page 8 – 11 Job/Schedule Details > Operations Operation Documents: page 2 – 40 Setup > Operation Documents Pending Jobs and Schedules: page 3 – 63 Discrete > Pending Jobs and Schedules Repetitive > Pending Jobs and Schedules Pending Job and Schedule Errors: page 3 – 63 Discrete > Pending Jobs and Schedules > [Errors] Repetitive > Pending Jobs and Schedules > [Errors] Pending Move Transactions: page 8 – 59 Move Transactions > Pending Move Transactions Pending Resource Transactions: page 9 – 30 Resource Transactions > Pending Resource Transactions Personal Profile Values (see User) Other > Profile Persons (see HR) Setup > Employees > Persons Print: page 3 – 29 Discrete > Discrete Jobs > Special menu > Print Reports Discrete > Close Discrete Jobs > Special menu > Print Reports Discrete > Purge Discrete Jobs > Special menu > Print Reports Windows and Navigator Paths A–3 Window Name Navigation Path Print: page 6 – 21 Repetitive > Repetitive Schedules > Special menu > Print Reports Repetitive > Repetitive Schedules > Special menu > Print Reports Production Lines: page 2 – 36 Repetitive > Production Lines Purge Discrete Jobs: page 3 – 57 Discrete > Purge Discrete Jobs > Purge Discrete Jobs (Form) Purge Jobs and Schedules: page 14 – 40 Discrete > Purge Discrete Jobs > Purge Discrete Jobs (SRS) Repetitive > Purge Repetitive Schedules > Purge Repetitive Schedules (SRS) Purge Options: page 3 – 59 Discrete > Purge Discrete Jobs > Purge Discrete Jobs (Form) > Special menu > Purge Repetitive > Purge Repetitive Schedules > Purge Repetitive Schedules (Form) > Special menu > Purge Purge Repetitive Schedules: page 6 – 40 Repetitive > Purge Repetitive Schedules > Purge Repetitive Schedules (Form) Repetitive Schedules: page 6 – 13 Repetitive > Repetitive Schedules Reschedule: page 8 – 17 Job/Schedule Details > Operations > [Reschedule] Resource Requirements: page 9 – 10 Job/Schedule Details > Operations > [Resources] Resource Transactions: page 9 – 22 Resource Transactions > Resource Transactions Sales Orders: page 3 – 21 Discrete > Discrete Jobs [Sales Orders] Save Simulated Job: page 3 – 43 Discrete > Simulate Discrete Jobs > Special meuu > Save Simulated Job Schedule Groups: page 2 – 32 Setup > Schedule Groups Shop Floor Statuses: page 2 – 30 Move Transactions > Shop Floor Statuses > Shop Floor Statuses Simulate Discrete Jobs: page 3 – 43 Discrete > Simulate Discrete Jobs Submit Requests (see User) Report > Submit Requests Transaction Summary: page 3 – 33 Discrete > Discrete Jobs > Special menu > Transaction Summary Discrete > View Discrete Jobs > Special menu > Transaction Summary Discrete > Close Discrete Jobs > Special menu > Transaction Summary Discrete > Purge Discrete Jobs > Special menu > Transaction Summary A–4 Oracle Work in Process User’s Guide Window Name Navigation Path View Discrete Jobs: page 3 – 31 Discrete > View Discrete Jobs View Material Requirements: page 7 – 13 Job/Schedule Details > View Material Requirements View Move Transactions: page 8 – 49 Move Transactions > View Move Transactions View Operations: page 8 – 19 Job/Schedule Details > View Operations View Repetitive Schedules: page 6 – 24 Repetitive > View Repetitive Schedules View Resource Requirements: page 9 – 16 Job/Schedule Details > View Resource Requirements View Resource Transactions: page 9 – 27 Resource Transactions > View Resource Transactions WIP Accounting Classes: page 2 – 27 Setup > WIP Accounting Classes WIP Material Transactions: page 7 – 26 Material Transactions > WIP Material Transactions WIP Value Summary (see CST) Discrete >WIP Value Summary Repetitive > WIP Value Summary Work in Process Parameters: page 2 – 16 Setup > Parameters Work Order–less Completions: page 5 – 5 Material Transactions > Work Order–less Completions Windows and Navigator Paths A–5 A–6 Oracle Work in Process User’s Guide APPENDIX B Comparison of Manufacturing Methods T his appendix explains the differences between manufacturing methods in Oracle Applications. Comparison of Manufacturing Methods B–1 Comparison of Manufacturing Methods Oracle Applications supports discrete, project, repetitive, assemble–to–order, and flow (work order–less) manufacturing methods. Discrete Manufacturing You use discrete manufacturing for assemblies that you make in groups or batches. You define jobs with a job name, a job type, assembly, a job quantity, a start date, and an end date. For non–standard discrete jobs, you have the option of entering an assembly and job quantity. You can use assembly bills of material to create job material requirements. You can also use routings to schedule job production activities and create operation specific material and resource requirements. In discrete manufacturing, production costs are normally charged to a job. This is called job costing. You open jobs, collect charges, close jobs, and analyze and report costs and variances by job. Project Manufacturing You can use project manufacturing to meet demand driven production requirements for large contracts or projects. Project manufacturing allows you to plan, schedule, process, and cost against a specific contract or a group of contracts for a specific customer. If Oracle Projects is installed and the Project References Enabled and Project Control Level parameters are set in the Organization Parameters window in Oracle Inventory, you can assign project and, if required, task references to planned orders, jobs, purchase orders, sales orders, miscellaneous transaction and other entities within Oracle Manufacturing. If the Project Cost Collection Enabled parameter is also set, you can optionally collect and transfer manufacturing cost to Oracle Projects. Project costs are tracked by project/task and expenditure type. Assemble–to–Order(ATO) Manufacturing You can define available options for unique product configurations. You can master schedule models and options then create work orders to build these unique configuration. Oracle Order Entry/Shipping supports building and shipping ATO configurations. B–2 Oracle Work in Process User’s Guide Repetitive Manufacturing You use repetitive manufacturing for assemblies you make on a continuous or semi continuous basis over a predefined interval. You identify which assemblies are built on which production lines in advance. You can build assemblies on dedicated lines (one assembly per line) or on mixed model lines (many assemblies per line). You can build an assembly on multiple lines. You define repetitive schedules by the assembly, its daily quantity and its production lines, no job or work order exists. You can schedule production of a single assembly continuously for just a few hours or for any number of days. You can schedule repetitive production based on the fixed lead time of your production line if the lead time does not vary from one assembly to another assembly. If the lead time varies by assembly, you can schedule the repetitive production time based on the routing of the assembly the line is building. In repetitive manufacturing, you charge the cost of production directly to the assembly and line. You analyze and report costs by assembly and line during the period close. At period close, all charges to a repetitive assembly for that period are totalled and divided by the number of assemblies produced during that period. Period close also calculates assembly costs and usage variances. Repetitive schedules and discrete jobs can coexist. Oracle Master Scheduling/MRP and Oracle Supply Chain Planning plans production using repetitive or discrete planning techniques based on the planning type you specify for the item in Oracle Inventory. Flow Manufacturing Flow Manufacturing is an innovative manufacturing approach that aligns production with customer demand. Flow manufacturing employs Just–In–Time (JIT) concepts such as manufacturing to demand (vs. forecast), production lines for families of products (vs. process layout), pull material using kanbans (vs. push material), backflush material and costs upon completion (vs. at each operation), and so on. This in turn helps decrease inventories, optimize machine utilization, reduce response time to customer needs, and simplify shop floor activities. To prepare for flow manufacturing, you design production lines and production processes so that each line can produce a constantly changing mix of products within a family at a steady rate. Flow Comparison of Manufacturing Methods B–3 manufacturing production lines are designed to support the inter–mixed production of multiple products within a family on the same line. Line design includes grouping products into families, defining the processes and events required to produce each product, and grouping events into operations. By specifying demand rates for each product you can predict line capacities. As a part of line design, you can specify demand forecasts for the products, derive TAKT times (also called Operational Cycle Time), and calculate optimal kanban quantities. Flow manufacturing can be used in Oracle Inventory to replenish kanbans and in Oracle Work in Process to complete assemblies without having to created a job or a schedule. See: Performing Work Order–less Completions: page 5 – 5. Manufacturing Costing The costing method of the organization you are operating in determines whether you can used mixed manufacturing methods. See: Work in Process Costs: page 11 – 6. See Also Overview of Discrete Manufacturing: page 3 – 2 Overview of Repetitive Manufacturing: page 6 – 2 Overview of Configure to Order, Oracle Bills of Material User’s Guide Oracle Flow Manufacturing, Oracle Bills of Material User’s Guide Overview of Kanban Replenishment, Oracle Inventory User’s Guide Work in Process Planning: page D – 2 B–4 Oracle Work in Process User’s Guide APPENDIX C Supply Types T his appendix describes supply types and how they are used in Work in Process and other Oracle Manufacturing Applications. Supply Types C–1 Supply Types Supply types control how component materials are supplied to discrete jobs and repetitive schedules in Oracle Work in Process, how materials are planned in Oracle Master Scheduling/MRP and Supply Chain Planning, and how materials are costed in Oracle Cost Management. You can assign supply types to the items you define in Oracle Inventory. You can also assign supply types to components when you create bills of material in Oracle Bills of Material and Oracle Engineering. See: Defining Items, Oracle Inventory User’s Guide, Work In Process Attribute Group, Oracle Inventory User’s Guide, and Creating a Bill of Material, Oracle Bills of Material User’s Guide. In Oracle Work in Process, you can change the defaulted Based on Bill (see below) supply type that is assigned as you define jobs and schedules. Below is a list of the supply types and their uses: Assembly Pull Assembly Pull components are issued to discrete jobs and repetitive schedules when you complete assemblies in Work in Process. They are pulled from the supply subinventory assigned to the component requirement. If you must assign pull components to a bill of material or job that is not associated with a routing, you must assign an Assembly Pull, rather than operation pull, supply type. You cannot assign this supply type to a non–standard discrete job if you have not specified an assembly or bill of material reference for that job. Based on Bill The Based on Bill supply type is Work in Process specific. When you define a discrete job or a repetitive line/assembly association in Oracle Work in Process, the supply type for the assembly defaults to Based on Bill and assembly components are supplied based upon their bill of material supply types. See: Creating a Bill of Material, Oracle Bills of Material User’s Guide. If the supply type for a job or line/assembly association is changed, the new supply type is applied to all component material requirements. For example, if you change the supply type of a job assembly from Based on Bill to Assembly Pull, the C–2 Oracle Work in Process User’s Guide supply types of all assembly components are changed to Assembly pull. You can update the supply types of individual material requirements using the Material Requirements window in Oracle Work in Process. See: Adding and Updating Material Requirements: page 7 – 9. The system automatically changes components with a supply type of Operation Pull to Assembly Pull, when the Based on Bill supply type is applied to a job or repetitive schedule that has a bill of material but lacks a routing or operations. Bulk Bulk component requirements can be viewed and are displayed on reports. They can be used to communicate to the shop floor that bulk components must be used but need not be transacted. Bulk components are not backflushed nor do they default when issuing all components for an assembly. You can, however, manually issue specific bulk components to a discrete job or repetitive schedule. Operation Pull Operation pull components are issued to discrete jobs and repetitive schedules when you complete backflush operations. Components are pulled the supply subinventory assigned to the component. You cannot assign this supply type to an assenbly without a routing or a non–standard discrete job without a routing. You can assign this supply type to assemblies that have routings with no operations or when the routing has disabled operations. However, all components with a supply type of operation pull are automatically changed to assembly pull. Phantom Phantom components can be assigned to bill of material component subassemblies and subassembly items in Oracle Bills of Material and Oracle Engineering. Components of phantom subassemblies are used as if they were tied directly to the parent assembly. Phantom supply types cannot be assigned to jobs and repetitive Supply Types C–3 lines/assembly associations in Work in Process. See: Phantoms, Oracle Bills of Material User’s Guide. Phantoms behave normally when they are top level assemblies, such as when master scheduled or manufactured on a discrete job. As subassemblies, they lose their distinct identity and become a collection of their components. Phantom components (not the phantom itself) are included on discrete jobs and repetitive schedules and are listed on the Discrete Job and Repetitive Schedule Pick List Reports. Oracle Master Scheduling/MRP and Supply Chain Planning plans phantom subassemblies with lot–for–lot lot sizing. Otherwise, phantoms are planned like other assemblies. You must set the lead time of a phantom to zero to avoid lead time offset during the planning process. Oracle Master Scheduling/MRP and Supply Chain Planning ignores demand time fences, planning time fences, and order modifiers when planning phantom subassemblies. When assembly costs are rolled up in Oracle Cost Management, the material costs, but not the routing costs, of phantom assemblies are included in the cost of the higher level assemblies that include those phantoms. Push Push components can be issued directly to discrete jobs and repetitive schedule as required. You can specify the subinventory from which to issue push components, though Work in Process defaults the supply subinventory associated with the component. Supplier Supplier component requirements can be included on bills of material. Requirements for supplier components are created when you define discrete jobs and repetitive schedules in Work in Process. Supplier component requirements can be viewed and are displayed on reports. They provide information on the component materials that your suppliers provide but need not be transacted. C–4 Oracle Work in Process User’s Guide Supplier components are not backflushed nor do they default when issuing all components for an assembly. You can, however, manually issue specific supplier components to discrete jobs and repetitive schedules. See Also Overview of Bills of Material, Oracle Bills of Material User’s Guide Bills of Material Profile Options, Oracle Bills of Material User’s Guide Supply Types C–5 C–6 Oracle Work in Process User’s Guide APPENDIX D Work in Process Planning T his appendix describes the MRP planning process and how it is applied to discrete jobs and repetitive schedules. Work in Process Planning D–1 Work in Process Planning When you define an item in Oracle Inventory, you can specify whether Oracle Master Scheduling/MRP and Supply Chain Planning includes that item in the planning process. Discrete versus Repetitive Planning Oracle Master Scheduling/MRP and Supply Chain Planning considers the type of Work in Process production being used— discrete or repetitive — when planning supply and demand. Repetitive assemblies are planned in terms of daily production quantities rather than in terms of discrete quantities as are discrete assemblies. You can define acceptable overrun rates and repetitive planning periods for repetitive schedules. Oracle Master Scheduling/MRP and Supply Chain Planning uses overrun rates and planning periods to smooth production by preventing schedule rates from fluctuating too frequently. Planner Workbench You can use the Planner Workbench in Oracle Master Scheduling/MRP and Supply Chain Planning to implement all or some planned orders. You can modify the due dates and quantities of orders. The accounting class and lot numbers for planned orders are derived using the WIP Default Discrete Class and Default Lot Number Parameters. Default job names can be automatically generated by the automatic sequence generator if a prefix has been specified for the WIP:Discrete Job Prefix profile option. See Also Repetitive Planning Versus Discrete Planning, Oracle Master Scheduling/MRP and Oracle Supply Chain Planning User’s Guide Overview of Material Requirements Planning, Oracle Master Scheduling/MRP and Oracle Supply Chain Planning User’s Guide Overview of Planner Workbench, Oracle Master Scheduling/MRP and Oracle Supply Chain Planning User’s Guide Overview of Repetitive Planning, Oracle Master Scheduling/MRP and Oracle Supply Chain Planning User’s Guide Net Work in Process, Oracle Master Scheduling/MRP and Oracle Supply Chain Planning User’s Guide D–2 Oracle Work in Process User’s Guide APPENDIX E Attachments T his appendix describes the purpose and process of creating job, schedule, and operation attachments. Attachments E–1 Attaching Files to Jobs, Schedules, and Operations You can attach illustrative or explanatory files — in the form of text, images, word processing documents, spreadsheets, video, and so on— to discrete jobs, repetitive schedules, and job/schedule operations. For example, you can attach a text message, such as “source inspection required,” to a job to indicate that completed assemblies must be inspected before they can be shipped to customers. Routing operation attachments defined in Oracle Bills of Material are automatically copied to your work in process routing operations. You can delete them and add new ones as required. Deleting an attachment to an image or OLE object deletes the link to the file not the file itself. " To attach files to discrete jobs or repetitive schedules: 1. Navigate to the Discrete Jobs or Repetitive Schedules window and select a discrete job or repetitive schedule. You can only define attachments for discrete jobs and repetitive schedules that have been saved. See: Defining Discrete Jobs Manually: page 3 – 12 and Defining Repetitive Schedules Manually: page 6 – 13. 2. " Choose Attachments from the Edit Menu. To attach files to operations: 1. Navigate to the Operations window then select an operation in the Operations region. You can only define attachments for operations that have been saved. See: Adding and Updating Operations: page 8 – 11. 2. Choose the Attachments from the Edit menu. See Also Working with Attachments, Oracle Application User’s Guide Defining Job and Schedule Documents: page 2 – 39 Defining Operation Documents: page 2 – 40 E–2 Oracle Work in Process User’s Manual APPENDIX F Outside Processing and Work in Process Outside Processing and Work in Process F–1 Outside Processing and Work in Process You can use the closed loop system provided by Oracle Inventory, Oracle Purchasing, and Oracle Work in Process to manage outside processing. See: Outside Processing, Oracle Purchasing User’s Guide F–2 Oracle Work in Process User’s Manual APPENDIX G Special Menu Options T his appendix explains the various options that are available from the Special Menu. Special Menu Options G–1 Special Menu Depending on the currently active window and conditions applying to that window, functions available from the Special Menu can include: Discrete Jobs window Change Status Changes the statuses of discrete jobs you select. See: Mass Changing Discrete Job Statuses: page 3 – 40. Apply Default Job Name Generates a default Job name, based upon the prefix specified for the WIP:Discrete Job Prefix profile option, using the automatic sequence generator. See: Defining Discrete Jobs Manually: page 3 – 12. Print Reports Allows you to print the Discrete Job Routing Sheet, Discrete Job Pick List Report, or the Discrete Job Shortage Report for the ’active’ or current job. See: Printing Reports for Current Discrete Jobs: page 3 – 29 and Current Record Indicator, Oracle Applications User’s Guide. Transaction Summary Allows you to view pending job transactions for the ’active’ or current job. Pending transaction prohibit you from closing, purging, and in some instances, changing the status of a job. See: and Viewing Pending Job Transactions: page 3 – 33Current Record Indicator, Oracle Applications User’s Guide. Close Discrete Jobs window Close Closes selected jobs. See: Closing Discrete Jobs: page 3 – 51. Unclose Uncloses selected jobs. Note: This option appears only if the Close Discrete Jobs function security parameter is set to Y. G–2 Oracle Work in Process Check Requests Resubmits jobs that have failed to close and have a Pending Close status. Print Reports Allows you to print the Discrete Job Routing Sheet, Discrete Job Pick List Report, or the Discrete Job Shortage Report for the ’active’ or current job. See: Printing Reports for Current Discrete Jobs: page 3 – 29 and Current Record Indicator, Oracle Applications User’s Guide. Transaction Summary Allows you to view pending job transactions for the ’active’ or current job. Pending transaction prohibit you from closing, purging, and in some instances, changing the status of a job. See: Current Record Indicator, Oracle Applications User’s Guide and Viewing Pending Job Transactions: page 3 – 33. Purge Discrete Jobs window Purge Invokes the Purge Options window. See: Specifying Purge Options: page 3 – 59. Print Reports Allows you to print the Discrete Job Routing Sheet, Discrete Job Pick List Report, or the Discrete Job Shortage Report for the ’active’ or current job. See: Printing Reports for Current Discrete Jobs: page 3 – 29 and Current Record Indicator, Oracle Applications User’s Guide. Transaction Summary Allows you to view pending job transactions for the ’active’ or current job. Pending transaction prohibit you from closing, purging, and in some instances, changing the status of a job. See: Current Record Indicator, Oracle Applications User’s Guideand Viewing Pending Job Transactions: page 3 – 33. Simulate Discrete Jobs window Save Simulated Job Invokes the Save Simulated Job window. See: Simulating and Saving Simulated Discrete Jobs: page 3 – 43. Viewing Discrete Jobs window Transaction Summary Allows you to view pending job transactions for the ’active’ or current job. Pending transaction prohibit you from closing, purging, and in some instances, changing the status of a job. See: Current Record Indicator, Oracle Applications User’s Guide and Viewing Pending Job Transactions: page 3 – 33. Special Menu Options G–3 Repetitive Schedules window Change Status Changes the statuses of the repetitive schedules you select. See: Mass Changing Repetitive Schedule Statuses: page 6 – 31. Print Reports Allows you to print the Repetitive Routing Sheet, Repetitive Pick List Report, Repetitive Line Report, Repetitive Schedule Shortage Report or Repetitive Schedule Data Report for the ’active’ or current repetitive schedule. See: Printing Reports for Current Repetitive Schedules: page 6 – 21 and Current Record Indicator, Oracle Applications User’s GuideCurrent Record Indicator, Oracle Applications User’s Guide. Purge Repetitive Schedules window Purge Invokes the Purge Options window appears. See: Specifying Purge Options: page 3 – 59. Print Reports Allows you to print the Repetitive Routing Sheet, Repetitive Pick List Report, Repetitive Line Report, Repetitive Schedule Shortage Report or Repetitive Schedule Data Report for the ’active’ or current repetitive schedule. See: Printing Reports for Current Repetitive Schedules: page 6 – 21 and Current Record Indicator, Oracle Applications User’s Guide.Current Record Indicator, Oracle Applications User’s Guide Pending Jobs and Schedules window Concurrent Requests Resubmits job and schedule records that have failed the load process. See: Processing Pending Jobs and Schedules: page 3 – 63. WIP Material Transactions Component Item Details Displays details for push component items issued or added as you issue and return components using the ’All material’ option. See: Issuing and Returning All Push Components: page 7 – 30. Enter Quality Results Navigates to the Enter Quality Results window in Oracle Quality. See: Entering Quality Results Move Transactions G–4 Oracle Work in Process Associated with Move Transactions, Oracle Quality User’s Guide. Pending Move Transactions Select All for Resubmit Resubmits move transactions that have failed validation and remain in the Open Move Transaction Interface table. See: Processing Pending Move Transactions: page 8 – 59. Pending Resource Transactions Select All for Resubmit Resubmits resource transactions that have failed validation and remain in the Open Resource Transaction Interface table. See: Processing Pending Resource Transactions: page 9 – 30. Special Menu Options G–5 G–6 Oracle Work in Process Glossary absorption account The offset or contra account for any cost charged to your inventory or work in process value. For example, when you perform a purchase order receipt and the item has a material overhead rate, you debit your inventory valuation account and credit your material overhead absorption account for the material overhead cost. You have ”absorbed” expenses from your general ledger accounts into your inventory. At the month–end, you compare your absorption accounts against expenses incurred in your general ledger and write the difference off to your income statements. accounting class See WIP accounting class active schedule A schedule currently running on a production line. A schedule can be active past its scheduled completion date or before its scheduled start date. activity A business action or task which uses a resource or incurs a cost. alternate bill of material An alternate list of component items you can use to produce an assembly. alternate routing An alternate manufacturing process you can use to produce an assembly. assemble–to–order (ATO) An environment where you open a final assembly order to assemble items that customers order. Assemble–to–order is also an item attribute that you can apply to standard, model, and option class items. assemble–to–order (ATO) model A configuration you make in response to a customer order that includes optional items. assembly An item that has a bill of material. You can purchase or manufacture an assembly item. See also assemble–to–order, bill of material. assembly completion pull transaction A material transaction where you backflush components from inventory to work in process as you complete the operation where the component is consumed. See operation completion pull transaction. assembly completion transaction A material transaction where you receive assemblies into inventory from a job or schedule upon completion of the manufacture of the assembly. assembly move completion transaction A move transaction that completes assemblies into inventory. assembly scrap transaction A move transaction where you charge a scrap account as you move assemblies into a Scrap intraoperation step. This reduces the value of your discrete job. assembly UOM item A purchasing item associated with an outside resource that you purchase using the assembly’s unit of measure. The assembly’s unit of measure should be the same as the purchasing item’s unit of measure. asset item Anything you make, purchase, or sell including components, subassemblies, finished products, or supplies which carries a cost and is valued in your asset subinventories. Glossary 1 asset subinventory Subdivision of an organization, representing either a physical area or a logical grouping of items, such as a storeroom where quantity balances are maintained for all items and values are maintained for asset items. assigned units The number of resource units assigned to work at an operation in a routing. For example, if you have 10 units of machine resource available at a department, you can assign up to 10 of these units to an operation in a routing. The more units you assign, the less elapsed time Work in Process schedules for the operation. ATP See available to promise. ATT See available to transact. autocharge A method of charging a discrete job or repetitive schedule for the resources consumed at an operation. automatic sourcing A Purchasing feature which allows you to specify for predefined items a list of approved suppliers and to associate source documents for these suppliers. When you create a requisition or purchase order line for the item, Purchasing automatically provides appropriate pricing for the specified quantity based on the top–ranked open source document for the supplier with the highest percentage allocation. autorelease To automatically release the next available repetitive schedule upon completion of the current repetitive schedule. Available To Promise (ATP) The quantity of current on–hand stock, outstanding receipts and planned production which has not been committed through a reservation or placing demand. In Oracle Inventory, you define the types of supply and demand that should be included in your ATP calculation. 2 Oracle Work in Process User’s Guide Available To Transact (ATT) Quantity on hand less all reservations for the item which may be transferred within or out of inventory. backflush operation A routing operation where you backflush component items. backflush transaction A material transaction that automatically issues component items into work in process from inventory when you move or complete the assembly. Also known as post–deduct or pull. See pull transaction backward scheduling A scheduling technique where you specify a production end date and Oracle Manufacturing calculates a production start date based on detailed scheduling or repetitive line scheduling. bill revision A specific version of an item which specifies the components that are active for a date range. bill/routing reference A bill or routing you assign to non–standard discrete jobs. You use the bill reference to create the material requirements for the job. You use the routing reference to create the routing for the job. blanket purchase agreement A type of purchase order you issue before you request actual delivery of goods or services. You normally create a blanket purchase agreement to document a long–term supplier agreement. A blanket purchase agreement may contain an effective date and an expiration date, a committed amount, or quantity. You use a blanket purchase agreement as a tool for specifying agreed prices and delivery dates for goods and services before ordering them. blanket purchase order See blanket purchase agreement blanket release An actual order of goods and services against a blanket purchase agreement. The blanket purchase agreement determines the characteristics and prices of the items. The blanket release specifies actual quantities and dates ordered for the items. You identify a blanket release by the combination of the blanket purchase agreement number and the release number. bucket days The number of workdays within a repetitive planning period. build sequence The sequence of jobs within a schedule group. For example, you can use sequences to prioritize all jobs on a specific production line by customer. Similarly, you can use sequences to insure that jobs are built in reverse departure order thus facilitating truck loading. See also schedule group bulk items Component items on a bill of material not usually transacted directly to the job or repetitive schedule. Bulk items are usually charged to the work in process department where the item is consumed. bulk requirement See bulk items buyer Person responsible for placing item resupply orders with suppliers and negotiating supplier contracts. by–product Material produced as a residual of a production process. Represented by negative usage in the bill of material for an assembly. cancelled job A discrete job you no longer want to work on. You cannot make transactions, move assemblies, or apply or update costs. cancelled schedule A repetitive schedule you no longer want to work on. You cannot make transactions, move assemblies, or apply costs. capital project A project in which you build one or more depreciable fixed assets. charge type See autocharge closed job A discrete job that is unavailable for charges or any type of transaction. Closing a job calculates final costs and variances and creates history for the job. common bill of material An assembly that uses the bill of material of another assembly as its bill. This enables you to reduce your maintenance effort by sharing the same bill structure among two or more assemblies. For example, if you have identical bills of material that produce the same product in two different organizations, you can define common bills of material for the identical structures. common locator .A locator without a project or project and task reference. See also project locator common routing A routing that uses the routing of another assembly as its routing. This enables you to reduce your maintenance effort by sharing the same routing and operations for two or more assemblies. common subinventory Subinventory that does not have a project reference into which items can be delivered and out of which items can be issued and transferred. completed assembly An assembly you built on a discrete job or repetitive schedule and received into inventory. completed job A discrete job whose quantity planned equals the number of assemblies actually completed. Glossary 3 completed schedule A repetitive schedule whose number of assemblies planned equals the number of assemblies actually completed. completion date The date you plan to complete production of the assemblies in a discrete job. completion locator An inventory location within a completion subinventory where you receive completed assemblies from work in process. completion subinventory An inventory location at the end of your production line where you receive completed assemblies from work in process. Often this is the supply subinventory for subassemblies or finished goods inventories for final assemblies. component demand Demand passed down from a parent assembly to a component. component item An item associated with a parent item on a bill of material. component yield The percent of the amount of a component you want to issue to build an assembly that actually becomes part of that assembly. Or, the amount of a component you require to build plus the amount of the component you lose or waste while building an assembly. For example, a yield factor of 0.90 means that only 90% of the usage quantity of the component on a bill actually becomes part of the finished assembly. configuration bill of material The bill of material for a configuration item. 4 Oracle Work in Process User’s Guide configuration variance For Work in Process, this quantity variance is the difference between the standard components required per the standard bill of material and the standard components required per the work in process bill of material. Currently, this variance is included with the material usage variance. cost element A classification for the cost of an item. Oracle Manufacturing supports five cost elements: material, material overhead, resource, outside processing, and overhead. cost group An attribute of a project which allows the system to hold item unit costs at a level below the inventory organization. Within an organization, an item may have more than one cost if it belongs to multiple cost groups. Item costing can be specific to a single project if each project has a distinct cost group, or specific to a group of projects if all projects in that group are assigned to the same cost group. cost transaction The financial effect of your material, resource, overhead, job and period close, and cost update activities. For example, each material quantity transaction may have several cost accounting entries, and each accounting entry is a cost transaction. cost type A set of costs for items, activities, resources, outside processing, and overheads. You may have unlimited cost types for each organization, but only one is used to record cost transactions. The Frozen Standard cost type is used for standard costing; the Average Costs type is used for Average costing. Others could be defined for simulation or temporary purposes. count point operation A default operation to move to and from where you record move and charge resource transactions. Also known as pay point. critical path The series of operation start and completion dates and times that result from the detailed scheduling algorithm. current average cost The current weighted average cost per unit of an item before a transaction is processed. See new average cost. current on–hand quantity Total quantity of the item on–hand before a transaction is processed. daily line capacity The daily production rate of assemblies on a production line. This is equal to the line speed (in hours) times the line production hours. daily quantity See daily rate daily rate The number of completed assemblies a repetitive schedule plans to produce per day. Also known as production rate. See repetitive rate demand class A classification of demand to allow the master scheduler to track and consume different types of demand. A demand class may represent a particular grouping of customers, such as government and commercial customers. Demand classes may also represent different sources of demand, such as retail, mail order, and wholesale. department An area within your organization that consists of one or more people, machines, or suppliers. You can also assign and update resources to a department. departure order The order of jobs within a schedule group. Jobs are normally sequenced within a schedule group in the order that they must be loaded onto the truck for shipment. See also schedule group and detailed scheduling A method of scheduling production that considers minute to minute resource availability information as well as exact resource requirements from routings. disable date A date when an Oracle Manufacturing function is no longer available for use. For example, this could be the date on which a bill of material component or routing operation is no longer active, or the date a forecast or master schedule is no longer valid. Glossary 5 discrete job A production order for the manufacture of a specific (discrete) quantity of an assembly, using specific materials and resources, in a limited time. A discrete job collects the costs of production and allows you to report those costsincluding variancesby job. Also known as work order or assembly order. discrete manufacturing A manufacturing environment where you build assemblies in discrete jobs or batches. Different from a repetitive production environment where you build assemblies on production or assembly lines at a daily rate. dispatch report A report that prioritizes planned production work based on operation schedule dates and times. distribution account An account where you record material, material overhead, resource, outside processing, and overhead charges incurred by a discrete job or repetitive assembly. In a standard costing system, this is where you record your standard costs. efficiency A productivity measure that focuses on actual performance against a standard. Expressed in a percentage figure, it is calculated by dividing actual resource time charged to a task by the standard resource requirements for the same task. efficiency variance A quantity variance defined as the difference between the amount of a resource (typically in hours) required at standard and the actual amount used to manufacture an assembly. elemental variance A work in process variance between the standard of an assembly and the actual charges to a standard job or repetitive schedule distributed by cost element. 6 Oracle Work in Process User’s Guide engineering change order (ECO) A record of revisions to one or more items usually released by engineering. engineering item A prototype part, material, subassembly, assembly, or product you have not yet released to production. You can order, stock, and build engineering items. expenditure type An implementation–defined classification of cost you assign to each expenditure item. Expenditure types are grouped into cost groups (expenditure categories) and revenue groups (revenue categories). expense item Anything you make, purchase, or sell including components, subassemblies, finished products, or supplies and that does not carry a cost. Also known as a non–asset item. expense subinventory Subdivision of an organization, representing either a physical area or a logical grouping of items, such as a storeroom where no value exists but the quantities may be tracked. express receipt A site option that lets you receive an entire purchase order or blanket purchase agreement release with one keystroke. final assembly order A discrete job created from a configuration or an assemble to order item and linked to a sales order. Also known as final assembly schedule. first unit completion date The date and time you plan to complete production of the first assembly on a repetitive schedule. This date equals the first unit start date plus the lead time. first unit start date The date and time you plan to begin production of the first assembly on a repetitive schedule. This date equates to the start of your lead time. flow charging A repetitive transaction method where you charge material, move, resource, and overhead transactions to a specific assembly on a line rather than a specific repetitive schedule. See repetitive allocation flow manufacturing folder A flexible entry and display window in which you can choose the fields you want to see and where each appears in the window. forward scheduling A scheduling technique where you specify a production start date and Oracle Manufacturing calculates a production end date using either detailed scheduling or repetitive line scheduling. intraoperation steps The particular phases within an operation. There are five intraoperation steps in Work in Process: Queue, Run, To Move, Reject, and Scrap. issue transaction A material transaction to issue component items from inventory to work in process. item–based resource A resource whose usage quantity is the amount required per assembly unit you make. job costing A method of collecting and reporting costs for each individual discrete job. Includes costs in due to material, resource and overhead transactions, and costs out due to completions, scrap and variances. Used for standard and non–standard asset discrete jobs. job status An Oracle Manufacturing function that lets you describe various stages in the life cycle of a discrete job and control activities that you can perform on the job. labor efficiency variance The difference between actual and standard man–hours of work. last unit completion date The date and time you plan to complete production of the last assembly on a repetitive schedule. This date equates to the first unit completion date plus processing days. last unit start date The date and time you plan to begin production of the last assembly on a repetitive schedule. This date is the first unit start date plus processing days. lead time line The production line Bills of Material uses to calculate the processing lead time for a particular repetitive assembly, since lead times may vary on different production lines. lead time rollup A Bill of Material program that computes cumulative lead times for items. line lead time The time required to complete the first assembly on a production line. line lead time basis A repetitive scheduling technique that uses a fixed line lead time for all production on a repetitive line or calculates the line lead time based on each assembly’s routing. Glossary 7 line priority The line priority indicates which production line to use to build assemblies. You create repetitive schedules on the highest priority line first, then, if the line capacity is less than demand, additional repetitive schedules are created on other lines in decreasing order of their line priority. For example, if demand is for 1000 units per day on two lines with a daily capacity of 750, the line with the highest priority is loaded with 750 and the lower priority line with 250. For lines of equal priority, the load is allocated evenly across lines. line production hours The number of hours per day that production line operates. This is equal to the difference between the line start time and line stop time. line speed The hourly production rate of assemblies on a production line. line start time The time a production line starts running every day. The line start time is used to schedule repetitive schedules on a line. line stop time The time a production line stops running every day. The line stop time is used to schedule repetitive schedules on a line. locator Physical area within a subinventory where you store material, such as a row, aisle, bin, or shelf. locator control An Oracle Manufacturing technique for enforcing use of locators during a material transaction. lot A specific batch of an item identified by a number. lot based resource A resource whose usage quantity is the amount required per job or schedule. 8 Oracle Work in Process User’s Guide lot control An Oracle Manufacturing technique for enforcing use of lot numbers during material transactions thus enabling the tracking of batches of items throughout their movement in and out of inventory. manual resource A resource manually charged to a discrete job or repetitive schedule. mass loading An Oracle Manufacturing function to create one or more discrete jobs or repetitive schedules based on planned orders or schedules in your MRP or master production schedule. mass rescheduling An Oracle Manufacturing function where you can reschedule or change the status of one or more discrete jobs based on your planned reschedule recommendations in your MRP or MPS. material overhead rate A percentage of an item cost you apply to the item for the purposes of allocating material overhead costs. For example, you may want to allocate the indirect labor costs of your manufacturing facility to items based on a percentage of the item’s value and usage. material requirement An inventory item and quantity needed to build an assembly on a job or repetitive schedule. Discrete job and repetitive schedule material requirements are created based on the component items defined on the assembly’s bill of materials. Issue transactions fulfill material requirements. material transaction Transfer between, issue from, receipt to, or adjustment to an inventory organization, subinventory, or locator. Receipt of completed assemblies into inventory from a job or repetitive schedule. Issue of component items from inventory to work in process. maximum rate The maximum number of completed assemblies a production line can produce per hour. methods variance For Work in Process, this quantity variance is defined as the difference between the standard resources required per the standard bill of material and the standard resources required per the work in process bill of material. This variance is included with the resource efficiency variance. midpoint scheduling A scheduling technique where you specify an operation start or end date and Oracle Manufacturing automatically calculates production start and end dates. minimum rate The minimum number of completed assemblies a production line can produce per hour. model bill of material A bill of material for a model item. A model bill lists option classes and options available when you place an order for the model item. move transaction A transaction to move assemblies from operation to operation or within an operation on a discrete job or repetitive schedule. MPS–planned item An item controlled by the master scheduler and placed on a master production schedule. The item is critical in terms of its impact on lower–level components and/or resources, such as skilled labor, key machines, or dollars. The master scheduler maintains control for these items. MRP net quantity The quantity planning views as supply coming from a discrete job on the scheduled completion date. negative requirement A requirement supplied to a discrete job or repetitive schedule instead of being consumed by it. Negative requirements can be created to support by–products or other reusable components. nettable control An Oracle Manufacturing function that lets you specify whether the MRP planning process considers the requirements of the job or schedule in its netting calculations. new average cost Cost of an item after a transaction that affects the average cost is processed. See current average cost. new on–hand quantity The quantity on–hand immediately after the transaction is performed and saved. Equal to current on–hand quantity plus total quantity. See current on–hand quantity, total quantity. non–standard asset job A type of non–standard job carried as an asset during the life of the job. Glossary 9 non–standard discrete job A type of discrete job that controls material and resources and collects costs for a wide variety of miscellaneous manufacturing activities. These activities can include rework, field service repair, upgrade, disassembly, maintenance, engineering prototypes, and other projects. Non–standard jobs do not earn material overhead upon assembly completion. non–standard expense job A type of non–standard job expensed at the close of each accounting period. Typical expense jobs include maintenance and repair. offsetting account The source or opposite side of an accounting entry. For example, when you charge resources in Work in Process you debit a resource to your work in process resource valuation account; the offset account is the credit to the resource absorption account. on hold job/schedule A job or repetitive schedule not accepting further activity and is therefore untransactable. open interface A Manufacturing function that lets you import or export data from other systems through an open interface. An example is a bar code reader device accumulating data you later import into your manufacturing system for further processing. open requirement A WIP material requirement you have not yet transacted to a discrete job or repetitive schedule. It equates to the component quantity required less any quantity issued. operation A step in a manufacturing process where you perform work on, add value to, and consume department resources for an assembly. 10 Oracle Work in Process User’s Guide operation code A label that identifies a standard operation. operation completion pull transaction A material transaction where you backflush components from inventory to work in process as you complete the operation where the component is consumed. See also backflush transaction operation completion transaction A move transaction from one operation to the next where you have completed building the assembly at that operation. In this process, you can also charge resources and overheads and backflush component items. operation overlap scheduling A scheduling technique that allows you to schedule resource activities in the prior and next operations to overlap with the current operation. operation sequence A number that orders operations in a routing relative to each other. organization A business unit such as a plant, warehouse, division, department, and so on. Order Entry refers to organizations as warehouses on all Order Entry windows and reports. outside operation An operation that contains outside resources and possibly internal resources as well. outside processing Performing work on a discrete job or repetitive schedule using resources provided by a supplier. outside processing operation Any operation that has an outside processing resource. See outside resource outside processing item An item you include on a purchase order line to purchase supplier services as part of your assembly build process. This item can be the assembly itself or a non–stocked item which represents the service performed on the assembly. outside resource A resource provided by a supplier you include in your routings, such as supplier sourced labor or services. This includes both PO move and PO receipt resources. overhead The indirect expenses allocated in your budgeting process and assigned to your resources or departments. You charge overhead costs based on resource value, resource units, or operation completions. You typically include administration, facility, depreciation activity, and other costs you cannot directly charge to your manufactured items. Does not include material overhead. overhead transaction A work in process transaction that automatically charges overhead costs to a job or repetitive schedule as you perform moves or charge resources. pending A status where a process or transaction is waiting to be completed. period–based costing A method of collecting and reporting costs by period rather than by some other method such as by discrete jobs. Used primarily in costing repetitive schedules and non–standard expense discrete jobs. phantom assembly An assembly Work in Process explodes through when it creates the bill of material for a job or schedule. A particular assembly can be a phantom assembly on one bill and a subassembly on another. pick list A report that lists all component requirements sorted by supply type for a particular discrete job, repetitive schedule or production line. pick–to–order A configure–to–order environment where the options and included items in a model appear on pick slips and order pickers gather the options when they ship the order. Alternative to manufacturing the parent item on a work order and then shipping it. Pick–to–order is also an item attribute that you can apply to standard, model, and option class items. planned order A suggested quantity, release date, and due date that satisfies net item requirements. MRP owns planned orders, and may change or delete the orders during subsequent MRP processing if conditions change. MRP explodes planned orders at one level into gross requirements for components at the next lower level (dependent demand). Planned orders along with existing discrete jobs also serve as input to capacity requirements planning, describing the total capacity requirements throughout the planning horizon. Glossary 11 PO move resource An outside resource that is automatically charged upon receipt of a purchase order. PO move resources also automatically initiate shop floor move transactions upon receipt. PO receipt resource An outside resource that is automatically charged upon receipt of a purchase order. previous level costs The material, material overhead, outside processing, resource and overhead costs of the components used in the manufacture of an assembly. primary bill of material A list of the components you most frequently use to build a product. The primary bill is the default bill for rolling up costs, defining a job, and calculating cumulative item lead times. Master Scheduling/MRP uses this bill to plan your material. primary routing A list of the operations you most frequently perform to build a product. The primary routing is the default routing for defining a job and calculating manufacturing lead times. processing days See repetitive processing days processing status The processing state of a row (record) in an open interface table. Common statuses include, but are not restricted to, Pending, Running, and Error. See repetitive processing days. production line The physical location where you manufacture a repetitive assembly, usually associated with a routing. You can build many different assemblies on the same line at the same time. Also known as assembly line. production rate See line speed. 12 Oracle Work in Process User’s Guide project A unit of work broken down into one or more tasks, for which you specify revenue and billing methods, invoice formats, a managing organization, and project manager and bill rates schedules. You can charge costs to a project, as well as generate and maintain revenue, invoice, unbilled receivable and unearned revenue information for a project. project inventory Any and all items and costs in both project subinventories and project work in process jobs. project job A standard or non–standard WIP job with a project reference. The valuation accounts associated with this type of job will be project work in process. Any balance remaining in such a job when it is closed will be reported as a variance. project locator A locator with a project or project and task reference. See also common locator. project manufacturing The type of project that uses Projects with Manufacturing to track the costs of a manufacturing–related project against a project budget. project subinventory A subinventory with a project reference into which terms can be delivered and out of which items can be issued and transferred. project task A subdivision of Project Work. Each project can have a set of top level tasks and a hierarchy of subtasks below each top level task. You can charge costs to tasks at the lowest level only. See also Work Breakdown Structure. pull transaction A material transaction that automatically issues component items into work in process from inventory when you move or complete the assembly. Also known as post–deduct or backflush. See backflush transaction purge A technique for deleting data in Oracle Manufacturing that you no longer need to run your business. push transaction A material transaction to issue component items from inventory to work in process before you manufacture the assembly. quantity completed For an operation on a discrete job or repetitive schedule, the quantity of the assembly that you transacted beyond the Run intraoperation step. For a discrete job or repetitive schedule, the quantity of the assembly that you received into inventory. quantity in operation The quantity of an assembly in an operation on a discrete job or repetitive schedule. This includes the quantities in each of the intraoperation steps. quantity issued The quantity of a component item issued from inventory to a discrete job r repetitive schedule to fulfill a WIP material requirement. quantity on hand Current quantity of an item in inventory. quantity remaining The quantity of an assembly remaining to be completed at an operation in a discrete job or repetitive schedule. This is the sum of the quantities in all intraoperation steps at all operations before the current operation, plus the quantities in the Queue and Run intraoperation steps at the current operation. quantity required The total quantity of a component item required to produce all the assemblies in a discrete job or repetitive schedule as determined by the usage quantity on the bill of materials, the production quantity, and the component yield. queue An intraoperation step in an operation where assemblies are waiting to be worked on. The default intraoperation step for every operation in a routing. rate variance For resources charged to work in process, this variance is the difference between the actual resource rate and the standard resource rate times the resource quantity charged to the job or repetitive schedule. You create rate variance entries if you charge resources using an actual rate and you chose Yes for the Standard Rate field in the Resources window. reject An intraoperation step in an operation where you can record assemblies that require rework or need to be scrapped. release date The date when you release a discrete job or repetitive schedule to the shop floor signifying that work can begin and the discrete job or repetitive schedule becomes transactable. released job/schedule A discrete job or repetitive schedule that you have signified available to be worked on and transactable. repetitive allocation An Oracle Manufacturing technique for applying transaction quantities and costs across several repetitive schedules that are building the same repetitive assembly on the same line. See flow charging Glossary 13 repetitive assembly An assembly that you build in a repetitive manufacturing environment (for example on a production line). You can also build a repetitive assembly in discrete jobs if you operate in a hybrid manufacturing environment. repetitive line scheduling A method of scheduling repetitive production on a line that considers line speed, line start and stop times, lead time, and workday calendar. repetitive manufacturing A manufacturing environment where you build assemblies repetitively, on production lines, rather than in discrete jobs or batches. repetitive planning period A period, defined as a number of days, that smooths the production rate over time. With repetitive planning periods, you can prevent your planned repetitive production rate from fluctuating too frequently. repetitive processing days The number of days you plan to work on a repetitive schedule, from the first unit start date to the last unit start date. repetitive rate The daily rate for a repetitive schedule. See daily rate repetitive schedule A production order for the manufacture of an assembly on a continuous basis as defined by a daily rate, using specific materials and resources, over a period of time. A repetitive schedule collects the costs of production, but you report those costs by period rather than by schedule. Also known as flow order or scheduled rate. repetitive schedule allocation The process of dividing suggested aggregate repetitive schedules and allocating them across individual production lines, based on predefined line priorities and line speeds. 14 Oracle Work in Process User’s Guide repetitive schedule status An Oracle Manufacturing function that lets you describe various stages in the life cycle of a repetitive schedule and control activities that you can perform on the schedule. replenish to order See assemble–to–order (ATO) requirement See material requirement requirement date The date when the requirement needed by the discrete job or repetitive schedule is to be consumed. Requirement dates are defaulted to the start date of the operation where a requirement is consumed. reschedule To modify the schedule of a discrete job. You can reschedule a discrete job by changing the start date, completion date, job quantity or any operation date on the routing. Planning can automatically reschedule jobs that are not firm based on planning requirement changes. resource Anything of value, except material and cash, required to manufacture, cost, and schedule products. Resources include people, tools, machines, labor purchased from a supplier, and physical space. resource basis The basis for resource usage quantity that indicates whether that quantity is required per item or per lot. resource charge See resource transaction. resource requirement A resource and quantity needed to build an assembly on a job or repetitive schedule. Discrete job and repetitive schedule resource requirements are created based on the resource requirements specified on the assembly’s routing. Resource transactions fulfill resource requirements. resource sequence The number that indicates the order of a resource in an operation relative to other resources. resource transaction A transaction where you automatically or manually charge resource costs to a discrete job or repetitive schedule. resource units applied A quantity you charge to a job or repetitive schedule for work performed by a resource. The quantity is expressed in the unit of measure of the resource. For example, if the unit of measure of a resource is hours and the resource works 10 hours, you apply 10 resource units to the job or repetitive schedule. resource UOM item A purchasing item associated with an outside resource that you purchase using the resource’s unit of measure. return to supplier A transaction that allows you to return to the supplier items from a fully or partially received purchase order and receive credit for them. reversing transaction A transaction that reverses a previously processed material, move, resource, or overhead transaction. revision A particular version of an item, bill of material, or routing. revision control An inventory control option that tracks inventory by item revision and forces you to specify a revision for each material transaction. roll forward An Oracle Manufacturing technique where you can automatically take the material you over issued to a particular repetitive schedule and move it forward into the next available repetitive schedule. route sheet A report that provides full routing, operation, resource, and material requirement details for jobs and repetitive schedules. Typically used to know how, when, where, and who builds an assembly. Also known as traveler. routing revision A specific version of a routing that specifies the operations that are active for a date range. run An intraoperation step where you move assemblies that you are working on at an operation. schedule group An identifier used to group jobs for scheduling and releasing purposes. For example, you might group together all jobs that must be completed on a specific date and are being built on the same production line. Jobs within a schedule group can be sequenced. See also build sequence scheduled resource A resource on a routing that is scheduled by Work in Process. scrap An intraoperation step where you move assemblies that cannot be reworked or completed. scrap account An account that you may use to charge scrap transactions. serial number A number assigned to each unit of an item and used to track the item. serial number control A manufacturing technique for enforcing use of serial numbers during a material transaction. shift A scheduled period of work for a department within an organization. Glossary 15 shop floor status An Oracle Manufacturing function that lets you restrict movement of assemblies at an operation and intraoperation step within a discrete job or repetitive schedule. shortage An open requirement with no inventory in the organization to support the requirement. shrinkage rate The percentage on a parent assembly expected to be scrapped in work in process. simulated job Job used to evaluate the availability of material and resources required for a potential discrete job based on the job quantity and need date for the assembly. single level variance A work in process variance that is the difference between the standard cost of an assembly and the actual charges to a standard jobs or repetitive schedules distributed by structure level. This variance looks at the assembly cost for the resource and overhead standard cost at the top level and compares them to the actual resource and overhead costs charged to the standard job or repetitive schedule. All other costs material, material overhead, outside processing, resource and overhead costs from lower level assemblies are included in the material usage variance calculation. standard comments Standard text you can assign to discrete jobs or repetitive schedules. Special instructions or details specific to a particular job or circumstance. 16 Oracle Work in Process User’s Guide standard costing A costing method where a predetermined standard cost is used for charging material, resource, overhead, period close, job close, and cost update transactions and valuing inventory. Any deviation in actual costs from the predetermined standard is recorded as a variance. standard discrete job A type of discrete job that controls material and resources for standard production assemblies. standard operation A commonly used operation you can define as a template for use in defining future routing operations. start date The date you plan to begin production of assemblies in a discrete job. subassembly An assembly used as a component in a higher level assembly. subinventory Subdivision of an organization, representing either a physical area or a logical grouping of items, such as a storeroom or receiving dock. suggested repetitive schedule The schedule for an individual production line for a specific item that is derived from the Suggested aggregate schedule. MRP divides the suggested aggregate schedule for a specific line and item based on the production line attributes: priority, minimum and maximum rates. supplier Provider of goods or services. supplier requirement See supplier sourced component supplier sourced component A component item on a bill of material supplied to work in process directly by a supplier. supply A quantity of materials available for use. Supply is replenished in response to demand or anticipated demand. supply locator The specific location, such as shelves or containers, within a supply subinventory that you use as the default locator in a material transaction. supply subinventory The subinventory you use as a primary source of supply to meet a specific material requirement in a discrete job or repetitive schedule. In Release 9, this is the backflush subinventory for pull material or the primary issue subinventory for push material. supply type A bill of material component field that controls issue transactions from inventory to work in process. Supply types supported by Work in Process include: Push, Assembly pull, Operation pull, Bulk, Supplier, Phantom, and Based on bill. this level costs The cost or value added at the current level of an assembly. Resource, outside processing and overhead costs are examples of this level costs. Material is always a previous level cost. to move An intraoperation step where assemblies can either be completed to a subinventory or wait to be moved to another operation. transaction cost The cost per unit at which the transaction quantity is valued. transaction date The date you enter and Oracle Manufacturing maintains for any manufacturing transaction. The date must fall within an open accounting period and be greater than the release date for transactions on a discrete job or repetitive schedule. transaction interface An open interface table through which you can import transactions. See open interface. transaction manager A concurrent program that controls your manufacturing transactions. transaction quantity The quantity of a transaction. transaction worker An independent concurrent process launched by a transaction manager to validate and process your manufacturing transactions. traveler See route sheet. unit of measure The unit that the quantity of an item is expressed. unreleased job/schedule A discrete job or repetitive schedule planned but not released for work to begin and not yet transactable. UOM See unit of measure. usage quantity The quantity of a component, including component yield required to produce one assembly in a discrete job or repetitive schedule as stated on the bill of materials. usage rate The amount of a resource consumed at an operation. Glossary 17 usage variance A quantity variance defined as the difference between the amount of material required at standard and the actual amount you use to manufacture an assembly. valuation account Your inventory and work in process asset accounts set up in Inventory, Work in Process, and Purchasing. value added See outside processing variance An accounting term used to express the difference between an expected cost and an actual cost. A variance can be favorable or unfavorable. Variances are usually written directly to the income statement as a period expense. variance account An account where you record your variance charges. You can maintain several variance accounts in your work in process system, depending on what you are charging and which class you use. vendor See supplier. WIP accounting class A set of accounts that you use to charge the production of an assembly. You assign accounting classes to discrete jobs and repetitive schedules. Each accounting class includes distribution accounts and variance accounts. Also used in cost reporting. 18 Oracle Work in Process User’s Guide WIP move resource A resource automatically charged to a discrete job or repetitive schedule by a move transaction. Resources are automatically charged when a forward move occurs, or uncharged when a backward move occurs. work in process An item in various phases of production in a manufacturing plant. This includes raw material awaiting processing up to final assemblies ready to be received into inventory. workday calendar A calendar that identifies available workdays for one or more organizations. Master Scheduling/MRP, Inventory, Work in Process, and Capacity plan and schedule activities based on a calendar’s available workdays. worker An independent concurrent process that executes specific tasks. Programs using workers to break large tasks into smaller ones must coordinate the actions of the workers. yield See component yield Index A Account aliases, 2 – 3 material asset, 2 – 24 material expense, 2 – 25 material overhead asset, 2 – 24 outside processing asset, 2 – 25 outside processing expense, 2 – 26 overhead asset, 2 – 25 overhead expense, 2 – 26 resource asset, 2 – 25 resource expense, 2 – 25 standard cost update expense, 2 – 26 Account number, scrap, 8 – 57 Accounting class discrete, 3 – 14 elemental accounts, 2 – 23 name, 2 – 27, 2 – 28 pending jobs, 3 – 66 repetitive, 6 – 8 type, 2 – 27, 2 – 28 work order–less assembly, 5 – 8 Accounting classes discrete, 2 – 22 non–standard discrete, 2 – 22 repetitive, 2 – 23 standard discrete, 2 – 22 Active accounting class, 2 – 27, 2 – 28 production line, 2 – 38 Activity pending resource transaction, 9 – 33 resource, 9 – 8 resource requirement, 9 – 13 resource transaction, 9 – 24 Actual labor rate, 9 – 19 Actual outside processing charges, 9 – 19 Actual rate, pending resource transaction, 9 – 33 Aliases, account, 2 – 3 All material issuing and returning components schedules, 7 – 33 issuing and returning components to jobs, 7 – 32 Allow creation of new operations, parameter, 2 – 19 Allow moves, shop floor status option, 2 – 31 Allow moves over no move shop floor statuses, parameter, 2 – 20 Alternate, line/assembly association routing, 6–7 Alternate bill discrete job, 3 – 17 line/assembly association, 6 – 7 work order–less assembly, 5 – 8 Alternate bill of material pending job, 3 – 68 simulated job, 3 – 44 Alternate routing discrete job, 3 – 18 pending job, 3 – 68 simulated job, 3 – 44 Index – 1 work order–less assembly, 5 – 8 Assemblies based on bill, C – 2 completing, 7 – 58 completing with move transactions, 8 – 46 moving, 8 – 35 returning, 7 – 58 returning with move transactions, 8 – 46 scrapping, 8 – 56 Assembly job, 3 – 14 job simulation, 3 – 43 line, 6 – 7 work order–less, 5 – 6 Assembly completion, moves, 8 – 34 Assembly completions, 7 – 53 final assembly order, 7 – 54 Assembly over–completions, 7 – 55 Assembly returns, 7 – 53 lot control, 7 – 53 revision control, 7 – 54 serial number control, 7 – 53 Assign Shop Floor Statuses window, Assigning and Viewing Shop Floor Statuses, 8 – 68 Assigned units, resource requirement, 9 – 12 ATP Results window, Entering ATP Criteria and Viewing Results, 7 – 17 Attachments, Attaching Files to Jobs, Schedules, and Operations, E – 2 Autocharge, enabling, 8 – 13 AutoCreate window, AutoCreating Final Assembly Orders, 14 – 3 Autorelease days, parameter, 2 – 18 Available supply quantity, calculation, 3 – 8 B Backflush enabling, 8 – 14 supply subinventories and locators, 7 – 48 Backflush default supply locator, parameter, 2 – 20 Index – 2 Backflush default supply subinventory, parameter, 2 – 20 Backflush lot selection method, parameter, 2 – 20 Backflush lot verification method, parameter, 2 – 20 Backflush transaction, options, 7 – 51 Backflush transactions, 7 – 47 assembly pull, 7 – 50 operation pull, 8 – 41 reversing, 7 – 47 Backflushing lot and serial numbers, 7 – 49 pull components, 8 – 42 Basis item, 9 – 11 lot, 9 – 11 resource, 9 – 8 resource requirement, 9 – 11 Bill alternate discrete job, 3 – 17 line/assembly association, 6 – 7 work order–less assembly, 5 – 8 Bill reference, non–standard discrete, 3 – 16, 3 – 67 Bill revision discrete job, 3 – 17 pending jobb, 3 – 68 repetitive schedules, 6 – 16 simulated job, 3 – 44 work order–less assembly, 5 – 7 Bill revision date discrete jobs, 3 – 17 pending jobb, 3 – 68 repetitive schedules, 6 – 17 simulated job, 3 – 44 work order–less assembly, 5 – 7 Bills of material, 2 – 4 engineering, 2 – 4 Build sequence for discrete job, 3 – 20 for pending jobs, 3 – 66 Business examples, descriptive flexfields, 13 – 11 By–product, recovery, 7 – 8 C Calculation, available supply quantity formula, 3–8 Calendar, workday, 2 – 4 Capacity changes permanent decrease in repetitive output, 12 – 21 permanent increase in repetitive output, 12 – 20 temporary decrease in repetitive output, 12 – 20 temporary increase in repetitive output, 12 – 20 Change order, engineering, 2 – 4 Charge type, resource requirement, 9 – 14 Charge types, WIP move, 9 – 5 Class type, job, 14 – 6 Classes demand, 2 – 5 WIP accounting, 2 – 22 Close Discrete Jobs, Closing Discrete Jobs Using Submit Requests, 14 – 6 Close Discrete Jobs window, Closing Discrete Jobs, 3 – 52 Close jobs, status requirements, 14 – 7 closing, discrete jobs, 3 – 53 Comparison, manufacturing methods, B – 2 Completins date, job simulation, 3 – 44 Completion date discrete jobs, 3 – 15 first unit, 6 – 16 last unit, 6 – 16 Completion locator discrete job, 3 – 18 line/assembly association, 6 – 8 replenishment higher level supply, 7 – 45 work order–less assembly, 5 – 7 Completion subinventory discrete job, 3 – 18 line/assembly association, 6 – 8 pending jobs, 3 – 68 replenishment higher level supply, 7 – 45 work order–less assembly, 5 – 7 Completion transaction discrete job, 3 – 47 repetitive production line, 7 – 54 repetitive schedule, 6 – 34 Completion transaction options, 7 – 53 Completion Transactions window Completing and Returning Assemblies, 7 – 58 Replenishing Higher Level Supply, 7 – 45 Completions alternate unit of measure, 7 – 53 assembly, 7 – 53 subinventories, 7 – 54 Component issue, transaction type, 7 – 25 Component return, transaction type, 7 – 25 Components assembly pull, C – 2 bulk, C – 3 issuing all, 7 – 30 issuing specific, 7 – 26 operation pull, C – 3 phantom, C – 3 push, C – 4 returning all, 7 – 30 returning specific, 7 – 26 supplier, C – 4 Components window, adding, deleting, changing, specifying lot/serial information, 5 – 9 Costs non–standard discrete job, 11 – 8 standard discrete job, 11 – 8 work in process, 11 – 6 Count point, enabling, 8 – 13 Count points only, charging resource, 9 – 23 Created by identifier pending move transaction, 8 – 61 pending resource transaction, 9 – 32 Created by identifiere, pending jobs, 3 – 68 Criteria, material transactions, 7 – 32, 7 – 42 Index – 3 Currency code, pending resource transaction, 9 – 33 Cutoff date, 14 – 42 D Daily, quantity, 6 – 15 Daily quantity, formula, 12 – 14 Date accounting class inactive, 2 – 27, 2 – 28 assembly completion, 7 – 59 assembly return, 7 – 59 issue transaction, 7 – 27 material requirement, 7 – 10 move completion transaction, 8 – 47 pending move transaction, 8 – 62 pending resource transaction, 9 – 34 production line inactive, 2 – 38 replenish supply subinventory, 7 – 41 replenishing higher level supply, 7 – 45 reschedule, 8 – 18 resource transaction, 9 – 23 return transaction, 7 – 27 scrap, 8 – 57 shop floor status inactive, 2 – 31 WIP material transaction, 7 – 27 WIP replenishment transactions, 7 – 41 work order–less assembly completion, 5 – 5 work order–less assembly return, 5 – 5 Days, schedule, 6 – 15 Default, generating job names sequentially, 3 – 13 Default discrete class, parameter, 2 – 17 Default lot number type, parameter, 2 – 17 Demand class discrete job, 3 – 19 repetitive schedule, 6 – 15 work order–less assembly, 5 – 8 Demand classes, 2 – 5 Departments, 2 – 4 Description discrete jobs, 3 – 19, 3 – 45 pending jobs, 3 – 68 repetitive schedule, 6 – 16 Index – 4 Descriptive flexfield business examples, 13 – 11 relationships, 13 – 6 setting up for Work in Process, 13 – 4 using, 13 – 6 Descriptive flexfield business example managing outside processor sterilization, 13 – 13 managing quality information, 13 – 11 Descriptive flexfields defining, 13 – 2 transferring from Oracle Bills of Material, 13 – 9 transferring within Oracle Work in Process, 13 – 10 updating, 13 – 2 upgrading, 13 – 3 Detailed scheduling, 12 – 7 assigned units, 12 – 8 backward, 12 – 9 forward, 12 – 9 item basis, 12 – 8 lot basis, 12 – 8 multiple resources, 12 – 7 scheduled options, 12 – 8 shift calendar, 12 – 9 details, discrete job, 3 – 56, 6 – 39 Diagram discrete manufacturing process, 3 – 6 interoperation move transaction process, 8 – 26 intraoperation move transaction process, 8 – 28 material control process, 7 – 19 move transaction process, 8 – 23 repetitive manufacturing process, 6 – 11 Discrete, accounting class, 3 – 14 Discrete job history, 3 – 51 reporting by status, 10 – 20 Discrete Job Data Report, 14 – 9 Discrete Job Dispatch Report, 14 – 11 Discrete Job Listing Report, 14 – 13 Discrete Job Pick List Report, 14 – 15 Discrete Job Routing Sheet, 14 – 17 Discrete Job Shortage Report, 14 – 19 Discrete Job Value Report, 14 – 22 Discrete jobs closing, 3 – 51 closing using submit requests, 14 – 6 completing, 3 – 47 controlling transactions, 10 – 18 final assembly orders, 3 – 8 finding, 3 – 25 planned, 3 – 7 planning by status, 10 – 20 purging information, 14 – 41 releasing, 3 – 28 rescheduling, 3 – 38 status changing, 3 – 40 Discrete Jobs Summary window Changing Discrete Jobs, 3 – 37 Defining Discrete Jobs Manually, 3 – 13 Releasing Discrete Jobs, 3 – 28 Discrete Jobs window Changing Discrete Jobs, 3 – 37 Defining Discrete Jobs Manually, 3 – 13 Linking ATO Sales Orders and Discrete Jobs, 3 – 22 Mass Changing Discrete Job Statuses, 3 – 41 Releasing Discrete Jobs, 3 – 28 Rescheduling Discrete Jobs, 3 – 38 Viewing Linked ATO Sales Orders and Discrete Jobs, 3 – 23 Discrete jobs window, attachments, E – 2 Discrete manufacturing, process diagram, 3 – 6 Discrete rescheduling by importing discrete jobs, 12 – 11 capacity modifications, 12 – 12 job changes, 12 – 11 operation dates, 12 – 11 planned orders, 12 – 11 workday calendar, 12 – 12 Discrete scheduling completion date, 12 – 5 material requirement dates, 12 – 6 operation dates, 12 – 6 start date, 12 – 5 Discrete Shop Packet, 14 – 26 Dispatching discrete jobs, 8 – 58 repetitive schedules, 8 – 58 E ECO, 2 – 4 ECOs discrete job implementation, 10 – 19 repetitive schedule implementation, 10 – 19 Effective date, employee, 2 – 35 Elemental accounts valuation, 2 – 23 variance, 2 – 23 Employee hourly labor rate, 2 – 35 labor rate effective date, 2 – 35 name, 2 – 35 number, 2 – 35 Employee Labor Rates window, Defining Employee Labor Rates, 2 – 34 Employee number, pending resource transaction, 9 – 33 Employee Rates Listing Report, 14 – 27 Enabled intraoperation steps, parameter, 2 – 20 Engineering bills of material, 2 – 4 change orders, 2 – 4 routings, 2 – 4 Expense Job Value Report, 14 – 29 F Final assembly orders, 3 – 8 autocreating, 14 – 3 Find Discrete Jobs window, Finding Discrete Jobs, 3 – 26 Find Operations window, Finding Operations, 8 – 19 Find Pending Move Transactions window, Finding Pending Move Transactions window, 8 – 59 Index – 5 Find Pending Resource Transactions window, Finding Pending Resource Transactions, 9 – 30 Find Resource Requirements window, Finding Resource Requirements, 9 – 16 Finding Pending Jobs and Schedules window, Finding Pending Jobs and Schedules, 3 – 63 Firm discrete jobs, 3 – 14 repetitive schedules, 6 – 15 First unit completion date, 6 – 16 First unit start date, 6 – 16 reschedule, 8 – 17 G Group ID, selecting import jobs and schedules rows, 14 – 33 H Hourly rate production line maximum, 2 – 37 production line minimum, 2 – 37 I Import Jobs and Schedules window, Importing Jobs and Schedules, 14 – 32 Include configurations, 14 – 42 Interface open move transaction, 8 – 32 open resource transaction, 9 – 20 Interfaces, transaction, 2 – 3 Interoperation move transactions, process diagram, 8 – 26 Intraoperation move transactions, process diagram, 8 – 28 Intraoperation moves, 8 – 28 Intraoperation step queue, 8 – 8 reject, 8 – 8 run, 8 – 8 Index – 6 scrap, 8 – 9 to move, 8 – 8 Intraoperation steps, 8 – 8 assigning statuses to, 8 – 69 complete, 8 – 9 incomplete, 8 – 9 parameter, 2 – 20 Inventory accuracy cycle counting WIP inventories, 7 – 65 physically inventorying WIP inventories, 7 – 65 Issue transaction lot control, 7 – 30, 7 – 36, 7 – 44 revision control, 7 – 22 serial number control, 7 – 30, 7 – 36, 7 – 44 Issues component, 7 – 20 repetitive component, 7 – 22 specific components, 7 – 28 Item, job lot, 7 – 64 J Job assembly, 3 – 14 MRP net quantity, 3 – 15 name, 3 – 13 pending, 3 – 66 start quantity, 3 – 15 status, 3 – 14 type, 3 – 14 Job and Schedule Documents window, Defining Job and Schedules Documents, 2 – 39 job and schedule interface record details, viewing, 3 – 65 job and schedule interface records deleting, 3 – 69 updating, 3 – 65 Job Lot Composition Report, 14 – 34, 14 – 36 Job Lot Compositions window, Viewing Job Lot Composition, 7 – 62 Job status, 14 – 4 Job type, 14 – 41 Jobs firming, 3 – 14 project, 3 – 24 L Labor rate, employee hourly, 2 – 35 Last unit completion date, 6 – 16 reschedule, 8 – 17 Last unit start date, 6 – 16 Lead time, line, 6 – 9 Lead times, repetitive line scheduling, 12 – 13 Line assembly, 6 – 7 for discrete job, 3 – 20 lead time, 6 – 9 name, 2 – 36 production, 6 – 7 sales order, 3 – 23 line, work order–less completion, 5 – 6 Line priority, 6 – 8 Lines and assemblies, associating, 6 – 6, 6 – 10 Load type, 14 – 4 pending jobs and schedules, 3 – 66 Locator line/assembly completion, 6 – 8 substitute component, 5 – 10 Lot number backflushing, 7 – 49 discrete jobs, 3 – 19 issue transaction, 7 – 30, 7 – 36, 7 – 44 pending job assembly, 3 – 66 Lot number information, work order–less component, 5 – 11 Lot selection method, parameter, 2 – 20 Lot verification method, parameter, 2 – 20 M Managers, transaction, 2 – 3 Manufacturing methods, compared, B – 2 Material control, 7 – 2 cycle counting, 7 – 65 physical inventory, 7 – 65 Material requirement component, 7 – 10 netting, 7 – 11 operation sequence, 7 – 10 per assembly quantity, 7 – 11 required quantity, 7 – 11 Material requirements ad hoc, 7 – 26 deleting, 7 – 12 open, 7 – 7 Material requirements control, 7 – 7 Material Requirements window Adding and Updating Material Requirements, 7 – 9 Deleting Material Requirements, 7 – 12 Material shortages, 7 – 7 Material transaction, types, 7 – 25 Material usage variance, 11 – 10 Modifying repetitive production capacity, 12 – 20 Move based overhead efficiency variance, 11 – 10 Move transaction assembly completion, 8 – 34 interoperation moves, 8 – 25 intraoperation moves, 8 – 28 operation completion, 8 – 29 options, 8 – 32 process diagram, 8 – 23 production lines, 8 – 31 reverse operation completion, 8 – 29 types, 8 – 34 Move Transaction Report, 14 – 37 Move transaction types, complete, 8 – 34 Move transactions, 14 – 43 controlling, 8 – 65 Move Transactions window Performing Move Completion/Return Transactions, 8 – 46 Performing Move Transactions, 8 – 24, 8 – 35, 9–6 Moves, interoperation, 8 – 25 Multiple repetitive schedules, 6 – 34, 7 – 23 Index – 7 N Name accounting class, 2 – 27, 2 – 28 employee, 2 – 35 job, 3 – 13 pending resource transaction, 9 – 33 resource requirement, 9 – 11, 9 – 15 Navigator, Object, 7 – 64 Navigator paths, A – 2 Negative, inventory balances, 7 – 20 Negative component issue, transaction type, 7 – 20, 7 – 25 Negative component return, transaction type, 7 – 25 Net, material requirement, 7 – 11 Non–standard discrete job assemblies, 4 – 2 asset accounting classes, 4 – 3 bills of material, 4 – 2 close, 4 – 3 costs, 4 – 3 expense accounting classes, 4 – 3 planning, 4 – 2 quantities, 4 – 2 routings, 4 – 2 transactions, 4 – 2 Non–standard discrete jobs disassembly, 4 – 12 engineering prototypes, 4 – 16 to 4 – 28 equipment maintenance, 4 – 14 other projects, 4 – 19 to 4 – 31 prototypes, 4 – 16 to 4 – 28 repairs, 4 – 8 rework, 4 – 7 upgrade assemblies, 4 – 10 versus standard discrete jobs, 4 – 4 Number, employee, 2 – 35 O Object Navigator, 7 – 64 Offset days, 14 – 3 Open, material requirements, 7 – 7 Open Interface, job and schedule, 3 – 9 Index – 8 Open interface move transaction, 8 – 32 resource transaction, 9 – 20 Operation autocharge, 8 – 13 backflush, 8 – 14 count point, 8 – 13 description, 8 – 15 non–autocharge, 8 – 13 non–backflush, 8 – 14 non–count point, 8 – 13 sequence, 8 – 12, 8 – 16 Operation completion, moves, 8 – 29 Operation completion date, resource requirement, 9 – 13 Operation Documents window, Defining Operation Documents, 2 – 40 Operation sequence assigning statuses, 8 – 69 issue transactions, 7 – 29 pending resource transaction, 9 – 32 resource transaction, 9 – 23 return transactions, 7 – 29 WIP material transactions, 7 – 29 Operation sequence range, charging resources, 9 – 23 Operation start date, resource requirement, 9 – 13 Operations, 8 – 5 to 8 – 9 department, 8 – 13 first unit completion date, 8 – 15 first unit start date, 8 – 15 job, 8 – 12 last unit completion date, 8 – 15 last unit start date, 8 – 15 line/assembly, 8 – 12 minimum transfer quantity, 8 – 14 rescheduling, 8 – 17 scheduling based on resources, 8 – 5 to 8 – 9 Operations window Adding and Changing Operations, 8 – 11 attachments, E – 2 Deleting Operations, 8 – 16 Midpoint Rescheduling, 8 – 17 operations, and operation resources are required to support that job. , 3 – 43 Oracle Work in Process, setting up, 2 – 2 Organization, 14 – 4 pending jobs and schedules, 3 – 66 Outside processing charging resources, 9 – 19 efficiency variance, 11 – 10 managing, 8 – 51 resource, 9 – 8 Work in Process, F – 2 Over–completions discrete job assemblies, 7 – 55 repetitive schedule assemblies, 7 – 55 Over–returns assembly, 7 – 56 discrete job assemblies, 7 – 56 repetitive schedule assemblies, 7 – 56 Overhead charging, resource transaction, 9 – 19 P Parameter allow creation of new operations, 2 – 14 auto compute final completion, 2 – 13 cost type, 2 – 13 default completion cost source, 2 – 12 default discrete class, 2 – 10 default lot number type, 2 – 10 intraoperations steps, 2 – 16 lot selection method, 2 – 15 lot verification, 2 – 16 recognize repetitive period variances, 2 – 11 repetitive autorelease days, 2 – 11 require scrap account, 2 – 14 respond to sales order changes, 2 – 11 shop floor status for PO move resources, 2 – 13, 2 – 14 supply locator, 2 – 15 supply subinventory, 2 – 15 system option, 2 – 13 Parameters average cost, 2 – 12 backflush default, 2 – 15 discrete manufacturing, 2 – 10 move transaction, 2 – 13 repetitive manufacturing, 2 – 11 WIP, 2 – 9 Work in Process, 2 – 9 Parameters window AutoCreating Final Assembly Orders, 14 – 3 Closing Discrete Jobs Using Submit Requests, 14 – 6 Importing Jobs and Schedules, 14 – 32 Purging Jobs and Schedules, 14 – 40 Pending Jobs and Schedules Errors window, viewing pending jobs and schedule errors, 3 – 65 Pending Jobs and Schedules window, Processing Pending Jobs and Schedules, 3 – 64 Pending move transaction errors, viewing, 8 – 61, 9 – 31 Pending move transactions deleting, 8 – 64 organization, 8 – 61 processing, 8 – 59 resubmitting, 8 – 63, 9 – 34 selecting and resubmitting all, 3 – 69, 8 – 63 updating, 8 – 61 viewing, 8 – 60 Pending Move Transactions Errors window, viewing pending move transaction errors, 8 – 61 Pending Move Transactions window, Processing Pending Move Transactions, 8 – 60 Pending resource transactions deleting, 9 – 35 organization, 9 – 32 processing, 9 – 30 selecting and resubmitting, 9 – 34 updating, 9 – 32 viewing, 9 – 31 Pending Resource Transactions Error window, viewing pending resource transaction errors, 9 – 32 Pending Resource Transactions window, Processing Pending Resource Transactions, 9 – 30 Period–based costs non–standard expense jobs, 11 – 9 Index – 9 repetitive assemblies, 11 – 9 Planned discrete jobs, 3 – 7 repetitive schedules, 6 – 12 Planning discrete, D – 2 discrete versus repetitive, D – 2 Planner Workbench, D – 2 repetitive, D – 2 repetitive versus discrete, D – 2 Work in Process, D – 2 Print discrete reports, printing current jobs, 3 – 29 Print reports, printing current schedules, 6 – 22 Print window Printing Reports for Current Discrete Jobs, 3 – 29 Printing Reports for Current Repetitive Schedules, 6 – 21 Priority, line, 6 – 8 Process, material control diagram, 7 – 19 Process diagram discrete manufacturing, 3 – 6 interoperation move transactions, 8 – 26 intraoperation move transactions, 8 – 28 material control, 7 – 19 move transaction, 8 – 23 repetitive manufacturing, 6 – 11 Production hourly rate, 6 – 9 line, 6 – 7 Production line for discrete job, 3 – 20 name, 2 – 36 repetitive line scheduling, 12 – 13 production line, work order–less completion, 5–6 Production Line Report, 14 – 39 Production Lines window, Defining Production Lines, 2 – 36 Production rate, repetitive line scheduling, 12 – 13 Profile option background shop floor material processing, 2 – 42 Index – 10 completion material processing, 2 – 43 completion transaction form, 2 – 44 completion transactions first field, 2 – 44 concurrent message level, 2 – 45 default job start date, 2 – 49 define discrete job form, 2 – 50 discrete job prefix, 2 – 51 exclude open ECOs, 2 – 51 job name updateable, 2 – 51 material transaction form, 2 – 45 material transactions first field, 2 – 45 move completion default, 2 – 51 move transaction, 2 – 46 move transactions first field, 2 – 46 move transactions quantity default, 2 – 47 operation backflush setup, 2 – 47 requirements nettable option, 2 – 51 resource transaction first field, 2 – 48 see engineering items, 2 – 52 shop floor material processing, 2 – 48 Profile options WIP, 2 – 41 Work in Process, 2 – 41 Project discrete job, 3 – 20 for pending job, 3 – 66 jobs, 3 – 24 work order–less assembly, 5 – 8 Pull transaction, repetitive production line, 7 – 49 Purge Discrete Jobs Summary window, Purging Discrete Jobs, 3 – 57 Purge Discrete Jobs window, Purging Discrete Jobs, 3 – 57 Purge Jobs and Schedules window, Purging Jobs and Schedules, 14 – 40 Purge Repetitive Schedules Summary window, Purging Repetitive Schedules, 6 – 40 Purge Repetitive Schedules window, Purging Repetitive Schedules, 6 – 40 Purge Report, 14 – 45 Purging, job and schedule detail information, 14 – 43 Push components issuing all, 7 – 30 returning all, 7 – 30 Q Quantities assembly completions, 7 – 53 assembly returns, 7 – 53 material requirement, 7 – 20 Quantity assembly completion, 7 – 60 assembly return, 7 – 60 daily schedule, 6 – 15 job MRP Net, 3 – 15 job simulation, 3 – 43 material required, 7 – 11 material required per assembly, 7 – 11 minimum transfer, 8 – 38, 8 – 47 move transaction, 8 – 38, 8 – 43 pending move transaction, 8 – 62 pending resource transaction, 9 – 33 replenishing higher level supply, 7 – 46 replenishment transaction, 7 – 44 resource transaction, 9 – 24 scrap, 8 – 56 substitution, 5 – 10 total, 6 – 15 WIP material transaction, 7 – 30 work order–less assembly completion, 5 – 7 work order–less assembly return, 5 – 7 Quantity allocated, 3 – 23 Queue intraoperation step, 8 – 8 R Rate employee hourly, 2 – 35 hourly production, 6 – 9 Reason code backflush transaction, 8 – 44 completion transaction, 7 – 61 move completion transaction, 8 – 48 move transaction, 8 – 38 resource transaction, 9 – 24 scrap, 8 – 57 WIP material transaction, 7 – 30, 7 – 44 work order–less completion, 5 – 9 work order–less substitution, 5 – 11 Reason codes, transaction, 2 – 3 Recovering by–products, 7 – 8 scrap, 8 – 53 Reference backflush transaction, 8 – 44 completion transaction, 7 – 61 move completion transaction, 8 – 48 move transactions, 8 – 38 resource transaction, 9 – 24 scrap, 8 – 57 WIP material transaction, 7 – 30, 7 – 44 work order–less completion/return, 5 – 9 work order–less substitution, 5 – 11 Reject intraoperation step, 8 – 8 Repetitive accounting class, 6 – 8 component issues, 7 – 22 component returns, 7 – 22 returns, 7 – 23 Repetitive autorelease days, parameter, 2 – 17, 2 – 18 Repetitive Line Report, 14 – 46 Repetitive line rescheduling bill revision dates, 12 – 19 repetitive schedule changes, 12 – 18 repetitive schedule dates, 12 – 18 routing revision dates, 12 – 19 Repetitive line scheduling daily quantity, 12 – 14 forward scheduling, 12 – 15 lead time, 12 – 15 lead times, 12 – 13 processing days, 12 – 14 production line, 12 – 13 production rate, 12 – 13 repetitive schedule dates, 12 – 15 repetitive schedule quantities, 12 – 13 sequencing repetitive assemblies on a line, 12 – 17 Repetitive Line/Assembly Associations Summary window Associating Lines and Assemblies, 6 – 6 Index – 11 Deleting Line/Assembly Associations, 6 – 10 Repetitive Line/Assembly Associations window Associating Lines and Assemblies, 6 – 6 Deleting Line/Assembly Associations, 6 – 10 Repetitive manufacturing, process diagram, 6 – 11 Repetitive Pick List Report, 14 – 47 Repetitive production, modifying capacity, 12 – 20 Repetitive production line, pull transaction, 7 – 49 Repetitive recognize period variances, parameter, 2 – 17 Repetitive rescheduling, 12 – 18 Repetitive Routing Sheet, 14 – 49 Repetitive schedule excess material, 6 – 35 pending, 3 – 66 reporting by status, 10 – 20 rescheduling, 12 – 18 rolling material forward, 6 – 35 status, 6 – 15 Repetitive Schedule Data Report, 14 – 50 Repetitive schedule lead time, formula, 12 – 16 Repetitive Schedule Shortage Report, 14 – 51 Repetitive schedules completing, 6 – 34 controlling transactions, 10 – 18 firming, 6 – 15 multiple schedules, 7 – 23 planned, 6 – 12 planning by status, 10 – 20 purging information, 14 – 41 releasing, 6 – 21 rescheduling, 6 – 29 status changing, 6 – 31 stopping, 6 – 37 Repetitive Schedules Summary window Changing Repetitive Schedules, 6 – 28 Defining Repetitive Schedules Manually, 6 – 14 Mass Changing Repetitive Schedule Statuses, 6 – 32 Rescheduling Repetitive Schedules, 6 – 29 Index – 12 Repetitive Schedules window Changing Repetitive Schedules, 6 – 27, 6 – 28 Defining Repetitive Schedules Manually, 6 – 14 Mass Changing Repetitive Schedule Statuses, 6 – 32 Releasing Repetitive Schedules, 6 – 21 Rescheduling Repetitive Schedules, 6 – 29 Repetitive schedules window, attachments, E–2 Repetitive Shop Packet, 14 – 54 Repetitive Value Report, 14 – 55 Replenish component supply subinventory, 7 – 41 higher level supply, 7 – 45 Replenishment, WIP supply subinventory, 7 – 38 Replenishment options, completing lower level assemblies, 7 – 38 Replenishment supply subinventory, transaction type, 7 – 25 Reports Discrete Job Data, 14 – 9 Discrete Job Dispatch, 14 – 11 Discrete Job Listing, 14 – 13 Discrete Job Pick List, 14 – 15 Discrete Job Routing Sheet, 14 – 17 Discrete Job Shortage, 14 – 19 Discrete Job Value, 14 – 22 Discrete Shop Packet, 14 – 26 dispatch, 8 – 58 Employee Rates Listing, 14 – 27 Expense Job Value, 14 – 29 Job Lot Composition, 14 – 34, 14 – 36 Move Transaction, 14 – 37 Production Line, 14 – 39 Purge, 14 – 45 Repetitive Line, 14 – 46 Repetitive Pick List, 14 – 47 Repetitive Routing Sheet, 14 – 49 Repetitive Schedule Data, 14 – 50 Repetitive Schedule Shortage, 14 – 51 Repetitive Shop Packet, 14 – 54 Repetitive Value, 14 – 55 Resource Performance, 14 – 58 Resource Transaction, 14 – 60 Schedule Group Listing, 14 – 63 Shop Floor Statuses, 14 – 62 WIP Account Distribution, 14 – 64 WIP Account Summary, 14 – 67 WIP Accounting Classes, 14 – 68 WIP Location, 14 – 69 WIP Offsetting Account, 14 – 71 WIP Outside Processing, 14 – 72 WIP Parameters, 14 – 73 WIP Value, 14 – 74 Require scrap account, parameter, 2 – 19 Reschedule window, Midpoint Rescheduling, 8 – 17 Rescheduling based on bill revision changes, 12 – 19 based on job changes, 12 – 11 based on repetitive schedule changes, 12 – 18 based on routing revision changes, 12 – 19 by importing discrete jobs, 12 – 11 discrete capacity modifications, 12 – 12 discrete jobs, 12 – 11 discrete jobs with changed quantities, 3 – 40 discrete jobs with routings, 3 – 38 discrete jobs without routings, 3 – 39 discrete operation dates, 12 – 11 discrete planned orders, 12 – 11 discrete workday calendar, 12 – 12 repetitive schedule dates, 12 – 18 repetitive schedules, 6 – 29, 12 – 18 repetitive schedules with changed quantities, 6 – 30 Resource activity, 9 – 8 non–standard rate, 9 – 8 outside processing, 9 – 8 standard rate, 9 – 8 Resource based overhead efficiency variance, 11 – 10 Resource charge transaction options, 9 – 21 Resource charge type manual, 9 – 6 PO move, 9 – 6 PO receipt, 9 – 6 Resource charge types, 9 – 5 Resource efficiency variance, 11 – 10 Resource management, 9 – 2 Resource Performance Report, 14 – 58 Resource requirements, 9 – 8 ad hoc, 9 – 22 multiple resources, 9 – 9 operation resources, 9 – 9 resource basis, 9 – 8 resource scheduling, 9 – 9 Resource Requirements window, Adding and Updating Resources, 9 – 10, 9 – 15 Resource sequence pending resource transaction, 9 – 33 resource requirement, 9 – 11, 9 – 15 resource transaction, 9 – 23 Resource transaction actual labor rate, 9 – 19 actual outside processing charges, 9 – 19 overhead charging, 9 – 19 Resource transaction distributions, viewing, 9 – 28 Resource Transaction Report, 14 – 60 Resource transactions, 9 – 19, 14 – 43 resource activity charging, 9 – 19 Resource Transactions window, Charging Resources with Move Transactions, 9 – 25 Resources, 2 – 4 Respond to sales order changes, parameter, 2 – 17 Returns assembly, 7 – 53 component, 7 – 20 repetitive component, 7 – 22 Reverse, backflush transactions, 7 – 47 Revision discrete job routing, 3 – 18 issue transactions, 7 – 29 replenishment transactions, 7 – 43 return transactions, 7 – 29 work order–less substitute component, 5 – 11 Revision control, issue transaction, 7 – 22 Rework, 8 – 51 Rework production, 8 – 51 non–standard job, 8 – 52 reject intraoperation step, 8 – 52 rework operations, 8 – 52 Index – 13 Routing alternate discrete job, 3 – 18 line/assembly association, 6 – 7 work order–less assembly, 5 – 8 Routing reference non–standard discrete jobs, 3 – 18 pending jobs and schedules, 3 – 68 Routing revision discrete job, 3 – 18 pending jobs and schedules, 3 – 68 repetitive schedules, 6 – 17 simulated job, 3 – 44 work order–less assembly, 5 – 7 Routing revision date discrete jobs, 3 – 18 pending jobs and schedules, 3 – 68 repetitive schedule, 6 – 17 simulated job, 3 – 44 work order–less assembly, 5 – 8 Routings, 2 – 4, 8 – 5 to 8 – 9 engineering, 2 – 4 Routings and Operations, 8 – 5 to 8 – 9 Rules backflush transaction, 7 – 50 move completions, 8 – 45 move returns, 8 – 45 Run intraoperation step, 8 – 8 S Sales order line, 3 – 23 Sales order number, final assembly orders, 14 – 3 Save Simulated Job window, saving simulated jobs, 3 – 45 Schedule group assigning, 3 – 20 for pending jobs, 3 – 66 work order–less completion, 5 – 6 Schedule Group Listing Report, 14 – 63 Scheduling discrete completion date, 12 – 5 discrete job detailed scheduling, 12 – 7 to 12 – 8 discrete jobs, 12 – 5 Index – 14 discrete jobs with routings, 3 – 15 discrete jobs without routings, 3 – 16 discrete material requirement dates, 12 – 6 discrete operation dates, 12 – 6 discrete start date, 12 – 5 production line, 12 – 13 repetitive lead time, 12 – 15 repetitive lead times, 12 – 13 repetitive line, 12 – 13 repetitive processing days, 12 – 14 repetitive production rate, 12 – 13 repetitive schedules forward, 12 – 15 resource, 9 – 9 sequencing repetitive assemblies on a line, 12 – 17 Scheduling dates, repetitive schedules, 6 – 16 Scheduling method, for pending job, 3 – 67 Scheduling option next operation overlap, 9 – 13 previous operation overlap, 9 – 13 resource requirements, 9 – 13 Scheduling resources, 9 – 12 Scrap assemblies, 8 – 53 costing, 8 – 53 effect on backflush components, 8 – 54 netting assemblies, 8 – 54 recovery, 8 – 53 transactions, 8 – 53 Scrap intraoperation step, 8 – 9 Security functions, 2 – 53 Sequence material requirement, 7 – 10 operation, 8 – 12, 8 – 16 resource requirement, 9 – 11, 9 – 15 Serial number backflushing, 7 – 49 issue transaction, 7 – 30, 7 – 36, 7 – 44 Serial number information, work order–less component, 5 – 11 Setting up discrete manufacturing, 3 – 5 flow manufacturing, 5 – 4 material control, 7 – 6 Oracle Work in Process, 2 – 2 repetitive manufacturing, 6 – 5 resource management, 9 – 4 shop floor control, 8 – 4 Work in Process costing, 11 – 5 Setup discrete manufacturing, 3 – 5 flow manufacturing, 5 – 4 material control, 7 – 6 repetitive manufacturing, 6 – 5 resource management, 9 – 4 shop floor control, 8 – 4 Work in Process costing, 11 – 5 Shop floor control, 8 – 2 managing outside processing, 8 – 51 to 8 – 54 Shop floor status discrete job, 8 – 69 repetitive line/assembly, 8 – 69 Shop floor statuses, 8 – 65 Shop Floor Statuses Report, 14 – 62 Shop Floor Statuses window, Defining Shop Floor Statuses, 2 – 30 Shortages, material, 7 – 7 Simulate Discrete Jobs window, Simulating Discrete Jobs, 3 – 43 Source code pending job and schedules, 3 – 65 pending move transaction, 8 – 61 pending resource transaction, 9 – 32 Source line pending jobs and schedules, 3 – 65 pending move transaction, 8 – 61 pending resource transaction, 9 – 32 Special menu apply default job name, 3 – 13 changing job statuses, 3 – 41 changing repetitive schedule statuses, 6 – 32 checking job close requests, 3 – 53 choosing purge options for discrete jobs, 3 – 59 choosing purge options for repetitive schedules, 6 – 42 closing discrete jobs, 3 – 53 options, G – 2 printing discrete job reports, 3 – 29 printing repetitive schedule reports, 6 – 22 resubmitting failed jobs and schedules, 3 – 69 resubmitting failed move transactions, 8 – 63 unclosing discrete jobs, 3 – 53 viewing component item details, 7 – 36 viewing pending job transactions, 3 – 33 Standard cost adjustment variance, 11 – 10 Standard discrete jobs, versus non–standard discrete jobs, 4 – 4 Standard rate resource charge, enabling, 9 – 13 Start date discrete job, 3 – 15 first unit, 6 – 16 job simulation, 3 – 44 last unit, 6 – 16 Start quantity, job, 3 – 15 Status cancelled discrete job, 10 – 8 cancelled repetitive schedule, 10 – 13 closed discrete job, 10 – 8 complete discrete job, 10 – 7 complete repetitive schedule, 10 – 12 complete–no charges discrete job, 10 – 7 complete–no charges repetitive schedule, 10 – 13 failed bill load discrete job, 10 – 8 failed close discrete job, 10 – 9 failed routing load discrete job, 10 – 9 intraoperation step, 8 – 69 job, 3 – 14, 14 – 4 on hold discrete job, 10 – 7 on hold repetitive schedule, 10 – 13 pending bill load discrete job, 10 – 8 pending close discrete job, 10 – 9 pending job, 3 – 67 pending mass loaded repetitive schedule, 10 – 14 pending routing load discrete job, 10 – 8 processing for repetitive schedule, 10 – 14 released discrete job, 10 – 7 released repetitive schedule, 10 – 12 repetitive schedule, 6 – 15 unreleased discrete job, 10 – 7 unreleased repetitive schedule, 10 – 12 Status changes discrete job, 10 – 15 repetitive schedules, 10 – 15 Status control discrete job, 10 – 4 Index – 15 for cost update transactions, 10 – 18 for job close transactions, 10 – 18 for material, move, and resource transactions, 10 – 18 for period close transactions, 10 – 18 for purge transactions, 10 – 18 repetitive schedules, 10 – 10 Status name, 2 – 30 Statuses discrete job, 10 – 2, 10 – 7 processing for discrete jobs, 10 – 8 repetitive schedule, 10 – 2, 10 – 12 shop floor, 8 – 65 user controlled for discrete jobs, 10 – 7 user controlled for repetitive schedules, 10 – 12 using, 10 – 23 to 10 – 25 using to close discrete jobs, 10 – 24 to 10 – 26 using to sequence repetitive schedules, 10 – 24 to 10 – 26 using to start production, 10 – 23 to 10 – 25 using to stop production, 10 – 23 to 10 – 25 Steps, intraoperation, 8 – 8 Subinventory discrete job completion, 3 – 18 line/assembly completion, 6 – 8 substitute component, 5 – 10 Substitute, component quantity, 5 – 10 Substitution, type, 5 – 10 Substitution type add, 5 – 10 change, 5 – 10 delete, 5 – 10 lot/serial specification, 5 – 10 Supply locator backflush, 7 – 48 issue transactions, 7 – 27 material requirement, 7 – 11 parameter, 2 – 20 replenishment transaction, 7 – 41, 7 – 43 return transactions, 7 – 27 WIP material transactions, 7 – 27 work order–less substitute component, 5 – 11 Supply locators, replenishing, 7 – 40 Supply subinventories, replenishing, 7 – 40 Index – 16 Supply subinventory backflush, 7 – 48 issue transaction, 7 – 27 material requirement, 7 – 11 parameter, 2 – 20 replenishment transaction, 7 – 41, 7 – 43 return transaction, 7 – 27 WIP material transaction, 7 – 27 work order–less substitute component, 5 – 11 Supply type assembly pull, C – 2 based on bill, C – 2 discrete job, 3 – 17 line/assembly association, 6 – 8 material requirement, 7 – 11 operation pull, C – 3 pending job, 3 – 68 push, C – 4 supplier, C – 4 Supply types, C – 2 supply types, bulk, C – 3 T Task discrete job, 3 – 20 for pending job, 3 – 66 work order–less assembly, 5 – 8 To move intraoperation step, 8 – 8 Total, quantity, 6 – 15 Transact Resources window, Charging Resources Manually, 9 – 22 Transaction interfaces, 2 – 3 managers, 2 – 3 reason codes, 2 – 3 user–defined types, 2 – 3 Transaction options backflush, 7 – 51 component issue, 7 – 24 component return, 7 – 24 moving assemblies, 8 – 32 replenishing supply locators, 7 – 40 replenishing supply subinventories, 7 – 40 resource charge, 9 – 21 WIP Material, 7 – 24 Transaction Summary window, viewing pending job transactions, 3 – 33 Transaction type work order–less completion assembly return, 5–6 work order–less schedule assembly completion, 5 – 6 Transaction types completion, 7 – 57 move, 8 – 34 replenishment supply subinventory, 7 – 25 user–defined, 2 – 3 WIP assembly completion, 7 – 57 WIP assembly returns, 7 – 57 WIP component issue, 7 – 25 WIP component return, 7 – 25 WIP negative component issue, 7 – 25 WIP negative component return, 7 – 25 Transactions backflush assembly, 7 – 50 backflush operation, 8 – 41 backflushing negative requirements, 8 – 41 issues, 7 – 20 returns, 7 – 20 scrap, 8 – 53 Transfer quantity, minimum, 8 – 38, 8 – 47 Type job, 3 – 14 substitution, 5 – 10 U unclosing, discrete jobs, 3 – 53 Units of measure, 2 – 3 UOM alternate, 2 – 3 backflush transaction, 8 – 43 issue transactions, 7 – 30 move transactions, 8 – 38, 8 – 47, 9 – 24 pending move transaction, 8 – 62 pending resource transaction, 9 – 33 replenishing higher level supply, 7 – 46 replenishment supply subinventory, 7 – 44 return transactions, 7 – 30 scrap, 8 – 56 unit of measure, 2 – 3 WIP material transactions, 7 – 30 work order–less completion, 5 – 6 Usage rate, resource requirement, 9 – 12 User–defined, transaction types, 2 – 3 V Valuation material asset account, 2 – 24 material expense account, 2 – 25 material overhead asset account, 2 – 24 outside processing asset account, 2 – 25 overhead asset account, 2 – 25 overhead expense account, 2 – 26 resource asset account, 2 – 25 resource expense account, 2 – 25, 2 – 26 standard cost expense account, 2 – 26 Value, resource requirement, 9 – 12 Variance material usage, 11 – 10 move based overhead efficiency, 11 – 10 outside processing efficiency, 11 – 10 resource based overhead efficiency, 11 – 10 resource efficiency, 11 – 10 standard cost adjustment, 11 – 10 Variances, Work in Process, 11 – 10 View Discrete Jobs Summary window, Viewing Discrete Job Information, 3 – 31 View Discrete Jobs window, Viewing Discrete Job Information, 3 – 31 View Material Requirements window, Viewing Material Requirements, 7 – 13 View Move Transactions window, Viewing Move Transactions, 8 – 49 View Operations window, Viewing Operations, 8 – 19 View Repetitive Schedules Summary window, Viewing Repetitive Schedule Information, 6 – 24 View Repetitive Schedules window, Viewing Repetitive Schedule Information, 6 – 24 View Resource Requirements window, Viewing Resource Requirements, 9 – 17 Index – 17 View Resource Transactions window, Viewing Resource Transactions, 9 – 27 W Windows, navigator paths, A – 2 WIP Account Distribution Report, 14 – 64 WIP Account Summary Report, 14 – 67 WIP accounting class defaults, 3 – 10 non–project related, 3 – 10 project related, 3 – 11 WIP Accounting Class window, Defining WIP Accounting Classes, 2 – 27, 2 – 28 WIP Accounting Classes Report, 14 – 68 WIP Location Report, 14 – 69 WIP Material Transactions window Issuing and Returning All Components, 7 – 31 Issuing and Returning Specific Components, 7 – 27 Replenishing Supply Subinventories and Locators, 7 – 41 WIP Move, charge type, 9 – 5 Index – 18 WIP Offsetting Account Report, 14 – 71 WIP Outside Processing Report, 14 – 72 WIP parameters, defining, 2 – 16 WIP Parameters Report, 14 – 73 WIP scheduling detailed scheduling, 12 – 7 discrete rescheduling, 12 – 11 discrete scheduling, 12 – 5 repetitive line, 12 – 13 repetitive rescheduling, 12 – 18 WIP Value Report, 14 – 74 Work in Process Parameters window, Defining WIP Parameters, 2 – 17 Work in Process planning, D – 2 Work order–less assemblies completing, 5 – 5 returning, 5 – 5 Work order–less assembly, accounting class, 5–8 Work Order–less Completions window, Performing Work Order–less Completions, 5–5 Workday calendar, 2 – 4