1
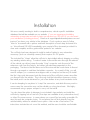
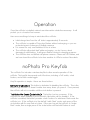
noPhoto User Manual ©noLimits Enterprises, 2013 Congratulations You just received driving freedom. Extended support can be found on our website: www.nophoto.com/support So go ahead… Meet the noPhoto Introduction The noPhoto is a highly advanced “smart” license plate frame designed to protect your license plate from flash photography. Using patent-pending technology, the noPhoto reacts to flashes from automated traffic enforcement and consumer cameras, overexposing the imaging sensor of the camera by adding extra white light. For the noPhoto to work correctly, the flash detection sensor must be kept clean and free of debris. We recommend simply wiping the sensor with a tissue or a finger each time you fill up for gas. Normal road dust is not an issue; heavier mud and snow is. When testing your noPhoto, the flash detection distance is directly proportional to the flash power being used. We tuned the noPhoto to work best with the 200w+ flashes used by automated enforcement. The noPhoto will certainly react and defeat many consumer cameras, but it will not detect a 10w compact camera flash at equivalent distance that it would a 200w photo-enforcement flash. Likewise, we have made many photo-enforcement specific tweaks such as optimizing the performance for specific angles that have little effect on consumer cameras. You can still expect the noPhoto to defeat many consumer cameras, but testing with a compact camera is not representative of real-world performance against enforcement cameras. Warnings Do not attempt to open or modify the noPhoto in any way. Like any consumer product using Xenon flashes, the noPhoto contains high voltages that are potentially dangerous, and the potential for shock exists if improperly opened. The circuitry in the noPhoto is permanently sealed, weatherproofed, and protected. noLimits Enterprises, INC is not liable for any damages, injury, or hazards caused by opening the enclosure. Do not stare directly into the flash from close range. The flashes in the noPhoto are similar to those in a high-end consumer DSLR camera. There are light-guides built into the enclosure to shield following drivers from light – do not circumvent such safety precautions. Carefully follow all instructions when installing the noPhoto. As when doing any electronics work on any automobile, ALWAYS disconnect the primary vehicle battery before beginning. Be mindful of live wiring and take standard and common precautions when working around any electricity. Do not route wiring through areas with sharp corners, or in areas where it may become crushed. Such actions could lead to a short circuit, creating dangerous conditions. It is the sole responsibility of the end-user to inform themselves of existing vehicle codes, guidelines, regulations, and laws in their local areas. Do not use the noPhoto in jurisdictions where it may be against vehicle code. Parts and Layout 1x noPhoto 1x 4.5ft wire extension 2x Quick Disconnects 1x Compatibility Bracket 4x Bolts 4x Nuts Installation We are currently working to build a comprehensive, vehicle-specific installation database that will be available on our website. If you are experienced installing automotive accessories and wish to help, we will send you $10 USD if you document your installation (including pictures). Email us at [email protected] and inquire if we have your vehicle in the database. If not, create an easy to follow “how-to” document with a picture and brief description of each step and email it to us. We will send $10 USD immediately upon receipt of the document provided it is clear and complete, and the guide will be posted to our website. The noPhoto has been designed to install in similar fashion to any automotive accessory (such as a backup camera) that requires 12v DC power. The included 3m “t-taps” allow the noPhoto to be installed without stripping or cutting any existing vehicle wiring. To make it easier to thread the wire through the exterior of the vehicle, we did not crimp the male “t-tap” connector onto the end of the extension cord from the factory, but rather included them separately in the packaging. The idea is that the bare end of the wires will be much easier to thread through a grommet or seal than the bulkier connector. As a result of this, you will need a crimper (or a common wire stripper with a crimp tool on the end) to install the 3m t-tap quick disconnect onto the bare end of the noPhoto’s power wire after you thread it into the vehicle. This is the only tool that should be necessary during the install, and it can be obtained for just a few dollars at any local hardware store. It can be tempting to use pliers to “crimp” the connector, and while this may work in some cases, the connection may not be reliable on a long term basis. We highly recommend using a proper crimper to carry out the install. You also have the option to disregard our included t-taps entirely and install the noPhoto by tapping into a fuse box (fuse taps are available at any automotive store) or other 12v power source. In cases where you cannot find an easily accessible 12v wire, this may be a simpler choice. Do not power the noPhoto directly from the vehicle battery without a suitable fuse in place – this can be a fire hazard. The instructions included do not cover this method, and the user should be comfortable working with electronics and automotive wiring should they attempt their own installation that deviates from these instructions. Standard Installation instructions: For a helpful video on how to use t-taps and a crimp tool: http://www.youtube.com/watch?v=0sGbES2_Tg0 Scan QR Code With Smartphone To Watch 1. Disconnect vehicle battery and ensure no power is present. 2. The noPhoto requires only two wires to be connected for installation – a 12v power source that turns on with vehicle ignition, and a ground. Any standard 12v vehicle accessory wire should suffice. Please be sure that the wire you choose does not remain powered after the ignition is turned off – this will drain your battery. Before beginning installation, select and locate where you would like to tap into a 12v power source in the vehicle. Common 12v sources include tail running lights, 12v DC power outlets in the trunk, backup cameras, etc. Many cars are required to have pre-existing license plate lighting installed. If these lights are on at all times (and not controlled by an ambient light sensor) this is an ideal spot to easily access power and ground. 3. Identify the extension wire included with the noPhoto – this is the wire with a quick connector on one end, and a stripped wire on the other end. 4. Route the stripped end of the extension wire through the vehicle trunk or tailgate and into the area where you chose to tap into the 12v wire. This step varies significantly vehicle by vehicle. In most cases, the wire can be routed to the vehicle interior through a pre-existing rubber grommet on a backup camera, license plate light, trunk seal, or other exterior feature. 5. Identify the included two “t-tap” male connectors. Take one t-tap male connector and insert the stripped positive (red) wire into the narrow end. Using your crimp tool, solidly crimp the narrow end around the wire. Repeat this process with the second male t-tap connector and the negative (black) wire of the extension wire. 6. Identify the two included female t-tap connectors. Take one of them and attach it to the 12v power wire you have selected from the car. To attach the t-tap, simply open the tap and close it FIRMLY around the 12v power wire. Use pliers to ensure the clamp is closed firmly. These t-taps will automatically tap into 18-22awg wire at the correct depth. 7. Repeat this process with the second female t-tap connector, except this time attaching it to the GROUND wire you have identified from the car. CHECKPOINT: At this point, you should have one female t-tap attached to the 12v power wire from the car, one female t-tap attached to the ground wire from the car, and two male t-taps attached to the power and ground extension cable. 8. Insert the male t-tap connectors into the female t-tap connectors. Be sure to push firmly. You’re done with the hardest part! 9. Insert your license plate into the noPhoto by sliding it into the opening at the top of the enclosure. 10. The included compatibility bracket ensures a good fit on a variety of cars. Use the original license plate screws that came with your car to affix the two brackets vertically (not horizontally) to the car. 11. Line up the noPhoto with the compatibility bracket to determine which screw holes to use. Use the included bolts to screw the noPhoto to the compatibility bracket. 12. Plug in the quick connector attached to the end of the 6 inch wire on the noPhoto to the quick connector attached to the end of the extension cable. 13. Ensure no wires are being crushed or pinched, and turn on the vehicle power. 14. Test the noPhoto using any camera with a xenon flash (or the test function if you have a noPhoto Pro). If the noPhoto flashes back in response to the flash of a camera, you are ready to drive protected. Operation Once the noPhoto is installed, minimal user intervention should be necessary. It will protect you in a hassle-free manner. Here are some things to keep in mind about the noPhoto: Initial charge time from the off state is approximately 15 seconds The noPhoto is capable of firing two flashes without recharging, so you are protected even in instances of multiple cameras It is normal for only one flashtube to fire at a time The noPhoto will protect itself while recharging – so don’t worry about damaging it while testing. It will ignore flashes during its charging sequence The noPhoto does not defeat cell phone cameras – these use LED flashes, and we have tuned the noPhoto to be less sensitive to LEDs to reduce false alerts noPhoto Pro Keyfob The noPhoto Pro includes a wireless keyfob to allow remote operation of the noPhoto. This keyfob has several useful functions, including a “kill” switch, a test feature, and a flash-mode toggle. Keyfob operation is simple – there are three buttons. Kill Switch (red button): This button is dedicated to disabling the noPhoto. This is the button’s only function – it doesn’t matter how many times you press it. Once pressed, the noPhoto will not re-enable until the circle button is pressed. Test Button/Re-Enable (circle button): This button has two purposes. If the noPhoto has been disabled by the Kill Switch, this button will re-enable it. If the noPhoto is enabled, this button provides a test function for whichever flash mode the noPhoto is in. If the noPhoto is in the default “multi-flash” mode, each press of the circle button will fire one flash at a time. If the user has set the noPhoto to “singleflash” mode, then a single press of the circle button will fire both flashes at once. The purpose of this test feature is to ensure that the bulbs in the noPhoto are in good operational condition. When the noPhoto is re-enabled by the circle button, the unit will always default to “multi-flash” mode. Mode Switch (triangle button): The triangle button is used to switch between the default multi-flash mode and single-flash mode. This is a feature for advanced users that are familiar with the types of cameras they come into contact with on a regular basis. The default mode for the noPhoto is multi-flash mode. This means that the noPhoto can react to up to two cameras consecutively (using two flashes) without having to recharge. The noPhoto accomplishes this by firing the left and right flashes in staggered mode, not simultaneously. The brightness from a single flash is more than sufficient to blank out the license plate in every test we have conducted. If the user determines that the camera systems in their area use only a single flash and single camera, we provide the ability to press the triangle button to switch the noPhoto into single-flash mode. This effectively doubles the power output of the noPhoto by firing both left and right flashes simultaneously, but at the expense of only being able to react to a single flash before recharging is needed (15 second recharge time). This mode is also most effective at defeating advanced consumer cameras that use manually metered flashes. Most consumer cameras use automatic pre-flashes – leave the noPhoto in default mode for these. However, many paparazzi and professional photographers use manually metered flashes with no preflash. If you know there is no preflash being used, the single-flash mode will make it simply impossible for images to be obtained of the license plate under any conditions. SETTING THIS MODE INCORRECTLY CAN RESULT IN TICKETS BEING RECEIVED. Available Accessories There will be several accessories available for the noPhoto; some at the time of launch, and some coming shortly after. These accessories include, but are not limited to: Security Screws and L Key: These custom-made pin in torx security screws are designed to prevent anyone with a common screwdriver from being able to steal the noPhoto. Comes with matching L Key for driving in and removing the screws. Hardwire Power Switch: While it is impossible to add the remote keyfob to non-Pro models because of (expensive!) hardware differences, there will be a hardwire power toggle switch available that can disable the noPhoto at the touch of a button. Weatherproof Lettering: We are in the process of testing several materials suitable for producing weatherproof adhesive lettering. This will allow you to customize your noPhoto with any name, number, or phrase. Warranty The noPhoto is protected by a one-year limited warranty valid from date of first purchase. This warranty includes, but is not limited to, manufacturing, workmanship, materials, and electrical defects. The warranty is NOT valid in cases of: Significant physical damage to the noPhoto Complete water submersion (normal rain and weathering is expected and will not damage the unit, but it is not designed to be completely submerged in a body of water) Salt or chemical corrosion If the noPhoto is received DOA (dead on arrival), not only will we replace your noPhoto with a working one, but we will cover your return shipping as well. While we do retain the right to deny warranty coverage in the instances outlined above, please contact us at [email protected] if there is a problem with your unit. The bottom line is that we will do everything reasonable to take care of you. Thank You Maybe you are one of our original Indiegogo contributors, or perhaps one of first retail customers. Either way, we here at noLimits need to thank you for making the noPhoto possible. Simply put, we couldn’t do it without your support. Our customers and fellow countermeasure enthusiasts have been nothing short of wonderful throughout the entire development process – patient, understanding, and offering many helpful suggestions that we have incorporated. Speaking of that, we don’t look at the launch of the noPhoto as an end. We think it’s just the beginning; the first shot across the bow of those who would violate your privacy and rights. We will need your continued help to ensure the success of not just the noPhoto, but of all such privacy countermeasures. The best way you can do this is by contacting us ([email protected]) with any suggestions, comments, feature requests, improvements, or ideas that you have. We want to be a company that has a close relationship with its users, and if an improvement or feature is useful and cost-feasible, we will strive to incorporate it. As a company that was funded in part by crowdsourcing, we look forward to using a similar people-centric approach to defeating automated enforcement once and for all. So again, thank you from the bottom of our hearts. We hope you enjoy the noPhoto, and that we can serve you for years to come. Drive Free, Jonathan Dandrow, Nathan Stokes, and the noLimits Team