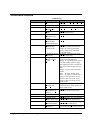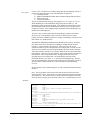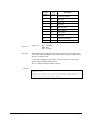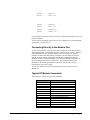
1
User’s Guide
Point Manager
Version 2.5a
10/20/06
Copyright © 2006, Point Six, Inc.
Point Six, Inc.
2333 Alumni Park Plaza
Suite 305
Lexington, KY 40517
(859)266-3606
[email protected]
[email protected]
http://www.pointsix.com
Contents
Introduction
7
Overview ................................................................................................................................... 7
Models ....................................................................................................................................... 9
Connecting the Point Manager
11
Overview: Connecting ............................................................................................................. 11
Setup & Startup........................................................................................................................ 12
Ethernet – TCP/IP.................................................................................................................... 12
LAN Connection ....................................................................................................... 12
Direct to PC ............................................................................................................... 13
Browser ..................................................................................................................... 13
Serial Ports............................................................................................................................... 14
Command Radio (Option) ....................................................................................................... 14
Modem Support (Option)......................................................................................................... 14
Modem Usage............................................................................................................ 14
Connecting Directly to the Modem Port.................................................................... 15
Common Software Tools
17
Software................................................................................................................................... 17
Point Manager Functions
19
Overview of Point Manager Functions .................................................................................... 19
Data Acquisition ...................................................................................................................... 19
The Web Pages.......................................................................................................... 20
Current I/O Readings................................................................................................. 23
Historical Log............................................................................................................ 23
Events and Alarms..................................................................................................... 26
Event Log .................................................................................................................. 26
Pass-Thru Mode ........................................................................................................ 27
Control ..................................................................................................................................... 29
Outputs ...................................................................................................................... 29
Timers........................................................................................................................ 31
Matches ..................................................................................................................... 31
Scheduled Outputs..................................................................................................... 31
Support Functions.................................................................................................................... 37
Point Manager Callout............................................................................................... 37
XML Delivery (option) ............................................................................................. 42
Password Protection .................................................................................................. 50
DHCP ........................................................................................................................ 51
Time Management (Realtime Clock) ........................................................................ 51
Communicating with the Point Manager
Point Manager Manual
53
Contents • i
Point Manager Protocol ........................................................................................................... 53
CRC16 Algorithm ..................................................................................................... 54
Example C function................................................................................................... 55
General information................................................................................................................. 56
Sensors ...................................................................................................................... 56
Command Overview................................................................................................................ 58
Command Syntax ...................................................................................................... 58
Time representations ................................................................................................. 58
Future Compatibility ................................................................................................. 59
Command Outline.................................................................................................................... 60
Commands
65
‘A’ - Auto Add Mode command............................................................................................. 65
‘C’ – Notify Setup ................................................................................................................... 70
‘CAE’ – Configure/Read AutoAdd Sensor Events.................................................................. 71
‘CC’ – Configure/Read Clock ................................................................................................. 73
‘CCN’ – Configure Automatic Time Update........................................................................... 75
‘CD’ – Configure/Read Point Manager Identification Label................................................... 76
‘CESB’ & ‘CERB’ - Configure/Read Point Manager System Events .................................... 77
‘CESL’ & ‘CERL’ - Configure/Read Log Filled Action........................................................ 80
‘CESP’ & ‘CERP’ - Configure/Read Sensor I/O Point Events .............................................. 82
Sensor I/O Point Event Setup ................................................................................... 82
‘CESS’ & ‘CERS’ - Configure/Read Sensor Events .............................................................. 88
‘CI’- Configure/Read Point Manager Static IP Address.......................................................... 90
‘CID’- Configure DHCP.......................................................................................................... 92
‘CIP’- Configure TCP/IP Ports................................................................................................ 93
‘CM’ – Configure/Read Media Callout Table ......................................................................... 94
‘CN’ – Configure/Read Email Destination.............................................................................. 97
‘CO’ – Configure/Read Sensor I/O Corrections ...................................................................... 99
‘CPD’ & ‘CPC’ – Configure Login Passwords ..................................................................... 103
‘CR’ - Configure Radio ........................................................................................................ 104
‘CS’ - Configure/Read Sensor Setup .................................................................................... 106
Sensor I/O Point Setup ............................................................................................ 107
‘CT’ – Configure Media Ports ............................................................................................... 112
‘CTT’ – Configure Extended Media Parameters ................................................................... 115
‘CU’ – Configure/Read PassThru Media Callout Table ........................................................ 118
‘D’ - Get Last Data command............................................................................................... 122
‘E’- Read Scheduled Output Control Status .......................................................................... 126
‘EC’ – Clear Event Log ......................................................................................................... 127
‘ER’ – Read an Event Log Record ........................................................................................ 128
‘EU’ – Event Log Usage........................................................................................................ 135
‘EZ’ – Read Event Log Records Compressed ....................................................................... 136
‘G’ – Configure/Read Group Description.............................................................................. 137
‘HC’ – Clear Historical Log .................................................................................................. 138
‘HI’ – Configure/Read the History Interval ........................................................................... 139
‘HO’ – Configure/Read History Log Offline Indicator ......................................................... 140
‘HR’ – Read a Historical Log Record.................................................................................... 141
‘HS’ – Force Historical Log Snapshot................................................................................... 144
‘HU’ – Historical Log Usage................................................................................................. 145
‘HZ’ – Read Historical Log Records Compressed ................................................................ 146
‘IC’ – Information Counts ..................................................................................................... 147
‘ID’ – Information Delivery .................................................................................................. 148
‘IE’ – Information Email Delivery ........................................................................................ 149
‘IK’ – Information Output Packet State................................................................................. 150
‘IL’ – XML Delivery Information ......................................................................................... 151
ii • Contents
Point Manager Manual
‘ILR’ – XML Delivery Last HTTP Response ....................................................................... 152
‘IM’ – Media Information...................................................................................................... 153
‘IMM’ – Modem Information................................................................................................ 154
‘IP’ – IP Address Settings...................................................................................................... 155
‘IPS’ – DHCP State Information ........................................................................................... 156
‘IT’ – Time Zone Information ............................................................................................... 157
‘ITD’ – Daylight Savings Schedule....................................................................................... 158
‘IU’ – Information Pass-Thru ................................................................................................ 160
‘IV’ – Version Information.................................................................................................... 161
‘IY’ – Information Synchronize the Clock ............................................................................ 162
‘J’ – Configure/Read I/O Job Descriptions............................................................................ 163
‘K’ – Configure/Read Outputs............................................................................................... 164
‘L’ – Login/Logout Commands ............................................................................................. 166
‘ME’ – Configure/Read Scheduled Outputs .......................................................................... 167
‘MM’ – Configure/Read Match Sensor Packet...................................................................... 169
‘O’ – Test Sensor I/O Correction........................................................................................... 172
‘P’ – Force Call (Push a Connection) .................................................................................... 173
‘PK’ – Force Output .............................................................................................................. 175
‘PX’ – Force XML Delivery.................................................................................................. 176
‘PY’ – Attempt Automatic Time Update............................................................................... 177
‘S’ - Get Status Data Command............................................................................................ 178
‘SO’ - Set Exception Schedule ............................................................................................. 180
‘SW’ - Set Day of Week Schedule ....................................................................................... 181
‘T’ - Set/Read Timers ........................................................................................................... 182
‘U’ - Set Pass-Thru Mode..................................................................................................... 184
‘V’ – Verbose ........................................................................................................................ 186
‘XD’ – XML Delivery Destination........................................................................................ 187
‘XM’ – XML Delivery History Log Position ........................................................................ 188
‘XP’ – XML Delivery Interval Parameters............................................................................ 189
‘XT’ – XML Date and Time Format ..................................................................................... 190
Error Codes
193
Overview ............................................................................................................................... 193
Error Code List ...................................................................................................................... 193
Appendix
195
Modem Support (Option)....................................................................................................... 195
General Usage ......................................................................................................... 195
Dialup Modem......................................................................................................... 197
Cell Modem............................................................................................................. 198
IP Dialup Modem .................................................................................................... 201
Debug and Testing Modem ..................................................................................... 202
Connecting Directly to the Modem Port.................................................................. 203
Typical AT Modem Commands .............................................................................. 203
Data Compression.................................................................................................................. 205
Using Thermistors ................................................................................................................. 207
Overview ................................................................................................................. 207
Linearizing Thermistors .......................................................................................... 207
Point Manager UPS Operation .............................................................................................. 209
Installation ............................................................................................................... 209
Operation ................................................................................................................. 209
Notes........................................................................................................................ 210
Serial Cable............................................................................................................................ 211
Specifications......................................................................................................................... 211
Point Manager Manual
Contents • iii
Acknowledgements
212
Trademarks ............................................................................................................................ 212
Glossary of Terms
iv • Contents
215
Point Manager Manual
Point Manager Manual
Introduction • 5
Introduction
Overview
The Point Manager is a stand-alone data server designed to process and serve data
received from wireless Point sensors. The Point Manager receives data packets from
Point Sensors, processes the data and makes the data available via command,
asynchronous transmissions and through dynamic HTML (viewable from a standard
web browser). Commands can be sent over any of the Point Manager’s media:
2 serial ports,
Ethernet (TCP/IP), and
900 Mhz/2.4 Ghz command radio (optional).
The Point Manager contains a time of day clock, battery backed RAM, and flash
programmable memory. It is fully configurable, both locally and remotely. It can
store configuration information for up to 100 sensors having a combined maximum
of 250 I/O points.
The Point Manager has several options for receiving Point sensor data:
Internal:
418/433 Mhz Receiver, or
900 Mhz/2.4 Ghz radio (used with 900 Mhz/2.4 Ghz Point sensors,
and Point Repeaters)
External:
418/433 Mhz Point Manager receiver,
418/433 Mhz high performance receiver,
900 Mhz/2.4 Ghz TZR transceiver (used with 900 Mhz/2.4 Ghz Point
sensors, and Point Repeaters) (option on the Point Manager)
direct serial
The Point Manager was built with the flexibility needed to satisfy varied user
requirements. Conceptually there are several modes of operation that allow the user
to balance simplicity, costs, precision, and timeliness.
Monitoring - The easiest way to get information from the Point Manager is to view
the current sensor values. This can be accomplished with a Web browser (no
software coding required) or polling by a host. Both alarms and data are available.
Point Manager Manual
Introduction • 7
Collecting – Snapshots of the current sensor values can be periodically stored in a
Historical Log. The snapshots can be retrieved for later analysis. The Point
Manager can be thought of as a remote data logger.
Concentrating – Key changes in a sensor reading, sensor age or system parameters
can trigger records to be logged into an Event Log.
Notifying – Each event can be configured to trigger the Point Manager to notify a
host. The Point Manager can notify a host by either pushing a connection through the
Ethernet (TCP/IP), command radio or one of the two serial ports. The Point
Manager can be configured to notify up to 5 host destinations trying each destination
until the event is confirmed delivered. The Point Manager can also send emails
using SMTP to send text messages to destination hosts notifying them of events.
Control – The Point Manager has several built-in control functions. Outputs are
used to control the output sensor. Outputs can be tied to events so that when an
event fires the Point Manager can send an output action. Timers are used to send
outputs at precise intervals. “Matches” are used to trigger output actions or
additional control functions. Scheduled Outputs are used to set an output based on a
day of week schedule.
The Point Manager is a data logger that can be used to store data while the Point
Manager is not connected to a host computer. The data-logging feature can be used
in applications where the connection is temporary and short or not 100 percent
reliable. The data-logging feature can be used as a backup in case communications
is lost through the Ethernet connection. The Point Manager stores a snap shot of all
the current readings of the sensors in a Historical Log at preset intervals of time.
The Point Manager contains the ability to generate events (exceptions) and alarms.
The Point Manager can detect conditions with the sensor or the internal system that
will generate events. The events can be logged to an Event Log and can initiate the
Point Manager to push a connection through the Ethernet, command radio or one of
the two serial ports to a host computer. The host computer then does not need to be
always connected and polling the Point Manager. The Point Manager can inform the
host of the exceptions by establishing the connection itself.
The Point Manager can deliver the Historical and Event Log records to a web server
in XML form. The Point Manager can initiate the process periodically or when an
alarm occurs. This functionality makes it easy to have the Point Manager deliver
data from behind a firewall (the Point Manager looks like to the firewall a Browser
that is running on a PC). Having the data in XML format makes it straight forward
to process the data by the web server.
PointWare is an application designed to manage and maintain hundreds of Point
Managers. Ask your dealer from more information about this application.
8 • Introduction
Point Manager Manual
Models
Model
Point Manager –
900
Media
Ethernet Port
2 Serial Ports
Built in 900 Mhz
transceiver
Point Manager –
418
Ethernet Port
2 Serial Ports
Built in 418 Mhz
Radio
Description
Point Manager is ready to receive
transmissions from 900 Mhz
sensors and 900 Mhz Point
Repeaters. (Shown on cover page
of manual.) Commands can be
received and output packets or
strings can be sent.
The built in receiver only receives
data from 418 Mhz sensors.
Command cannot be sent through
this receiver.
Point Manager
433/2.4-CE
Ethernet Port
CE approvals
Built in 433 Mhz
receiver and 2.4 Ghz
transceiver
Point Manager can receive sensor
data through both 433 Mhz and
2.4 Ghz radios. Commands can
be received and output packets or
strings can be sent through the 2.4
Ghz transceiver
Point Manager
418/900-MR
Ethernet Port
Point Manager can receive sensor
data through both 418 and 900
Mhz radios. Commands can be
received and output packets or
strings can be sent through the
900 Mhz transceiver. Through the
serial port the Point Manager is
ready to support an AT modem:
dialup or cellular.
1 Serial Port –
external modem
ready
Built in 418 Mhz
receiver and 900 Mhz
transceiver
Point Manager
418/900-MRUPS
Ethernet Port
1 Serial Port –
external modem
ready
Same as the Point Manager
418/900-MR with additional UPS
power
Built in 418 Mhz
receiver and 900 Mhz
transceiver
Point Manager Manual
Introduction • 9
10 • Introduction
Point Manager Manual
Connecting the Point Manager
Overview: Connecting
The Point Manager has four communication ports: Ethernet-TCP/IP, built-in 900/2.4
Mhz/Ghz Radio and two serial RS232 ports. The Point Manager will respond to
commands on all four ports. The Point Manager can place calls or make connections
to a host computer through each of these ports. The Point Manager with the built-in
418/433 Mhz receiver can only receive sensor data. It cannot process commands or
initiate connections through this port. Before using the Point Manager, you should
carefully evaluate the communication resources available at the site where the Point
Manager will be installed.
Ethernet Port
Power Connection
Local Serial Port
Ethernet Link
Power & Activity
Point Manager Manual
Receiver Serial Port
Connecting the Point Manager • 11
Setup & Startup
If you have a Point Manager Receiver, connect it to the Point Manager’s Receiver
Port using the provided serial cable. Depending on your module thread the supplied
antenna to the antenna connector either to the Point Manager or to the Point Manager
Receiver.
If using Ethernet, connect the RJ-45 cable to the Point Manager (use a straight when
connecting to a LAN; use a crossover cable when connecting directly to a PC). The
green light will light if there is an active Ethernet connection
Connect the provided power supply to the Point Manager. If you are using a Point
Manager Receiver, power can be connected either to the Point Manager or the Point
Manager Receiver. If the power supply needs to be replaced, use a power supply
that can deliver 6 to 12 volts DC and a minimum of 600 milliamps at 9 volts. When
power is applied, the Point Manager will turn on the red light on both components.
The red light indicates that the Point Manager is functioning. The Point Manager
also uses the red light to indicate reception of a packet from a Point sensor. The
Point Manager will blink the red light momentarily indicating a packet has been
received and processed.
NOTE: If you are using the built-in 418/433 Mhz receiver or the external Point
Manager Receiver, install antenna or the receiver unit as far away as possible
(minimum of 2 feet) from the Point Manager and any high speed electronics
equipment. These devices can radiate noise at 418/433Mhz that will diminish the
receiver unit’s performance.
Ethernet – TCP/IP
LAN Connection
In order for the Point Manager to communicate TCP/IP, it needs an IP address,
network mask, and possibly a gateway address. You may need to consult with your
network administrator to determine these parameters. Chances are you will have to
change the Point Manager’s default IP address: IP address 192.168.1.55, network
mask 255.255.255.0, no gateway address and port 1000. You can change this setting
using the “CIS” command through any of the communications ports. If you need to
use the Ethernet port to change this setting see the next section “Direct to PC”.
Example
Command:
<^B>CIS192.168.1.46,255.255.255.0,192.168.1.200<CR>
Response: <^B>CIS192.168.1.46<CR>
Remarks: set IP address to “192.168.1.46”, subnet mask
to”255.255.255.0” and gateway to “192.168.1.200“.
<^B> is STX (02H). Press Ctrl and B using a terminal emulation program.
<CR> is 0DH. Press Enter using a terminal emulation program.
Connect your Point Manager through its Ethernet port to the LAN with a straight
through Ethernet cable (10baseT). The ‘Ethernet Link’ light will turn on indicating
a valid Ethernet physical connection. To test if the connection is valid and the Point
Manager is set up properly, use the Ping utility on your computer and ping the Point
Manager’s IP address. Use your Internet browser to view the Point Manager HTML
information.
12 • Connecting the Point Manager
Point Manager Manual
The Point Manager can push a connection to a host computer. Use the “CMS”
command to set the host name or IP address of the host computer and the port
number. To verify that this connection will work use the “P” command to tell Point
Manager to make the connection to the host computer. (You will need the host
computer set up properly and an operator to verify that the connection was
successful.)
Example
Command:
<^B>CMS5,60(T64.256.97.29:1000)<CR>
Response: <^B>CMS5<CR>
Command:
<^B>P1<CR>
Response: <^B>P1<CR>
Remarks: the first command sets up the Point Manager with the IP
address of the host computer. The second command tells the Point
Manager to push (call) a connection to the host computer using the
assigned IP address.
Note: the Point Manager will automatically terminate the connection if it does not
receive a command within the Inactivity Timeout, which is 1 minute.
Direct to PC
The Point Manager can be connected directly to a computer through the Ethernet
port by a crossover network cable (10baseT). You may need to change the TCP/IP
settings on your PC and/or the settings in the Point Manager. The default address for
the Point Manager is 192.168.1.55, subnet mask of 255.255.255.0 and port 1000.
You will need to set the computer’s address to an address on the Point Manager’s
subnet or change the Point Manager’s address to match the computer’s subnet mask.
To change the IP settings on a computer running the Windows operating system,
follow these steps: select the following ‘Control Panel -> Network -> TCP/IP’; select
the TCP/IP service for your network card; choose ‘Properties->IP Address’; choose
‘Specify an IP Address’ (example: 192.168.1.40 255.255.255.0); and fill in the
initial values for subnet mask and IP address. Restart the PC and run WINIPCFG or
IPCONFIG to verify changes. When finished changing the IP address and
connecting the computer to the Point Manager, use the Ping utility on your computer
and ping the Point Manager to verify your settings and connection. Use your
Internet browser to view the Point Manager HTML information.
Note: the Point Manager will automatically terminate the connection if it does not
receive a command within the Inactivity Timeout, which is 1 minute.
Browser
Once you have your Point Manager connected and configured for TCP/IP
communications, start the browser on your computer and enter the Point Manager’s
IP address where you would normally enter an URL (Ex. Address: 192.168.1.55). If
you have successfully made the connection, your browser should show the title
“Point Manager” and a header row for the sensor table with no sensors.
Point Manager Manual
Connecting the Point Manager • 13
Serial Ports
The Point Manager has two Serial ports. Each port can receive packet information
from a receiver or receive commands and send responses. The Receiver Port is
ready to be connected to an external receiver. The Receiver Port is an RS232 DTE
device and requires a NULL modem cable to connect to a computer. The Local
Serial Port is designed to be a maintenance port. A special cable is available as an
option to use to connect to the Local Serial Port of the Point Manager. The cable has
an DB9 connector at one end and a phono connector at the other. Plug the male
phono connector into the connector labeled “Serial” on the Point Manager. Connect
the DB9 connector to the Serial port of the host computer. For both ports, Point
Manager uses RS232 communication parameters of 19200 baud, 8 data bits, 1 stop
bit and no parity. The Point Manager does not use any of the RS232 handshaking
lines or the standard software handshaking. The Local Serial Port is an RS232 DCE
device. The Local Serial Port is referred to as the Serial 1 (the primary port) and the
Receiver Port is Serial 2.
Note: the Point Manager will automatically log out a user (if a login password is
configured) if it does not receive a command within the Inactivity Timeout, which is
1 minute.
Command Radio (Option)
The Command Radio is a 900 Mhz/2.4 Ghz transceiver used to receive sensor
packets from 900 Mhz/2.4 Ghz sensors and Point Repeaters and send commands to
the Point Manager. Use the “CR” command to set the radio parameters. All 900
Mhz/2.4 Ghz sensors and Point Repeaters must be set to the same radio parameters.
The default parameters are “505” for the network id and “5” for the hop table
(Channel 7).
Modem Support (Option)
Modem Usage
The Point Manager will support an external modem that uses the AT command set.
The Point Manager will set up the modem to listen for incoming connection attempts
and to initiate connection attempts. The modem port is an RS232 DTE device with
the following handshaking lines supported: DTR for entering command mode or
hangup, DCD to determine if there is a connection, and CTS and RTS for data flow
control. The default communication parameters are 19200 baud, 8 data bits, no
parity and 1 stop bit. Use a straight-thru DB9 RS232 cable to connect the Point
Manager and the modem.
The Point Manager has built support for four modems: AT Hayes compatible dialup
modem, MultiTech MultiModem GPRS Wireless Modem, Enfora GSM1218 and
14 • Connecting the Point Manager
Point Manager Manual
ConnectOne iModem. Other modems can be used simply by modifying the modem
command strings of the Point Manager.
Once a connection is made, the Point Manager will support all the Point Manager
commands.
Please see the following commands for more information: “CT, CTT, IM, and
IMM”. The appendix section called “Modem (Option)” is a reference about how to
use a modem with Point Manager.
Connecting Directly to the Modem Port
You can connect directly to the serial port with a computer or some other processor.
The default baud rate is 19200 baud (no parity, 8 data bits and 1 stop bit). The flow
control handshake lines are available and active but are not required. The host
computer can then send Point Manager commands. After the Inactivity time has
elapsed, the Point Manager will send the ATZ modem command and enter the
Initialization State. If the Point Manager receives a Point Manager command, then
the Point Manager will enter the Connected state. Any application that uses the
Modem Port directly through the RS232 connection, must be able to tolerate
asynchronously sent “ATZ” strings. Use a “NULL modem” cable to connect the
Point Manager with a host computer.
You can also attach a receiver such as a Point Host or Point Transceiver to the
Modem Port.
Point Manager Manual
Connecting the Point Manager • 15
Common Software Tools
Software
PointWare is an application designed to manage and maintain hundreds of Point
Managers. Ask your dealer from more information about this application.
The interface to the Point Manager was designed to meet common standards and be
easy to use. You can use common software that either comes with your operating
system or can be purchased to diagnose common problems and to communicate with
the Point Manager. You can use a communication program that has terminal
emulation to get familiar with the Point Manager commands and communications.
Once you are familiar with the commands, you can automate the communications
using common development programming languages.
Here are some examples of common software:
Microsoft Windows
Ping – simple program to test the TCP/IP connection.
Telnet – simple program to send commands and see responses via TCP/IP.
Note: Point Manager uses port 1000 as default.
Winipcfg – utility that shows the computer’s IP address.
Ipconfig – utility that shows the computer’s IP address (DOS program).
HyperTerminal – provides terminal emulation program to communicate via
TCP/IP and serial port. Note: HyperTerminal can answer calls via
TCP/IP but does not work very well with the Point Manager in this
mode because HyperTerminal echos characters it receives.
Procomm – third party program – provides terminal emulation to
communicate via TCP/IP and serial port.
Note: The easiest way to configure a sensor is to read the default information and
then copy that string to a text editor, edit it, and copy it back to the communications
program. Remember to remove the parameter specifying type.
Other Operating Systems
Ping – simple program to test the TCP/IP connection.
Telnet – simple program to send commands and see responses via
TCP/IP. Note: Point Manager uses port 1000 as default.
Point Manager Manual
Common Software Tools • 17
18 •
Point Manager Manual
Point Manager Functions
Overview of Point Manager Functions
Broadly speaking, the Point Manager has two main functions: Data Acquisiton and
Control.
Data Acquisition
Email
Ethernet
Serial
TCP/IP
CRC16
Dynamic
HTML
CRC16
Pass Thru
& Pass
Thru Media
Callout
Table
Event & Alarm
Processor
900 Mhz Radio (internal
or external)
Modem (opt.)
CRC16
Media
Callout
Table
Event Log
Command Processor
Current I/O
Readings
Historical
Log
XML Delivery
Point Sensor
Packet Processor
900 Mhz Radio (internal
or external)
418 Mhz Receiver
(internal or external)
Point Manager Data Acquisition Function Diagram
Point Manager Manual
Point Manager Functions • 19
The Web Pages
Point Manager displays a menu at the top of the page. You can select either I/O
Status (which is the default file), Events or Controls. I/O Status page shows a list
and the state of the I/O that are set up. The Events page shows the events in the
Event Log. The Controls page shows the status of the Scheduled Output controls.
The Controls page is described more fully in the Controls section.
In the menu section, the Point Manager also shows the name of the Point Manager
and the date and time when the page was created.
I/O Status
The following is an example illustrating the I/O Status page on your browser:
The I/O Status page has the following fields or columns:
Sensor – name given to the sensor
ID – serial number of the sensor
Age – number of seconds since the last reading was received (0 to 65535).
‘-‘ indicates that the Point Manager has never received a transmission
from the sensor.
Srv - sensor data was transmitted in response to the service button being
pressed on the transmitter.
Last Reading – shows the data from the sensor. Each I/O point is shown a
separate line.
20 • Point Manager Functions
Point Manager Manual
Units – units of the readings.
The web page is automatically refreshed every 15 seconds.
Point Manager will show that a sensor is in a “state of concern” by highlighting the
row in the color yellow. The Point Manager will indicate the specific concern by
showing the text red.
The Point Manager displays Analog and Integer I/O point data in engineering units.
Note: If the string “BAD CFG” is displayed for the Last Reading, Point Manager is
indicating that there is error in the setup for the sensor. The I/O point type defined
by the setup does not match the I/O point type of the physical sensor.
Example
This example shows how to construct the sensor table and shows the resulting Point
Manager output on the I/O Status page.
Command:
<^B>CSC<CR>
Response: <^B>CSC<CR>
Remarks: Clear the sensor table of all sensors.
Command:
<^B>CSS1,D40000000B1FBD28,Inside RH(A1.0,0,%RH,0,0,0)
(A0.1125,32,F,1,0,0),2<CR>
Response: <^B>CSS1<CR>
Remarks: Configure this sensor’s I/O points. The first one is an
Analog with scale 1, offset 0, units %RH, and decimal places 0. The
second I/O point is scale 0.1125, offset 32, units F (degrees
Farenheit) and decimal places 1.
<^B> is STX (02H). Press Ctrl and B using a terminal emulation program.
<CR> is 0DH. Press Enter using a terminal emulation program.
Remarks: Here is the table with the sensor “Inside RH” added. It has been
59 seconds since this sensor last transmitted.
Point Manager Manual
Point Manager Functions • 21
Events
The Point Manager makes accessible events that are stored in the Event Log. The
Point Manager shows the latest events first and shows the events in descending
order. The Point Manager shows 10 events at a time. You can move through the
Event Log by using the following links that at the bottom of the page:
Newest – the Point Manager shows the latest events. This the default page
when first select Events from the menu.
Previous – the Point Manager shows the previous (older) events.
Next – the Point Manager shows the next (newer) events.
Oldest – the Point Manager shows the first events that were logged.
The following is an example Event Report page:
22 • Point Manager Functions
Point Manager Manual
Current I/O Readings
The current readings of the sensors can be obtained by issuing a “D” command. The
Point Manager will return the row number in the sensor table, the current readings of
the sensors and flags indicating “state of concern”. The current reading can be
obtained at any time when there is a connection established. Use the “S” command
to determine the number of sensors in the sensor table.
Example
Command:
<^B>S<CR>
Response: <^B>S,2,na,na<CR>
Command:
<^B>D1-2<CR>
Response: <^B>D1-2,F0600002FFFtrans.|F8|F2,0200021FTF69|F77.0<CR>
Command:
<^B>D1-2<CR>
Response: <^B>D1-2,F0600008FFFtrans.|F8|F2,0200027FTF69|F77.0<CR>
Remarks: “F” no system alarm; First sensor: “06” – LSX, “00008” – age,
“FF” – no sensor state of concern, no service button, “Ftrans.|F8|F2” –
data with no I/O Point state of concern; Second sensor: “02” –
Humidity/Temperature, “00027” – age, “FT” – no sensor state of concern
but service button was pressed, “F69|F77.0” – data with no states of
concern.
Historical Log
The current readings from all the sensors can be stored as a record in the Historical
Log. The Point Manager creates these records periodically based on the History
Interval as set up by the user. The Point Manager can be configured, for instance, to
log all the current readings once an hour on the hour. Use the “HI” command to set
the History Interval. Use the “HR” command to read a record from the Historical
Log.
The number of records the Historical Log can hold depends on the number of sensors
in the sensor table and the I/O Point types of these sensors. The following is a table
that illustrates the maximum number of records the Historical Log can hold with a
variety of sensor setups.
Sensor Scenario
1 Sensor – 1 I/O point (ex. Point Temp)
1 Sensor – 2 I/O points (ex. Point Humid)
1 Sensor – 3 I/O points (ex. Point Count)
10 Sensors – 2 I/O points (ex. Point Humid)
10 Sensors – 3 I/O points (ex. Point Count)
25 Sensors – 2 I/O points (ex. Point Humid)
25 Sensors – 3 I/O points (ex. Point Count)
50 Sensors – 1 I/O point (ex. Point Temp)
50 Sensors – 2 I/O points (ex. Point Humid)
100 Sensors – 1 I/O points (ex. Point Temp)
No. of Records
Available
12800
10667
7529
2667
1306
1185
549
1185
615
615
Number of Historical Log Records Available
If the Historical Log’s capacity is exceeded, the Point Manager will rollover the new
records over top of the oldest records. The oldest records are then destroyed and not
accessible. The Point Manager makes sure the most recent data is available. If you
Point Manager Manual
Point Manager Functions • 23
are concerned about losing data, make sure you take the data before the Historical
Log rolls over. You can have the Point Manager notify you when the Historical Log
is approaching full. You will need to plan carefully the History Interval and how
often you want to collect the data. Also the Point Manager can be set up so that snap
shots of the current data can be logged in the Historical Log when an event occurs.
Plan carefully your usage of the Historical Log when using this feature.
If the “Filled Mode” is enabled, the Point Manager will stop logging data to both the
Historical and Event Logs when either the Historical or Event Logs become full.
Use the “CESL” command to set this mode.
The Point Manager has several options for determining that a sensor is offline when
logging the history snap shot of the sensor values. When the Point Manager
determines that a sensor is offline or that the sensor values are not available, the
Point Manager will use “na” for the sensor I/O value. The 3 options are 1) record the
last value received, 2) indicate offline by the max age value as set with the “CESS”
command, 3) indicate offline if sensor packet has not been received since the last
history interval.
The following example illustrates how to collect the data from the Historical Log.
For more information see the “HR” and “HC” commands.
Example
24 • Point Manager Functions
Point Manager Manual
Remarks: The following is an example of how to obtain the Historical
Log records. The Point Manager was set up with 7 sensors: Analog with
Data (2 I/O Points), Analog (1 I/O Point), Analog (1 I/O Point), 3 –
Temperatures (1 I/O Points each), and Humidity (2 I/O Points)
Command: <^B>HR052701093110<CR>
* request an early date
Response:
<^B>HR05270109311000,09040109232901,0.00|qwertyui,0.78,1.12,74.3,74.3,7
8.8,73|75.2<CR>
Command: <^B>HR09040109232901<CR>
Response:
<^B>HR09040109232901,09040109240001,0.00|qwertyui,0.78,1.12,74.3,74.3,7
8.8,74|75.2<CR>
Command: <^B>HR09040109240001<CR>
Response:
<^B>HR09040109240001,09040109250001,0.00|qwertyui,0.78,1.12,74.3,74.3,7
8.8,73|75.2<CR>
Command: <^B>HR09040109250001<CR>
Response:
<^B>HR09040109250001,09040109260001,0.00|qwertyui,0.78,1.12,74.3,74.3,7
8.8,74|75.2<CR>
Command: <^B>HR09040109260001<CR>
Response:
<^B>HR09040109260001,09040109270001,0.00|qwertyui,0.78,1.12,74.3,74.3,7
8.8,73|75.2<CR>
Command: <^B>HR09040109270001<CR>
Response:
<^B>HR09040109270001,09040109280001,0.00|qwertyui,0.78,1.12,74.3,74.3,7
8.8,73|75.2<CR>
Command: <^B>HR09040109280001<CR>
Response:
<^B>HR09040109280001,090401092901,0.00|qwertyui,0.78,1.12,74.3,74.3,78.
8,73|74.3<CR>
Command: <^B>HR09040109290001<CR>
Response:
<^B>HR09040109290001,090401093001,0.00|qwertyui,0.78,1.12,74.3,74.3,78.
8,74|74.3<CR>
Command: <^B>HR09040109300001<CR>
Response:
<^B>HR09040109300001,09040109301901,0.00|qwertyui,0.78,1.12,74.3,74.3,7
8.8,73|74.3<CR>
Command: <^B>HR09040109301901<CR>
Response: <^B>HR09040109301901<CR>
Command: <^B>HC090401093019<CR>
* clear the Historical Log
Response: <^B>HC090401093019<CR>
Point Manager Manual
Point Manager Functions • 25
Events and Alarms
Events are “conditions of concern” that have occurred either with the Point Manager
system, sensor or the sensor’s I/O Points. The user can configure these “conditions
of concern”. An event can be logged to the Event Log, force the Point Manager
initiate a connection with a host computer or trigger on output.
An Alarm is defined as an event that forces the Point Manager to place a call or push
a connection. Point Manager can also send emails triggered by events. Any
combination of these actions can be specified.
Events indicate transitions in the system. Point Manager can also show “states of
concern” that indicate a process is in a state that needs to be brought to the user’s
attention through the “D” command (get current data) and the I/O Status page.
“States of concern” may or may not produce events.
Event Log
The Event Log holds a collection of records that contain a date and time stamp of
when an event occurred and a message indicating the type of events.
The Event Log can hold about 7500 event records.
If the Event Log’s capacity is exceeded, the Point Manager will rollover the new
records over top of the oldest records. The oldest records are then destroyed and not
accessible. The Point Manager makes sure the most recent data is available. If you
are concerned about losing data, make sure you take the data before the Event Log
rolls over. You can have the Point Manager notify you when the Event Log is
approaching full. You will need to plan carefully the frequency of events being
logged versus how often you want to collect the data.
If the “Filled Mode” is enabled, the Point Manager will stop logging data to both the
Historical and Event Logs when either the Historical or Event Logs become full.
Use the “CESL” command to set this mode.
The Point Manager will also log changes to the Point Manager setup as events.
These events then can be used as an audit trail. See the “ER” command for more
information.
The following example illustrates how to collect the data from the Event Log. For
more information see the “ER” and “EC” commands.
Example
26 • Point Manager Functions
Point Manager Manual
Command:
<^B>ERV06170122363100<CR>
Response: <^B>ERV06170122363100,09250122330001
Command:
<^B>ERV09250122330001<CR>
Response: <^B>ERV09250122330001,09250122332201
Change,1ibtn,5300000008184C0C<CR>
Command:
<^B>ERV09250122332201<CR>
Response: <^B>ERV09250122340401,09250122340701
degF<CR>
Command:
<^B>ERV09250122340701<CR>
Response: <^B>ERV09250122340701,09250122351001
Command:
<^B>ERV09250122351001<CR>
Response: <^B>ERV09250122351001,09250122352401
Command:
<^B>ERV09250122352401<CR>
Response: <^B>ERV09250122352401<CR>
Command:
<^B>EC092501223524<CR>
Response: <^B>EC092501223524<CR>
Remarks: Verbose (V) option was used.
* select an early date
Service,2Humid<CR>
High,2Humid,82.4
Old,2Humid<CR>
Start<CR>
* clear the Event Log
Pass-Thru Mode
Point Manager can be placed in a mode where packet information that it receives can
be repeated via Serial, Ethernet and/or Command Radio. Point Manager can forward
these packets as is or convert the data to engineering units and send it as a comma
delimited record.
To set up the Server for Pass-Thru mode, send the “US” command on the media you
wish to receive packets. The packet is an ASCII Hexadecimal string of 29 characters
(or 31 characters if location information from a Point Repeater is included). The
contents of this string depends on the type of transmitter that originally sent the
packet. Check the specification for the transmitter for more information.
The Server can also convert the Pass-Thru data to engineering units. Point Manager
will only forward packets from sensors that are contained in the Sensor Table. The
Sensor Table must be previously set up either by adding sensors using the “CSC”
command or Auto Add Mode. The record for Engineering mode is formatted as
follows:
Location,name,type,serial no,warn,service(,warn1,value1,unit1)..(,warnn,valuen,unitn)
Where:
location – Point Repeater Location ID (‘a’ to ‘z’). If not Point Repeater
Location ID is available, Point Manager will return ‘na’.
name – name of the sensor
Type – type of sensor (enumerated) See the “CS” command for more
information
serial no – sensor serial number
warn – is the sensor in a “state of concern” (T or F)
service – packet produced from the Servvice button on the transmitter being
pressed.
warnn – is the I/O point in a “state of conern” (T/F)
valuen – value of the I/O point
unitn – engineering units label of th eI/O point
Point Manager Manual
Point Manager Functions • 27
Example
na,2Humid_Temp,2,D40000000B1FBD28,F,F,F,45,%RH,T,71.6,F
Remarks:
warn, value and unit are repeated for every I/O point of the sensor. For the actual
data fields, consult the specification for the transmitter being used.
To place the Server in Pass-Thru mode with engineering unit conversion, send the
“UE” command on the media you wished to receive packets.
For the media in Pass-Thru mode, the Server does not apply the Inactivity Timeout.
Point Manager can passively wait to be placed in Pass-Thru mode or actively push a
connection and then go into Pass-Thru mode. Point Manager has a Pass-Thru Media
Callout Table that it uses to place and maintain a connection with the Point Manager
in Pass-Thru mode. The “CUS”, “CUR” and “CUC” commands are used to set and
maintain the Pass-Thru Media Callout Table. You specify the media to push, the
type of Pass Thru mode and how aggressively to retry the connection if the
connection is disrupted.
28 • Point Manager Functions
Point Manager Manual
Control
Ethernet
Serial
TCP/IP
CRC16
Timers
Outputs
900 Mhz Radio (internal
or external))
CRC16
Command Processor
Matches
Event & Alarm
Processor
Scheduled
Outputs
Point Sensor
Packet Processor
900 Mhz Radio (internal
or external)
418 Mhz Receiver
Point Manager Control Function Diagram
Outputs
The Point Manager output function is used for control. The Point Manager initiates
output actions based on event actions firing. For example, you have a temperature
sensor with a high event set at 45 and an exit event set at 38. You can have the Point
Manager set such that when the high event fires it triggers the Output action to
energize a relay and the exit event turn off the relay.
The Point Manager will initiate output actions for event actions (both system, sensor
and control), Scheduled Outputs, Timers and Matches.
The Point Manager has support for 2 categories of outputs: generic string, and sensor
packet output. Each output action is listed in the Output table. The “KS” and “KR”
commands are used to set each output action in the table. Each entry defines an
Point Manager Manual
Point Manager Functions • 29
action typically “On” or “Off”. To fully control a relay for example, you would need
two entries, one output action to turn “On” the relay and the other to turn off the
relay “Off”.
For types generic string and sensor packet, you set the number of times to send the
packet, the amount of time between packets, the destination media (serial, radio and
TCP/IP), and the contents (a string or sensor packet).
Generic string
You can send strings out any of the media. For example suppose you have a serial
display attached to the Point Manager serial port. You can set up Point Manager to
send messages to the display when the event actions fire. You can embed control
codes into the string. See the “K” command for more details.
Sensor Packet
You can send sensor packets out any of the media. Some wireless outputs will use
matching sensor packets to trigger whether a relay is energized. One sensor packet
(as part of the output action) is used to energize a relay and another to de-energize
the relay. See the “K” command for details and the documentation for the wireless
output you are using.
Output Groups
Instead of an event action or timer, triggering just one output action, the Point
Manager can fire a set of output actions. Each output action can be assigned to a set
of outputs. Sets of outputs can be named using the “G” command. Event actions
and timers are then assigned with the set identifier instead of the individual output
action. See the “K” command and the description of the event actions for more
details.
Examples:
// Set up outputs to send string out serial port for display
KS1,1,On,0,0,5,10,1S,High Temp Alarm\r
KS2,2,Off,0,0,5,10,1S,Exit High Temp Alarm\r
// Set up outputs – packet based
KS3,1,On,0,0,5,10,1R,11524F5903D70000060000790B6F\r
KS4,2,Off,0,0,5,10,1R,11524F5900570400FFFFFF758A62\r
Command:
GS1,Lvl1Alrm High
Command:
GS2,Lv1Alrm Exit
Remarks: Set the group description at the first and second rows
30 • Point Manager Functions
Point Manager Manual
Timers
Timers are used to initiate output actions at a predetermined start time and then
optionally repeat the output action at a set interval. Timers can also use output
groups.
Example:
Command :
TS1,090403142500,00000500,1,0
Remarks: set the first timer to start the output at row 1 starting at
09/04/03 14:25:00 every 5 minutes.
Matches
Matches are used to trigger output actions or control functions (Scheduled Outputs)
from information contained in a sensor packet. A match can fire a trigger or control
function with a reception of specified sensor, service button mark of the sensor, or
predetermined contents of the sensor packet. You can specify a mask location, a
mask and mask result to isolate and compare the specific contents of the sensor
packet.
There is a set of pre-established triggers for the control functions (Scheduled
Outputs). This allows the control functions to be assigned I/O data. See the controls
functions for more information.
See the “MM” command for more details.
Example:
// Set up the matches to tie the Scheduled Output and the push button
on the Space Temp sensor together
MMS1,OVER_REQ_ACT ,1,I,5,FF,1,N,0,0,E,1,1,2
MMS2,OVER_REQ_INACT,1,I,5,FF,2,N,0,0,E,1,2,2
MMS3,OVER_REQ_CLEAR,1,I,5,FF,0,N,0,0,E,1,3,2
Scheduled Outputs
The Point Manager allows output actions to be triggered based on a day of week
schedule. You specify the “ON” schedule for each day of the week. Times not
specified are assumed to be in the “OFF” schedule. You can also specify up to 5
schedule exceptions to accommodate holidays. The schedules (day of week and
exception) can be viewed or changed using the Schedule Web page. The “SWSE”
and “SOSE” commands are used to maintain the schedule.
Point Manager Manual
Point Manager Functions • 31
Web Pages
Control Status
The Control Status page shows the current state of the Scheduled Output. The
following is example of the Control Status page:
The following is a description of the columns and controls:
Control – name of the control given during set up
Override – is the control overridden (Yes or No). The control can be
overridden either by an external sensor input or clicking the highlighted
Yes/No in the Override column ( the Point Manager will present a new
page with override options ). The web page override will last an hour;
the external sensor input override typically lasts an hour.
Schedule – “ON” or “OFF”.
Info – miscellaneous information about the control status
Schedule List Box – select the Scheduled Output you want to change the
schedule and click the “Go” button. The Point Manager will present
the Schedule page.
32 • Point Manager Functions
Point Manager Manual
Schedule
The Schedule page allows to set up a schedule for every day of the week. This is the
weekly default schedule. You specify a day of the week, starting time and a duration
time. This specifies the “ON” schedule. All times not specified are assumed to be
the “OFF” schedule.
You can specify exceptions to the weekly schedule by specifying up to 5 exceptions
schedules. For the exception schedule you specify a “from” date and a “to” date and
then a start time, duration and mode (“ON”/”OFF”). The exception schedule can
span multiple days. For instance suppose your store is closed for a week in the
summer. You would specify a “from” date (start of the week) and “to” date (end of
the week) and start time and duration that overrides the weekly schedule and “OFF”
for the mode.
The following is an example of the Schedule page:
The following is a description of the fields:
Schedule table – current settings of the schedule for each day of the week
Point Manager Manual
Point Manager Functions • 33
Change day schedule
Day – select the day of the week you want to update
Start – start time of the “ON” mode.
Duration – number of hours in “ON” mode. The number can entered as
a decimal such as 1.5 for one and half hours
Submit – click the submit button to apply the changes.
Exception Schedule table – lists the current setting for the each exception.
Change an exception schedule
Item – select the item you want operate.
Action – perform the following on of the following options
Edit – edit the selected item
Insert After – insert an new exception schedule after the selected item
Insert Before – insert a new exception schedule before the selected item
Delete – delete the selected item.
From – specify the date to start the exception
To – specify the date to end the exception
Start – select the starting time to apply the schedule mode (“ON” or
“OFF”). Note: if the From and To dates span more than 1 day, the
start time will be initiated for each day.
Duration – specify in hours the duration of the schedule mode (“ON” or
“OFF”). You can specify hours as a decimal number. (Ex. 1.5
hours)
Mode – select the schedule mode: “ON” or “OFF”.
34 • Point Manager Functions
Point Manager Manual
Override
The Override page shows the current override and allows you to override the
schedule. You can override “ON”, override “OFF” or turn off the override. The
override lasts for 1 hour.
The following is an example of the Override page.
The options for override are
No Override – not overridden or turn off the current override mode
ON – the output override is forced ON or override into the ON state
OFF – the output override is forced OFF or override into OFF state.
Click the submit button to have the Point Manager to enter the chosenoverride mode.
Miscellaneous
An external override can be used to override the schedule and setting the output into
the “ON” state or force it to the “OFF” state. The external override can be initiated
either through the Control Status page or though a discrete input.
Match commands may be used to tie the discrete input sensor with the Scheduled
Output control. The match triggers must be set up in order for the external override
from a discrete input sensor can be used. The match triggers are used to tie the
sensor input to the Scheduled Output control. See the example below and the “MM”
command for more details.
Setup
The Scheduled Output must be set up with the following steps:
1) Set up the output actions in the output table (use the “K” command)
2) (optional) If using the external discrete override sensor, the sensor must be set
up in the sensor table (use the “CS” command or “A” command).
3) Set up the Scheduled Output in the control table (use the “ME” command).
4) (optional) If using the external discrete override sensor, you must set up the
match triggers to tie the discrete override with the Scheduled Output (use the
“MM” command.
5) Set up the default weekly schedule for the Scheduled Output (use the “SWSE”
command).
Point Manager Manual
Point Manager Functions • 35
6) (optional) Set up the exception schedule to accommodate exceptions like
holidays (use the “SOSE” command)
Example:
// Set up outputs
KS1,0,On,0,0,5,10,1R,11524F5903D70000060000790B6F\r
KS2,0,Off,0,0,5,10,1R,11524F5900570400FFFFFF758A62\r
// Set up I/O
Space Temp – using the push button for the override
CSS1,17,00000000001F2109,SpaceTemp(A0.1125,32.0000,F,1,0,0)(SNormal,Occ
upy,Unocc.,0)(DT,0)
// Set up Scheduled Output
MES1,LGHTZN1,L,1,2,L,2,1,M,0,0,M,0,0,M,0,0
// Set up the matches to tie the Scheduled Output and the push button
on the Space Temp sensor together
MMS1,OVER_REQ_ACT ,1,I,5,FF,1,N,0,0,E,1,1,2
MMS2,OVER_REQ_INACT,1,I,5,FF,2,N,0,0,E,1,2,2
MMS3,OVER_REQ_CLEAR,1,I,5,FF,0,N,0,0,E,1,3,2
// Set up the schedule
SWSE1,000000,0,060000,130000,060000,130000,060000,130000,060000,130000,
060000,130000,000000,0
// Set up the exception schedule
SOSE1,122503,010104,000000,240000,F
Reading the Status
The current state of the Schedule Output Control can be obtained by issuing an “E”
command. The Point Manager returns the state of the output, “ON” or “OFF” and
whether the control is overridden.
Example:
Command:
E1
Response: E1,F,F
Remarks: get the status for the first Scheduled Output: not in override
mode and not active.
36 • Point Manager Functions
Point Manager Manual
Support Functions
Point Manager Callout
The Point Manager can initiate a connection to a host computer through the Serial
ports, Command Radio and Ethernet. The Point Manager has two mechanisms for
pushing connections: the Media Callout table and the Pass-Thru Media Callout table.
Through Ethernet the Point Manager can send an email or deliver Historical data
through email.
Point Manager uses the Media Callout table to know how to make the connection
with an external host for delivering alarms and making periodic contact. The Media
Callout table tells the Point Manager what media to use (TCP/IP, Serial or Command
Radio) and IP address to use to make the connection. The Point Manager will try the
connection multiple times based on the programmed number of tries. The Point
Manager considers a callout successful when it receives a “SR” command from the
host. The “SR” command tells the Point Manager to reset the callout condition from
an alarm or the Periodic Interval Callout. There are two types of functions that will
cause the Point Manager to make a call: Periodic Interval Callout and Alarm Callout.
Pont Server uses the Pass-Thru Media Callout table to know how to make a
connection for delivering asynchronous packet data result from the transmission of
sensors. Point Manager will try to continuously maintain these connections.
Note: Both the Media Callout and the Pass-Thru Media Callout tables cannot have
the same media types listed.
Periodic Interval Callout
The Point Manager can callout at regular intervals to the host computer using the
Media Callout table. The host computer can gather records from the Historical Log
and the Event Log, gather the current readings or make a change in the Point
Manager set up. Use the “CESB” command to set up the Point Manager for Periodic
Interval Callout. When the host receives a call it should use the “S” command to ask
why the Point Manager called. After the host is finished with gathering the data, the
host should send the “SR” command. This command tells the Point Manager to stop
calling because of this Periodic Interval Callout. The following is the flow of
commands and actions:
Host Actions
Answers call
“S” command
Gathers records from the Historical and
Event Logs, gets the current sensor
readings or changes a setup.
“SR” command
Point Manager actions
Makes call
“S,2,082001153022,na,082701111800”
response – Periodic Interval Callout has
occurred
“SR,2,082001153022,na,082701111800”
response; resets the calling mechanism
Disconnects the media
Prepares to answer the next call
Point Manager Manual
Point Manager Functions • 37
Alarm Callout
The Point Manager can be set up to call a host computer based on an event
triggering. Point Manager uses the Media Callout table to establish the connection.
The events can be based on the Point Manager system, sensor or I/O point values.
See the “CES” series of commands for more information about setting up Point
Manager to trigger events and alarms. When the host receives a call it should use the
“S” command to ask why the Point Manager called. The host should gather records
from the Event Log to determine why an alarm has occurred. After the host is
finished with gathering the data, the host should send the “SR” command. This
command tells the Point Manager to stop calling because of this Alarm Callout. The
following is the flow of commands and actions:
Host Actions
Answers call
“S” command
Gathers records from Event Log to
determine what caused the alarm.
Optionally gathers records from the
Historical Log, gets the current sensor
readings or changes a setup.
“SR” command
“S” command – to verify that there are
no more alarms.
Disconnects the media
Prepares to answer the next call
Point Manager actions
Makes call
“S,2,082001153022,082801122800,na”
response – an alarm has occurred
“SR,2,082001153022,082801122800,na”
response; resets the calling mechanism
“S,2,082001153022,na,na” response;
“na” indicates no more alarms
Media Callout Table
The Media Callout Table specifies how the Point Manager makes a connection to the
host computer for delivering alarms or to make periodic contact. The Media Callout
Table has five entries for the connection definition. The Point Manager can make a
connection to each of the media types: Ethernet, Command Radio and both Serial
ports. Each entry represents a type of media and connection information to connect
to a host. For the TCP/IP connection, the user will specify an IP address with an IP
port. For Command Radio or Serial, the user will specify an identifier string. The
Point Manager will try each entry in the Media Callout Table a set number of times
until the Point Manager receives a “SR” command to reset the calling condition. The
following illustrates the flow of commands and actions:
Host Actions
Sends the setup command: CMS2,60
(T192.168.1.100:1000) (SCalling)
Note: two entries are made in the Media
Callout. The first entry is for the Point
Manager to use the Ethernet port and the
second is for the Point Manager to use the
Serial port.
38 • Point Manager Functions
Point Manager actions
Point Manager Manual
… Time later …
“S” command to determine why Point
Manager called
Gathers records from Event Log to
determine what caused the alarm.
Optionally gathers records from the
Historical Log, gets the current sensor
readings or changes a setup.
“SR” command
Point Manager detects an event that
forces an alarm.
Point Manager tries Modem with
phone number 18002334567. Point
Manager fails to connect
Point Manager waits 60 seconds
Point Manager tries Modem with
phone number 18002334567. Point
Manager fails to connect
Point Manager waits 60 seconds
Point Manager tries TCP/IP with
address 192.168.1.100 at port 1000.
Point Manager fails to connect
Point Manager waits 60 seconds
Point Manager tries TCP/IP with
address 192.168.1.100 at port 1000.
Point Manager succeeds in
connecting to host
“S,2,082001153022,
082801122800,na” response – an
alarm has occurred
“SR,2,
082001153022,082801122800,na”
response; resets the calling
mechanism
Disconnects the media
Prepares to answer the next call
Use the “ID” command to diagnose problems with the Media Callout Table. The
“ID” command provides information on the current state of the Media Callout Table.
Point Manager Manual
Point Manager Functions • 39
Email
The Point Manager can send emails through the Ethernet port (TCP/IP) based on
triggered events. The Point Manager can send emails to a single or multiple
destinations. The Point Manager sends email to an external email server. An ISP or
your company can provide the email server. See your network administrator or your
ISP for more information about the email server. In order to use the email system
you must set up the Point Manager (using the “CN” and “CI” commands) with the
following information: the TCP/IP connection must be set up with an IP address and
subnet mask, gateway address and name server; email must be set up with an SMTP
server name, “from” email address and “to” email address. The name server is used
to resolve the gateway address and SMTP server names to internal IP addresses.
More than one “to” email address can be specified by separating the addresses by
“;”.
The Point Manager will queue up multiple emails to send based on multiple events.
The Point Manager has a buffer allocated for email that is used as a first in first out
buffer. If the buffer overflows because of multiple events, the Point Manager will
ignore the event emails (the event is still logged in the Event Log). The Point
Manager treats the first few emails caused by a sequence of events as the most
important. When an email is received, it is important to connect with the Point
Manager and examine the Event Log. The number of emails the Point Manager will
queue up varies with the nature of the event and other setup information.
If the sending of the email messages fails (for example because the SMTP server is
not correct), Point Manager will log this error as an event in the Event Log.
The emails are formatted like the responses to the “ER” and “ERV” commands. For
more information about the email data see the “ER” command description. The first
line in the email is like the “ER” command response. The second line is like the
“ERV” command response. The subject line is the Point Manager identification
name (as set in the “CD” command).
Use the “PE” command to test the Point Manager’s email function and to see if the
email is set up properly. Use the “IE” command to diagnose any problems with
email delivery.
The following are examples of delivered emails:
To: [email protected]
From: [email protected]
Subject: HVAC2-1
01160106455651,2
011601064556 Old,Sen2
Remarks: The event was generated at 1/16/01 6:45:56. Event occurred with the
second sensor name “Sen2”. The event type is 51, which is labeled “Old” which
means the sensor age exceeded the set limit.
40 • Point Manager Functions
Point Manager Manual
To: [email protected]; [email protected]
From: [email protected]
Subject: HVAC2-1
01170102093560,1,94.4
011701020935 High,SolarTmp1,94.4 degF
Remarks: The event was generated at 1/17/01 2:09:35. Event occurred with the
sensor name “SolarTmp1”. The event type is 60, which is labeled “High” which
means the sensor age exceeded the high analog threshold at 94.4 degF.
To: [email protected]
From: [email protected]
Subject: HVAC2-1
012001044233Pushed Email
012001044233 testing email system
Remarks: The email was generated at 01/20/01 4:42:33. The email was created in
response to “PE” command.
Pass-Thru Media Callout Table
The Pass-Thru Media Callout Table specifies what media to automatically connect to
delivery the asynchronous pass thru data resulting from transmissions from the
sensors. The Point Manager can make a connection to each of the media: Ethernet,
Command Radio and both Serial ports.. Each entry represents a type of media and
connection information to connect to a host. For the TCP/IP connection, the user
will specify an IP address with an IP port. Up to 4 simultaneous connections can be
made. The Point Manager will try to maintain each connection and if a connection is
broken it will try to reestablish the connection according the rules for retries and
delays. With each entry you can specify if you want the data in standard mode (the
format as received from the sensors) or Engineering Mode.
The media type or instance may not be listed in the Media Callout Table if it is going
to be used in the Pass-Thru Media Callout Table.
The “CUS”, “CUR” and “CUC” commands are used to set and maintain the PassThru Media Callout Table.
Point Manager Manual
Point Manager Functions • 41
XML Delivery (option)
The Point Manager can initiate a connection to an HTTP 2.0 Server and send records
in the History or Event Log as XML data. You specify the destination URL and how
often to initiate a connection with the HTTP Server. If the Point Manager fails to
deliver the XML data, you can specify how many times to try to deliver. (See the
“XPH” and “XDH” commands.). The Point Manager can deliver Event records via
XML when an alarm occurs. When Point Manager delivers the XML data, the
HTTP Server must either acknowledge or reject the data. The acknowledgment or
rejection must be in XML form. When an acknowledgment is received, the Point
Manager remembers the last History or Event Log position and starts with the next
record on the next interval. If the acknowledgment is not received, the Point
Manager will send the same data again starting from the last History or Event Log
positon when the last ackowledgement was received.
Point Manager sends an HTTP POST whose content is the XML history or event
data. The Point Manager then expects an HTTP response from the HTTP Server
with the contents being the XML response either “Acknowledgement” or “Error”
response. If the Point Manager has more data and has received the
“Acknowledgement” response, the Point Manager will issue another HTTP POST
during the same connection. When the Point Manager has no more data, it will drop
the connection after processing the last response. The largest XML history or event
data content that the Point Manager can send is 4000 bytes in a single HTTP POST.
When History and Event records are delivered, Point Manager delivers these types to
two separate URLs.
If the XML Delivery fails for the interval, the Point Manager will log an XML
failure message in the Event Log.
Note: If the Point Manager does not receive an acknowledgement response either
because the error response was sent or the connection was dropped., the Point
Manager will send the same data again. Your application that processes the data
needs to handle the possibility of receiving duplicate data.
42 • Point Manager Functions
Point Manager Manual
XML History Schema
<DataRecords ID=Point Manager serial number Name=Point Manager name NoSensors=number of
sensosr TZOffset=timezone DST=daylightsavings>
<Record>
<TimeStamp>timestamp</TimeStamp>
<HIndex>timestampindex</HIndex>
<PointID>point id</PointID>
<SensorID>sensorserialnumber</SensorID>
<SensorName>sensorname</SensorName>
<SensorType>sensortype</SensorType>
<PointIndex>pointindex</PointIndex>
<PointType>pointdatatype</PointType>
<Value>pointvalue</Value>
<Units>pointunits</Units>
<Scale>engrscale</Scale> *
<Offset>engroffset</Offset>*
<Status>sensorstatus</Status>
</Record>
</DataRecords>
Where
Point Manager serial number – Point Manager MAC address (See the
“CDR” command)
Point Manager name – name of the Point Manager (See the “CDR”
command).
number of sensosr – number of sensors in the Sensor Table (See the
“S”Command).
timezone – The number of hours standard local time is from UTC time.
This number can be negative and can be a fraction of an hour.
(Example “–5” for Eastern Standard time; -3.5 for Newfoundland)
(See the “IT” command)
daylightsavings – indicates if this Point Manager uses daylight savings. (1 –
daylight savings; 0 – standard time) (See the “IT” command).
timestamp – time stamp of the record. Either “mm/dd/yy hh:mm:ss” or
“yyyy-mm-ddThh:mm:ss” which is subset of ISO 8601. See the “XT”
command to set the date-time format.
timestampindex – two digit ASCII Hexadecimal number (“00” to “FF”)
starting at 01. Used to distinguish between multiple records that have
the same time stamp.
point id – “Sensor Serial No_PointIndex” - the sensor serial number is
appended with the position of the point within the sensor.
sensorserialnumber – sensor serial number
Point Manager Manual
Point Manager Functions • 43
sensortype – see the “CS” command for the list of sensor types.
pointindex – the I/O points position in the sensor (starting at 1).
pointdatatype – point’s data type:
0 – Analog
1 – State
2 – Integer
3 - Data
pointvalue – value of I/O point. If the sensorstatus is 2 (offline) then the
value will be “na”. Note that the value of the State I/O type will be a
string (like “Open”/”Closed” or “On”/”Off”). Check the set up for the
sensor to determine the possible values.
pointunits – engineering units of the value
engrscale – engineering scale applied to the raw sensor reading. (*Note:
tag is provided only with Analog or Integer data types)
engroffset – engineering offset to the raw sensor reading. For Analog data
types the offset is applied after the scale is applied. For Integer data
types the offset is applied before the scale is applied. (*Note: tag is
provided only with Analog or Integer data types)
sensorstatus – status of the sensor:
0 – online
1 - reserved
2 - offline
XML History Example
<DataRecords ID="00:90:C2:C1:0F:BE" Name="Point Manager" NoSensors="2" TZOffset="-6"
DST="1">
<Record>
<TimeStamp>2004-01-15T16:03:47</TimeStamp>
<HIndex>1</HIndex>
<PointID>00000000001F0DA8_1</PointID>
<SensorID>00000000001F0DA8</SensorID>
<SensorName>1FastCntTemp</SensorName>
<SensorType>15</SensorType>
<PointIndex>1</PointIndex>
<PointType>3</PointType>
<Value>6659340</Value>
<Units>count</Units>
<Scales>1.0</Scale>
<Offsets>0.0</Offset>
<Status>0</Status>
</Record>
</DataRecords>
44 • Point Manager Functions
Point Manager Manual
XML Event Schema
<DataRecords ID=Point Manager serial number Name=Point Manager name NoSensors=number of
sensor TZOffset=timezone DST=daylightsavings>
<EvtRecord>
<TimeStamp> timestamp </TimeStamp>
<EIndex> timestampindex </EIndex>
<Evt> evt msg </Evt>
<SensorName> sensorname </SensorName>
<Info> info </Info>
<Value>pointvalue</Value>
<SensorID> sensorserialnumber </SensorID>
<PointID> point id </PointID>
<PointIndex> pointindex </PointIndex>
<Units>pointunits</Units>
<Scale>engrscale</Scale> *
<Offset>engroffset</Offset>*
<EvtID> evt id </EvtID>
<Alarm> alarm </Alarm>
</EvtRecord>
</DataRecords>
Where
Point Manager serial number – Point Manager MAC address (See the
“CDR” command)
Point Manager name – name of the Point Manager (See the “CDR”
command).
number of sensosr – number of sensors in the Sensor Table (See the
“S”Command).
timezone – The number of hours standard local time is from UTC time.
This number can be negative and can be a fraction of an hour.
(Example “–5” for Eastern Standard time; -3.5 for Newfoundland)
(See the “IT” command)
daylightsavings – indicates if this Point Manager uses daylight savings. (1 –
daylight savings; 0 – standard time) (See the “IT” command).
Point Manager Manual
Point Manager Functions • 45
timestamp – time stamp of the record. Either “mm/dd/yy hh:mm:ss” or
“yyyy-mm-ddThh:mm:ss” which is subset of ISO 8601. See the “XT”
command to set the date-time format.
timestampindex – two digit ASCII Hexadecimal number (“00” to “FF”)
starting at 01. Used to distinguish between multiple records that have
the same time stamp.
evt msg – Event message
info – miscellaneous information about the event
pointvalue – value of I/O point
sensorserialnumber – sensor serial number
point id – “Sensor Serial No_PointIndex” - the sensor serial number is
appended with the position of the point within the sensor.
pointindex – the I/O points position in the sensor (starting at 1)
pointunits – engineering units of the value
engrscale – engineering scale applied to the raw sensor reading. (*Note:
tag is provided only with Analog or Integer data types)
engroffset – engineering offset to the raw sensor reading. For Analog data
types the offset is applied after the scale is applied. For Integer data
types the offset is applied before the scale is applied. (*Note: tag is
provided only with Analog or Integer data types)
evt id – Event ID – See the ER command for a list of event ids.
alarm – (T/F) –indicates if this event would cause the Point Manager to
push a connection.
46 • Point Manager Functions
Point Manager Manual
XML Event Example
<DataRecords ID="00:90:C2:C3:8B:C1" Name="Point Manager" NoSensors="3" TZOffset="-6"
DST="1">
<EvtRecord>
<TimeStamp>04/28/04 15:35:37</TimeStamp>
<EIndex>1</EIndex>
<Evt>High Span</Evt>
<SensorName>1Analog</SensorName>
<Info>30 sec</Info>
<Value>97.66</Value>
<SensorID>1234567890123456</SensorID>
<PointID>1234567890123456_1</PointID>
<PointIndex>1</PointIndex>
<Units>%</Units>
<Scales>0.0244</Scale>
<Offsets>0.0</Offset>
<EvtID>62</EvtID>
<Alarm>F</Alarm>
</EvtRecord>
</DataRecords>
XML Acknowledgement Response
<ErrorList>
<Success>message</Success>
</ErrorList>
If Point Manager receives the “<Success>” tag, the Point Manager assumes the
HTTP Server to have successfully processed the XML data. As long as the
<Success> is present, the exact XML Schema does not matter.
XML Acknowledgement Response Example
<ErrorList>
<Success>WEBAPP.dll/XMLPost</Success>
</ErrorList>
XML Error Response
<ErrorList>
Point Manager Manual
Point Manager Functions • 47
<Error>message</Error>
</ErrorList>
If the Point Manager receives the “<Error>” tag, the Point Manager assumes the
HTTP Server has rejected the data. The last error message contained in the tag can
be retrieved using the “ILH1” command.
XML Error Response Example
<ErrorList>
<Error>Error on Parse: WEBAPP.dll/XMLPost</Error>
</ErrorList>
48 • Point Manager Functions
Point Manager Manual
XML History Setup
Use the “XDH” command to set the location of the host (domain name (or ip
address) and URL). Use the “XPH” command to set when to start delivering and
how often. To test the setup use the “PXH” command to initiate the delivery
mechanism. Use the “ILH” command to determine the state of the XML delivery
mechanism
Command:
xdhs1,192.168.0.1,/Point Manager Test/History,1024
Response: xdhs1
Command:
xphs1,012104221030,00000100,2,15
Response: xphs1
Remarks:
The Point Manager will deliver History data to 192.168.0.1
at /Point Manager Test/History at port 1024. It starts delivering
01/21/04 22:10:30. It will try twice with 15 seconds between tries if
there is an error.
XML Event Setup
Use the “XDH” command to set the location of the host (domain name (or ip
address) and URL). Use the “XPH” command to set when to start delivering and
how often. Also use the “XPH” command to tell the Point Manager to start the
delivery mechanism when an alarm occurs. To test the setup use the “PXH”
command to initiate the delivery mechanism. Use the “ILH” command to determine
the state of the XML delivery mechanism.
Command:
xdes1,192.168.0.1,/Point Manager Test/Events,1024
Response: xdes1
Command:
xpes1,012104221030,00000100,2,15,T
Response: xpes1
Remarks:
The Point Manager will deliver Event data to 192.168.0.1 at
/Point Manager Test/Event at port 1024. It starts delivering 01/21/04
22:10:30 but will also deliver when an alarm occurs. It will try twice
with 15 seconds between tries if there is an error.
Point Manager Manual
Point Manager Functions • 49
Password Protection
Point Manager controls access to the different resources of the Point Manager
through passwords. There are two levels of Login access for the Point Manager:
Data and Configure. Through the Data Login, the Point Manager allows access to
the data portions of the Point Manager like the Web pages, current readings,
Historical and Event Logs, and setup information. Through the Configure Login, the
user can make changes to the Point Manager setup. With the Configure Login, the
Point Manager allows access to the data portions of the Point Manager like the
current readings, Historical and Event Logs, and setup information. You can change
the set up for the Scheduled Output override and schedule pages. If the Login
password has been configured and the user has not logged in yet, the Point Manager
will respond with an error message to commands.
Any of the web pages will require a login if the Point Manager is set up with
passwords. The report pages require a Data Login and pages that allow changes to
the setup of the Point Manager require a Configure Login. For a Data Login use the
ID name of the Point Manager for the user name (default is “Point Manager”). For a
Configure Login use “Admin” for the user name. The browse login window will
look like the following:
User the “LI” command to Login in the Point Manager via commands.
Use the “LO” command to Logout of the Point Manager. The Point Manager will
automatically log out a user after the Inactivity Timeout has expired (1 minute). (For
the Web pages, the user is never logged out automatically unless the password has
changed.)
Use the “CP” command to set the passwords.
Note: The user name and password are case-sensitive.
50 • Point Manager Functions
Point Manager Manual
DHCP
The Point Manager can have it’s IP address automatically assigned by a DHCP
server. The Point Manager can have its IP address, subnet mask, gateway, name
server and smtp server dynamically assigned. By default, the Point Manager uses the
static address assigned using the “CIS” command. To enable dynamic addressing,
use the “CID” command. The Point Manager will request of the DHCP server an IP
address. If the Point Manager cannot find a DHCP server, the Point Manager will
fall back to the static IP address or use the IP address of “0.0.0.0” (depending on the
setting of the “CID” command). At power up, if the Point Manager had an IP
address previously assigned, the Point Manager will fall back to this address if the
DHCP server cannot be found. The Point Manager will periodically try to make
contact with the DHCP server until the DHCP server provides the IP address. Use
the “IP” command to retrieve the current IP address (whether dynamically assigned
or statically assigned).
Note: this implementation of DHCP by the Point Manager is only useful for when
the Point Manager makes a connection to a host computer. The Point Manager does
not provide a means of making its address known across a LAN.
Time Management (Realtime Clock)
Time Zones and Daylight Savings Time
If you have multiple Point Managers located across multiple time zones, set the Point
Manager’s clock to UTC time and then set the time zone. The Point Manager will
log history and event records with the UTC time stamp. The Point Manager will
present time in Web pages in local time. The Point Manager will account for
daylight savings time also when presenting time. The application collecting the
history and events logs can then convert the UTC time stamps to the Point
Manager’s local time or to the host’s local time. See the “CC” and “IT” commands
for more information.
The Point Manager defaults to an USA daylight savings schedule. It has 4 schedules
availble: USA, USA old, Greenwich Mean Time, Central European Time and
Eastern European Time. You can also define your own daylight savings time. See
the “ITD” command for more information.
SNTP
The Point Manager’s clock can drift a few seconds a day. In order to keep the Point
Manager clock accurate, the Point Manager has a built in time update service that
uses SNTP to access time from an external time service. The Point Manager can
access a time server from a LAN, WAN or from the Internet.
Consult with your network administrator to determine the host name of an NTP
Server to use. Point Manager’s SNTP time client follows the RFC-2030
specification. Here are two links to lists of time servers on the internet:
http://support.microsoft.com/kb/262680 and
http://ntp.isc.org/bin/view/Servers/WebHome. You can also purchase a commercial
timer server for the LAN or WAN.
In order to use the SNTP function, the Point Manager’s clock must be set to UTC
time. Use the “CCN” command to specify where the SNTP service is located. The
Point Manager Manual
Point Manager Functions • 51
Point Manager will query the SNTP service twice a day for the current time:
00:20:00 and 12:20:00. The Point Manager will also query the SNTP service when
the “CCNS” command is received. The Point Manager indicates the status of the
last query attempt in three ways: the syncflag in the “CCR” response, the “IY”
command, and the framing of the time of day shown in the header of the web page.
If the last query attempt failed the Point Manager will frame the time of day shown
in the header of the web page with “*” characters. Just because the query failed does
not necessarily mean the clock is wrong but that the clock has not been
synchronized. Use the “IY” command to show the status of the SNTP client in the
Point Manager. For more information see the “CCN”, “CCR”, “PY” and “IY”
commands.
52 • Point Manager Functions
Point Manager Manual
Communicating with the Point
Manager
Point Manager Protocol
The system for communicating with the Point Manager is based on a commandresponse architecture. Every submitted command will receive a response, as long as
there is a connection. Successful commands are responded to with an echo of the
primary command, and if the command returns data, the data is appended to the
primary command echo after a comma (if the comma is part of the command). The
primary command is the submitted command string in its entirely or up to but not
including the first comma. Sending the next command before receiving a response
to the last command is an error.
Each command must be prefixed with an ASCII 02 character (STX) (on most
terminal emulation programs, type Ctrl-B) and must end with an ASCII 13 character
(CR) (on most terminal emulation programs, type Ctrl-M or Enter). This protocol
will work with all the Point Manager communication media: Serial port, Command
Radio (option) and TCP/IP.
Example
Command:
<STX>S<CR>
Response:
<STX>S,6,082701111800,na,na<CR>
Remarks:
<STX> is an ASCII 02 (or Ctrl-B on the keyboard)
<CR> is an ASCII 13 (or Ctrl-M or Enter on the
keyboard)
There is an additional layer of communications protocol that is media-specific. This
has been added to ensure reliability when using media lacking built-in error
detection. This protocol is recommended to be used with the Point Manager’s
Command Radio, and Serial ports. The command must be prefixed with an ASCII 01
character (SOT) (on most terminal emulation programs, key in Ctrl-A), then
following the command with a 4-character ASCII hex CRC16. The command is
then terminated with an ASCII 13 character (CR) (on most terminal emulation
programs, key in Ctrl-M or Enter). The CRC16 must be calculated using the full
command but does not include the ASCII 01 (SOT) or the ASCII 13 (CR). An
Point Manager Manual
Communicating with the Point Manager • 53
ASCII 01 (SOT) prefixed command not followed by a CRC16 will result in an error.
Point Manager will respond with a response prefixed with an ASCII (SOT), followed
by a 4-character ASCII hexadecimal CRC16 and terminated with the ASCII 13 (CR).
The returned CRC16 is calculated using the full response but does not include the
ASCII 01 (SOT) or the ASCII 13 (CR).
Note: The letters of the 4-character ASCII hexadecimal CRC16 must be in
uppercase.
Example
Command:
<SOT>S3D40<CR>
Response:
<SOT>S,6,082701111800,na,na3A3E<CR>
Remarks:
<SOT> is an ASCII 01 (or Ctrl-A on the keyboard);
<CR> is an ASCII 13 (or Ctrl-M or Enter on the keyboard); “3D40” is
the calculated CRC16 value in 4-character ASCII hexadecimal of the
command “S”; “3A3E” is the calculated CRC16 value in 4-character
ASCII hexadecimal of the response “S,6,082701111800,na,na”.
CRC16 Algorithm
The CRC16 Algorithm is a sophisticated method of checking the integrity of
transmitted data for transmission errors. The algorithm indicates whether or not the
data has any error. It does not indicate which bit or how the error occurred. Point
Manager ignores data packets that have errors. The host should resend the command
if the response from the Point Manager has errors.
54 • Communicating with the Point Manager
Point Manager Manual
Example C function
// on entry:
dataptr – pointer to array of bytes – pointer to start
of the bytes to be CRC16.
//
len – number of bytes in the array to apply CRC16
//
seed – starting seed of the CRC16 (for Point Manager use 0)
// on exit: calculated CRC16 value
const short oddparity[16] = { 0, 1, 1, 0, 1, 0, 0, 1, 1, 0, 0, 1, 0, 1,
1, 0 };
Word DoCRC16(byte *dataptr, Word len, Word seed)
{
Word CRC16;
int i;
Word data;
CRC16 = seed;
for (i=0; i<len; i++)
{
data = dataptr[i];
data = (data ^ (CRC16 & 0xff)) & 0xff;
CRC16 >>= 8;
if (oddparity[data & 0xf] ^ oddparity[data >> 4])
CRC16 ^= 0xC001;
data <<=
CRC16 ^=
data <<=
CRC16 ^=
6;
data;
1;
data;
}
return CRC16;
}
Point Manager Manual
Communicating with the Point Manager • 55
General information
Sensors
All sensors have two unique identifiers:
•
Serial Number – Internal, factory assigned, unique, can’t be changed.
•
Name – a label that the user assigns.
The Point Manager keeps a list of sensors and all configured I/O points in a table.
The user can use a command string to associate a sensor’s serial number with a label,
and configuration information for all of the sensor’s I/O points. The row number in
the sensor table is used to specify the sensor
I/O Points
In addition to the two identifiers, sensors also contain a varying number and type of
I/O points. I/O points collect or contain measurable values such as temperature,
identification, count, etc. Each I/O point contains configurable parameters. You can
read and change these parameters using the “C” command, which will be explained
in more detail below.
Sensor Table: The sensor table can hold up to 100 sensors, having among them a
maximum of 250 I/O points.
I/O Point Type
Analog
Integer
Data
State
I/O Point Type
Configurable Parameters
Scale
Offset
Units
Decimal Places
Scale
Offset
Units
Decimal Places
Presented as ASCII hexadecimal
Name1, …, Namex
Analog
Analog I/O points are configured using a scale and offset to convert the data into
engineering units. A scale is a multiplier for the data. Before data from a configured
I/O point is displayed, it will be multiplied by the scale. The offset is then added. In
this way the user can control the units in which data from an I/O point is displayed.
All temperature I/O points are treated as signed 16 bit values where 1 bit is 1/16th of
a degree Celsius. All Analog I/O are treated as signed 16 bit values. If the Analog
I/O from the sensor is 12 bits, the data value is normalized to 16 bits in the Point
Manager (multiply by 16). The value of an Analog I/O point will be displayed as
(raw data * scale) + offset. The following table contains common scales and
offsets:
56 • Communicating with the Point Manager
Point Manager Manual
Common Analog Scales and Offsets
Scale
Offset
0.0625
0
0.1125
32
0.00305
0.125
1.0
0
0
0
Units
Degrees Celsius
(1/16 of a degree)
Degrees Fahrenheit
(1.8 * 0.0625)
% of full scale
Raw 12 bits
Raw signed 16 bits
Corrections
Point Manager can apply a correction to an Analog I/O raw data before a scale and
offset is applied. This correction is useful for Analog I/O that is not linear (like a
thermistor) or needs to be calibrated. For more information about corrections see the
“CO” command.
Integer
Integer I/O points work similarly as Analog I/O points. A scale and offset is applied
before the data is displayed or delivered. However for Integer I/O points the offset is
applied before the scale and is an integer value (can be used to zero the reading).
The value of an Integer I/O point will be displayed as ( raw data - offset ) * scale.
For example, suppose you have a wireless rain gauge and 1 count of the rain gauge
equals 0.1 inches. And suppose you want to show in the I/O Status page the amount
of rain since the beginning of the year. You set up the scale to be 0.1 and the offset
to be the count of the sensor at the beginning of the year and suppose the
accumulated count is 233489 at the beginning of the year. So in this example the
scale is 0.1 and the offset is 233489.
State
State I/O are discrete I/O points. The number of states for the State I/O depends on
the type of Sensor (for instance a Counter has four states and a Discrete has two).
The meaning of the states depends on the type of sensor. Each state can be named.
Data
A Data I/O contains 8 bytes of data. How these 8 bytes are used depends on the type
of sensor. Point Manager can present this data in one of three ways: as character
data, Serial Number as ASCII Hexidecimal or ASCII Hexidecimal.
Point Manager Manual
Communicating with the Point Manager • 57
Command Overview
Command Syntax
The following table describes the shorthand used to define each command.
Syntax Element
Purpose
<>
Enclose a set of options, ones of which is required
|
Separates elements in a set of options
[]
Enclose an optional expression
…
Denotes variable length
Marks repeatable expression
1 ,…x
n
Only or low row number of a sensor
m
High row number of a sensor
Italics
Strings in italics are place holders for values
Rules governing commands include:
•
Command strings may contain no spaces.
•
Reserved characters: commas (,), pipes ( | ), SOT (ASCII 1), STX
(ASCII 2), colons (:), carriage returns (ASCII 10), and the bell code
(ASCII 7) are reserved, and may only appear as part of the command
syntax. Do not use these characters in label names or state names.
•
Command strings have a maximum length of 128 characters.
•
When specifying a range, the maximum is ten sensors. Specifying a
range including more than ten will return an error.
Time representations
Date and Time Stamps
Time and date stamps or times that are set or compared to the real-time clock are
always expressed in military time and represented as:
mmddyyhhnnss
Where
mm – month of the year
dd – day of the month
yy – year starting at year 2000
hh – hours
nn - minutes
ss - seconds
58 • Communicating with the Point Manager
Point Manager Manual
Interval or Duration Times
Times that are duration are always expressed in military time and represented as:
hhnnss
ddhhnnss
Where
dd – number of days
hh – number of hours
nn – number of minutes
ss – number of seconds
XML Date and Time Stamps
The Point Manager will represent the date and time in one of two formats:
mm/dd/yy hh:mm:ss
or
yyyy-mm-ddThh:mm:ss
which is subset of ISO 8601.
Email
The Point Manager will present both of the following formats as part of the
body of the email message:
mmddyyhhnnss
and
mm/dd/yy hh:mm:ss
Future Compatibility
All commands and fields will be maintained for downward compatibility. Future
function in the Point Manager will be added by extending commands with commas
and adding new commands. These added fields will be optional for the command
syntax.
Point Manager Manual
Communicating with the Point Manager • 59
Command Outline
Command
A<T[U]|F|R|S[U] >
C<B|E>
CAE<C|R|RC|S>
CC<S[F|S]|R>
CCN<S|R>
CD<S|R>
CE<S|R>B
CE<S|R>L
CE<S|R>P
CE<S|R>S
CI<S|R>
CID<S|R>
CIP<S|R>
CM<S|R|C>
CN<S|R|C>
CO<S|R|C>
60 • Communicating with the Point Manager
Command List
Description
Options & Parameters
<True[Unfiltered]|False|Read|Service[Un
Auto Add Mode
filtered]>
Configure Notify
<Begin|End>
Configure AutoAdd <Clear|Read|Read Count|Set>
Sensor Events
Configure/Read
<Set[Force| Synchronize]
Clock
|Read>(mmddyyhhnnss)
Configure
<Set|Read>(host name)
Automatic Time
Update
Configure/Read
<Set|Read>(ID Name)
Point Manager
Identification Label
Configure/Read
<Set|Read> (startup action, period
Point Manager
timer base, periodic timer interval,
System Events
Event Log % full, log full action,
history % full, history full action,
sensor add action)
Configure/Read Log <Set|Read> (full action, full output
Full Action
start, full output stop)
<Set|Read> (sensor index:point index
Configure/Read
(point event configurations))
Sensor I/O Point
Analog: A (Type) high value, action,
Events
low value, action, hysteresis, high
span, high span action, low span, low
span action, high exit span, low exit
span
Integer: I (Type) value, increment,
action*
Data: D (Type) change action
State: S (Type) to 1 action, from 1
action, 1 error, to 2 action, from 2
action, 2 error, to 3 action, from 3
action, 3 error, to 4 action, from 4
action, 4 error
<Set|Read> (sensor index, max age,
Configure/Read
old action, service action, history on
Sensor Events
alarm, online action)
Configure/Read
<Set|Read> (IP Address, Subnet [,
Point Manager IP
Gateway][, Name Server][,Port])
Address
DHCP Enable
<Set|Read>(dynamic,fallback)
IP Ports
<Set|Read>(httpport, cmdport)
Configure/Read
<Set|Read|Clear> (tries, time between
Media Callout Table tries(specific media connections))
Configure/Read
<Set|Read|Clear> (smtp server name,
Email Destinations
from address, to address(es))
Configure/Read
NTS Thermistor <Set>(correction
Sensor I/O
id,0,0,scaling resistor, corr A, corr B,
Point Manager Manual
Corrections
CP<D|C>
CR<S|R>
CS<S|R|C[F]|D[F]>[n]
CT<S|R>
CTT<S|R>
CU<S|R|C>
CV<S|R|C>
CW<S|R>
D<n|n-m>
E<n>
EC[A]
E<A|F|L|N|P|R[V]
EU
EZ[V]
G<C|R|S>
HC[A]
HI<S|R>
H<A|F|L|P|R>
HO<F|T|P>
Point Manager Manual
Configure Login
Passwords
Configure Radio
Configure/Read/Cle
ar /Delete Sensor
Setup
Configure Media
Ports
Configure Extended
Media Parameters
Configure PassThru
Configure
Enumerated
Engineering Unit
Conversion
Configure Base
Get Last Data
Get Scheduled
Output Control
Status
Clear Event Log
Read a Event Log
Record
Event Log Usage
Read Event Log
Records
Compressed
Group Description
Clear Historical Log
Configure/Read the
History Interval
Read a Historical
Log Record
History Offline
corr C
Offset Corrections <Set>(correction
id,1,0,no of points, starting,interval
<Set>(correction id,1,index, .. data ..)
Lookup Table <Set>(correction
id,1,0,no of points, starting,interval
<Set>(correction id,1,index, .. data ..)
<Clear>(All|correction id)
<Data|Configure> (password)
<Set|Read>(hop table, network id)
<Set|Read|Clear[Force]|Delete[Force]>
(sensor index, serialno, label(I/O point
setup(s)))
Analog:
(AScale,Offset,Units,Decimal_Places)
Integer:
(IScale,Offset,Units,Decimal_Places)
Data: (D<Y|N>)
State: (SName1[,…Namex]), sensor
type
<Set|Read>(mediainstanceMedia)
<Set|Read>(mediainstanceMedia)
<Set|Read|Clear>(reconnect delay,fast
try count, fast try delay, slow try base,
slow try interval(specific media
connections))
<Set|Read|Clear>
<Set|Read>
[All](mmddyyhhnnss)
<Again|First|Last|Next|Previous|Read
using time> [Verbose]
(mmddyyhhnnss)<index>
[Verbose] (mmddyyhhnnss<index>[mmddyyhhnnss])
<Clear|Read|Set>
[All](mmddyyhhnnss)
<Set|Read> (base mmddyyhhnnss,
interval ddhhnnss)
<Again|First|Last|Next|Previous|Read
using time>
(mmddyyhhnnss<index>[sensor
index|sensor range])
<False|SensorTime|Packet>
Communicating with the Point Manager • 61
HS
HU
HZ
IC
ID
IE
IK
IL<E|H|>1
ILR
IM
IMM
IP
Indicator
Force Historical
Log Snapshot
Historical Log
Usage
Read Historical Log
Records
Compressed
Information Counts
Information
Delivery
Information Email
Information Outputs
Information XML
Delivery
Information Last
HTTP Response
Media Information
Modem Information
Information IP
Settings
IPS
Information DHCP
IT<S|R>
Time Zone
Information
Daylight Savings
Schedule
Information
PassThru
Version Information
Clock Synchronize
Information
I/O Job Description
Outputs
Login/Logout
Scheduled Outputs
Matches
Try Correction
Force Call – Push
Connection
Force Output
Force XML
Delivery
Attempt Automatic
Time Update
Get Status Data
ITD<D|R|S>
IU
IV
IY
J<C|R|S>
K<C|R|S>
L<I|O|OC>
ME<C[F]|R|S>
MM<C[F]|R|S>
O
P<n|A|E|R|ING>
PK<A|D|T>
PX<E|H>1
PY
S[R|RP|RA]
SOR<E>
SOS<E>
SWR<E>
SWR<E>
T<C|R|S>
U[E|N|Q|R|S]
62 • Communicating with the Point Manager
Exception Schedule
Day of Week
Schedule
Timer
PassThru Mode
(mmddyyhhnnss<index>[mmddyyhhnnss])
(id, state, try, parameters)
(active, at, error)
(output packet cnt, ,…)
<Event|History>
(isdynamic,successfully bound,IP
address, subnet mask, gateway, name
server, SMTP server)
(DHCP Acquire state, DHCP state,
lease time, wait time, link)
<Set|Read> (time zone
hhmmss,daylight savings)
<Daylightschedule|Read|Set>
(media state, last action, next action)
<Clear|Read|Set>
<Clear|Read|Set>
<In|Out|Out&Disconnect> (password)
<Clear[Force]|Read|Set>
<Clear[Force]|Read|Set>
(correction id, analog raw value)
<media index|All|Email|Reset> (name
or ip address)
<Activate|Deactive|Test>
<Event|History>
[Reset All][Reset Periodic
Callin][Reset Alarm]
<Scheduled Output>
<Scheduled Output>
<Clear|Read|Set>
[Engineering Mode|No|Quiet
Point Manager Manual
V<B|E>
XD<E|H><R|S>1
XP<E|H><R|S>1
XM<E|H><R|S>1
XT
Point Manager Manual
Verbose Mode
XML Delivery
Destination
XML Delivery
Interval Parameters
XML Delivery
History Postion
XML Date and
Time Stamp Format
Mode||Read|Standard Mode]
<Begin|End>
<Event|History><Read|Set>1,
domain,urlpath
<Event|History><Read|Set>1,
periodbase,periodinterval,tries,retrytim
e
<Event|History><Read|Set>1,
timestamp[index]
<1|2>
1 – “mm/dd/yy hh:mm:ss”
2 - “yyyy-mm-ddThh:mm:ss” which is
subset of ISO 8601
Communicating with the Point Manager • 63
Commands
‘A’ - Auto Add Mode command
Command Options
Command/Response Syntax
Parameters
Login Level
A<T[U]|F|S[U]|R>
Command:
AT
Response:
AT
Command:
ATU
Response:
ATU
Command
AF
Response:
AF
Command:
AS
Response:
AS
Command:
ASU
Response:
ASU
Command:
AR
Response:
AR,<T|S|F>
turn AutoAdd Mode on
turn AutoAdd Mode on
turn AutoAdd Mode off
turn on AutoAdd (add when service pressed)
turn on AutoAdd (add when service pressed)
Query AutoAdd Mode
Where: ‘T’ – true or yes
‘F’ – false, no or off
‘S’ – service mode
‘R’ - read
Login Level:
AR – Data
AT,AF,AS, - Configure
Description
Point Manager Manual
If AutoAdd mode is on and the Point Manager receives a packet from a sensor not
already in the sensor table, it will add the new sensor to the table automatically.
When the Point Manager adds a sensor to the sensor table through AutoAdd mode it
assumes certain defaults for the parameters based on the type of sensor. You can
then modify these parameters using the “CS” command. The Point Manager will
add a new sensor to its table either whenever it receives a new sensor’s packet
[AutoAdd] or when it receives a new sensor’s packet sent in service mode
[AutoAdd(service)]. AutoAdd(service) gives you a little more control over building
your sensor table. You may need to push the service button to transmit the data and
have the sensor added. Using AutoAdd(service) you can add sensors to the table in a
particular order and segregate sensors between Point Managers. After you have
added the sensors you want the Server to use, use the “AN” command to turn off
AutoAdd mode to prevent your setup from being changed.
Commands • 65
NOTE: For the “AT” and “AS” commands, in order for the Point Manager to
automatically add the sensor, the Point Manager must receive two packets from the
sensor no less than 5 seconds apart. If “ATU” or “ASU” is used only one packet is
needed for the Point Manager to automatically add the sensor.
When a sensor is automatically added to the sensor table because of the AutoAdd
mode, Point Manager will assume certain defaults for the setup information for the
sensor. For the sensor name, Point Manager prefixes the default name with the row
number (sensor index) in the sensor table. Below is a table of the different sensor
types with the default setup information. The setup information is expressed as the
response to the CSR command.
Sensor Model
Point Temp
Point Humid
Point Light
Point PIR
Point Analog
Point IR
Counter and
LSX
AngData
Point Analog
w/ Temp
Discrete
Point
Thermistor
16-bit Analog
Point Counter
Temperature
Point Fast
Counter
Temperature
Alarm Temp
Space Temp
Directional
Counter
ID Reader
Proximity2
66 • Commands
AutoAdd Mode Default Entries
Sensor
Default Setup (response from the CSR
Description
command)
Temperature
1,0700000005B3F528,13Temperature(A0.112
5,32.0000,degF,1)
Humidity/
2,7D000000059A9328,2Humid_Temp(A1.00
Temperature
0,0.000,%RH,0)(A0.1125,32.0000,degF,1)
Light
3,230000000348A8328,3Light(A0.02440,0.00
00,%,2)
iButton
4.278C000000000000,4iButton(DN)
Analog
5,2A0000000B66C628,1Analog(A0.02440,0.
00000,%,2)
Dual Counter
6,000000000013D6F1,6Counter(SBlocked,Op
with Dual
en,Closed,Error)(I1,0,count,0)(I1,0,open s,0)
Discretes
Analog with
8,DC00000001F15D27,5Analog_Data(A0.02
Data
440,0.00000,%,2)(DY)
Analog /
9,A500000001E45227,6Analog_Temp(A0.02
Temperature
440,0.00000,%,2)(A0.1125,32.0000,degF,1)
Discrete Sensor 11,0110211220200100,16Discrete(Soff,on)
Thermistor
12,0101211220200100,1Thermistor(A0.1125,
Sensor
32.0000,F,1,128)
Signed 16 bit
13,010A211220200100,10Analog16(A0.0030
Analog sensor
5,0.00000,%,2,0)
Counter
14,00000000000B1534,2CntTemp(STrans.,O
Temperature
pen,Closed,Error)(I1,0,count,0)(A0.1
Sensor
125,32.0000,F,1,0)
Fast Counter
15,00000000001F0FC7,3FastCntTemp(I1,0,c
Temperature
ount,0)(A0.1125,32.0000,F,1,0)(I1,0
Sensor
,sec,0)(A0.1000,0.0000,Rate,1,0,0)
Alarm
16,00000000000B77F3,1AlarmTemp(SOK,Al
Temperature
arm,0)(SOK,Alarm,0)(A0.1125,32.0000,
F,1,0,0)(DT,0)
Space
17,00000000001F2109,SpaceTemp(A0.1125,
Temperature
32.0000,F,1,0,0)(SNormal,Occupy,Unoc
Override
c.,0)(DT,0)
Directional
18,0000000080257310,1Direct_Cnt(SBlocked
Counter
,Okay,PwrAlrm,BattAlrm,0)(I1,0,cou
nt,0,0)(I1,0,count,0,0)
ID Reader
20,0000000028806910,1ID_Reader(SBatt
OK,LowBatt,0)(STamp OK,Tamper,0)(SClo
sed,DoorOpen,HeldOpen,HeldOpen,0)(DT,0)
Counter with
23,000000009810654C,1Proximity2(Sstate1,
Point Manager Manual
Dual Analog
accumulated
time, time in
state and Range
Status
Dual Analog
Dual Analog
Dual Analog
CounterAnalog
Counter/Analog
Point Humid2
Humidity/
Temperature
Object,NoObject,state2,0)(I1,0,cou
nt,0,0)(I1,0,sec,0,0)(I1,0,sec,0,0)(S1,2,3,4,0)
27,0000000038202551,1Analog(A0.00305,0.0
0000,%,2,0,0)
28,0000000000602651,1Analog_2(A0.00305,
0.00000,%,2,0,0)(A0.00305,0.00000,%
,2,0,0)
29,0000000000504660,1CntAnalog(STrans.,Ope
n,Closed,Error,0)(I1,0,count,0,0
)(A0.00305,0.00000,%,2,0,0)
30,0000000004703560,1Humid_Temp(A0.0244,
0.0000,%RH,1,0,0)(A0.0549,-40.0000
,F,1,0,0)
The sensor is given a default name, which is the name of the physical type of sensor.
The Point Manager prefixes the default name with the row number in the sensor
table. The following is a table that shows the default names:
Sensor Model
Point
Temperature
Point
Humidity
Point Light
Point PIR
Point Analog
Point IR
Counter and
LSX
AngData
Point Analog
Temperature
Discrete
Point
Thermistor
16-bit Analog
Point Counter
Temperature
Point Fast
Counter
Temperature
Alarm Temp
Space Temp
Directional
Counter
ID Reader
Point
Proximity2
Dual Analog
Point Manager Manual
Sensor Description
Default Sensor Name
“Temperature”
Humidity / Temperature
“Humid_Temp”
Light
iButton
Analog
Dual Counter sensor
“Light”
“iButton”
“Analog”
“Counter”
Analog with Data
Analog / Temperature
“Analog_Data”
“Analog_Temp”
Discrete Sensor
Thermistor Sensor
“Discrete”
“Thermistor”
Signed 16 bit Analog
sensor
Counter Temperature
Sensor
Fast Counter Temperature
Sensor
“Analog16”
Alarm Temperature
Space Temperature
Override
Directional Counter
“Alarm Temp”
“SpaceTemp”
ID Reader
Proximity Sensor with
Time in View and Range
Status
Dual Analog
“ID_Reader”
“Proximity2”
“CntTemp”
“FastCntTemp”
“Direct_Cnt”
“Analog”
Commands • 67
Dual Analog
CounterAnalog
Point Humid2
68 • Commands
Dual Analog
Counter / Analog
Humidity / Temperature
“Analog_2”
“CntAnalog”
“Humid_Temp”
Point Manager Manual
Examples
Command:
AT
Response: AT
Remarks: turn on Auto AddMode.
Command:
AS
Response: AS
Remarks: turn on Auto AddMode but only add those sensors that have
service button pressed
Command:
AF
Response: AF
Remarks: turn off Auto AddMode
Command:
AR
Response: AS
Remarks: The Point Manager is current in AddMode with service
Point Manager Manual
Commands • 69
‘C’ – Notify Setup
Command Options
C<B[E>
B – begin setup process
E – end setup process
Command:
Response:
Command:
Response:
CB
CB
CE
CE
Login Level
Login Level:
CB – Configure
CE – Configure
Description
Use the “CB” command to suppress logging of individual setup change events to the
Event Log and to suppress Periodic Callout.. Each setup command will cause an
event to be logged into the Event Log. If the “CB” command issued before a series
of setup commands is sent, then only one event will be logged. Also some of the
events may fire and if the Point Manager is not fully set up then this might cause a
problem especially with Alarms. When the “CB” command is invoked, the Point
Manager will suppress the callout mechanism triggered by alarms until the “CE”
command is issued. Frame a series of setup commands starting the “CB” command
and ending with the “CE” command.
Command/Response Syntax
Note: If the “CE” command is never sent, the Point Manager will reset the “CB”
mode when either the connection is terminated or the inactivity time expires.
An event can be set up to fire when the “CE” command is issured or the “CB”
command was sent and the inactivity time expired. See the “CESB” command
(manage items parameter) for more information.
Examples
Command:
CB
Response: CB
.
. (series of setup commands)
.
Command:
CE
Response: CE
70 • Commands
Point Manager Manual
‘CAE’ – Configure/Read AutoAdd Sensor Events
Command Options
CAE<C,R,RC,S>
C – clear the AutoAdd Sensor event table
R – read the AutoAdd Sensor event
RC – read the number of rows in the AutoAdd Sensor event table
S – set the AutoAdd Sensor event
Command/Response Syntax
Parameters
Command:
CAEC
Response:
CAEC
Command:
CAER
Response:
CAER row, sensor type, event type, event action, event start
output, event stop output[, parameters]
Command:
CAERC
Response:
CAERC,no rows
Command:
CAESsensor type, event type,event action, event start output,
event stop output[, parameters]
Response:
CAES
Where:
row – row number of the AutoAdd Sensor event table (1-30)
sensor type – see “CS” command for a list of the available sensor types. If
the value is “0” then event setup will apply to all sensor types.
event type – supported events: 50: ‘Service”, 51: “Offline”, 54: “Online”,
120: “Count Time”.
event action – event actions that tell the Point Manager what to do with the
event. All event actions have the following options: ‘N’ - do nothing,
‘E’ – email, ‘L’ – log event in the Event Log, ‘M’ – log and email, ‘A’
– alarm and log the event, and ‘B’ – alarm, log and email.
event start output – when an event occurs, the Point Manager will generate
a output start operation for the specified row. (See the “KS”
command). If this number is greater than 32768 (8th bit set) then this
parameter refers to a set of outputs where 32768 is output set 0 and
32769 is set 1 and 327611 is set 3. 0 is no action.
event stop output – when an event occurs, the Point Manager will generate
a output stop operation for the specified row. (See the “KS”
command). If this number is greater than 32768 (8th bit set) then this
parameter refers to a set of outputs where 32768 is output set 0 and
32769 is set 1 and 327611 is set 3. 0 is no action.
parameters – only applies to the 51: “Offline” event type. This is the
maximum number of seconds since the last packet update to trigger the
“Offline” event. See the “CESS” command for more details.
Point Manager Manual
Commands • 71
Login Level
Login Level:
CAEC – Configure
CAER – Data
CAERC – Data
CAES – Configure
Description
The “CAE” commands allow you to set up default event information that the Point
Manager assigns to sensors when the sensor is added to the Sensor Table with the
AutoAdd function. You specify default actions for the following event types: 50:
‘Service”, 51: “Offline”, 54: “Online” and 120: “Count Time”. You specify these
event types for all sensor types or for specific sensor types. Note: 120: “CountTime”
event is specific to the CounterRng sensor (sensor type 23). A sensor type of 0
indicates that the event setup applies to all sensor types.
The parameters fields is only used to set up the 51: “Offline” event (specify the
MaxAge parameter).
When the “CAES” command is issued, the Point Manger searches a table of
AutoAdd event setups for a corresponding sensor type/event type match. If it finds a
match, then the Point Manager updates that event setup entry. If it does not find a
match, the Point Manager adds the event setup to the end of the table.
Use the “CAERC” command to find the number of entries in the AutoAdd event
setup table. Use the “CAER” command to iterate though the table. Issuing the
“CAEC” command clears the table.
Examples
Command:
CEAS0,51,L,0,0,360
Response: CEAS0
Remarks: Set for all sensors an “Offline” event with an age of 360
seconds. The event is set up for logging to the event log.
Command:
CAES23,120,B,0,0
Response: CEES23
Remarks: Set for the CounterRng sensor type (23) the 120: “CountTime”
event type. The event is set up for logging, alarming, and email.
Command:
CAERC
Response: CEERC,2
Remarks: Read the number of entries in the AutoAdd event setup table
Command:
CAER1
Response: CEER1,0,51,L,0,0,360
Remarks: Read the first entry in the AutoAdd event setup table
72 • Commands
Point Manager Manual
‘CC’ – Configure/Read Clock
Command Options
CC<S[F|S]|R>
SF – clear the Historical and Event Logs and set the Point Manager clock
SS – synchronize the Point Manager clock
S – set the Point Manager clock
R – read the current clock setting
Command/Response Syntax
Parameters
Command:
Response:
Command:
Response:
Command:
Response:
Command:
Response:
CCSmmddyyhhnnss
CCSmmddyyhhnnss
CCSFmmddyyhhnnss
CCSFmmddyyhhnnss
CCSSmmddyyhhnnss
CCSSmmddyyhhnnss
CCR
CCR,mmddyyhhnnss,syncflag
Where:
mmddyyhhnnss – date and time to set the clock or the date and time of the read
clock
syncflag – Has the Point Manager been syncronized with an SNTP service? “T”
– yes, the clock has been updated ; “F”- either SNTP is not being used,
there was a failure to get time from the SNTP service, or cannot set clock
because too much difference in time.
Login Level
Point Manager Manual
Login Level:
CCS – Configure
CCSF – Configure
CCSS – Configure
CCR – Data
Commands • 73
Description
The “CC” command configures or reads the Point Manager time of day clock. The
Point Manager uses the clock for the Historical Log, Event Log, Event Alarms, and
Periodic Timer Callout. Setting the correct time for the Point Manager is crucial for
Point Manager operations that concern time.
The Point Manager will return an error 16 for the “CCS” command when there are
records in the Historical Log or the Event Log. The Historical and Event Logs must
be empty before the clock can be set unless the “F” option is used (which erases the
Historical and Event Log).
The Point Manager’s clock is set at the factory to Eastern Standard Time.
The Point Manager’s clock will drift over time. The realtime clock should be set
periodically.
The “CCSS” allows you to set the click without having to clear the Historical and
Event Logs. If this command is used to set the clock forward in time, the Point
Manager will go ahead and set the clock. If this command is used to set the clock
back in time, the Point Manager will set the clock if no Events or History records are
recorded in the Logs between the time before the attempted clock change and the
desired set time. The Point Manger will return an error code 36 for setting the clock
back greater than 15 minutes, otherwise the Point Manager will set the clock in
stages as to not allow time to be set less than the time of the last Event or History
record. Use the “IY” to examine the progress of the Point Manager setting the clock
in stages. If you issue the “CCS” command while the Point Manager is setting the
clock in stages, the Point Manager will return an error code 37 indicating that the
Point Manager is attempting to set the clock and cannot honor the command.
The Point Manager clock can be updated twice a day from an SNTP service. See the
“CCN” command for more information. The syncflag returned in the response to
the “CCR” command, indicates if the clock has been updated by an SNTP service.
Note: The Point Manager’s clock and internal time registers will rollover in the year
2048.
Note: The Point Manager will return an error if the clock is set within 2 hours of a
daylight savings boundary.
Examples
Command:
CCS082901224100
Response: CCS082901224100
Remarks: set the clock to 08/29/01 22:41:00
Command:
CCR
Response: CCR,082901224212,F
Remarks: the Point Manager’s clock is set to 08/29/01 22:42:12
74 • Commands
Point Manager Manual
‘CCN’ – Configure Automatic Time Update
Command Options
Command/Response Syntax
CCN<S|R>
S – set Automatic Time Update
R – read Automatic Time Update settings
Command:
Response:
Command:
Response:
CCNShost name
CCNShost name
CCNR
CCNR,host name
Parameters
Where: host name – is the host name or domain name of the time server (NTP
Server). host name can be an IP address.
Login Level
Login Level:
Description
The “CCN” command configures the SNTP time client. host name can be a domain
name or IP address. If domain name is specified, then the Name Server (DNS
Server) field must be specified with the “CIS” command. Set host name to blank to
turn off the time client. Before setting the host name field, make sure the time zone
offset and daylight savings mode is set properly (“IT” command). Also make sure
the clock is set as well.
CCNS – Configure
CCNR – Data
When the command is issued with the host name, the Counter will initiate a try of
the time server immediately. If you want the Point Manager to immediately try then
just send the “CCN” command again. Use the “IY” command to read the current
state of the time client.
The Point Manager indicates the status of the last query attempt in three ways: the
syncflag in the “CCR” response, the “IY” command, and the framing the time of day
shown in the header of the web page. If the last query attempt failed the Point
Manager will frame the time of day shown in the header of the web page with “*”
characters. Just because the query failed does not necessarily mean the clock is
wrong but that the clock has not been synchronized.
Examples
Command:
CCNR
Response: CCNR,ntp.dayww.net
Remarks: the time client is active and uses “ntp.dayww.net” as the time
server.
Command:
CCNS
Response: CCNS
Remarks: turn off the time client.
Point Manager Manual
Commands • 75
‘CD’ – Configure/Read Point Manager Identification
Label
Command Options
Command/Response Syntax
Parameters
CD<S|R>
S – set the Point Manager Identification Label
R – read the Point Manager Identification Label
Command:
Response:
Command:
Response:
CDSlabel
CDSlabel
CDR
CDR,MAC,label
Where:
label –label name used to identify the Point Manager. (maximum 19
characters)
MAC – Point Manager’s Ethernet MAC address
Login Level
Login Level:
CDS – Configure
CDR – None
Description
Use the Point Manager Identification Label to uniquely identify the Point Manager.
The Identification Label is displayed in the Web pages, used in the subject line in
sent emails and passed as a field in the XML data. The MAC address is permanently
part of the Point Manager, cannot be changed and is unique for all Ethernet
interfaces.
Examples
Command:
Response:
CDSmy Point Manager
CDSmy Point Manager
Command:
CDR
Response: CDR,00:90:C2:C0:15:D9,my Point Manager
Remarks: “00:90:C2:C0:15:D9” is the Point Manager’s MAC. “my Point
Manager” is the identification label for the Point Manager.
76 • Commands
Point Manager Manual
‘CESB’ & ‘CERB’ - Configure/Read Point Manager
System Events
Command Options
Command/Response Syntax
CE<S|R>B
S – set the system events
R – read the system events
Command:
CESBstartup action, period timer base,, periodic timer interval,
event log % full, event full action, history % full, history full action, [sensor add
action, startup start output, startup stop output, event full start output, event full
stop output, history full start output, history full stop output, sensor add start
output, sensor add stop output, push fail action, push fail start output, push fail
stop output, smtp fail action, smtp start output, smtp stop output]
Response:
CESB
Command:
CERB
Response:
CERB,startup action, period timer base, periodic timer interval,
next period timer, event log % full, event full action, history % full, history full
action, sensor add action, push fail action, push fail start output, push fail stop
output, smtp fail action, smtp start output, smtp stop output, startup start output,
startup stop output, event full start output, event full stop output, history full
start output, history full stop output, sensor add start output, sensor add stop
output, manage items action, manage items start output, manage items stop
output, add items action, add items start output, add items stop output, delete
item action, delete item start ouput, delete item stop output, edit item action, edit
item start output, edit item stop output
Parameters
Where:
“action” – event actions that tell the Point Manager what to do with the
event. All event actions have the following options: ‘N’ - do nothing,
‘E’ – email, ‘L’ – log event in the Event Log, ‘M’ – log and email, ‘A’
– alarm and log the event, and ‘B’ – alarm, log and email.
“start output” – when an event occurs, the Point Manager will generate a
output start operation for the specified row. (See the “KS” command).
If this number is greater than 32768 (8th bit set) then this parameter
refers to a set of outputs where 32768 is output set 0 and 32769 is set 1
and 327611 is set 3. 0 is no action.
“stop output” – when an event occurs, the Point Manager will generate a
output stop operation for the specified row. (See the “KS” command).
If this number is greater than 32768 (8th bit set) then this parameter
refers to a set of outputs where 32768 is output set 0 and 32769 is set 1
and 327611 is set 3. 0 is no action.
startup – The Point Manager will generate a startup event when it first
powers up.
period timer base – starting time for the Periodic Interval Callout
(mmddyyhhnnss) (set to “0” to turn off) (“na” if no Periodic Interval
Callout is set)
Point Manager Manual
Commands • 77
periodic timer interval – interval timer for the Periodic Interval Callout
(ddhhnnss) (“0” – place call out when period timer base is reached)
(“na” if no Periodic Interval Callout is set) . The Interval time must be
greater or equal to 10 seconds)
next period timer- next scheduled time the Point Manager will push a
connection. (mmddyyhhnnss) (“na” if no period timer is scheduled)
This parameter is accessed only through the read command CERB.
event log % full – % of the Event Log at which to create an event. (0 to
100)
history % full – % of the Historical Log at which to create an event. (0 to
100)
sensor add – The Point Manager generates an event when a sensor is added
to the sensor table via one of the media. See the “A” command for
more information.
push fail – The Point Manager will generate an event when it cannot
complete a connection with a host. See the “CM” command for more
information
smtp fail – The Point Manager will generate an event when it cannot
deliver an email message. See the “CN” and “IE” commands for more
information
manage items – The Point Manager will generate an event when the
Manage items mode is exited with the “CE” command or after a “CB”
command is issued and the inactivity time has expired.
add items – The Point Manager will generate an event when a sensor,
correction, group, job, output, scheduled output, match and timers are
added. See the “CSS”, “COS”, “GS”, “JS”, “KS”, “MES”, “MMS”
and “TS” commands.
delete items – The Point Manager will generate an event when the
following items are either deleted or cleared: Media Callout, Email,
correction, sensors, Media PassThru, Event Log, groups, History Log,
jobs, outputs, scheduled outputs, match and timers. See the following
commands: “CMC”, “CNC”, “COC”, “CSC”, “CUC”, “EC”, “GC”,
“HC”, “JC”, “KC”, “MEC”, “MMC” and “TC”.
edit items – The Point Manager will generate an event when the a mode
gets changed or a parameter is edited.
Login Level
Login Level:
CESB – Configure
CERB – Data
Description
Use this command to set up various system events. Point Manager can log into the
Event Log when it starts up from a power down. The Point Manager can alarm
periodically to make regular calls or connections with a host computer. Period timer
base controls when the Point Manager will create the first Periodic Interval Callout
and the periodic timer interval controls how often the periodic alarm occurs. The
Point Manager can alarm based on the percentage full for both the Event Log and the
Historical Log. It can also trigger an event when a sensor is added.
If the period timer base is set to a time in the past, Point Manager will fire the event
on the next interval.
78 • Commands
Point Manager Manual
Examples
Command:
CESBL,092701150000,01000000,75,A,90,A,N
Response: CESBL
Remarks: The Point Manager is set up for the following: startup as
event that is logged; start the Periodic Interval Callout at 09/27/01
15:00:00 and make call every 24 hours; an event will be triggered and
force a connection at 75 % of the Event Log and 90% of the Historical
Log; take no action when a sensor is added.
Command:
CESBL,0,0,0,N,0,N,N
Response: CESBL
Remarks: The Point Manager is set up to log startup, turn off the
Periodic Interval Callout, and turn off the detection of the Historical
and Event Log full alarms; take no action when a sensor is added.
Command:
CERB
Response:
CERBL,072203135848,00001000,082003171848,80,B,80,B,B,0,0,0,0,0,0,0,
0,L,0,0,L,0,0,L,0,0,L,0,0,L,0,0,L,0,0
Remarks: default settings of the Point Manager: startup: log; Periodic
Interval Callout scheduled for 7/22/03 13:00:00 at every 10 minutes;
80% full notification of both Event and Historical Logs triggering an
Event Log, alarm and email; alarm and email when a sensor has beed
added through Auto Add Mode.
Command:
CESBL,0,0,0,N,0,N,L,32771,0,0,0,0,0,1,0,L,0,0,L,0,0,L,0,0,L,0,0,L,0
,0,L,0,0
Response: CERBL
Remarks: The Point Manager is setup to log startup event, log event
when sensors are added, at startup initiate output start operation of
output set 3 (32771-32768), when a sensor is added initiate output
start operation for output at row 3, log the following events: push
fail, smtp fail, manage items, add items, delete items, edit items
Point Manager Manual
Commands • 79
‘CESL’ & ‘CERL’ - Configure/Read Log Filled Action
Command Options
Command/Response Syntax
Parameters
CE<S|R>L
S – set the log filled action
R – read the action
Command:
Response:
Command:
Response:
history filled
CESLevent action, start output, stop output
CESL
CERL
CERL,event action, start output, stop output, is event filled, is
Where:
event action – ‘N’ - do nothing, ‘E’ – email, ‘L’ – log event in the Event
Log, ‘M’ – log and email, ‘A’ – alarm and log the event, and ‘B’ –
alarm, log and email. All event actions except ‘N’ cause the Point
Manager to stop logging to both Event and Historical Logs when either
Logs become full.
start output – when an event occurs, the Point Manager will generate a
output start operation for the specified row. (See the “KS” command).
If this number is greater than 32768 (8th bit set) then this parameter
refers to a set of outputs where 32768 is output set 0 and 32769 is set 1
and 327611 is set 3. 0 is no action.
stop output – when an event occurs, the Point Manager will generate a
output stop operation for the specified row. (See the “KS” command).
If this number is greater than 32768 (8th bit set) then this parameter
refers to a set of outputs where 32768 is output set 0 and 32769 is set 1
and 327611 is set 3. 0 is no action.
Is event filled – the Event Log is full and the Point Manager has stopped all
logging to the Event and Historical Logs.
Is history filled – the Historical Log is full and the Point Manager has
stopped all logging to the Event and Historical Logs
Login Level
Login Level:
CESL – Configure
CERL – Data
Description
All event actions except ‘N’ cause the Point Manager to stop logging to both Event
and Historical Logs when either the Logs become full. To re-enable logging, clear
the Log that is full. When the event action is ‘N’, the Point Manager will allow the
Logs to rollover when full and thus overwriting the oldest records with the newest.
Note: other event actions such as email and triggering outputs will still operate even
though the Point Manager may not log records because the Event and/or Historical
Log is full.
Examples
80 • Commands
Point Manager Manual
Command:
CESLL,0,0
Response: CESLL
Remarks:
Set the Point Manager to stop logging to the Event and
History Logs when either Log is full.
Point Manager Manual
Commands • 81
‘CESP’ & ‘CERP’ - Configure/Read Sensor I/O Point
Events
Command Options
Command/Response Syntax
Parameters
CE<S|R>P
S – set the sensor I/O point events
R – read the sensor I/O point events
Command:
CESPsensor index: I/O point index (I/O point event setup)1..(I/O
point event setup)n
Response:
CESP
Command:
CERPsensor index: I/O point index
Response:
CERP,sensor index: I/O point index (I/O point event setup)1..(I/O
point event setup)n
Where:
sensor index – sensor row in the sensor table (1-100)
I/O point index – index number of the I/O point for the selected sensor (1
to maximum of 5)
(I/O point event setup) – see description below for more information
n – number of events setup for I/O Point. Analog I/O points can have 3
events configured. Integer I/O points can have 2 events configured.
State and Data I/O Points only have 1 event configured
More Parameters
Sensor I/O Point Event Setup
Point Manager supports 4 type of sensor I/O points:
Analog
Ahigh value, high value action, low value, low value action,
hysteresis[,high span, high span action, low span, low span acion, high
exit action, low exit action, high value start ouput, high value stop
output, low value start output, low value stop output, high span start
output, high span stop output, low span start output, low span stop
output, high exit start output, high exit stop output, low exit start
output, low exit stop output]
A is the flag for an Analog I/O point type
“action” – event actions that tell the Point Manager what to do with the
event. All event actions have the following options: ‘N’ - do nothing,
‘E’ – email, ‘L’ – log event in the Event Log, ‘M’ – log and email, ‘A’
– alarm and log the event, and ‘B’ – alarm, log and email.
“start output” – when an event occurs, the Point Manager will generate a
output start operation for the specified row. (See the “KS” command).
If this number is greater than 32768 (8th bit set) then this parameter
refers to a set of outputs where 32768 is output set 0 and 32769 is set 1
and 327611 is set 3. 0 is no action.
“stop output” – when an event occurs, the Point Manager will generate a
output stop operation for the specified row. (See the “KS” command).
82 • Commands
Point Manager Manual
If this number is greater than 32768 (8th bit set) then this parameter
refers to a set of outputs where 32768 is output set 0 and 32769 is set 1
and 32771 is set 3. 0 is no action.
high value - when the analog value of the sensor is equal to or exceeds this
value, the Point Manager will trigger an event (entered in engineering
units)
low value - when the analog value of the sensor is equal to or below this
value the Point Manager will trigger an event (entered in engineering
units)
hysteresis – controls when the reading can trigger another event. When a
high threshold event has triggered, the sensor value must go below the
(high value – hysteresis) before another high threshold event can be
triggered. When a low threshold event has triggered, the sensor value
must go above the (low value + hysteresis) before another low
threshold event can be triggered. (entered in engineering units)
high span – time from when the high value event fired to when the span
event is fired. (ddhhmmss) When the value falls below the high value
– hysteresis the high span event expires without firing.
low span – time from when the low value event fired to when the span event
is fired. (ddhhmmss) When the value rises above the low value +
hysteresis the low span event expires without firing.
high exit – event fires when value falls below the high value - hysteresis
after the high value event fires.
low exit – event fires when value falls below the low value + hysteresis after
the low value event fires.
Example High Event Sequence
HT – High Threshold
HY – Hysteresis
S – High Span
1 – High Value event fires
2 – High Span event fires
3 – High Exit event fires
4 – High Value event fires again
Point Manager Manual
Commands • 83
Integer
Ibase value, increment, action, start output, stop output
I is the flag for an Integer I/O point type
base value – value at which the Point Manager will trigger the first event.
This value is a 32-bit integer value. Do not use the scaled value but the
raw integer or count.
increment – the increment value at the Point Manager that will trigger
additional events. This value is a 32-bit integer value.
action - ‘N’ - do nothing, ‘E’ – email, ‘L’ – log event in the Event Log, ‘M’
– log and email, ‘A’ – alarm and log the event, and ‘B’ – alarm, log and
email.
start output – when an event occurs, the Point Manager will generate a
output start operation for the specified row. (See the “KS” command).
If this number is greater than 32768 (8th bit set) then this parameter
refers to a set of outputs where 32768 is output set 0 and 32769 is set 1
and 327611 is set 3. 0 is no action.
stop output – when an event occurs, the Point Manager will generate a
output stop operation for the specified row. (See the “KS” command).
If this number is greater than 32768 (8th bit set) then this parameter
refers to a set of outputs where 32768 is output set 0 and 32769 is set 1
and 327611 is set 3. 0 is no action.
Data
Dchange action, change start output, change stop output
change action – trigger an event when the data changes. The following are
the possible actions: ‘N’ - do nothing, ‘E’ – email, ‘L’ – log event in
the Event Log, ‘M’ – log and email, ‘A’ – alarm and log the event, and
‘B’ – alarm, log and email.
Change start output – when an event occurs, the Point Manager will
generate a output start operation for the specified row. (See the “KS”
command). If this number is greater than 32768 (8th bit set) then this
parameter refers to a set of outputs where 32768 is output set 0 and
32769 is set 1 and 327611 is set 3. 0 is no action.
change stop output – when an event occurs, the Point Manager will generate
a output stop operation for the specified row. (See the “KS”
command). If this number is greater than 32768 (8th bit set) then this
parameter refers to a set of outputs where 32768 is output set 0 and
32769 is set 1 and 327611 is set 3. 0 is no action.
State
Sto 1 action, from 1 action, 1 state,…, to x action, from x action, x state[,to 1 start
output, to 1 stop output, from 1 start output, from 1 stop output,…, to x start output,
to x stop output, from x start output, from x stop output]
S is the flag for a State I/O point type.
84 • Commands
Point Manager Manual
“action” – event actions that tell the Point Manager what to do with the
event. All event actions have the following options: ‘N’ - do nothing,
‘E’ – email, ‘L’ – log event in the Event Log, ‘M’ – log and email, ‘A’
– alarm and log the event, and ‘B’ – alarm, log and email.
“start output” – when an event occurs, the Point Manager will generate a
output start operation for the specified row. (See the “KS” command).
If this number is greater than 32768 (8th bit set) then this parameter
refers to a set of outputs where 32768 is output set 0 and 32769 is set 1
and 327611 is set 3. 0 is no action.
“stop output” – when an event occurs, the Point Manager will generate a
output stop operation for the specified row. (See the “KS” command).
If this number is greater than 32768 (8th bit set) then this parameter
refers to a set of outputs where 32768 is output set 0 and 32769 is set 1
and 327611 is set 3. 0 is no action.
to 1 – when the sensor enter this state, the Point Manager will trigger an
event.
from 1 – when the sensor exits this state, the Point Manager will trigger an
event.
1 state – (T/F) – indicate through the “D” command and I/O Status page
that the I/O point is in a state of concern.
to x – when the sensor enter this state, the Point Manager will trigger an
event.
from x – when the sensor exits this state, the Point Manager will trigger an
event.
x state – (T/F) – indicate through the “D” command and I/O Status page
that the I/O point is in a state of concern.
Where: x is the number states. The number of states depends on the type of sensor.
Discretes have 2 states and Counter have 4.
Login Level
Point Manager Manual
Login Level:
CESP – Configure
CERP – Data
Commands • 85
Description
For Analog I/O points, Point Manager can trigger events or alarms when the reading
is above a high threshold or below a low threshold. The hysteresis controls when the
reading can trigger another event. When a high threshold event has triggered, the
sensor value must go below the (high value – hysteresis) before another high
threshold event can be triggered. When a low threshold event has triggered, the
sensor value must go above the (low value + hysteresis) before another low
threshold event can be triggered. The Point Manager will indicate a “state of
concern” when the sensor value is equal to or above the high threshold or equal to or
below the low threshold.
Note that the values in the Analog I/O Point response to the “CERP” command may
be different from the values entered in the setup command. For the Analog I/O
Point, Point Manager converts and stores the values at the resolution of the sensor.
The values that the Point Manager returns in response to the “CERP” command are
the actual values used internally when making the comparison for the thresholds and
hysteresis. The difference in values can be as much as +/- ½ the scale.
For Integer I/O points, Point Manager can trigger events or alarm when reading
reaches or exceeds a preset value and then trigger additional events at every
increment above the preset value.
For Data I/O points, Point Manager can trigger an event or alarm when the data
contents changes.
For State I/O points, Point Manager can trigger events or alarm when the I/O point
enters or leaves a selected state. Also the State I/O point state can be set up to show
the value in a “state of concern” for the “D” command and the I/O Status page.
Note: The sensor at this row must have been previously setup using the “CSS”
command otherwise the Point Manager will return an error 10.
Examples
Command:
CERP1:1
Response: CERP1:1
Remarks: Read the setup for the first sensor’s first I/O Point’s event
setup. This response indicates that no events have been set up for
this I/O Point.
Command:
CERP1:1
Response: CERP1:1
(A100.0000,L,60.0000,A,2.0000,00000000,N,00000000,N,N,N,0,0,0,0,0,0,0,0
,0,0,0,0)
Remarks: Point Manager has a high threshold of 100 and logs the event,
a low threshold of 60 and logs and alarms; and a hysterisis value of 3
Command:
CESP1:1(A100.0,L,60.0,L,2.0,00000200,A,00000200,L,L,L)
Response: CESP1:1
Remarks: Set the first sensor’s first I/O Points events for the
following: high value of 100 and log the event; low value of 60 and log
the event; hysterisis of 2.0; high span for 2 minutes and both log and
alarm event; low span for 2 mintues and log event; log both high and
low exit events.
Command:
CERP4:1
Response:
CERP4:1(SL,N,F,N,N,F,L,N,F,A,N,F,0,0,0,0,0,0,0,0,0,0,0,0,0,0,0,0)
Remarks: This is the default setup for the State I/O Point type events.
All the events are turned off.
86 • Commands
Point Manager Manual
Command:
CESP4:1(SN,N,F,A,N,T,N,N,F,N,N,F)
Response: CESP4:1
Remarks: This command sets the first I/O Point State events of the 4th
sensor. Point Manager is set up so that when sensor transitions to the
second state, the Point Manager will trigger an alarm and start the
calling mechanism based on the Media Callout Table. Also while the
sensor value is the second state, Point Manager will indicate a “state
of concern” in the I/O Status page and the response to the “D” command.
Command:
CESP4:2(I1000,1000,L)
Response: CESP4:2
Remarks: This command sets the second I/O Point Integer events of the
4th sensor. Point Manager is set up so that when the sensors integer
value reaches 1000 or greater or intervals of 2000, the Point Manager
will trigger an event and record it in the Event Log.
Command:
CESP5:2(DA)
Response: CESP5:2
Remarks: This command sets the second I/O Point Data event of the 5th
sensor. Point Manager is set up so that when the Data I/O Point
changes value, the Point Manager will trigger an event, record it in
the Event Log and the start the calling mechanism based on the Media
Callout Table.
Point Manager Manual
Commands • 87
‘CESS’ & ‘CERS’ - Configure/Read Sensor Events
Command Options
Command/Response Syntax
Parameters
CE<S|R>S
S – set the sensor events
R – read the sensor events
Command:
CESSsensor index, max age, max age action, service action,
history on alarm[,online action, history on log, online start output, online stop
output, max age start output, max age stop output, service start output, service stop
output]
Response:
CESSsensor index
Command:
CERSsensor index
Response:
CERSsensor index, max age, max age action, service action,
history on alarm, online action, history on log, online start output, online stop
output, max age start output, max age stop output, service start output, service stop
output
Where:
“action” – event actions that tell the Point Manager what to do with the
event. All event actions have the following options: ‘N’ - do nothing,
‘E’ – email, ‘L’ – log event in the Event Log, ‘M’ – log and email, ‘A’
– alarm and log the event, and ‘B’ – alarm, log and email.
“start output” – when an event occurs, the Point Manager will generate a
output start operation for the specified row. (See the “KS” command).
If this number is greater than 32768 (8th bit set) then this parameter
refers to a set of outputs where 32768 is output set 0 and 32769 is set 1
and 327611 is set 3. 0 is no action.
“stop output” – when an event occurs, the Point Manager will generate a
output stop operation for the specified row. (See the “KS” command).
If this number is greater than 32768 (8th bit set) then this parameter
refers to a set of outputs where 32768 is output set 0 and 32769 is set 1
and 327611 is set 3. 0 is no action.
sensor index – sensor row in the sensor table (1-100)
max age – maximum age before firing the event ( 1 – 32767; 0 – no event )
service – the Point Manager will fire an event if it detects that the service
button on the sensor transmittor has been pressed..
history on alarm – (T/F) take a snap shot of all the readings of all the
sensors in the sensor table and store them in the history log when any
alarm event is triggered for this sensor.
online – the Point Manager will issue an event when it receives a
transmission from a sensor after the max age event has happened
(when the sensor is considered offline)..
history on log – (T/F) take a snap shot of all the readings of all the sensors
in the sensor table and store them in the history log when any event is
triggered for this sensor.
88 • Commands
Point Manager Manual
Login Level
Login Level:
CESS – Configure
CERS – Data
Description
With the “CESS” command, the Point Manager can trigger events/alarms based on
period of time a sensor has not transmitted or when the service button is pressed on
the sensor. The Point Manager can also be configured to store a snap shot of all the
current readings of all the sensors in the sensor table when any event occurs with the
specified sensor (including the sensors I/O point events). Point Manager can also
trigger an event when sensor comes back online after the max age event has fired.
Note: if a power down/up has occurred, the age event will not fire until the full age
time has expired.
Examples
Command:
CERS1
Response: CERS1,0,N,N,F,N,F,0,0,0,0,0,0
Remarks: This response is the default set up for a sensor. “1” is the
first row in the sensor table; “0,N” – no age event set; “N” – no
service event is set; “F” – no historical snap shot on alarm; “N” – no
online event is set; “F” – no historical snap shot on log event; no
outputs set up.
Command:
CESS1,600,A,L,F,A,F,0,0,0,0,0,0
Response: CESS1
Remarks: The first sensor in the sensor table is set up for the
following: “600,A” - alarm if the sensor age is 600 seconds or greater;
“L” – log into the Event Log if the service button was pressed; “F” –
no historical snap shot; “A” – alarm if the sensor comes back online.
Point Manager Manual
Commands • 89
‘CI’- Configure/Read Point Manager Static IP Address
Command Options
Command/Response Syntax
Parameters
CI<S|R>
S – set the Point Manager static IP address
R – read the Point Manager static IP address
Command:
[,port]
Response:
Command:
Response:
CISip address, subnet mask[, gateway address][,name server]
CIS
CIR
CIR, ip address, subnet mask, gateway address, name server, port
Where:
ip address – IP address formatted as xxx.xxx.xxx.xxx
subnet mask – subnet mask formatted as yyy.yyy.yyy.yyy
gateway address – gateway address formatted as zzz.zzz.zzz.zzz. (required
for email support)
name server – ip address of the name server formatted as vvv.vvv.vvv.vvv.
(required for email support)
port – IP port number (optional) (default is 1000)
Login Level
Login Level:
CIS – Configure
CIR – Data
Description
In order to use the Point Manager Ethernet interface, the Point Manager must be
assigned an IP address and a subnet mask. The gateway address is optional if all
communication is on a LAN (if not using email). The name server and gateway are
required when using email. Consult your network administrator for more
information.
The Point Manager will process the “CI” command through the communication
media. The Point Manager will disconnect the current TCP/IP session while
changing the IP address.
Note: Telenet uses port 23 by default.
Note: Use the “CID” command to dynamically set the IP address using DHCP. The
“IP” command provides the current IP address whether it is dynamically or statically
assigned.
The default IP address is 192.168.1.55
The default subnet mask is 255.255.255.0
The default gateway address is “” (null)
The default name server address is “” (null)
The default port is 1000
Note: The set parameters will not take affect until the current connection for the
effected media is closed. If the media is not connected then the parameters will take
affect right away. The connection can be closed by the host closing the connection,
inactivity time has expired, power down/up or the “LOC” command being received.
90 • Commands
Point Manager Manual
Examples
Command:
CIS192.168.1.46,255.255.255.0
Response: CIS192.168.1.46
Remarks: set IP address to “192.168.1.46” and the subnet mask
to”255.255.255.0”. No gateway address and name server were set.
Command:
CIR
Response: CIR,192.168.1.46,255.255.255.0,,,1000
Remarks: the Point Manager’s IP address is “192.168.1.46” and the
subnet mask is ”255.255.255.0”. No gateway address and name server
were set. The default port of 1000 is being used
Command:
CIS192.168.1.55,255.255.255.0,192.168.1.200,192.168.1.199,1300
Response: CIS
Remarks: the Point Manager’s IP address is “192.168.1.55” and the
subnet mask is ”255.255.255.0”. Gateways is “192.168.1.200” and the
name server is “192.168.1.199”. Gateway and the name server are
necessary for email. The port number is 1300.
Point Manager Manual
Commands • 91
‘CID’- Configure DHCP
Command Options
Command/Response Syntax
Parameters
CID<S|R>
S – set the DHCP settings
R – read the DHCP settings
Command:
CIDSdynamic,fallbackstatic
Response:
CIS
Command:
CIDR
Response:
CIDR,dynamic,fallbackstatic
Where:
dynamic – use DHCP to dynamically set the IP address, subnet mask, gateway,
name server and SMTP server.
fallbackstatic – If the Point Manager cannot find the DHCP Server and the Point
Manager has not previously had an IP address assigned, it will fall back to
the static IP address settings. If this parameter is “F”, the Point Manager
will fall back to the IP address “0.0.0.0”.
Login Level
Login Level:
CIDS – Configure
CIDR – Data
Description
Use the “CID” command, to use the static IP address settings or have the IP address
settings dynamically assigned. Use the “IP” command to read the current IP
settings. The Point Manager will disconnect the current TCP/IP session if the IP
address is changed.
Note: The set parameters will not take affect until the current connection for the
effected media is closed. If the media is not connected then the parameters will take
affect right away. The connection can be closed by the host closing the connection,
inactivity time has expired, power down/up or the “LOC” command being received.
Examples
Command:
CIDST,T
Response: CIDST
Remarks: Set to dynamically assign IP address using DHCP. If the IP
address cannot be assigned then fallback to either the previous dynamic
address or the static address
92 • Commands
Point Manager Manual
‘CIP’- Configure TCP/IP Ports
Command Options
Command/Response Syntax
Parameters
CIP<S|R>
S – set the TCP/IP ports
R – read the TCP/IP ports settings
Command:
CIPShttpport, cmdport
Response:
CIPShttpport
Command:
CIPR
Response:
CIPR,httpport, cmdport
Where:
httpport – the http port (web page port) (default: 80). If set to 0 then the web
page is not accessible.
Cmdport – the command TCP/IP port (default: 1000). If set to 0 then the
TCP/IP command port will not respond.
Login Level
Login Level:
CIPS – Configure
CIPR – Data
Description
Great care must be taken when using this command. You can unintentionally
change these setting in such a way that you may not be able to access the Point
Manager via TCP/IP.
Note: The set parameters will not take affect until the current connection for the
effected media is closed. If the media is not connected then the parameters will take
affect right away. The connection can be closed by the host closing the connection,
inactivity time has expired, power down/up or the “LOC” command being received.
Examples
Command:
CIPS0,0
Response: CIPS0
Remarks: Turn off listening of HTTP and TCP/IP Command ports.
Point Manager Manual
Commands • 93
‘CM’ – Configure/Read Media Callout Table
Command Options
Command/Response Syntax
Parameters
CM<S|R|C>
S – set the Media Callout Table parameters
R – read the Media Callout Table parameters
C – clear the Media Callout Table parameters
Command:
Response:
Command
Response:
Command:
Response:
CMStries,time between tries(cCpath)1...(cCpath)n
CMS
CMR
CMR, tries,time between tries(cCpath)1...(cCpath)n
CMC
CMC
Where:
tries – the number of times to try this media path (1-255)
time between tries – the number seconds the Point Manager waits before
calling (1-65535 seconds)
C – media choices: ‘M’ – Modem; ‘T’ – TCP/IP; ‘R’ – Command Radio;
‘S’ – Local Serial port; ‘2S’ – Receiver Serial port
c – communication port number. For port number of 1 this value is
optional and assumed.
path – media connection path. For Modem: “[ATcommands]phone
number[:dialtime]” where optional AT commands can be included to
configure Modem before dialing; phone number may include dialing
commands (if AT option is used, must prefix phone number with “D”);
and optional dialtime in seconds (60 s. default). See Appendix for a
list of AT Commands. For TCP/IP: host name:port or “ip
address:port” number (ex. 192.168.1.30:1000). If port is not specified,
then the default is assumed to be 1050. For Serial ports: path is a
wakeup string to be sent. (80 characters maximum)
1..n – number of media callout entries. A maximum of 5 can be configured.
Login Level
94 • Commands
Login Level:
CMS – Configure
CMR – Data
CMC – Configure
Point Manager Manual
Description
Media Callout Table command instructs the Point Manager how to make a
connection when an alarm or Periodic Interval Callout occurs. The Point Manager
will try the first entry in the Media Callout Table the number of specified tries before
moving to the next Media Callout Table entry. If Point Manager receives a “SR”
command during this process, the Point Manager will halt execution of the Media
Callout logic. If the Point Manager does not receive a “SR” command during the
execution of the Media Callout logic, the Point Manager will halt execution with the
last try of the last entry in the Media Callout Table.
For the media choice type ‘M’, the Point Manager can receive dialing commands in
the path string. Normally the phone number is all that is needed in the path string. If
the path string starts with “AT”, the Point Manager will send the path string to the
Modem without prefixing the “ATD” modem command to the string. Example:
“ATX0D18002445678”. The following is a list of possible modem commands:
D – dial command
BN – communication standard option
Hn – switch hook control option
On – on-line command
Sn= - write to an S Register
Xn – Call Progress Option – X0: no dial tone detection
Dial modifiers:
P – pulse dial
T – tone dial
W – wait for dial tone
, - pause
! – flash hook
@ - wait for quiet anser command
; - return to idle state
The dialtime parameter is optional.
The Modem path also has a substitution feature where the path contents can be
inserted into the Push command string as specified in the “CTT” command. If the
Push command string contains a substring “%%h”, the Point Manager will insert and
replace the “%%h” string with the modem path contents. If the Push command
string contains a substring “%%p”, the Point Manager scans the modem path for a ‘|’
delimiter, takes the contents after the delimiter and inserts and replaces the “%%p”.
If the delimiter does not exist, then the Point Manager substitutes “1050”. The
mechanism is used for cellular modems where a host name or IP address needs to be
inserted into the Push command string. Here is an example command:
“CMS2,10(Mwww.acmeweb.com|440)”. In this example the Point Manager will
initiate a connection to “www.acmeweb.com” at port 440.
For the “R”, ‘S’ and ‘2S’ media types, the Point Manager will wait up to 30 seconds
from when the path string is sent for a character from the host. It the Point Manager
does not receive a valid command, the push attempt is considered failed. If a valid
command is received, the Point Manager will consider it as a successful connection.
Note: Both the Media Callout and the Pass-Thru Media Callout tables cannot have
the same media types listed.
The “CMC” command clears the Media Callout Table. The Point Manager will not
callout when alarms occur.
By default the Point Manager will wait 60 seconds for a modem connection and 20
seconds for a TCP/IP connection.\
Use the “ID” command to help in troubleshooting the Media Callout Table.
Point Manager Manual
Commands • 95
Note: For the TCP/IP path, if a host name is used, the Name Server parameter must
be specified in order for the Point Manager to resolve the name to an IP address. See
the “CI” and “IP” commands.
Examples
Command:
CMS5,60(T192.168.1.29:1000)(M9,18002335687)
Response: CMS5
Remarks: try each media 5 times with 60 seconds between tries. The
first media to call is TCP/IP at address “192.168.1.29” at port “1000”.
The second media to try is the Modem. Point Manager will call the
phone number “18002335687”. The “,” is a dialing attribute command
that is part of the Hayes ATD command. The “,” means to pause while
dialing.
Command:
Response:
CMR
CMR,5,60(T192.168.1.29:1000)(M9,18002335687)
Command:
CMS4,60(MATX0D2335867)
Response: CMS4
Remarks: “ATX0” turns off dialtone detection. “ATDT” is the dial
command is necessary when the media path is prefixed with “AT”.
Command:
CMS8,120(M9,18002338832:100)
Response: CMS8
Remarks: “,” is the modem pause attribute after the number “9”. “:100”
– Point Manager will wait up to 100 seconds for a connection to be
established.
96 • Commands
Point Manager Manual
‘CN’ – Configure/Read Email Destination
Command Options
Command/Response Syntax
Parameter
CN<S|R|C>
S – set email destination
R – read email destination
C – clear the email parameters
Command:
Response:
Command:
Response:
Command:
Response:
CNSsmtp server, from address, to address
CNS
CNR
CNR,smtp server, from address, to address
CNC
CNC
Where:
smtp server – ip address of the smtp email server with format as
xxx.xxx.xxx.xxx or name (50 characters maximum)
From address – “from” email address (25 characters maximum)
To address – “to” email address(es). If more than one email address is
listed then each address is seperated by “;”. Spaces are not allowed (75
characters maximum)
Login Level
Description
Login Level:
CNS – Configure
CNR – Data
CNC – Configure
The “CN” command setups up the Point Manager with the necessary information to
send an email to another host triggered by an event. The smtp server is the address
of the external smtp email server. Your ISP or network administrator can provide
this email server. The from address needs to be in the format of
[email protected].
The emails are formatted like the responses to the “ER” and “ERV” commands. For
more information about the email data see the “ER” command description. The first
line in the email is like the “ER” command response. The second line is like the
“ERV” command response. The subject line is the Point Manager identification
name (as set in the “CD” command).
Use the “IE” and “PE” commands to aid in troubleshooting email problems.
NOTE: Before you configure email notification you must be sure you have fully
specified your gateway and DNS server using the CIR command or have been set
dynamically from the DHCP Server. To find your default gateway and DNS server,
run ‘ipconfig’ on the PC. (Go to Start|Run and type ‘ipconfig’ –without the quotes-in the box.)
NOTE: The Point Manager may override the smtp server entry if DHCP support is
enabled and the DHCP Server assigns an address for the SMTP Server.
Examples
Command:
CNSsmtp.xyz.com,Point [email protected],[email protected]
Response: CNSsmtp.xyz.com
Remarks: the smtp server is “smtp.xyz.com”. The from address is
[email protected]. The to address is [email protected]
Point Manager Manual
Commands • 97
Command:
CNSsmtp.xyz.com,Point
[email protected],[email protected];[email protected]
Response: CNSsmtp.xyz.com
Remarks: an example showing multiple “to” addresses
98 • Commands
Point Manager Manual
‘CO’ – Configure/Read Sensor I/O Corrections
Command/Response Syntax
Parameters
Command:
Response:
Command:
Response:
Command:
Response:
Command:
Response:
COScorrection id,correction kind,page index, ..data…
COScorrection id
CORrow,page index
CORrow,correction id, correction kind, page index, ..data…
CORC
CORcorrection table count
COC<A|correction id>
COC<A|correction id>
Where:
Correction id – a handle that identifies the correction table. The correction
id is assigned by the user. Correction ids greater than 127 refer to
correction tables stored permenantly in the Point Manager. Correction
ids below 128 refer to correction table entries that were set up by the
user.
Correction kind – refers to the type of correction implemented: 0 – NTC
Thermistor; 1 – Correction Offset; 2 – Lookup Table
Page index – page number start at 0 of the Correction Table
Correction table count –The number of Tables in Point Manager
…data… - specific data for the type of correction being applied.
Login Level
Login Level:
COS – Configure
COR – Configure
COC – Data
Description
Point Manager can adjust an Analog I/O Point’s value to linearize the point, apply a
calibration or correct the value. Point Manager supports 3 types of Sensor I/O
corrections:
NTC Thermistor – Point Manager linearizes the output of thermistors
Correction Offset – Point Manager adjust an analog value based on a table of offsets
Lookup Table – Point Manager replace the analog value with value found in the
lookup table.
Correction tables are downloaded to the Point Manager and Point Manager also has
some permanent predefined Correction tables. The Correction Table is referenced
by the user with a Correction ID. Corection ID’s that are equal to or greater than
128 reference permanent Correction tables. Correction ID’s less than 128 reference
Correction tables that are download to Point Manager.
A Correction ID is assigned to the Analog I/O point. A value of 0 means no
correction is implemented. See the CSS command for more information. If the
Correction ID is assigned to the Analog I/O point but the Correction table does not
exist for the Correction ID, Point Manager does not implement any corrections to
that I/O point.
Use the “O” command to test the Correction function.
Point Manager Manual
Commands • 99
NTC Thermistor
Command:
COScorrection id,correction kind,page index,divider
resistor,normalizing resistor,A,B,C,D
Response:
COScorrection id
Command:
CORrow,page index
Response:
CORrow,correction id, correction kind, page index,divider
resistor,normalizing resistor,A,B,C,D
Where:
divider resistor – physical resistor value of the input,
normalizing resistor – constant parameter of the type of thermistor
A,B,C,D – linearization constants
Point Manager uses the Stein-Hart equation to linearize the output of thermistors.
See “Appendix: Using Thermistors” for more information.
Point Manager has a preset NTC Thermistor correction at Correction Id 128. The
values for this correction are:
divider resistor:
10,000 ohms
normalizing resistor:
10,000 ohms
Fitting constants:
A:
3.3539264E-03
B:
2.5609446E-04
C:
1.9621987E-06
D:
4.6045930E-08
Correction Offset
Command:
COScorrection id,correction kind,0,no points,start value,interval
Response:
COScorrection id
Command:
COScorrection id,correction kind,>0, datan1..datan20max
Response:
COScorrection id
Command:
CORrow,page index
Response:
CORrow,correction id, correction kind, 0, no pages, no
points,start value,interval
Response:
CORrow,correction id, correction kind, >0, datan1..datan20max
Where:
no points – number of points to apply the correction offset. This the number points
in the table.
start value – the starting value from the transmitter to apply the correction offset
interval – the intervals from starting value to apply the corresponding correction
offset
datan1..datan20max – individual correction offsets. The Point Manager can only
accept a maximum of 20 offsets per page. If more than 20 offsets, use multiple
pages. Example: 42 offsets: 2 pages with 20 offsets each and 1 page with 2 offsets.
The range of the offset is -128 to 128.
no pages – number of pages for the table.
Point Manager takes the output of a transmitter and finds the correction offset
corresponding to the starting value and interval in the table and applies the offset. If
the output of the transmitter does not fall on the interval then the Point Manager will
interpolate the offset and apply it. If the output falls outside of the table, Point
Manager will apply the closest offset.
100 • Commands
Point Manager Manual
Correction Lookup
Command:
COScorrection id,correction kind,0,no points,start value,interval
Response:
COScorrection id
Command:
COScorrection id,correction kind,>0, datan1..datan20max
Response:
COScorrection id
Command:
CORrow,page index
Response:
CORrow,correction id, correction kind, 0, no pages, no
points,start value,interval
Response:
CORrow,correction id, correction kind, >0, datan1..datan14max
Where:
no points – number of points to apply the correction lookup. This the number points
in the table.
start value – the starting value from the transmitter to apply the correction lookup
interval – the intervals from starting value to apply the corresponding correction
lookup
datan1..datan20max – individual correction offsets. The Point Manager can only
accept a maximum of 14 entries per page. If more than 20 entries, use multiple
pages. Example: 30 entries: 2 pages with 14 entries each and 1 page with 2 entries.
The range of the lookup values is –32768 to 32767.
no pages – number of pages for the table.
Point Manager takes the output of a transmitter and finds the correction lookup value
corresponding to the starting value and interval in the table and applies the lookup
value. If the output of the transmitter does not fall on the interval then the Point
Manager will interpolate the lookup value and apply it. If the output falls outside of
the table, Point Manager provides the output value.
Examples
Command:
COS10,1,0,127,0,16
Response: COS10
Command:
COS10,1,1,2,4,3,1,-1,-2,-3,-4,-4,-5,-2,-1,-3,-5,-5,-6,-6,5,-5,-4
Response: COS10
Command:
COS10,1,2,-4,-2,-4,-4,-4,-4,-4,-4,-4,6,8,8,6,4,3,1,2,4,4,3
Response: COS10
Command:
COS10,1,3,1,-1,-2,-3,-1,-1,-2,-2,-2,1,1,0,1,0,0,0,1,1,0,1
Response: COS10
Command:
COS10,1,4,2,2,2,2,1,2,4,2,4,4,4,4,5,5,4,3,4,5,5,9
Response: COS10
Command:
COS10,1,5,9,14,13,13,13,14,14,13,14,14,13,10,12,12,14,14,13,13,14,1
4
Command:
COS10,1,6,15,17,16,17,17,19,20,20,20,20,19,20,20,20,20,20,22,22,23,
25
Response: COS10
Command:
COS10,1,7,26,25,26,26,25,25,26
Response: COS10
Remark: Download an Offset Correction Table referenced by correction
id 10, has 127 points, corrections start at 0 and offsets occur at
interval of every 16.
Command:
COS11,2,0,10,1000,16
Response: COS11
Command:
COS11,2,1,2000,2016,2032,2048,2064,2080,2096,2112,2128,2144
Response: COS11
Remark: Download a Lookup Correction Table referenced by correction 11,
has 10 points, corrections start 1000 and look ups at interval of 16.
Point Manager Manual
Commands • 101
Command:
CORC
Response: CORC,6
Remark: Determine the number of Correction Tables in Point Manager.
This number includes the permanent tables.
6.
Command:
COR5,0
Response: COR5,11,2,1,0,10,1000,16
COR5,1
Response:
COR5,11,2,1,2000,2016,2032,2048,2064,2080,2096,2112,2128,2144
Remark: Read the 5th Correction table. This table is a Lookup Table.
Command:
COR6,0
Response: COR6,10,1,7,0,127,0,16
Command:
COR6,1
Response: COR6,10,1,1,2,4,3,1,-1,-2,-3,-4,-4,-5,-2,-1,-3,-5,-5,-6,6,-5,-5,-4
Command:
COR6,2
Response: COR6,10,1,2,-4,-2,-4,-4,-4,-4,-4,-4,4,6,8,8,6,4,3,1,2,4,4,3
Command:
COR6,3
Response: COR6,10,1,3,1,-1,-2,-3,-1,-1,-2,-2,-2,1,1,0,1,0,0,0,1,1,0,1
Command:
COR6,4
Response: COR6,10,1,4,2,2,2,2,1,2,4,2,4,4,4,4,5,5,4,3,4,5,5,9
Command:
COR6,5
Response:
COR6,10,1,5,9,14,13,13,13,14,14,13,14,14,13,10,12,12,14,14,13,13,14
,14
Command:
COR6,6
Response:
COR6,10,1,6,15,17,16,17,17,19,20,20,20,20,19,20,20,20,20,20,22,22,2
3,25
Command:
COR6,7
Response: COR6,10,1,7,26,25,26,26,25,25,26
Remark: Read the 6th Correction table. This table is a Correction
Offset Table.
102 • Commands
Point Manager Manual
‘CPD’ & ‘CPC’ – Configure Login Passwords
Command/Response Syntax
Parameters
Command:
Response:
Command:
Response:
CPDdata password
CPD
CPCconfigure password
CPC
Where:
data password – login data password (7 characters maximum). Enter a
blank password to clear.
config password – login config password (7 characters maximum). Enter a
blank password to clear.
Login Level
Login Level:
CPD – Configure
CPC – Configure
Description
Point Manager can control access to the medias through passwords. There are two
levels of password access. For “Data” login, Point Manager allows the access of the
data information of the system such as the current sensor readings, Web pages,
Historical and Event Logs and setup information. For “Configure” login, Point
Manager allows the same access as the “Data” login as well as access to change any
of the setup information. If the Configure login password is blank, the Point
Manager will assume the Data Login password for the Configure Login. Use the
Login command “LI” to control and gain access.
To clear the passwords, you must set the Data password to blank and then the
Configure password to blank.
Note: Login password is case sensitive.
Note: The Web page login through a browser requires the Data or Configure
password (if set).
Note: If you forget your password, you will not be able to collect the data in the
Point Manager. You will have to reset the Point Manager to factory defaults and set
up new passwords.
Examples
Command:
CPDadata
Response: CPDadata
Remark: The “Data” login password was configured to “adata”.
Command:
CPCaconfig
Response: CPCaconfig
Remark: The “Configure” login password was configured to “aconfig”.
Point Manager Manual
Commands • 103
‘CR’ - Configure Radio
Command Options
Command/Response Syntax
Parameters
CR[S|R]
R – read radio parameters
S – set radio parameters
Command:
Response:
Command:
Response:
CRS network id, hoptable
CRS network id
CRR
CRR,network id, hoptable
Where:
network id – network identification
hoptable – frequency hop table setting
Login Level
Login Level:
CRS – Configure
CRR – Data
Description
The Radio media is an option and typically a spread-spectrum 900Mhz radio that can
receive sensor packets and exercise the Point Manager’s command/response
protocol. The default is 505 for the network id and 5 for the hop table.
Note: The set parameters will not take affect until the current connection for the
effected media is closed. If the media is not connected then the parameters will take
affect right away. The connection can be closed by the host closing the connection,
inactivity time has expired, power down/up or the “LOC” command being received.
104 • Commands
Point Manager Manual
Examples
Command:
CRS399,1
Response: CRS399
Remarks: Set the radio option to hop table 399 and network id 1
Command:
CRR
Response: CRR,505,5
Remarks: The radio is set to hop table 505 and network id 5
Standard Radio Settings
Channel
Point Manager Manual
Network
Address
Network
Hop
Table
1
399
1
2
398
2
3
397
3
4
395
4
5
555
5
6
901
6
7
(default)
505
5
Commands • 105
‘CS’ - Configure/Read Sensor Setup
Command Options
Command/Response Syntax
CS<S|R|C[F]|D[F]>[n]
S – set the sensor setup information
R – read the sensor setup information
C – clear the sensor setup table
D – delete sensor from the sensor table
F – force the sensor setup table to cleared
Command:
CSSn,serial no, label(sensor point setup)1…(sensor point setup)x,
sensor type
Response:
CSSn
Command:
CSRn
Response:
CSRn,sensor type,serial no,label(sensor point setup)1…(sensor
point setup)x
Command:
CSC
Response:
CSC
Command:
CSCF
Response:
CSCF
Command:
CSDn
Response:
CSDn
Command:
CSDFn
Response:
CSDFn
Parameters
Where:
F – force Point Manager to clear the Historical and Event Logs before
either clearing the sensor table or deleting the sensor.
n – sensor index. Each sensor is placed in a row in the sensor table.
serial no – unique serial number of the sensor (16 characters)
label – identification label for the sensor. This label is displayed with the
sensor information in the I/O Status page. (16 characters maximum)
sensor I/O point setup – described below
x – number of sensor points (5 maximum). This number depends on the
type of sensor. See the table below called “Sensor I/O Definitions”.
sensor type – type of sensor enumerated. See table below for possible
values.
Sensor type
1
2
3
4
5
6
8
9
11
106 • Commands
Sensor Types
Description
Temperature
Humidity/Temperature
Light
IButton (Point PIR)
Analog
Counter
Analog with Data
Analog with Temperature (compensated)
Discrete
Point Manager Manual
12
13
14
15
16
17
18
20
23
27
28
29
30
More Parameters
Thermistor
16-bit signed Analog
Counter Temperature
Fast Counter Temperature
Alarm Temperture
Space Temperature Override
Directional Counter
ID Reader
Point Proximity2
Dual Analog (1 Channel)
Dual Analog (2 Channel)
Counter Analog
Humidity/Temperature2
Sensor I/O Point Setup
Point Manager supports 4 types of sensor I/O points:
Analog
AScale,Offset,Units,Decimal_Places,Correction ID[, Tag] are Analog I/O point
options
A is the flag for an Analog I/O point type
Scale - the raw data is multiplied by this value
Offset - this value is applied to the raw data after the scale has been applied
Units - this is a friendly description of the units used for presentation (6
characters maximum)
Decimal_Places - this is the number of decimal digits used for presentation
Correction ID – determines the type of correction that is applied to the
analog value. 0 is Linear (or no correction). Values greater or equal to
128 are predefined in the Point Manager. Values less then 128 are user
defined. See the “CO” command for more information.
Tag – user defined tag (0 to 255).
Integer
IScale,Offset,Units,Decimal_Places[, Tag] are Integer I/O point options
I is the flag for an Integer I/O point type
Scale - the raw data is multiplied by this value
Offset - this value is applied to the raw data before the scale has been
applied
Units - this is a friendly description of the units used for presentation
Decimal_Places - this is the number of decimal digits used for presentation
Tag – user defined tag (0 to 255).
Point Manager Manual
Commands • 107
Data
D<T|F>[, Tag] are Data I/O point options
D is the flag for a Data I/O point type
T - display character data
F - display as Serial Number in ASCII Hexadecimal
A – display as ASCII Hexadecimal
Tag – user defined tag (0 to 255).
State
SName1[,…Namex][, Tag] are State I/O point options
S is the flag for a State I/O point type
Name – name used to describe each state used in presentation (8 charcters
maximim)
Tag – user defined tag (0 to 255).
Login Level
108 • Commands
Login Level:
CSS – Configure
CSR – Data
CSC – Configure
Point Manager Manual
Description
Each sensor fills an entry or row in the Point Manager sensor table. The sensor
index then is used to both originally define the where the sensor is located in the
sensor table and then used to retrieve sensor information (both data and setup).
Once a sensor has been defined and placed in the sensor table, the sensor I/O point
type cannot be changed. The Point Manager will return an error 6 when the sensor
type or the I/O type is attempted to be changed. You will have to clear the sensor
table and send the setup information again for all sensors. You can change the other
attributes of the sensor.
The value of an Integer I/O point will be displayed as ( sensor data - offset ) *
scale.
The value of an Analog I/O point will be displayed as (sensor data * scale) + offset.
For some specific types of Analog I/O points, the scale and offset are provided with
the documentation for sensor. For example, the scale and offset for the Humidity
I/O point of the Point Humidity is 1 and 0. For more general purpose Analog I/O
points, you will have to calculate the scale and offset. You need to know the
resolution of sensor and span of what you measuring. If you know or can calculate
two points of measurement, you can use the following formula to calculate the scale
and offset:
Scale = (Engr Value2 – Engr Value1)/ (Sensor Reading2 – Sensor
Reading1)
Offset = Engr Value2 – Sensor Reading2 * scale
Where:
Engr Value – engineering value expressed in engineering units (such as
PSI, volts and so on).
Sensor Reading – reading directly from the sensor that is associated
with the corresponding engineering value.
All temperature I/O points are treated as signed 16 bit values where 1 bit is 1/16th of
a Degree Celsius. For units of Celsius Degrees, use a scale of 0.0625 and a offset of
0. For units of Fahrenheit Degrees, use a scale of 0.1125 (1.8 * 0.0625) and an
offset of 32.
All Analog I/O points are treated as signed 16 bit values. If the sensor is a 12 bit
Analog Sensor it is normalized to 16 bits (multiplied by 16). The exception is
Humidity where the Humidity value is given in 8 bits and then passed on as 8 bits (0
to 255).
Note: If Point Manager is in Auto Add mode (either “AT” or “AS”), the Point
Manager may place sensor setup information automatically into the sensor table.
When the Point Manager does this, it will append the sensor setup to the end of the
sensor table and it will assume default values for the setup. For more information
see the command “A” – Auto Add Mode.
Point Manager Manual
Commands • 109
Sensor
Type
Type
Description
1
Temperature
(Point Temp)
Humidity/
Temperature
(Point Humid)
Light (Point
Light)
IButton (Point
PIR)
Analog (Point
Analog)
IR Counter,
and LSX
2
3
4
5
6
8
9
11
12
13
14
Analog with
Data
Analog /
Temperature
Discrete
Thermistor
16-bit signed
Analog
Counter
Temperature
No.
I/O
Pts
1
Sensor I/O Definitions
I/O Point
Example I/O Point Setup String
Types
Analog
(A0.1125,32.0000,degF,1,0)
2
Analog,
Analog
(A1,0,%RH,0,0)
(A0.1125,32.0,degF,1,0)
1
Analog
(A0.02440,0.00000,%,2,0)
1
Data
(DF)
1
Analog
(A0.02440,0.00000,%,2,0)
3
State,
Integer,
Integer
Analog,
Data
Analog,
Analog
State
Analog
Analog
(SBlocked,Open,Closed,Error)
(I1,0,open,0)
(I1,0,close,0)
(A0.02440,0.00000,%,2)
(DT)
(A0.244,0.0,PSI,1,0)
(A0.1125,32.0000,degF,1,0)
(Soff,on)
(A0.1125,32.0000,degF,1,0)
(A0.02440,0.00000,%,2,0)
State,
Integer,
Analog
Integer,
Analog,
Integer
Analog
State,
State,
Analog,
Data
Analog,
State,
Data
State,
Integer,
Integer
(STrans.,Open,Closed,Error)
(I1,0,count,0)
(A0.1125,32.0000,F,1,0,0)
(I1,0,count,0)
(A0.1125,32.0000,F,1,0,0)
(I1,0,sec,0)
(A0.1000,0.0000,Rate,1,0,0)
SOK,Alarm,0)
(SOK,Alarm,0)
(A0.1125,32.0000,F,1,0,0,0)
(DT,0)
(A0.1125,32.0000,F,1,0,0,0)
(SNormal,Occupy,Unocc.,0)
(DT,0)
(SBlocked,Okay,PwrAlrm,BattAlr
m,0)
(I1,0,count,0,0)
(I1,0,count,0,0)
(SBatt OK,LowBatt,0)
(STamp OK,Tamper,0)
(SClosed,DoorOpen,HeldOpen,Hel
dOpen,0)
(DT,0)
(Sstate1,Object,NoObject,state2,0)
(I1,0,count,0,0)
(I1,0,sec,0,0)
(I1,0,sec,0,0)
(S1,2,3,4,0)
2
2
1
1
1
3
15
Fast Counter
Temperature
3
16
Alarm
Temperature
4
17
Space
Temperature
Override
Directional
Counter
3
20
ID Reader
4
State,
State,
State,
Data
23
Proximity2
4
State,
18
3
Integer,
Integer,
Integer,
110 • Commands
Point Manager Manual
27
28
Dual Analog
Dual Analog
1
2
29
CounterAnalog
2
30
Humidity/
Temperature
(Point Humid2)
2
State
Analog
Analog
Analog
State
Integer
Analog
Analog
Analog
(A0.00305,0.00000,%,2,0,0)
(A0.00305,0.00000,%,2,0,0)
(A0.00305,0.00000,%,2,0,0)
(STrans.,Open,Closed,Error,0)
(I1,0,count,0,0)
(A0.00305,0.00000,%,2,0,0)
(A0.0244,0.0000,%RH,1,0,0)
(A0.0549,-40.0000,F,1,0,0)
The “CSC” command clears all the entries in the sensor table. This includes both event
information for all sensors and I/O points and sensor setup. Point Manager requires that
the Historical Log be cleared before the “CSC” command is honored. If the Historical
Log or the Event Log has entries, Point Manager will give an error “16” when processing
the “CSC” command. The “CSCF” command clears the Historical Log and the Event
Log before clearing the entries in the sensor table.
The “CSD” command removes a single sensor from the sensor table. If the Historical
Log or the Event Log has entries, Point Manager will give an error “16” when processing
the “CSD” command. The “CSDF” command clears the Historical and the Event Log
before clearing the entries in the sensor table.
If a sensor has been set up with the wrong type of I/O Point Type, the Point Manager
will display “BAD CFG” for the I/O data in the I/O Status page and the response to
the “D” command. If this condition occurs, you will have to delete the setup entry in
the sensor table.
Sensors of type unknown can be added through Auto Add Mode but cannot be set
using the “CSS” command.
Examples
Command:
CSS1,7D000000059A9328,1Humid(A1,0,%RH,0)(A1.8,32.0,degF,1),2
Response: CSS1
Remarks: configure row 1 in the sensor table as a Humidity/Temperature
sensor. “7D000000059A9328” is the serial number. “1Humid” is the
sensor label. “(A1,0,%RH,0)” is the first I/O point which is Analog
type and is the humidity portion of the sensor. “(A1.8,32.0,degF,1)”
is the second I/O point which is an Analog type and is the temperature
portion of the sensor.
Command:
CSR1
Response:
CSR1,2,7D000000059A9328,1Humid(A1,0,%RH,0,0)(A1.8,32.0,degF,1,0)
Command:
CSS1,7D000000059A9328,HmdA23-2(A1,0,HUM,0)
(A1.8,32.0,FAR,1),2
Response:
CSS1
Command:
Response:
CSR2
CSR2,8,87000000002D0A27,1AngD(A0.02,0.00,%,2,0)(DY,0)
Command:
CSD2
Response: CSD2
Remark: Clear the second sensor in the sensor table
Point Manager Manual
Commands • 111
‘CT’ – Configure Media Ports
Command Options
CT<S|R>
S – set the Media port parameters
R – read Media parameters
Command/Response Syntax
Modem commands
Command:
CTSmediainstanceManswer count, baud, reserved, initretrytime
[,handshake]
Response:
CTSmediainstanceManswer count
Command:
CTRmediainstanceM
Response:
CTRmediainstanceM,answer count, baud, reserved,
initretrytime,handshake
Serial Commands
Command:
Response:
Command:
Response:
CTSmeidainstanceSbaud, parity, data
CTSmeidainstanceSbaud
CTRmeidainstanceS
CTRmeidainstanceS ,baud, parity, data
Radio Commands
Command:
Response:
Command:
Response:
112 • Commands
CTSmeidainstanceRradiocommands
CTSmeidainstanceRradiocommands
CTRmeidainstanceR
CTRmeidainstanceR , radiocommands
Point Manager Manual
Parameters
Where: (Serial)
mediainstance - 1 – serial port; 2 – receiver port
baud – baud rate of the serial port
(1200,2400,4800,9600,19200,38400,57600 and 115200) (default is
2400 baud.)
parity - ‘N’ – no parity; ‘O’ – odd parity; ‘E’ – even parity; ‘2’ – two stop
bits and no parity. (default is no parity)
data – data bits: 7 or 8 (default is 8 data bits)
(Radio)
mediainstance - 1 – command radio port
radiocommands – radio command separated by the ‘;’ delimiter. The radio
commands are commands that are normally sent with the AT
command. (18 characters maximum).
(Modem)
mediainstance - 1 – modem port
answer count – number of rings before the Modem will answer (0 to 50) (0
means do not answer).
baud – baud rate of the Modem (1200,2400,4800,9600,19200,38400,57600
and 115200) (factory modem is 2400 baud.)
reserved – leave this field blank
initretrytime – amount of time (in seconds) before the Point Manager will
initialize the modem since the last modem activity (incoming or
outgoing call). (default is 900 seconds.)
handshake – (optional) (T/F) use the serial handshaking lines for data flow.
Handshaking is enabled by default.
Login Level
Login Level:
CTS – Configure
CTR – Data
Description
The “CT” command sets and reads particular media parameters. Use the “CT”
command to set the serial, modem and radio media parameters. See the appendix
section “Modem Support“ for more information about the modem interface.
Note: The set parameters will not take affect until the current connection for the
effected media is closed. If the media is not connected then the parameters will take
affect right away. The connection can be closed by the host closing the connection,
inactivity time has expired, power down/up or the “LOC” command being received.
Examples
Command:
CTS1M10,19200,S6=20S8=8
Response: CTS1M10
Remarks: set the number answer rings to 10, baud rate = 19200 and the
modem intialization string is “S6=20S8=8
Point Manager Manual
Commands • 113
Command:
CTR1M
Response: CTR1M,1,2400,
Remarks: number answer rings is 1, baud rate is 2400 (default
parameters)
Command:
CTS1S9600,N,8
Response: CTS1S9600
Remarks: set the first serial port to 9600 baud, no parity and 8 data
bits.
Command:
CTSS2,9600,N,8
Response: CTSS2
Remark:
set the receiver serial port to 9600 baud, no parity and 8
data bits.
114 • Commands
Point Manager Manual
‘CTT’ – Configure Extended Media Parameters
Command Options
Command/Response Syntax
Parameters
CTT<S|R>
S – set the Extended Media parameters
R – read Extended Media parameters
Modem commands
Command:
CTTS,type,value
Response:
CTTS
Command:
CTTR,type
Response:
CTTR,type,value
Command:
CTTSmediainstanceMtype,value
Response:
CTSmediainstanceMtype,value
Command:
CTTRmediainstanceM
Response:
CTRmediainstanceM,type,value
Where: (Modem)
mediainstance - 1 – modem port
answer count – number of rings before the Modem will answer (0 to 50) (0
means do not answer).
type – “I” for Initialization string; “L” for Listen string; “S” for Signal
Strength string; “P” for Push string; “H” for Hangup string; “R” for
Reset string; “D” for power up delay (in seconds) and “T” for default
type initialization (set only; no read counterpart).
value – dependant on the type. For strings the Point Manager expects each
modem command to be delimited by “;”. Point Manager prefixes each
command found in the string with an “AT” therefore the “AT” prefix
does not need to be included with the command. For the “D” type, the
Point Manager expects a number from 1 to 65535 seconds for the
power up delay. For the “T” type, the Point Manager expects a value
or “1”,“2”,”3” or “4”. The size of fields are I: 100, L: 100, S: 20; P:
100 and H: 30 characters.
Login Level
Point Manager Manual
Login Level:
CTTS – Configure
CTTR – Data
Commands • 115
Description
Use the “CTT” command to set command strings that the Point Manager will use to
configure the attached modem. Four default modems are supported:
1) AT Dialup modem.
2) MultiTech MultiModem GPRS Wireless Modem (Model: MTCBA-G-F2)
3) Enfora GSM 1218
4) ConnectOne iModem
Specify the default modem strings by specifying the type “T” a value of “1” to “4”.
The Point Manager sets the initialization strings using the provided type. The
initialization strings can then be modified. If any changes are made to these strings,
the Point Manager will hold off initializing the modem for up to 2 minutes before
using the new strings. If the Hangup string is modified then the Point Manager will
initialize the modem right away.
The power delay is used to delay when the Point Manager initializes the modem
after power up. Some modems require extra time to initialize before ready to
properly respond to command requests (for example, establishing a connection to the
data network of a cellular network).
The MultiTech MultiModem GPRS Wireless Modem has the option to disconnect
the current connection by having the Point Manager sending an ETX character
(ASCII 3 ^C) when running in TCP/IP mode. If this option is used, special
consideration must be given in the application receiving the data. In order for ETX
characters to be transferred as data, the Point Manager precedes the ETX character
with a DLE character (ASCII 16 ^P). All DLE characters are also proceeded with a
DLE character. Therefore each ETX character will be coded as DTE ETX and each
DTE character will be coded as DTE DTE. The application must remove the
decoding before processing this data. The Point Manager will only encode
transferred data this way is when “^C” is specified in the Hangup string. The only
time the Point Manager has the potential of transferring the ETX character as data is
when it transfers compressed data as a result of the HZ or EZ command being
received.
See the appendix section “Modem Support“ for more information about the modem
interface.
Note: The set parameters will not take affect until the current connection for the
effected media is closed. If the media is not connected then the parameters will take
affect right away. The connection can be closed by the host closing the connection,
inactivity time has expired, power down/up or the “LOC” command being received.
Examples
Command:
CTTS,T,2
Response:
CTTS
Command:
CTTR,I
Response:
CTTR,I,&D1;+CGREG=1;+CGATT=1;#LTCPSTOP<CR>
Command:
CTTR,L
Response:
CTTR,L,#CONNECTIONSTOP;#CONNECTIONSTART;#TCPPORT="1000";#TCPSERV="2
55.255.255.255";#LTCPSTART
Command:
CTTR,S
Response:
CTTR,S,+CSQ
Command:
CTTR,P
Response:
#LTCPSTOP;#TCPPORT="%%p";#TCPSERV="%%h";#OTCP
Command:
CTTR,H
Response:
CTTR,H,#CONNECTIONSTOP
Remark: default to the “MultiTech MultiModem GPRS Wireless Modem” and
then read all the command strings.
116 • Commands
Point Manager Manual
Command:
CTTS,H,H0
Response:
CTTS
Remark: set the Hangup command string
Point Manager Manual
Commands • 117
‘CU’ – Configure/Read PassThru Media Callout Table
Command Options
Command/Response Syntax
Parameters
CU<S|R|C>
S – set the PassThru Media Callout Table parameters
R – read the PassThru Media Callout Table parameters
C – clear the PassThru Media Callout Table parameters
Command:
CUSreconnect delay,fast try count, fast try delay,slow try base,
slow try interval(cCmpath)1...(cCmpath)n
Response:
CUS
Command
CUR
Response:
CUR, reconnect delay,fast try count, fast try delay,slow try base,
slow try interval(cCmpath)1...(cCmpath)n
Command:
CUC
Response:
CUC
Where:
reconnect delay – the amount of time to wait before trying to reconnect for
the first time after a power up or disconnect (15 to 65535 seconds)
fast try count – the number of times to try to connect (0 to 255)
fast try delay – the amount of time to wait between the fast try reconnects (1
to 65535 seconds)
slow try base – the starting time to attempt to reconnect after the fast tries
have been exhausted (mmddyyhhnnss) (“na” when reading)
slow try interval – the next time interval from the base time to try to
reconnect after the fast tries have been exhausted (ddhhnnss) (“na” if
no Slow Try is set)
C – media choices: ‘M’ – Modem; ‘T’ – TCP/IP; ‘R’ – Command Radio;
‘S’ – Local Serial port; ‘2S’ – Receiver Serial port 2.
c – communication port number. For port number of 1 this value is
optional and assumed.
m – Pass Thru Mode – S: Standard and E: Engineering
path – media connection path. For Modem: “[ATcommands]phone
number[:dialtime]” where optional AT commands can be included to
configure Modem before dialing; phone number may include dialing
commands (if AT option is used, must prefix phone number with “D”);
and optional dialtime in seconds (60 s. default) . For TCP/IP: “ip
address:port” number (ex. 192.168.1.30:1000). If port is not specified,
then the default is assumed to be 1050. No path information for ‘S’,
‘2S’ and ‘R’ media choices.
1..n – number of media callout entries. A maximum of 5 can be configured.
Login Level
118 • Commands
Login Level:
CUS – Configure
CUR – Data
CUC – Configure
Point Manager Manual
Description
PassThru Media Callout Table command instructs the Point Manager how to make
and keep a connection to a remote host in order to asynchronously send packet
information caused by sensor transmissions. Each entry represents an independent
connection that the Server will attempt to keep alive and deliver data.
For the media choice type M, the Point Manager can receive dialing commands in
the path string. Normally the phone number is all that is needed in the path string. If
the path string starts with “AT”, the Point Manager will send the path string to the
Modem without prefixing the “ATD” modem command to the string. Example:
“ATX0D18002445678”. The following is a list of possible modem commands:
D – dial command
BN – communication standard option
Hn – switch hook control option
On – on-line command
Sn= - write to an S Register
Xn – Call Progress Option – X0: no dial tone detection
Dial modifiers:
P – pulse dial
T – tone dial
W – wait for dial tone
, - pause
! – flash hook
@ - wait for quiet anser command
; - return to idle state
The dialtime parameter is optional.
Note: Both the Media Callout and the Pass-Thru Media Callout tables cannot have
the same media types listed.
The “CUC” command clears the Media Callout Table. The Point Sever will not
initiate connections.
By default the Point Manager will wait 60 seconds for a modem connection and 20
seconds for a TCP/IP connections to be established.
Examples
Command:
CUS30,3,30,012803000000,00003000(TE192.168.1.45)
Response: CMS30
Remarks: delay 30 seconds, fast try 3X, wait 30 seconds between fast
tries, start slow try on 01/28/03 00:00:00 and at every 30 minutes
since; connect TCP/IP in Engineering mode to 192.168.1.45 assuming port
1050
Command:
Response:
CUR
CUR,30,3,30,012803000000,00003000(TE192.168.1.45:1050)
Command:
CUS30,3,30,012803000000,00003000(MSATX0D2335867)
Response: CUS30
Remarks: delay 30 seconds, fast try 3X, wait 30 seconds between fast
tries, start slow try on 01/28/03 00:00:00 and at every 30 minutes
since; connect via Modem in Standard mode. “ATX0” turns off dialtone
detection. “ATDT” is the dial command is necessary when the media path
is prefixed with “AT”.
Command:
CUR
Response: CUR,30,3,30,na,00000000
Remarks: Pass-Thru Media Callout table is empty
Point Manager Manual
Commands • 119
‘CV’ – Configure/Read Enumerated Engineering Unit
Table
Command Options
Command/Response Syntax
Parameters
CV<S|R|C>
S – set the Enumerated Engineering Unit Table parameters
R – read the Enumerated Engineering Unit Table parameters
C – clear the Enumerated Engineering Unit Table parameters
Command:
Response:
Command
Response:
Command
Response:
Command:
Response:
CVSeeu, scale, offset, units, decimals
CVSeeu
CVRC
CVRC, no_entries
CVRrow
CVRrow, eeu,scale, offset, units, decimals
CVC
CVC
Where:
eeu – (Enumerated Engineering Units) – number from 0 to 63 that identifies
the type of Engineering Unit conversion to be performed See
description below.
scale – Engineering scale. The raw sensor data is multiplied by this value.
offset – Engineering offset. The value is added to the raw data after the
scale has been applied.
units – Enginerring units label. Description of the units for presentation.
decimals– number of decimal places to display.
no_entries – number of entries in the table
row – row number of an entry in the table. (starts at 1)
Login Level
Login Level:
Description
Some sensors provide a number (called an Enumerated Engineering Units) that
allows the Point Manager to convert the raw sensor data to engineering units. The
Point Manager has predefined enumeraters 61-63. Additional Enumerated
Engineering Units can be added starting at 1 and ending at 31. 0 is the default
Enumerated Engineering unit if no number is assigned to the sensor. The predefined
enumeraters can be overridden. Currently only the Dual Analog (27 & 28) and
CounterAnalog(29) sensors use the Enumerated Engineering Units construct. The
following is a table showing the predefined enumerations:
Enum
0
63*
62
61
120 • Commands
Bin1
0
0
0
0
Engr1
0
-40
-40
0
CVS – Configure
CVR – Data
CVC – Configure
Bin2
4095
4095
4095
4095
Engr2
100
85
185
100
Scale
0.0244
0.030525
0.0549
0.0244
Offset
0
-40
-40
0
Units
%
degC
degF
%RH
Description
Generic
Temperature
Temperature
Humidity
Point Manager Manual
*Note: Point Manager converts the temperature to degrees F as the default
temperature units.
Use the “CVRC” command to obtain the number of Enumerated Engineering Units
entries in the table. (This includes all the predefined enumerations.)
Use the “CVR” command with the row number (starting at 1) to read an entry in the
table.
Use the “CVS” command to set or override an entry (including predefined entries)
using the enumerated number.
Use the “CVC” command to clear the table. The Point Manager will repopulate the
table with the predefined Enumerated Engineering Unts entries.
Examples
Command:
CVC
Response: CVC
Remarks: clear the Enumerated Engineering Units table.
Command:
CVRC
Response: CVRC,4
Remarks : read the number of entries in the Enumerated Engineering
Units table
Command:
Response:
Command:
Response:
Command:
Response:
Command:
Response:
Remarks:
CVR1
CVR1,0,0.00305,0.00000,%,1
CVR2
CVR2,61,0.02440,0.00000,%RH,1
CVR3
CVR3,62,0.05495,-40.00000,degF,1
CVR4
CVR4,63,0.05495,-40.00000,degF,1
read 4 entries from the Enumerated Engineering Units table
Command:
CUR
Response: CUR,30,3,30,na,00000000
Remarks: Pass-Thru Media Callout table is empty
Command:
Response:
Remarks:
At 100 PSI
Point Manager Manual
CVS2,0.0244,0,psi,1
CVS2
Add a new entry for Enumerated Engineering Units value #2.
the raw sensor reading is 4095.
Commands • 121
‘CW’ – Configure Base
Command Options
Command/Response Syntax
Parameters
CW<S|R>
S – set the Point Manager base parameters
R – read the Point Manager base parameters
Command:
Response:
Command:
Response:
CWS,scaledinteger
CWS
CWR
CWR,scaledinteger
Where:
scaledinteger – (T/F) ‘T’ – scale all integer values; ‘F’ (default) – do not
scale integer values.
Login Level
Login Level:
CWS – Configure
CWR – Data
Description
Use the “CW” command to set global Point Manager parameters and compatibility
flags.
The scaledinteger flag is used to have the Point Manager report Integer data types as
engineering decimal values for the “D” command response, the History (“H”) and
Event (“E”) responses, Email text and XML content (both History and Event). Use
the “CSS” command to set the scale and offset. When scaledinteger = F, the Point
Manager will report Integer data types as whole integers. When scaledinteger = T,
the Point Manager will report Integer data types as scaled decimal values.
Note: the Point Manager always displays the integer values in the web I/O page as
scaled decimal values regardless of the parameter scaledinteger.
Examples
Command:
CWS,T
Response:
CTTS
Remark: set the Point Manager to report integer data types as scaled
engineering decimal values
Command:
CWR
Response:
CWR,F
Remark: read the scaledinteger parameter
122 • Commands
Point Manager Manual
‘D’ - Get Last Data command
Command Options
Command/Response Syntax
Parameters
D<n|n-m>
Command:
Response:
specify one sensor or a range of sensors
Dn or Dx-y
Dn,[A][ttiiiiiasC1DATA1|...|CmDATAm],[....]
Where:
n – row number in the sensor table
x-y – range of rows that correspond to the sensor table (maximum of 10 for
the range)
A - system alarm. Point Manager is trying to callout to deliver alarms.
“SR” command resets this flag.
tt - type of sensor. See the Sensor Type table below.
iiiii - age of sensor reading in seconds. If the Point Manager has never
received a packet for this sensor the value here will be 65535. The age
parameter will always be 5 characters with leading 0s.
a - sensor in a “state of concern” (T/F)
s – service button on sensor was pressed (T/F)
C – a “T” of “F” will prefix DATAn indicating whether or not the I/O point
is in a “state of concern”. If it is in a “state of concern”, Point Manager
may have triggered corresponding events or alarms.
DATA - data for each of I/O points for the sensor. The data points are
separated by a ‘|’ (pipe). The order and number of I/O points
corresponds with the sensor’s setup in the sensor table.
m – number of I/O Points. The number is defined by the type of sensor.
See the “Sensor I/O Definitions” table for more information.
Login Level
Login Level:
Data
Description
When the Point Manager receives this command, the Point Manager will return the
last reading it received for the specified sensor. It also responds with system alarms,
sensor alarms, and “state of concern” for the I/O Points of the sensor. Use the “S”
command to determine the number of sensors in the sensor table.
The Point Manager gives Analog I/O point data in engineering units and Integer I/O
point data in the raw counts.
If the Point Manager has never received any transmissions from the specified sensor,
the Point Manager will respond with “na” for the sensor’s data. If the sensor has
been set up incorrectly, the Point Manager will respond with “BAD CFG” for the
specified sensor.
Point Manager Manual
Commands • 123
Sensor type
0
1
2
3
4
5
6
8
9
11
12
13
14
15
16
17
18
20
23
27
28
29
30
Sensor Types
Description
Unknown
Temperature
Humidity/Temperature
Light
IButton (Point PIR)
Analog
Counter
Analog with Data
Analog with Temperature (compensated)
Discrete
Thermistor
16-bit signed Analog
Counter Temperature
Fast Counter Temperature
Alarm Temperature
Space Temperature Override
Directional Counter
ID Reader
Proximity2
Dual Analog (single channel)
Dual Analog (two channel)
Counter Analog
Humidity / Temperature2
Examples
Command:
D1
Response: D1,F0500000FFF0.78
Remarks: D1- echo of the primary command; 1 signifies the position of
the sensor in the table.
F - no system alarms
05 - type of sensor. In this case it is an Analog.
00000 - age of reading; here, 0 seconds.
F - no sensor alarm
F - sensor was not in service mode when it transmitted.
F – I/O point was not in a “state of concern”
0.78 - the analog reading
Command:
D1
Response: D1,F0800029FTF0.68|FTKA49332
Remarks: D1 - get last data for sensor 1
F - no system alarms
08 - type of sensor. In this case it is an analog with data.
00029 - age of reading in seconds
F - no sensor alarm
T - sensor was not in service mode when it transmitted.
F - I/O point was not in a “state of concern”
0.68 - I/O point 1 of 2 is analog
| - a delimiter between the sensor’s I/O points
F - I/O point was not in a “state of concern”
TKA49332 -I/O point 2 of 2 is data
124 • Commands
Point Manager Manual
Command:
D3-5
Response: D3-5,F0500000FFF1.93,0100016FFF74.3,0100790FTF74.3
Remarks: D3-5 request for last data for sensors 3 thru 5. Note that
each sensor’s data is comma delimited. “F0500000FFF1.93” is Sensor 3
data; “0100016FFF74.3” is Sensor 4 data; “0100790FTF74.3” is Sensor 5
data.
Command:
D7
Response: D7,F0600061FFFopen|200302|200309
Remarks: example LSX at sensor position 7
F - no system alarms
06 – sensor type: LSX.
00061 – age of reading in seconds
F – no sensor alarm
F – no service mode
F – I/O point not in “state of concern”
Open – state of the LSX
200302 – open counts
200309 – close counts
Command:
D2
Response: D2,Fna
Remarks: requested data from sensor 2. “na” indicates that the Point
Manager has never received any packets from this sensor.
Command:
D1
Response: D1,FBad Cfg
Remarks: Sensor at row 1 was not set up properly.
was not set up according to the type of sensor.
Point Manager Manual
The I/O Point type
Commands • 125
‘E’- Read Scheduled Output Control Status
Command Options
Command/Response Syntax
Parameters
E<n>
Command:
Response:
En
En, overridden, active
Where:
n – the row number of the Scheduled Output. Starts at 1.
overridden – (T/F) T – the control is forced either into Active or “On” or
Inactive or “Off”. F – normal operating mode.
active – (T/F) T – the Scheduled Output Control has the “ON” or engaged;
F – the Scheduled Output Control has the output “OFF” or de-engaged.
Login Level
Description
Login Level:
E – Data
The “E” command gives the status the of the Scheduled Output for the passed row.
The “E” command provides two parameters: overridden which indicates if the
Scheduled Output has been placed into override mode and active which indicates
that state of the output driven by the Scheduled Output.
Examples
Command:
E1
Response: E1,F,F
Remarks: get the status for the first Scheduled Output: not in override
mode and not active.
Command:
E2
Response: E2,F,T
Remarks: get the status for the second Scheduled Output: not in
override mode and the control has engaged the output
126 • Commands
Point Manager Manual
‘EC’ – Clear Event Log
Command Options
Command/Response Syntax
Parameters
EC[A]
Command:
Response:
ECtime stamp
ECtime stamp
Command:
Response:
ECA
ECA
Where:
A – clears all events from the event log.
time stamp – clears every record OLDER than the time stamp.
(mmmddyyhhnnss)
Login Level
Login Level:
EC – Configure
Description
Point Manager clears all records or clears records in the Event Log that are OLDER
then time stamp. Once the Point Manager clears the records, the data is lost and
cannot be retrieved.
Example
Command:
EC082101120000
Response: EC082101120000
Remarks: This command tells the Point Manager to clear all records
older than or equal to 08/21/00 12:00:00
Point Manager Manual
Commands • 127
‘ER’ – Read an Event Log Record
Command Options
Command/Response Syntax
128 • Commands
E<A|F|L|N|P|R[V]
A – request same record again
F – request first record in the Event Log
L – request last record in the Event Log
N – request next record in the Event Log
P – request previous record in the Event Log
R – request record later than the passed time
V – verbose response
Command:
Response:
Command:
Response:
data]
Command:
Response:
Command:
Response:
data]
Command:
Response:
Command:
Response:
data]
Command:
Response:
Command:
Response:
data]
Command:
Response:
Command:
Response:
data]
Command:
Response:
Command:
Response:
data]
EA
EAtime stamp<index>,rec time stamp,event id[event data]
EAV
EAVtime stamp<index>,rec time stamp,event string[verbose event
EF
EFtime stamp<index>,rec time stamp,event id[event data]
EFV
EAVtime stamp<index>,rec time stamp,event string[verbose event
EL
EAtime stamp<index>,rec time stamp,event id[event data]
ELV
EAVtime stamp<index>,rec time stamp,event string[verbose event
EN
EAtime stamp<index>,rec time stamp,event id[event data]
ENV
EAVtime stamp<index>,rec time stamp,event string[verbose event
EP
EAtime stamp<index>,rec time stamp,event id[event data]
EPV
EAVtime stamp<index>,rec time stamp,event string[verbose event
ERtime stamp<index>
ERtime stamp<index>,rec time stamp,event id[event data]
ERVtime stamp<index>
ERVtime stamp<index>,rec time stamp,event string[verbose event
Point Manager Manual
Parameters
Where:
time stamp – Point Manager reads the first record whose time stamp/index
is greater than the time stamp/index. (mmddyyhhnnss)
index – two digit ASCII Hexidecimal number (“00” to “FF”) starting at 01.
Used to access multiple records that have the same time stamp.
rec time stamp – time stamp of the returned record
event id – identifies the type of event. See table below for list and
description of event ids.
event string – identifies the type of event. See table below for list and
description of event strings.
event data – the contents of the data varies with the event id field. See the
table below for the list of parameters for each event id.
verbose event data – the contents of the data varies with the event string
field. See the table below for the list of parameters for each event
string.
sensor row – row number of the sensor in the sensor table
sensor name – name of the sensor.
i/o value – data value that triggered the event. For analog types, the value is
given in engineering units. For integer types, the value is given in raw
counts.
i/o units label – label describing the units of the i/o value.
sample no – indicates which I/O point caused the event. The first I/O point
starts at 1.
event no – indicates which event series for the I/O point caused the event.
Some I/O points have multiple event series. Starts at 1.
span – the number seconds since the analog threshold event fired.
alarm – indicates if this event would cause the Point Manager to push a
connection.
Point Manager Manual
Commands • 129
Event
ID
1
2
3
4
130 • Commands
Event String
Description
Start
Log Full
Hist Full
Push Failed
5
SMTP
Failed
6
Manage
7
Add
8
Edit
9
Delete
10
XML Failed
20
Match
50
51
54
Service
Offline
Online
57
AddSensor
60
High
Point Manager Startup
Event Log % Full
Historical Log % Full
Point Manager failed to make
connection with host
Point Manager failed to
deliver the email to Internet
SMTP Server
“CB” and “CE” Commands;
notification that a series of
setup commands are occuring
Add an item (like a sensor or
an output)
Edited item (like a sensor or
an output)
Deleted an item (like a sensor
or an output)
Point Manager failed to
deliver the XML History or
Event data to the destination
A Match Sensor Packet has
triggered
Service button pressed
Sensor age too large
Sensor came online after old
fired
Sensor has been added to
sensor table through Auto
Add mode.
Analog type high threshold
61
Low
Analog type low threshold
62
High Span
Analog time span event
63
Low Span
Analog time span event
64
High Exit
Analog exit high threshold
65
Low Exit
Analog exit low threshold
70
Value
Integer type base or interval
80
Enter
State type state entered
81
Exit
State type state exited
90
Change
Data type data changed
100
On (Active)
Scheduled Output is Active
101
Scheduled Output is Inactive
102
Off
(Inactive)
Force On
103
Force Off
104
Force End
120
Count Time
Scheduled Output override
Active
Scheduled Output override
Inactive
Scheduled Output override
was stopped
Reports time of count
Parametes
event id,alarm
event id,alarm
event id,alarm
event id,alarm
event id,alarm
event id,user,no items,alarm
event id,user,item id, item
row,alarm
event id,user,item id, item
row,alarm
event id,user,item id,alarm
event id,alarm
event id,match row,sensor
row,alarm
event id,sensor row,alarm
event id,sensor row,alarm
event id,sensor row,alarm
event id,sensor row,alarm
event id,sensor row,i/o
value,sample no,event no,alarm
event id,sensor row,i/o
value,sample no,event no,alarm
event id,sensor row,i/o
value,sample no,event no,alarm
event id,sensor row,i/o
value,sample no,event no,alarm
event id,sensor row,i/o
value,sample no,event
no,span,alarm
event id,sensor row,i/o
value,sample no,event
no,span,alarm
event id,sensor row,i/o
value,sample no,event no,alarm
event id,sensor row,i/o
value,sample no,alarm
event id,sensor row,i/o
value,sample no,,alarm
event id,sensor row,i/o
value,sample no,alarm
event id,schedulted output
row,alarm
event id,schedulted output
row,alarm
event id,schedulted output
row,duration,alarm
event id,schedulted output
row,duration,alarm
event id,schedulted output
row,alarm
event id,sensor row,i/o
value,sample
count,state,alarm
Point Manager
Manual
Manage Description Table
Item
ID
Login Level
Point Manager Manual
Item Description
Command
1
2
3
4
5
6
7
8
9
10
11
12
13
14
15
16
17
18
19
20
21
22
Auto Add
Clock
Id
Base Events
Sample Events
Sensor Events
IP Address
Media Contact
Notify
Correction
Password
Radio
Sensor
Telephone
Pass Contact
Event Log
Groups
History
Timezone
Job
Packet
Output
“A”
“CC”
“CD”
“CEB”
“CEP”
“CES”
“CI”
“CM”
“CN”
“CO”
“CP”
“CR”
“CS”
“CT”
“CU”
“EC”
“G”
“HC”
“IT”
“J”
“K”
“ME”
23
Output Sched.
“SO” & “SW”
26
27
28
29
Match
Timer
Pass Thru
Verbose
“MM”
“T”
“U”
“V”
Login Level:
Comments
Scheduled Output
Control
Output Control
Schedule Change;
EA – Data
EF – Data
EL – Data
EN – Data
EP – Data
ER – Data
Commands • 131
Description
Use the “A”,”F”,”L”,”N”, and “P” command to iterate and read the Event Log. For
the “R” command, the Point Manager uses a time stamp as index to have “randomaccess” to the Event Log. Point Manager reads the first record in the Event Log
whose time stamp/index is greater than the passed time stamp/index. If the
Point Manager cannot find any records, then it will respond with the command
followed by the passed time stamp parameter. The index parameter is used to
access multiple records with the same time stamp. The first record has an index of
“01” but use “00” to get the first record. When the ‘V’ option is include, the Point
Manager will return the names of the events and sensors. The “R” option is
recommended when writing an application to read the Event Log.
Hint: When using the ER command, enter the preceding time stamp/index from the
response to the ER command to obtain the next record.
Examples
Command:
ERV05230109282800
Response: ERV05230109282800,08310108202401 Start
Remark: Request the first record by providing a date in the past that
would not be in the Event Log: 05/23/01 09:28:28. Point Manager found
the first record with a time stamp of 08/31/01 08:20:24. This event
was a “start up” event where Point Manager logged when it started.
Command:
ER08310108202400
Response: ER08310108202400
Remark: Continuing in the process of reading the Event Log, the time
and date stamp of the previous event was used in the “ER” command to
get the next record. Point Manager indicates there are no more records
by responding with the command and not data.
Command:
ER06170122363100
Response: ER06170122363100,0925012233000150,2,F
Remarks: Service Mode button pressed (50) for the sensor 2 at 9/25/01
22:33:00.
Command:
ER09250122330001
Response: ER09250122330001,0925012234070160,1,5300000008184C0C,2,T
Remarks: Data changed (90) for sensor 1 at 9/25/01 22:34:07 which is
the 2nd I/O Point and caused an alarm
Command:
ER09250122340701
Response: ER09250122340701,0925012234070251,2,F
Remarks: Multiple Record example: Sensor age event (51) for sensor 2 at
9/25/01 22:35:10.
Command:
ER09250122340702
Response: ER09250122340702,092501223524011,F
Remarks: Point Manager start up at 9/25/01 22:35:24
Command:
ER09250122352400
Response: ER09250122352400
Remarks: no more events in the Event Log
132 • Commands
Point Manager Manual
Command:
ERV06170122363100
Response: ERV06170122363100,09250122330001 Service,2Humid
Command:
ERV09250122330000
Response: ERV09250122330000,09250122332201
Change,1ibtn,5300000008184C0C
Command:
ERV09250122332201
Response: ERV09250122332201,09250122340701 High,2Humid,82.4 degF
Command:
ERV09250122340701
Response: ERV09250122340701,09250122351001 Old,2Humid
Command:
ERV09250122351001
Response: ERV09250122351001,09250122352401 Start
Command:
ERV09250122352401
Response: ERV09250122352401
Remarks: These events are the same as the above example except that the
Verbose (V) option was used.
Command:
ER03110311531200
Response: ER03110311531200,0311031153120162,12,89.6,2,2,F
Remarks: At 03/11/03 11:53:12 a High Span (62) event was recorded.
Sensor 12 had remained high for the span duration. The value of sensor
12 when the record was created was 89.6. The event trigger was the
second sample's second event. Finally, the last field means no push
occured in response to this event.
Command:
ERV03110311531200
Response: ERV03110311531200,03110311531201 High
Span,12Humid_Temp,89.6 F,75
Remarks: At 03/11/03 11:53:12 a High Span event was recorded. The
sensor
involved was 12Humid_Temp. Its value when the record was
created was 89.6 F. The sensor had been high for 75 seconds.
Command:
ER03110312001002
Response: ER03110312001002,0311031200100364,12,48.2,2,2,492,F
Remarks: At 03/11/03 12:00:10 a High Exit (64) event was recorded.
Sensor
12 had a value of 48.2 when the record was created. The event trigger
was the second sample's second event. The value had remained high for
492 seconds. Finally, the last field means no push occured in response
to this event.
Command:
ERV03110312001002
Response: ERV03110312001002,03110312001003 High
Exit,12Humid_Temp,48.2 F,492
Remarks: At 03/11/03 12:00:10 a High Exit event was recorded. The
sensor involved
was 12Humid_Temp. Its value when the record
was created was 48.2 F.
The sensor had remained high for 492 seconds.
Command:
ER03110312005400
Response: ER03110312005400,0311031200540163,12,48.2,2,1,F
Remarks: At 03/11/03 12:00:54 a Low Span (63) event was recorded.
Sensor 12
had remained high for the span duration. The value of
sensor 12 when the record was created was 48.2. The event trigger was
the second sample's first event. Finally, the last field means no push
occurred in response to this event.
Command:
ERV03110312005400
Response: ERV03110312005400,03110312005401 Low Span,12Humid_Temp,48.2
F,45
Remarks: 03/11/03 12:00:54 a Low Span event was recorded. The sensor
involved
was 12Humid_Temp. Its value when the record was
created was 48.2 F. The sensor had been high for 45 seconds.
Point Manager Manual
Commands • 133
Command:
ER03110312072901
Response: ER03110312072901,0311031207290265,12,62.6,2,1,439,F
Remarks: At 03/11/03 12:07:29 a Low Exit (65) event was recorded.
Sensor 12 had a value of 62.6 when the record was created. The event
trigger was the second sample's first event. The value had remained
low for 439 seconds. Finally, the last field means no push occured in
response to this event.
Command:
ERV03110312072901
Response: ERV03110312072901,03110312072902 Low Exit,12Humid_Temp,62.6
F,439
Remarks: At 03/11/03 12:07:29 a Low Exit event was recorded. The sensor
involved
was 12Humid_Temp. Its value when the record was
created was 62.6 F. The sensor had remained low for 439 seconds.
134 • Commands
Point Manager Manual
‘EU’ – Event Log Usage
Command/Response Syntax
Parameters
Command:
Response:
EU
EU, bytes used/ max bytes
Where:
bytes used – the number of bytes used in the Event Log
max bytes – maximum number of bytes the Event Log will hold
Login Level
Login Level:
EU – Data
Description
The Point Manager provides a relative indicator of the usage of the Event Log. By
dividing the bytes used and the max bytes, you can determine the
percentage of how much is used in the Event Log.
Example
Command:
EU
Response: EU,11/70956
Remarks: 11 bytes out of the 70,956 bytes of the Event Log is used.
Point Manager Manual
Commands • 135
‘EZ’ – Read Event Log Records Compressed
Command Options
Command/Response Syntax
Parameters
EZ[V]
V – verbose response
Command:
EZstarttime<index>[-endtime]
Response:
EZstarttime<index>[,CompressData]
Command:
EZVstarttime<index>[-endtime]
Response:
EZVstarttime<index>[,CompressData]
Where:
starttime – Point Manager reads the first record whose time stamp/index is
greater than the starttime. (mmddyyhhnnss)
index – two digit ASCII Hexadecimal number (“00” to “FF”) starting at 01.
Used to access multiple records that have the same time stamp.
endtime – optional end timestamp. This time stamp defines the end of the
range of History records to retrieve. If the endtime is not specified,
then the Point Manager will end with the last record stored in the
History Log. (mmddyyhhnnss)
[,CompressData] – if there is compressed data to send, the Point Manager
will send the “CompressData” message followed by the <CR> and then
the compressed data. If there is no data, the Point Manager responds
with just starttime<index>.
Login Level
Description
Login Level:
EZ – Data
EZV - Data
Use the EZ command to retrieve multiple compressed Event records from the Point
Manager. The EZ uses a start time and end time to define a range of requested
records. If the end time is not defined then the Point Manager will grab records after
the start time until the end of the Event Log (the most recent record).
See the appendix section called “Data Compress” for more information.
Example
Command:
EZ11100500000000-111005120000
Response: EZ11100500000000-111005120000
Remark: No compressed data
Command:
EZ11100500000000Response: EZ11100500000000-,Compress Data
Remark: Get compressed data starting after 11/10/05 00:00:00 at index
of “00” to the present time with compressed data to follow.
136 • Commands
Point Manager Manual
‘G’ – Configure/Read Group Description
Command Options
Command/Response Syntax
Parameters
G<C|R|S>
C – clear Group descriptions
R – read Group description
S – set Group description
Command:
Response:
Command:
Response:
Command:
Response:
GC
GC
GRn
GRn, groupdesc
GSn, groupdesc
GSn
Where:
n – row number of the group description (1 to 16)
groupdesc – description of the group (8 characters maximum)
Login Level
Description
Login Level:
GC – Configure
GR – Data
GS – Configure
The Group description used to label the output sets. The group description is a
general purpose field and is not used by the Point Manager
The “S” command returns the number of groups.
Example
Command:
GS1,Lvl1Alrm
Response: GS1
Remarks: Set the group description at the first row
Command:
GR3
Response: GR3,Lvl3Alrm
Remarks: Read the group description at row 3
Point Manager Manual
Commands • 137
‘HC’ – Clear Historical Log
Command Options
Command/Response Syntax
Parameters
HC[A]
Command:
Response:
HCtime stamp
HCtime stamp
Command:
Response:
HCA
HCA
Where:
A – clears all events from the event log.
time stamp – clears every record OLDER than the time stamp.
(mmddyyhhnnss)
Login Level
Login Level:
HC – Configure
Point Manager clears all records or clears records in the Historical Log that are
OLDER than time stamp. Once the Point Manager clears the records, the data is
lost and cannot be retrieved.
Example
Command:
HC082101120000
Response: HC082101120000
Remarks: This command tells the Point Manager to clear all records
older than or equal to 08/21/00 12:00:00
138 • Commands
Point Manager Manual
‘HI’ – Configure/Read the History Interval
Command Options
Command/Response Syntax
Parameters
HI<S|R>
S – set the History Interval
R – read the History Interval
Command:
Response:
Command:
Response:
HISstarting time, interval timer
HIS
HIR
HIR,starting time, interval time,next interval time
Where:
starting time – the starting time when the Point Manager will start
logging the current readings of all the sensors in the sensor table to the
Historical Log. (mmmddyyhhnnss) A value of “0” will clear the
History Interval. (“na” if not set)
interval time – specified when the Point Manager will log
periodically the current readings of all the sensors in the sensor table to
the Historical Log once the Point Manager has logged the first record
based on the starting time. (ddhhnnss) A value of “0” will clear the
History Interval. (Minimum History Interval is 10 seconds.)
next interval time – time when the Point Manager will record the
next Historical Record (mmddyyhhnnss) (“na” if not set)
Login Level
Login Level:
HIS – Configure
HIR – Data
Description
Point Manager will log the first record (snap shot of the current readings for all the
sensors in the sensor table) when the starting time has been reached. For then
on the Point Manager will use the interval time to log the next records
periodically to the Historical Log. If the start time is in the past, Point
Manager will start logging based on the interval time when the command is
processed.
Examples
Command:
HIS082101120000,00000100
Response: HIS
Remarks: This command tells the Point Manager to start logging at the
date and time of 8/21/00 12:00:00 and the log periodically every minute
Command:
HIR
Response: HIR,082101120000,00000100,082101120500
Remarks: The Point Manager is set to start logging at 08/21/01 20:00:00
at every minute. The next time the Point Manager will log a Historical
record is 08/21/00 20:05:00.
Command:
HIS0,0
Response: HIS0
Remarks: The Point Manager is set up to not log any records to the
Historical Log.
Point Manager Manual
Commands • 139
Command:
Response:
Remarks:
HIR
HIR,na,01000000,na
History interval is not set.
No records will be recorded.
‘HO’ – Configure/Read History Log Offline Indicator
Command Options
Command/Response Syntax
Parameters
HO<F|T|P>
F – no offline indictor logged
T – offline indicator is logged when sensor is offline because of “max age”
P – offline indicator is logged when sensor packet has not been received within the
History Log interval.
R – read offline indicator mode
Command:
Response:
Command:
Response:
Command:
Response:
Command:
Response:
HOF
HOF
HOT
HOT
HOP
HOP
HOR
HOR,a
Where:
a – is one of the modes: F,T, or P
Login Level
Login Level:
HOF – Configure
HOT – Configure
HOP – Configure
HOR - Data
Description
The Point Manager will mark “na” for the I/O points for the sensor if the sensor is
considered offline when the History record is taken
Examples
Command:
HOF
Response: HOF
Remarks: Do not mark fields as offline but also use the last reading.
Command:
HOP
Response: HOP
Remarks: Mark the I/O field as offline if the sensors has not been
updated since the last History snap shot.
Command:
HOR
Response: HOR,P
Remarks: Read mode of mark the I/O field as offline if the sensors has
not been updated since the last History snap shot.
140 • Commands
Point Manager Manual
‘HR’ – Read a Historical Log Record
Command Options
Command/Response Syntax
Parameters
H<A|F|L|N|P|R>
A – request same record again
F – request first record in the Historical Log
L – request last record in the Historical Log
N – request next record in the Historical Log
P – request previous record in the Historical Log
R – request record later than the passed time
Command:
HA
Response:
HA, rec time stamp<rindex>,sensor data1..sensor datan
Command:
HF
Response:
HF, rec time stamp<rindex>,sensor data1..sensor datan
Command:
HL
Response:
HL, rec time stamp<rindex>,sensor data1..sensor datan
Command:
HN
Response:
HN, rec time stamp<rindex>,sensor data1..sensor datan
Command:
HP
Response:
HP, rec time stamp<rindex>,sensor data1..sensor datan
Command:
HRctime stamp<cindex>[sensor index|sensor range]
Response:
HR, ctime stamp<cindex>[sensor index|sensor range][,rec time
stamp<rindex>,sensor data1..sensor datan]
Where:
sensor index – return one sensor’s information based on the sensor row at
the given time stamp. (optional)
sensor range – returns the sensors’ information based on the sensor range at
the given time stamp. (1 to 10) (optional)
ctime stamp – Point Manager reads the first record whose time stamp/index
is greater than the time stamp/index. (mmmddyyhhnnss)
cindex – two digit ASCII Hexidecimal number (“00” to “FF”) starting at 01.
Used to access multiple records that have the same time stamp.
rec time stamp – time stamp of the returned record
rindex – two digit ASCII Hexidecimal number (“00” to “FF”) starting at 01.
Used to access multiple records that have the same time stamp.
sensor data1..sensor datan – logged data for that record. All the sensors are
logged that are listed in the sensor table. Each sensor’s data is comma
delimited. Each I/O point for a sensor is delimited by a ‘|’.
n – number of sensors in the sensor table at the time when the record was
logged or that was specified with the sensor index or sensor range
parameters.
Login Level
Point Manager Manual
Login Level:
HR – Data
Commands • 141
Description
Use the “A”,”F”,”L”, and “P” options to interate through the Historical Log. For
the “R” command, the Point Manager uses a time stamp as index to have “randomaccess” to the Historical Log. Point Manager reads the first record whose time
stamp/rindex is greater than the passed time stamp/rindex. If the Point
Manager cannot find any records, then it will respond with the command followed
by the passed time stamp/rindex parameter. The rindex parameter is used to
access multiple records with the same time stamp. The first record has an index of
“01” but use “00” to get the first record so that the time stamp/rindex is before the
desired record.
The order of the sensor information and I/O point information follows the order as
defined by the sensor table.
The Point Manager gives Analog I/O point data in engineering units and Integer I/O
point data in the raw counts.
The sensor index and sensor range parameters are optional and are used to obtain
either specific sensors in the Historical Log record or to break up the response into
smaller pieces. Breaking up the response may be important for situations where a
specific media might be noisy and the throughput limiting such as modem/telephone.
Worst case, the Point Manager might deliver up to 1700 characters in a Historical
Log record. In a noisy environment that amount of data might be difficult to get
through but breaking up the response into pieces might stand a better chance of
getting received by the host. When designing a program to receive the Historical
Log, have the option available for the program to use the sensor index and sensor
range parameters in case the program has difficulties without these parameters.
If a sensor has been set up but no data has been received for that sensor, Point
Manager will set the I/O point values to “na”.
The “R” option is recommended when writing an application to read the Event Log.
Hint: When using the HR command, enter the preceding time stamp/rindex from the
response to the HR command to obtain the next record.
Examples
Command:
HR08270110380000
Response: HR08270110380000,08270110390001,0.00,65|75.2
Remarks: Found one record with 2 sensors.
142 • Commands
Command:
Response:
HR08270110390000
HR08270110390000,08270110400001,0.00,66|75.2
Command:
Response:
Remarks:
HR08270112000000
HR08270112000000
cannot find any records greater than this time
Point Manager Manual
Example shows how to break up the Historical Record into smaller packets.
Command:
HR10220112000000
Response:
HR10220112000000,10220112023601,7.03,0.00,44|74.3,closed|149|122,,1
1.98,closed|0|1,
50|69.8,72.5
Remarks: normal HR command with 9 sensors
Command:
HR102201120000001-5
Response: HR102201120000001-5
,10220112023601,7.03,0.00,44|74.3,closed|149|122,
Remarks: grab the first five sensors in this history record
Command:
HR102201120000006-9
Response: HR102201120000006-9
,10220112023601,11.98,closed|0|1,50|69.8,72.5
Remarks: grab the last 4 records
Command:
HR102201120000001
Response: HR102201120000001,10220112023601,7.03
Command:
HR102201120000002
Response: HR102201120000002,10220112023601,0.00
Command:
HR102201120000003
Response: HR102201120000003,10220112023601,44|74.3
Command:
HR102201120000004
Response: HR102201120000004,10220112023601,closed|149|122
Command:
HR102201120000005
Response: HR102201120000005,10220112023601,
Command:
HR102201120000006
Response: HR102201120000006,10220112023601,11.98
Command:
HR102201120000007
Response: HR102201120000007,10220112023601,closed|0|1
Command:
HR102201120000008
Response: HR102201120000008,10220112023601,50|69.8
Command:
HR102201120000009
Response: HR102201120000009,10220112023601,72.5
Command:
HR1022011200000010
Response: 2,HR1022011200000010
Remarks: grab each sensor one at a time for this record. Last command
was trying to get a sensor that did not exist.
Point Manager Manual
Commands • 143
‘HS’ – Force Historical Log Snapshot
Command/Response Syntax
Command:
Response:
Parameters
None
Login Level
Login Level:
HS
HS
HS – Data
Point Manager will log a Historical snapshot record of the current sensors readings
when the HS command is received. The log record will have the current time and
date.
Use this command to force the latest data into the Historical Log after collecting all
the records in the Historical Log. You can obtain the current readings by using the
“HR” command (without using the “D” command).
Example
Command:
HS
Response: HS
Remarks: Places a Historical Log record into the Historical Log with
the current time and date.
144 • Commands
Point Manager Manual
‘HU’ – Historical Log Usage
Command/Response Syntax
Parameters
Command:
HU
Response:
HU,bytes used/max bytes
Where:
bytes used – the number of bytes used in the Historical Log
max bytes – maximum number of bytes the Historical Log will hold
Login Level
Login Level:
HU – Data
Description
The Point Manager provides a relative indicator of the usage of the Historical Log.
By dividing the bytes used and the max bytes, you can determine the
percentage of how much is used in the Historical Log.
Example
Command:
HU
Response: HU,0/75959
Remarks: 0 byte out of the 75,959 bytes of Historical Log space is
used.
Point Manager Manual
Commands • 145
‘HZ’ – Read Historical Log Records Compressed
Command/Response Syntax
Parameters
Command:
Response:
HZstarttime<index>[-endtime]
HZstarttime<index>[-endtime][,CompressData]
Where:
starttime – Point Manager reads the first record whose time stamp/index is
greater than the starttime. (mmddyyhhnnss)
index – two digit ASCII Hexadecimal number (“00” to “FF”) starting at 01.
Used to access multiple records that have the same time stamp.
endtime – optional end timestamp. This time stamp defines the end of the
range of History records to retrieve. If the endtime is not specified,
then the Point Manager will end with the last record stored in the
History Log. (mmddyyhhnnss)
[,CompressData] – if there is compressed data to send, the Point Manager
will send the “CompressData” message followed by the <CR> and then
the compressed data. If there is no data, the Point Manager responds
with just starttime<index>.
Login Level
Description
Login Level:
HZ – Data
Use the HZ command to retrieve multiple compressed History records from the
Point Manager. The HZ uses a start time and end time to define a range of requested
records. If the end time is not defined then the Point Manager will grab records after
the start time until the end of the History Log (the most recent record).
See the appendix section called “Data Compress” for more information.
Example
Command:
HZ11100500000000-111005120000
Response: HZ11100500000000-111005120000
Remark: No compressed data
Command:
HZ11100500000000Response: HZ11100500000000-,Compress Data
Remark: Get compressed data starting after 11/10/05 00:00:00 at index
of “00” to the present time with compressed data to follow.
146 • Commands
Point Manager Manual
‘IC’ – Information Counts
Command/Response Syntax
Parameters
Command:
IC
Response:
IC,commissioned date,Powered up date,Powered up,hard resets,
soft resets,watchdog resets
Where:
commissioned date – the date of when the Point Manager started
operations (mmddyyhhnnss)
Powered up date – the date of when the Point Manager powered up
(mmddyyhhnnss)
Powered up – number of times the Point Manager has powered up
hard resets – number of hardware resets the Point Manager has had
soft resets – number of software resets the Point Manager has had
watchdog resets – number of watchdog resets
Login Level
Login Level:
Data
Description
The “IC” command gives information about the performance of the Point Manager.
This information is given for diagnostic purposes.
Example
Command:
IC
Response: IC,090501130703,090601221649,4,3,0,0
Remarks: Point Manager commissioned data: 09/05/01 13:07:03; Point
Manager last powered up date: 09/06/01 22:16:49; 4 power ups; 3
hardware resets; 0 software resets; and 0 watchdog resets.
Point Manager Manual
Commands • 147
‘ID’ – Information Delivery
Command/Response Syntax
Parameters
Command:
Response:
ID
ID,state,try,params
Where:
state – current of the media callout state machine: “None”, “Wait Clear”,
“Test” and “Attempt”
try – attempt count if the state is not “None”
params – media information of the current row in the Media Callout Table
Login Level
Login Level:
Data
Description
The “ID” command provides information about the state of the Media Callout Table
when it is trying to make a connection with host. Use this command to help
diagnose problems with the Media Callout Table.
state definitions are:
“None” – Point Manager is not trying to make a connection
“Wait Clear” – just disconnected and waiting for delay or the media is
currently being used and wait for it to be free
“Test” – Server is activity pushing because a “P” command was issued
“Attempt” – Server is currently trying to establish a connection
Example
Command:
ID
Response: ID,None,na,na
Command:
ID
Response: ID,Wait Clear,1,T192.168.1.40:1050
Command:
ID
Response: ID,Wait Clear,2,T192.168.1.40:1050
Command:
ID
Response: ID,Wait Clear,2,T192.168.1.40:1050
Command:
ID
Response: ID,Wait Clear,2,T192.168.1.40:1050
Command:
ID
Response: ID,None,na,na
Command:
IC
Response: IC,090501130703,090601221649,4,3,0,0
Remarks: The commands/response show a sequence for when a success push
was made from the Point Manager to a host at ip address 192.168.1.40
148 • Commands
Point Manager Manual
‘IE’ – Information Email Delivery
Command/Response Syntax
Parameters
Command:
Response:
IE
IE,attempt,at,status
Where:
attempt – (“T” or “F”) is Point Sever currently attempting to deliver email
at – time of the last email attempt (mmddyyhhnnss).
status – status of the last attempt: “None”, “Setup”, “Timeout”,
“Unexpected”, “Socket” and “Unsupported”
Login Level
Login Level:
Data
Description
The “IE” command provides information the status of the last email attempt. This
command is useful for diagnosing problems with email.
The status definitions are:
“None” – no email has been attempted.
“Setup” – Setup information is incomplete. Not enough information given in
the “CNR” command.
“Timeout” – no response from the SMTP server.
“Unexpected” – SMTP error.
“Socket” – no Name Server given in the “CIR” command or TCP/IP error.
“Unsupported” – internal error.
Example
Command:
IE
Command:
IE,F,na,None
Remarks: Point Manager has not attempted to deliver email
Point Manager Manual
Commands • 149
‘IK’ – Information Output Packet State
Command/Response Syntax
Parameters
Command:
Response:
by rown,…)
IK
IK,(output packet count, active output packet count, active outputs
Where:
output packet count – count of the number of outputs
active output packet count – count of the number of outputs that are
currently active.
active outputs by rown – row numbers of the outputs that are active. Each
row number is delimited by a comma.
Login Level
Description
Login Level:
Data
The “IK” show the current state of the outputs. All the outputs that are active
(being activity sent out a media) is reported.
Example
Command:
PKA1
Response: PKA1
Command:
IK
Response: IK,(2,1,1)
Remarks: Trigger the first output. 2 outputs are configured; 1 output
is active; output at row 1 is active.
150 • Commands
Point Manager Manual
‘IL’ – XML Delivery Information
Command Options
Command/Response Syntax
IL<E|H>1
E – Event Delivery
H – History Delivery
Command:
ILE1
Response:
ILE1,state,tries,trytime,nextinterval,current history time,no history
recs,waiting on resource,lasterror,errorresponse
Command:
ILH1
Response:
ILH1,state,tries,trytime,nextinterval,current history time,no history
recs,waiting on resource,lasterror,errorresponse
Parameters
Where:
state – state of the XML Delivery state machine:
Off – XML Delivery is off
Next Interval – wait for the next interval to happen – see nextinterval
for when the next interval will occur.
Resolving – Point Manager is currently resolving the domain name to
IP address.
Connecting – Point Manager is establishing a connection with the
HTTP server.
Build XML – Point Manager is building the XML data content.
Xmit - Point Manager is currently sending the XML data.
Response Wait – Point Manager is waiting for a response from the
HTTP server.
Closing – Point Manager is closing the connection
Error – Point Manager has encounter an error – see lasterror and
errorresponse for error information
Retrying – Point Manager has encountered an error and is retrying the
connection.
tries – the number of attempts to make a connection for this interval.
trytime – the time when the last delivery attempt was made
(mmddyyhhmmss).
nextinterval – the time the next interval attempt will be made
(mmddyyhhmmss).
current history time – next history record to be delivered
(mmddyyhhmmssii – see “HR” command).
no history recs - number of history records delivered at this attempt.
waiting on resource – (T/F) is XML Delivery waiting on resource to finish
Point Manager Manual
Commands • 151
lasterror – error message from the last attempt:
Parameters (cont.)
No DNS Server –
DNS: Not Resolved –
DNS: Timeout –
No Socket – Point Manager internal error
Error Response – XML error response given by the HTTP server in the
error response field.
Disconnected – the connection was unexpectedly terminated.
Not Connected – failed to connect to the destination.
Timeout – connected but failed to get a response from destination.
Login Level
Login Level:
Data
Description
The “IL” command retrieves information about the state of the XML Delivery
function.
Example
Command:
ILH1
Response:
ILH1,Connecting,2,010804023610,012104221030,01078021015701,1,F,Not
Connected,
Remarks:
state: Connecting; try number – 2; 01/08/04 02:36:10 – time
of last try; 01/21/04 22:10:30 – next interval try; 01078021015701 –
current history record time; number of history records at last attempt;
F – not waiting on email; “Not Connected” – error message
‘ILR’ – XML Delivery Last HTTP Response
Command/Response Syntax
Parameters
Command:
Response:
ILR
http response ILR
Where:
http response – last http response
Login Level
152 • Commands
Login Level:
Data
Point Manager Manual
Description
The “ILR” command is used to retrieve the last HTTP response received when the
Point Manager attempted to deliver XML data. This command is provided for
diagnostic purposes. The “ILR” command violates the normal Point Manager
command response protocol. There may be multiple lines in the response. The
“ILR” command is only honored on the Serial media.
‘IM’ – Media Information
Command/Response Syntax
Parameters
Command:
Response:
IM
IM,name,login level,state,last activity,…
Where:
name – name of the media
login level – current login level (none, data, configure)
state – message that describes the current state of the media. The
possible messages are the following: “Disabled”, “Configuring”,
“Waiting”, “Pushing”, “Connected”, “Talking” and “Closing”.
last activity – duration of the last connection in seconds.
… - this information is repeated for every media. The media listed is
dependant on the options and version of the Point Manager.
Login Level
Login Level:
Data
Example
Command:
IM
Response: IM,TCP/IP,C,Connected,0,Serial,C,Waiting,445,Serial,C,
Waiting,na,Radio,C,Waiting,na
Point Manager Manual
Commands • 153
‘IMM’ – Modem Information
Command/Response Syntax
Parameters
Command:
IMM
Response:
IMMsignalstrength,lastconnerrtime,lastconnerr,lasterrtm,
lasterr,lasterrcmd
Where:
signalstrength – response from the signal strength command (signal
strength command is issued during the Listen state).
lastconnerrtime – time stamp of the last connection error (mmddyyhhmmss)
lastconnerr – last connection error string
lasterrtm – time stamp of the last intialization error (mmddyyhhmmss)
lasterr – last intialization error string
lasterrcmd – command that intiated the last error
Login Level
Login Level:
Data
Example
Command:
IMM
Response: IMM,"+CSQ: 30,",na,"",112205181833,"ERROR: 35866",
"AT#CONNECTIONSTOP"
154 • Commands
Point Manager Manual
‘IP’ – IP Address Settings
Command/Response Syntax
Parameters
Command:
IP
Response:
IP, dynamic,successfully bound,IP address, subnet mask, gateway,
name server, SMTP server
Where:
dynamic – the IP address parameters are to be dynamically assigned
successfully bound – has the IP address parameters been successfully
assigned. If “F” then the Point Manager has fallen back to either the
previously assigned dynamic address or the static address.
IP address – the current IP address (static or dynamic)
subnet mask – the current subnet mask (static or dynamic)
gateway – the current gateway (static or dynamic)
name server – the current name server (static or dynamic)
SMTP server – the current smtp server (static or dynamic)
Login Level
Description
Login Level:
Data
Use the “IP” command to determine the current IP address settings.
Note: the “CIR” and “CIS” commands now only refer to the static ip address
settings.
Example
Command:
IP
Response: ip,F,F,192.168.0.55,255.255.255.0,,,
Static, never bound, default ip address, subnet mask, no gateway and no
DNS
Command:
IP
Response: ip,T,T,192.168.1.44,255.255.255.0,,64.90.1.10,
Dynamic address, address dynamically assigned, 192.168.1.44 – ip
address, 255.255.255.0 - subnet mask, no gateway assigned, 64.90.1.10 –
DNS address
Point Manager Manual
Commands • 155
‘IPS’ – DHCP State Information
Command/Response Syntax
Parameters
Command:
Response:
IPS
IPS, DHCP acquire state, DHCP state, lease time, wait time, link
Where:
DHCP Acquire state – None, Wait Acquire, Acquiring
DHCP state – Inform_Send(3), Inform(4),BootP_Init(6), BootP_Send(7),
BootP_Wait(8), ToBInit(10), Init(12), Sel_Send(13), Sel (16),
Req_Send(17), Req(20), Arp_Send(23), Arp(24), Bound(28),
Renew_Send(29), Renew(32), Rebind_Send(33), Rebind(36), Release(40),
Timeout(101), Expired(103)
lease time – the amount of time when the lease will be renewed or “expired”.
wait time – number seconds before next state is executed.
link – (T/F) – indicates if there is a link to the hardware Ethernet interface.
Login Level
Login Level:
Data
Example
Command:
IPS
Response: IPS,None,28,259110,0,T
Remark: None – state machine is not running; 28 – Bound: DHCP state;
259110 – lease time; 0 – wait time for the next time; Ethernet
connected
156 • Commands
Point Manager Manual
‘IT’ – Time Zone Information
Command Options
Command/Response Syntax
Parameters
IT<S|R>
S – Set the time zone information
R – Read the time zone information
Command:
Response:
Command:
Response:
ITS[s]hhmmss[daylightsavings]
ITS[s]hhmmss
ITR
ITR,[s]hhmmss,daylightsavings
Where
s – optional sign character: ‘-‘
hhmmss – offset to apply to diplayed time to account for timezone. The
clock must be set to UTC time in order to used the timezone offset
otherwise set the timezone offset to zero.
daylight savings – (T/F) adjust for daylight savings time. Daylight savings
time starts with at 2:00 am on the first Sunday in April and ends at 2:00
am on the last Sunday in October.
Login Level
Description
Login Level:
ITS: Configure
ITR: Data
Both the timezone offset and the daylight savings parameters are used to tell the
Point Manager how to display time. The timezone and daylight savings parameters
are not used when the Point Manager logs History or Events or when the History or
Events are retrieved via command or XML Delivery.
Examples
Command:
ITS-050000
Response: ITS-050000
Remark: This command sets the time zone value to Eastern Standard Time
Zone (-5 hours from UTC).
Command:
ITS-050000,T
Response: ITS-050000
Remark: Point Manager was set to Eastern Standard Time Zone Offset and
Daylight savings is enabled.
Command:
ITR
Response: ITR,-050000,T,F
Remark: Time zone offset is -5 hours; Daylight savings time mode is
set; current date and time is not in daylight savings time.
Point Manager Manual
Commands • 157
‘ITD’ – Daylight Savings Schedule
Command Options
Command/Response Syntax
Parameters
ITD<S|R>
S – Set the current daylight savings schedule
R – Read the current daylight savings schedule
Command:
Response:
Command:
Response:
Command:
Response:
ITDSrow,(BegDLS1,EndDLS1)…(BegDLS5,EndDLS5)
ITDSrow
ITDSDschedule
ITDSDschedule
ITDRrow
ITDRrow
Where
row – row number (1 to 3). The Point Manager can accept 5 years (pairs)
of daylights savings times. Use row to select which 5 year group of
daylight savings information you want to access.
BegDLS – beginning daylight savings time in “mmddyyhhmmss” format.
EndDLS – ending daylight savings time in “mmddyyhhmmss” format.
Schedule – enumerated schedule where 1 – USA (default); 2 – old USA, 3
Greenwich Mean Time; 4 – Central European Time; 5 – Eastern
European Time.
Login Level
Description
Login Level:
ITS: Configure
ITR: Data
The Point Manager contains a 15 year daylight savings schedule. Because of
limitation of command size, the Point Manager uses 3 rows of 5 year daylight
savings schedules. You can specify your own schedule by using the “ITDS”
command. You select between one of 5 preestablished schedules using the
“ITDSD” command.
Examples
Command:
ITDR1
Response:
ITDR1,(040206020000,102906020000)(031107020000,110407020000)(030908
020000,11020
8020000)(030809020000,110109020000)(031410020000,110710020000)
Command:
ITDR2
Response:
ITDR2,(031311020000,110611020000)(031112020000,110412020000)(031013
020000,11031
3020000)(030914020000,110214020000)(030815020000,110115020000)
Command:
ITDR3
Response:
ITDR3,(031316020000,110616020000)(031217020000,110517020000)(031118
020000,11041
8020000)(031019020000,110319020000)(030820020000,110120020000)
Remark: Read the current daylight savings schedule
158 • Commands
Point Manager Manual
Command:
ITDSD3
Response: ITDSD3
Remark: Set a new daylight savings schedule using the Greenwich Mean
Time schedule
Command:
ITDS1,(032606030000,102906030000)(032507030000,102807030000)(033008
030000,102608030000)(032909030000,102509030000)(032810030000,1031100300
00)
Response: ITDS1
Command:
ITDS2,(032711030000,103011030000)(032512030000,102812030000)(033113
030000,102713030000)(033014030000,102614030000)(032915030000,1025150300
00)
Response: ITDS2
Command:
ITDS3,(032716030000,103016030000)(032617030000,102917030000)(032518
030000,102818030000)(033119030000,102719030000)(032920030000,1025200300
00)
Response: ITDS3
Remark: Set new daylight savings schedule (for 15 years)
Point Manager Manual
Commands • 159
‘IU’ – Information Pass-Thru
Command/Response Syntax
Parameters
Command:
Response:
IU
IU,state,last action,next action
Where:
state – current state of the Pass Thru Callout table: “Disabled”,
“Configuring”, “Waiting”, “Pushing”, “Connected”, and “Closing”.
last action – the last time a connection was attempted or if connected when
the connection was made (mmddyyhhnnss).
next action – time of the next attempt or if the currently connected “na”
(mmddyyhhnnss).
Login Level
Login Level:
Data
Description
The “IU” command provides information about the state of the Pass-Thru Media
Callout Table when it is trying to make a connection with host.
Example
Command:
IU
Response: IU,(Connected,012903105644,na)
Remarks: Successful connection
Command:
IU
Response: IU,(Waiting,012903105638,012903105833)
Remark: The connection was terminated. Waiting because of the delay.
160 • Commands
Point Manager Manual
‘IV’ – Version Information
Command/Response Syntax
Parameters
Command:
Response:
notice
IV
IV,version number,supported media list,server type,copyright
Where:
version number – version number of the firmware of the Point
Manager
supported media list – list of the supported media for the Point
Manager delimited by |.
Server type – the type of server: Point Manager or Point Logger.
copyright notice – copyright notice for the Point Manager software.
Login Level
Login Level:
None
Example
Command:
IV
Response:
IV,2.1|Serial|Radio|TCP/IP,Point Manager,"Copyright Jun 09
2004 16:05:35 Point Six, Inc."
Point Manager Manual
Commands • 161
‘IY’ – Information Synchronize the Clock
Command/Response Syntax
Parameters
Command:
IY
Response:
IY,sync adjust,next attempt,current time,
lastsntp,nextsntp,sntpcomment
Where:
sync adjust – amount of time in seconds to adjust the clock. As the function
runs this is the remaining time left to adjust.
next attempt – the number of seconds till the next attempt to adjust the
clock. The Point Manger is adjusting the time in stages.
current time – time of the clock (mmddyyhhnnss).
Lastsntp – last time the Point Manager attempted to get the time from the
SNTP service.
Nextsntp– next time the Point Manager will attempt to get the time from the
SNTP service.
Sntpcomment – status of the SNTP Client: “Off”, “Success”, “Trying to get
time”, and “Error: “.
Login Level
Login Level:
Data
Description
Use the “IY” command to examine the state of the Point Manager setting the clock
in stages. See the “CCSS” command for more information.
Example
Command:
IY
Response: IY,0,,032105154603,na,na,Off
Remarks: Point Manager is not currently synchronizing the clock
Command:
IY
Response: IY,57,3,032105154603,na,na,Off
Remark: Point Manager is synchronizing the clock in stages. It needs
to adjust the time by 57 seconds. The next attempt to adjust the clock
will occur in 3 seconds. 03/21/05 15:46:03 is the current time of the
clock
Command:
IY
Response: IY,0,0,111705192414,111705122408,111805002404,Success
Remarks: The SNTP client has successfully got the current time at
11/17/05 12:24:08 and then next time the Point Manager will get the
time is 11/08/05 00:24:04.
162 • Commands
Point Manager Manual
‘J’ – Configure/Read I/O Job Descriptions
Command Options
Command/Response Syntax
Parameters
J<C|R|S>
C – clear Job descriptions
R – read Job description
S – set Job description
Command:
Response:
Command:
Response:
Command:
Response:
JC
JC
JRn
JRn, jobdesc
JSn, jobdesc
JSn
Where:
n – row number of the group description (1 to 64)
jobdesc – description of the job (8 characters maximum)
Login Level
Description
Login Level:
JC – Configure
JR – Data
JS – Configure
The Job description used to label the association of jobs with I/O of a sensor. The
job description is a general purpose field and is not used by the Point Manager.
Each sensor I/O has an optional job row number. Use the job description row
number in the sensor I/O fields to describe the “job” of the I/O point. See the “CS”
command for more information.
The “S” command returns the number of job descriptions.
Example
Command:
JS1,Freezer1
Response: JS1
Remarks: Set the group description at the first row
Command:
JR3
Response: JR3,Freezer2
Remarks: Read the group description at row 3
Point Manager Manual
Commands • 163
‘K’ – Configure/Read Outputs
Command Options
Command/Response Syntax
Parameters
K<C|R|S>
C – clear Output table
R – read Output setup
S – set Output setup
Command:
KC
Response:
KC
Command:
KRn
Response:
KRn, type, desc, output sets, job row, interval, times, dest, packet
string
Command:
KSn, type, desc, output sets, job row, interval, times, dest, packet
string
Response:
KSn
Where:
n – row number of the Output setup (1 to 100)
type – 1 – sensor output packet (28 characters and enclosed in quotes); 2 –
output string – can include embedded escape characters.
desc – description of the output (8 characters maximum)
output sets – bit-mapped word describing the sets of which this packet is a
member (bits 0-15 correspond to Groups 1-16)
job row – the row number cooresponding to the Job association for this
output. See the “J” and “CS” commands for more information.
interval – duration (ddhhnnss) between transmissions
times – total number of transmissions (1 to 255) . 0 – transmit forever
dest – destination for the output: ‘M’ – Modem; ‘T’ – TCP/IP; ‘R’ –
Command Radio; ‘S’ – Local Serial port; ‘2S’ – Receiver Serial port
packet string – sensor packet (28 characters) or generic string (50 characters
maximum) that is transmitted. The sensor packet is enclosed in quotes.
“C style” escape sequences can be inserted in the generic string to
allow non-visible characters in the string. See the table below for the
possible options.
164 • Commands
Point Manager Manual
Escape
Sequence
Login Level
Description
Login Level:
Ascii
Code
Description
\a
07
Alert (bell) character
\b
08
Backspace
\f
0C
Form feed
\n
0A
Line feed
\r
0D
Carriage return
\t
09
Horizontal tab
\v
0B
Vertical tab
\\
5C
Backslash
\ooo
Pass an octal number
\xhh
Pass a hexidecimal number
KC – Configure
KR – Data
KS – Configure
The Point Manager can change the state of wireless outputs or send strings out one
of the media. The Point Manager will send the outputs or strings at regular intervals
and for a set amount of time.
Use the “PK” command to test the output. You can tie outputs to events, timers,
matches and the Scheduled Output control.
The “S” command returns the number of outputs.
Example
Command:
KS1,1,DESC,0,0,00000003,5,S,"11524F5A03D70000060000391E43"
Response: KS1
Remarks: Set output at row 1; send sensor packet; label: DESC; not part
of output set; no job; send every 3 seconds; send 5 times; send to
serial 1; sensor output packet in quotes
Point Manager Manual
Commands • 165
‘L’ – Login/Logout Commands
Command Options
LI
LO[C]
Command/Response Syntax
Parameters
Command:
Response:
Command:
Response:
Command:
Response:
LIpassword
LIpassword,level
LO
LO
LOC
LOC
Log in command
Log out command
Log out command and disconnect
Where:
password – either a data or configure password as set up with the
Configure Login Password (‘CPD’ and ‘CPC’). The password
parameter for this command is case sensitive.
level – level of access authorized by the Point Manager: 1 – ‘Data’; 2 –
‘Configure’
Login Level
Login Level:
none
Description
Point Manager will allow access to a set of commands based on the entered
password. There are two levels of access ‘Data’ and ‘Configure’. With the ‘Data’
login, a user can access the current readings, the I/O Status page, Historical and
Event Logs and other information. With the ‘Data’ login, the Point Manager will not
allow access to commands or Web page that change the setup information. With the
‘Configure’ login, the Point Manager will allow all commands to be processed.
For the “LI” command, if the password does not match the Data or Configure
password the Point Manager will return a 17 error code.
The “LOC” command causes the Point Manager to log out and then close the
connection.
Note: Login is case sensitive.
Note: If you forget your password, you will not be able to collect the data in the
Point Manager. You will have to reset the Point Manager to factory defaults and set
up new passwords.
Example
Command:
LInow
Response: LInow,1
Remarks: Login using the password “now”.
the “Data” login level.
166 • Commands
Logged in at level 1 which is
Point Manager Manual
‘ME’ – Configure/Read Scheduled Outputs
Command Options
Command/Response Syntax
Parameters
ME<C[F]|R|S>
C – clear Scheduled Output table
CF – clear Scheduled Output table and delete references in the Match table
R – read Scheduled Output setup
S – set Scheduled Output setup
Command:
MEC
Response:
MEC
Command:
MECF
Response:
MECF
Command:
MERn
Response:
MERn, desc, on action, on start output, on stop output, off action,
off start output, off stop output, force on action, force on start output, force on stop
output, force off action, force off start output, force off stop output, force end action,
force end start output, force end stop output
Command:
MESn, desc, on action, on start output, on stop output, off action,
off start output, off stop output, force on action, force on start output, force on stop
output, force off action, force off start output, force off stop output, force end action,
force end start output, force end stop outputstring
Response:
MESn
Where:
“action” – event actions that tell the Point Manager what to do with the
event. All event actions have the following options: ‘N’ - do nothing,
‘E’ – email, ‘L’ – log event in the Event Log, ‘M’ – log and email, ‘A’
– alarm and log the event, and ‘B’ – alarm, log and email.
“start output” – when an event occurs, the Point Manager will generate a
output start operation for the specified row. (See the “KS” command).
If this number is greater than 32768 (8th bit set) then this parameter
refers to a set of outputs where 32768 is output set 0 and 32769 is set 1
and 327611 is set 3. 0 is no action.
“stop output” – when an event occurs, the Point Manager will generate a
output stop operation for the specified row. (See the “KS” command).
If this number is greater than 32768 (8th bit set) then this parameter
refers to a set of outputs where 32768 is output set 0 and 32769 is set 1
and 327611 is set 3. 0 is no action.
n – row number of the Output setup (1 to 100)
desc – description of the Scheduled Output (8 characters maximum)
on – the output to send when the Scheduled Output turns “on”.
off - the output to send when the Scheduled Output turns “off”.
force on – the output to send when the Scheduled Output is overridden to
the “on” state.
force off – the output to send when the Scheduled Output is overriden to the
“off” state.
force end– the output to send when the Scheduled Output override is turned
off.
Point Manager Manual
Commands • 167
Login Level
Description
Login Level:
MEC – Configure
MECF – Configure
MER – Data
MES – Configure
The “ME” command sets up the outputs and event actions that a Scheduled Output
can trigger. The Scheduled Output has five states: on, off, force on, force off and
force end. The force states are triggered when the Scheduled Output is overridden
with a discrete input.
The “S” command returns the number of Scheduled Outputs.
Example
Command:
MER1
Response: MER1,Energy1,L,17,18,L,18,17,N,0,0,N,0,0,N,0,0
Remarks: Read Scheduled Output at row 1: Energy1-label,L-log on action,
on start – trigger output at 17; on stop – trigger output at 18; L –
log off action; off start – trigger output at 18; off stop – trigger
output at 17; force actions and outputs are off
Command:
MES2,Front,L,17,18,L,18,17,L,17,18,L,18,17,N,0,0
Response: MES2
Remarks: Set Scheduled Output at row 1: Front-label,L-log on action, on
start – trigger output at 17; on stop – trigger output at 18; L – log
off action; off start – trigger output at 18; off stop – trigger output
at 17; force on – log, start at 17, stop at 18; force off – log, start
at 18, stop at 17; force end actions and outputs are off
168 • Commands
Point Manager Manual
‘MM’ – Configure/Read Match Sensor Packet
Command Options
Command/Response Syntax
Parameters
MM<C[F]|R|S>
C – clear Match table
CF – clear Match table and delete references in the Scheduled Output table
R – read Match setup
S – set Match setup
Command:
MMC
Response:
MMC
Command:
MMCF
Response:
MMCF
Command:
MMRn
Response:
MMRn, kind, desc, sensor row, service filter, mask location, mask
and, mask result, action, start output, stop output, control kind, control row, control
trigger, control content
Command:
MMSn, kind, desc, sensor row, service filter, mask location, mask
and, mask result, action, start output, stop output, control kind, control row, control
trigger, control content
Response:
MMSn
Where:
n – row number of the Match setup (1 to 100)
kind – Match kind. 0 – packet matching; 1 – specific sensor event trigger
(mask location, mask and, mask result, control kind, control row and
control trigger are ignored)
desc – description of the match trigger (8 characters maximum)
sensor row – row number (1 to 100) of the sensor to match when a packet is
received from this sensor.
service filter – Is the service button mark involved in the match: (I,R,E): I –
Ignore; R – Require; E – Exclude..
mask location – byte position into the binary image of the sensor packet
(starting at 0). Packets are always 14 binary bytes. AsciiHexidecimal
string sensor packet is 28 characters plus 1 more for the carriage return.
If the mask location is greater than 13 then the a match trigger will
occur for every reception of the packet from a the sensor specified in
sensor row.
mask and – the mask to isolate the bit or bits to be examined in the byte at
the mask location of the sensor packet. This number is given in
hexidecimal and ranges from ‘01’ to ‘FF’.
mask result – the matching result from the “mask and” at the mask location
of the sensor packet.. This number is given in hexidecimal and ranges
from ‘01’ to ‘FF’.
action – event actions that tell the Point Manager what to do with the
event. All event actions have the following options: ‘N’ - do nothing,
‘E’ – email, ‘L’ – log event in the Event Log, ‘M’ – log and email, ‘A’
– alarm and log the event, and ‘B’ – alarm, log and email.
Point Manager Manual
Commands • 169
start output – when an event occurs, the Point Manager will generate a
output start operation for the specified row. (See the “KS” command).
If this number is greater than 32768 (8th bit set) then this parameter
refers to a set of outputs where 32768 is output set 0 and 32769 is set 1
and 327611 is set 3. 0 is no action.
stop output – when an event occurs, the Point Manager will generate a
output stop operation for the specified row. (See the “KS” command).
If this number is greater than 32768 (8th bit set) then this parameter
refers to a set of outputs where 32768 is output set 0 and 32769 is set 1
and 327611 is set 3. 0 is no action.
control kind – the kind of control to send triggers (N,E): N – None; E –
Scheduled Outputs.
control row – the row number of either the Schedule. This field is ignored
if control kind is set to ‘N’ for none.
control trigger – enumerated value that indicates the trigger action a control
should perform based on a match. See the table below for possible
values of control trigger. This field is ignored if control kind is set to
‘N’ for none.
control context – additional information for the control based on the control
trigger. This field is ignored if control kind is set to ‘N’ for none. Set
to 0 if not used.
control
trigger
Login Level
170 • Commands
Description
control context meaming
0
No trigger specified
ignored
1
Override to the Active State
(or “On” state)
Row index (from 0) of
the sensor I/O to be
examined. The sensor
I/O must be of type
“Data” and have the
format HHMM
2
Override to the InActive
State (or “Off” state)
Row index (from 0) of
the sensor I/O to be
examined. The sensor
I/O must be of type
“Data” and have the
format HHMM
3
Turn off Override
Row index (from 0) of
the sensor I/O to be
examined. The sensor
I/O must be of type
“Data” and have the
format HHMM
Login Level:
MMC – Configure
MMCF – Configure
MMR – Data
MMS - Configure
Point Manager Manual
Description
There are two types of Match functions available. First type is the “Match Sensor
Packets” which allows you to define what sensor I/O states trigger specific actions in
the Scheduled Outputs or trigger event actions or outputs. This type can trigger the
20: “Match”, 102: “Force On”, 103: “Force Off” or the 104: “ForceEnd” events. For
the Scheduled Outputs, the Match Sensor Packet allows you to define what I/O state
triggers the different override states of the control: Active (or “On”), Inactive (or
“Off”), Clear.
The second type is the “specific sensor event trigger” which allows specific sensors
to trigger events outside of the Point Manager event mechanism. Currently the
CounterRng sensor (type 23) is supported. Using the match construct you can
trigger the 120: “Count Time” event. To set up this event specify the sensor row in
the Sensor table that contains the CounterRng. Specifiy the event action, start output
or stop output row number for the type of action when this event is triggered.
Specify all other fields with the disabled values. Each CounterRng sensor in the
Sensor Table that needs the 120: “Count Time” event specified will have an entry in
the Match table.
The “S” command returns the number of Match Sensor Packets.
Example
Command:
MMS1,0,OVER_REQ_ACT ,1,I,5,FF,1,N,0,0,E,1,1,2
Response: MMS1
Command:
MMS2,0,OVER_REQ_INACT,1,I,5,FF,2,N,0,0,E,1,2,2
Response: MMS2
Command:
MMS3,0,OVER_REQ_CLEAR,1,I,5,FF,0,N,0,0,E,1,3,2
Response: MMS3
Remark: The 3 commands set up the 3 match triggers. It assumes that 2
outputs and a SPACE sensor is defined (at row 1). Match triggers at
rows 1,2,3; description names, use the sensor at row 1, Ignore service
button mark; mask location at byte 5, “mask and” is FFH; 1,2,0 – mask
result (in hex); no event action; no start output, no stop output, E –
scheduled output trigger; 1 – scheduled output row; 1,2,3 – trigger
types for scheduled outputs; 2 – 3rd I/O of SPACE Temp
Command:
MMR1
Response: MMR1,1,COUNTERRNG,1,I,0,00,00,B,0,0,N,1,0,0
Remark: “specific sensor event trigger”, set up for COUNTERRNG sensor
in row 1 of the sensor table. The Event action is alarm, log and
email.
Point Manager Manual
Commands • 171
‘O’ – Test Sensor I/O Correction
Command Options
Command/Response Syntax
Parameter
O
Command:
Response:
Ocorrection id, raw analog value
Ocorrection id, raw analog value, corrected value
Where:
correction id – references the correction table in the Point Manager
raw analog value – analog value to test (0 to 65535)
corrected value – the corrected value that Point Manager calculates when it
applies the Correction Table.
Description
With the “O” command, Point Manager will return a corrected value based on the
raw analog value passed as referenced by the correction id. The correction id tells
Point Manager which Correction to use when calculating the corrected value. This
command gives the user a means to test Point Manager’s correction function
manually. If the correction id does not exist, Point Manager will return an error 22.
Please see the “CO” command for more information.
Examples
Command:
O129,4000
Response: O129,4000,425
Remarks: Point Manager uses the permanent internal correction table
defined by correction id 129 and apply a correction to the value 4000.
Point Manager calculates a value of 425
Command:
O10,240
Response: O129,240,242
Remarks: Point Manager uses the correction table defined by correction
id 10 and applies a correction to the value 240. Point Manager
calculates a value of 242.
172 • Commands
Point Manager Manual
‘P’ – Force Call (Push a Connection)
Command Options
Command/Response Syntax
Parameter
P<n|A|E|ING|R>
Command:
Response:
Command:
Table
Response:
Command:
test message.
Response:
Command:
Response:
Command:
Table
Response:
Pn
Pn
PA
Push a specific entry row in the Media Callout Table
Iterate through all the entry rows in the Media Callout
PA
PEmessage
Force the Point Manager to immediately email a
PE
PINGipaddress
PINGipaddress,resolve result,ping result
PR
Stop the calling and iterating through the Media Callout
PR
Where:
n – the row in the Media Callout Table (1 to 5)
message – message that is sent with the test email. (100 characters
maximum)
ipaddress – ip address or name
resolve result – message of the resolve result: “Unable to resolve” or
“Resolved”.
ping result – message of the ping results: “Success” or “Failed”.
Login Level
Description
Login Level:
Pn – Data
PA – Data
PE – Data
PING - Data
PR – Data
The “P” commands can be use test and trouble shoot the parameters that are set up in
the Media Callout Table. With this command you could test whether a host IP
address and port are correct, whether a phone number and dialing configure will
work or a host destination be emailed. The “P” command will initiate the Call but
does not provide any feedback as to whether or not the call was successful. Use the
“P” command in conjunction with the Media Information command (“IM”) and the
“CN” command for emails. Use the “ID” and “IE” commands to provide
information about the delivery process. Use the “V” command to obtain more
interactive information about the connection process.
The “PING” command validates if the passed ip address can be pinged. Use this
command to check the IP addresses passed in the Media Callout Table, addresses set
in the Point Manager for gateway and name server, and addresses setup for email.
The “PING” command may take up to 20 seconds to complete.
Point Manager Manual
Commands • 173
Examples
Command:
P1
Response: P1
Remarks: Tell the Point Manager to use the first entry in the Media
Callout Table to place a call.
Command:
PA
Response: PA
Remarks: Iterate the whole Media Callout Table
Command:
PEtesting email
Response: PE
Remarks: Force the Point Manager to email the destination host
(previously setup with the “CN” command).
Command:
PR
Response: PR
Remarks: Stop the calling or iteration of the Media Callout Table
Remarks: examples of using the PING command
Command:
PING192.107.41.34
Response: PING192.107.41.34,Unable to resolve,Success
Command:
PINGabc.com
Response: PINGabc.com,Resolved [204.202.136.32],Success
Command:
PING192.168.1.199
Response: PING192.168.1.199,Unable to resolve,Failed
174 • Commands
Point Manager Manual
‘PK’ – Force Output
Command Options
Command/Response Syntax
Parameter
PK<A|D|T>
Command:
Response:
Command:
Response:
Command:
Response:
PKAn Activate the Output packet (start output)
PKAn
PKDn Deactivate the Output packet (stop output)
PKDn
PKTn Test the Output packet (send output once)
PKTn
Where:
n – the row number of Output packet. If this number is greater than 32768
(8th bit set) then this parameter refers to a set of outputs where 32768 is
output set 0 and 32769 is set 1 and 327611 is set 3. 0 is no action.
Login Level
Description
Login Level:
PKA – Data
PKD – Data
PKT – Data
The “PK” commands can be use test and trouble shoot the output packets set up with
the “KS” command. Use the “IK” command to get information about the state of the
output.
Examples
Command:
PKA1
Response: PKA1
Remarks: Tell the Point Manager to active (start) the first output.
Command:
PKD1
Response: PKD1
Remarks: Tell the Point Manager to deactive (stop) the first output.
Command:
PKT2
Response: PKT2
Remarks: Tell the Point Manager to send the first output only once
instead following the times set up with the KS command.
Point Manager Manual
Commands • 175
‘PX’ – Force XML Delivery
Command Options
PX<E|H>1
E – Event Delivery
H – History Delivery
Command/Response Syntax
Login Level
Description
Command:
Response:
PXE1
PXE1
Command:
Response:
PXH1
PXH1
Login Level:
PXE1 – Data
PXH1 – Data
The “PXH” command causes the Point Manager to initiate an XML Delivery attempt
immediately. The Point Manager considers this a valid attempt and will set the
History or Event position if the HTTP server sends an acknowledgment. Use the
“IL” command to view the status of this attempt.
Examples
Command:
PXH1
Response: PXH1
Remarks: Tell the Point Manager to start the XML Delivery function now.
176 • Commands
Point Manager Manual
‘PY’ – Attempt Automatic Time Update
Command/Response Syntax
Login Level
Description
Command:
Response:
Login Level:
PY
PY
PY – Data
The “PY” command causes the Point Manager to initiate a connect to an NTP Server
to update the clock. See the “CCN” and “IY” commands for more information.
Examples
Command:
PY
Response: PY
Remarks: Tell the Point Manager to get the lastest time from the NTP
Server.
Point Manager Manual
Commands • 177
‘S’ - Get Status Data Command
Command Options
Command/Response Syntax
Parameters
S[R|RP|RA]
R – reset alarm time, periodic time and alarm push connection.
Command:
S
Response:
S,sensor count, last setup change time, alarm time, periodic time,
job count, output count, timer count, match count, scheduled output count
Command:
SR
Response:
SR,sensor count, last setup change time, alarm time, periodic time,
job count, output count, timer count, match count, scheduled output count
Command:
SRA
Response:
SRA,sensor count, last setup change time, alarm time, periodic
time, job count, output count, timer count, match count, scheduled output
count[,failed]
Command:
SRP
Response:
SRP,sensor count, last setup change time, alarm time, periodic
time, job count, output count, timer count, match count, scheduled output
count[,failed]
Where:
sensor count – number of sensors in the sensor list
last setup change time – time and date of the last setup change
(mmddyyhhnnss)
alarm time – na – no current alarm; mmddyyhhnnss – time of when the first
alarm occurred since the last reset.
periodic timer – na – no periodic alarm pending; mmddyyhhnnss – time of
when the first periodic time alarm was reached since last reset.
job count – number of jobs in the job list. See the “JS” command.
output count – number of outputs in the output table. See the “KS”
command.
timer count – number of timer outputs in the timer table. See the “TS”
command.
match count – number of matches in the match table. See the “MMS”
command.
scheduled output count – number of schedule outputs. See the “MES”
command.
failed – reseting the periodic alarm time failed: “,F”; blank if succeeded.
This field is always at the end of the record. If additional fields are
added, the failed field will always end the record.
Login Level
178 • Commands
Login Level:
Data
Point Manager Manual
Description
Returns the number of sensors in the configuration table and the when the last alarm
from an event or periodic timer occurred. It also returns the number items for jobs,
outputs, timers, matches, and scheduled outputs.
The last setup change time can be used by host to determine if the setup has been
changed by a second host.
R – reset the media callout. Both the periodic and alarm times are reset.
RA – reset the alarm time and if periodic alarm is not pending then reset the media
callout if at the end of the Event Log. If not at the end of the Event Log, Point
Manager will fail to reset and the failed parameter will be “,F”.
RP – reset the periodic alarm time and if an alarm is not pending then reset the
media callout.
Examples
Command:
S
Response: S,6,082503153753,na,na,0,22,0,6,2
Remarks: 6 sensors are set up; last setup change occurred at 08/25/03
15:37:53; no alarm; no periodic callin; 0 jobs; 22 outputs; 0 timers; 6
matches; 2 scheduled outputs.
Point Manager Manual
Commands • 179
‘SO’ - Set Exception Schedule
Command Options
Command/Response Syntax
Parameters
SOR<E>n
SOS<E>n
Read Exception Schedule for either Schedule Outputs (E)
Set Exception Schedule for either Schedule Outputs (E)
Command:
SOREn
Response:
SOREn,, from1 date, to1 date, start time1, duration1,
modem,..fromm date, tom date, start timem, durationm, modem
Command:
SOSEn,, from1 date, to1 date, start time1, duration1,
modem,..fromm date, tom date, start timem, durationm, modem
Response:
SOSEn
Where:
n – row number of the Scheduled Output
m – number of Exception Schedules (1 to 5)
from date – from date for the exception (mmddyy)
to date – to date for the exception (mmddyy)
start time – start time for when the mode will start (hhmmss).
duration – duration of the mode (ddhhmmss)
mode – (T/F) T – Active or “On” schedule; F – Unactive or “Off” schedule.
Login Level
Description
Login Level:
SORE – Data
SOSE – Configure
With the “SO” command, you can set up to 5 exception schedules that override the
daily schedule. All schedules for the control are set on the same command line. An
exception schedule entry can span multiple days. The from date and to date defines
the span of the excecption schedule. The start time and duration defines when the
time frame of the mode occurs for each day.
Examples
Command:
SOSE1,090303,090303,080000,00100000,F
Response: SOSE1
Remarks: set for first Scheduled Output control; one exception
schedule; from 09/03/03; to 09/03/03; start at 08:00:00; for 10 hours
set output to inactive.
Command:
SORE3
Response: SORE3,092103,092603,080000,00100000,F
Remarks: for third scheduled output; one exception schedule; from
09/21/03; to 09/26/03; start at 08:00:00; for 10 hours set output to
active state for each day.
Command:
SORE3
Response: SORE3,070403,070403,080000,00100000,F
,122503,122503,080000,00100000,F
Remarks: for third scheduled output; two exception schedule; from
07/04/03; to 07/04/03; start at 08:00:00; for 10 hours set to inactive
for each day. from 12/25/03; to 12/25/03; start at 08:00:00; for 10
hours set to inactive for each day.
180 • Commands
Point Manager Manual
‘SW’ - Set Day of Week Schedule
Command Options
Command/Response Syntax
Parameters
SWR<E>n
SWS<E>n
Read Weekly Schedule for either Schedule Outputs (E)
Set Weekly Schedule for either Schedule Outputs (E)
Command:
Response:
Command:
Response:
SWREn
SWREn,, start timeday1, durationday1,…start timeday7, duration day7
SWSEn,, start timeday1, durationday1,…start timeday7, duration day7
SWSEn
Where:
n – row number of either Scheduled Output.
start time – start time to either Active or “On” schedule (mmddyyhhmmss)
duration – duration of either Active or “On” schedule (ddhhmmss)
Login Level
Description
Login Level:
SWRE – Data
SWSE – Configure
With the “SW” command, you can set up a default weekly for each day of the week
(Sunday through Saturday).. The start time and duration specify when and how long
the control will be Active or in “On” mode. For times not specified, the control is
assumed to be InActive or in “Off” mode.
Examples
Command:
SWRE1
Response:
SWRE1,120000,00080000,120000,00080000,080000,00100000,080000,
00100000,080000,00100000,080000,00100000,090000,00080000
Remarks: Sunday: 12:00:00, 8 hours; Monday: 12:00:00, 8 hours; Tuesday:
08:00:00, 10 hours; Wednesday 08:00:00, 10 hours; Thursday 08:00:00, 10
hours; Friday 08:00:00, 10 hours; Saturday 09:00:00, 8 hours
Point Manager Manual
Commands • 181
‘T’ - Set/Read Timers
Command Options
Command/Response Syntax
Parameters
T[C|R|S]n
C – Clear Timer
R – Read Timer
S – Set Timer
Command:
Response:
Command:
Response:
Command:
Response:
TC
TC
TRn
TRn,start time, interval, next time, start output, stop output
TSn,start time, interval, start output, stop output
TSn
Where:
n – row number of the Timer.
start time – start time when the timer will fire the start output or stop output
(mmddyyhhmmss)
interval – the amount of time since the startup time or the last interval when
the timer will fire the start output or stop output (ddhhmmss). If
interval is set to “00000000”, then the timer will fire only once.
next time – next time when the timer will fire the start output or stop output
(mmddyyhhmmss). If the timer has never fired then next time will be
“na”
start output – when an event occurs, the Point Manager will generate a
output start operation for the specified row. (See the “KS” command).
If this number is greater than 32768 (8th bit set) then this parameter
refers to a set of outputs where 32768 is output set 0 and 32769 is set 1
and 327611 is set 3. 0 is no action.
stop output – when an event occurs, the Point Manager will generate a
output stop operation for the specified row. (See the “KS” command).
If this number is greater than 32768 (8th bit set) then this parameter
refers to a set of outputs where 32768 is output set 0 and 32769 is set 1
and 327611 is set 3. 0 is no action.
Login Level
Description
Login Level:
TC – Configure
TR - Data
TS – Configure
With the “T” command, you can set the Point Manager to send outputs at periodic
intervals..
Examples
Command :
TS1,090403142500,00000500,1,0
Response: TS1
Remarks: set the first timer to start the output at row 1 starting at
09/04/03 14:25:00 every 5 minutes.
182 • Commands
Point Manager Manual
Command :
TR2
Response: TR2,090403143600,00000500,090403144100,2,0
Remarks: the second timer is set to start to start the output at row 2
starting at 09/04/03 14:36:00 every 5 minutes. The next time it will
fire is at 09/04/03 14:41:00
Point Manager Manual
Commands • 183
‘U’ - Set Pass-Thru Mode
Command Options
Command/Response Syntax
Parameters
U[E|N|Q|R|S]
Command:
Response:
Command:
Response:
Command:
Response:
Command:
Response:
Command:
Response:
UE
UE
UN
UN
UQ
UQ
UR
UR,mode
US
US
Where:
mode – “E”, “F”,”N”, “S” or “T”
Login Level
Login Level:
Data
Description
“UE” tells Point Manager to set the current media connection to pass thru mode
using engineering mode. See the section “Point Manager Functions: Pass-Thru
Mode” for information about the fields sent.
“UN” turns off pass thru mode for the current media.
“UQ” temporarily turns off pass thru mode for the current media. Point Manager
will resume pass thru mode when the connection is terminated or when the log off
command (“LO”) is issued. Send this command first in a sequence of commands if
you do not want to process the asynchronous data from pass thru mode.
“UR” reads the current setting of the pass thru mode for the current media. The
Point Manager will respond with:
“E” - engineering mode
“F” - engineering mode temporarily quieted
“N” – Pass-Thru off
“S” – standard mode
“T” – standard mode temporarily quieted
“US” tells Point Manager to set the current media connection to pass thru mode
using standard mode.
When in engineering mode, the Point Manager will convert the I/O data received
from a Point sensor and then forward the converted record across the current media.
When in standard mode, the Point Manager will send the packet it received from a
Point sensor as is across the current media.
For more information about the format of the data sent via pass thru mode, see the
documentation for your specific Point sensor.
184 • Commands
Point Manager Manual
Examples
Command:
US
Response: US
Remarks: Turn on standard pass thru mode for the current media.
Manager will start sending asynchronous packets:
5428769D1B000000C30158B68E0A
11301020024F0C0029560232B334
11301020024F0C0029560232B334
Point
Command:
UE
Response: UE
Remarks: Turn on engineering pass thru mode for the current media.
Point Manager will start send converted data asynchronously:
na,2Humid_Temp,2,D40000000B1FBD28,F,F,F,45,%RH,T,71.6,F
na,3Limit_Switch,6,0000000000181032,F,F,T,trans.,state,F,186,open,F,106
,close
Command:
UQ
Response: UQ
Remarks: Temporarily turn off pass thru mode until log off or
disconnect
Point Manager Manual
Commands • 185
‘V’ – Verbose
Command Options
Command/Response Syntax
Parameter
Description
V<B|E>
Command:
Response:
Command:
VB
VB
VE
Start Verbose Mode
End Verbose Mode
None
Verbose Mode is used to troubleshoot and diagnose problems with the Point
Manager. When in Verbose Mode, the Point Manager will send asynchronously
message strings out through the media in which the “V” command was sent. These
string messages show information such as when a packet of data is received, when
events are triggered, when Media Callout Table is initiated, when connects are made
attempted to a host and so on.
Verbose Mode should only be used for troubleshooting. Do not use this mode with a
program. The message strings might change in future firmware releases of the
product.
The Point Manager when in Verbose Mode does not use the Inactivity Timer. Point
Manager in this mode will not automatically disconnect from a media when there is
not activity.
Since the Serial port and the Command Radio is active all the time and the Point
Manager does not automatically turn off Verbose Mode, programs should send a
“VE” command to the Serial port to start a conversation. If Verbose Mode is enable
while a program is sending commands, verbose messages might sent ahead of the
command response thus creating errors and confusion for the program.
The “V” command is very useful in combination with the “P” command.
Examples
Command:
VB
Response: VB
Remarks: Start Verbose Mode
Command:
VE
Response: VE
Remarks: End Verbose Mode
Remarks: Example conversations with Verbose Mode on
CSR1
OD - CfgSet_Sensor
CSR1,2,7D000000059A9328,1Humid(A1.000,0.000,%RH,0)(A0.1125,32.0000,degF
,1)
CMS3,20(M2336784)
CMS3
P1
OD - Push Modem connection: 29
P1
OD - Modem Failed to establish connection
OD - Modem Listening
186 • Commands
Point Manager Manual
‘XD’ – XML Delivery Destination
Command Options
Command/Response Syntax
Parameters
XD<E|H><R|S>1
E – Event Delivery
H – History Delivery
R – read Destination parameters
S – set Destination parameters
Command:
XDES1, domain,urlpath,[port]
Response:
XDES1, domain
Command:
XDER1
Response:
XDER1, domain,urlpath,[port]
Command:
XDHS1, domain,urlpath,[port]
Response:
XDHS1, domain
Command:
XDHR1
Response:
XDHR1, domain,urlpath,[port]
Where:
domain – domain name of where to deliver the XML data. Can be either a
domain or a valid IP address.
urlpath – path name where to send the XML data.
port – ip port. Default is 80.
Login Level
Description
Login Level:
XDES1 – Configure
XDER1 – Data
XDES1 – Configure
XDHR1 – Data
Use the “XD” to specify where to deliver the XML data.
Example
Command:
XDHS1,192.168.1.40,/Point Manager Test,1024
Response: XDHS1
Remark: set domain to 192.168.1.40; URL path is /Point Manager Test;
port number is 1024
Command:
XDHR1
Response: XDHR1,acme.com,/hostside,80
Remark: acme.com – domain; /hostside – URL Path; 80 – default port
number
Point Manager Manual
Commands • 187
‘XM’ – XML Delivery History Log Position
Command Options
Command/Response Syntax
Parameters
XM<E|H><R|S>1
E – Event Delivery
H – History Delivery
R – read Interval parameters
S – set Inverval parameters
Command:
Response:
Command:
Response:
Command:
Response:
Command:
Response:
XMES1, timestamp[index] or F - First; L - Last
XMES1, timestamp[index] or F - First; L - Last
XMER1
XMER1, timestamp[index]
XMHS1, timestamp[index] or F - First; L - Last
XMHS1, timestamp[index] or F - First; L - Last
XMHR1
XMHR1, timestamp[index]
Where:
timestamp – set the History Log position to the first record that is greater than
the passed timestamp (mmddyyhhmmss). When part of the response,
timestamp is the time and date of the record that will delivered next.
index – two digit ASCII Hexadecimal number (“00” to “FF”) starting at 01.
Used to access multiple records that have the same time stamp.
Login Level
Description
Login Level:
XMES1 – Configure
XMER1 – Data
XMHS1 – Configure
XMHR1 – Data
The Point Manager moves the History or Event Log position as the sent XML data is
acknowledged. To obtain older data or newer data use the “XM” command to set
the History or Event Log position. You can set the position to the beginning or the
end of the History or Event Log. You can also specify a time to access records
within the History Log. Both “XM<E|H>R1” and “XM<E|H>S1” will return “na” if
there are no records in the History or Event Log.
Note: Be careful when using this command. If the History or Event Log is full and
the log position is set to the beginning, it may take a long time to deliver all the data.
Example
Command:
XMHS1,F
Response: XMHS1,01070421015701
Remark: Set History Log Position to the beginning (first record)
Command:
XMHS1,01010400000001
Response: XMHS1,01070421015701
Remark: Set History position to beginning of year 2004 but first record
is at 01/07/04 21:01:57 at the first index.
188 • Commands
Point Manager Manual
‘XP’ – XML Delivery Interval Parameters
Command Options
Command/Response Syntax
Parameters
XP<E|H><R|S>1
E – Event Delivery
H – History Delivery
R – read Interval parameters
S – set Inverval parameters
Command:
Response:
Command:
Response:
nextInterval
Command:
Response:
Command:
Response:
XPES1, periodbase,periodinterval,tries,retrytime,alarm
XPES1, periodbase
XPER1
XPER1, periodbase,periodinterval,tries,retrytime,alarm,
XPHS1, periodbase,periodinterval,tries,retrytime
XPHS1, periodbase
XPHR1
XPHR1, periodbase,periodinterval,tries,retrytime,nextInterval
Where:
periodbase – date and time to start the XML Delivery process
(mmddyyhhmmss).
periodinterval – the interval (start from the base) to deliver the XML data
(ddhhmmss). The minimium interval is 10 seconds.
tries – the number of times to try a delivery attempt during the interval.
retryTime – this the amount of time to wait between tries
nextInterval – the time of the next delivery interval
Login Level
Description
alarm – initiate the XML Delivery mechanism when an alarm occurs.
Login Level:
XPES1 – Configure
XPER1 – Data
XPHS1 – Configure
XPHR1 – Data
Use the “XP” command to specify when to deliver the XML data. To reset the XML
Delivery parameter, send the command “XPES1,0,0,1,1” or “XPHS1,0,0,1,1”.
Example
Command:
XPHS1,012104221030,00000100,2,15
Response: XPHS1
Remark: Start the delivery at 01/21/04 22:10:30 and attempt every
minute; retry twice every 15 seconds if error
Point Manager Manual
Commands • 189
‘XT’ – XML Date and Time Format
Command Options
Command/Response Syntax
Parameters
XT<R|S>
R – read Date-Time format
S – set Date-Time format
Command:
XTS format
Response:
XTSformat
Command:
XTR
Response:
XTR, format
Where:
format – 0 – “mm/dd/yy hh:mm:ss”; 1 - “yyyy-mm-ddThh:mm:ss” which is
subset of ISO 8601
Login Level
Description
Login Level:
XTS – Configure
XTR – Data
Set or Read the date-time format that is used by Point Manager in the XML Delivery
data.
Example
Command:
XTS1
Response: XTS1
Remark: Set the XML Delivery date-time stamp to “yyyy-mm-ddThh:mm:ss”
format
190 • Commands
Point Manager Manual
Point Manager Manual
• 191
Error Codes
Overview
When the Point Manager encounters a problem with the command string it will write
out an error response. This response takes the form <BEL>ee,Cmd where <BEL>
is the ASCII 07 code (Ctrl-G on most terminal emulation programs); ee is the
specific error (see below); Cmd is an echo of the primary command that contained
the error. The primary command is the entire command string or the first part of the
string up to but not including the first comma.
Error Code List
Error Code
1
2
3
4
5
6
7
8
9
10
11
12
13
14
15
16
17
18
19
20
Point Manager Manual
Meaning
Invalid command
Position or Range Error
Command syntax error; command cannot be parsed
Syntax error inside parentheses for sensor configuration
Wrong type specifier; specified type does not exist
Type cannot be changed or new sensor cannot be this type
Table is full
Invalid command configuration
No password – did not previously logged in
Not configured
Connection failed
Already connected
Illegal parameter
Syntax error with the sample
Illegally changing sample type
Cannot perform operation because the Historical Log or the
Event Log has data records. Clear either the Historical Log or
the Event Log and try the command again.
Password given with the “LI” command does not match the
Data or Configure passwords
The parameter cannot be modified while sending email
Delivery busy: an Active alarm or test in progress
Write to flash memory failed. Internal Error or flash memory
has failed.
Error Codes • 193
21
22
23
24
25
26
27
28
29
30
31
32
33
34
35
36
37
38
“BAD CFG”
194 • Error Codes
Did not receiver a response to a batch command
No correction entry table foun
Out of dynamic memory
No match for the media kind / instance specified
Internal Error
Sensor serial number is already in use
Cannot share the same media in Media Callout table and the
PassThru Media Callout table
Correction parameter is out of range
Not a valid group Output ID or Output ID
Job number is not defined
Control kind does not support Trigger
Control is in use. Cannot delete
Output is referenced. Cannot delete.
Jobs are referenced. Cannot delete.
Command rejected. Function not supported.
Cannot Synchronize the clock
Point Manager is synchronizing the clock and cannot execute
command.
Cannot set time near a Daylight savings boundary
A Sensor has been set up incorrectly. The sensor’s setup of the
I/O Point types does not match the sensor’s type of I/O Points.
Point Manager Manual
Appendix
Modem Support (Option)
General Usage
The Point Manager will honor any Point Manager command received through the
modem port. Use the <^A> prefix with a CRC16 postfix for commands when using
a standard dial modem. The Point Manager protocol provides a means of detecting
errors in the communications. If the modem has a high level protocol with error
detection and retries (like the TCP/IP in a cellular modem), then use the simpler
<^B> Point Manager protocol. For more information see the “Point Manager
Protocol” section in the “Communicating with the Point Manager” chapter of the
Point Manager manual.
The Point Manager will support any modem that uses the AT command set. The
modem may need to be pre-configured (with parameters saved to nonvolatile
memory or switch settings) in order to be used with the Point Manager. The
following is a list of requirements for the modem that Point Manager uses:
•
Point Manager uses DTR handshake line to either disconnect or enter
command mode. If DTR is used to enter command mode, a disconnect
command needs to be entered in the Hangup string.
•
Support auto-baud or be settable to 19200 baud.
•
Must assert DCD handshake line when a connection is established.
•
Point Manager uses CTS and RTS for data flow control.
The Point Manager currently has default support for four types of modems: dialup
Hayes AT compatible modem, MultiTech MultiModem GPRS Wireless Modem
(Model: MTCBA-G-F2), Enfora GSM1218 and ConnectOne iModem. Other AT
modems can be supported simply by modifying the modem strings.
The Point Manager has six states that are used to manage the external modem:
Initialization, Listen, Reset, Push, Connect and Hangup.
Initialization
The Point Manager sends the initialization commands when it first powers up, upon an
error with any of the other states or if a Point Manager command is not received while a
connection is made. The Point Manager pulses the DTR handshake line and then sends
Point Manager Manual
Appendix • 195
an Escape Sequence ( 1 second delay ‘+++’ 1 second delay) and the ATZ command. If
an “OK” is received then the Point Manager sends the “ATS7=255S0=” command. The
Point Manager then sends the initialization command string. After the initialization
string is successfully sent, the Point Manager then enters the Listen state. If there was an
error during the initialization state the Point Manager will retry the initialization state
after 30 seconds.
Listen
The Point Manager sends the Listen commands to set up the modem to answer
incoming connection attempts. Most modems do not need this state since the
initialization state will accomplish the same thing. If the Initialization and Listen
string commands were successful, the Point Manager then wait for the modem to
answer in coming connection attempts.
Reset
If the Point Manager encounters errors when in the Initialization and Listen states,
after 5 tries the Point Manager will send the Reset string commands to the modem in
order to reset the modem. After the Reset string commands have been sent, the Point
Manager will wait 30 seconds and then enter the Initialization state. If the Reset
string is empty, the Point Manager just enters the Initialization state after waiting 30
seconds. The Reset state is not normally needed but some modems may get into a
lockup state and require a “reset” to continue functioning.
Push
The Point Manager uses the Push state to force the modem to initiate a connection
with another modem or network. If the Push command string is blank, the Point
Manager by default will send the “ATDTphone number” string using the phone
number listed in the Media Callout Table (“CMS” command). If there are entries in
the Push string, then Point Manager will use those entries to send to the modem. The
Point Manager has a substitution feature where if “%%h” is placed in the Push
string, the Point Manager will take the entry made in the Media Callout table and
substitute it for the “%%h”. This mechanism allows a phone number or network
host name to be inserted into the Push string. “%%p” is used to substitute a IP port
number if it is specified in the Media Callout table otherwise the default IP port
(1050) will be used.
Connect
Point Manager enters the Connect state when it detects the modem has connected to
another device by monitoring the DCD (Carrier Detect) handshake line. This can
occur while in the Listen or Push states. At this point the Point Manager is ready to
respond to Point Manager commands. If a valid command is never received and/or if
the Inactivity time (60 seconds) has expired, the Point Manager will enter the
Hangup state. If no valid command has been received then the Point Manager will
enter the Initialization state after the Hangup state is finished otherwise it will enter
the Listen state. The Point Manager will also leave the Connect state if the DCD
handshake line indicates the connection has been dropped.
Hangup
The Point Manager pulses the DTR handshake line to instruct the modem to hangup
the connection. If any Hangup commands are listed in the Hangup string then the
Point Manager will send these commands. The Point Manager will enter the Listen
state if a valid command was received during the Connect state or it will enter the
Initialization state.
196 • Appendix
Point Manager Manual
Command Strings
There are 6 modem command strings: Initialization, Listen, Signal Strength, Reset,
Hangup and Push. Any or all 6 strings can be blank. Each command in each string
is delimited by ‘;’. The Point Manager iterates through the string and sends
commands one by one that are delimited. No “AT” prefix is given. The Point
Manager adds the “AT” prefix as it sends each command.
For a Initialization, Listen and Reset strings a macro directive can be entered in place
of a command to have the Point Manager wait a specified number of seconds before
continuing with the next command or next state. The macro directive format is
“%%dx” where x is the number of seconds to pause.
The Signal Strength command is sent when the Listen state is executed. Point
Manager takes the response given by the modem and stores it. You can retrieve the
response using the “IMM” command. This mechanism was intended to be used to
capture the signal strength of a cellular modem but any AT command can be used.
You can use this mechanism to capture a value from a modem register.
Media Callout Table
The Media Callout Table contains a list of the contact information necessary to
initiate a connection. The first entry is the primary contact. The remaining entries
are fallback contacts if the first entry fails after the specified retries. Technically you
could specify the contact information in the Push string but you would loose the
capability of using the fallback contacts. The CMS command supports the use of
specifying a host name and port address in the path string. For example, suppose a
cellular modem is used that can access the Internet. The command is
CMS1,10(Mwww.acme_services.com). The Point Manager supports a substitution
function in the Push string. “%%h” is used to substitute the hostname from the
media callout table into the Push string. “%%p” is used to substitute the IP port
number into the Push string. The syntax for the path in the CMS command is
(Mhostname[|port number] where hostname can be a valid domain name, an IP
address or a telephone number; port number is an optional IP port number. The IP
port number does not apply when a telephone number is used in the host name.
Powerup Delay
After power up the Point Manager will wait for a set period of time before trying to
initialize it. This delay is to give the modem a chance to initialize before having to
honor commands from the Point Manager. See the “D” type in the “CTT” command
for more information.
Dialup Modem
The Point Manager can use the dialup AT modem by default with either no setup or
minimum setup. You may need to set up the modem to hang-up the modem upon
assertion of the DTR handshake line. Just attach the modem to the modem port
using a straight through cable. Power up the modem and the Point Manager will
initialize the modem. Use the “IM” and “IMM” commands to determine if the
modem was initialized properly and ready for to answer or initiate a connection.
The default power delay for the dialup AT modem is 10 seconds.
Point Manager Manual
Appendix • 197
U.S. Robotics V.92 Setup
Switch settings:
Switch
1
2
3
4
5
6
7
8
Setting
UP
UP
DOWN
UP
DOWN
UP
UP
DOWN
Comment
Data Terminal Ready normal
Verbal Results
Display result codes
Echo offline commands
Auto answer off (Point Manager will enable it)
Carrier detect normal
Load NVRAM defaults
Smart mode
Point Manager Initialization Strings
No changes are needed to the default initialization strings.
Cell Modem
MultiTech MultiModem GPRS Wireless Modem (Model:
MTCBA-G-F2) Setup
Setup Commands to Configure MultiTech MultiModem GPRS Wireless Modem
(Model: MTCBA-G-F2)
AT+WOPEN=1
AT#PPPMODE=1
AT#GPRSMODE=1
AT#APNSERV=”ISP.CINGULAR”
AT#APNUN=”[email protected]
AT#APNPW=”ZXY203DC9K0402”
AT#DLEMODE=0
AT#PHYTIMEOUT=1
AT#DNSSERV1=”66.209.10.201”
AT#DNSSERV2=”66.209.10.202”
Start the TCP/IP stack
Standard PPP
Activate GPRS mode
Set the APN Server (GPRS provider). May be different for other
providers.
Set APN login. May be different for other providers.
Set APN password. May be different for other providers.
Not using ETX character to disconnect.
Set inactivity timeout to 1 minute.
Set first DNS Server address. May be different for other
providers.
Set second DNS Server address. May be different for other
providers.
The above example assumes Cingular as the provider. The information for other
providers may be different.
The default power delay for the MultiTech modem is 60 seconds.
Point Manager Initialization Strings
Initialization = “&D1;+CGREG=1;+CGATT=1;#LTCPSTOP;#CONNECTIONSTOP;%%d10;
#CONNECTIONSTART”
AT&D1
AT+CGREG=1
198 • Appendix
Go command mode when DTR is asserted
GPRS registration
Point Manager Manual
AT+CGATT=1
AT#CONNECTIONSTOP
%%d10
GPRS attach
End GPRS communication
Wait 10 seconds before connecting to the
GPRS network
Make a connection to the GPRS network
AT#CONNECTIONSTART
Listen = “#LTCPSTOP;#TCPPORT="1000";#TCPSERV="255.255.255.255"; #LTCPSTART”
AT#LTCPSTOP
Close TCP listening mode
AT#TCPPORT="1000"
Listen IP port “1000”
AT##TCPSERV="255.255.255.255" Accept connections from any IP address
AT#LTCPSTART
Open a listening TCP connection
Signal Strength = “+CSQ”
AT+CSQ
Retrieve signal strength value
Reset = “+CFUN=1;%%d40”
AT+CFUN
%%d40
Reset modem as if from a power up
Wait 40 seconds for the modem to intialize
before sending initilziation commands
Push = “#LTCPSTOP;#TCPPORT="%%p";#TCPSERV="%%h";#OTCP”
AT#LTCPSTOP
AT#TCPPORT="%%p"
AT#TCPSERV="%%h"
AT#OTCP
Close TCP listening mode
Specify IP port to connect to. The
substitution string “%%p” is used. Point
Manager will use the IP port number
specified in Media Callout table. If not
specified then Point Manager defaults to
1050.
Specify the IP address to connect to. The
substitution string “%%h” is used. Point
Manager will use the IP address specified in
the Media Callout table.
Initiate a connection with a remote TCP
server
Hangup = “#CONNECTIONSTOP”
AT#CONNECTIONSTOP
End GPRS communication. Note: the
command is sent only if connection has not
been terminated yet.
Note about “MultiTech MultiModem GPRS Wireless
Modem” Usage
The MultiTech MultiModem GPRS Wireless Modem has the option to disconnect
the current connection by having the Point Manager sending an ETX character
(ASCII 3 ^C) when running in TCP/IP mode. If this option is used, special
consideration must be given in the application receiving the data. In order for ETX
characters to be transferred as data, the Point Manager precedes the ETX character
with a DLE character (ASCII 16 ^P). All DLE characters are also proceeded with a
DLE character. Therefore each ETX character will be coded as DTE ETX and each
DTE character will be coded as DTE DTE. The application must remove the
decoding before processing this data. The Point Manager will only encode
transferred data this way is when “^C” is specified in the Hangup string. The only
time the Point Manager has the potential of transferring the ETX character as data is
Point Manager Manual
Appendix • 199
when it transfers compressed data as a result of the HZ or EZ command being
received. The modem must be preconfigured with AT#DLEMODE=1 to use this
option.
Enfora GSM1218 Setup
Setup Commands to Configure Enfora GSM1218
AT&F
AT+CGDCONT=1,”IP”,”apn here”
AT$HOSTIF=2
AT$PADSRC=1000
AT$AREG=1
AT%CGATT=0,1
AT%CGPCO=1,”,”,1
AT$PADCMD=10
AT$PADTO=1
AT$IDLETO=20
AT$CONNTO=45
AT&D2
AT&C1
ATE1
AT&W
Reset to factory defaults
Define PDP context for GPRS: apn here is provided by the
wireless provider
Set the interface type to TCP
Set the TCP server port to 1000
Automatically register and log in to GSM network at power up
Auot GPRS attach
Set login for GPRS context activation
PAD Command Features: If using Historical or Event Log
compression command use a value of “10” otherwise use “1B”.
A value of “1B” instructs the modem to forward any data being
held when a CR is received.
PAD Timeout Value: forward queued data after 10 ms of not
receiving any more data
TCP PAD Idle Timeout: Time of inactivity in seconds before the
connection is terminated
Maximum time in seconds to attempt a connection
Reset modem when DTR is applied
DCD line is asserted when connection is established
Echo modem commands
Save paremeters to non-volatile memory
The above example assumes Cingular as the provider. The information for other
providers may be different.
The default power delay for the Enfora modem is 60 seconds.
Point Manager Initialization Strings
Initialization = “”
Listen = "$ACTIVE=0”
AT$ACTIVE=0
Note: no initialization commands are needede
Place modem in TCP server mode
(listening mode)
Signal Strength = “+CSQ”
AT+CSQ
Retrieve signal strength value
Reset = “+CFUN=1;%%d40”
AT$RESET
Push "$ACTIVE=1;$PADDST="%%h",%%p;D*99***1#"
AT$ACTIVE=1
AT;$PADDST=\"%%h\",%%p
ATD*99***1#
200 • Appendix
Place modem in TCPclient mode
Specify IP address and port to connect to.
The substitution string “%%h” and “%%p”
are used. Point Manager will use the IP
address and port number specified in Media
Callout table. If the port number is not
specified then Point Manager defaults to
1050.
Initiate a connection attempt to the host
Point Manager Manual
Hangup = “”
Note: no commands are needed. DTR is applied.
Point Manager Setup
<^B>CTTS,T,3<CR>
<^B>CMS1,10(M66.147.93.113)<CR>
Use default modem initialization string for
the Enfora Modem
Set up media callout table with one entry.
Push connection to IP address and default
port 1050.
IP Dialup Modem
ConnectOne iModem Setup
The ConnectOne iModem is a dialup modem with PPP and TCP/IP capability built
in. Using the iModem the Point Manager can dial and connect to the Internet using a
Internet Service Provider (ISP) over analog telephone lines.
The iModem and Point Manager setup is designed to allow the ISP phone number to
be set in the Point Manager. This way the local ISP number can be set in the Point
Manager. The Point Manager can then have alternate phone numbers to call (listed
in the Media Callout Table (“CM” command)).
ConnectOne provides a utility to configure the iModem. The following table
describes the necessary commands to use the iModem with the Point Manager. If
using the ConnectOne utility, the field names are the actual modem command with
out the “AT+i” prefix. The iModem has two components, an iChip which provides
the PPP and TCP/IP function and a modem module. Commands with “AT+i”
program the iChip. All other commands are sent to the modem module.
Setup Commands to Configure ConnectOne iModem
AT&F
AT+iFD
AT+iBDRF=6
AT+iBDRM=6
AT+iFLW=7
AT+iMIS=”AT&FE0V1X4Q0&D2M0L0”
AT+iATH=1
AT+iRTO=180
AT+iUSRN=”username”
AT+iPWD=”password”
AT+iHSRV=”66.147.93.113”:”2051”
AT+iFCHR=\x0D
AT+iMTTF=2
AT+iSNRD=30
AT+iSNSI=6,8,N,1,0
ATE1
AT&W
Reset to factory defaults
Restore all parameters to Factory Defaults
(BDRF) Define fixed baud rate with host = 19200
(BDRM) Define fixed baud rate on iChip = 19200
(FLW) Flow control is mirrored across iChip
(MIS) Modem initialization string
(ATH) Set PPP Authentication method = PAP
(RTO) Delay period between redials to ISP in seconds
(USRN) Define ISP connection user name
(PWD) Define ISP connection password
(HSRV) Host server name/IP and port
(FCHR) SerialNet:Characters to enforce flush
(MTTF) SerailNet: Max timeout to flush
(SNRD) SerialNet: Timeout before reestablishing connection
(SNSI) SerialNet: Port settings
Echo modem commands
Save parameters to non-volatile memory
The default power delay for the iModem is 60 seconds. A host name can be used
with the “AT+iHSRV”; the iModem will use DNS to resolve the host name to an IP
address.
Point Manager Manual
Appendix • 201
Point Manager Initialization Strings
Initialization = “”
Note: no initialization commands are needed.
Listen = “”
Note: no listen commands are needed.
Signal Strength = “”
Note: no commands are needed
Reset = “%%d2;+++;%%d6”
%%d2
+++
%%d6
Delay for 2 seconds
Enter command mode
Delay for 6 seconds
Push "+iISP1=”%%h”;+I!SNMD;E1"
AT+iISP1=”%%h”
Set ISP phone number
AT+i!SNMD
Initial connection via SerialNet
ATE1
Dummy command to fool the Point
Manager
Hangup = ““%%d2;+++;%%d6”
%%d2
+++
%%d6
Delay for 2 seconds
Enter command mode
Delay for 6 seconds
Point Manager Setup
<^B>CTTS,T,4<CR>
<^B>CMS1,10(M4224600)(M432499)<CR>
Use default modem initialization string for
the iModem
Set up media callout table with two entries.
Example numbers are local ISP phone
numbers
Debug and Testing Modem
To test the modem, call the Point Manager using an application that can send Point
Manager commands using a modem. You can also have the Point Manager initiate a
call. Specify a phone number using the “CMS” command. Use the “P1” command
to have the Point Manager initiate the call. Use the “IM” and “IMM” to verify the
results of this call. The following is an example of testing the Point Manager callout
function:
Command:
<^B>CMS2,10(M8595551010)<CR>
Response:
<^B>CMS2<CR>
Command:
<^B>P1<CR>
Response:
<^B>P1<CR>
Command:
<^B>IM<CR>
Response:
<^B>IM….<CR>
.
.
202 • Appendix
Point Manager Manual
.
Command:
<^B>IM<CR>
Response:
<^B>IM….<CR>
.
.
.
Command:
<^B>IM<CR>
Response:
<^B>IM….<CR>
Command:
<^B>IMM<CR>
Response:
<^B>IMM….<CR>
Use the “IMM” to determine if there were any errors during the sending of any of the
modem commands.
You can also use the Debug Verbose mode (“VB” command) to view the commands
and responses sent and received.
Connecting Directly to the Modem Port
You can connect directly to the serial port with a computer or some other processor.
The default baud rate is 19200 baud (no parity, 8 data bits and 1 stop bit). The flow
control handshake lines are available and active but are not required. The host
computer can then send Point Manager commands. After the Inactivity time has
elapsed, the Point Manager will send the ATZ modem command and enter the
Initialization State. If the Point Manager receives a Point Manager command, then
the Point Manager will enter the Connect state. Any application that uses the
Modem Port directly through the RS232 connection, must be able to tolerate
asynchronously sent “ATZ” strings.
You can also attach a receiver such as a Point Host or Point Transceiver to the
Modem Port.
Typical AT Modem Commands
The following is brief list of typical AT Commands:
Commands
Hn
On
Xn
Yn
S1
S6
S7
S8
S9
S10
S11
&Cn
&Dn
&Gn
Point Manager Manual
Function
Switch Hook Control Option
Online Command
Result Code Set/Call Progress Option
Long Space Disconnect Option
Ring Count
Wait for Dial tone
Wait for Data Carrier
Pause Time for Comma
Carrier Detect Response Time
Lost Carrier to Hang-up Delay
DTMF Dialing Speed
Data Carrier Detect Option
Data Terminal Ready Option
Guard tone Option
Appendix • 203
&Pn
&Sn
%Dn
Dial Modifiers
P
R
T
W
;
@
!
,
S9
204 • Appendix
Make to Break Ratio Selection
Data Set Ready Option
DTMF Attenuation
Function
Pulse Dial
Originate Call in Answer Mode
Touch Tone Dial
Wait for Dial Tone
Return to Idle State
Wait for Quiet Answer Command
Flash Hook
Pause
Carrier Detect Response Time
Point Manager Manual
Data Compression
The Point Manager uses an LZSS style compression algorithm to compress the
requested contents of either the History or Event Log before sending the data to a
host. Typical compression ration is 2:1 but can be as high as 5:1 for the History data
if the data does not change very much.
To request data from the History Log, the host will issue the “HZ” command with
beginning and ending timestamps. To request data from the Event Log, the host will
issue the “EZ” or “EZV” (for verbose event messages) command with beginning and
ending timestamps. If there is data for the requested range of time, the Point
Manager will send the “Compress Data” message as a response. Shortly after, the
Point Manager will begin streaming the data in binary form. When the Point
Manager finishes, it sends a <CR>. To know when the Point Manager has finished
sending the data, the Point Manager inserts one byte block length indicators into the
stream. The Point Manager sends the length indicator first and the block of data
followed by a length indicator and another block and so on. Point Manager will send
an 0 length indicator to indicate that there is no more data. A <CR> will follow the 0
length indicator. The block length can be maximum of 255 bytes but is typically 100
or less. The following illustrates sending of the compressed data:
10100500000001,CompressData<CR>
[Len1][Block1][Len2][Block2][Lenn][Blockn][0]<CR>
If the error check version of the protocol is used (by sending <^A> instead of <^B>
and have a CRC16 after the command), the Point Manager inserts a two byte CRC16
sum of the block data immediately after the block data. The high byte of the CRC16
is first followed by the low byte. The following illustrates sending of the
compressed data with the error check version of the protocol:
10100500000001,CompressData3A3E<CR>
[Len1][Block1][CRC161][Len2][Block2][CRC162][Lenn][Blockn][CRC16n][0]<CR>
The Point Manager will abort the sending of compressed data when it receives a
valid command on the media that it is sending the compressed data.
For History data the expanded result of the sent data is multiple records in the same
format as the response to the “HA”, “HF”, “HL”, “HN”, and “HP” commands:
rec time stamp<rindex>,sensor data1..sensor datan
rec time stamp<rindex>,sensor data1..sensor datan
rec time stamp<rindex>,sensor data1..sensor datan
rec time stamp<rindex>,sensor data1..sensor datan
rec time stamp<rindex>,sensor data1..sensor datan
rec time stamp<rindex>,sensor data1..sensor datan
See the “HA”, “HF”, “HL”, “HN” or “HP” commands for the meaning of the fields.
The results of the expanded Event data is similar to the History data where each
event record in the requested range is sent sequentially. The “EZ” command
retrieves the normal event records and “EZV” retrieves the verbose event records.
See the “EA”, “EAV”, “EF”, “EFV”, “EL”, “ELV”, “EN”, “ENV”, “EP” or “EPV”
commands for more information about the format.
Contact your dealer about C language source code that has a function to decompress
the compressed data using the LZSS algorithm.
Point Manager Manual
Appendix • 205
If there is an error in the transfer such as a disconnect or a CRC16 error, the
application can resume the transfer by getting the timestamp of the last good record
and use that time stamp as the start time in the range for the “HZ” or “EZ”
command.
Although the Point Manager can compress all the records in the History or Event
Logs in one operation, it is good practice to request the log records in manageable
blocks. 100 records is a practical size for 10 sensors. The larger the number of
records the better the compression.
The compression function is relatively slow so it is best to use this function where
the application is concerned about the number of bytes transferred.
206 • Appendix
Point Manager Manual
Using Thermistors
Overview
A thermistor’s resistance changes with temperature. Point Thermistor sensors
provide signed 16 bit values that are a measurement of this resistance. The
relationship between temperature and this resistance is non-linear. The Point
Manager uses the Steinhart-Hart Equation to produce a linear value. Different
models of thermistors use different fitting constants for the Steinhart-Hart Equation.
The Point Manager can be set up with various fitting constants for various models of
thermistors. See the “CO” command for more information.
The Point Manager has predefined fitting constants for some standard Point
Thermistors. As of this writing, the Server has predefined support for this model of
thermistor: Vendor: Thermometrics; Part Number: RL0503-5820-97-MS; http:
//www.thermometrics.com/. More predefined fitting constants will be added in
future versions of the Point Manager. Point Sever uses the Correction ID 128 for
this sensor. This Correction ID is used to associate the correction parameters (the
thermistor fitting constants) with a specific Analog I/O point. Use the “CSC”
command to change this value for the Analog I/O point. Point Themistor sensors are
identified as sensor type 12. See the “CSC” command for more information.
Linearizing Thermistors
The following discusses how Thermistors are linearized.
Computing normalized resistance
Need to convert the raw binary as received from the A/D convertor to a normalized
resistance. The binary value is given as a signed 16 bit number. The possible range
of this number is from 0 to 32767. The following equation is used to compute the
normalized resistance.
Rnorm = (Rdiv / ( 32767 / Bin ) – 1) / Rnominal
Where:
Rnorm is the computed normalized resistance.
Rdiv is the value of the dividor resistor
Rnominal is the Thermistor resisitance at 0 degrees C.
Bin is the binary value provided by the A/D convertor.
Use a scale of 1.0 and offset of 0 for the Point Manager to pass the reading in raw
form (and Correction ID 0).
Computing temperature from the normalized resistance
The following equation uses the Steinhart-Hart Equation to compute temperature
using the normalized resistance as the input.
Point Manager Manual
Appendix • 207
Tk = 1 / (a + b(ln Rnorm) + c(ln Rnorm)2 + d(ln Rnorm)3)
Tc = Tk – 273.15
Where:
Tk is the resulting temperature in degrees K
Tc is the resulting temperature in degrees C
a,b,c,d are fitting constants provided by the manufacture.
Rnorm is the normalized resistance read from the thermistor.
Thermistor Parameters
These are the parameters and fitting constants that are predefined for Correction ID
128:
Rdiv:
10,000 ohms
Rnominal:
10,000 ohms
at 25 degrees C
Fitting constants:
208 • Appendix
a:
3.3539264E-03
b:
2.5609446E-04
c:
1.9621987E-06
d:
4.6045930E-08
Point Manager Manual
Point Manager UPS Operation
Installation
The Point Manager is shipped with the UPS module turned off (indicated byte the
back LED flashing). The Point Manager is fully operational except that the UPS
module will not supply power if the power to the Point Manager is turned off. To
turn on the UPS module hold the push button on the back of the unit for 5 seconds or
more until the LED stops flashing and is on. The UPS module is now ready for
operation. Note: the UPS module comes fully charged from the factory.
Operation
Start
The UPS module flashes the LED indicating that the module is off. Press the push
button for 5 seconds or more until the LED stops flashing and is on steady.
Turning Off
If the UPS module is on (the LED is on steady or off (not flashing)), press the push
button for 5 seconds until the LED starts flashing. If line power is off, the UPS LED
will be off.
UPS Sensor
The UPS module has an internal sensor that reports the state of the UPS module.
The Point Manager normally is shipped with this sensor registered in its sensor table.
If the sensor table is cleared, you can register the sensor by setting Auto-Add mode
to SERVICE and then momentarily pressing the button of the UPS module located in
the back panel of the Point Manager. Momentarily pressing the button causes the
UPS sensor to send a packet marked with a service indicator to the Point Manager.
Push button modes
Push button for 5 seconds or more: toggles on/off the UPS module.
Momentary push (while on): send packet with service indicator.
LED
UPS LED
On
Flashing
Off
POWER LED
On
On
On
UPS mode
On
UPS is off
UPS powered
Line Power
On
On
Off
Off
Off
UPS powered
off
Off
Point Manager Manual
Indication
Nomal Operation
UPS is turned off
UPS is powering the Point
Manager
UPS is either off or the UPS
power has been exhausted
Appendix • 209
Analog Sensor Value
0 % – UPS is turned off
Between 100% and 50% - line powered
Greater than 0% and less than 50% - UPS powered
Less than 35% - less than 1 hour of UPS power left.
You can set your event and alarm points to detect if the sensor is off, is UPS
powered and/or is about to exhaust the UPS batteries. For the UPS powered
detection, you can also set threshold-time event or alarm. For example you can set
up Point Manager to alarm when the power has been off for 2 hours.
Notes
210 • Appendix
1.
The battery takes 20 hours to fully recharge from when the batteries
were exhausted.
2.
The UPS will power the Point Manager for up to 4 hours (assuming the
batteries are fully charged).
Point Manager Manual
Serial Cable
The following table shows the pin out of the Point Manager Serial Cable.
Point Manager
TX
RCV
GND
DB9 Female
2
3
5
1/8 Inch Phono Male
Tip
Body
Center Band
Specifications
Parameter
Power Supply Voltage
Power Supply Current
Receiver Frequency
Receiver Range with Sensor
Ethernet
Serial Port (both)
Battery
Event Log
Historical Log
Number of Sensors
Point Manager Manual
Value
6 to 12 volts DC
600 milliamps @ 9 volts
418/433 Mhz
or 900/2.4 Mhz/Ghz
900 feet line of sight for 418/433 Mhz
or 3 miles line of sight for 900/2.4 Mhz/Ghz
10BaseT (10 Mhz)
19200 baud, no parity, 8 data bits, 1 stop bit
3 Volt Lithium
CR2032
Backup of the SRAM & real time clock:
6 years without power
9000 records
12800 records with 1 Sensor with 1 I/O Point
615 records with 50 Sensors with 2 I/O Points
615 records with 100 Sensors with 1 I/O Point
100 sensor or 250 I/O points
Appendix • 211
Acknowledgements
Trademarks
Windows is a registered trademark of Microsoft Corporation.
Procomm is a registered trademark of Symantec Corporation.
212 • Acknowledgements
Point Manager Manual
Point Manager Manual
Acknowledgements • 213
Glossary of Terms
Alarms
Events that cause the Point Manager to place a call or push a connection to another
host.
Alarm Callout
The Point Manager places a call or pushes a connection to a host computer triggered
by an event.
Auto Add Mode
When in this mode, the Point Manager receives sensor information from a sensor and
then automatically appends the sensor to the sensor table with default setup
information.
CRC-16 error-checking
An algorithm designed to check for errors in a data stream.
DHCP
Dynamic Host Configuration Protocol, a protocol for assigning dynamic IP
addresses to devices on a network. With dynamic addressing, a device can have a
different IP address every time it connects to the network. In some systems, the
device's IP address can even change while it is still connected.
Ethernet
The physical and electrical interface for connecting computers together on a
network.
Events
Changes in performance or of state that cross predefined boundaries.
Point Manager Manual
Glossary of Terms • 215
Event Log
The Point Manager stores events selected by the user in the event log. These events
might include changes in sensor values, sensor performance or system performance.
Events recorded in the event log are stamped with time and date information, and
include a message describing the event.
Historical Log
A container in the Point Manager memory that holds records that are placed
periodically or based on an event. These records have a time and date stamp and
then the current readings of all the sensors in the sensor table.
HTML
HyperText Markup Language - fundamental language used in creating web pages.
HTTP
HyperText Transfer Protocol, the underlying protocol used by the World Wide Web.
HTTP defines how messages are formatted and transmitted, and what actions Web
servers and browsers should take in response to various commands. For example,
when you enter a URL in your browser, this actually sends an HTTP command to the
Web server directing it to fetch and transmit the requested Web page.
Hysteresis
Controls when the sensor reading can trigger another event. When a high threshold
event has triggered, the sensor value must go below the (high value – hysteresis)
before another high threshold event can be triggered. When a low threshold event
has triggered, the sensor value must go above the (low value + hysteresis) before
another low threshold event can be triggered.
Inactivity Timeout
The amount of time the Point Manager will wait for a command before terminating
the connection. Inactivity Timeout applies to all media connections. For the local
serial ports, Point Manager will automatically log out a user if a command is not
received within this time.
IP address
32 bit address usually represented as a series of 4 numbers that uniquely identifies a
device that is using the TCP/IP protocol.
ISP
Internet Service Provider - provides the means to interfacing to the Internet.
MAC
The MAC address is permanently part of the Point Manager cannot be changed and
is unique for all Ethernet interfaces.
216 • Glossary of Terms
Point Manager Manual
Media Callout Table
Defines for the Point Manager a list of host computers to call or push a connection
to. The entries can be either phone numbers for the Serial, Command Radio, Modem
or IP addresses and port number for TCP/IP.
Modem
A device that converts serial digital data into a signal that can be transported over
analog phones.
Name Server
A function that provides the service of translating a domain name to an IP address.
NTP
Network Time Protocol. Protocol that Point Manager uses to get the current time
from a time service.
Periodic Interval Callout
The Point Manager can call or push a connection at periodic intervals. The host
computer can gather the current sensor data, Historical and Event Logs and change
the setup information.
Ping
TCP/IP diagnostic utility used to determine if connection with another TCP/IP host
is possible.
Push Connection
The Point Manager forces a connection either through TCP/IP, Serial or Command
Radio to another host or calls throught the Modem another host.
RS232
Standard electrical interface used for serial ports.
Sensor
418/433 Mhz wireless transmitter
Sensor Age
The amount of time since the Point Manager has received a data packet from the
sensor.
Point Manager Manual
Glossary of Terms • 217
Sensor I/O point(s)
I/O points collect or contain measurable values such as temperature, identification,
count, etc.
Sensor Table
Each row in the sensor table contains the a sensor's current readings, event states and
setup information. Commands either read or set infomration to and from the sensor
table.
Service
Point transmitters have a Sevice button that when pressed forces the Point sensor to
transmit its readings.
SMTP
Protocol used with TCP/IP to transport emails.
SMTP server
A server that delivers emails to destination(s).
SNTP
Simple Network Time Protocol. Protocol that Point Manager uses to get the current
time from a time service.
State of Concern
I/O point or sensor state exceeds a preset threshold.
TCP/IP
Transmission Control Protocol. TCP is one of the main protocols in TCP/IP
networks. Whereas the IP protocol deals only with packets, TCP enables two hosts to
establish a connection and exchange streams of data. TCP guarantees delivery of
data and also guarantees that packets will be delivered in the same order in which
they were sent.
XML
Extensible Markup Language was designed especially for Web documents. It allows
designers to create their own customized tags, enabling the definition, transmission,
validation, and interpretation of data between applications and between
organizations.
218 • Glossary of Terms
Point Manager Manual