1
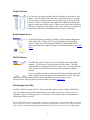
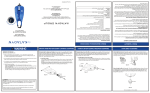
User Manual 1 TABLE OF CONTENTS SECTION 1: INTRODUCTION 4 Advantages of a YSI 650 MDS to SondeCom 4 Key Features of SondeCom 4 Hardware_Requirements 4 SECTION 2: GETTING STARTED 5 Installing Software 5 Setting up the Sync Manager 5 Connecting to a Sonde 6 SECTION 3: GENERAL SOFTWARE OPERATION 7 The Startup Screen 7 The Sonde Menu Screen 7 Real Time Data Screen 7 View File Screen 8 Kermit Upload Screen 8 PDA File Screen 8 Data Storage in the PDA 8 SECTION 4: SYNCING DATA TO A PC 10 What happens during a sync? 10 Finding your SondeCom Folder 10 SECTION 5: TROUBLESHOOTING 11 I do not have the Palm OS version 3.5 or higher; how do I upgrade? 2 11 My PDA is fixed on one screen and is not responding to buttons or screen taps. 11 My PDA will not connect with my 6-Series sonde. 11 After using SondeCom, the sonde is sending me funny lines of data when I use my PC terminal. 12 3 SECTION 1: INTRODUCTION REGISTER SONDECOM If you do not register SondeCom, then you will not receive upgrades, so please take the time to do so. You can register at http://www.ysi.com/epg/productregistration. SondeCom is a powerful software package that allows the users to interface with their YSI sondes in a very simple manner- much like the YSI 650 Multiparameter Display System (650 MDS). It allows the user to display sonde sensor readings, configure sondes, upload data from sondes, and transfer data to a PC for analysis and plotting. Though PDAs are lightweight and easy to carry around, they are no substitute for the YSI 650 MDS. Compared to a PDA, the 650 is much more durable and meets IP67 specifications for ruggedness (waterproof up to 1 meter and drop tested at 1 meter; see the IP67 specification for more details). YSI Inc. makes no claims and will not be held responsible for any damages that may be incurred to the users' PDAs. Advantages of a YSI 650 MDS to SondeCom: • The 650 is much more durable (it meets IP67 specifications). • The 650 can power a sonde. • You can log data directly to the internal memory of the 650. Key features of SondeCom: • All of the menu functions of the sonde are accessible with a lightweight and portable PDA. This includes the ability to upload data and configure and calibrate sondes. • PDAs can have extremely large amounts of memory. • Uploading data to a PC is as easy as syncing your PDA. • You can keep your date book, calendar, and your other favorite applications on the same device that you use to interface with your YSI sonde. Partnered with a YSI 6-Series sonde, SondeCom allows the user to easily: • Display real-time readings from YSI 6-Series sondes. • Set up sondes for deployment. • Calibrate sondes for deployment. • Upload data from sondes for transfer to PC. Hardware Requirements In order to run SondeCom, the following hardware requirements must be met. • The PDA (Personal Data Assistant) must be manufactured by Palm and must run on Palm OS v3.5 or higher. • Your PC must use one of these operating systems: Windows 98, Windows NT, Windows 2000, or Windows XP. 4 • Your PC must have a sync manager installed (this is the software that should have come with your PDA). Palm Desktop’s HotSync Manager is a very common example of a sync manager. 5 SECTION 2: GETTING STARTED Installing the Software Insert your SondeCom CD into your drive and run the setup.exe file. This will install the conduit (the software that synchronizes the data between your PDA and your PC) and will put the SondeCom.prc file into the install folder of all of the users listed in your sync manager. That means that all you have to do in order to install the software onto your PDA is run the install program, then sync your PDA. The program will automatically load onto your PDA. Setting up the sync manager Most users will want to leave the sync manager set to the default option: Handheld overwrites Desktop. This option will copy all sonde files that are on your handheld to your PC when you perform a sync. However, if you would like to change your settings so that the files will not be transferred, then you may do so the same way you would for any other PDA software application. Right-click the sync icon located on your program tray (usually on the lower-right corner of the screen). A menu will pop up like the one you see in the screen shot to the left. From that menu, select custom. Your sync manager application will launch and all of the conduits for your PDA will be listed; SondeCom will be one of them. If you would like to change the action, then click on SondeCom to highlight it, then select change. 6 A window will pop up prompting you to select between Handheld overwrites Desktop and Do nothing. Select whichever action you desire. Then, click ok. If you check the Set as default box, then the action you have selected will be used every time you sync thereafter unless you specifically change it as is described above. Connecting to a Sonde In order to connect your PDA to a YSI 6-Series sonde, you will need to have YSI cables that allow you to connect your sonde to a PC, a serial cable for your particular PDA, and the connector that was shipped with your copy of SondeCom. Unfortunately, PDAs do not have a standard serial connector. That is why YSI requires users to purchase their serial cable through Palm. You can get your serial cable from the Palm Store. It will be listed under Accessories>Peripherals. You may use your cradle as the serial cable (unless you have a USB cradle), but it is somewhat bulky and difficult to handle. In order to connect to the sonde, you will need a YSI Calibration Cable (6067B) or a combination of a YSI Field Cable of any length (609x) and an adapter (6095B). Basically, you need to have a DB9 connector (shown on the left) coming off the sonde. Attach the connector that came with the SondeCom CD to the end of this cable. You should be able to connect your PDA serial cable to the other end of this connector. Now you're ready to use SondeCom! 7 SECTION 3: GENERAL SOFTWARE OPERATION This section describes the general software operation of SondeCom. For information on the options offered in the sonde menus, please refer to your YSI 6-Series sonde manual. Only the functions specific to the PDA software will be described here. The Startup Screen Every time you launch SondeCom, you will see this startup screen. There are only two buttons on this screen: the Sonde button and the PDA File button. If you press the Sonde button, then SondeCom will try to establish a connection with your 6-Series sonde. If the connection is successful, then you will be in the sonde menu. The Sonde Menu Screen To navigate through these menus, simply tap the screen on the selection you would like to make. The house in the upper right corner is the home button. That button will take you back to the startup screen. The arrow on the top of the screen is the back button. It will move you back to the previous menu. If there are more choices than there are lines of text on the screen, then a little arrow will appear in the corner of the list box rectangle. It will be in the lower right corner if there are more options below what is displayed, and it will be in the upper right corner if there are more options above what is displayed. Simply tap the arrow to scroll the list. Real Time Data Screen This is the screen that will be displayed when you set the sonde up in Run mode. If you have more parameters than what are able to fit on the screen, a scroll bar will appear on the far right side of the screen. There are three buttons on the bottom of the screen. When you tap the Log One button, a picture of a log will show up in place of the button. Once the sonde finishes logging the point, the button will reappear. Upon pressing the Start Log button, the Log One button will go away and, after the PDA receives verification from the sonde, the Start Log button will become a Stop Log button. Receiving verification from the sonde could take a couple of seconds, so please be patient while SondeCom ensures that the sonde is indeed logging when you think it is. The Clean Opt button will wipe your optical sensors. 8 View File Screen The view file screen (accessible from the File menu of the sonde) is very simple. The title of the form is the name of the file that you are viewing. The scroll bar on the right allows you to quickly drag your way through the data. If there is more data to the right, then a right arrow button will appear on the bottom of the screen. If there is more data to the left, then a left arrow will appear at the bottom of the screen. When you reach the far end of either side, the corresponding button will not be displayed. Kermit Upload Screen To upload a file from a sonde to your PDA, simply navigate through the sonde menu (File | Upload or File | Quick Upload) to the upload data option. SondeCom will automatically handle the Kermit data transfer. Once the transfer has completed, tap the close button to return to the sonde menu. PDA File Screen The PDA file screen will give you a list of all files stored in the PDAs memory. The file name is always listed in the left column. The right column defaults at showing the file size in bytes, but if you tap on the title of the column, you will have the option to select number of samples instead. If you would like to delete or rename the file, then you simply tap the file name, and the buttons will appear at the bottom of the screen. Tap on the button that you would like and follow the instructions that come up on the screen. The back arrow at the top of the screen will return you to the startup screen. Data Storage in the PDA In a PDA, all data is stored in RAM. That means that if power is removed from the PDA for even just a short amount of time, then all data on your PDA could be lost. That is why it is important to sync your data to your PC as a backup. See the next section for information on syncing your PDA to your PC. NOTE: Though SondeCom has been thoroughly tested prior to release, there is still a possibility that some software bugs may exist. If, in your use of SondeCom, you encounter something that you believe to be a software bug, then please send us an email describing the bug in as much detail as possible, so that we may correct the problem and 9 provide you with an upgrade. Send the email to [email protected] with SondeCom Bug Report in the subject. Also, please include the make and model of your PDA and the version of SondeCom that you are using. 10 SECTION 4: SYNCING DATA TO A PC For details on how to set up the sync option on the PC (ie. to change from Handheld overwrites Desktop to Do Nothing or vice-versa), see section 2: Set up your sync manager. This section explains what happens during a sync and where the files are stored on your PC. What happens during a sync? When you initiate a sync between your PC and your PDA, the SondeCom conduit (software that is automatically installed in the section: Installing the Software) will look at the files that have been uploaded to the PDA from the sonde. All of the files are then copied from the PDA to the PC. They are copied to the user directory in a subdirectory named SondeCom. For example, if the user name is Smith, then the folder could be named C:\Palm\Smith\SondeCom. If you cannot find your SondeCom folder, then see the section: Finding your SondeCom Folder. If there is a file in the SondeCom folder that has the same name as a file being transferred to the PC, then the SondeCom will not transfer the file. It will simply give you an error message telling you what files did not get copied to your PC. If you want to upload the file, then you will need to get rid of the file specified in the error message. Please note that you can rename a file before syncing it to the PC. See the PDA File Screen section for details on how to rename a file. Finding your SondeCom Folder The easiest way to find your user folder is to do a global search. For Windows 95/98/NT, right click on the start menu button and select find. For Windows 2000/XP, right click on the start menu and select search. Using this program, search for SondeCom on your local hard drive (this could take a little while if you have a lot of files). The system should find the folder named SondeCom. Make note of where the folder is located because every time you upload the files from your PDA to your PC, the files will go in this folder. Note that there will be a SondeCom folder for every user on the PC, so if you have multiple users syncing on the same PC, then each user will have his own SondeCom folder. 11 SECTION 5: TROUBLESHOOTING This troubleshooting guide lists some common problems and their solutions. Please check this list before calling YSI customer support. I do not have the Palm OS version 3.5 or higher; how do I upgrade? In order to run SondeCom, you must use Palm OS 3.5 or greater. Many of the PDAs on the market have upgradeable flash ROM. If you do not know whether or not you have upgradeable flash ROM, then you will need to consult your PDA's user manual or contact your PDA sales representative. If you do not have upgradeable flash ROM, then you will be unable to update your OS. Using flash ROM is more expensive than using traditional ROM; that is why some companies choose not to use it. The advantage is that flash ROM can be erased and reprogrammed. If you do have flash ROM, then you can download an OS upgrade from the Palm Store web page (http://store.palm.com/). Also, some of the PDA manufacturers will sell you an OS upgrade (consult your manufacturer for more information). My PDA is fixed on one screen and is not responding to buttons or screen taps. In the rare event that this happens, you will need to reset your device. First try a soft reset, if that doesn't work, then you may have to do a hard reset. To do a soft reset just poke the end of a paper clip or a needle through the pin-hole in the back of your device labeled reset (this process should be described in your PDA's user manual also). If that does not work, then you may have to do a hard reset (which should also be described in your PDA manual). Doing a hard reset will erase all of the memory on your PDA and bring it back to way it was when you first turned it on. First, poke and hold down the reset button as described in the soft reset. Then, press and hold down the power button. After you have both buttons depressed, let go of the reset button while still holding on to the power button. Finally, release the power button and the device should show the screen shown on the left. If you press the up arrow button located beneath your screen, then you will erase all of the memory on your PDA and start from the beginning. If you press any other button, it will not reset. My PDA will not connect with my 6-Series sonde. The first thing to do is make sure that your sonde has power. Are the batteries ok? If you are not using batteries, then is your sonde plugged in? Next, make sure that you have the proper cable connections. See the section "Connect your PDA to a sonde". After using SondeCom, the sonde is sending me funny lines of data when I use my PC terminal. You may see some unfamiliar information coming from the sonde after using SondeCom. That is because SondeCom uses a special interface with the sonde that is useful to a PDA, but a little 12 confusing for a human being. Simply hit the escape key several times until you see the # prompt. From there, you can enter the menu command and proceed as usual. 13