1
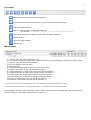
-1-
User Manual
www.freshney.org :: www.xinorbis.com :: [email protected] :: www.twitter.com/freshneydotorg
© Paul Alan Freshney 2010
Last Revision: January 9th 2010 (4.2.6)
-2-
Contents
Overview ........................................................................................................................4
Conventions .................................................................................................................4
Layout ............................................................................................................................5
Common Functions and Behaviour ................................................................................... 10
Charts ....................................................................................................................... 10
Advanced chart options................................................................................................ 11
Information Tab ............................................................................................................. 12
Summary Tab............................................................................................................. 12
Table Tab................................................................................................................... 13
Type Tab.................................................................................................................... 14
Folders Tab ................................................................................................................ 15
More Detail display................................................................................................... 16
Magnitude Tab............................................................................................................ 17
File Dates Tab ............................................................................................................ 18
History Tab ................................................................................................................ 19
Top 101 Tab ............................................................................................................... 20
Other Tab .................................................................................................................. 21
Null Files and Folders Tab............................................................................................. 22
Users Tab .................................................................................................................. 23
Temporary Files Tab .................................................................................................... 24
Search Tab................................................................................................................. 25
Drive Details Tab ........................................................................................................ 27
Navigate Tab ................................................................................................................. 28
File History.................................................................................................................... 29
Information ................................................................................................................ 30
Chart......................................................................................................................... 30
Table ......................................................................................................................... 31
File History Search ...................................................................................................... 31
File History Compare ................................................................................................... 32
Search Syntax ............................................................................................................... 33
Searching by file name ................................................................................................ 33
Searching by file size................................................................................................... 33
Searching by date ....................................................................................................... 34
Searching by time ....................................................................................................... 34
Searching by category ................................................................................................. 34
Searching by file attribute ............................................................................................ 35
Searching by user (owner) ........................................................................................... 35
File History Specific Functions....................................................................................... 36
Combining Search Functions......................................................................................... 37
File Size Spread ............................................................................................................. 38
Benford’s Law............................................................................................................. 39
Duplicate Files (by Size).................................................................................................. 40
Duplicate Files (by Name) ............................................................................................... 41
Reference ..................................................................................................................... 42
-3Settings ........................................................................................................................ 44
General ..................................................................................................................... 44
File Association Categories ........................................................................................... 45
Temporary Files .......................................................................................................... 46
Chart Options ............................................................................................................. 46
Output Options ........................................................................................................... 46
Autosave Options ..................................................................................................... 46
HTML Output Options ............................................................................................... 47
XML Output Options ................................................................................................. 48
CSV Output Options ................................................................................................. 49
Text Output Options ................................................................................................. 50
Xinorbis Output Options ............................................................................................ 50
Quick Folders ............................................................................................................. 51
Navigate .................................................................................................................... 51
Importing from a CSV file................................................................................................ 52
Customising Xinorbis’ reports .......................................................................................... 55
HTML......................................................................................................................... 55
Text .......................................................................................................................... 56
XML........................................................................................................................... 57
Using Xinorbis as a “portable application”.......................................................................... 58
Information for advanced users ....................................................................................... 59
Customising the QuickSearch popup menus. .................................................................. 59
XML Report Structure .................................................................................................. 61
Credits.......................................................................................................................... 63
-4-
Overview
Xinorbis was designed to be a simple to use but powerful disk analysis tool. If you have any suggestions
on how to improve this software or identify any bugs, then please email me at the address on the credits
page.
The software is capable of giving you a quick analysis of how the space on the folder is drive is used. For
desktop users and network administrators it should make finding unwanted content much easier. Being
able to compare drives or folders (Folder History) to how they were many days/weeks/months or even
years ago is going to make spotting space wasting material or wasteful users much easier.
Once a folder or drive has been scanned then you have the ability to create many reports from that data.
Xinorbis is a powerful program so please read (and print if possible) the whole of this manual; you’ll find
lots of interesting information on features that allow you to make the most of the application.
There are several ways of accessing help from within Xinorbis, should you need it;
Most of Xinorbis' windows have this button
open window specific help.
located at the bottom right. Clicking it will
The search tabs have these buttons;
Open the main search parameters help page.
Opens the “search parameters” tool window (or press F3)
or
Select the "Help" item from the Help menu (or press F1).
Select the "Context Help" item from the Help menu (or press F2).
Conventions
When dealing with file sizes Xinorbis uses the following conventions;
1
1
1
1
kilobyte (1K)
megabyte (1MB)
gigabyte (1GB)
terabyte (1TB)
=
=
=
=
1024 bytes
1048576 bytes (1024 x 1024)
1073741824 bytes (1024 x 1024 x 1024)
1099511627776 bytes (1024 x 1024 x 1024 x 1024)
Not all applications follow this convention but as well as being the most commonly used throughout the
industry it’s also how Windows reports file sizes.
It’s worth noting that hard disk manufacturers tend to use a slightly different method when reporting hard
disk sizes;
1 gigabyte (1GB)
1 terabyte (1TB)
= 1000000000 bytes (1000 x 1000 x 1000)
= 1000000000000 bytes (1000 x 1000 x 1000 x 1000)
-5-
Layout
The Xinorbis window is split in to seven discrete sections;
The first is the menu bar, located at the very top of the main Xinorbis window.
Menu bar
a)
b)
c)
d)
e)
f)
Clear all displays
Import, from CSV or Xinorbis data
Save many reports at once
Print the contents of the current tab*
Configure print options
Exit the program *Printing with CTRL+P will always ask you to confirm printer settings
before printing starts. Use ALT+P to print using the previous settings,
without confirmation.
a) Open the Search Tab
b) Open the search Wizard (for Search and File History)
a)
b)
c)
d)
e)
f)
g)
h)
i)
j)
k)
l)
m)
Open an HTML report using the Quick settings
Open an XML report using the Quick settings
Open a CSV report using the Quick settings
Open a Text report using the Quick settings
Save a Xinorbis report using the Quick settings
Save a Tree report using the Quick settings
View the report that was generated most recently
Copy the last report to the clipboard
Open the report folder path within Windows Explorer
View one of the information tabs
Toggle the various toolbars
Open the Search Syntax window
Open the Category Colours window
a)
b)
c)
d)
Open the File Size Spread window
Open the Duplicate File Name window
Open the Duplicate File Size window
Show detailed folder information
-6-
a)
b)
c)
d)
Open the settings and configuration window
Open the Folder History information window
Backup the contents of the Xinorbis data folder*
Select Xinorbis’ language
a)
b)
c)
d)
e)
f)
g)
h)
Open the HTML help pages
Open a help page specific to the currently opened tab
Open the Frequently Asked Questions pages
Open the Donate page!
Open the Xinorbis website
Check for an updated version of Xinorbis
Register your interest in Xinorbis
Show version information
* Default is “C:\documents and settings\<your user name>\xinorbis”
-7Top toolbar
Save many reports from the same window.
Print the contents of the current tab, using the previous print settings.
Open Xinorbis Settings.
Open the report folder in Windows Explorer.
(by default; c:\documents and settings\<your user name>\Xinorbis)
Refresh all displays and tables, useful after changing settings.
Please donate!
Open the About dialog.
Opens help
Middle toolbar
1) Click to scan the folder specified in (2).
2) The folder to scan, the last twenty scanned folders can be accessed by clicking the down arrow.
3) Click to open a folder selector dialog.
4) Exclude folders from the scan. *
5) Quick folders
6) Combine multiple folders/drives in to the same scan
7) Explore the folder at (2) with Windows Explorer.
8) Create and open a HTML report using the Quick settings. **
9) Create and open an XML report using the Quick settings. **
10) Create and open a CSV report using the Quick settings. **
11) Create and open a Text report using the Quick settings. **
12) Create a Xinorbis report using the Quick settings. **
13) Create a Tree report using the Quick settings. **
* Be careful when excluding folders from the scan as this will affect all of Xinorbis’ displays and reports.
** More information is available on creating reports; see the “Customising Xinorbis’ reports” section.
It’s possible to quickly create and open a new HTML or Text report by pressing the right mouse button
over the HTML or Text buttons and selecting “Custom…”
-8File History toolbar
1)
2)
3)
4)
The computer where the folder lies (only really useful for portable users).
The currently selected folder.
Open the selected folder (2) within Folder History.
View a list of scans for the selected computer/folder combination.
Information Tabs
The tabs within the Information section are built from the current scan location data. They are all
described in much more detail later on in this manual.
Navigate Tabs
The navigate tab is a quick and easy way to navigate the folder and file structure of the current scan
location. This tab is described in more information later in this manual.
-9File History Tabs
Folder History is the place where details of previous scans can be analysed and compared. The tabs found
with the Information sub tab (Table, Type, Folders, Magnitude, Dates and Users) work the same as
those found in the main Information tab. Folder History is described in much more detail later on in this
manual.
The Chart Tab allows for the quick comparison of the type, quantity and size of files at previous scan
dates.
The Table Tab is similar to the Chart tab except in table form.
Search for files and folders within any previous scan, selectable from a list on the left.
The File History Compare Tab is more sophisticated version of the Search Tab that allows for two
dates to be scanned, viewed and compared simultaneously.
- 10 -
Common Functions and Behaviour
All of the charts and tables have extra functionality that can be accessed via a popup menu, press the
right mouse button over a table, chart, tree or list to access the menu.
Charts
The following controls behave in the same way throughout all of Xinorbis’ tabs.
For each tab that contains a graph you’ll find the following set of controls;
1)
2)
3)
4)
5)
Set the chart to Pie.
Set the chart to Bar.
Show by size of files
Show by number
Toggle the graph’s legend.
Pressing the right mouse button over any chart will open up the following popup menu;
1)
2)
3)
4)
Save the chart as a bitmap image (.bmp).
Copy the chart as a bitmap to the clipboard.
Open the Advanced chart options dialog (below).
Print a copy of the selected chart.
- 11 Advanced chart options
Theses extra chart options allow for an increased level of customisation to Xinorbis’ charts.
a)
b)
c)
d)
e)
f)
Example
Set the zoom level of the chart [Pie charts only].
Make the largest slice “explode” away from the rest of the pie [Pie charts only].
Toggle the display of labels
Select the background colour for labels
Select the contents of the label;
a. Value of the pie slice or bar
b. Percentage
c. The label
d. Label + percentage
e. Label + value
f. Legend
g. Percentage + total
h. Label + percentage + total
i. X/Y value
g) Save the current settings to ALL Xinorbis charts
h) Save the current settings to only the selected chart
- 12 -
Information Tab
After a folder or drive has been scanned the fourteen tabs that belong to the
filled with data and all tables, trees and charts updated.
section will be
It’s possible to configure Xinorbis to open a specific tab after a scan has finished, please see the Settings
pages for more information.
Summary Tab
The summary tab shows a simple summary of the information gathered from the latest scan.
Save the contents of the summary to a text file.
Configure the layout of the summary
The summary can contain one or more of the following sections
o
o
o
o
o
o
o
o
Header
File / folder count
File sizes
Null files / folders
Averages
Largest file / folder
User
Category statistics
- 13 -
Table Tab
A display of the distribution, within the various Xinorbis categories, of the files from the drive or folder
being scanned. Displayed by size (how the combined size of the files make up the drive) and by quantity
(how many of the separate files make up the drive).
The second table on the Table Tab displays the number of files that were found to be set as hidden,
system, archive, read only, created today, accessed today or modified today and those files of null (zero)
length.
Double-clicking on either table will automatically open the search tab and list all files belonging to the
highlighted category or file type.
Right-click on the top most table (categories) to open a popup menu with some extra functions;
1) Export all of the file details of the selected category to a CSV file (these can be imported in to
Microsoft Excel, as well as many others applications).
2) Add all of the files from the selected category to a zip (compressed) file.
3) Copy the table to the clipboard.
- 14 -
Type Tab
See how the individual file type categories are broken up in to each extension. The user can see how
many graphic type files exist and how many of each type of graphic exist: i.e. how many .gif, .jpg etc.
Right mouse button on the category will allow you to toggle a graphic representation of the contents of
the category.
Double click on any extension in the tree to see a list of files matching the selected extension.
Right-click on the tree to open a popup menu with some extra functions;
1) Export the contents of the entire "tree" to a text file.
2) Add all of the files from the selected category OR with the selected file extension to a zip
(compressed) file.
3) Copy the entire tree, in text format, to the clipboard.
- 15 -
Folders Tab
Similar to the Table view it shows how each of the folders with the search path constitutes the given
search. The graph below the table gives this information in an easy to read form.
Click the button (or double click a row in the table) to get a detailed view of the contents of the
highlighted folder. Selecting the root folder '\' will show a detailed view of the analysed folder. Click here
for more information on the More Detail display.
Use the Filter drop down list to limit the amount of information that is shown on the graph. Add only those
results where the percentage of files (either by size or quantity) in each folder is greater than 1%, 2%,
3%, 4%, 5%, 10% or 15%. This can be very useful for making the graph easier to read if you have many
folders listed that only contain a small amount of files.
Right mouse button on any folder listed in the table to bring up the following popup menu:
1) Show more detail on the selected folder (same as clicking on the “more detail” button).
2) Analyses the highlighted drive (you can't analyse the root '\' folder!).
3) Open the selected folder in Windows Explorer.
4) Copy the table, as text, to the clipboard
- 16 More Detail display
Double click any folder in the More Detail window to show more detail for that selected folder and its
subfolders.
a)
b)
c)
d)
e)
f)
Switch the graph between relative quantities and sizes.
Go up a level of folder hierarchy
Number of files and folders being shown. Size of included files is also shown
Filter the contents of the folder display.
Folders with size and quantity of files.
Filter the contents of the folder.
- 17 -
Magnitude Tab
The magnitude tab shows how the files from the scanned folder are distributed by size. There are eleven
ranges that are displayed in the table and graph;
<=1k
1K < x <=1MB
1MB < x <=10MB
10MB < x <=50MB
50MB < x <=100MB
100MB < x <=150MB
150MB < x <=200MB
200MB < x <=250MB
250MB < x <=500MB
500MB < x <=1GB
1GB < x <=2GB
>2GB
Files
Files
Files
Files
Files
Files
Files
Files
Files
Files
Files
Files
less than or equal to 1K (1024 bytes)
greater than 1K but less than or equal to 1MB
greater than 1MB but less than or equal to 10MB
greater than 10MB but less than or equal to 50MB
greater than 50MB but less than or equal to 100MB
greater than 100MB but less than or equal to 150MB
greater than 150MB but less than or equal to 200MB
greater than 200MB but less than or equal to 250MB
greater than 250MB but less than or equal to 500MB
greater than 500MB but less than or equal to 1GB
greater than 1GB but less than or equal to 2GB
greater than 2GB
Use the File Size Spread display (from the Details menu) for a more detailed look at the distribution of
files by size.
Double click on any row to see a list of all files within the selected range.
Click the right mouse button to open a popup menu which has the following options;
1) Export the contents of the table to a text file.
2) Add all of the files from the selected size range to a zip (compressed) file.
3) Copy the entire table, in text format, to the clipboard.
- 18 -
File Dates Tab
The displays on this tab show the distribution of files by year, month and date. It shows the number of
files (and size of those files) that belong to each day, month and year.
The "tree view" is shown here without file names listed beneath each date; this can be enabled in
Settings.
Display according to Created date, Last Accessed date or Last Modified date.
The table has a popup menu (available by clicking the right mouse button) that has options for;
a)
b)
c)
d)
e)
f)
Open the selected file with the Windows' default viewer.
Open the selected file with the "custom viewer" as specified in Settings.
Open the folder of the selected file in Explorer.
Show the Windows File Properties dialog for the selected file.
Generate and MD5 checksum for the selected file.
Export the entire contents of the "tree" to a text file.
- 19 -
History Tab
Not to be confused with File History. Xinorbis uses the created, last modified and last accessed dates of
each file to create trends of file usage.
The graph below is showing the quantity of files created over a period of one month (18th May 2008 to
18th June 2008). Over that period files were only created on six of those days, 4 on the 19th May, 5 on the
22nd May etc.
The graph shows the number, or size, of files created within the selected date range.
1)
2)
3)
4)
5)
Select the date range you wish to see
Select the date range you wish to see
Select how the data should be shown; by day, week, month or hour
Show the number of files created or the size of the files
Cumulative graph, each bar is equivalent to its value plus all previous values.
When (3) is set to Hour the display shows the rate of usage over each hour of a 24 hour period, not for
each hour between the two selected dates.
- 20 -
Top 101 Tab
The Top 101 tab shows the top 101 largest and smallest files and the top 101 files listed by Created, Last
Modified and Last Accessed date.
Clicking the right mouse button on a selected entry in the table will bring up the following menu;
a)
b)
c)
d)
e)
f)
g)
h)
i)
j)
Open the selected file with the Windows' default viewer.
Open the selected file with the "custom viewer" as specified in Settings.
Open the folder of the selected file in Explorer.
Show the Windows File Properties dialog for the selected file.
Generate and MD5 checksum for the selected file.
Copy the selected file OR all of the files from the selected table to another location.
Move the selected file OR all of the files from the selected table to another location.
Delete the selected file OR all of the files from the selected table to the Recycle Bin.
Add all of the files from the selected table to a zip (compressed) file.
Copy the table, as text, to the clipboard.
- 21 -
Other Tab
If a file has an extension that is not recognised (i.e. it doesn't appear in any of the 19 categories; system,
graphics, etc.) then its extension will be put in to this table. The table lists the extension and the number
of files found with it.
Clicking an extension will bring up list of possible file types; e.g. in the example above, Xinorbis suggests
that this is a file from Microsoft's Visual Source Safe. Xinorbis can identify over 3000 file extensions.
Use the Right Mouse Button on an extension to bring up a menu which allows you to fast-track an
extension to the correct category, without the need to go in to preferences. It's possible to fast-track
more than one extension at a time to the same category. Select multiple rows using SHIFT+CLICK or
CONTROL+CLICK.
Clicking the "Show files" menu item will open the Search Tab and list all files that have the selected
extension.
- 22 -
Null Files and Folders Tab
Shows empty files (those with zero size) and empty folders (those that contain no other files or folders).
Double-click any folder to open it within Windows Explorer.
- 23 -
Users Tab
The users tab displays all the users that were identified during the scan along with the amount of files
that "belong" to them.
Double-click within the list on the right to see all the files belonging to the selected user, in the Search
Tab.
Right-click on the tree to open a popup menu with some extra functions;
1) Export all of the file details belonging to the selected user to a CSV file.
2) Add all of the files belonging to the selected user to a zip (compressed) file.
3)
Copy the table, as text, to the clipboard.
- 24 -
Temporary Files Tab
The temp tab shows all of the files that have been identified as temp (from Preferences).
Right mouse button on a selected file in the table to bring up the following menu;
a)
b)
c)
d)
e)
f)
g)
h)
i)
j)
Open the selected file with the Windows' default viewer.
Open the selected file with the "custom viewer" as specified in Settings.
Open the folder of the selected file in Explorer.
Show the Windows File Properties dialog for the selected file.
Generate and MD5 checksum for the selected file.
Copy the selected file OR all displayed files to another location.
Move the selected file OR all displayed files to another location.
Delete the selected file OR all displayed files to the Recycle Bin.
Add all of the temporary files to a zip (compressed) file.
Copy the table, as text, to the clipboard.
- 25 -
Search Tab
a)
b)
c)
d)
Toggle accessed date, modified date, owner and attributes respectively.
Show the full file path in the search results (shown) or just the file name.
Colour-code each entry in the table according to the type (category) of file (shown below).
Information on search results.
Using the default colours, this table shows me that the search results are made up of files belonging to
the "graphics" (yellow) and "other" (purple) categories.
Click
to access many default searches, and quick access to category and attribute specific searches.
The quick search menu can be customised, see the “Information for Advanced Users” section towards the
end of this manual.
Execute the search.
Open the search documentation.
Open the floating search syntax window (F3).
Save the search results as a text file or CSV file.
Show information for the selected file or folder.
Toggle the chart display.
- 26 The search chart shows the current search results in the context of the current scan.
It can show either; the size of the search results as a percentage
of the size of the whole of the last scan or the number of files in
the search results as a percentage of the total files scanned.
The search results are shown in yellow, with the grey portion of
the chart representing the rest of the scanned files (ie those files
not in the search results).
When the number of matching search hits is greater than the maximum number of hits that can be
displayed at one time then the following toolbar will appear at the bottom of the search tab;
a)
b)
c)
d)
Previous page of results
Next page of results
Current page (total pages)
The results currently being displayed
Clicking the right mouse button on a selected entry in the table will bring up the following menu;
k)
l)
m)
n)
o)
p)
q)
r)
s)
t)
Open the selected file with the Windows' default viewer.
Open the selected file with the "custom viewer" as specified in Settings.
Open the folder of the selected file in Explorer.
Show the Windows File Properties dialog for the selected file.
Generate and MD5 checksum for the selected file.
Copy the selected file OR all displayed files to another location.
Move the selected file OR all displayed files to another location.
Delete the selected file OR all displayed files to the Recycle Bin.
Add all of the files from the last search to a zip (compressed) file.
Copy the table, as text, to the clipboard.
- 27 -
Drive Details Tab
Information on the used and available space of the drive being analysed.
Drive type can be: Unknown, Removable, Hard Disk, Remote Drive, CD-ROM or RAM Disk
A cluster is the smallest unit of disk space that can be allocated to a file, which is why clusters are often
known as “allocation units”.
The size of a cluster is calculated by multiplying the number of bytes in a sector by the number of sectors
in a cluster. In the example above that would be 512 bytes x 8 = 4096 bytes = 4k. The drive E on the
machine in the example can be said to have 4k clusters.
A file of 5k on this drive wouldn’t fit in to one cluster; it would need two, and therefore take up 8k of
space, wasting 3k.
File System refers to the method in which data is stored on the hard disk. On Windows the most
common types are FAT32 and NTFS.
- 28 -
Navigate Tab
Easily navigate the files and folders of the current scan.
The navigation tab is split in to two sections. Double-clicking on a folder in the left hand part will show all
of the files and folders belonging to it in the right hand part.
a)
b)
c)
d)
e)
f)
g)
Toggles the "created date" column
Toggles the "accessed date" column
Toggle the "modified date" column
Toggle the file owner column
Toggle the file attributes column
Toggle the "size on disk" column
Colour codes each file (not folders)
Right mouse button on a selected file or folder in the table to bring up the following menu;
a)
b)
c)
d)
e)
f)
g)
h)
i)
j)
Open the selected file with the Windows' default viewer.
Open the selected file with the "custom viewer" as specified in Settings.
Open the folder of the selected file in Explorer.
Show the Windows File Properties dialog for the selected file.
Generate and MD5 checksum for the selected file.
Copy the selected file OR all displayed files to another location.
Move the selected file OR all displayed files to another location.
Delete the selected file OR all displayed files to the Recycle Bin.
Add the selected files to a zip (compressed) file.
Copy the table, as text, to the clipboard.
Select multiple rows by selecting with CLICK+CTRL or CLICK+SHIFT.
- 29 -
File History
When enabled the File History feature of Xinorbis will allow you to track the changes of drives and folders
on your PC or network.
Every time a folder, drive or network share is scanned its details are stored so that they can be
referenced again and compared against the same location on previous dates.
For each scan Xinorbis stores; Number of files, number of folders, combined size of files, magnitude
details and the quantity / size of each of the fifteen categories (programs, graphics etc.).
Xinorbis also stores details of every file that's scanned so that detailed analysis of the folder or drive is
possible.
The File History Tab works in conjunction with the File History toolbar.
(b) shows the currently selected folder, all the following tabs work with it. To work with a different folder;
select the Computer where the folder is located with (a), select the folder from the drop down list (b) and
press (c) to select. Press (d) to see a list of scans (and basic information) for the selected computer and
folder [(a) and (b)].
Clicking on (d) will open the following window which shows details of scans performed on the selected
Folder History folder (b);
For each scan the following details are shown;
Time and date of the scan
The number of files found
The total size of the files within the folder
The number of folders found
- 30 Information
The information tab is similar to the "main" information tab. The Table, Type, Folders, Magnitude,
Dates and Users displays work exactly the same as those on the main information tab.
a)
b)
c)
d)
A list of scans, listed by date/time, yyyy/mm/dd hh:mm:ss.
Click to populate the information tabs with data from the selected scan in (a).
Export all of the data from the scan (a) to XML.
Export all of the data from the scan (a) to CSV format.
Chart
At the top of the Chart section is a toolbar that is used to customise the chart's content.
From left to right;
show by the number of files belonging to each category.
show by the size of files belonging to each category.
The centre fifteen buttons toggle the relevant categories from the chart display.
The magnitude buttons have the same effect as the equivalent Files buttons, in that they show the
size and quantity of files displayed according to the magnitude of the file's size.
The left hand side of the Chart tab shows a list available scan dates. Clicking an entry will show the
number of files, folders and total size for that scan in the area below the toolbar. Selecting the entry (tick
the check box on the left) will add that scan's data to the chart.
- 31 Table
The Table view shows all of the scan data that is available.
The delta column represents the difference between the row and the current (the top) data.
File History Search
Use the File History Search to search through the contents of the selected folder at any previous scan
date/time. See the Search Syntax section later in this manual for more details.
Press
a)
b)
c)
d)
e)
f)
g)
h)
i)
or press enter [when the cursor is in (f)] to run the search.
A list of scans, listed by date/time, yyyy/mm/dd hh:mm:ss.
Select how the file size should be display, most convenient, all in kilobytes or as bytes.
Show the full file path for the file or just the name and extension.
Colour code the files, the colour represents the category that the file belongs to.
Click for a list of predefined searches.
Type the search command in here.
Click for more information on the search commands.
Save the search reports.
Search results.
- 32 File History Compare
Use the File History Compare tab to compare the contents of a folder at two specific dates.
a)
b)
c)
d)
e)
f)
g)
h)
Select from a set of predefined searches.
Run the search.
Enter the search commands in here, see here for more information.
Open the floating search command syntax window.
Select from three different file size formats.
Toggle the full path of the file, when unselected only the file name will be shown.
Colour the files according to the category they belong to.
Select which scan (date and time) to search.
i)
j)
k)
l)
m)
n)
o)
p)
Save the search results.
Toggle the "created date" column.
Toggle the "accessed date" column.
Toggle the "modified date" column.
Toggle the "user name" column.
Toggle the "file attributes" column.
Toggle the "size on disk" column.
Highlights the items on the selected side that aren't present on the other side.
- 33 -
Search Syntax
To access a comprehensive HTML-based search syntax reference from within Xinorbis, press F5.
Xinorbis has a powerful search system that allows for detailed filtering of all the files from the previous
scan (as well as the File History).
The search commands are not case sensitive, so (size>100k) is the same as (SiZe>100k).
The order in which the commands are entered won’t make a difference to the search results.
Searching by file name
A simple "or" search, find files with the words city or java in the path;
city java
A simple "and" search, find files with the words city and java in the path;
“city java”
Combining and with or, find files that contain city and java or aardvark in the path;
“city java” aardvark
The above examples will look for the specified keyword(s) anywhere within the file name and path of the
file, the following examples allow for more targeted searches.
Lets say we want to find all sound files that start with cat;
cat* #snd
Or we want to find all MP3s that end in dog;
*dog.mp3
Use of the * wildcard restricts the search to file names only.
Searching by file size
Limit the search results to files with sizes less than or equal to 100k;
(size<100k)
Limit the search results to files with sizes greater than or equal to 100k;
(size>100k)
Limit the search results to files with sizes greater than or equal to 100k and less than 1 megabyte;
(size>100k)(size<1mb)
When using the "size>" or "size<" functions you have four options for units;
(size>500)
blank, this is interpreted as bytes (e.g. everything above 500 bytes in size)
(size>500k) k, this is interpreted as kilobytes (e.g. everything above 500 kilobytes in size)
(size>1mb)
mb, this is interpreted as megabytes (e.g. everything above 1 megabyte in size)
(size>1gb)
gb, this is interpreted as gigabytes (e.g. everything above 1 gigabyte in size)
- 34 Searching by date
Each of the date search functions can be used with the following date formats;
dd/mm/yyyy, yyyy/mm/dd or yyyymmdd
If the Date Format (configurable in Settings) is set to mm/dd/yyyy then Xinorbis will accept dates in
mm/dd/yyyy format instead of dd/mm/yyyy.
For files with created dates greater than or equal to 30/10/2005;
(date>30/10/2005)
For files with created dates earlier than or equal to 30/10/2005;
(date>30/10/2005)
For files with created dates of 30/10/2005 only;
(date=30/10/2005)
Replace date with;
mdate to filter by last modified date
adate to filter by last accessed date.
Searching by time
All times are in 24 hour format, HHMM, where HH is 00-23 and MM is 00-59. The seconds part of time is
discarded.
For files created after or at 5:30pm;
(time>1730)
For files created early than or at 9am;
(time<0900)
For files created at exactly 2:30pm;
(time=1430)
Replace time with;
mtime to filter by last modified time
atime to filter by last accessed time
Searching by category
Add the following keywords to filter your results by Xinorbis category;
#PROGRAM or #PROG
#SYS or #SYSTEM
#GRAPHICS or #GFX
#MOVIE
#SND or #SOUND
#OFFICE or #OFF
#CODE or #COD
#COMPRESSED or #COM
#OTHER
#C1 to #C10
Program files
System files
Graphics, photos and other images
Movie, video or other animations
Sounds and music
Documents, diagrams, spreadsheets etc.
Programming and development related files
Compressed files or other archives
Files that don’t fit in the other categories
User definable categories.
- 35 Combine multiple keywords for more powerful searches;
#SYSTEM #COMPRESSED
Will return SYSTEM and COMPRESSED files.
Add a – (minus) to the end to exclude files from that category from the results;
#SYSTEMWill exclude system files from the search.
The Xinorbis categories come populated with a selection of file types but these can be expanded on by
adding new ones through Settings or the Other Tab.
Searching by file attribute
It is possible to filter by various file attributes;
@HIDDEN
@SYSTEM
@ARCHIVE
@NULL
@READONLY
@CREATED
@ACCESSED
@MODIFIED
@FILE
@FOLDER
search
search
search
search
search
search
search
search
search
search
only
only
only
only
only
only
only
only
only
only
hidden files.
system files.
files with the archive file attribute
files that have null (zero) size
files that are read-only
files that were created today
files that have been accessed today
files that have been modified today
files (will ignore folders)
items that are folders
Add a – (minus) to the end to exclude files with that attribute from the search results;
@HIDDENWill exclude system files from the search.
Searching by user (owner)
The user name to search for is not case-sensitive.
Filter your search results by the owner (creator) of the file;
(user=paul alan freshney)
Filter results to include files that aren't owned by a specific user;
(user!=paul alan freshney)
Filter results to include files that are owned by a user whose name contains certain text;
(user~paul)
Filter results to include files that are NOT owned by a user whose name contains certain text;
(user!~paul)
If multiple “owner” parameters are specified then files matching either are returned;
(user=Julie) (user=Orion)
will return files owned by Julie OR Orion.
- 36 File History Specific Functions
List the top files by size (similar to the Top 101 display)
Show the top largest files (the top 20 is displayed below);
(top=20)
Like all search parameters it can be combined, shown below is a method of showing the top 20 graphic
files;
(top=20) #GFX
List the bottom files by size (similar to the Top 101 display)
Show the smallest files (the bottom 10 is shown below);
(bot=10)
List the top files by created date
Show a number of the largest files by creation date;
(ctop=20)
List the top files by accessed date
Show a number of the largest files by last accessed date;
(atop=10)
List the top files by modified date
Show a number of the largest files by last modified date;
(mtop=10)
- 37 Combining Search Functions
It’s possible to combine two or more search functions together to create very powerful searches.
Find all the graphics files that contain the words bank and 2000 in the path;
“bank 2000” #GFX
Find for all graphics files greater than or equal to 100k that have the words bank and 2000 in the path;
“bank 2000” #GFX (size>100k)
Find all system files created today;
#SYSTEM @CREATED
Find all of the graphics files created by me that are over 1MB in size;
#GFX (user=paul alan freshney) (size>1MB)
Find all files created today that contain the text fish;
@CREATED fish
Find all system files greater than 5MB in size that were created today;
@CREATED #SYS (size>5MB)
Find all audio and movie files created today and owned by me;
#SOUND #MOVIE @CREATED (user=paul alan freshney)
- 38 -
File Size Spread
The File Size Spread display is a more powerful version of the magnitude display.
a) Build the graph.
b) Select the resolution of the graph. Small numbers make for more
detailed graphs but at the expense of build time and memory usage.
The default is 512K so they first bar of the graph will show the number
of files between 0 bytes up to (but not including) 512k, the second bar
for files of 512k up to (1MB and so on in intervals of 512K.
c) Build the graph from only a selected range of file sizes form (d) to (e)
inclusive.
d) Start size for the range.
e) End size for the range.
f) Use a multi-coloured graph or colour based on y-axis value (darker
colour for larger values).
g) Use a logarithmic Y-axis.
In the example below the "multi" colour mode is shown. There is too much information to show on the Xaxis so the information is available by moving the mouse over a bar. The mouse is located over "blue" bar
next the end, the top part of the example shows that this bar represents files of 3.50MB up to (but not
including) 4.00MB of which there are 24.
The interval in this example is 0.5MB or 512KB. Each bar represents a spread of this amount.
- 39 In the example below the "gradient" colour mode is shown. The mouse is located over the bar that
represents files of 15MB up to (but not including) 16MB of which there are 3.
Benford’s Law
Benford's Law describes how the distribution of a set of numbers should vary with the leading digit of
each number.
Numbers beginning with '1' should be around 30.1%, '2' 17.61%, '3' 12.49%, '4' 9.69%, '5' 7.92%, '6'
6.69%, '7' 5.80%, '8' 5.12% and those beginning with '9' would only be expected to account for 4.58% of
the total.
The Benford's Law display will show you the distribution of the file sizes according to the file size's leading
digit.
- 40 -
Duplicate Files (by Size)
A list of files that all share the exact file size is available from the Detail menu.
The display lists all files with the same size that exist within the current scan folder.
a) Start looking for duplicates.
b) Save the list of duplicates to a text file.
- 41 -
Duplicate Files (by Name)
A list of files that all share the exact file name is available from the Detail menu.
The display lists all files with the same file name that exist within the current scan folder.
c) Start looking for duplicates.
d) Save the list of duplicates to a text file.
- 42 -
Reference
File Extensions
Find information on a specific file extension or group of file extensions. Currently Xinorbis has information
on over 6000 file extensions.
Windows Files
Find information on a Windows XP or Windows 7 DLL. Xinorbis currently holds information on around 3300
files.
- 43 -
Combine Multiple Paths
The combine dialog lets you choose which drive or folder paths to merge into the same report.
1) Type the folder to add in this box or (3)
2) Add the chosen folder to the list
3) Use the folder picker dialog to choose the folder to add
4) Complete list of drives/ folders to combine
5) Delete an entry from the list
6) Load a previously saved list
7) Save the current list of folders to a file
8) Scan this list of folders now
9) Cancel this operation and return to Xinorbis
10) Open the selected folder in Windows Explorer
When the combine has finished you will have access to the same types of reports and information as
when you analyse a single drive or folder. Don't forget that it may take some time to analyse if you add a
lot of drives!!!
Click on the Scan button to continue with the analysis or Cancel to cancel the compare operation and
return to the application.
- 44 -
Settings
General
Show start-up screen
Enable this to show the "drives and folder" selection window when Xinorbis is opened.
Automatically check for updates on start-up
Enable this if you want to check for updates every time Xinorbis is opened. If this option is disabled
then it's still possible to check for updates from the "help" menu.
Enable folder history
For more information on Folder History see the Folder History section.
Enable full file logging
When enabled this causes Xinorbis to store the full details of very file and folder from the scan.
Allow SQL statements when searching
Enable the use of SQL statements when searching. Only valid in Folder History.
Table row height (default is 17)
Set the height of all the rows in each Xinorbis table.
Date Format (default is dd/mm/yyyy)
Select which date format that Xinorbis should use within the application and reports.
Select from; dd/mm/yyyy, mm/dd/yyyy or yyyy/mm/dd.
Search result limit (default is 5000)
Sets the maximum amount of search results that will be returned on one “page”. When the
number of search hits is greater than this value then it’s still possible to see them by “paging”
through the results. This setting affects Search, File History Search and File History Compare.
Xinorbis data folder
Set the location where Xinorbis stores reports and the File History database.
Open which data tab after scan ...
Select which (select "do nothing" for none) data tab you would Xinorbis to open as soon as the
search has finished
Custom viewer
Select an application (such as a hex editor) that you wish to use to view files instead of the default
Windows setting. The custom viewer option is available with the right mouse button on the Search
table and Dates tree view.
Xinorbis has several settings that will increase processing speed and minimise memory usage, although
disabling some options will restrict the information that can be gathered.
Just-in-time processing
Enabling this setting will cause Xinorbis to only build certain displays when they are required. This
will speed up the initial scan but may cause (slight) delays when selecting certain tabs, although
this will only happen once for each tab/display.
Don't build date tree
When a drive or folder with many thousands of files has been processed the routines that create
the Date tree can take a while to build the display. If you aren't interested in the time and date
stamps of the files being scanned then enabling this optimisation will decrease the time of the
initial scan. After the scan has finished it's still possible to see the Date tree display by selecting
from the drop down list (Created, Modified and Accessed).
The ability to search by dates (created, modified and accessed) is not affected by this option.
- 45 Add file names to "Date" tab
If this setting is selected the every file in the current scan will be added to the relevant Date
"node" in the Date tree display. Disabling this option will save processing time and Xinorbis'
memory footprint.
When there's less than this many files
Enabling this setting will mean that file names are only added to the Date tree when there's less
files in the current scan than the specified amount, the default is 1000.
Don't get file owner details
Enable this option if you are running on a system that only has one user, or you aren't interested
in who each file belongs to. If you are scanning many thousands of files then enabling this
optimisation can significantly speed up the scanning process.
Scanning progress update/refresh speed
This setting has six distinct steps that will make the Xinorbis window more or less responsive
during scanning but at the expense of scan speed. The more responsive it is during scanning then
the longer it will take. For small scans this will make no perceivable difference but for scans of
entire drives it could add 10% or more (on the “Highest Process Update”).
File Association Categories
1)
2)
3)
4)
5)
6)
7)
8)
9)
Select a category to edit.
Type the extension in the box (no need for the leading '.') and click "add" or press enter.
List of extensions in this currently selected category.
Click here to delete a selected entry from the list.
Click to change the display colour of this category. (shown in graphs and in the reports)
Click to restore the default associations.
Import a list of extensions for a text file (one extension per line).
Export the extensions from the current category to a text file.
Select how Xinorbis should handle file extensions when they appear in more than one category.
See below.
10) Rename the appropriate custom category.
Xinorbis allows you to decide how it should handle file extensions that appear in more than one category;
Ignore duplicate extensions in custom categories (standard categories take precedence) (default)
- 46 The file extension will be processed as if it only appears in the standard categories, it will not
appear as though it appears in any custom category.
Ignore duplicate extensions in standard categories (custom categories take precedence)
The file extension will be processed as if it only appears in the custom categories, it will not appear
as though it appears in any other category.
Use extensions as specified in all categories (charts and reports may be inaccurate)
The file extension will be processed for every category it appears in, this will make charts and
reports inaccurate so it is not recommended.
This control panel allows you to tell Xinorbis which file extensions should be associated to which category.
The software has a default setup of around 40 associations. Click the "restore defaults" button to restore
the associations to those of a fresh installation.
The "other" category is reserved for files with extensions that do not match any of those in the other
categories. You cannot add file extensions to it!
Temporary Files
Tell Xinorbis what file types you would like flagged as temporary.
Use the filename or specific pattern, such as \temp\ or thumbs.db.
Use a wildcard such as *.tmp, ~* or *dat*.
Chart Options
Each chart within Xinorbis can have its gradient configured within this preferences section.
a) Gradient start colour
b) Gradient end colour
c) Toggle the gradient fill
Output Options
For each report type Xinorbis allows for five layout presets;
Auto Save
Quick
Other
Custom1
Custom2
Always used by the “auto save mode”.
Always used by the quick reports (F7 – F12)
The default for the “save reports” window
User defined
User defined
Autosave Options
Autosave Drive Report
Will automatically save any drive analysis report, using the “Auto save” report preset.
Files are saved to: “<report folder> \<computer name>\autosaves”
The format of all reports is: “drive_folder_yyyymmdd_hhmmss”
- 47 HTML Output Options
When viewing an HTML report within Xinorbis, you can select a specific application to view the
report with. If no application is specified then the default Windows HTML viewer (such as Internet
Explorer) is used.
Customise the output of the HTML report by altering the colours used within the report. There are
several predefined schemes available that can be imported using the “Load” button. To save a
scheme use the “Save As” button. Click the preview button to see a preview of your scheme in an
example report.
For each report type Xinorbis allows for five layout presets (Auto Save, Quick, Other, Custom1 and
Custom2) that determine what data should be added to the report. The “report layout” section of
the HTML settings is where all of the presets can be edited. Select from (b) the preset you wish to
edit and press (a) to open the editing window. The current layout for the selected preset (b) is
shown in (c).
HTML layouts can be configure for 800x600 or 1024x768 displays from the window that’s accessed
from (a).
- 48 XML Output Options
When viewing an XML report within Xinorbis, you can select which application to view the report
with. If no application is specified then Notepad is used.
For each report type Xinorbis allows for five layout presets (Autosave, Quick, Other, Custom1 and
Custom2) that determine what data should be added to the report. The “report layout” section of
the XML settings is where all of the presets can be edited. Select from (b) the preset you wish to
edit and press (a) to open the editing window. The current layout for the selected preset (b) is
shown in (c).
- 49 CSV Output Options
Setting the "include column titles" option will add an extra row to the top of the file which lists the
titles of each column.
When viewing an CSV report within Xinorbis, you can select which application to view the report
with. If no application is specified then Notepad is used.
The "Which data" option has two settings;
Category
Files
output the same information as in the "table" view.
output every file that was found in the current scan along with size and date
details.
The last option is “Show sizes in” and will change the way that file sizes are displayed in the
report.
For example, a file of exactly 1MB would be shown as;
Most convenient unit;
As bytes;
As kilobytes;
1MB*
1048576*
1024*
* This is not always the case with all applications, but Xinorbis uses the most commonly recognised convention.
- 50 Text Output Options
When viewing a Text report within Xinorbis, you can select which application to view the report
with. If no application is specified then Notepad is used.
For each report type Xinorbis allows for five layout presets (Autosave, Quick, Other, Custom1 and
Custom2) that determine what data should be added to the report. The “report layout” section of
the Text settings is where all of the presets can be edited. Select from (b) the preset you wish to
edit and press (a) to open the editing window. The current layout for the selected preset (b) is
shown in (c).
Xinorbis Output Options
Select the preset to edit using (a).
Normal
Stores only the file names, folder names and file sizes. This produces a smaller file at the
expense of detail.
Detailed
Stores all file and folder information, much more detailed but produces much larger files
(around 300% larger).
- 51 Quick Folders
Quick Folders are a list of Folders (drives, local folders or remote) that can be accessed from the button
on the main toolbar.
a)
b)
c)
d)
e)
The list of current Quick Folders (a maximum of 20).
Move the selected Folder up one.
Move the selected Folder down one.
Add a new Folder.
Delete the selected Folder.
Navigate
Click either of the blue/grey or purple/grey parts to change the relevant colours on the Navigate Tab
display.
- 52 -
Importing from a CSV file
Xinorbis allows you to process data that has been created with other applications, as well as those created
by Xinorbis. CSV files can be created from many other applications and therefore it makes it a common
choice.
There is no single specification for how a CSV (comma separated values) file should be laid out for the
purposes of storing file data. The CSV format only specifies how the data should be stored, not in what
order or format!!!
That's where the import system comes in;
The Xinorbis import CSV data screen allows you to tell Xinorbis the structure of the CSV file you wish to
import.
To make it easier to decide which field of the file contains which data, Xinorbis will show you the first item
of data available for each field. From this it should be easy to decide how to import the data.
For each item of data in the file you can decide whether it is;
Full file path; e.g. c:\some folder\somefile.txt
File size (in bytes); e.g. 10000, this field has to be a number (only characters 0-9 allowed)
File date (dd/mm/yyyy); e.g. 17/04/1975
File date (mm/dd/yyyy); e.g. 04/17/1975 (US style date format)
File path; e.g. c:\some folder\
File name; e.g. somefile.txt
If the CSV file you wish to import contains data that Xinorbis doesn't need (such as modified data, in the
above image) then setting that field to ignore will ensure Xinorbis ignores it.
Only the file name is mandatory, all of the rest are optional but will result in inaccurate reports if they are
missing. If no size value is given then all files are treated as 1 byte.
If the CSV file you wish to import contains a "title" or "header" record as its first record (as in the above
example), then you can stop Xinorbis trying to process this by checking the "Ignore first record" tick box.
This first record is often added as it can be useful when importing the data in to Excel as it acts as column
titles.
Xinorbis supports importing from the first seven fields; all of the rest are ignored automatically. Most
programs that create the sort of data that you'd want to import in to Xinorbis (such as XYplorer) allow you
to customise their output, so this shouldn't be a problem.
- 53 -
Saving Reports
Select which report(s) to create by clicking the check-box in the top left corner of a report type. Enter a
file name (or use the automatic file name generator
).
For each report type Xinorbis stores five presets; Autosave, Quick, Other, Custom1 and Custom2.
These come with default settings but can be edited either from Settings (press F6) or from within the
individual report sections, below.
Clicking the “Options >>” button will open the full range of options for the selected report. For those
reports that use the presets select from the drop-down box labelled “Edit” and click the “Edit” button to
edit them. The Quick reports (F7 to F12) always use the Quick report settings so it’s best not to edit and
use that particular preset here.
The selected preset will be the one used when the “Save” button is pressed to create and save the
reports.
A CSV report can contain either the list of categories (audio, video, system, etc.) along with the relevant
data or a complete list of files with details; size, date, file attributes etc.
The HTML report options are shown here along with the option of selecting how file sizes should be shown.
For example, a file of exactly 1MB would be shown as;
Most convenient unit;
As bytes;
As kilobytes;
1MB*
1048576*
1024*
* This is not always the case with all applications, but Xinorbis uses the most commonly recognised convention.
- 54 The Text report options are shown here. Any of the five presets can be selected and/or edited.
The Xinorbis report type only has two options;
Normal
Stores only the file names, folder names and file sizes. This produces a smaller file
at the expense of detail.
Detailed
Stores all file and folder information, it’s much more detailed and produces much
larger files (around 300% larger).
A XML report can contain either the scan data or a complete list of files along with size, date, type etc.
The selected presets are not used when “Full file list” is selected.
- 55 -
Customising Xinorbis’ reports
HTML
The left hand side of the HTML report layout window lists all of the available report sections. Click on each
section individually to add it to the report (the items on the right hand side). Each section can only be
added once.
To remove an item from a report; double-click the selected item on the right or press the
To alter the order in which the items appear on the report; click an item and use the
to move it around the report.
and
button.
buttons
Reports can be generated with or without graphs by toggling the “Include images” check-box. The size of
the report can be altered to fit either 800x600 or 1024x768 displays.
The “Categories and file extension” section can be customised by clicking the “Advanced” button. This will
open up a list of available categories that can be included/excluded from the report.
The report can be saved by clicking the “Save as” button. Saved HTML reports can be executed as “quick”
reports by right-clicking the Quick HTML report icon and selecting “Open…”.
It’s worth noting that selecting either of the “File dates” items may slow down the HTML report generation
as this data will have to be generated before the report can be saved.
- 56 Text
The left hand side of the Text report layout window lists all of the available report sections. Click on each
section individually to add it to the report (the items on the right hand side). Each section can only be
added once.
To remove an item from a report; double-click the selected item on the right or press the
To alter the order in which the items appear on the report; click an item and use the
to move it around the report.
and
button.
buttons
The “Categories and file extension” section can be customised by clicking the “Advanced” button. This will
open up a list of available categories that can be included/excluded from the report.
The report can be saved by clicking the “Save as” button. Saved Text reports can be executed as “quick”
reports by right-clicking the Quick Text report icon and selecting “Open…”.
It’s worth noting that selecting either of the “File dates” items may slow down the Text report generation
as this data will have to be generated before the report can be saved.
- 57 XML
The left hand side of the XML report layout window lists all of the available report sections. Click on each
section individually to add it to the report (the items on the right hand side). Each section can only be
added once.
To remove an item from a report; double-click the selected item on the right or press the
To alter the order in which the items appear on the report; click an item and use the
to move it around the report.
and
button.
buttons
The “Categories and file extension” section can be customised by clicking the “Advanced” button. This will
open up a list of available categories that can be included/excluded from the report.
It’s worth noting that selecting either of the “File dates” items may slow down the XML report generation
as this data will have to be generated before the report can be saved.
For more information on the XML structure that Xinorbis uses see the “Xinorbis report structure” section.
- 58 -
Using Xinorbis as a “portable application”
By default Xinorbis will store user preferences to the Windows’ registry.
To stop all registry access and to force Xinorbis to store user preferences locally to the application, create
a file called custom.ini and place it in the same folder as the x4.exe file. An example file is included in the
same folder as the Xinorbis executable and is named "_custom.ini".
The custom.ini should be a text file with the following structure;
[main]
portablemode=1
This will tell Xinorbis to operate in "portable mode", disabling all registry
access.
All user preferences are saved to the custom.ini file.
copyprefs=1
When not running in "portable mode" this option will tell Xinorbis to save a
copy of Settings to the custom.ini file.
datapath=
The location to use for all reports and saved files.
The path specified in datapath will be created if it doesn't exist. There are two special variables that can
be used within the datapath entry;
$xdrive
$xfolder
<???>
the drive where Xinorbis is being run from.
the folder where Xinorbis is being run from.
where “???” is any environmental variable.
If your copy of Xinorbis is installed to "P:\utils\xinorbis4\" then;
$xdrive would be equal to "P:"
$xfolder would be equal to "P:\utils\xinorbis3" .
Any user additions to the file extension categories will be stored in "<install folder>\data". The
following files are used;
audio.txt
compressed.txt
graphics.txt
movie.txt
office.txt
programming.txt
programs.txt
system.txt
Sound, music or other audio files
Compressed archives of files
Graphics, 3D objects etc.
Movie or animation files
Text file, spreadsheets etc.
Project files, includes, source code etc.
Executable files
Operating system files
custom1.txt
custom2.txt
custom3.txt
custom4.txt
custom5.txt
custom6.txt
custom7.txt
custom8.txt
custom9.txt
custom10.txt
Create these as necessary, they aren't defined by default.
These can be edited if required. Each file is a standard ASCII text file and contains one file extension per
line. No need to add the leading '.'.
Please email me if you would like more options and customisations added to to Xinorbis' "portable mode".
- 59 -
Information for advanced users
Customising the QuickSearch
popup menus.
The information that Xinorbis needs in order to build the popup menus that appear when the quick search
menu button is pressed is stored in two files called;
FHQuickSearch.menu and QuickSearch.menu.
There is copy for each language, stored in \data\languages\, which is located in the folder where
Xinorbis was installed.
The files are standard text files that can be edited with any decent ASCII editor. I've written an
application that will let you test the menu scripts, it's called MenuBuilder.exe and is located in the
\data\languages\ folder.
Each line of the text file is an instruction to the menu builder code.
A greyed-out title is created by putting some text between a set of { }
A separating line is created by having a single - (hypen) on a line.
A clickable menu item looks like this;
.Some Text=command
See further down for information on available commands.
A clickable sub-menu item looks something like this;
[The name/description of the menu]
.An Item=command
.Another Item=command
*
The * (asterisk) signifies the end of a sub-menu.
Commands
A command can be any search command or list of commands.
To search for all files created after the 17th of April 2009;
.Menu Item=(date>20090417)
However, this isn't very useful so it's possible to have Xinorbis generate a date or get the user to select
one.
Date / Time Commands
{NOW}
Today's date.
.Menu Item=(date>{NOW})
Clicking on this menu item will search for all files created on or after today.
{DECWEEK}
A date one week ago from today.
.Menu Item=(date>{DECWEEK})
Clicking on this menu item will search for all files created in the last week.
- 60 {DECMONTH}
A date one month ago from today.
.Menu Item=(date>{DECMONTH})
Clicking on this menu item will search for all files created in the last month.
{DECMONTH6}
A date six months ago from today.
.Menu Item=(date>{DECMONTH6})
Clicking on this menu item will search for all files created in the last six months.
{DECMONTH12}
A date one year ago from today.
.Menu Item=(date>{DECMONTH12})
Clicking on this menu item will search for all files created in the last twelve months.
{DECMONTH24}
A date two years ago from today.
.Menu Item=(date>{DECMONTH24})
Clicking on this menu item will search for all files created in the last twenty four months.
{GetDateDialogA}
Creates a search function dialog, for searching for last accessed dates between two user selectable
dates.
.Menu Item={GetDateDialogA}
Clicking on this menu item will search for all files accessed within the user's selection.
{GetDateDialogC}
Creates a search function dialog, for searching created dates between two user selectable dates.
.Menu Item={GetDateDialogC}
Clicking on this menu item will search for all files created within the user's selection.
{GetDateDialogM}
Creates a search function dialog, for searching modified dates between two user selectable dates.
.Menu Item={GetDateDialogM}
Clicking on this menu item will search for all files modified within the user's selection.
File Size Commands
{GetSizeDialog}
Creates a search function dialog, for searching for between a set of file sizes.
.Menu Item={GetSizeDialog}
Clicking on this menu item will search for all files with the user's selection.
- 61 XML Report Structure
Xinorbis outputs fully v1.0 compliant XML.
Structure for XML file list ;
<xinorbisfilelist>
<file>
<name>
<path>
<sizewords>
<sizebytes>
<sizeondiskwords>
<sizeondiskbytes>
<owner>
<datecreated>
<datemodified>
<dateaccessed>
<category>
<directory>
<readonly>
<hidden>
<system>
<archive>
</file>
</xinorbisfilelist>
File name
Full file path
Size represented in most convenient format; 1MB, 500K etc.
Size in bytes
Used disk space in the most convenient format; 1MB, 500K etc.
Actual used disk space in bytes
File owner
Date file created in DD/MM/YYYY format
Date file modified in DD/MM/YYYY format
Date file was last accessed in DD/MM/YYYY format
File category (1- programs etc.)
1 if folder, 0 if file.
1 if file is read only
1 if file is hidden
1 if file is system file
1 if file is archive
Structure for XML report output
<xinorbisreport>
<information>
<directory>
<date>
<numberoffiles>
<numberofdirectories>
<sizeoffiles>
<diskspacefreee>
<diskspacemax>
<sectorspercluster>
<bytespersector>
<freeclusters>
<totalclusters>
<volumename>
<serialnumber>
<filesystem>
</information>
analysed path
date of analysis
number of files included in analysis
number of folder in analysis
total size of the files analysed
disk space available on target drive
disk space total on target drive
number of sectors per cluster
number of bytes per sector
free clusters on hard disk
total clusters on hard disk
volume name of hard disk
hard disk serial number
file system type (FAT32, NTFS etc.)
<categorylist>
<category name='">
<numberoffiles>
<numberoffilesaspercent>
<sizeoffiles>
<sizeoffilesaspercent>
</categorylist>
one section for each of the 10 file categories
number of files belonging to relevant category
number of files as percentage of total analysed
size of files analysed, belonging to relevant category
size of files as percentage of total analysed, relevant category
<dirlist>
<dir name="">
one section for each dir analysed
<numberoffiles>
number of files in analysed folder
<numberoffilesaspercent> number of files as percentage of total analysed
<sizeoffiles>
combined size of files
<sizeoffilesaspercent>
combined size of files, as percentage of total analysed
- 62 </dir>
</dirlist>
<magnitudelist>
<magnitude name="">
one section for each magnitude category
<numberoffiles>
number of files in analysed folder
<numberoffilesaspercent> number of files as percentage of total analysed
<sizeoffiles>
combined size of files
<sizeoffilesaspercent>
combined size of files, as percentage of total analysed
</magnitude>
</magnitudelist>
<extensiondata>
<extensioncategory name="">
one section for each extension category
<numberoffiles>
number of files in analysed folder
<numberoffilesaspercent> number of files as percentage of total analysed
<sizeoffiles>
combined size of files
<sizeoffilesaspercent>
combined size of files, as percentage of total analysed
<extension name="">
one section for extension within this category that has more
than one file associated with it
<numberoffiles>
number of files in analysed folder
<numberoffilesaspercent> number of files as percentage of total analysed
<sizeoffiles>
combined size of files
<sizeoffilesaspercent>
combined size of files, as percentage of total analysed
</extension>
</extensioncategory>
</extensiondata>
<top50largest>
<top50large size="">path to file</top50large>
</top50largest>
<top50smallest>
<top50small size=””>path to file</top50small>
</top50smallest>
<nullfiles>
<nullfile name=''">path to</nullfile>
</nullfiles>
</xinorbisreport>
If you need any help with the XML output please don't hesitate to contact me.
- 63 -
Credits
Programming
Paul A Freshney
Development Cat
Orion
Database Engine
SQlite (www.sqlite.org)
ZIP Compression
TZipMaster (www.delphizip.org)
French Translation
Christian Perronnet
Thanks to
Julie, Monpelaud, Dave Mahadevan, Damiaan Peeters, Mike Dutch,
Robert Pallot, Peter Garrety, Fred de Vries, Glyn Selwyn, Tom Grimes
and Ferdie Botha.
A very big thanks for all of those people that have donated, it’s very much appreciated.
A big thanks to all those that have sent me bug reports, comments and feature requests, please keep
them coming!
www.freshney.org :: [email protected] :: www.xinorbis.com
.END.