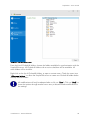
1
User manual Version: Date: 4.0 07/22/2015 Microsoft, Windows, Windows Vista, Outlook and Microsoft .NET are either registered trademarks or trademarks of the Microsoft Corporation in the USA and / or other countries. Copyright © 2004 - 2015 creativbox.net – Internet Solutions All rights reserved. No part of this user guide is allowed to be reproduced, changed or multiplied in any form (print, photocopy or any other method including electronic systems) without the written consent of creativbox.net – Internet Solutions. SimpleSYN – User manual Content Introduction .............................................................................................................. 5 Security advice .......................................................................................................... 6 System requirements .................................................................................................. 7 Installation ................................................................................................................ 8 Upgrade ............................................................................................................... 8 Uninstall ............................................................................................................... 8 Start SimpleSYN ........................................................................................................ 9 Exiting SimpleSYN ................................................................................................ 11 Trial version ............................................................................................................ 12 Buy..................................................................................................................... 13 Activate............................................................................................................... 13 Help ................................................................................................................... 13 License Information .............................................................................................. 13 Activating SimpleSYN .............................................................................................. 14 Set-up .................................................................................................................... 16 Configuration wizard ............................................................................................ 16 Profile selection ................................................................................................ 17 Selection of SimpleSYN role .............................................................................. 18 Configuration of the SimpleSYN server ............................................................... 19 Set-up of SimpleSYN client(s) ............................................................................. 20 Select folders ................................................................................................... 23 Rerun the configuration wizard .............................................................................. 25 Synchronization ....................................................................................................... 26 Automatic synchronization .................................................................................... 26 Folder synchronization ...................................................................................... 26 Manual synchronization ........................................................................................ 26 Initial synchronization of an Outlook® folder ......................................................... 27 SimpleSYN notification area symbol .......................................................................... 28 SimpleSYN main window ......................................................................................... 30 Status ..................................................................................................................... 32 Pending synchronization ....................................................................................... 33 Synchronization conflicts .......................................................................................... 34 Modification conflict............................................................................................. 35 Delete conflict ..................................................................................................... 37 Options.................................................................................................................. 38 Profile selection ................................................................................................... 38 Start ................................................................................................................... 39 Client / Server ..................................................................................................... 39 SimpleSYN server settings .................................................................................. 40 SimpleSYN-client settings .................................................................................. 43 Advanced options ................................................................................................ 46 General settings ............................................................................................... 46 Conflict resolving ............................................................................................. 47 Windows Service .............................................................................................. 48 Synchronization settings ........................................................................................... 49 The computer has been configured as a SimpleSYN client ....................................... 49 Selection of the Outlook® folders for automatic synchronization ........................... 49 creativbox.net – Internet Solutions 3 SimpleSYN – User manual Context menu .................................................................................................. 51 The computer has been configured as a SimpleSYN-server ...................................... 54 Security .................................................................................................................. 55 Authentication and Authorization ........................................................................... 55 Configuration of security settings – SimpleSYN server .............................................. 56 Configuration of security settings – SimpleSYN client ............................................... 59 Set available Outlook® folders ............................................................................. 60 SimpleSYN has been configured as SimpleSYN server .......................................... 60 SimpleSYN has been configured as SimpleSYN client ........................................... 61 Filter ...................................................................................................................... 63 Different filter settings in source and target folder .................................................... 64 Filter settings ....................................................................................................... 65 Filter options .................................................................................................... 65 More Choices .................................................................................................. 67 Manual synchronization ........................................................................................... 69 Synchronize Items ................................................................................................ 69 Synchronize Folder ............................................................................................... 69 Synchronize Items to............................................................................................. 70 Synchronize Folder to ........................................................................................... 70 Tools ..................................................................................................................... 71 Repair Links ......................................................................................................... 71 Repair Distribution List .......................................................................................... 71 Restore deleted objects ......................................................................................... 71 Find duplicates .................................................................................................... 71 Automatic updates .................................................................................................. 72 Problem solutions .................................................................................................... 73 Support .................................................................................................................. 78 Legal notice ............................................................................................................ 79 creativbox.net – Internet Solutions 4 SimpleSYN – User manual Introduction Welcome to SimpleSYN. We are delighted with your decision to use the modern and highperformance Outlook® synchronisation with SimpleSYN. SimpleSYN enables you to synchronise your Outlook® data on all your Windows® computers in a fast and easy way and allows you therefore to always work with your most up-to-date data such as e-mails, appointments and contacts. creativbox.net – Internet Solutions 5 SimpleSYN – User manual Security advice SimpleSYN works directly with your Outlook® data, including synchronisation of deletions. Backup your Outlook® data before the initial synchronization and afterwards in regular intervals. creativbox.net – Internet Solutions 6 SimpleSYN – User manual System requirements For the program to run smoothly there are the following requirements: Microsoft® Outlook® 2007, Microsoft® Outlook® 2010 (32-bit/64-bit), or Microsoft Outlook® 2013 (32-bit/64-bit) or Microsoft Outlook® 2016 (32bit/64-bit) Microsoft® Windows Vista® (32-bit/64-bit) with Service Pack 1, Microsoft® Windows® 7 (32-bit/64-bit), Microsoft® Windows® 8.1 (32-bit/64-bit) or Microsoft® Windows® 10 (32-bit/64-bit); Microsoft® Windows® Server 2008 R2 or Microsoft® Windows® Server 2012 Microsoft® .NET Framework 4.5 A active Internet connection is required during the synchronization No proxy servers are supported In the SimpleSYN standard edition a Windows user must be logged in and SimpleSYN must be running. creativbox.net – Internet Solutions 7 SimpleSYN – User manual Installation Administrator rights are needed for the installation of SimpleSYN. SimpleSYN has to be installed on all computers to be synchronised with each other. The installation of SimpleSYN requires only a few steps. A wizard will guide you through the installation. The installation of SimpleSYN checks in advance whether Microsoft® .NET Framework 4.5 is installed. In the case of non-availability it will be downloaded from the Internet. The installation of .NET Frameworks might require a reboot of the computer. The setup of SimpleSYN will be continued afterwards. Should the setup not continue automatically after the reboot, restart the setup manually. To install SimpleSYN on your computer, follow these steps: 1. Start the computer on which SimpleSYN is to be installed 2. Download SimpleSYN from www.simplesyn.net 3. Start the installation of SimpleSYN with a double click on the downloaded setup file (“SimpleSYN.exe”, or “SimpleSYN_Business.exe”) 4. Follow the installation instructions Upgrade An existing SimpleSYN installation will be replaced by the installation of SimpleSYN 4.0. Uninstall To remove SimpleSYN from the computer, close Outlook® and SimpleSYN. To uninstall open the Windows Control Panel and select “Uninstall a program”. Search the entry “SimpleSYN 4.0” and click on “Remove” or “Uninstall”. creativbox.net – Internet Solutions 8 SimpleSYN – User manual Start SimpleSYN To start SimpleSYN do either of the following: Windows 8 On the Windows start screen type “SimpleSYN” and start the found SimpleSYN App by hitting the Enter key or by clicking on the entry. Image 1: Start SimpleSYN on Windows 8 Windows 10 On the Windows search bar type “SimpleSYN” and start the found SimpleSYN App by hitting the Enter key or by clicking on the entry. creativbox.net – Internet Solutions 9 SimpleSYN – User manual After the configuration SimpleSYN will start automatically in default settings as soon as you log onto Windows®. creativbox.net – Internet Solutions 10 SimpleSYN – User manual Exiting SimpleSYN To end SimpleSYN, right click on the SimpleSYN symbol in the Windows® notification area and choose the entry “Exit”. Image 2: Exit SimpleSYN In the case of the SimpleSYN symbol not being visible, click on the arrow “Show hidden icons”. It is also possible to end SimpleSYN through the main menu. Press inside of SimpleSYN’s main window once the “Alt” key to open the main menu and choose the menu item “File Exit SimpleSYN”. creativbox.net – Internet Solutions 11 SimpleSYN – User manual Trial version The trial version of SimpleSYN is useable without restrictions for 30 days. During the trial a dialog indicating the remaining time opens when starting SimpleSYN. Image 3: Trial This dialog needs to be confirmed manually at each start of SimpleSYN to be able to use SimpleSYN. For this click on the link “Continue”. At the end of the trial the link “Continue” will be exchanged for the link “Close SimpleSYN” and SimpleSYN cannot be used anymore. creativbox.net – Internet Solutions 12 SimpleSYN – User manual Image 4: Trial expired This dialog will not be shown once SimpleSYN is licensed and the full version has been unlocked using a license file. Buy Click onto “Buy” to open the SimpleSYN-Website with information about the purchase of SimpleSYN. Activate Click to open a dialog in which to open a license file. With the help of the license file the full version of SimpleSYN will be unlocked. This dialog will not be shown again afterwards. Help Click to open the online help. License Information Click to open the licensing terms. creativbox.net – Internet Solutions 13 SimpleSYN – User manual Activating SimpleSYN Continued use of SimpleSYN after trial expiration requires the purchase of a license. After the purchase a license file will be issued. Save the license file onto your hard drive. Click in the SimpleSYN main window or in the dialog with the remaining trial time onto the link “Activate”. Select the license file saved locally onto the hard drive. If the license file is valid, the full version of SimpleSYN will be unlocked. Alternatively you can also double-click the license file to import it into SimpleSYN automatically. Do not modify your license file since it can become invalid. Image 5: Import license file creativbox.net – Internet Solutions 14 SimpleSYN – User manual Image 6: Import license file from the main menu creativbox.net – Internet Solutions 15 SimpleSYN – User manual Set-up SimpleSYN will have to be set up once before SimpleSYN can be used for synchronization. SimpleSYN contains a configuration wizard which will guide you through the steps necessary to set-up SimpleSYN. Alternatively, manual configuration of SimpleSYN is possible. More information about the settings can be found on page 38. SimpleSYN will run either as SimpleSYN server or as SimpleSYN client. One installation set up as SimpleSYN server and at least a second installation set up as SimpleSYN client are needed for the synchronization to work. The SimpleSYN server is the central contact point and forwards the items to be synchronized to all SimpleSYN clients. Synchronization of e.g. a desktop computer with a notebook will require the desktop computer being setup as SimpleSYN server and the notebook as SimpleSYN client. Configuration wizard The wizard will be started automatically the first time SimpleSYN is started or after an upgrade from an older version. The wizard enables easy set-up of SimpleSYN in a few steps. The wizard should be run completely on all computers that are supposed to be synchronized for an easy set-up of SimpleSYN. Start with the set-up of your SimpleSYN server. In this way the SimpleSYN clients will be able to find the SimpleSYN server automatically. creativbox.net – Internet Solutions 16 SimpleSYN – User manual Image 7: Welcome page of the configuration-wizard. Click on “Next” to start the set-up of SimpleSYN. Profile selection The page “Profile selection” will only be shown if several Outlook®-profiles are available. First, the Outlook®-profile to be synchronized by SimpleSYN has to be selected. creativbox.net – Internet Solutions 17 SimpleSYN – User manual Image 8: Select Outlook®-profile SimpleSYN can be configured independently for every Outlook®-profile. The SimpleSYN settings apply to the currently active Outlook®-profile. Following settings can be set for profile selection: 1. Use default profile: SimpleSYN uses the Outlook® default profile. In the case of no standard profile being available, a dialog will be shown for the selection of the profile. 2. Use following profile: SimpleSYN uses the selected profile in the drop-down list. 3. User selection: If neither “Use default profile” nor “Use following profile” is selected, the profile can be selected manually at each start of SimpleSYN. This is especially helpful if swapping between several profiles for synchronization is needed. Click on “Next” to confirm profile selection. Selection of SimpleSYN role SimpleSYN can either be configured as SimpleSYN server or as SimpleSYN client. One Simple server can be synchronized with several SimpleSYN clients. creativbox.net – Internet Solutions 18 SimpleSYN – User manual One computer has to be configured as SimpleSYN server. The SimpleSYN server is the central contact point and forwards the elements to be synchronized to all SimpleSYN clients. The SimpleSYN server should be set up first. This eases the configuration of the SimpleSYN clients as they can automatically identify the SimpleSYN server in the default settings. SimpleSYN will try to find any possibly existing SimpleSYN server computer automatically. Should no SimpleSYN server be found, the option “This is the SimpleSYN server” will be automatically preselected. Otherwise SimpleSYN will be preconfigured as SimpleSYN client of the first found SimpleSYN server. Configuration of the SimpleSYN server To configure SimpleSYN as a server, follow these steps: Image 9: Set-up of SimpleSYN-server 1. Select the radio button “This is the SimpleSYN server” to configure the computer as SimpleSYN server. 2. The “Server Name” shows the name given your SimpleSYN server. 3. Each SimpleSYN server gets a unique server ID. A SimpleSYN client can connect to the SimpleSYN server with this ID, if the SimpleSYN server cannot be found automatically. 4. Select the checkbox “Synchronize via the Internet” if synchronization with this SimpleSYN server via the Internet is planned (Internet synchronization is only creativbox.net – Internet Solutions 19 SimpleSYN – User manual available in the SimpleSYN Business version). With activation of Internet synchronization, the SimpleSYN server will be made accessible from the Internet. Choose a strong and secure password to prevent any unauthorized access to the SimpleSYN server. More information about the security of SimpleSYN can be found on page 55. 5. Click on the link “Show invitation options for clients” to remove the server ID or create an invitation file for clients. More information about invitation options can be found on page 40. 6. Enter a Password to protect your SimpleSYN server. 7. Repeat the password to avoid a faulty insertion. After a click on “Next”, the set-up of the SimpleSYN server will be completed. When the configuration of the SimpleSYN server completed successfully, a summary of your settings will be shown. Note this information for connecting your SimpleSYN clients. Close the wizard through a click on “Finish”. Set-up of SimpleSYN client(s) The SimpleSYN server set-up should be finished before setting up the SimpleSYN client(s). More information about the SimpleSYN server set-up can be found on page 19. After finishing the set-up of the SimpleSYN server, switch to the computer to be set up as SimpleSYN client. Repeat the following steps of setting up the SimpleSYN client on all client computers. Should SimpleSYN not be able to find a SimpleSYN server in the configuration wizard, make sure the SimpleSYN server is running and successfully set-up. If the setup of the SimpleSYN server was successful, it will be found automatically by the configuration wizard of the client computer and the SimpleSYN client settings will be preselected. creativbox.net – Internet Solutions 20 SimpleSYN – User manual Image 10: Configure SimpleSYN-client 1. Select the radio button “This is a SimpleSYN client” to configure the computer as a SimpleSYN client. 2. Select the SimpleSYN server to synchronize with. The drop-down list lists all SimpleSYN servers available in the local network. If the SimpleSYN server is available via the local network, it can be selected in the drop-down list. To update the list of available SimpleSYN servers, put the input focus on the drop-down list and hit the key „F5“. If your SimpleSYN server is not available in the drop-down list, you will need either an invitation file or a unique ID to connect to the SimpleSYN server. Click on “Connect to a different server”. creativbox.net – Internet Solutions 21 SimpleSYN – User manual Image 11: Connect to SimpleSYN server If you have received a server ID, click on “Enter Server ID” and type in the ID. Afterwards the server information will be retrieved and added to the drop-down list. If you got an invitation file, click on “Open invitation file”. The SimpleSYN server will be added to the drop-down list. 3. Select the checkbox “Synchronize via the Internet” if a connection to a SimpleSYN server via the Internet exists or will be used for synchronization in the future (Internet synchronization is only available in the SimpleSYN Business version). 4. Fill in the field “Password” with the password of the SimpleSYN server chosen during the configuration of the SimpleSYN server. Click “Next” to proceed with the set-up of your SimpleSYN client. SimpleSYN then tries to establish a connection with the SimpleSYN server. creativbox.net – Internet Solutions 22 SimpleSYN – User manual Image 12: Connection to the server being tested If SimpleSYN is unable to establish a connection to the SimpleSYN server, check your connection settings. In case that the SimpleSYN server is not started it is possible to continue without an established connection. Select folders Once a connection to the SimpleSYN server is successfully established, selection of the Outlook® folders for automatic synchronization will be possible in the following window. Select the checkbox in front of the corresponding folders to define the direction of the synchronization. An arrow in both directions means that the folder will be synchronized by both server and client. A second click changes the direction of synchronization. An arrow pointing right means synchronization of the folder from the client towards the server only; an arrow pointing left means synchronization of the folder from the server to the client only. Detailed information about the synchronization settings can be found in the section Synchronization settings on page 49. creativbox.net – Internet Solutions 23 SimpleSYN – User manual Image 13: Select folders A click on “Next” will finish the set-up of the SimpleSYN client. Close the configuration wizard with a click on “Finish”. SimpleSYN is now ready for synchronization. creativbox.net – Internet Solutions 24 SimpleSYN – User manual Rerun the configuration wizard After having been run the configuration wizard will not be displayed again at the start of SimpleSYN. To access the configuration wizard again, activate “Run configuration wizard at next start” in the menu and restart SimpleSYN. For this purpose open SimpleSYN and hit the key “Alt” to open the main menu. Select the menu “Help” and activate the entry “Run configuration wizard at next start”. Close SimpleSYN and restart SimpleSYN. Image 14: Rerun the configuration wizard Information about starting and closing SimpleSYN can be found on page 9. creativbox.net – Internet Solutions 25 SimpleSYN – User manual Synchronization After configuring SimpleSYN and establishing a connection between SimpleSYN client and SimpleSYN server the automatic synchronization starts. It is possible to additionally synchronize user-defined Outlook® folders or items manually. Automatic synchronization All Outlook® folders selected either in the configuration wizard (see page 23) or in the synchronization settings of the SimpleSYN clients (see page 49) will be synchronized automatically. SimpleSYN monitors the data pool and synchronizes all changes to the data pool automatically. Example: If the Outlook® folders “Inbox” and “Calendar” are monitored and a new email is received or a new appointment is created, the e-mail or appointment will be synchronized automatically. In the case of no connection being available between SimpleSYN client and SimpleSYN server while modifying the Outlook®-data, the data will be synchronized as soon as both SimpleSYN installations are running and a connection via the network is established. Folder synchronization When using the automatic synchronization it is also possible to synchronize all Outlook® subfolders automatically. The Outlook® subfolders will use the same synchronization direction and settings as their parent folder. Changes to the folder hierarchy below a selected folder are being synchronized. If you change a folder name on SimpleSYN client and SimpleSYN server simultaneously, the SimpleSYN server name will take precedence. Changes of the selected parent folder are not automatically synchronized. If a selected parent folder is being moved or deleted, the synchronization of this folder and all of its children will stop. Adjust the synchronization settings on your SimpleSYN client in this case (see page 49). Moved subfolders are being deleted and completely resynchronized on the remote computer. Deleted folders are also deleted on the remote side; all data inside the folder will be deleted in this case. Manual synchronization Manual synchronization functions the same way as automatic synchronization. However, synchronization will not be triggered by a modification in the data, but only started manually. More information about manual synchronization can be found on page 69. creativbox.net – Internet Solutions 26 SimpleSYN – User manual Initial synchronization of an Outlook® folder The first synchronization of an Outlook® folder to a defined destination folder is a socalled initial synchronization. During this initial synchronization all selected Outlook® items will be combined into a single data pool. SimpleSYN compares each item and associates equal existing items together. Not existing items are added. The following synchronizations after the initial synchronization will only adjust modifications that happened since the last synchronization. The initial synchronization can take some time depending on the size of the affected Outlook® folder. Deletions will only be synchronized following the initial synchronization. SimpleSYN does not merge items. If an item is already included in both folders but differs slightly in some details, it will be added twice in the folder. creativbox.net – Internet Solutions 27 SimpleSYN – User manual SimpleSYN notification area symbol The notification area on the Windows® taskbar shows the SimpleSYN notification area symbol. Closing the SimpleSYN main window does not end SimpleSYN but minimizes it to the notification area. The synchronization status can always be read from the different symbols. Offline SimpleSYN server: The SimpleSYN server is not ready. SimpleSYN client: No connection established. This symbol is also shown if SimpleSYN does not have access to your Outlook® data. Ready SimpleSYN server: Ready for operation SimpleSYN client: Connected to the SimpleSYN server and ready for synchronizing. Synchronizing SimpleSYN is currently synchronizing. Synchronization paused The synchronization has been paused. Error An error has been detected. Warning There have been warnings during synchronization. These can be e.g. conflicts or invalid authentication settings. When right clicking on the SimpleSYN symbol in the notification area, a shortcut menu opens. creativbox.net – Internet Solutions 28 SimpleSYN – User manual Image 15: SimpleSYN shortcut menu Open SimpleSYN Opens the SimpleSYN main window. Status Opens the SimpleSYN main window with the menu point “Status” selected. This shows which Outlook® folders are currently being synchronized. Synchronization enabled Click onto “Synchronization enabled” to pause the synchronization. Once the synchronization is paused on the SimpleSYN server, all SimpleSYN clients are shown as “Offline”. Synchronization suspended Click on “Synchronization suspended” to continue synchronizing. Check for updates Manually checks whether a new version of SimpleSYN is available. Help Opens the SimpleSYN online documentation. Exit Ends SimpleSYN. creativbox.net – Internet Solutions 29 SimpleSYN – User manual SimpleSYN main window To open the SimpleSYN main window, start SimpleSYN and double click onto the SimpleSYN symbol in the Windows® notification area. Alternatively right click the symbol and select “Open SimpleSYN”. The information page shows the license information or the remaining test time as well as links to the online help. Image 16: SimpleSYN main window Buy Click on “Buy” to open the SimpleSYN web page concerning the purchase of SimpleSYNlicenses. Activate Once a SimpleSYN license has been purchased, click on “Activate” to open the license file. The SimpleSYN trial version will be unlocked to the full version. Help Opens the online help. Contact Should help be needed, click on “Contact” to open the SimpleSYN contact and support web page. creativbox.net – Internet Solutions 30 SimpleSYN – User manual Feedback You have suggestions for improvement or features, or you would like to give us critiques or praise? Click on “Feedback”. We are always pleased to hear from you. creativbox.net – Internet Solutions 31 SimpleSYN – User manual Status There is a permanently available status overview under the menu entry “Status”. It shows which Outlook® folder are actually being synchronized in which direction. Image 17: Status overview On the status page information and warnings about the found firewall settings and connection errors are also shown. It is possible to cancel the synchronization of a single Outlook® folder. Click on “Cancel” to stop the synchronization of an Outlook® folder. The data in the affected folder will not be synchronized completely. In the case of the Outlook® folder having been marked for synchronization on several computers, it is possible that the synchronization restarts even after having been cancelled. Abort the synchronization again until the folder is not being synchronized anymore. This can for example happen when the folder is supposed to be synchronized on the SimpleSYN client and on the SimpleSYN server automatically when modifications occur. The synchronization of an automatically synchronizing Outlook® folder will restart with modification in the folder after a cancelled synchronization. creativbox.net – Internet Solutions 32 SimpleSYN – User manual Pending synchronization Click on the menu entry “Status” and afterwards on “Pending synchronization” to view all Outlook® folders currently marked for synchronization. To remove a folder from the list of pending synchronizations, right click a folder to open a context menu. Click on “Do not synchronize” to remove the designation for synchronization. Image 18: Folders due for synchronization creativbox.net – Internet Solutions 33 SimpleSYN – User manual Synchronization conflicts Synchronization conflicts occur when Outlook® items assigned to each other have been modified on two or more computers without being synchronized in between the different modifications. A conflict also occurs when an Outlook® item is being modified on one computer and deleted on another. SimpleSYN provides several possibilities to handle synchronization conflicts. If set to default settings synchronization conflicts have to be handled manually. It is possible to have synchronization conflicts solved automatically by SimpleSYN. More information can be found on page 47. If one or more conflicts occur during synchronization, a notification will appear in the Windows® notification area. Image 19: Conflicts have occurred SimpleSYN provides several possibilities to solve synchronization conflicts manually under the menu point “Conflicts”. All found conflicts are listed in the overview. Double click on an entry and specify in the opened window how SimpleSYN is to solve this conflict. Right click a conflict to open a context menu. This allows opening the Outlook® item, refreshing the list or restoring an already solved conflict. In this way it is possible to solve a conflict with different settings. Solved conflicts are being hidden from the list in default settings even if they have not been synchronized yet. creativbox.net – Internet Solutions 34 SimpleSYN – User manual Image 20: List of synchronization conflicts It is impossible to solve the conflict if it is supposed to be handled differently on several computers. Conflicts supposed to be solved differently on several computers are being marked with a red cross on the list. Conflict, no solution specified Conflict solved but not synchronized yet Conflict solved differently on several computers and unable to be synchronized Modification conflict A modification conflict occurs when an Outlook® item has been modified on two or more computers at the same time. Modifications of an Outlook® item are all actions during which an item of Outlook® is being saved. These can also for example be modifications on the reminder of a date. creativbox.net – Internet Solutions 35 SimpleSYN – User manual Image 21: Dialog of conflict solution To solve a conflict, select one of the following choices: Keep item from client Saves the item from the SimpleSYN client, modifications on the SimpleSYN server are being overwritten. Keep item from server Saves the item from the SimpleSYN server, modifications on the SimpleSYN client are being overwritten. Keep both items The item is being copied and both modifications are being saved. This results in duplication of the item. Do not synchronize The item is not being synchronized. Both versions of the item are being saved and handled as equals. Should one of the items be modified again, the other item is going to be overwritten. This may lead to data loss. creativbox.net – Internet Solutions 36 SimpleSYN – User manual Delete conflict A delete conflict occurs when an Outlook® item is being deleted on one computer and modified on another. Modifications of an Outlook® item are all actions during which an item of Outlook® is being saved. These can also for example be modifications on the reminder of a date. Image 22: Dialog of conflict solution To solve the conflict, select one of the following choices: Keep item The modifications are being retained and the item is not being deleted. Delete item The modifications are being discarded and the deletion synchronized. creativbox.net – Internet Solutions 37 SimpleSYN – User manual Options In this area it is possible to change settings set in the configuration wizard and to adapt SimpleSYN to your personal needs. Image 23: Options All modifications will only be adopted after a click on “Save”. Click on “Back” or leave the options through another menu entry to discard made modifications to the settings. Profile selection SimpleSYN can be configured independently for every Outlook® profile. The settings of SimpleSYN only apply to the active Outlook® profile. In the default settings SimpleSYN uses the Outlook® standard profile. Alternatively it is possible to select any other profile for synchronizing. The following settings can be made for the profile selection: creativbox.net – Internet Solutions 38 SimpleSYN – User manual 1. Use default profile: SimpleSYN uses the Outlook® default profile. A dialog for profile selection is shown in the case of no standard profile being available. 2. Use following profile: SimpleSYN uses the profile selected in the drop-down list. 3. User selection: If neither “Use default profile” nor “Use following profile” is selected, the profile can be selected manually at each start of SimpleSYN. This is especially helpful if swapping between several profiles for synchronization is needed. Selection of neither “Use default profile” nor “Use following profile” leads to a dialog for profile selection appearing at the start of SimpleSYN. Keep in mind that the configuration depends of the currently selected profile. Image 24: Select profile All further settings under “Options” are based on the selected Outlook® profile. Changes of the profile selection result in according actualizations of the remaining fields. Start Here it is possible to define whether SimpleSYN is to be started automatically with Windows®. Activate the check box “Start with Windows” to automatically start SimpleSYN together with Windows. Client / Server Here definition whether SimpleSYN is to be run as SimpleSYN server or as SimpleSYN client is possible. It is absolutely necessary to configure one computer as SimpleSYN server. The SimpleSYN server is the central contact point and forwards the items for synchronization to all SimpleSYN clients. Check the radio button “This is the SimpleSYN server” if no SimpleSYN server has been configured before. Check the radio button “This is a SimpleSYN client” if this SimpleSYN installation is to be connected to an existing SimpleSYN server. creativbox.net – Internet Solutions 39 SimpleSYN – User manual SimpleSYN server settings When the radio button “This is the SimpleSYN server” has been selected, SimpleSYN is being run as server. Image 25: SimpleSYN-server settings with Peer Name Resolution Protocol Server Name The SimpleSYN server will be listed on the SimpleSYN clients with this name. In the default settings SimpleSYN uses the current computer name as name for the SimpleSYN server. It is possible to freely choose the SimpleSYN server name. Click on “Change server name” to enter a custom name. It is also possible to add a short comment about the SimpleSYNserver. If “Change server name” is not enabled, the SimpleSYN server has been published. Click on “Show invitation options for clients” and choose “Revoke Published server”. creativbox.net – Internet Solutions 40 SimpleSYN – User manual Image 26: Enter SimpleSYN server name Server ID Each SimpleSYN server gets a unique server ID. A SimpleSYN client can connect to the SimpleSYN server with this ID, if the SimpleSYN server cannot be found automatically. Internet Synchronization Internet synchronization is only available in the SimpleSYN business version. Select the checkbox “Synchronize via the Internet” if you want to synchronize with this SimpleSYN server via the Internet. Invite Clients To enable SimpleSYN clients to access your SimpleSYN server, click “Show invitation options for clients”. This allows you to create a unique server ID or an invitation file to invite clients. Communicate the server ID along with the server password to your SimpleSYN clients for example by e-mail or phone. An invitation file can be forwarded for example on a USBstick or via e-mail to your SimpleSYN clients. With this data the SimpleSYN client can connect to the SimpleSYN server. creativbox.net – Internet Solutions 41 SimpleSYN – User manual Image 27: Publish SimpeSYN server Publish Server Click on “Publish Service” to retrieve a unique server ID. Communicate the server ID along with the server password to your SimpleSYN clients for example by e-mail or phone. With this data the SimpleSYN client can connect to the SimpleSYN server. Revoke publication It is possible at all times to cancel the publication of your SimpleSYN server. Thereunto click again onto “Show invitation options for clients” and subsequently on “Revoke server publication”. The server ID will be invalid afterwards. Save invitation file Alternatively it is possible to save an invitation file. Forward the invitation file for example on a USB-stick or via e-mail together with your server password to your SimpleSYN clients. If the possibility to establish the SimpleSYN clients in the same network as your SimpleSYN server exists, it is unnecessary to either save an invitation file or to publish the SimpleSYN server. The SimpleSYN client will locate the server automatically in the local network. Password / Repeat Password The SimpleSYN server is being protected through a password against non-authorised access. Enter a password into the field “Password”. To avoid a faulty insertion, the password has to be entered in the field “Repeat Password” again. creativbox.net – Internet Solutions 42 SimpleSYN – User manual SimpleSYN-client settings When the radio button “This is a SimpleSYN client” has been selected, SimpleSYN is being run as client. Image 28: SimpleSYN client settings Server Select the SimpleSYN server to synchronize with. The drop-down list lists all SimpleSYN servers available in the local network. If the SimpleSYN server is available via the local network, it can be selected in the drop-down list. To update the list of available SimpleSYN servers, put the input focus on the dropdown list and hit the key „F5“. If the SimpleSYN server you want to synchronize with is not available in the dropdown list, click on “Connect to a different server”. Connect to a different server If the SimpleSYN server is not located in the same local network, you need a server ID or an invitation file to establish a connection. Click on “Connect to a different server”. creativbox.net – Internet Solutions 43 SimpleSYN – User manual Image 29: Connect to a SimpleSYN server If you have received a server ID, click on “Enter Server ID” and type in the ID. Afterwards the server information will be retrieved and added to the drop-down list. Image 30: Enter server ID If you got an invitation file, click on “Open invitation file”. The SimpleSYN server will be added to the drop-down list. Internet Synchronization Internet synchronization is only available in the SimpleSYN Business version. Select the checkbox “Synchronize via the Internet” if a connection to a SimpleSYN server via the Internet exists or will be used for synchronization in the future. creativbox.net – Internet Solutions 44 SimpleSYN – User manual Logon In the drop-down list “Logon” you can choose the authentication type used by SimpleSYN. Choose the authentication type as configured on the SimpleSYN server. In the default settings select “Default” i.e. all SimpleSYN clients will use the same configuration. More information about the authentication types can be found on page 55. User Name, Domain and Password Depending on the authentication type several input fields will be shown. Enter the user name, domain and password of your SimpleSYN server into the fields “User name”, “Domain” and “Password”. The default configuration will use the authentication type “Default”. In this case only the password must be entered. creativbox.net – Internet Solutions 45 SimpleSYN – User manual Advanced options Click on the menu point “Options” and subsequently on “Advanced Options” to configure more settings of SimpleSYN. All modifications are only applied after they have been saved through “Save”. Click on “Back” or leave the advanced options through another menu entry to discard the modifications. Image 31: Advanced options General settings Device name The device name is used as an internal denomination for the SimpleSYN client or the SimpleSYN server. This name is being shown for example under “Status”. In the default settings this name is equal to the name of the current computer. Check for updates Activate the checkbox “Check for updates” to be notified automatically about updates of SimpleSYN. If the setting is activated SimpleSYN checks about every 24 hours whether a newer version is available. If the checkbox is “Check for updates” is deactivated it is only possible to check manually for updates. More information about the automatic updates can be found on page 72. creativbox.net – Internet Solutions 46 SimpleSYN – User manual Add new contact folders to the Address Book If this option is activated new contact folders are automatically added to the Outlook® Address Book. Delete items completely In SimpleSYN default settings, deleted items are being moved by SimpleSYN into a hidden backup folder of the Outlook® data file. If this option is activated deletions are no longer backed up but are directly deleted completely. Completely deleted Outlook® items cannot be recovered. Keep conflicted items If this option is activated SimpleSYN saves a copy of the items having caused a conflict in the backup Outlook® folder. Move deleted items to – Use default waste folder Here it is possible to specify whether deleted items are being moved into the standard folder for deleted objects, or into another folder. By default the backup folder for deleted items is not visible in Outlook® but can be shown by using the SimpleSYN Outlook® AddIn. Conflict resolving Here it is possible to specify how SimpleSYN is supposed to handle synchronization conflicts. More information about conflicts can be found on page 34. Resolve conflicts manually Each synchronization conflict has to be solved manually. Resolve using a copy The item is copied and both copies are maintained. Activation of this option can lead to duplicates. Resolve by using the newest item The latest modification is being synchronized; all modifications done beforehand are being discarded. Activation of the option “Resolve using a copy” or “Resolve by using the newest item” leads to deletions being ignored should a deletion conflict occur. creativbox.net – Internet Solutions 47 SimpleSYN – User manual Hide resolved conflicts Deactivate the checkbox “Hide resolved conflicts” to show solved but not yet synchronized conflicts under the menu point “Conflicts”. Windows Service Select the checkbox “Run unattended as a Windows Service” to start SimpleSYN automatically even if no user is logged on to Windows. The Windows® password of the currently logged on user must be entered in the field “Windows Password”. The Windows service is only available in the SimpleSYN business edition. Make sure you have selected the Outlook default profile or an explicit profile. Otherwise no synchronization will take place. creativbox.net – Internet Solutions 48 SimpleSYN – User manual Synchronization settings In this area it is possible to configure in detail the method of synchronization. The options under “Synchronization settings” are differing depending on whether SimpleSYN has been configured as a SimpleSYN-server or a SimpleSYN-client. All modifications will only be adopted after a click on “Save”. Click on “Back” or leave the options through another menu entry to discard made modifications to the settings. The computer has been configured as a SimpleSYN client If SimpleSYN is configured as a SimpleSYN-client the synchronization settings show the configuration of the automatic synchronization. On the left hand side is the folder structure of the client computer, on the right hand side the structure of the SimpleSYN-server. Check all Outlook® folders that are supposed to be synchronized automatically. Modifications in the marked Outlook® folders are being monitored by SimpleSYN and automatically synchronized. Selection of the Outlook® folders for automatic synchronization Should only the note “No folder information is currently available” be shown, follow the instructions for problem solving on page 73. creativbox.net – Internet Solutions 49 SimpleSYN – User manual Image 32: Synchronization settings Selection of an Outlook® folder either on the client or the server side leads to automatic marking of the currently selected or automatically attributed target folder on the according other folder list. In this way it is always possible to see which folders are being synchronized with each other. Click on the checkbox in front of the desired Outlook® folder on the client or the server side to select the Outlook® folder for automatic synchronization. The arrows inside the checkbox designate the synchronization direction. Click several times on the checkbox to select the synchronization direction. The Outlook® folder is synchronized in both directions from the SimpleSYN-client towards the SimpleSYN-server and from the SimpleSYN-server towards the SimpleSYN-client. The Outlook® folder is only synchronized from the SimpleSYN-client towards the SimpleSYN-server. The Outlook® folder is only synchronized from the SimpleSYN-server towards the SimpleSYN-client. It is also possible to drag an Outlook® folder from the client or the server side onto another folder per Drag & Drop to designate the synchronization in both directions. creativbox.net – Internet Solutions 50 SimpleSYN – User manual SimpleSYN automatically selects the most appropriate target folder. Before saving your settings, make sure the right target folders are selected. Select a checked folder on either the client or server folder list to see the actual target folder on the other folder list. If a folder is selected on the client or server side that does not exist on the opposite side this folder will be automatically created by SimpleSYN and shown with a “plus” symbol until the first synchronization. New folders can only be created automatically if SimpleSYN allows this. Subfolders of a checked Outlook® folder will be synchronized with the same synchronization direction and settings. Changes to the subfolder hierarchy will also be synchronized by default (new, renamed and deleted subfolders). If you do not want to synchronize all subfolders, right click on the folder to open a context menu. Disable the menu item “Synchronize subfolders”. Context menu Right click an Outlook® folder to obtain more configuration possibilities. The context menu allows detailed specifications which method of synchronization to use. Image 33: Context menu creativbox.net – Internet Solutions 51 SimpleSYN – User manual Synchronization type Here it is possible to indicate the synchronization direction. The synchronization direction is also being shown through arrows in the checkbox in front of the according folder. Target... Lets you manually select the target folder for the synchronization. Select the target folder for synchronization in the following dialog. Image 34: Select target folder Click on “New…” to create a new Outlook® folder on the target computer. New target folders can only be created if generation of Outlook® folders is allowed on the opposite side. More information can be found under Security on page 55. creativbox.net – Internet Solutions 52 SimpleSYN – User manual Image 35: Create new folder Synchronize subfolders If activated, subfolders will be automatically created, renamed and deleted. The subfolders will be synchronized with the same synchronization direction and settings as the configured parent folder. Synchronize new items If activated every new item in this folder is synchronized. Synchronize changed items If activated every modified item in this folder is synchronized. Synchronize deleted items If activated deleted items are also deleted in the target folder. Only deletions of previously synchronized Outlook® items are synchronized. Synchronize read state If activated the read status of an item is synchronized. New Folder... Here it is possible to create new folders. creativbox.net – Internet Solutions 53 SimpleSYN – User manual Refresh Reloads the folder list. Click on “Refresh” to adopt newly created or deleted folders within Outlook®. The click on “Refresh” on the server side of the folder list initializes the exchange of folder information. For this a SimpleSYN server needs to available. Filter… The filter function is only available in the SimpleSYN Business version. Click on “Filter…” to filter the synchronization of the folder. In this way it is possible to exclude private elements from the synchronization. More information about the filters can be found on page 63. The computer has been configured as a SimpleSYN-server If SimpleSYN is configured as a SimpleSYN-server more information about the synchronization settings can be found in the chapter Security on page 55. creativbox.net – Internet Solutions 54 SimpleSYN – User manual Security SimpleSYN is very concerned by the security of your Outlook® data. The communication of SimpleSYN is always highly encrypted. SimpleSYN uses TLS and SSL respectively to secure the connection between the SimpleSYN client and server. Additionally it is possible to authenticate and authorise the SimpleSYN client through a user name and password. It is thus possible to realise different security access levels for different users. SimpleSYN allows sharing every Outlook® folder separately, so that the SimpleSYN server or SimpleSYN client can only see and synchronize the Outlook® folders that have been selected explicitly beforehand. Thus it is possible to exclude an Outlook® folder with private data easily from synchronization. In the default settings all Outlook® folders are shared. Authentication and Authorization SimpleSYN is configured in a way that only authorized users can synchronize. SimpleSYN contains multiple authentication methods to allow different usage scenarios. The authorization is based on SimpleSYN internal users, local Windows® user accounts or Windows® domain user accounts. Default logon In the default configuration SimpleSYN uses the logon type “Default”. In this case the special user account “All users” will be used. With this account all users will share the same settings. This configuration only uses a password for authentication. SimpleSYN logon SimpleSYN has an integrated user management. It uses user names and passwords for log-on. Windows logon Alternatively to the integrated user management it is possible to log-on SimpleSYN clients with the currently signed-up Windows® user or any Windows® user account to the SimpleSYN server. Either domain user accounts or local user accounts can be used. If local Windows® user accounts or domain user accounts are being used they have to have a password. Otherwise it is impossible to use said user account for log-on through the network. creativbox.net – Internet Solutions 55 SimpleSYN – User manual Configuration of security settings – SimpleSYN server If SimpleSYN is configured as a SimpleSYN server, open SimpleSYN and click on “Synchronization Settings”. Click on “Manage Users” to open the SimpleSYN user management. In the user management it is possible to create integrated SimpleSYN user accounts or to provide Windows® user accounts in SimpleSYN. All existing SimpleSYN users and their attributed Windows® user accounts are being shown here. Under “Used by” is shown which SimpleSYN client is using a specified user. Image 36: SimpleSYN server user management The user account “All users” allows anonymous access to the SimpleSYN server; only the password is required in this case. If only selected users are supposed to be able to log-on deactivate or delete the user account “All users”. A symbol in front of the user shows whether the user is activated or deactivated. Is a user deactivated a log-on to the SimpleSYN-server is impossible for said user. Image 37: User activated creativbox.net – Internet Solutions 56 SimpleSYN – User manual Image 38: User deactivated All modifications will only be adopted after a click on “Save”. Click on “Back” or leave the options through another menu entry to discard made modifications to the settings. Add user Click on “Add user” to create a new SimpleSYN integrated user, or click on “Add Windows- / Active-Directory-user” to use an existing local Windows® user account or a domain user account as SimpleSYN log-on. Add SimpleSYN-user Enter a unique user name and password to create an integrated user account. Confirm the dialog with “OK”. Image 39: Add user Add Windows- /Active-Directory-user It is only possible to use local Windows® user accounts that have a password. To use a local Windows® user account or a domain user in SimpleSYN select the user account through the standard windows dialog. creativbox.net – Internet Solutions 57 SimpleSYN – User manual Image 40: Assign user account Disable / enable users To activate or deactivate a user account right click the according user account and select “Disable” or “Enable”. Only activated users can log onto the SimpleSYN server. Edit users and change passwords To edit an integrated SimpleSYN user double click on the user or right click and select the menu item “Properties”. In the following dialog it is possible to change the user name or give a new password. Image 41: Edit user Should the selected user account be a local Windows® user account or a domain user account it is possible to select another user account. Delete user To completely delete a user right click the user and then on “Delete user”. creativbox.net – Internet Solutions 58 SimpleSYN – User manual Configuration of security settings – SimpleSYN client If SimpleSYN is configured as a SimpleSYN client, open SimpleSYN and click on “Options” to configure the security settings. Image 42: Client security settings Save the entries with a click on “Save”. Click on “Back” or exit the options through another menu entry to discard the settings. Logon In the drop-down list “Logon” select the authentication type that correspond to the user account on the SimpleSYN server. More information about creating SimpleSYN users can be found on page 56. Default Select the authentication type “Default” to use the special user account “All Users”. In this case authentication requires a password only. Enter the SimpleSYN server password in the field “Password”. creativbox.net – Internet Solutions 59 SimpleSYN – User manual SimpleSYN user If you have created an integrated SimpleSYN user on the server, select the authentication type “SimpleSYN user”. Enter the log-on data of the integrated SimpleSYN user into the fields “User Name” and “Password”. Windows user / Logged on Windows user If a Windows® user account or domain user account has been added on the SimpleSYN server and it is supposed to be used for log-on select “Windows user” and “Logged on Windows user” respectively. Enter the log-on data of the user into the fields “User Name”, “Password” and “Domain”. If you select “Logged on Windows user” no additional log-on information is required. If the authentication type “Logged on Windows user” is selected the current user accounts needs to be known to the SimpleSYN server. If it is a local Windows® user account, a user account with identical name and password has to exist on the SimpleSYN server computer. If a local Windows® user account is being used the field “Domain” is equal to the computer name of the SimpleSYN-server computer. Should the log-on to the SimpleSYN server fail with the current settings the SimpleSYN client will also prompt the entry of log-on data. Set available Outlook® folders All Outlook® folders are available for synchronization by default. To restrict the Outlook® folders for each synchronization partner, proceed as followed. SimpleSYN has been configured as SimpleSYN server If SimpleSYN has been configured as SimpleSYN server, click on “Synchronization settings” to open the folder selection. Select the user whose settings are to be changed under “Current user”. creativbox.net – Internet Solutions 60 SimpleSYN – User manual Image 43: Select available folders Available folders From the list of Outlook® folders, choose the folders available for synchronization with the selected user. All Outlook® folders with an active checkbox will be available. All other folders will be invisible. Right click on the list of Outlook® folders, to open a context menu. Check the menu item “Allow new folders”, to allow the SimpleSYN clients to create new Outlook® folders below already allowed folders. All modifications will only be adopted after a click on “Save”. Click on “Back” or leave the options through another menu entry to discard made modifications to the settings. SimpleSYN has been configured as SimpleSYN client If SimpleSYN has been configured as SimpleSYN client, click on “Synchronization settings” and afterwards on “Advanced client settings” to limit the visible Outlook® folders for the SimpleSYN-server. creativbox.net – Internet Solutions 61 SimpleSYN – User manual Image 44: Limit available folders From the list of Outlook® folders, choose the folders available for synchronization with the SimpleSYN-server. All Outlook® folders with an active checkbox will be available. All other folders will be invisible. Right click on the list of Outlook® folders, to open a context menu. Check the menu item “Allow new folders”, to allow the SimpleSYN server to create new Outlook® folders below already allowed folders. All modifications will only be adopted after a click on “Save”. Click on “Back” or leave the options through another menu entry to discard made modifications to the settings. creativbox.net – Internet Solutions 62 SimpleSYN – User manual Filter The filter function is only available in the SimpleSYN business version. The SimpleSYN business version additionally allows you to filter the Outlook® folders that are being synchronized. This allows for example exclusion of private items from synchronization. To set a filter open SimpleSYN and select the point “Synchronization Settings”. Right click the Outlook® folder to be filtered and select the menu entry “Filter…”. Filter can either be set on the uppermost layer of a data store (for example PSTfiles) or onto specific folders. If a filter is being set on the uppermost layer it applies to all subfolders that do not have their own filter settings. Other filters are not inherited by subfolders. The following dialog allows detailed settings of which items are to be synchronized. All items not specified by the given rules would not be synchronized. Image 45: Filter settings If an Outlook® folder, or the uppermost layer of the folders, has been allocated a filter it will be marked with an exclamation mark in the synchronization settings. creativbox.net – Internet Solutions 63 SimpleSYN – User manual Image 46: Folder with allocated filter Different filter settings in source and target folder If the filters of the Outlook® source and target folders are regulated differently unanticipated behaviour might be the result. Adhere to the following constraints. New items of an unfiltered Outlook® folder are being synchronized with a filtered Outlook® folder even if these items are subject to filter regulations in the target folder. All subsequent modifications of the elements are not being synchronized anymore. If items are being synchronized out of an unfiltered Outlook® folder into a filtered Outlook® folder and these items are subject to filter regulations duplicates might occur if the filtered target folder already contains said items. SimpleSYN is not able to know whether a deleted item was subject to filter regulations when synchronizing. If the items have already been synchronized, for example before the filter had been set or out of an unfiltered Outlook® folder, the deletion will be synchronized into the filtered Outlook® folder even if the deleted item was subject to the filter regulations. creativbox.net – Internet Solutions 64 SimpleSYN – User manual To avoid this behaviour define the same filter regulations for source and target folder. Pause the synchronization while modifying the filter regulations to rule out unwanted synchronizations. Information about pausing the synchronization can be found on page 31. Filter settings The following options for filtering an Outlook® folder or a data store are available. If the parent data store has an allocated filter the checkbox “Inherit from parent store” is activated. Deactivate the checkbox “Inherit from parent store” if the regulations of the uppermost layer are to be overwritten. Click onto “Reset” to delete the inherited regulations. Click on “OK” to apply the regulations or on “Cancel” to discard the modifications. The modifications of filter regulations are only applied after saving of the synchronization settings. This allows for filter regulation of several folders. Several filter options have the option “Exclude items”. If this option is selected, found items are excluded from the synchronization. Filter options Search for the word(s) Searches for the search terms in the fields specified under “In”. Only items containing the search terms in the specified fields are synchronized. From Only items sent by the persons specified under “From…” are synchronized. Click onto “From…” to open the address book. Sent to Only items sent to the specified persons under “Sent to…” are synchronized. Click onto “Sent to…” to open the address book. Organized by Only appointments organized by the specified persons under “Organized by…” are synchronized. Click onto “Organized by…” to open the address book. creativbox.net – Internet Solutions 65 SimpleSYN – User manual Attendees Only appointments having the specified persons as attendees stated under “Attendees…” are synchronized. Click onto “Attendees…” to open the address book. E-mail Only contacts having an e-mail address specified under “E-mail…” are synchronized. Click onto “E-mail…” to open the address book. Contact Only journal entries allocated to a specified contact are synchronized. Click onto “Contact…” to open the address book. Status Only tasks having the specified status are synchronized. Journal type Only journal entries having the specified type are synchronized. Where I am Only items having the specified criteria from the list are synchronized. Time Only items conforming to the specified time criteria are synchronized. creativbox.net – Internet Solutions 66 SimpleSYN – User manual More Choices Image 47: Further filter options Categories Only items in a specified category are synchronized. Click on “Categories…” to select the categories. creativbox.net – Internet Solutions 67 SimpleSYN – User manual Image 48: Select categories Only items with Only items with attachments or items without attachments are synchronized. Whose importance is Only items with the specified priority are synchronized. Whose confidentiality is Only items with the specified confidentiality are synchronized. Labels Only items with the specified labels are synchronized. Case sensitive search If the checkbox “Case sensitive search” is activated all text input is searched in the entered spelling. Otherwise case sensitivity is ignored. Size Only items in the specified size are synchronized. creativbox.net – Internet Solutions 68 SimpleSYN – User manual Manual synchronization After setting SimpleSYN up and establishing a connection between SimpleSYN client and SimpleSYN server it is possible to manually synchronize individual Outlook® items or complete Outlook® folders at any time via the additional SimpleSYN Outlook® Add-in. The Outlook® folders do not have to be selected for automatic synchronization. Use the manual synchronization if a single Outlook® item is to be synchronized or the Outlook® item is in a folder that is not automatically synchronized. Information about automatic synchronization can be found on page 49. Use the SimpleSYN toolbar that is automatically being loaded at the start of Outlook® for manual synchronization. Image 49: SimpleSYN Add-In (Outlook® 2016) SimpleSYN has to be started for manual synchronization. Synchronize Items Click on “Synchronize Items” to add all currently in Outlook® selected items to synchronization. SimpleSYN uses the target folders specified under “Synchronization Settings”. SimpleSYN will try to synchronize the items into a target folder with equal name and path as the source folder in case of the current source folder is not being selected for automatic synchronization. If the current folder is not being synchronized automatically and no folder with the same path is available on the target computer or a folder with the same path cannot be created, the synchronization will fail. Synchronize Folder To synchronize the currently in Outlook® shown folder click on “Synchronize Folder”. SimpleSYN synchronizes the whole currently selected folder. SimpleSYN uses the target folder and options specified under “Synchronization Settings”. SimpleSYN will try to synchronize the items into a target folder with equal name and path as the source folder in case of the current source folder is not being selected for automatic synchronization. Synchronization will happen in both directions in this case. creativbox.net – Internet Solutions 69 SimpleSYN – User manual If the current folder is not being synchronized automatically and no folder with the same path is available on the target computer or a folder with the same path cannot be created, the synchronization will fail. Synchronize Items to To synchronize the in Outlook® selected items into a specific target folder on the other computer select in the SimpleSYN toolbar the menu entry “Synchronize Items to…”. SimpleSYN will open a dialog for the selection of the target folder. Image 50: Select target folder for synchronization If the current computer is the SimpleSYN-server it is possible to select the user additionally to the target folder for synchronization. Synchronize Folder to To synchronize the current Outlook® folder into a specific target folder on the other computer select the menu entry “Synchronize Folder to…” in the SimpleSYN toolbar. SimpleSYN will open a dialog for the selection of the target folder. If the current computer is the SimpleSYN-server it is possible to select the user additionally to the target folder for synchronization. creativbox.net – Internet Solutions 70 SimpleSYN – User manual Tools SimpleSYN cannot only perfectly synchronize Outlook® but offers additional powerful features. These can be found in the SimpleSYN menu which is directly integrated into Outlook® in the submenu “Tools” or respectively in the SimpleSYN-ribbon in Outlook® 2010 / 2013. Image 51: SimpleSYN Add-in (Outlook® 2016) Repair Links Outlook® items (such as appointments, e-mails, journal entries, etc.) allow the creation of links to contacts. These links contain an unambiguous ID which can, i.e. after being exported and then imported into another Outlook® data file, refer to old Outlook® items and therefore be invalid. This feature allows automatic repairs of such links. SimpleSYN tries to recover the linked contacts in the Outlook® address book. If a linked contact has been found SimpleSYN restores the link. Repair Distribution List Distributions lists in Outlook® can contain links to contacts. These links contain an unambiguous ID which can, after being exporting and importing the list, refer no longer to correct contacts and be therefore invalid. This feature allows automatic repairs of such links. SimpleSYN tries to recover the linked contacts in the Outlook® address book. If a linked contact has been found SimpleSYN restores the link. This feature is only active if a distribution list is selected. Restore deleted objects Allows to restore items and folder deleted by SimpleSYN during the synchronization. Note that it is not possible to restore items deleted completely. Find duplicates The SimpleSYN duplicate finder provides an easy and fast method to find and delete Outlook® duplicates. The duplicate finder searches automatically the currently selected Outlook® folder and shows all found duplicates. The duplicates can then be moved into a folder of your choice or deleted completely. Make a backup of your Outlook® data before completely deleting duplicates. creativbox.net – Internet Solutions 71 SimpleSYN – User manual Automatic updates SimpleSYN checks in default settings once daily whether a newer version of SimpleSYN is available. If a newer version of SimpleSYN is available, SimpleSYN notifies with a signal. If authorized to install it is possible to automatically install the SimpleSYN update. Otherwise a manual download and installation of the new version is necessary. An Internet connection has to be available for checking. No personal data is being transferred during checks for updates. creativbox.net – Internet Solutions 72 SimpleSYN – User manual Problem solutions If you have difficulties with SimpleSYN, read the following information. Question / Problem SimpleSYN does not establish a connection, the symbol in the Windows® notification area is shown grey Solution If SimpleSYN cannot establish a connection make sure the following is correct: 1. Make sure SimpleSYN is installed and started on both the client and the server computer 2. At least one computer has to be configured as SimpleSYN server and a second as SimpleSYN client 3. Install the latest version of SimpleSYN on all computers that are to be synchronized 4. Make sure you have an active internet connection on both computers 5. Check whether the time is correctly set on both computers. Set the same time on both computers. Additionally: 1. Make sure the correct server has been selected on the SimpleSYN clients. 2. Make sure the password has been entered correctly. No synchronization is taking place Make sure the Outlook® folders supposed to be synchronized automatically are selected in the synchronization settings. More information can be found on page 49. The synchronization settings of the SimpleSYN client only show “No folder information is currently available.” under “Server Folders” This message is being shown if the SimpleSYN client cannot establish a connection to the SimpleSYN server or if the SimpleSYN server is not available. Make sure SimpleSYN has successfully established a connection between server and client. Right click the window of the server folders and click “Refresh”. SimpleSYN is not being started automatically Activate under the menu point “Options” the checkbox “Start with Windows”. More information can be found on page 39. E-mail duplicates occur when synchronizing Duplicate e-mails can occur when e-mails from more than one computer being synchronized are retrieved from the e-mail server. This is the case if the function “Leave copy of messages on the server” was activated in a POP3 E-mail account. creativbox.net – Internet Solutions 73 SimpleSYN – User manual In this case deactivate the Outlook function “Leave copy of messages on the server” so as not to save e-mails in your mail server and download them repeatedly. To deactivate this function follow these steps: Outlook 2003 1. Open Outlook 2. In the menu “Tools” click on “E-mail Accounts“ 3. Enable “View or change existing e-mail accounts “ and click on “Next” 4. Highlight the POP3 E-mail account in question and click on “Change” 5. Click on “More Settings“ 6. In the tab “Advanced” deactivate the check box “Leave copy of messages on the server“ 7. Confirm the changes by clicking “OK“ 8. Click on “Next“ and then on “Finish“ Outlook 2007 1. Open Outlook 2. In the menu “Tools” click on “Account Settings“ 3. Highlight the POP3 E-mail account in question and click on “Change“ 4. Click on “More Settings“ 5. In the tab “Advanced” deactivate the check box “Leave copy of messages on the server “ 6. Confirm the changes by clicking “OK“ 7. Click on “Next“ and then on “Finish“ Outlook 2010 1. Open Outlook 2. Open the Backstage area by clicking on “File“ 3. In the category “Information” click on “Account Settings” and “Add or Remove Accounts…” 4. Highlight the POP3 E-mail account in question and click on “Change“ 5. Click on “More Settings“ 6. In the tab “Advanced” deactivate the check box “Leave copy of messages on the server “ 7. Confirm the changes by clicking “OK“ 8. Click on “Next“ and then on “Finish“ creativbox.net – Internet Solutions 74 SimpleSYN – User manual Note: If you use an IMAP account, this could also lead to duplicate e-mails. We do not recommend synchronizing IMAP accounts. Should this feature be necessary other solution possibilities exist: Initial synchronization leads to duplicates of tasks, contacts or dates Disable automatic synchronization of SimpleSYN, fetch the e-mails on both computers and manually synchronize SimpleSYN afterwards End SimpleSYN before fetching the e-mails and only restart SimpleSYN after both computers have fetched the e-mails. Set the E-mail account up so that e-mails are retrieved by one computer and sent from another one If SimpleSYN apparently duplicates tasks, contacts or dates during the initial synchronization these have as a rule been created manually beforehand and therefore different for SimpleSYN. Usage of other synchronization tools may also lead to duplicates during the initial synchronization of SimpleSYN. Delete the doubled items. All further synchronizations won’t create duplicates Some conflicts cannot be solved If a conflict occurs during automatic synchronization and the target folder settings are being modified before the conflict is solved it may happen that the conflict cannot be solved anymore. In this case synchronize once manually into the same folder as before to allow conflict solution. To do this open the according folder in Outlook® and click on the button “Synchronize Folder to” in the SimpleSYN toolbar. In the following SimpleSYN dialog select the previous Outlook® folder as target for the synchronization. The Outlook® folders used during conflict occurrence are shown in the conflict overview. Already solved conflicts can be hidden from the list. More information can be found on page 47. The SimpleSYN toolbar is not being shown in Outlook® creativbox.net – Internet Solutions Check whether the SimpleSYN Add-in has been deactivated by Outlook®. Open Outlook® and 75 SimpleSYN – User manual follow the instructions. Outlook 2010 and newer: 1. Open Outlook 2. Check whether the SimpleSYN menu strip was switched off. To this end click in Outlook on “File” to open the Backstage area and then on “Options“ 3. Click in the area “Categories” on “Customize menu strip“ 4. In the area beneath “Customize menu strip” click on “Main tabs” and search for the entry “SimpleSYN“ 5. Check the check box next to the entry “SimpleSYN“ If no entry “SimpleSYN“ is to be found under the main tabs then proceed as follows: 1. In the Outlook Backstage area click on “Options“ 2. In the area “Categories” click on “Add-Ins“ 3. Search for the SimpleSYN Add-In in the detail area in the list of disabled items If the SimpleSYN-Add-In is listed in disabled items, then follow these steps: 1. In the tab “Manage“ click on “Deactivated elements“ and then on “Go to“ 2. Highlight the SimpleSYN Add-In and click on “Activate“ 3. Click on “Close“ 4. Shut down and restart Outlook If the SimpleSYN toolbar is still not visible: 1. Click in the Outlook Backstage area “Options“ 2. In the area “Categories” click on “Add-Ins“ 3. Search for the SimpleSYN Add-In in the detail area in the list of disabled items 4. In the tab “Manage“ click on “COM-AddIns“ and then on “Go to“ 5. Check the check box next to the disabled SimpleSYN Add-In in the dialog COM-AddIns 6. Click on “OK“ 7. Shut down and restart Outlook Outlook® 2007: 1. Go to “Trust Center” creativbox.net – Internet Solutions 76 SimpleSYN – User manual 2. Click on “Add-Ins” and check whether the SimpleSYN Add-In has been deactivated. Reactivate the Add-In. Older Outlook® versions: 1. Click on the Outlook® menu “Help” or “?” 2. Click on “Info” and then on “Deactivated elements”. If the SimpleSYN Add-In is listed, reactivate it. The notification “Some folders could not be synchronized” is shown This notification appears if the target folder for the synchronization of one or several folders is not available. This can have several reasons: 1. The available folders have been restricted. See page 60 for more information. 2. New folders cannot be created. See page 60 for more information. 3. The data store is currently not available. Click on the notification to show the not synchronizeable folders. Here it is possible to specify how to handle the unsynchronized folders. Click on “Do not synchronize this folder” to not show the notification again. The error message “An error occurred during access of your Outlook data.” is shown This message can be caused by faulty Outlook® Add-Ins of third party producers. Faulty Add-Ins of third parties can affect the closing of Outlook® which may leads to locking of the Outlook® PST file. This prevents communication between SimpleSYN and Outlook®. In this case deinstall the faulty Add-In, contact the support of the producer or wait for an update. The message can also occur if your PST file is corrupt. More information about checking the PST files can be found under http://support.microsoft.com/?scid=kb%3Benus%3B287497&x=10&y=14 The error message “Authentication failed” is shown creativbox.net – Internet Solutions Make sure that the logon data for the SimpleSYN server is correct. More information can be found on page 55. 77 SimpleSYN – User manual Support The SimpleSYN team is interested in providing a fully functional product. If you should despite our entire effort encounter a problem we would be pleased if you would contact us. This allows for elimination of the problem with the next update and perfecting of SimpleSYN for you. Before contacting the support please follow the instructions: Follow the instructions in this user manual Read the advice on Problem solutions on page 73 The FAQ on the SimpleSYN home page gives you current information. The FAQ can be found under http://www.simplesyn.net/Support/QuestionsandAnswers/tabid/412/ItemID/50/l anguage/en-US/Default.aspx Use the support form under http://www.simplesyn.net/Support/tabid/382/language/en-US/Default.aspx Should you find no response contact the SimpleSYN team through e-mail at [email protected] creativbox.net – Internet Solutions 78 SimpleSYN – User manual Legal notice creativbox.net - Internet Solutions Torsten Leithold & Georg von Kries GbR Glashüttenstr. 2 D-30165 Hannover [email protected] http://www.creativbox.net Telefone: +49 511-53 46 23-0 (not a support hotline) E-Mail: [email protected] Presse: [email protected] Company entitled to representation: Torsten Leithold, Georg von Kries Tax number: 25/235/41607 VAT-No: DE 243 674 351 creativbox.net – Internet Solutions 79