1
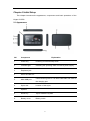
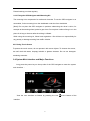
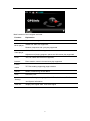
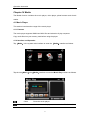
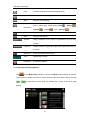
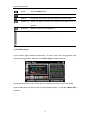
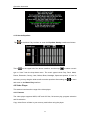
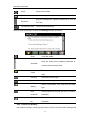
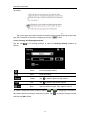
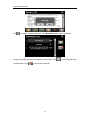
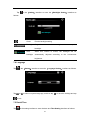
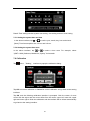
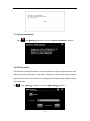
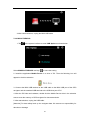
EZINAV G4 GPS USER MANUAL Table of Contents Chapter I Welcome............................................................................................................. 1 Chapter II Initial Setup ....................................................................................................... 2 2.1 Appearance ............................................................................................................ 2 2.2 Power Supply & Charging ...................................................................................... 3 2.3 Basic Use ............................................................................................................... 4 2.4 System Main Interface and Major Functions.......................................................... 5 Chapter III GPS ................................................................................................................... 8 3.1 Map ......................................................................................................................... 8 3.2 Navigation ............................................................................................................... 8 3.3 Reception ............................................................................................................... 8 Chapter IV Media ................................................................................................................ 9 4.1 Music Player ........................................................................................................... 9 4.2 Video Player ......................................................................................................... 12 4.3 Photo Browser ...................................................................................................... 14 4.4 E-book Reader ..................................................................................................... 16 Chapter V Games ............................................................................................................. 20 5.1 Othello .................................................................................................................. 20 5.2 DuiDuiPeng .......................................................................................................... 20 5.3 Russia Block ......................................................................................................... 21 Chapter VI Tools............................................................................................................... 22 6.1 Calculator ............................................................................................................. 22 6.2 Unit ....................................................................................................................... 22 Chapter VII Settings......................................................................................................... 23 7.1 Summary .............................................................................................................. 23 7.2 Volume .................................................................................................................. 24 7.3 Backlight ............................................................................................................... 24 7.4 Language .............................................................................................................. 25 7.5 Date& Time ........................................................................................................... 25 7.6 Calibration ............................................................................................................ 26 7.7 System Info........................................................................................................... 27 7.8 FM Transmitter ..................................................................................................... 27 7.9 USB Setting .......................................................................................................... 28 7.10 Navigation Path .................................................................................................. 30 7.11 Factory Reset ..................................................................................................... 30 Appendix Troubleshooting ............................................................................................. 33 Operation Instruction Chapter I Welcome Thanks for purchasing the Kogan G4 GPS. With navigation as the major function, it also supports audio play, video play, photo browsing and e-book reading. SiRF Atlas-IV duel core CPU with high performance and low power consumption Friendly user interface for simple operation Power management for longer and more stable operation Data transmission with computers via Mini USB Quality reception for accurate positioning You may use the GPS navigator anytime anywhere, for example while driving, walking or cycling. To fully exert the functions of the Kogan G4 GPS and to understand the operational details, please read the manual carefully. You may see the following supplemental information in the manual. [Note]: Explanation of relevant subjects [Relevant Information]: Extra information of relevant subjects [Attention]: Precautions or warnings of relevant subjects. Please pay attention to this information and follow the instructions. This manual is applicable only to the Kogan G4 GPS. 1 Chapter II Initial Setup This chapter introduces the appearance, components and basic operations of the Kogan G4 GPS. 2.1 Appearance SN Component Explanation 1 Power key Powering on/off and sleep mode 2 Indicator light Indicating the operating state of external power supply 3 Earphone jack 4 Micro SD card slot 5 MINI USB port Communicating with PC via MINI USB cable and used as the charging port 6 Stylus slot Location of the stylus 7 Speaker 8 Reset key Tap to restart the system 9 Battery cover Battery inside 2 2.2 Power Supply & Charging Charge the GPS navigator fully with the charger before the first use. 2.2.1 Power Supply The Kogan G4 GPS can be powered by the built-in battery or external power supply. When the GPS navigator is unconnected to the charger, it is powered by the Li-polymer battery. The battery capacity icon「 」in the system main interface shows current residual battery capacity. When the GPS navigator is connected to the charger, it is powered by external power and the battery is charged. [Attention] The GPS navigator adopts an internal removable Li-polymer battery. To avoid battery rupture, explosion, release of hazardous substance or burn, do not unpack, pierce, strike on or discard the battery in fire or water. The work temperature of the device is 0~50°C and its storage temperature is -10~60°C. Do not leave the device under heat sources or in high thermal areas such as an unattended vehicle in the strong sunshine. End-of-life battery disposal please follow local relevant regulations 2.2.2 Charging by AC Adapter Plug the USB terminal of the AC adapter into the USB port on the left side of the GPS navigator and the other to the power socket to supply power and charge the GPS navigator. [Note] The charging indicator light is red during charging. Do not unplug the AC adapter until the battery is fully charged and the indicator light turns green. Please charge the GPS navigator when the battery is low or used up in succeeding use. 2.2.3 Charging by Car Charger Plug one terminal of the car charger into the USB port on the left side of the GPS navigator and the other to the charging port to supply power and charge the GPS 3 navigator. [Note] Plug in the car charger after the automobile is started to avoid damage due to current surge. 2.3 Basic Use 2.3.1 Powering on/off & Sleep 2.3.1.1 Powering on Long press the power key on the top side of the GPS navigator to power it on. [Note] Great humidity fluctuation may lead to short circuit of the GPS navigator. Power on the navigator after it has accommodated to new environment. 2.3.1.2. Powering off & Sleep Long press the power key to power off the GPS navigator. The following interface will be prompted. If is selected, the navigator will automatically resume the state before entering sleep mode when powered on again. 2.3.2 Restarting the System When the system does not response, press the Reset key on the back of the GPS navigator to restart the system. [Relevant Information] The following situations might lead to no response of the system. 1. Delay or stagnancy in interface switching; 2. Failure of function activation with overlong execution; 3. Failure to power on/off the GPS navigator by pressing the power key [Note] Restarting the system by pressing the Reset key will result in loss of unsaved data. 4 Please backup your data regularly. 2.3.3 Fixing the GPS Navigator with Mounting Kit The mounting kit is composed of a cradle and a bracket. To use the GPS navigator in an automobile, fix the mounting kit on the dashboard under the front windshield. [Note]: Do not place the GPS navigator in positions obstructing the driver’s vision, for example at the steering wheel, pedal or gear lever. Do not place it without fixing it or in the place of air bag or the area after the air bag is inflated. While using the mounting kit, follow local regulations. We will have no responsibility for any penalty or damage resulting from traffic violation. 2.3.5 Using Touch Screen To protect the touch screen, do not operate it with acute objects. To cleanse the screen, use soft cloth with water, isopropyl alcohol or glasses cleanser. Do not use detergent containing ammonia. 2.4 System Main Interface and Major Functions Long press the power key on the top side of the GPS navigator to enter the system main interface : View the next interface as follows by pressing the icon interface. 5 at the bottom of the Main functions of the navigator are listed : Function Explanation GPS Tap to enable navigation function WMA9 and WAV files supported; Music player Random, sequence and cycle play supported WMV, ASF and AVI files supported; Video player Adjustment of playing progress, pause and full-screen play supported Photo JPG, GIF, BMP and PNG files supported; browser Photo rotation, zoom in/out and auto play supported E-book TXT files reading supporting page selection reader Games Othello, DuiDuiPeng, Russia Block Tools Calculator, Unit Volume, Backlight, Language, Date& Time, Calibration, FM Transmitter Settings and System Information. GPS Info Display GPS signal state, reset GPS signal 6 Operation Instruction Chapter III GPS Various navigation mapping applications can be installed in the GPS navigator, such as CARELAND and RITU intelligent navigation systems, which position the navigator via the satellite receiver and display it on the map. Set a destination, and the system will automatically work out the best path to help the user reach the destination safely and quickly. 3.1 Map Due to transportation development, inconformity between products and real traffic information will occur a period after product release. Please drive according to road conditions and abide by traffic regulations. 3.2 Navigation Navigation paths are for reference only, and the user may decide whether to follow them. In some instance your good knowledge of the road condition may take priority 3.3 Reception High and crowded structures (such as inside of tunnels, space between high buildings, underground car parks and under viaducts), weather change or satellite signals turnoff may influence signal reception, resulting in positioning failure, inaccurate positioning, navigation failure or system function abnormity. With stereoscopic maps, instant animation, voice prompt and text prompt of the navigation system, you will appreciate its unique charm and enjoy a great trip. Different navigation maps may have different operation methods. Please follow instructions of corresponding navigation mapping applications. [Note]: Before using the GPS navigator, please purchase and install mapping applications and appoint file paths. For setting methods please refer to 7.10Setting Navigation Path. 8 Operation Instruction Chapter IV Media The Media function includes the music player, video player, photo browser and e-book reader. 4.1 Music Player This section introduces the usage of the music player. 4.1.1 Features The music player supports WMA9 and WAV files and selection of play sequence Copy audio files into your memory card before using the player. 4.1.2 Interface and Operation Tap「Media」in the system main interface to enter the「Media」interface as follows: Tap the icon「Music」in the「Media」interface to enter the Music Play interface as follows: Close Close the music player Minimize Minimize the music player and return to the Media interface. 9 Operation Instruction Play Continue playing the paused/ stopped music. Pause Pause the music playing Stop Stop the music playing. play Tap to switch play mode among Order , AllCyc , sequence Random , Once and OnceCyc . Previous Play the previous music. Next Play the next music. Volume Drag it leftward to turn down or rightward to turn up the volume. Progress Drag it leftward or rightward to play from a previous or future moment. Music list Enter it to select music to play. Time Display the run time. Equalizer Enter the equalizer 4.1.3 Selecting and Playing Music in the Music Play interface to enter the Music List interface as follows. Tap Tap to open file folder in the left to select wanted music from flash memory and tap / to add them into the play list, double tap a piece of music to start playing. 10 Operation Instruction Close Close the Music List Add one Add a piece of music on the left list to the play list on the right. Add all Add all the music on the left list to the play list on the right. Delete one Select one piece of music in the play list and tap the icon to delete it. Delete all Delete all the music in the play list. Scroll bar Drag it upward/ downward to view all music. 4.1.4 Viewing Lyrics If your memory card contains corresponding. .irc files for the music being played, then lyrics will be played at the right side of the Music Play interface as follows: Double tap the lyrics area to view the lyrics in full screen as follows. Under full screen mode, double tap the screen to return to normal-sized interface, i.e. the above Music Play interface. 11 Operation Instruction 4.1.5 Set the Equalizer Tap Tick in in the Music Play interface to enter the Equalizer Setting interface as follows: on the upper left of the above interface, and then tap to select a music type or “User” from the drop-down menu. The music types include Pop, Rock, Metal, Dance, Electronic, Country, Jazz, Oldies, Blues, Nostalgia, Opera and speech. If “User” is selected, you may drag the slider at will to set the equalizer. After setting, tap to save and return to the Music Play Interface 4.2 Video Player This section introduces the usage of the video player. 4.2.1 Features The video player supports WMV, ASF and AVI files, full-screen play, progress selection and file selection. Copy video files to a folder in your memory card before using the player. 12 Operation Instruction 4.2.2 Interface and Operation Tap 「Video」in the Media interface to enter the video player interface as follows: Close Close the video player. Previous film Play the previous film. Play Continue playing the paused/ stopped music. Next film Play the next film. Stop Stop the film being played. Video folder Enter it to select a film to play. Drag the sliding block leftward to play from a previous Progress moment or rightward coming moment. Drag it leftward to turn down or rightward to turn up Volume the volume. Time Display the play time and the film duration. 4.2.3 Selecting and Playing Video Tap in the Video Play interface to enter the Video List interface as follows. Double tap a video file folder to start circle play all video files in the folder. 13 Operation Instruction Close Close the video folder. Return Return to the previous folder. Film name& format Film name and its format Drag the sliding block upward/ downward to view all Scroll bar the files inside the folder. 4.3 Photo Browser This section introduces the usage of the photo browser. 4.3.1 Features The photo browser supports JPG, GIF, BMP and PNG files, photo rotation, zoom in/ out and auto play. Copy photos to a folder in your memory card before using the browser. 4.3.2 Interface and Operation Tap 「Photo」in the Media interface to enter the photo browser interface as follows: Previous View the preview photo in the folder. Next View the next photo in the folder. 14 Operation Instruction Tap Zoom in Scale up current photo. Zoom out Scale down current photo. Rotate Rotate current photo 90°clockwise. Auto play Cycle play all the photos in the folder from current photo. Folder Enter the photo folder to select a photo. Close Close the browser and return to the Media interface. in the browser interface to enter the photo folder as follows: Close Close the current folder. Return Return to the previous folder. Scroll bar Drag the sliding block to view all the photos. In the above interface, double tap on the screen to display photos in full screen. Tap to enter auto play interface as follows. Drag the slider at the bottom of the screen to regulate play speed (1-10 seconds), and then tap on the screen to hide the slide (or the slide will be hidden automatically); tap on the screen to show the slide. Double tap on the screen to stop playing and return to the browsing interface. 15 Operation Instruction 4.4 E-book Reader This section introduces the usage of the E-book reader. 4.4.1 Features The reader supports TXT files, page turn and folder selection. Copy TXT files into your memory card before using the browser. 4.4.2 Interface and Operation Tap the icon 「Ebook」 in the Media interface to enter the reader interface as follows: Tap in the e-book reader interface to enter the e-book folder as follows: 16 Operation Instruction Close Close current folder. Return Return to the previous folder. Drag the sliding block upward/ downward to view all Scroll bar TXT files. File name& format The file name and format. Select a book file and tap it to enter the Reading interface as follows: Close Close the reader. Drag the sliding block upward/ downward to Scroll bar view all content of the e-book. Enter the e-book folder to select an e-book to Folder read. Previous Read the previous page. Next Read the next page. Select a text theme, font, word size and bold Setting type. New Select partial text and tap the icon to create a bookmark bookmark. Bookmark Enter the bookmark list to select or delete a list bookmark. 4.4.2.1 Full Screen Reading In the above interface, double tap the screen to enter to the full screen reading mode 17 Operation Instruction as follows: Tap on the upper part of the interface to read the previous page while tap on the lower part of the interface to read the next page; tap the icon to quit. 4.4.2.2 Creating and Viewing Bookmark Tap the icon follows: in the reading interface to open the Reading Setting interface as Close Exit the setting interface Save Save the setting. Theme Tap to select a theme for the e-book. Font Tap to select a font for the e-book. Bold Tap to enable bold type. Tap it again to cancel. To create a bookmark, locate a page by taping or or dragging the scroll bar in the reader interface and drag to select text content. Tap to popup a dialog as follows and then tap OK to finish. 18 Operation Instruction Tap to view all created bookmarks in the Bookmark List interface as follows: Drag the scroll bar and select a bookmark on the left list. Tap the bookmark or tap to delete the bookmark. 19 to go to the page with Chapter V Games This chapter introduces the usage of Games. Tap「Games」in the system main interface to enter the games interface as follows. Tap to exit. Tap the game icon to start to play games. 5.1 Othello Tap the icon in the Games interface to enter the interface as follows: 5.2 DuiDuiPeng Tap the icon in the Games interface to enter the interface as follows: 20 5.3 Russia Block Tap the icon in the Games interface to enter the interface as follows: 21 Chapter VI Tools The tools include Calculator and Unit conversion. Tap 「Tools」in the system main interface to enter the tools interface as follows and tap to exit. 6.1 Calculator Tap in the tools interface to enter the calculator interface as follows: 6.2 Unit Tap in the tools interface to enter the unit interface as follows: 22 Chapter VII Settings 7.1 Summary This chapter introduces the system settings of the GPS navigator. Tap the icon 「Setting」 in the system main interface to enter the system setting interface as follows to set volume, backlight, language, date & time, calibration, factory reset, system info, USB and navigation path. Tap to display the next page as follows. Function Explanation Adjust the speaker volume; Volume Open/ close the tap sound startup music setting Adjust the brightness of touch screen backlight; Backlight Support auto backlight. Language System language selection 23 System date setting; Date & time System time setting; System time zone setting; Calibration If deviation occurs while touching the screen, calibrate the screen. Display system information including ROM version, software System info version, OEM version, platform ID and device ID. FM Transmitter Transmit audio signals of the navigator to radio sets. USB setting Data transmission mode between the navigator and PC. Navigation path Select a document path for the navigator. Factory Reset Reset the factory default settings. 7.2 Volume Tap in the 「Setting」interface to enter the「Volume Setting」interface as follows: Close Exit the volume setting. Sounds for taps Tap it to enable the function. Tap it again to disable the function. Volume Drag the slider leftwards / rightwards to turn down / up the volume Tap or to select power-on music or Power-on music disable it. 7.3 Backlight Backlight setting includes backlight brightness adjustment and auto backlight. 24 in the「Setting」interface to enter the「Backlight Setting」interface as Tap follows: Close Exit the backlight setting. Backlight Drag leftward to turn down or rightward to turn up the backlight. Auto When this column is ticked, the backlight will be backlight automatically adjusted according to the environment brightness. 7.4 Language Tap in the「Setting」interface to enter the「Language Setting」interface as follows: Tap or to select a system language, and then tap to save the settings and tap to exit. 7.5 Date& Time Tap in the setting interface to enter the date and Time Setting interface as follows. 25 Date & Time setting includes system date setting, time setting and time zone setting. 7.5.1 Setting the system date and time In the above interface, tap or to set the year, month, day, hour and minute. [Note]: Time format options are 12-hour and 24-hour. 7.5.2 Setting the system time zone In the above interface, tap or to select a time zone. For example, select “(GMT+10:00) Canberra, Melbourne, Sydney” for Australia. 7.6 Calibration Tap in the 「Setting」 interface to popup the calibration dialog : Tap OK to execute calibration or Cancel to cancel calibration and go back to the setting interface. Tap OK, and the following calibration interface is prompted. Click the center of cross cursor with the stylus and the cursor shifts from the center, upper left, lower left, upper right and lower right to finish the calibration and the interface will be closed automatically to go back to the setting interface. 26 7.7 System Information Tap the in the「Setting」interface to enter the System Information interface : 7.8 FM Transmitter FM transmitter realizes transmission of audio signals of the GPS navigator to radio sets. Adjust the emission frequency of the GPS navigator the same as that of the receiving frequency of the radio, and sounds of the navigator will be output by the amplifier system of the radio sets. Tap in the「Setting」interface to enter the「FM Setting」interface : 27 ⒑ Close Exit the FM Setting. Save Save current setting. Use FM Tick in the box to enable FM function. Frequency Drag the slide block rightwards (or tap ) to increase the frequency and leftwards (or tap ) to reduce the frequency. The frequency range is 88.00 Mhz-108.00 Mhz. 7.9 USB Setting Connect the GPS navigator to PC via the MINI USB port to transmit data, or back up data from the navigator data to PC. The GPS navigator provides MASS STORAGE and MS STORAGE modes. Select one in the USB setting. 7.9.1 MASS STORAGE 1. Have the GPS navigator in operation status and the SD card plugged in the slot; 2. Tap in the system setting interface to enter USB Option as shown below. Select MASS STORAGE and tap to save it. 3. Connect the MINI USB terminal of the USB cord to the MINI USB port of the GPS navigator and the standard USB terminal to the USB Host port of PC. Then the PC will recognize the navigator and prompt the following interface. To disconnect the navigator from PC and enter USB charging mode, you may select 28 . 4. After communication, unplug the MINI USB cable. 7.9.2 MS ACTIVESYNC 1. Tap in the system interface to enter USB Option as shown below. Select MASS ACTIVESYNC and tap to save the setting. 2. Install the application Mobile Device in a drive of PC. Then the following icon will appear in the drive selection. 3. Connect the MINI USB terminal of the USB cable to the MINI USB port of the GPS navigator and the standard USB terminal to the USB Host port of PC. 4. After the PC finds new hardware, double click the Mobile Device drive in the selection area to enter the memory of GPS navigator for data transmission. 5. After transmission, unplug the USB cable. [Attention] For data safety back up the navigator data. We assume no responsibility for data loss or damage 29 [Note] If MASS STORAGE is selected while the GPS navigator is connected with PC, other operations will be suspended. [Attention] The following operations will stop suspend the communication of the system and PC and unsaved data will be lost. 1. Unplugging the MINI USB cable; 2. Powering off the GPS navigator; 3. Resetting the system; 4. Tap the on close button on the top right. 30 7.11 Factory Reset Tap in the system interface to restore the factory setting. The following dialog will be prompted. Tap OK to restore the default setting or Cancel to return to the setting interface. 31 Chapter VIII GPS Info Tap in the system main interface to view the GPS information interface as follows: In the above interface, it shows information on signal state, latitude, longitude, coordinated universal time, number of satellites, valid satellites and its speed. Tap to popup a dialog : Tap OK to reset the GPS satellite or tap Cancel to exit. 32 Appendix Troubleshooting Please carry out the following operations in case of abnormal operation of the GPS navigator. For further problems, please contact our customer service center. Fault Reason Solution Startup failure Low battery Supply external power and charge the battery. Sudden power cut System down Reset the GPS navigator. Low battery Supply external power and charge the battery. No/ vague display Low backlight Turn up the backlight. Backlight off Tap the screen with the touch pen. Incorrect tapping Touch screen not Recalibrate the screen. response calibrated No sounds Low volume Poor contact Turn up the volume. of Check the earphone connection. earphone Communication with Poor USB PC connection GPS signals reception Poor GPS signal Check the USB cable connection. About 3 minutes are needed for low failure Loss of map data intensity of local GPS satellite signal. Accidental deletion Contact your agent or distributor. Input a new password after recovering the GPS data. Note: This document is for guidance only and the content is subject to change without notice. 33