1
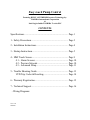
Easy touch Pump Control
Featuring BUILT 4 EXTREMES Inverter Technology by:
TOSHIBA International Corporation
&
Intel-Logics-Inside TOSHIBA T series PLC
CONTENTS
Specifications.......................................................................... Page 1
1 - Safety Precautions............................................................. Page 2
2 - Installation Instructions...................................................... Page 4
3 - Startup Instructions............................................................ Page 5
4 - HMI Touch Screen............................................................. Page 9
4.1 - Alarm Screens........................................................ Page 10
4.2 - Pressure Setpoint.................................................... Page 10
4.3 - Advanced Setup..................................................... Page 11
5 - Trouble Shooting Guide..................................................... Page 13
VFD Trip Codes & Resetting ........................................ Page 14
6 - Warranty Registration........................................................ Page 15
7 - Technical Support.............................................................. Page 16
- Wiring Diagrams
Ver: 3.01
05/2010
Easy touch Pump Control models
230 volt, single phase input
HP
Max. Amps
Model
S2015-7
2
7.8
S2022-11
3
11
S2055-16
5
16.5
S2075-19
7.5
19
S2110-35
10
35
S2150-41
10
41
230 volt, three phase input
Model
HP
Max. Amps
2037-17
5
17.5
2055-27
7.5
27.5
2075-33
10
33
2110-54
15
54
2150-66
20
66
460 volt, three phase input
HP
Max. Amps
Model
4015-4
2
4.1
4022-5
3
5.5
4037-9
5
9.5
4055-14
7.5
14.3
4075-17
10
17
4110-27
15
27.7
4150-33
20
33
575 volt, three phase input
Model
HP
Max. Amps
6015-3
2
3
6022-4
3
4
6037-6
5
6
6055-9
7.5
9
6075-12
10
12
6110-17
15
17
6150-22
20
22
General Specifications:
Voltage supply:
Frequency:
Tolerance:
Control system:
Overload Rating:
Frequency Setting signal:
Carrier Frequency:
Accel/Decel:
Retry Operation:
Protective Functions:
Power Failure:
Keypad:
Installation:
Ambient:
Single Phase 200 - 240 vac, 3 Phase 200 - 230vac, 3 Phase 380 - 500vac, 3 phase 575V
50/60Hz
Voltage: +10%, -15% continuous operation, Frequency +/- 5%
Sine Wave PWM system and Intel-Logics micro PC.
150% FLA for 60 seconds
0-10vdc, pressure sensor, included, face mounted speed knob (hand operation)
Preset at 2kHz.
Automatically adjusted for pumping demands
Preset to 3 retry attempts for non-critical faults
Overpressure, underpressure, stall protection, current limit, output short circuit, over
voltage, under voltage, ground fault, output single phase, overload protection by
electronic thermal setting, over heat and optional external fault circuit.
Auto reset after power failure
Seven segment, four digit LED. Displays inverter output frequency, running and faults
Indoor, 3300 feet altitude (without derating), protect from corrosive & explosive gases
Temperature: 0 to 40 degrees C, 32 to 104 degrees F, Humidity: 95%
non-condensating.
Range: 40 - 100PSI, adjustable on color touch screen HMI
Enclosure: 24x20x10 inches, 610x508x254 mm.
Canadian Standards Association (CSA), as industrial motor control assemblies.
Pressure setting:
Dimensions:
Approval:
Notes:
-- Select Easy Pump Control model based on Maximum Amp capacity, not horse power rating.
-- Standard pressure setting range is adjustable from 40-100 PSI, custom ranges available at no extra charge when
specified at time of order.
-- Load reactors may be required where long cable lengths exist from the controller to the pump motor.
[230V > 1,200 ft.]
[460V > 400 ft.]
[575V > 120 ft.]
-- Specifications subject to change, manufacturer reserves the right for product alterations and/or improvements.
Page 1
Thank you for your purchase of the Easy touch Pump Control.
The Easy touch Pump Control is manufactured by Automated Electric Systems Ltd. and is
made with the highest quality components, strict quality control during assembly and full
factory testing of each unit before shipping. The industry proven quality devices,
together with Intel-Logics is your assurance of Easy installation and startup with
years of trouble-free operation.
1 - Safety Precautions:
Thoroughly read this manual to understand the installation and
operation of your Easy touch Pump Controller.
Controller must be wired by a qualified Electrician
- Observe all National and Local electrical codes for wiring installation. Ensure proper
grounding in accordance with the codes.
- Mount the panel at an elevation that places the touch screen HMI at eye level.
- After mounting, check all internal electrical connections. Terminations may loosen
during shipping.
- Connect all field wiring to the terminal strip as shown on the wiring diagram.
- The connected power supply must have the correct voltage and capacity for the
model as shown in the specifications.
- Compare the pump motor FLA with the Maximum Full Load Amp rating of the Easy
Pump Control, model specifications (page: 1). The Easy pump control MUST have a
rating equal to or greater than the motor FLA.
- Never connect power to the output (motor) terminals (T1,T2,T3). Permanent
damage will result.
- Pressure sensor cable may be extended when required, provided a two conductor
#18 AWG, shielded cable is used, and correct polarity is observed.
Page 2
The pump connected to the Easy Pump Control must have a
performance curve capable of exceeding the maximum desired
setpoint pressure.
- When evaluating the pump curve compatibility for setpoint pressure, be sure to
include all site conditions affecting the pump’s performance, such as; NPSH, maximum
suction lift, total well drawdown, etc.
- If unsure, record the pump brand and model number, call tech support for curve
specifications.
- Failure to confirm compatibility will result in permanent pump damage.
General Precautions
- Never disassemble, modify or repair. This can result in electric shock, fire and injury.
For repairs, call Tech Support.
- Never remove the front cover when power is on or open door if enclosed in a cabinet.
The unit contains many high voltage parts and contact with them will result in electric
shock.
- Don't stick your fingers into openings such as cable wiring hole and cooling fan
covers. This can result in electric shock or other injury.
- Don't place or insert any kind of object into the inverter (electrical wire cuttings, rods,
wires). This can result in electric shock or fire.
- Do not allow water or any other fluid to come in contact with the inverter. This can
result in electric shock or fire.
Page 3
2 - Installation:
A.
Install the Easy touch Pump Control in a location suitable for NEMA 1 electrical
equipment. NEMA 1 locations are indoors, dry, free of high concentrations of
dust, dropping or spraying water. Mount the panel at an elevation that places the
touch screen HMI at eye level.
B.
Wiring must be performed by a qualified electrician (see Safety Precautions).
Note:
i) Care must be taken when drilling holes for conduit and cable entries, metal
filings must not fall into the electrical components and should be thoroughly
cleaned up after drilling is complete. Failure to do so can result in voided
warranty, equipment failure and electric shock or fire hazard.
ii) Power supply conductors and motor load conductors must not be contained in
or share the same conduit or cable.
C.
Connect all field wiring to the terminal strip as shown on the wiring diagram.
i) Minimum Easy Pump Control connections include grounding, power supply
L1,L2, (L3), motor supply T1, T2, T3 and pressure sensor 24VDC+, SIGNAL,
and Shield.
ii) Optional wiring includes a no-voltage remote alarm contact, two terminals
labeled FLT L (fault light). External “closed loop” fault circuit for connection of a
low water float switch, high water float switch, low temperature alarm, etc. see
diagrams. Terminals labeled EXT F.
D.
The connected power supply must have the correct voltage and capacity for the
model as shown in the specifications. Never connect power to the output
(motor) terminals (T1,T2,T3) as this will destroy the inverter.
E.
Pressure sensor must be located on the discharge piping as shown on the “typical”
installation drawing. Pressure sensor cable may be extended when required,
provided a two conductor #18 AWG, shielded cable is used, and correct polarity
is observed. Pressure sensor cable must be run separately from all other wiring.
F.
Connect three phase wiring from T1,T2,T3 terminals to the pump motor complete
with required grounding. Ensure correct wire sizing for motor load current. In the
event of long cable lengths from the controller to the pump motor, ensure the wire
size is large enough to compensate for voltage drop and does not require a load
reactor (see specification notes, page 1).
i) Danger: Equipment will be damaged or personal injury may result if lightning
arrestors, power factor capacitors or surge capacitors are connected to the load
terminals (T1, T2, T3) of the Easy Pump Control.
Page 4
G.
Before applying power to the Easy Pump Control, the connected pump and
motor must be installed and plumbed according to the manufacturer’s
specifications.
i) If the pump is a close coupled end suction, frame mounted end-suction or
multi-stage centrifugal type, record motor name plate data on the form provided at
the back of this manual. Careful attention must be given to voltage and full load
amperes (FLA). Compare the pump motor FLA with the Maximum Full Load
Amp rating of the Easy Pump Control, model specifications (section 1). The
Easy pump control MUST have a rating equal to or greater than
the motor FLA.
ii) Prime the pump by filling any suction line and pump bowl assemblies with
water to prepare for starting.
ii) In the case of submersible pump/motor units, record motor data prior to
installation or from the accompanying manufacturer’s literature. In the case of
newly installed submersibles, open a valve on the discharge piping for 1 hour to
allow water into the pump and riser pipe.
3 - Startup:
A.
After following the installation instructions. Place the door mounted, pump
control selector switch to the OFF position, then apply power to the panel.
B.
Open the control panel door, Caution: Do not touch any of the internal
components, wiring or termination points, personal injury or death could
result from electric shock! The display on the inverter will read “0.0”
Note: The Toshiba inverter contained in your Easy Pump Control is programmed
for proper operation of your pump. Changes or adjustment of any operational
parameters is not required and could void the warranty.
The only parameter that must be field set is the motor full load current. This
parameter must be programmed at time of installation and prior to startup.
The electronic thermal overload protection for the pump motor will not function
and motor damage can result if the procedure described below is not carefully
followed.
Page 5
i) Step #1: Press the MODE button, display will show AUH. This is the display
for the first basic parameter.
ii) Step #2: By pressing the UP or DOWN arrow buttons, scroll the display until
the “tHr” parameter is displayed.
tHr is the parameter that must be programmed with motor current, if you pass this
parameter while using the arrow buttons, you can get back to it by using the
opposite arrow.
iii) Step #3: With the tHr parameter shown on the display, press the ENT button.
The display will change to show the full output amp. capacity of the inverter.
iv) Step #4: Using the DOWN arrow, change the value to the motor FLA you
have recorded. The UP arrow can be used if the correct number is passed.
v) Step #5: With the motor FLA shown on the display, press the ENT button. The
unit will accept the new value by flashing the tHr and FLA alternately twice.
Example: You have an Easy Pump Control model 2055-27 and your pump motor
FLA is 19.6 amp. You will find the factory default value of 27.5 in the tHr
parameter. Using the arrows change the value to 19.6 and press ENT. Display will
flash tHr and 19.6.
vi) Step #6: Press the MODE button twice to return to standard frequency
monitor display. The inverter display will show 0.0
C.
Motor rotation check. With the control panel door open, switch the door
mounted selector to the HAND position. Whenever the selector is placed to
HAND, the inverter is controlled by the UP and DOWN arrow buttons of the
keypad on the face of the inverter.
i) Step #1: Using the UP arrow, increase pump speed to 20Hz.
ii) Step #2: In Hand with 20Hz flashing on the display, the pump motor will be
turning at approximately 30% of full speed. Check the direction of motor rotation.
Then use DOWN arrow to decrease speed to 0.0Hz followed by the ENT button to
stop the 0.0 from flashing.
Page 6
(1)
If rotation is correct for the pump as indicated, go to: v) step #5 below.
(2)
If rotation is incorrect go to: iii) step #3 below.
(3)
If the pump shaft is not visible, rotation direction is not indicated or your
pump is a submersible, go to: iv) step #4 below.
iii) Step #3: Change pump rotation to the correct direction when incorrect rotation
has been observed.
(1)
Press the stop button on the inverter keypad, wait for pump to stop and
turn off the power supply to the Easy Pump Control, wait ten minutes
for capacitor discharge.
(2)
Exchange the motor lead wires connected to terminals T1 and T2 (remove
both wires, place former T1 to T2 position and former T2 to T1 position).
Restore power to the panel and recheck rotation as described in:
ii) step #2. With rotation correct, proceed to: v) step #5 below.
iv) Step #4: If you are starting a submersible pump or have a pump that does not
show the direction of rotation:
(1)
Isolate the discharge piping by closing the discharge valve or closing all
valves in the system, thereby allowing the pump to produce pressure in a
no-flow condition.
(2)
As described in step #1 & #2 above, run the pump to approximately 30Hz
for 60 seconds and watch the pressure gauge, make note of the highest
pressure produced at that speed.
(3)
Stop the pump by pressing the DOWN arrow button on the inverter
keypad until 0.0Hz. Release any pressure in the piping by opening a
valve.
(4)
Turn off the power supply to the Easy Pump Control, wait ten
minutes for capacitor discharge.
Exchange the motor lead wires connected to terminals T1 and T2 (remove
both wires, place former T1 to T2 position and former T2 to T1 position).
Restore power to the panel.
(5)
Close any discharge valves that were opened to release pressure, press the
UP arrow on the keypad, to operate at the same speed, 30Hz, as tested in
item (2) above, the motor will run the opposite direction of rotation. Check
the pressure gauge, note the pressure produced.
Page 7
(6)
The direction of rotation that produced the highest pressure, is the right
direction. Follow item (4) above if motor rotation needs to be corrected,
and proceed to: v) step #5 below.
v) Step #5: With rotation confirmed. Open valves in the discharge piping then use
HAND and UP arrow to run the pump at 35Hz to fill all plumbing lines and fixtures.
In cases where high elevation lift from the pump location to point of water use is
experienced, speed will need to be increased gradually until water reaches the
highest point.
D.
With the system fully charged with water, close the valve(s) and increase pump
speed to raise system pressure to 40 PSI. Then stop the pump with the DOWN
arrow button. If pressure holds, panel is ready for AUTO operation. Move the
door selector to the AUTO position.
E.
The Easy Pump Control will operate the pump to maintain a constant discharge
pressure at any flow rate within the pump’s capacity. At a zero flow condition, the
pump will come to a stop, restarting automatically when water demand returns.
F.
Important: With the pump running in AUTO, close all valves to provide a zero
flow condition to confirm a pump stop. If the pump does not stop at zero flow, go
to Trouble Shooting, section 5, page 13.
Page 8
4 - HMI Touch Screen:
Above is a display of HOME screen. Information includes current date & time,
pump status, pump hour meter, present pressure in the system, setpoint pressure and
pump speed. After 30 minutes of no activity, screen saver turns off the backlight, to
reactivate simply touch the blank screen.
Buttons:
EVENTS: Touching this button will access a data log of station activity
complete with time & date stamp. The data is stored in a flash memory area
of the HMI, meaning it is retained even on power down.
MENU: Touching this button will access the navigation screen to information
and user input areas of the processor.
Most areas are fully self explanatory on the respective screens displayed.
Further details for the ALARMS and SETPOINT buttons follows.
Three LED indications at the top of the HMI:
ALM (red) Flashing, alarm condition in memory, access alarm management to
clear (see 4.1 below).
COM (green) -
PWR (orange) -
Off, no communication established.
On, communication normal.
Flashing, communication error exists.
On, power applied
Page 9
4.1 - Alarms:
Touching this button on the System Navigation screen
(MENU) will show an alarm management screen. An alarm
condition that has been corrected can be cleared with an
ACCEPT button at the bottom of the management screen. This will also clear it
from the notification banner on home screen.
All alarm conditions will cause a full screen notification with cause and corrective
measures. Once corrected, the alarm management screen must be accessed to accept
the alarm which removes it from the bottom banner of home screen.
Sample alarm screen. Alarm conditions include: Low Pressure, High Pressure,
Pressure Signal Fault, VFD trip, and external device fault.
4.2 - Setpoint:
Touching this button on the System Navigation screen
(MENU) will show the pressure adjustment screen, shown on
next page.
Page 10
The setpoint operating pressure can be set and adjusted via this screen. By touching
the numeric PSI field, a popup keypad will display where a new value can be
entered. Adjustment can made while pump is running or stopped. Setting is in 1 PSI
increments, with a range of 40 - 100 PSI.
4.3 - Advanced Setup:
Advanced setup is a unique feature in the Easy Touch pump controller. Factory
default settings will operate any pump correctly when connected to the panel,
however user preferences for pump response and cycle duration may be
manipulated using Advanced Setup.
The Advanced Setup screen, shown next page, displays two "slider" entry switches.
The yellow slider with blue setting button adjusts cycle rate and the white slider
with red setting button adjusts pump response.
Page 11
Cycle Rate:
The default setting for cycle has the blue button approximately 1/4 down the slider
from the left. After a pump stop at no flow, a 10 PSI drop is required before restart.
Moving the button further left will lengthen pump run time at low flow. If the nature
of your system has extended periods of time where small flows are used, the 10 PSI
pressure change can be avoided by keeping the pump running longer.
Moving the button right will shorten pump run time at low flows, thereby increasing
start/stop cycles. You should be aware that your VFD controlled pump is in no way
adversely affected by repeated short cycles. Hydraulic stresses to mechanical
equipment and motor heating are eliminated with use of the VFD.
Response Rate:
The default setting for response has the red button approximately 1/3 down the
slider from the left. A faster response of pump speed to changes in flow rate can be
set by moving the button further left. Doing so will result in some pressure
overshoot when flow rate drops quickly or stops suddenly. Left side settings are
best suited for accurate pressure control at higher flow rates with decreasing
demands done in a gradual manner.
Moving the button right substantially reduces any pressure overshoot. Right side
settings work well for lower flow rate demands and is ideal for dampening the
effects of speed changes on large horse power or high capacity pump curves.
After changing settings, always test the pump system by running some normal
demand rates to confirm satisfactory operation.
Page 12
5 - Trouble Shooting Guide:
Symptom:
Pump does not stop
at Zero flow
condition
Probable Causes
Remedies
Pump performance curve not capable of
producing the setpoint pressure.
Lower the setpoint, check pump curve to
confirm pump can exceed desired setpoint.
Pump not at zero flow.
Ensure all valves are closed and pump is
not supplying any leaks.
Pump has lost prime or water level in
wetwell too low.
Check water levels and confirm pump
performance at normal flow rates.
Pump wear.
Pump no-longer performing to original
curve, repair or replace pump.
Low pressure fault.
Flow rates beyond pump capacity, check for
unusual high demands or large leaks in the
system.
High pressure fault.
Reset and check operation.
External fault circuit open.
If a device has been wired to the optional
fault terminals, check the device and it’s
operation.
VFD tripped.
See inverter monitor and resetting, page 14.
Loss of signal from pressure transmitter.
Check wiring from panel to transmitter.
.
Alarm Screens
Page 13
Inverter Trip codes, resetting and status monitoring:
With the power on, open the control panel door, Caution: Do not touch any of the internal components,
wiring or termination points, personal injury or death could result from electric shock!
If the display reads 0.0 - the pump is stopped and the status is normal.
If the display shows a steady value or fluctuating value between 0 - 60, the pump is running and the value
is a speed display of hertz (Hz) in normal operation.
If the inverter is in a tripped condition, refer to the table below:
Display
OC1
OC2
OC3
OCA
OCL
Problem
- Overcurrent during accel.
- Overcurrent during decel.
- Overcurrent during run
- Arm overcurrent.
- Load overcurrent
Causes
- Pump load change causing excess current.
- Check pump and motor for wear or damage.
OP1
OP2
OP3
- Overvoltage accel.
- Overvoltage decel.
- Overvoltage run
- System supply voltage may be fluctuating.
- Pump motor is generating voltage, because of
water spinning the pump.
- Input line reactor may be required.
OL1
OL2
- Inverter overload
- Motor overload
- A seized or hard turning pump and motor shaft
- restart attempted after very short power fail
EPHO
- Output phase failure
- Check motor and wiring for open phase load.
EPHI
- Input phase failure
- Check incoming power supply
OH
- Overheat
- Inverter too hot, check temp. and fans (if equip.)
UP1
- Undervoltage trip
- Incoming voltage too low
EF2
- Ground Fault trip
- A phase to ground fault in load wires or motor
E
- Emergency stop
- Keypad stop button pressed twice to halt inverter
Err2
Err3
Err4
Err5
EEP1
- Main RAM fault
- Main ROM fault
- CPU fault
- Remote comm. Error
- EEPROM fault
- Contact Tech Support in the event of these faults
- Contact Tech Support if OCA
- Remove power for 120 seconds, then restore. If
inverter does not recover from the error, contact
Tech Support.
Resetting the inverter from a tripped condition:
After recording the trip condition and taking corrective action, the drive can be reset by
pressing the door mounted reset button or pressing the inverter keypad STOP button
twice.
Page 14
6 - Warranty Registration:
Terms and conditions:
The Easy Pump Control is manufactured by Automated Electric Systems Ltd. and is made with the
highest quality components, strict quality control during assembly and full factory testing of each unit
before shipping.
The Easy Pump Control is warranted for a period of 12 months from date of purchase. The warranty shall
extend to the repair or replacement of any component found to be defective during this time. Warranty
does not extend to cover costs for damage or injury resulting from component failure.
Warranty does not include labor or expenses incurred in the replacement of any component found to be
defective.
Warranty will not extend to the mistreatment, application or abuse of products supplied, as determined by
Automated Electric Systems Ltd.
Registration:
Complete and return the following registration form within 30 days of
purchase and Automated Electric Systems Ltd, will extend your
warranty by 6 months for a total of 18 months, at no extra charge.
Name:
Address:
City:
Phone:
Province/State:
Email (optional):
Easy Pump Control Model Number:
Date of purchase:
Pump Manufacturer:
Postal Code/Zip:
Serial Number:
Date of Startup
Model
Motor Name Plate Data
Motor Manufacturer:
Horse Power:
RPM:
Volts:
NEMA design:
FLA:
SF:
Site conditions & Startup Procedures
Approximate wire length from Control to motor:
Wire Size:
Wire: copper
aluminum
Installation steps followed
Startup steps followed
All power and control connections tight
Pump stop at zero flow confirmed
Motor full load amps (FLA) programmed into inverter
(see section 3, item B, page 5)
Please return to: Automated Electric Systems Ltd. Attention Warranty Department, #5 - 3160 12 Ave. North,
Lethbridge, Alberta, T1H 5V1, Fax. 403-328-3882.
Page 15
7 - Technical Support:
Full technical support can be accessed by contacting Automated Electric Systems Ltd.
(8:00 AM. to 5:00 PM. MST)
Ph.: 403-328-4400
Toll Free: 1-888-328-4408
Fax.: 403-328-3882
www.automatedelectric.com
Page 16