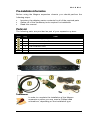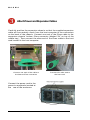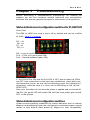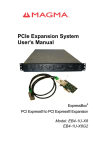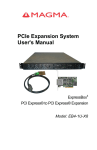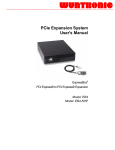
1
PCIe Expansion System User's Manual ExpressBox4 PCI Express® to PCI Express® Expansion Model: EB4-1U-X8 EB4-1U-X8G2 Copyright © 2010 Mission Technology Group, Inc. - DBA Magma This pub lication is protected by Federal Copy right Law, with all rig hts reserv ed. No part of this publication may be copied, photocopied, reproduced, stored in a retri ev al system, translated, transmitted or transcribed, in any f orm or by any means manual, electric, electronic, electro-magnetic, mechanical, optical or other wise, in wh ole or i n part without prior written consent f rom Magma. Limitation of Liability Inf ormation presented by Magma in this guide is believ ed to be accurate and reliabl e. Howev er, Magma assumes no responsibility f or its use. No license is granted by implication or otherwise to any rights of Magma. Product specif ications and prices are subject to change without notice. Trademark References Tradema rks and registered trademarks respectiv e manuf acturers. are propri etary to their M A G M A T a ble o f C o nte n t s PREF ACE .................................................................................. V Adv isories ...................................................................................v Saf ety Instructions ....................................................................... v i When Working Inside a Computer.................................................. v i Protecting Against Electrostatic Discharge...................................... v ii Rack-Mount Instructions ..............................................................v iii CHAPTER 1 INTRODUCTION....................................................1 General Sp ecif ications ..................................................................1 MTBF Top Lev el Calculations.........................................................1 Pre-Installation Inf ormation ............................................................3 Parts List.....................................................................................3 Tools Require d f or Installation ........................................................3 CHAPTER 2 HARDW ARE INSTALL ATION .................................4 Bef ore y ou Begin..........................................................................5 Install PCI Express Host Card ........................................................5 Install Chassis in Rack ..................................................................7 Attach Power and Expansion Cables ............................................. 16 Laptop Installati on (Opti onal).................................................................................. 17 Recheck the Installation............................................................... 19 Apply ing Power Correctly............................................................. 20 Starting U p: ................................................................................................................. 20 Softwar e Dri ver Installati on: .................................................................................... 21 Shutti ng D own: ........................................................................................................... 24 CHAPTER 3 VERIFY INSTALL ATION....................................... 25 Windows ................................................................................... 25 Mac OS X ................................................................................. 26 Expansion Slot Utility................................................................................................ 26 Apple Sy stem Prof iler.................................................................. 27 RedHat 9 Linux .......................................................................... 29 CHAPTER 4 INSTALL C ARDS AND DRIVES ............................ 32 Open PCIe Expansion Chassis .................................................... 32 Install 3rd Party PCIe Cards ......................................................... 33 Installing 3rd Party PCIe C ards .............................................................................. 33 Sy stem Should Be Up and Running............................................... 34 SNMP Features and Conf iguration ................................................ 35 SNMP F eatures ......................................................................................................... 35 SNMP C onfiguration................................................................................................. 35 Configure N etwor k Setti ngs .................................................................................... 37 Configure SNMP Settings ....................................................................................... 38 Change User N ame and Pas s wor d ...................................................................... 39 Reset to D efault Val ues ........................................................................................... 39 Configure your SNMP Agent .................................................................................. 40 i M A G M A Retrievi ng the MIB File ....................................................................................40 Acc essing the various SNMP func tions ................................................................41 Remote C hassis R es et ( tur nPower OffOn) .................................................42 Remote Sl ot Power to the C hassis (turnSlot_x _OffOn) ..........................43 Finishing Touches .......................................................................43 “Hot-Swapp able” PCIe Card Installations........................................44 Proc edure for hot- un- plugging a PC Ie pl ug in car d: ..........................................45 PCIe Expansion Solutions with the EB4-1U- X8 ................................48 Digi Design Pr o T ools® ............................................................................................48 Video Car d expansion s ol utions .............................................................................49 High Thr oughput stor age sol uti ons ........................................................................51 CHAPTER 5 TROUBLESHOOTING ..........................................53 Status Indicators and conf iguration switches f or 01-04978-03 ............53 Status Indicators and conf iguration switches ...................................53 Chas sis Power Good Indic ators: ............................................................................54 Chas sis R ESET Indicators: .....................................................................................54 Chas sis Sig nal D etect Indic ators: ..........................................................................54 EB4-1u- x8- G2 Chassis Sl ot Power Indicators: ...................................................55 Chas sis Linkup and Acti vity Indic ators: ................................................................55 Chas sis Al ter nate Functi on DIP Switc h: ...............................................................57 SNMP Power-On Sourc e J umper: .........................................................................58 Locating the Problem ..................................................................60 My C omputer C an’t Fi nd the PCIe Expansi on Sys tem .....................................61 When N othing Wor ks ................................................................................................63 My C omputer H angs Duri ng Power U p.......................................................64 My PCIe C ard Does n’t Wor k...................................................................................65 rdP Support for 3P Party PCIe C ards ..............................................................67 Windows Error C odes .....................................................................................67 My s ystem hangs beyond a cer tai n number of add-in c ards ...........................69 CHAPTER 6 HOW TO GET MORE HELP ..................................70 Frequently Asked Questions (FAQ) ...............................................70 Contacting Technical Support .......................................................70 Magma D ebug Utility.................................................................................................71 PCIScope Softwar e Utility........................................................................................72 Returning Mercha ndise to MAG MA ................................................74 APP ENDIX A NEED MORE PCIE SLOTS? .................................75 Multiple PCIe Expansion Sy stem Conf igurations..............................75 Fan- Out........................................................................................................................77 Verify your c onfiguration .................................................................................78 Dais y-Chaini ng ...........................................................................................................78 Verify your c onfiguration.................................................................................80 PCI e Card Conf licts....................................................................81 Powe r-On Seq uence f or Adv anced Conf igurations...........................81 Troub leshooting Adv anced Conf igurations ......................................81 Findi ng the Probl em Car d ..............................................................................83 APP ENDIX B COMPLIANCE ....................................................84 FCC..........................................................................................84 ii M A G M A Industry Canada......................................................................... 84 CE ........................................................................................... 84 iii M A G M A Preface Advisories Fiv e ty pes of adv isories are used throughout this manual to prov ide helpf ul inf ormation, or to alert y ou to the potential f or hardware dama ge or personal injury . They are Note, Important, Caution, Warning, and Danger. The f ollowing is an example of each ty pe of adv isory. NOTE Used to amplify or explai n a c omment rel ated to pr oc edural steps or text. IMPORT ANT Used to indic ate an important pi ec e of i nformati on or special “tip” to hel p you CAUTION Used to indic ate and prevent the foll owing proc edure or step from c ausing damage to the equi pment. W ARNING Used to indic ate and prevent the foll owing step fr om c ausing injur y. DAN GER o r STOP Used to indic ate and prevent the foll owing step fr om c ausing serious i njur y or signi ficant data loss. COMPATIB ILIT Y ISSUE Used to indic ate a known or potenti al c ompati bility iss ue between Mag ma and non-Mag ma har dwar e that may c ause malfuncti on. Disclaimer: We hav e attempted to identify most situations that may pose a danger, warn ing, or caution condition in this manual. Howev er, Magma. does n ot claim to hav e cov ered all situations that might require the use of a Caution, Warning, or Danger indicator. v M A G M A Safety Instructions Alway s use caution when serv icing any electrical component. Bef ore handling the Magma PCI-Express Expansion chassis, read the f ollowing instructions and saf ety guidelines to prev ent damage to the product and to ensure y our own personal saf ety. Ref er to the “Adv isories” section f or adv isory conv entions used in this manual, including the distinction between Dang er, Warning, Caution, Important, and Note. Alway s use caution when handling/operatin g the computer. Only qualif ied, experienced, authori ze d electronics p ersonnel should access the interior of the computer. The power suppli es produce hig h v oltages and energy hazards, which can cause bodily harm. Use extreme caution whe n installing or remov ing components. Ref er to the installation instructions in this manual f or precautions and proced ures. If y ou hav e any questions, please contact Magma Technical Suppo rt. W ARNING High voltages ar e pres ent i nside the expansi on chassis when the unit’s power c ord is pl ugged into an el ectric al outlet. Disc onnect the power c ord from i ts s ource before r emovi ng the s ys tem cover. Nev er modify or remov e the radio f requency interf erence shielding f rom y our workstation or expansion unit. To do so may cause y our installation to produce emissions that could interf ere with other electronic equipment in the area of y our sy stem. WhenWorking Inside a Computer Bef ore taking cov ers off a computer, perf orm the following steps: vi 1. Turn off the computer and any peripheral dev ices. 2. Disconnect the computer and peripherals f rom their power sources to prev ent electric shock or system board damage. 3. Disconnect any telephone or telecommunications li nes f rom the computer. M A G M A In addition, take note of these saf ety guidelines when ap propri ate: To h elp av oid possible damage to sy stems boards, wait f iv e seconds after turning off the computer bef ore remov ing a component, remov ing a sy stem board, or disconnecting a peripher al dev ice f rom the computer. When y ou disconnect a cable, pull on its connector or on its strain-relief loop, not on the cable itself. Some cables hav e a connector with locking tabs. If y ou are disconnecting this ty pe of cable, press in on the locking tabs bef ore disconnecting the cable. As y ou pull connectors apart, keep them ev enly aligned to av oid bending any connector pins. Also, bef ore connecting a cable, make sure both con nectors are correctly oriented and aligned. CAUTION Do not attempt to s er vic e the s ys tem yoursel f exc ept as expl ained in this manual. F ollow ins tall ation i nstr ucti ons closel y. Protecting Against Electrostatic Discharge Electro static D isch arg e (ESD) W arning Elec trostatic Discharge ( ESD) is the enemy of s emic onductor devic es . You s houl d al ways take pr ec auti ons to eli minate any elec trostatic c harge from your body and clothi ng before touc hing any semiconduc tor devic e or car d by using an elec trostatic wrist s trap and/or rubber mat. Static electricity can harm sy stem boards. Perf orm serv ice at an ESD workstation and f ollow proper E SD procedures to reduce the risk of damage to components. Magma strongly encourages y ou to f ollow proper ESD procedur es, which can i nclude wr ist straps and smocks, when serv icing equipment. Y ou can also take the f ollowing steps to prev ent damage f rom electrostatic discharge (ESD): When unpacking a static-sensitiv e component f rom its shipping carton, do not remov e the compone nt’s anti-static packaging material until y ou are ready to install the component in a computer. Just bef ore unwra pping the anti-static packaging, be sure y ou are at an ESD workstation or are grounded. When transporting a sensitiv e component, f irst place it in an anti-static container or packaging. vii M A G M A Handle all sensitiv e components at an E SD workstation. If possible, use anti-static f loor pads and workbench pads. Handle compone nts and b oards with care. Don’t touch the components or contacts on a board. Hold a boar d by its edges or by its metal mounting bracket. Rack-Mount Instructions Elevated Operating Ambient - If installed in a closed or multi-unit rack assembly, the operating ambient temperature of the rack env ironment may be greater than ro om ambie nt. Theref ore, consideration should be giv en to installing the equipment compatible with the maximum ambient temperature (Tma) Specif ied by the manuf acturer. Reduced Air Flow - Installation of the equipment in a rack should be such that the amount of air f low required f or saf e operation of the equipment is not compromised. Mechanical Loading - Mounting of the equipment in the rack should be such that a hazardous condition is not achiev ed due to unev en mechanical loading. Circuit Overloading - Consideration should be giv en to the connection of the equipment to the supply circuit and the ef f ect that ov erloading of the circuits might hav e on ov ercurrent protection and supply writing. Appropri ate consideration of equipment nameplate ratings shoul d be used when ad dressing this concern. Reliable Earthing - Reliable earthing of rack-mounted equipment should be maintained. Particular attention should be giv en to supply connections other than direct connections to the branch circuit (e.g. use of power strips). viii M A G M A Chapter 1 Introduction General Specifications The Magma 4 Slot PCI Express® to PCI Express® Expansion Sy stem is a general- purpose bus expansio n chassis f or the Peripheral Component Interconnect Express (PCIe) local bus. The expa nsion chassis is f ully compliant with the PCI Express Local Bus S pecif ication. This system consists of a PCI Express host card, a 1-meter iPass cable, th e 4 Slot PCIe expansion chassis and a set of rack-mount brackets. Item Description Host Card: Backplane: Enclosure: Dimensions: Weight: Standard Cable Length: PCI Express Bus Specification PCI Local Bus Specification: PCI Bridge Architecture Spec: Interconnect Bandwidth: Cooling: Power Supply: MT BF: Monitoring: Operating En vironment: Operating S ystems: Warrant y: Available Options: Low Profile PCI Express x8 host card 4 PCIe slots (expandable to 8 or mo re by chaining chases ) 1U Rack-mo unt 19" W x 1.73 5" H x 28 " D 27lbs or 12.25 kg 1-meter iPass cable Revision 2 Revision 2.3 Revision 1.2 8000 MB/sec or 8 GByte/sec T hree 15.8 CF M fans One fan in each power supply module 250W, 90-264VAC/5 A, 47-63 HZ, 1+1 redundant, hot swapp able power supply 4,500,000 hours see table on next page SNMP via Ethernet Audible Alarm 0º to 70º C Operating T emperatu re -55º to 125º C Storage T emperatu re 0% to 90% Relative Humidity, Non -condensing Windows XP/2000/Server 2003/Vista Mac OS X version 10.4. x + Red Hat Linux 9 1 Year Return to Factory 3-meter o r 7-mete r iPass cable MTBF Top Level Calculations 1 M A G M A EB4-1U-x8G2 SYS TEM Sub-assembly Power supply n+1 Fan(s) n+1 Ho st card Vertical Backplane Horizontal Backplane SNMP Module Total M TBF 2 Quantity 2 3 1 2 MTBF (unit) [Hours] 100000.0 40000.0 27000000.0 50000000.0 MTBF (all units) [Hours] 10000000000.0 1600000000.0 27000000.0 25000000.0 1 1 10000000.0 20000000.0 10000000.0 20000000.0 ~ 4,500,000 M A G M A Pre-InstallationInformation Bef ore using the Magma expansion chassis y ou should perf orm the f ollowing steps: Inv entory the shipping carton contents f or all of the required parts Gather all of the necessary tools required f or installation Read this manual Parts List The f ollowing parts are prov ided as part of your expansion sy stem: Item Qty Item 1 EB4-1U-X8 M ag ma expansi on c has sis 1 1-meter s hiel ded i Pass™ cable 1 Low pr ofile PCI Expr ess x8 host car d 2 Rail ins tall ation ears 2 U.S. Standard 115V power cor d 1 Quic k Start Guide Tools Required for Installation In order to complete the installation of the Magma expansion system you may need a Phillips-head screwdriv er, depending on the installation ty pe. 3 M A G M A Chapter 2 Hardware Installation The f ollowing steps wi ll guide y ou through the installation of y our Magma expansio n system. Electro static D isch arg e (ESD) W arning All PCI c ards are s usc epti ble to elec tros tatic dis charge. When moving PCI car ds, i t is best to carr y the c ards in anti -static pac kaging. If you need to set a PCI e c ard down, be sur e to place it inside or on top of an anti-static s urface. F or more i nfor mati on, s ee “Protecti ng Agai nst El ectr ostatic Dis charge” in the Pr eface. W ARNING High voltages ar e pres ent i nside the expansi on chassis when the unit’s power c ord is pl ugged into an el ectric al outlet. Disc onnect the power c ord from i ts s ource before r emovi ng the encl os ure c over. Turni ng the s ystem power off at the power on/off s witch does not remove power to components. High voltage is still pres ent. CAUTION Befor e touchi ng anythi ng insi de the enclos ur e, move to an ESD stati on and follow pr oper ESD pr ocedures. F ailur e to do so may result in el ectrostatic disc harge , damaging the c omputer or i ts components . F or mor e i nformati on, s ee “Protecting Agai nst Elec trostatic Discharge” i n the Pr efac e. STOP If your M ag ma expansi on c has sis was not purc hased directl y fr om Magma, you must chec k to ens ure that it does n’t contain any preinstalled PC Ie car ds. Chec k the rear si de of the chassis to s ee if any PCIe c ards ar e visibl e in the slots. If you s ee a PC Ie car d, you s houl d c ontinue install ati on using i nstr ucti ons pr ovided by your deal er. If no s eparate ins tructi ons are available, remove the c over by usi ng ins truc tions i n C hapter 4 Install C ards and Dri ves . T hen r emove the c ar d(s) as nor mal. If no PCIe c ard is visibl e, then c ontinue with the c abl e installati on. 4 M A G M A Before you Begin The sy stem’s ATX p ower supply is auto-switching. This mea ns that it will automatically switch to match whatev er source power y ou are using. Since all pro ducts ship with a US/Canadia n Standar d 125V po wer cord, y ou will need to use a locally av ailable power cord f or non-US Standa rd powe r sources. Install PCI Express Host Card Begin the installation of y our PCI Express (PCIe) host card by first powe ring d own y our computer. Use the procedures f or shutting down y our operating sy stem and shutting off power to y our sy stem prov ided in y our owner’s manual or sy stem documentation. The PCIe host card is a “h alf -height,” x8-capable PCIe card mounted to a “f ull-height” bracket as shown below: For low prof ile case applications, y ou may need to change the mounting bracket to the low p rof ile bracket that shipped with y our sy stem. This is done by remov ing the screws that hold the card to the bracket. Be sure y ou are using proper ESD procedures when completing this action. Once the host computer is off and all power cords disconn ected, remov e the cov er and insert the PCI Express host card into a v acant x8 (or x16) PCIe slot by gently pushing the card until it is f irmly seated. Then secure the card to the slot with a mounting screw. Notice that the PCI Express slots are located at a greater distance f rom the edge of the computer’s mother-board than are the standard PCI slots as illustrated in the following f igure. 5 M A G M A STOP YOU MU ST ONLY INST ALL TH E PCIe H OST CARD INTO A PCI EXPRESS SL OT. Only u se card s W ITH br acket s. This will ensur e that your PC Ie host card can onl y be i ns erted i nto a PCI e sl ot. Although PC I Expr ess cards without brac kets may fit into c onventional PC I sl ots, you run the ris k of damaging the PCI Express hos t c ard i f you ins ert it into a PCI sl ot. Pl ease ens ure that your hos t c omputer has PC I Expr ess slots and ins tall the host c ard only i nto a PC I Expr ess slot. For more inf ormation on using PCIe cards, please ref er to your computer’s user manual or sy stem documentation. Next check the DIP switch settings on the Magma Host Card as shown: Host /Expansion Switch (Default Host): As long as the card is used as Host, the switch should remain OFF. Mov e to the ON position only when the card is used as an Expansion Interf ace (EIF) in a Magma Chassis that supports this f eature. 6 M A G M A Bandwidth Switch (Default x8): This DIP switch sets the card’s PCIe interf ace bandwidth to either x4 or x8 as can be seen in the photo. For x8: Set pos. 1 & 2 to OFF (Def ault) right For x4: Set pos. 1=ON and 2=OFF For s Since the EB4 -1U- X8 sup ports x8 speeds, it is set in the x8 position by def ault. It should only be set to x4 if one is certain that the PCIe slot on the host PC supports only a x4 PCIe bandwidth. Install Chassis in Rack Locate a v acant 1U slot in y our rack that is within the reach of the one meter cable that came with y our EB4-1U- X8 Expa nsion Sy stem. Install the rails in the rack as shown belo w: Measure the rack f rom f ront to back so y ou can conf irm how long the r ail must be to f it properly . Installation of Rack Ears (Original) Install Rack Ears on both sides of the EB41U.. 7 M A G M A Use a 8/32 x 5/8 screws to mount the Rack Ears , as shown f rom the photo belo w. The screws are prov ided in the KIT Align the Rack Ear o n the side of chassis and secure it with the t wo screws, as shown f rom the picture 8 M A G M A NOTE Notic e that the hol es on the Bar N ut are spac ed unevenl y to acc ommodate differ ent rac ks. Using new Rack Ears ((with single mounting hole) Y ou can also use the new Rack Ear with single mou nting hole, as shown f orm the photo below. 9 M A G M A Use a 8/32 x 5/8 screws to mount the Rack Ears on both sides of EB41U, as shown f rom the photo below. The screws are prov ided in the KIT 10 M A G M A 11 M A G M A 12 M A G M A Next, assemble the Slide piece with the end bracket as shown and secure with 2 Panhead screws and locking nut. Ensure the Phillips screw head is located on the “open” side How to secure EB4-1U using Original Rac k Ears Install the Chassis into the Rack slide and secure it using Truss Head screws 8/32 X1 13 M A G M A 14 M A G M A Using New Rack Ears to Secure EB14 unit. Secure EB4-1U unit onto the Rack using the new Rack Ear with single-mounting hole. Use screw that came with the Rack. 15 M A G M A AttachPower and Expansion Cables Caref ully position the expansion chassis so that the supplied expansion cable will conv eniently reach f rom the host computer to the conn ectors on the back of the chassis. Connect one end of the iPass cable to the expansion chassis’ bottom iPass connector (labeled “IN” on top of the mobile tray ). Then conn ect the other en d of the iPass cable to the h ost card located in the host computer. Connect one end of the c abl e to the bottom iPass connector Connect the power cord to the powe r-in receptacle located at the rear of the enclosure. 16 Connect the other end to the hos t c ard. M A G M A CAUTION All cables attac hed to the expansi on chassis mus t be secur el y fastened. When you hear a “clic k,” it is pr operl y s ecur ed. If not sec urel y c onnected, the c onnectors may caus e inter mittent or l ost connecti ons . NOTE If at all possi ble, plug all power c ords from the expansi on chassis and your host c omputer into a shared power s trip, pr eferabl y one that has s urge and noise suppressi on circuitr y built i nto it. Laptop Installation (Optional) In addition to interf acing the EB4-1U-X8 expansion sy stem to a PC, y ou can now add a dditional PCI Express slots to y our laptop by installing Magma’s ExpressCard host and connecting it to y our chassis with a dedicated iPass-to-TDP cable f eaturing an iPass interf ace on one side and a TDP interf ace on the other. Attach one end of the PCI Express cable to the Magma ExpressCard module and the other end to the connector on the back of the Magma chassis. TDP side to Laptop iPass side to EB4-1U-X8 Chassi s 17 M A G M A Tighten the thumbscrews connecting the ExpressCard to the cable on one end an d v erify the other end is properly latched into the iPass connector of the chassis. In spite of the standardize d design of the TDP interf ace, it is not impossible to connect the male and f emale connectors upside-down. In order to av oid that, please note the prope r and imprope r concav ity orientation of the connectors as shown in the two cases below: Picture A shows the correct orientation: Picture B shows the Incorrect orientation: 18 M A G M A Bef ore inserting the Magma ExpressCard, power down y our laptop computer. Use the procedures f or shutting do wn and po werin g off y our sy stem prov ided in y our owner’s manual or sy stem documentation. Insert the Magma ExpressCard module with the logo side u p, into the ExpressCard slot on y our computer. Gently push the card until it is f irmly seated. NOTE The Mag ma Expr essCar d modul e c an onl y be used i n a c omputer sys tem that c ontai ns an Expr essC ard sl ot. It will not func tion i n CardBus or PCMCIA sl ots . NOTE If your l aptop’s Expres sCar d sl ot is “spring -loaded”, be s ure that your Expr essC ard is ins erted c orrectl y. It is ver y eas y for this style slot to parti all y rel ease a car d if touc hed slightl y. For more inf ormation on usin g ExpressCard mo dules, please ref er to y our computer’s user manual or system documentation. Recheck the Installation 19 M A G M A Check y our installation before powering up the Magma expa nsion chassis f or the f irst time. Although the power supply has an ov er voltage protection dev ice built into it, it may not "trip" in time to fully protect a dev ice that has been impro perly connected, or whose p ower cable has been damage d. CAUTION This product is pr ovided with a power s uppl y that automatic all y adj usts to input voltages between 100 to 240 Vac . A U .S. and Canadian 125 V power s uppl y cor d is provi ded with this produc t. If using this pr oduct outsi de of the U.S. or C anada, please use loc all y avail abl e power s uppl y cor ds Applying Power Correctly Starting Up: Y ou must apply power to the EB4- 1U- X8 exp ansion chassis BEFORE y ou power up y our computer. This wi ll allo w the higher number ed PCIe buses in the PCIe bus hierarchy to be at a stable state when the host sy stem issues its master power-on b us reset. In systems that perf orm automatic PCIe bus conf iguration, this wi ll all ow the co nf iguration code to recognize the PCIe bus hierarchy and any attached dev ices. UUU There are three O n/Off switches on the f ront of the chassis, directly behind the f ront panel, as well as L ED indicators to indicate powe r status. The master po we r switch is located on the f ar left and indiv idual power switches are located on each powe r supply . Y ou must first turn on each of the indiv idual powe r switches. Only then can the entire sy stem be turned on using the master power switch. 20 UUU M A G M A IMPORT AN T Unless both redundant power s upplies are tur ned on first, an alar m will sound once the master s witch is acti vated (the sys tem consi deri ng one of them as havi ng failed). These 1+1 r edundant power s upplies are hot s wappabl e, which means that the s ystem can full y oper ate on one power suppl y while the other is r emoved for repair/replac ement. If repl aci ng a power suppl y, be sur e to sec ure the new one in with its thumbscr ew for better grounding and nois e i mmuni ty. Windows Start Up As y our Windows computer starts up, y ou will see a small message box pop-up in the lower -right corner of the screen to alert y ou that Windows has f ound new hard ware. The sy stem does not require any Magma driv ers in order to operate properly with the x8 PCIe Host card. Howev er, it may require a driv er in order to work with the optional ExpressCard host, hence we added the next section. Y ou may now proceed to Chapter 3 Verify Installation. MAC St art Up Apple MAC OS computers will boot up witho ut any visible indicators that the Expansion Sy stem is connected. Go to: Chapter 3 Verify Installation. RedHat 9 Linux Start Up Similarly , RedHat9 OS computers will boot up without any v isible indicators that the Expansion Sy stem is connected. Proceed to: Chapter 3 Verify Installation. Software Driver In stallation: First it should be noted that a driv er is NOT required f or a non-Windows OS. It may or may not be required f or a Windows XP installation rd dependi ng on y our host sy stem BIOS. Y ou should f irst install y our 3 Party card and connect the sy stem as described earlier in this chapter. The Magma sof tware driv ers should be installed only if y ou are hav ing problems accessing the expansion or if y ou require the HotPlug f eature. Bef ore attempting to install anything on a Windows XP sy stem, y ou should ensure that y ou hav e set a new Restore Point. See y our Windows XP manua l to learn how to set a new Restore Point. Y ou should ensure that all data files are closed and that y ou hav e a current backup. 21 M A G M A STOP Befor e ins talli ng dri vers, you s hould ens ure that you have a c urrent sys tem bac kup of all of your important data. Failure to follow thes e i nstr ucti ons exac tl y c oul d r esul t in a s ystem loc k-up and potential l oss of data. You must als o disable your anti- virus softwar e befor e c ontinuing. For achiev ing the best results when installing the Magma driv er: Hav e a current system backup or restore point Reboot and Shut down each time y ou are prompted Be logged in as a ‘Sy stem Administrator’ Install Driver Open Magma’s support website at: http://www.magma.com/support/driv ers/index.html 1 Unless noted otherwise, y ou will f ind the latest univ ersal driv er f or all PCIe chasses listed on top of the older driv ers on that page. If y ou encountered a wi ndo ws error code prev iously, scroll down to locate a more specif ic driv er f or that error code. Click on the Open button to create a C:\ExpressBox f older on y our 2 computer. 3 Click on the Winzip button to unpack t he files into the C:\ExpressBox f older. 4 Click on the OK button to conf irm the files are unpacked. 5 Click on the Close button to close WinZip. 6 Go to the C:\ExpressBox f older and double-click on the Setup.exe f ile to start the driv er installation. 7 Follow instructions on the screen during the installation. 8 Reboot y our computer. The setup prog ram will p repar e the necessary files and present the f ollowing wind ow to start the driv er installation. 22 M A G M A Click Next to continue and rev iew the licensing agreement. Rev iew the licensing agreement. If y ou agree, click Yes to continue. If y ou do not agree, click No to exit. 23 M A G M A Rather than r estarting y our computer, it is recommende d that y ou click “No, I will restart my computer later.”, and then click Finish. Y ou will be instructed to SHUT DOWN y our computer in the next step. IMPORT AN T If installing the Mag ma dri ver di dn’t produc e the anticipated res ults pleas e s ee Chapter 6 for infor mation on how to contact Mag ma’s Tec hnic al s upport team. While ever y attempt was made to produc e as uni vers al a dri ver as possibl e, ther e may be compati bility iss ues with s ome s ys tems . At the s ame ti me, the driver is flexi ble enough to be customi zed to a cli ent’s s ystem by turni ng s peci fic inter nal func tions on and off. Shutting Down: STOP DO NOT TURN OFF TH E M AGM A EXPAN SION CHASSIS UNTIL YOU H AVE SHUT D OWN YOUR C OMPUT ER C OMPLETELY! It can c aus e a s ystem loc kup and loss of any uns aved data. When shutting y our system down, it is recommended that y ou first shut down the computer correctly , and then power do wn the Magma expansion chassis to av oid ‘computer lock -up’ and potential data loss. 24 M A G M A CHAPTER 3 Verify Installation Windows To v erify a successf ul installation on Windo ws, f ind the ‘My Computer’ icon and “right-click” on it. The n select ‘Manage’ f rom the pop-up menu. Next, click on ‘ Device Manag er’ i n the l ef tmost Computer Man agement windo w. Final ly , click on the View Men u an d select View Devices by Conn ection. Open ACPI (BIOS) O pen PCI Bus Click the ‘ +’ sign sev eral times until y our reach a PCI Express Root Port with a PCI Standard PCI -toPCI Bridge beneath it. When installed p roperly , y ou will see eight PCI Bridges (p orts) belo w y our system’s PCIe Root port. 25 M A G M A If the v erif ication is successf ul, y ou may now proceed to Chapter 4 and rd install 3 Party PCIe Cards as well as auxiliary peripherals, such as hard driv es into the chassis. P P If , howev er, the installation was unsuccessf ul, y ou may not see the PCI to PCI Bridge, or it will hav e a small y ellow below: in f ront of it as shown In that case proceed to Chapter 5 for Troubleshooting installation problems. Mac OSX When using Mac O S X n o additio nal sof tware or driv ers are ne eded. The op erating sy stem should automatically recognize the Magma h ost card and expansion chassis. Expansion Slot Utility The f ollowing screen may be display ed the f irst time y ou turn on y our computer with the Magma EB4-1U- X8 installed. Choose OK. MacOS X is pr ompting y ou to choose a PCI Express prof ile that maximizes the perf ormance of y our attached dev ices. The Magma host card can communicate up to a bandwidth of x8 to and from the expansion chassis and devices. Y ou should choose a prof ile that matches the conf iguration of all the cards installed in y our Mac. Magma recommends that y ou install the sy stem host card into a x8 slot in order to maximize throughput. In this example, the Magma host card is installed in slot 4 a nd ap pears as “Intel PCI-to-PCI Bridge Card”. 26 M A G M A If y our computer did not automatically prompt y ou to choose a PCI Express prof ile, y ou can locate this utility under Sy stem Library CoreServ ices Expansion Slot Utility.app. Apple System Profiler When using Mac OS X no a dditional sof tware or driv ers are needed. As long as y ou are usin g Mac O S X Versio n 1 0.4 or ne wer, the oper ating sy stem should automatically recognize the Magma expansion chassis. Select “About This Mac” unde r the Apple Icon Then click the “ More Inf o” button click on the Dev ices tab y ou should see a pci-bridge dev ice listed under PCI as shown below: 27 M A G M A Any PCIe Cards y ou install in the expansion chassis will appea r behi nd the pci-bridge dev ice. Mac OS 10. 5.x If any of these dev ices are not display ed as shown abov e, y ou should shut down y our system (computer f irst, then the expansion chassis) and reconnect the cables and the PCIe expansion host card to ensure that y ou hav e a solid connection. Then restart the Magma expansion chassis f ollowed by the computer. Next, try to v erify the installation again, as shown abov e. If y ou are still hav ing problems, contact Magma Technical Sup port at (858) 530-251 1. 28 M A G M A RedHat 9 Linux Once the EB4-1U- X8 has been installed in a RedHat9-based sy stem, its installation can be v erif ied by typing the f ollowing command lines: lspci –t Display s the ov erall structure of the PCIe expansion system lspci –vv Lists additional inf ormation about the PCIe switch (in our case it will list the Integrated Dev ice Technology (IDT) inf ormation. Ispci –vvv Display s the most comprehensiv e inf ormation about the expansion system. Belo w we’v e shown the output corresponding to the lscpi command: 00:00.0 Host bridge: Intel Corporation Memory Controller Hub (rev 20) 00:01.0 PCI bridge: Intel Corporation PCI Express Port 1 (rev 20) 00:05.0 PCI bridge: Intel Corporation PCI Express Port 5 (rev 20) 00:09.0 PCI bridge: Intel Corporation PCI Express Port 9 (rev 20) 00:10.0 Host bridge: Intel Corporation FSB Registers (rev 20) 00:10.1 Host bridge: Intel Corporation FSB Registers (rev 20) 00:10.2 Host bridge: Intel Corporation FSB Registers (rev 20) 00:10.3 Host bridge: Intel Corporation FSB Registers (rev 20) 00:10.4 Host bridge: Intel Corporation FSB Registers (rev 20) 00:11.0 Host bridge: Intel Corporation Unknown dev ice 4031 (rev 20) 00:15.0 Host bridge: Intel Corporation FBD Registers (rev 20) 00:15.1 Host bridge: Intel Corporation FBD Registers (rev 20) 00:16.0 Host bridge: Intel Corporation FBD Registers (rev 20) 00:16.1 Host bridge: Intel Corporation FBD Registers (rev 20) 00:1b.0 Audio dev ice: Intel Corporation 631xE SB/632xES B High Def inition Audio Controller (rev 09) lscpi command cont. 00:1c.0 PCI bridge: Intel Corporation 631xESB/632xE SB/3100 Chipset PCI Express Root Port 1 (rev 09) 29 M A G M A 00:1c.1 PCI bridge: Intel Corporation 631xESB/632xE SB/3100 Chipset PCI Express Root Port 2 (rev 09) 00:1d.0 USB Controller: Intel Corporatio n 631xES B/632xESB/31 00 Chipset UHCI USB Controller #1 (rev 09) 00:1d.1 USB Controller: Intel Corporatio n 631xES B/632xESB/31 00 Chipset UHCI USB Controller #2 (rev 09) 00:1d.2 USB Controller: Intel Corporatio n 631xES B/632xESB/31 00 Chipset UHCI USB Controller #3 (rev 09) 00:1d.3 USB Controller: Intel Corporatio n 631xES B/632xESB/31 00 Chipset UHCI USB Controller #4 (rev 09) 00:1d.7 USB Controller: Intel Corporatio n 631xES B/632xESB/31 00 Chipset EHCI USB2 Controller (rev 09) 00:1e.0 PCI bridge: Intel Corporation 82801 PCI Bridge (rev d9) 00:1f.0 ISA bridge: Intel Corporatio n 631xE SB/632xESB/31 00 Chipset LPC Interf ace Controller (rev 09) 00:1f.1 IDE interf ace: Intel Corporation 631xES B/632xESB Controller (rev 09) IDE 00:1f.2 RAID bus controller: Intel Corporation 631xESB/632xESB SA TA RAID Controller (rev 09) 00:1f.3 SMBus: Intel Corporatio n 631xE SB/632xESB/31 00 Chipset SMB us Controller (rev 09) 01:00.0 VGA compatible co ntroller: nVidi a Corpor ation Unknown dev ice 040e (rev a1) The hi ghlighted segme nt belo w of the lscpi command corresponds to the Magma expansion sy stem: 02:00.0 PCI bridge: Integrated Dev ice Technology , Inc. Unknown dev ice 8037 03:02.0 PCI bridge: Integrated Dev ice Technology , Inc. Unknown dev ice 8037 30 M A G M A 03:04.0 PCI bridge: Integrated Dev ice Technology , Inc. Unknown dev ice 8037 03:06.0 PCI bridge: Integrated Dev ice Technology , Inc. Unknown dev ice 8037 03:08.0 PCI bridge: Integrated Dev ice Technology , Inc. Unknown dev ice 8037 03:0a.0 PCI bridge: Integrated Dev ice Technology , Inc. Unknown dev ice 8037 03:0c.0 PCI bridge: Integrated Dev ice Technology , Inc. Unknown dev ice 8037 03:0e.0 PCI bridge: Integrated Dev ice Technology , Inc. Unknown dev ice 8037 0b:00.0 PCI bridge: Intel Corporation 6311ES B/6321E SB PCI Express Upstream Port (rev 01) 0b:00.3 PCI bridge: Intel Corporation 6311ES B/6321E SB PCI Express to PCI-X Bridge (rev 01) 0c:00.0 PCI bridge: Intel Corporation 6311ESB/63 21ES B PCI Express Downstream Port E1 (rev 01) 0f:00.0 Ethernet controller: Broadcom Corporation NetXtreme BC M57 54 Gigabit Ethernet PCI Express (rev 02) 10:00.0 Ethernet controller: B roadcom Corpo ration BCM575 4 Gigabit Ethernet PCI Express (rev 02) Net Xtreme 31 M A G M A Chapter 4 Install Cards and Drives rd This chapter prov ides inf ormation on how to install 3 Party PCIe cards into y our MAG MA expansio n chassis. More details o n the installation of indiv idual cards are prov ided by the card’s manuf acturer. This chapter is prov ided as a simple guide to hel p y ou install y our PCIe cards in the chassis. P P For the purpose of installation, the MAGMA expansio n chassis f unc tions exactly as a standard desktop computer chassis. Alway s f ollow the manuf acturer’s instructions f or installing their card or ha rd dr iv e on a desktop computer. IMPORT AN T rd We will pr ovide r easonabl e tec hnic al s upport with 3 Party PC Ie cards . H owever, i f you have verified a s ucc ess ful i nstallation of the MAGMA expansion s ys tem (as defi ned i n Chapter 3) , but experienc e diffic ulty i nstalling your 3 rd Party PCIe c ards , the c ard manufacturer shoul d be abl e to provi de the best s upport. P HHHUU P P UUHHH P Open PCIe Expansion Chassis Two (2) thumbscrews secure the PCIe slots in the expansion chassis. Loosen these screws and pull to slide the PCIe slots out. 32 M A G M A Install 3rdParty PCIe Cards CAUTION When i nstalling PC Ie car ds, pl ease ens ure that the i nput c urrent rating s pecified on the AC input l abel is not exc eeded. Installing 3rd Party PCIe Cards The EB 4-1U- X8 chassis prov ides space f or up to four (4) PCIe cards. Generally , it makes no diff erence which PCIe slot y ou use when rd installing y our 3 Party PCIe cards in the MAGMA expansion chassis, unless specif ied by the card manuf acturer. As can be see n in the f ollowing grap hic, each of the f our PCIe slots has a sliding slot guide to allow y ou to install any size PCIe card. Simply loosen the adjustment screw f or the slot you are using and slide is f orward or backward until the card f its snugly . Then tighten the a djustment screw a nd secure the card to the slot cov er using the screw prov ided. P P If y our PCIe card is too short f or the adjustable card slot guides, y ou can rotate the slot guard to make if f it. Simply loosen the adjustment screw f or the slot y ou are using and slide the guard to piv ot hole, as shown, and remov e it. 33 M A G M A Next, rotate the slot guard 180° and reinsert it. Finally , adjust the card slot guard to f it the card’s length. Be sure to install y our PCIe cards f ollowing the PCIe card manuf acturer’s recommendations. Some PCIe card manuf acturers recommend that y ou install their software driv er(s) prior to installin g the hard ware. If this is the case, y ou should install their driv er bef ore y ou connect and power up the expansion chassis. Make sure that all PCIe cards are f ully s eated in their connectors. When correctly seated in its connector, y ou will notice a f irm resistance wh en y ou pull up gently on the card. To keep the cards in place, secure them in the enclosure with their retaining screws (supplied with the MA G MA expansion chassis). IMPORT AN T The sheer number of PC Ie car ds and device dri vers avail abl e makes it i mpossibl e for M agma to full y test and certify all available PCIe c ards for us e i n the MAGMA expansion c hassis. Our best advic e to you i n this r egar d is to i nsist on full PCIe Specific ati on compli anc e from your c ard and s ystem vendors. Car ds and sys tems s hould be at least PCIe Specific ati on Revi sion 1.0 compli ant or better. Complianc e in your s ystem motherboard, PC Ie cards , and c onsol e firmware ( or BIOS) is your bes t assur ance that ever ythi ng will ins tall and oper ate s moothl y. Not all PC Ie c ards are as " well- behaved" as they shoul d be. Someti mes si mpl y movi ng a PCIe c ard that is havi ng a pr obl em to a different slot, or reordering your car ds i n their slots, will allevi ate "behavi or" problems . System Should Be Upand Running Apply power to the MAG MA expansion ch assis f irst, then po wer u p the computer. Use the procedures detailed in Chapter 3 to conf irm the card installation(s) in the Windows Dev ice Manager or App le Sy stem Prof iler. When ev erything is f unctioning correctly, y our Windows Dev ice Mana ger should look something like this: HHHUU 34 UUHH M A G M A rd If y ou discov er that any of y our 3 Party PCIe cards contain a y ou hav e a problem with that card. Ref er to Chapter 6 Troubleshooti n g f or further guidance. HHH UU UU UUUU UUHHH SNMP Featuresand Configuration SNMP Features Magma’s EB4- 1U- X8 chassis supports the Simple Network Mana gement Protocol f or remote monitoring and administration by off ering the f ollowing f eatures: Internal Temperature monitori ng External Temperatur e monitoring Clear Alarm button monitoring Swap pable f an status (f or f ans 1,2 and 3 in the f ront) Powe r supply 1 status Powe r supply 2 status Powe r supply f an 1 status Powe r supply f an 2 status 10 Traps are def ined to alert the SN MP serv er in case of ov erheat or f ailure in any of the subsy stems mentioned abov e Remote chassis turn on Conf iguration retriev al v ia standardized MIB f ile interf ace (see Retriev ing the MIB f ile section) SNMP Configuration To ensure that y ou can successf ully monitor y our new sy stem, y ou will need to connect it to a local or priv ate hub using a standard RJ45 Ethernet Cable. Connect one end of the cable to the RJ45 port, located on the rear of the chassis, and the other end to y our local area network connector. In case y ou connect the chassis to a local computer/laptop be sure to use a Hub with a regular network cable or a crossov er cable without a Hub. The SN MP module in the EB4-1U- X8 system is conf igured f or DHCP access (though this setting can be changed as described in the next 35 M A G M A section). Once the chassis is turned on it will be assigned an IP address by y our network’s DHCP serv er. If y ou hav e access to y our network’s DHCP serv er make sure to look up and write do wn that IP address. In any other case y ou will need to use the IPsetup.exe utility to discov er the IP address that was assigned to the chassis. It can be downloaded at: http://www.magma.com/support , Click Driv ers and Utilities, search f or IPsetup.exe Double click on the utility icon af ter y our chassis has been connected to the network and powered on. It will then identify y our chassis based on its MAC address and display the f ollowing inf ormation: In this case the IPsetup utility has found the EB4-1U- X8 chassis at IP address 192.168.1.10 . To v erify we’v e successf ully detected the EB4-1U- X8 on our network press on the Launch Webpage button or open y our browser and direct it to the new f ound IP address of the chassis (in our case it will be: http://10.203.0.186). CAUTION Aside fr om r eading an IP addres s, the IPs etup.exe utility can be used to set an IP address other than the one as signed i nitiall y by the DHCP s er ver— usi ng the Set button. It is r ec ommended, however, not to us e the utility for this purpose since we will loose connec ti vity wit h the c hassis until the mac hine r unni ng IPsetup.exe obtains an IP addres s in the same IP subnet. T he next s ecti on will show a preferred way of acc omplishi ng this via the br ows er interfac e. In cas e you need to bac k-tr ac e any of these steps, you c an al ways reset the c hassis bac k to its factor y s etti ngs. 36 M A G M A Configure Network Settings Open y our browser and enter the IP address in the URL windo w and press Enter. The f ollowing bro wser win do w will ope n up: The initial pag e prov ides status inf ormation and no username or password is required. If the main power switch is off, then this page will show the IP Address that is currently assigned to the chassis, the IP Address that will receiv e trap inf ormation, the temperature set tings and that the chassis is powered off . To make changes to y our settings y ou will need to f ollow the “Chassis Settings” Link. This page is password protected and bef ore access is giv en the f ollowing dialog wil l appear The factory settings will define the User name to be “default” and the password to be “magma”. Enter these values in the appropriate field and select OK. If the username and password have not been changed from the factory settings, the Device Network Settings page will appear. If not see your network administrator for the correct user name and password. To change the IP address, enter the new static IP address in the IP Address f ield. Enter the new subnet mask in the Network Mask f ield. Enter the IP addresses f or the Gateway and the D NS Serv er in the appropri ate f ields. Finally , enter the network name of the EB4-1U- X8 in the DHCP Dev ice Name field f or use when accessing the chassis when DHCP is enabled. If y ou wish to use DHCP, enter 0.0.0.0 in the IP Address f ield. When y ou hav e finished conf iguring the network settings, you can either conf igure the SNMP settings as described in the next section, change the def ault user name and password, or sav e the current changes by clicking on the Submit New Settings button at the bottom of the screen. Now y ou can connect y our chassis to the network. To f ind the IP address assigned by your DHCP serv er, look in the DHCP serv er’s list of attached dev ices f or the name y ou assigned to y our EB4-1U-X8 chassis. The def ault name is Magma_EB4 -1U. 37 M A G M A Configure SNMP Settings If y ou are adding y our EB4-1U-X8 chassis to an existing SNMP network, or if y ou are planning to trap SNMP errors, y ou will need to conf igure the SNMP settings f or use with y our SNMP agent. The def ault v alues f or the SNMP settings are shown in the f ollowing graphic. The EB4 -1U- X8 chassis monitors two temperature sensors; (one in the f ront of the chassis and one in the rear of the chassis); three f ans; and two redundant power supply modules. To conf igure these v alues f or y our SNMP network, simply change the def ault v alues to match y our requirements. Change the Read Community Name and Write Community Name f ields to match those required by y our SNMP network. The def ault v alue is public. Change the Trap Destination IP Address to the IP address of the computer getting the SNMP data. The def ault Trap Destination IP address in the abov e example was: 10.203.11.15. Change the Alarm Settings f or both the Front and Rear Alarm settings by entering both a high and low temperature in t he appro priate f ields. Any time the temperature in the chassis changes abov e or below these limits, an audible alarm will sound and the Temp. Light will change color f rom green to red. The same applies to the bottom PWR LED, in case one of the redunda nt power suppli es f ails. Aside f rom the LEDs changing colors, an alarm will sound in both cases, which can be reset by 38 M A G M A pressing the black reset switch in the middle. The Locator LED v isually display s traps and can be turned off by pressing either the white pushbutton in the f ront or the one located in the back of the chassis. When y ou hav e finished conf iguring the SNMP settings, y ou can either conf igure the network settings as described in the prev ious section, change the def ault user name and password as desc ribed below, or sav e the current changes by clicking on the Submit New Settings button at the bottom of the screen. Change User Name and Password This section al lo ws y ou to change the def ault user name (default) a nd password ( mag ma). To chan ge the user name, simply enter y our new user name in the user name f ield. To change y our password, enter y our new pass word in the pass word f ield. Enter it again in the password(again) f ield. The p assword in b oth f ields must match bef ore they can be accepted. Re set to Default Values Y ou can restore y our EB4-1U-X8 chassis to the f actory def ault v alues by pressing and holding the Alarm Reset Button f or 10 seconds the Powe r LED will blink durin g this 10 second period. When all v alues hav e been restored, the LED will stop blinking and turn off. When y ou hav e finished changing the def ault user name and password, y ou can either conf igure the network settings or conf iguring the SNMP settings as described in prev ious sections, or sav e the current changes by clicking on the Submit New Settings button at the bottom of the screen. IMPORT AN T The user name and p asswo rd fi elds ar e c as e-sensiti ve. 39 M A G M A Configure your SNMP Agent If y ou use an SNMP agent to help y ou monitor y our network, y ou will f ind all necessary monitoring inf ormation in the MIB f ile. Retrieving the MIB File The MIB f ile is av ailable f or download at http://www.magma.com/support, select Driv er and Utilities and then search f or MIB. After y ou click on the MIB f ile link, the inf ormation y ou need to conf igure y our SNMP agent will be display ed on the screen in Notepad (or equiv alent text editor). To sav e this inf ormation click on File Sav e As, then switch the entry “Sav e As Ty pe” to: “All Files” as shown below: 40 M A G M A Once the MIB f ile is sav ed it can now be copied and load ed locally or to a remote serv er. Accessing the various SNMP functions Once the MIB f ile has been loaded to an SNMP serv er (v ia a front-end sof tware ty pically called a MIB Browser) we can read in status inf ormation and set up specif ic f unctions otherwise not av ailable v ia the Web interf ace. The MIB Browser (or eq uiv alent f ront-end SNMP software) will display the Magma chassis MIB contents in an explorer-like, Tree interf ace. A snapshot f orm the MIB Browser by iReasoning is shown below: 41 M A G M A Under the MIB Tree, the Magma Chassis will hav e status inf ormation that can be read by expanding the respec tiv e folders. This inf ormation is also av ailable in the Web interf ace mentioned prev iously. In addition, if we expand the sendAction f older (as shown abov e) we gain access to “writable” f unctions that essentially allow us to remotecontrol the chassis. Remote Chassi s Reset (turnPowerOffOn) This f unction allows us to remotely turn the chassis off and on. Right-click on it, and a n options menu will app ear. Select the Set command: 42 M A G M A A dialog box will open wher e we can set the integer v alue to either: “1”= True (Turn ON) “0”= False (Turn OFF) IMPORT AN T In order to s ucc ess full y appl y this functi on you must first s et the SNMP Power-on J umper i n the position between PS_ON and ON_BY_MCU. This is not the default position of that jumper . Additionall y, the c hassis’ master on/off s witc h as well as each of the redundant power s upplies’ s witc hes mus t be turned ON. Remote Slot Power (turnSlot_x_OffOn) to the Chassis This f unction allows us to remotely power on specif ic slots in the chassis without it being con nected to a Host sy stem, but v ia the RJ -45 Ethernet interf ace only. The X in the name abov e ref ers to slots 1-to-4. In a similar manne r to the turn PowerOffOn f unction, each of the f our turnSlot_x_OffOn f unctions accept an integer v alue of “1” to turn power ON to the respectiv e slot and “0” f or turning it OFF in the Set command. IMPORT AN T In order to s ucc ess full y appl y this functi on you must first dis abl e the HotPlug and enable the Ind epen dent Po wer setti ngs in the Alter nate Functi on DIP s witch . H aving both turned on will c ause erratic behavi or onc e the H otplug s ys tem tries to s hut down power to a sl ot otherwis e forc ed on by in dependent power. Additionall y, the c hassis’ master on/off s witc h as well as each of the redundant power s upplies’ s witc hes mus t be turned ON. Finishing Touches After y our system is working prop erly , replace any empty slots with slot cov ers, replace the host computer cov er, and the close the expansion chassis carriage. 43 M A G M A “Hot-Swappable” PCIe Card Installations rd New PCI Express technology allows y ou to remov e y our 3 Pa rty PCIe cards f or maintenance or repl acement – witho ut shutting do wn the sy stem. The EB 4-1U- X8 expansions sy stem supports Hot Plugging/Hot Swap ping of cards as def ined by the PCI express specif ications. By design, this f eature allows the host PC to gracef ully remov e power to a slot, so that a PCIe card can be remov ed and replaced. It then powers on the ne w card in coord ination with the PC’s operating sy stem. By def ault, the EB4-1U- X8 ships with this f eature turned on. IMPORT AN T For this feature to wor k, you need to ins tall the M agma H otPlug software dri ver. See C hapter 2 for i nstr ucti ons on how to download the lates t s oftwar e for your s ystem. IMPORT AN T Ther e are c as es i n whic h you would wish to turn off this featur e, especi all y if the PCIe c ards you pl an on installing in the EB4-1UX8 chassis r equire or adhere to a different ti ming budget than allowed in the PCIe s pecifications. In order to turn off Hot-pl ug/Hot-s wap, toggle the top actuator on the Chassis Alternate F unc tion DIP Switc h from its default right posi tion to the l eft as shown bel ow: If you have any doubts, pleas e c hec k wi th you car d’s vendor that no such constr ains exi st for this car d. COMPATIB ILIT Y ISSUE A doc umented c ompati bility iss ue exists between an Apple’s MacBook Pro and G5 s ys tems in conjunc tion with the EB4-1UX8 chassis on which is c onnected an ATT O T echnologies’ UL5D PCIe SC SI adapter. In this configur ati on, the Hot Plug feat ure needs to be disabled, other wise the s ystem won’t boot. 44 M A G M A Each of the PCIe slots is controlled by a Hotplug (HP) pushbutton. The buttons are labeled 1-4 in silkscreen on top of the card carriage: HP Slot 1 Button HP Slot 2 Button HP Slot 3 Button HP Slot 4 Button Simply press the Attention Pushbutton corresponding to the slot y ou wish to “po wer-d own.” Th e po wer will no w b e remov ed f rom that slot so that the card can be r eplaced. All other PCIe cards r emain f ully f unctional, as they are independ ent of this slot. Below is the outlin ed procedure step-by -step: Procedure for hot-un-plugging a PCIe plug in card: 1. Giv en a stable Windows-based sy stem booted with the Magma chassis, an applet on the right hand side of the start menu bar should appear depicting a card with a green arro w abov e it. Double click on the applet. 2. A dialog should app ear with the title “Saf ely Remov e Hardwar e” in the dialog will b e a list of dev ices that may be remov ed f rom the system. Within this list will be the cards currently plugged into the chassis. Select a device and click on the “Properties button”. 3. If the dev ice is currently in the Magma chassis, the location will show “Magma chassis x slot y”. Where x identif ies the phy sical chassis and y identif ies the slot the dev ice is plugged into. After verifying that this is the device to be removed, click on the OK button to close the new dialog. 45 M A G M A 4. The prop erties dialog should close and the original “S af ely Remov e Hardware” dial og should remain. Click on the Stop button of the dialog. 5. A dialog with the title “Stop a Hardware dev ice” should appear. This dev ice is used to conf irm that the user wishes to stop this dev ice. Click on the OK button of the new dialog. 6. After a brief period a pop up will appea r telling the user that the dev ice may be remov ed saf ely, and the dev ice will be remov ed f rom the list of the original dialog. In the chassis, press the Att ention Button that corresponds to the slot where the device is located. 7. An LED, labeled Sx PWR ATTN (wh ere X corresponds to the slot number) will begin to f lash. The LEDs are located on the v ertical backplanes towards the back edge of the chassis as shown belo w: Note: If, by mistake, you’ve pressed the button corresponding to the wrong slot, then press it again within 5 seconds and the hot plug request will be ignored. Otherwise continue to step 8. 8. 46 After 5-6 seconds the LED will stop f lashing and turn off completely. M A G M A Remove the card and replace it with a new one. Then press the button again. Remov e and replace the respectiv e PCIe card IMPORT AN T Ideall y the PCIe c ard that was removed from the s ystem will be repl aced with an identic al, wor king c ard. R epl acing that car d with one that has a different func tion or purpos e may c ause the s ystem to cr as h due to a mis matc h i n the resources pr e-all ocated by the operating s ystem. 9. The LED should start f lashing again. If power should not be applied to this slot, immediately press the button again and the LED will stop flashing and remain off, otherwise go to step 10. 10. After 5-6 seconds the L ED will stop f lashing and remain on. After a brief period the new device will be recognized by the syste m, and it should be added back to the list in the “Safely Remove Hardware” dialog. 47 M A G M A PCIe Expansion Solutionswith the EB4-1U-X8 In the f ollowing section we will take a look at possible PCI Express expansion solutions using Magma’s EB4- 1U- X8 chassis. Digi Design Pro Tools® Pro Tools® is a comprehensiv e solution f or prof essional music editing. It offers adv anced capabilities f or recording and manipulation of music by controlling a large number of music tracks. This is d one using at l east one PCIe card with multiple Digital Signal P rocessor (DSP) chips onboard. From a sy stem’s standpoint, the more PCIe cards (and hence DSP chips) are av ailable, the more tracks can be edited and recorde d digitally f or a better f inal result. By combining the power of PCIe expansion throug h an EB4-1U- X8 sy stem with multiple such PCIe car ds, the same PC can r ecord substantially more tracks. Additionally the same system may contain a storage controller (SAS/SA TA/SCSI) and the ha rd driv es f or actually recording the tracks – all inside one box, f reeing much of the PC hard ware f or other tasks. The table bel ow sho ws a comparison betwe en PCI and PCIe cards in terms of the number of recorded tracks. Sampled Frequ ency 48KHz 192 out of 192 96KHz 96 out of 96 192 KHz 36 out of 36 48KHz 48 No. of tr acks out of maximu m possib le Description/Not es Using Mag ma ExpressBox2 PCIe Expansion s ystem 144 out of 192 96KHz 96 out of 96 192 KHz 13 out of 36 Using Mag ma CB2 PCI Expansi on M A G M A Note that the maximum number of tracks is achiev ed with all PCIe cards inserted directly into the PC. Using the EB4-1U- X8 expa nsion chassis we note the diff erence in track counts is no la rger tha n 20 % compar ed to a scenario wher e all cards reside in the PC, taking up all av ailable slots. Video Card expansion solutions Magma’s EB4-1U- X8 chassis can be used to add a hig h e nd PCI express v ideo card to a PC sy stem or laptop that were n ot equipp ed with such a dev ice f or v arious reasons: cost , phy sical space, heat dissipation etc. A question then arises as to ho w g ood of a perf ormance we can get by utilizing the exp anded PCIe bus and high end v ideo card . In order to obtain a def initiv e answer we turn to Futuremark’s 3DMark® b enchmarking sof tware. Since its introd uction at the turn of the millennium, 3DMark® has become the de-f acto standard in Video card perf ormance testing and ev aluation. The 3DMa rk® suite is optimized to work und er Windo ws Vista and supports the latest DirectX and deriv ativ e 3D multimedia technologies. In this env ironment, a low-pr of ile Dell Powe rEdge se rv er (with a built-in ATI ES1000 v ideo chipset) was tested with v arious external PCIe video cards. 49 M A G M A Since the built-in v ideo chipset doesn’t support 3D ren dering need ed to run 3DMark® , we f irst established a baseline by installing an entry lev el PCIe card into an EB4-1U-X8 expansion chassis (Nv idia Quadro NVS440). All subsequent benchmarks were completed usin g higher pe rf orming v ideo cards and documented in the table below: Test ed Vid eo C ard SM2.0 B en chm ar k Sco re SM3.0 B en chm ar k Sco re 151 182 229 479 ATI 1650 Pro 757 773 NVidi a GeF ORCE 7600GS 861 768 1048 979 NVidi a GeF ORCE 7900GS 1582 1528 ATI 1900XT 2286 2504 3678 3412 3774 3843 NVidi a Quadr o N VS440 NVidi a Quadr o F X560 NVidi a Quadr o F X1500 NVidi a Quadr o F X5600 NVidi a 8800 Ultra The comp arison table sho ws perf ormance improv ements f rom 263% to 2111% bet ween the baseli ne and the high est -end v ideo card tested (the NVidia GeFORCE 8800 Ultra). In other words, by expanding the PCI Express bus, the EB4-1U- X8 sy stem was able to f acilitate an ev errd improv ing benchmark result limited only by the 3 party card’s perf ormance and the bandwidth limitations of the bus itself. For more details on the actual test methodology and an explanatio n of the benchmark f igures please ref er to: www.f uturemark.com 50 M A G M A High Throughput storage solutions The gro wing d emand f or storage solutions in the past f ew y ears was one of the major cataly sts behind the exponential gro wth in hard driv e capacity . Moreov er, a new bre ed of f aster and more eff icient interf aces hav e emerged in order to prov ide higher throu ghput while maintaini ng the lowest possible de lay s in accessing our data. One such solution is A TTO Technol ogy ’s FC-44ES Fibre Channel PCIe controlle r. It can reach data transf er rates of up to 800MB/sec per chan nel when taking f ull adv antage of the PCI Express bandwidth. But what if this impressiv e perf ormance is still not enough to satisfy a bandwidth-hun gry application such as a multi-d imensional database, or a hig h-def inition, real time, v ideo streaming broadcast? In that case, the EB4-1U-X8 becomes an obv ious solution by allowing the user to combin e up to 4 Fib re Chan nel controllers into one sy stem, which, in turn, only compromises a single PCIe slot out of the ones av ailable in the host computer. Assuming we acqui red the necessary hard ware (controllers, the f iber medium and an array of high-speed storage dev ices) the question that arises is: How can we quantify the power of multiple controller cards? The answe r lies in an open-sou rce appl ication, v astly popular among those working in the storage industry: Iometer® (see screenshot below) Iometer® is a sof tware-based I/O exerciser capable to test and characterize stand- alone as well as clustered storag e sy stems. 51 M A G M A Dev eloped originally by Intel as a proprietary tool, it ev entually became part of the Open Source Dev elopment Lab (OSDL) f rom which point it has undergon e sev eral rev isions and updates. Going back to the Fibre channel host controller cards, one of the f eatures that the ATTO FC-44 ES supp orts is the creation of multiple, small v irtual driv es that can be striped by the OS f or f aster access. What that translates to is the ability of two cards to communicate amon gst themselv es at the f astest possible rate, unaff ected by delays otherwise encountered by mov ing parts in an actual disk driv e. By using this method combined with the Iometer® application, one can benchmark the communication channel a nd v erify that the PCIe express link is utilized to its f ullest potential. In the example b elo w, a single A TTO FC-44ES card was installed i nto one of the 4 PCIe expansion slots prov ided by the EB 4-1U- X8 chassis. It was then connected v ia f iber optic cables to a second FC-44ES card (set to simulate a f ibre disk array , by using a striped set of small v irtual driv es ). Three tests wer e perf ormed using Iometer. In the f irst, an equal amount of read and write threads were exercised bet ween the two cards. The f ollowing two tests f ocused on either all-r ead or all- write threads. The test results are shown in the table below: I/O Test t yp e Throughput [MB yt e/sec] 50% R eads; 50% Writes 1003.3 100% Reads 696.1 100% Writes 677.7 The results show a n agg regate thro ughput exceedi ng 1G By te in the case where reads a nd writes are ev enly split 50-50 and a slower, more realistic rate when only a single ty pe of threads was exercised. 52 M A G M A Chapter 5 Troubleshooting Bef ore discussing a troubleshooting methodol ogy f or locating the problem we will f irst introduce sev eral indicators and conf iguration switches that prov ide general and specif ic inf ormation f or this process. Status Indicatorsand configuration switches for 01-04978-03 Host Card The EB4- 1u-x8G2 host card is set to x8 by def ault and can be v erif ied by SW2. Page 7 in manual D2 -- x8 D6 --x4 D7 --x2 D8 --x1 D9 -- Loss of Lock/Loss of Signal asserted (when ON) D12 -- PCIe CLK good (when ON) D14 -- Reset# asserted (when ON) If the D12 LED is ON and the D14 LED is OFF and all other link LEDs are OFF that means that no link has been established, check both host and expansion to see, as one can be indicating proper link operation(i.e. expansion) while the other (i.e. host) can be indicating no link (all link LEDS OFF). Also note, that after the f irst time the power is applied and not turned off the D12 (clk good) LED will remain ON until the main power gets turned OFF to the system. Status Indicatorsand configuration switches Under no rmal op erating conditions the status indicators are f or internal Magma troub leshooting while the conf iguration switches/jumpers should remain in their def ault state preset by Magma f or best compatibility . 53 M A G M A Howev er, should a problem occur with the chassis (or a special mode of operation be solicited by the client) we included bel ow explan ations as to what all these items are and how they should be treated: Chassi s Power Good Indicators: As long as all po wer supply v oltages are properly regulated to +5V, +1 2V, +3.3V and +3.3V AU X, the LEDs D27, D29, D30 and D28 will light up respectiv ely as f ollows: Chassi s RESET Indicators: Under normal ope rating conditions RESE T lights f or the slots should be off, with the exception of RST# CB and the moment when any slot RESET is applied (RST S L1-4#). In case that the chassis is on but the Host system is turned off , then the MASTER RS T# will be on as shown bel ow: Chassi s Signal Detect Indicators: This group of LEDs (D1-D10) indicates the existence of PCIe traffic on the receiv er side on all PCIe lanes. x8 PCIe traff ic, will turn on 8 LEDs. During normal op eration all L EDs should be ON with the exception of D9 and D10, whose rol e is to indicate loss of signal. If the Host system is off, all LEDs should be off ev en if the chassis itself is turned on. 54 M A G M A EB4-1u-x8-G2 Cha ssis Slot Power Indicators: When lit, the red Power Fault LED f ound on the left side of each expansion slot indicates lack of power at t he respectiv e PCIe slot. This wou ld be a normal condition if the chassis is powered on whil e the Host system is turned off (RESET state) or if power to a specif ic slot has been remov ed f or it to be swapped as part of the Hot-Plug procedure : If the Host system is turned ON but there is no PCIe card in the slot, the Powe r Fault LED will be ON as well, as can be seen below: In all other cases of normal operation, the respectiv e green PWR EN LED should be lit f or each slot – whether a PCIe card is inserted or not. Chassi s Linkup and Activity Indicators: These indicators wer e purposely made v isible through the card carriage when it is closed in order to allow a quick v erif ication of connectiv ity between Host and chassis. L ED Cluster 55 M A G M A The three LED clusters display Link (L) and Activity ( A) status f or Uplink communication with the Host; Downlink communication with a Daisy - Chained chassis (see Appendix A f or Daisy -Chain setups) and communication with the f our PCIe expansion slots as f ollows: LO – Link Out: Downlink/Daisy -Chained dev ice is trained and linked AO – Activ ity Out: Activ ity on the Downlink channel LI – Link In: The EB4-1U-X8 is trained to Uplink dev ice/Root Complex AI – Activ ity In: Activity on the Uplink channel L2 – Slot 2 is trained and linked A2 – Activ ity on Slot 2 L1 – Slot 1 is trained and linked A1 – Activ ity on Slot 1 L3 – Slot 3 is trained and linked A3 – Activ ity on Slot 3 L4 – Slot 4 is trained and linked A4 – Activ ity on Slot 4 For example, the scenario pictured below sho ws a linked and activ e chassis being connected v ia the iPass interf ace to a Host sy stem (LI – Lit; AI—blinking), while the cards in slots 1 and 2 are PCIe-trained and linked but show no activ ity in terms of transf erring data (L1 & L2 – Lit; A1 & A2— Off ). SLOT 2 SLOT 1 56 iPass M A G M A Chassi s Alternate Function DIP Switch: The alternate f unction DIP switch (SW8) is located o n the i nner sid e of the backplane, which requ ires the card carriage be p ulled out to its maximum extension, as shown below: SW8 DIP Switch The Alternate f unction DIP switch controls the f ollowing thre e f unctions: Hot Plug, Clock and power deliv ery behav ior. 57 M A G M A Actuator (1): Turns the Hot Plug f unction ON and OFF. Its def ault position is ON, i.e. Hot Plug is enabled in which case a Hot Plug controller superv ises powe r deliv ery to the PCIe slots. Actuator (2): Turns on a local clock gener ated by the chassis itself independent of that of the Host system. Its def ault position is OFF, i.e. the system Clock comes f rom the Host system (uplink). Actuator (3): Allows to turn on power to the expansion slots without a Host system being connected, by using the SNMP interf ace v ia the chassis’ RJ-45 Ethernet connector. Its def ault position is OFF, i.e. no outside agent controls power to the slots. Actuator (4): Not in use. SNMP Power-On Source Jumper: The SNMP module inside the EB4-1U- X8 chassis f eatures a power-on source jumper to select between local power- on (v ia the master on/off switch) and remote turn-on (v ia the SNMP software/f ront end). 58 M A G M A In order to gain access to this module (and respectiv e jumper), the top cov er of the chassis needs to be remov ed. Dismount the chassis from the rack (if applicable) and caref ully remov e the 11 screws holding the chassis cov er in place. The SN MP module will be located on y our left looking at the chassis f rom the f ront: Now locate the J6 jumper as shown belo w: For local power-o n set the jumper between P S_ON and ON_BY_SW (Def ault) For Remote power-on set the jumper betwee n PS_ON and O N _ B Y_ MCU 59 M A G M A Locating the Problem If y ou are hav ing trouble with the Magma expansio n system, f irst v erify that all cards and cables are seated properly . Be sure y ou f ollowed the instructions in earlier sections of this User Guide. Alway s remember to powe r On and Off correctly when rechecking y our installation. If y ou are still hav ing problems, try these troubleshooting steps: My Computer Can’t Find the PCIe Expansion Sy stem When Nothing Works My PCIe Card Doesn’t Work My system hangs bey ond a certain number of add-in cards The Magma PCIe Expansion Sy stem is correctly display ed as a “PCI standard PCI-to-PCI bridge” in Windows Dev ice Man ager and as a “pci-bridge” in the MAC Apple Sy stem Prof iler and in Linux. When connected and f unctioning correctly , this Expansion Sy stem will be display ed as f ollows: Windows MAC If this is not what y ou see when y ou v erify y our installation, the f ollowing troubleshooting steps may help y ou locate and resolv e y our installation issues without hav ing to call Technical Support. 60 M A G M A My Computer Can’t Find the PCIe Expansion System If the expansion system is not v isible in y our Windows Dev ice Manag er or y our Apple Sy stem Prof iler at all, y ou will nee d to turn off y our computer (f irst) and then the Magma expa nsion chassis (second) and test all cords and cables to ensure y ou hav e ev ery thing connected correctly . If ev erything seems to be connected correctly , and y ou are sure y ou hav e applied po wer correctly (power up the expansio n chassis f irst and then the computer), then try the following troublesho oting steps: Verify that the required LEDs on the back of the chassis are lit as explained in the Ch assis Linkup section abov e. The most important indicators are the LINK LEDs that indicate a proper connection. All LINK LEDs should be ON if both PCIe slots are populated and both an uplink and a do wnlink iPass cable are connected properly . The ACT (activ ity) LEDs will light/blink only upon data transf ers between host and expa nsion. Th ey can be off so long as the required LINK LEDs remain on. Also v erify the Magma PCI Express Host card is properly inserted into the host computer slot. In case any other LED is off, ensure the respectiv e card is f unct ional and properly seated in its ExpressBox slot. Try mov ing the PCIe host card to a diff erent PCIe slot. If the expansion system is still not v isible af ter try ing all of the abov e steps, go to Chapter 6 to get additional help. 61 M A G M A Windows If the PCI-to-PCI Bridge is now v isible, but contains a in f ront of it, it has a problem that must be f ixed. (exclamation) To identify this problem, right-click on the line with the “Properties” f rom the pop-up menu. and select Resolv e the identif ied problem or go to Chapter 6 to get additional help. MAC Go to Chapter 6 to get additional help. RedHat9 Linux Go to Chapter 6 to get additional help. 62 M A G M A When Nothing Works The f ollowing troublesh ooting steps will help y ou when the computer or chassis won’t turn on or “nothing seems to work” correctly : NOTE Review Chapters 3 (Verify Installation) and 4 (Install Car ds and Drives) as necessar y to verify that you have a valid i nstallati on of the Mag ma expansion s ystem and that you have correctl y i nstalled your 3 rd Par ty PCIe card(s) and their ass ociated drivers ( as required). P P If it powers up OK, but nothing works, check the computer’s Dev ice Mana ger or Sy stem Prof iler to see if the expansion sy stem has been f ound. If not f ound, try the troubleshooting steps f or My Computer Can’t Find the PCIe Expansion Sy stem. If the expansion system is v isible, but has a problem, try to resolv e the problem (See Note abov e). If that fails, go to Chapter 7 to get additional help. 63 M A G M A My Computer Hangs During Power Up If y our computer “hangs” while being turned o n and y ou can’t ev en start, f ollow the f ollowing steps to try to f ix this problem: 1. Shut off the computer (f irst) and then the Magma expansion sy stem and v erify that all cards and cables are con nected and seated correctly . 2. If it still hangs and y ou hav e added one or more h ard driv es in addition to sev eral PCIe cards, ensure that y ou hav e not exceeded the p ower capab ilities of the expansion sy stem‘s powe r supply . Y ou can v erify the capacity of y our power supply by checking the label on the power supply . If y ou are not certain about the power consumption of y our peripherals , it is best to remov e them one by one (starting with those y ou suspect of being most “power hungry ”) until the sy stem powers up. 3. If y ou hav e remov ed all 3 Party PCIe cards f rom the Magma chassis and it still hangs, try the f ollowing: rd P a. Remov e the Magma PCIe expansion host card f rom the computer and try booting up witho ut the Ma gma expansion system attached. i. If it boots up OK without the Ma gma expa nsion sy stem attached, call Magma Technical Sup port. ii. If it still hangs, the problem is in the computer and not rd with the Magma expa nsion system or the 3 Party PCIe cards. rd b. 64 P If it boots up OK without any 3 Party PCIe cards installed, try adding only one card and see if it boots up. i. If it boots up OK with on e card in it, shut it do wn a nd swap cards. Repe at this until all car ds hav e been tested. If they all test OK, then add them b ack one at a time until y ou find the combination that doesn’t work. If y ou f ind a bad card, call Technical S upport. If y ou don’t – congratulations, y ou f ixed it! ii. If it still hangs up, try a diff erent card – this on e is probably bad (or has driv er problems). If the second cards works, troubleshoot the f irst card. If the second card also f ails, call Technical Support. M A G M A My PCIe Card Doe sn’t Wo rk The f ollowin g f lowchart describes a general a pproach to resolv e PCIe card issues: The f ollowing add itional steps might also help when the abov e troubleshooting steps f ail to resolv e y our problem: 65 M A G M A 1. Shut down the computer f ollowed by the Magma expansion chassis 2. Remov e the PCIe card display ing a problem 3. Replace the “problem card” with a si mple PCIe card, such as an Ethernet card that h as driv ers built into the operating sy stem. (Using this “type of card” will avoid any future questions about drivers possibly being installed incorrectly.) 4. Turn o n the Magma expansion chassis, and then turn on the computer. Windows 5. Next, open the Dev ice Manager (Vie w by selection). Connection rd If the is gone, the p roblem is with the 3 Pa rty PCIe card or the card driv ers. Y ou should go to the Windows Error Codes section of this chapter to learn ho w to trou bleshoot using error codes. P P If the is still v isible, the problem may be with the Magma expansion sy stem. Please contact Magma Technical Supp ort f or further guidance and/or a replacement product. MAC 5. Next, open the Apple Sy stem Prof iler and the 3 card(s) should now be v isible. rd P P Party PCIe RedHat9 Linux 5. Using the lspci command, v erify that the PCIe card is visible. 66 M A G M A Support for 3 rd Party PCIe Cards P P rd Magma will prov ide reasonabl e technical suppo rt to with 3 Pa rty PCIe cards. Howev er, if y ou hav e v erif ied a successf ul installation of the Magma PCIe Expansion Sy stem (as def ined in Chapter 4), but rd experience diff iculty installing y our 3 Party PCIe cards, the card manuf acturer should be able to prov ide the best support. P P P P IMPORT AN T The Mag ma PC Ie Expansi on System is designed to func tion exactl y li ke your des ktop c omputer. T his means that you should follow the car d maker’s i nstr ucti ons for installati on on a Windows or Mac c omputer as if the expansi on chassis WAS the des ktop computer. When correctl y i nstalled, there is no differ ence to the operating s ystem, removabl e c ards, or most s oftwar e. Windows Error Codes If y ou are hav ing a problem with one of y our dev ices, and the Dev ice status box shows a Windows Err or Code, ref er to the f ollowing list of error codes f or guidance: 67 M A G M A Error Code Description/Action This cod e indicat es that th er e is a pro blem with th e 3 Part y PCI e C ard d river . 10 rd If nec ess ar y, contact the car d’s manufacturer for updated software dri vers. If all else fails, c ontact M agma T ec hnic al Support for fur ther assistance. On the Bridg e: If you rec ei ve error c ode 12 on the first PCI to PCI Bridge, c all Mag ma T echnic al Support. 12 Error Code 28 1 On the Card: T his us uall y means the memor y, I/O, or prefetc h is more than has been all ocated. Call M agma Tec hnical Support. Description/Action The dri ver for the PC Ie car d is not i nstalled on your s ystem. Reins tall the c ard dri ver followi ng the manufac tur er’s instructions. If that fails to fi x the pr obl em, call the c ard manufacturer for new drivers. The PC Ie host car d or expansion c hassis are not wor king correctl y. R eins tall the PCI e hos t c ard into the c omputer’s sl ot and r echec k all c able connec tions. If the error code remains , try another PCI e sl ot. If the error persists, call M ag ma Tec hnic al Support. For all other err or codes, call: On the PC I to PCI B ridg e: Mag ma T echnic al Support Other C odes On the Card: Car d M anufacturer’s Tec hnical Support, after first verifying that the M agma expansi on s ystem is installed properl y. If y ou are still hav ing problems, contact Magma Technical S upport f or more help. 68 M A G M A My system hangs beyond a certain number of add-in cards Any PCI or PCI Express expansion scheme requires the coope ration of the computer sy stem’s BIOS in order to operate proper ly , regardless of the platf orm (PC/Laptop/Serv er) or operating sy stem (MS Windows/MAC OS/LINUX etc.) The BIOS hosts the f irst and the most f undamental code (f irmware) that a computer executes upon boot-u p. It is then that each an d ev ery PCI/PCIe add-in card (be it l ocated on the h ost system or on Magma’s expansions chassis) is allocated Input/Output memory space f or proper operation. By installing multiple ad d-in car ds in one chassis or daisy -chaining multiple Magm a chasses (as discussed in: Appendix A), we’ re requesting more and mo re resources f rom the BIOS and thus must make sure we pre-allocate them suff iciently. It is theref ore imperativ e that our computing pl atf orm allocates at least 32KB of I/O memory space to allow multipl e add in cards to op erate properly . This setting may be editable or preset by y our BIOS (or computer) v endor. If y ou’re hav ing this problem it is recommend ed that y ou first update y our system to the latest f irmware prov ided by your v endor. Instruction on how to do that (as well as making a backup of y our current BIOS f irmware) should be prov ided by y our computer v endor on their web site. In case this property is editable, y ou computer v endor should also be able to tell y ou how to select at least 32KB using their BIOS interf ace. 69 M A G M A Chapter 6 How to Get More Help Frequently Asked Questions (FAQ) Y ou can v isit the Magma Technical S upport FAQ pages o n the Internet at: www.magma.com/support/ HT TH Contacting TechnicalSupport Our support de partment can be reach ed by f ax at (858) 530-273 3 or by phone at (858) 530-25 11. Support is av ailable Mond ay through Friday , 8:00 AM to 5:00 P M P T. When contacting Ma gma Techn ical Suppo rt, please be sure to include the f ollowing inf ormation: 1) Name 7) Serial N umber 2) Company Name 8) Computer Make 3) Phone N umber 9) Computer Model 4) Fax N umber 5) Email Address 10) Operating System and Version 11) M ake/M odel of PCI car ds i n expansion c hassis 6) Model Number 12) D etailed descripti on of the problem Y ou can also v isit our web site at: www.magma.com/support/ HT TH For a quick response, use the Technical Support and RMA Requ est Form av ailable in the Support Section of the website. Simply complete the f orm with all required inf ormation. Please make sure that your problem description is suff iciently detailed to help us unde rstand y our problem. For exa mple: Don’ t say “Won’ t boot up.” Do say “Tried all the steps in the Troublesho oting Section and it still won’ t boot up.” For f aster diagnosis of y our problem, please run the two utility programs described in the f ollowing sections and i nclude the diag nostic f iles they generate with y our email. 70 M A G M A Magma Debug Utility Occasionally , Technical Support may request Windows users to produce and emai l a Ma gma debu g log f ile to help them resolv e your problem. This f ile should be included as an attachment when submitting a Technical Supp ort request at www.magma.com/ s upport . H TU T U H 1. Locate a f ile called dbgview.exe on the Magma CDROM. 2. Double-click on the f ile dbgview.exe 3. While the dbgview screen is o pen, locate a nd d ouble-click on a f ile called dump.exe on the Magma CDROM. Switch back to the dbgview screen, which is no w f illed with data. 4. 5. Sav e the file and include it as an attachment when submitting a Technical Sup port request. Incl ude your Name and the Date the l og was created i n the file name. Then email it to Tec hnic al Support. Use the “Sav e as ty pe” drop-down arro w to select a f ile ty pe of (*.LOG). 71 M A G M A PCIScope Software Utility PCIScope is a powerf ul tool f or Windows users. It was designed by a Germany company called APSof t. This sof tware utility is a v aluable resource to explore, examine and debug the PCI subsystem of your computer. It was made to f it the requirements of the most demanding users, especially engineers, programmers, and sy stem adm inistrators, and to integr ate all a dv anced f unctions and tools into o ne pr oduct. Please v isit www.tssc.de f or more inf ormation about the cap abilities of PCIScope and other utilities offered by APSoft. HT TH An ev aluation v ersion of PCIScope is av ailable f or download at www.tssc.de . (Y ou can purchase an inexpensiv e license f rom APSof t f or use bey ond the ev aluation period.) HT H T PCIScope has prov en to be extremely usef ul when v erify ing and debuggi ng conf igurations inv olv ing the Magma PCI Expansion Sy stems under any Windows platf orm. PCIScope can prov ide inf ormation to y ou and our Technical Su pport Group such as PCI Bus Numbering, Resource Allocation, and other inf ormation that may prov e usef ul when debugg ing expansio n chassis or PCI card problems. If y ou are experiencing problems setting up y our system, y ou should run PCIScope bef ore contacting the Magma Technical Su pport Group. With the Magma expansion chassis po were d up and con nected to y our computer, load and launch the PCIScope application. The PCIScope Program will be installed on y our computer and a wind ow similar to the one sho wn bel ow wil l appe ar. (The example was taken f rom a Compaq Armada 7400) 72 M A G M A Y ou should sav e this data as a f ile on y our computer. Please include y our name and date as part of the f ile name with an extension of “.bpd.” This f ile should be include d as an attachment wh en submitting a Technical Sup port request at www.magma.com/ s upport . H TU UT H 73 M A G M A ReturningMerchandise to MAGMA If f actory serv ice is required, a Serv ice Representativ e will giv e y ou a Return Merch andise A uthori zation (R MA) number. P ut this number a nd y our return address on the shipping label when y ou return the item(s) f or serv ice. Magma will return any product that is not accompanied by an RMA number. Please n ote that Ma gma WILL NO T accept COD packages, so be sure to return the product freight and duties -paid. Ship the well-p ackaged product to the address below: MAG MA RE TURNS DEPT. RMA # _____ ___ 9918 Via Pasar San Diego, CA 92126 USA It is not required, though highly recommended, that y ou keep the packaging f rom the original shipment of y our Magma product. Howev er, if y ou return a product to Magma f or warranty repair/ repl acement or take adv antage of the 30-day money back guarantee, y ou will need to package the pr oduct in a mann er similar to the mann er in which it was receiv ed f rom our plant. Magma cannot be responsible f or any phy sical damage to the product or component pieces of the product (such as the host or expansion interf aces f or the PCIe expansion chassis) that are damaged due to ina dequate packing. Phy sical damage sustained in such a situation will be repair ed at the o wne r’s expense in accordance with Out of Warranty Procedures. Please, protect y our inv estment, a bit more paddi ng in a good box wi ll go a long way to insuring the dev ice is returned to use i n the same condition y ou shipped it in. P lease call f or an RMA number f irst. 74 M A G M A Appendix A Need More PCIe Slots? Multiple PCIe Expansion System Configurations The PCI Express Local Bus Specif ication def ines the bus as hierarchical, wher e logical PCI to PCI Bridges (PPBs) may be used to add "l ev els" to the PCI bus hi erarchy within a PCIe s witch. Because hierarchies are orga nized systems arrang ed into different levels , y ou can take adv antage of this automatic organizing and lay ering to expand the number of av ailable PCIe slots bey ond the number av ailable in y our computer’s motherboard. Y ou can easily add two or more Magma expansion systems to your current system in either a "f an-out" or "daisy -chain" conf iguration. Each of these conf igurations has adv antages and uses. To determine which ty pe of conf iguration y ou wish to use, y ou should f irst understand a f ew basic f acts: 1. In a desktop computer, the BIOS enumerates automatically behind logical PCI bridges. In the Magma conf iguration, the BIOS looks bey ond the Host card to f ind any PCIe cards installed in the expansion chassis behind a PCIe switch. The PCIe switch, in turn, emulates logical PRBs. The BIOS can then conf igure the cards and allocate resources. Empty PCIe slots are ignored during conf iguration. In theory, y our computer “should” be abl e to tr avel across up to 255 PC Ie bus es to identify and c onfigure all installed PCI e cards . The 255 PCI bus li mi t is actually a theoretic al maxi mu m. The practical li mit is s omewhat l ower and di ffers from one system to another , but s hould still be a fairly l arge number . In a des ktop c omputer the bus numbers tend to be lower (0, 1, 2, etc .). Onc e the BIOS is fi nished config uring ever ything and assigni ng resources , the Operating Sys tem starts loadi ng and acti vates the PCI e c ards found. When adding more Expansi on Systems to an exi sting s ystem, be s ure to c onnect and test them “one-at- a-ti me.” Thi s will allow you to quic kl y r es ol ve any connec ti vity, or other, issues right at rd the start. D O NOT INSTALL any 3 Party PCIe car ds i nto any system until ALL attac hed systems ar e w orking c orrectly . 75 76 2. Most computers allow multiple logical bri dges (and thus PCIe buses) to be correctly conf igured. Some computers, unf ortunately , place an arbitrary limit on the number of bridge lev els that can be trav eled during po wer-o n conf iguration. Y our computer “po wer-o n-sof tware” should be complia nt with the PCIe bus specif ication 1.1 in order to eff ectiv ely use a Magma PCIe Expansion Sy stem. For "f an-out" and "da isy chained" sy stem conf igurations, where more than one PCI e expansion sy stem is being used, y ou should count all of the logical bridge lev els to y our most deeply nested PCI bus to determine the maximum number of bridge lev els that must be trav eled. Exceeding this number may cause sof tware conf iguration conf licts ev en though hardwar e-wise the PCIe sy stem is properly conf igured. 3. For easier un derstanding, a giv en PCI system should be v iewed as a “Resou rce Toll r oad” that r uns f rom the computer CPU (resource home), throu gh the “ Toll Booths” (the PCI e switches and logical PCI bridges), to the “Resource Users” (PCIe Cards). As in the case of a real Toll Road, the more Toll Booths y ou hav e to cross (ev en if it takes a nanos econd), the longer it will take y ou (y our data) to get f rom the PCI e Card to the CPU and back again. Under most circumstances the eff ect cannot ev en be detected. Howev er, under other conditions, it can be important to know about. M A G M A Fan-Out For reasons described in b ullet # 3 ab ov e, we recommen d using a f anout conf iguration when y ou need to add successiv e PCI e expansion sy stems to the host computer. This addition to the PCI bus hierarchy is at the "peer" lev el of other existing expansion buses, thus adding "breadth" to the PCI bus hierarchy , since these buses will be at the same hierarchical lev el within the system conf iguration. You must ens ure that you have the c orres ponding PCIe to PCI e Expansion Sys tem, or chassis to c onnect with your hos t car d to support your desired c onfiguration. In this conf iguration, y ou hav e f ewer “Toll Booths” to pass through; theref ore the latency is shorter, howev er y ou’v e “sacrif iced” another PCIe slot from the host computer, which may not always be an option. For clarific ati on, it i s nec ess ar y to understand that the amount of latenc y c aused by a PCIe s witc h (or a PCIe-to- PCI bridge rd built into some 3 Party PC Ie c ards) is negligible (“nanos ec onds”) and will not produce any visi ble effect on most sys tems. It is onl y menti oned her e bec aus e o f c ertain specializ ed configur ati ons invol ving unique PC Ie car ds with special s oftware dri vers . The total number of logical bus es that the data must pas s through COU LD make a differenc e. See Chapter 5 Troubl es hooti ng for mor e infor mation if you sus pect this c ould be an issue wi th one of your speci alty PCI e c ards . 77 Verify your configuration Bef ore y ou start installing y our PCIe cards (ref er to Chapter 4 Install Cards and Driv es f or more inf ormation), y ou should conf irm that ev ery thing is in proper working order. Ref er to Chapter 3 Verify Installation f or guidance in v erifying the proper installation of y our Expansion Sy stem. For example, the f ollowing ima ge sho ws the div ision within the Windo ws Dev ice Manager display between t wo Expansion Sy stems connected in a “Fan-Out” conf iguration. In this case each expansion chassis off ers only two slots of expansion. The f ollowing image sho ws the Apple Prof iler display when a MAC has 2 Expansion Sy stems connected in a “Fan-Out” conf iguration Daisy-Chaining Recognizin g the ty pical insignif icance of the perf ormance v ariance between the “Fan -Out” and “Daisy -Chaining” conf igurations, the primary reason f or using this one would be limitations on phy sical space. This 78 M A G M A could be the number of av ailable slots on the host computer motherboard, or a lack of desk or rack space. In the daisy -chain conf iguration, successiv e PCIe expansion sy stems are add ed to the "en d" of the PCIe expansio n hier archy , which adds "depth" to the Local Bus by increasing the number of the logical PCI lev els activ e in the system conf iguration. The daisy -chain conf iguration is theref ore more popular among users that hav e only one av ailable PCIe slot on the host computer, require 8, 12 o r more PCIe slots keeping in mind that mor e latency be introduced ev ery time we go past one expa nsion chassis to other. the but will the 79 Note: A downlink daisy -chained chassis can be Hot-unplugged witho ut hav ing to turn-off the chassis it is connected to. That can be accomplished by pressing the “Attention CP” pushbutton shown below: In practice, the daisy chain conf iguration will be connected as f ollows: Verify your configuration Bef ore y ou start installing y our PCI cards (ref er to Chapter 4 Install Cards and Driv es f or more inf ormation), y ou should conf irm that ev ery thing is in proper working order. Ref er to Chapter 3 Verify Installation f or guidance in v erifying the proper installation of y our Expansion Sy stem. NOTE Notic e that each Dais y-C hai ned unit appears in the D evic e M anager in the reverse or der of its pl ace in the configur ation. 80 M A G M A PCIe Card Conflicts If y ou determine that one PCIe card is interf ering with the operation of another card, f irst try reorganizing the car ds on the motherb oard. Mov ing the cards around can change the order in which the cards are conf igured by the sy stem during po wer-on. This will go a long way toward resolv ing module conf licts. Power-OnSequence for Advanced Configurations As prev iously stated in Chapter 2 Har dware Installation, it remains necessary to power up ALL Exp ansions Sy stems BEFORE y ou turn on the computer. This will ensure that y our power- on sof tware can read all av ailable buses and properly conf igure all installed PCI e cards. Obv iously , the rev erse also remains true f or shutting y our system down. The computer must be shut off BEFORE y ou attempt to turn off your Expansion Sy stem(s). Troubleshooting Advanced Configurations When try ing to troubleshoot problems with PCI e cards in a multiple expansion sy stem conf igurations, it is v ital to correctly determine the nature of the probl em. The ref ore, the f irst task is to identify the card or chassis hav ing a problem by using the Windo ws Dev ice Manag er, or Apple Sy stem Prof iler. Ref er to the f irst part of this Appendix f or more inf ormation on identify ing hierarchical lev els in multiple expansion sy stem conf igurations. rd Problems with 3 Party PCIe cards might only be traceable once y ou hav e identif ied the expansion system containing the problem card. Belo w is a f low chart off ering a troubleshooting ap proach when multiple expansion chasses are inv olv ed: 81 82 M A G M A Finding the Problem Card Windows If y ou need help to determine which PCI e card, or which expansion chassis, has the problem, y ou can “right -click” on the card with the and check the inf ormation contained in the “Location:” field. Look f or the “Error Code” in the box in the center of the Properties Window an d then go to the Windows Error Code section f or inf ormation on how to resolv e this issue. MAC and Linux If y ou hav e already reinstalled and reseated ev erything according to instructions in Chapter 2, and the PCI to PCI Bridge is still not v isible in the Apple Sy stem Prof iler, call Magma Technical Support. 83 APPENDIX B Compliance FCC NOTE: T his equi pment has been tes ted and found to compl y wi th the li mits for a Class A digital devic e, pursuant to part 15 of the FCC Rul es. Thes e li mits ar e desig ned to provi de reas onable protecti on against har mful inter fer enc e when the equipment is operated in a commercial envir onment. T his eq uipment generates , uses, and c an radiate radio freq uenc y energy and, if not installed and used in acc ordanc e with the ins truc tion manual, may c aus e harmful interferenc e to radi o communic ations. Oper ation of this equi pment i n a r esidenti al ar ea is li kel y to cause har mful interferenc e in which c as e the user will be requir ed to c orrect the inter fer enc e at his own expens e. This devic e complies wi th Part 15 of the FCC R ules . Oper ati on is s ubj ect to the followi ng two c onditi ons : (1) this devic e may not caus e harmful interferenc e, and (2) this devi ce must acc ept any i nterference r ec ei ved including interferenc e that may c ause undesir ed oper ati on. Changes or modifications not expr essl y approved by the party res ponsi ble for compli anc e could voi d the us er’s authority to operate the eq uipment. NOTE The as sembler of a personal c omputer s ys tem may be r equired to test the s ystem and/or make nec ess ar y modi fications if a s ystem is found to caus e har mful i nter fer enc es or to be nonc ompli ant with the appropriate standar ds for i ts intended us e. Industry Canada This Class A di gital app aratus complies with Canadi an ICES-003. Cet appareil numériq ué de la classe A est conf ormé à la norme NMB-003 du Canad a CE The pro duct(s) described in this manual complies with all applica ble Europea n Union (CE ) directiv es. Magma will not retest or recertify sy stems or components that hav e been reconf igured by customers. 84 M A G M A Mess-, Steuer- und Regelgeräte GmbH Heppstrasse 30 . D - 80995 München Phone: +49 (89) 313 30 07 Fax: +49 (89) 314 67 06 Internet: http://www.wuntronic.de E-Mail: [email protected] Manual P/N 09-09949-01-B 85