1
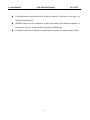
SEIKA
Braille Display
User’s Manual
V3 Pro Version 1.0
User’s Manual
Seika Braille Display
Nov 2012
Preface
Thank you very much for purchasing Seika3 Pro Braille Display.
The Seika refreshable Braille display provides a tactile interface to your
computer.
Before using the Seika display, please read this user’s manual.
If there is anything that you don’t understand about using the display,
or if you find mistakes or omissions in this user’s guide, please contact
distributors by letter, FAX, or telephone.
Safety Precautions:
This User’s manual describes safety precautions according to the
following level and marks of warning.
Warning mark
Mark to Prohibit
Procedures
Warning Caution
Actions Prohibited
Disconnect the power plug
This precaution must be followed, or it could cause
【Warning】
of fire or electric shock which could result in
serious injuries or death.
This precaution must be followed, or it may cause
【Caution】
of electric shock and/or any other accidents which
may result in injuries and/or partial damage of
the products or surrounding equipment.
I
User’s Manual
z
Seika Braille Display
Nov 2012
Unauthorized reproduction of this document, in whole or in part, is
strictly prohibited.
z
Modifications to the contents of this document for improvements or
revisions may be made without prior notification.
z
Product liability is limited within the country of original purchase.
II
User’s Manual
Seika Braille Display
Nov 2012
Table of Contents
Quick Installation Guide .............................................................................................. 1 Chapter 1 – Overall description of the Seika Braille Display ................................... 2 1. Name and Functions of All Components ....................................................................................2 1.1 Overall Illustration of the Product ........................................................................................2 1.2 Description of the right side ..........................................................................................4 2. Beep indication .........................................................................................................................4 3. Sleep mode ...............................................................................................................................4 Chapter 2 - Setup .......................................................................................................... 5 1. Service Precautions (at setup time) ......................................................................................5 2. Installation Space ....................................................................................................................5 3. Operating Environment ...........................................................................................................6 4. Precautions for Moving ...........................................................................................................6 Chapter 3 - Seika Braille Display Driver .................................................................... 7 Chapter 4 – Using Seika Braille Display with JAWS ................................................ 8 1. Installing Seika Patch for JAWS ............................................................................................8 2. Working in JAWS .....................................................................................................................8 2.1 Configuring JAWS ...........................................................................................................8 2.2 Navigation and control keys function ........................................................................ 11 3. Uninstalling the patch of JAWS ...........................................................................................14 3.1 Uninstall the old version of Seika patch for Jaws ..................................................14 3.2 Uninstall the current version of Seika patch for Jaws ..........................................14 Chapter 5 – Using Seika Braille Display with Window-Eyes ................................. 15 1. Working in Window-Eyes ......................................................................................................15 1.1 Configuring Window-Eyes 7.2 .....................................................................................15 III
User’s Manual
Seika Braille Display
Nov 2012
1.2 Configuring Window-Eyes 7.5 .....................................................................................15 2. Navigation and Control keys function .................................................................................18 Chapter 6 –Using Seika Braille Display with HAL and Supernova....................... 21 1. Working in HAL and Supernova ..........................................................................................21 1.1 Configuring HAL Version 10 .......................................................................................21 1.2 Configuring Supernova Version 11 and Version 12 ...............................................24 2. Navigation and Control keys function .................................................................................30 Chapter 7 – Using Seika Braille Display with COBRA ........................................... 32 1. Configuring COBRA ..............................................................................................................32 2. Navigation and Control keys function .................................................................................34 Chapter 8 – Using Seika Braille Display with NVDA.............................................. 35 1. Configuration of BRLTTY .....................................................................................................35 2. Configuration of NVDA..........................................................................................................35 3. Reconnection..........................................................................................................................35 4. Navigation and Control keys function .................................................................................36 Chapter 9 - Display Specifications ............................................................................ 37 Q&A ............................................................................................................................. 38 1. How to verify which Virtual COM port has been used by Seika Braille Display ...........38 2. How to uninstall the Seika Braille display driver ...............................................................38 3. Braille display doesn’t work ..................................................................................................38 3.1 Check Seika Braille display driver ............................................................................38 3.2 Check the screen reader configuration......................................................................39 IV
User’s Manual
Seika Braille Display
Nov 2012
Quick Installation Guide
z
The below steps assume that you have installed the screen reader
and windows in their default locations.
z
Install Seika Braille display driver (refer to Chapter 3).
z
Install the Seika patch program and configure your screen reader
(refer to Chapter 4 for Jaws, Chapter 5 for Window-Eyes, Chapter 6
for HAL and Supernova, Chapter 7 for COBRA, Chapter 8 for
NVDA).
1
User’s Manual
Seika Braille Display
Nov 2012
Chapter 1 – Overall description of the Seika Braille Display
1. Name and Functions of All Components
1.1 Overall Illustration of the Product
1~8---Navigation and Control Keys
Seika Braille Display’s size:
12.99(W) x 3.58(D) x 0.98(H) inches and weight: 600g
Display
There are 40 refreshable Braille cells (8-pin).
【Caution】:Please touch the Braille cell with clean finger,
otherwise the dust will block the pins.
2
User’s Manual
Seika Braille Display
Nov 2012
Cell Position Mark
It marks the cell position. There is the position mark per 5 cells. From
left to right the position mark means the 1st, 5th, 10th, 15th, 20th, 25th,
30th, 35th, 40th cell.
Navigation and Control Keys
Place the Seika Braille Display on a flat surface with the Braille display
facing upwards and the buttons facing towards you.
Top surface keys are located on the top of the Seika Braille Display.
z
Behind the Braille cells are the CURSOR ROUTING BUTTONS.
These tiny buttons are used to move the computer's cursor directly
to a particular location on the screen.
z
Near each end of the Braille display is a small round button. The
LEFT BUTTON is to the left and the RIGHT BUTTON is to the
right.
Front panel navigation keys are located on the front edge, facing the
user.
z
On the left half of the front panel is the LEFT CTRL which contains
LEFT CTRL LEFT and LEFT CTRL RIGHT.
z
In the middle of the front panel are two buttons. The LEFT SHIFT
is toward the left and the RIGHT SHIFT is toward the right.
z
On the right half of the front panel is the RIGHT CTRL which
contains RIGHT CTRL LEFT and RIGHT CTRL RIGHT.
3
User’s Manual
Seika Braille Display
Nov 2012
1.2 Description of the right side
Mini USB Port
On the right side of the display, there is a Mini USB port. You could
connect Seika with the computer by plugging in a USB cable.
【Caution】: When a laptop computer is used for operating the
Braille display, please make sure that it is supplied with power
via the electrical cable rather than battery. Otherwise it may
cause a deficiency in the power supply.
2. Beep indication
Seika will beep twice when it is connected with a computer in which the
Seika driver is installed successfully.
3. Sleep mode
The Braille display will sleep if there is not any operation within one
minute. You could wake up the Seika Braille display by press any button or
activate your screen reader.
4
User’s Manual
Seika Braille Display
Nov 2012
Chapter 2 - Setup
1. Service Precautions (at setup time)
【Prohibited】: Avoid using the display in the following conditions,
which may cause malfunctions.
z
Direct sunlight, near air conditioners or outside.
z
High humidity, such as those near a water supply or humidifier, or
any place with water, oil, or chemicals.
z
Avoid contact with dust, waste particles, near open windows, or
locations with any toxic gases or iron powder.
【Caution】:Please touch the Braille cell with clean finger,
otherwise the dust will block the pins.
Also, do not install the display near any televisions, radios, speakers,
short-wave radios, or anything that is magnetic or emits radio waves. If you
use it adjacent to any of these items, it can interfere with reception.
2. Installation Space
【Caution】: Install the product in a location which meets the
following criteria:
z
The product must be installed on a level surface.
5
User’s Manual
z
Seika Braille Display
Nov 2012
It is recommended to avoid putting anything heavier than a
keyboard or a laptop computer or similar on top of the device as it
may cause malfunction.
3. Operating Environment
z
Temperature: 41 – 95 ℉ (5 – 35 ℃)
z
Humidity: 20 - 80% (no condensation)
4. Precautions for Moving
【Warning】
z
Violent shaking or vibrations at the time of moving may cause
product failures.
【Requirement】
z
Turn off the computer which is connected with the Seika,
and disconnect the USB cable, then move the Seika.
6
User’s Manual
Seika Braille Display
Nov 2012
Chapter 3 - Seika Braille Display Driver
Installing Seika Braille display driver (Windows XP / Vista / Windows 7)
Before using Seika with the screen reader, please install Seika Braille
display driver. Make sure that Seika Braille display is not connected to your
computer.
z
Run “Seika Driver XP_Vista_Win7 V6.3a.exe” in the “Seika driver”
folder in the CD.
z
Select “Install” to install Seika Braille display driver.
z
When prompted “Installation Successful”, press ENTER.
z
Follow the instruction and restart your computer.
z
The Seika driver is installed successfully.
7
User’s Manual
Seika Braille Display
Nov 2012
Chapter 4 – Using Seika Braille Display with JAWS
(For JAWS version 10.0.1154 and later)
NOTE:
The below steps assume that you have already install Seika driver and Jaws
version 10.0.1154 or later. If you have not installed Seika driver, please refer to
Chapter3.
If you have already installed the older version of Seika Patch for JAWS, please
refer to the 4.3.1 Uninstall the old version of Seika patch for Jaws, and uninstall
the old version of Seika patch.
1. Installing Seika Patch for JAWS
z
Open the “Seika patch for JAWS” folder in the CD. Run the Seika Patch for
JAWS according to your Windows operating system.
z
Install the patch by default steps. The Seika Patch for JAWS will be installed
by the JAWS Utility automatically. A console window appears and it will take
several minutes.
2. Working in JAWS
2.1 Configuring JAWS
z
Connect the Seika display with your computer.
z
Start JAWS and select “Braille…” in the “Options” menu.
8
User’s Manual
z
Seika Braille Display
Nov 2012
Assuming that the default Braille display is set to “No display”, tab
to the “Add Braille Display” button and press enter.
z
In the “Select components” dialog box, there is a list of Braille
displays. Select the “Seika” by pressing the space bar.
9
User’s Manual
z
Seika Braille Display
Nov 2012
Tab to the “Next” button and press enter.
If you already connected Seika with your computer by USB cable, the output
port will be set automatically, it does not need change.
z
Tab to the “Next” button and press Enter.
z
When prompted to set the primary device, select “Seika” in the
“Primary device” list.
10
User’s Manual
Seika Braille Display
Nov 2012
z
Tab to the “Finish” button and press enter.
z
In the “Braille Basic Settings” dialog box, tab to the “OK” button
and press it.
z
Restart the JAWS and the Seika Braille Display will work now.
NOTE: if the Seika could not work with Jaws, please check the setting of output
port in Jaws by the following steps.
z
Run the “Detect Seika COM Port V1.0.exe” in the “tool” folder in the
CD, remember the Seika COM port number.
z
In the “Braille Basic Settings” dialog box, press the button of
“Modify Settings…”. In the “set device options” dialog box, you can
manually select the output port which you remember.
2.2 Navigation and control keys function
11
User’s Manual
Seika Braille Display
Nov 2012
Left Button
Left Ctrl Left
Left Ctrl Right
Left Shift
Right Shift
Right Ctrl Left
Right Ctrl Right
Right Button
Braille Commands:
Description
Command
Braille Mode Toggle
Left Button + Right Button
Attribute/Character mode toggle
Left Ctrl Left + Right Ctrl Left
Adjust Braille Option Dialog
Left Ctrl Left + Left Shift
Attribute Marking Off
Left Button + Left Ctrl Left + Left Shift
Braille Marking Off
Left Button + Left Ctrl Left + Left Shift
8-Dot/6-Dot Toggle
Right Shift + Left Shift + Right Ctrl Right
8 Pixels/Unlimited Pixels Per Space
Left Shift + Right Shift + Right Ctrl Left
Repeat Last Flash Message
Left Ctrl Left + Right Ctrl Right
12
User’s Manual
Seika Braille Display
Nov 2012
Navigation Commands:
Description
Command
Auto Advance Mode
Left Ctrl Right + Right Ctrl Left
Increase Auto Advance Speed
Left Button + Right Shift
Decrease Auto Advance Speed
Left Button + Left Shift
Top Of Window
Left Ctrl Left
Bottom Of Window
Left Ctrl Right
Pan Left
Left Button
Pan Right
Right Button
Braille Next Line
Right Ctrl Left
Braille Prior Line
Right Ctrl Right
PAGE DOWN (Active Cursor)
Left Ctrl Right + Right Shift
PAGE UP (Active Cursor)
Left Ctrl Left + Right Shift
TAB
Left Shift + Right Ctrl Left
CTRL+TAB
Left Ctrl Right + Right Button
SHIFT+TAB
Left Shift + Right Ctrl Right
CTRL+SHIFT+TAB
Left Ctrl Left + Right Button
Cursor Commands:
Description
Command
Braille follows Active
Left Shift
Active follows Braille
Left Shift + Right Shift
Route Braille To Active
Right Shift
Screen Reader Cursor
Right Button + Right Ctrl Left
Mouse Button Right Click
Left Shift + Right Button
PC Cursor
Right Button + Right Ctrl Right
Route Screen Reader to PC Cursor
Right Shift + Right Ctrl Right
Route PC to Screen Reader Cursor
Right Shift + Right Ctrl Left
Select Text
Any Cursor Routing Button + Right Shift
13
User’s Manual
Seika Braille Display
Nov 2012
3. Uninstalling the patch of JAWS
NOTE:
Uninstall the patch of JAWS will disable the Seika Braille Display work with
JAWS and delete all the patch files.
You must uninstall this patch before uninstall the JAWS.
3.1 Uninstall the old version of Seika patch for Jaws
Open the “Add or Remove Programs” in the “Control Panel”, and select
the item: “Seika Braille Display version 3” or “Seika Patch for JAWS V1.x”
or “Seika Patch for JAWS V2.x”. Uninstall the item step by step. The
uninstall will taking several minutes. Please restart computer after
finished.
3.2 Uninstall the current version of Seika patch for Jaws
Open the “Add or Remove Programs” in the “Control Panel”, and select
the item: “Seika Patch for JAWS V2.2”. Uninstall the “Seika Patch for
JAWS V2.2” step by step. The uninstall will taking several minutes. Please
restart computer after finished.
14
User’s Manual
Seika Braille Display
Nov 2012
Chapter 5 – Using Seika Braille Display with Window-Eyes
NOTE:
The below steps assume that you have already install Seika driver and
Window-eyes version 7.2 or later. If you have not installed Seika driver, please
refer to Chapter3.
1. Working in Window-Eyes
1.1 Configuring Window-Eyes 7.2
z
Connect the Seika display.
z
Run the “Detect Seika COM Port V1.0.exe” in the “tool” folder in the
CD, remember the Seika COM port number.
z
Start Window-eyes 7.2.
z
Select “File” in Window-Eyes, and then select “Select Braille
Display”.
z
Select “Seika” in “Braille” option.
z
In “Ports” option, select the Seika COM port number which you
remember.
z
Select OK button.
1.2 Configuring Window-Eyes 7.5
z
Connect the Seika display.
z
Run the “Detect Seika COM Port V1.0.exe” in the “tool” folder in the
CD, remember the Seika COM port number.
z
Start Window-eyes 7.5 and select “Device” in the “Settings” list.
15
User’s Manual
Seika Braille Display
Nov 2012
z
Select “Braille Display” in the “Device” list.
z
In “Displays” option, select “Seika” option.
z
In “Ports” option, select the Seika COM port number which you
remember.
16
User’s Manual
Seika Braille Display
Nov 2012
z
Tab to the “Activate” button and press Enter.
z
Select “Keep Changes” button in the “Braille Settings” dialog box,
then press Enter.
z
Tab to “Save Settings” button and press Enter.
17
User’s Manual
Seika Braille Display
2. Navigation and Control keys function
18
Nov 2012
User’s Manual
Seika Braille Display
Nov 2012
Left Button
Left Ctrl Left
Left Ctrl Right
Left Shift
Right Shift
Right Ctrl Left
Right Ctrl Right
Right Button
Description
Key Press
Scroll Braille Left
Left Button
Scroll Braille Right
Right Button
Prior Braille Line
Left Ctrl Left
Next Braille Line
Left Ctrl Right
Top Line
Right Ctrl Left
Bottom Line
Right Ctrl Right
Mouse Top Left
Left Button + Left Ctrl Left
Mouse Bottom Left
Left Button + Left Ctrl Right
Mouse Top Right
Right Ctrl Left + Right Button
Mouse bottom right
Right Ctrl Right + Right Button
To Focus
Left Button + Right Button
Grade 2 Braille Toggle
Left Shift + Right Shift
19
User’s Manual
Seika Braille Display
Nov 2012
Untranslate At Cursor
Left Shift + Right Ctrl Left
Untranslate At Mouse
Left Shift + Right Ctrl Right
Scroll Mode Toggle
Left Ctrl Left + Right Ctrl Left
Spacing Toggle
Left Ctrl Right + Right Ctrl Right
Attributes To Show Rotor
Left Ctrl Left + Right Shift
Show Attributes Toggle
Left Ctrl Right + Right Shift
Quick Message Rotor
Left Ctrl Right + Right Ctrl Left
Display Individual Attribute Rotor
Left Ctrl Left + Left Shift
Braille graphic
mode
Left Ctrl Right + Left Shift
Toggle 6/8 Braille
Right Shift
Braille tracking toggle
Left Shift
20
User’s Manual
Seika Braille Display
Nov 2012
Chapter 6 –Using Seika Braille Display with HAL and
Supernova
(For HAL version 10 and later)
NOTE: The below steps assume that you have already install Seika driver and
HAL version 10 or later. If you have not installed Seika driver, please refer to
Chapter3.
1. Working in HAL and Supernova
Refer to the “1.1 Configuring HAL Version 10” or “1.2 Configuring
Supernova Version 11 and Version 12”.
1.1 Configuring HAL Version 10
z
Connect the Seika display.
z
Run HAL.
z
Open the HAL Control Panel Window.
z
Select Configuration.
z
Select SAM Set UP.
21
User’s Manual
Seika Braille Display
z
Select “Detect All Devices now”.
z
HAL will automatically detect the Seika Braille.
z
Return to the HAL Control Panel Window.
z
Select “Braille Display”.
22
Nov 2012
User’s Manual
z
Seika Braille Display
Click “Select Braille Display”.
z
Select the “Seika Braille” from the list and click “OK”.
z
Return to HAL Control Panel.
z
Ensure that the On Screen Monitor is enabled.
z
Restart your HAL.
23
Nov 2012
User’s Manual
Seika Braille Display
Nov 2012
1.2 Configuring Supernova Version 11 and Version 12
z
Connect the Seika display.
z
Run the “Detect Seika COM Port V1.0.exe” in the “tool” folder in the
CD, remember the Seika COM port number.
z
Run Supernova.
z
On the “Supernova Control Panel”, select “Advanced Options…”
from the menu item “General”.
z
Select “System Configuration” tab, tab to “SAM Setup…” and press
enter.
24
User’s Manual
z
Seika Braille Display
Nov 2012
Check the “Seika Braille” item on the “SAM Configuration” dialog
box. Tab to the “Configure…” button and press enter.
z
Select the “Manual Configuration” radio button, tab to the “Serial
Ports…” button and press enter.
25
User’s Manual
z
Seika Braille Display
Nov 2012
In the list of COM ports, select the Seika COM port number which
you remember and press “OK” button.
z
In the “Seika Braille Configuration” dialog box, select the serial port
you have just checked and tab to the “OK” button and press.
z
In the “SAM Configuration” dialog box, the units of the Seika Braille
is 1. The Seika Braille connects to the Supernova is successful. Tab
to the “Close” button and press enter.
26
User’s Manual
z
Seika Braille Display
Nov 2012
Tab to the “OK” button and press enter in the “General Advanced
Options” dialog box.
z
On the “Supernova Control Panel”, select “General Preferences…”
from the menu item “Braille”.
27
User’s Manual
z
Seika Braille Display
Nov 2012
Select “Braille Device” tab in the “General Preferences” dialog box,
tab to the “Select Braille Display” button and press enter.
z
Tab to the “Seika Braille” item in the “Select Braille Display” dialog
box and press “OK” button.
28
User’s Manual
z
Seika Braille Display
Nov 2012
Select “Translation Tables” tab in the “General Preferences” dialog
box. Configure the “Unicode to Braille Conversion”, “Unicode to
Literary Braille Conversion” and “Literary Braille Input” according
to the local language. Tab to the “OK” button and press enter.
z
Restart your Supernova and Seika Braille Display will work now.
NOTE: If you use another model Seika Braille display, please repeat the step of
“1.Working in HAL and Supernova”.
29
User’s Manual
Seika Braille Display
Nov 2012
2. Navigation and Control keys function
Left Button
Left Ctrl Left
Left Ctrl Right
Left Shift
Right Shift
Right Ctrl Left
Right Ctrl Right
Right Button
Action
Key press
Braille Back
Left Button
Braille Forward
Right Button
Braille Line up
Right Ctrl Right
Braille Line down
Right Ctrl Left
Braille Go To Focus
Left Shift
Braille Line Start
Left Button + Right Ctrl Right
Braille Line End
Left Button + Right Ctrl Left
Braille Top
Left Button + Left Ctrl Left
Braille Bottom
Left Button + Left Ctrl Right
30
User’s Manual
Seika Braille Display
Nov 2012
Braille Cell Left
Right Ctrl Right + Right Button
Braille Cell Right
Right Ctrl Left + Right Button
Braille Physical/Logical Mode
Left Ctrl Left + Right Ctrl Right
Braille Cycle Attributes
Left Ctrl Left
Braille Describe Character on off
Left Ctrl Right
Braille Output On Off
Left Ctrl Right + Right Ctrl Left
Braille tracking on off
Right Shift
31
User’s Manual
Seika Braille Display
Nov 2012
Chapter 7 – Using Seika Braille Display with COBRA
NOTE: The below steps assume that you have already install COBRA and Seika
driver. If you have not installed Seika driver, please refer to Chapter3.
1. Configuring COBRA
z
Connect the Seika display.
z
Run the “Detect Seika COM Port V1.0.exe” in the “tool” folder in the
CD, remember the Seika COM port number.
z
Start COBRA by pressing left CTRL+ALT+Shift+F7.
z
From the Start Menu, select Programs, BAUM Retec, Braille Server,
then “Control Panel”.
z
Select “Active devices”.
32
User’s Manual
Seika Braille Display
Nov 2012
z
click on “Add device”.
z
Select the desired display from the list and type the port to which
you remember.
z
Click on “OK” to reboot the Braille Server.
z
Please also reboot COBRA, so that it can recognize the new Braille
display.
z
Start COBRA by pressing left CTRL+ALT+Shift+F7 again. This
combination must be held for at least one second.
33
User’s Manual
Seika Braille Display
Nov 2012
2. Navigation and Control keys function
Left Button
Left Ctrl Left
Left Ctrl Right
Left Shift
Right Shift
Right Ctrl Left
Right Ctrl Right
Right Button
Action
Key press
Scroll left
Left Button
Scroll right
Right Button
Previous item or up screen
Left Ctrl Left
Next item or down screen
Left Ctrl Right
Shift + Tab
Right Ctrl Right
Tab
Right Ctrl Left
Move navigation to focus
Left Shift
Focus is in element mode
Left Button + Left Ctrl Left
Focus is in line mode
Left Button + Left Ctrl Right
Navigation is in line mode
Left Button + Right Ctrl Left
Navigation in element mode
Left Button + Right Ctrl Right
Move navigation to the top
Left Ctrl Left + Right Ctrl Right
Move navigation to the bottom
Left Ctrl Right + Right Ctrl Left
Escape
Left Ctrl Left + Right Button
Enter
Left Ctrl Right + Right Button
34
User’s Manual
Seika Braille Display
Nov 2012
Chapter 8 – Using Seika Braille Display with NVDA
1. Configuration of BRLTTY
Before using Seika Display with NVDA, please install BRLTTY (for
windows) and configure BRLTTY as follows:
z
Make sure that Seika Display driver has been installed successfully
and Seika Braille Display has been connected with your computer.
z
Run the “Detect Seika COM Port V1.0.exe” in the “tool” folder in the
CD, remember the Seika COM port number.
z
Double click “brlttycnf.exe” to chose “Seika” at Braille display list.
z
In the COM port list, select the Seika COM port which you
remember.
z
Click OK button to save and exit.
z
Double click “install.bat” to install BRLTTY service.
z
You will hear beeps when BRLTTY starts to work successfully as
system service and Braille Display will update display. If not, please
reboot computer with connecting display and “brltty.exe” will run
automatically.
2. Configuration of NVDA
To use Seika Display with NVDA through brltty, please configure
NVDA as follows:
z
Run “nvda.exe”, select “preference”, and select “Braille settings”.
z
Select “brltty” at Braille display list, click OK to save and exit.
3. Reconnection
For any reconnection needs, please reboot computer or configure Brltty
35
User’s Manual
Seika Braille Display
Nov 2012
as follows:
z
Run “uninstall.bat” to uninstall service.
z
Do the same as Configuration of BRLTTY.
4. Navigation and Control keys function
Left Button
Left Ctrl Left
Left Ctrl Right
Left Shift
Right Shift
Right Ctrl Left
Right Ctrl Right
Right Button
Description
Key Press
Scroll Braille Left
Left Button
Scroll Braille Right
Right Button
Braille Prior Line
Left Ctrl Left
Braille Next Line
Left Ctrl Right
36
User’s Manual
Seika Braille Display
Nov 2012
Chapter 9 - Display Specifications
Display system
8 dots Braille
Display capacity
40 cells
Navigation and Control keys
8 Control keys
Touch cursor key
40 keys
Character code
original code
Interface
MiniUSB
Power supply
bus power
Size
12.99(W) x 3.58(D) x 0.98(H)inches
Weight
600g
37
User’s Manual
Seika Braille Display
Nov 2012
Q&A
1. How to verify which Virtual COM port has been used by Seika Braille
Display
z
Run “Detect Seika COM Port V1.0.exe” in the “tool” folder in the CD.
z
Seika COM port number will be displayed.
2. How to uninstall the Seika Braille display driver
Open the “Add or Remove Programs” in your Windows operation system,
select and remove the item “Silicon Laboratories CP210x USB to UART
Bridge”
NOTE: For the old version of Seika driver, select and remove the item
according to the following different Windows operation system.
XP: ”CP210x USB to UART Bridge Controller”
Win7 32/64bit: ”Seika Braille Display System Driver (Driver Removal)”
Vista 32/64bit: ”Seika Braille Display (Driver Removal)”
3. Braille display doesn’t work
If the Seika Braille display doesn’t work, please check Seika Braille
display driver and also the screen reader setting.
3.1 Check Seika Braille display driver
z
Right click the icon of “My Computer” on desktop, and select
“Properties”.
38
User’s Manual
z
Seika Braille Display
Nov 2012
Select “Hardware” on the top menu, and click the button “Device
Manager”.
If there is a yellow interrogation marks before both the item “Other
Device” and its subdirectory “Silicon Labs CP210x USB to UART Bridge” in
the catalog, it would mean that Seika Braille display driver doesn’t work. It
is necessary to reinstall the driver.
z
Right click “Silicon Labs CP210x USB to UART Bridge”, and select
“uninstall”.
z
Install the Seika Braille display driver again (refer to Chapter 3).
3.2 Check the screen reader configuration
Run the “Detect Seika COM Port V1.0.exe” in the “tool” folder in the CD,
remember the Seika COM port number. Check the COM port setting in
your screen reader.
39