1
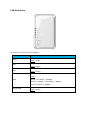
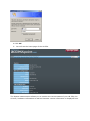
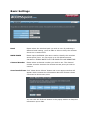
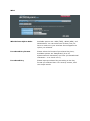
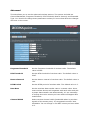
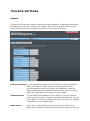
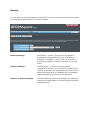
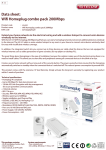
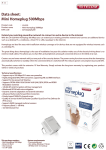
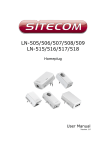
Wi-Fi homeplug LN-554 User Manual Table of Contents Introduction .......................................................................................................... 3 Package Contents .................................................................................................. 4 Cautions ............................................................................................................... 5 Product Layout ...................................................................................................... 6 Connecting the Homeplug ....................................................................................... 8 Configuring the device ..........................................................................................11 Addendum: Declaration of Conformity .....................................................................26 Revision 1.3 © Sitecom Europe BV 2015 Note: All the information contained in this manual was correct at the time of publication. However, as our engineers are always updating and improving the product, your device’s software may have a slightly different appearance or modified functionality than presented in this manual. Introduction Homeplug is home and office networking using the electric wiring already installed in the building. Cost factor and transmission quality Homeplug is an economical and easy-to-use networking technology. You don't need to lay cables and you can connect to the home network at every power point. The Homeplug standard modulates and demodulates additional frequencies on the power lines. Modulation and demodulation is a well-known and proven method of data transmission, which has been in use in other applications for a number of years. Now it is used to set up Internet and network accesses in the home or office. Depending on the damping factor, distances of at least 200 meters can be covered. With a maximum data rate up to 500 Mbps and symmetrical upload and download speeds, Homeplug is comparable to traditional Ethernet network solutions. Data security and radiation 128-bit AES encryption is used, which guarantees secure data transfer within the network. WiFi Not only is the LN-554 very compact, it is designed with a built-in power adapter. This design allows you to plug it directly into an electrical outlet, eliminating the need for an additional power cable. You can easily install it where your Wi-Fi signal needs enhancement and enjoy high-speed wireless performance without any hassles. The latest 802.11n technology is built into the LN-554 to broaden its wireless coverage and to eliminate dead spots within the wireless range. The LN-554 complies with wireless 802.11b/g/n standards and can reach data transmission rates of up to 300Mbps when connected to wireless 802.11n devices. It provides faster and more reliable wireless connections than standard 802.11b/g wireless networks. This product can be used safely in the countries listed below: Package Contents Open the package carefully, and make sure that none of the items listed below are missing. Do not discard the packing materials, in case of return; the unit must be shipped back in its original package. The LN-554 WiFi homeplug A Quick Install Guide An UTP cable Cautions This device’s design and manufacturer has your safety in mind. In order to safely and effectively use this device, please read the following before usage. Usage Cautions The user should not modify this device. The environmental temperature should be within +5 ~ +35 degrees Celsius. Power The device’s power voltage is AC 230v. To reduce the risk of electric shock, unplug the device first before cleaning it. Never connect the device in a humid or dusty area. Repair If the device has a problem, you should take it to an appointed repair center and let the specialists do the repair. Never repair the device yourself, you might damage the device or endanger yourself. Disposing of the Device When you dispose of the device, be sure to dispose it appropriately. Some countries may regulate disposal of an electrical device, please consult with your local authority. Others When using this device, please do not let it come into contact with water or other liquids. If water is accidentally spilled on the device, please use a dry cloth to absorb the spillage. Electronic products are vulnerable, when using please avoid shaking or hitting the device, and do not press the buttons too hard. Do not let the device come into contact with water or other liquid. Do not disassemble, repair or change the design of the device; any damage done will not be included in the repair policy. Avoid hitting the device with a hard object, avoid shaking the device and stay away from magnetic fields. If during electrostatic discharge or a strong electromagnetic field the product will malfunction, unplug the power cable. The product will return to normal performance the next time it is powered on. Product Layout Port Description LAN Connect your PCs or network devices to these ports Security Push to connect to Homeplug network Reset Push 15 seconds to reset the device to factory default Backlabel and Network Details Folder The Network Details Folder describes the IP address, login details, network name, security code and OPS button functionality. Button Description OPS BUTTON Press 0-5 seconds for WiFi WPS mode LED Definition As shown from the top to the bottom. Port Power LAN LAN Description Shows the device is turned on. Color: Green Shows the LAN cable is connected. Color: Green Shows the LAN cable is connected. Color: Green Shows homeplug connectivity Color: Data Green: PHY RATE > 40Mbps Orange: 20Mbps < PHY RATE < 40Mbps Red: PHY RATE < 20Mbps WiFi & OPS Shows WiFi & OPS/WPS activity Color: Green Connecting the Homeplug You can plug the LN-554 directly into a wall outlet. Switch the device on with the power switch located on the bottom of the device. The LN-554 automatically enters the self-test phase. During self-test phase, the Power LED will be lit continuously to indicate that this product is in normal operation. Homeplug This product is a Homeplug AV power line device. Each Homeplug has a Homeplug network name. Multiple Homeplug devices with the same network names can communicate with one another, and thus belonging to a same Homeplug network security. Devices with a different network name won’t communicate. Any ‘Homeplug-AV’ compliant Homeplug which comes new from the box, including this device, has a default network name of HomeplugAV. It can communicate with other brands of new Homeplug-AV compliant devices, thus these new devices are so called belonging to the public network. Pushing the SECURITY button of the device will change its network name. This way, users can create one or multiple private Homeplug network securitys using this button, without complicated setup software involved, thus protect their data which is being transmitted over the power line. Pressing the RESET button of a power-active Homeplug device will reset the network name back to its factory default (HomeplugAV). By pushing the SECURITY button for more than 10 seconds, a random network name (different from HomeplugAV) for the device will be generated. This device can then ask other devices to join its Homeplug network to form a private network security. Any other device, the Slave Homeplug for instance, which wants to join this device’s (the Master) Homeplug network security can be added by the steps below: (NOTE: it is more convenient to bring devices, which are to be configured into the same logical network security, side by side during this procedure. After the network security is set, the devices can be deployed anywhere at home) Create a private encrypted network Step 1: Create a secure network. First clear the public network and create a private network on HomePlug A by pressing the SECURITY button more than 10 seconds until all LED lights simultaneously turn off and on once. Do the same on HomePlug B. At this moment, the network names have changed to a random name and are ready to be joined together. Step 2: Join the secure network. Press the SECURITY button of both HomePlugs for 2 to 3 sec (make sure the POWER LED starts blinking). It doesn’t matter which device’s button is pushed earlier than the other, but please push the second device’s Security button within two minutes after pushing the first device’s Security button. This way, HomePlug B joins the same encrypted network as HomePlug A. Please note: If you want to connect with any of the below Sitecom Homeplugs, press the NMK button on these for 5~8 seconds to join a secure network. - LN-506/LN-516 LN-507/LN-517 LN-508/LN-518 LN-509/LN-519 Add an extra Homeplug First, clear the original network security of the extra HomePlug by pressing its SECURITY button more than 10 seconds until all LED lights simultaneously turn off and on once. At this moment, its network security name has been changed to a random name and is ready to be assigned another network name. Next, press the SECURITY button of the extra HomePlug and the SECURITY button on a HomePlug that is already connected to the network for 2 to 3 sec (make sure the POWER LED starts blinking). It doesn’t matter which device’s button is pushed earlier than the other, but please push the second device’s Security button within two minutes after pushing the first device’s Security button. This way, the extra HomePlug joins the same encrypted network as the rest. Remove a device from a network Security If for example, device A and device B are in the same logical network security and you want to remove device A from this logical network security, just press the SECURITY button of device A for 10 seconds. This makes device A unable to communicate with device B. Make two public network devices private If you want to make two new public devices (network name HomePlugAV) to become private, please carry out Step 1 on both devices, then do step 2 on these two devices. Finally, a private random network name is generated for these two devices. Standby Mode The standby mode enables the Homeplug to save power consumption. The Homeplug automatically enters standby if no Ethernet cable is connected, or the connected device enters standby, hibernation, or is powered-off for over two minutes. During standby, only the POWER LED blinks at a slow rate. To exit standby, just insert the Ethernet cable to the Homeplug, or wake up the connected device. Note: Some computers support the Wake on LAN function that may cause the Homeplug not to enter the standby mode. Configuring the device LOGIN procedure 1. OPEN your browser (e.g. Internet Explorer). 2. Type http://sitecom.plug in the address bar and press [Enter] 3. Type user name and password (default username is ‘admin’, the password can be found on the backlabel of the LN-554). 4. Click OK. 5. You will see the home page of the LN-554. The System status section allows you to monitor the current status of your LN-554, the UP time, hardware information as well as firmware version information is displayed here. Basic Settings Band Please select the wireless band you wish to use. By selecting a different band setting, you’ll be able to allow or deny the wireless clients on a certain band. MAIN ESSID Please input the ESSID (the name used to identify this wireless access point) here. You can input up to 32 alphanumerical characters. PLEASE NOTE THAT THE ESSID IS CASE SENSITIVE. Channel Number Please select a channel number you wish to use. The channel number must be same as the wireless access point you wish to connect. Associated Clients Click ‘Show Active Clients’ button and a new popup window will appear which contains the information about all wireless clients connected to this access point. You can click the ‘Refresh’ button in the popup window to keep the information up-to-date ADVANCED SETTINGS Security This device provides many types of wireless security (wireless data encryption). When you use data encryption, data transferred by radio signals in the air will become unreadable for those people who don’t know the correct encryption key (encryption password). There are four types of security level you can select: Disable (no security - data encryption disabled), WEP, WPA Pre-shared Key, and WPA Radius. Please refer to the following sections for detailed instructions. Disabled When you select ‘Disabled’, wireless encryption for the network is disabled. This is not recommended. Click <Apply> at the bottom of the screen to save the above configuration. You can now configure other sections by choosing Continue, or choose Apply to apply the settings and reboot the device. WEP Key Length You can select the WEP key length for encryption, 64-bit or 128-bit. The larger the key will be the higher level of security is used, but the throughput will be lower. Key Format You may select ASCII Characters (alphanumeric format) or Hexadecimal Digits (in the "A-F", "a-f" and "0-9" range) to be the WEP Key. Key1-Key4 The WEP keys are used to encrypt data transmitted in the wireless network. Use the following rules to setup a WEP key on the device.64-bit WEP: input 10-digits Hex values (in the "A-F", "a-f" and "0-9" range) or5digit ASCII character as the encryption keys. 128-bit WEP: input 26digitHex values (in the "A-F", "a-f" and "0-9" range) or 13-digit ASCII characters as the encryption keys. Click <Apply> at the bottom of the screen to save the above configuration. You can now configure other sections by choosing Continue, or choose Apply to apply the settings and reboot the device. WPA WPA Unicast Cipher Suite Available options are: WPA (TKIP), WPA2 (AES), and WPA2 Mixed. You can select one of them, but you have to make sure your wireless client supports the cipher you selected. Pre-shared Key Format Please select the format of pre-shared key here, available options are ‘Passphrase’ (8 to 63 alphanumerical characters) and ‘Hex (64 hexadecimal characters – 0 to 9 and a to f). Pre-shared Key Please input pre-shared key according to the key format you selected here. For security reason, don’t use simple words. Advanced This tab allows you to set the advanced wireless options. The options included are Channel Bandwidth, Fragment Threshold, RTS Threshold, Beacon Interval, and Preamble Type. You should not change these parameters unless you know what effect the changes will have on the router. Fragment Threshold Set the Fragment threshold of wireless radio. The default value is 2346. RTS Threshold Set the RTS threshold of wireless radio. The default value is 2347. Beacon Interval Set the beacon interval of wireless radio. The default value is 100. DTIM Period Set the DTIM period of wireless radio. The default value is 3. Data Rate Set the wireless data transfer rate to a certain value. Since most wireless devices will negotiate with each other and pick a proper data transfer rate automatically, it’s not necessary to change this value unless you know what will happen after modification. Channel Width Select wireless channel width (bandwidth taken by wireless signals of this access point). It’s suggested to select ‘Auto 20/40MHz’. Do not change to ’20 MHz’ unless you know what it is. Preamble Type Set the type of preamble of wireless radio. The default setting is ‘Short Preamble’. Broadcast ESSID Decide if the wireless access point will broadcast its own ESSID or not. You can hide the ESSID of your wireless access point (set the option to ‘Disable’), so only people who know the ESSID of your wireless access point can get connected. TX Power You can set the output power of wireless radio. Unless you’re using this wireless access point in a really big space, you may not have to set output power to 100%. This will enhance security (malicious / unknown users on a distance will not be able to reach your wireless access point). OPS One Push Setup (OPS) is the simplest way to establish a connection between the wireless clients and the wireless router. You don’t have to select the encryption mode and fill in a long encryption passphrase every time when you try to setup a wireless connection. You only need to press a button on both wireless client and wireless router, and OPS will do the rest for you. Check the box to enable the OPS function and uncheck it to disable the OPS function. OPS Current Status If the wireless security (encryption) function of this wireless router is properly set, you’ll see a ‘Configured’ message here. Otherwise, you’ll see ‘UnConfigured’. Self Pin Code This is the WPS PIN code of the wireless router. You may need this information when connecting to other WPS-enabled wireless devices. SSID This is the network broadcast name (SSID) of the router. Authentication Mode It shows the active authentication mode for the wireless connection. Passphrase Key It shows the passphrase key that is randomly generated by the wireless router during the WPS process. You may need this information when using a device which doesn’t support WPS. WPS via Push Button Press the button to start the WPS process. The device will wait for the WPS request from the wireless devices within 2 minutes. WPS via PIN You can fill-in the PIN code of the wireless device and press the button to start the WPS process. The router will wait for the WPS request from the wireless device within 2 minutes. TOOLBOX SETTINGS System This device provides some control functions including password, IP address management, and DHCP server function. Please go to Toolbox, and open the ‘System’ tab, to access these functions. Below are detailed descriptions of every control function. Password Settings You can change the password used to enter the web configuration menu of this device. Please input the current password in the ‘Current Password’ field, then input a new password in both the ‘New Password’ and the ‘Re-Enter Password’ field. After you finish, please go to the bottom of the page and click ‘Apply’. IP Management You can change the IP address of this device, so it can become a part of your local network. Please remember this address or you will not be able to connect the configuration menu of device. The default configuration is set to DHCP client. DHCP Server If you want to activate the DHCP server function of this device, please select ‘Enabled’ in the ‘DHCP Server’ option, and see the next Section for detailed instructions. If you don’t want to use the DHCP server function of this device, or there’s another DHCP server on the network this device connects to, please select ‘Disable’. After you finish, please go to the bottom of this page and click ‘Apply’. DHCP Server This device is capable to act as a DHCP server for your network. Default Gateway Please input the IP address of default gateway of your network here. DNS Address Please input the IP address of domain name server (DNS) here. DHCP Client Start Address Please input the start IP address of the IP range. DHCP Client End Address Please input the end IP address of the IP range. Domain Name If you wish, you can also optionally input the domain name for your network. This is optional. Lease Time Please choose a lease time (the duration that every computer can keep a specific IP address) of every IP address assigned by this access point from dropdown menu. After you finish, please click ‘Apply’. Backup You can back up all configurations of this device to a file, so you can make several copies of access point configuration for security reasons. Backup Settings Press ‘Save...’ button, and you’ll be prompted to download the configuration as a file. The default filename is ‘config.bin’. You can save it as another filename for different versions, and keep it in a safe place. Restore Settings Press ‘Browse…’ to pick a previously-saved configuration file from your computer, and then click ‘Upload’ to transfer the configuration file to the device. After the configuration is uploaded, the configuration will be replaced by the file you just uploaded. Restore to Factory Default Click this button to remove all settings you made and restore the configuration of this device back to factory default settings. Upgrade If there is a new firmware available, you can upload the firmware to the device to get extra functions or problem fixes. Click the ‘Browse’ button. You’ll be prompted to provide the filename of the firmware upgrade file. Please download the latest firmware file from our website, and use it to upgrade your device. After a firmware file is selected, click the ‘Apply’ button, and the device will start the firmware upgrade procedure automatically. The procedure may take several minutes, so please be patient. NOTE: Never interrupt the upgrade procedure by closing the web browser or physically disconnecting your computer from the device. Reset When you think the device is not working properly, you can use this function to restart the device; this may help and solve the problem. This function is useful when the device is far from you or unreachable. However, if the device is not responding, you may have to switch it off by unplugging the power plug and plugging it back again after 10 seconds. Addendum: Declaration of Conformity