1
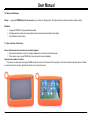
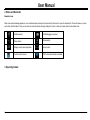
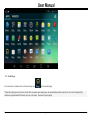
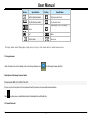
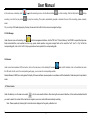
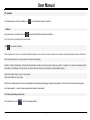
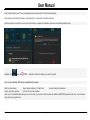
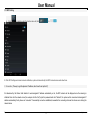
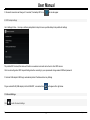
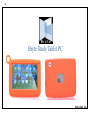
Q1 Bryte Study Tablet PC Bryte Kids Tab User Manual Important safety information Your tablet should be treated with care. The information below has been provided in the interest of safety and will help you to enjoy this product and the benefits it brings for many years. • Keep the product and all of its part out of the reach of children. • This product is not intended for use by persons (including children) with reduced physical, sensory or mental capabilities, or lack of experience and knowledge, unless they have been given supervision or instruction concerning the use of the appliance by a person responsible for their safety. • Keep it dry, Avoid exposure to precipitation, humidity and liquids which could all affect the product circuitry. • DO NOT leave it in high temperatures as electronic devices and plastic parts may warp in heat. • DO NOT leave it in low temperatures as moisture can form inside the product, which may damage the circuit board. • DO NOT block or cover slots, holes or openings on the product by placing on soft furnishings such as carpets, rugs or beds as these are provided for functionality and/or ventilation to ensure safe operation of the product. • DO NOT expose the tablet to direct sunlight. • Disconnect your tablet from the mains power supply during thunderstorms. • Avoid any heavy impacts caused by collisions or dropping your tablet as this may damage the product. • Where the mains power plug or an appliance coupler is used as the disconnect device, the disconnect device shall remain readily operable. • DO NOT store in dusty or dirty areas. • DO NOT use harsh chemicals, cleaning solvents or detergents to clean the product. Wipe with a dry soft cloth or tissue paper to clean. • DO NOT attempt to open the product. This product does not contain any user serviceable parts. Unauthorized handling of the device may damage it and will void your warranty. • Keep the device away from magnets or magnetic fields. • NEVER use the tablet near emergency/ intensive care medical equipment, if you have a pacemaker fitted or during an electrical storm. • The underneath and sides of the product may become warm after a long period of use. This is normal. Bryte 1 www.brytestore.com User Manual Know your Device Check the package contents The package contains: - 1 pcs of Bryte Tablet - 1 x USB Charging Cable - 1 x User Manual - 1x OTG Cable Charging your tablet Your battery has been partially charged by the manufacturer, but you may need to recharge it before you can switch the tablet on for the first time. Note: It is recommended to charge the battery of the tablet fully before turning on for the first time. Important: Use only the approved chargers with this tablet . 1. Plug the charger into a wall outlet 2. Connect the charger to your tablet via the Micro-B Type USB connector port. When the battery is full, disconnect the charger from the tablet, then from the wall outlet. Note: You don’t need to charge the tablet for specific length of time, and you can use the tablet while it is charging. Note: If the battery is completely discharged, it may take several minutes before the tablet can be used. Rechargeable Lithium-Ion battery Your tablet has an internal Lithium-ion polymer battery which should last the lifetime of the product. If you suspect that the battery is dead, try charging it several times and follow the steps for charging your tablet. Bryte 2 www.brytestore.com User Manual • Do NOT attempt to change the battery yourself. • CAUTION: Danger of explosion may occur if batteries are incorrectly replaced. • NEVER use or charge the battery if it appears to be leaking, discolored, deformed or in any way abnormal. • NEVER expose the battery to any liquid. • NEVER expose the battery to excessive heat such as direct sunlight or fire. • NEVER throw batteries in a fire or attempt to open the outer casing. • Batteries are harmful if swallowed, so keep away from and out of reach of infants and young children. Getting Started Turning your tablet On To turn your tablet on, press and hold the Power/ Sleep button until the power indicator LED turns on and the tablet will begin to power up. Putting your tablet into Sleep mode To put your tablet into Sleep mode, press the Power/ Sleep button once. The screen should switch off and your tablet will be in Sleep mode. To wake the tablet from Sleep mode, press the Power/Sleep button once. The screen should wake up and display the lock-screen. Turning your tablet Off To turn your tablet off, press and hold the Power/ Sleep button until you are prompted with the ‘Slide to shut down your PC’ message. Slide and drag your finger down the screen to begin the shutdown process and turn off your tablet. Emergency reboot Bryte 3 www.brytestore.com User Manual To reboot your tablet if the screen becomes unresponsive, press and hold the Power/Sleep button for 10 seconds until the screen turns off. Note: Leave the tablet for 15 seconds before trying to reboot the tablet. Caution: Avoid powering the tablet down by using the emergency reboot where possible. Always try to shut down your tablet using the correct shut down method to avoid loss or damage to data. Increasing and decreasing the volume To increase the volume level on your device, press the Volume up button. Repeatedly press the Volume up button until the desired volume is reached. To decrease the volume level on your device, press the Volume down button. Repeatedly press the Volume down button until the desired volume is reached. Using headphones with your tablet You can connect headphones with a 3.5mm plug (not included) to your tablet. The headphone socket can be found on the top of the device highlighted with . When you have headphones connected the tablet speaker is switched off and all sound is via the headphones. Installing a Micro SD card Your tablet supports Micro SD cards (not included) for additional storage of data and files. Bryte 4 www.brytestore.com User Manual Important: Use only compatible memory cards approved for use with this device. Incompatible cards may damage the card and the device and may cause corrupt data stored on the card. To install a Micro SD memory card: 1. Locate the Micro SD card slot on the tablet. 2. Insert the Micro SD card into the slot with the gold contacts facing down, carefully slide the memory card into the slot, pushing gently until it clicks into place. Instructions for Use 1. Preparing 1.1 Keys Function Description: Power button Short press to sleep/wake up, long press to startup and shutdown. Volume +(up) increase the volume Volume -(down) decrease the volume Click it in any interface will return to main interface. HOME button (home) Back button(back) Menu button Setting button Bryte click it in any interface will return to previous menu This button will display in menu interface. display recently browsed history 5 www.brytestore.com User Manual 1.2 Startup and Shutdown Startup Long press POWER key for three seconds, you can enter into startup picture. The system enters into screen lock status, please unlock it. Shutdown 1. Long press POWER, it will popup shutdown window. 2. Shutdown window contains mute mode, airplane mode, reboot mode and shutdown four options. 3. Click Shutdown is the last step. 1.3 Open and Close of the Screen Screen will be closed on its own when no operation happens. 1. Screen will be closed on its own if no operation happens for some time to save battery power 2. When screen is open, press POWER key, the screen will be closed immediately. Open the screen when it is closed. If the screen is I sleep mode, short press POWER to open the screen. The screen will be locked open it, it will show the picture as below picture, left slide to unlock and enter into camera, right slide the unlock icon to unlock the screen. Bryte 6 www.brytestore.com User Manual 2. Status and Reminder Reminder Icons When some remind message appears in your reminder window, please click column and slip the screen to open the reminder list. Choose the menu you need, and confirm the information. Then you can close the reminder window through clicking the column to slide up. Please refer to below status icons: USB connected USB debugging connected Return button Downloading Display recently-used application Home button Current electric volume WIFI connected, internet is available 3. Operating Details Bryte 7 www.brytestore.com User Manual 3.1 Audio Player In the main menu or desktop, click on the audio player icon into the audio playing. * When the audio player not in the list of music files, the system open audio player, will automatically load the music files on the card to the playlist (the machine is supported audio file formats: mp3, wav, midi, wma) . As shown in Figure playlist. Bryte 8 www.brytestore.com User Manual Playlist Previous Add songs Search Loop playing Pause Shuffle playing Next 3.2 Video Player In the main menu or on the desktop,click on the video icon corresponding folder, double-click on your favorite movie to play. to enter the video player interface, file storage, depending on your situation, open the * Support video formats: MKV, AVI, RM, RMVB, MP4, MOV, VOB, DAT, FLV, 3GP * When there is no file in the video playlist, the system will add the files in the insert card automatically. * drag the playback progress bar , you can adjust the video's playback progress * Video Player Button Description * when the video play you can click Bryte button, to clear bookmarks, playback mode, etc. 9 www.brytestore.com User Manual Button Specification Button Specification Brightness adjustment Add a video bookmark Play the next video Video format 16:9 / 4:3 / restore Play the Previous video Pause exit Menu Volume down Volume up Click play mode, select Single player, single cycle, all loop, or click menu option to return previous menu 3.3 Image browser Under the main menu or the desktop, click on the image browser icon into the image browser interface: Description of the image browser button Picture formats: BMP, JPG, JPEG, PNG, GIF If there is no file in the picture list, the system will load the pictures in the inserted card automatically. Click in picture menu, delete/rotation/photo information/photo edit/modify,etc. 3.4 Sound Recorder Bryte 10 www.brytestore.com User Manual In the main menu or desktop, click recording. Just click the play button to enter the recording screen, click the Record button to start recording. Click the Stop button to stop to play the recording. The system automatically prompts or abandon the use of this recording, please manually select. Play recordings: With audio player play the tape, choose and click a file from the resource manager,it will play. 3.5 File Manager Under the main menu or the desktop, click into the management interface, click the "SD Card", "Internal Memory" and "USB" to expand the drop-down folder and related files, can be added, such as copy, paste, delete operation. long press a single folder or file, select the "last", "next", or "top" to find the corresponding path, click on the "edit" in the pop-up window choose paste to the corresponding path. 3.6 Browser Under normal circumstances WIFI connection, click on the main menu or the desktop IE browser enter into IE interface, click on the address bar enter the URL and click Go, enter the corresponding web page, you can view the corresponding website. Remark: Browser USES the current popular third-party IE browser software, please operate in accordance with the standards of Internet explorer's operational mode. 3.7 Voice Search Under the desktop or in the main menu select [ ] into the voice search interface: after entering the voice search interface, to the machine standard of what you need to search the content of the machine to recognize your voice content after automatically searching. Note: Please operate by following the 3 instruction items displayed on the gravity calibration tool Bryte 11 www.brytestore.com User Manual 3.8 Calculator on the main menu or click the calculator icon on the desktop to open the calculator 3.9 Clock In the main menu or click the clock icon on the desktop Set the clock into the interface The clock interface can Setting the time and alarm Click to clock alarm interface Click on either alarm clock, can be Setting detailed information: alarm clock time, whether the alarm bell, vibration and repeated alarm condition, the label set. Every day: set the alarm to ring every day at the same time repeating Monday, Tuesday, Wednesday, Thursday, Friday, Saturday, Sunday: check the number of days you need, For example: You choose the weekday alarm, respectively, from Monday to Friday tick the box, set the alarm at the same time, Monday to Friday repeated ringing Note: Set the alarm rings only once, not repeated Click Clock: Select the clock model After the time setting and alarm clock can be adjustable according to personal enjoy to power-saving mode. Touch the screen for the power saving mode, touch below again to normal. Power saving mode as shown in figure below: 3.10 Camera Operating Instructions In the main menu or click Bryte Enter the camera interface 12 www.brytestore.com User Manual Button Specification Button Specification Camera status Photographic state Shutter button Checking photos Camera settings Front/rear camera switch EV value White balance settings 3.11 Micro SD card The device has SD card port, where files on SD card can be read. When using, you have to ensure you the correct SD card (Micro SD), gently insert it into the slot, push gently until you hear a click sound. To remove the SD card from the slot, please push the memory/SD gently, and then release. The SD card will automatically pop up, then remove the card. Caution A. Disclose the SD cover (cap) on the back cover (battery cover) and insert the card properly. B. When the memory card operation (such as read, copy, etc.), do not pull out the memory card, otherwise there might be data loss or the card may be damaged. C. Avoid in high temperature or high humidity environment. D. Keep the memory card away from liquid and corrosive materials. 3.12 APK software install and uninstall Your device supports third-party applications based on Android platform, most applications can be obtained from the internet or through Flash Share, copy them into the device storage or T-Flash card, then install and use. Bryte 13 www.brytestore.com User Manual Install: Internal Memory and TF card corresponding flash ram disk and the T-flash Card storage disk. After entering, select the APK installer which inside left box , double-click to install the software After the operation is complete to return to the main interface, complete the installation, and have corresponding software menu Uninstall: Click , enter the application. Select the software you want to uninstall Note: only user installed APKs can be unistalled from the system. Start: Run the software Export: Export software to T-Flash Card Uninstall: Uninstall the software Cancel: cancel the operation Exit: return to the main interface Note: some of the standard keyboard keys can not be used, you need to modify the system by definition ANDROIED keyboard code value, we recommend using the factory supplied ones. Bryte 14 www.brytestore.com User Manual 3.13 WIFI Setting A. Click on desktop, enter the function menu list, click to . B. Click WIFI Settings and select network notification, system will automatically find WIFI network names and show them. C. Connection:( The way to get the dynamic IP address, don't need to set up the IP) It’s determined by the Router itself whether it needs assigned IP address automatically or not, the WIFI network will be displayed once the scanning is initialized then click the network name (for example click the “test”),input the password and click “finished”, the system will be connected and assigned IP address automatically, finally shows as “connected” if successfully connection established, meanwhile the connecting status will be shown once clicking the network name. Bryte 15 www.brytestore.com User Manual D. Successful connection will change to "connected", the desktop WIFI icon will also be appear. E. WIFI hotspot settings Go to Settings>> More… then tap on tethering and portable hotspot: choose a portable hotspot into portable hot settings The portable WIFI checked, this device will function as a wireless router and can be found in other WIFI devices. Click to enter configuration WIFI hotspots Settings interface: according to your requirements change network SSID and password: F. External RJ45 adapter USB Dongle: automatically obtain IP address without any Settings Plug an external RJ45 (USB adapter) into the USB HOST, a connected icon will appear at the right below. 3.14 Sound Settings Click Bryte to enter the sound settings 16 www.brytestore.com User Manual A. [Quiet Mode]: Click to enter the volume settings, the machine enters the silent state. B. [Volume]: Click to enter the volume settings and set the volume big or small. C. Set the media/alarm/notification volume. D. Ringtones setting In the settings interface, click [phone ringtone] into “ringtones setting” interface E. System prompts sound settings Touch the hint sound (click on the touch screen) Lock screen tone (playing a sound when locking and unlocking the screen) Vibration touch; (eg. machine equipped with vibrating motors, clicking on the touch screen machine slight vibration) Options are available, Click on the highlighted is OK. 3.15 Display wallpaper Settings In the setup interface, click display wallpaper into wallpaper Settings, choose static or dynamic wallpaper according to your preference. You can also replace the Wallpaper by long-press any one blank position on the Home Screen, the screen menu appears. 【Brightness 】 according to your preference, drag to adjust backlight brightness, click DONE and return 3.16 Checking Storage Capacity Click the setting menu tag 【 】 to check the all the device storage status To check FLASH total capacity, SD total capacity, available space, etc Bryte 17 www.brytestore.com User Manual 3.17 Battery Status Click the tag 3.18 Apps Setting Click the menu tag 3.19 The running service settings: to check the status of battery using enter the Application interface. Click the【running service 】to check and control the current running services 3.20 Local Access and Security Setting Click the setting menu tag to enter the Local access setting Click the setting menu tag 【 】to enter the security setting :the personal device information setting Screen lock setting: several methods for screen lock(slide, face unlock, pattern and Pin code) Setting face unlock: Choose the face unlock to enter Set it up and click for confirm, face need be center in the dashed area and face is identified also setting is completed when appears. Meanwhile the second unlock method will be initialed to prevent the face unlock failure, that is Pattern or PIN code. 【pattern unlock setting】:enter the screen lock setting and choose the pattern and follow the instructions Draw the unlock pattern,4 point at least need to be connected for a pattern draw and twice input for the same draw. 3.21 Language and Input Setting Click the setting menu tag to enter the setting page and choose the language as well as input. A. Language setting: Bryte 18 www.brytestore.com User Manual The device support multiple languages, according to your needs,choose the right one from the languages list. B. Setting for keyboard and input setting Input method can be set according to the user’s needs 3.22 Backup and Reset Click the Settings menu to enter backup and reset interface, restore the factory default Select Erase SD card Note: remember that before you restore the factory default, file backup to other device, such as computer, usb flash disk 3.23 Date and Time Settings Click Settings menu to enter the date and time Settings interface, cancel the automatic option, or click on the " date and time" can manually modify the date, time, time zone. Date setting: enter the correct date, click DONE to complete Time setting : enter the right time ,click DONE to complete 3.24 Auxiliary function Operation Can set up automatic screen rotation in this interface , etc. Developer options: It is recommended to use the factory default mode , otherwise it will affect some features using Click to enter the developer options 3.25 Desktop icons move/delete/increase Bryte 19 www.brytestore.com User Manual On the desktop, click the function module menu icon , enter the desktop drawer function menu lists all the application icons laid out page display,press and hold the application icon, you can drag it to the current function menu desktop. Long press the application icon on the desktop to enter edit mode, you can move the position. When the icon button and drag to the drawer, the drawer button becomes the Delete button Bryte , then release to delete the icon. 20 www.brytestore.com User Manual About Bryte Warranty A. GENERAL Your Bryte Product from Technology Professionals Limited is a sophisticated electronic device, we strongly encourage you to read and follow its user guide. Please also note that your Product may contain parts, which can be damaged if not handled very carefully. During the warranty period, Bryte or a Technology Professionals authorized service center will remedy defects in materials and workmanship that result in Product failure during normal usage free of charge in a reasonable time by either repairing or replacing the Product. In case of defect or damages caused user during normal or abnormal use of the device, or as stated in Section C of this article (such as Broken Screen, Damaged Charging port etc) Technology Professionals Limited will carry out the repair free of charge but the user will bear the cost of the new part(s). Where there is established factory defect of the device, Technology Professionals Limited will rectify such defect or replace the device with same or similar model as may be required. B. WARRANTY PERIOD The warranty period starts when the Product is sold to an end-user for the first time. This can be evidenced by the proof of purchase issued by the first retailer. The main device is covered by a 13-Month Manufacturer’s Warranty. No repair or replacement will renew or extend the warranty periods. C. WHAT IS NOT COVERED Technology Professionals Limited does not provide a warranty for the following: 1. User guides; 2. Any third party software, settings, content, data, or links installed or downloaded onto your Product at any time; 3. Third party services or enabling 4. Normal wear and tear; 5. Reduced charging capacity of the battery, which is a result of the natural end of life process of batteries; 6. Defects or damage caused by: Misuse Exposure to abnormal conditions, improper storage, exposure to moisture or dampness Not using your Product in accordance with the user guide Any products combined with your Product by a third party, or Bryte 21 www.brytestore.com User Manual Other acts beyond our reasonable control; 7. Damage caused by hacking, cracking, viruses, or other malware, or by unauthorized access to services, accounts, computer systems or networks; 8. Pixel defects in your Product’s display that are within the scope of industry standards. 9. Loss or corruption of, or damage to, data or the recreation or transfer thereof even if such loss was a result of a defect in the Product. D. WARRANTY INVALIDATION This Warranty is not valid if: Your Device has been (a) opened, modified, or repaired without Technology Professionals’ authorization, or (b) repaired with unauthorized spare parts. Unauthorized repair or replacement of any Parts in the Product will, void this Warranty and any of your rights set forth herein. Your Product has been exposed to moisture, to dampness or to extreme thermal or environmental conditions or to rapid changes in such conditions, to corrosion, to oxidation, to spillage of food or liquid or to influence from chemical products. The Operating System (Platform, Model, Version) modified or upgraded without Technology Professionals’ authorization. Rooting, Flashing or Modification of System Files of your device. OTHER IMPORTANT NOTICES An independent operator provides the SIM card and the cellular or other network or system on which your device operates. Therefore, Technology Professionals Limited does not assume any responsibility for the operation, availability, coverage, services, or range of the cellular or other networks or systems. All parts of your Device that Technology Professionals has replaced become Technology Professionals’ property. When repairing or replacing your Product, we may use new or re-conditioned parts or products. Bryte 22 www.brytestore.com User Manual For further information and enquires please visit our website www.brytestore.com, also stay connected via social media. Like us on Facebook www.facebook.com/BryteStore Follow us on Twitter http://twitter.com/BryteStore Add us to your Google Plus circle at https://plus.google.com/+BryteStore/ Technology Professionals Limited 15/17 Abimbola Way , Isolo Industrial Estate Banex Building Opp Johnson Wax off Oshodi Apapa Exp Way. Lagos, Nigeria 234-803 474 4441, 234-1-4534880 [email protected] Bryte 23 www.brytestore.com