1
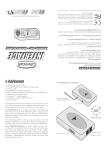
© 2009 Cheetah Advanced Technologies Ltd, Scotland.
All rights reserved.
This device complies with Part 15 of the FCC Rules. Operation
is subject to the following two conditions: (1) this device may not
cause harmful interference, and (2) this device must accept any
interference received, including interference that may cause
undesired operation.
Cheetah Advanced Technologies Ltd. declares that this product
is in compliance with the essential requirements and other
relevant provisions of Directive 1999/5/EC.
If any problems persist, or to arrange a product return, please
email [email protected]
Europe & Rest of World - visit www.SpeedCheetah.com
USA & Canada - visit www.GPSdetector.com
Service & Support
If for any reason your Cheetah product develops a fault,
please check our Customer Service page on:
Limited Warranty
Cheetah Advanced Technologies Ltd. warrant our products
against all defects in materials and workmanship for a period
of one year from the date of the original purchase. Full
warranty terms and conditions available online at:
www.SpeedCheetah.com
Warranty Registration
Register online at www.SpeedCheetah.com
Thank you for purchasing the new VizAlert V2, the world’s
most advanced motorcycle display for radar detectors.
The VizAlert is the only motorcycle heads-up display system
that works with both radar detectors and laser jammers. It is
also the only system which can convey both the alert type
and the signal strength, through the use of different colors
and flash rates.
I’m sure you’ll find it an invaluable tool to help you use speed
trap countermeasures more effectively on your motorcycle.
Two CR2032 batteries are already installed and should last
more than 60 hours during normal operation. Replacement
CR2032 3V batteries are readily available at all good battery
stockists.
1 Remove the four screws that secure the battery cover and
take the battery holder out of the casing.
2 Insert a nail file, screwdriver or similar object at the opposite end of the battery to the retaining clip. Gently prise the
battery out of it’s holder.
Your sincerely,
Al Smith, Director, Cheetah Advanced Technologies Ltd.
.
RETAINING CLIP
1 x VizAlert V2 Helmet Display (not waterproof)
2 x CR2302 cell batteries (installed)
2 x Sets of self adhesive Velcro dots
1 x User manual
Please note, this pack contains only the helmet display. This
is just a receiving unit. It can only be used in conjunction with
a Cheetah Interface for your radar detector and/or your laser
jammer.
3 Insert 2 x CR2032 3V button cell batteries with the positive
side facing upwards. The batteries securely click into position.
4 Replace the battery holder inside the casing and re-tighten
the screws.
1.1 LED Display
The mounting location for the LED display is a matter of personal choice. It can
be held securely in place by your helmet’s cheek padding, so that it does not
move during use. To begin with, we recommend fitting it as far towards the front
of the view port as possible (Fig 1 - position A), but please note that it must never
be mounted where it interferes with your forward vision. As you become more
used to the display, you may prefer to move it more towards the side of your
helmet, in your peripheral vision (Fig 1 - position B).
The beam from the LED display is directional, so care must be taken when
mounting to ensure that the raised “bubbles” are kept pointing towards your eye,
otherwise you may miss some alerts. TIP - Use a mirror and press the test button
on the RADARnode transmitter to see where the beams are pointing.
A
B
1.2 Receiver
The receiver can be easily tucked behind the comfort liner or even slipped
underneath the base gasket, and secured with Velcro, if required.
1.3 Battery Pack
Secure the battery pack with Velcro, in a convenient location for access to the
ON/OFF switch. The battery pack is not waterproof so must be positioned
inside the helmet.
Fig. 1
6 color display
Battery pack with
ON / OFF switch
2 x CR2032 installed
1.4 Cruiser / Open Face / Shorty Helmets
The VizAlert V2 is designed for installing inside full-face helmets. However a
boom arm, to support the VizAlert LED display in your forward vision, is available
as an optional extra on our website. You may also like to consider purchasing
the VizAlert Classic display, as its receiver / battery compartment is waterproof
and mounts on the outside of an open face helmet.
2.1 Switching ON your system
The radar detector and the helmet display operate independently.The VizAlert’s
battery pack has a sliding ON/OFF switch. All 6 LEDs will flash once, at the
same time, to confirm it is switched on.
Your radar detector will power up when you start the engine. The RADARnode
transmitter will then begin transmitting to the VizAlert and all the LED's will flash
in a circular sequence to confirm that the wireless link is established.
2.2 Switching off your system
When you switch off your engine, power to the RADARnode transmitter and your
radar detector is automatically cut off, so you won’t get a flat battery.
The VizAlert’s battery pack has a sliding ON/OFF switch.
2.3 Automatic shut-down
If you forget to switch the VizAlert display off, it will automatically shut itself down
10 minutes after the RADARnode stops transmitting, to conserve battery power.
All 6 LEDs will flash twice to confirm it is switching off. When you next use the
system after an automatic shut down, you must first move the battery
switch to the OFF position, then turn it back ON again as normal.
Wireless
receiver
2.4 Light sensitive
The automatic dimming feature will reduce the LED intensity at night time. If
required, the display may be temporarily rotated away to further protect your
night vision.
Green = KA
Yellow = X
Blue = Future Use
Red = Laser
Orange = KU
White = K
Daylight
Sensor
Different colors represent different radar / laser bands. There are three flash rates
to indicate signal strength - slow, medium and fast.
LED
Green
White
Yellow
Orange
Red (medium flashing)
Red (rapid flashing)
Blue
All 6 LEDs flash once
All 6 LEDs flash twice
All 6 LEDs flash in sequence
Green, Blue then Orange
Yellow and Orange alternately
MEANING
KA band radar
K band radar
X band radar
KU band radar
Laser alert from your radar detector
Laser alert from your laser jammer
not currently used - reserved for future
Power ON
Power OFF
Wireless link established
Low battery - replace the batteries soon
No wireless link
(6 flashes ever 30 seconds until the wireless connection is re-established)